1
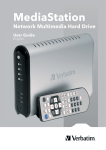
MediaStation Pro
Wireless Network
Multimedia Hard Drive
User Guide
English
1
Contents
Introduction
3
Precautions
3
Specifications
3
Package Content
4
Product Overview
4
1. Use as External USB HDD
5
1.1 Copy Data via USB
1.1.1 Windows 2000, XP
1.1.2 Linux
1.1.3 Mac
5
5
6
6
2. Connect to PC via Network
6
2.1 Wired LAN Connection
2.2 Wireless LAN Connection
6
7
3. Shared File Playback (Stream)
9
3.1 Windows 2000
3.2 Windows XP
3.3 Windows Vista
9
11
13
4. Use USB Host
15
5. Connect to External AV Device
15
5.1 Connect Video Cable
5.2 Connect Audio Cable
15
16
6. Basic Setup
17
6.1 Video Setup
6.2 Audio Setup
6.3 Network Setup
6.4 Wireless Setup
6.5 Wireless Security Setup
6.6 LED Setup
6.7 Photo View Setup
6.8 Language Setup
6.9 Screen Ratio Setup
6.10 Auto Play Setup
6.11 Internet (How to setup the Internet)
6.12 i-RADIO
6.13 SKIN
6.14 ETC
6.15 Protocol
6.16 FTP Server / Client setup
17
17
18
19
19
19
19
20
20
20
21
21
22
23
24
24
7. How to Play (Remote Control)
25
7.1 Basic Screen Menu
7.1.1 Mode Selection
7.1.2 File Selection
7.2 Play Video Files
7.3 Play DVD File
7.4 Play Audio File
7.5 Play Photo File
7.6 Make a Play List
7.7 Create a Private Folder
25
25
25
26
27
28
29
30
31
8. Firmware Upgrade
32
Technical Support
32
Limited Warranty Terms
32
WEEE Notice
32
FCC Compliance
33
CE Declaration - EC DECLARATION OF CONFORMITY
33
RoHS Compliance
33
2
Introduction
MediaStation Pro fully supports HD (High Definition) files and can stream media files from a PC via wireless (802.11b/g) or wired LAN. It also
has USB host that can support external USB storage devices and memory card readers..
•
Wireless High Definition Multimedia Player
•
Features powerful media decoding chip -Sigma Design EM8621 Chip
•
Full HD file playback up to 1920 x 1080p
•
HDMI Video output
•
IEEE 802.11g(54Mbps) 802.11b(11Mbps) wireless standard / 10/100Mbs wired LAN
•
Wireless security - WEP (Wired Equivalent Privacy)
•
Wireless Infrastructure and Ad-Hoc Mode
•
External storage device for PC via USB 2.0 connection
•
2x USB 2.0 host connectors for external USB devices
•
DVD Manager - Playback of DVD File same as Original DVD title
•
Video output - HDMI, Component, S-Video and Composite
•
Audio output – Stereo, Digital Coaxial & Optical 5.1 ch. Sound, DTS down mix to stereo
•
FTP Sever / Client function
•
Internet Radio function
•
UPnP function
•
Firmware Upgradable
Precautions
Please read the followings carefully and refer to [Cautions] in the manual for proper use.
Codec
*There are very many different codecs and file formats in use today. MediaStation Pro may not play all associated media files. Please
check list of supported codecs later in this manual.
USB Device
* Connect the power adapter when you connect MediaStation Pro to a PC.
Do not connect MediaStation Pro with a cable longer than 3m. If the USB cable is too long the transfer speed may be adversely affected.
We recommend you to use the supplied USB cable.
If you connect this device to USB 1.1 Host Adapter the speed is USB 1.1 (Max. 12Mbps)
USB Host
* The USB Host may not be compatible with all USB storage devices.
Network connection
* Data transfer through wired or wireless network connection may be disrupted by other network traffic which may affect playback
performance.
Radio transmission
* MediaStation Pro generates radio waves, do not use in areas where radio transmissions are prohibited e.g. hospitals and aircraft.
Data Backup
* We strongly recommend you to back up the data to another safe media. We are not responsible for data damage or loss.
Handling
* Handle MediaStation Pro with care. Do not drop or subject to impact or shock.
Disassembly
* Do not disassemble MediaStation Pro as you may cause damage and you will invalidate your warranty
Exposure to water, moisture, etc
* Do not expose MediaStation Pro to oil, water, dust, moisture or rain and wind.
Cautions for heat
* Keep MediaStation Pro away from heated areas. Set it up in well-ventilated places.
Cautions for magnetic materials
* Keep all magnetic materials away from MediaStation Pro. Magnetic materials such as speakers or magnets may erase or cause damage
to the data stored in the hard disk.
Specifications
Product Name
MediaStation Pro
Power
12V / 3A
Weight
1300g (including HDD & wireless antenna)
Dimension
48 x 150 x 210 mm (without wireless antenna)
Available OS
USB Device Compatible: Windows 2000/XP/Vista, Mac OS 9.0 higher, Linux 2.4 higher
USB Device
Device Port x 1ea, 480Mbps USB 2.0 (USB 1.1 compatible)
USB Host
Host Port x 2ea, 480Mbps USB 2.0 (USB 1.1 compatible)
Supporting to read USB devices e.g. External USB HDD, ODD, Flash Drive, Card Reader
Wired LAN
10/100 Mbps LAN (RJ-45) x 1ea, 100BaseTx:UTP/STP Category 5 LAN cable compatible
Wireless LAN
54Mbps IEEE802.11g, 5dBi detachable antenna x 1ea, SMA type connector
HDD Type
3.5” SATA HDD
3
HDD File System
NTFS / FAT32 (Preformatted to FAT32)
TV Type
NTSC / PAL
Video Format
AVI : MS-MPEG4v3/XviD/WMV9 (Not support XviD which has GMC option applied)
WMV : WMV9
ASF : WMV9
MP4 : MPEG4 Video
DAT : MPEG1
VOB : MPEG2
MPG/MPEG : MPEG1/MPEG2
TP/TS/TRP : HD-MPEG2/SD-MPEG2
ISO, IFO
Audio Format
MP3, OGG, WAV, WMA
Photo Format
JPG/JPEG, PNG, BMP
Video Output
COMPOSITE
S-VIDEO
HD COMPONENT Y, Pb, Pr (480p, 720p, 1080i)
HDMI (480p, 720p, 1080i, 1080p)
Audio Output
STEREO L-R
S/PDIF Digital Output ( Coaxial/Optical )
Working Temperature
0˚C ~ 60˚C
Working Humidity
10% ~ 50%
Package Contents
Mediastation Pro network multimedia drive, Remote Control (+Battery), Stand, Composite video / Stereo audio cable, Component Video
cable, HDMI cable, USB Cable, External AC Power Adapter, User manual CD , Quick start guide
Product Overview
Front View
Back View
① USB HOST
① POWER
② LAN
② PLAY/PAUSE
③ PRE / REW / LEFT
③ USB DEVICE
④ NEXT / FF / RIGHT
④ CVBS
⑩ ANT
⑤ STOP / DOWN
⑤ Y,PB,PR
⑥ OPTICAL
⑥ PWR
⑦ S-VIDEO
⑪ COAXIAL
⑦ NET
Front View
⑧ HDD
⑧ HDMI
⑨ IR
⑨ PWR
① USB HOST
Connect to an external USB device with USB cable
② LAN
Connect LAN cable for wired networking
① POWER
Power On, Off
③ USB Device
Connect to a computer with USB cable
② PLAY / PAUSE
Play all files from selected file / Pause
④ CVBS
Connect Composite cable for video output
③ PRE / REW / LEFT
Go to the previous page or Rewind / Left key
④ NEXT / FF / RIGHT
Go to the next page or Fast Forward / Right key
⑤ STOP / DOWN
Stop / Scroll down key
⑦ S-VIDEO
Connect S-Video cable for video output
⑥ IPWR
Power LED
⑧ HDMI
Connect HDMI cable for video output
⑦ NET
Network LED
⑨ PWR
Connect power adapter
⑧ HDD
HDD running LED
⑩ ANT
Connect wireless antenna for wireless networking
⑨ IR
IR Receiver
⑪ COAXIAL
Connect Coaxial cable for 5.1 ch. Digital audio output
Back View
4
⑤ Y, PB, PR
Connect component Y, Pb, Pr cable for video output
⑥ OPTICAL
Connect Optical cable for 5.1 ch. Digital audio output
1. Use as External USB HDD
1.1 Copy Data via USB
It is possible to use as a external USB hard disk drive in case of inserting hard disk into MediaStation PRO. You can copy data from your PC to
built-in HDD of MediaStation Pro via USB. It is possible to play media files at the hard disk on TV set.
* When connecting PC, you have to connect power cable of MediaStation Pro
1.1.1 Windows 2000, XP, Vista
1) After connecting MediaStation Pro and plug power cable, Windows
itself will install driver automatically. And then, check the driver
installation at Windows [Start > Settings > Control panel > (switch to
classic View on Windows XP) > system > Hardware > Device manager
> Universal Serial Bus controllers > USB Mass Storage Device ].
3) After copying data, remove MediaStation Pro with using remove
icon at Windows right-down corner. If you don’t follow this procedure,
data and MediaStation Pro may have damage.
2) Check ‘My Computer’ or ‘Explorer’, there should be a new volume.
You can copy any data to this volume.
✓ When you see ‘Non High-Speed USB Hub Message’
The message will be displayed On windows XP when you plug MediaStation Pro into
USB 1.1 spec. Host adapter.
✓ If new volume is not be appeared, check HDD format or not. W and HDD file system.
Windows 2000, XP detect both FAT32 and NTFS file system.
5
1.1.2 Linux
Manual Mount
✓ It can be available on Linux 2.4 higher.
Connect MEDIASTATION PRO -> Power On MEDIASTATION PRO ->
Check the detection with [fdisk] -> make Mount Pointer (ex. mediatest)
at Folder Mount(/mnt) -> Edit [/etc/fstab] -> add the following;
Automatic Mount
After booting, do log-in.
mount –t vfat /dev/sda /mnt/mediatest (in case of FAT32 HDD)
Connect MEDIASTATION PRO -> Power On MEDIASTATION PRO ->
Check the detection with [fdisk] -> make Mount Pointer (ex. mediatest)
at Folder Mount(/mnt) -> Edit [/etc/fstab] -> add the following;
mount –t ntfs /dev/sda /mnt/mediatest (in case of FAT32 HDD)
✓ Above example “sda” is assumed that the MEDIASTATION PRO will be detected as
“sda” on your system. If not, you have to write the drive name which is detected as “USB
Mass Storage”, not “sda”
/dev/sda /mnt/mediatest vfat noauto, user 0 0
(in case of FAT32 HDD)
/dev/sda /mnt/mediatest ntfs noauto, user 0 0
How to stop using
Do [unmount] at Device Control.
(in case of NTFS HDD)
Do Log-in again.
✓ Above example “sda” is assumed that the MEDIASTATION PRO will be detected as
“sda” on your system. If not, you have to write the drive name which is detected as “USB
Mass Storage”, not “sda”
1.1.3 Mac
✓ It can be available on Mac 9.0 higher.
No need to install the installation driver at Mac OS 9.x version and
the MEDIASTATION PRO will be detected automatically. If the
MEDIASTATION PRO is detected correctly, an icon is appeared at a
monitor.
When removing MEDIASTATION PRO safely, drag the icon to a trash
and unplug MEDIASTATION PRO.
2. Connect to PC via Network
2.1 Wired LAN Connection
When connecting Computer to MEDIASTATION directly
When connecting with IP Router or Hub
Connect LAN cable to LAN port between MEDIASTATION and PC. In
this case, you have to use Cross LAN cable type generally.
[TIP] If the computer’s LAN card was connected to Internet line, you
can mount additional LAN card to your PC and connect that additional
LAN card to MEDIASTATION.
Connect LAN cable to LAN port between IP Router or Hub.
In this case, you have to use Direct LAN Cable type generally.
✓ When you want to play shared multimedia files on network, refer to “3.Shared File Playback (Stream)”.
6
2.2 Wireless LAN Connection
MediaStation Pro supports two types of wireless structure-Infrastructure mode & Ad-Hoc mode.
Infrastructure Mode
Wireless LAN connection type with Wireless Access Point.
Ad-Hoc Mode
1:1 wireless LAN connection type between wireless adapter and MediaStation Pro
without wireless access point.
✓ Note
Wireless Access Point (Infrastructure Mode) or Wireless Adapter (Ad-Hoc Mode) is required for wireless connection. IEEE 802.11g wireless standard is recommended for better wireless
environment. MediaStation Pro is compatible with IEEE 802.11g & b standard.
① Move to Setup screen by pressing [SETUP] button.
② Move to ‘Wireless-I’ Icon and press [OK] button. Setup box will be displayed under icon menu..
③ Move to ‘AP Scan’ and press [OK] button. Available wireless network are detected and displayed.
④ Select preferred network from list of available wireless networks.
*Wireless network information is displayed.
-SSID: Name of Wireless Network
-Connection Mode: AP Mode (to connect an Access Point)
Ad-hoc Mode (to connect wireless adapter)
-Channel: Wireless channel used by wireless station
⑤ Information of wireless station will be displayed. Press [SETUP] for saving configuration.
7
✓ Note: When connecting Ad-Hoc Mode, manual setting of IP Address and Subnet mask will be needed.
Manual setting of IP address and Subnet mask of wireless adapter and MediaStation Pro will be required. Disable DHCP and enter “IP Address” and “Subnet mask”. IP address must be
different between MediaStation Pro and wireless adapter, subnet mask must be the same for both MediaStation Pro and wireless adaptor.
Example: MediaStation Pro: IP Address(192.168.10.2) Subnet(255.255.255.0) ==> Wireless adapter: IP Address(192.168.10.3) Subnet mask (255.255.255.0)
<MediaStation Pro IP manual setting>
<Wireless Adapter IP manual setting
⑥ [WIRELESS] icon is activated. Select the icon, and the PC list on the network is displayed. Access your
preferred PC and files stored on it.
✓ Note: When connecting to AP with wireless security
If wireless network has security applied you will be required to enter appropriate key
to enable communication. MediaStation Pro supports the following wireless security
protocols: WEP, WPA – TKIP or WPA-AES
✓ Note: When wireless icon is not activated or not connected to wireless station.
1. [Waiting or Rebooting] It might take some time to assign IP address from AP in
case of AP Mode. If it fails to connect reboot Access Point and MediaStation Pro
simultaneously.
2. [Manual Setting of IP address and Subnet mask] In case of AP Mode, disable DHCP
support and set IP Address and subnet mask manually. IP address must be different
between MediaStation Pro and wireless adapter, subnet mask must be the same for both
MediaStation Pro and wireless adaptor.
Example: MediaStation Pro: IP Address(192.168.10.2) Subnet(255.255.255.0) ==>
Wireless adapter: IP Address(192.168.10.3) Subnet mask (255.255.255.0)
Check IP address of AP
Select appropriate security protocol for your wireless network and then enter the
corresponding security key.
Press [OK] to save configuration.
Manual Setting of IP address and subnet mask MediaStation Pro
8
3. Shared File Playback (Stream)
After connecting LAN cable, you have to set network configurations of both Computer and MediaStation Pro.
*It is possible to assign IP address and Subnet Mask of MediaStation Pro as dynamic or static.
3.1 Windows 2000
1. Select a folder which you want to share. Right-click the folder and
click ‘Sharing’ in pop menu.
2. Check ‘Share this folder’ and write ‘share name’.
For example, “My Movie”
4. After that, the shared folder will be displayed as following
picture.
✓ Make sure to write ‘share name’ within 12 characters in English.
5. Move to [Settings > Control Panel> Administrative Tools >
Computer management > Local Users and Groups > Users], and
double click ‘Guest’.
3. Click ‘Permissions’ and check whether “Everyone” account is or
not. If not, add “Everyone” account.
✓ Recommend only to use ‘Read>Allow’ at Permissions.
9
6. Check ‘User cannot change password’ and ‘Password never
expires’.
For example,
IP address: 192.168.1.3
Subnet mask: 255.255.255.0
7. Move to [Control Panel>Network and Dial-up Connections], and
select Properties of ‘Local Area Connections’ by right click of
mouse.
✓ If you have already been ‘obtained an IP address automatically’ from DHCP Server
or IP Router on your local area network, you don’t need to write specific IP address
absolutely. Use ‘Obtain an IP address automatically’ or write IP address & Subnet mask
that DHCP Server or IP Router provide.
10. Set the network configurations of MediaStation Pro.
✓ If you see two or more ‘Local area connections’, select one that you will use for
connecting to MEDIASTATION PRO.
✓ You have to connect MediaStation Pro to TV set for this setup. See “6.1 Connect
Video Cable”.
Press [SETUP] of remote control for moving to setup screen. On
that screen, select ‘DHCP Support Off’ and write IP address &
Subnet mask.
For example,
IP Address: 192.168.1.2
Subnet mask: 255.255.255.0
8. Double click ‘Internet Protocol (TCP/IP)’ that you want to use on
your computer.
After writing, press [SETUP] again for saving configurations.
✓ If you have already been provided dynamic IP address from DHCP Server or IP Router
on your local area network, you don’t need to write static IP address absolutely. Use
‘DHCP on’ or write IP address & Subnet mask that DHCP Server or IP Router provide.
✓ Check ‘IP address obtained automatically’
When you use ‘DHCP On’, you can see the IP address on information screen with
pressing [INFO] button.
9. Check ‘Use the following IP address’, and write ‘IP address’ &
‘Subnet mask’ that you want to use.
<MediaStation Pro’s IP Address>
10
3.2 Windows XP
1. Select a folder which you want to share. Right-click the folder and
click ‘Sharing and Security’ in pop menu.
5. Check ‘User cannot change password’ and ‘Password never
expires’.
2. Check ‘Share this folder on the network’ and write ‘Share name’.
For example, “My Movie”
✓ Make sure to write ‘share name’ within 12 characters in English.
6. Move to [Control Panel>Network connections], and select ‘Local
area connections’ properties by right click of mouse.
✓ If you can’t find ‘Administrative Tools’ at Control Panel, click “Switch to classic view” in
left-up corner on screen.
✓ If you see two or more ‘Local area connections’, select one that you will use for
connecting to MediaStation Pro.
3. After that, the shared folder will be displayed as following
picture.
4. Move to [Settings>Control Panel>Administrative Tools>Computer
management>Local Users and Groups>Users], and double click
‘Guest’.
✓ This is for Windows XP Professional. Windows XP Home users can’t see this figure.
Go to next number 6).
✓ If you can’t find ‘Administrative Tools’ at Control Panel, click “Switch to classic view” in
left-up corner on screen.
11
7. Double click ‘Internet Protocol (TCP/IP)’ that you want to use on
your computer.
9. At above number 7) figure, click ‘Advanced’ Tab. Disable ‘Internet
Connection Firewall’.
✓ If you use service pack 2, refer to the following figures.
Click ‘Settings’ at ‘Windows Firewall’
8. Check ‘Use the following IP address’, and write ‘IP address’ &
‘Subnet mask’ that you want to use.
For example,
IP address: 192.168.1.3
Subnet mask: 255.255.255.0
Check ‘Off’ and click ‘OK’
✓ If you have already been provided dynamic IP address from DHCP Server or IP Router
on your local area network, you don’t need to write static IP address absolutely. Use
‘Obtain an IP address automatically on’ or write IP address & Subnet mask that DHCP
Server or IP Router provide.
12
10. Set the network configurations of MediaStation Pro.
After writing, press [SETUP] again for saving configurations.
✓ If you have already been provided dynamic IP address from DHCP Server or IP Router
on your local area network, you don’t need to write static IP address absolutely. Use
‘DHCP on’ or write IP address & Subnet mask that DHCP Server or IP Router provide.
✓ You have to connect MediaStation Pro to TV set for this setup. See “6.1 Connect Video
Cable”.
Press [SETUP] of remote control for moving to setup screen. On
that screen, select ‘DHCP Support Off’ and write IP address &
Subnet mask.
✓ Check ‘IP address obtained automatically’
When you use ‘DHCP On’, you can see the IP address on information screen with
pressing [INFO] button.
For example,
IP Address: 192.168.1.2
Subnet mask: 255.255.255.0
<MediaStation Pro’s IP Address>
3.3 Windows Vista
Before you do “folder sharing”, you need to set up 3 things for Network sharing.
1. Setup of User Accounts and Family safety
c. If the “Guest” account is off, then switch it to “On”.
a. Click Start > Settings > Control Panel > Users Accounts and
Family safety
b. Make sure the account is “Guest”.
13
2. Disable “Firewall”
c. make a folder you want to share.
a. Click Start > Setting > Control Panel > Security > Windows
Firewall on / off
d. You will get a popup “Choose people to share with” then
select “Everyone (All users in this list) and press “Add” button.
b. Click at ‘Off (not recommended)
e. After you register the user account, then click “Share” button.
3. Setup of Network and Sharing Center
a. Click Start > Setting > Control Panel > Network and Internet >
Network and Sharing Center
b. Select “Password Protected sharing” and select “Turn off
password protected sharing”.
14
4. Using the USB Host
✓ Note: How to eject the tray of external USB ODD (Optical Disk Drive)
Stop playback and press number [3] button in order to eject the tray of external USB ODD. In addition, original DVD title with CSS Lock should not be played when connecting with USB
host, but it is possible to play other format like XviD.
✓ Note: It is not possible to guarantee compatibility with all USB devices available in the marketplace. The MediaStation Pro has been tested on a variety of devices from various
manufacturers without issue.
Connect your external USB device to one of the USB host ports of MediaStation Pro.
The USB icon will be activated on file selection screen.
Select the USB icon and the files or folders of the USB device will be displayed. Select file for playback.
5. Connect to External AV Device
5.1 Connect Video Cable
MediaStation Pro supports 4 type of video output; “Composite, S-video, Component, HDMI”. Use the video connection that your TV supports.
Standard TV supports composite video connection, and this package includes a composite video cable.
① Component: Y, Pb, Pr component cable (supplied)
Green (Y)
Connect Y Jack of TV
Red (Pr)
Connect Pr Jack of TV
Blue (Pb)
Connect Pb Jack of TV
② Composite: Yellow RCA cable. (Supplied)
Red (right)
Connect to Audio RED of TV
White (Left)
Connect to Audio White of TV
Yellow (CVBS)
Connect to Composite
(CVBS) Jack of TV
③ S-Video: (cable not supplied)
Connect S-Video Jack of TV
S-VIDEO
④ HDMI : HDMI Cable (supplied)
Connect HDMI Jack of TV
HDMI
✓ If you can not see a picture after connecting video cable, check the following:
1. “TV “– Switch to Video Input Mode: Turn on TV, and switch to video input mode same as video connection. See TV user manual.
2. “MediaStation Pro” – Switch to Video Output Mode: Press [TV OUT] button repeatedly. Whenever you press [TV OUT], video output signal is changed.
3. Once you see a picture you must save video configurations of MediaStation Pro.See “6.1 Video Setup”.
15
5.2 Connect Audio Cable
MediaStation Pro supports 3 type of audio output; “Stereo, Coaxial, Optical”. Use the audio connection that your TV or Audio system supports.
Normally TV supports stereo audio connection, and this package includes a stereo audio cable.
① Stereo L / R (Supplied)
Red (right)
Connect to Audio RED of TV
White (Left)
Connect to Audio White of TV
Yellow (CVBS)
Connect to Composite
(CVBS) Jack of TV
② Optical ( ): Optical Cable for Digital 5.1 ch. (not supplied)
OPTICAL ( )
Connect Optical Jack of Amplifier or Receiver
✓ Don’t connect optical and coaxial cable together at the same time.
③ Coaxial: Coaxial cable for Digital 5.1 ch. (not supplied)
Connect coaxial jack of Amplifier or Receiver.
COAXIAL
✓ If you can not hear sound after connecting Optical or Coaxial Cable, you must change audio setup of MediaStation Pro to Encoded Digital. See “6.2 Audio Setup”
16
6. Basic Setup
6.1 Video Setup
This is the guide for setting the video output of your MediaStation Pro.
✓ If you can not see a picture after connecting video cable, check the following:
1. “TV “– Switch to Video Input Mode: Turn on TV, and switch to video input mode same as video connection. See TV user manual.
2. “MediaStation Pro” – Switch to Video Output Mode: Press [TV OUT] button repeatedly. Whenever you press [TV OUT], video output signal is changed.
TV Video Input Mode
MEDIASTATION PRO Video Output Mode
Normal Video
“TV Output” = Composite Mode
“Composite Mode” = C/S-Video
S-Video
Component 480i
“TV Output” = Composite Mode
”Composite Mode” = C/YPbPr
Component
480p
720p
1080p
”TV Output” = Component Mode
”Component Mode” = Select one among
480p, 720p, and 1080i same as TV input
mode
HDMI
480p
720p
1080i
1080p
640x480
800x600
1024x768
1280x1024
1600x1200
”TV Output” = HD-DVI Mode
”HD-HDMI Mode” = Select one among
480p, 720p, 1080i, 1080p, 640x480,
800x600, 1024x768, and 1280x1024,
1600x1200 same as TV input mode
Connection on TV, MEDIASTATION Pro
Video Cable Type
CVBS or Composite
(Generally Yellow)
Yellow RCA Cable
(Supplied)
S-Video
S-Video Cable
* Black rounded
Component 3
* Y(Green), Pb(Blue), Pr(Red)
Component Cable
* Y(Green), Pb(Blue), Pr(Red)
HDMI
HDMI Cable
✓ NTSC, PAL : Standard of TV Output. Select a proper one for using in your country. (European standard is PAL)
Setup Procedure
① Turn on MediaStation Pro and press [SETUP] on Mode Selection screen.
② Move to ‘Video Out’ icon and press [OK]. Setup box will be displayed under icon menu.
③ Select a TV Out Mode and each detailed video output mode according to the selected
TV Out, and then press [OK].
④ Finally, press [SETUP] again for saving configurations.
6.2 Audio Setup
This is the guide for setting the audio output of MediaStation Pro. You can use Stereo or Digital 5.1 ch.
✓ Analogue/DCPM: Select when you connect the supplied audio cables (Red / White) to TV or Audio set directly.
✓ Encoded Digital: Select when you want to listen through 5.1Ch / DTS Dolby by connecting receiver (or amplifier) with an Optical or Coaxial cable.
Setup Procedure
① Turn on MediaStation Pro and press [SETUP] on Mode Selection screen.
② Move to ‘Audio Out’ icon and press [OK]. Setup box will be displayed under icon menu.
③ Select Audio Out Mode from Stereo or Encoded Digital, and then press [OK].
④ Finally, press [SETUP] again for saving configuration.
17
6.3 Network Setup
It is possible to obtain an IP address automatically from DHCP Server or IP Router, or set the specific IP address. Check your network
environment.
✓ Note
DHCP On: You can use this option when it is possible to obtain IP address automatically from DHCP Server or IP Router. (Recommended for most users)
DHCP Off: When it is not possible to obtain IP address automatically or you connect to your PC directly without DHCP Server or IP Router, you have to use this option. Just write IP address
and Subnet mask.
‘DHCP Support On’ Setup Procedure
DHCP Support OFF Setup Procedure
① Turn on MediaStation Pro and press [SETUP] on Mode Selection screen.
① Turn on MediaStation Pro and press [SETUP] on Mode Selection screen.
② Move to ‘Network’ icon and press [OK]. Setup box will be displayed under icon menu.
③ Select ‘DHCP Support-ON’ and press [OK].
④ Finally, press [SETUP] again for saving configuration..
② Move to the ‘Network’ icon and press [OK]. Setup box will be displayed under icon
menu.
③ Select ‘DHCP Support-OFF’ and press [OK].
④ Move to ‘IP Address’, ‘Subnet’ and press [OK]. Input box will be displayed, enter
number with [Direction] button or [Number] button. Finally, press [ENTER] for saving
configuration.
✓ Check the obtained IP address
Press [INFO] on Mode Selection screen, and you will see the current IP address obtained
from the DHCP
✓ Check the obtained IP address
Press [INFO] on Mode Selection screen, and you will see the current IP address obtained
from the DHCP server.
18
6.4 Wireless Setup
Refer to “2. Connect to PC via Network > 2.2 Wireless LAN Connection”.
6.5 Wireless Security Setup
Refer to “2. Connect to PC via Network > 2.2 Wireless LAN Connection”.
6.6 LED Setup
It is possible to turn on or off a backlight LED of arrow button on the front side. When the LED disturbs you in night, turn off the LED.
① Turn on MediaStation Pro and press [SETUP] on Mode Selection screen.
② Move to ‘LED’ icon and press [OK]. Setup box will be displayed under icon menu.
③ Select one out of ‘ON’ or ‘OFF’ and press [OK].
④ Finally, press [SETUP] again for saving configurations.
6.7 Photo View Setup
When playing photo files it is possible to enable or disable Back Ground Music (BGM) and set the playback interval time of each photo files.
✓ Back Ground Music, Music Slide Show
Make a ‘music’ folder (in a lower case at root directory) of built-in HDD and save MP3 files into this folder. When you play one or all photo files, you can listen to mp3 files and see the photo
slide show together.
Before playing photo files, set the Photo mode by pressing [PHOTO] button.
Setup Procedure
① Turn on MediaStation Pro and press [SETUP] on Mode Selection screen.
② Move to ‘Photo View’ icon and press [OK]. Setup box will be displayed under
icon menu.
③ Select ‘ON’ or ‘OFF’ and press [OK] and set up [Slide show] / [Effect].
④ Finally, press [SETUP] again for saving configuration.
*It is possible to set the slide show interval time.
19
6.8 Language Setup
It is possible to set the preferable language. This language setup option may not be supported. In addition, this language will be applied on
OSD Language, not subtitle.
6.9 Screen Ratio Setup
This is guide for setting TV Type. You can use 4:3 Letter Box, 4:3 Pan Scan, and 16:9.
Setup Procedure
① Turn on MediaStation Pro and press [SETUP] on Mode Selection screen.
② Move to ‘Scr. Rate’ icon and press [OK]. Setup box will be displayed under icon menu.
③ Select one out of ‘4:3 Letter Box’, ‘4:3 PanScan’ or ’16:9’, and press {OK}.
④ Finally, press [SETUP] again for saving configurations.
6.10 Auto Play Setup
When this Auto Play function is On, MEDIASTATION PRO play the file continuously form the time of being stopped.
Setup Procedure
① Turn on MediaStation Pro and press [SETUP] on Mode Selection screen.
② Move to ‘Auto Play’ icon and press [OK]. Setup box will be displayed under icon menu.
③ Select one out of ‘ON’ or ‘OFF’ and press {OK}.
④ Finally, press [SETUP] again for saving configurations.
20
6.11 Internet (How to setup the Internet)
This is for how to connect MEDIASTATION PRO to the Internet.
① Turn on MediaStation Pro and press [SETUP] on Mode Selection screen.
② Go to the 2nd page and select [INTERNET] icon and press [ENTER] button then you
will get the above page.
③ By using arrow buttons, go to the bottom setup.
By using arrow & number keys, set the configuration and press [ENTER] for saving of the
configuration.
④ Press [SETUP] button for the saving of the configuration.
6.12 i-RADIO
How to set up the “i-Radio” on MEDIASTATION PRO.
✓ [Note]
i-Radio includes server lists of Shoutcast , Inlive ( live broadcasting list scan ) or UserList.
( save pls, m3u files in “iradio “ folder.).
How to setup
② Go to the 2nd page and select [i-RADIO] icon and press [ENTER] button.
③ By using arrow buttons, go to the bottom setup.
By using arrow & number keys, set the configuration and press [ENTER] for saving of the
configuration.
④ Press [SETUP] button for the saving of the configuration.
① After turning MediaStation Pro on, press [SETUP] button and go to [SETUP] page.
✓ Server lists
Shoutcast and Inlive has many server lists, you may wish to limit the server number list
with this function.
21
If “Off” option has been selected at the server list setting
✓ [Note]
After you have created the “iradio” folder in the root directory in the HDD of MEDIASTATION PRO, it shows only the list saved
in pls, m3u file. You can utilize play list creation software or media player software to create personal internet radio playlists.
① Press ◀ key at the main page, select “i-RADIO” icon and press [ENTER] button.
② Server lists saved in the “iradio” folder at the root directory are displayed. Select a list
and press [ENTER] button, after communicating with server radio stream should begin.
If “Shoutcast / Icecast” option has been selected at the server list setting
① It shows the live broadcasting server list and your own playlist from “iradio” folder.
② Select a list and press [ENTER] button, after communicating with server radio stream
should begin.
6.13 SKIN
With SKIN function, you can make your own GUI of MEDIASTATION PRO.
✓ [Note]
Save your own GUI or icon images in “skin1” folder at the root directory of MEDIASTATION PRO.
① After turning MediaStation Pro on, press [SETUP] button and go to [SETUP] page.
✓
✓
✓
✓
② Go to the 2nd page and select [SKIN] icon and press [ENTER] button then you will see
the setup page.
③ By using arrow buttons, go to the bottom setup.
By using arrow & number keys, set the configuration and press [ENTER] for saving of the
configuration.
④ Press [SETUP] button for the saving of the configuration.
SKIN Folder : you can make up to 10 (skin1,skin2…,skin10).
User Color File: If “colorx.txt” file is in the SKIN folder, it is showed as the user wants. If there is no color.txt file, then the default color is showed.
Font color: Select the font color on the GUI (default : black)
Font color selected: Font color when it is selected (Default : White)
22
How to setup
① Make “skin1” folder and save “GUI” or “Images” in the folder at the root directory in a
HDD of MediaStation Pro
② At Setup page of SKIN, select [ON] of [SKIN Support] and select [SKIN folder]. Press
[SETUP] button for saving the configuration.
③ Now you see the changed GUI.
If you can not see the font, then change the font color.
(Setup Page => SKIN=> Change Font Color)
④ As the above, it supports several font colors.
6.14 ETC
Here you set up a number of miscellaneous features; sound effect, screensaver and loading message.
How to setup
① After turn MediaStation Pro on, press [SETUP] button and go to [SETUP] page.
② Go to the 2nd page and select [ETC] icon and press [ENTER] button then you will get
the above page.
③ By using arrow buttons, go to the bottom setup.
By using arrow & number keys, set the configuration and press [ENTER] for saving of the
configuration.
④ Press [SETUP] button for the saving of the configuration.
23
6.15 Protocol
Here you can set up data transfer protocol to access data stored on servers on your network
How to setup
① After turning MediaStation Pro on, press [SETUP] button and go to [SETUP] page.
② Go to the 2nd page and select [Protocol] icon and press [ENTER]
③ Select Protocol you require from the options of SAMBA, NFS, FTP or uPNP
④ Depending on protocol selected enter the required parameters
i) SAMBA Server Address Setting : Select Auto or Manual
ii) SAMBA Server Address : Enter the server address
iii) NFS Server Address : Enter the NFS server address
iv) NFS Shared Folder : Enter the shared folder path.
v) FTP Address : Enter the FTP address
vi) FTP ID : Enter the FTP ID
Use the numeric pad and up/down buttons to select appropriate characters, [PREV] button
allows you to delete entries.
Press [SETUP] button to save the configuration.
6.16 FTP Server / Client setup
You can set up for FTP Server / Client.
How to setup
① After turning MediaStation Pro on, press [SETUP] button and go to [SETUP] page.
② Go to the 2nd page and select [FTP] icon and press [ENTER]
③ Use the numeric pad and up/down buttons to select appropriate characters, [PREV]
button allows you to delete entries.
④ Set the appropriate parameters:
i) FTP Client Local Disk : Enter the HDD path that you will use FTP client disk.
ii) MediaStation Pro FTP Server Setting : Set MediaStation Pro as FTP server.
iii) FTP Server Disk : Enter the HDD path that you will use FTP Server disk.
iv) Server ID : create the Server ID
v) Server Password : create the password to access the FTP server.
vi) Server Port : The default is 21 and you can select a preferable port number.
Press [SETUP] button to save the configuration.
24
7. How to Play (Remote Control)
7.1 Basic Screen Menu
7.1.1 Mode Selection
After turning on the MEDIASTATION PRO, you can see mode selection screen. In this screen you can select HDD, External USB device,
LAN(wired network) or WIRELESS(wireless network)
You can select one out of them.
7.1.1.1 Built-in HDD or external USB device
Following example is in case of built-in HDD. External USB device is same as built-in HDD.
① [Mode Selection] Select ‘HDD’ icon and press [OK]. (In case of external USB device,
select ‘USB’ icon)
② Data of built-in HDD is displayed. In order to play, select a file and press [OK].
7.1.1.2 Wired & Wireless Network
Following example is in case of wired network. Functionality is the same for wireless networking.
③ Shared folder of PC is displayed. In order to play, select a file and press [OK].
① [Mode Selection] Select ‘LAN’ icon and press [OK]. (In case of wireless network, select
‘WIRELESS’ icon,
② [PC List on Network] All accessible computers on your network will be displayed on
the screen.
✓ Refresh Network PC
To refresh list of computers on your network press [STOP]
25
7.1.2 File Selection
Select a file and press [OK] in order to play.
Function and Button Descriptions
Remote Control
Function
Descriptions
MENU
Menu Icon
Menu Icon is displayed including ‘Play one, Play all and Play-list’. Press again for returning file selection screen.
STWX
Direction Key
Direction key
PREV IWW
Move by page
In case of two or more file list page, move to previous page.
NEXT XXI
Move by page
In case of two or more file list page, move to next page.
SLOW ()
Up directory
Return to up directory.
DEVICE
Mode Selection
Return to HDD, USB, LAN, WIRELESS selection screen.
OK XI
Playback
Play a file.
SELECT
(Number 1)
Register a file at Play-List
Use when registering a file at Play-List. After selecting a file, move to “[MENU]>Play-List”
SELECT ALL
(Number2)
Register all files at Play-List
Use when registering all files at Play-List. After selecting files, move to “[MENU]>Play-List”
MOVIE
Movie Mode
Only Movie files are displayed.
MUSIC
Music Mode
Only Music files are displayed.
PHOTO
Photo Mode
Only Photo files are displayed
*After pressing [PHOTO], you can use photo slide show.
ALL MEDIA
All Media Mode
All media files are displayed including movie, music and photo.
INFO
-
Current information of MEDIASTATION PRO is displayed.
TV OUT
Video Out Signal
Press button to cycle through video signal types until you see a picture on your display screen.
Brt.CONT
Control luminosity, colour depth,
brightness
When pressing this button, 3 modes switch. After selecting a mode, change settings with TS arrow buttons.
SETUP
-
Move to setup screen.
✓ Play All File, Play One File
Press [MENU] and move to ‘Play Mode’ icon. Two Play modes are available, when pressing [OK], change the mode “Play one>Play all”. After selecting one, press [MENU] again for saving
configurations.
*Play One: Play the selected file and stop.
*Play All: Played the selected file and continue to play next all files at the directory including sub directory.
✓ Refresh Network
Press [STOP], computers listed on the network or shared folder list are refreshed.
✓ Jump to first or last page
There might to be two or more list pages in case of many files at directory. At the time, conveniently jump to first or last page.
*Jump to last page from first page: Move to [Up Directory] on the top of first page and press [▲] or [Previous].
*Jump to first page from last page: Move to the last file on last page and press [▼] or [Next]
✓ See a long directory path
In case of Directory path information is longer than file information, press [Scr.SIZE].
26
7.2 Play Video Files
When pressing [MENU] while playing a file, “Tool Box Menu” is displayed. Tool Box allows
using detailed playback function.
Select a file and press [OK].
Function and Button Descriptions
Remote Button
Function
Description
MENU
Tool Box
Tool Box is displayed. For returning to playback, press again.
Playback
Play file.
Pause
When pressing while playing a file, pause the playback. To resume playback, press again.
NEXT XXI
Playback
Next File
Play the next file after the file currently being played.
*” Play all” must be selected in order to use this function.
PREV IWW
Playback
Previous File
Play the previous file after the file currently being played.
*” Play all” must be selected in order to use this function.
Direction XXX
Fast Forward
Press this button to change play speed : 2x -4x- 8x -16x - 32x
Direction WWW
Rewind
Press this button to change reverse play speed : 2x -4x- 8x -16x - 32x
SLOW
Playback Slow
Play slowly 1/2x, 1/4x, and 1/8x whenever pressing this button.
Jump to Preferable Playback Time
Move to a selected time of a file.
Enter your preferred playback time with [Number] and press [OK]
Volume Up
Volume up.
Volume Down
Volume down.
OK XII
SEARCH
VOLUME +
Direction S
VOLUME Direction T
MUTE
Sound Off
Mute the sound.
Subtitle Move & Size
It is possible to change subtitle size and location.
WX arrow button changes size and ST arrow button changes location. After doing, press [OK].
Subtitle Sync.
It is possible to set the subtitle sync. with WX(one second) ST(60 second) when motion and subtitle
synchronisation does not match.
Subtitle Select or Hide
The subtitle name same as video file is displayed on screen automatically. However, it is possible to open the other
preferred subtitle files or hide.
Subtitle Language Select
It is possible to switch each subtitle language when the subtitle is dual language format, for example, including a
local language and English.
* When selecting ‘Discriminating subtitle language’, first subtitle language will be displayed.
BOOKMARK
Specific Playback Time Memory
Save specific playback time when pressing this button. If you want to see book mark list, press [BOOKMARK] on
file selection screen.
AUDIO
Dual Audio
It is possible to switch each audio language when the audio format is dual-audio, for example, including a local
language and English.
SUBTITLE
INFO
Show File Information
Show the file information which is being played. In order to hide the information, press this button again.
Brt. CONT
Control luminosity, color depth, brightness
When pressing this button, 3 modes switch. After selecting a mode, change settings with ST arrow buttons.
27
7.3 File Selection
DVD manager function supports the playback of backed up DVD Files in the same way as the original DVD.
Make a folder and then save all the DVD files into the folder. After connecting TV(or Monitor), select VIDEO_TS.IFO file at the folder. Make sure
that all the DVD backup files including VIDEO_TS.IFO from one DVD title will be located in one folder
✓ √ Note
If you can not find VIDEO_TS.IFO file among all the backed up files from an original DVD title, DVD manager function will not work.
Select ‘video_ts.ifo’ file and press [OK] button.
Move to the folder including backed up DVD files
Function and Button Descriptions
Remote Control
AUDIO
Function
Descriptions
Dual Audio
It is possible to switch each audio language when the audio format is dual-audio, for example, including a local
language and English.
SUBTITLE
Select Subtitle Type
Subtitle type will be changed whenever pressing this button.
Scr. SIZE
Screen Size
Screen size will be changed when press the button.
MENU
Go to Menu
Move to main menu while playing DVD.
SLOW
Playback Slow
Play slowly 1/2x, 1/4x, and 1/8x whenever pressing this button.
REPEAT
Chapter, Title Repeat
Set chapter, title repeat.
A-B REPEAT
A-B repeat
Set the A-B repeat.
TITLE
Go to Title Menu
Move to title menu while playing DVD.
ANGLE
Angle
Apply angle function.
INFO
Show File Information
Show the file information which is being played. In order to hide the information, press this button again.
SEARCH
Jump to Preferable Playback Time
Move to a selected time of a file.
(It is not possible to use time searching bar.)
Brt. CONT
Control luminosity, color depth,
brightness
When pressing this button, 3 modes switch. After selecting a mode, change settings with ST arrow buttons.
Playback
Next Chapter
Play a next chapter.
Playback
Previous Chapter
Play a previous chapter.
IW
FF XXX
Fast Forward
Whenever pressing this button, play speed is changed with 8x, 16x, 32x, 48x in forward.
REW WWW
Rewind
Whenever pressing this button, play speed is changed with 8x, 16x, 32x, 48x in backward.
NEXT
XXI
PREV
OK XII
Playback
Play ‘Video_ts.ifo’ file.
Pause
Pause playback, if pressing this button when a file is being played. In order to play again, press this button again.
Volume Up
Volume Up.
Volume Down
Volume Down.
Sound Off
Mute the sound. In order to hear sound, press this button again.
VOLUME +
Direction S
VOLUME Direction T
MUTE
28
7.4 Play Audio File
When pressing [MENU] while playing a file, “Tool Box Menu” is displayed. Tool Box allows
using detailed playback function.
Move to the folder including backed up DVD files
Function and Button Descriptions
Remote Control
Function
Descriptions
MENU
Tool Box
Tool Box is displayed. For returning to playback, press again.
Playback
Play file.
Pause
When pressing while playing a file, pause the playback. For returning to playback, press again.
NEXT XXI
Playback Next File
Play a next file after a current playback file.
* Play mode must be in Play all in order to use this function.
PREV IWW
Playback Previous File
Play a previous file after a current playback file.
* Play mode must be in Play all in order to use this function.
FF XXX
Fast Forward
Whenever pressing this button, play speed is changed with 2x, 4x 8x, 16x, 32x in forward.
REW WWW
Rewind
Whenever pressing this button, play speed is changed with 8x, 16x, 32x in backward.
SEARCH
Playback Time
Enter your preferable playback time with [Number] and press [OK].
Volume Up
Volume Up.
*It is not possible to use this button when manual subtitle is displayed while playing audio file.
Volume Down
Volume Down.
*It is not possible to use this button when manual subtitle is displayed while playing audio file.
OK XI
VOLUME +
Direction S
VOLUME Direction T
MUTE
Sound Off
Mute the sound. In order to hear sound, press this button again.
INFO
Show File Information
Show the file information which is being played. In order to hide the information, press this button again.
Brt. CONT
Control luminosity, color depth, brightness
When pressing this button, 3 modes switch. After selecting a mode, change settings with ST arrow buttons.
29
7.5 Play Photo File
When pressing [MENU] while playing a file, “Tool Box Menu” is displayed. Tool Box allows
using detailed playback function.
Select a file and press [OK].
Function and Button Descriptions
Remote Control
Function
Descriptions
Tool Box
Tool Box is displayed. For returning to playback, press
again.
Playback
Play file.
Pause
When pressing while playing a file, pause the playback. For
returning to playback, press again.
NEXT XXI
Playback
Next File
Play a next file after a current playback file.
* Play mode must be in Play all in order to use this function.
PREV IWW
Playback
Previous File
Play a previous file after a current playback file.
* Play mode must be in Play all in order to use this function.
INFO
Show File Information
Show the file information which is being played. In order to
hide the information, press this button again.
Brt. CONT
Control luminosity, color depth, brightness
When pressing this button, 3 modes switch. After selecting
a mode, change settings with ST arrow buttons.
MENU
OK XI
✓ Photo Slide Show
When play mode is set on ‘Play all(Default value)’, all photo files will be played continuously. So, It is possible to use as photo slide show.
✓ Music Slide Show
Make a ‘music’ folder (in lowercase) at the root directory of built-in HDD and save MP3 files at the folder. When you play one or all photo files, you can listen to the mp3 files and view photo
slide show simultaneously.
✓ Set the playback interval time
For a more convenient photo slide show, it is possible to set slide show interval setting . Press [SETUP] to access settings.
7.6 Make a Play List
You can make a playlist by selecting your favourite media files. Music, photo and movie files may be combined in the list.
✓ Note
After rebooting MEDIASTATION PRO, registered play list will be clear.
② After compiling files, press [MENU] and select “Play List”.
① Highlight the required file(s) and confirm by pressing [SELECT] or [SELECT ALL].
30
③ Play List screen is displayed.
-Play: Play the registered files.
-Cancel: Close the Play List screen.
-Move up, down: Change the file location..
-Shuffle: File location is mixed randomly.
-Delete: Delete the selected file..
-Delete all: Delete all the registered files.
7.7 Create a Private Folder
You can create your own folder of media content. This can be viewed by entering a PIN code during the device setup.
✓ Note
The “private” folder access is only controlled during playback on a display. If the HDD is connected to a computer all folders (and their contents) including “private” folder can be viewed
③ You can choose to enable “private folder view” by highlighting “ON” and pressing [OK]
④ You can set your own password. The default password is 0000. Press down arrow to
move to next input box.
⑤ Enter your chosen password using the numeric keys.
⑥ Press down arrow to move to next input box.
⑦ Confirm chosen password.
⑧ Press [OK] and press [SETUP] to save setting change.
⑨ “private” folder is now visible.
① When connected to your computer create a folder in the root directory called “private”
(in lowercase)
② Press [SETUP] button, highlight “Folder Lock” and select [OK]
31
8. Firmware Upgrade
From time to time a firmware upgrade file may be available, please check www.verbatim-europe.com/support . You can check the version of
firmware installed in your MediaStation Pro by pressing [INFO] button from main file selection screen.
Download upgrade file from website and save to the root directory of MediaStation Pro hard disk.
After connecting TV set, highlight the upgrade file and press [OK]. Upgrade will be completed automatically.
After finishing upgrade, you can check firmware version on Setup screen. Press [SETUP] button.
Technical Support
If you are experiencing difficulty installing or using your Verbatim product, please visit the main Verbatim Technical Support website at www.
verbatim-europe.com. From this page you can access our library of user documentation, read answers to frequently asked questions, and
download available software updates. Although most of our customers find this content sufficient to put them back on the right track, this
page also lists ways in which you can contact the Verbatim Technical Support Team directly.
Europe: For technical support in Europe e-mail [email protected] or call 00 800 3883 2222 in the following countries:
Austria, Belgium, Denmark, Finland, France, Germany, Hungary, Italy, Luxemburg, Monaco, Netherlands, Norway, Poland, Portugal, Republic of
Ireland, Spain, Sweden, Switzerland and the United Kingdom. All other countries call +353 61 226586.
Limited Warranty Terms
Verbatim Limited warrants this product to be free from defects in material and workmanship for a period of 2 years from date of purchase. This
warranty excludes batteries. If this product is found to be defective within the warranty period, it will be replaced at no cost to you. You may
return it with your original cash register receipt to the place of purchase or contact Verbatim.
In the following European countries, Austria, Belgium, Denmark, Finland, France, Germany, Greece, Hungary, Italy, Luxembourg, Monaco,
Netherlands, Norway, Poland, Portugal, Republic of Ireland, Spain, Sweden, Switzerland, and the United Kingdom call 00 800 3883 2222. All
other European countries call +353 61 226586. You can email [email protected].
Product replacement is your sole remedy under this warranty, and this warranty does not apply to normal wear or to damage resulting from
abnormal use, misuse, abuse, neglect or accident, or to any incompatibility or poor performance due to the specific computer software or
hardware used. VERBATIM WILL NOT BE LIABLE FOR DATA LOSS OR ANY INCIDENTAL, CONSEQUENTIAL OR SPECIAL DAMAGES, HOWEVER
CAUSED, FOR BREACH OF WARRANTIES OR OTHERWISE. This warranty gives you specific legal rights and you may also have other rights
which vary from state to state or country to country
WEEE Notice
The Directive on Waste Electrical and Electronic Equipment (WEEE), which entered into force as European law on 13th February 2003, resulted
in a major change in the treatment of electrical equipment at end-of-life.
The WEEE logo (shown at the left) on the product or on its box indicates that this product must not be disposed of or
dumped with your other household waste. For more information about electronic and electrical waste equipment disposal,
recovery, and collection points, please contact your local municipal household waste disposal service or shop from where
you purchased the equipment.
32
FCC Compliance
This equipment has been tested and found to comply with the limits for a Class B digital device, pursuant to Part 15 of the FCC Rules. These
limits are designed to provide reasonable protection against harmful interference in a residential installation. This equipment generates, uses
and can radiate radio frequency energy and, if not installed and used in accordance with the instructions, may cause harmful interference to
radio communications. However, there is no guarantee that interference will not occur in a particular installation. If this equipment does cause
harmful interference to radio or television reception, which can be determined by turning the equipment off and on, the user is encouraged
to try to correct the interference by one or more of the following measures:
Reorient or relocate the receiving antenna.
Increase the separation between the equipment and receiver.
Connect the equipment into an outlet on a circuit different from that to which the receiver is connected.
Consult the dealer or an experienced radio/TV technician for help.
CE Declaration
EC DECLARATION OF CONFORMITY
It is hereby declared that this product complied with the essential protection requirements of Council Directive 89/336/EEC and its amendments
on the approximation of the laws of the Member States relating to electromagnetic compatibility.
This declaration applies to all specimens manufactured identical to the model submitted for testing/evaluation.
EN 55022: 1998 + A1: 2000 +A2: 2003
EN 61000-3-3:1995 + A1: 2001
EN 55024: 1998 + A1: 2001 + A2: 2003
IEC 61000-4-2: 1995 + A1: 1998 + A2: 2000
IEC 61000-4-3: 2002 + A1: 2002
IEC 61000-4-4: 1995 + A1: 2000 + A2: 2001
IEC 61000-4-5: 1995 + A1: 2000
IEC 61000-4-6: 1996 + A1: 2000
IEC 61000-4-8: 1993 + A1: 2000
IEC 61000-4-11: 1994 + A1: 2000
RoHS Compliance
This product is in compliance with Directive 2002/95/EC of the European Parliament and of the Council of 27 January 2003, on the restriction
of the use of certain hazardous substances in electrical and electronic equipment (RoHS) and its amendments.
THIS DEVICE COMPLIES WITH PART 15 OF THE FCC RULES. OPERATION IS SUBJECT TO THE FOLLOWING TWO CONDITIONS:
(1) THIS DEVICE MAY NOT CAUSE HARMFUL INTERFERENCE, AND
(2) THIS DEVICE MUST ACCEPT ANY INTERFERENCE RECEIVED, INCLUDING INTERFERENCE THAT MAY CAUSE UNDESIRED OPERATION.
33