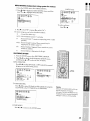
1
TOSHIBA
F FRAN(_AIS
S. ESPANOL
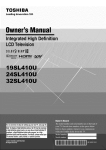
OWNER'SMANUAL
PlasmaColorTelevision
COLOR_TREliH"
,a==x.=_.
Drl,r_
SUIR R,OU,NID
SRS(O_
Dear Customer,
Thank you for purchasing this Toshiba TV. This manual will
help you use the many exciting features of your new TV.
Before operating the TV, please read this manual
completely, and keep it nearby for future reference.
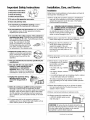
Safety Precautions
WARNING
TO REDUCE THE RISK OF FIRE OR ELECTRIC SHOCK,
DO NOT EXPOSE THIS APPLIANCE TO RAIN OR
MOISTURE.
ChildSafety
It MakesADifference
WhereYourTVStands
Congratulations on your purchase=.As you enjoy
your new TV, keep these safety tips in mind:
The Issue
i_ If you are like mostconsumers,you havea TV in yourhome.
Many homes,in fact, havemorethan one TV.
WARNING: TO REDUCE THE RISK OF ELECTRIC
SHOCK, DO NOT REMOVE COVER (OR BACK).
NO USER.SERVICEABLE
PARTS INSIDE. REFER
SERVICING TO QUALIFIED SERVICE PERSONNEL.
The lightning symbol in the triangle tells you that the
voltage Inside this product may be strong enough to
cause an electric shock. DO NOT TRY TO SERVICE
THIS PRODUCTYOURSELF.
The exclamctlon mark In the triangle tells you that
Important operating and maintenance Instructions
follow this symbol.
WARNING
To prevent injury, this apparatus must be securely attached
to the floor/wall in accordance with the installation
instructions.
NOTETOCAW INSTALLERS
IN THEUSA
This is a reminder to call the CATV system installer's
attention to Article 820-40 of the NEC, which provides
guidelines for proper grounding and, in particular, specifies
that the cable ground shall be connected to the grounding
system of the building, as close to the point of cable entry
as practical. For additional antenna grounding information,
see items 25 and 26 on page 4.
NOTICEOFPOSSIBLETV STANDINSTABILITY
DANGER:RISK OF SERIOUSPERSONAL
INJURY OR DEATH!
Use the Plasma Color TV only with the following
optional TV stand or bracket, use with any other type of
optional accessories may cause instability which could
result in the possibility of injury.
This servicing instructions are for use by qualified
service personnel only.
• Pedestal stand ...................................
FPT-TS42E
• Angled wall-hanging bracket...... FPT-TA4
When installing the TV,leavea space of at least 4 inches
around the TV.
2
i_ Thehometheaterentertainmentexperienceis a growing
trend,and largerTVsare popular purchases;however,they
are not alwayssupportedon the proper TVstands.
i_ SometimesTVsare improperlysecuredor inappropriately
situatedon dressers,bookcases,shelves,desks,audio
speakers,chests,or carts. As a result,TVsmayfall over,
causingunnecessaryinjury.
ToshibaCares!
i_ Theconsumerelectronicsindustry
is committedto making home
entertainmentenjoyableand safe.
i_ The ConsumerElectronics
Associationformed the Home
EntertainmentSupportSafety
Committee,comprisedof TVand
consumerelectronicsfurniture
manufacturers,to advocate
children'ssafetyand educate
consumersand theirfamiliesabout
televisionsafety.
rune Into Safety
i_ Onesizedoes NOTfit all! Useappropriate
fumiture large enoughto support the weight of your
"IV (andother electroniccomponents).
_3 Use appropriateangle braces,straps,and anchorsto secure
yourfurniture to the wall (but neverscrewanythingdirectly
into the TV).
_3 Carefullyread and understandthe other enclosed
instructionsfor proper useof this product.
_3 Do not allow childrento climb on or playwith fumiture
and TVs.
_3 Avoidplacingany item on top of your TV (suchas a VCR,
remotecontrol,or toy) that a curious child may reachfor.
_3 Rememberthat childrencan becomeexcitedwhile watching
a programand can potentiallypush or pull a TVoven
_3 Shareour safety messageaboutthis hidden hazardof the
home with your family and friends. Thank you!
2500 Wilson Bird
Arlington, VA 22201 US.A.
Tel 703-907-7600 Fax703=£07=7690
www CE.org
CEAiS the Sponsor, Producer and
Managerof the International
CE5_
Important Safety Instructions
1) Read these instructions,
r
2) Keep these instructions.
3) Heed all warnings.
4) Follow all instructions.
/_._
Installation
_^
_._
Follow these recommendations and precautions and heed all
warnings when installing your TV:
16) Never modify this equipment. Changes or modifications
may void: a) the warranty, and b) the user's authority to
operate this equipment under the rules of the Federal
Communications Commission.
5) Do not use this apparatus near water.
6) Clean only with dry cloth.
7) Do not block any ventilation openings. Install in
accordance with the manufacturer's instructions.
8) Do not install near any heat sources such as radiators,
heat registers, stoves, or other apparatus (including
amplifiers) that produce heat
9) Do not defeat the safety purpose of the polarized or
grounding type plug. A polarized plug has two blades
with one wider than the other_ A grounding type plug has
two blades and a third grounding
prong. The wide blade or the third
prong are provided for your safety.
If the provided plug does not fit into
your outlet, consult an electrician
for replacement of the obsolete outlet.
10) Protect the power cord from being
walked on or pinched, particularly at
plugs, convenience receptacles, and
the point where they exit from the
apparatus.
11) Only use attachments/accessories
manufacturer.
Installation,Care, and Service
17) _l_
DANGER: RISK OF SERIOUS PERSONAL
/ | \ INJURY, DEATH, OR EQUIPMENT
_DAMAGE!
Never place the TV on
an unstable cart, stand, or table. The TV
may fall, causing serious personal injury,
death, or serious damage to the TW
18) Never place or store the TV in direct sunlight; hot, humid
areas; areas subject to excessive dust or vibration
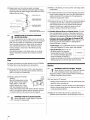
19) Always place the TV on the floor or a
sturdy, level, stable surface that can
support the weight of the unit.
Use a sturdy tie between the TV's rear
hook and the rear wall, pillar, etc., to
secure the TV.
Hook
TV
front
Wal_
20) Never place items such as vases, aquariums, or candles
on top of the TV.
specified
by the
12) Use only with the cart, stand, tripod,
bracket, or table specified by the
manufacturer, or sold with the
apparatus. When a cart is used, use
caution when moving the cart/apparatus
combination to avoid injury from tip-over.
13) Unplug this apparatus during
lightning storms or when
unused for long periods of
time.
14) Refer all servicing to qualified service personnel.
Servicing is required when the apparatus has been
damaged in any way, such as power-supply cord or plug is
damaged, liquid has been spilled or objects have fallen
into the apparatus, the apparatus has been exposed to
rain or moisture, does not operate normally, or has been
dropped.
15) The apparatus shall not be exposed to dripping or
splashing and that no objects filled with liquids, such as
vases, shall be placed on the apparatus.
21) Never
block or
cover
slots
or openings
in the
TVthe
cabinet
back, bottom, and sides.
Never place the TV:
___
• on a bed, sofa, rug, or similar
surface;
• too close to drapes, curtains,
or walls; or
• in a confined space such as a bookcase, built-in cabinet,
or any other place with poor ventilation.
The slots and openings are provided to protect the TV
from overheating and to help maintain reliable operation
of the TV.
22) Never allow anything to rest on or roll over the power
cord, and never place the TV where the power cord is
subject to wear or abuse.
23) Never overload wall outlets and extension cords.
24) Always operate this equipment with
a 120V AC, 50/60Hz power source
only, See page 7.
=
use the polarized plug with an extension cord, receptacle,
other outlet
can be inserted
I or
CAUTION:
To unless
reduce the
the blades
risk of electric
shock, do not
completely to prevent blade exposure.
(continued on next page)
3
J
J
I
J
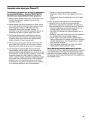
25) Always make sure the antenna system is properly
grounded to provide adequate protection against voltage
surges and built-up static charges (see Section 810 of the
National Electric Code).
/
Ground clamp
Etectdc service equipment \
Ground clamps
26)
Antenna
lead-in
wire
30) While it is thundering,
or apparatus.
Antenna discharge unit
(NES Section 810-20)
conductors
(NECSection 810-21)
Power service grounding
electrode system (NECArt 250 Part H)
_
DANGER: RISK OF SERIOUS PERSONAL
/ | \ INJURY OR DEATH!
_•
Use extreme care to make sure you are never in
a position where your body (or any item you are in contact
with, such as a ladder or screwdriver) can accidentally
touch overhead power lines. Never locate the antenna
near overhead power lines or other electrical circuits.
• Never attempt to install any of the following during
lightning activity:
a) an antenna system; or b) cables, wires, or any home
theater component connected to an antenna or phone
system.
For better performance and safer operation of your TOSHIBA
TV, follow these recommendations and precautions:
27) If you use the TV in the room of 0°C or less, the picture
brightness may vary until the plasma monitor warms up.
This is not a sign of a malfunction.
28) Always unplug the TV before
cleaning
Wipe the display panel surface
gently using only the supplied
wiping cloth or a soft cloth
(cotton, flannel, etc.). A hard
cloth may damage the surface
of the panel. Avoid contact with alcohol, thinner, benzene,
acidic or and alkaline solvent cleaners, abrasive cleaners,
or chemical cloths, as the surface may be impaired.
4
_
/ | \
_into
cables
31) For added protection of your TV from lightning and power
surges, always unplug the power cord and disconnect the
antenna fi'om the TV if you leave the TV unattended or
unused for long periods of time.
32) During normal use, the TV may make occasional snapping
or popping sounds. This is normal, especially when the
unit is being turned on or off. If these sounds become
frequent or continuous, unplug the power cord and
contact a Toshiba Authorized Sewice Center.
33) Possible Adverse Effects on Plasma Screen: If a fixed
(non-moving) pattern remains on the plasma screen for
long periods of time, the image can become permanently
engrained in the plasma TV panel and cause subtle but
permanent ghost images. This type of damage is NOT
COVERED BY YOUR WARRANTY Never leave you="TV
on for long periods of time while it is displaying the
following formats or images:
• Fixed Images, such as PIP/POP windows, stock tickers,
video game patterns, TV station Iogos, and websites.
• Special Formats that do not use
the entire screen For example,
viewing letterbox style (16:9) media
WARNING: RISK OF ELECTRIC SHOCK!
Never spill liquids o1"push objects of any kind
the TV cabinet slots,
_;_D@z_
i
on a normal (4:3) display (gray bars
=
at top and bottom of screen); or
viewing normal style (4:3) media on a widescreen (I 6:9)
display (gray bm_ on left and right sides of screen).
Care
29)
do not touch the connecting
Service
34)
_
WARNING: RISK OF ELECTRIC SHOCK!
/ | \ Never attempt to service the TV yourself. Opening
_and
removing the covers may expose you to
dangerous voltage or other hazards. Refer all servicing to
a Toshiba Authorized Service Center,
35) If you have the TV serviced:
• Ask the service technician to use only replacement parts
specified by the manufacturer,
• Upon completion of service, ask the service technician to
perform routine safety checks to determine that the TV is
in safe operating condition.
36) When the TV reaches the end of its useful life, ask a
qualified service technician to properly dispose of the TV.
Important notes about your Plasma TV
The following symptoms are not signs of malfunction
but technical limitation. Therefore TACP/THI/TCL
disclaims any responsibility for these symptoms.
1) Plasma display radiates infrared rays. It may affect other
infrared communication equipment under certain
operating condition.
2) Plasma display may cause interference in image, sound,
etc. of other electronic equipment that is easy to receive
electromagnetic waves (Le. AM radios and video
equipment_ under certain installed condition. In
particulal; it may affect electronic equipment beyond the
residential unit where a plasma display TV is used.
3) The Plasma display panel is manufactured using an
extremely high level of precision technology, however
sometimes some parts of the screen may be missing
picture elements or have luminous spots.
4) You can enjoy a video game with this TV. However, the
game which uses a ray gun etc and makes a screen a
target has some which cannot be used on a principle
5) Like all phosphor-based display devices and all gas
plasma display, plasma display can be susceptible to
permanent ghost image (phosphor burn-in) under certain
circumstances,
Certain operating conditions, such as the
continuous display of a static image (Le, logo& video
games, computer images, teletext) and displaying images
in 4:3 mode over a prolonged period of time, accelerate
phosphor burn-in if proper precautions are not taken,
To minimize the occurrence of phosphor burn-in, adhere
to the following guidelines and recommendations:
• Display a moving image whenever possible,
• Change the position of the menu display from time to
time,
• Always power down the display when you are finished
using it,
6) Even though you follow the above recommendations,
phosphor bum-in can still occur since phosphors
deteriorate as usage time accumulates. To reduce and
delay the phosphor burn-in take the following measures:
• Lower the Brightness and Contrast levels as much as
possible without impairing image readability.
• The LONG LIFE settings can reduce phosphor burn-in,
(page 60,)
• Display an image with many colors and color gradations
(i.e. photographic or photo-realistic images).
• Create image content with minimal contrast between
light and dark areas, for example, avoid white characters
on black backgrounds. Use complementary or pastel
color whenever possible.
• Avoid displaying images with few colors and distinct,
sharply defined borders between colors.
About ISM (Image Sticking Minimization)
function
The ISM function (The Image Sticking Minimization function)
automatically starts to decrease the brightness with small
steps when fixed pattern displays for long time, The pace of
the decrease and the delay time depend on the brightness in
the displayed screen,
5
Introduction
................................................................
to "Ibshiba .........................................................
Welcome
Supplied
accessories
Note Regarding
Exploring
.........................................................
Qtfick
Connect
Guide
........................
7
Adjusting
9
a VCR ........................................................
10
Connecting
a cable converter
box ..................................
10
Connecting
a cable converter
box and VCR ...................
11
Connecting
a DVD
player with ColorStream
40
with keeping aspect ratio .............
41
41
Using the favorite channel search function ..............
About the auto favorite feature ................................
42
42
Using the LOCKS
channel
menu
search function
...............................................
Entering the PIN code ............................................
if you cannot remember your PIN code ..................
Using the V-CHIP
menu
...............................................
BLOCKING
..........................................
43
43
43
44
44
12
TV RATING (independent
rating system for
broadcasters)
...........................................................
44
13
MPAA R*_PING (independent
rating system for
movies) ...................................................................
45
BLOCKING
45
c_
(component
video) and a VCR ......................................
Connecting
a DTV
ColorStream
_°(component
Connecting
two VCRs ...................................................
15
Locking channels
Connecting
a camcorder
15
Locking video inputs
.....................................................
47
Connecting
a device to the DVI/HDCP
........................
16
Using the game timer .....................................................
48
Connecting
a device to the TheaterLink
........................
17
Using the front panel lock feature ..................................
48
Connecting
an audio system ..........................................
Changing
the PIN code .................................................
48
Adjusting
the picture
49
Using
the
receiver/set-top
box with
video) and a VCR ................
................................................
control
remote
Preparing
the remote
Installing
the remote control
Remote
......................................
control for use ..............................
Control
batteries
functional
Device code setup
14
Unlocking
18
19
............................
key chart ......................
Operational
feature reset (8900) .............................
Device code table ....................................................
Learning
Setting
about
the remote control
IV
up your
Learning
..................................................
about the menu system
Using the Quick Connect
Changing
the on-screen
Selecting the antenna
Adding
channels
Changing
49
49
(Digital
channels
the lV's
Adjusting
channels
51
Labeling
52
the video input sources
caption
Setting the ON-timer
....................................
of the menu display
...............
feature .....................................
52
53
....................................................
54
Setting the sleep timer ....................................................
54
Adjusting
55
the sound .......................................................
Muting the sound ...................................................
Selecting stereo/SAP broadcasts ..............................
55
55
the sound
57
58
"][hrning off the built-ln speakers .............................
Selecting the Audio O(3"I' sound .............................
58
59
Using the StableSound _ feature ..............................
Adjusting the long life features .......................................
59
60
Displaying
..................................
62
mode ..................................
62
31
........................
31
32
using SurfLock
TM
.......................
formats ........................
32
34
35
the picture size .........................................
the "]['heater Wide picture
(Theater
Wide 2 and 3 only)
..................................
37
Using the auto aspect feature
..................................
38
the cinema mode ......................................
feature ..........................
the main and POP pictures .....................
Viewing
.... 32
Scrolling
Switching
51
Selecting the video input source .....................................
Resetting your audio adjustments
...........................
Using the sub-bass system (SBS) .............................
...................................................
Using the POP double-wlndow
50
Adjusting
Selecting
Selecting
..............
31
..........................................
picture
quality adjustments
30
your favorite channels
channels
your picture
......................
32
the wide-screen
Resetting
manually ....................
Switching between two channels using Channel
Return ....................................................................
Labeling
50
...............................
the Dolby Virtual sound feature ............... 56
the WOW TM surround sound feature ...... 56
32
Viewing
.......................................
the color temperature
Using the dosed
29
settings ........................................
Programming
Noise Reduction)
Selecting
Enjoying
Enjoying
automatically
Switching between two channds
50
rM DNR
Selecting the background
26
...................................
30
using SpeedSurf
features
the channel
23
24
29
............................
........................................................
channels
23
28
quality ...................................
Saving your new preferences
20
...................................
input ............................................
46
the picture
27
.......................
.....................................................
46
Adjusting
27
display language
and erasing channels
Changing
Using
Guide
...........................................................
19
...................................
to the 'PC-'s memory
Programming
Adding
.................................
............................
the picture mode ......................................
22
.....................
temporarily
Selecting
Searching and sampling the code of a device (8500) .... 22
lock feature (8000)
programs
..........................................
19
22
...................................................
Using the volume
OPTION
Using CableClear
Programming
the remote control for use with
your audio/video
devices ................................................
6
40
.................
.............
ENABLE
Connecting
a DVD player or satellite receiver and
a VCR ............................................................................
........................................
the size of the double-wlndow
Using the programmed
8
Connecting
the POP picture
Double-Window
7
TV ..................................................
your
Freezing
7
your new TV ...................................................
Connecting
7
39
40
the auto power off feature ......................
Understanding
the last mode memory
Index
feature ................
...................................................................
Specifications
38
information
the demonstration
....................................
Understanding
Appendix
35
on-screen
quality
57
62
62
63
.................................................................
63
Troubleshooting
.............................................................
64
Limited United
States Warranty
65
Limited Canada
Warranty
.....................................
..............................................
..........................................................................
66
67
liEN
I See "Important notes about
your Plasma 711"on page 5.
Introduction
Welcome
I
iTVi:
|
|
to Toshiba
Congratulations! You have purchased one of the finest Plasma TVs on
the market. The goal of this manual is to guide you through setting
up and operating your Toshiba TV as quickly as possible.
The model and serial numbers are on the back of your TV. Write
these numbers in the space provided on the front cover of this manual
for your records.
Note Regarding
QuickConnectGuide
Instructions in this manual are based on using the remote control.
You also can use the controls on the TV if they have the same name as
those referred to on the remote control.
TheQuick Connect Guide
automatically
appearson screen
thefirsttimethe TVisturnedon.
77_1s
featureprovideson screen
instructlbns
to guideyou through
theibl_ialsetupofyour 7V
Please read all the safety and operating instructions carefully, and keep
this manual for future reference.
TostoptheQuick Connect Guide
eitherpressEXITor turnoff the TV
See page 28 for details.
Supplied accessories
Check that you have the accessories and items shown.
Owner's Manual
Remote control
CT-90164
Batteries for the remote control
LR6 (AA) x 2
Power cord*
TheaterLink cable
Soft cloth for cleaning the screen
(three wire grounding
type)
Noise filter
* The power cord supplied with this product is to be used in United States and Canada only. tf this product is
used in another country, use a power cord which confirms to the law or regulations of that country.
Do not remove the noise filter from the power cord.
The noise filter is to reduce the interference in image or sound of other electronic equipment.
7
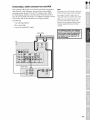
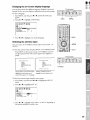
Exploring
your new "IV
You can operate
remote control.
your TV are on
(see illustrations
18.
TheaterLink
(IR pass
through)
Remote control
your TV using the buttons on the front panel or the
The A/V terminals for connecting other equipment to
the back panel and inside the storage compartment
below). Also see "Connecting your TV" on pages 9-
Power indicator
TV front
Remote sensor
I • 41
Push up
Left pocket panel
TVNIDEO
Headphones
Channel TA
Menu T_,
VIDEO-3
INPUT
Volume 4 I_
Menu < I_
jack
Wall outlet
Back
HDq
Variable
AUDIO OUT
ColorStream
HD-2
8
liEN
:N
Connecting
your TV
Note: One TheaterLinkcableis provided with your 7t/. No other cables
are providec_
• Coaxial cable is the cablethat comes in from your antenna,cable"IV
service,or cableconverterbox.Coaxialcable has"F" connectors.
Coaxial (antenna) cable
• Standard stereo AN cables usually come in setsof three,and are
typically color-coded according to use: yellow for video, red for stereo
right audio,and white for stereoleft (:ormono) audio.Your TV'sstandard
AN inputs are color-coded in the same manneras the cables.
Standardstereo _/cables
• S-video cable is for usewith video equipmentthat hasan S-Video
connector.
• Componentvideo cables come in setsof three (typically color-coded
red,green,and blue),and are for usewith videoequipmentthat has
componentvideo connectors.Your TV'sColorStream
_ (componentvideo)
inputs are color-coded in the samemanneras the cables.
• DVI-D digital single-link cable is for usewith videoequipmentthat has
a DVI-Ddigital single-link connector (seepage 16).
• TheaterLink cable is usedto remotelycontrol otherAN equipment
(equippedwith an infraredsenso0 throught the "11/(seepage 17).
NOTEREGARDINGPICTUREQUALITY
(typically color-coded yellow for video,
red and white for audio)
S-video
cable
Componentvideo cables
(typically color-coded red, green, blue)
DVI-D digital single-link cable
_/henconnectingvideo equipmentto yourToshiba"IV:
• For GOODpicture quality: Usea standard stereo A/V (yellow)
video cable.
• For BETTERpicture quality: If your equipmenthas an S-video
connector,use an S-videocable insteadof a standard yellowvideo cable.
(Youstill must connect the standard red and white audio cablesfor full
systemconnection,but do not connecta standardyellow videocableat
the sametime or the picture performancewill be unacceptable.)
TheaterLink
cable
CAUTION:
Do not plug ll} any power cords until you have
fimshed connecting all equipmen_
• ForBESTpicture quality: If your equipment hascomponentvideo
connectors,use componentvideo cablesinsteadof a standardyellow
video cableor an S-videocable [plus the standardred and white audio
cablesfor full systemconnection.)If your equipment hasa OVI-O
digital single-link connector,usea DVI-D cable _lus standardred
and white audio cablesconnectedto the audio terminals labeled"For
DVI/HDCPIN" for full systemconnection).
9
Connecting
a VCR
This connection allows you to watch local channels and video
Note:
programs, watch video tapes, and record one channel
another channel.
Ifyou have a mono VCR,connect L/Mono to
VCRAudio OUT using only one audio cable
while watching
ffyou have a VCRwith S video, use an S
video cable instead of the standard video
cable.
You will need:
• two coaxial cables
• one set of standard A/V cables
From Cable Box or Antenna _b
Stereo VCR
The unauthorizedrecording, use, distribution,
or revisionof television programs, videotapes,
DVDs,and other materials is prohibited under
the CopyrightLawsof the United States and
other countries,and may subjectyonto civil
and criminal liability.
TV
Connecting
This connection
channels.
a cable converter
box
allows you to watch basic and premium
Note:
cable
To use the TV's features, select ANT-1. To view premium channels,
select ANT-2, tune the TV to channel 3 or 4 (whichever channel is
vacant in your area), and use the converter
You will need:
• three coaxial cables
From Cable
TV
10
box to change channels.
Whenyou use a converter box withyour TV,
the remote control will not operate some
features,such asprogramming your favorite
channels,labeling channels,and Iock/_Tg
channels.
J
|
|
|
|
BEll
Connecting
a cable converter
:N
box and VCR
This connection allows you to watch and record basic and premium
cable channels, watch videotapes, and record one channel while
watching another channel. To use the TV's features, select ANT-I.
To view premium channels or record with the VCR, select ANT-2,
tune the TV and VCR to channel 3 or 4 (whichever channel is vacant
in your area), and use the converter box to change channels.
You will need:
• one cable signal splitter
• five coaxial cables
Note:
If you have a mono VCR,connect L/Mono to
VCRAudio OUT using only one audio cable.
If you have a VCR with S video,use an S
video cable instead of a standard video cable.
Whenyou use a converter box with your 7V,,
the remote control will not operate so/7?e
features, such asprogramming your favorite
channels,labeling channels,and locking
channeb.
• one set of standard A/V cables
From Cable
or revisionof television programs,videotapes,
DVDs,and other materials is prohibited under
the CopyrightLawsof the United States and
I other
The unauthorized
countries,andmay
recording,
subjectyou
use, distribution,
to civil
I
andcriminal liability.
TV
11
Connecting
and a VCR
a DVD player or satellite
receiver
This connection allows you to watch DVD/satellite, VCR, and TV
programs, and record one channel while watching another channel.
You will need:
• two (or three, if satellite receiver is used) coaxial cables
• one set of standard A/V cables (between the TV and VCR)
(plus one additional set of standard A/V cables if satellite receiver
is used)
• one S-video cable (between the TV and DVD player/satellite
receiver)
• one pair of standard audio cables (between the TV and DVD
player/satellite receiver)
Note:
For the highest possiblepicture quality from a
DVD player/satellite receiver without
component video or DVI/HDCP, use an
S video cable between the TVand DVD
player/satellite receiver Clfyour DVD player/
satellite receiveris compatible with
component video,see page 13 If your DVD
player/satellite receiveris compatible with
DVI/HDCP, see page 16).
Do not connect the DVD player/satellite
receiverand VCR to the same video channel
on the 7g CSeethe illustrations,which show
the DVD player/satellite receiverconnected to
VIDEO 1 on the TVand the VCRconnected
to VIDEO 2 on the Tg5
Stereo VCR
From
Antenna
TV
From
Satellite
Dish
12
Theunauthorizedrecording, use, distribution, I
or revision of television programs, videotapes, ]
DVDs, andother materials is prohibitedunder ]
the CopyrightLawsof the UnitedStates and
]
othercountries,and may subjectyonto civil ]
andcriminal liability.
BEll
Connecting
[component
This connection allows you to watch DVD, VCR, and TV programs,
and record TV programs. You can record one channel while watching
another channel.
Your TV has ColorStream ® (component video) inputs. Connecting
your TV to a DVD player with component video (such as a Toshiba
DVD player with ColorStream ®)can greatly enhance picture quality
and realism.
You will need:
• two coaxial cables
• one set of component
Note:
For the highest possiblepicture quality,use
componentvideo cables Cora DVI D digital
single link cable) between the TVand DVD
player.
Youcan connect component video cables
from the DVD player to either set of
ColorStream terminalsof} the TV(HD 1or
HD 2).
The ColorStream HD 1and HD 2 terminals
can be used with ProgressiveC480p,720p)
and Interlaced C4801;1080i) scan systems.
• one set of standard A/V cables
video cables
If your DVD player is not compatible with
component video (or DVl/HDCP), use an
S video cable Cplusan audio connection)
instead
• one pair of standard audio cables
From
Antenna
:N
a DVD player with ColorStream ®
video) and a VCR
Stereo VCR
or revision oftelevision programs,videotapes,
DVDs,and other materials is prohibited onder
the CopyrightLaws ofthe United States and
I othercountries,and
The unauthorized recording,
may subjectyouto
use, distribution,
civil
I
andcriminal liability.
Tv
DVD p{ayer with component video
13
Connecting a DTV receiver/set-top
box with
ColorStream ® (component
video} and a VCR
This connection allows you to watch DTV (digital TV broadcast),
VCR, and TV programs, and record DTV and TV programs. You can
record from one source while watching a program from another
source.
Your TV
your TV
enhance
You will
has ColorStream ® (component video) inputs. Connecting
to a DTV receiver with component video can greatly
picture quality and realism.
need:
• three coaxial cables
• two sets of standard A/V cables
• one set of component
video cables
• one pair of standard audio cables
From
Antenna
Stereo
VCR
Note:
For the highest possiblepicture quality,use
component video cables Cora DVl D digital
single link cable] between the TVand DTV
receiveL
Youcan connect component video cables
from the DTV receiver to either set of
CelorStream terminals on the TVCHD I or
HD 2].
The ColorStream HD l and HD_ terminals
can be used with ProgressiveC480p,720p]
and Interlaced C480_lO80i) seansystems.
#your DTV receiveris not compatible
wi_l component video CorDVI/HDCP], use
an S video cable Cplusan audio connection]
insteac_
Torecord from the DTV receiver,set the VCR
to Line IN. Tomonitor recording from the DTV
receiver,set the VCRto Line IN and the 7V to
VIDEO 1
Theunauthorizedrecording, use, distribution, I
or revision of television programs, videotapes, ]
DVDs, andother materials is prohibitedunder ]
the CopyrightLawsof the UnitedStates and
]
othercountries,and may subjectyonto civil ]
andcriminal liability.
From
DTV Antenna
14
I
II EII
Connecting
:N
two VCRs
This connection
allows you to record (dub/edit)
from one VCR to
another VCR while watching a videotape. You also can record one
channel while watching another channel.
You will need:
• two coaxial cables
• two sets of standard
A/V cables
Note:
If you have VCRswit/?S video,use S video
cables insteadof standard video cables.Do
not connect both a standard video cable and
an S video cable to VIDEO 7 CerVIDEO 2) at
the same time, or the picture performance
will be unacceptable.
De not connect the same VCR to t/?eoutput
and input terminals on the TVat the same
time.
VCR1
From Antenna
Todub or edi_ VCR2 must select Line/IV,,
and the TVmust select VIDEO 7.
* Tl?eVideoOUTterminalsdeesneteutput
the POP picture.
TV
** TheAudio OUT terminalscan output t/?e
sound of either the Main or POPpicture
Csee"Selecting the Audio OUT sound" of?
page 59)
or revision oftelevision programs,videotapes,
OVDs,and other materials is prohibited under
the CopyrightLaws ofthe United States and
J othercountries,and
The unauthorized recording,
use, distribution,
J
may subjectyouto
civil
andcriminal liability.
VCR2
Connecting
This connection
a camcorder
allows you to watch video materials
_mcorder.
You will need:
• one set of standard
A/V cables
recorded
on a
Note:
If you have a camcorder with S video, use an
S video cable instead era standard video
cable. Do not connect bet/?a standard video
cable and an S video cable at the same time,
or the picture performance will be
unacceptable
Video-3 (front panel)
15
Connecting
a device to the DVI/HDCP
Your TV's DV1/HDCP* 1N terminal is designed to accept HDCP
program material in digital form from E1A/CEA-861-compliant
**
consumer electronic devices, such as a set-top box or DVD player
equipped with a DV1-D digital single-link OUT terminal.t
The DV1/HDCP IN terminal is designed for best performance with
1080i high-definition video signals, but also will accept and display
480p, 720p, and 480i picture signals.
Note: ThisTVis not intendedfor connectionto
and shouldnot be used with a PC Cpersonal
eomputerJ.
You will need:
* DVI/HDCP ... Digital V_sualInterface/
High ban&vidth Digital Content Protection.
** EIA/CEA 867 compliance coversthe
transmissionof uncompresseddigital
video with high bandwidth digital content
protection, which is being standardizedfor
future reception of high definition video
signals
t Consultyour consumer electronicsdealer
for availability
Notes
• Make sure the DVI cable is fastened
• one DVI-D digital single-link cable
You will need:
securely to the TV and DVI device.
If the cable is not fastended securelyon
both ends, the TVmay suffer from picture
noise C3now") or have no picture at all
• Toensurethat the DVI/HDCP device is
Note: Forproperoperation,the DVI D cablelength
shouldnotexceed3m C98 ft5 Therecommended
length is2m C6.6 fO.
• one pair of standard audio cables
reset properly, it is recommended thatyou
follow theseprocedures:
DVI/HDCP device
(for example, set-top box or DVD player)
a) When turning on your electronic devices,
turn on the TV first, and then the
DVI/NDCP device.
b) When turning off your electronic devices,
turn off the DVIIHDCP device
first, and then the T7
TV
16
mEN
:N
Connecting a device to the TheaterLink
The TheaterLink allows you to remotely operate (through the TV)
most infrared-controlled devices* (such a_sa Toshiba infraredcontrolled VCR or DVD player) endosed within an entertainment
center or similar cabinet. Without the TheaterLink, the device
typically would need to be visible to operate it remotely.
You can use the TV's remote control (programmed to operate
the device; see pages 19-25) or the device's remote control. Point
the remote control at the front of the TV and press the button for the
desired function. The signal passes from the remote control through
the TV to the device via the TheaterLink cable (included with your
TV).
To connect, align the TheaterLink cable's infrared "eye" with the
device's infrared sensor and attach it using double-sided mounting
tape (included with the cable in the accessory pack). Plug the other
end of the TheaterLink cable into the TV's TheaterLink OUT
terminal.
You will need:
• one TheaterLink
cable (included)
• one piece of double-sided mounting tape (included)
Front of infrared-controlled device*
(such as a Toshiba infrared-controUed
VCR or DVD player)
TheaterLink
cable's infrared
device's infrared
With this connection, point the Toshiba
TVremote control at the front of the 71/
to operate bob'?the TVand the infrared
controlled device (You also can point
the device's remote control at the 7q/to
operate the device,but you also will
need to use the TV'sremote control to
operate the TIZ)
Back of TV
*The TheaterUnk OUT function has been verified for use with Toshiba fafrared-controlled devices Due to the wide variation in remote control
operation among manufacturers, these functions may or may not operate with other brands
17
Connecting
an audio system
This connection allows you to hear the TV sound through external
speakers connected to an audio amplifier.
To control the audio through the amplifier, turn on the TV and the
amplifier, set the volume of both to a moderate level, and turn offthe
TV's built-in speakers (see "Turning off the built-in speakers" on page
58).
You will need:
• one pair of standard audio cables
Amplifier
TV
18
Note:
If the volume of either the TVor the amplifier
is set to 0 CorOFF),you will not hear any
sound
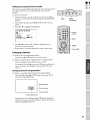
IEI
Using the remote
Preparing
control
the remote
control
for use
Your Toshiba TV remote control has one dedicated TV mode and five
universal modes: VCR, Cable/SAT, DVD, Audiol, and Audio2. The
target devices and default devices
are as follows:
being programmed
for each mode
Target device/Mode mapping
TV
Toshiba TV
CABLE/SAT
Universal Cable, Satellite
VCR
Universal VCR, DVD, LD, Cassette
DVD
Universal DVD, VCR, LD, Cassette
AUDIO1
Universal Audio: Amp., Tuner, Misc.Audio, CD/MD
AUDIO2
Universal Audio: CD/MD,
Note:
Your TV'sremote control may not operate
certain featureson your VCR, cable 7V
converter,or otber electronic device
Refer to the owner's manuals foryour other
devices to determine tbeir availablefeatures.
ffyour 7V's remote control does not operate a
specific feature on a dewbe,use the remote
control that came with the device.
Amp., Tuner, Misc.Audio
Default device codes
TV
Toshiba TV
CABLE/SAT
ToshiBa Satellite receiver
VCR
Toshiba VCR
DVD
Toshiba DVD
AUD[OI
Pioneer Audio receiver
AUDIO2
Pioneer LD
MODE
Repeatedly press MODE to cycle among the modes, lfyou own
different brands of audio/video devices, you must first program your
remote control (see "Programming the ,'emote control for use with
your audio/video device_' on page 22).
Installing the remote control batteries
To install the batteries:
i. Slide the battery cover off the back of the remote
control,
r\
Caution:
• Dispose of batteriesff_a designated
disposalarea Do not throw battedes into
a f/r_
• Donotmixbatteryzypesorcomblheused
batteries with new or?e&
• /fthe remote contm/deeaootoperate
_orrectl_oriftheaperat/ngraogebeoomes
\1
2. Install two "AA" size alkaline batteries. Match the + and - signs
on the batteries to the signs on the Battery compartment.
3. Slide the battery cover back on to the remote control until the
lock snaps.
feduceg
ones
rep/acebothbatteries_Jth
_e_/
• ffthe batteries are dead of Jfyou wJJ/not
use the remote control for a long time,
remove the batteries to prevent battery add
from leaking into the battery compartment
Remote
Control
functional
'fbshiba TV
key chart
Cable
_ SAT
Satellite
CB LSAT
Receiver
Lights the remote key, and toggles between enabled and disabled Illumination
CD/MD
Cassette
mode.
Sleep timer
Power
.....................
Power
Power
Power
Power
Power
Power
Power
Digit i
Digit 1
Digit i
Digit i
Digit i
AV input 1
Digit 1
Digit i
Digit 2
Digit 2
Digit 2
Digit 2
Digit 2
AV input 2
Digit 2
Digit 2
Digit 3
Digit 3
Digit 3
Digit 3
Digit 3
AV input 3
Digit 3
Digit 3
Digit 4
Digit 4
Digit 4
Digit 4
Digit 4
AV input 4
Digit 4
Digit 4
Digit 5
Digit 5
Digit 5
Digit 5
Digit 5
CD
Digit 5
Digit 5
Digit 6
Digit 6
Digit 6
Remote control device mode selection
Digit 6
Digit 6
'llmer
Digit 6
Digit 6
Selects the
_
<
<
<
TV
<
'IV
'IV
<
'IV
<
'IV
TV
'IV
image shape.
tLNT
Digit 7
Digit 7
Digit 7
Digit 7
Digit 7
Phono
Digit 7
Digit 7
Digit 8
Digit 8
Digit 8
Digit 8
Digit 8
Cassette
Digit 8
Digit 8
Digit 9
......
100
Digit 9
Digit 9
Menu
+10
Aux
.........
.........
Digit 9
Digit 9
---
Digit 9
Digit 9
Action, Men....
i00/ ....
Digit 0
Digit 0
Digit 0
Digit 0
Digit 0
Digit 0
Digit 0
Digit 0
CH Enter
..................
Guide
INFO
-----
DVD setup .........
TITLE ..........
Favorites
---
'lbp menu
Subtitle
.........
Audio
.........
Menu
.........
Volume
up/down*
Ener t --{
ETUP
......
......
{{{{{:{
{{a:{{
Favorites
---
TheaterLink
.........
Menu
-_-
Action
Menu
_-_
Menu select/ -_FAV AV
Menu select _-_
Menu select .........
Menu select -_-
Menu select _-_
Menu select .........
Enter
-_-
Select
_-_
Enter
.........
Volume
up/down*
Exit
Volume
up/down*
-_-
Volume
up/down*
Exit
Volume
up/down*
--_
Volume
up/down*
DVD clear
Volume
up/down*
.........
Volume
up/down*
Channel
Channel
Channel
Channel
_--
Channel
......
up/down
up/down
up/down
up/down
TV/Video
<
TV
<
TV
VCR input
up/down
<
'IV
Input
<
TV
<
TV
select
Sound mute*
On-screen
display
Previous
channel
;ound mute*
On-screen
display
Previous
channel
;ound mute* Sound mute* Sound mute* Sound mute*
On-screen
display
Previous
channel
......
.........
2O
;ound mute* Sound mute*
On-screen
display
---
On-screen
display
DVD
return
.........
Slow FWD
Slow FWD
Slow REV
.........
.........
_-_
_-_
_-_
Skip FWD
Skip REV
Rewind
-_-_Rewind
.........
VCR _
.........
.........
VCR_
VCR _
Rewind
Skip FWD
Skip REV
Rewind
VCR _
VCR_
VCR_
Pause
Pause
_-_
Pause
Pause
VCR _
VCR _
VCR_
VCR_
VC_
VCR_
Play
Fast FWD
Play
Fast FWD
_-_
_-_
Play
Fast FWD
Play
Fast FWD
IEI
'IbshibaTV
Cable
Satel[ke
TV/SKF
VCR
TV/VCR
.......
VCR--_
VCR_
TV
VCR_
<-TV
TV
<-_
TV
<-_TV
<-_TV
i!iiiiiiiii!i
<--_÷
TV
-- TV
-- TV
-- TV
Stop
Record _*
Stop
_--
<_
'IN'
Receiver
CD/MD
.........
Cassette
Reverse
Disc shift
VCR_
<--
DVD/LD
AM/FM
Disc shift
Deck side
MB switch
Stop
Stop
Record**
Record**
'IV
<---
TV
<----
TV
<----
TV
TV
TV
<--TV
<---'IW
<---TV
<----TV
"g_
TV
<--TV
<--TV
_--TV
<---'IV
_---'IV
_---'IV
÷---IN"
÷----TV
-_----IV
÷----TV
÷----TV
*----TV
_--TV
÷--TV
÷--TV
<--TV
_--TV
<---'fV
<---TV
÷----'fV
÷----TV
_TV
+-----TV
_TV
÷--TV
<----TV
<----TV
Notes:
"- " will sendnothing.
• "<
- 7V" willjump to TI/
• "--_
VCR" wdljump to last acdve FOR or DVD Active VCR/DVD £' de£,ted as'the mode that rematktsfor a mk_imumof 5
.s_c'oltfla,or ira key is p_ssefl i_)fl_atmode.
* The VOLUME _nd MUTE willjtlrr_p to '7V" by default Whes the volume i_unlocked, all tits devic'es'will have their own volume.
TheAUDIO 1/2 (Bees)vet,CD) modes will hove theL,own volume eves if Volume Lock is os TV,,CABI E/SA?7VCR,or DV[2 See
"U.s2tgthe Volume Lock feature" on page 23.
**Presstits REC button twice within 5 secosds to record each audio/video ,_oarce
21
Programming the remote control for use with
your audio/video devices
Device code setup
1. Refer to tile Device code table on pages 24-25 to find the code
for the brand of your device.
tf more than one number is listed, try each one separately until
you find the one that works.
2. Press MODE until the Mode indicator of the device (CABLE/
SAT, VCR, DVD, AUDIO1, AUD102) lights up.
3. While holding down the RECALL button, press the Channel
Number buttons to enter the four-digit code of your brand of
device. If a valid code is entered, the mode indicator will blink
twice, lfan invalid code is entered, the mode indicator will blink
one long blink.
4. Point the remote control at the device and press POWER to test
the code.
tf the device turns on, you have entered the correct code.
tf the device does not respond to the remote control, you may
have entered the wrong code. Repeat steps 3 and 4 using another
code.
5. Press MODE to select the TV mode to control the TV.
Searching
and sampling
the code of a device [8500}
If you do not know the device code for a particular target unit, you
can cycle the remote control through the available codes for that
device mode and sample the functions to find the code that properly
operates the target device. The keys available to be sampled, provided
they are applicable to that mode, are POWER, 1, VOL A, CH A, and
PLAY. Invalid keys will be ignored while in program mode.
To cycle through each available device code and sample its functions:
1. Press MODE to select the mode you want to set up.
2. While holding down the RECALL button, press 8 -5 -0 -0.
The remote control will enter program mode.
3. Point the remote control at the target device and press POWER
(or other function buttons that are available to be sampled).
4. tfthe device responds to the remote control:
Press RECALL to store the device code.
The mode indicator will blink twice and the remote control
will exit the program mode.
tf the device does not respond to the remote control:
Press A, and then press POWER.
Repeat this step until the device responds to the remote
control, and then press RECALL.
Note:
22
When a search cycleis completed, the mode indicator will blink
three times 7heremote control will begin to cycle through the
availablecodesagain ff no key is pressed within tOseconds while
programming, the remote control will exit the program mode and
return to the previous code
Note:
• Everytime you replace the batteries,you
must reprogram the remote con_oL
• Some newer VCRsare capable ofworking
on either of two remote codes TheseVCRs
havea switch labeled "VCRI/VCR2."
ffyour VCRhas thiskind of switch and
does not respond to any of the codes for
your VCR brand,set the switch to the other
position (VCRI or VCR2)and reprogram
the remote con_ol
Using the volume
lock feature
(8000)
For the TX,(CABLE/SAT, VCR, and DVD mode,t, the volmne
controls (VOL &l r and MUTE) can be programmed (locked) to the
selected device mode. This feature does not apply to the AUDIOI/2
modes.
Number
For example, to lock the volume controls to always jump to tile
CABLE/SAT mode:
MODE
1. Repeatedly press MODE to select the CABLE/SAT mode.
2. While holding down the RECALL button, press 8 -0 -0 -0.
3. Press VOL &.
The Mode indicator will blink two times (locked).
The following table describes in more detail the Volume Lock
implementation.
VOL& •
RECALL
TV
CB_SAT
DVD
I AUD2
I
AUD1 lAUD2
CB_SAT
CBUSAT
CBL/SAT
AUDI lAUD2
T
VCR
VCR
¥CR
AUDllAUD2
DVD
DVD
D_)
AUDllAUD2
AUDI
AUD1
AUD1
AUDlfAUDI
AUD2
AUD2
AUD2
AUD21AUD2
I
[
I
'IN
BV/S
VCR
'IN
AUD]
TV
I
I
I
To reset the volume controls to the original device code:
1. While holding down the RECALL button, press 8 -0 -0 -0.
2. Press VOL Y.
The Mode indicator will blink four times (unlocked).
Operational
feature reset (8900)
This feature clears all _tup features not related m "Device code set
up" and resets the Volume Lock to "TV."
To reset tile features:
While holding down the RECALL button, press 8 -9 -0 -0.
The Mode indicator will blink two times, and then pause and
blink two more times.
23
Device code table
VCR setup codes
Code
ADMIRAL
AIWA
AKAI
0135
0127, 0132, 0181
0129, 0114, 0115,
0116
0139, 0111
0105, 0113
0120, 0126, 0180
0123, 0125
0143
0106
0105, 0129, 0106
0145,0124,0127
0143, 0101, 0124,
0175
0139, 0110, 0111
0145
0143, 0126, 0119,
0103, 0125, 0142,
0120,0118
0105, 0108, 0109,
0107, 0113,0165
0127, 0126, 0120,
0134
0133, 0145, 0124
0137, 0151, 0163,
0149, 0150, 0182
0106
PHILCO
0170, 0171, 0168,
0134,0156
0123, 0145, 0100,
0127, 0168
0124,0123
0139
0139,0110,0111,
0134,0157,0158,
0184, 0185
0139, 0110, 0106,
0111
0159
0127, 0106, 0100,
0107, 0108, 0105,
0109
0131, 0123, 0124,
0173
0139, 0110, 0111
0106
0124, 0109
0138, 0140, 0147,
0148, 0141, 0142
0100, 0145
0138, 0140, 0147,
0148, 0141, 0142,
0161, 0164
0147, 0127, 0104
0139,0110,0111,
0134
0124, 0123
0128, 0121, 0135,
0106
SANYO
SCOTT
AUDIO DYNAMIC
BELL&HOWELL
BROKSONIC
CANON
CCE
CITIZEN
CRAIG
CURTIS MATHES
DAEWOO
DBX
DIMENSIA
EMERSON
FISHER
FUNAI
GE
GO VIDEO
GOLDSTAR
GRADIENTE
HITACHI
INSTANT REPLAY
ENSEN
JVC
KENWOOD
LG
LXI
MAGNAVOX
MARANTZ
MARTA
MEMOREX
MGA
M INOLTA
MITSUBISHI
MULTITECH
NEC
OLYMPIC
OPTIMUS
ORION
PANASONIC
PENNEY
PENTAX
24
Cable box setup codes
Brand
0126,
0123,
0122
0124,
0105,
0111
0100,
0120, 0132
0124, 0121,
0100, 0145,
0139, 0110,
0111, 0145
PHILIPS
PIONEER
PROSCAN
0131,0124,0127,
0123,0126,0120,
0143
0131,0123,0124,
0173
0123
0145,0100,0123,
0124,0131,0146,
0101,0102,0133,
0174
QUASAR
0121,0122,0123,
0124
RADIO SHACK
0133,0124,0105,
0136,0109,0140,
0127
0133,0145,0100,
0123,0124,0131,
0146,0101,0102,
0170,0172,0174,
0176,0183
0124,0105,0136,
0109,0140, 0127
0137,0102,0104,
0133
0163
0139,0126,0120,
0152
0105,0109,0113
0101,0102,0104,
0109,0138,0140,
0147,0148,0126,
0120
0105,0106,0107,
0108,0100
0135,0136,0167,
0162
RCA
REALISTIC
SAMSUNG
SAMTRON
SANSUI
SEARS
SHARP
SHINTOM
SIGNATURE 2000
SINGER
SONY
SV2000
SYLVANIA
SYMPHONIC
TASHIRO
TATUNG
TEAC
0117
0127,0135
0117
0128, 0129, 0130,
0153,0154,0155
0127
0131,0123,0124,
0127,0178
0127,0168,0177
0106
0139,0110,0111
0139,0110,0127,
0111
TECHNICS
0121,0122,0123,
0124
TEKNICA
0124,0127,0112
THOMSON
0179,0183
TOSHIBA
0101,0146,0166,
0160
VECTOR RESEARCH0111
WARDS
0135,0136,0109,
0144,0106
YAMAHA
0105,0139,0110,
0111
ZENITH
0144,0106,0169,
0180
Brand
Code
ABC
ARCHER
CABLEVIEW
CITIZEN
CURTIS
DIAMOND
EAGLE
EASTERN
GCBRAND
GEMINI
G.I._ERROLD
1124
1132,1125
1105,1132
1122,1105
1112, 1113
1124, 1132,1125
1129
1134
1132, 1105
1122, 1143
1119, 1124, 1125,
1126,1127,1120,
1121,1122,1111,
1123,1152
1140, 1141, 1142,
1145,1118,1112
1103,1124
1103, 1104,1105,
1108
1133
1130
1132, 1105
1139,1137,1102
1109, 1110,1114,
1151,1153
HAMLIN
HITACHI
MACOM
MAGNAVOX
MEMOREX
MOVIETIME
OAK
PANASONIC
PHILIPS
PIONEER
PULSAR
PUSER
RCA
REALISTIC
REGAL
REGENCY
REMBRANT
SAMSUNG
S.A.
SLMARK
SPRUCER
STARGATE
TELECAPTION
TELEVIEW
TEXSCAN
TOCOM
TOSHIBA
UNIKA
UNIVERSAL
VIDEOWAY
VIEWSTAR
ZENITH
ZENITH/DRAKE
;ATELL1TE
1128,
1106,
1131
1101,
1105,
1132
1115
1132
1112,
1141,
1149
1134
1137,
1138
1105
1111,
1105,
1105,
1132,
1148
1101,
1144
1135,
1104,
1132,
1122,
1106
1129, 1130,
1107, 1150,
1116
1132
1118, 1140,
1142, 1145,
1132, 1105,
1112, 1113
1101
1110
1105
1105
1136, 1147
1146
1125
1132
1129, 1130
1117, 1100
1100
IEI
Device code table
N_:
CO Player setup codes
Brand
ADMIRAL
AIWA
CARVER
DEHON
EMERSON
FISHER
GARRARD
HARMAN KARDON
HITACHI
ENSEN
JVC
KENWOOD
LX[
MAGNAVOX
MARANTZ
MCINTOSH
NAKAMICHI
ONKYO
OPTIMUS
PANASONIC
PH|DPS
PIONEER
QUASAR
RCA
SANSUI
SANYO
SCOTT
SHARP
SHERWOOD
SONY
SOUNDE-SIGH
TEAC
TECHNICS
VICTOR
YAMAHA
Code
6126
61,t3,
6129
6142,
6139
6105,
6117
6120,
6119
6107
6134
6140,
6148,
6100,
6145
6136
6129,
6129
612 I
6110
6114,
6108,
6122
6124,
6150
6129,
6108
6125,
6147,
6131,
6110,
6105
6110,
6142,
6120
6128
6144
6112,
6127,
6140,
6102,
6135
6151
6106
6121,6123,
6141,6145,
6151
6101,611 I,
6132
6115
6118, 6120,
6125, 6127,
6130, 6149
6127, 6124
6137, 6138,
6152
6146, 6l 13
6146
6143
6116, 61 I8
6124, 6125
6141,6145
6103, 6104
Receiver setup codes
Brand
ADMIRAL
AIWA
DENON
Code
4120
4125,
4134,
4143
FISHER
4104
GARRARD
4113
HARMAN KARDON 4115,
iENSEN
4129
JVC
4132,
4144
KENWOOD
MAGNAVOX
MARANTZ
MCINTOSH
M1TSUBISHI
NAKAMICHI
ONKYO
OPTIMUS
PANASONIC
PHILIPS
PIONEER
4100,
4142,
4127,
4124
4116
4148
4106,
4109,
4103,
4130
4l 19,
4123
4105,
4126, 4146
4135, 4136,
4123, 4145
4133, 4140,
DVD setup codes
Brand
Code
QUASAR
RC__,
4I 19,4II8,4121
4103, 4105, 4127,
4131, 4130, 4149
4103, 4111,4139
4134, 4137
4122
4138
4112, 4113,4111,
4110
4121,4118,4119
4132, 4133
4101, 4102
SANSUI
SHARP
SONY
SOUNDE-SIGH
TEAC
TECHNICS
VICTOR
YAMAHA
Cassette Player setup codes
Brand
Code
AIWA
DENON
FISHER
ENSEN
JVC
7123, 7124, 7125
713l
7103
7114
7129, 7130, 7132,
7133
7100, 7107
7102
7105
7108, 7109, 7113
7116, 7118
7122, 7121
7104, 7106
7126, 7127, 7128,
7134, 7135
7105, 7I I0, 71 I2
713t
7119, 7120
7110,7111,7115
7116, 7118, 7117
7101, 7102
KENWOOD
MARANTZ
NAICa*MICHI
ONKYO
PANASONIC
PHILIPS
PIONEER
PCA
SANSUI
SHARP
SONY
TEAC
TECHNICS
YAMAHA
Laser
Disc
setup
cedes
Brand
DENON
HITACHI
Code
5114
5100
KENWOOD
MAGNAVOX
MARANTZ
MITSUBISHI
NEC
PANASONIC
5102,
5101
5114
5114,
5114
5104,
5115
51 l 1
5114
5114
5104,
5115
5114
51 l 2
5114,
5113,
5107,
5110
5ll4
5 114
5101
PHILIPS
PIONEER
PROSCAN
QUASAR
4108, 4141,
4147
4128
RUA
SAMSUNG
SANYO
SHARP
SONY
4117
4114
4127, 4131,
TEAC
TOSHIBA
YAMAHA
A[WA
APEX
DENON
FERGUSON
HITACHI
3123
3120
3100, 3117
3101
3111
JVC
KENWOOD
KONKA
MITSUBISH1
NORDMENDE
ONKYO
ORITRON
PANASONIC
3109
3115, 3129
3119
3105
3101
3121
3124
3100
PHIL1PS
PIONEER
RAITE
RCA
SABA
SAMPO
SAMSUNG
SHARP
SILVANIA
SMC
SONY
3103,
3102
3 l 13
3101,
3101
3114
311o
3108
3132,
3125
3104,
3128
3100
3101
3103
3122
3100,
3107,
3131
3132,
TECHNICS
THOMSON
TOSHIBA
WA_ E
YAMAHA
ZENITH
VIALTA
FUNAI
5118, 5119
5105, 5106,
Brand
DISH NETWORK
(Echostar)
G.L (GENERAL
INSTRUMENT)
GRADIENTE
HITACHI
HNS (Hughes)
MAGNAVOX
PANASONIC
PHILIPS
PRIMESTAR
PROSCAN
5105, 5106,
RCA
SONY
5117
5116
5108, 5109,
3106
3118
3126, 3127,
3130
3112
3118
Satellite Receiver setup codes
ECHOSTAR
EXPRESS VU
G.E,
5103
3116
STAR CHOICE
TOSHIBA
UNIDEN
Code
2105, 2115, 2116,
2117
2105
2105, 2115
2106
2108
2114
2103,
2103
2101,
21 O4
2101,
2108
2106,
2113
2106,
2113
2107
2103,
2100,
2120,
2101,
2111,2112
2102
2102, 2118
2109, 21 I0,
2109, 21 I0,
2108
2103, 2119,
2121
2102
4118, 4121
4107, 4150
25
0;
Learning about the remote control
Tile buttons used for operating the TV only are described here. For a
complete list of the remote control's functions, see the "Remote
Control functional key chart" on pages 20-21.
POWERturns the TV on and off"
SLEEPallows access to the automatic TV shut-off."function (page 54)
LIGHT
The first press of the LIGHT button lights the keypad and turns
on the Illumination mode. With the Illumination mode on,
pressing any other key lights the keypad for 5 seconds (10 seconds
if you're in programming mode).
Subsequent presses of the LIGHT button toggle between turning
the Illumination mode on and off.
ChannelNumbers(0-9, 1003allow direct access to channels (page
31)
MODEcycles through the six device modes: TV, CABLE/SAT, VCR,
DVD, AUDIO1, and AUDIO2. The mode indicator light will
remain lit for a few seconds (page 22).
PICSIZEcycles through the five pictures sizes: Natural, Theater Wide 1,
2, 3, and Full (page 35)
FAVORITE
allows access to the favorite channel search function (page 42)
MENUallows access to on-screen programming menus (page 27)
ENTERsets programming menu information (page 27)
,Iv • _ select or adjust programming menus (page 27)
FAVAvcydes through favorite channels (page 33)
CHAT cycles through programmed channels (page 30)
VOt ,IV adjusts the volume level
EXITexits the programming menus (page 27)
INPUTsdects the video input source (page 51 )
MUTEmutes the sound (page 55)
RECALL
displays on-screen information (page 62)
CH RTNreturns to the last viewed channels (page 32)
POPCHA_' sdects the POP (picture-out-picture)
channel (page 39)
SPLITturns the POP feature on and off (page 39)
Note:
CHSCANaJlowsaccessto the programmed channel search function (page 41 )
The error message "NozAvailable" will appear
if you pressa key for a function that is not
available.
FREEZE
freezes the POP picture (page 40)
SWAPswitches the main and POP pictures (page 40)
POPDIRECTOHallows direct access to POP channels (page 39)
SOURCEselects the POP picture source (page 39)
26
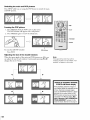
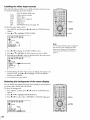
BEll
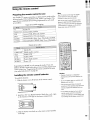
Setting
up your TV
Learning
about
the menu
system
TV front panel
After you have installed the batteries and programmed the remote
control, you will need to set some preferences on the TV using the
menu system. You can access the menu using the buttons on your TV
or remote control.
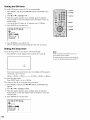
1. Press MENU to display the menu system.
2. Press • or • to select a menu.
MENU
I
<1I_Y_
3. Press • or • to select an item.
4. Press • or • to select or adjust a setting.
EXIT
_o_by
wrtu_
WoW
S_S _D
FOCt_S
Xr_B_S
O_F
O_F
O_F
.......... @@@#@@
P
] CTU£E
C
] _E#A
_
SC_
MODE
SELEOT
LANGU,_GE
ENGL
ANTI
ANTI
CABLE
/_
TV/CA
CH
_L LE
Note:
Youcan change the background of the menu.
Seepage 52 for detaffs
_ SH
}=F_RAM
•
AOD/E_A£
OU_CK
CO
LONG
k]FE
_EW_SE
WHIZE
_
T_MEa
00bOOm
co
F_vOal
_VOal
_F
T_
T_
C_
C_
_
..........
_
SELECT
(_
N
V-CHIP
EN_aLE
BLOCg
zv
_AT_ _a
MI'AA
8AT]
:HBLOGK
LOCKI Na
V _O
IAM_
_aO_X
I Na
OFF
NG
•
OPTION
LOC_
• I _Ea
P_EL
LOCK
_
OFF
OFF
OFF
• Press ENTER to activate the function settings in the menus.
• tfyou do not make a selection within 15 seconds, the main
menus closes automatically; the other menus close automatically
within 6 seconds.
• To close an on-screen menu instantly, press EXIT.
27
Using the Quick
Connect
Guide
Tile Quick Connect Guide automatically starts tile first time tile TV
is turned on. This feature provides on-screen instructions to guide you
through initial setup of your TV.
To manually start the Quick Connect Guide and change the current
settings.
1. Press MENU, and then press • or • until the SET UP menu
appears.
2. Press • or • to highlight "QUICK CONNECT
ANT_/2LANGUAGE
EN
TV/CABLE
CH
PROGRAM
CABLE
MENU
GUIDE."
U
H
AN_I/_NT2
3. Press • or • to enter the Quick Connect Guide mode. Advance
through the setup according to the guide displayed on-screen.
• Press • or • to make a selection.
• Press MENU to continue to the next screen.
The Quick Connect Guide will guide you through the following
items.
No
ml
To stop the Quick Connect Guide:
Press EXIT or turn offthe TV.
28
BEll
Changing the on-screen
display language
TV front panel
You can choose from three different languages (English, French and
Spanish) for the on-screen display of adjustment menus and messages.
To select a language:
1. Press MENU, and then press *_ or • until the SET UP menu
appears.
2. Press • or • to highlight LANGUAGE.
SET
MENU
< I_vA
UP
TV/CABLE
CH pROGRAM
ADD/ERASE
QUEOK CONNE©T
CABLE
ADD
GUEDE
3. Press • or • to highlight your desired language.
Selecting the antenna input
You can connect to two different antenna input sources (ANT 1 or
ANT 2).
To select the antenna input using the INPUT or TV/V1DEO button:
Press INPUT on tile remote control or TV/VIDEO on tile TV
(see illustrations below). The current signal source displays in
purple.
TV front panel
SOURCE
SELECTION
SOL}ROE
0: ANT 1
1 : VEDEO 1
2: VEDEO 2
3: VEDEO 3
4:Co_orStream
5:Co]orStre_m
6:DV_
7: ANT
2
0.7
TO
SELECt)ON
ANT 1
VIDEO
1
VIDEO 2
VIDEO 3
Go_orStream
Oo_orStream
DV E
ANT
2
HDI
HD2
TVNEDEO
SELECT
PressingINPUTon the remote control
the currentsignalsoume
_ress lNPUT againor O 7 to_
TO
HDI
HD2
TVNIDEO
SELECT
PressingW/VIDEO on the TV
chan#esthe currentsignalsoume
To select the antenna input using the menu system:
1. Press MENU, and then press _ or • to highlight the SET UP
menu.
2. Press • or • to highlight ANT 1/2.
SE
T
UP
LANGUAGE
EN
TV
OH
GABLE
/CABLE
p NOGNt',M
ADD/ERASE
QUICK
CONNEOT
LI#H
_
ADD
GUIDE
_*
3. Press • or • to highlight either ANT 1 or ANT 2, depending on
the antenna terminal you wish to use.
29
Adding channels to the TV's memory
When you press Channel • or •, your TV will stop only on tile
channels you program into the TV's channel memory.
Follow the steps below and on the next page to program all active
channels into the TV's memory.
Programming
channels
Note:
Totune the TVto a channel not programmed
if?the channel memory, you must use the
Channel Number buttons on the remote
control
automatically
Your TV can automatically detect all active channels in your area and
store them into its memory. After the channels are programmed
automatically, you can manually add or erase individual channels (see
page 31).
To program channels automatically:
1. Press MENU, and then press • or • until the SET UP menu
appears.
Channel
Number
2. Press • or • until TV/CABLE is highlighted.
3. Press • or • to highlight either TV or CABLE, depending on
which you use. If you use an antenna, highlight TV; if you use
cable, highlight CABLE.
LANGUAGE
ANT
Z2
CH PROGRAM
ADO/ERASE
OU[CK CONNECT
ENGLESH
AN_
Channel &V
AOO
GUIDE
4. Press • to select CH PROGRAM.
LANGUAGE
ANTI/2
OUECK
CONNECT
ENGLISH
ANTI
GUEDE
i{
...............................................................
i_
5. Press • or • to start channel programming. The TV will
automatically cycle through all the TV or Cable channels
(depending on which you selected), and store all active channels
in the channel memory.
While the TV is cycling through the channels, the message
"Programming Now--Please Wait" appears.
6. _,,Vhenchannel programming
"Completed" appears.
is complete, the message
7. Press Channel • or • to view the programmed
3O
MENU
channels.
IIEII
Adding and erasing channels
manually
:_
After you have automatically programmed the active channels into the
TV's channel memory, you can manually add or erase specific
channels.
TV front panel
To add or erase channels:
1. Select the channel you want to add or erase, tfyou are adding a
channel, you must select the channel using the Channel Number
buttons.
MENU
_1•TA
Channel TA
2. Press MENU, and then press • or • until the SET UP menu
appears.
3. Press • or • to highlight ADD/ERASE.
Channel
Number
LANGUAGE
ANTI/2
ENGLISH
ANTI
MENU
4. Press • or • to select ADD or ERASE, depending on the
function you want to perform.
5. Repeat steps 1-4 for other channels you want to add or erase.
Changing
channels
To change to the next programmed channel:
Press Channel • or • on the TV or remote control.
To change to a specific channel (programmed or unprogrammed):
Press the Channel Number buttons (0-9 and 100).
For channels 100 and higher, press the 100 button, and then the
next two numbers. For example, to select channel 125, press
100, 2, 5.
Changing
channels
using SpeedSurf
To change to a specific programmed channel using SpeedSurfi
Press and hold Channel • or • for about one second. The TV
will enter the SpeedSurf mode.
Upper channels
t
Current
channel
Lower channels
Channel label (if set)
Repeatedly press or hold Channel • or • while the SpeedSurf
mode is on-screen to scroll the channel list. Release the button to
display the highlighted channel.
31
Using the TV's features
Adjusting
Switching
the channel
between
settings
two channels
using Channel
Return
Tile Channel Return feature allows you to switch between two
channels without entering an actual channel number each time.
To switch between two channels:
Channel
Number
1. Select the first channel or video mode you want to view.
2. Select a second channel using tile Channel Number buttons
(0-9, lOO).
3. Press CH RTN. The previous channel will be displayed.
Each time you press CH RTN, the TV will switch back and forth
between the last two channels that were selected.
Switching
between
two channels
using SurfLock
TM
The Surf Lock TM feature temporarily "memorizes" one channel in the
CH RTN button, so you can return to that channel quickly from any
other channel by pressing CH RTN.
To memorize a channel in the CH RTN button:
1. Select the channel you want to program into the CH RTN
button.
2. Press and hold CH RTN for about 2 seconds until the message
"Channel Memorized" appears (flashing) on-screen. The channel
has been programmed into the CH RTN button.
3. Continue to change channels.
4. Press CH RTN. The memorize_ channel will be selected.
The TV will return to the memorized channel one time only. Once
you press CH RTN and then change channels again, tile CH RTN
SurfLock memory will be cleared and the button will function as
Channel Return, by switching back and forth between the last two
channels that were selected.
Programming
your favorite
channels
You can preset up to 7 of your favorite channels each for tile
FAVORITE CH1 and FAVORITE CH2 modes using tile Favorite
Channel Programming
feature. Because this feature scans through
only your favorite channels, it allows you to skip other channels you
do not normally watch.
To program your favorite
1. Press MENU,
appears.
2. Press •
or •
TIMER
ON
SLEEp
channels:
and then press _1 or I_ until the CUSTOM
to highlight
FAVORITE
CH1 or FAVORITE
TEMER
OOhO
m
0hOSm
_EP
©C
OH
LABELING
VIDEO
LABEL
BAOKGROUND
32
VEDEO
LABEL
I3/_CKGROUND
oo.oom
0h00m
OFF
menu
CH2.
CH RTN
INPUT
lIEN
3. Press • or • to display the FAVORITE CHI menu, fbr example.
CH INPUT will be highlighted,
®@@@@@
Note:
• 7he FAVA_ buttons operate as
menu <1I_ buttons when a menu displayis
OYl screen,
• Thefavorite ehanne/feature is not availab/e
m ANT2 mode.
TIMER
GI-EAR
4. Press the Channd
channels.
ALL
Number
buttons
m enter one of your favorite
5. Press ENTER.
6. Repeat steps 4 and 5 for other channels.
To select your favorite
channds:
Press FAV IV.
To quickly scan through
multi-window:
your favorite
channels
in a 7-picture
Press FAVORITE (see page 42).
To dear a favorite channel:
1. Press MENU, and then press • or • until the CUSTOM
appears.
menu
2. Press • or • to highlight FAVORITE CH2, for example.
3. Press • or • to display tl'le FAVORITE CH2 menu.
iiii i i i/iiii
!_i!ii!ii!ili!i
I_iiiiii_i{i
I
TIMER
c_LNE EP
OhOOm
OOhOOm
OFF
V_DEO
LABEL
BAGKGROUND
_
15
18
OTV
4. Press 1••
• to highlight
then press ENTER.
2O
C_LE
the channel
you want to clear, and
CUSTOM
•C M_EER
OFF
2
6
BAGKGROIANO
5. Repeat step 4 for other channels.
To dear all favorite
channels
at once:
Press • or • to highlight
press • or •.
CLEAR
TIMER
EP
OOhOOm
OhOOm
GH
ENPUT
_
ALL in step 4 above, and then
Labeling
channels
Channel labels appear above the on-screen channel number display
each time you turn on the TV, change the channel, or press RECALL.
You can choose any four characters to identify a channel.
To create channel labels:
Channel
Number
1. Press MENU, and then press • or • until the
CUSTOM menu appears.
2. Press • or • to highlight CH LABELING.
MENU
3. Press • or • to display the CH LABELING menu.
CH INPUT will be highlighted.
ENTER
AV41 •
_CUSTOM
TtMER
OC
FAVORETE
.
OhOOm
OFF
CH_
Press the Channel Number buttons to select a channel youwant
to label.
_CUSTOM
%_EP
• t MER
oc
FAVORITE
oo.oom
OhO_F
OH1
)
................................................................
}i
. Press •
to highlight LABEL.
6. Repeatedly press • or • to select a character for the first space,
and then press ENTER.
_©USTOM
TIMER
c_LNEEp
FAVORETE
OOhOOm
CHI
OhOOm
OFF
...................................i!
7. Repeat step 6 to enter the rest of the characters.
For a blank space in the label name, choose an empty space from
the list of characters; otherwise, a dash "-" will appear in the
space.
You must assign a character to all four spaces or the channel will
not be labeled.
8. Repeat steps 4-7 for other channels. You can assign labels to a
maximum of 32 channels.
To erase a channel label:
1. Press MENU, and then press • or • until the CUSTOM
appears.
menu
2. Press • or • to highlight CH LABELING.
3. Press • or • to display the CH LABELING
menu.
4. Press • to highlight CH INPUT, then select the channel you
want to dear with the Channel Number buttons.
(Continued on nextpage)
34
IEI
5. Press • to highlight
CLEAR.
_O.2J_ZQM
6. Press • or • to erase the
channel label,
TEME_
o_L_Ep
7. Repeat steps 4-6 to
erase other channel
labels.
8ho8_
m
0 h_
OFF
.........................................................................
Viewing the wide-screen
{
picture formats
You can view programs in a variety of picture slzes--Natural,
Wide l, Theater Wide 2, Theater Wide 3, and Full.
Theater
The way the image displays in any of the picture sizes will vary
depending on he format of the program you are viewing, Select the
picture size that displays the current program the way that looks best
to you.
Selecting the picture size
1. PressPIC SIZE on the remote control.
2. Press the corresponding number button to select the desired
picture size, as described below and on the next page.
-- AY_ P-
P E CTURE
0:
1 :
2
3:
4:
_ATURAL
THEATER
T_4_,T_
T_EATER
FULL
0-4TO
_EZE
W I DE
Vq_DE
WIDE
1
2
3
SELECT
Note:
• The PICTURESIZE feature may not be
avail#hie far some program formats
Natural picture size
• The picture is displayed close to its originally formatted
proportion. Some program formats will display with side bars
and/or bars at the top and bottom (see examples bdow).
O
©
©
©
• Youalso can change the picture size by
sefectleg PICTURE SIZE in the THEAT£R
Ff?enLL
oo°o
Co E_y
VlrluBE
WOW
SR$
30
FOCUS
ON
AUTO
PICTURE
O_NEMA
OFF
ASPEOT
_ROLL
MQDE
OFF
OFF
•
F_LM
NOTICE OF POSSIBLE ADVERSE
EFFECTS ON Plasma display
Natural picturesize examples:Theway the image displayswill vary
dependingon the format of the programyou ere currently watching.
Avoid dJspJayingstationary images on
your Plasmadisplay for extended periods
of time, Fixed(non-moving) images
such as still PlP/P0P windows at btacW
gray bars in 4:3 screen picture or PIP/
POPformats) can become permanently
engrained in the Plasmadisplay.nds
type of damage is NOT COVERED BY
YOUR WARRAN'I'Y becauseit is the
result of misuse,Seeitem 33 on pacJe4,
Theater Wide 1 picture size
Note:
• Toseleo_the picture size,press PlC SIZE
on the yelr?ote control or select PICTURE
SIZ£ in the 7HEATERmenu
• The picture is non-uniformly
enlarged--the center of the
picture remains dose to its
original proportion, but the left
and right edges are stretched
wider to fill the screen.
• A small part of the picture at
the top and bottom is hidden;
however, this mode cannot be
scrolled.
heaterWide 1 picture sizeexample
• ffyou select TheaterWide2 or 3, the top
and bottom edges of the picture may be
hidden The see the hidden edges, either
scroll the picture Cseepage 37.}of try
viewing the program in Furlp*cturesize
Theater Wide 2 picture size
• The entire picture is uniformly
enlarged--it is stretched the
same amount herb wider and
taller (retains its original
proportion).
• Part of the picture at the top
and bottom is hidden. To view
the hidden areas, see "Scrolling
die Theater Wide picture" on
page 37.
Number
PIC SIZE
TheaterWide 2 picture sizeexample
Theater Wide 3 picture size
• The picture is non-uniformly
enlarged--it is stretched wider
to Cdlthe width of the screen,
but only slightly stretched
taller.
• A small part of the picture at
tile top and bottom is bidden.
To view the hidden areas, see
"Scrolling the Theater Wide
picture" on page 37.
TheaterWide3 picturesizeexample
Full picture size
• The picture is non-uniformly
enlarged--it is stretched wider
to fill the width of the screen,
but not stretched miler.
NOTICE OF POSSIBLE ADVERSE
EFFECTSON Plasma display
• None of the picture is hidden.
Full picture size example
36
Avoid displaying stationary images on
,our P_asmadisplay for extended periods
?ftime. Fixed (non-moving) images
(such as still PIP/POPwindows or black/
_raybars in z_:3semen picture or PIP/
POPformats) can become permanently
engmined in the Plasmadisplay.This
type of damage is NOT CO_/ERED BY
YOUR WARRANTY becauseit is the
result of misuse,Seeitem 33 on page 4,
IIEll
Scrolling the Theater Wide picture
[Theater Wide 2 and 3 only)
I. Press PIC SIZE to select either Theater Wide 2 or 3 mode.
2. Press MENU, and then press • or _ until theTHEATER
appears,
3. Press • or • to highlight PICTURE
menu
PIC SIZE
SCROLL.
MENU
-- AV_I_
4. Press • or Ib-to display the Scroll Adjustment mode.
_CROLL
ADjUSTMeNT
iy:TO
Note:
Youcan scrd/thep_tura_TheaterWide2
and TheaterWide3 on_ Thescroflamoun_
are asfollows
o
ADJUST
Wide i
Wide2'
Not adjustable
4-2Oto
10
Wide3
+20 to
10
5- Press • or • to adj_t the vertical position of the picture.
• Normal (center) position
. !
,721_?
!i!i_ ?,
¸r¸',¸ _
_iii_ii!ii!;
_ ,:_,_,, _:;!'ii!i'!_
o
• To raise the picture, press •,
÷20
" To lower the picture, press •.
_,o
NOTICE OF POSSIBLE ADVERSE
EFFECTS ON Plasma display
Avoid displaying stationa_ images on
your Plasmadisplay for extended periods
of time. Fixed(non-moving] images
(such as still PIP/POPwindows or black/
gray bars in 4:3 s_een picture or PIP/
POPformats) can become permanently
engrained in the Plasmadisplay. "n_ts
type of damage is NOT COVEREI3BY
YOUR WARRANTY becauseit is the
result of misuse.See item 33 on page 4,
37
) }
Using the auto aspect
feature
When receiving 480i signal, the TV will automatically change the
picture size by reading aspect information (1D-1 data) from the input
signal. If the signal does not include aspect information (1D-1 data),
tile picture size mode you set is selected.
Note:
Thisfeature doesnot operate for the antenna
(cable5and D VIinput sources.
To turn on the auto aspect:
1. Press MENU, and then press • or • until the THEATER
appears.
DoEby
Virtual
TruSass
PECTURE
S_ZE
A •
APE
•
PY_UR_
S_ROLL
C_NEMA
MODE
OFF
MENU
OFF
OFF
V i DE_
X
2. Press•or•to
highlightAUTOASPECT,
• m select ON.
DoEby
Virtua_
WOW
SRS
3D
FOCUS
TruSass
OFF
C_NEMA
VIDEO
MODE
menu
and then press•or
AV4f D,,
ON
ON
OFF
NOTICE OF POSSIBLE ADVERSE
EFFECTS ON Plasma display
Avoid displaying stationary images on
your Plasmadisplay for extended periods
of time. Fixed (non-moving) images
(such as still PIP/POPwindows or blacW
gray bars in 4:3 screen picture or PIP/
POPformats) can become permanently
engrained in the Plasmadisplay.This
type of damage is NOT COVERED BY
YOUR WARRANTY because it is the
result of misuse.See item 33 on page 4.
4:3 Normal
16:9 Full
4:3 Letter box
Not Defined
Selecting
the cinema mode
When you view a DVD movie (3-2 pulldown processed) from a DVD
player connected to the ColorStream (component video) or DVI/
HDCP inputs on the TV, smoother and more natural motion can be
obtained by setting the CINEMA MODE to FILM (auto).
To set the CINEMA MODE to FILM (auto):
1. Press MENU, and then press • or • until the THEATER menu
appears.
2. Press • or • to highlight CINEMA MODE.
3. Press • or • to select FILM (auto).
DoEby
Virtue_
WOW
SRS
3D
FOCUS
TruBass
PECTURE
SEZE
OFF
AUTO
OFF
ASPEGT
ON
OFF
OFF
To set the CINEMA MODE to VIDEO
(off):
Press • or • to select VIDEO in step 3 above.
38
IEI
Using the POP double-window
feature
The POP (picture-out-picture)
feature splits the screen into a double
window that allows you to watch two programs at the same time, The
POP program can come from a TV broadcast or an external source,
such as a VCR.
Note:
• TheSPLITbuttons on the remote control
operate the TV'sPOP features
• YoucannotaeeessPOPfeatureswheo
wewing DVI input
• YoucannotdisplaytheANT-2signalsouree
_hthe POP windo,_z
To display a TV broadcast in the POP window:
1. Press SPLIT to display the POP window:
• Youcanchoosetoflearthesouedofeither
the main or POPprogram Csee"Selecting
the Audio OUTsound" on page 59)
Main
--Channel
Number
2. Select channds of the POP window in tile following two ways:
• To change to a specific channels, press POP DIRECT CH.
While "POP" is on _h¢ screen, press the Channel Number
buttons (0-9 and 100).
• To change the next programmed channels, press POP CH
iT.
if the V-CHIP feature is active and you try to watch a TV
program that exceeds your set rating limits, the program will be
blocked (see "Using the V-CHIP menu" on page 44).
-- EXiT
-- SPLIT
-- POPDIRECTOH
-- SOURCE
!i!%:!;!_!!i_
POP CH AV
_iiiiiiiSiiii_!ii!
To display a picture from an external souive in tire POP window:
1. Connect the cxtern'.d source equipment
TV" on page 9).
(see "Connecting
your
2. Select tile TV program you want to watch in the main window.
3. Press SPLIT to display the POP window.
4. Repeatedly press SOUR.CE to select the input source for tile POP
window (VIDEO 1, VIDEO 2, VIDEO 3, ColorStream HD1,
or ColorStream HD2 only; you cannot select DVI in POP
mode). The current source will display in purple.
5. _)u can play a tape as the POP picture, or select a channel for the
POP window using the VCR's channel keys.
O-STO
NOTICE OF POSSIBLE ADVERSE
EFFECTSON Plasma display
Avoid displayingstatione0_images on
your PLasmadisplay for extended periods
of time, Fixed(non-moving) images
(such as still PIP/POPwindows or black/
gray bars in 4:3 screen picture or PiP/
POPfom_ats] can become permanently
e_grained in the Plasmadisplay.This
type of damage is NOT COVERED RY
YOUR WARRANTY becauseit is the
result of misuse,See item 33 on page &
_!_iiiiii!!i!ii
ii
ii:!ii_il
While the above menu is on the screen, you can select the desired
signal input source by pressing the corresponding number button
(0-5).
To close the POP window:
Press SPLIT again or EXIT.
39
Switching
the main and POP pictures
Press SWAP while you are using the POP feature to switch the main
and POP pictures.
Freezing
the POP picture
1. Press FREEZE while the POP is not on the screen.
The POP window will appear with a still picture.
EXIT
2. Press FREEZE again to renew the still picture.
WAP
To erase the still POP window:
I
Still picture
Press EXIT.
Adjusting
the size of the double-window
When the input signals of the main and POP pictures are 480i, you
can adjust the size of each window. Continuously pressing _1or •
changes the size in 9 steps.
Note:
If the signal format other than 4801is
received, this feature is not available "Not
available" will appear on the screen.
<
NOTICE OF POSSIBLE ADVERSE
EFFECTS ON Plasma display
I
<I
4O
I
I•
Avoid displaying stationary images on
your Plasmadisplay for extended periods
of time. Fixed (non-moving) images
(such as still PIP/POPwindows or blacW
gray bars in 4:3 screen picture or PiP/
POP formats) can become permanently
engrained in the Plasmadisplay.This
type of damage is NOT COVERED BY
YOUR WARRANTY because it is the
result of misuse.See item 33 on page 4.
IEI
Double-Window
with keeping
aspect ratio
The Double-Window displays the pictures with va,'ious aspect ratio
according to the input signal format.
Note:
7_eaug a_eet feature does not qoemte _n
the Double-Window mode.
;CAN
Using the programmed
channel search function
You can use the programmed channel search function to quickly scan
your programmed channels (see "Adding channels to TV's memory"
on page 30).
1. Press CH SCAN.
The TV automatically enters POP mode, and begins a sevenpicture scan of your programmed channels in the POP window.
Note:
?heaspectratio of altma#7and POP windows
are td9.
2. Press AIF41 libto select one of the seven pictures (becomes a
moving picture). The main picture is an always moving picture.
NOTICE OF POSSIBLE ADVERSE
EFFECTSON Plasma display
3. Press ENTER to display the channel you selected in step 2 as a
normal picture.
Avoid displaying stationary images on
your Plasma display for extended periods
of time. Fixed (nommoving) images
(such as still PIP/POPwindows of black/
g_y bars in 4:3 screen picture or RP/
POPformate) can becomepermanently
engraioed in the Plasmadisplay, This
type of damage is NOT COVERED BY
YOUR WARRANTY because it is the
result of misuse,Seeitem 33 on page 4.
Moving picture
0
41
Usingthe favorite channelsearchfunction
You can use the favorite channel search function to quickly scan your
favorite channels (see "Programming your favorite channels" on page
32).
1. Press FAVORITE.
The TV automatically enters POP mode, and begins a sevenpicture scan of your favorite channels in the POP window.
K2
2. Press AV, I_ to select one of the seven pictures (becomes a
moving picture). The main picture is an always moving picture.
3. Press ENTER to display the channel you selected in step 2 as a
normal picture.
Moving picture
This feature does not operate in the DW
mode
Note:
Every time you press FAVORITE, the POP window scans your
favorite channels in the following order:
FAVORITE CH 1 -- FAVORITE CH2 -- Off
About the auto favorite feature
tf your TV is in tile program lock mode, after 4 seconds, tile TV starts
tile auto favorite channel search function. See page 46 for details.
_T_ls
HA_
XC
V PG
r
DS
_,_
8
BLOCKED!
8"[
•
VLIMI
8
GABLE
42
_
PROGRAM
BEN
9
NOTICE OF POSSIBLE ADVERSE
EFFECTS ON Plasma display
Avoid displaying stationary images on
your Plasmadisplay for extended periods
of time. Fixed(non-moving) images
(such as still PIP/POPwindows or blacW
gray bars in 4:3 screen picture or PIP/
POPformats) can become permanently
engrained in the Plasmadisplay. This
type of damage is NOT COVERED BY
YOUR WARRANTY because it is the
result of misuse.See item 33 on page 4.
IEI
Using the LOCKS
menu
The LOCKS menu includes the V-Chip, CH Lock, Video Lock, and
New PIN Code functions. You can use these functions after entering
the correct PIN code.
Note:
The ¼C/'dpfuf_tiorl is ava//ab/eon/y for the
LLS IFOhJ_9
SySteftzTheCafzedianV Ch/p
systemis not suppoNe_
Entering the PiN code
1. Press MENU, and fhen press _ or _ until the LOCKS menu
appears.
LOCKS
V
GHIp
ENABLE
I_LOCK
E NG
OFF
TV
NG
MpAAF_T{RATING
BI-OCK
I NG OPTION
Vl DEO
(_AME
FRONT
NE_q
LOCK
TEMER
_aA_
p IN
2. Press •
L_YP_;
OFF
OFF
O_F
CODE
or •
i•
to display the PIN code entering
• Blocking l_,¢setstatus:
Set your 4-dlgit code by pressing
file Number buttons (0--9), and
then press ENTER.
mode.
• When the PIN co& is already stored:
Press the Number buttons (0_9) to enter
the 4-digit PIN code used for blocklt_g
channeJs, and then press ENTER.
tf the wrong PIN code is entered, the message "Incorrect"
appears. Enter the code again, and then press ENTER.
If you cannot remember
your PIN code
While the P_N code entering screen is displayed, pres_ RECALL
four times within five seconds. The PIN code *viii be released
(blocking
reset status restored).
MPAA
_AT_NG
BLOCKING
OPTION
LOCK
GAME
TIMER
_RONT
PANEL
LOGK
NEx2_ p_
CODE
•
Continue
I*
OFF
OFF
to set each item following
{
=
the steps on the next page.
43
Using the V-CHIP
Note:
menu
The V Cbip function is availableonly for the
LZ,_ ¼Chip system The Canadian¼Cbljo
system is not supported
Some TV programs and movies include signals that classify the
content of tile program (dialog, language, sex, violence). The V-CHIP
control feature in this TV detects the signals and blocks the programs
according to your selections. To use this feature, perform the
following setup.
ENABLE BLOCKING
LOCKS menu
1. From the LOCKS menu, select ENABLE BLOCKING.
@@@@@@
2. Press • or • to select ON or OFE
ON : To enable your V-CHIP setting (Lock)
OFF: To release your V-CHIP setting (Unlock)
MPAA
RATING
BLOCKING
OPTION
CH
LOCK
VIDEO
LOCK
GAME
TEMER
FRONT
PANEL
LOCK
N_VpEN
_DE
Note: TheCH LOCKfunctionisnot affectedbytheENABLEBLOCKING
setting.
TV RATING ([Independent
broadcasters)
rating system for
OFP
OFF
OFF
To select each item:
Press • or •.
1. From the LOCKS menu, select TV RATING.
2. Press • or • to display
the TV RATING menu.
LOCK
3. Press • or • to select item.
4. Press • to lock (displays "X" )
Press • to unlock (displays ",d ")
5. Repeat steps 3 and 4 to set
the next item.
S
TV
RATENG
DIALOG
LANGUAGE
YOUTH
V--CHIP
TV
MA
X
14
_,
X
RATING
Y7FV
MENU
PG
,_
,t
G
Y7
Y
I,
i:i
The age-based TV ratings and content themes you can lock are listed
in the table below.
MA
14
PG
Mature Audience Only ('['his program is specifically
designed to be viewed by adults and therefore may be
unsuitable for children under 17.)
L) Crude or indecent language S) Explidt sexual activity
V) Graphic violence
Parents Strongly Cautioned (This program contains some
material that many parents would find unsuitable for
children under 14 years of age.)
D) Intensely suggestive dialog L) Strong, coarse language
S) Intense sexual situations V) Intense violence
Parental Guidance Suggested (This program contains
material that parents may find unsuitable for younger
children.)
D) Some suggestive dialog L) Infrequent coarse
language S) Some sexual situations V) Moderate
violence
Press RECALL to display the rating of
the TV program you are currently
watching.
STEREO
ANT
G
44
General Audience (Most parents would find this program
suitable for all ages.)
Y7,
Y7FV
Directed to Older Children ('['his program is designed for
children age 7 and above. Note: Programs in which fantasy
violence may be more intense or more combative than other
programs in this category are designated Y7FV.)
Y
All Children (This program is designed to be appropriate for
all children)
CABLE
I
4
IIEII
MPAA RATING {independent
rating system for movies}
LOCKS menu
1. From the LOCKS menu, select MPAA RATING.
2. Press 4 or _ to display the MPAA RATING menu, and then
press • or • to highlight MPAA RATING.
O_
v-cH ] P
ENABLE
BLOCK __G
ON
_LOCK8
To select each item:
Press•or•.
3. Press _ to lock ("X") or press 4 to unlock (",/").
The movie ratings you can lock are described as follows:
X
: X-rated (For adt_lts only-)
NC17 : Not intended for anyone 17 and under
R
: Restricted (Under 17 requires accompanying parent or adult
guardian.)
PG 13 : Parents Strongly Cautioned (Some material may be
inappropriate for children under 13)
PG
: Parental Guidance Suggested (Some material may not be
suitable for children)
G
: General Audience (Appropriate for all ages)
BLOCKING
OPTION
1. From the LOCKS menu, select BLOCKING
OPTION.
2. Press 411or I_"to display the BLOCKING OPTION menu,
and then press • or • to select an item, as follows:
MPAA UNRATED:
Press 41 or _" to select ON (lock) or OFF (unlock) for unrated
programs in the MPAA rating system.
@@@@@@
V--CHIP
Et_ABLE
BLOGK
_ _'G
OAME
TtMER
F_ONT
_AN_L
LOC_
NEW PEN
OODE
ON
OFF
OFF
OFF
TV NONE RATING
Press 4 or I_ to select ON (lock) or OFF (unlock) for programs
rated NONE in the T¥ PARENTAL GUIDELINES.
Caution
getting the TV NONE RATING to ON may
block the broadcasl of emergency
informst/or? Themenu wilt dtspfaythe no_e,
"Enablingthis o#t/on may block emergency
messages"to !4/amyou of thispossibility
PT_ON
Oa_V MESSAGES
BLOCK
_ME_GENGY
V-CHIP MENU:
_
Press '41or _ to return to the LOCKS menu.
2!_;_;;;
¸ d_:
;{ii!i;:i!iiii!ili
ii_i!iii_!;i
:{ ;{
;
::I
)
45
Unlocking
programs
temporarily
1. tfyou try to watch a TV program that exceeds the rating limits
you set, the TV enters program lock mode. After 4 seconds, the
TV starts the favorite channel search function (see page 42). You
can either unlock the program temporarily (see steps 2 and 3) or
select a non-locked program to watch.
After 4 seconds
T_s
PROGnAM
TWpG
•
E XC_EO8
HAS BEEN
BLOCKE_
TH_S
V
8_T
Channel
Number
HAS
• _ M _ TS
PROGRAM
BEEN
_
7
BLOO_D_
ENTER
CABLE
CABLE 9
9
AV< 1_"
CH &v
2. To temporarily unlock the program, press MUTE.
MUTE
3. Press the Number buttons (0-9) to enter your 4-digit PIN code,
and then press Enter.
BLOCKING
ENTER
TO
0
ACTEVE
PEN
CODE
TEMPORARILY
9TO
UNfiBLOCK
SELECT
ENTERTO
SET
tf the correct code is entered, the program lock mode is released
and the normal picture appears.
All locking is disabled until the TV is turned off, and will be
enabled when the TV is turned on again.
Locking channels
You can use the CH LOCK feature to lock specific channels. You will
not be able to tune locked channels with either the Channel • •
buttons or Channel Number buttons, unless you clear the setting.
You can lock a maximum of nine channels.
To lock channels:
LOCKS menu
1. From the LOCKS menu, select CH LOCK.
2. Press • or 1_ to display the CH LOCK menu.
CH INPUT will be highlighted.
LOCK
V
3. Press the Channel Number buttons to enter the channel you
want to lock.
OHIP
ENABLE
S
8LOOKENG
VIDEO
4. Press ENTER.
GAME
FRONT
NE_Vp_N
LOOK
T_ME_
_RNEL
GODE
OFF
LOOK
To select each item:
Press•or•.
V-O}4 EP
ENABLEBLOCK
TV
RATENG
MPAA RATI NG
ENG
v I DEO LOCK
GAME
TIMER
FRONT
PANEL
LO©K
NEWpIN
CODE
V-OH
]p
EN A BLEt3LOCK
TV f=t ATI NG
OFF
I*
I*
_4pAA
0
0
0
0
0
TV
CASLE_
_NG
NG
GAME
TIMER
FRONT
PANEL LOOK
NEWp_N
OODE
5. Repeat steps 3 and 4 for other channels.
46
RATE
OFF
_*
_*
0
0
TV
ON
TV RATING
MPAA
RATING
0
0
0
0
CABLE
!
OFF
OFF
i:i
IEI
To unlock
channds:
1. From the LOCKS
2. Press •
menu,
select CH LOCK.
or _ to display the CH LOCK
3. Press AV• 1_ to highlight
then press ENTER.
tile channel
menu.
you want to unlock,
and
i!{_i!i!i{_!
ii!iii{_i_
_s
V-CH_p
ENA_LEBL
GK_NG
TV RATEN_
ON
i ii!
4. Repeat step 3 for other channels
To dear all locked channels
you want to unlock.
i!,{:iii!:iiiii
!ili:_i_'_f
at once:
Press • or • to highlight
press _ or •.
!!i!
CLEAR ALL in step 3 above, and then
iiiii{iii_ii{_i!i
V-CH
_P
ENA_3LE_LO_K
TV
_AT_ NG
_NG
ON
b
GH iNpUT
,¢'1 DE_
F_ONT
L
a*a'
-K
pAb]EK
LC_N
Locking video inputs
i!,{_i
ii_
i_iii{i:_ii_
You can use the VIDEO LOCK feature to lock out tile video input
sources (VIDEO 1, VIDEO 2, VIDEO 3, ColorStream HD1,
ColorStream HD2, DVI) and channels 3 and 4.
4!iii_i
i!_ii!i'_!i!
iii!i!ii
i!:!iii_i_i_i
_i_!i_ii!,!!,
You will not be able to select the locked input sources with the TW
VIDEO, INPUT, or Channel button unless you dear the setting.
To set up the video lock:
1. From the LOCKS menu, select VIDEO
_i:ii!i:ii
:ii iii
LOCK.
2. Press • or _ to highlight the level of video locking you want, as
follows:
VIDEO
: Locks VIDEO 1, VIDEO
HD1/HD2, and DVL
2, VIDEO 3, ColorStream
VIDEO+ : Locks V1DEO 1, VIDEO 2, VIDEO 3, ColorStream
HD1iHD2, DV1, and channds 3 and 4.
Select VIDEO+ if you use the antenna terminal
to play a video tape.
OFF
: Unlocks all video input sources.
!_{!ii:si!
Xii_i_7!i!_i'
_i_i_i_i
_I_:L
__
V-CPH
p
ENABLE
BLOCK
TV
RAT_
NG NG
MPAA
RATE
8LOCK
I NG
OPT
_ NG
E ON
ON
•
i:iii
....
47
Using the game
timer
This feature allows you to restrict the time which has chosen the video
mode. When the time set up beforehand is passed, the last tuned channel
will be selected automatically (The VIDEO LOCK is set to VIDEO).
Note:
After the game timer set is operated, set me
VIDEO LOCK to "OFF"/s necessary
To set the game timer:
1. From the LOCKS menu, select GAME TIMER.
2. Press • or • to select the length of time until the video mode is
blocked from among 30, 60, 90 and 120 minutes. When the
number is highlighted, the timer will start countdown.
V
CHIP
ENABLE
BLOCKENG
TV
MPAA RATING
RATENG
CHBLOCKING
LOCK
OPTION
•
N_
PEN
ON
7
_DE
:
To cancel the timer:
Select OFF in step 2 above.
Using the front panel lock feature
Lock the front panel buttons to prevent the buttons from being
pressed accidentally (by children, for example). When the front panel
lock is in ON, all control buttons on the TV front panel (except
POWER) do not operate.
To lock the front panel:
1. From the LOCKS menu, select FRONT
TV front panel
Buttons to be locked
PANEL LOCK.
2. Press • or • to highlight ON.
--Number
V
CHIP
ENABLE
BLOCKENG
TV
MPAARATING
RATENG
BLOCKING
OPTION
LOCK
•
tfa button on the front panel is pressed, the message "Not
Available" appears.
To unlock the front panel:
Highlight OFF in step 2 above, or press and hold the VOL •
button on the TV for about 10 seconds until tile message "Front
Panel Lock: Off" appears on the screen.
Changing
the PIN code
1. From tile LOCKS menu, select NEW PIN CODE.
2. Press tile Number buttons (0-9) to enter a 4-digit code.
The numbers you enter will replace the dashes in tile display.
@@@@@@
V
CHIP
ENABLE
BLOCKING
TV
MPAA
BLO
RATING
NATENG
KING
VIDEO
LOCK
o. LSCK
48
ON
_
OPTION
VIDEO
3. Press ENTER.
The new PIN code is now active.
BEll
Adjusting the picture
Selecting
the picture mode
You can select from four picture
Preference.
Sports
Standard
Movie
Preference
Note:
modes:
Sports, Standard,
Movie, arid
Bright and dynamic picture (factory setting)
Standard picture setting (factory setting)
Movieqike picture setting (factory setting)
Your personal preferences*
Ifyou select one of the factory-setpicture
modes (SPORTS,STANDARDS,or MOVIE_
and then change a picture quality setting
& g increasethe comTasO,the picture mode
automatfcaffychanges to PREFERENCEif?
t#ePicture nTeeu
Tosave your new picture quality settings,you
must se/ect SAVENEW PREFERENCE(see
page 5@ before d%$/r?9" t/18Picture menu or
the TVwill return to the previouspicture
mode.
*(see "Saving your new preferencef' on page 50.)
To select the picture mode:
1. Press MENU, and then press • or • until the PICTURE menu
appears.
2. Press • or • to select MODE.
TV front panel
3. Press • or • to highlight the mode you prefer.
_;_C_
B_
ANTENNA
EG HTN_S
TENT
SHAR_NE_
F?E.qET
SAVE
NEW
v
Adjusting
MENU
411_'V&
5 0
5 0
PAEFERENCE
_
i
the picture quality
You can adjust the picture quality to your personal preferences,
including the contrast, brighmess, color, tint, sharpness.
contrast
brightness
color
tint
sharpness
lower
darker
paler
reddish
so_er
higher
lighter
deeper
greenish
sharper
MENU
To adjust the picture quality:
1. Press MENU, and then press • or • until the PICTURE
appears,
menu
-- A'V_! I,,
2, Press • or • until the item you want to adjust is highlighted.
3. Press • or • to adjust the level,
_ANTENNA
MOII_E
!i{iiiiii_!_!_!
;iiiii
'_ii_!ii!i_i!i_:!!ii!:ii
STA_A_
5O
T_T
"HA_pNEsS
_ESET
_AV_
N_W
5_
pREF_REN©E
:i
!ili
{i!i!!ii:!!!i_:ii
i
The PICTURE qualities you adjusted can be saved in the TV%
memory with the SAVE NEW PREI:_ERENCE feature (see page 50).
You can keep these settings or choose factory set options, as described
under "Selecting the picture mode" above.
ii_!ii!!i!;!i_i_ii/_:
it% i_79)¸¸¸_i_{_
i!iiiiiiii;ii
!ii
i{_i
_i!}flail
iiiii{i!iii!i
_
Saving your new preferences
You can save the picture qualities you adjusted (contrast, brightness,
color, tint, and sharpness) in the PICTURE menu PREFERENCE
mode.
To save your new preferences:
1. Press MENU, and then press • or • until the PICTURE
appears.
2. Press • or • to highlight SAVE NEW PREFERENCE.
menu
MENU
3. Press • or •. The menu displays "DONE."
@@@@@@
AV< b
MODE
Cab_eCEear
COLOR
TEMPERATURE
_AME_:::_EF_HE_GE_
DNR
PREFERENCE
AUTO
MEDEUM
eAte_
DOmE
_{
You can choose your saved preferences by selecting PREFERENCE
"Selecting the picture mode" on page 49).
Using CableClear
TM
DNR [Digital
(see
Noise Reduction]
CableClear TM DNR reduces visible interference in your TV picture.
This is useful when receiving a broadcast with a weak signal or playing
back a video cassette or disc damaged by repeated use.
To turn on CableClear DNR:
1. Press MENU, and then
press • or • until the
PICTURE menu appears.
2. Press • or • to highlight
CableClear DNR.
@@@@@@
MODE
pREFERENCE
TEMPERATURE
SAVE
NEW
MEDI
t3M
pREFERENCE
3. Press • or • to highlight
AUTO.
To turn offCableClear
DNR:
Highlight OFF in step 3 above.
Selecting
the color temperature
You can change the quality of the picture by selecting from three
preset color temperatures: cool, medium, and warm.
To select the color temperature:
1. Press MENU, and then press • or • until the PICTURE menu appears.
2. Press • or • to highlight COLOR TEMPERATURE.
3. Press • or • to highlight the mode you prefer.
@_
MODE
5O
ANTENNA
PREFERENCE
!{
Note:
The "CableClearDNR" menu Iist#?gwill
change to "DNR" in VIDEO mode
IEI
Resetting
your picture quality adjustments
The RESET function returns
_llowing factory settings:
Contrast
................
Brightness
............
Color ...................
Tint
.......................
Sharpness
.............
the picture quality adjustments
max (100)
to the
center
(50)
Color temperature ........... cool
DNR .............................
auto
center
(50)
Mode ...........................
center
center
i!iii
ii
sports
(0)
(50)
MENU
To reset your picture quality ad)ustments:
1. Press MENU, and then press • or IP"until the PICTURE menu
appears.
2. Press • or • to highlight RESET.
-- &T< I_
3. Press • or II,-.The menu displays "DONE."
i!i!iii_i
_PI_TURE
ANTENNA
i
_ONTRA_T
AUTO
8OL_R
_
_TN_SS
5O
5o
....................................................................
i¸
Selecting
the video input source
Press INPUT on the remote control or TV/VIDEO on the TV to view
a signal coming from another device connected to your TV,,such as
a VCR or video disc player (see illustrations below). You can sdect
ANT 1, VIDEO 1, VIDEO 2, VIDEO 3, ColorSrream HD1,
Cx31orStreamHD2, DVI, orANT 2 depending on which input
terminals are tksed to connect your devices (see "Connecting your TV"
on pages 9-1 8.)
SDt)RCE
HDI
_D2
¸ TO _ELE_T
PressiegINPUTon the remote control
d_
the currentsignalsource
CpresgINPUTagalbor 0-7 to
TVNiDEO
• _/hef? _o/oFSt/'ean?/-/Dt/HD2,
OF DVI is
selected, the VIDEO OUTjack does not
output a signal Toreceive a VIDEO OUT
stgna/,use a standard video or Swideo IN
connection thsteacZ
• /@ou select Co/orStreamHD 7/HDZ DVI
white the POP plbture I_active, the POP
window will close
SELff_TION
ANT 1
V¢O_O t
WO_O
2
VIDEO
3
Go_orStream
Oo_orStrearn
DV E
ANT
2
1
3: VIDEO
3
4:ColorStream
5:Oola_S_ream
6:DVI
7: ANT
2
O.7
S{7_UROE
SELECTION
O: ANT 1
1: VIDE
Note:
TO
TV front panel
HDI
HD2
SELECT
PressingTV/VIDEOon the TI/
chan_ the current signalsource
TV/VIDEO
MENU
AT<_
EXIT
INPUT
51
iiiiii!!iiiiii
Labeling the video input sources
The video label feature allows you to label each input source for your
TV from the following preset list of labels:
Uses tile default label name
VCR
Video cassette recorder
DVD
DVD video
DTV
SAT
CBL
Digital TV set-top box
Satellite box
: Cable box
HD
: DV1/HDCP
MENU
device (see page 16)
To label the video input sources:
1. Press MENU, and then press • or • until the CUSTOM
appears.
AV_
menu
2. Press • or • to highlight VIDEO LABEL.
EXIT
@@@@@@
TIMER
ON
SLEEP
OC
FAVORETE
FAVORITE
O0hOOm
0h0Om
OFF
Note:
CHI
OH2
3. Press • or • to display the VIDEO LABEL menu.
4. Press • or • to highlight the video source you want to label.
5. Repeatedly press • or • to select the desired label tbr that input source.
_
C_ZQM
COSTO
.... 0
"
i:i
6. Finish labeling the other video sources as desired. To return to tile
previous menu, press • or • to highlight CUSTOM MENU,
and then press • or •.
7. To exit tile menu, press EXIT.
Selecting the background
of the menu display
You can change tile background of the menu display by selecting from
two preset types: shaded and solid (black).
To select the background:
1. Press MENU, and then press • or • until the CUSTOM
appears.
menu
2. Press • or • to highlight BACKGROUND.
3. Press • or • to select either a SHADED
@@@@@@
TIMER
2N_
°Sk88N
CC
C 1
FAVORITE
FAVORITE
GH
52
LABELING
OH1
GH2
or SOLID background.
TheHD (high definition) label is availablefor
DVI mode only Csee"Selectingthe video
input source," above, and "Connecting a
device to the DVl/HDCP IN terminal" on
page 16.
BEll
Using the closed caption feature
The closed caption
feature
has two options:
• Captions--An
on-screen display of the dialogue, narration,
sound effects of TV programs and videos thai: are closed
captioned (usually marked as "CC" in TV listings).
and
• Text--An
on-screen display of information
not related to ttle
current program, such as weather or stock data (when provided
by individual stations).
To view captions
or text:
1. Tune the TV to the desired
2. Press MENU,
appears.
3. Press • or •
program.
and then press 4 or • until the CUSTOM
to highlight
menu
CC.
MENU
t
t
TIMER
FAVO_T_
VID_ o
CH2
L*_BEL
_
_CKGROU_gO
-- A'Y4 It.
[
I
4. Press 4 or • to highlight the desired closed caption mode, as
follows:
• To view captious, highlight C1, C2, C3, or C4 (C1 displays
translation of the primary language in your area).
Note: If theprogramor videoyouselectedisnot closedca,
ot/oned*)o
captionswilldisplayon_creen
Note:
A dosed captleo signal may not display in the
foflowleg situations:
• when a videotape has been dubbed
• when the signalreception is weak
• when the signal reception is oonsta_)dard
• To view text, highlight T1, T2, T3, arT4.
Note: If textisnot availablei?}your area,a Mackrectanglemay8ppear
on screen,If thishappens,turnoff the ClosedCaptionfeature.
To turn off the Closed Caption feature:
Highlight OFF in step 4 above.
,!ii::!!
_:!!;
i
iii!:i:
i{;i!!ii:i:i{il;:{_
53
ii!!;i!}!i::!;i{!:}i
Setting the ON-timer
To set the ON-timer
to turn tile TV on automatically:
SLEEP
1. Press MENU, and then press _ or • until the CUSTOM menu
appears.
POWER
2. Press • or • to highlight ON.
Number
3. After the number position starts to blink, press the Number
buttons (0-9) to enter the length of time until the TV turns on
automatically.
You can set the ON-timer by 10 minutes, up to 12h00m.
4. Press ENTER to start the timer.
MENU
ENTER
AV'q 1_TIMER
CO
FAVORITE
CHI
FAVORITE
CH2
CH
LABEUNG
VIDEO
LABEL
BACKGROUND
.
Press POWER
The TVwill
OFF
•
•
•
to turn offtheTV.
turn on automatically
after the time you preset.
Setting the sleep timer
To set the sleep timer to turn the TV off automatically:
1. Press SLEEP to set the length of time until theTV turns off.
Note :
When an instant power fai/ure occurs, the
timer setting may be cleared
Todisplay the amount of time/eft und/ the TV
turns on or off automatically,press RECALL
TEMER
OhOOm
Every time you press the button, the time display will increase by
10 minutes, up to 3 hours.
0h00m + 0hl0m -+ 0h20ra
÷ 2h50m -+ 3h00ra -+ 0h00m
To cancel the sleep timer:
Press SLEEP until it is set to 0h00m.
The timer can also be set using the on-screen menu:
1. Press MENU, and then press _ or • until the CUSTOM menu
appears.
2. Press • or • to highlight SLEEP.
3. After the number position starts to blink, press the Number
buttons (0-9) to enter the length of time until the TV turns off
automatically.
4. Press ENTER to start the timer.
TEMER
FAVORETE
OH_
FAVORETE
CH2
CH
VEDEOLASELENG
LABEL
BACKGROUND
54
•
•
•
IIEil
Adjusting the sound
Muting the sound
Press MUTE m temporarily reduce (1/2 MUTE) or turn off (MUTE)
the sound. While the sound is reduced, the screen display "112
MUTE" or "MUTE" in the lower dght corner. Each time you press
MUTE, the mute mode will change in the following order.
[-> Normal --, I/2 MUTE "--, MUTE
When you sdect "MUTE" mode, the closed caption feature is
automatically activated. To deactivate this Featme, deactivate MUTE.
This feature works only when tile closed caption mode is set to OFE
See "Using the closed caption feature" on page 53 for more
information.
Selecting
stereo/SAP
MENU
broadcasts
The multi-channel TV sound (MTS) feature allows you to listen to
high-fidelity stereo sound while watching TV. MTN can also transmit
a second audio program (SAP) containing a second language, music,
or other audio information (when provided by individual stations).
When the TV receives a stereo or SAP broadcast, the word STEREO
or SAP appears on-screen every time the TV is turned on, the channel
is changed, or the RECALL button is pressed.
The MTS feature is not available when the TV is in VIDEO mode.
I
• b listen m stereo sound:
1. Press MENU,
appears.
TV front panel
MENU
and then press • or • until the AUDIO
_w&
menu
2. Press • or • to highlight MTS.
3. Press • or • to highlight STEREO.
Note :
A second audio program CSAP)can be heard
only oo those TVstations that offer It
_
For example, a stat]oo might broadcast music
as a second audio program, flyou have SAP
or_,you w///see the current program on the
screen but hear mzJs/e/f_steadof trio
a_L(ZLQ
TREDLE
I_ALAN_
_E_ET
50
P
/
program's norms/atJdJo
You can leave your TV in STEREO mode because it will
automatically output the type of sound being broadcast (stereo or
monaural). The word "STEREO" or "SAP" displays in yellow in
the menu when tile TV receives the signal.
tf the stereo sound is noisy, select MONO
to reduce the noise.
To listen to SAP (if available):
/fyou have SAP on and thestationyou are
watchieg is not currently broadcaat)l)ga
secoad audio program, the station's normal
audio wit/be output
Howeveg occastbna//ythereis no soundatM
Ihthislhstance.
If thishappens, set the MTS feature to
STEREOmode.
1. Press MENU, and then press • or • until the AUDIO menu
appears.
2. Press • or • to highlight MTS.
[:({
3. Press • or • to highlight SAP. You will hear the station's second
audio program (if available) from tile speakers, while viewing the
original program's picture (see note at right).
55
Enjoying the Dolby Virtual sound feature
Note:
The Dolby ®Virtual sound feature allows you to enjoy virtual
surround sound from the TV's speakers.
• tfyou connect a device (a game console, a DVD player or a DTV
receiver, etc.) with analog audio output to standard (analog)
audio terminals on the TV, and the input source is encoded with
Dolby Surround ,D_
sound or Dolby Digital D,13=
,[_ _ sound,
the Dolby Virtual feature functions as Virtual Dolby Surround
wJalr ul*=
_
(VDS). VDS simulates Dolby Surround sound from the
TV's speakers.
The Dolby Virtualand SRS 3D features
cannot be on at the same t#ne
To turn on the Dolby Virtual sound feature:
1. Press MENU, and then press • or • until the THEATER
appears.
2. Press • or • to highlight Dolby Virtual.
menu
3. Press • or • to highlight ON.
MENU
-- AV4f •
SRS
3D
FOCUS
TruBass
PICTURE
SIZE
AUTO
ASPECT
P_CTU
R E SC R O LL
CIN EM A M O DE
OFF
OFF
OFF
OFF
VIDEO
_
To turn off the Dobly Virtual sound feature:
Highlight OFF in step 3 above.
Enjoying the WOW
TM
surround
sound feature
The WOW TM surround sound features (SRS 3D, FOCUS and
TruBass) expand the audio listening field wider and deeper to create
exceptional sound quality from the TV's speakers. The WOW features
use stereo signals from a TV broadcast or video input.
• SRS 3D -- Surround sound effect
• FOCUS -- Vocal emphasis effect
• TruBass --
Bass expansion level (HIGHT,
LOW, or OFF)
To adjust the WOW feature:
1. Select STEREO
page 55).
mode (See "Selecting stereo/SAP broadcasts" on
2. Press MENU, and then press • or • until the THEATER
appears.
menu
3. Press • or • to highlight the desired WOW feature you want to
adjust (SRS 3D, FOCUS, or TruBass), and then press • or • to
adjust the item.
TruBaSS
P_CTURE
SIZE
AUTO
ASPECT
P_CTURE
SCROLL
CINEMA
MODE
56
HIGH
OFF
FILM
Note:
If the broadcast is monaural, the WOW SRS
3D surround sound effect wil/ not work.
lIEN
Adjusting
the sound quality
You can change the quality of your TV's sound by adjusting the bass,
treble, and balance.
To adjust the sound quality:
1. Press MENU, and then press • or • until the AUDIO menu
appears.
2. Press • or • to highlight the item you want to adjust (BASS,
TREBLE, or BALANCE).
MENU
}
AV<
i i!!iiii
:i ili!i
3- Press • or • to adjust the level.
• • makes the sound quality weaker or decreases the balance in the
right channd, depending on the item selected.
!iii_[i!(!ii_i!i!
• • makes the sound quality stronger or decreases the balance in
lhe left channel, depending on the item selec*ed.
Resetting
your audio adjustments
The RESET funcdon returns your audio adjustments to tile following
Factory settings:
Bass ..................
center (50)
Treble ...............
center (50)
_!i!!iii!i:!
ii
Balance ............ center (0)
To rese_your audio adjustments:
Zl.Press MENU, and then press • or • until the AUDIO
appears.
2. Press • or • to highlight RESET.
menu
3. Press • or •. The menu displays "DONE."
_AUDEO
MT_
TREBLE
_TEREO
_0
57
Using the sub-bass
system (SBS)
The sub-bass system allows you to enhance bass performance,
when the volume is low.
even
To turn on the SBS:
1. Press MENU, and then press • or • until the AUD10
appears.
menu
2. Press • or • to highlight SBS.
3. Press • or • to highlight ON.
@@@@@@
MENU
AUDE o
SPEAKERS
AUDEO
OUT
STABLE
SOUND
ON
MAEN
OFF
AV4f •
To adjust the SBS level:
4. Press • or • to highlight SBS LEVEL.
5. Press • or • to adjust the SBS level.
Note:
AUDIO
STABLE
OUT
SOUND
The58S s/grid does not pass through the
"VariableAudio OUT"jacks (see "Connecting
an audio system" on page 18.).
MAEN
OFF
To turn offthe SBS:
Highlight OFF in step 3 above.
Turning off the built-in
speakers
Use this feature to turn the TV speakers off when you connect an
audio system (see "Connecting an audio system" on page 18).
To turn off the built-in speakers:
1. Press MENU, and then press • or • until AUDIO
appears.
2. Press • or • to highlight SPEAKERS.
3. Press • or • to highlight OFE
_BS
STABLE
ON
SOUND
OFF
To turn on the built-in speakers:
Highlight ON in step 3 above.
58
menu
EEl
Selecting
the Audio OUT sound
This feature allows you to select the sound source (MAIN or POP)
that is output from the AUDIO OUT terminals.
Tl_is is useful when
external equipment
through the built-in
page 18.
To select the Audio
amplifying or recording the POP sound with
while hearing tile sound of the main picture
speakers. See "Connecting an audio system" on
Note:
Make sure the volume control of your audio
ampD#er*sset to a moderate hstening/eveZ
OUT sound:
1. Press MENU, and then press • or • until the AUDIO menu
appears.
2. Press • or • to highlight AUDIO OUT.
3. Press • or • to select MAIN or POP.
MENU
_AUDEO
_s
_BS
LEVEL
ON
100
-- A'_411b
• MAIN:
Outputs the sound of the main program through the
AUDIO OUT terminals.
• POP:
Outputs the sound of the POP program through the
AUDIO OUT terminals.
Using the StableSound
_ feature
The StableSound ® feature limits he highest volume level to prevent
extreme changes in volume when the signal source is changed (for
example, to prevent the sudden increase in volume that often happens
when a TV program switches to a commercial).
To turn on the StabieSound ® feature:
Note:
When the POPis not on the screen,the
sound of the maio program is ou_ouz,even if
the POP sound is selected
1. Press MENU, and then press • or • until the AUDIO menu
appears.
2. Press • or • to highlight STABLE SOUND.
3. Press • or • to select ON.
_S
Otq
To turn off the StableSound _'feature:
Highlight OFF in step 3 above.
59
Adjusting the long life features
The long life settings (Picture shift, Reverse, White, and (;ray level)
are to mitigate the phosphor burn-in of the plasma screen.
Picture shift
The picture moves around the screen intermittently.
reduce the phosphor burn-in of the plasma screen.
Select ON to
Note
:
reduceme_k of_osphoc bum/o, me
Pictureshiftfunctionactivatesasdefault:[Set
ON.)
To activate the picture shift:
1. Press MENU, and then press • or • until the SET UP menu
appears.
2. Press • or • to highlight PICTURE
WHITE
GRAY
SHIFT.
_
LEVEL
1
3. Press • or • to select ON.
To deactivate the picture shift:
Select OFF in step 3 above.
Reverse
TV front panel
The picture is displayed alternately between positive image and
negative image to reduce the phosphor burn-in of the screen. This
function is effective for the pattern image.
To activate the reverse:
1. Press MENU, and then press • or • until the SET UP menu
appears.
2. Press • or • to highlight REVERSE.
_'ONG
• I FE
3. Press • or • to reverse between the positive image and negative
image.
After the result of the phosphor burn-in, you may mitigate the
image retention if you keep on the Reverse for the same period of
time the phosphor burn-in generated.
To return to the normal picture:
Press any button.
6O
MENU
41_YA
IEI
White
A white pattern is displayed on the whole screen.
To display the white pattern:
TV front panel
1. Press MENU, and then press • or • until the SET UP menu
appears,
2, Press • or • to highlight WHITE.
MENU
_E T
_ONG
LIFE
E GTUFtE
I
4 IbV•
UP
_14
I _
ON
3. Press • or I1_to display the white pattern.
After the result of the phosphor bum-in, the image retention may
be mitigated if you keep o_l tile White pattern for a given length
of time.
MENU
To return to the normal picture:
Press any button.
Gray level
-- •Y4_
You can adjust the brightness of the gray zone of the screen when in
the 4:3 mode.
To adjust the gray level:
1. Press MENU, and then press • or • until the SET UP menu
appears.
2. Press • or • to highligt_t GRAY LEVEL.
_NG
LIFE
EGTt2RE
SH I Fr
ON
3. Press • or • to selec* the gray level from 1, 2 or 31: Dark gray
2: Mid gray
3: Light gray
61
Displaying
on-screen
information
Press RECALL to display tile following information on-screen:
Antenna mode (when in TV mode)
Channel number or video mode selected
Remaining time of ON/SLEEP
time (if set)
Channel label (if set)
Stereo or SAP audio status
V-CHIP rating status
Picture size
STEREO
SAP
TV..pG
ON TEMEn
SLEEP
TJMEn
_TE_EO
•
TV..pG
ON T_MER
SLEEP
TIMER
V
12h34m
lh_3m
V
12h34m
1_23m
RECALL
ANT
ABCD
FULL
CABLE
6
Viewing the demonstration
Tile demonstration
features.
•
CoEor_tr_am
OVD
HO_
mode
mode will demonstrate
several of your TV's
TV front panel
To start tile demo:
Press and hold MENU on tile TV control panel for 4 seconds.
MENU
To stop the demo:
POWER
Press RECALL, EXIT, or POWER.
Understanding
the auto power off feature
The TV will automatically turn itself off after approximately 15
minutes if it is tuned to a vacant channel or a station that completes
its broadcast for the day. This feature does not work in VIDEO mode.
Understanding
POWER
the last mode memory feature
If the power is cut off while you are viewing the TV, the Last Mode
Memory feature turns on tile TV automatically when tile power is
resupplied.
tf the power is going to be off for a long time and you are going to be
away from your T_ unplug the power cord to prevent the TV from
turning on in your absence.
EXIT
RECALL
62
BEll
!:_:¢
Appendix
Specifications
, Design and specifications
are subject to ch_ge without
= Never service or remodel the !_V set by yourself.
notice.
It may expose you to a fire hazard or dangerous voltage.
Television System
NTSC standard
TheaterLink
OUTPLFY: 3 V(p-p), 10k ohm
Channel Coverage
VHF: 2 through 13
UHF: 14 through 69
Cable 'IV: Mid band (A-8 through A-l, A through i)
Super band (1 through W)
Hyper band (,_k through ZZ, *_,
BBB)
Ultra band (65 through 94, 100 through 125)
Power
Dimensions
Width : 51-57/64 inches (1318 mm)
Height : 27-15/32 inches (698 mm)
Depth : 4-57/64 inches (124 ram)
Mass (weight)
108.5lbs (49.2 kg)
Source
110-240
VAC,
50/60 Hz (See page 7.)
Operating
Power Consumption
301 W (average)
Audio Power
10W+
Speaker Type
Main
Tweeter
ii
condition
Temperature:
32°F - 95°F (0°(2 - 35°C)
Humidity:
20 - 80% (no moisture condensation)
10W
Exemptions
: Four 2-1/4
:Two
x 5-1/8 inches
(70 x 130 mm)
TACP/THI/TCL
are not liable for:
1-1/4 inches (32 ram) round
(1)
Video/Audio Terminals
S-VIDEO INPUT
Y : 1 V(p-p), 75 ohm, negative sync.
C : 0.286 V(p-p) (burst signal), 75 ohm
VIDEO/AUDIO INPUT
VIDEO: 1 V(p*p), 75 ohm, negative sync.
AUDIO: 150 mV(rms) (30% modulation equivalent,
47k ohm)
ColorStream/_/(cow.ponent video) INP[fI'
Y : 1V(p-p), 75 ohm
Ply,:0.7 V(p-p), 75 ohm
PB: 0.7 V(p-p), 75 ohm
AUDIO: 150 mV(rms), 47k ohm
VIDEO/AUDIO OUTPUT
VIDEO: 1 V(p-p), 75 ohm, negative sync.
AUDIO: 150 mV(rms) (30% modulation equivalent,
4.7k ohm)
VAPdABLE AUDIO OUTPUT
0--300 mV(rms) (30% modulation equivalent, 4.7k ohm)
DVI/HDCP INPUT
HDCP compliant
E-EDID* 1.3 compliant
DV[-D uncompressed, high-speed, digital si_xgte-ti_xk
connection
Suggested inpu_ scan rates: 1080i, 720p, 480p, 480i
Headphones jack
3.5 mm stereo
*E-EDID = Enhanced-Exten&'d
damage caused by rims, natural disaster (such as thuMer,
earthquake, etc.), use by third person, accidems, owner's
misuse, or use in other improper
(2)
conditions;
incidental damages (such as profit loss or interruption
in
business, modification
or erasure of record data, and so
forth)
caused by use or misuse of this product;
(3)
damage caused by neglect of the instructions
the owner's manual; and
(4)
damage caused by misuse or malfunction
simultaneous
use of this product
described
in
through
and the connected
equipment.
Display Identification
63
Troubleshooting
Before calling a service technician, please check tile following table for a possible cause of the problem and
some solutions.
Problem
Solution
TV will not turn on
• Make sure the power cord is plugged in, then press POWER.
• The remote control batteries may be dead. Replace the batteries.
No picture, no sound
• Check the antenna/cable
No sound, picture OK
• The sound may be muted. Press VOLUME.
connections.
• The station may have broadcast difficulties. Try another channel.
• Check that the SPEAKERS function in AUDIO menu is set properly.
Poor picture, sound OK
• Check the antenna connections.
• The station may have broadcast difficulties. Try another channel.
• Adjust the PICTURE
Poor reception of broadcast channels
menu.
• The station may have broadcast difficulties. Try another channel.
• Check the antenna connections.
• tfyou are using a VCR, make sure the TV/VCR button is set
correctly.
Cannot receive above channel 13
• Make sure the TV/CABLE switch is set to the mode that
corresponds with the signal source type (cable company or outside
antenna).
Black box appears on the screen
• The closed caption feature may be set to one of the Text modes (T1,
T2, T3, or T4). Turn closed captioning OFE
Unable to select a certain channel
• The channel may be locked out with the CH LOCK feature, or
erased with the ADD/ERASE feature.
Multiple images
• The station may have broadcast difficulties. Try another channel.
• Antenna reception may be poor. Use a highly directional outdoor
antenna.
Poor color or no color
• The station may have broadcast difficulties. Try another channel.
• Adjust the TINT and/or COLOR
in the PICTURE menu.
No stereo or SAP sound from a
known MTS broadcast
• Make sure the MTS feature is set properly.
The front panel buttons do not operate
• Check the FRONT PANEL LOCK feature.
The remote control does not operate
• Check whether the appropriate device mode is selected.
• Remove all obstructions between the remote control and the remote
control sensor in the TV.
• The remote control batteries may be dead. Replace the batteries.
Cannot access signal input sources
(Videol, Video2, Video3,
ColorStream HD1/HD2, DV1/HDCP)
and/or Channels 3 and 4.
64
• Check the VIDEO LOCK feature.
BEll
Limited United States Warranty
!_%"
for Wide Plasma Color TV
ToshibaAmerica Consumer Products,Inc. ("TACP")and Toshiba
Hawaii,inc. ("THI") makethe following limited warranties to original
consumers in the United States.THESE LIMITED WARRANTIES
EXTENDTO THE ORIGINAL CONSUMER PURCHASEROR
ANY PERSON RECEIVING THIS PLASMA TV AS A GIFT FROM
THE ORIGINAL CONSUMER PURCHASER AND TO NO OTHER
PURCHASEROR TRANSFEREE.
PRODUCTS PURCHASED IN THE U.&A. AND USED IN
CANADA ARE NOT COVERED BY THESEWARRANTIES.
PRODUCTS PURCHASED IN CANADA AND USED IN THE
U.S.A. ARE NOT COVERED BY THESEWARRANTIES.
Limited One (1) Year Warranty on Parts and Labor*
TACPfFHIwarrant this plasmaTV and its parts against defects in
materialsrv workmanship for a period of one (1) year after the date
of odginal retail purchase. DURING THIS PERIOD,TACP/THI
WILL, AT TACP/THI'S OPTION, REPAIROR REPLACEA
DEFECTIVEPARTWITH A NEW OR REFURBISHED PART
WITHOUT CHARGE TO YOU FOR PARTSOR LABOR.TACP/THI
Authorized ServiceStation personnel will cometo your home when
warranty service is required. Depending on the type of repair
required,either the servicewill be performed in your home or the set
will be taken to the TACPfrHI AuthorizedService Stationfor repair
and returned to your home at no cost to you.
Rental Units
The warranty for rental units beginswith the date of first rental or
thirty (30) days from the date of shipmentto the rental firm,
whichever comes first.
*Commemial Units
PlasmaTVssold and used for commercial purposes havea limited
ninety (90) day warranty for all parts, labor.
Owner's Manual and Product Registration Card
Read this owner's manuatthoroughly before operating this plasma
TV.Completeand mailthe enclosed product registrationcard within
ten days after you, or the personwho has given you this product as a
gift, purchasedthis plasmaTV. Returningthe product registration
card will enable TACP/THIto provideyou with better customer
serviceand improved product support. Failureto return the product
registrationcard will not affect your rights under this warranty.
Your Responsibility
THE ABOVE WARRANTIESARE SUBJECTTO THE FOLLOWING
CONDITIONS:
(1) Youmust provideyour bill of sale rv other proof of purchase.
(2) All warranty servicingof this plasmaTVmust be made by an
AuthorizedTACPFIHIServiceStation.
(3) 1he warrantiesfrom TACPand THI areeffective only if the
plasmaTV is purchasedand operated in the U.S.A. or Puerto
Rico.
zrv;
Row to Obtain Warranty SerVices
If, after following all of the operating instructionsin this manualand
checking the "Troubleshooting"section, you find that serviceis
needed:
(1) Tofind the nearestTACP/TH_Authorized ServiceStation:
For plasmaTVspurchased in the United States,except Hawaii,
visit TACP'sweb site at www.toshiba.eom/tacp, or call toll
free t 800 631 3811.
For plasmaTVspurchased in Hawaii,contact ToshibaHawaii,
Inc., 327 KamakeeStreet, Honolulu, HI 96814, (8083 591 9281.
(2) Presentyour bill of sale or other proof of purchase to the
AuthorizedService Station. AuthorizedTACP/THIService Station
personnel will cometo you_home when warranty service is
required. Depending on the type of repair required,either the
servicewill be performedin your home or the set will be taken to
the Authorized ServiceStation for repairand returned to your
home at no cost to you.
I For additionalwww.toshiba.com/tacp.
information, visit TACP's web site:
ALL WARRANTIES IMPLIED BY THE LAW OF ANY STATEOF
THE U.S.A.,INCLUDING THE IMPLIED WARRANTIES OF
MERCHANTABILITY AND FITNESS FOR A PARTICULAR
PURPOSE,ARE EXPRESSLYLIMITED TO THE DURATION OF
THE LIMITED WARRANTIES SET FORTHABOVE. WITH THE
EXCEPTIONOF ANY WARRANTIES IMPLIED BY THE LAW OF
ANY STATEOF THE U.S.A.AS HEREBY LIMITED, THE
FOREGOINGWARRANTY IS EXCLUSIVEAND IN LIEU OF ALL
OTHER WARRANTIES, GUARANTEES,AGREEMENTS, AND
SIMILAR OBLIGATIONS OF TACPOR THI WITH RESPECTTO
THE REPAIR OR REPLACEMENT OF ANY PARTS.iN NO EVENT
SHALL TACPOR THI BE LIABLE FOR CONSEQUENTIAL OR
INCIDENTAL DAMAGES.
No person, agent, distributor,dealer,or companyis authorizedto
change,modify, or extend the terms of these warranties in any
manner whatsoever.The time within which action must be
commencedto enforce any obligation of TACPor THI arising under
this warranty or under any law of the United States or of any state
thereof is hereby limited to 90 days from the date you discover,or
should havediscovered,the defect. This limitationdoes not apply to
impliedwarranties arising under the law of any state of the U.S.A.
THIS WARRANTY GIVESYOU SPECIFICLEGAL RIGHTS,AND
YOU MAY ALSO HAVE OTHER RIGHTS,WHICH MAY VARY
FROM STATETO STATEIN THE U.S.A. SOME STATESOF THE
U.S.A. DO NOT ALLOW LIMITATIONS ON THE DURATION OF
AN IMPLIED WARRANTY, LIMITATIONSON THE TIME WITHIN
WHICH AN ACTION MAY BE BROUGHT,OR THE EXCLUSION
OR LIMITATION OF INCIDENTAL OR CONSEQUENTIAL
DAMAGES; THEREFORE,THE ABOVE LIMITATIONS OR
EXCLUSIONS MAY NOT APPLY TO YOU UNDER SUCH
CIRCUMSTANCES.
REV. JUN02
(4) Laborservicecharges for set installation,setup, adfustmentof
customer controls, and installationare not coveredby these
warranties.
(5) Warrantiesextend onlyto defects in materialsor workmanship
as limited above and do not extend to any plasmaTVor parts
that havebeen lost or discarded by you or to damage to plasma
TV or parts caused by misuse,accident, Acts of God (such as
lightning or fluctuationsin electric powe0, improper installation,
improper maintenance,or use in violation of instructions
furnished by TACP/THI;or to units that havebeen modified or
hadthe serial number removed,altered, defaced,or rendered
illegible.
65
ii
Limited Canada Warranty
for Wide Plasma Color TV
Toshibaof Canada Limited CTCE') makesthe following limited
warranties to original consumers in Canada.
THESE LIMITED WARRANTIES EXTEND TO THE ORIGINAL
CONSUMER PURCHASEROR ANY PERSON RECEIVING THIS
PLASMA TV AS A GIFT FROM THE ORIGINAL CONSUMER
PURCHASERAND TO NO OTHER PURCHASEROR
TRANSFEREE.
PRODUCTSPURCHASED IN THE U.S.A.AND USED IN
CANADA ARE NOT COVEREDBY THESEWARRANTIES.
PRODUCTSPURCHASED IN CANADA AND USED IN THE
U.S.A. ARE NOT COVEREDBY THESE WARRANTIES.
Limited One (1) Year Warranty on Parts and Labor*
TCL warrants this plasmaTVand its parts against defects in materials
or workmanship for a period of one (1) year after the date of original
retail purchase.DURING THIS PERIOD, TCL WILL, AT TCL'S
OPTION, REPAIROR REPLACEA DEFECTIVEPARTWITH A
NEW OR REFURBISHEDPARTWITHOUT CHARGE TO YOU
FOR PARTSOR LABOR.TCL Authorized ServiceDepot personnel
will come to you_home when warranty service is required.
Depending on the type of repair required,either the sewice will be
performed in your home or the set will be taken to the TCL
AuthorizedService Depot for repairand returned to your home at no
cost to you. IN-HOME SERVICEONLY APPLIESWITHIN 100
KILOMETERS OF AN AUTHORIZED TCL SERVICE DEPOT.
Rental Units
The warrantyfor rental units begins with the date of first rental or
thirty (30) days from the date of shipment to the rentalfirm,
whichever comesfirst.
*Commercial
Units
PlasmalVs sold and used for commercial purposes havea limited
ninety (90) day warranty for all parts, labor.
Owner's Manual
Readthis owneds manualthoroughlybefore operatingthis plasma
TV.
Your Responsibility
THE ABOVE WARRANTIESARE SUBJECTTO THE FOLLOWING
CONDITIONS:
(1) Youmust provideyour bill of sale or other proof of purchase.
(2) All warranty servicing of this plasmaTVmust be made by an
Authorized TCL ServiceDepot.
(3) lhe warranties from TCL are effective only if the plasmaIV is
purchased in Canadafrom an authorizedTCL dealerand
operated in Canada.
(4) Laborservice chargesfor set installation,setup, adjustment of
customer controls,and installationare not coveredby these
warranties.
(5) Warrantiesextend only to defects in materialsor workmanship
as limited above and do not extend to any plasmaIV or parts
that have been lost or discarded by you or to damageto plasma
IV or parts caused by misuse,accident, Acts of God (such as
lightning or fluctuationsin electric powe0, improper installation,
improper maintenance,or use in violation of instructions
furnished by ICL; or to units that havebeen modified or had the
serial number removed,altered,defaced, or rendered illegible.
66
How to Obtain Warranty Services
If,after following all of the operating instructions in this manualand
checking the "Troubleshooting"section,you find that serviceis
needed:
(1) Tofind the nearestTCL Authorized ServiceDepot, visit TCEs
web site: www.toshiba.ca
(2) Presentyour bill of sale or other proof of purchase to the
Authorized Service Depot. AuthorizedICL Service Depot
personnel wilt come to your homewhen warranty serviceis
required.Depending on the type of repair required, either the
servicewill be performed in your home or the set will be taken to
the AuthorizedService Depot for repairand returned to your
home at no cost to you. IN-HOME SERVICE ONLY APPLIES
WITHIN tO0 KILOMETERSOF AN AUTHORIZED TeL
;ERVICEDEPOT.
For additional information, visit TCL's web site:
www.toshiba.ca
I
I
ALL WARRANTIESIMPLIED BY THE LAW OF ANY PROVINCE
OF CANADA, INCLUDING THE IMPLIED WARRANTIESOF
MERCHANTABILITY AND FITNESS FORA PARTICULAR
PURPOSE,ARE EXPRESSLYLIMITED TO THE DURATION OF
THE LIMITED WARRANTIES SET FORTHABOVE. WITH THE
EXCEPTIONOF ANY WARRANTIES IMPLIED BY THE LAW OF
ANY PROVINCEOF CANADA AS HEREBY LIMITED, THE
FOREGOINGWARRANTY IS EXCLUSIVEAND IN LIEU OF ALL
OTHERWARRANTIES, GUARANTEES,AGREEMENTS,AND
SIMILAR OBLIGATIONS OF TeL WITH RESPECTTO THE
REPAIR OR REPLACEMENT OF ANY PARTS.IN NO EVENT
SHALL TCL BE LIABLE FOR CONSEQUENTIAL OR
INCIDENTAL DAMAGES.
No person,agent, distributor, dealer,or company is authorizedto
change,modify, or extend the terms of these warranties in any
manner whatsoevenThetime within which action must be
commencedto enforce any obligation of TCLarising under this
warranty or under any law of Canadaor of any provincethereof, is
hereby limited to 90 days from the date you discover,or should have
discovered,the defect. This limitationdoes not apply to implied
warrant_esarising under the law of any province of Canada.
THIS WARRANTY GIVES YOU SPECIFIC LEGAL RIGHTS,AND
YOU MAY ALSO HAVE OTHER RIGHTS,WHICH MAY VARY
FROM PROVINCE TO PROVINCE IN CANADA. SOME
PROVINCESOF CANADA DO NOT ALLOW LIMITATIONS ON
THE DURATION OF AN IMPLIED WARRANTY, LIMITATIONS
ON THE TIME WITHIN WHICH AN ACTION MAY BE BROUGHT,
OR THE EXCLUSION OR LIMITATION OF INCIDENTAL OR
CONSEQUENTIAL DAMAGES; THEREFORE,THE ABOVE
LIMITATIONS OR EXCLUSIONS MAY NOT APPLY TO YOU
UNDER SUCH CIRCUMSTANCES.
REV.JUNO2
IIEII
Index
/S.B
ANT 1/2 ...................................................................................
29
Antenna cables ......................................................................
9
AUDIO OUT sound, selecting .......................................59
Audio system connection .................................................
18
Auto aspect ...........................................................................
38
Auto power off ......................................................................
62
A/V cables ................................................................................
9
Back of the TV ........................................................................
8
C
Cable converter box connection ...................................10
Camcorder connection ......................................................
15
CH AV buttons ....................................................................
30
Channel surf mode [SpeedSurf] ...................................31
CH LABEL .............................................................................
34
CH LOCK .................................................................................
46
CH RTN button .....................................................................
32
Channel Number buttons ................................................
31
Channel programming
ADD/ERASE ....................................................................
31
Automatic programming
.............................................
30
TV/CABLE selection ......................................................
30
CH SCAN button .................................................................
41
Cinema mode ........................................................................
38
Closed caption ......................................................................
53
Color temperature ...............................................................
50
Component video cables ....................................................
9
D
Demonstration
mode .........................................................
62
Dobly Virtual sound ...........................................................
56
Double-window
["POP"] feature ...................................39
DNR [Digital Noise Reduction] .....................................
50
DTV receiver connection ..................................................
14
DVD connection ...........................................................
12, 13
DVI/H DCP connection ......................................................
16
FGI
FAV VA buttons ..................................................................
33
FAVORITE button .................................................................
42
Favorite channels ................................................................
32
Favorite channel search ....................................................
42
FOCUS .....................................................................................
56
Front of the TV ........................................................................
8
Front panel lock ..................................................................
48
Game timer ...........................................................................
48
INPUT button ................................................................
29, 51
LM
Labeling channels ...............................................................
34
Labeling video inputs ........................................................
52
Language selection ............................................................
29
Last mode memory .............................................................
62
Locking channels ................................................................
46
Locking video inputs ..........................................................
47
LOCK menu ...........................................................................
43
LONG life features .............................................................
60
Menu system .........................................................................
27
MTS feature ...........................................................................
55
MUTE button .........................................................................
55
OPQ
ON-timer
.................................................................................
54
Picture adjustments
COLOR TEMPERATURE ..............................................
50
Picture mode ....................................................................
49
Picture quality ..................................................................
51
Picture-out-picture
[POP)
POP CH AV buttons ....................................................
39
SOURCE button .............................................................
39
FREEZE button ................................................................
40
SWAP button ....................................................................
40
Picture scroll ..........................................................................
37
Picture size selection .........................................................
35
Quick connect guide ..........................................................
28
R
RECALL button ....................................................................
62
Remote control
Battery installation .........................................................
19
Device code table ...................................................
24-25
Functional key chart ..............................................20-21
Learning about the buttons ........................................
26
Operational feature reset ............................................
23
Programming ....................................................................
22
Volume Lock feature .....................................................
23
RESET ..............................................................................
51, 57
S
S-video cables ........................................................................
9
SAP sound ..............................................................................
55
Satellite receiver connection ...........................................12
Scrolling the Theater Wide picture ...............................37
Set-top box ............................................................................
14
Sleep timer .............................................................................
54
Sound quality adjustments ..............................................
57
SPEAKERS on/off ...............................................................
58
Specifications ........................................................................
63
SpeedSurf ...............................................................................
31
SRS 3D ....................................................................................
56
StableSound :_........................................................................
59
Stereo sound .........................................................................
55
Sub-bass
Su rfLock
system (SBS) ....................................................
58
...............................................................................
32
TM
TheaterLink
connection
....................................................
17
Troubleshooting
..................................................................
64
TruBass feature ....................................................................
56
TV/VlDEO button .........................................................
29, 51
V
V-CHIP
BLOCKING OPTION ......................................................
45
ENABLE BLOCKING ....................................................
44
MPAA RATING ................................................................
45
NEW PIN CODE .............................................................
48
TV RATING ........................................................................
44
Unlocking programs temporarily ..............................46
VCR connection ....................................................
10, 11-15
VIDEO LABEL .......................................................................
52
VIDEO LOCK .........................................................................
47
W
Warranty ..................................................................................
65
WOW featu re .........................................................................
56
67
TOSHIBA
AMERICA
CONSUMER
HEAD OFFICE/82 TOTOWA ROAD, WAYNE, NEW JERSEY 07470
NATIONAL SERVICE DIVISION:1420B TOSHIBA DRIVE, LEBANON,
TOSHIBA
HAWAII,
HEAD OFFICE/327 KAMAKEE
TOSHIBA
INC.
TN. 37087
INC.
STREET, HONOLULU,
OF
PRODUCTS,
HAWAII
96814, U.S.A. TEL: (808) 591-9281
CANADA
LTD.
HEAD OFFICE/191 McNABB STREET MARKHAM, ONTARIO L3R 8H2, CANADA TEL: (905) 479-5400
SERVICE CENTERS/TORONTO:
191 McNABB STREET MARKHAM, ONTARIO L3R 8H2, CANADA TEL: (905) 470- 5400
MONTREAL:
1643, NORTH SERVICE RD., TRANS-CANADA
HIGHWAY, DORVAL QUEBEC, H9P 1J1, CANADA
TEL: (514) 856-4100
VANCOUVER:
22171 FRASERWOOD WAY, RICHMOND, B.C. V6W 1J5, CANADA TEL: (604) 303-2500
MANUFACTURED
TOSHIBA
BY
VISUAL-EQUIPMENT
CORPORATION
ColorStream
and StableSound
are registered trademarks of Toshiba America
SurfLock is trademark of Toshiba America Consumer Products, Inc.
Dolby and the double-D
symbol
WOW and the CO_) symbol
WOW technology
is incorporated
Printed in Japan
(03-08)
are registered
are trademarks
trademarks
Consumer
of Dolby Laboratories.
Products, Inc.
Manufactured
under license
from Dolby
Laboratories.
of SRS Labs, Inc.
under license from
SRS Labs, Inc.
TOSHIBA
_23566133