1
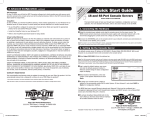
ty n: r a ite ty
an tio ay fo ipp L rran
r
ar ra d Tr wa
W ist ne to EE om/
g nli FR e.c
Reter o in a ipplit
w .tr
s
gi o
re ce t ww
w
an —
ch uct
od
pr
Quick Start Guide
B095-003-1E-M and B095-004-1E
This Quick Start walks you through installation, configuration and local operation. For more details
please refer to the User Manual on the CD-ROM.
Check Kit Contents
B095 Console Server
UTP Cables (2) and
DB9F-RJ45F Straight
and Cross-Over
Adapters
Quick Start Guide &
CD-ROM
AC Power Adapter
Connect the Hardware
• Plug the console server into a power supply (PDU, surge or UPS) using the provided AC power
adapter.
• Connect the NETWORK port on the console server to your network, connect your serial devices
to any of the console server’s SERIAL ports.
• For out-of-band (OoB) dial-in access on the B095-003-1E-M, connect the internal MODEM
port to the phone line. For out-of-band (OoB) dial-in access on the B095-004-1E, you can
connect an external modem to either the USB Type A port or one of the serial ports.
1111 W. 35th Street, Chicago, IL 60609 USA
www.tripplite.com/support
Copyright © 2011 Tripp Lite. All rights reserved. All trademarks are the property of their respective owners.
1
201102195 93-2977.indd 1
3/1/2011 11:05:14 AM
Setup the B095 Console Server
The default console server IP address is 192.168.0.1 (subnet mask 255.255.255.0). With a
web browser on any computer that is LAN connected to the console server:
• Enter https://192.168.0.1 into the address bar.
• Log in using the default system user name root and the default password default, a Welcome
screen listing the basic configuration steps is displayed.
• Select System: Administration, enter and confirm a new System Password and click Apply.
Note: The LAN connected computer must have an IP address in the same network range
(192.168.0.xxx) as the B095 console server. Alternately you can use the ARP Ping command
to set the IP address (refer to the User Manual). The console server DHCP client is enabled by
default, so it will automatically accept any network IP address assigned by any DHCP server on
your network – and will then respond at both 192.168.0.1 and its DHCP address.
• To assign your console server a static IP address or to permanently enable DHCP, select
System: IP then check DHCP or Static for Configuration Method.
Configure Serial & Network Devices
• Select Serial & Network: Serial Port to display the labels, modes and protocol options currently
set for each serial port—by default all serial ports for B095- and B096-Console Servers are set
in Console Server mode (refer to the User Manual if other modes are required). Serial ports on
the B092-016 are set to UPS (PowerAlert) Device mode.
• To configure a serial port, click Edit.
• Configure the Common Settings (Baud Rate, Parity, Data Bits, Stop Bits and Flow Control) to
match those of the device being controlled.
• Select the Console Server protocols (Telnet, SSH, TCP and RFC2217) that are to be used for
the data connection to that port.
• A Logging Level may also be set to specify the level of information to be logged and monitored
for each port. Click Apply.
• To access locally networked computers (referred to as Hosts) through the console server select
Serial & Network: Network Hosts and click Add Host.
• Enter the IP address/DNS Name of the host.
• Edit the Permitted Services used for accessing this host, e.g. HTTPS (TCP port 443), VNC (TCP
port 5990) or add custom TCP or UDP port numbers – only the services specified here are
tunneled to the host, all other services are blocked.
• You may now specify the level of information to be logged and monitored for each host access.
Click Apply.
2
201102195 93-2977.indd 2
3/1/2011 11:05:14 AM
Add New Users
Note: It is recommended that you set up a new Administrator user (in the admin group with full
access privileges) and login as this new user for all ongoing administration functions (rather than
continuing as root).
• For each new user, select Serial & Network: Users & Groups and click Add User.
• Enter a Username and enter and confirm a Password, and nominate the Accessible Hosts and
Ports the user is allowed to access, then click Apply.
Configure Dial-In Access
For dial in modem access you must set up PPP with a user account:
• Select System: Dial and select the port to be configured (either Internal Modem Port or Serial
Port 1/ External USB Type A Port for B095-004-1E with external modem).
• Set the Baud Rate and Flow Control that will be used on the modem link. When using a
console server with a built-in modem, it is recommended that this be changed to 115200
Baud Rate with hardware Flow Control. When connecting an external modem to Serial Port 1
or the USB Type A port on the B095-004-1E, these settings must match that of the external
modem.
• Check Enable Dial-In Access and configure the Dial-In Settings (Username, Password, Remote
and Local PPP IP Address field, Authentication).
• Click Apply.
• If you wish additional dial-back security, check Enable Dial-Back and enter the phone number
to be called to re-establish an OoB link once a dial-in connection has been logged.
Advanced Configurations
The B095 console server offers many more advanced functions including:
• The Alerts & Logging: Alerts facility which monitors serial ports, hosts, user log ins, UPS and
PDUs. A broad selection of trigger events (such as data patterns, temperature or battery
levels) can be specified. When triggered a warning email, SMS, Nagios or SNMP alerts are
sent to a nominated destination.
• Extensive management of Tripp Lite and third party UPSs and PDUs using open source NUT and
Powerman tools. The Manage: Power facility enables both administrators and regular users to
monitor and control attached PDU power strips, and servers with embedded IPMI BMCs.
• Historical logs of all communications with serial- and network-attached devices, system activity,
UPS and PDU power status, environmental status, etc. The level of logging is set as ports and
devices are configured, Alerts & Logging: Port Log allows this history to be saved locally or
remotely. Logs can be viewed from the Status and Manage menus.
3
201102195 93-2977.indd 3
3/1/2011 11:05:14 AM
Advanced Configurations
continued
• Other advanced features, such as Serial Port Cascading, remote Authentication, Trusted
Networks, Secure Tunneling, Nagios Distributed Monitoring, the Command Line interface –
these are covered in detail in the User Manual on the CD-ROM.
Note: On the CD-ROM you will also find the SDT Connector software tool which provides you
with secure, point and click access to the console server and all the attached devices. Refer to
SDTConnector Quick Start for set up details.
VirtualPort
On the CD-ROM, you will also find VirtualPort software which enables applications on your
Windows PC (or Windows server or virtual server) to control serial port devices attached to a
remote B095 console server.
• To use VirtualPort configure the B095 serial port in console server mode and specify the
appropriate protocol to be used (either RFC2117 or RAW).
• Install the VirtualPort client on your Windows® PC.
Refer to the VirtualPort Quick Start or the User Manual on your CD-ROM for more details.
2-Year Limited Warranty
TRIPP LITE warrants its products to be free from defects in materials and workmanship for a period of two (2) years from
the date of initial purchase. TRIPP LITE’s obligation under this warranty is limited to repairing or replacing (at its sole option)
any such defective products. To obtain service under this warranty, you must obtain a Returned Material Authorization (RMA)
number from TRIPP LITE or an authorized TRIPP LITE service center. Products must be returned to TRIPP LITE or an
authorized TRIPP LITE service center with transportation charges prepaid and must be accompanied by a brief description
of the problem encountered and proof of date and place of purchase. This warranty does not apply to equipment which has
been damaged by accident, negligence or misapplication or has been altered or modified in any way.
EXCEPT AS PROVIDED HEREIN, TRIPP LITE MAKES NO WARRANTIES, EXPRESS OR IMPLIED, INCLUDING
WARRANTIES OF MERCHANTABILITY AND FITNESS FOR A PARTICULAR PURPOSE. Some states do not permit
limitation or exclusion of implied warranties; therefore, the aforesaid limitation(s) or exclusion(s) may not apply to the
purchaser.
EXCEPT AS PROVIDED ABOVE, IN NO EVENT WILL TRIPP LITE BE LIABLE FOR DIRECT, INDIRECT, SPECIAL,
INCIDENTAL OR CONSEQUENTIAL DAMAGES ARISING OUT OF THE USE OF THIS PRODUCT, EVEN IF ADVISED OF
THE POSSIBILITY OF SUCH DAMAGE. Specifically, TRIPP LITE is not liable for any costs, such as lost profits or revenue,
loss of equipment, loss of use of equipment, loss of software, loss of data, costs of substitutes, claims by third parties, or
otherwise.
WARRANTY REGISTRATION
Visit www.tripplite.com/warranty today to register the warranty for your new Tripp Lite product. You’ll be automatically
entered into a drawing for a chance to win a FREE Tripp Lite product!*
* No purchase necessary. Void where prohibited. Some restrictions apply. See website for details.
Tripp Lite follows a policy of continuous improvement. Product specifications are subject to change without
notice.
1111 W. 35th Street, Chicago, IL 60609 USA
www.tripplite.com/support
4
201102195 93-2977.indd 4
201102195 • 93-2977-EN
3/1/2011 11:05:14 AM