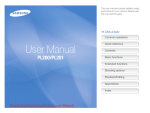
Download Samsung PL20 Camcorder User Manual
Transcript
Thank you for buying a Samsung Camera. This user manual includes detailed usage instructions for your camera. Please read this manual thoroughly. Click a topic Basic troubleshooting User Manual PL20/PL21 Quick reference Contents Basic functions Extended functions Shooting options Playback/Editing Settings Appendixes Index Health and safety information Always comply with the following precautions and usage tips to avoid dangerous situations and ensure peak performance of your camera. Keep your camera away from small children and pets. Warning—situations that could cause injury to yourself or others Keep your camera and all accessories out of the reach of small children and animals. Small parts may cause choking or serious injury if swallowed. Moving parts and accessories may present physical dangers as well. Do not disassemble or attempt to repair your camera. This may result in electric shock or damage to the camera. Do not expose the camera to direct sunlight or high temperatures for an extended period of time. Do not use your camera near flammable or explosive gases and liquids. Prolonged exposure to sunlight or extreme temperatures can cause permanent damage to your camera’s internal components. This may cause a fire or explosion. Do not insert flammable materials into the camera or store these materials near the camera. Avoid covering the camera or charger with blankets or clothes. This may cause a fire or electric shock. The camera may over-heat, which may distort the camera or cause a fire. Do not handle your camera with wet hands. If liquid or foreign objects enter your camera, immediately disconnect all power sources, such as the battery or charger, and then contact a Samsung service center. This may result in electric shock. Prevent damage to subjects’ eyesight. Do not use the flash in close proximity (closer than 1 m/3 ft) to people or animals. If you use the flash too close to your subject’s eyes, this can cause temporary or permanent eyesight damage. 1 Health and safety information Do not use batteries for unintended purposes. Caution—situations that could cause damage to your camera or other equipment This may cause a fire or electric shock. Do not touch the flash while it fires. Remove the batteries from your camera when storing it for an extended period of time. The flash is very hot when fired and may burn your skin. Installed batteries may leak or corrode over time and cause serious damage to your camera. When you use AC charger, turn off the camera before you disconnect the power to the AC charger. Use only authentic, manufacturer-recommended, Lithiumion replacement batteries. Do not damage or heat the battery. Failing to do so may result in fire or electric shock. This may cause a fire or personal injuries. Failing to do so may result in fire or electric shock. Use only Samsung-approved batteries, chargers, cables and accessories. Do not use a damaged power supply cord, plug, or loose outlet when you charge batteries. • Unauthorized batteries, chargers, cables or accessories can cause batteries to explode, damage your camera, or cause injury. • Samsung is not responsible for damages or injuries caused by unapproved batteries, chargers, cables or accessories. This may cause a fire or electric shock. Disconnect chargers from power sources when not in use. Do not allow the AC charger to come in contact with the +/- terminals on the battery. This may cause a fire or electric shock. 2 Health and safety information Do not force the camera’s parts or apply pressure to the camera. Check that the camera is operating properly before use. The manufacturer takes no responsibility for any loss of files or damages that may result from camera malfunction or improper use. This may cause your camera to malfunction. Exercise caution when you connect cables or adapters and install batteries and memory cards. You must plug the end of the cable with the indicator light (▲) into your camera. If you force the connectors, improperly connect cables, or improperly install batteries and memory cards, you can damage ports, connectors, and accessories. If the cable is reversed, it may damage your files. The manufacturer is not responsible for any loss of data. Keep cards with magnetic strips away from the camera case. Information stored on the card may be damaged or erased. Never use a damaged charger, battery, or memory card. This may result in electric shock or camera malfunction or cause a fire. 3 Organization of the user manual Basic functions Copyright information 11 Learn about your camera’s layout, icons, and basic functions for shooting. • Microsoft Windows and the Windows logo are registered trademarks of the Microsoft Corporation. • Mac is a registered trademark of the Apple Corporation. • Trademarks and trade names used in this manual are the property of their respective owners. Extended functions 27 Learn how to take a photo by selecting a mode and how to record a video or voice memo. Shooting options • Camera specifications or contents of this manual may be changed without prior notice due to upgrade of camera functions. • For Open Source License information, refer to the “OpenSourceInfo.pdf” in the provided CD-ROM. 35 Learn about the options you can set in shooting mode. Playback/Editing 52 Learn how to play back photos, videos, or voice memos and edit photos or videos. You will also learn how to connect your camera to your photo printer or TV. Settings 73 Refer to options to configure your camera’s settings. Appendixes Refer to error messages, specifications, and maintenance tips. 4 79 Indications used in this manual Shooting mode Icons used in this manual Indication Icon Function Additional information Smart Auto Program [ ] DIS ( ) Photo Help Guide → Scene Movie * Safety warnings and precautions Camera buttons; for example: [Shutter] represents the shutter button. Page number of related information The order of options or menus you must select to perform a step. For example: Select Shooting → White Balance represents select Shooting, and then select White Balance. Annotation Shooting mode icons These icons indicate that a function is available in the corresponding modes. The mode may not support functions for all scenes. Abbreviations used in this manual Abbreviation Definition e.g.) Available in the Program, DIS, and Movie modes 5 ACB Auto Contrast Balance AEB Auto Exposure Bracket AF Auto Focus DIS Digital Image Stabilization DPOF Digital Print Order Format EV Exposure Value ISO International Organization for Standardization WB White Balance Expressions used in this manual Pressing the shutter Exposure (Brightness) • Half-press [Shutter]: press the shutter halfway down • Press [Shutter]: press the shutter all the way down The amount of light that enters your camera determines the exposure. You can alter the exposure with shutter speed, aperture value, and ISO speed. By altering the exposure, your photos will be darker or lighter. Half-press [Shutter] Press [Shutter] Normal exposure Subject, background, and composition • Subject: the main object of a scene, such as a person, animal, or still life. • Background: the objects around the subject. • Composition: the combination of a subject and background. Background Composition Subject 6 Overexposure (too bright) Basic troubleshooting You can get answers to common questions. Solve problems easily by setting shooting options. The subject's eyes appear red. This is caused by a reflection from the camera flash. • Set the flash option to Red-eye or Red-eye Fix. (p. 40) Red-eye Fix in the edit menu. (p. 62) • If the photo has already been taken, select Photos have dust spots. Dust particles floating in the air may be captured in photos when using the flash. • Turn off the flash or avoid taking photos in a dusty place. • Set ISO speed options. (p. 40) Photos are blurred. This may be caused by taking photos in low light conditions or holding the camera incorrectly. • Press [Shutter] halfway down to make sure the subject is focused. (p. 25) • Use the mode. (p. 31) Photos are blurred when shooting at night. As the camera tries to let in more light, the shutter speed slows. This can make it difficult to steady the camera and may result in camera shake. • Select Night in the mode. (p. 30) • Turn on the flash. (p. 39) • Set ISO speed options. (p. 40) • Use a tripod to prevent your camera from shaking. Subjects come out too dark because of backlighting. When the light source is behind the subject or when there is a high contrast between the light and dark areas, the subject may come out shaded. • Avoid shooting with the sun behind your subject. • Select Backlight in the mode. (p. 30) • Set the flash option to Fill in. (p. 40) • Set the Auto Contrast Balance (ACB) option. (p. 46) • Adjust the exposure. (p. 46) Spot if a bright subject is in the center of the frame. (p. 47) • Set the metering option to 7 Quick reference Taking photos of people • mode > Beauty Shot 30 mode > Portrait 30 • • Red-eye, Red-eye Fix (to prevent or correct red-eye) 40 • Face Detection 43 Taking photos at night or in the dark • mode > Night 30 mode > Sunset, Dawn 30 • • Flash options 39 • ISO speed (to adjust the sensitivity to light) 40 Adjusting the exposure (brightness) • ISO speed (to adjust the sensitivity to light) 40 • EV (to adjust exposure) 46 • ACB (to compensate for subjects against bright backgrounds) 46 • Metering 47 • AEB (to take three photos of the same scene with different exposures) 49 Applying a different effect • Smart Filter (to apply effects) 50 • Image adjust (to adjust saturation, sharpness, or contrast) 51 Taking action photos Reducing camera shake • Continuous, Motion Capture 49 • mode 31 Taking photos of insects, or flowers • mode > Close Up 30 • Macro, Auto Macro (to take close-up photos) 41 • White Balance (to change the color tone) 47 8 • Viewing files by category in Smart Album 54 • Deleting all files on the memory card 56 • Viewing files as a slide show 57 • Viewing files on a TV 64 • Connecting your camera to a computer 65 • Adjusting sound and volume 75 • Adjusting the brightness of the display 75 • Changing the display language 76 • Setting the date and time 76 • Formatting the memory card 76 • Troubleshooting 90 Contents Basic functions ................................................................ 11 Shooting options ............................................................. 35 Unpacking .................................................................... Camera layout .............................................................. Inserting the battery and memory card ....................... Charging the battery and turning your camera on ...... Charging the battery .................................................... Turning on your camera ............................................... Performing the initial setup .......................................... Learning icons .............................................................. Selecting options ......................................................... Setting the display and sound ..................................... Changing the display type . .......................................... Setting the sound . ...................................................... Taking photos ............................................................... Zooming . ................................................................... Tips for getting a clearer photo .................................... Selecting a resolution and quality ................................ Selecting a resolution .................................................. Selecting image quality ................................................ Using the timer ............................................................. Shooting in the dark ..................................................... Preventing red-eye ...................................................... Using the flash ............................................................ Adjusting the ISO speed .............................................. Changing the camera’s focus ...................................... Using macro ............................................................... Using auto focus . ....................................................... Adjusting the focus area .............................................. Using face detection .................................................... Detecting faces . ......................................................... Taking a self-portrait shot ............................................. Taking a smile shot ...................................................... Detecting eye blinking . ................................................ Adjusting brightness and color .................................... Adjusting the exposure manually (EV) ............................ Compensating for backlighting (ACB) ............................ Changing the metering option ...................................... Selecting a light source (White balance) ....................... Using burst modes ....................................................... Improving your photos ................................................. Applying filter effects . .................................................. Adjusting your photos .................................................. 12 13 15 16 16 16 17 18 19 21 21 21 22 23 25 Extended functions ......................................................... 27 Shooting modes ........................................................... Using the Smart Auto mode ......................................... Using the Photo Help Guide mode ............................... Using the Scene mode . .............................................. Using the Beauty Shot mode ....................................... Using the DIS mode .................................................... Using the Program mode ............................................. Recording a video ....................................................... Recording voice memos .............................................. Recording a voice memo ............................................. Adding a voice memo to a photo . ................................ 28 28 29 30 30 31 32 32 34 34 34 9 36 36 36 37 39 39 39 40 41 41 41 42 43 43 44 44 45 46 46 46 47 47 49 50 50 51 Contents Playback/Editing ............................................................. 52 Playing back ................................................................. Starting Playback mode ............................................... Viewing photos ........................................................... Playing a video . .......................................................... Playing voice memos . ................................................. Editing a photo ............................................................. Resizing photos .......................................................... Rotating a photo ......................................................... Applying smart effects ................................................. Correcting exposure problems ..................................... Creating a print order (DPOF) ....................................... Viewing files on a TV .................................................... Transferring files to your Windows computer .............. Transferring files using Intelli-studio ................................ Transferring files by connecting the camera as a removable disk ........................................................... Disconnecting the camera (for Windows XP) ................. Transferring files to your Mac computer ...................... Printing photos with a PictBridge photo printer .......... Appendixes ...................................................................... 79 53 53 57 58 59 60 60 60 61 62 63 64 65 67 Error messages ............................................................ 80 Camera maintenance ................................................... 81 Cleaning your camera . ................................................ 81 Using or storing the camera ......................................... 82 About memory cards . ................................................. 84 About the battery ........................................................ 86 Before contacting a service center .............................. 90 Camera specifications ................................................. 93 Glossary ....................................................................... 96 FCC notice ................................................................. 101 Index ........................................................................... 102 69 70 71 72 Settings ............................................................................ 73 Camera settings menu ................................................. Accessing the settings menu ....................................... Sound . ...................................................................... Display ....................................................................... Settings . .................................................................... 74 74 75 75 76 10 Basic functions Learn about your camera’s layout, icons, and basic functions for shooting. Unpacking … ………………………………… 12 Camera layout ………………………………… 13 Inserting the battery and memory card … … 15 Charging the battery and turning your camera on …………………………………… 16 Charging the battery … ………………………… 16 Turning on your camera ………………………… 16 Performing the initial setup … ……………… 17 Learning icons ………………………………… 18 Selecting options ……………………………… 19 Setting the display and sound … …………… 21 Changing the display type ……………………… 21 Setting the sound … …………………………… 21 Taking photos … ……………………………… 22 Zooming ………………………………………… 23 Tips for getting a clearer photo ……………… 25 Unpacking Check your product box for the following items. Optional accessories Camera AC adapter / USB cable Quick Start Manual Rechargeable battery Camera case Memory cards Battery charger A/V cable Strap Software CD-ROM (User manual included) The illustrations may differ from your actual items. Basic functions 12 Camera layout Before you start, familiarize yourself with your camera's parts and their functions. Microphone POWER button Speaker Shutter button Flash AF-assist light/timer lamp Lens Tripod mount Battery chamber cover Insert a memory card and battery Basic functions 13 Camera layout Status lamp Zoom button • Blinking: When the camera is saving a photo or video, being read by a computer or printer, or out of focus • Steady: When the camera is connecting to a computer or in focus • Zoom in or out in Shooting mode. • Zoom in on part of a photo or view files as thumbnails in Playback mode. MENU button Access options and settings menu, or return to the previous mode Display SMART button Press this button, Select / Cancel "Smart Auto" mode Button Description Navigation In Shooting mode While setting Change the display option Move up Change the macro option Move down Change the flash option Move left Change the timer option Move right USB and A/V port Confirm the highlighted option or menu Playback Enter Playback mode Function • Access options in Shooting mode • Delete files in Playback mode Accepts USB cable or A/V cable Basic functions 14 Inserting the battery and memory card Learn to insert the battery and an optional memory card into the camera. Removing the battery and memory card Memory card Insert a memory card with the gold-colored contacts facing down. Push the lock down to release the battery. Battery lock Memory card Push the card gently until the card disengages from the camera, and then pull it out of the slot. Battery Insert the battery with the Samsung logo facing down. • You can use the internal memory as a temporary storage device when the memory card is not inserted. • Insert a memory card in the correct direction. Inserting a memory card in the wrong direction may damage your camera and memory card. Battery Basic functions 15 Charging the battery and turning your camera on Charging the battery Turning on your camera Before using the camera for the first time, you must charge the battery. Attach the USB cable to the AC adapter, and then plug the end of cable with the indicator light into your camera. Press [POWER] to turn your camera on or off. • The initial setup screen appears when you turn on the camera for the first time. (p. 17) Turning on your camera in Playback mode Press [ ]. The camera turns on and accesses Playback mode immediately. Indicator light • Red: Charging • Green: Fully charged When you turn on your camera by pressing and holding [ ] for about 5 seconds, the camera does not emit any camera sounds. Basic functions 16 Performing the initial setup When the initial setup screen appears, follow the steps below to configure the camera’s basic settings. 1 Press [POWER]. 2 Press [ ] or [ [ ] or [ ]. • The initial setup screen appears when you turn on the camera for the first time. ] to select Language and press 6 7 Press [ ] or [ ] to select Date/Time Set and press [ ] or [ ]. Press [ ] or [ ] to select an item. Language :English Time Zone :London Date/Time Set :/01/01 Date Type yyyy mm dd Language English Time Zone 한국어 Date/Time SetFrançais Date Type Deutsch 2011 / 01/01 12:00 Español Italiano Back 3 4 5 Back 8 Set Press [ ] or [ ] to select a language and press [ ]. Press [ ] or [ ] to select Time Zone and press [ ] or [ ]. Press [ ] or [ ] to select a time zone and press [ ]. • To set the daylight-saving time, press [ ]. 9 Press [ [ ]. Press [ [ ] or [ Set ] or [ ] to set the date and time, and press ] or [ ]. ] to select Date Type and press Language :English Time Zone :London Date/Time SetOff Date Type :mm/ dd/mm/yyyy Time Zone mm/dd/yyyy yyyy/mm/dd Back London [GMT +00:00] 2011/01/01 12:00 PM Back DST 10 Press [ 11 Press [ Basic functions 17 Set ] or [ ] to select a Date Type and press [ ] to switch to Shooting mode. ]. Learning icons The icons displayed will change according to the mode you select or the options you set. A Icon C. Icons on the left Description Auto focus frame Camera shake B Icon Description Aperture and shutter speed Exposure value Zoom ratio White balance Current date and time C A. Information Icon Description Selected shooting mode Available number of photos Photo resolution Smart filter Video resolution Image adjustment (contrast, sharpness, saturation) Frame rate Photo quality Memory card is not inserted Metering option Memory card inserted Flash option : Fully charged : Partially charged (Red) : Charging needed Voice memo ISO speed Description Available recording time • • • Face retouch B. Icons on the right Icon Face tone Voice muted Burst type Timer option Auto focus option Face detection Basic functions 18 Selecting options You can select options by pressing [ ], and then using the navigation buttons ([ You can also access shooting options by pressing [ 1 2 In Shooting mode, press [ 3 ]). ] again to go back to the previous menu. Press [Shutter] to return to Shooting mode. ]. EV Back ], [ Going back to the previous menu Press [ Use the navigation buttons to scroll to an option or menu. Press [ ], [ ], but some options are not available. ]. • To move left or right, press [ ] or [ ]. • To move up or down, press [ ] or [ ], [ Move ] to confirm the highlighted option or menu. Basic functions 19 Selecting options Example: Selecting a White Balance option in the P mode 1 2 In Shooting mode, press [ 3 Press [ ] or [ ] to scroll to Program, and then press [ ] or [ ]. Press [ [ ] or [ ]. Press [ ] or [ ] to scroll to White Balance, and then press [ ] or [ ]. ] or [ ] to scroll to Mode, and then press ]. Smart Auto Program DIS Photo Help Guide Scene Movie Exit 4 5 6 Press [ Photo Size Quality EV ISO White Balance Smart Filter Face Detection Exit 7 Press [ ] or [ Back Shooting Photo Size Quality Daylight ISO Display White Balance Exit Back 8 Press [ EV Sound Settings ] to scroll to a White Balance option. ]. Press [ ] or [ ] to scroll to Shooting, and then press [ ] or [ ]. Mode Back Smart Filter Face Detection Change Basic functions 20 Move ]. Setting the display and sound Learn how to change the basic display and sound settings. Changing the display type Setting the sound Select a display type for Shooting or Playback mode. Each type displays different shooting or playback information. Set whether your camera emits a specified sound when you operate your camera. Press [ 1 2 ] repeatedly to change a display type. In Shooting or Playback mode, press [ Select Sound → Beep Sound → an option. Show all photographic information. Modes Display Type Choices Shooting • Display all information about shooting • Hide information about shooting, except the available number of photos (or available recording time) and the battery icon Playback • Display all information about the current photo • Hide all information about the current file • Display information about the current file, except the shooting settings and captured date Basic functions ]. 21 Options Description Off The camera does not emit any sounds. 1/2/3 The camera emits one of three sounds, depending on the option you select. Taking photos Learn how to take photos easily and quickly in the Smart Auto mode. 1 2 In Shooting mode, press [ Press [ [ ] or [ ] or [ ] to scroll to Mode, and then press ]. 3 Press [ press [ ]. 4 5 Half-press [Shutter] to focus. 6 Press [Shutter] to take a photo. • A green frame means the subject in focus. • A red frame means the subject is out of focus. ] or [ ] to scroll to Smart Auto, and then Smart Auto Program DIS Photo Help Guide Scene Movie Exit ]. Back See page 25 for tips to get clearer photos. Align your subject in the frame. Basic functions 22 Taking photos Zooming Digital zoom You can shoot close-up photos by adjusting the zoom. Your camera has a 5X optical zoom, 2X Intelli zoom, and 3X digital zoom. Intelli zoom and digital zoom cannot be used at the same time. If the zoom indicator is in the digital range, your camera is using the digital zoom. The picture quality may deteriorate when you use the digital zoom. By using both the optical zoom and digital zoom, you can zoom in up to 15 times. Push [Zoom] up to zoom in on your subject. Push [Zoom] down to zoom out. Zoom in Zoom indicator Digital range Zoom ratio Optical range Zoom out • The digital zoom is not available when you use the , , (in some scenes) and modes. • It may take longer to save a photo when you are using the digital zoom. Available zoom ratio for videos differs from photo zoom ratio. Basic functions 23 Taking photos Intelli zoom Setting Intelli zoom If the zoom indicator is in the Intelli range, your camera is using the Intelli zoom. Photo resolution varies according to the zoom rate if you use the Intelli zoom. By using both the optical zoom and Intelli zoom, you can zoom in up to 10 times. 1 2 In Shooting mode, press [ Select Shooting → Intelli Zoom → an option. Options Photo resolution when Intelli zoom is on ]. Zoom indicator Intelli range Description Off: Deactivate the Intelli zoom. On: Activate the Intelli zoom. Optical zoom • The Intelli zoom is available only in , and (in some scenes) modes. • The Intelli zoom is available only when you set a 4:3 resolution ratio. If you set another resolution ratio with Intelli zoom on, the Intelli zoom will be turned off automatically. • Intelli zoom helps you capture a photo with less quality deterioration than the digital zoom. However, the photo quality may be lower than when you use the optical zoom. Basic functions 24 Tips for getting a clearer photo Reducing camera shake Holding your camera correctly Make sure nothing is blocking the lens. • Select the mode to reduce camera shake digitally. (p. 31) When is displayed Half-pressing the shutter button Half-press [Shutter] and adjust the focus. The camera adjusts the focus and exposure automatically. The camera sets the aperture value and shutter speed automatically. Focus frame • Press [Shutter] to take the photo if the focus frame appears in green. • Change the frame and half-press [Shutter] again if it appears in red. Basic functions Camera shake When shooting in the dark, avoid setting the flash option to Slow Sync or Off. The aperture remains open longer and it may be harder to hold the camera still. • Use a tripod or set the flash option to Fill in. (p. 40) • Set ISO speed options. (p. 40) 25 Preventing your subject from being out of focus • When you take photos in low light It may be difficult to get your subject in focus when: -- there is little contrast between the subject and background Turn on the flash. (p. 39) (When your subject is wearing clothing that is similar in color to the background) -- the light source behind the subject is too bright -- the subject is shiny -- the subject includes horizontal patterns, such as blinds -- the subject is not positioned in the center of the frame • When subjects are moving fast Use the continuous or motion capture function. (p. 49) Use the focus lock Half-press [Shutter] to focus. When the subject is in focus, you can reposition the frame to change the composition. When you are ready, press [Shutter] to take your photo. Basic functions 26 Extended functions Learn how to take a photo by selecting a mode and how to record a video or voice memo. Shooting modes … …………………………… 28 Using the Smart Auto mode … ………………… Using the Photo Help Guide mode … ………… Using the Scene mode … ……………………… Using the Beauty Shot mode …………………… Using the DIS mode … ………………………… Using the Program mode … …………………… Recording a video … …………………………… 28 29 30 30 31 32 32 Recording voice memos … ………………… 34 Recording a voice memo … …………………… 34 Adding a voice memo to a photo … …………… 34 Shooting modes Take photos or record videos by selecting the best shooting mode for the conditions. Using the Smart Auto mode Icon In this mode, your camera automatically chooses the appropriate camera settings based on the type of scene it defects. Smart Auto Mode is helpful if you are not familiar with the camera settings for various scenes. 1 2 In Shooting mode, press [ Description Appears when taking photos of landscapes. Appears when taking photos with bright white backgrounds. Appears when taking photos of landscapes at night. This is available only when the flash is off. ]. Appears when taking portraits at night. Select Mode → Smart Auto. Appears when taking photos of landscapes with backlighting. Appears when taking portraits with backlighting. Press [SMART] to go to 3 Appears when taking portraits. mode directly. Appears when taking close-up photos of objects. Appears when taking close-up photos of text. Align your subject in the frame. Appears when taking photos of sunsets. • The camera selects a scene automatically. An appropriate scene mode icon appears at the top left of the screen. The icons are listed below. Appears when taking photos of clear skies. Appears when taking photos of forested areas. Appears when taking close-up photos of colorful subjects. Appears when the camera is stable (on a tripod, for example) and the subject is motionless for a period of time. This is available only when you are shooting in the dark. Appears when taking photos of actively moving subjects. Appears when taking photos of fireworks. This is available only when you use a tripod. Extended functions 28 Shooting modes 4 5 Using the Photo Help Guide mode Half-press [Shutter] to focus. Helps the user learn the correct picture taking method and includes solutions for potential problems that may occur. This also enables the user to practice the best way to take the pictures. Press [Shutter] to take the photo. • If the camera does not recognize a proper scene mode, appears and the camera uses default settings. • Even if it detects a face, the camera may not select a portrait mode depending on the subject's position or lighting. • The camera may not select the correct scene depending on the shooting condtions, such as camera shake, lighting, and distance to the subject. • Even if you use a tripod, the camera may not detect the mode depending on the subject's movement. 1 2 3 In Shooting mode, press [ Select Mode → Photo Help Guide. Select the options you need. Photo Help Guide Photo Help Guide Features to use when the image is out of focus Features to reduce camera shake Features to use in low light conditions Features to use when adjusting brightness Features to use when adjusting colors Change Extended functions ]. 29 Shooting modes Using the Scene mode Using the Beauty Shot mode Take a photo with options preset for a specific scene. Take a photo of a person with options to hide facial imperfections. 1 2 1 2 3 In Shooting mode, press [ ]. Select Mode → Scene → a scene. Smart AutoBeauty Shot Program Night DIS Portrait Photo HelpLandscape Guide Scene Close Up Movie Sunset Back 4 Set In Shooting mode, press [ Select Mode → Scene → Beauty Shot. To make the subject's skin tone appear lighter (face only), press [ ], and then go to Step 4. To hide facial imperfections, press [ ], and then go to Step 5. Select Shooting → Face Tone → an option. • Select a higher setting to make skin tone appear lighter. • To change the scene mode, press [ ], and then select Mode → Scene → a scene. • For the Beauty Shot mode, see “Using the Beauty Shot mode" on page 30. 3 Align your subject in the frame, and then half-press [Shutter] to focus. 4 Press [Shutter] to take the photo. Face Tone Back Extended functions ]. 30 Move Shooting modes 5 Select Shooting → Face Retouch → an option. • Select a higher setting to hide a greater number of imperfections. Using the DIS mode Reduce camera shake and prevent blurred photos with Digital Image Stabilization functions. Face Retouch Back Move 6 Align your subject in the frame, and then half-press [Shutter] to focus. 7 Press [Shutter] to take the photo. The focus distance will be set to Auto Macro. Before correction After correction 1 2 3 In Shooting mode, press [ 4 Press [Shutter] to take the photo. ]. Select Mode → DIS. Align your subject in the frame, and then half-press [Shutter] to focus. • The digital zoom does not work in this mode. • If your subject is moving rapidly, the photo may be blurry. • The DIS function may not work in a place where the lighting is brighter than that of a fluorescent lamp. Extended functions 31 Shooting modes Using the Program mode Recording a video In the Program mode, you can set various options except the shutter speed and aperture value, which the camera sets automatically. You can record videos of up to 4 GB or 2 hours each. The recorded video is saved as an MJPEG file. 1 2 In Shooting mode, press [ Select Mode → Program. Smart Auto Program DIS Photo Help Guide Scene Movie Exit 3 • Some memory cards may not support high definition recording. If this occurs, set a lower resolution. (p. 36) ]. 1 2 3 4 Align your subject in the frame, and then half-press [Shutter] to focus. 5 Press [Shutter] to take the photo. ]. Select Mode → Movie. Press [ ]. Select Movie → Frame Rate → a frame rate (the number of frames per second). • As the frame rate increases, action appears more natural, but the file size also increases. Back Set options. (For a list of options, refer to “Shooting options.”) 4 In Shooting mode, press [ • The zoom ratio and angle of view might decrease when shooting video. Extended functions 32 Shooting modes 5 6 Press [ ]. Select Movie → Voice → a sound option. Option Description On: Record a video with sound. To pause recording The camera allows you to pause a video temporarily while recording. With this function, you can record several scenes as a single video. Press [ ] to pause while recording. Press it again to resume. Off: Record a video without sound. Zoom Mute: The camera stops recording sound temporarily when you use the zoom. 7 Set other options as desired. (For options, refer to “Shooting options.”) 8 9 Press [Shutter] to start recording. Stop Press [Shutter] again to stop recording. Extended functions 33 Pause Recording voice memos Learn how to record a voice memo that you can play back at any time. You can add a voice memo to a photo as a short reminder of shooting conditions. You will get the best sound quality when recording 16 inches (40 cm.) away from the camera. Recording a voice memo 1 2 3 In Shooting mode, press [ Adding a voice memo to a photo ]. Select Shooting → Voice → Record. Press [Shutter] to record. • You can record voice memos of up to 10 hours in length. • Press [ ] to pause or resume recording. 1 2 3 4 In Shooting mode, press [ ]. Select Shooting → Voice → Memo. Align your subject in the frame, and then take a photo. Record a short voice memo (10 seconds maximum). • Begin recording the voice memo right after taking the photo. • Press [Shutter] to stop recording a voice memo before the 10 seconds are up. You cannot add voice memos to photos in the burst mode. Stop Pause 4 Press [Shutter] to stop. 5 Press [ • Press [Shutter] again to record a new voice memo. ] to switch to Shooting mode. Extended functions 34 Shooting options Learn about the options you can set in shooting mode. Selecting a resolution and quality …………… 36 Adjusting brightness and color ……………… 46 Selecting a resolution …………………………… 36 Selecting image quality … ……………………… 36 Adjusting the exposure manually (EV) … ……… Compensating for backlighting (ACB) … ……… Changing the metering option … ……………… Selecting a light source (White balance) … …… Using the timer ……………………………… 37 Shooting in the dark … ……………………… 39 Preventing red-eye ……………………………… 39 Using the flash … ……………………………… 39 Adjusting the ISO speed … …………………… 40 Changing the camera’s focus … …………… 41 Using macro … ………………………………… 41 Using auto focus … …………………………… 41 Adjusting the focus area ………………………… 42 Using face detection … ……………………… 43 Detecting faces … ……………………………… Taking a self-portrait shot … …………………… Taking a smile shot ……………………………… Detecting eye blinking … ……………………… 43 44 44 45 46 46 47 47 Using burst modes …………………………… 49 Improving your photos … …………………… 50 Applying filter effects … ………………………… 50 Adjusting your photos … ……………………… 51 Selecting a resolution and quality Learn how to change the image resolution and quality settings. Selecting a resolution When recording a video: As you increase the resolution, your photo or video will include more pixels, so it can be printed on larger paper or displayed on a larger screen. When you use a high resolution, the file size also increases. 1 2 In the In Shooting mode, press [ ]. Select Movie → Movie Size → an option. Option Description 1280 X 720: For play back on an HDTV. When taking a photo: 1 2 mode, press [ 640 X 480: For play back on a standard, analog TV. ]. 320 X 240: To post on a web page. Select Shooting → Photo Size → an option. Option Description 4320 X 3240: Print on A1 paper. Selecting image quality 4320 X 2880: Print on A1 paper in wide ratio (3:2). The camera compresses and saves the photos you take in JPEG format. Higher quality images result in larger file sizes. 4000 X 3000: Print on A1 paper. 4320 X 2432: Print on A2 paper in panorama ratio (16:9) or play back on an HDTV. 3264 X 2448: Print on A3 paper. 1 2 In Shooting mode, press [ ]. Select Shooting → Quality → an option. 2592 X 1944: Print on A4 paper. Option Description 1984 X 1488: Print on A5 paper. Super Fine 1920 X 1080: Print on A5 paper in panorama ratio (16:9) or play back on an HDTV. Fine Normal 1024 X 768: Attach to email. The options may differ depending on the shooting mode. Shooting options 36 Using the timer Learn how to set the timer to delay shooting. 1 In Shooting mode, press [ 3 ]. Press [Shutter] to start the timer. • The AF-assist light/timer lamp blinks. The camera automatically takes a photo at the specified time. • Press [ ] to cancel the timer. • Depending on the face detection option you have selected, the timer function or some timer options may not be available. • When you set burst options, you cannot use the timer function. Off 2 Select an option. Option Description Off: The timer is not active. 10 Sec: Takes a photo in 10 seconds. 2 Sec: Takes a photo in 2 seconds. Double: Takes a photo in 10 seconds, and then takes another 2 seconds later. Motion Timer: Detects your movement, and then takes a photo. (p. 38) The options may differ depending on the shooting mode. Shooting options 37 Using the timer 6 Using the motion timer 1 2 3 4 In Shooting mode, press [ 5 Make a motion, such as waving your arms, to activate the timer. Select ]. Pose for your photo while the AF-assist light/timer lamp is blinking. • The AF-assist light/timer lamp stops blinking just before the camera automatically takes a photo. . Press [Shutter]. Stand within 10 ft. (3 m) of the camera within 6 seconds after pressing [Shutter]. • The AF-assist light/timer lamp starts to blink rapidly when the camera detects you. The motion timer may not work when: • you are more than 10 ft. (3 m) away from the camera • your movements are too subtle • there is too much light or backlight The detection range of the motion timer Shooting options 38 Shooting in the dark Learn how to take photos at night or in low light conditions. Preventing red-eye Using the flash If the flash fires when you take a photo of a person in the dark, a red glow may appear in the person's eyes. To prevent this, select Red-eye or Red-eye Fix. Refer to flash options in "Using the flash." Use the flash when taking photos in the dark or when you need more light in your photos. 1 In Shooting mode, press [ ]. Auto 2 Select an option. Option Description Off: • The flash does not fire. • The camera displays the camera shake warning ( when you are shooting in low light. ) Auto: The camera selects a proper flash setting for the scene it detects in the mode. Shooting options 39 Shooting in the dark Option Description • Flash options are not available if you set burst options or select Blink Detection. • Make sure that your subjects are within the recommended distance from the flash. (p. 93) • If light from the flash is relected or there is a large amount of dust in the air, tiny spots may appear in your photo. Red-eye Fix*: • The flash fires twice when the subject or background is dark. The subject should not move until the flash fires a second time. • The camera corrects red-eyes through its advanced software analysis. Slow Sync: • The flash fires and the shutter stays open longer. • Select this when you want to capture ambient light to reveal more details in the background. • Use a tripod to prevent your photos from blurring. Fill in: • The flash always fires. • The camera adjusts light intensity automatically. Red-eye*: • The flash fires twice when the subject or background is dark. • The camera reduces red-eyes. Auto: The flash fires automatically when the subject or background is dark. Adjusting the ISO speed The ISO speed is the measure of a film’s sensitivity to light as defined by the International Organization for Standardization (ISO). The higher ISO speed you select, the more sensitive to light your camera becomes. With a higher ISO speed, you can get a better photo without using the flash. 1 2 In Shooting mode, press [ Select Shooting → ISO → an option. • Select to use an appropriate ISO speed based on the brightness of the subject and lighting. The options may differ depending on the shooting mode. * There is an interval between two bursts of the flash. Do not move until the flash fires a second time. Shooting options ]. • The higher ISO speed you select, the more image noise you may get. • When you select Motion Capture, the camera sets the ISO speed to Auto. 40 Changing the camera’s focus Learn how to adjust the camera's focus. Using macro Using auto focus Use macro to take close-up photos of subjects, such as flowers or insects. Refer to macro options in “Using auto focus.” To take sharp photos, select the appropriate focus according to your distance from the subject. 1 In Shooting mode, press [ ]. Normal (AF) 2 Select an option. Option Description Normal (AF): Focus on a subject farther than 31.5 in. (80 cm) from the camera. Farther than 39 in. (1 m) when using the zoom. • Try to hold the camera very still to prevent blurry photos. • Turn off the flash if the distance to the subject is less than 15.7 in. (40 cm.) Macro: Focus on a subject 2 to 31.5 in. (5 - 80 cm) from the camera. Auto Macro: Focus on a subject farther than 2 in. (5 cm). Farther than 39 in. (1 m) when using the zoom. The options may differ depending on the shooting mode. Shooting options 41 Changing the camera’s focus Adjusting the focus area You can get clearer photos by selecting an appropriate focus area according to your subject’s location in the scene. 1 2 In Shooting mode, press [ ]. Select Shooting → Focus Area → an option. Option Description Center AF: Focus on the center. Suitable when subjects are located in the center. Multi AF: Focus on one or more of 9 possible areas. The options may differ depending on the shooting mode. Shooting options 42 Using face detection If you use face detection options, your camera can automatically detect a human face. When you focus on a human face, the camera adjusts the exposure automatically. Take photos quickly and easily by using Blink Detection to detect closed eyes or Smile Shot to capture a smiling face. • In some scene modes, face detection is unavailable. • Face detection may not be effective when: -- the subject is far from the camera (The focus frame will appear orange for Smile Shot and Blink Detection.) -- it is too bright or too dark -- the subject is not facing the camera -- the subject is wearing sunglasses or a mask -- the subject is backlit or the lighting condition is unstable -- the subject’s facial expression changes remarkably • Face detection is not available when using a smart filter or image adjustment option. • Depending on the face detection option you selected, the timer or some timer options are not available. • Depending on the face detection option you selected, some burst options are not available. Detecting faces Your camera automatically detects human faces (up to 10 faces in one scene). 1 2 In Shooting mode, press [ ]. Select Shooting → Face Detection → Normal. • The nearest face appears in a white focus frame and the rest of the faces appear in gray focus frames. • The closer you are to the subject, the quicker your camera detects faces. Shooting options 43 Using face detection Taking a self-portrait shot Taking a smile shot Take photos of yourself. The camera automatically sets the photo distance to close-up and emits a beep when ready. The camera automatically releases the shutter when it detects a smiling face. 1 2 A beeping sound will start and increase in frequency as the face comes into focus. 1 2 3 In Shooting mode, press [ In Shooting mode, press [ Select Shooting → Face Detection → Smile Shot. • When your subject smiles broadly, your camera can detect the smile more easily. ]. Select Shooting → Face Detection → Self-Portrait. When you hear a beep, press [Shutter]. • The beeps will not be heard if the Volume is set to Off in the camera settings menu.(p. 75) Shooting options ]. 44 Using face detection Detecting eye blinking If your camera detects closed eyes, it automatically takes two photos in succession. 1 2 In Shooting mode, press [ ]. Select Shooting → Face Detection → Blink Detection. • Hold your camera still while “Capturing” is displayed on the screen. • When blink detection fails, the “Picture taken with eyes closed.” message appears. Take another photo. Shooting options 45 Adjusting brightness and color Learn how to adjust the brightness and color for better image quality. Adjusting the exposure manually (EV) Compensating for backlighting (ACB) When the light source is behind your subject or there is high contrast between your subject and the background, your subject is likely to appear dark in the photo. If this occurs, turn the Auto Contrast Balance (ACB) option on. Depending on the intensity of the ambient light, your photos may be too bright or dark. In these cases, you can adjust the exposure to get a better photo. Darker (-) 1 2 3 Neutral (0) In Shooting mode, press [ Brighter (+) Without ACB ]. 1 2 Select Shooting → EV. Select a value to adjust the exposure. With ACB In Shooting mode, press [ ]. Select Shooting → ACB → an option. Option Description Off: ACB is off. • Once you adjust the exposure, the setting will remain the same. You may need to change the exposure value later to avoid overexposure or underexposure. • If you cannot decide on an appropriate exposure, select AEB (Auto Exposure Bracket). The camera takes three photos, each with a different exposure: normal, underexposed, and overexposed. (p. 49) Shooting options On: ACB is on. • The ACB feature is not available when you set Continuous, Motion Capture, or AEB options. 46 Adjusting brightness and color Changing the metering option The metering mode refers to the way in which a camera measures the quantity of light. The brightness and lighting of your photos will vary depending on the metering mode you select. 1 2 In Shooting mode, press [ ]. Selecting a light source (White balance) The color of your photo depends on the type and quality of the light source. If you want the color of your photo to be realistic, select a white balance setting that matches the lighting conditions, such as Daylight, Cloudy, or Tungsten. Select Shooting → Metering → an option. Option Description Multi: • Your camera divides the scene into several areas, and then measures the light intensity of each area. • Suitable for general photos. Spot: • Your camera measures only the light intensity of the very center of the frame. • If a subject is not in the center of the scene, your photo may be improperly exposed. • Suitable for a subject with backlighting. Center-weighted: • Your camera averages the meter reading of the entire frame with emphasis placed on the center. • Suitable for photos with subjects in the center of the frame. Shooting options (Auto WB) (Cloudy) 47 (Daylight) (Tungsten) Adjusting brightness and color 1 2 In Shooting mode, press [ Defining your own white balance ]. Select Shooting → White Balance → an option. Icon Description Auto WB: Automatically sets the white balance based on the lighting conditions. 1 2 3 In Shooting mode, press [ 4 Press [Shutter]. Select Shooting → White Balance → Measure: Shutter. Aim the lens at a piece of white paper. Daylight: Select when taking outdoor photos on a sunny day. Cloudy: Select when taking outdoor photos on a cloudy day or in shadows. Fluorescent_H: Select when shooting under a daylight fluorescent or three-way fluorescent light. Fluorescent_L: Select when shooting under white fluorescent light. Tungsten: Select when taking indoor photos under incandescent bulbs or halogen lamps. Measure: Shutter: Use white balance settings you defined. (See procedure at right.) Shooting options ]. 48 Using burst modes It can be difficult to take photos of fast-moving subjects or capture natural facial expressions and gestures of your subjects in photos. In these cases, select one of the burst modes to take multiple pictures rapidly. • You can use the flash, timer, and ACB only when you select Single. • When you select Motion Capture, the resolution is set to VGA and the ISO speed is set to Auto. • Depending on the face detection option you selected, some burst options are not available. 1 2 In Shooting mode, press [ ]. Select Shooting → Drive → an option. Option Description Single: Take a single photo. Continuous: • While you are pressing [Shutter], the camera takes photos continuously. • The maximum number of photos depends on the capacity of your memory card. Motion Capture: • While you are pressing [Shutter], the camera takes VGA photos (6 photos per second; maximum of 30 photos). AEB: • Take 3 photos with different exposures: normal, underexposed, and overexposed. • Use a tripod to prevent blurry photos. The options may differ depending on the shooting mode. Shooting options 49 Improving your photos Learn how to improve your photos by applying smart filter effects, or by making some adjustments. Applying filter effects Defining your own RGB tone Apply various filter effects to your photos to create unique images. Vivid 1 2 Retro In Shooting mode, press [ 1 2 3 In Shooting mode, press [ ]. Select Shooting → Smart Filter → Custom RGB. Select a color (R: Red, G: Green, B: Blue). Cool ]. Select Shooting → Smart Filter→ an option. • Select Custom RGB to define your own RGB tone. Back 4 • If you use this function, you cannot set face detection and image adjustment options. Shooting options Move Adjust the amount of the selected color. (-: less or +: more) 50 Improving your photos Adjusting your photos Saturation option Description Adjust the contrast, sharpness, and saturation of your photos. - Decrease the saturation. 1 2 3 In Shooting mode, press [ + Increase the saturation. 4 Select a value to adjust the selected item. ]. Select Shooting → Image Adjust. • Select 0 if you do not want to apply any effects (suitable for printing). • If you set an Image Adjust option, Smart Filter function is not available. Select an adjustment option. • Contrast • Sharpness • Saturation Contrast option Description - Decrease the color and brightness. + Increase the color and brightness. Sharpness option Description - Soften the edges on your photos. Suitable for editing the photos on your computer. + Sharpen the edges to improve the clarity of your photos. This may also increase the noise on your photos. Shooting options 51 Playback/Editing Learn how to play back photos, videos, or voice memos and edit photos or videos. You will also learn how to connect your camera to your photo printer or TV. Playing back …………………………………… 53 Starting Playback mode ………………………… Viewing photos … ……………………………… Playing a video … ……………………………… Playing voice memos …………………………… 53 57 58 59 Editing a photo ……………………………… 60 Resizing photos ………………………………… Rotating a photo … …………………………… Applying smart effects … ……………………… Correcting exposure problems … ……………… Creating a print order (DPOF) …………………… 60 60 61 62 63 Viewing files on a TV … ……………………… 64 Transferring files to your Windows computer … …………………………………… 65 Transferring files using Intelli-studio … ………… 67 Transferring files by connecting the camera as a removable disk … ………………………… 69 Disconnecting the camera (for Windows XP) … …………………………… 70 Transferring files to your Mac computer …… 71 Printing photos with a PictBridge photo printer … ……………………………………… 72 Playing back Learn to play back photos, videos, or voice memos, and manage files. Starting Playback mode Display in Playback mode View photos or play videos and voice memos stored in your camera. 1 2 Press [ ]. • The most recent file you have taken or recorded is displayed. • If the camera is off, it will turn on. Press [ ] or [ Information ] to scroll through files. • Press and hold to scroll through files quickly. • If you want to play videos and voice memos stored in your camera, please turn off camera and remove your memory card, and then turn on the camera into playback mode to play. • The camera will not properly play back files that are too large or those taken with cameras from other manufacturers. Icon Description Photo includes a voice memo Video file Print order has been set (DPOF) Protected file Folder name – File name • If you want to view the file information, press the [ Playback/Editing 53 ] button. Playing back Viewing files by category in Smart Album View and manage files by categories, such as date, file type, or week. 1 2 3 In Playback mode, push [Zoom] down. Press [ 4 Press [ ] or [ 5 Press [ ]. Select a category. Type Date Color Week Back Set Option Description Type View files by file type. Date View files by the date they were saved. Color View files by the dominant color of the image. Week View files by the weekday they were saved. It may take some time for the camera to open Smart Album or to change the category and recognize files. Playback/Editing ] to scroll through files. • Press and hold to scroll through files quickly. 54 ] to return to the normal view. Playing back Viewing files as thumbnails Protecting files Scan thumbnails of files. Protect your files from accidental deletion. In Playback mode, push [Zoom] down to display 9 or 20 thumbnails (push [Zoom] up to return to the previous mode). 1 2 3 4 In Playback mode, press [ ]. Select File Options → Protect → Select. To protect all files, select All → Lock. To protect a single file, select the file you want to protect, and then press [ ]. • Press [ ] again to cancel your selection. Filter To Do this Scroll through files Press [ Delete files Press [ ], [ ], [ ] or [ ]. ], and then select Yes. Select 5 6 Playback/Editing Set Repeat Step 4 to protect additional files individually. Press [ 55 ]. Playing back Deleting files Delete single files or all files at once. You cannot delete protected files. To delete a single file, 1 2 In Playback mode, select a file, and then press [ ]. Select Yes to delete the file. To delete multiple files, 1 2 3 In Playback mode, press [ 4 5 Press [ ]. Select Multiple Delete. Select the files you want to delete, and then press [ • Press [ ]. ] again to cancel your selection. ]. Select Yes. To delete all files, 1 2 In Playback mode, press [ ]. Select File Options → Delete → All → Yes. Playback/Editing 56 Playing back Viewing photos Starting a slide show You can apply effects and add audio to your slide show. Zoom in on part of a photo or view photos in a slide show. Enlarging a photo In Playback mode, push [Zoom] up to enlarge a photo (push [Zoom] down to reduce a photo). 1 2 3 The enlarged area and zoom ratio are indicated on the top of the screen. The maximum zoom ratio may vary depending on the resolution. Trim To Do this Move the enlarged area Press [ Trim the enlarged photo Press [ ]. The trimmed photo is saved as a new file. ], [ ], [ ] or [ In Playback mode, press [ Select Multi Slide Show. Select a slide show effect option. • Skip to step 5 to start a slide show with no effects. Option Description Images Select the photos you want to view as a slide show. • All: View all photos in a slide show. • Date: View photos captured on a specific date in a slide show. • Select: View selected photos in a slide show. Effect • Select a transition effect. • Select Off for no effects. Interval • Set the interval between photos. • This is available when you select Off in the Effect option. See below. Music Select a background audio. ]. Playback/Editing ]. 57 Playing back 4 5 Set the slide show effect. Playing a video Select Start → Play. You can play a video or capture an image from a video. • To loop the slide show, select Repeat. • Press [ ] to pause or resume the slide show. To stop the slide show and switch to Playback mode, press [ [ ] or [ ]. 1 In Playback mode, select a video, and then press [ ], and then Playback time Pause 2 Use the following buttons to control playback. Press To [ Scan backward. ] [ [ Playback/Editing 58 ] ] Pause or resume playback. Scan forward. ]. Playing back Adding a voice memo to a photo Capturing an image during playback 1 Press [ image. 2 Press [ ] at the point where you want to save a still ]. A captured image has the same resolution as the original video file and is saved as a new file. 1 In Playback mode, select a photo, and then press [ ]. 2 3 Select File Options → Voice memo → On. Press [Shutter] to record a short voice memo (10 seconds maximum). • Press [Shutter] to stop recording a voice memo. You cannot add a voice memo to protected files. Playing voice memos Playing a voice memo 1 In Playback mode, select a voice memo, and then press [ ]. 2 Use the following buttons to control playback. Press To [ Scan backward. ] [ ] Playing a voice memo added to a photo In Playback mode, select a photo that includes a voice memo, and then press [ ]. • Press [ Pause or resume playback. [ ] Scan forward. [ ] Stop playback. Playback/Editing 59 ] to pause or resume playback. Editing a photo Perform photo editing tasks, such as resizing, rotating, eliminating red-eyes, and adjusting brightness, contrast, or saturation. The camera saves edited photos as new files. Resizing photos Rotating a photo 1 In Playback mode, select a photo, and then press [ ]. 1 In Playback mode, select a photo, and then press [ ]. 2 Select Edit → Resize → an option. • Select to save the photo as a start image. (p. 75) 2 Select Edit → Rotate → an option. Right 90° 1984 X 1488 Back Back Move Available options differ depending on the size of the selected photo. Playback/Editing 60 Move Editing a photo Applying smart effects Apply various filter effects to your photos to create unique images. The edited photo will be saved as a new file but it could be resized to a lower resolution. Miniature Back Move Defining your own RGB tone Miniature Vignetting 1 In Playback mode, select a photo, and then press [ ]. 2 3 Select Edit → Smart Filter → Custom RGB. Select a color (R: Red, G: Green, B: Blue). Fish-eye 1 In Playback mode, select a photo, and then press [ ]. 2 3 Select Edit → Smart Filter → an option. Select Custom RGB to define your own RGB tone. Back 4 Playback/Editing Move Adjust the amount of the selected color. (-: less or +: more) 61 Editing a photo Correcting exposure problems 3 Adjust ACB (Auto Contrast Balance), brightness, contrast, or saturation; remove red-eye; hide facial imperfections; or add noise to the photo. Select a level. • As the number increases, the face becomes clearer. Adjusting brightness/contrast/saturation Adjusting ACB (Auto Contrast Balance) 1 In Playback mode, select a photo, and then press [ ]. 2 Select Edit → Image Adjust → ACB. 1 In Playback mode, select a photo, and then press [ ]. 2 3 Select Edit → Image Adjust. Removing red-eye 1 In Playback mode, select a photo, and then press [ ]. 2 Select Edit → Image Adjust → Red-eye Fix. 4 Select an adjustment option. • • • : Brightness : Contrast : Saturation Select a value to adjust the selected item. (-: less or +: more) Adding noise to the photo Hiding facial imperfections 1 In Playback mode, select a photo, and then press [ ]. 2 Select Edit → Image Adjust → Face Retouch. 1 In Playback mode, select a photo, and then press [ ]. 2 Select Edit → Image Adjust → Add Noise. Playback/Editing 62 Editing a photo Creating a print order (DPOF) Select photos to be printed and set options, such as the number of copies or paper size. • You can take the memory card to a print shop that supports DPOF (Digital Print Order Format) or you can print photos directly through a DPOF-compatible printer at home. • Wide photos may print with the left and right edges cut off, so be aware of the dimensions of your photos. • You cannot set the DPOF for the photos stored in the internal memory. 1 2 3 In Playback mode, press [ 4 5 6 ]. Description Select Print the selected photos. All Print all photos. Reset Reset to the default settings. Select File Options → DPOF → Size → an option. Option Description Select Specify the print size for the selected photo. All Specify the print size for all photos. Reset Reset to the default settings. If you select Select, scroll to a photo, and then push [Zoom] up or down to select the print size. Repeat for the photos you want to print, and then press [ ]. ] or [ ]. ] or [ ] to select the print size, Printing photos as thumbnails 1 2 In Playback mode, press [ If you specify the print size, you can print photos only with DPOF 1.1compatible printers. ] to select the number of Playback/Editing ]. Select File Options → DPOF → Index → Yes. If you select Select, scroll to a photo, and then push [Zoom] up or down to select the number of copies. Repeat for the photos you want to print, and then press [ ]. • If you select All, press [ copies, and then press [ ]. • If you select All, press [ and then press [ ]. Select File Options → DPOF → Standard → an option. Option Press [ 63 Viewing files on a TV Play back photos or videos by connecting your camera to a TV using the A/V cable. 1 2 3 In Shooting or Playback mode, press [ 4 5 Turn off your camera and TV. 8 ]. Select Settings → Video Out. View photos or play videos using the buttons on your camera. • On some TVs, digital noise may occur or part of an image may not appear. • Images may not appear centered on the TV screen depending on your TV settings. • You can capture photos or videos while the camera is connected to a TV. Select a video signal output according to your country or region. Connect your camera to your TV using the A/V cable. Video Audio 6 Turn on your TV, and then select the video output mode using the TV remote control. 7 Turn on your camera, and then press [ ]. Playback/Editing 64 Transferring files to your Windows computer Transfer files by connecting your camera to your Windows PC. Requirements for Intelli-studio • Intelli-studio may not perform correctly on some computers, even when the computer meets the requirements. • If your computer does not meet the requirements, videos may not play correctly or it may take longer to edit videos. • Install DirectX 9.0c or above before you use the program. • Your computer must have Windows XP/Vista/7 or Mac OS 10.4 or later for you to connect the camera to the computer as a removable disk. Item Requirements CPU Intel Pentium 4, 3.2 GHz or higher/ AMD Athlon™ FX 2.6 GHz or higher RAM Minimum 512 MB RAM (1 GB and above recommended) OS Windows XP SP2/Vista/7 Hard disk capacity 250 MB or more (1 GB or more recommended) Others • CD-ROM drive • nVIDIA Geforce 7600GT or higher/ATI X1600 series or higher • 1024 x 768 pixels, 16-bit color display compatible monitor (1280 x 1024 pixels, 32-bit color display recommended) • USB port, Microsoft DirectX 9.0c or later Using a self-assembled PC or a PC and OS that are not supported may void your warranty. * The programs may not work properly on 64-bit Edition of Windows XP, Vista and 7. Playback/Editing 65 Transferring files to your Windows computer Installing Intelli-studio 1 2 Insert the installation CD in a compatible CD-ROM drive. 3 Select the programs to install, and then follow the onscreen instructions. 4 Click Exit to complete the installation, and then restart your computer. When the setup screen appears, click Samsung Digital Camera Installer to start installation. Playback/Editing 66 Transferring files to your Windows computer 3 Transferring files using Intelli-studio You can easily transfer files on your camera to your computer by using Intelli-studio. Turn on the camera. • The computer recognizes the camera automatically. If the camera fails to connect, a pop-up window will appear. Select Computer. The battery will be charged while the camera is connected to a computer with the USB cable. 1 Connect the camera to your computer with the USB cable. 4 Select a folder on your computer to save new files. 5 Select Yes. • If your camera has no new files, the pop-up window for saving new files will not appear. • New files are transferred to the computer. You must plug the end of the cable with the indicator light (▲) into your camera. If the cable is reversed, it may damage your files. The manufacturer is not responsible for any loss of data. 2 Run Intelli-studio. Playback/Editing 67 Transferring files to your Windows computer Using Intelli-studio The Intelli-studio allows you to play back and edit files. You can also upload files to websites, such as Flickr or YouTube. For details, select Help → Help in the program. • You cannot edit files directly on the camera. Transfer files to a folder on your computer before editing. • You cannot copy files in your computer to the camera. • Intelli-studio supports the following formats: -- Videos: MP4 (Video: H.264, Audio: AAC), WMV (WMV 7/8/9), AVI (MJPEG) -- Photos: JPG, GIF, BMP, PNG, TIFF 1 2 3 4 5 15 6 14 7 13 8 9 12 10 11 Playback/Editing 68 Transferring files to your Windows computer Icon Transferring files by connecting the camera as a removable disk Description 1 Open menus 2 Display files in the selected folder 3 Change to the Photo edit mode 4 Change to the Video edit mode 5 Change to the Sharing mode (You can send files by email or upload files to websites, such as Flickr or YouTube.) 6 Enlarge or reduce the thumbnails in the list 7 Select a file type 8 View files of the selected folder on your computer 9 Show or hide files of the connected camera You can connect the camera to your computer as a removable disk. 10 View files of the selected folder on the camera 11 View files as thumbnails or on a map 12 Browse folders in the connected device 13 Browse folders in your computer 14 Move to the previous or next folder 15 Print files, view files on a map, store files in My Folder, or register faces 1 Playback/Editing Connect the camera to your computer with the USB cable. You must plug the end of the cable with the indicator light (▲) into your camera. If the cable is reversed, it may damage your files. The manufacturer is not responsible for any loss of data. 69 Transferring files to your Windows computer 2 Disconnecting the camera (for Windows XP) Turn on the camera. • The computer recognizes the camera automatically. The way to disconnect the USB cable for Windows Vista/7 is similar. If the camera fails to connect, a pop-up window will appear. Select Computer. 3 On your computer, select My Computer → Removable Disk → DCIM → 100PHOTO. 4 Select the files you want and drag or save them to your computer. 1 If the status lamp on your camera is blinking, wait until it stops. 2 Click on the tool bar at the bottom right of your PC screen. 3 4 Click the pop-up message. Remove the USB cable. The camera may not be removed safely when Intelli-studio is running. End the program before disconnecting the camera. Playback/Editing 70 Transferring files to your Mac computer When you connect the camera to a Macintosh computer, the computer recognizes the camera automatically. You can transfer files directly from the camera to the computer without installing any programs. Mac OS 10.4 or later is supported. 1 Connect your camera to a Macintosh computer with the USB cable. 2 Turn on the camera. • The computer recognizes the camera automatically and displays a removable disk icon. You must plug the end of the cable with the indicator light (▲) into your camera. If the cable is reversed, it may damage your files. The manufacturer is not responsible for any loss of data. If the camera fails to connect, a pop-up window will appear. Select Computer. 3 4 Playback/Editing Double-click the removable disk icon. Transfer photos or videos to the computer. 71 Printing photos with a PictBridge photo printer Print photos with a PictBridge-compatible printer by connecting your camera directly to the printer. 1 2 3 4 In Shooting mode, press [ Configuring print settings ]. Select Settings → USB. Select Printer. With the printer on, connect your camera to the printer with the USB cable. Images : One Photo Size : Auto Layout : Auto Type : Auto Quality : Auto Exit Print Option Description Images: Select whether to print the current photo or all photos. Size: Specify the size of the print. 5 Turn on your camera. Layout: Create thumbnail prints. • The printer recognizes the camera automatically. Type: Select the type of paper. 6 Press [ ] or [ Quality: Set the printing quality. • Press [ ] to set printing options. See “Configuring print settings.” Date: Set to print the date. 7 Press [ Reset: Reset the print options. ] to select a photo. File Name: Set to print the name of the file. ] to print. • Printing starts. Press [ ] to cancel printing. Some options are not supported by some printers. Playback/Editing 72 Settings Refer to options to configure your camera’s settings. Camera settings menu … …………………… 74 Accessing the settings menu …………………… Sound …………………………………………… Display … ……………………………………… Settings … ……………………………………… 74 75 75 76 Camera settings menu Learn about various options to configure your camera's settings. 3 Accessing the settings menu 1 2 In Shooting or Playback mode, press [ Volume Start Sound Shutter Sound Beep Sound AF Sound ]. Select a menu. Mode Shooting Sound Display Volume Start Sound Shutter Sound Beep Sound AF Sound Back 4 Settings Exit Menu Select an option and save your settings. Change Description Sound: Set various camera sounds and the volume. (p. 75) Display: Customize the display settings, such as start image and brightness. (p. 75) Settings: Change the settings for the camera system, such as memory format, default file name, and USB mode. (p. 76) Settings 74 Press [ Off Low Medium High Set ] to return to the previous screen. Camera settings menu Sound Display * Default * Default Item Description Item Description Volume Adjust the volume of any sound. (Off, Low, Medium*, High) Function Description Display a brief description of an option or menu. (Off, On*) Start Sound Select the sound the camera emits when you turn it on. (Off*, 1, 2, 3) Shutter Sound Select the sound the camera emits when you press the shutter button. (Off, 1*, 2, 3) Beep Sound Select the sound the camera emits when you press buttons or switch modes. (Off, 1*, 2, 3) Start Image Set a start image to display when the camera turns on. • Off*: Display no start image. • Logo: Display a default image stored in the internal memory. • User Image: Display the image you want. (p. 60) AF Sound Select the sound the camera emits when you half-press the shutter button. (Off, On*) • Only one user image will be saved in the memory. • If you select a new photo as a user image or reset your camera, the current image will be deleted. Display Brightness Quick View Settings 75 Adjust the brightness of the screen. (Auto*, Dark, Normal, Bright) Normal is fixed in Playback mode even if you have selected Auto. Set the duration for reviewing a captured image before returning to the Shooting mode. (Off, 0.5 sec*, 1 sec, 3 sec) Camera settings menu * Default Item Description Power Save If you perform no operations for 30 seconds, the camera automatically switches to Power save mode (press any button to deactivate the Power save mode). (Off*, On) Settings * Default Item Description Format the memory card. Format deletes all files, including protected files. (Yes, No) Format If the Power save mode is deactivated, the display will dim to save battery life when you perform no operations for about 30 seconds. Reset Settings If you use a memory card used with cameras from different manufacturers or a memory card reader, or one formatted on a computer, your camera may read the card incorrectly. Format the card before using it. Reset menus and shooting options. Date and time, language, and video output settings are not reset. (Yes, No) Language Select a language for the display text. Time Zone Select a region and set the daylight-saving time (DST). Date/Time Set Set the date and time. Date Type Select a date format. (Off, dd/mm/yyyy, mm/dd/yyyy, yyyy/mm/dd*) 76 Camera settings menu * Default Item Description Specify how to name files. • Reset: Set the file number to start from 0001 when inserting a new memory card, formatting a memory card, or deleting all files. • Series*: Set the file number to follow the previous file number when inserting a new memory card, formatting a memory card, or deleting all files. File No. * Default Item Description • Select whether to display the date and time on your photos when printing. (Off*, Date, Date & Time) Imprint • The default name of the first folder is 100PHOTO and the default name of the first file is SAM_0001. • The file number increases one at a time from SAM_0001 to SAM_9999. • The folder number increases one at a time from 100PHOTO to 999PHOTO. • The maximum number of files that can be stored in one folder is 9999. • The camera defines file names according to the Digital rule for Camera File system (DCF) standard. If you change the names of files intentionally, the camera may not play back the files. • The date and time is displayed on the bottomright corner of the photo. • Some printer models may not print the date and time. • Set the camera to turn off automatically when you are not using it. (Off, 1 min, 3 min*, 5 min, 10 min) Auto Power Off Settings • Your settings will not change after replacing the battery. • The camera will not automatically turn off when: -- it is connected to a computer or printer -- you are playing a slide show or videos -- you are recording a voice memo AF Lamp • Turn on an assistant light to help you focus in dark places. (Off, On*) Video Out Set the video signal output according to your region. • NTSC*: USA, Canada, Japan, Korea, Taiwan, Mexico. • PAL (supports only BDGHI): Australia, Austria, Belgium, China, Denmark, Finland, Germany, England, Italy, Kuwait, Malaysia, New Zealand, Singapore, Spain, Sweden, Switzerland, Thailand, Norway. 77 Camera settings menu * Default Item Description USB Select the function to use when you connect the camera to a computer or printer using a USB cable. • Auto*: Set your camera to select a USB mode automatically. • Computer: Connect your camera to a computer for transferring files. • Printer: Connect your camera to a printer for printing files. Settings 78 Appendixes Refer to error messages, specifications, and maintenance tips. Error messages … …………………………… 80 Camera maintenance ………………………… 81 Cleaning your camera … ……………………… Using or storing the camera … ………………… About memory cards …………………………… About the battery … …………………………… 81 82 84 86 Before contacting a service center … ……… 90 Camera specifications … …………………… 93 Glossary … …………………………………… 96 FCC notice … ……………………………… 101 Index ………………………………………… 102 Error messages When the following error messages appear, try these remedies. Error message Suggested remedies Card Error • Turn off your camera, and then turn it on again. • Remove your memory card, and insert it again. • Format your memory card. (p. 76) Unlock the memory card. Card Locked Card not supported. The inserted memory card is not compatible with your camera. Insert an appropriate memory card. DCF Full Error File names do not match the DCF standard. Transfer the files on the memory card to your computer, and then format the card. (p. 76) File Error Delete the damaged file or contact a Samsung service center. Low Battery Insert a charged battery or recharge the battery. Memory Full Delete unnecessary files or insert a new memory card. No Image File Take photos or insert a memory card that has some photos. Appendixes 80 Camera maintenance Cleaning your camera Camera body Wipe gently with a soft, dry cloth. Camera lens and display Use a blower brush to remove dust, and then wipe the lens gently with a soft cloth. If any dust remains, apply lens cleaning liquid to a piece of lens cleaning paper, and then wipe gently. • Never use benzene, thinners, or alcohol to clean the device. These solutions can damage the camera or cause it to malfunction. • Do not press on the lens cover or use a blower brush on the lens cover. Appendixes 81 Camera maintenance Using or storing the camera Using on beaches or shores Inappropriate places to use or store the camera • Avoid exposing the camera to very cold or very hot temperatures. • Avoid using your camera in areas with extremly high humidity, or where the humidity changes drastically. • Avoid exposing the camera to direct sunlight and storing it in hot, poorly-ventilated areas, such as in a car during summer time. • Protect your camera and the display from impact, rough handling, and excessive vibration to avoid serious damage. • Avoid using or storing your camera in dusty, dirty, humid, or poorly-ventilated areas to prevent damage to moving parts and internal components. • Do not use your camera near fuels, combustibles, or flammable chemicals. Do not store or carry flammable liquids, gases, or explosive materials in the same compartment as the camera or its accessories. • Do not store the camera where there are mothballs. • Protect your camera from sand and dirt when you use it on beaches or in other similar areas. • Your camera is not waterproof. Do not handle the battery, adapter, or memory card with wet hands. Operating the camera with wet hands may cause damage to your camera. Storing for extended period of time • When you store the camera for an extended period, place it in a sealed container with an absorbent material, such as silica gel. • Remove the batteries from your camera when storing it for an extended period. Installed batteries may leak or corrode over time and cause serious damage to your camera. • Over time, unused batteries will discharge and must be recharged before use. Exercise caution when using the camera in humid environments When you transfer the camera from a cold environment to a warm one, condensation can form on the lens or internal components of the camera. In this situation, turn off the camera and wait for at least 1 hour. If condensation forms on the memory card, remove the memory card from the camera and wait until all moisture has evaporated before reinserting it. Appendixes 82 Camera maintenance Other cautions • Do not swing your camera by the strap. This may cause injury to yourself or others or damage to your camera. • Do not paint your camera, as paint can clog moving parts and prevent proper operation. • Turn off the camera while not in use. • Your camera consists of delicate parts. Avoid impacts to the camera. • Protect the display from external force by keeping it in the case when not in use. Protect the camera from scratches by keeping it away from sand, sharp implements, or loose change. • Do not expose the lens to direct sunlight, as this may discolor the image sensor or cause it to malfunction. • Protect your lens from fingerprints and scratches. Clean your lens with a soft, clean, debris-free lens cloth. • The camera may turn off if impacted from the outside. This is to protect the memory card. Turn on the camera to use it again. • While you use the camera, it may heat up. This is normal and should not affect your camera’s lifespan or performance. • When you use the camera in low temperatures, it may take some time to turn on, the color may be changed temporarily, or after-images may appear. These conditions are not malfunctions and they will correct themselves when the camera is returned to normal temperatures. Appendixes • Paint or metal on the outside of the camera may cause allergies, itchy skin, eczema, or swelling for people with sensitive skin. If you have experience any of these symptoms, stop using the camera immediately and consult a doctor. • Do not insert foreign objects into any of your camera’s compartments, slots, or access points. Damage due to improper use may not be covered by your warranty. • Do not allow unqualified personnel to service the camera or attempt to service the camera yourself. Any damage that results from unqualified service is not covered by your warranty. 83 Camera maintenance About memory cards Memory card capacity The memory capacity may differ depending on the scenes you shoot or the shooting conditions. These capacities are based on a 1 GB SD card: Supported memory cards Your camera supports SD (Secure Digital), or SDHC (Secure Digital High Capacity) memory cards. Size Terminal Write-protect switch Label (front) You can prevent files from being deleted by using the writeprotect switch on the SD or SDHC card. Slide the switch down to lock or slide it up to unlock. Unlock the card when shooting. P h o t o s * V i d e o s Super Fine Fine Normal 30 FPS 24 FPS 15 FPS 129 240 292 - - - 152 249 312 - - - 147 284 403 - - - 179 282 353 - - - 232 391 510 - - - 411 583 823 - - - 643 858 1,029 - - - 870 1,144 1,437 1,584 1,765 1,993 - - - - - - - Approx. 7'16" Approx. 11'37" - Approx. 18’ 54’’ - Approx. 49’ 15’’ - - - Approx. 9’ 53’’ - - - Approx. 26’ 19’’ * Available recording time may vary if you use the zoom. Several videos were recorded in succession to determine the total recording time. Appendixes 84 Camera maintenance Cautions when using memory cards • Insert a memory card in the correct direction. Inserting a memory card in the wrong direction may damage your camera and memory card. • Do not use memory cards that have been formatted by other cameras or by a computer. Reformat the memory card with your camera. • Turn off the camera when you insert or remove the memory card. • Do not remove the memory card or turn off your camera while the lamp is blinking, as this may damage your data. • When the lifespan of a memory card has expired, you cannot store any more photos on the card. Use a new memory card. • Do not bend, drop, or subject memory cards with heavy impact or pressure. • Avoid using or storing memory cards near strong magnetic fields. • Avoid using or keeping memory cards in areas with high temperature, high humidity, or corrosive substances. • Prevent memory cards from making contact with liquids, dirt, or foreign substances. If dirty, wipe the memory card clean with a soft cloth before you insert the memory card in your camera. • Do not allow liquids, dirt, or foreign substances to come in contact with memory cards or the memory card slot. Doing so may cause memory cards or the camera to malfunction. Appendixes • When you carry a memory card, use a case to protect the card from electrostatic discharges. • Transfer important data to other media, such as a hard disk, CD, or DVD. • When you use the camera for an extended period, the memory card may become warm. This is normal and does not indicate a malfunction. The manufacturer is not responsible for any loss of data. 85 Camera maintenance About the battery Battery life Be sure to use rechargeable battery for reuse. Available batteries for this camera are listed below. Average shooting time / Number of photos Battery specifications Approximately 110 min/ Approximately 220 photos Specification Description Model BP70A Type Lithium-ion battery Cell capacity 740 mAh (Minimum: 700 mAh) Voltage 3.7V Charging time* (when the camera is switched off) Approximately 150 min Test conditions (when the battery is fully charged) The battery life was measured under the following conditions: in mode, at 14M resolution, on Fine quality. 1. Set the flash option to Fill in, take a single shot, and zoom in or out. 2. Set the flash option to Off, take a single shot, and zoom in or out. Photos 3. Perform steps 1 and 2 for 30 seconds and repeat for 5 minutes. Then turn off the camera for 1 minute. * Charging the battery by connecting it to a computer may take longer. 4. Repeat steps 1 to 3. Videos Approximately 90 min Record videos at 1280 X 720 resolution and 24 FPS. • The figures above are based on Samsung’s standards. Your results may differ depending on your actual usage. • Several videos were recorded in succession to determine the total recording time. Appendixes 86 Camera maintenance Low battery message Cautions about using the battery When the battery charge has fully discharged, the battery icon will turn red and the ‘Low Battery’ message will appear. Notes about using the battery • Avoid exposing batteries or memory cards to very cold or very hot temperatures (below 0º C/32º F or above 40º C/104º F). Extreme temperatures can reduce the charging capacity of your batteries and can cause memory cards to malfunction. • When you use the camera for an extended period, the area around the battery chamber may become warm. This does not affect the normal use of the camera. • Do not pull the power supply cord to disconnect the plug from the power outlet, as this may cause a fire or electric shock. • In temperatures below 0 º C, battery capacity and battery life may decrease. • Battery capacity may decrease in low temperatures but will return to normal in milder temperatures. Appendixes Protect batteries, chargers, and memory cards from damage Prevent batteries from making contact with metal objects, as this can create a connection between the + and – terminals of your battery and lead to temporary or permanent battery damage and may cause a fire or electric shock. Notes about charging the battery • If the indicator light is off, make sure that the battery is inserted correctly. • If the camera is on while charging, the battery may not fully charge. Turn off the camera before charging the battery. • Do not use your camera when you charge the battery. This may cause a fire or electric shock. • Do not pull the power supply cord to disconnect the plug from the power outlet, as this may cause a fire or electric shock. • Wait to turn on the camera until after the battery has charged for at least 10 minutes. • If you connect the camera to an external power source while the battery is depleted, using some high energy-consuming functions will cause the camera to turn off. To use the camera normally, recharge the battery. 87 Camera maintenance • Using the flash or recording videos depletes the battery quickly. Charge the battery until the indicator light turns green. • If the indicator light blinks in orange or does not illuminate, reconnect the cable, or remove the battery and insert it again. • If you charge the battery when the cable is overheated or the temperature is too high, the indicator light may turn orange. Charging will start when the battery cools down. • Overcharging batteries may shorten battery life. After charging is finished, disconnect the cable from your camera. • Do not bend or place heavy objects on the AC cable. Doing so may damage the cable. Handle and dispose of batteries and chargers with care • Never dispose of batteries in a fire. Follow all local regulations when you dispose of used batteries. • Never place batteries or cameras on or in heating devices, such as microwave ovens, stoves, or radiators. Batteries may explode when they are overheated. Notes about charging with a computer connected • Use only the provided USB cable. • The battery may not charge when: -- you use a USB hub -- other USB devices are connected to your computer -- you connect the cable to the port on the front side of your computer -- the USB port of your computer does not support the power output standard (5 V, 500 mA) Appendixes 88 Camera maintenance Personal injury or death can occur if the battery is handled carelessly or improperly. For your safety, follow these instructions for proper battery handling: • The battery can ignite or explode if not handled properly. If you notice any deformities, cracks, or other abnormalities in the battery, immediately discontinue use of the battery and contact a service center. • Use only authentic, manufacturer-recommend battery chargers and adapters and charge the battery only by the methods described in this user manual. • Do not place the battery near heating devices or expose it to excessively warm environments, such as the inside of an enclosed car in the summertime. • Do not place the battery in a microwave oven. • Avoid storing or using the battery in hot, humid places, such as spas or shower enclosures. • Do not rest the device on flammable surfaces, such as bedding, carpets, or electric blankets for a prolonged period. • When the device is switched on, do not leave it in any confined space for a prolonged period. • Do not allow battery terminals to come in contact with metallic objects, such as necklaces, coins, keys, or watches. • Use only authentic, manufacturer-recommended, Lithium-ion replacement batteries. Appendixes • Do not disassemble or puncture the battery with any sharp object. • Avoid exposing the battery to high pressure or crushing forces. • Avoid exposing the battery to major impacts, such as dropping it from high places. • Do not expose the battery to temperatures of 60° C (140° F) or above. • Do not allow the battery to come in contact with moisture or liquids. • Do not expose the battery to direct sunlight, fire, or any other source of excessive heat. Disposal guidelines • Dispose of the battery with care. • Do not dispose of the battery in a fire. • Disposal regulations may differ by country or region. Dispose of the battery in accordance with all local and federal regulations. Guidelines for charging the battery Charge the battery only by the method described in this user manual. The battery can ignite or explode if not charged properly. 89 Before contacting a service center If you are having trouble with your camera, try these troubleshooting procedures before contacting a service center. If you have attempted the troubleshooting solution and are still having problems with your device, contact your local dealer or service center. Situation Suggested remedies Cannot turn on the camera • Make sure that the battery is inserted. • Make sure that the battery is inserted correctly. • Charge the battery. The power turns off suddenly • Charge the battery. • Your camera may be in Power save mode. (p. 76) • The camera may turn off to prevent the memory card from being damaged due to an impact. Turn on your camera again. The camera is losing battery power quickly • The battery may lose power more quickly in low temperatures (below 0° C). Keep the battery warm by putting it into your pocket. • Using the flash or recording videos depletes the battery quickly. Recharge if needed. • Batteries are consumable parts that must be replaced over time. Get a new battery if the battery life is diminishing quickly. Appendixes Situation Suggested remedies Cannot take photos • There is no space on the memory card. Delete unnecessary files or insert a new card. • Format the memory card. (p. 76) • The memory card is defective. Get a new memory card. • Make sure that the camera is switched on. • Charge the battery. • Make sure that the battery is inserted correctly. The camera freezes Remove the battery and insert it again. • The flash option may be set to Off. (p. 39) The flash does not work • You cannot use the flash in the , or some modes. , The flash fires unexpectedly The flash may fire due to static electricity. This is not a malfunction. The date and time are incorrect Set the date and time in the display settings menu. (p. 76) 90 Before contacting a service center Situation Suggested remedies The display or buttons do not work Remove the battery and insert it again. The camera screen works poorly If you use your camera at low temperatures, it can cause the camera screen to malfunction or discolor. For better performance of your camera screen, use your camera at normal temperatures. The memory card has an error The memory card has not been reset. Format the card. (p. 76) Cannot play back files If you change the name of a file, your camera may not play the file. (Note: File names should meet the DCF standard.) If you encounter this situation, play back the files on your computer. The photo is blurry • Make sure that the focus option you set is suitable for close-up shots. (p. 41) • Make sure that the lens is clean. If not, clean the lens. (p. 81) • Make sure that the subject is within range of the flash. (p. 93) Situation Suggested remedies The photo is too bright • Turn off the flash. (p. 39) • Your photo is overexposed. Adjust the exposure value. (p. 46) The photo is too dark Your photo is underexposed. • Turn on the flash. (p. 39) • Adjust the ISO speed. (p. 40) • Adjust the exposure value. (p. 46) The TV does not display your photos • Make sure that the camera is correctly connected to the TV with the A/V cable. • Make sure that your memory card contains photos. Your computer does not recognize your camera • Make sure that the USB cable is connected correctly. • Make sure that your camera is switched on. • Make sure that you are using a supported operating system. (p. 65) The file transmission may be interrupted by Your computer disconnects the camera static electricity. Disconnect the USB cable while transferring files and connect it again. An incorrect white balance can create The colors in the photo unrealistic color. Select the proper white do not match the actual balance option to suit the light source. scene (p. 47) Appendixes 91 Before contacting a service center Situation Suggested remedies Your computer cannot play videos • Depending on the video player programs installed on your PC, video files captured by your camera may not play. To ensure the video files play on your computer, install and use the Intelli-studio. (p. 67) • Make sure that the USB cable is connected correctly. Intelli-studio is not functioning properly • End Intelli-studio and restart the program. • You cannot use Intelli-studio on Macintosh computers. • Depending on your computer's specification and environments, the program may not launch automatically. In this case, click Start → All Programs → Samsung → Intelli-studio→ Intellistudio on your computer. Appendixes 92 Camera specifications Image sensor Shutter speed Type 1/2.3" (Approx. 7.78 mm) CCD Effective pixels Approx. 14.2 Mega-pixels Total pixels Approx. 14.58 Mega-pixels • Smart Auto: 8 - 1/2,000 sec. • Program: 1 - 1/2,000 sec. • Night: 8 - 1/2,000 sec. Exposure Lens Control Program AE Samsung Lens f = 4.9 ~ 24.5 mm (35 mm film equivalent: 27 - 135 mm) Metering Multi, Spot, Center-weighted F No. F3.5 (W) ~ F5.9 (T) Compensation ±2EV (1/3EV steps) Digital zoom • Still Image mode : 1.0X ~ 3.0X • Play mode : 1.0X ~ 13.5X (depends on image size) ISO equivalent Auto, 80, 100, 200, 400, 800, 1600 Focal length Display Type TFT LCD Feature 2.7" (6.9 cm), 230K Focusing Type Range TTL auto focus (Multi AF, Center AF, Face Detection AF) Flash Mode Off, Auto, Red-eye, Fill in, Slow Sync, Red-eye Fix Range • WIDE: 0.2 m - 2.63 m (ISO Auto) • TELE: 0.5 m - 1.56 m (ISO Auto) Recharging time Approx. 4 sec. (depending on battery condition) Shake reduction Digtial Image Stabilization (DIS) Wide (W) Tele (T) Normal 80 cm - infinity 100 cm - infinity Macro 5 cm - 80 cm 100 cm - 150 cm Auto Macro 5 cm - infinity 100 cm - infinity Effect Appendixes Shooting mode 93 • Smart Filter: Normal, Fish-eye, Vivid, Retro, Cool, Classic, Negative, Custom RGB • Image Adjust :Sharpness, Contrast, Saturation Camera specifications White Balance Playback Auto WB, Daylight, Cloudy, Fluorescent_H, Fluorescent_L, Tungsten, Custom Type Single image, Thumbnails, Multi Slide show, Movie Clip * Slide show : Slide show with Effect & Music Edit Resize, Rotate, Smart Filter, Image Adjust Effect • Smart Filter: Normal, Miniature, Vignetting, Fish-eye, Vivid, Retro, Cool, Classic, Negative, Custom RGB • Image Adjust : ACB, Red-eye Fix, Face Retouch, Brightness, Contrast, Saturation, Add Noise Date Imprinting Date&Time, Date, Off Shooting Photos • Mode: Smart Auto (Portrait, Night Portrait, Backlight Portrait, Backlight, Landscape, White, Action, Tripod, Night, Macro, Macro Text, Blue Sky, Sunset Sky, Macro Color, Natural Green, Fireworks), Program, DIS, Photo Help Guide , Scene (Beauty Shot, Night, Portrait, Landscape, Close Up, Sunset, Dawn, Backlight, Beach & Snow) • Drive: Single, Continuous, Motion Capture, AEB • Timer: 10 Sec, 2 Sec, Double, Motion Timer • Format: MJPEG (Max recording time: 2 hours) • Size: 1280x720 (24FPS,15FPS), 640x480 (30 • Voice Recording (max. 10 hours) • Voice Memo in Still Image (max. 10 sec.) Storage Media FPS,15 FPS), 320x240 (30 FPS,15 FPS) Videos Voice recording • Frame Rate: 30 FPS, 24 FPS, 15 FPS • Voice: On, Off, Zoom Mute • Video editing (embedded): Pause during recording, * Internal memory capacity is subject to change without prior notice. • Still Image : JPEG (DCF), EXIF 2.21, DPOF 1.1, Still image capture File format Appendixes • Internal memory: Approx. 9 MB • External memory (Optional): -- SD Card(up to 2GB guaranteed) -- SDHC (up to 8GB guaranteed) 94 PictBridge 1.0 • Movie Clip : AVI (MJPEG) • Audio : WAV Camera specifications For 1GB SD Image size Power source Super Fine Fine Normal 4320 X 3240 129 240 292 Rechargeable battery 4320 X 2880 152 249 312 The power source may differ depending on your region. 4000 X 3000 147 284 403 Dimensions (W x H x D) 4320 X 2432 179 282 353 96.8 × 58 × 20.3 mm (excluding protrusions) 3264 X 2448 232 391 510 Weight 2592 X 1944 411 583 823 103 g (without battery and memory card) 1984 X 1488 643 858 1,029 Operating temperature 1920 X 1080 870 1,144 1,437 0 - 40˚ C 1024 X 768 1,584 1,765 1,993 Operating humidity T hese figures are measured under Samsung’s standard conditions and may vary depending on shooting conditions and camera settings. Lithium-ion battery: BP70A, 740 mAh (Minimum: 700 mAh) 5 - 85 % Software Intelli-studio Interface Digital output connector USB 2.0 Audio output Microphone : Mono Internal Speaker : Mono Video output NTSC, PAL (user selectable) DC power input 4.2V Specifications are subject to change without prior notice. Appendixes 95 Glossary ACB (Auto Contrast Balance) Composition This feature automatically improves the contrast of your images when the subject is backlit or when there is a high contrast between your subject and the background. Composition in photography means arranging objects in a photo. Usually, abiding by the rule of thirds leads to a good composition. DCF (Design rule for Camera File system) AEB (Auto Exposure Bracket) This feature automatically captures several images at different exposures to help you capture a properly-exposed image. A specification to define a file format and file system for digital cameras created by the Japan Electronics and Information Technology Industries Association (JEITA). AF (Auto Focus) Depth of field A system that automatically focuses the camera lens on the subject. Your camera uses the contrast to focus automatically. The distance between the nearest and farthest points that can be acceptably focused in a photograph. Depth of field varies with lens aperture, focal length, and distance from the camera to the subject. Selecting a smaller aperture, for example, will increase the depth of field and blur the background of a composition. Aperture The aperture controls the amount of light that reaches the camera’s sensor. Digital zoom Camera shake (Blur) If the camera is moved while the shutter is open, the entire image may appear blurred. This occurs more often when the shutter speed is slow. Prevent camera shake by raising the sensitivity, using the flash, or using a faster shutter speed. Alternately, use a tripod, the DIS or OIS function to stabilize the camera. Appendixes A feature that artificially increases the amount of zoom available with zoom lens (optical zoom). When using the digital zoom, the image quality will deteriorate as the magnification increases. DPOF (Digital Print Order Format) A format for writing printing information, such as selected images and number of prints, on a memory card. DPOF-compatible printers, sometimes available at photo shops, can read the information from the card for convenient printing. 96 Glossary EV (Exposure Value) Focal length All the combinations of the camera’s shutter speed and lens aperture that result in the same exposure. The distance from the middle of the lens to its focal point (in millimeters). Longer focal lengths result in narrower angles of view and the subject is magnified. Shorter focal lengths result in wider angles of view. EV Compensation This feature allows you to quickly adjust the exposure value measured by the camera, in limited increments, to improve the exposure of your photos. Set the EV compensation to -1.0 EV to adjust the value one step darker and 1.0 EV to one step brighter. Exif (Exchangeable Image File Format) A specification to define an image file format for digital cameras created by the Japan Electronic Industries Development Association (JEIDA). Histogram A graphical representation of the brightness of an image. The horizontal axis represents the brightness and the vertical axis represents the number of pixels. High points at the left (too dark) and right (too bright) on the histogram indicate a photo that is improperly exposed. Image sensor Exposure The physical part of a digital camera that contains a photosite for each pixel in the image. Each photosite records the brightness of the light that strikes it during an exposure. Common sensor types are CCD (Charge-coupled Device) and CMOS (Complementary Metal Oxide Semiconductor). The amount of light allowed to reach the camera’s sensor. Exposure is controlled by a combination of the shutter speed, the aperture value, and ISO sensitivity. Flash A speed light that helps to create adequate exposure in low-light conditions. Appendixes 97 Glossary ISO sensitivity MJPEG (Motion JPEG) The sensitivity of the camera to light, based on the equivalent film speed used in a film camera. At higher ISO sensitivity settings, the camera uses a higher shutter speed, which can reduce blur caused by camera shake and low light. However, images with high sensitivity are more susceptible to noise. A video format which is compressed as a JPEG image. JPEG (Joint Photographic Experts Group) A lossy method of compression for digital images. JPEG images are compressed to reduce their overall file size with minimal deterioration of the image resolution. Noise Misinterpreted pixels in a digital image that may appear as misplaced or random, bright pixels. Noise usually occurs when photos are shot with a high sensitivity or when a sensitivity is automatically set in a dark place. Optical zoom This is a general zoom which can enlarge images with a lens and does not deteriorate quality of images. LCD (Liquid Crystal Display) A visual display commonly used in consumer electronics. This display needs a separate backlight, such as CCFL or LED, to reproduce colors. Quality An expression of the rate of compression used in a digital image. Higher quality images have a lower rate of compression, which usually results in a larger file size. Macro Resolution This feature allows you to capture close-up photos of very small objects. When using the macro feature, the camera can maintain a sharp focus on small objects at a near life-size ratio (1:1). The number of pixels present in a digital image. High resolution images contain more pixels and typically show more detail than low resolution images. Metering The metering refers to the way in which the camera measures the quantity of light to set the exposure. Appendixes 98 Glossary Shutter speed Shutter speed refers to the amount of time it takes to open and close the shutter, and it is an important factor in the brightness of a photo, as it controls the amount of light which pass through the aperture before it reaches the image sensor. A fast shutter speed allows less time to let light in and the photo becomes darker and more easily freezes subjects in motion. Vignetting A reduction of an image’s brightness or saturation at the periphery (outer edges) compared to the center of the image. Vignetting can draw interest to subjects positioned in the center of an image. White balance (color balance) An adjustment of the intensities of colors (typically the primary colors red, green, and blue), in an image. The goal of adjusting the white balance, or color balance, is to correctly render the colors in an image. Appendixes 99 Correct disposal of batteries in this product Correct Disposal of This Product (Waste Electrical & Electronic Equipment) (Applicable in the European Union and other European countries with separate battery return systems) (Applicable in the European Union and other European countries with separate collection systems) This marking on the product, accessories or literature indicates that the product and its electronic accessories (e.g. charger, headset, USB cable) should not be disposed of with other household waste at the end of their working life. To prevent possible harm to the environment or human health from uncontrolled waste disposal, please separate these items from other types of waste and recycle them responsibly to promote the sustainable reuse of material resources. Household users should contact either the retailer where they purchased this product, or their local government office, for details of where and how they can take these items for environmentally safe recycling. Business users should contact their supplier and check the terms and conditions of the purchase contract. This product and its electronic accessories should not be mixed with other commercial wastes for disposal. This marking on the battery, manual or packaging indicates that the batteries in this product should not be disposed of with other household waste at the end of their working life. Where marked, the chemical symbols Hg, Cd or Pb indicate that the battery contains mercury, cadmium or lead above the reference levels in EC Directive 2006/66. If batteries are not properly disposed of, these substances can cause harm to human health or the environment. To protect natural resources and to promote material reuse, please separate batteries from other types of waste and recycle them through your local, free battery return system. This Class [B] digital apparatus complies with Canadian ICES-003. PlanetFirst represents Samsung Electronics’ commitment to the sustainable development and social responsibility through eco-driven business and management activities. Appendixes 100 FCC notice • NOTE: This equipment has been tested and found to comply with the limits for a Class B digital device, pursuant to part 15 of the FCC Rules. These limits are designed to provide reasonable protection against harmful interference in a residential installation. This equipment generates, uses and can radiate radio frequency energy and, if not installed and used in accordance with the instructions, may cause harmful interference to radio communications. However, there is no guarantee that interference will not occur in a particular installation. If this equipment does cause harmful interference to radio or television reception, which can be determined by turning the equipment off and on, the user is encouraged to try to correct the interference by one or more of the following measures: - Reorientate, or relocate, the receiving antenna. - Increase the distance between the equipment and receiver. -C onnect the equipment into an outlet on a circuit different from that to which the receiver is connected. -C onsult the dealer or an experienced radio / TV technician for help. • Declaration of Conformity Trade Name : Samsung PL20/PL21 Responsible Party :S amsung Electronics America, Inc. Address :8 5 Challenger Road, Ridgefield Park, NJ 07660 Telephone No. : 1-800-SAMSUNG (726-7864) T his device complies with Part 15 of the FCC Rules. Operation is subject to the following two conditions: (1) This device may not cause harmful interference, and (2) this device must accept any interference received, including interference that may cause undesired operation. • CAUTION: Changes or modifications not expressly approved by the manufacturer responsible for compliance could void the user’s authority to operate the equipment. Appendixes :S amsung Electronics America, Inc. Model No. 101 Index A Blink detection 45 Disconnecting the device 70 ACB Burst DIS mode 31 in Playback mode 62 in Shooting mode 46 Adjusting Brightness 62 Contrast in Playback mode 62 in Shooting mode 51 Saturation in Playback mode 62 in Shooting mode 51 Sharpness 51 AF Lamp 77 AF Sound 75 Auto Contrast Balance (ACB) 46 Auto Exposure Bracket (AEB) 49 Continuous 49 Motion capture 49 DPOF 63 E Camera shake 25 Editing 60 Capturing an image from a video 59 Enlarging 57 Cleaning Date/Time Set 76 Battery Date Type 76 Error messages 80 Exposure 46 Body 81 Display 81 Lens 81 B Beauty Shot mode 30 Display type 21 C Face detection Blink Detection 45 Normal 43 Self-Portrait 44 Smile Shot 44 Deleting files 56 Facial brightness 30 Digital Image Stabilization 31 Facial imperfections 31 Digital zoom 23 Appendixes Auto 40 Fill in 40 Off 39 Red-eye 40 Red-eye Fix 40 Slow Sync 40 Focus area Center AF 42 Multi AF 42 Focus distance Macro 41 Normal (AF) 41 Format 76 Frame rate 32 F D Charging 87 Specifications 86 Display brightness 75 Flash 102 Function button 14 Function description 75 H Half-pressing 6 Index I Memory card Icons 18 Image adjust ACB 62 add noise 62 brightness 62 contrast 62 face retouch 62 red-eye fix 62 saturation 62 MENU button 14 Playback button 16 Metering Playback mode 53 Center-weighted 47 Multi 47 Spot 47 Motion Timer 38 Protecting files 55 Intelli-studio 68 Muting Camera 16 Video 33 N Light source (White balance) 47 Navigation button 14 Maintenance 81 P Resolution Photo 36 Video 36 RGB tone in Playback mode 61 in Shooting mode 50 Rotating 60 S Scene mode 30 Quick View 75 Self-Portrait 44 Recording Video 32 Voice memo 34 Red-eye in Playback mode 62 in Shooting mode 39 Photo quality 36 Photo styles Resizing 60 Q R L Macro 41 Print order 63 Program mode 32 Movie mode 32 M Printing photos 72 MJPEG (Motion JPEG) 94 Imprint 77 ISO speed 40 in Playback mode 61 in Shooting mode 50 Capacity 84 Reset 76 Appendixes 103 Service center 90 Settings Accessing 74 Camera 76 Display 75 Sound 75 Shooting mode DIS 31 Movie 32 Program 32 Index Scene 30 Smart Auto 28 Slide show 57 Smart Album 54 Smart Auto mode 28 Smile shot 44 Start image 60, 75 on TV 64 Slide show 57 Voice memo Playing 59 Recording 34 Volume 75 W White Balance 47 T Timer 37 Transferring files for Mac 71 for Windows 65 Z Zoom button 14 Zooming 23 V Video Playing 58 Recording 32 Video Out 77 Viewing files as thumbnails 55 by category 54 Appendixes 104 Please refer to the warranty that came with your product or visit our website http://www.samsung.com/ for after-sales service or inquiries.