1
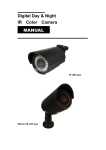
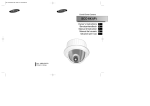
220X POWER ZOOM CAMERA
SCC-C4201(P), C4203(P),
C4301(P), C4303(P)
Owner’s Instructions
Gebrauchsanleitung
Guide d’utilisation
Guía del usuario
Istruzioni per l’uso
220x Pow
LOW
er Zoom
L
DIGIT
AL CO IGHT
LOR
CAM
ERA
Part : AB68-00366A
Printed in Korea
✽ Be sure to read the "Safety Precautions" in this manual
to ensure correct use and operation of this product.
E
D
F
Es
I
Safety Precautions
The purpose of safety precautions is to prevent
accidental injury or property damage. Always observe
all safety precautions.
✽ The precautions are divided into "Warnings" and
"Cautions" as distinguished below:
Warning
Ignoring this precaution
may result in death or
serious injury.
Caution
Ignoring this precaution
may result in injury or
damage to property.
Warnings
1. Be sure to use only the standard adapter which is
specified in the specification sheet. (page 28~31)
Using any other adapter could cause fire, electrical
shock, or damage to the product.
2. Check the external connection terminals first before
connecting the power source and signal wires.
Connect the alarm signal wires to the alarm
terminals. Connect the DC12V power adapter to
the SCC-C4201(P)/C4203(P) power input, making
sure that the currect polarity is observed.
Connect the DC12V or AC24V power adapter to
the SCC-C4301(P)/C4303(P) power input.
3. Do not connect multiple cameras to a single
adapter. (Exceeding the capacity may cause
abnormal heat generation or fire.)
1
4. Securely plug the power cord into the power
receptacle. (A loose connection may result in fire.)
5. When mounting the camera on a wall or ceiling,
fasten it safely and securely. (A falling camera may
cause personal injury.)
E
6. Do not place conductive objects (e.g.,
screwdrivers, coins, and metal things) or containers
filled with water on top of the camera. (Serious
injury may result from fire, electrical shock, or
falling objects.)
7. Do not install the unit in humid, dusty, or sooty
locations. (Doing so may cause fire or electrical
shock.)
8. If any unusual smells or smoke come from the unit,
stop using the product. In such case, immediately
disconnect the power source and contact the
service center. (Continued use in such a condition
may cause fire or electrical shock.)
9. If this product fails to operate normally, contact the
store of purchase or your nearest service center.
Never disassemble or modify this product in any
way. (Problems caused by unauthorized user
disassembly or repairs are not covered by your
warranty.)
10. When cleaning, do not spray water directly onto
parts of the product. (Doing so may cause fire or
electrical shock.) Gently wipe the surface with a dry
cloth. Never use detergents or chemical cleaners
on the product, as this may result in discoloration
of surface or cause damage to the finish.
2
Contents
Cautions
1. Do not drop objects on the product or apply strong
shock to it. Keep away from a location subject to
excessive vibration or magnetic interference.
2. Do not install in a location subject to high
temperature, low temperature, or high humidity.
(Doing so may cause fire or electrical shock.)
3. Avoid a location which is exposed to direct sunlight,
or near heat sources such as heaters or radiators.
(Neglecting to do so may result in a risk of fire.)
4. If you want to relocate the already installed product,
be sure to turn off the power before moving or
reinstalling it.
5. Install in a well-ventilated location.
6. Remove the power plug from the outlet when there
is a lightning storm. (Neglecting to do so may cause
fire or damage to the product.)
1. Overview.............................................................5
2. Part Names and Functions ...............................6
3. Installation ........................................................ 8
Checking the Package Contents ....................... 8
Preparing the Cables ........................................ 9
Connecting the Cables .................................... 10
4. Navigating the Setup Menu........................... 12
Structure of the Setup Menu ...........................
- CAMERA ID...................................................
- IRIS................................................................
- BLC................................................................
- ALC ...............................................................
- MANU ............................................................
- SHUTTER......................................................
- AGC (MOTION) .............................................
- WHITE BAL ...................................................
- SPECIAL .......................................................
- AUTO FOCUS ...............................................
- MOTION DET ................................................
- PRESET ........................................................
- COLOR/ BW ..................................................
- EXIT...............................................................
12
16
17
17
17
18
19
20
21
22
24
24
25
26
28
5. Specifications ............................................... 29
6. Others ............................................................ 33
3
4
E
1
Overview
2
Part Names and Functions
This camera is a high performance surveillance camera that
provides a maximum of 220x zoom surveillance capability
with its 22x optical zoom lens and digital zoom IC.
It is a multifunction camera that is equipped with all of the
key features of the existing surveillance cameras :
●
E
Day & Night function (SCC-C4203(P), C4303(P)) that
ensures sharp and clear images even at night.
●
Low - Light Surveillance function that enables image
capture even under extremely low light conditions.
●
White Balance function that provides accurate color
rendition under any light conditions.
●
BLC function that enables effective back light
compensation even under a spotlight or a very bright
incident light.
●
Auto Focus function that automatically tracks and focuses
on the moving subject.
●
RS485/ Wired remote control function.
220x Power Zoom
LOW LIGHT
DIGITAL COLOR CAMERA
SET-UP button
REMOTE
RS-485
POWER
Instead of “POWER”, “DC IN”
is writtern in
SCC-C4201(P)/4203(P).
Instead of “POWER”, “PWR
IN” and instead of “GND”,
“DC12&AC24V” is writtern in
SCC-C4301(P)/4303(P).
Broadcast System
●
●
SCC-C4201/ C4203/ C4301/ C4303 : NTSC System
SCC-C4201P/ C4203P/ C4301P/ C4303P : PAL System
Power System/Power Consumption
●
●
SCC-C4201(P), C4203(P) : DC 12V/5.0W
SCC-C4301(P), C4303(P) : AC 24V, DC 12V/5.5W
* The followings may occur in a camera with built-in zoom.
- When the zoom rate becomes closer to the TELE side,
the edges of the screen may become dim.
- When connected to a DVR or an LCD monitor, the screen
corners may be obstructed.
5
SET-UP button
The function of the SET-UP button varies depending on
whether you are currently in Normal Operation mode (i.e.,
the Setup Menu is not displayed) or Setup Menu mode.
☞ In Normal Operation Mode
- UP/ DOWN buttons : Use as the ZOOM Tele button
and the ZOOM Wide button respectively.
- LEFT/ RIGHT buttons : Use as the FOCUS Near
button and the FOCUS Far button respectively.
- SET- UP button: Use to enter the Setup Menu.
Hold the SET- UP button for longer than 3 seconds to
enter the Setup Menu.
6
3
☞ In Setup Menu Mode
Installation
- UP/ DOWN buttons: Use to move the cursor up or down.
- LEFT/ RIGHT buttons: Use to move the cursor left or
right, or to sequentially view the values that can be
assigned to a parameter.
- ENTER button: Use to select a Sub Menu item, and to
accept the current value.
ZOOM/ FOCUS REMOTE terminals
Use to control ZOOM/ FOCUS from an external controller.
Depending on the input conditions, the terminals can be
set to 4 different modes.
(Operating Voltage Range : +3V ~+13V, -3V~-13V)
Item
Code
A
B
C
D
Tele
-6V
-6V
+6V
+6V
Wide
+6V
+6V
-6V
-6V
Far
+6V
-6V
+6V
-6V
Near
-6V
+6V
-6V
+6V
Caution : In the event of a simultaneous input of RS485 and
wired remote control signal, whichever was input first
will be activated.
(For a camera with the ROM version 1.2 or above,
please refer to page 33.)
Before Installation
Checking the Package Contents
Make sure that the following accessories are included in
the package.
E
220x Powe
r Zoom
LOW
LIG
DIGITA
L CO
LOR
HT
CAM
ERA
SCC-C4201(P),C4203(P),
C4301(P),C4303(P)
User's Guide
ALARM OUT terminal
An alarm signal is output from this terminal when the
MOTION DET mode is activated or BW mode is activated.
(Open Collector: DC24V 40mA Max)
VIDEO OUT terminal
Connect the monitor's VIDEO IN. The video signal from
the camera is transmitted to the monitor via this terminal.
RS485 terminal
RS485 remote control terminal.
Mount Adapter
Screw (2)
Terminal Block
Power LED
Lights when power is on.
POWER IN terminal
Plug in the power adapter here.
7
8
Preparing the Cables
To install and use the camera, first prepare the following
cables.
The requirements for the power adapter, which connects to
the camera's POWER IN terminal, are as follows:
●
●
Connecting the Cables
1. Connect one end of the BNC cable to the VIDEO OUT.
2. Connect the other end of the BNC cable to the VIDEO IN
of the monitor.
SCC-C4201(P), SCC-C4203(P) : DC12V 600mA
SCC-C4301(P), SCC-C4303(P) : AC24V 300mA
DC12V 600mA
E
Video terminals on the back
of the monitor
BNC cable
REMOTE
RS-485
POWER
3. Plug in the power adapter. Use a "minus" screwdriver to
connect one part of the power adapter, which consists of two
lines, to the POWER terminal of the camera as follows :
Video Cable
Use a BNC cable, such as the one shown below, to connect
the camera's VIDEO OUT to the monitor.
POWER SELECTION switch
underneath the power adapte
POWER SELECTION
switch underneath the
power adapte
9
REMOTE
RS-485
POWER
10
4
4. Determine the type of power supply and set the POWER
SELECTION switch accordingly. Next, plug the power
adapter into a wall outlet.
The requirements for the power adapter for each model are
as follows:
●
●
SCC-C4201(P), SCC-C4203(P) : DC12V 600mA
SCC-C4301(P), SCC-C4303(P) : AC24V 300mA
DC12V 600mA
5. If the camera operates normally, the following screen will
be displayed for 5 seconds and then disappears.
SAMSUNG PROTOCOL
ADDR : 0
TYPE : RS-485, HALF
BAUD : 9600
LENS CHECK : OK!
Navigating the Setup Menu
In this chapter, we will take a look at the menu system of the
SCC-C4201(P), C4203(P), C4301(P), and C4303(P). First,
we will take a look at the structure of the Setup Menu and
then describe the functions of each menu item in the menu.
Structure of the Setup Menu
●
E
Structure of the Setup Menu of the SCC-C4201(P)
CAMERA ID
OFF/ON...
IRIS
ALC.../MANU...
SHUTTER
OFF/1/100(1/120) ~ 1/10K
/AUTO X2~X128/FIX X2~X128
AGC
OFF/LOW/HIGH
MOTION
S.S/SLOW/NORMAL/FAST/F.F
WHITE BAL
ATW/AWC/MANU...
SPECIAL
...
6. The requirements for RS485 control is as follows :
● Signaling Speed: 9600 bps
● Data Bit : 8 bits
● Stop Bit : 1 bit
● Parity Bit : none
LANGUAGE
ENGLISH
CTRL TYPE
A/B/C/D
RS-485
...
PIP
OFF/ON...
MIRROR
OFF/ON
D-ZOOM
OFF/X2 ~ X10
POSI/NEGA
+/-
ZOOM SPEED
1/2/3/4
DETAIL(0)
---- I----
RET
11
AUTO FOCUS
AF/MF/ONEAF
MOTION DET
OFF/ON...
PRESET
...
EXIT
QUIT/SAVE/PRESET
12
Structure of the Setup Menu
●
Structure of the Setup Menu of the SCC-C4203(P)
●
Structure of the Setup Menu of the SCC-C4301(P)
CAMERA ID
OFF/ON...
CAMERA ID
OFF/ON...
IRIS
ALC.../MANU...
IRIS
ALC.../MANU...
SHUTTER
OFF/1/100(1/120) ~ 1/10K
/AUTO X2~X128/FIX X2~X128
SHUTTER
OFF/1/100(1/120) ~ 1/10K
/AUTO X2~X128/FIX X2~X128
AGC
OFF/LOW/HIGH
AGC
OFF/LOW/HIGH
MOTION
S.S/SLOW/NORMAL/FAST/F.F
MOTION
S.S/SLOW/NORMAL/FAST/F.F
WHITE BAL
ATW/AWC/MANU...
WHITE BAL
ATW/AWC/MANU...
SPECIAL
...
SPECIAL
...
LANGUAGE
ENGLISH
LANGUAGE
CTRL TYPE
A/B/C/D
V-SYNC
INT/LINE...
RS-485
...
CTRL TYPE
A/B/C/D
ENGLISH
PIP
OFF/ON...
RS-485
MIRROR
OFF/ON
PIP
OFF/ON...
D-ZOOM
OFF/X2 ~ X10
MIRROR
OFF/ON
POSI/NEGA
+/-
D-ZOOM
OFF/X2 ~ X10
ZOOM SPEED
1/2/3/4
POSI/NEGA
+/-
DETAIL(0)
---- I----
ZOOM SPEED
1/2/3/4
DETAIL(0)
----I----
RET
E
...
RET
13
AUTO FOCUS
AF/MF/ONEAF
MOTION DET
OFF/ON...
AUTO FOCUS
AF/MF/ONEAF
PRESET
...
MOTION DET
OFF/ON...
COLOR/BW
COLOR/BW/AUTO...
PRESET
...
EXIT
QUIT/SAVE/PRESET
EXIT
QUIT/SAVE/PRESET
14
Structure of the Setup Menu
●
Structure of the Setup Menu of the SCC-C4303(P)
CAMERA ID
OFF/ON...
IRIS
ALC.../MANU...
SHUTTER
OFF/1/100(1/120) ~ 1/10K
/AUTO X2~X128/FIX X2~X128
AGC
OFF/LOW/HIGH
MOTION
S.S/SLOW/NORMAL/FAST/F.F
WHITE BAL
ATW/AWC/MANU...
SPECIAL
...
ENGLISH
V-SYNC
INT/LINE...
CTRL TYPE
A/B/C/D
RS-485
PIP
...
OFF/ON...
MIRROR
OFF/ON
D-ZOOM
OFF/X2 ~ X10
POSI/NEGA
+/-
ZOOM SPEED
1/2/3/4
DETAIL(0)
----I----
RET
15
EXIT
LANGUAGE
AUTO FOCUS
AF/MF/ONEAF
MOTION DET
OFF/ON...
PRESET
...
COLOR/BW
COLOR/BW/AUTO...
EXIT
QUIT/SAVE/PRESET
(SET UP)
CAMERA ID
OFF
IRIS
ALC...
SHUTTER
OFF
AGC
LOW
WHITE BAL
ATW
SPECIAL
...
AUTO FOCUS
ONEAF
MOTION DET
OFF
PRESET
...
COLOR/BW
COLOR
EXIT
QUIT
(SET UP)
CAMERA ID
OFF
IRIS
ALC...
SHUTTER
OFF
AGC
LOW
WHITE BAL
ATW
SPECIAL
...
AUTO FOCUS
ONEAF
MOTION DET
OFF
PRESET
...
QUIT
[SCC-C4201(P),SCC-C4301(P)]
[SCC-C4203(P),SCC-C4303(P)]
The COLOR/BW option is available only with the
SCC-C4203(P) and C4303(P).
CAMERA ID
In the CAMERA ID menu, you can assign an ID to the camera
that appears on the monitor screen. If you select ON...
for CAMERA ID and press the ENTER button, a screen from
which you can assign a camera ID will appear.
You can use alphanumeric characters and a few special
characters that are displayed on the screen to assign a
maximum of 20 characters for the CAMERA ID.
You can use the LOCATION option to place the camera ID
anywhere on the screen.
(SET UP)
CAMERA ID
ON...
IRIS
ALC...
SHUTTER
OFF
AGC
LOW
WHITE BAL
ATW
SPECIAL
...
AUTO FOCUS
ONEAF
MOTION DET
OFF
PRESET
...
COLOR/BW
COLOR
EXIT
QUIT
(CAMERA ID)
A B C D
MNO P
Y Z 0 1
: ! -
Press the
ENTER
button.
E
Q
2
+
F
R
3
*
G
S
4
(
H
T
5
)
I J K L
U VWX
6 7 8 9
/
SP
SP
LOCATION...
RET
ZOOM.CAMERA.........
16
E
IRIS
The level of video output to the monitor can be controlled by
the iris lens according to the intensity of the incoming light.
This product is equipped with an iris lens. In the ALC (Auto
Light Compensation) menu, you can set the video output
level. In the MANU menu, you can manually set the opening
and closing of the iris.
BLC (Option in the ALC Menu)
SIZE
SIZE
➞
➞
➞
➞
If you use an ordinary camera when a strong light source,
such as a spot light, is shining from behind the subject, the
subject will appear dark on the monitor because of the back
light. For the SCC-C4201(P), C4203(P), C4301(P), and
C4303(P), appropriately set the BLC in the ALC menu to
solve the back -light problem and have a clear picture even
under a spotlight or a very bright incident light.
If you set the AREA option to USER and press the ENTER
button, you can customize the area to which the BLC function
will be applied. You can specify the size of the area by using
the UP, DOWN, LEFT, and RIGHT buttons. After setting the
size of the area, press the ENTER button. The specified area
will start flashing. Then, you can use the UP, DOWN, LEFT
and RIGHT buttons to specify the location of the area.
Use the ENTER button and the UP, DOWN, LEFT and
RIGHT buttons to specify the size of the area and to position
the area. Press the ENTER button again to exit the AREA
E
setting menu.
ALC
POSITION
If you select ALC for IRIS and press the ENTER button, a
screen from which you can set the video output level and BLC
will appear. In the LEVEL option, you can use the LEFT/
RIGHT buttons to set the video output level. If you set the
BLC to ON, the BLC function will be applied to the screen
area specified in the AREA option. The AREA option can be
set to either PRESET or USER to specify the screen area to
which the BLC function will be applied. If you set the AREA
option to PRESET, the BLC function will be applied to the
area specified at the time of factory shipment.
(SET UP)
CAMERA ID
OFF
IRIS
ALC...
SHUTTER
OFF
AGC
LOW
WHITE BAL
ATW
SPECIAL
...
AUTO FOCUS
ONEAF
MOTION DET
OFF
PRESET
...
COLOR/BW
COLOR
EXIT
QUIT
17
(ALC)
Press the
ENTER
button.
AREA
BLC
LEVEL
RET
PRESET...
OFF
( 0) ----I----
Use the UP,
DOWN,
LEFT, and
RIGHT
buttons.
POSITION
MANU
If you select MANU for IRIS and press the ENTER button, a
screen from which you can manually adjust the iris to a
desired level will appear. In the LEVEL option, you can use
the LEFT/ RIGHT buttons to set the manual opening and
closing of the iris.
(SET UP)
CAMERA ID
OFF
IRIS
MANU...
SHUTTER
OFF
AGC
LOW
WHITE BAL
ATW
SPECIAL
...
AUTO FOCUS
ONEAF
MOTION DET
OFF
PRESET
...
COLOR/BW
COLOR
EXIT
QUIT
(MANUAL)
Press the
ENTER
button.
LEVEL ( 00) ----I---RET
18
SHUTTER
AGC (MOTION)
In the SHUTTER option, you can specify the speeds of the
high-speed electronic shutter, auto low-speed shutter, and fix
low-speed shutter. The high - speed electronic shutter
supports 7 shutter speeds from 1/100 seconds to 1/10K
seconds, and the auto low-speed shutter and fix low-speed
shutter support 12 shutter speeds from 2x to 128x
respectively. The low-speed shutter allows you to set the
shutter speed to a slow setting to obtain a clearer video
when shooting in dark lighting conditions. Select an auto
low -speed shutter in order to have the camera detect the
amount of light and automatically set the shutter speed to a
slow setting according to the degree of darkness. Select an
item that starts with "FIX" to specify the shutter speed
yourself. The numbers that immediately follow the "AUTO"
and "FIX" indicate the number of accumulated fields.
The higher the field number, the slower the shutter speed.
Accordingly, a still picture will be sharper. In the case of
video, an image captured of an object will be blurry.
In the AGC (Automatic Gain Control) option, you can specify
whether to automatically control the GAIN when the obtained
video is below a certain level of brightness because it was
recorded under insufficient lighting. To automatically control
the GAIN, set the AGC option to LOW or HIGH. Otherwise,
set it to OFF. If the you set the AGC option to LOW, the
maximum GAIN of the AGC will be set to low, and if set to
HIGH, the maximum GAIN will be set to high.
If the SHUTTER option is set to an auto low-speed, the AGC
option will change to the MOTION option. In the MOTION
option, use the LEFT and RIGHT buttons to select from S.S, E
SLOW, NORMAL, FAST, and F.F.
(SET UP)
CAMERA ID
OFF
IRIS
ALC...
SHUTTER
OFF
AGC
LOW
WHITE BAL
ATW
SPECIAL
...
AUTO FOCUS
ONEAF
MOTION DET
OFF
PRESET
...
COLOR/BW
COLOR
EXIT
QUIT
SHUTTER
➞ OFF ➞ 1/100(1/120) ➞ 1/250 ➞ 1/500 ➞ 1/1000 ➞ 1/2000 ➞
1/4000 ➞ 1/10K ➞ OFF ➞ AUTOX2 ➞ AUTOX4 ➞ AUTOX6 ➞
AUTOX8 ➞ AUTOX12 ➞ AUTOX16 ➞ AUTOX24 ➞ AUTOX32
➞ AUTOX48 ➞ AUTOX64 ➞ AUTOX96 ➞ AUTOX128 ➞ OFF
➞ FIXX2 ➞ FIXX4 ➞ FIXX6 ➞ FIXX8 ➞ FIXX12 ➞ FIXX16 ➞
FIXX24 ➞ FIXX32 ➞ FIXX48 ➞ FIXX64 ➞ FIXX96 ➞ FIXX128
19
(SET UP)
CAMERA ID
OFF
IRIS
ALC...
SHUTTER
AUTOX4
MOTION
NORMAL
WHITE BAL
ATW
SPECIAL
...
AUTO FOCUS
ONEAF
MOTION DET
OFF
PRESET
...
COLOR/BW
COLOR
EXIT
QUIT
☞
☞
☞
☞
☞
S.S : Select to maximally enhance the resolution of a still
image by increasing the lowest value of AGC GAIN and
the scale of low speed shutter to their maximum.
(This is used mainly to monitor almost still objects in dark
places.)
SLOW : Select to enhance the resolution of a still image
as much as possible by increasing a low value of AGC
GAIN and the scale of low speed shutter. (This is used
mainly to monitor objects that make a small movement in
dark places.)
NORMAL : Select to display the normal picture with a
medium value of AGC GAIN and the scale of normal
speed shutter. (This is used mainly to monitor moving
objects in dark places.)
FAST : Select to focus on the moving objects by
decreasing a high value of AGC GAIN and the scale of
normal speed shutter. (This is used mainly to monitor
objects showing active movements in dark places.)
F.F : Select to focus on the moving objects by
decreasing the highest value of AGC GAIN and the scale
of low speed shutter to their minimum. (This is used
mainly to monitor fast moving objects in dark places.)
20
WHITE BAL
SPECIAL
In the WHITE BAL option, you can set the White Balance
function, which enables you to see the white color correctly
under illumination of any color temperature. If you set the
WHITE BAL option to ATW, the camera will continuously
monitor changes in the ambient color temperature and
automatically set the White Balance according to the color
temperature. If you set the WHITE BAL option to AWC, place
a piece of white paper in front of the camera, and press the
ENTER button, the Auto White Balance Control will be
activated just once to set the color temperature and this
value will be maintained.
You can manually adjust the LANGUAGE, V-SYNC, CTRL TYPE,
RS485, PIP, MIRROR, D-ZOOM, POSI/ NEGA, ZOOM SPEED,
and DETAIL.
If you set the WHITE BAL option to MANUAL, you can
customize the white balance to take into account the current
lighting condition.
☞
☞
☞
3200°K : Select to set the color temperature to 3200°K.
5600°K : Select to set the color temperature to 5600°K.
USER : Select to set the color temperature by selecting
appropriate values from the RED and BLUE
graphs.
MANU : If you select the MANU option and press the
ENTER button, a screen from which you can manually select
the white balance will appear. In the PRESET option, use the
LEFT and RIGHT buttons to select 3200°K, 5600°K, or
USER.
(SET UP)
CAMERA ID
OFF
IRIS
ALC...
SHUTTER
OFF
AGC
LOW
WHITE BAL
MANU...
SPECIAL
...
AUTO FOCUS
ONEAF
MOTION DET
OFF
PRESET
...
COLOR/BW
COLOR
EXIT
QUIT
(AWB/MANU)
Press the
ENTER
button.
PRESET OFF(USER)..
RED
(-2C) - - - I - - - BLUE
(-5B) - I - - - - - RET
The V-SYNC option is available only with the SCC-C4301(P)
and C4303(P).
If you press the ENTER button while in "---" is shown, the
SPECIAL screen from which you can set the special functions
will appear. When activating each function, use the LEFT and
RIGHT buttons to set the desired item.
(SET UP)
CAMERA ID
OFF
IRIS
ALC...
SHUTTER
OFF
AGC
LOW
WHITE BAL
ATW
SPECIAL
...
AUTO FOCUS
ONEAF
MOTION DET
OFF
PRESET
...
COLOR/BW
COLOR
EXIT
QUIT
Press the
ENTER
button.
E
(SPECIAL)
LANGUAGE
ENGLISH
V-SYNC
INT
CTRL TYPE
A
RS-485
...
PIP
OFF
MIRROR
OFF
D-ZOOM
OFF
POSI/NEGA
+
ZOOM SPEED
3
DETAIL
(0) ----I-RET
: Specify the vertical synchronization method that
☞ Vwill- SYNC
be used by the SCC-C4301(P) and C4303(P).
There are 2 types of vertical synchronization signal that the
camera supports : INT mode in which the signal is generated
by the camera's internal clock and LINE mode which sets the
vertical synchronization by the external power frequency. If
you select LINE and press ENTER button, the LL-PHASE
screen from which you can adjust the phase of LINE LOCK
will appear. You can specify the desired phase level in the
PHASE option.
(SPECIAL)
LANGUAGE
ENGLISH
V-SYNC
LINE...
CTRL TYPE
A
RS-485
...
PIP
OFF
MIRROR
OFF
D-ZOOM
OFF
POSI/NEGA
+
ZOOM SPEED
3
DETAIL
(0) ----I-RET
(LL-PHASE)
Press the
ENTER
button.
PHASE (0)
RET
----|----
If you are using DC power supply, it will work only in INT mode.
For LINE mode operation, use the AC power adapter (50Hz).
21
22
☞
☞
CTRL TYPE : You can select the A, B, C, or D mode
depending on the input of the wired remote control terminal.
(See page 7.)
RS-485 : It sets up ADDRESS, PROTOCOL, and BAUD
RATE of RS-485 communication.
(BAUD RATE: 2400bps, 4800bps, 9600bps, 19200bps, 38400bps)
Caution : A communication error may occur if you connect
more than one camera set with an identical address.
☞
PIP : This is the Picture in Picture feature. It will show a
screen reduced by 1/16 of the main screen only when
operating the Digital Zoom. If you set the PIP option to ON
and press the ENTER button, you can use the UP, DOWN,
LEFT, and RIGHT buttons to set the PIP position.
* The PIP feature does not work in a low speed shutter mode.
The MIRROR feature does not work on the PIP window.
(SPECIAL)
EANGUAGE
ENGLISH
V-SYNC
LINE...
CTRL TYPE
A
RS-485
...
PIP
ON
MIRROR
OFF
D-ZOOM
OFF
POSI/NEGA
+
ZOOM SPEED
3
DETAIL
(0) ----I-RET
☞
☞
☞
☞
Press the
ENTER
button.
PIP
MIRROR : Horizontally flips the video output signal.
D-ZOOM : Sets the magnification of the Digital Zoom.
The magnification level can be set to up to 10x.
POSI/ NEGA : Outputs the video output signal normally or
inversely.
ZOOM SPEED : In the ZOOM SPEED option, use the
LEFT and RIGHT buttons to set the speed as follows:
1 : Takes about 17 seconds from 1 x to 22 x magnification (slowest speed).
2 : Takes about 10 seconds from 1 x to 22 x magnification (slow speed).
3 : Takes about 6 seconds from 1 x to 22 x magnification (fast speed).
4 : Takes about 3 seconds from 1 x to 22 x magnification (fastest speed).
☞
23
DETAIL: Adjusts the sharpness.
AUTO FOCUS
In the AUTO FOCUS option, you can specify the Focus
method to AF, MF, or ONEAF.
☞
☞
☞
AF : Focuses automatically by continuously monitoring the
screen in AUTO FOCUS mode. It does not process the
FOCUS button input because it focuses automatically
during ZOOM.
MF : You can manually adjust
(SET UP)
the focus.
CAMERA ID
OFF
IRIS
ALC...
ONEAF : Focuses about 5
SHUTTER
OFF
seconds only when ZOOM is
AGC
LOW
WHITE BAL
ATW
moved Wide to Tele. It is same
SPECIAL
...
as MF mode while in STOP
AUTO FOCUS
AF
mode, and same as AF mode
MOTION DET
OFF
PRESET
...
after ZOOM Tele.
COLOR/BW
EXIT
COLOR
QUIT
MOTION DET
In the MOTION DET option, you can set the Motion
Detection function, motion detection sensitivity, and the
motion detection area. If you set the Motion Detection
function, you can detect an intruder's movement and check it
through the monitor and the ALARM OUT terminal.
If you set ALARM which is located under COLOR/BW
AUTO menu to ON while MOTION DET remains ON, the
ALARM output port can not send any motion.
* MOTION detection function operates based on the
brightness change within the setup region. Therefore,
erroneous operation may occur depending on the brightness
difference between the background and the object that is
being taken, or the status of the area setup, etc.
(SET UP)
CAMERA ID
OFF
IRIS
ALC...
SHUTTER
OFF
AGC
LOW
WHITE BAL
ATW
SPECIAL
...
AUTO FOCUS
ONEAF
MOTION DET
ON...
PRESET
...
COLOR/BW
COLOR
EXIT
QUIT
(MOTION DET)
Press the
ENTER
button.
AREA
SENSITIVITY
RET
PRESET...
MEDIUM
24
E
If you select ON and press the ENTER button, the MOTION
DET screen will come up. You can set the AREA to which the
Motion Detection function will be applied to either PRESET or
USER. If you set the AREA option to PRESET, the Motion
Detection function will be applied to the areas preset as factory
defaults. If you set the AREA option to USER and press the
ENTER button, you can change the area size and position and
select the area where you want to apply the Motion Detection
function. You can specify the size of the area by using the UP,
DOWN, LEFT, and RIGHT buttons. If the area is not flashing,
press the ENTER button. When the area starts flashing, use the
UP, DOWN, LEFT and RIGHT buttons to specify the location of
the area. Use the ENTER button and the UP, DOWN, LEFT,
and RIGHT buttons to specify the size of the area and to
position the area. Press the ENTER button again to exit the
AREA setting menu. You can use the SENSITIVITY option to
set the motion detection sensitivity. The higher the setting, the
more sensitive the motion detection.
SIZE
➞
➞
➞
POSITION
Use the UP,
DOWN,
LEFT, and
RIGHT
buttons.
0 H 1
2
5
6
7
10
11
12
15
16
17
20
21
22
25
26
27
30
31
HOME RETURN
EXIT
3
8
13
18
23
28
4
9
14
19
24
29
RET
OFF
QUIT
You can store up to 128 ZOOM and FOCUS positions with the
PRESET. You can use the PRESET function when you connect
the SSC-1000 to the RS-485.
25
4
9
14
19
24
29
RET
OFF
QUIT
POSITION SET
PRESET ID
...
ON...
EXIT
QUIT
Press the
ENTER
button.
If you select a preset number and press the ENTER button, a screen
that looks as above will appear.
☞
☞
POSITION SET : Select to store the ZOOM and FOCUS
positions.
PRESET ID : Select to set an ID for the PRESET position,
as you did with Camera ID.
The COLOR / BW option is available only with the SCC-C4203(P)
and C4303(P).
POSITION
(PRESET MAP)
Press the
ENTER
button.
EXIT
PRESET NO. 0
3
8
13
18
23
28
COLOR / BW
PRESET
(SET UP)
CAMERA ID
OFF
IRIS
ALC...
SHUTTER
OFF
AGC
LOW
WHITE BAL
ATW
SPECIAL
...
AUTO FOCUS
ONEAF
MOTION DET
OFF
PRESET
...
COLOR/BW
COLOR
EXIT
QUIT
0 H 1
2
5
6
7
10
11
12
15
16
17
20
21
22
25
26
27
30
31
HOME RETURN
The HOME RETURN function is available with a camera
with the ROM version 1.2 or above. For instruction on the
use of this function, please refer to page 33.
SIZE
➞
(PRESET MAP)
In the COLOR / BW option, you can set the IR (infrared) Filter to ON or
OFF. In the BW mode, the IR Filter is turned OFF and the level of
sensitivity is increased to a level comparable to a black and white
camera. In the COLOR mode, on the other hand, the IR Filter is turned
ON and the screen turns normal, as the level of sensitivity is decreased.
☞
☞
☞
COLOR : The IR Filter is ON and the screen is normal.
BW : The IR Filter is OFF and the screen is black and
white. (Sensitivity to low light is increased to a level
comparable to a black and white camera.)
AUTO : Select to automatically switch between the COLOR
mode and BW mode depending on the amount of light.
26
E
In low light conditions, the IR Filter is turned OFF and the
sensitivity to low light is increased by switching to the BW
mode, but in bright light conditions, the IR Filter is turned
ON and the sensitivity is decreased by switching to the
COLOR mode. If you select AUTO and press the ENTER
button, a screen from which you can set the ALARM
ON/OFF, BURST ON / OFF, BW LEVEL and DWELL TIME
will appear.
- ALARM ON : It sends out signals through the ALARM output
port in the BW mode.
- ALARM OFF : The ALARM output port is synchronized with
the MOTION DET finction regardiess of the COLOR/BW
mode.
- BURST ON : The color burst signal is output together with
black and white composite video signal.
BURST OFF : The color burst signal is not output.
- LEVEL : You can set the brightness level that changes from
COLOR mode to BW mode in 3 steps : LOW, MEDIUM, and
HIGH.
- DWELL TIME : Set the HOLDING time for switching between
COLOR and BW mode depending the changes in the amount
of light. You can set the HOLDING time to 10sec (S), 30sec,
60sec, or 300sec( L).
EXIT
The EXIT option is used to quit the Setup Menu mode and
return to the Normal Operation mode.
☞
☞
☞
QUIT : Select to ignore any changes you have made and
restore the previously saved settings.
SAVE : Select to save the settings that have been
changed so far.
PRESET : Select to ignore any changes you have made
and restore the factory default settings.
In AUTO mode, AGC will operates in high speed mode, and
you cannot change it manually, as it is indicated by "---".
(SET UP)
CAMERA ID
OFF
IRIS
ALC...
SHUTTER
OFF
AGC
--WHITE BAL
ATW
SPECIAL
...
AUTO FOCUS
ONEAF
MOTION DET
OFF
PRESET
...
COLOR/BW
AUTO...
EXIT
QUIT
(BW SETUP)
Press the
ENTER
button.
ALARM
BURST
LEVEL
DWELL TIME
RET
OFF
ON
MEDIUM
S--|----L
Caution : If you use an infrared light source while in AUTO
mode, AUTO switching malfunction and camera
AF malfunction may occur.
27
28
E
5
Specifications
SCC-C4201/C4203
SCC-C4201P/C4203P
Item
Product Type
Power Supply Voltage
Power Consumption
Broadcast System
Description
- 22x Zoom Camera
- DC 12V ± 10%
- 5.0 W
- NTSC Standard Color System
Imaging Device
- 1/4 inch IT CCD
Effective Pixe
- 768(H) x 494 (V)
Scanning Method
Line Frequency
Synchronization Method
- 525 Line, 2:1 Interlace
- Horizontal : 15,734 Hz (INT)
- Vertical : 59.94 Hz (INT)
- INT Only
Remark
Item
Product Type
Power Supply Voltage
Power Consumption
Broadcast System
Imaging Device
Effective Pixe
Scanning Method
Line Frequency
Synchronization Method
- 5.0 W
- PAL Standard Color System
- 752 (H) X 582 (V)
- 625 Line, 2:1 Interlace
- Horizontal : 15,625 Hz(INT)
- Vertical : 50 Hz(INT)
- INT Only
Resolution
- 480 TV Lines
S/N Ratio
- 52dB(AGC OFF)
S/N Ratio
- 52dB(AGC OFF)
Minimum Scene Illumination
- 0.3Lux(SENS UP X4)
(0.01Lux)
- B/W(SCC-C4203P):0.4Lux
(0.003Lux)
White Balance
- ATW/ AWC/ Manual Mode
(3200°K, 5600°K, R/B Gain Control)
White Balance
- ATW/ AWC/ Manual Mode
(3200°K, 5600°K, R/B Gain Control)
Signal Output
- Composite Video Out : 1.0 Vp-p
75ohms/BNC
Signal Output
- Composite Video Out : 1.0 Vp-p
75ohms/BNC
Lens
- 22x Zoom Lens in a single unit
- Focal length : 3.6 to 79.2 mm
- Aperture : F1.6(Wide), F3.8(Tele)
- IR Filter On/Off (SCC-C4203 Only)
Lens
- 22x Zoom Lens in a single unit
- Focal length : 3.6 to 79.2 mm
- Aperture : F1.6(Wide), F3.8(Tele)
- IR Filter On/Off (SCC-C4203P Only)
Electronic Shutter
- Off, 1/100, 1/250, 1/500, 1/1K, 1/2K,
1/4K, /10K sec
Electronic Shutter
- Off, 1/120, 1/250, 1/500, 1/1K, 1/2K,
1/4K, /10K sec
Back Light Compensation
Sense Up
Digital Zoom
Motion Detection
- Off / On (Area Setting)
- Off/Auto 2x~128x/Fix 2x~128x
- Off / On (x10), PIP
- Off / On (Area / Sensitivity Setting)
Back Light Compensation
Sense Up
Digital Zoom
Motion Detection
Operating Temperature
and Humidity
- 14°F ~ +122°F, ~90 %
Operating Temperature
and Humidity
Dimensions
- 59.5 x 60.5 x 109.5mm
Dimensions
Weight
- 375g
Weight
E
- 1/4 inch IT CCD
- 480 TV Lines
- 0.3Lux(SENS UP X4)
(0.01Lux)
- B/W(SCC-C4203):0.4Lux
(0.003Lux)
Remark
- DC 12V ± 10%
Resolution
Minimum Scene Illumination
29
Description
- 22x Zoom Camera
- Off / On (Area Setting)
- Off/Auto 2x~128x/Fix 2x~128x
- Off / On (x10), PIP
- Off / On (Area / Sensitivity Setting)
- 14°F ~122°F, ~90 %
- 59.5 x 60.5 x 109.5mm
- 375g
30
Specifications
SCC-C4301/C4303
SCC-C4301P/C4303P
Item
Product Type
Power Supply Voltage
Power Consumption
Broadcast System
Description
- 22x Zoom Camera
- AC 24V (60Hz) or DC 12V ± 10%
- 5.5W
- NTSC Standard Color System
Imaging Device
- 1/4 inch IT CCD
Effective Pixe
- 768(H) X 494(V)
Scanning Method
Line Frequency
Synchronization Method
- 525 Line, 2:1 Interlace
- Horizontal : 15,734 Hz(INT), 15,750 Hz(L/L)
- Vertical : 59.94 Hz(INT), 60 Hz(L/L)
- INT / Line Lock
Remark
Item
Product Type
Power Supply Voltage
Power Consumption
Broadcast System
- 5.5W
- 1/4 inch IT CCD
Effective Pixe
- 752(H) X 582(V)
Line Frequency
Synchronization Method
- 625 Line, 2:1 Interlace
- Horizontal : 15,625 Hz(INT), 15,625 Hz(L/L)
- Vertical : 50 Hz(INT), 50 Hz(L/L)
- INT / Line Lock
- 480 TV Lines
Resolution
- 480 TV Lines
S/N Ratio
- 52dB(AGC OFF)
S/N Ratio
- 52dB(AGC OFF)
- 0.3Lux(SENS UP X4)
(0.01Lux)
- B/W(SCC-C4303):0.4Lux
(0.003Lux)
Minimum Scene Illumination
- 0.3Lux(SENS UP X4)
(0.01Lux)
- B/W(SCC-C4303P):0.4Lux
(0.003Lux)
White Balance
- ATW/ AWC/ Manual Mode
(3200°K, 5600°K, R/B Gain Control)
White Balance
- ATW/ AWC/ Manual Mode
(3200°K, 5600°K, R/B Gain Control)
Signal Output
- Composite Video Out : 1.0 Vp-p
75ohms/BNC
Signal Output
- Composite Video Out : 1.0 Vp-p
75ohms/BNC
Lens
- 22x Zoom Lens in a single unit
- Focal length : 3.6 to 79.2 mm
- Aperture : F1.6(Wide), F3.8(Tele)
- IR Filter On / Off (SCC-C4303 Only)
Lens
- 22x Zoom Lens in a single unit
- Focal length : 3.6 to 79.2 mm
- Aperture : F1.6(Wide),F3.8(Tele)
- IR Filter On/ Off (SCC-C4303P Only)
Electronic Shutter
- Off, 1/100, 1/250, 1/500, 1/1K, 1/2K,
1/4K, /10K sec
Electronic Shutter
- Off, 1/120, 1/250, 1/500, 1/1K, 1/2K,
1/4K, /10K sec
Back Light Compensation
Sense Up
Digital Zoom
Motion Detection
- Off / On (Area Setting)
- Off/Auto 2x~128x/Fix 2x~128x
- Off / On (x10), PIP
- Off / On (Area / Sensitivity Setting)
Back Light Compensation
Sense Up
Digital Zoom
Motion Detection
Operating Temperature
and Humidity
- 14°F ~122°F, ~90 %
Operating Temperature
and Humidity
Dimensions
- 59.5 x 60.5 x 143mm
Dimensions
Weight
- 500g
Weight
E
- PAL Standard Color System
Imaging Device
Scanning Method
Remark
- AC 24V (50Hz) or DC 12V ± 10%
Resolution
Minimum Scene Illumination
31
Description
- 22x Zoom Camera
- Off / On (Area Setting)
- Off/Auto 2x~128x/Fix 2x~128x
- Off / On (x10), PIP
- Off / On (Area / Sensitivity Setting)
- 14°F ~122°F, ~90 %
- 59.5 x 60.5 x 143mm
- 500g
32
6
Others
ZOOM/FOCUS Remote Terminals
These terminals are to activate the ZOOM/FOCUS,
MENU CONTROL, HOME RETURN, and AF functions
by using an external controller. They could be set to one
of four modes depending on the input condition: A, B, C,
and D. (SPECIAL - CTRL TYPE)
(Operating Voltage Range : +3V~+13V, -3V~-13V)
1 : With the menu "off", if voltage is applied for shorter than 2
seconds, the AF function will be activated, and if voltage is
applied for longer than 2 seconds, the menu will be "on".
With the menu "on", if voltage is applied, the ENTER
function will be activated.
2 : If voltage is applied for longer than 2 seconds, the
camera will return to the specified home position
E
(PRESET 0).
1) If voltage is applied to either the ZOOM or FOCUS
terminal, but not both
HOME RETURN
Function*1
Code
A
TELE (Up)
WIDE (Down) NEAR (Left)
ZOOM Terminal
FAR (Right)
FOCUS Terminal
-6V
+6V
-6V
+6V
B
-6V
+6V
+6V
-6V
C
+6V
-6V
-6V
+6V
D
+6V
-6V
+6V
-6V
1: In MENU OFF, these are used to control the
ZOOM/FOCUS function, and in MENU ON, these
are used as the UP, DOWN, LEFT, and RIGHT
keys
If no keys are pressed for a period of time, the camera will
automatically return to the specified home position.
The home position is set to PRESET 0. If the position of
PRESET 0 has not been saved, the HOME RETURN
function will not work.
Setting the Home Return Time
➞ OFF ➞ 1 MIN ➞ 2 MIN ➞ 3 MIN ~ 60 MIN ➞ 2HOUR ➞
3HOUR ~12HOUR
2) If voltage is applied to the ZOOM and FOCUS
terminals at the same time
Function
Code
33
ENTER/AF*1
HOME RETURN*2
ZOOM Terminal FOCUS Terminal ZOOM Terminal FOCUS Terminal
A
-6V
-6V
+6V
B
-6V
+6V
+6V
-6V
C
+6V
-6V
-6V
+6V
D
+6V
+6V
-6V
-6V
+6V
34
220X POWER ZOOM KAMERA
SCC-C4201(P), C4203(P),
C4301(P), C4303(P)
Gebrauchsanleitung
D
220x Pow
LOW
er Zoom
L
DIGIT
AL CO IGHT
LOR
CAM
ERA
✽ Die “Sicherheitshinweise” in diesem Handbuch
sorgfältig lesen, damit Sie dieses Produkt korrekt
benutzen und betreiben können.
Sicherheitshinweise
Ziel dieser Information ist es, den ordnungsgemäßen Gebrauch
dieses Geräts sicherzustellen und dadurch Gefahren oder
Sachbeschädigungen zu vermeiden. Bitte befolgen Sie alle
Anweisungen.
✽ Die Hinweise sind in “Achtung” und “Warnung” wie unten geteilt.
Warnung
Die Nichtbeachung eines
Warnhinweises kann zum
Tode oder zu schweren
Verletzungenführen.
Achtung
Die Nichtbeachtung eines mit
Achtung gekennzeichneten
Hinweises kann zu Verletzungen
und Sachschaden führen.
Warnung
5. Bei der Wand - oder Deckeninstallation bringen Sie die
Kamera sicher und fest an.
(Fällt die Kamera herunter, kann es zur Verletzung von
Personen kommen.)
6. Plazieren Sie keine leitfähigen Gegenstände (wie z.B.
Schraubenzieher, Münzen und metallene Objekte) oder mit
Wasser gefüllte Behälter auf der Kamera.
(Das kann zur Verletzung von Personen durch Feuer,
Stromschlag oder herunterfallende Gegenstände führen.)
7. Die Kamera darf nicht an einem rußigen, staubigen oder
feuchten Ort installiert werden.
(Andernfalls besteht die Gefahr eines Brandes oder
Stromschlags.)
1. Achten Sie darauf, daß Sie nur den mitgelieferten Adapter
verwenden. (Seite 28-31)Die Verwendung eines anderen
Adapters als des mitgelieferten kann Feuer, einen
Stromschlag oder die Beschädigung des Geräts verursachen.
8. Beim Auftreten eines ungewöhnlichen Geruchs oder einer
Rauchentwicklung, die vom Gerät ausgehen, ziehen Sie
unverzüglich das Netzkabel aus der Steckdose und wenden
Sie sich an Ihr Kundendienstzentrum.
(Die Fortsetzung des Gebrauchs kann in diesem Fall zu
Feuer oder einem elektrischen Schlag führen.)
2. Beim Anschließen der Netz- und Signalkabel müßen Sie
zuerst die externen Anschlußbuchsen überprüft werden.
Schließen Sie die Alarmsignalkabeladern an die
Alarmanschlüße an.
Der DC12V Netzadapter an die SCC-C4201(P)/C4203(P)
Netzsteckdose anschließen und achten Sie dabei auf die richtige
Polarität. Schließen Sie der DC12V oder AC24V Netzadapter an
den SCC-C4301(P)/C4303(P) Stromeingang an.
9. Sollte das Gerät nicht störungfrei funktionieren, setzen Sie
sich mit Ihrem Händler oder dem nächsten
Kundendienstzentrum in Verbindung. Das Gerät darf niemals
in keiner Weise zerlegt oder modifiziert werden.
(Keine Haftung für die Probleme übernimmt werden, die durch
unbefugte Abänderungen oder einen Reparaturversuch
herbeigeführt sind.)
3. Schließen Sie nicht mehrere Kameras an einen Adapter an.
(Wird die Kapazität überschritten, kann es zu einer anormalen
Wärmeentwicklung oder Feuer verursachen.)
4. Stecken Sie das Neztkabel fest in die Steckdose ein.
(Ein loser Anschluß kann Feuer verursachen.)
1
10. Beim Reinigen darf Wasser niemals direkt auf die Geräteteile
gelangen. (Andernfalls besteht die Gefahr eines Brandes oder
Stromschlags.)Die Oberfläche kann mit einem trockenen
Tuch abgewischt werden. Verwenden Sie für das Gerät keine
Reinigungsmittel oder chemischen Reiniger, da sich durch
solch Mittel die Farbe ablösen und der Oberflächenüberzug
beschädigt werden kann.
2
D
Inhalt
Achtungen
1. Lassen Sie keine Gegenstände auf das Gerät fallen, und
setzen Sie es einen starken Stößen aus. Setzen Sie die
Kamera keinen Starken Vibrationen oder magnetischen
Störfeldern aus.
2. Die Kamera darf nicht an Orten mit hohen Temperaturen bzw
.tiefen Temperaturen oder hoher Luftfeuchtigkeit installiert
werden.
(Andernfalls besteht die Gefahr eines Brandes oder
Stromschlags.)
3. Installieren Sie das Gerät nicht in der Nähe von
Wärmequellen, wie z.B. einem Heizgerät oder Heizkärper,
und an Orten, an denen es direktem Sonnenlicht ausgesetzt
ist. (Hier besteht Feuergefahr.)
4. Wenn Sie die bereits installierte Kamera an einen anderen Ort
verlegen wollen, achten Sie darauf, die Kamera
auszuschalten, bevor Sie sie abnehmen oder neu installieren.
5. Die Installation sollte an einer gut belüfteten Stelle erfolgen.
6. Ziehen Sie bei einem Gewitter den Netzstecken.
(Die Nichtbeachtung kann zu Feuer oder einer Beschädigung
des Geräts führen.)
1. Übersicht ................................................................................. 5
2. Bezeichnung der Teile und ihrer Funktionen ..................... 6
3. Installation ............................................................................... 8
Überprüfung des Lieferumfangs ........................................... 8
Vorbereitung der Kabel ......................................................... 9
Anschluß der Kabel ............................................................. 10
4. Übersicht über das Einstellmenu ....................................... 12
Aufbau des Einstellmenus ................................................... 12
- KAMERA ID ....................................................................... 16
- BLENDE ............................................................................ 17
- GLK .................................................................................... 17
- ALC .................................................................................... 17
- MANUEL ........................................................................... 18
- SHUTTER ......................................................................... 19
- AGC (BEWEGUNG) ......................................................... 20
- WEISSABGL ..................................................................... 21
- SPEZIAL ............................................................................ 22
- AUTO FOKUS ................................................................... 24
- AKTIVITAET ...................................................................... 24
- PRESET ............................................................................ 25
- FARBE S/W ....................................................................... 26
- AUSGANG ........................................................................ 28
5. Spezifikationen ......................................................................29
6. Sonstiges ................................................................................33
3
4
D
1
Übersicht
2
Bezeichnung der Teile und ihrer
Funktionen
Diese Kamera ist eine hohe Erfüllung - überwachungskamera, die
dank 22fach-zoomobjektiv und digitalem Zoom - IC eine
Überwachung mit max. 220fachem Zoom erlaubt.
Die Kamera ist ein multifunktionales Überwachungsgerät, daß mit
allen Hauptmerkmalen bereits existierender
Überwachungskameras ausgestattet ist:
●
Die Tag & Nacht Funktion (SCC-C4203(P), C4303(P) folgen
die deutliche und klare Bilder auch an der Nacht.
●
Die Low - Light - Überwachungsfunktion ermöglicht die
Aufnahme bewegter Objekte bei sehr geringer Beleuchtung.
●
Die Weße Abgleichsfunktion sorgt für eine exakte
Farbwiedergabe bei einer beliebigen Lichtquelle.
●
Die GLK-funktion erlaubt eine wirkungswolle Gegenlicht
Kompensation auch an Orten mit einem Scheinwerfer oder
starkem Lichteinfall.
●
Die Autofokus Funktion verfolgt und fokussiert automatisch die
bewegte Objekte.
●
RS485/Kabel Fernbedienung Funktion
220x Power Zoom
LOW LIGHT
D
DIGITAL COLOR CAMERA
Bouton SET-UP
REMOTE
RS-485
POWER
“POWER”ist gleich “DC IN”bei
SCC-C4201(P)/C4203(P).
“POWER”ist gleich “PWR IN”ber
SCC-C4301(P)/C2303(P).
“GND” und “+12V”ist gleich
“DC12&AC24V”bei
SCC-C4301(P)/C4303(P)
Übertragung System
●
SCC-C4201/C4203/C4301/C4303 : NTSC System
●
SCC-C4201P/C4203P/C4301P/C4303P : PAL System
Power System / Power Verbrauch
●
SCC-C4201(P), C4203(P) : DC 12V/5.0W
●
SCC-C4301(P), C4303(P) : AC 24, DC 12V/5.5W
* Folgendes kann bei einer Kamera mit eingebautem
Zoom auftreten:
- Wenn sich der Zoomfaktor in Richtung TELE bewegt,
kann der Rand des Bildschirms dunkel werden.
- Bei Anschluss an einen DVR oder einen LCD-Bildschirm
werden die Bildschirmecken möglicherweise nicht
vollständig angezeigt.
5
SET-UP Taste
Die Funktion der SET-UP Taste ändern sich je nachdem, ob sich
die Kamera gerade in der Normalbetriebsart (wo das Einstellmenu
nicht auf dem Bildschirm angezeigt wird) oder Setup Menu Mode
befindet.
☞ In normaler Betriebsmode
- Die Richtungstasten AUF/AB : Diese Tasten fungiert als
ZOOM Tele Taste und als ZOOM Breit Taste.
- Die Richtungstasten LINKS/RECHTS: Diese Tasten fungiert
als FOKUS Weit Taste und FOKUS Nah Taste.
- Setup Taste : Diese Taste ist für das Einstellmenu.
Die SETUP Taste länger als 3 Sekunden drücken bleiben,
das Setup Menu zu befinden.
6
3
☞ In Setup Menu Mode
Installation
- Die Richtungstasten AUF/AB : Mit diesen Tasten wird der
Cursor auf - und abwärts bewegt.
- Die Richtungtasten LINKS/RECHTS : Mit diesen Tasten wird
der Cursor nach links oder rechts bewegt oder werden die
Werte, die in jedem Einstellmenu zugewiesen werden
können, der Reihe nach angezeigt.
- Die Taste ENTER : Mit dieser Taste wird ein Einstellmenu mit
dem jeweiligen Untermenu ausgewählt und der aktuelle Wert
akzeptiert.
Vor der Installation
Überpüfung des Lieferumfangs
Überprüfen Sie bitte, ob die folgenden Zubehörteile im
Lieferumfang enthalten sind.
D
ZOOM/FOKUS FERN - anschlußklemme
Mit dieser Klemme wird ZOOM/FOKUS von einer
Außenkontrolle kontrolliert. Je nach den Input-bedingungen,
kann die Anschlußklemme in 4 verschiedene Mode einstellen.
(In Betriebs-spannung Bereich : +3V ~ +13V, -3V ~ -13V)
Artikel
Code
A
B
C
D
220x Powe
Tele
-6V
-6V
+6V
+6V
Breit
+6V
+6V
-6V
-6V
Weit
+6V
-6V
+6V
-6V
Nah
-6V
+6V
-6V
+6V
r Zoom
LOW
LIG
DIGITA
L CO
LOR
HT
CAM
ERA
SCC-C4201(P), C4203(P),
C4301(P), C4303(P)
Bedienungsanleitung
Achtung : Im Falle eines gleichzeitigen RS485 Input und des
Kabel-fernbedienungssignals, welcher Input zuerst war,
aktiviert werden. (Informationen für die Kamera mit der
ROM-Version 1.2 oder höher finden Sie auf Seite 33.)
ALARM OUT Anschlußklemme
Ein Alarm signal ist ein Ausgang von diesem Terminal wenn die
AKTIVITAET Mode aktiviert ist, oder die S/W Mode aktiviert
ist.(offen kollektor). (freier Kollektor: DC24V 40mA Max)
VIDEO OUT Anschlußklemme
Schließen Sie VIDEO IN in Monitor an. Das Videosignal von
der Kamera wird zum Monitor über diese Klemme getragen.
RS485 Anschlußklemme
RS485 Fernbedienungsklemme
POWER LED
Bei POWER auf ON leuchtet.
POWER IN Anschlußklemme
Der Netzadapter hier anschließen.
7
Montier-adapter
Schrauben(2)
Anschlußklemme Block
8
Vorbereitung der Kabel
Anschluß der Kabel
Folgende Kabel werden für die Installation und den Einsatz der
Kamera benötigt.
1. Schließen Sie zuerst das eine Ende des BNC Kabels an den
VIDEO OUT an.
Der Netzadapter, der an die POWER IN Buchse der Kamera
angeschloßen wird, sind wie folgt :
2. Schließen Sie als nächstes das andere Ende des BNC Kabels
an die VIDEO IN des Monitors an.
●
SCC-C4201(P), SCC-C4203(P) : DC 12V 600mA
●
SCC-C4301(P), SCC-C4303(P) : AC 24V 300mA
DC 12V 600mA
D
Videobuchse auf der Hinterseite
des Monitors BNC Kabel
BNC Kabel
REMOTE
Video Kabel
POWER
3. Schließen Sie dann den Netzadapter an. Verwenden Sie einen
“Schlitz” Schraubenzieher, um das zweiadrige Ende des
Netzadapterkabels an den POWER Anschlußklemme der
Kamera wie folgt anzuschließen
Das Kabel, das den VIDEO OUT der Kamera mit dem Monitor
verbindet, ist ein BNC Kabel.
POWER AUSWAHL
schaltet unter den
Netzadapter um.
POWER AUSWAHL
schaltet unter den
Netzadapter um.
9
RS-485
REMOTE
RS-485
POWER
10
4
4. Wählen Sie die Art der Stromquelle, die Sie benutzen wollen,
und stellen Sie die entsprechende POWER AUSWAHL Taste
ein. Stecken Sie anschließend den Netzadpter am Wand-ablauf
ein.
In diesem Kapitel, wir werden einen Überblick über dem Menu
System des SCC-C4201(P), C4203(P), C4301(P) und C4303(P)
geben.Zuerst, wir werden einen Überblick über den Aufbau der
Einstellmenu und ihrer Funktionen des jeden Menu Artikels geben.
Der Netzadapter für jedes Model sind wie folgt :
●
●
SCC-C4201(P), SCC-C4203(P) : DC 12V 600mA
SCC-C4301(P), SCC-C4303(P) : AC 24V 300mA
DC 12V 600mA
5. Wenn die Kamera normal funktioniert, erscheint der folgende
Bildschirm und wird nach 5 Sekunden wieder ausgeblendet.
SAMSUNG PROTOKOLL
ADDR : 0
TYPE : RS-485, HALB
BAUD : 9600
OBJEKTIV TEST : OK!
Übersicht über das Setup Menu
Aufbau des Setup Menu
●
D
Aufbau des SCC-C4201(P) Einstellmenus
KAMARA ID
AUS/EIN...
BLENDE
ALC.../MANU...
SHUTTER
AUS/1/100(1/120)~1/10K/AUTO X2~
X128/FEST X2~X128
AGC
AUS/WENIG/HOCH
BEWEGUNG
S.LANG/LANG/NORM/SCHN/S.SCHN
WEISSABGL
ATW/AWC/MANU...
SPEZIAL
...
6. Bei der RS485-Steuerung überprüfen Sie bitte Folgendes :
● Kommunikations-geschwindigkeit : 9600 bps
● Daten Bit : 8 Bits
● Stopp Bit : 1 Bit
● Parität Bit : None
SPRACHE
DEUTSCH
CTRL TYPE
A/B/C/D
RS-485
...
BIB
AUS/EIN...
SPIEGEL
AUS/EIN
D-ZOOM
AUS/X2~X10
POSI/NEGA
+/-
ZOOM GESCH
1/2/3/4
DETAIL (0)
----I----
RUE
11
AUTO FOKUS
AF/MF/EINAF
AKTIVITAET
AUS/EIN...
PRESET
...
AUSGANG
VERL/SICHERN/PRESET
12
Aufbau des Setup Menu
●
●
Aufbau des SCC-C4203(P)
Aufbau des SCC-C4301(P) Einstellmenus
KAMARA ID
AUS/EIN...
KAMARA ID
AUS/EIN...
BLENDE
ALC.../MANU...
BLENDE
ALC.../MANU...
SHUTTER
AUS/1/100(1/120)~1/10K/AUTO X2~
X128/FEST X2~X128
SHUTTER
AUS/1/100(1/120)~1/10K/AUTO X2~
X128/FEST X2~X128
AGC
AUS/WENIG/HOCH
AGC
AUS/WENIG/HOCH
S.LANG/LANG/NORM/SCHN/S.SCHN
BEWEGUNG
S.LANG/LANG/NORM/SCHN/S.SCHN
BEWEGUNG
WEISSABGL
ATW/AWC/MANU...
WEISSABGL
ATW/AWC/MANU...
SPEZIAL
...
SPEZIAL
...
D
SPRACHE
DEUTSCH
SPRACHE
CTRL TYPE
A/B/C/D
V-SYNC
INT/LINIE...
RS-485
...
CTRL TYPE
A/B/C/D
BIB
AUS/EIN...
RS-485
...
SPIEGEL
AUS/EIN
BIB
AUS/EIN...
D-ZOOM
AUS/X2~X10
SPIEGEL
AUS/EIN
POSI/NEGA
+/-
D-ZOOM
AUS/X2~X10
ZOOM GESCH
1/2/3/4
POSI/NEGA
+/-
DETAIL (0)
----I----
ZOOM GESCH
1/2/3/4
DETAIL (0)
----I----
RUE
DEUTSCH
RUE
AUTO FOKUS
AF/MF/EINAF
AKTIVITAET
AUS/EIN...
AUTO FOKUS
AF/MF/EINAF
PRESET
...
AKTIVITAET
AUS/EIN...
FARBE S/W
FARBE/S/W/AUTO...
PRESET
...
VERL/SICHERN/PRESET
AUSGANG
VERL/SICHERN/PRESET
AUSGANG
13
14
(SET UP)
KAMERA ID
AUS
BLENDE
ALC...
SHUTTER
AUTO X4
BEWEGUNG
NORM
WEISSABGL
ATW
SPEZIAL
...
AUTO FOKUS
EINAF
AKTIVITAET
AUS
PRESET
...
Aufbau des Setup Menu
●
Aufbau des SCC-C4303(P)
KAMARA ID
AUS/EIN...
BLENDE
ALC.../MANU...
SHUTTER
AUS/1/100(1/120)~1/10K/AUTO X2~
X128/FEST X2~X128
AGC
AUS/WENIG/HOCH
BEWEGUNG
S.LANG/LANG/NORM/SCHN/S.SCHN
WEISSABGL
ATW/AWC/MANU...
SPEZIAL
...
VERL
[SCC-C4201(P),SCC-C4301(P)]
[SCC-C4203(P),SCC-C4303(P)]
Die FARBE/SW Option ist nur mit SCC-C4203(P) und
C4303(P) verfügbar.
D
KAMERA ID
SPRACHE
DEUTSCH
V-SYNC
INT/LINIE...
CTRL TYPE
A/B/C/D
RS-485
...
BIB
AUS/EIN...
SPIEGEL
AUS/EIN
D-ZOOM
AUS/X2~X10
POSI/NEGA
+/-
ZOOM GESCH
1/2/3/4
DETAIL (0)
----I----
RUE
15
AUSGANG
(SET UP)
KAMERA ID
AUS
BLENDE
ALC...
SHUTTER
AUTO X4
BEWEGUNG
NORM
WEISSABGL
ATW
SPEZIAL
...
AUTO FOKUS
EINAF
AKTIVITAET
AUS
PRESET
...
FARBE S/W
FARBE
AUSGANG
VERL
AUTO FOKUS
AF/MF/EINAF
AKTIVITAET
AUS/EIN...
PRESET
...
FARBE S/W
FARBE/S/W/AUTO...
AUSGANG
VERL/SICHERN/PRESET
Im Menu KAMRA ID, können Sie ein ID Für die Kamera festlegen,
die auf dem Monitor Bildschirm erscheint.
Wenn Sie im Einstellmenu KAMERA ID auf EIN stellen und ENTER
drücken, wird ein Untermenu Bildschirm eingeblendet, in dem Sie
der Kamera ID zuweisen können. Dazu können Sie
alphanumerische Zeichen und einige Sonderzeichen verwenden,
die Untermenu Bildschirm gezeigt werden.
In Untermenu POSITION können Sie die Kamera ID an einer
bestimmten Stelle auf dem Monitor plazieren.
(SET UP)
KAMERA ID
AUS
BLENDE
ALC...
SHUTTER
AUTO X4
BEWEGUNG
NORM
WEISSABGL
ATW
SPEZIAL
...
AUTO FOKUS
EINAF
AKTIVITAET
AUS
PRESET
...
FARBE S/W
FARBE
AUSGANG
VERL
(KAMERA ID)
A B C D
MNO P
Y Z 0 1
: ! -
Die ENTER
Taste
drücken.
E
Q
2
+
F
R
3
*
G
S
4
(
H
T
5
)
I J K L
U VWX
6 7 8 9
/
SP
SP
POSITION...
RUE
ZOOM.CAMERA.........
16
BLENDE
Der Pegel des Videoausgans zum Monitor kann durch das BLENDE
Objektiv je nach Intensität des einfallenden Lichts gesteuert werden.
Die Kamera ist grundsätzlich mit einem BLENDE -Objektiv ausgestattet.
Im ALC Menu (Auto Licht Kompensation) können Sie den
Videoausgangspegel einstellen. Im Menu MANUEL können Sie
Öffnung und Verschluss der Irisblende manuell einstellen.
GLK (Ein Untermenu des ALC Menus)
GROESSE
GROESSE
➞
Wird bei einer normalen Kamera eine starke Lichtquelle benutzt, wie
z.B. ein Scheinwerfer, der das Objekt von hinten beleuchtet, dann
erscheint es auf dem Monitor aufgrund des Gegenlichts dunkel. Zur
Lösung des Gegenlichtproblems, SCC-C4201(P), C4203(P), C4301(P)
und C4303(P) können bei der Kamera die Gegenlichtkompensation
GLK als Untermenu von ALC/MANUEL so eingestellt werden, dass bei
einen Scheinwefer oder sehr hellem beiläufigem Licht klare
Videobilder gelingen.
Wenn Sie BEREICH auf PRESET einstellen, wird die werkseitige
Standardeinstellung der GLK Funktion auf den Bildschirm Bereich
angewendet. Wenn Sie BEREICH auf BENUTZER einstellen und
ENTER drücken, können Sie selbst einen Bereich angeben, auf den
die GLK Funktion angewendet werden soll. Sie können die Größe des
Bereichs mit den Tasten AUF, AB, LINKS und RECHTS angeben.
Nach der Einstellung der Größe des Bereichs, drücken Sie die Taste
ENTER. Der angegebene Bereich beginnt zu blinken. Sie können jetzt
mit den Tasten AUF, AB, LINKS und RECHTS die Position des
Bereichs festlegen.Sie können mit den Tasten von ENTER und den
Tasten AUF, AB, LINKS und RECHTS die Größe des Bereichs und
die Position des Bereichs festlegen. Durch erneutes Drücken von
D
ENTER verlassen Sie das Einstellmenu BEREICH.
➞
➞
➞
ALC
Wenn Sie die BLENDE auf ALC einstellen und ENTER drücken, wird
ein Untermenu eingeblendet, in dem Sie den Videoausgangspegel und
die GLK einstellen können. Die Option PEGEL ermöglicht Ihnen die
Einstellung des Videoausgangspegels mit Hilfe der Tasten
LINKS/RECHTS. Wenn Sie das GLK Menu auf ON stellen, wird die
GLK Funktion auf den im Menu BEREICH festgelegten Bildschirm
Bereich angewendet. Das Menu BEREICH, in dem der Bildschirm
Bereich festgelegt wird, auf den die GLK Funktion angewendet werden
soll, lässt sich auf PRESET oder BENUTZER einstellen.
(SET UP)
KAMERA ID
AUS
BLENDE
ALC...
SHUTTER
AUTO X4
BEWEGUNG
NORM
WEISSABGL
ATW
SPEZIAL
...
AUTO FOKUS
EINAF
AKTIVITAET
AUS
PRESET
...
FARBE S/W
FARBE
AUSGANG
VERL
17
(ALC)
Die ENTER
Taste
drücken.
BEREICH
PRESET...
GLK
AUS
PEGEL ( 0) ----I---RUE
POSITION
Die Tasten
AUF, AB,
LINKS und
RECHTS
verwenden.
POSITION
MANUEL
Wenn Sie die BLENDE auf MANUEL einstellen und ENTER drücken,
wird ein Untermenu eingeblendet, in dem Sie Öffnung und Verschluss
der BLENDE manuell einstellen können. Im Punkt PEGEL können Sie
mit den Tasten LINKS/RECHTS Öffnung und Verschluss der
BLENDE manuell einstellen.
(SET UP)
KAMERA ID
AUS
BLENDE
MANU...
SHUTTER
AUTO X4
BEWEGUNG
NORM
WEISSABGL
ATW
SPEZIAL
...
AUTO FOKUS
EINAF
AKTIVITAET
AUS
PRESET
...
FARBE S/W
FARBE
AUSGANG
VERL
(MANUAL)
Die Taste
ENTER
drücken.
PEGEL
RUE
( 00) ----I----
18
SHUTTER
AGC (BEWEGUNG)
Im Menu SHUTTER können Sie die Verschlusszeiten des
elektronischen Schnellverschlusses sowie von AUTO Low-Speed
Shutter und FEST Low-Speed Shutter festlegen.
Der elektronische Schnellverschluss unterstützt 7 Verschlusszeiten von
1/100 Sekunden bis 1/10K Sekunden. AUTO Low-speed Shutter und
FEST Low-Speed Shutter unterstützen jeweils 12 Verschusszeiten von
2x bis 128x. Die Funktion Low-Speed Shutter ermöglicht Ihnen die
Einstellung einer langsameren Verschlusszeit in der Dunkelheit, um die
klare Bilder zu erhalten.Wählen Sie AUTO Low-speed Shutter, damit
die Kamera die Lichtmenge ermittelt und je nach Grad der Dunkelheit
automatisch eine langsame Verschlusszeit einstellt. Wählen FEST,
um die Verschlusszeit selbst einzustellen. Die Nummern, die gerade
“AUTO” und “FEST” folgen, zeigen die Nummern der sammelten Felder
an. Je höher die Feldnummer ist, desto langsamer die Shutter
Schnelligkeit. Folglich, ein stilles Bild wird deutlicher. Im Fall von Video,
wird ein festgenommenes Bild eines Gegenstandes verschwommen.
Sie können angeben, ob die AGC (Automatische Verstärkung Kontrolle)
Option aktiviert werden soll, wenn das erhaltene Videobild unter einer
bestimmten Helligkeit-stufe liegt, weil es bei unzureichenden Licht
Verhältnissen aufgenommen wurde.Der GAIN automatisch zu
kontrollieren, stellen Sie die Option AGC zu WENIG oder HOCH ein.
Anderenfalls, zu AUS einstellen. Wenn Sie die AGC Option zu WENIG
einstellen, der maximum GAIN des AGC wird auf Niedrig eingestellt und
wenn Sie es HOCH einstellen, der maximum GAIN wird auf Hoch
eingestellt. Wenn Die Option SHUTTER zu einer Auto Low Speed
eingestellt ist, wird die Option AGC zur BEWEGUNG Option wechseln.
In der BEWEGUNG Option, mit den Tasten LINKS und RECHTS
können Sie von S.LANG, LANG, NORM, SCHN und S.SCHN
D
auswählen.
(SET UP)
KAMERA ID
AUS
BLENDE
MANU...
SHUTTER
AUTO X4
BEWEGUNG
NORM
WEISSABGL
ATW
SPEZIAL
...
AUTO FOKUS
EINAF
AKTIVITAET
AUS
PRESET
...
FARBE S/W
FARBE
AUSGANG
VERL
SHUTTER
➞ AUS ➞ 1/100(1/120) ➞ 1/250 ➞ 1/500 ➞ 1/1000 ➞ 1/2000 ➞
1/4000 ➞ 1/10K ➞ AUS ➞ AUTOX2 ➞ AUTOX4 ➞ AUTOX6 ➞
AUTOX8 ➞ AUTOX12 ➞ AUTOX16 ➞ AUTOX24 ➞ AUTOX32
➞ AUTOX48 ➞ AUTOX64 ➞ AUTOX96 ➞ AUTOX128 ➞ AUS
➞ FESTX2 ➞ FESTX4 ➞ FESTX6 ➞ FESTX8 ➞ FESTX12 ➞
FESTX16 ➞ FESTX24 ➞ FESTX32 ➞ FESTX48 ➞ FESTX64
➞ FESTX96 ➞ FESTX128
19
(SET UP)
KAMERA ID
AUS
BLENDE
MANU...
SHUTTER
AUTO X4
BEWEGUNG
NORM
WEISSABGL
ATW
SPEZIAL
...
AUTO FOKUS
EINAF
AKTIVITAET
AUS
PRESET
...
FARBE S/W
FARBE
AUSGANG
VERL
: Die Resolution eines stillen Bild zur maximalen
☞ S.LANG
Erhöhung, der niedrigst AGC GAIN Wert und der Umfang des
☞
☞
☞
☞
niedrigen Speed Shutters erhöhend. (Diese läßt sich hauptsächlich,
um unbewegliche Objekte an dunklen Orten überzuwachen.)
LANG : Die Resolution eines stillen Bild zur Erhöhung, der
niedrige AGC GAIN Wert und der Umfang des niedrigen Speed
Shutters möglichst erhöhend.
(Diese läßt sich hauptsächlich, um nur wenig bewegte Objekte an
dunklen Orten überzuwachen.)
NORM : Das normale Bild mit einem mittleren AGC GAIN Wert
wird angezeigt und der Umfang des normalen Speed Shutters
anzuzeigen. (Diese läßt sich hauptsächlich, um bewegte Objekte an
dunklen Orten überzuwachen.)
SCHN : Die bewegende Objekte werden eingestellt, ein AGC GAIN
hoher Wert und der Umfang des normalen Speed Shutters
mindernd. (Diese läßt sich hauptsächlich, um sich schnell
bewegende Objekte an dunklen Orten überzuwachen.)
S.SCHN : Die bewegende Objekte werden eingestellt, ein AGC
GAIN höchster Wert und der Umfang des niedrigen speed Shutters
möglichst mindernd.(Diese läßt sich hauptsächlich, um sich schnell
bewegende Objekte an dunklen Orten überzuwachen.)
20
WEISSABGL
SPEZIAL
Im Menu WEISSABGL können Sie den Weissabgleich einstellen,
der eine korrekte Weiß-Wiedergabe bei Lichtquellen mit
verschiedenen Farbtemperaturen gewährleistet. Wenn Sie
WEISSABGL auf ATW Mode einstellen, überwacht die Kamera
kontinuierlich die Veränderungen der Farbtemperatur und passt
den Weißabgleich automatisch an die Farbtemperatur an. Wenn
Sie WEISSABGL auf AWC Mode einstellen, plazieren Sie ein
Stück Weißen Papier in der Vorderseite der Kamera, dann
drücken Sie die ENTER Taste, wird der Weißabgleich einmal an
die Farbtemperatur angepasst, und dieser Wert wird beibehalten.
Sie können die Optionen SPRACHE, V-SYNC, CTRL TYPE,
RS-485, BIB, SPIEGEL, D-ZOOM, POSI/NEGA, VITE ZOOM und
DETAIL manuell einstellen.
Die V-SYNC Option ist nur mit SCC-C4301(P) und C4303(P) verfügbar.
Wenn Sie WEISSABGL auf MANUEL Mode einstellen, können
Sie den Weißabgleich an die aktuellen Lichtverhältnisse anpassen.
☞ 3200°K : Die Farbtemperatur wird auf 3200°K eingestellt.
☞ 5600°K : Die Farbtemperatur wird auf 5600°K eingestellt.
☞ BENUTZER : Die Farbtemperatur wird durch Auswahl des
entsprechenden Wertes der ROT und BLAU Einstellungen
eingestellt.
MANUEL : Wenn Sie die Option MANUEL auswählen und ENTER
drücken, wird ein Untermenu eingeblendet, in dem Sie einen
manuellen Weißabgleich vornehmen können. Sie haben die Wahl
zwischen 3200°K, 5600°K oder BENUTZER, indem Sie die Tasten
LINKS und RECHTS in der Option PRESET drücken.
(SET UP)
KAMERA ID
EIN...
BLENDE
MANU...
SHUTTER
AUTO X4
BEWEGUNG
NORM
WEISSABGL
MANU...
SPEZIAL
...
AUTO FOKUS
EINAF
AKTIVITAET
AUS
PRESET
...
FARBE S/W
FARBE
AUSGANG
VERL
(AWB/MANUEL)
Die Taste
ENTER
drücken.
PRESET AUS(BENUTZER)..
ROT (-2C) ---I----BLAU (-5B) -I------RUE
Wenn Sie während des “---” Menus ENTER drücken, wird ein
SPEZIAL Untermenu eingeblendet, indem Sie Sonderfunktionen
einstellen können. Um jede einzelne Funktion zu aktivieren,
stellen Sie mit den Tasten LINKS und RECHTS den gewünschten
Punkt ein.
(SET UP)
KAMERA ID
EIN...
BLENDE
MANU...
SHUTTER
AUTO X4
BEWEGUNG
NORM
WEISSABGL
MANU...
SPEZIAL
...
AUTO FOKUS
EINAF
AKTIVITAET
AUS
PRESET
...
FARBE S/W
FARBE
AUSGANG
VERL
Die Taste
ENTER
drücken.
(SPEZIAL)
SPRACHE
DEUTSCH
V-SYNC
INT
CTRL TYPE
A
RS-485
...
BIB
AUS
SPIEGEL
AUS
D-ZOOM
AUS
POSI/NEGA
+
ZOOM GESCH
3
DETAIL ( 0) ----I-RUE
D
: Die vertikale Synchronisation Methode ist für
☞ V-SYNC
SCC-C4301(P) und C4303(P) bestimmt. Es gibt 2 Type des
vertikalen Synchronisation Signals, die der Kamera anhänglich
sind: Die INT Mode hat das Signal, zu der internen Uhr der
Kamera führt und die LINIE Mode ist für die vertikale
Synchronisation erforderlich, um die Kameras mit Hilfe des
externen Signals zu betreiben. Wenn Sie LINIE wählen und die
Taste ENTER drücken, erschein der LINIE LOCK Bildschirm,
in dem Sie die LINIE LOCK eingestellt haben. Sie können die
gewünschte Phase Stufe in der PHASE Option einstellen.
(SPEZIAL)
SPRACHE
DEUTSCH
V-SYNC
LINIE...
CTRL TYPE
A
RS-485
...
BIB
AUS
SPIEGEL
AUS
D-ZOOM
AUS
POSI/NEGA
+
VITE ZOOM
3
DETAIL ( 0) ----I-RUE
(LINIE LOCK)
Die Taste
ENTER
drücken.
PHASE
RUE
( 0) ----I----
Wenn Sie DC Stromversorgung benutzen, wird es nur in INT
Mode betreiben. Für die LINIE Mode Operation, der AC
Netzadapter (50Hz) benutzen.
21
22
TYPE : Sie können die A,B,C oder D Mode jenach dem
☞ CTRL
Input der Kabel Fernbedienungsklemme auswählen.
☞
(Siehe auf die Seite 7).
RS-485 : Es stellt ADRESSE, PROTOKOLL und BAUD RATE
der RS-485 Kommunikation ein.
(BAUD RATE: 2400bps, 4800bps, 9600bps, 19200bps, 38400bps)
Achtung : Ein Kommunikationsfehler kann sich ereignen
wenn Sie mehr als eine Kamera Set mit einer
identischen Adresse anschließen lassen.
PIP : Es ist Bild-in Bild Funktion. Zeigt einen 1/16-großen
☞ Bildschirm,
nur bei Verwendung des Digital Zooms. Wenn Sie
die PIP Option auf ON einstellen und die Taste ENTER
drücken, können Sie mit dem Tasten AUF, AB, LINKS und
RECHTS die PIP Position einstellen.
* Das PIP Feature betreibt nicht in der niedrigen Speed Shutter
Mode. Das SPIEGEL Feature betreibt nicht auf das PIP Window.
(SPEZIAL)
SPRACHE
DEUTSCH
V-SYNC
LINIE...
CTRL TYPE
A
RS-485
...
BIB
EIN...
SPIEGEL
AUS
D-ZOOM
AUS
POSI/NEGA
+
ZOOM GESCH
3
DETAIL ( 0) ----I-RUE
Die Taste
ENTER
drücken.
PIP
: Dreht das Videoausgangssignal horizontal.
☞ SPIEGEL
: Stellt die Vergrößerung des Digitalzooms ein.
☞ D-ZOOM
Die Vergrößerung Stufe ist bis 10fach einstellbar.
: Gibt das Videoausgangssignal normal oder
☞ POSI/NEGA
umgekehrt aus.
ZOOM : In der Option VITE ZOOM, mit den Tasten LINKS
☞ VITE
und RECHTS kann die Geschwindigkeit wie folgt einstellen:
1: Dauer 17 Sekunden von 1fach bis 22fach Vergrößerung
(Langsamste Geschwindigkeit.)
2: Dauer 10 Sekunden von 1fach bis 22fach Vergrößerung
(Langsame Geschwindigkeit.)
3: Dauer 6 Sekunden von 1fach bis 22fach Vergrößerung
(Schnelle Geschwindigkeit.)
4: Dauer 3 Sekunden von 1fach bis 22fach Vergrößerung
(Schnellste Geschwindigkeit.)
DETAIL : Reguliert die Schärfe.
23
☞
AUTO FOKUS
Im Menu AUTO FOKUS können Sie die Fokus Methode auf AF,
MF oder ONEAF festlegen.
: Fokussiert automatisch durch kontinuierliche
☞ AF
Überwachung des Bildschirms in der AUTO FOKUS Mode. In
☞
☞
dieser Mode bleibt ein Druck auf der Taste FOKUS ohne
Reaktion, da die fokussierung automatisch erfolgt, wenn Sie
die Taste ZOOM betätigen.
MF : Sie können manuell die
(SET UP)
KAMERA ID
EIN...
Mode Fokus einstellen.
BLENDE
MANU...
EINAF : In dieser Mode wird für 5
SHUTTER
AUTO X4
Sekunden fokussiert, nur wenn die BEWEGUNG
NORM
WEISSABGL
ATW
ZOOM Taste auf TELE gedrückt
SPEZIAL
...
wird. Diese Mode kombiniert den
AUTO FOKUS
EINAF
AKTIVITAET
EIN...
MF Mode beim STOP Mode der
PRESET
...
Kamera mit dem AF Mode nach
FARBE S/W
FARBE
der ZOOM Tele Mode.
AUSGANG
VERL
AKTIVITAET
In der Option AKTIVITAET können Sie die
Bewegungsmelderfunktion, die Bewegungsmelder-empfindlichkeit
und den Bewegungsmelder-bereich einstellen. Die Aktivitätfunktion erkennt sich bewegende Objekte und kann durch den
Monitor und die ALARM OUT Anschlußklemme kontrollieren.
Bei der AKTIVITAET EIN, wenn Sie der ALARM in der FARBE S/W
AUTO Mode ouf EIN stellen, auch eigendeine Bewenng wahrnimmt,
vom ALARM Ausgang-anschlusskanal kann kein Signal ansgehen.
* Die Funktion “MOTION DETECTION” (Bewegungsmelder) wird
durch Helligkeitswechsel innerhalb des Einstellungsbereichs
aktiviert. Je nach Helligkeitsunterschied zwischen dem Hintergrund
und dem aufgenommenem Objekt, dem Status des
Einstellungsbereichs und anderen Faktoren kann die Kamera
versehentlich aktiviert werden.
(SET UP)
KAMERA ID
EIN...
BLENDE
MANU...
SHUTTER
AUTO X4
BEWEGUNG
NORM
WEISSABGL
ATW
SPEZIAL
...
AUTO FOKUS
EINAF
AKTIVITAET
EIN...
PRESET
...
FARBE S/W
FARBE
AUSGANG
VERL
(AKTIVITAET)
Die Taste
ENTER
drücken.
BEREICH
EMPFINDLICH
RUE
PRESET...
MITTEL
24
D
Wenn Sie auf ON wählen und ENTER drücken, wird das AKTIVITAET
Bild eingeblendet. Sie können BEREICH einstellen, in dem die
Bewegungsmelder-funktion zu PRESET oder BENUTZER
angewendet wird. Wenn Sie die Option EREICH zu PRESET
angeben wird die Bewegungsmelder-funktion auf den Bereich Preset
als werkseitige Standardeinstellung. Wenn Sie die Option BEREICH
auf BENUTZER einstellen und ENTER drücken, können Sie die
Bereichgröße und die Position ändern und die Bereich wählen wo Sie
die Bewegungsmelder-funktion anwenden möchten.Sie können die
Größe des Bereichs mit den Tasten AUF, AB, LINKS und RECHTS
angeben. Drücken Sie die Taste ENTER , wenn der Bereich nicht
blinkt. Wenn er beginnt zu blinken, können Sie jetzt mit den Tasten
AUF, AB, LINKS und RECHTS die Position des Bereichs
festlegen.Mit der Taste ENTER und die Tasten AUF, AB, LNKS und
RECHTS können Sie die Gräßen und die Position des Bereichs
festlegen. durch erneutes Drücken von ENTER verlassen Sie die
Menu BEREICH. Sie können ödie Option EMPFINDLICH verwenden,
die Bewegungsmelder-empfindlichkeit einzustellen. Je höher die
Einstellung, desto empfindlicher der Bewegungsmelder.
GROESSE
0 H 1
2
5
6
7
10
11
12
15
16
17
20
21
22
25
26
27
30
31
HOME ZURÜCK
PRESET NR. 0
3
8
13
18
23
28
ID : PRESET Ø
4
9
14
19
24
29
RET
AUS
POSITIONS PROG
PRESET ID
...
EIN...
AVSGANG
VERL
Die Taste
ENTER
drücken
Wenn Sie eine PRESET-Nummer auswählen und die ENTER Taste
drücken, erscheint der oben abgebildete Bildschirm.
☞ POSITIONS PROG : Speichert die ZOOM und FOKUS Positionen.
ID : Stellt eine ID für die PRESET Position ein, wie das
☞ PRESET
der Fall bei Kamera ID war.
Die Funktion ZUR_CK ZUM ANFANG steht bei Kameras ab der
ROM-Version 1.2 oder h_her zur Verf_gung. Anweisungen zur
Anwendung dieser Funktion finden Sie auf Seite 33.
GROESSE
➞
➞
➞
➞
POSITION
Die Tasten
AUF, AB,
LINKS und
RECHTS
verwenden.
FARBE S/W
Die FARBE S/W Option ist nur mit SCC-C4203(P) und
C4303(P) verfügbar.
In der FARBE S/W Option, können Sie das IR(Infrarot) Filter EIN-oder
AUS-schalten. In der S/W Mode schaltet das IR Filter AUS und die Stufe
der Empfindlichkeit wird bis zu einer vergleichbaren Stufe mit einer
schwarz und weisse Kamera erhöht. Andernfalls, in der FARBE Mode,
schaltet das IR Filter EIN und das Bild kommt normal zurück, wie die Stufe
der Empfindlichkeit niedriger geworden ist.
POSITION
PRESET
(SET UP)
KAMERA ID
AUS
BLENDE
ALC...
SHUTTER
AUTO X4
BEWEGUNG
NORM
WEISSABGL
ATW
SPEZIAL
...
AUTO FOKUS
EINAF
AKTIVITAET
AUS
PRESET
...
FARBE S/W
FARBE
AUSGANG
VERL
(PRESET KARTE)
Die Taste
ENTER
drücken.
0 H 1
2
5
6
7
10
11
12
15
16
17
20
21
22
25
26
27
30
31
HOME ZURÜCK
3
8
13
18
23
28
4
9
14
19
24
29
RET
AUS
ID : PRESET Ø
Sie können bis zu 128 ZOOM und FOKUS Positionen mit PRESET
speichern. Die Funktion PRESET kann genutzt werden, wenn Sie
den SSC-1000 mit RE-485 anschließen.
25
(PRESET KARTE)
☞
☞
☞
FARBE : Das IR Filter ist EIN und der Bildschirm ist normal.
S/W : Das IR Filter ist AUS und der Bildschirm ist schwarz und
weiß. (Die Empfindlichkeit bei wenigem Licht wird bis zu einer
vergleichbaren Stufe mit einer Schwarz und Weisse Kamera
erhöht.)
AUTO : Dieses Menu ändert sich automatisch die FARBE Mode
auf S/W Mode oder umgekehrt, je nach Lichteinfall, Bei geringen
Lichteinfall, schalter der IR Filter AUS und die Empfindlichkeit für
das wenigen Licht wird bei der Schaltung auf S/W Mode, erhöht.
26
D
Bei hochem Lichtumgebung schaltet der IR Filter EIN und die
Empfindlichkeit wird bei der Schaltung aufr FARB Mode niedriger.
Wenn Sie AUTO wählen und die Taste ENTER drücken, wird ein
Menüpunkt erschienen, in dem Sie ALARM EIN/AUS,
FARBTRAGER EIN/AUS, S/W PEGEL und SCHWELLZEIT
einstellen können.
- ALARM EIN : Es sendet die Signale durch die ALARM Ausgangsbuchse in der S/W Mode.
- ALARM AUS : Die ALARM Ausgangs-buchse ist mit der
AKTIVITAET Funktion ohne Rüsicht auf der FARBE S/W Mode
synchronisiert.
- FARBTRAGER EIN : Das Farbe Bruch Signal ist mit dem
Schwarz und Weiss bildeten Videosignal zusammen ausgegeben.
- FARBTRAGER AUS : Das Farbe Bruch Signal ist nicht
ausgegeben.
- PEGEL : Sie können die Helligkeitsstufe einstellen, die von der
FARBE Mode zur S/W Mode in 3 Stufen ändert: WENIG, MITTEL
und HOCH.
- SCHWELLZEIT : Die HOLDING ZEIT für die Schaltung zwischen
der FARBE und der SW Mode je nach der Änderung in der
Lichtsmenge einstellen. Sie können die HOLDING ZEIT in 10Sek
(S), 30Sek, 60Sek oder 300 Sek (L) einstellen.
AUSGANG
Die AUSGANG Option beendet das Einstellmenu und kehrt zum
Normalbetrieb zurück.
VERL : Übergeht alle von Ihnen vorgenommenen Veränderungen
☞ und
stellt das vorherig gespeicherte Einstellmenu wieder her.
SICHERN
: Speichert die Einstellungen, die bisher verändert
☞
worden sind.
: Übergeht alle von Ihnen vorgenommenen
☞ PRESET
Veränderungen und stellt die werkseitigen Standardeinstelllungen
wieder her.
D
In der AUTO Mode, wird AGC in der hohen Speedmode betreiben
und Sie können nicht es
manuell ändern, wie es bei “---” angezeigt wird.
(SET UP)
KAMERA ID
AUS
BLENDE
ALC...
SHUTTER
AUTO X4
BEWEGUNG
NORM
WEISSABGL
ATW
SPEZIAL
...
AUTO FOKUS
EINAF
AKTIVITAET
AUS
PRESET
...
FARBE S/W
AUTO...
AUSGANG
VERL
(S/W SETUP)
Die Taste
ENTER
drücken.
ALARM
FARBTRAGER
PEGEL
SCHWELLZEIT
RUE
EIN
EIN
WENIG
S--|----L
Achtung : Wenn Sie eine Infrarot Lichtquelle in der AUTO
Mode verwenden, kann eine AUTO
Schaltungsstörung und eine Kamera AF Störung
auftreten.
27
28
5
Spezifikationen
SCC-C4201P/C4203P
SCC-C4201/C4203
Parameter
Produkt Typ
Spannungsquelle
Leistungsaufnahme
Beschreibung
- 22fach Zoom Kamera
- DC 12V ± 10%
- 5.0 W
Bemerkung
Parameter
Produkt Typ
Spannungsquelle
Leistungsaufnahme
Beschreibung
- DC 12V ± 10%
- 5.0 W
Fernsehnorm
- NTSC Standard Farbe System
Fernsehnorm
- PAL Standard Farbe System
Bildaufnehmer
- 1/4 inch IT CCD
Bildaufnehmer
- 1/4 inch IT CCD
Effektive Pixel
- 768 (H) X 494 (V)
Effektive Pixel
- 752 (H) X 582 (V)
Abtastverfahren
- 525 Zeilen, 2:1 Zeilensprung
Abtastverfahren
- 625 Zeilen, 2:1 Zeilensprung
Zeilenfrequenz
- Horizontal : 15,734 Hz (INT)
- Vertikal : 59.94 Hz (INT)
Zeilenfrequenz
- Horizontal : 15,625 Hz (INT)
- Vertikal : 50 Hz (INT)
Synchronisationsverfahren
Auflösung
S/N Abstand
Minimum Szenen
Beleuchtung
- INT nur
- 480 Fernsehzeilen
- 52dB(AGC OFF)
- 0.3Lux(Sense Up X4)
(0.01Lux)
- S/W(SCC-C4203):0.4Lux
(0.003Lux)
Synchronisationsverfahren
Auflösung
S/N Abstand
Minimum Szenen
Beleuchtung
- 480 Fernsehzeilen
- 52dB(AGC OFF)
- 0.3Lux(Sense Up X4)
(0.01Lux)
- S/W(SCC-C4203P):0.4Lux
(0.003Lux)
- ATW/AWC/Manuell MODE
(3200°K, 5600°K, R/B Gain Kontrolle)
Weissabgleich
- ATW/AWC/Manuell MODE
(3200°K, 5600°K, R/B Gain Kontrolle)
Signalausgang
- Composite-Videoausgang : 1.0 Vp-p
75 ohms/BNC
Signalausgang
- Composite-Videoausgang : 1.0 Vp-p
75 ohms/BNC
Objektiv
- 22fach Zoom in einziger Einheit
- Brennweite : 3.6 - 79.2mm
- Öffnung : F1.6 (Weite), F3.8 (Tele)
- IR Filter ON/OFF (SCC-C4203 nur)
Objektiv
- 22fach Zoom in einziger Einheit
- Brennweite : 3.6 - 79.2mm
- Öffnung : F1.6 (Weite), F3.8 (Tele)
- IR Filter ON/OFF (SCC-C4203P nur)
Elektronischer Shutter
- Off, 1/100, 1/250, 1/500, 1/1K, 1/2K,
1/4K, 1/10K sec
Elektronischer Shutter
- Off, 1/120, 1/250, 1/500, 1/1K, 1/2K,
1/4K, 1/10K Sek.
Sense Up
Digital Zoom
Bewegungsmeldung
Temperatur und Feuchtigkeit
beim Betrieb
Abmessungen
Gewicht
29
- Off/On (Einstellung des Bereichs)
- Off/AUTO 2fach - 128fach / Fest 2fach - 128fach
- Off/On (10fach) BIB
- Off/On (einstellung von Bereich/Empfindlichkeit)
- 14°F - +122°F, -90%
- 59.5 x 60.5 x 109.5 (H)mm
- 375g
Gegenlicht Kompensation
Sense Up
Digital Zoom
Bewegungsmeldung
Temperatur und Feuchtigkeit
beim Betrieb
Abmessungen
Gewicht
D
- INT nur
Weissabgleich
Gegenlicht Kompensation
Bemerkung
- 22fach Zoom Kamera
- Off/On (Einstellung des Bereichs)
- Off/AUTO 2fach - 128fach / Fest 2fach - 128fach
- Off/On (10fach) BIB
- Off/On (einstellung von Bereich/Empfindlichkeit)
- 14°F - +122°F, -90%
- 59.5 x 60.5 x 109.5 (H)mm
- 375g
30
Spezifikationen
SCC-C4301/C4303
Parameter
Produkt Typ
Spannungsquelle
Leistungsaufnahme
SCC-C4301P/C4303P
Beschreibung
- 22fach Zoom Kamera
- AC 24V (60Hz) oder DC 12V ± 10%
- 5.5 W
Bemerkung
Parameter
Produkt Typ
Spannungsquelle
Leistungsaufnahme
Beschreibung
- AC 24V (50Hz) oder DC 12V ± 10%
- 5.5 W
Fernsehnorm
- NTSC Standard Farbe System
Fernsehnorm
- PAL Standard Farbe System
Bildaufnehmer
- 1/4 inch IT CCD
Bildaufnehmer
- 1/4 inch IT CCD
Effektive Pixel
- 768 (H) X 494 (V)
Effektive Pixel
- 752 (H) X 582 (V)
Abtastverfahren
- 525 Zeilen, 2:1 Zeilensprung
Abtastverfahren
- 625 Zeilen, 2:1 Zeilensprung
Zeilenfrequenz
- Horizontal : 15,734 Hz (INT), 15,750 Hz (L/L)
- Vertikal : 59.94 Hz (INT), 60 Hz (L/L)
Zeilenfrequenz
- Horizontal : 15,625 Hz (INT), 15,625 Hz (L/L)
- Vertikal : 50 Hz (INT), 50 Hz (L/L)
Synchronisationsverfahren
- INT/Zeilen Lock nur
Synchronisationsverfahren
Auflösung
- 480 Fernsehzeilen
Auflösung
S/N Abstand
Minimum Szenen
Beleuchtung
- 52dB(AGC OFF)
- 0.3Lux(Sense Up X4)
(0.01Lux)
- S/W(SCC-C4303):0.4Lux
(0.003Lux)
S/N Abstand
Minimum Szenen
Beleuchtung
- 480 Fernsehzeilen
- 52dB(AGC OFF)
- 0.3Lux(Sense Up X4)
(0.01Lux)
- S/W(SCC-C4303P):0.4Lux
(0.003Lux)
- ATW/AWC/Manuell MODE
(3200°K, 5600°K, R/B Gain Kontrolle)
Weissabgleich
- ATW/AWC/Manuell MODE
(3200°K, 5600°K, R/B Gain Kontrolle)
Signalausgang
- Composite-Videoausgang : 1.0 Vp-p
75 ohms/BNC
Signalausgang
- Composite-Videoausgang : 1.0 Vp-p
75 ohms/BNC
Objektiv
- 22fach Zoom in einziger Einheit
- Brennweite : 3.6 - 79.2mm
- Öffnung : F1.6 (Weite), F3.8 (Tele)
- IR Filter ON/OFF (SCC-C4303 nur)
Objektiv
- 22fach Zoom in einziger Einheit
- Brennweite : 3.6 - 79.2mm
- Öffnung : F1.6 (Weite), F3.8 (Tele)
- IR Filter ON/OFF (SCC-C4303P nur)
Elektronischer Shutter
- Off, 1/100, 1/250, 1/500, 1/1K, 1/2K,
1/4K, 1/10K Sek.
Elektronischer Shutter
- Off, 1/120, 1/250, 1/500, 1/1K, 1/2K,
1/4K, 1/10K Sek.
Sense Up
Digital Zoom
Bewegungsmeldung
Temperatur und Feuchtigkeit
beim Betrieb
Abmessungen
Gewicht
31
- Off/On (Einstellung des Bereichs)
- Off/AUTO 2fach - 128fach / Fest 2fach - 128fach
- Off/On (10fach) BIB
- Off/On (einstellung von Bereich/Empfindlichkeit)
- 14°F - +122°F, -90%
- 59.5 x 60.5 x 143 (H)mm
- 500g
Gegenlicht Kompensation
Sense Up
Digital Zoom
Bewegungsmeldung
Temperatur und Feuchtigkeit
beim Betrieb
Abmessungen
Gewicht
D
- INT/Zeilen Lock
Weissabgleich
Gegenlicht Kompensation
Bemerkung
- 22fach Zoom Kamera
- Off/On (Einstellung des Bereichs)
- Off/AUTO 2fach - 128fach / Fest 2fach - 128fach
- Off/On (10fach) BIB
- Off/On (einstellung von Bereich/Empfindlichkeit)
- 14°F - +122°F, -90%
- 59.5 x 60.5 x 143 (H)mm
- 500g
32
6
Sonstiges
ZOOM/FOCUS FB-Anschlüsse
Diese Anschlüsse ermöglichen die Aktivierung der Funktionen
ZOOM-/FOKUS, MENÜ-STEUERUNG, RESET und die AF
durch Verwenden einer externen Steuereinheit.
In Abhängigkeit von der Eingabebedingung können Sie auf
einen der folgenden Modi gesetzt werden: A, B, C und D.
(EXTRA – STRG-TYP)
1: In der Stellung Menü „aus“ wird bei Spannung für weniger als 2
Sekunden die Funktion AF aktiviert, bei mehr als 2 Sekunden
wird das Menü auf „an“ gesetzt. Ist das Menü auf „an“ gesetzt,
wird die EINGABE-Funktion aktiviert.
2: Wenn die Spannung länger als 2 Sekunden angelegt wird, so
wird die Kamera in die angegebene Reset-Position (PRESET 0)
gesetzt.
(Bereich der Betriebs-Spannung: +3V~+13V, -3V~-13V)
1) Spannung kann entweder auf ZOOM oder FOKUS gelegt
werden, aber nicht auf beide.
Funktion*1 TELE (Aufärts) WEITWINKEL (Abwärts)
Kode
ZOOM-Anschluss
NAH (Links)
FERN (Rechts)
FOKUS-Anschluss
A
-6V
+6V
-6V
B
-6V
+6V
+6V
-6V
C
+6V
-6V
-6V
+6V
D
+6V
-6V
+6V
-6V
+6V
1: In MENÜ AUS wird mit diesen die Zoom-/Fokus-Funktion
gesteuert; in MENÜ AN haben sie die Funktion der Knöpfe
AUF, AB, LINKS und RECHTS
D
HOME ZURÜCK
Wenn für eine Weile keine Taste betätigt wird, kehrt die Kamera
automatisch zur angegebenen Reset-Position zurück. Die ResetPosition ist auf die PRESET 0 gesetzt. Wurde die PRESET 0 zuvor
nicht gespeichert, so kann die HOME ZURÜCK-Funktion nicht
arbeiten.
Die Reset-Zeit festlegen
➞ OFF ➞ 1 MIN ➞ 2 MIN ➞ 3 MIN ~ 60 MIN ➞ 2STUNDE ➞
3STUNDE~12STUNDE
2) Wenn Spannung gleichzeitig auf ZOOM und FOKUS gelegt wird
Funktion
Kode
33
EINGABE/AF*1
RESET*2
ZOOM-Anschluss FOKUS-Anschluss ZOOM-Anschluss FOKUS-Anschluss
A
-6V
-6V
+6V
B
-6V
+6V
+6V
-6V
C
+6V
-6V
-6V
+6V
D
+6V
+6V
-6V
-6V
+6V
34
220X POWER ZOOM CAMERA
SCC-C4201(P), C4203(P),
C4301(P), C4303(P)
Guide d’utilisation
F
220x Pow
LOW
er Zoom
L
DIGIT
AL CO IGHT
LOR
CAM
ERA
✽ Veuillez lire attentivement les ‘précautions de sécurité’
de ce manuel afin d’assurer une utilisation et un
fonctionnement corrects de l’appareil.
Précautions de sécurité
Les précautions de sécurité sont des mesures à prendre pour
éviter toute blessure accidentelle ou un dommage sur l’appareil.
Veuillez toujours respecter toutes les précautions.
4. Branchez solidement le cordon d’alimentation sur le secteur.
(Une connexion lâche peut provoquer un incendie.)
✽ Ces précautions comportent les mention ‘Avertissement’ et
‘Attention’ comme indiqué ci-dessous :
5. Lors d’une installation mural ou au plafond, fixez solidement la
caméra en toute sécurité. (Une chute de la caméra peut
provoquer une blessure personnelle.)
Avertissement
Ignorer cette précaution peut
provoquer une blessure
sérieuse voir mortelle.
Attention
Ignorer cette précaution peut
provoquer une blessure ou un
endommagement de l’appareil.
Avertissement
1. IN’utilisez que l’adaptateur standard précisé sur la feuille de
spécifications (page 28-31). L’utilisation d’un adaptateur d’un
autre type peut provoquer un incendie, un choc électrique ou
un dommage sur l’appareil.
2. IVérifiez d’abord les terminaux de connexions externes avant
de connecter le cordon d’alimentation et les câbles signaux.
Connectez les câbles signaux d’alarme aux terminaux
d’alarme. Connectez l’adaptateur de puissance 12V CC à
l’entrée d’alimentation de SCC-C4201(P) / C4203(P) en
respectant la polarité.
Connectez l’adaptateur de puissance 12V CC ou 24V CA à
l’entrée d’alimentation de SCC-C4301(P) / C4303(P).
3. INe connectez pas de multiples caméras à un seul
adaptateur. (Une capacité excessive peut provoquer un
échauffement anormal ou un incendie.)
1
6. Ne placez pas d’objets conducteurs (tournevis, pièces de
monnaie ou objets métalliques) ou des conteneurs remplis
d’eau au-dessus de la caméra. (Des blessures sérieuses
peuvent être provoquées par un incendie, un choc électrique
ou une chute d’objets.)
F
7. N’installez pas l’appareil dans des endroits humides,
poussiéreux ou couverts de suie. (Ceci peut provoquer un
incendie ou un choc électrique.)
8. En cas d’émission d’odeur ou de fumée inhabituels hors de
l’appareil, arrêtez immédiatement son fonctionnement et
débranchez le cordon d’alimentation. Contactez ensuite le
centre de service. (Une utilisation en continu dans ces
conditions peut provoquer un incendie ou un choc électrique.)
9. Si l’appareil ne fonctionne pas correctement, contactez le
centre d’achat ou votre centre de service le plus proche. En
aucun cas, vous ne devez démonter ni modifier l’appareil.
(Les problèmes causés par le démontage ou la réparation par
une personne non autorisée ne sont pas couverts par votre
garantie.)
10. Lors d’un nettoyage, évitez de vaporiser de l’eau directement
sur les parties de l’appareil. (Ceci peut provoquer un incendie
ou un choc électrique). Essuyez doucement la surface avec
un tissu sec. N’appliquez jamais de détergent ou de nettoyant
chimique sur l’appareil, car ceci peut provoquer une
décoloration endommager la surface.
2
Sommaire
Attention
1. Ne faites pas tomber d’objet sur l’appareil et ne lui donnez pas
de choc. L’emplacement de l’appareil doit être éloigné des
l’interférences magnétique ou de vibration excessive.
2. N’installez pas l’appareil dans un endroit humide ou à une
température trop haute ou trop basse.
(Ceci peut provoquer un incendie ou un choc électrique.)
3. Evitez un emplacement exposé aux rayonnements direct du
soleil ou proche des sources de chaleur telles que les
radiateurs.
(Ne pas respecter ceci risque de provoquer un incendie.)
1. Introduction ............................................................................. 5
2. Noms et fonctions des composants .................................... 6
3. Installation ............................................................................... 8
Vérification du contenu de l’emballage ................................. 8
Préparation des câbles .......................................................... 9
Connexion des câbles ......................................................... 10
4. Utilisation du menu Setup ................................................... 12
Structure du menu Setup .................................................... 12
- CAMERA ID ...................................................................... 16
4. Si vous voulez déplacer un appareil déjà installé, n’oubliez
pas de le mettre hors tension avant le déplacement et la
réinstallation.
- IRIS .................................................................................... 17
5. Installez l’appareil dans un endroit bien aéré.
- MANU ................................................................................ 18
6. Retirez la prise de courant lors d’un orage accompagné
d’éclairs. (Ne pas respecter ceci risque de provoquer un
incendie ou un dommage sur l’appareil.)
- SHUTTER ......................................................................... 19
- CJOUR .............................................................................. 17
- ALC .................................................................................... 17
- CAG(MOUVEMENT) ......................................................... 20
- BAL BLANCS .................................................................... 21
- SPECIAL ........................................................................... 22
- AUTO FOCUS ................................................................... 24
- DET MOUVE ..................................................................... 24
- PRESET ............................................................................ 25
- COULEUR/N&B ................................................................ 26
- SORTIE ............................................................................. 28
5. Spécifications ....................................................................... 29
6. Autres ..................................................................................... 33
3
4
F
1
Introduction
2
Noms et fonctions des composants
Cette caméra de surveillance à hautes performances dispose d’un
zoom de 220x au maximum avec un objectif à zoom optique 22x
et un zoom numérique intégré.
C’est une caméra multifonctions équipée de toutes les
caractéristiques essentielles des caméras de surveillance
existantes :
●
●
Fonction ‘Jour & Nuit’ (SCC-C4203(P), C4303(P)) qui offre des
images nettes et claires même dans la nuit.
220x Power Zoom
LOW LIGHT
DIGITAL COLOR CAMERA
Fonction ‘Surveillance en basse luminosité’ qui permet de
capturer une image même sous un éclairage extrêmement
faible.
●
Fonction ‘Balance des blancs’ qui offre une interprétation
précise des couleurs sous n’importe quel éclairage.
●
Fonction ‘CJOUR’ qui permet une compensation efficace du
contre-jour même sous un spot ou un éclairage sur scène très
lumineux.
●
Fonction ‘Focalisation automatique’ qui suit et focalise le sujet
mobile.
●
Fonction ‘RS485 / Contrôle à distance câblé’.
F
Bouton SET-UP
REMOTE
RS-485
POWER
A la place de ‘POWER’,
‘DC IN’ est écrit sur
SCC-C4201(P) / C4203(P).
A la place de ‘POWER’ et ‘GND’,
‘PWR IN’ et ‘DC12&AC24V’ sont
écrits sur
SCC-C4301(P) / C4303(P).
Système de diffusion
●
●
SCC-C4201 / C4203 / C4301 / C4303 : Système NTSC
SCC-C4201P / C4203P / C4301P / C4303P : Système PAL
Système d’alimentation / Consommation électrique
●
●
SCC-C4201(P), C4203(P) : 12V CC / 5.0W
SCC-C4301(P), C4303(P) : 24V CA, 12V CC / 5.5W
* Les situations suivantes peuvent se produire avec un appareil
photo avec zoom intégré.
- Í Si le réglage du zoom se rapproche du côté TELE (TELE), il se
peut que les angles de l'écran deviennent flous.
- Î Si l'appareil photo est branché sur un magnétoscope numérique
ou un écran LCD, il se peut que les angles de l'écran soient
masqués.
5
Bouton SET-UP
La fonction du bouton SET-UP varie selon le mode actuel : mode
de fonctionnement normal (i.e., le menu Setup n’est pas affiché)
ou mode de menu Setup.
☞ En mode de fonctionnement normal :
- Boutons Haut / Bas : Utilisez-les comme le bouton ‘ZOOM
Tele’ et le bouton ‘ZOOM Wide’ respectivement.
- Boutons Gauche / Droite : Utilisez-les comme le bouton
‘FOCUS Near’ et le bouton ‘FOCUS Far’ respectivement.
- Bouton SET-UP : Utilisez-le pour accéder au menu Setup.
Appuyez sur le bouton SET-UP pendant plus de 3
secondes pour entrer dans le menu Setup.
6
3
☞ En mode de menu Setup :
Installation
- Boutons Haut / Bas : Utilisez-les pour déplacer le curseur vers
le haut ou le bas.
- Boutons Gauche / Droite : Utilisez-les pour déplacer le curseur
vers la gauche ou la droite, ou pour voir séquentiellement les
valeurs qui peuvent être assignées à un paramètre.
- Bouton Entrée : Utilisez-le pour sélectionner le menu Setup et
pour accepter la valeur actuelle.
Terminaux à distance ZOOM / FOCUS
Ils servent à contrôler ZOOM / FOCUS à partir d’un contrôleur
externe. Selon les conditions d’entrée, les terminaux peuvent
être réglés sur 4 modes différents. (Etendue du voltage de
fonctionnement : de +3V à +13V, de -3V à -13V)
Article
Code
A
B
C
D
Tele
-6V
-6V
+6V
+6V
Wide
+6V
+6V
-6V
-6V
Far
+6V
-6V
+6V
-6V
Near
-6V
+6V
-6V
+6V
Attention : En cas d’entrées simultanées d’un signal RS485 et de
contrôle à distance, le signal entré en premier sera
activé. (Pour un appareil photo ayant la version ROM
1.2 ou supérieure, veuillez vous reporter à la page 33.)
Avant installation
Vérification du contenu de l’emballage
Assurez-vous que les accessoires suivants sont inclus dans
l’emballage.
F
220x Powe
r Zoom
LOW
LIG
DIGITA
L CO
LOR
HT
CAM
ERA
SCC-C4201(P), C4203(P),
C4301(P), C4303(P)
Guide d’utilisation
Terminal ALARM OUT
Un signal d’alarme est émis de ce terminal lorsque le mode DET
MOUVE ou N&B est activé.
(Collecteur ouvert: CC24V 40mA Max).
Terminal VIDEO OUT
Il est connecté à VIDEO IN du moniteur et le signal vidéo émis
de la caméra est transmis au moniteur via ce terminal.
Terminal RS485
Terminal de contrôle à distance RS485.
Support d’installation
Vis (2)
Bloc terminal
LED de tension
EIle s’allume lorsque l’appareil est sous tension.
Terminal POWER IN
Branchez ici l’adaptateur.
7
8
Préparation des câbles
Avant d’installer et d’utiliser la caméra, préparez les câbles
suivants.
Les caractÉristiques de liadaptateur qui sera connectÉ au terminal
POWER IN de la camÉratsont les suivantes :
●
●
Connexion des câbles
1. Connectez une extrémité du câble BNC à la sortie VIDEO OUT.
2. Connectez l’autre extrémité du câble BNC à l’entrée VIDEO IN
du moniteur.
SCC-C4201(P), SCC-C4203(P) : 12V CC 600mA
SCC-C4301(P), SCC-C4303(P) : 24V CA 300mA
12V CC 600mA
Terminaux vidéo au dos
du moniteur
F
Câble BNC
REMOTE
Câble Vidéo
POWER
3. Branchez l’adaptateur d’alimentation. Utilisez un tournevis
‘négatif’ pour connecter une partie de l’adaptateur d’alimentation
qui est composé de deux lignes, au terminal POWER de la
caméra comme le montre la figure ci-dessous :
Utilisez un câble BNC comme indiqué ci-dessous pour connecter
la sortie VIDEO OUT de la caméra au moniteur.
Bouton de sélection de
puissance en dessous de
l’adaptateur
Bouton de sélection de
puissance en dessous
de l’adaptateur
9
RS-485
REMOTE
RS-485
POWER
10
4
4. Vérifiez la tension d’alimentation et réglez le bouton pour
l’adaptation. Ensuite, branchez l’adaptateur sur le secteur
mural.
Ce chapitre contient des informations sur l’utilisation du menu
système de SCC-C4201(P), C4203(P), C4301(P) et C4303(P).
Après une observation globale de la structure du menu Setup,
prenez connaissance des fonctions de chaque article de ce menu.
Les caractÉristiques de liadaptateur pour chaque mideËletsont les
suivantes :
●
●
SCC-C4201(P), SCC-C4203(P) : 12V CC 600mA
SCC-C4301(P), SCC-C4303(P) : 24V CA 300mA
12V CC 600mA
5. Si la caméra fonctionne correctement, l’écran suivant s’affichera
pendant 5 secondes avant de disparaître.
SAMSUNG PROTOCOLE
ADDR : 0
TYPE : RS-485, DEMI
VITESSE : 9600
TEST OBJECTIF : OK!
Utilisation du menu Setup
Structure de menu Setup
●
Structure de menu Setup de SCC-C4201(P)
CAMERA ID
OFF/ON...
IRIS
ALC.../MANU...
SHUTTER
OFF/1/100(1/120)~1/10K
/AUTO X2~X128/FIXE X2~X128
CAG
OFF/BAS/HAUT
F
MOUVEMENT
T.LENT/LENT/NORM/VITE/T.VITE
BAL BLANCS
BA/BM/MANU...
SPECIAL
...
6. Les caractÉristiques pour le contrôle RS485 sont les suivantes :
● Vitesse de transmission : 9600 bps
● Bits des données : 8 bits
● Bits d’arrêt : 1 bit
● Bits de parité : aucun
LANGAGE
FRAN AIS
TYPE CMND
A/B/C/D
RS-485
...
PIP
OFF/ON...
MIROIR
OFF/ON
D-ZOOM
OFF/X2~X10
POSI/NEGA
+/-
VITE ZOOM
1/2/3/4
DETAIL (0)
----I----
RET
11
AUTO FOCUS
AF/MF/UNAF
DET MOUVE
OFF/ON...
PRESET
...
SORTIE
QUITTER/SAUVER/PRESET
12
Structure de menu Setup
●
Structure du menu Setup de SCC-C4203(P)
●
Structure du menu Setup de SCC-C4301(P)
CAMERA ID
OFF/ON...
CAMERA ID
OFF/ON...
IRIS
ALC.../MANU...
IRIS
ALC.../MANU...
SHUTTER
OFF/1/100(1/120)~1/10K
/AUTO X2~X128/FIXE X2~X128
SHUTTER
OFF/1/100(1/120)~1/10K
/AUTO X2~X128/FIXE X2~X128
CAG
OFF/BAS/HAUT
CAG
OFF/BAS/HAUT
MOUVEMENT
T.LENT/LENT/NORM/VITE/T.VITE
MOUVEMENT
T.LENT/LENT/NORM/VITE/T.VITE
BAL BLANCS
BA/BM/MANU...
BAL BLANCS
BA/BM/MANU...
SPECIAL
...
SPECIAL
...
F
LANGAGE
FRAN AIS
LANGAGE
FRAN AIS
TYPE CMND
A/B/C/D
V-SYNC
INT/LIGNE...
RS-485
...
TYPE CMND
A/B/C/D
PIP
OFF/ON...
RS-485
...
MIROIR
OFF/ON
PIP
OFF/ON...
D-ZOOM
OFF/X2~X10
MIROIR
OFF/ON
POSI/NEGA
+/-
D-ZOOM
OFF/X2~X10
VITE ZOOM
1/2/3/4
POSI/NEGA
+/-
DETAIL (0)
----I----
VITE ZOOM
1/2/3/4
DETAIL (0)
----I----
RET
RET
13
AUTO FOCUS
AF/MF/UNAF
DET MOUVE
OFF/ON...
AUTO FOCUS
AF/MF/UNAF
PRESET
...
DET MOUVE
OFF/ON...
COULEUR/N&B
COULEUR/N&B/AUTO...
PRESET
...
SORTIE
QUITTER/SAUVER/PRESET
SORTIE
QUITTER/SAUVER/PRESET
14
Structure de menu Setup
●
Structure du menu Setup de SCC-C4303(P)
CAMERA ID
OFF/ON...
IRIS
ALC.../MANU...
SHUTTER
OFF/1/100(1/120)~1/10K
/AUTO X2~X128/FIXE X2~X128
CAG
OFF/BAS/HAUT
MOUVEMENT
T.LENT/LENT/NORM/VITE/T.VITE
BAL BLANCS
BA/BM/MANU...
SPECIAL
...
SORTIE
LANGAGE
FRAN AIS
V-SYNC
INT/LIGNE...
TYPE CMND
A/B/C/D
RS-485
...
PIP
OFF/ON...
MIROIR
OFF/ON
D-ZOOM
OFF/X2~X10
POSI/NEGA
+/-
VITE ZOOM
1/2/3/4
DETAIL (0)
----I----
RET
15
AUTO FOCUS
AF/MF/UNAF
DET MOUVE
OFF/ON...
(REGLAGE)
CAMERA ID
OFF
IRIS
ALC...
SHUTTER
AUTO X4
MOUVEMENT
NORM
BAL BLANCS
BA
SPECIAL
...
AUTO FOCUS
UNAF
DET MOUVE
OFF
PRESET
...
PRESET
...
COULEUR/N&B
COULEUR/N&B/AUTO...
SORTIE
QUITTER/SAUVER/PRESET
(REGLAGE)
CAMERA ID
OFF
IRIS
ALC...
SHUTTER
AUTO X4
MOUVEMENT
NORM
BAL BLANCS
BA
SPECIAL
...
AUTO FOCUS
UNAF
DET MOUVE
OFF
PRESET
...
COULEUR/N&B COULEUR
SORTIE
QUITTER
QUITTER
[SCC-C4201(P),SCC-C4301(P)]
[SCC-C4203(P),SCC-C4303(P)]
L’option COULEUR/N&B est disponible uniquement sur
SCC-C4203(P) et C4303(P).
F
CAMERA ID
Dans le menu CAMERA ID, vous pouvez assigner une
identification à la caméra qui va apparaître sur l’écran du moniteur.
Sélectionnez ON… pour CAMERA ID et appuyez sur le bouton
Entrée pour faire apparaître l’écran sur lequel vous pouvez
assigner une identification de la caméra.
Vous pouvez composer jusqu’à 20 caractères en utilisant les
caractères alphabétiques et quelques caractères spéciaux affichés
sur l’écran.
Utilisez l’option POSITION pour positionner cette identification de la
caméra là où vous désirez.
(REGLAGE)
CAMERA ID
ON...
IRIS
ALC...
SHUTTER
AUTO X4
MOUVEMENT
NORM
BAL BLANCS
BA
SPECIAL
...
AUTO FOCUS
UNAF
DET MOUVE
OFF
PRESET
...
COULEUR/N&B COULEUR
SORTIE
QUITTER
(CAMERA ID)
A B C D
MNO P
Y Z 0 1
: ! -
Appuyez sur
le bouton
Entrée.
E
Q
2
+
F
R
3
*
G
S
4
(
H
T
5
)
I J K L
U VWX
6 7 8 9
/
SP
SP
POSITION...
RET
ZOOM.CAMERA.........
16
IRIS
Le niveau de la sortie vidéo du moniteur peut être contrôlé par l’iris
de l’objectif selon l’intensité de la lumière entrante.
Cet appareil est équipé d’un objectif à iris. Dans le menu ALC
(Auto Light Compensation), vous pouvez régler le niveau de la
sortie vidéo. Dans le menu MANU, vous pouvez régler
manuellement l’ouverture et la fermeture de l’iris.
CJOUR (Option dans le menu ALC)
➞
➞
➞
Si vous appuyez sur le bouton Entrée après avoir sélectionné ALC
dans le menu IRIS, un écran sur lequel vous pouvez régler le
niveau de la sortie vidéo et CJOUR apparaîtra. Dans l’option
NIVEAV, utilisez les boutons Gauche / Droite pour régler le niveau
de la sortie vidéo. Si vous réglez CJOUR sur ON, la fonction
CJOUR sera appliquée dans la zone d’écran désignée par l’option
ZONE. Pour désigner une zone d’écran où la fonction CJOUR sera
appliquée, réglez l’option ZONE sur PRESET ou UTIL. Si vous
réglez l’option ZONE sur PRESET, la fonction CJOUR sera
appliquée à la zone définie en sortie d’usine.
17
TAILLE
POSITION
ALC
(REGLAGE)
CAMERA ID
OFF
IRIS
ALC...
SHUTTER
AUTO X4
MOUVEMENT
NORM
BAL BLANCS
BA
SPECIAL
...
AUTO FOCUS
UNAF
DET MOUVE
OFF
PRESET
...
COULEUR/N&B COULEUR
SORTIE
QUITTER
TAILLE
➞
Si vous utilisez une caméra ordinaire avec une source de lumière
puissante telle un spot projeté à partir de l’arrière d’un sujet, ce
sujet apparaîtra sombre sur le moniteur à cause du contre-jour.
Avec SCC-C4201(P), C4203(P), C4301(P) et C4303(P), vous
pouvez régler convenablement la fonction CJOUR dans le menu
ALC pour résoudre ce problème de contre-jour et obtenir une
image constante même sous un spot ou un éclairage de scène
très lumineux.
Si vous réglez l’option ZONE sur UTIL et appuyez sur le bouton
Entrée, vous pouvez personnaliser la zone où la fonction CJOUR
sera appliquée. Vous pouvez régler la taille de la zone en utilisant
les boutons Haut, Bas, Gauche et Droite. Après avoir réglé la taille
de la zone, appuyez sur le bouton Entrée. La zone réglée se mettra
à clignoter. Utilisez ensuite les boutons Haut, Bas, Gauche et
Droite pour désigner la position de la zone.
Utilisez le bouton Entrée et les boutons Haut, Bas, Gauche et
Droite pour régler la taille de la zone ou pour la positionner.
Appuyez encore une fois sur le bouton Entrée pour sortir du menu
du réglage ZONE.
(ALC)
Appuyez sur
le bouton
Entrée.
ZONE
CJOUR
NIVEAU
RET
PRESET...
OFF
( 0)----I----
Utilisez les
boutons
Haut, Bas,
Gauche et
Droite.
F
POSITION
MANU
Si vous sélectionnez MANU dans le menu IRIS et appuyez sur le
bouton Entrée, un écran sur lequel vous pouvez ajuster l’iris
manuellement sur un niveau apparaîtra. Dans l’option NIVEAU,
utilisez les boutons Gauche / Droite pour régler manuellement
l’ouverture et la fermeture de l’iris.
(REGLAGE)
CAMERA ID
OFF
IRIS
MANU...
SHUTTER
AUTO X4
MOUVEMENT
NORM
BAL BLANCS
BA
SPECIAL
...
AUTO FOCUS
UNAF
DET MOUVE
OFF
PRESET
...
COULEUR/N&B COULEUR
SORTIE
QUITTER
(MANUEL)
Appuyez sur
le bouton
Entrée.
NIVEAU ( 0) ----I---RET
18
SHUTTER
CAG(MOUVEMENT)
Dans l’option SHUTTER, vous pouvez régler les vitesses de
l’obturateur électrique à haute vitesse, de l’obturateur automatique
à basse vitesse et de l’obturateur fixe à basse vitesse. L’obturateur
électrique à haute vitesse supporte 7 vitesses, de 1/100 de
seconde à 1/10K de seconde, et l’obturateur automatique à basse
vitesse supporte 12 vitesses, de 2x à 128x. L’obturateur fixe à
basse vitesse vous permet d’obtenir une vidéo plus nette lors de la
prise de vue sous un éclairage faible. Sélectionnez l’obturateur
automatique à basse vitesse pour que la caméra détecte la
quantité de lumière et règle automatiquement la vitesse de
l’obturateur selon la luminosité. Sélectionnez un article
commençant par ‘FIXE’ pour régler la vitesse de l’obturateur par
vous-même. Les chiffres qui suivent juste après ‘AUTO’ et ‘FIXE’
indiquent le nombre de champs accumulées.
Plus le nombre de champs est élevé, plus la vitesse d’obturateur
est lente.
En conséquence, une image fixe sera plus nette. Quant à la vidéo,
l’image capturée d’un objet sera trouble.
Dans l’option CAG (Automatic Gain Control), vous pouvez régler le
contrôle automatique du GAIN lorsque la luminosité de la vidéo est
en dessous d’un certain niveau à cause d’un éclairage insuffisant.
Pour contrôler automatiquement le GAIN, réglez l’option CAG sur
BAS ou HAUT. Sinon, réglez-la sur OFF.
Si vous réglez l’option CAG sur BAS, le maximum du GAIN CAG
diminue et si vous la réglez sur HAUT, le maximum du GAIN CAG
augmente.
Si l’option SHUTTER est réglée sur Auto à basse vitesse, l’option
CAG se déplacera sur l’option MOUVEMENT. Dans l’option
MOUVEMENT, utilisez les boutons Gauche et Droite pour
sélectionner T.LENT, LENT, NORM, VITE ou T.VITE
(REGLAGE)
CAMERA ID
OFF
IRIS
MANU...
SHUTTER
AUTO X4
MOUVEMENT
NORM
BAL BLANCS
BA
SPECIAL
...
AUTO FOCUS
UNAF
DET MOUVE
OFF
PRESET
...
COULEUR/N&B COULEUR
SORTIE
QUITTER
OBTURATEUR
➞ OFF ➞ 1/100(1/120) ➞ 1/250 ➞ 1/500 ➞ 1/1000 ➞ 1/2000 ➞
1/4000 ➞ 1/10K ➞ OFF ➞ AUTOX2 ➞ AUTOX4 ➞ AUTOX6 ➞
AUTOX8 ➞ AUTOX12 ➞ AUTOX16 ➞ AUTOX24 ➞ AUTOX32
➞ AUTOX48 ➞ AUTOX64 ➞ AUTOX96 ➞ AUTOX128 ➞ OFF
➞ FIXEX2 ➞ FIXEX4 ➞ FIXEX6 ➞ FIXEX8 ➞ FIXEX12 ➞
FIXEX16 ➞ FIXEX24 ➞ FIXEX32 ➞ FIXEX48 ➞ FIXEX64 ➞
FIXEX96 ➞ FIXEX128
19
(REGLAGE)
CAMERA ID
OFF
IRIS
MANU...
SHUTTER
AUTO X4
MOUVEMENT
NORM
BAL BLANCS
BA
SPECIAL
...
AUTO FOCUS
UNAF
DET MOUVE
OFF
PRESET
...
COULEUR/N&B COULEUR
SORTIE
QUITTER
: A sélectionner pour augmenter au maximum la
☞ T.LENT
résolution d’une image fixe, en augmentant la valeur minimale
☞
☞
☞
☞
du GAIN CAG et l’échelle de l’obturateur à basse vitesse jusqu’à
leurs limites. (Cette fonction est utilisée essentiellement pour
surveiller des objets immobiles dans des lieux sombres.)
LENT : A sélectionner pour augmenter le plus possible la
résolution d’une image fixe en augmentant la valeur basse du
GAIN CAG et l’échelle de l’obturateur à basse vitesse. (Cette
fonction est utilisée essentiellement pour surveiller des objets
ayant un petit mouvement dans des lieux sombres.)
NORM : A sélectionner pour afficher une image standard avec
la valeur moyenne du GAIN CAG et l’échelle de l’obturateur à
vitesse normale. (Cette fonction est utilisée essentiellement pour
surveiller des objets mobiles dans des lieux sombres.)
VITE : A sélectionner pour une focalisation sur des objets
mobiles en diminuant la valeur maximale du GAIN CAG et
l’échelle de l’obturateur à vitesse normale. (Cette fonction est
utilisée essentiellement pour surveiller des objets très mobiles
dans des lieux sombres.)
T.VITE : A sélectionner pour une focalisation sur des objets
mobiles en diminuant la valeur maximale du GAIN CAG et
l’échelle de l’obturateur à basse vitesse jusqu’à leurs limites.
(Cette fonction est utilisée essentiellement pour surveiller des
objets très mobiles dans des lieux sombres.)
20
F
BAL BLANCS
SPECIAL
Dans l’option BAL BLANCS, vous pouvez régler la fonction
‘Balance des blancs’ qui vous permet de voir correctement la
couleur blanche sous l’éclairage de n’importe quelle température
de couleur. Si vous réglez l’option BAL BLANCS sur BA, la
caméra surveillera en continu les changements de température de
couleur ambiante et règlera automatiquement la balance des
blancs selon la température de couleur. Si vous réglez l’option
BAL BLANCS sur BM, placez une feuille de papier blanc en face
de la caméra et appuyez sur le bouton Entrée pour activer juste
une fois la fonction de contrôle automatique de balance des
blancs (Auto White Balance Control) afin de régler la température
de couleur qui sera maintenue.
Vous pouvez ajuster manuellement les fonctions LANGAGE,
V-SYNC, TYPE CMND, RS485, PIP, MIROIR, D-ZOOM, POSI /
NEGA, VITE ZOOM et DETAIL.
L’option V-SYNC est disponible uniquement sur
SCC-C4301(P) et C4303(P).
Si vous appuyez sur le bouton Entrée pendant que "---" est affiché,
l’écran SPECIAL sur lequel vous pouvez régler les fonctions
spéciales apparaîtra. Lors de l’activation de chaque fonction,
utilisez les boutons Gauche et Droite pour régler les valeurs.
Si vous réglez l’option BAL BLANCS sur MANU, vous pouvez
personnaliser la balance des blancs pour prendre en compte les
conditions d’éclairage actuel.
A sélectionner pour régler la température de couleur
☞ 3200°K : sur
3200°K.
☞
☞ UTIL : A sélectionner pour régler la température de couleur en
5600°K : A sélectionner pour régler la température de couleur
sur 5600°K.
sélectionnant une valeur à partir du diagramme Rouge
et Bleu.
MANU : Si vous sélectionnez l’option MANU et appuyez sur le
bouton Entrée, un écran sur lequel vous pouvez sélectionner
manuellement la balance du blanc apparaîtra. Dans l’option
PRESET, utilisez les boutons Gauche et Droite pour sélectionner
3200°K, 5600°K, ou UTIL.
(REGLAGE)
CAMERA ID
OFF
IRIS
MANU...
SHUTTER
AUTO X4
MOUVEMENT
NORM
BAL BLANCS
MANU...
SPECIAL
...
AUTO FOCUS
UNAF
DET MOUVE
OFF
PRESET
...
COULEUR/N&B COULEUR
SORTIE
QUITTER
21
(ABB/MANUEL)
Appuyez sur
le bouton
Entrée.
PRESET
ROUGE
BLEU
RET
OFF(UTIL)..
(-2C) ---I----(-5B) -I-------
(REGLAGE)
CAMERA ID
ON...
IRIS
MANU...
SHUTTER
AUTO X4
MOUVEMENT
NORM
BAL BLANCS
MANU...
SPECIAL
...
AUTO FOCUS
UNAF
DET MOUVE
OFF
PRESET
...
COULEUR/N&B COULEUR
SORTIE
QUITTER
Appuyez sur
le bouton
Entrée.
(SPECIAL)
LANGAGE
V-SYNC
TYPE CMND
RS-485
PIP
MIROIR
D-ZOOM
POSI/NEGA
VITE ZOOM
DETAIL
RET
FRANCAIS
INT
A
...
ON...
OFF
OFF
+
3
( 0) ----I--
F
– SYNC : vous pouvez définir le mode de synchronisation
☞ Vverticale
utilisé par SCC-C4301(P) et C4303(P).
La caméra supporte 2 types de signaux de synchronisation
verticale : mode INT dans lequel le signal est généré par les
fréquences interne de la caméra et mode LIGNE qui règle la
synchronisation verticale par les fréquences d’alimentation
externe. Si vous sélectionnez LIGNE et appuyez sur le bouton
Entrée, l’écran LIGNE BLOC sur lequel vous pouvez ajuster la
phase du mode de verrouillage de ligne (LIGNE BLOC)
apparaîtra. Dans l’option PHASE, vous pouvez définir le
niveau de phase désiré.
(SPECIAL)
LANGAGE
V-SYNC
TYPE CMND
RS-485
PIP
MIROIR
D-ZOOM
POSI/NEGA
VITE ZOOM
DETAIL
RET
FRANCAIS
LIGNE...
A
...
OFF
OFF
OFF
+
3
( 0) ----I--
(LIGNE BLOC)
Appuyez sur
le bouton
Entrée.
PHASE
RET
( 0) ----I----
Si vous utilisez une tension d’alimentation CC, seul le
mode INT fonctionnera. Pour faire fonctionner le mode
LIGNE, utilisez l’adaptateur CA (50Hz).
22
CMND : Vous pouvez sélectionner le mode A, B, C ou
☞ TYPE
D selon l’entrée du terminal de télécommande (voir la page 7).
☞ RS-485 : Ceci règle l’adresse, le protocle et le taux de
transfert de la communication RS-485.
(Viesse dè transmission: 2400bps, 4800bps, 9600bps,
19200bps, 38400bps)
Attention : Une erreur de communication peut survenir si
vous connectez plus d’une caméra avec la même
adresse.
: La fonction ‘Picture in Picture (Image dans l’image)’
☞ PIP
affiche un écran réduit à 1/16 de l’écran principal, uniquement
pendant le fonctionnement du zoom numérique. Si vous
réglez l’option PIP sur ON et appuyez sur le bouton Entrée,
vous pouvez utiliser les boutons Gauche, Droite, Haut et Bas
pour régler la position de l’écran PIP.
* La fonction PIP ne fonctionne pas sur le mode de l’obturateur à
basse vitesse.
La fonction MIROIR ne fonctionne pas sur l’écran PIP.
(SPECIAL)
LANGAGE
V-SYNC
TYPE CMND
RS-485
PIP
MIROIR
D-ZOOM
POSI/NEGA
VITE ZOOM
DETAIL
RET
FRANÇAIS
INT
A
...
ON...
OFF
OFF
+
3
( 0) ----I--
Appuyez sur
le bouton
Entrée.
PIP
: Vous pouvez inverser horizontalement le signal de
☞ MIROIR
sortie vidéo.
☞ D-ZOOM : Vous pouvez régler l’amplification du zoom numérique.
Le niveau d’amplification peut être réglé jusqu’à 10x.
/ NEGA : vous pouvez régler la sortie du signal pour que le
☞ POSI
signal sorte en mode normal ou en mode inverse.
☞ VITE ZOOM : Dans l’option VITE ZOOM, utilisez les boutons
Gauche et Droite pour régler la vitesse comme indiquée ci-après :
1 : Durée de 17 secondes de 1 x à 22 x d’amplification (vitesse la plus lente).
2 : Durée de 10 secondes de 1 x à 22 x d’amplification (vitesse lente).
3 : Durée de 6 secondes de 1 x à 22 x d’amplification (vitesse rapide).
4 : Durée de 3 secondes de 1 x à 22 x d’amplification (vitesse la plus rapide).
☞ DETAIL : Vous pouvez ajuster la netteté.
23
AUTO FOCUS
Dans l’option AUTO FOCUS (Focalisation automatique), vous
pouvez régler le mode de focalisation sur AF, MF ou UNAF.
: Mode de focalisation automatique par la surveillance en
☞ AF
continu de l’écran en mode AUTO FOCUS. Dans ce mode,
☞
☞
vous ne pouvez pas utiliser le bouton FOCUS car il focalise
automatiquement pendant le fonctionnement du zoom.
MF : Vous pouvez ajuster
(REGLAGE)
manuellement la focalisation.
CAMERA ID
OFF
IRIS
MANU...
UNAF : Mode de Focalisation
SHUTTER
AUTO X4
d’environs 5 secondes qui
MOUVEMENT
NORM
fonctionne uniquement lorsque
BAL BLANCS
MANU...
SPECIAL
...
le zoom se déplace de Wide à
AUTO FOCUS
UNAF
Tele. Il est identique au mode
DET MOUVE
ON...
PRESET
...
MF pendant le mode d’arrêt et
COULEUR/N&B COULEUR
identique au mode AF après le
SORTIE
QUITTER
zoom Tele.
F
DET MOUVE
Dans l’option DET MOUVE, vous pouvez régler la fonction
‘Détection de mouvement’ avec la sensibilité et la zone de détection
de mouvement. Si vous sélectionnez la fonction de détection de
mouvement, vous pouvez détecter le mouvement d’un intrus et le
vérifier à travers le moniteur et le terminal ALARME OUT.
Lorsque la fonction ALARME du menu COLOR N&B AUTO est activée,
le signal ne sera pas émis par la sortie Alarme après une détection du
mouvement, même si la fonction DET MOUVE est réglée sur ON.
* L'utilisation de la fonction MOTION detection (Détection de mouvements)
dépend du changement de la luminosité à l'intérieur de la zone de réglage.
C'est pourquoi il peut y avoir un dysfonctionnement dû à la différence de
luminosité entre l'arrière plan et l'objet photographié, ou l’état du réglage de
la zone, etc.
(REGLAGE)
CAMERA ID
OFF
IRIS
MANU...
SHUTTER
AUTO X4
MOUVEMENT
NORM
BAL BLANCS
MANU...
SPECIAL
...
AUTO FOCUS
UNAF
DET MOUVE
ON...
PRESET
...
COULEUR/N&B COULEUR
SORTIE
QUITTER
(DET MOUVE)
Appuyez sur
le bouton
Entrée.
ZONE
SENSIBILITE
RET
PRESET...
MOYEN
24
Si vous sélectionnez ON et appuyez sur le bouton Entrée l’écran
DET MOUVE apparaîtra. Vous pouvez régler la zone (ZONE) où
la fonction de détection de mouvement sera appliquée par
PRESET ou UTIL. Si vous réglez l’option ZONE sur PRESET,
la fonction de détection de mouvement sera appliquée dans la
zone préréglée en sortie d’usine. Si vous réglez l’option ZONE sur
UTIL et appuyez sur Entrée, vous pouvez modifier la taille et la
position de la zone et sélectionner la zone où vous souhaitez
appliquer la fonction de détection de mouvement. Vous pouvez
régler la taille en utilisant les boutons Gauche, Droite, Haut et Bas.
Si la zone ne clignote pas, appuyez sur le bouton Entrée. Lorsque
la zone se met à clignoter, utilisez les boutons Gauche, Droite,
Haut et Bas pour définir la position de la zone. Utilisez le bouton
Entrée et les boutons Gauche, Droite, Haut et Bas pour régler la
taille et la position de la zone. Appuyez à nouveau sur le bouton
Entrée pour sortir du menu de réglage de la zone (ZONE).Pour
régler la sensibilité de détection de mouvement, utiliser l’option
SENSIBILITE. Plus la valeur est haute, plus la détection de
mouvement sera sensible.
SIZE
SIZE
➞
➞
➞
➞
POSITION
Utilisez les
boutons
Gauche,
Droite,
Haut et Bas.
PRESET NO. 0
3
8
13
18
23
28
4
9
14
19
24
29
RET
OFF
ID: PRESET 0
PROG POSITION
PRESET ID
...
ON...
SORTIE
QUITTER
Appuyez sur
le bouton
Entrée.
Si vous sélectionnez un numéro d’enregistrement et appuyez sur le
bouton Entrée, l’écran ci-dessus apparaîtra.
POSITION : Sélectionnez ce mode pour enregistrer
☞ PROG
les positions de zoom et de focalisation.
ID : Selectionnez ce mode pour donner une
☞ PRESET
identification à la position d’enregistrement (PRESET),
F
comme pour l’identification de la caméra (CAMERA ID).
La fonction RET ORIGINE est disponible avec un appareil
photo ayant la version ROM 1.2 ou supérieure. Pour des
instructions concernant l’utilisation de cette fonction, veuillez
vous reporter à la page 33.
L’option COULEUR/N&B est disponible uniquement sur
SCC-C4203(P) et C4303(P).
POSITION
(PRESET CARTE)
Appuyez sur
le bouton
Entrée.
0 H 1
2
5
6
7
10
11
12
15
16
17
20
21
22
25
26
27
30
31
RET ORIGINE
COULEUR/N&B
PRESET
(REGLAGE)
CAMERA ID
OFF
IRIS
MANU...
SHUTTER
AUTO X4
MOUVEMENT
NORM
BAL BLANCS
MANU...
SPECIAL
...
AUTO FOCUS
UNAF
DET MOUVE
ON...
PRESET
...
COULEUR/N&B COULEUR
SORTIE
QUITTER
(PRESET CARTE)
0 H 1
2
5
6
7
10
11
12
15
16
17
20
21
22
25
26
27
30
31
RET ORIGINE
3
8
13
18
23
28
4
9
14
19
24
29
RET
OFF
Dans l’option COULEUR/N&B (Couleur / NB), vous pouvez régler le filtre
IR (infra rouge) sur ON ou OFF. En mode N&B (NB), le filtre IR est
désactivé et le niveau de sensibilité augmente jusqu’à un niveau
comparable à celui d’une caméra noir et blanc. Par contre, en mode
COULEUR, le filtre IR est activé et l’écran retourne en mode normal avec
un niveau de sensibilité diminué.
☞
☞
ID: PRESET 0
Vous pouvez enregistrer jusqu’à 128 positions de zoom et de
focalisation avec la fonction PRESET. Utilisez la fonction PRESET
lorsque vous connectez l’appareil SSC-1000 à l’interface RS-485.
25
☞
COULEUR : Le filtre IR est activé et l’écran est en mode normal.
N&B : Le filtre IR est désactivé et l’écran est en mode noir et
blanc. (La sensibilité sous un éclairage faible augmente
jusqu’à un niveau comparable à une caméra noir et blanc.)
AUTO : Selectionnez ce mode pour un basculement
automatique entre le mode COULEUR et le mode N&B selon
la quantité d’éclairage.
26
Lorsque l’éclairage est faible, le filtre IR est désactivé et la
sensibilité sous un faible éclairage augmente en basculant
vers le mode N&B. Lorsque l’éclairage est fort, le filtre IR est
activé et la sensibilité diminue en basculant vers le mode
COULEUR. Si vous sélectionnez le mode AUTO et appuyez
sur le bouton Entrée, un écran sur lequel vous pouvez régler
les fonctions ALARME ON/OFF S.PORTEUSE ON/OFF,
N&B NIVEAU et VIT CYCLE apparaîtra.
- ALARME ON : Ceci envoie les signaux par la sortie alarme en
mode N&B.
- ALARME OFF : La sortie alarme est synchronisée avec la fonction
DET MOVVE sans tenir compte du mode COULEUR/N&B.
- S.PORTEUSE ON : Le signal de luminosité de couleur est émis
avec le signal vidéo composite noir et blanc. S.PORTEUSE OFF :
Le signal de luminosité de couleur n’est pas émis.
- NIVEAU : Vous pouvez régler la luminosité qui varie du mode
COULEUR au mode N&B en 3 étapes : BAS, MOYEN et HAUT.
- VIT CYCLE : Vous pouvez régler la durée d’attente (HOLDING
time) en mode COULEUR ou en mode N&B selon les
changements du niveau d’éclairage. Vous pouvez régler cette
durée sur 10sec(S), 30sec, 60sec ou 300sec(L).
SORTIE
Utilisez cette option pour sortir du menu Setup et retourner sur le
mode de fonctionnement normal.
: A sélectionner pour ignorer toute modification
☞ QUITTER
apportée et restaurer les paramètres précédents.
: A sélectionner pour enregistrer les paramètres
☞ SAUVER
modifiés.
: A sélectionner pour ignorer toute modification
☞ PRESET
apporté et restaurer les paramètres par défaut en sortie
d’usine.
F
En mode AUTO, la fonction CAG est en mode de haute vitesse et
vous ne pouvez pas le changer manuellement, car il est indiqué
comme "---".
(REGLAGE)
CAMERA ID
OFF
IRIS
MANU...
SHUTTER
AUTO X4
MOUVEMENT
NORM
BAL BLANCS
MANU...
SPECIAL
...
AUTO FOCUS
UNAF
DET MOUVE
ON...
PRESET
...
COULEUR/N&B AUTO...
SORTIE
QUITTER
(N&B REGLAGE)
Appuyez sur
le bouton
Entrée.
ALARME
S.PORTEUSE
NIVEAU
VIT CYCLE
RET
OFF
ON
MOYEN
S--I----L
Attention : Si vous utilisez une source de lumière infrarouge en
mode AUTO, un mauvais fonctionnement du
basculement automatique ou de l’AF de la caméra peut
survenir.
27
28
5
Spécifications
SCC-C4201/C4203
Article
Type de produit
Tension d’alimentation
Consommation électrique
Système de diffusion
Dispositif de prise de vue
SCC-C4201P/C4203P
Description
- Caméra à zoom x22
- 12V CC ± 10%
- 5.0 W
- Système couleur standard NTSC
- 1/4 inch IT CCD
Remarques
Article
Type de produit
Tension d’alimentation
Consommation électrique
Système de diffusion
Dispositif de prise de vue
Description
- 12V CC ± 10%
- 5.0 W
- Système couleur standard PAL
- 1/4 inch IT CCD
Nombre de pixels
- 768 (H) X 494 (V)
Nombre de pixels
- 752 (H) X 582 (V)
Mode de balayage
- 525 lignes, Rapport d’entrelacement 2:1
Mode de balayage
- 625 lignes, Rapport d’entrelacement 2:1
Fréquences ligne
- Horizontal : 15,734 Hz (INT)
- Vertical : 59.94 Hz (INT)
Fréquences ligne
- Horizontal : 15,625 Hz (INT)
- Vertical : 50 Hz (INT)
Mode de synchronisation
- INT uniquement
Mode de synchronisation
- INT uniquement
Résolution
- 480 TV Lignes
Résolution
- 480 TV Lignes
Rapport S/B
- 52dB(CAG OFF)
Rapport S/B
Luminosité minimale
Luminosité minimale
- 0.3Lux(Sense Up X4)
(0.01Lux)
- N/B(SCC-C4203P):0.4Lux
(0.003Lux)
Balance des blancs
- Mode BA / BM / Manuel
(3200°K, 5600°K, Contrôle du Gain R/B)
Balance des blancs
- Mode BA / BM / Manuel
(3200°K, 5600°K, Contrôle du Gain R/B)
Objectif
- Sortie Vidéo Composite : 1.0 Vp-p
75 ohms/BNC
- Objectif à zoom 22x en une seule pièce
- Focale : de 3.6 à 79.2 mm
- Ouverture : F1.6 (Wide), F3.8 (Tele)
- Filtre IR On/Off (SCC-C4203 uniquement)
Sortie Signal
Objectif
- Sortie Vidéo Composite : 1.0 Vp-p
75 ohms/BNC
- Objectif à zoom 22x en une seule pièce
- Focale : de 3.6 à 79.2 mm
- Ouverture : F1.6 (Wide), F3.8 (Tele)
- Filtre IR On/Off (SCC-C4203P uniquement)
Obturateur électronique
- Off, 1/100, 1/250, 1/500, 1/1K, 1/2K,
1/4K, 1/10K sec
Obturateur électronique
- Off, 1/120, 1/250, 1/500, 1/1K, 1/2K,
1/4K, 1/10K sec
Correction de contre-jour
- Off / On (Réglage de Zone)
Correction de contre-jour
- Off / On (Réglage de Zone)
Sense Up
Zoom numérique
Détection de mouvement
Température et humidité de
fonctionnement
Dimensions
Poids
29
- Off / Auto 2x - 128x / Fixe 2x - 128x
- Off / On (x10), PIP
- Off / On (Réglage de Zone / Sensibilité)
- de 14°F à 122°F, moins de 90%
- 59.5 x 60.5 x 109.5mm
- 375g
Sense Up
Zoom numérique
Détection de mouvement
Température et humidité de
fonctionnement
Dimensions
Poids
F
- 52dB(CAG OFF)
- 0.3Lux(Sense Up X4)
(0.01Lux)
- N/B(SCC-C4203):0.4Lux
(0.003Lux)
Sortie Signal
Remarques
- Caméra à zoom x22
- Off / Auto 2x - 128x / Fixe 2x - 128x
- Off / On (x10), PIP
- Off / On (Réglage de Zone / Sensibilité)
- de 14°F à 122°F, moins de 90%
- 59.5 x 60.5 x 109.5mm
- 375g
30
Spécifications
SCC-C4301/C4303
Article
Type de produit
Tension d’alimentation
Consommation électrique
Système de diffusion
Dispositif de prise de vue
SCC-C4301P/C4303P
Description
- Caméra à zoom x22
- 24V CA (60 Hz) ou 12V CC ± 10%
- 5.5 W
- Système couleur standard NTSC
- 1/4 inch IT CCD
Remarques
Article
Type de produit
Tension d’alimentation
Consommation électrique
Système de diffusion
Dispositif de prise de vue
Description
- 24V CA (50 Hz) ou 12V CC ± 10%
- 5.5 W
- Système couleur standard PAL
- 1/4 inch IT CCD
Nombre de pixels
- 768 (H) X 494 (V)
Nombre de pixels
- 752 (H) X 582 (V)
Mode de balayage
- 525 lignes, Rapport d’entrelacement 2:1
Mode de balayage
- 625 lignes, Rapport d’entrelacement 2:1
Fréquences ligne
- Horizontal : 15,734 Hz (INT), 15,750 Hz (L/L)
- Vertical : 59.94 Hz (INT), 60 Hz (L/L)
Fréquences ligne
- Horizontal : 15,625 Hz (INT), 15,625 Hz (L/L)
- Vertical : 50 Hz (INT), 50 Hz (L/L)
Mode de synchronisation
- INT / Line Lock
Mode de synchronisation
- INT / Line Lock
Résolution
- 480 TV Lignes
Résolution
- 480 TV Lignes
Rapport S/B
- 52dB(CAG OFF)
Rapport S/B
Luminosité minimale
Luminosité minimale
- 0.3Lux(Sense Up X4)
(0.01Lux)
- N/B(SCC-C4303P):0.4Lux
(0.003Lux)
Balance des blancs
- Mode BA / BM / Manuel
(3200°K, 5600°K, Contrôle du Gain R/B)
Balance des blancs
- Mode BA / BM / Manuel
(3200°K, 5600°K, Contrôle du Gain R/B)
Objectif
- Sortie Vidéo Composite : 1.0 Vp-p
75 ohms/BNC
- Objectif à zoom 22x en une seule pièce
- Focale : de 3.6 à 79.2 mm
- Ouverture : F1.6 (Wide), F3.8 (Tele)
- Filtre IR On/Off (SCC-C4303 uniquement)
Sortie Signal
Objectif
- Sortie Vidéo Composite : 1.0 Vp-p
75 ohms/BNC
- Objectif à zoom 22x en une seule pièce
- Focale : de 3.6 à 79.2 mm
- Ouverture : F1.6 (Wide), F3.8 (Tele)
- Filtre IR On/Off (SCC-C4303P uniquement)
Obturateur électronique
- Off, 1/100, 1/250, 1/500, 1/1K, 1/2K,
1/4K, 1/10K sec
Obturateur électronique
- Off, 1/120, 1/250, 1/500, 1/1K, 1/2K,
1/4K, 1/10K sec
Correction de contre-jour
- Off / On (Réglage de Zone)
Correction de contre-jour
- Off / On (Réglage de Zone)
Sense Up
Zoom numérique
Détection de mouvement
Température et humidité de
fonctionnement
Dimensions
Poids
31
- Off / Auto 2x - 128x / Fixe 2x - 128x
- Off / On (x10), PIP
- Off / On (Réglage de Zone / Sensibilité)
- de 14°F à 122°F, moins de 90%
- 59.5 x 60.5 x 143mm
- 500g
Sense Up
Zoom numérique
Détection de mouvement
Température et humidité de
fonctionnement
Dimensions
Poids
F
- 52dB(CAG OFF)
- 0.3Lux(Sense Up X4)
(0.01Lux)
- N/B(SCC-C4303):0.4Lux
(0.003Lux)
Sortie Signal
Remarques
- Caméra à zoom x22
- Off / Auto 2x - 128x / Fixe 2x - 128x
- Off / On (x10), PIP
- Off / On (Réglage de Zone / Sensibilité)
- de 14°F à 122°F, moins de 90%
- 59.5 x 60.5 x 143mm
- 500g
32
6
Autres
Bornes ZOOM/MISE AU POINT à distance
Ces bornes permettent d’activer les fonctions ZOOM/MISE
AU POINT, COMMANDE DU MENU, RETOUR À LA
POSITION DE DÉPART et MISE AU POINT
AUTOMATIQUE à l’aide d’un contrôleur externe. Vous
pouvez les paramétrer sur l’un des quatre modes selon la
condition d’entrée : A, B, C et D. (SPÉCIAL – TYPE DE
COMMANDE)
(Plage de tension de fonctionnement : +3V~+13V, -3V~-13V)
1 : Lorsque le menu est "désactivé", si une tension est appliquée
durant moins de 2 secondes, la fonction mise au point
automatique est activée. Si une tension est appliquée durant
plus de 2 secondes, le menu est "activé". Lorsque le menu est
"activé", si une tension est appliquée, la fonction ENTRER est
activée.
2 : Si une tension est appliquée durant plus de 2 secondes,
l’appareil photo revient à la position de départ indiquée
(PRESET 0).
1) Si une tension est appliquée sur la borne ZOOM ou MISE
AU POINT mais pas aux deux.
Fonction*1 TÉLÉOBJECTIF (Haut) GRAND ANGLE (Bas) PROCHE (Gauche) ÉLOIGNÉ (Droite)
Code
A
Borne ZOOM
Borne MISE AU POINT
-6V
+6V
-6V
+6V
B
-6V
+6V
+6V
-6V
C
+6V
-6V
-6V
+6V
D
+6V
-6V
+6V
-6V
1: En MENU OFF, cela permet de contrôler la fonction
ZOOM/MISE AU POINT et en MENU ON, cela est utilisé
comme les touches HAUT, BAS, GAUCHE et DROITE
2) Si une tension est appliquée aux bornes ZOOM et MISE
AU POINT en même temps
F
RET ORIGINE
Si vous n’appuyez sur aucune touche pendant un moment,
l’appareil photo revient automatiquement à la position de départ
indiquée. La position de départ est paramétrée sur PRESET 0. Si
vous n’avez pas enregistré la position PRESET 0, la fonction RET
ORIGINE ne fonctionne pas.
Paramétrage de l’heure de retour à la position de départ
➞ OFF ➞ 1 MIN ➞ 2 MIN ➞ 3 MIN ~ 60 MIN ➞ 2HEURE ➞
3HEURE ~12HEURE
Fonction ENTRER/MISE AU POINT AUTOMATIQUE*1 RETOUR À LA POSITION DE DÉPART *2
Code
33
Borne ZOOM
Borne MISE AU POINT
Borne ZOOM
Borne MISE AU POINT
A
-6V
-6V
+6V
+6V
B
-6V
+6V
+6V
-6V
C
+6V
-6V
-6V
+6V
D
+6V
+6V
-6V
-6V
34
El PODER 220X VA ZUMBANDO CAMARA
SCC-C4201(P), C4203(P),
C4301(P), C4303(P)
Guía del usuario
Es
220x Pow
LOW
er Zoom
L
DIGIT
AL CO IGHT
LOR
CAM
ERA
✽ Asegúrese de leer las advertencias de seguridad de
este manual para asegurar el correcto uso y operación
de este producto.
Advertencias de seguridad
El propósito de estas advertencias de seguridad es
evitar posibles accidentes o daños materiales.
Siempre observe todas precauciones de la seguridad.
✽ Este apartado está dividido en "Advertencias" y
"Precauciones" según definido a continuación:
Advertencia
Ignorar estas advertencias
puede resultar en
la muerte o heridas
graves.
1
Enchufe correctamente el cable de alimenación en su
sitio. (una conexión suelta puede provocar un incendio).
5.
El montaje de la cámara en la pared o el techo, debe
realizarse de manera segura y debe qudar bien sujeta.
(la caída de una cámara puede causar lesiones
personales)
6.
No coloque objetos condctores (por ejemplo,
destornilladores, monedas, y objetos metálicos) o
recipientes con agua encima de la cámara (ellopodrá
provocar incendios, descargas eléctricas y la caída de
estos objetos.)
Precauciones
Ignorar estas precauciones
puede resultar en daños
materiaes.
Advertencias
1.
Asegúrse de utilizar sólo el adaptador estándar que se
especifica en la hoja de las características. (Página
28~31) El uso de cualquier otro adaptador podría causar
incendio, descarga eléctricas o daños materiales
irreversibles.
2.
Compbruebe los terminales externos de la conexión
primero antes de conectar la fuente de alimentación y
cables de señal. Conecte los cables de señal del
alarma a los terminales de la alarma. Conecte el
adaptador de DC12V a la entrada de corriente
SCC-C4201(P)/C4203(P), cerciorándose de que la
polaridad sea correcta. Conecte el DC12V o el adaptador
de AC24V a la entrada. SCC-C4301(P)/C4303(P).
3.
4.
No conecte varias cámaras con un solo adaptador
(Exceder la capacidad puede causar la
generación anormal de calor o provocar un incendio.)
7.
No instale la unidad en ubicaciones húmedas,
polvorientas ni hollinosas. (estas instalaciones pueden
causar incendios o descargas eléctricas.
8.
Si se observan olores extraños o humo de la instalación,
deje de usar el producto y desconecte el dispositivo de
la fuente de alimentación antes de ponerse en contacto
con el servicio técnico (El uso continuado en dichas
condiciones podrá causar incendios o descargas
eléctricas.
9.
Si este producto no funciona corectamente, póngase
en contacto con su proveedor o servicio técnico más
próximo. Nunca desmonte o modifique este producto de
ninguna manera. (los problemas originados por el
dsmontaje o reparaciones no autorizadas invalidarán la
garantía).
Es
10. No pulverice agua sobre este producto duante su
limpieza (el contact directo con eagua podrá povocar un
incendio o descargas eléctricas.) Limpie suavemente la
superficie con un paño seco. Nunca utilice detergentes u
otros productos químicos ya que su uso podrá decolorar
la superficie o dañar el acabado del producto.
2
Contenido
Precaución
1. No deje caer objetos sobre el producto ni sométalo
a golpes fuertes. Guárdelo lejos de una localización
conforme a la vibración excesiva o la interferencia
magnética.
2. No instale en una ubicación sujeta temperaturas
altas o bajas, ni en lugares de mucha humedad.
(El no respetar estas advertencias puede causar
incendios o descargas eléctricas.)
3. Evite exponer el producto a la luz solar directa, o a
fuentes de calor tales como calefactores o
radiadores. (El no respetar estas advertencias
puede provacar un inciendio o descarga elétrica.)
4. Si desea trasladar el producto ya instalado,
asegúrese de apagar la alimentación antes de
mover o volver a instalarlo.
5. Instale el producto en una localización bienventilada.
6. Desenchufe el aparato de la fuente de alimentación
en el caso de tormentas eléctricas. (El no respetar
estas advertencias puede provocar un incendio o
descarga eléctrica.)
1. Generalidades. ...................................................5
2. Nombres de las piezas y sus Funciones.........6
3. Instalación ........................................................ 8
Comprobar el Contenido.................................... 8
Preparación de los Cables ................................ 9
Conexión de los Cables................................... 10
4. Menú de Configuración ................................. 12
La estructura del Menú de Configuración .......
- CÁMERA ID...................................................
- IRIS................................................................
- BLC................................................................
- ALC ...............................................................
- MANUAL........................................................
- OBTURADOR................................................
- CAG (MOVIMIENTO) ....................................
- BALANCE BLANCO ......................................
- ESPECIAL .....................................................
- AUTO FOCUS ...............................................
- DET MOVI .....................................................
- PRESET ........................................................
- COLOR/ ByN .................................................
- SALIDA..........................................................
12
16 Es
17
17
17
18
19
20
21
22
24
24
25
26
28
5. Especificaciones............................................ 29
6. Otros ............................................................... 33
3
4
1
Generalidades
2
Nombres de las piezas y sus Funciones
Esta cámara es una cámara de vigilancia de altp
rendimiento que ofrece una capacidad máxima de zoom de
x220 en el modo de vigilancia con su lente x22 zoom y zoom
digital IC.
Es una cámara de multifunción equipada con todas las
características claves de las cámaras existentes de
vigilancia:
●
Función de día y noche (SCC-C4203(P), C4303(P))
que asegura la obtención de imágenes nítidas y claras
incluso por la noche.
●
La función de Luz reducida de Vigilancia permite capturar
imágenes bajo condiciones de luz muy reducida
●
La función de balance de blancos ofrece la identificación
exacta de color bajo cualquier condición de luz.
●
La función de BLC permite la compensación efectiva de
luz de fondo incluso debajo de focos u otra luz muy
intensa.
●
La función de enfoque automático que sigue
automáticamente y enfoca en el sujeto móvil.
●
RS485/función de mando a distancia con cable.
Sistema De Transmisión
●
●
SCC-C4201/C4203/C4301/C4303: Sistema de NTSC
SCC-C4201P/C4203P/C4301P/C4303P: Sistema de PAL
Sistema de alimentación / Consumo de energía
●
●
SCC-C4201(P), C4203(P) : DC 12V/5.0W
SCC-C4301(P), C4303(P) : AC 24V, DC 12V/5.5W
* Es posible que suceda lo siguiente en una cámara con
zoom incorporado.
- Cuando el índice del zoom se acerque al lado de TELE,
es posible que los bordes de la pantalla se atenúen.
- Al conectarse a un DVR o a una pantalla LCD, es posible
que se obstruyan las esquinas de la pantalla.
5
220x Power Zoom
LOW LIGHT
DIGITAL COLOR CAMERA
botón de configuración
Es
REMOTE
RS-485
POWER
En lugar de "POWER”, “DC
IN” figura en SCC-C4201(P)/
C4203(P).
En lugar de “POWER”, “PWR
IN” y en vez de “GND”,
“DC12&AC24V” figura en
SCC-C4301(P)/C4303(P).
botón de configuración
La función del botón de la configuración varía si
está actualmente en el modo de operación
normal (es decir, el menú de la configuración no se muestra
o en el modo del Menú de configuración.
☞ En el Modo Normal de Operación
- botones de ARRIBA/ ABAJO: Se utilizan como
botones tele del zoom y ancho del ZOOM
respectivamente.
- botones de IZQUIERDA/DERECHA: Se utilizan como
botones para el enfoque de objetos lejanos o
cercanos respectivamente.
- el botón de configuración: Se utiliza para acceder al
menú de la configuración.
Pulse el botón de configuración durante más de 3
segundos para acceder al menú de la configuración.
6
3
☞ Dentro del Menú de Configuración
Instalación
- botones de ARRIBA/ ABAJO: Se utilizan para mover el cursor
hacia arriba o abajo.
- botones de IZQUIERDA/DERECHA: Se utilizan para mover el
cursor a la izquierda o derecha, o para ver secuencialmente
los valores que pueden ser asignados a un parámetro.
- el botón de ENTER: Se utiliza para seleccionar un artículo del
menú secundario, y aceptar el valor actual.
Terminales REMOTOS de ZOOM/ ENFOQUE
Se utilizan para controlar el ZOOM/ ENFOQUE desde un
controlador remoto.Dependiendo de las condiciones de entrada,
los terminales se pueden configurar a 4 diversos modos.
(Rango de voltaje de operación: + 3V ~+13V, -3V ~-13V)
Artículo
código
A
B
C
D
tele
-6V
-6V
+6V
+6V
ancho
+6V
+6V
-6V
-6V
Lejos
+6V
-6V
+6V
-6V
cerca
-6V
+6V
-6V
+6V
Precaución: en caso de una entrada simultanea de RS485 y señal del
mando a distancia, el equipo responderá a la entrada de la
primera señal emitida. (Para una cámara con la versión
ROM 1.2 o superior, consulte la página 33.)
Antes de instalar
Verificar el Contenido del Paquete
Cerciórese de que los accesorios siguientes se incluyen
en el paquete.
Es
220x Powe
r Zoom
LOW
LIG
DIGITA
L CO
LOR
HT
CAM
ERA
SCC-C4201(P),C4203(P),
C4301(P),C4303(P)
Guía del usuario
Terminal de SALIDA DE ALARMA
Se emite una señal de salida de la alarma de este terminal
cuando se activa el mode DET MOVI o el modo de ByN se
activa. (Abrir Colector :DC24V 40mA Max)
Terminal de SALIDA DE VIDEO
Conecte la ENTRADA DE VÍDEO al monitor. La señal de video
de la cámara se transmite al monitor mediante este terminal.
Terminal RS485
Terminal del mando a distancia RS485
Soporte del transformador
Tornillos x 2 Terminales
LED indicador de alimentación
Este LED se enciende cuando el equipo está conecta.
Terminal ENTRADA DE ALIMENTACIÓN
Conecte el transformador aquí.
7
8
Preparación de los Cables
Conexión de los Cables
Para instalar y utilizar la cámara, prepare primero los cables
siguientes.
1. Conecte un extremo del cable de BNC a la SALIDA DE
VIDEO
Los requisitos para el transformador, que conecte con el
terminal de ENTRADA de la cámara, son como sigue:
2. Conecte el otro extremo del cable de BNC a la ENTRADA
DE VIDEO del monitor.
●
●
SCC-C4201(P), SCC-C4203(P) : DC12V 600mA
SCC-C4301(P), SCC-C4303(P) : AC24V 300mA
DC12V 600mA
Los terminales de video en la
parte posterior del monitor
Es
Cable BNC
REMOTE
El Cable de video
POWER
3. Conecte el transformador. Utilice un destornillador
"menos" para conectar una parte del transformador, que
consiste en dos líneas, con el terminal de POWER de la
cámara como sigue:
Utilice un cable BNC, tal como el que está demostrado abajo
para conectar la SALIDA DE VIDEO de la cámara al monitor.
interruptor de SELECCION de
añimentación debajo del
transformador de corriente
SELECTOR DE
ALIMENTACIÓN debajo
del transformador
9
RS-485
REMOTE
RS-485
POWER
10
4
4. Determine el tipo de fuente de alimentación y fije el
interruptor de la SELECCIÓN de la misma.
Después, enchufe el transformador en la toma de
corriente.
En este capítulo, veremos el sistema de menús del
SCC-C4201(P), C4203(P), C4301(P), y C4303(P). Primero,
veremos la estructura del Menú de Configuración y después
describiremos las funciones de cada apartado del mismo.
Los requisitos para el transformador de cada modelo son los
siguientes:
●
●
SCC-C4201(P), SCC-C4203(P) : DC12V 600mA
SCC-C4301(P), SCC-C4303(P) : AC24V 300mA
DC12V 600mA
5. Si la cámara funciona normalmente, la pantalla siguiente
se mostrará durante 5 segundos y después desaparece.
SAMSUNG PROTOCOLO
ADDR : 0
TIPO : RS-485, MEDIO
VELOCIDAD : 9600
TEST LENTE : OK !
Menú de Configuración
La estructura del Menú de Configuración
●
La Estructura del Menú de Configuración de SCC-C4201(P)
C MARA ID
OFF/ON...
IRIS
ALC.../MANU...
OBTURADOR
OFF/1/100(1/120)~1/10K
/AUTO X2~X128/FIJO X2~X128
Es
CAG
OFF/BASO/ALTO
MOVIMIENTO
M.DULC/DULC/NORM/R PI/M.R PI
BAL BLANCO
BA/BM/MANU...
ESPECIAL
...
IDIOMA
6. Los requisitos para el control RS485 son como sigue:
● Velcodidad de señal: 9600 bps
● Bits de datos: de 8 bits
● Stop bits: de 1 bit
● Bit de paridad: ninguno
ESPAN˝L
TIPO CMND
A/B/C/D
RS-485
...
PIP
OFF/ON...
ESPEJO
OFF/ON
D-ZOOM
OFF/X2~X10
POSI/NEGA
+/-
VEL ZOOM
1/2/3/4
DETALLE (0)
----I----
VUE
11
AUTO FOCUS
AF/MF/UNOAF
DET MOVI
OFF/ON...
PRESET
...
SALIDA
SALIR/GUARDAR/PRESET
12
La estructura del Menú de Configuración
●
La Estructura del Menú de Configuración de SCC-C4203(P)
●
La Estructura del Menú de Configuración de SCC-C4301(P)
C MARA ID
OFF/ON...
C MARA ID
OFF/ON...
IRIS
ALC.../MANU...
IRIS
ALC.../MANU...
OBTURADOR
OFF/1/100(1/120)~1/10K
/AUTO X2~X128/FIJO X2~X128
OBTURADOR
OFF/1/100(1/120)~1/10K
/AUTO X2~X128/FIJO X2~X128
CAG
OFF/BASO/ALTO
CAG
OFF/BASO/ALTO
MOVIMIENTO
M.DULC/DULC/NORM/R PI/M.R PI
MOVIMIENTO
M.DULC/DULC/NORM/R PI/M.R PI
BAL BLANCO
BA/BM/MANU...
BAL BLANCO
BA/BM/MANU...
ESPECIAL
...
ESPECIAL
...
IDIOMA
ESPAN˝L
IDIOMA
ESPAN˝L
V-SYNC
INT/LINEA...
V-SYNC
INT/LINEA...
TIPO CMND
A/B/C/D
TIPO CMND
A/B/C/D
RS-485
...
RS-485
...
PIP
OFF/ON...
PIP
OFF/ON...
ESPEJO
OFF/ON
ESPEJO
OFF/ON
D-ZOOM
OFF/X2~X10
D-ZOOM
OFF/X2~X10
POSI/NEGA
+/-
POSI/NEGA
+/-
VEL ZOOM
1/2/3/4
VEL ZOOM
1/2/3/4
DETALLE (0)
----I----
DETALLE (0)
----I----
VUE
VUE
13
Es
AUTO FOCUS
AF/MF/UNOAF
AUTO FOCUS
AF/MF/UNOAF
DET MOVI
OFF/ON...
DET MOVI
OFF/ON...
PRESET
...
PRESET
...
COLOR/ByN
COLOR/ByN/AUTO...
SALIDA
SALIR/GUARDAR/PRESET
SALIDA
SALIR/GUARDAR/PRESET
14
La estructura del Menú de Configuración
●
La Estructura del Menú de Configuración de SCC-C4303(P)
C MARA ID
OFF/ON...
IRIS
ALC.../MANU...
OBTURADOR
OFF/1/100(1/120)~1/10K
/AUTO X2~X128/FIJO X2~X128
CAG
OFF/BASO/ALTO
MOVIMIENTO
M.DULC/DULC/NORM/R PI/M.R PI
BAL BLANCO
BA/BM/MANU...
ESPECIAL
...
(CONFIGURACION)
CÁMARA ID
OFF
IRIS
ALC...
OBTURADOR
AUTO X4
MOVIMIENTO
NORM
BAL BLANCO
BA
ESPECIAL
...
AUTO FOCUS
UNOAF
DET MOVI
OFF
PRESET
...
SALIDA
(CONFIGURACION)
CÁMARA ID
OFF
IRIS
ALC...
OBTURADOR
AUTO X4
MOVIMIENTO
NORM
BAL BLANCO
BA
ESPECIAL
...
AUTO FOCUS
UNOAF
DET MOVI
OFF
PRESET
...
COLOR/ByN
COLOR
SALIDA
SALIR
SALIR
[SCC-C4201(P),SCC-C4301(P)]
[SCC-C4203(P),SCC-C4303(P)]
la opción de COLOR/ ByN está disponible sólo con el
SCC-C4203(P) y C4303(P).
Es
CÁMERA ID
IDIOMA
ESPAN˝L
V-SYNC
INT/LINEA...
TIPO CMND
A/B/C/D
RS-485
...
PIP
OFF/ON...
ESPEJO
OFF/ON
D-ZOOM
OFF/X2~X10
POSI/NEGA
+/-
VEL ZOOM
1/2/3/4
DETALLE (0)
----I----
En el menú de identificación de CÁMARA, se puede
asignar una identificación a la cámara que aparece en la
pantalla del monitor. Si selecciona ON... para la
identificación de CÁMARA y presiona el botón ENTER, una
pantalla desde la que puede asignar una identificación de
cámara aparecerá. Usted puede utilizar los caracteres
alfanuméricos y algunos caracteres especiales que se
muestran en la pantalla para asignar un máximo de 20
caracteres para la identificación de cada CÁMARA.
Usted puede utilizar la opción POSICION para colocar la
identificación de cámara donde quiera en la pantalla.
VUE
15
AUTO FOCUS
AF/MF/UNOAF
DET MOVI
OFF/ON...
PRESET
...
COLOR/ByN
AUTO...
SALIDA
SALIR/GUARDAR/PRESET
(CONFIGURACION)
CÁMARA ID
ON...
IRIS
ALC...
OBTURADOR
AUTO X4
MOVIMIENTO
NORM
BAL BLANCO
BA
ESPECIAL
...
AUTO FOCUS
UNOAF
DET MOVI
OFF
PRESET
...
COLOR/ByN
COLOR
SALIDA
SALIR
(CAMERA ID)
Presione el
bóton
ENTER
A B C D
MNO P
Y Z 0 1
: ! -
E
Q
2
+
F
R
3
*
G
S
4
(
H
T
5
)
I J K L
U VWX
6 7 8 9
/
SP
SP
POSICION...
VUE
ZOOM.CAMERA.........
16
IRIS
El nivel de salida de video al monitor se puede controlar
mediante el lente de iris según la intensidad de la luz entrante.
Este producto está equipado con un lente de iris.
En el menú ALC (la Compensación Ligera Auto), se puede fijar el
nivel de salida de video. En el menú MANU, se puede fijar
manualmente la apertura y el cierre del iris.
BLC (Opción en el Menú ALC)
TAMAÑO
➞
Si se selecciona ALC para el IRIS y presiona el botón ENTER,
una pantalla en la que usted puede fijar el nivel de la salida de
video y el BLC aparecerá. En la opción NIVEL, usted puede
utilizar los botones de la IZQUIERDA/ DERECHA para fijar el
nivel de salida de video. Si usted fija el BLC en ON, la función de
BLC se aplicará a la zona de la pantalla especificada en la
opción de ZONA. La opción de la ZONA se puede fijar a
PRESET o a USUARIO para especificar el área de la pantalla en
la que la función de BLC se aplicará. Si usted fija la opción de
ZONA a PRESET, la función de BLC será aplicada al área
especificada en la configuración por defecto de fábrica.
17
➞
➞
ALC
(CONFIGURACION)
CÁMARA ID
OFF
IRIS
ALC...
OBTURADOR
AUTO X4
MOVIMIENTO
NORM
BAL BLANCO
BA
ESPECIAL
...
AUTO FOCUS
UNOAF
DET MOVI
OFF
PRESET
...
COLOR/ByN
COLOR
SALIDA
SALIR
TAMAÑO
➞
Si se utiliza una cámara normal con una fuente de luz intensa,
como un foco que alumbra desde detrás del sujeto, este
aparecerá oscuro en la imagen del monitor a causa de
la contraluz. Para el SCC-C4201(P), C4203(P), C4301(P), y
C4303(P), fije apropiadamente la opción BLC en el menú
de ALC para resolver el problema de luz y por consiguiente
obtener una imagen clara incluso debajo de un foco o fuente
de luz muy intensa.
Si usted fija la opción de ZONA a USUARIO y presiona el botón
ENTER, usted puede personalizar el área para requisitos
particulares al que se aplicará la función de BLC. Usted puede
especificar el tamaño del área utilizando los botones arriba,
abajo, izquierda y derecha.
Después de fijar el tamaño del área, presione el botón de
ENTER. El área especificada empezará a parpadear. Entonces,
usted puede utilizar los botones de ARRIBA, ABAJO,
IZQUIERDA y DERECHA para especificar la localización del
área. Utilice el botón ENTER y los botones de ARRIBA, ABAJO,
IZQUIERDA y DERECHA para especificar el tamaño del área y
para posicionar el área. Presione el botón ENTER otra vez para
salida del menú de configuración de ZONA.
(ALC)
Presione el
bóton
ENTER
ZONA
BLC
NIVEL
VUE
PRESET...
OFF
( 0) ----I----
POSICIÓN
Utilice los
botones de
arriba, abajo,
izquierda y
derecha.
Es
POSICIÓN
MANU
Si se seleciona MANU para el IRIS y presione el botón
ENTER, una pantalla en la que se puede ajustar
manualmente el iris a un nivel deseado aparecerá.
En la opción NIVEL, usted puede utilizar los botones de la
IZQUIERDA/ DERECHA para fijar la apertura y el cierre
manual del iris.
(CONFIGURACION)
CÁMARA ID
OFF
IRIS
MANU...
OBTURADOR
AUTO X4
MOVIMIENTO
NORM
BAL BLANCO
BA
ESPECIAL
...
AUTO FOCUS
UNOAF
DET MOVI
OFF
PRESET
...
COLOR/ByN
COLOR
SALIDA
SALIR
(MANUAL)
Presione el
bóton
ENTER
NIVEL
VUE
( 00) ----I----
18
OBTURADOR
CAG(MOVIMIENTO)
En la opción del OBTURADOR, usted puede especificar las
velocidades del obturador electrónico de alta velocidad, la
velocidad automática lenta, y fijar la velocidad lenta del obturador.
La velocidad alta del obturador electrónico soporta 7 opciones de
velocidad del obturador a partir de la 1/100 segundos hasta
1/10K, segundos mientras el auto obturador de velocidad baja
soporta hasta 12 velocidades del obturador desde x2 hasta x128
respectivamente. El obturador de la velocidad baja le permite fijar
la velocidad del obturador a un ajuste lento para obtener imágenes
más claras al grabar en condiciones de poca iluminación.
Seleccione un valor bajo automático para que la cámara detecte de
forma automática la cantidad de luz y fije automáticamente la
velocidad del obturador a un ajuste lento según el grado de
oscuridad. Seleccione la opción "FIJO" para especificar la
velocidad del obturador manulamente. Los valores que siguen
inmediatamente el "AUTO" y "FIJO" indican el número de campos
acumulados. Cuanto más alto es el valor del campo, más lenta
es la velocidad del obturador. Por consiguiente, una imagen
de foto será más nítida mientras una imagen de video grabada
con el mismo valor será más borrosa.
En la opción del CAG (el Control Automático de Aumento) se puede
especificar si controlar automáticamente el AUMENTO cuando el
video obtenido está por debajo de un cierto nivel de brillo porque se
grabó con iluminación insuficiente. Para controlar automáticamente
el AUMENTO, ajuste la opción de CAG a BAJO o ALTO. Si se ajusta
la opción de CAG a BAJO, el máximo AUMENTO de CAG se fijará a
un nivel bajo, y si se fija en ALTO, el
máximo AUMENTO se fijará en alto.
(CONFIGURACION)
CÁMARA ID
OFF
Si la opción del OBTURADOR se fija
IRIS
MANU...
a una velocidad automática baja, la
OBTURADOR
OFF
opción CAG se cambiará a la función
CAG
BAJO
BAL BLANCO
BA
de MOVIMIENTO. En la opción del
ESPECIAL
...
MOVIMIENTO, utilice los botones de
AUTO FOCUS
UNOAF
DET MOVI
OFF
IZQUIERDA y DERECHA para
PRESET
...
seleccionar de entre M.DULC, DULC,
COLOR/ByN
COLOR
NORM, RÁPI, y M.RÁPI
SALIDA
SALIR
(CONFIGURACION)
CÁMARA ID
OFF
IRIS
MANU...
OBTURADOR
OFF
CAG
BAJO
BAL BLANCO
BA
ESPECIAL
...
AUTO FOCUS
UNOAF
DET MOVI
OFF
PRESET
...
COLOR/ByN
COLOR
SALIDA
SALIR
OBTURADOR
➞ OFF ➞ 1/100(1/120) ➞ 1/250 ➞ 1/500 ➞ 1/1000 ➞ 1/2000 ➞
1/4000 ➞ 1/10K ➞ OFF ➞ AUTOX2 ➞ AUTOX4 ➞ AUTOX6 ➞
AUTOX8 ➞ AUTOX12 ➞ AUTOX16 ➞ AUTOX24 ➞ AUTOX32
➞ AUTOX48 ➞ AUTOX64 ➞ AUTOX96 ➞ AUTOX128 ➞ OFF
➞ FIJOX2 ➞ FIJOX4 ➞ FIJOX6 ➞ FIJOX8 ➞ FIJOX12 ➞
FIJOX16 ➞ FIJOX24 ➞ FIJOX32 ➞ FIJOX48 ➞ FIJOX64 ➞
FIJOX96 ➞ FIJOX128
19
Es
☞
☞
☞
☞
☞
M.DULC: Utilice esta opción para aumentar al máximo la
resolución de una imagen de foto aumentando el valor más
bajo del AUMENTO de CAG y de la escala del obturador bajo
de la velocidad a su máximo. (Esto se utiliza principalmente
para controlar objetos casi inmóbiles grabados en lugares
oscuros.)
DULC: Utilice esta opción para aumentar la resolución de
una imagen inmóvil tanto como sea posible aumentando un
valor bajo del AUMENTO de CAG y la escala del obturador
bajo de la velocidad. (esto se utiliza principalmente para
visualizar los objetos que hacen movimiento a penas
perceptibles en lugares oscuros.)
NORM: Utilice esta opción para mostrar una imagen normal
con un valor medio del AUMENTO de CAG y la escala del
obturador normal de la velocidad. (esto se utiliza
principalmente para visualizar objetos móviles en lugares
oscuros.)
RÁPI: Utilice esta opción para enfocar en los objetos móviles
disminuyendo un valor alto del AUMENTO de CAG y la escala
del obturador normal de la velocidad.
(esto se utiliza principalmente para visualizar objetos que en
movimiento en lugares oscuros.)
M.RÁPI: Utilice esta opción para enfocar en los objetos
móviles disminuyendo el valor más alto del AUMENTO de CAG
y la escala del obturador bajo de la velocidad a su mínimo.
(Esto se utiliza para controlar principalmente objetos móviles
rápidos en lugares oscuros.)
20
BAL BLANCO
ESPECIAL
En la opción de BAL BLANCO, se puede fijar la función de
Balance de Blancos, que le permite ver el color blanco
correctamente bajo iluminación de cualquier color.
Si se fija la opción de BAL BLANCO a BA, la cámara controlará
continuamente los cambios en el ambiente del color y fijará
automáticamente el Balance de Blancos según la temperatura
del color. Si se ha seleccionado la opción de BAL BLANCO a BM,
coloca un papel blanco delante de la cámara, y pulse el botón
ENTER, el Auto Control Balance de Blancos se activará para fijar
una vez la temperatura del color y este valor se mantendrá. Si
usted fija la opción de BAL BLANCO a MANUAL, puede modificar
el Balance de Blancos para tener en cuenta la actual condición de
la iluminación.
Usted puede ajustar manualmente el IDIOMA, V-SYNC, TIPO
CMND, RS-485, PIP, ESPEJO, D -ZOOM, POSI/NEGA, VEL
ZOOM, y el DETALLE.
☞
☞
☞
3200°K : Seleccine para ajustar la temperatura del color a
3200°K.
5600°K : Seleccine para ajustar la temperatura del color a
5600°K.
UTIL: Seleccine para ajustar la temperatura del color
seleccionando los valores apropiadoss de los gráficos
ROJO y AJUL.
MANU: Si Selecciona la opción de MANU y presiona el botón
ENTER, una pantalla en la que usted puede seleccionar
manualmente el balance de blancos aparecerá. En la opción de
PRESET, utilice los botones de la IZQUIERDA y DERECHA
para seleccionar 3200°K, 5600°K, o los valores del USUARIO.
(CONFIGURACION)
CÁMARA ID
OFF
IRIS
ALC...
OBTURADOR
AUTO X4
MOVIMIENTO
NORM
BAL BLANCO
MANU...
ESPECIAL
...
AUTO FOCUS
UNOAF
DET MOVI
OFF
PRESET
...
COLOR/ByN
COLOR
SALIDA
SALIR
21
(ABB/MANUAL)
Presione el
bóton
ENTER
PRESET OFF(UTIL)..
ROJO (-2C) ---I----AJUL
(-5B) -I------VUE
La opción de V- SINCRONIZACION está disponible sólo con el
SCC-C4301(P) y C4303(P).
Si se pulsa el botón ENTER una vez dentro del menú se muestra "--"
la pantalla ESPECIAL en la que usted se puede fijar las funciones
especiales aparecerá. Al activar cada función, utilice los botones de la
IZQUIERDA y DERECHA para ajustar la opción deseada.
(CONFIGURACION)
CAMARA ID
OFF
IRIS
ALC...
OBTURADOR
AUTO X4
MOVIMIENTO
NORM
BAL BLANCO
MANU...
ESPECIAL
...
AUTO FOCUS
UNOAF
DET MOVI
OFF
PRESET
...
COLOR/ByN
COLOR
SALIDA
SALIR
Presione el
bóton
ENTER
(ESPECIAL)
IDIOMA
V-SYNC
TIPO CMND
RS-485
PIP
ESPEJO
D-ZOOM
POSI/NEGA
VEL ZOOM
DETALLE ( 0)
VUE
ESPANÕL
INT
A
...
OFF
OFF
OFF
+
3
----I--
Es
Especifique el método vertical de sincronización
☞ Vque- SYNC:
usará el SCC-C4301(P) y C4303(P). Hay 2 tipos de
señal vertical de sincronización que la cámara soporta: el
modo de INT en el que la señal es generada por el modo
interno de reloj y LINEA de cámara que ajusta la
sincronización vertical por la frecuencia externa de la
alimentación. Si se selecciona la LINEA y pulse el botón
ENTER, la pantalla de la LINEA BLOC en la que se puede
ajustar la fase del BLOQUEO DE LINEA aparecerá. Usted
puede especificar el nivel deseado de la fase en la opción de
FASE. A continuación pulse el botón ENTER.
(ESPECIAL)
IDIOMA
V-SYNC
TIPO CMND
RS-485
PIP
ESPEJO
D-ZOOM
POSI/NEGA
VEL ZOOM
DETALLE ( 0)
VUE
ESPANÕL
LINEA...
A
...
OFF
OFF
OFF
+
3
----I--
(LINEA BLOC)
Presione el
bóton
ENTER
FASE
VUE
( 000)----I----
Si se utiliza alimentación DC, funcionará sólo en el
modo de INT. Para la operación del modo de LINEA,
utilice el transformador de alimentación de DC (50Hz)
22
☞
☞
TIPO CMND: Se puede seleccionar el modo de A, B, C, o D
dependiendo de la entrada del terminal del mando a distancia
de cable. (Véase página 7.)
RS-485: Establece la DIRECCIÓN, PROTOCOLO, y el INDICE
de BAUDIOS de la comunicación RS-485.
Precaución: un error de comunicación puede producirse si se
conecta más de una cámara con la misma
dirección de indetificación.
☞
PIP: Esta es la pantalla de PIP (imagen en imagen).
Mostrará una imagen reducida por 1/16 de la pantalla principal
sólo al operar el Digital Zoom. Si elije la opción de PIP a ON y
pulse el botón ENTER, se puede utilizar los botones de arriba,
abajo, izquierda y la derecha para fijar la posición de PIP.
* La opción de PIP no funciona en un modo del obturador de
velocidad baja. La opción de ESPEJO no funciona en la ventana
de PIP.
(ESPECIAL)
IDIOMA
V-SYNC
TIPO CMND
RS-485
PIP
ESPEJO
D-ZOOM
POSI/NEGA
VEL ZOOM
DETALLE ( 0)
VUE
☞
☞
☞
☞
ESPANÕL
INT
A
...
ON...
OFF
OFF
+
3
----I--
Apriete el
botón
ENTER.
ESPEJO: invierte Horizontalmente la señal de salida de video.
D -ZOOM: Ajusta la ampliación del Zoom Digital.
El nivel de ampliación puede ser fijado a hasta x10.
POSI/NEGA: Sallida normal o inversa de la señal de video.
VEL ZOOM: En la opción de VEL ZOOM, utilice los botones
de la IZQUIERDA y DERECHA para ajustar la velocidad
de la siguiente manera:
1: Tarda unos 17 segundos a partir de 1 X en ampliar x22 (velocidad más lenta).
2: Tarda unos 10 segundos a partir de 1 X en ampliar x22 (velocidad lenta).
3: Tarda unos 6 segundos a partir de 1 X en ampliar x22X (velocidad rápida).
4: Tarda unos 3 segundos a partir de 1 X en ampliar x22 (velocidad más rápida).
☞
23
PIP
DETALLE: Ajusta la nitidez.
AUTO FOCUS
En la opción de AUTO FOCUS se puede especificar el método de
enfoque de entre AF, MF, o ONEAF.
☞
☞
☞
AF: enfoca automáticamente de forma continua controlando la
pantalla en el modo de AUTO FOCUS. No procesa el botón de
entrada del ENFOQUE porque enfoca automáticamente
durante mediante el ZOOM.
MF: Se puede ajustar
(CONFIGURACION)
manualmente el enfoque.
CAMARA ID
OFF
IRIS
ALC...
UNOAF: enfoca cerca de 5
OBTURADOR
AUTO X4
MOVIMIENTO
NORM
segundos sólo cuando el ZOOM
BAL BLANCO
MANU...
se mueve a Tele. Es igual que
ESPECIAL
...
AUTO FOCUS
UNOAF
el modo de MF mientras en el
DET MOVI
ON...
modo de PARADA, e igual
PRESET
...
COLOR/ByN
COLOR
que el modo de AF después de
SALIDA
SALIR
Es
Tele ZOOM.
DET MOVIMIENTO
En la opción de DET MOVIMIENTO, se puede fijar la función de
detección del Movimiento, la sensibilidad de detección del
movimiento, y el área de detección del movimiento. Si se fija la
función de detección de Movimiento, usted puede detectar un
movimiento de un intruso y comprobarlo en el monitor y el terminal
de SALIDA DE ALARMA.
Si fija la alarma localizada debajo de COLOR/ByN AUTO de ON
mientras tiene seleccionada la función de DET MOVI, la salida
de alarma no puede enviar movimientos.
* La función de detección de movimiento funciona basándose en el
cambio de brillo en el área de configuración. Por tanto, es posible
que se produzca un funcionamiento erróneo dependiendo de la
diferencia de brillo entre el fondo y el objeto captado, o bien el
estado de la configuración del área, etc.
(CONFIGURACION)
CAMARA ID
OFF
IRIS
ALC...
OBTURADOR
AUTO X4
MOVIMIENTO
NORM
BAL BLANCO
MANU...
ESPECIAL
...
AUTO FOCUS
UNOAF
DET MOVI
ON...
PRESET
...
COLOR/ByN
COLOR
SALIDA
SALIR
(DET MOVI)
Apriete el
botón
ENTER.
ZONA
SENSIBILIDAD
VUE
PRESET...
MEDIO
24
Si selecciona ON y pulsa el botón ENTER, la pantalla del DET
MOVI aparecerá. Se puede fijar la ZONA en la que la función de
detección de Movimiento se aplicará a PRESET o a USUARIO. Si
se fija la opción de ZONA a PRESET, la función de detección de
Movimiento se aplicará a las zonas fijadas por defecto de fábrica.
Si se fija la opción de ZONA a USUARIO y pulsa el botón ENTER,
se puede cambiar el tamaño del área y posición y seleccionar el
área donde usted quiera aplicar la función de detección de
Movimiento. Se puede especificar el tamaño del área utilizando los
botones de arriba, abajo, izquierda y derecha. Si el área no
parpadea, presione el botón ENTER. Cuando el área empieza a
parpadear, utilice los botones de ARRIBA, ABAJO, IZQUIERDA y
DERECHA para especificar la localización del área. Utilice el botón
ENTER y los botones de arriba, abajo, izquierda y derecha para
especificar el tamaño del área y para posicionar el área. Presione
el botón ENTER otra vez para salida del menú de configuración de
ZONA. Usted puede utilizar la opción de la SENSIBILIDAD para
ajustar la sensibilidad de la detección de movimiento. Cuanto más
alto es el ajuste, más sensible será la detección de movimiento.
TAMAÑO
0 H 1
2
5
6
7
10
11
12
15
16
17
20
21
22
25
26
27
30
31
VUELTA ORIG
PRESET NO. 0
3
8
13
18
23
28
ID : PRESET Ø
4
9
14
19
24
29
RET
HORA
PROG POSICIÓN
PRESET ID
...
ON...
SALIDA
SALIR
Presione el
botón
ENTER
Si selecciona un valor predeterminado y presiona el botón ENTER, una
pantalla como la de arriba aparecerá.
☞
☞
PROG POSICIÓN: Seleccione para almacenar la posición del
ZOOM y ENFOQUE.
PRESET ID: Seleccione para ajustar la identificación para una
posición FIJADA, igual que en el caso de identificación de
Es
Cámara.
TAMAÑO
➞
➞
➞
➞
POSICIÔN
POSICIÔN
Utilice los
botones de
arriba, abajo,
izquierda y
de la derecha
La función VOLVER A INICIO está disponible con una cámara
con la versión ROM 1.2 o superior. Para ver instrucciones de
uso de esta función, consulte la página 33.
COLOR/ByN
POSICIÔN
La opción de COLOR/ ByN está disponible sólo con el
SCC-C4203(P) y C4303(P).
PRESET
(CONFIGURACION)
CÁMARA ID
OFF
IRIS
ALC...
OBTURADOR
AUTO X4
MOVIMIENTO
NORM
BAL BLANCO
MANU...
ESPECIAL
...
AUTO FOCUS
UNOAF
DET MOVI
ON...
PRESET
...
COLOR/ByN
COLOR
SALIDA
SALIR
(PRESET MAPA)
Presione el
botón
ENTER
0 H 1
2
5
6
7
10
11
12
15
16
17
20
21
22
25
26
27
30
31
VUELTA ORIG
3
8
13
18
23
28
4
9
14
19
24
29
RET
HORA
ID : PRESET Ø
Se puede almacenar hasta 128 posiciones de ZOOM y ENFOQUE
con el PRESET. Se puede utilizar la función de PRESET cuando
se conecta el SSC-1000 al RS-485.
25
(PRESET MAPA)
En esta opción de COLOR/ ByN, se puede fijar el Filtro de IR (infrarrojo) a
ON o OFF. En el modo de ByN, el Filtro de IR se apaga y el nivel de la
sensibilidad se aumenta a un nivel comparable con la de una cámara de
blanco y negro. En el modo del COLOR, el Filtro de IR está activado y
la pantalla vuelve al modo normal conforme el nivel de sensibilidad se
disminuye.
☞
☞
☞
COLOR: El Filtro de IR está activado y la pantalla es normal.
ByN: El Filtro de IR está apagado y la pantalla muestra
imágenes en B/N. (La sensibilidad a luz reducida se aumenta a
un nivel comparable con el de una cámara de blanco y negro.)
AUTO: Seleccione para cambiar automáticamente entre el
modo de COLOR y el modo de ByN dependiendo de la
cantidad de la luz.
26
En condiciones de luz reducida, el Filtro de IR se apaga y la
sensibilidad a la luz reducida se aumenta cambiando al modo
de ByN, pero en condiciones de intensa luz, el Filtro de IR se
enciende y la sensibilidad se disminuye cambiando al modo de
COLOR. Si se selecciona la opción AUTO y se pulsa el botón
ENTER, una pantalla en la que se puede fijar la ALARMA a
ON/OFF, la SATURACTION a ON/OFF, el NIVEL de ByN y
TIEMPO DEL CICLO aparecerá.
- ALARMÁ ON: Envia señales a través del puerto de salida de
la ALARMA en el modo de ByN.
- ALARMA OFF: El puerto de salida de la ALARMA se
sincroniza con la función de DET MOVI a pesar del modo de
COLOR/ByN.
- SATURACTION ON: La señal de color es transmitida junta
con la señal de video compuesta de blanco y negro.
SATURACTION OFF: La señal de color no no es transmitida.
- NIVEL: Se puede ajustar el nivel de brillo que cambia del
modo de COLOR al modo de ByN en 3 pasos: BAJO, MEDIO,
y ALTO.
- CICLO TIEMPO: Ajusta el tiempo para cambiar entre el modo
del COLOR y de ByN dependiendo de los cambios en la
cantidad de la luz. Se puede fijar el CICLO TIEMPO a 10 seg
(S), 30 seg, 60 seg, o 300 seg (L).
SALIDA
La opción de SALIDA se utiliza para salida del modo de Menú de
Configuración y para volver al modo de Operación Normal.
☞
☞
☞
SALIR: Seleccione para ignorar cualquier cambio que usted
haya hecho y para restaurar los ajustes previamente
guardados.
GUARDAR: Seleccione para salir los ajustes que se hayan
cambiado hasta ahora.
PRESET: Seleccione para ignorar cualquier cambio que usted
haya hecho y para restaurar los valores de cpmfigración por
defecto de fábrica.
Es
En el modo de AUTO, CAG funcionará en el modo de alta velocidad,
y no se podrá puede cambiar manualmente, cuando se muestra "---".
(CONFIGURACION)
CAMARA ID
OFF
IRIS
ALC...
OBTURADOR
AUTO X4
MOVIMIENTO
NORM
BAL BLANCO
MANU...
ESPECIAL
...
AUTO FOCUS
UNOAF
DET MOVI
ON...
PRESET
...
COLOR/ByN
AUTO...
SALIDA
SALIR
(ByN CONFIGURACION)
Presione el
botón
ENTER.
ALARMA
SATURACTION
NIVEL
CICLO TIEMPO
VUE
OFF
ON
MEDIO
S--I----L
Precaución: Si se utiliza una fuente de luz infrarroja mientras en
el modo AUTO, el malfuncionamiento AUTO de la conmutación y
el malfuncionamiento AF de la cámara pueden ocurrir.
27
28
5
Especificaciones
SCC-C4201/C4203
SCC-C4201P/C4203P
artículo
Tipo de Producto
Alimentación
Consumo elétrico
Sistema de Transmisión
descripción
- Cámara Zoom 22x
- DC 12V ± 10%
- 5.0 W
- Sistema de Color Estándar NTSC
observación
artículo
Tipo de Producto
Alimentación
Consumo elétrico
Sistema de Transmisión
Dispositivo de imagen
- 1/4 inch IT CCD
Dispositivo de imagen
Píxeles eficaces
- 768(H) x 494 (V)
Píxeles eficaces
descripción
- DC 12V ± 10%
- 5.0 W
- Sistema de Color Estándar PAL
- 1/4 inch IT CCD
- 752 (H) X 582 (V)
Método de digitalización
- 525 líneas, 2:1 entrelazado
Método de digitalización
- 625 líneas, 2:1 entrelazado
Frecuencia de Línea
- Horizontal : 15,734 Hz (INT)
- Vertical : 59.94 Hz (INT)
Frecuencia de Línea
- Horizontal : 15,625 Hz(INT)
- Vertical : 50 Hz(INT)
Método De Sincronización
- SÓLO INT
Método De Sincronización
- 480 Líneas de TV
Resolución
- 480 Líneas de TV
Indice S/N
- 52dB(CAG OFF)
Indice S/N
- 52dB(CAG OFF)
Iluminación Mínima de
Escena
Iluminación Mínima de
Escena
- 0.3Lux(el Sentido Arriba X4)
(0.01Lux)
- ByN(SCC-C4203P):0.4Lux
(0.003Lux)
Balance blanco
- MODE BA/BM/MANU (3200°K, 5600°K,
R/Control de la Ganancia B)
Balance blanco
- MODE BA/BM/MANU (3200°K, 5600°K,
R/Control de la Ganancia B)
Señal de salida
- Video de Compuesto Fuera: 1.0 Vp-p
75ohms/BNC
Señal de salida
- Video de Compuesto Fuera: 1.0 Vp-p
75ohms/BNC
Lente
Obturador Electrónico
Compensación de luz ambiental
Sense up
Zoom Digital
- 22x Lente Zoom en una sola unidad
- longitud Focal: 3.6 a 79.2 mm
- Abertura: F1.6(lejos),F3.8(Tele)
- El Filtro del INFRARROJO ON/OFF (SCC-C4203 Sólo)
- Off, 1/100, 1/250, 1/500, 1/1K, 1/2K,
1/4K, /10K seg
- off/on (configuración de Area)
- off/Auto 2x ~128x/Fijo 2x ~128x
- off/on (x10), PEPITA
Lente
Obturador Electrónico
Compensación de luz ambiental
Sense up
Zoom Digital
- 22x Lente Zoom en una sola unidad
- longitud Focal: 3.6 a 79.2 mm
- Abertura: F1.6(lejos),F3.8(Tele)
- El Filtro del INFRARROJO ON/OFF (SCC-C4203P Sólo)
- Off, 1/120, 1/250, 1/500, 1/1K, 1/2K,
1/4K, /10K seg
- off/on (configuración de Area)
- off/Auto 2x ~128x/Fijo 2x ~128x
- off/on (x10), PEPITA
- off/on (Area/ajuste de Sensibilidad)
Detección De Movimiento
- off/on (Area/ajuste de Sensibilidad)
Temperatura y humedad
de Funcionamiento
- 14°F ~ +122°F, ~90 %
Temperatura y humedad
de Funcionamiento
- 14°F ~122°F, ~90 %
dimensiones
- 59.5 x 60.5 x 109.5mm
dimensiones
Detección De Movimiento
Peso
29
- 375g
Peso
Es
- SÓLO INT
Resolución
- 0.3Lux(el Sentido Arriba X4)
(0.01Lux)
- ByN(SCC-C4203):0.4Lux
(0.003Lux)
observación
- Cámara Zoom 22x
- 59.5 x 60.5 x 109.5mm
- 375g
30
Las especificaciones
SCC-C4301/C4303
SCC-C4301P/C4303P
artículo
Tipo de Producto
Alimentación
Consumo elétrico
Sistema de Transmisión
descripción
- 22x Zoom Camera
- AC 24V (60Hz) or DC 12V ± 10%
- 5.5W
- Sistema de Color Estándar NTSC
observación
artículo
Tipo de Producto
Alimentación
Consumo elétrico
Sistema de Transmisión
descripción
- AC 24V (50Hz) or DC 12V ± 10%
- 5.5W
- Sistema de Color Estándar PAL
Dispositivo de imagen
- 1/4 inch IT CCD
Dispositivo de imagen
- 1/4 inch IT CCD
Píxeles eficaces
- 768(H) X 494(V)
Píxeles eficaces
- 752(H) X 582(V)
Método de digitalización
Frecuencia de Línea
Método De Sincronización
- 525 líneas, 2:1 entrelazado
- Horizontal : 15,734 Hz(INT), 15,750 Hz(L/L)
- Vertical : 59.94 Hz(INT), 60 Hz(L/L)
- Mirada de INT/Línea
Método de digitalización
Frecuencia de Línea
Método De Sincronización
- 625 líneas, 2:1 entrelazado
- Horizontal : 15,625 Hz(INT), 15,625 Hz(L/L)
- Vertical : 50 Hz(INT), 50 Hz(L/L)
- 480 Líneas de TV
Resolución
- 480 Líneas de TV
Indice S/N
- 52dB(CAG OFF)
Indice S/N
- 52dB(CAG OFF)
Iluminación Mínima de
Escena
Iluminación Mínima de
Escena
- 0.3Lux(el Sentido Arriba X4)
(0.01Lux)
- ByN(SCC-C4303P):0.4Lux
(0.003Lux)
Balance blanco
- MODE BA/BM/MANU (3200°K, 5600°K,
R/Control de la Ganancia B)
Balance blanco
- MODE BA/BM/MANU (3200°K, 5600°K,
R/Control de la Ganancia B)
Señal de salida
- Video de Compuesto Fuera: 1.0 Vp-p
75ohms/BNC
Señal de salida
- Video de Compuesto Fuera: 1.0 Vp-p
75ohms/BNC
Lente
Obturador Electrónico
Compensación de luz ambiental
Sense up
Zoom Digital
- 22x Lente Zoom en una sola unidad
- longitud Focal: 3.6 a 79.2 mm
- Abertura: F1.6(lejos),F3.8(Tele)
- El Filtro del INFRARROJO ON/OFF (SCC-C4303 Sólo)
- Off, 1/100, 1/250, 1/500, 1/1K, 1/2K,
1/4K, /10K seg
- off/on (configuración de Area)
- off/Auto 2x ~128x/Fijo 2x ~128x
- off/on (x10), PEPITA
Lente
Obturador Electrónico
Compensación de luz ambiental
Sense up
Zoom Digital
- 22x Lente Zoom en una sola unidad
- longitud Focal: 3.6 a 79.2 mm
- Abertura: F1.6(lejos),F3.8(Tele)
- El Filtro del INFRARROJO ON/OFF (SCC-C4303P Sólo)
- Off, 1/120, 1/250, 1/500, 1/1K, 1/2K,
1/4K, /10K seg
- off/on (configuración de Area)
- off/Auto 2x ~128x/Fijo 2x ~128x
- off/on (x10), PEPITA
Detección De Movimiento
- off/on (Area/ajuste de Sensibilidad)
Detección De Movimiento
- off/on (Area/ajuste de Sensibilidad)
Temperatura y humedad
de Funcionamiento
- 14°F ~122°F, ~90 %
Temperatura y humedad
de Funcionamiento
- 14°F ~122°F, ~90 %
dimensiones
- 59.5 x 60.5 x 143mm
dimensiones
Peso
31
- 500g
Peso
Es
- Mirada de INT/Línea
Resolución
- 0.3Lux(el Sentido Arriba X4)
(0.01Lux)
- ByN(SCC-C4303):0.4Lux
(0.003Lux)
observación
- Cámara Zoom 22x
- 59.5 x 60.5 x 143mm
- 500g
32
6
Otros
Terminales remotos ZOOM/ENFOQUE
Estos terminales activan las funciones ZOOM/ENFOQUE,
CONTROL DE MENÚ, VOLVER A INICIO y AF utilizando un
controlador externo. Podrían configurarse en uno de los cuatro
modos en función del estado de entrada: A, B, C y D. (TIPO
ESPECIAL - CTRL)
(Intervalo de tensiones de servicio: +3V ~ +13V, -3V ~ -13V)
1) Si la tensión se aplica al terminal ZOOM o ENFOQUE, pero
no a ambos.
Función*1 TELE (Arriba) GRAN ANGULAR (Abajo) CERCA (Izquierda) LEJOS (Derecha)
Código
A
Terminal ZOOM
Terminal ENFOQUE
-6V
+6V
-6V
+6V
B
-6V
+6V
+6V
-6V
C
+6V
-6V
-6V
+6V
D
+6V
-6V
+6V
-6V
1: Con el menú "desactivado", si la tensión se aplica
durante menos de 2 segundos, la función AF se activará,
y si se aplica durante más de 2 segundos, el menú estará
"activado". Con el menú "activado", si se aplica tensión,
la función ENTRAR se activará.
2: Si se aplica tensión durante más de 2 segundos, la
cámara volverá a la posición inicial especificada
(PRESET 0).
VUELTA ORIG
Si no se pulsa ninguna tecla durante un tiempo, la cámara volverá
automáticamente a la posición inicial especificada. La posición
inicial está configurada en PRESET 0. Si no se ha guardado la
posición PRESET 0, la función VUELTA ORIG no funcionará.
1: En MENÚ DESACTIVADO, se utilizan para controlar la función
ZOOM/ENFOQUE y en MENÚ ACTIVADO se utilizan como las
teclas ARRIBA, ABAJO, IZQUIERDA y DERECHA
2) Si la tensión se aplica a los terminales ZOOM y
ENFOQUE a la vez
Función
Código
33
ENTRAR/AF*1
VOLVER A INICIO*2
Terminal ZOOM Terminal ENFOQUE
Terminal ZOOM Terminal ENFOQUE
A
-6V
-6V
+6V
B
-6V
+6V
+6V
-6V
C
+6V
-6V
-6V
+6V
D
+6V
+6V
-6V
-6V
Configuración del tiempo de vuelta a inicio
➞ OFF ➞ 1 MIN ➞ 2 MIN ➞ 3 MIN ~ 60 MIN ➞ 2HORA ➞
3HORA~12HORA
+6V
34
Es
Telecamera POWER ZOOM 220X
SCC-C4201(P), C4203(P),
C4301(P), C4303(P)
Istruzioni per l’uso
I
220x Pow
LOW
er Zoom
L
DIGIT
AL CO IGHT
LOR
CAM
ERA
✽ Leggete attentamente tutte le "Precauzioni per la
sicurezza"all’interno di questo manuale per un uso
corretto del prodotto.
Precauzioni per la sicurezza
Lo scopo di queste precauzioni è di prevenire danni
accidentali alle cose o alle persone. Osservate sempre
tutte le precauzioni.
✽ Le istruzioni sono divise in “Avvertimenti “ e “Attenzioni”
come nello schema sotto:
AVVERTIMENTO
Ignorare questa
precauzione può
provocare morte o
lesioni gravi
ATTENZIONE
Ignorare questa
precauzione può
provocare danni alle cose
o alle persone.
AVVERTIMENTI
1
3. Non collegate più di una telecamera al singolo
alimentatore (il sovraccarico potrebbe provocare un
surriscaldamento o un incendio).
4. Inserite saldamente il cavo di alimentazione nel scatola
di alimentazione (un collegamento non accurato
potrebbe provocare incendi).
5. Nell’installare la telecamera su una parete o sul soffitto
fissatela saldamente (la caduta della telecamera
potrebbe provocare lesioni alle peresone).
6. Non mettete oggetti conduttivi (per es. cacciaviti,
monete, oggetti metallici) o contenitori pieni d’acqua
sopra la telecamera (pericolo di lesioni gravi da
incendi, scosse elettriche o caduta di oggetti)
I
7. Non installate la telecamera in luoghi umidi, polverosi o
fumosi (pericolo di incendi o scosse elettriche).
1. Assicuratevi di usare esclusivamente l’alimentetore
standard specificato nel foglio illustrativo (Pagine 2831). L’uso di qualsiasi altro trasformatore può
provocare incendi, scosse elettriche o danni al
prodotto.
8. Se la telecamera sprigiona fumo o odori strani,
spegnetela. In questi casi scollegate subito
l’alimentazione e contattate il centro assistenza.
(L’utilizzo in queste condizioni può provocare incendi o
scosse elettriche).
2. Controllate le prese di collegamento esterne prima di
collegare i cavi di alimentazione e quelli di segnale.
Collegate i cavi del segnale di allarme alle prese
dell’allarme. Collegate l’alimentatore DC12V
all’ingresso dell’alimentazione dell’SCCC4201(P)/C4203(P), assicurandovi di osservare la
polarità corretta. Collegate l’alimentatore DC12V o
AC24V all’ingresso dell’alimentazione dell’SCC4301(P)/C4303(P).
Collegare l’adattatore della potenza DC 12V o AC24V
al input SCC-C4301(P)/C4303(P).
9. Se il prodotto non funziona normalmente, contattate il
rivenditore o il centro assistenza a voi più vicino. Non
smontate né apportate modifiche di qualsiasi tipo a
questo prodotto. (Problemi provocati da smontaggi o
riparazioni effettuati da un utente non autorizzato non
sono coperti dalla garanzia).
10. Nel pulire la telecamera non spruzzate acqua
direttamente sul prodotto. (pericolo di incendi o scosse
elettriche). Pulite delicatamente la superficie con un
panno asciutto. Non utilizzate mai saponi o detergenti
chimici sul prodotto, perché questo potrebbe provocare
lo scolorimento della superficie o danni alle rifiniture.
2
Indice
ATTENZIONII
1. Descrizione ....................................................... 5
1. Non fate cadere oggetti sull’apparecchio né colpitelo
con violenza. Tenetelo lontano da luoghi soggetti a
forti vibrazioni o interferenze magnetiche.
2. Nomi e funzioni delle parti .............................. 6
2. Non installate in luoghi molto caldi, molto freddi o
molto umidi. (pericolo di incendi o scosse elettriche).
Controllo del contenuto dell’imballaggio ............ 8
Preparazione dei cavi ........................................ 9
Collegamento dei cavi ...................................... 10
3. Evitate di installare il prodotto in luoghi esposti alla
luce solare diretta o vicino a fonti di calore come
stufe, o termosifoni (pericolo di incendi).
4. Se volete spostare una telecamera già installata,
assicuratevi di spegnerla prima di muoverla o
reinstallarla.
5. Installate in un luogo ben aerato.
6. Staccate la spina dalla presa di corrente in caso di
temporale. (pericolo di incendi o danni al prodotto).
3. IInstallazione ..................................................... 8
4. Esplorazione del Menu
Impostazione (Menu Setup) .........................12
Struttura del Menu Impostazione (Menu Setup) .... 12
- CAMERA ID ................................................... 16
- IRIS................................................................. 17
- BLC................................................................. 17
- ALC ................................................................ 17
- MANU ............................................................. 18
- SHUTTER....................................................... 19
- AGC (MOTION) .............................................. 20
- WHITE BAL .................................................... 21
- SPECIAL ........................................................ 22
- AUTO FOCUS ............................................... 24
- MOTION DET ................................................. 24
- PRESET ......................................................... 25
- COLOR/BW ................................................... 26
- EXIT................................................................ 28
5. Dati tecnicii ......................................................29
3
4
I
1
Descrizione
2
Nomi e funzioni delle parti
Questa è una telecamera di sorveglianza ad alte prestazioni
dotata di una capacità di ingrandimento di 220x grazie al
teleobiettivo ottico 22x e allo zoom digitale IC. È una
telecamera multifunzione dotata di tutte le caratteristiche
fondamentali delle attuali telecamere di sorveglianza:
●
●
●
●
Funzione DAY/NIGHT (SCC-C4203(P), C4303(P)) che
assicura immagini chiare e nitide anche di notte.
Funzione BLC che consente un’efficace compensazione
nelle riprese controluce anche sotto un riflettore o una luce
diretta molto forte.
●
Funzione controllo a distanza via cavo RS485
Sistema di trasmissione
SCC-C4201/ C4203/ C4301/ C4303: standard NTSC
SCC-C4201P/ C4203P/ C4301P/ C4303P: standard PAL
Sistema di alimentazione/Consumo di corrente
●
●
SCC-C4201(P), C4203(P): DC 12V/5.0W
SCC-C4301(P), C4303(P): AC 24V, DC 12V/5.5W
* In una videocamera con zoom incorporato possono verificarsi i
seguenti malfunzionamenti.
- Quando la gamma dello zoom si avvicina al lato TELE, i bordi dello
schermo possono diventare più scuri.
- Se collegata a un DVR o a un monitor LCD, gli angoli dello
schermo possono risultare ostruiti.
5
Pulsante SET-UP
Funzione White Bilance (bilanciamento del bianco) che
consente una resa accurata del colore in ogni condizione
di illuminazione.
Funzione Auto Focus (messa a fuoco automatica) che e
mette a fuoco automaticamente il soggetto in movimento.
●
LOW LIGHT
DIGITAL COLOR CAMERA
Funzione di sorveglianza Low-Light (bassa illuminazione)
che consente di riprendere anche in condizioni di
illuminazione estremamente bassa.
●
●
220x Power Zoom
REMOTE
RS-485
POWER
Sul modello SCC-C4201
(P)/4203 (P) è scritto “DC IN”
invece di “POWER”.
Sul modello SCC-4301
(P)/4303 (P) è scritto “PWR IN”
invece di “POWER” e
“DC12&AC24V” invece di
“GND”.
Pulsante SET-UP
La funzione del pulsante SET-UP varia secondo che siate in
modalità Operativa Normale (Normal Operation) (il menu
set up non è visualizzato) o in modalità Menu Impostazione
(Setup Menu).
☞ In Modalità Operativa Normale (Normal Operation)
- Pulsanti UP/DOWN: da utilizzare rispettivamente
come pulsanti Wide (grandangolo) e Tele
(teleobiettivo) dello ZOOM.
- Pulsanti LEFT/RIGHT: da utilizzare rispettivamente
per regolare la messa a fuoco su Vicino o su Lontano.
- Pulsante SET-UP: da utilizzare per accedere al Menu
Impostazione (Menu Setup). Per accedere al Menu
Impostazione (Menu Setup), tenete premuto il
pulsante SET-UP per più di tre secondi.
6
I
☞ In modalità Menu Impostazione (Setup Menu)
3
Installazione
- Pulsanti UP/DOWN: servono per spostare il cursore in
alto e in basso
- Pulsanti LEFT/RIGHT: servono per spostare il cursore a
sinistra o a destra o per visualizzare in sequenza i valori
che possono essere assegnati ad una voce di menu.
- Pulsante ENTER: serve per selezionare una voce di un
sottomenu o per confermare il valore attuale.
Prese ZOOM/FOCUS REMOTE
Servono per regolare lo ZOOM/FOCUS attraverso un
comando a distanza. A seconda dell’ingresso le prese
possono essere impostate in quattro modalità differenti.
(gamma dei voltaggi operativi: +3V ~+13V, -3V~-13V)
Articolo
Codice Codice/Voce Tele
(teleobiettivo)
A
B
C
D
-6V
-6V
+6V
+6V
Wide
(grandangolo)
+6V
+6V
-6V
-6V
Prima dell’installazione
Controllo del contenuto dell’imballaggio
Assicuratevi che l’imballaggio contenga i seguenti
accessori.
Far (lontano) Near (vicino)
+6V
-6V
+6V
-6V
-6V
+6V
-6V
+6V
ATTENZIONE : in caso di ingresso simultaneo del segnale
RS485 e del segnale di controllo a distanza via
cavo verrà attivato quello collegato per primo.
I
220x Powe
r Zoom
LOW
LIG
DIGITA
L CO
LOR
HT
CAM
ERA
SCC-C4201(P),C4203(P),
C4301(P),C4303(P) - manuale
d’istruzioni - adattatore del
telaio - viti - morsettiera
Istruzioni per l’uso
Presa ALARM OUT
Da questa presa esce un segnale di allarme quando è
attiva la modalità MOTION DET o la modalità BW
(Collettore aperto: massimo DC24V 14mA)
Presa VIDEO OUT
Collegata al VIDEO IN del monitor. Attraverso questa
presa il segnale video viene trasmesso dalla telecamera
al monitor.
Presa RS485
Presa per il controllo a distanza RS485
Vite(2) Addattore
Montato
Blocco Terminale
LED accensione.
È illuminato quando la telecamera è accesa
Presa POWER IN
Collegate qui l’alimentazione
7
8
Preparazione dei cavi
Per istallare e utilizzare la telecamera per prima cosa
preparate i seguenti cavi.
Queste sono i requisiti dell’alimentatore che va collegato alla
presa POWER IN della telecamera:
●
●
Collegamento dei cavi
1. Collegate un capo del cavo BNC al VIDEO OUT
2. Collegate l’altro capo del cavo BNC al VIDEO IN del
monitor
SCC-C4201(P), SCC-C4203(P) : DC12V 600mA
SCC-C4301(P), SCC-C4303(P) : AC24V 300mA
Prese video sul retro del
monitor - cavo BNC
Cavo BNC
REMOTE
RS-485
POWER
I
3. Collegate l’alimentatore. Utilizzate un cacciavite piatto per
collegare uno dei due cavi dell’alimentatore alla presa
POWER della telecamera come segue.
Cavo Video
interruttore per la selezione
dell’alimentazione; interruttore
per la selezione
dell’alimentazione sulla parte
posteriore dell’alimentatore.
Utilizzate un cavo BNC come quello mostrato sotto per
collegare il VIDEO OUT della telecamera al monitor.
interruttore per la selezione
dell’alimentazione;
interruttore per la selezione
dell’alimentazione sulla
parte posteriore
dell’alimentatore.
9
REMOTE
RS-485
POWER
10
4
4. Controllate il tipo di alimentazione e impostate di
conseguenza l’interruttore per la selezione
dell’alimentazione. Quindi attaccate l’alimentatore alla
presa di corrente.
Le caratteristiche dell’alimentatore per ciascun modello sono
le seguenti:
●
●
In questo capitolo illustreremo il menu dei modelli SCCC4201 (P), C4203 (P), C4301 (P) e C4303 (P). Per prima
cosa descriveremo la struttura del Menu Impostazione (Menu
Setup) e in seguito le funzioni di ciascuna voce all’interno del
menu.
Struttura del Menu Impostazione (Menu Setup)
SCC-C4201(P), SCC-C4203(P) : DC12V 600mA
SCC-C4301(P), SCC-C4303(P) : AC24V 300mA
●
5. Se la telecamera funziona normalmente la seguente
schermata apparirà per cinque secondi e poi sparirà.
SAMSUNG PROTOCOLLO
IND : 0
TIPO : RS-485, HALF
VELOCITA : 9600
TEST OBIETTIVO : OK!
Esplorazione del Menu
Impostazione (Menu Setup)
Struttura del Menu Impostazione (Menu Setup)
del modello SCC-C4201 (P)
CAMERA ID
OFF/ON...
IRIS
ALC.../MANU...
SHUTTER
OFF/1/100(1/120) ~ 1/10K/AUTO X2~X128/
FIX X2~X128/AUTO X2~X128/FISSO X2~X128
AGC
OFF/LOW/HIGH
MOTION
S.S/SLOW/NORMAL/FAST/F.F.
WHITE BAL
ATW/AWC/MANU...
SPECIAL
...
6. I requisiti per il controllo a distanza RS485 sono le seguenti:
● VVelocità del segnale: 9600bps.
● Data Bit : 8 bits
● Stop Bit : 1 bit
● Parity Bit : nessuna
LANGUAGE
ENGLISH
CTRL TYPE
A/B/C/D
RS-485
...
PIP
OFF/ON...
MIRROR
OFF/ON
D-ZOOM
OFF/X2~X10
POSI/NEGA
+/-
ZOOM SPEED
1/2/3/4
DETAIL(0)
----I----
I
RET
11
AUTO FOCUS
AF/MF/ONEAF
MOTION DET
OFF/ON...
PRESET
...
EXIT
QUIT/SAVE/PRESET
12
Struttura del Menu Impostazione (Menu Setup)
●
Struttura del Menu Impostazione (Menu Setup) del
modello SCC-C4203 (P)
●
Struttura del Menu Impostazione (Menu Setup) del
modello SCC-C4301 (P)
CAMERA ID
OFF/ON...
CAMERA ID
OFF/ON...
IRIS
ALC.../MANU...
IRIS
ALC.../MANU...
SHUTTER
OFF/1/100(1/120) ~ 1/10K/
AUTO X2~X128/FIX X2~X128
SHUTTER
OFF/1/100(1/120) ~ 1/10K/
AUTO X2~X128/FIX X2~X128
AGC
OFF/LOW/HIGH
AGC
OFF/LOW/HIGH
MOTION
S.S/SLOW/NORMAL/FAST/F.F.
MOTION
S.S/SLOW/NORMAL/FAST/F.F.
WHITE BAL
ATW/AWC/MANU...
WHITE BAL
ATW/AWC/MANU...
...
SPECIAL
...
SPECIAL
ENGLISH
LANGUAGE
ENGLISH
CTRL TYPE
A/B/C/D
V-SYNC
INT/LINE
RS-485
...
CTRL TYPE
A/B/C/D
...
LANGUAGE
OFF/ON...
RS-485
MIRROR
OFF/ON
PIP
OFF/ON...
D-ZOOM
OFF/X2 ~ X10
MIRROR
OFF/ON
POSI/NEGA
+/-
D-ZOOM
OFF/X2~X10
ZOOM SPEED
1/2/3/4
POSI/NEGA
+/-
DETAIL(0)
----I----
ZOOM SPEED
1/2/3/4
DETAIL(0)
----I----
PIP
RET
I
RET
AUTO FOCUS
AF/MF/ONEAF
MOTION DET
OFF/ON...
AUTO FOCUS
AF/MF/ONEAF
...
MOTION DET
OFF/ON...
PRESET
...
EXIT
QUIT/SAVE/PRESET
PRESET
13
COLOR/BW
COLOR/BW/AUTO…
EXIT
QUIT/SAVE/PRESET
14
Struttura del Menu Impostazione (Menu Setup)
●
Struttura del Menu Impostazione (Menu Setup) del
modello SCC-C4303 (P)
CAMERA ID
OFF/ON...
IRIS
ALC.../MANU...
SHUTTER
OFF/1/100(1/120) ~ 1/10K/
AUTO X2~X128/FIX X2~X128
AGC
OFF/LOW/HIGH
MOTION
S.S/SLOW/NORMAL/FAST/F.F.
WHITE BAL
ATW/AWC/MANU...
SPECIAL
...
(SET UP)
ID CAMERA
OFF
IRIS
ALC...
SHUTTER
AUTO X4
MOVIMENTO
NORM
BIL BIANCO
ATW
SPECIALE
...
AUTO FOCUS
UNOAF
ACTIVITY DET
OFF
PRESET
...
COLORE B/N
COLORE
USCITA
ESCI
(SET UP)
ID CAMERA
OFF
IRIS
ALC...
SHUTTER
AUTO X4
MOVIMENTO
NORM
BIL BIANCO
ATW
SPECIALE
...
AUTO FOCUS
UNOAF
ACTIVITY DET
OFF
PRESET
...
USCITA
ESCI
[SCC-C4201(P),SCC-C4301(P)]
[SCC-C4203(P),SCC-C4303(P)]
L’opzione COLOR/BW è disponibile solo nei modelli
SCC-C4203 (P) e C4303 (P).
CAMERA ID
LANGUAGE
ENGLISH
V-SYNC
INT/LINE…
CTRL TYPE
A/B/C/D
RS-485
...
PIP
OFF/ON...
MIRROR
OFF/ON
D-ZOOM
OFF/X2 ~ X10
POSI/NEGA
+/-
ZOOM SPEED
1/2/3/4
DETAIL(0)
----I----
I
All’interno del menu CAMERA ID, potete assegnare alla
telecamera un numero identificativo (ID),
che comparirà sullo schermo del monitor. Se selezionate ON...
all’interno del menu CAMERA ID e premete il pulsante
ENTER, comparirà una schermata dalla quale potrete
assegnare un ID alla telecamera.
L’ID può essere al massimo di venti caratteri ed essere
composto di caratteri alfanumerici e dei caratteri speciali che
verranno visualizzati sullo schermo.
Utilizzate l’opzione LOCATION per scegliere la posizione nella
quale l’ID apparirà sullo schermo.
RET
15
AUTO FOCUS
AF/MF/ONEAF
MOTION DET
OFF/ON...
PRESET
...
COLOR/BW
COLOR/BW/AUTO…
EXIT
QUIT/SAVE/PRESET
(SET UP)
ID CAMERA
ON...
IRIS
ALC...
SHUTTER
AUTO X4
MOVIMENTO
NORM
BIL BIANCO
ATW
SPECIALE
...
AUTO FOCUS
UNOAF
ACTIVITY DET
OFF
PRESET
...
COLORE B/N
COLORE
USCITA
ESCI
(ID CAMERA)
A B C D
MNO P
Y Z 0 1
: ! -
Premete il
pulsante
ENTER
E
Q
2
+
F
R
3
*
G
S
4
(
H
T
5
)
I J K L
U VWX
6 7 8 9
/
SP
SP
POSIZIONE...
RET
ZOOM.CAMERA.........
16
IRIS
Il livello dell'uscita video verso il monitor può essere regolato
attraverso l'obiettivo iride secondo l'ntensità della luce ricevuta.
Questo apparecchio è dotato di un obiettivo iride. All'interno del
menu ALC (compensazione automatica della luce), potete
impostare il livello dell'uscita video. All'interno del menu MANU
potete impostare manualmente l'apertura e la chiusura
dell'iride.
BLC (Opzione all'nterno del menu ALC)
DIMENSIONE
DIMENSIONE
➞
➞
➞
➞
Se utilizzate una normale telecamera, quando inquadrate un
soggetto che abbia dietro di sè una fonte luminosa forte, come
un riflettore, il soggetto apparirà scuro sul monitor a causa
dell'effetto controluce. Con le telecamere SCC-C4201(P),
C4203(P), C4301(P) e C4303(P) è sufficiente impostare
correttamente il BLC all'interno del menu ALC per risolvere il
problema del controluce ed ottenere un'immagine chiara anche
sotto un riflettore o una luce diretta molto forte.
Se impostate la funzione AREA su USER e premete il tasto
ENTER, potrete cambiare a vostro piacimento la misura e la
posizione dell'area alla quale applicare la funzione BLC.
Potete specificare la misura dell'area utilizzando i tasti UP,
DOWN, LEFT, e RIGHT. Dopo aver stabilito la misura
dell'area, premete il tasto ENTER. L'area così specificata
comincerà a lampeggiare. A questo punto, utilizzate i tasti
UP, DOWN, LEFT, e RIGHT per definire la posizione
dell'area. Utilizzate i tasti ENTER e UP, DOWN, LEFT e
RIGHT per definire la misura e la posizione dell'area.
Premete di nuovo il tasto ENTER per uscire dal menu di
impostazione AREA.
ALC
Se selezionate la voce ALC all'interno del menu IRIS e
premete il pulsante ENTER, apparirà una schermata dalla
quale potrete impostare il livello dell'uscita video e il BLC.
All'interno dell'opzione LEVEL, utilizzate i tasti LEFT\RIGHT
per impostare il livello dell'uscita video. Se impostate il BLC su
ON, la funzione BLC verrà applicata all'area dello schermo
specificata nell'opzione AREA. L'opzione AREA può essere
impostata sia su PRESET che su USER, per specificare la
parte dello schermo alla quale la funzione BLC verrà applicata.
Se impostate l'opzione AREA su PRESET, la funzione BLC
verrà applicata alla parte specificata al momento della
configurazione in fabbrica.(Default)
(SET UP)
ID CAMERA
OFF
IRIS
ALC...
SHUTTER
AUTO X4
MOVIMENTO
NORM
BIL BIANCO
ATW
SPECIALE
...
AUTO FOCUS
UNOAF
ACTIVITY DET
OFF
PRESET
...
COLORE B/N
COLORE
USCITA
ESCI
17
(ALC)
Premete il
pulsante
ENTER
ZONA
PRESET...
BLC
OFF
LIVELLO ( 0) ----I---RET
Utilizzate i
pulsanti UP,
DOWN, LEFT
e RIGHT)
POSIZIONE
I
POSIZIONE
MANU
SSe selezionate la voce MANU all'interno del menu IRIS e
premete il pulsante ENTER, apparirà una schermata dalla
quale potrete regolare manualmente il livello dell'iride.
All’interno dell'opzione LEVEL, utilizzate i tasti LEFT\RIGHT
per stabilire l'apertura e la chiusura manuale dell'iride.
(SET UP)
ID CAMERA
OFF
IRIS
MANU...
SHUTTER
AUTO X4
MOVIMENTO
NORM
BIL BIANCO
ATW
SPECIALE
...
AUTO FOCUS
UNOAF
ACTIVITY DET
OFF
PRESET
...
COLORE B/N
COLORE
USCITA
ESCI
(MANUALE)
Premete il
pulsante
ENTER
LIVELLO
RET
( 00) ----I----
18
SHUTTER
AGC (MOTION (movimento))
All'interno dell'opzione SHUTTER potete definire la velocità
dell'otturatore elettronico ad alta velocità, del'otturatore
automatico a bassa velocità e l'otturatore fisso a bassa
velocità. L'otturatore elettronico ad alta velocità consente 7
velocità di otturazione da 1\100 a 1\10000 di secondo; gli
otturatori fisso a bassa velocità e a bassa velocità
consentono rispettivamente velocità di otturazione da 2x a
128x. L'otturatore a bassa velocità vi permette di avere una
velocità di otturazione bassa in modo da ottenere
un'immagine chiara anche in caso di ripresa al buio.
Selezionate un otturatore automatico a bassa velocità se
volete che la telecamera rilevi la quantità di luce e imposti
automaticamente la velocità dell'otturatore ad un livello
basso secondo il grado di oscurità. Altrimenti, selezionate la
voce che inizia con FIX... per specificare da soli la velocità
dell'otturatore. I numeri che seguono immediatamente
"AUTO" e "FIX" indicano il numero delle immagini
accumulate. Più alto è il numero dei fotogrammi, più bassa è
la velocità dell'otturatore. Conseguentemente, un'immagine
ferma sarà più nitida, la ripresa di un oggetto in movimento
sarà confusa.
All'interno dell'opzione AGC (controllo automatico del guadagno)
potete decidere se regolare automaticamente il GAIN nel caso in
cui le immagini siano al di sotto di un certo livello di luminosità in
quanto registrate in condizioni di insufficiente illuminazione. Per
regolare automaticamente il GAIN, impostate l'opzione AGC su
LOW o su HIGH. se non volete regolare
(SET UP)
ID CAMERA
OFF
, impostatela su OFF. Se impostate
ALC...
l'opzione AGC su LOW, il GAIN massimo IRIS
SHUTTER
AUTO X4
MOVIMENTO
NORM
dell'AGC verrà fissato al minimo, e se
BIL BIANCO
ATW
impostato su HIGH, il GAIN massimo
SPECIALE
...
AUTO FOCUS
UNOAF
sarà fissato al massimo.
ACTIVITY DET
OFF
Se l'opzione SHUTTER è impostata su
PRESET
...
B/N
COLORE
una bassa velocità automatica, l'opzione COLORE
USCITA
ESCI
AGC verrà sostituita dall'opzione
MOTION. All'interno dell'opzione MOTION, utilizzate i tasti LEFT e
RIGHT per scegliere tra S.S, SLOW, NORMAL, FAST e F.F.
(SET UP)
ID CAMERA
OFF
IRIS
ALC...
SHUTTER
AUTO X4
MOVIMENTO
NORM
BIL BIANCO
ATW
SPECIALE
...
AUTO FOCUS
UNOAF
ACTIVITY DET
OFF
PRESET
...
COLORE B/N
COLORE
USCITA
ESCI
☞
☞
☞
SHUTTER
➞ OFF ➞ 1/100(1/120) ➞ 1/250 ➞ 1/500 ➞ 1/1000 ➞ 1/2000 ➞
1/4000 ➞ 1/10K ➞ OFF ➞ AUTOX2 ➞ AUTOX4 ➞ AUTOX6 ➞
AUTOX8 ➞ AUTOX12 ➞ AUTOX16 ➞ AUTOX24 ➞ AUTOX32
➞ AUTOX48 ➞ AUTOX64 ➞ AUTOX96 ➞ AUTOX128 ➞ OFF
➞ FISSOX2 ➞ FISSOX4 ➞ FISSOX6 ➞ FISSOX8 ➞ FISSOX12
➞ FISSOX16 ➞ FISSOX24 ➞ FISSOX32 ➞ FISSOX48 ➞
FISSOX64 ➞ FISSOX96 ➞ FISSOX128
19
☞
☞
S.S.: selezionate S.S. per aumentare al massimo la definizione di
un’immagine ferma portando il valore minimo dell’ACG GAIN e il
livello dell’otturatore a bassa velocità al loro massimo. (questa
impostazione viene usata soprattutto per controllare oggetti quasi
fermi in luoghi bui.)
SLOW: selezionate SLOW per migliorare il più possibile la
definizione di un’immagine ferma aumentando sia un valore
basso dell’AGC GAIN che il livello dell’otturatore a bassa velocità.
(questa impostazione viene usata soprattutto per controllare
oggetti che compiono piccoli movimenti in luoghi bui).
NORMAL: selezionate NORMAL per visualizzare l’immagine
normale con un valore medio di AGC GAIN e il livello di un
otturatore a velocità normale. (questa impostazione viene usata
soprattutto per controllare oggetti in movimento in luoghi bui).
FAST: selezionate FAST per mettere a fuoco oggetti in
movimento diminuendo sia un valore alto dell’AGC GAIN che il
livello dell’otturatore a velocità normale. (questa impostazione
viene usata soprattutto per controllare oggetti con movimenti
sensibili in luoghi bui).
F.F.: selezionate F.F. per mettere a fuoco oggetti in movimento
portando il valore massimo dell’AGC GAIN e il livello
dell’otturatore a bassa velocità al loro minimo. (questa
impostazione viene usata soprattutto per controllare oggetti che si
spostano rapidamente in luoghi bui).
20
I
WHITE BAL
SPECIALE
All’interrno dell’opzione WHITE BAL potete impostare la
funzione White Balance (bilanciamento del bianco), che vi
consentirà di vedere il colore bianco in maniera corretta sotto
una luce di qualsiasi temperatura. Se impostate l’opzione
WHITE BAL su ATW, la telecamera controllerà
continuamente i cambiamenti nella temperatura del colore e
imposterà automaticamente il WHITE BAL di conseguenza.
Se impostate l’opzione WHITE BAL su AWC, mettete un
pezzo di carta bianca davanti alla telecamera e premete il
pulsante ENTER: l’Auto White Balance Control verrà attivato
una sola volta per stabilire la temperatura del colore e il
valore così rilevato verrà mantenuto immutato.
Potete regolare manualmente le funzioni LANGUAGE, V-SYNC,
CTRL TYPE, RS485, PIP, MIRROR, D-ZOOM, POSI/ NEGA,
ZOOM SPEED e DETAIL.
Se impostate l’opzione WHITE BAL su MANUAL potrete
regolare a vostro piacimento il bilanciamento del bianco in
modo da tener conto delle attuali condizioni di illuminazione.
☞
☞
☞
3200°K: selezionate 3200°K per impostare la
temperatura del colore a 3200°K.
5600°K: selezionate 5600°K per impostare la
temperatura del colore a 5600°K.
USER : selezionate USER per impostare la
temperatura del colore scegliendo i valori
appropriati dal diagramma RED e BLUE.
MANU: se selezionate l’opzione MANU e premete il tasto
ENTER, apparirà una schermata dalla quale potrete
scegliere manualmente il bilanciamento del bianco.
All’interno dell’opzione PRESET, utilizzate i tasti LEFT e
RIGHT per selezionare 3200°K, 5600°K, o USER.
(SET UP)
ID CAMERA
ON...
IRIS
MANU...
SHUTTER
AUTO X4
MOVIMENTO
NORM
BIL BIANCO
MANU...
SPECIALE
...
AUTO FOCUS
UNOAF
ACTIVITY DET
OFF
PRESET
...
COLORE B/N
COLORE
USCITA
ESCI
(ABB/MANUALE)
Premete il
pulsante
ENTER
PRESET
OFF(UTIL)..
ROSSO (-2C) ---I----BLU
(-5B) -I------RET
L’opzione V-SYNC è disponibile solo nei modelli
SCC-C4301(P) e C4303(P).
Se premete il tasto ENTER mentre è visualizzato “---“, apparirà la
schermata SPECIAL dalla quale potrete impostare le funzioni
speciali. Nell’attivare ciascuna funzione, utilizzate i tasti LEFT e
RIGHT per impostare la voce desiderata.
(SET UP)
ID CAMERA
OFF
IRIS
ALC...
SHUTTER
AUTO X4
MOVIMENTO
NORM
BIL BIANCO
ATW
SPECIALE
...
AUTO FOCUS
UNOAF
ACTIVITY DET
OFF
PRESET
...
COLORE B/N
COLORE
USCITA
ESCI
Premete il
pulsante
ENTER
(SPECIALE)
LINGUA
V-SYNC
TIPO CTRL
RS-485
PIP
MIRROR
D-ZOOM
POSI/NEGA
VEL ZOOM
DETTAGLIO ( 0)
RET
ITALIANO
INT
A
...
OFF
OFF
OFF
+
3
----I--
I
☞ V-SYNC: serve per scegliere il metodo di sincronizzazione
verticale che verrà utilizzato dai modelli SCC-C4301(P) e
C4303(P). La telecamera consente l’uso di due segnali di
sincronizzazione verticale: la modalità INT, nella quale il
segnale viene generato dall’orologio interno della telecamera,
e la modalità LINE che imposta la sincronizzazione verticale
in base alla frequenza dell’alimentazione esterna. Se
selezionate LINE e premete il pulsante ENTER, apparirà la
schermata LL-PHASE dalla quale potrete regolare la fase del
LINE LOCK. Potete specificare il livello di fase desiderato
all’interno dell’opzione PHASE.
(SPECIALE)
LINGUA
V-SYNC
TIPO CTRL
RS-485
PIP
MIRROR
D-ZOOM
POSI/NEGA
VEL ZOOM
DETTAGLIO ( 0)
RET
ITALIANO
LINE...
A
...
OFF
OFF
OFF
+
3
----I--
(LINE LOCK)
Premete il
pulsante
ENTER
FASE
RET
( 000) ----I----
Se utilizzate un’alimentazione DC, funzionerà soltanto la modalità INT
21
22
☞
☞
CTRL TYPE: potete selezionare le modalità A, B, C e D a
seconda dell’ingresso del controllo a distanza (vedi pag. 7)
RS-485: serve per impostare ADDRESS, PROTOCOL e
BAUD RATE della comunicazione RS-485. (BAUD RATE:
2400bps, 4800bps, 9600bps, 19200bps, 38400bps)
Attenzione: potrebbe verificarsi un errore di comunicazione
se collegate più di una telecamera impostata con lo stesso
indirizzo.
☞
PIP: è la funzione Picture In Picture. Utilizzando lo Zoom
Digitale, consentirà di visualizzare una schermata ridotta
di 1/16 rispetto alla schermata principale. Se impostate
l’opzione PIP su ON e premete il pulsante ENTER,
potrete stabilire la posizione della schermata PIP
utilizando i tasti UP, DOWN, LEFT e RIGHT.
* L’opzione PIP non funziona con l’otturatore a bassa velocità.
La funzione MIRROR non funziona all’intenro della finestra PIP.
(SPECIALE)
LINGUA
V-SYNC
TIPO CTRL
RS-485
PIP
MIRROR
D-ZOOM
POSI/NEGA
VEL ZOOM
DETTAGLIO ( 0)
RET
☞
☞
☞
☞
ITALIANO
LINE...
A
...
ON...
OFF
OFF
+
3
----I--
23
All’interno dell’opzione AUTO FOCUS potete scegliere il
metodo di messa a fuoco tra AF, MF e ONEAF.
☞
☞
☞
AF: messa a fuoco automatica attraverso un controllo
continuo dello schermo in modalità AUTO FOCUS. Non
elabora i comandi in entrata del pulsante FOCUS perché
mette a fuoco automaticamente durante lo zoom.
MF: se selezionate MF potrete regolare manualmente la
messa a fuoco.
(SET UP)
ONEAF: mette a fuoco per circa 5
ID CAMERA
ON...
IRIS
MANU...
secondi solo quando lo ZOOM
SHUTTER
AUTO X4
viene spostato da Wide
MOVIMENTO
NORM
MANU...
(grandangolo) a Tele (teleobiettivo). BIL BIANCO
SPECIALE
...
E’ uguale alla modalità MF mentre
AUTO FOCUS
UNOAF
ACTIVITY DET
ON...
è in STOP, e uguale alla modalità
PRESET
...
AF dopo che lo ZOOM è stato
COLORE B/N
COLORE
USCITA
ESCI
spostato su Tele.
MOTION DET
Premete il
pulsante
ENTER
PIP
MIRROR: rovescia orizzontalmente il segnale video in
uscita.
D-ZOOM: serve per impostare l’ingrandimento dello
Zoom Digitale. Il livello di ingrandimento può arrivare fino
a 10x.
POSI/NEGA: consente di visualizzare il segnale video in
uscita normalmente o al negativo.
ZOOM SPEED: all’interno dell’opzione ZOOM SPEED
utilizzate i pulsanti LEFT e RIGHT per impostare la
velocità come segue:
1 : impiega circa 17 secondi per passare da un ingrandimento 1x a un 22x (velocità minima).
2 : impiega circa 10 secondi per passare da un ingrandimento 1x a un 22x (lento).
3 : impiega circa 6 secondi per passare da un ingrandimento 1x a un 22x (veloce).
4 : impiega circa 3 secondi per passare da un ingrandimento 1x a un 22x (velocità massima).
☞
AUTO FOCUS
DETAIL: Regola la nitidezza.
All’interno dell’opzione MOTION DET potete impostare la
funzione rilevazione di movimento (Motion Detection), la
sensibilità di movimento, e l’area di rilevazione del
movimento. Se impostate la funzione rilevazione del
movimento, potrete rilevare il movimento di un intruso ,
controllarlo attraverso il monitor e ottenerne la segnalazione
attraverso l'uscita ALARM OUT.
Se dal menu COLOR/BW AUTO impostate la funzione ALARM su ON
mentre la funzione MOTION DET è su ON, la porta in uscita di ALARM
non invierà alcun segnale.
* La funzione MOTION detection (Rilevamento movimento) opera in base alla
modifica della luminosità nell’area di impostazione. Per questo motivo, può
verificarsi un funzionamento scorretto a causa della differenza di luminosità
tra lo sfondo e l’oggetto inquadrato, lo stato di impostazione dell’area, ecc.
(SET UP)
ID CAMERA
ON...
IRIS
MANU...
SHUTTER
AUTO X4
MOVIMENTO
NORM
BIL BIANCO
MANU...
SPECIALE
...
AUTO FOCUS
UNOAF
ACTIVITY DET
ON...
PRESET
...
COLORE B/N
COLORE
USCITA
ESCI
(ACTIVITY DET)
Premete il
pulsante
ENTER
ZONA
SENSIBILITA'
RET
PRESET...
MEDIO
24
I
Se selezionate ON e premete il tasto ENTER apparirà la
schermata MOTION DET. Potete impostare su PRESET o su
USER l’area alla quale verrà applicata la funzione di rilevazione
del movimento. Se impostate l’opzione AREA su PRESET, la
funzione di rilevazione del movimento verrà applicata alle aree
preimpostate secondo la configurazione di fabbrica. Se
impostate l’opzione AREA su USER e premete il tasto ENTER,
potrete modificare la misura e la posizione dell’area e
selezionare la porzione dell’inquadratura alla quale applicare la
funzione di rilevazione del movimento. Potete specificare la
misura dell’area utilizzando i tasti UP, DOWN, LEFT, e RIGHT.
Se l’area non lampeggia, premete il tasto ENTER. Quando
l’area comincia a lampeggiare, utilizzat i tasti UP, DOWN, LEFT,
e RIGHT per specificare la posizione dell’area. Utilizzate i tasti
ENTER e UP, DOWN, LEFT, e RIGHT per specificare la misura
dell’area e per posizionarla. Premete ancora il tasto ENTER per
uscire dal menu di impostazione AREA. Potete utilizzare
l’opzione SENSITIVITY per stabilire la sensibilità della
rilevazione del movimento. Più alto è il valore, maggiore sarà la
sensibilità di rilevazione del movimento.
SIZE
0 H 1
2
5
6
7
10
11
12
15
16
17
20
21
22
25
26
27
30
31
RIT POS INIZ
PRESET NO. 0
3
8
13
18
23
28
ID : PRESET Ø
4
9
14
19
24
29
RET
OFF
PROG POSIZIONE
PRESET ID
...
ON...
USCITA
ESCI
Premete il
pulsante
ENTER
Se selezionate un numero di preimpostazione e premete il tasto
ENTER apparirà una schermata come quella sopra.
☞
☞
POSITION SET: Selezionate POSITION SET per registrare
le posizioni di ZOOM e FOCUS.
PRESET ID: Selezionate PRESET ID per assegnare un ID
(numero identificativo) alle posizione di PRESET, come per
Camera ID.
La funzione di ritorno nella posizione home (HOME
RETURN) è disponibile nelle telecamere con ROM
versione 1.2 o superiore. Per istruzioni relative all'uso
di questa funzione, consultare la pagina 33.
I
SIZE
COLOR/BW
➞
➞
➞
➞
Utilizzate i
pulsanti UP,
DOWN, LEFT
e RIGHT
POSIZIONE
L’opzione COLOR/BW è disponibile sono nei modelli
SCC-C4203(P) e C4303(P).
All’interno dell’opzione COLOR/BW potete impostare il Filtro IR
(infrarosso) su ON o su OFF. In modalità BW, il Filtro IR è spento e il
livello di sensibilità è innalzato fino a quello di una telecamera in bianco e
nero. In modalità COLOR, il filtro IR è attivo e lo schermo torna normale
quando il livello di sensibilità viene abbassato.
POSIZIONE
PRESET
(SET UP)
ID CAMERA
ON...
IRIS
MANU...
SHUTTER
AUTO X4
MOVIMENTO
NORM
BIL BIANCO
MANU...
SPECIALE
...
AUTO FOCUS
UNOAF
ACTIVITY DET
OFF
PRESET
...
COLORE B/N
COLORE
USCITA
ESCI
☞
☞
(PRESET MAPPA)
Premete il
pulsante
ENTER
0 H 1
2
5
6
7
10
11
12
15
16
17
20
21
22
25
26
27
30
31
RIT POS INIZ
3
8
13
18
23
28
4
9
14
19
24
29
RET
OFF
ID : PRESET Ø
Attraverso la funzione PRESET potete registrare fino a 128
posizioni dello ZOOM e del FOCUS. Potete utilizzare la
funzione PRESET una volta collegata la SCC-1000 all’RS-485.
25
(PRESET MAPPA)
☞
COLOR: Il Filtro IR è attivo e la schermata è normale.
BW: Il filtro IR è spento e la schermata è in bianco e nero. (la
sensibilità ad una luce bassa viene innalzata ad un livello pari a
quello di una telecamera in bianco e nero.)
AUTO: Selezionate AUTO per passare automaticamente dalla
modalità COLOR a quella BW a seconda della quantità di luce.
In condizioni di scarsa illuminazione, il Filtro IR viene disattivato
e la sensibilità alla luce bassa viene innalzata passando alla
modalità BW, ma in condizioni di luce brillante il Filtro IR viene
attivato e la sensibilità viene abbassata passando alla modalità
COLOR. Se selezionate AUTO e premete il tasato ENTER,
apparirà una schermata dalla quale potrete impostare le
funzioni ALARM ON/OFF, BURST ON / OFF, BW LEVEL e
DWELL TIME.
26
Nei condizioni della luce bassa da trasferiendo al modo
COLORE. Se seleziona AUTO e premere il tasto ENTER,
uno schermo da che può mettere il ALLARME ON/OFF,
BURST ON/OFF, B/N LIVELLO e TEMPO DI SCAN sarà
apparire.
- ALARM ON: invia segnali attraverso la porta in uscita ALARM
in modalità BW.
- ALARM OFF: la porta in uscita ALARM è sincronizzata con la
funzione MOTION DET indipendentemente dalla modailità
COLOR/BW.
- BURST ON: il segnale di burst colore esce insieme al segnale
video composito in bianco e nero.
BURST OFF: il segnale di burst colore non viene posto in
uscita.
- LEVEL: potete impostare il livello di luminosità che cambia
dalla modalità COLOR a quella BW secondo tre gradi: LOW,
MEDIUM, e HIGH.
- DWELL TIME: impostate il tempo di HOLDING (attesa) per
passare dalla modalità COLOR a quella BW secondo i
cambiamenti nella quantità di luce. Potete fissare il tempo di
HOLDING (attesa) a 10sec (S), 30sec, 60sec o 300sec (L).
EXIT
L’opzione EXIT serve per uscire dalla modalità Menu
Impostazioni e tornare alla modalità operativa normale.
☞
☞
☞
QUIT: selezionate QUIT per ignorare tutte le modifiche che
avete effettuato e per ristabilire le impostazioni salvate
precedentemente.
SAVE: selezionate SAVE per salvare le impostazioni
modificate fino a questo punto.
PRESET: selezionate PRESET per ignorare tutte le
modifiche che avete apportato e ristabilire le impostazioni di
fabbrica.
I
In modalità AUTO, l’AGC funzionerà ad alta velocità e non
potrete modificarlo manualmente, come indicato dal “---“.
(SET UP)
ID CAMERA
OFF
IRIS
MANU...
SHUTTER
AUTO X4
MOVIMENTO
NORM
BIL BIANCO
MANU...
SPECIALE
...
AUTO FOCUS
UNOAF
ACTIVITY DET
OFF
PRESET
...
COLORE B/N
AUTO...
USCITA
ESCI
(BW SETUP)
Premete il
pulsante
ENTER
ALLARME
BURST
LIVELLO
TEMPO DI SCAN
RET
OFF
ON
MEDIO
S--I----L
Attenzione: se utilizzate una sorgente di luce a infrarossi in
modalità AUTO, potrebbero verificarsi disfunzioni nella
commutazione AUTO e nell’Auto Focus.
27
28
5
Dati tecnici
SCC-C4201P/C4203P
SCC-C4201/C4203
Voce
Prodotto
Alimentazione
Consumo
Sistema di trasmissione
- DC 12V ±10%
- 5.0W
- Sistema a colori standard NTSC
Note
Voce
Prodotto
Alimentazione
Consumo
Sistema di trasmissione
Descrizione
- DC 12V ±10%
- 5.0 W
- Sistema a colori standard PAL
- CCD IT da 1/4 di pollice
Schermo
- CCD IT da 1/4 di pollice
Pixel reali
- 768(H)x494(V)
Pixel reali
- 752(H)x582(V)
Frequenza di linea
Metodo di sincronizzazione
Definizione
Rapporto segnale/disturbo
Illuminazione minima
Bilanciamento del bianco
Uscita del segnale
Obiettivo
Otturatore elettronico
Compensazione del controluce
Sense Up
Zoom digitale
Rilevazione del movimento
Temperatura ed umidità
operative
Dimensioni
Peso
- Linea 525, interlacciamento 2:1
- orizzontale: 15.734 Hz (INT)
- verticale 59,94 Hz (INT)
- Solo INT
- 480 linee TV
- 52dB(AGC OFF)
- 0.3Lux(Senso Sopra X4)
(0.01Lux)
- B/N(SCC-C4203):0.4Lux
(0.003Lux)
- ATW/AWC/modlità manuale (3200°K,
5600°K, Controllo del gain R/B)
- Segnale video composito: 1.0 Vp-p
75ohms/BNC
Metodo di scansione
Frequenza di linea
Definizione
Rapporto segnale/disturbo
Illuminazione minima
Bilanciamento del bianco
Uscita del segnale
Obiettivo
- Off, 1/100, 1/250, 1/500, 1/1K, 1/2K, 1/4K,
/10K sec
- off/on (impostazione dell’area)
Otturatore elettronico
- off/on (x10), PIP
- off/on (impostazione dell’area e della
sensibilità)
- 14°F~+122°F, ~90%
- 59,5 x 60,5 x 109,5mm
- 375g
- Linea 625, interlacciamento 2:1
- orizzontale: 15.625 Hz (INT)
- verticale 50 Hz (INT)
Metodo di sincronizzazione
- Obiettivo telescopico 22x integtrato
- Lunghezza focale: da 3,6 a 79,2 mm
- Apertura: F1,6(Wide), F3,8(Tele)
- Filtro IR acceso/spento (solo per il modello
SCC-C4203)
- off/Auto2x~128x/fix 2x~128x
Note
- Telecamera zoom 22x
Schermo
Metodo di scansione
29
Descrizione
- Telecamera zoom 22x
Compensazione del controluce
Sense Up
Zoom digitale
Rilevazione del movimento
Temperatura ed umidità
operative
Dimensioni
Peso
- Solo INT
- 480 linee TV
I
- 52dB(AGC OFF)
- 0.3Lux(Senso Sopra X4)
(0.01Lux)
- B/N(SCC-C4203P):0.4Lux
(0.003Lux)
- ATW/AWC/modlità manuale (3200°K,
5600°K, Controllo del gain
- Segnale video composito: 1.0 Vp-p
75ohms/BNC
- Obiettivo telescopico 22x integtrato
- Lunghezza focale: da 3,6 a 79,2 mm
- Apertura: F1,6(Wide), F3,8(Tele)
- Filtro IR acceso/spento (solo per il modello
SCC-C4203P)
- Off, 1/100, 1/250, 1/500, 1/1K, 1/2K, 1/4K,
/10K sec
- off/on (impostazione dell’area)
- off/Auto2x~128x/fix 2x~128x
- off/on (x10), PIP
- off/on (impostazione dell’area e della
sensibilità)
-14°F~+122°F, ~90%
- 59,5 x 60,5 x 109,5mm
- 375g
30
Dati tecnici
SCC-C4301/C4303
SCC-C4301P/C4303P
Voce
Prodotto
Alimentazione
Consumo
Sistema di trasmissione
Descrizione
- Telecamera zoom 22x
- AC 24V (60Hz) or DC 12V ± 10%
- 5.5 W
- Sistema a colori standard NTSC
Schermo
- CCD IT da 1/4 di pollice
Pixel reali
- 768(H)x494(V)
Metodo di scansione
Frequenza di linea
Metodo di sincronizzazione
Definizione
Rapporto segnale/disturbo
Illuminazione minima
Bilanciamento del bianco
Uscita del segnale
Obiettivo
Otturatore elettronico
Compensazione del controluce
Sense Up
Zoom digitale
Rilevazione del movimento
- Linea 525, interlacciamento 2:1
- Orizzontale: 15.734 Hz (INT), 15.750
Hz(L/L)- verticale : 59.94Hz(INT) 60Hz(L/L)
- IVerticale 59,94 Hz (INT), 60 Hz(L/L)
- INT, Line Lock
- 480 linee TV
- 52dB(AGC OFF)
- 0.3Lux(Senso Sopra X4)
(0.01Lux)
- B/N(SCC-C4303):0.4Lux
(0.003Lux)
- ATW/AWC/modlità manuale (3200°K,
5600°K, Controllo del gain R/B)
- Segnale video composito: 1.0 Vp-p
75ohms/BNC
- Obiettivo telescopico 22x integtrato
- Lunghezza focale: da 3,6 a 79,2 mm
- Apertura: F1,6(Wide), F3,8(Tele)
- Filtro IR acceso/spento (solo per il modello
SCC-C4303)
- Off, 1/100, 1/250, 1/500, 1/1K, 1/2K, 1/4K,
/10K sec
- off/on (impostazione dell’area)
- off/Auto2x~128x/fix 2x~128x
- off/on (x10), PIP
- off/on (impostazione dell’area e della
sensibilità)
Temperatura ed umidità
operative
- 14°F~+122°F, ~90%
Dimensioni
- 59,5 x 60,5 x 143mm
Peso
31
- 500g
Note
Voce
Prodotto
Alimentazione
Consumo
Sistema di trasmissione
Descrizione
- AC 24V (60Hz) or DC 12V ± 10%
- 5.5 W
- Sistema a colori standard PAL
Schermo
- CCD IT da 1/4 di pollice
Pixel reali
- 752(H)x582(V)
Metodo di scansione
Frequenza di linea
- Linea 625, interlacciamento 2:1
- Orizzontale: 15.625 Hz (INT), 15.625 Hz(L/L)
- Verticale 50 Hz (INT), 50 Hz(L/L)
Metodo di sincronizzazione
- INT/Line Lock
Definizione
- 480 linee TV
Rapporto segnale/disturbo
IIlluminazione minima
Bilanciamento del bianco
Uscita del segnale
- 0.3Lux(Senso Sopra X4)
(0.01Lux)
- B/N(SCC-C4303P):0.4Lux
(0.003Lux)
- ATW/AWC/modalità manuale (3200°K,
5600°K, Controllo del gain R/B)
- Segnale video composito: 1.0 Vp-p
75ohms/BNC
Obiettivo
Otturatore elettronico
- Off, 1/100, 1/250, 1/500, 1/1K, 1/2K, 1/4K,
/10K sec
Sense Up
Zoom digitale
Rilevazione del movimento
- off/on (impostazione dell’area)
- off/Auto2x~128x/fix 2x~128x
- off/on (x10), PIP
- off/on (impostazione dell’area e della
sensibilità)
Temperatura ed umidità operative
- 14°F~+122°F, ~90%
Dimensioni
- 59,5 x 60,5 x 143mm
Peso
I
- 52dB(AGC OFF)
- Obiettivo telescopico 22x integtrato
- Lunghezza focale: da 3,6 a 79,2 mm
- Apertura: F1,6(Wide), F3,8(Tele)
- Filtro IR acceso/spento (solo per il modello
SCC-C4303)
Compensazione del controluce
Note
- Telecamera zoom 22x
- 500g
32
6
Altre
Terminali remoti ZOOM/MESSA A FUOCO
Questi terminali servono per attivare le funzioni
ZOOM/FOCUS, CONTROLLO MENU, RITORNO NELLA
POSIZIONE HOME e AF per mezzo di un controller
esterno. A seconda della condizione di ingresso, i
terminali possono essere impostati su una delle quattro
modalità seguenti: A, B, C e D. (SPECIALE - TIPO CTRL)
(Limiti della tensione di esercizio: +3V~+13V, -3V~-13V)
1: Quando il menu è disattivato ("off"), se la tensione viene
applicata per meno di 2 secondi, la funzione AF verrà
attivata; nel caso in cui la tensione venga applicata per
più di 2 secondi, il menu verrà attivato ("on"). Con il menu
attivato ("on"), in caso di applicazione della tensione,
verrà attivata la funzione INVIO.
2: Se la tensione viene applicata per più di 2 secondi, la
telecamera ritornerà nella posizione home specificata
(PRESET 0).
1) La tensione può essere applicata al terminale
ZOOM o FOCUS, ma non a entrambi.
Funzione*1 TELEOBIETTIVO (Su) GRANDANGOLO (Giù) VICINO (Sinistra) LONTANO (Destra)
Terminale ZOOM
Terminale FOCUS
A
-6V
+6V
-6V
+6V
B
-6V
+6V
+6V
-6V
C
+6V
-6V
-6V
+6V
D
+6V
-6V
+6V
-6V
Codice
1: Con il MENU ATTIVATO questi tasti sono utilizzati per
controllare la funzione ZOOM/MESSA A FUOCO, mentre
con il MENU DISATTIVATO sono utilizzati come tasti SU,
GIÙ, SINISTRA E DESTRA.
2) In caso di applicazione simultanea della tensione ai
terminali ZOOM e FOCUS
Funzione
Codice
33
INVIO/AF*1
RITORNO NELLA POSIZIONE HOME
Nel caso in cui non venga premuto alcun tasto per un
determinato periodo di tempo, la telecamera ritornerà
automaticamente nella posizione home specificata. La
posizione home corrisponde alla posizione PRESET 0. Nel
caso in cui la posizione PRESET 0 non sia stata salvata, la
funzione di RTT POS INIZ non sarà attiva.
Impostazione del tempo di ritorno nella posizione home
➞ OFF ➞ 1 MIN ➞ 2 MIN ➞ 3 MIN ~ 60 MIN ➞ 2ZORA ➞
3ZORA~12ZORA
RITORNO NELLA POSIZIONE INIZIALE*2
Terminale ZOOM Terminale FOCUS Terminale ZOOM Terminale FOCUS
A
-6V
-6V
+6V
B
-6V
+6V
+6V
-6V
C
+6V
-6V
-6V
+6V
D
+6V
+6V
-6V
-6V
+6V
34
I