1
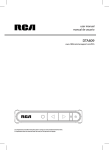
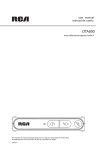
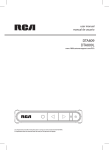
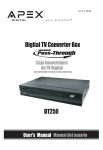
user manual
STB7766C
www.RCAav.com
It is important to read this instruction book prior to using your new product for the first time.
- 20 -
SAFETY PRECAUTIONS
CAUTION
RISK OF ELECTRIC SHOCK
DO NOT OPEN
The lightning flash with an arrowhead symbol, within the
equilateral triangle, is intended to alert the user to the
presence of uninsulated “dangerous voltage” within the
product’s enclosure that may be of sufficient magnitude to
cause an electric shock.
The exclamation point within the equilateral triangle is
intended to alert the user to the presence of important
operating and maintenance (servicing) instructions in this
owner’s manual.
WARNING:
TO REDUCE THE RISK OF ELECTRIC SHOCK, DO NOT REMOVE COVER (OR BACK). NO USERSERVICEABLE PARTS INSIDE. REFER SERVICING TO QUALIFIED SERVICE PERSONNEL.
WARNING:
TO PREVENT FIRE OR SHOCK HAZARD, DO NOT EXPOSE THIS APPLIANCE TO RAIN OR MOISTURE. DO NOT
PLACE OBJECTS FILLED WITH LIQUIDS ON OR NEAR THIS UNIT.
C
Equipment tested for
compliance as a
complete unit
This device complies with Part 15 of the FCC Rules. Operation is subject to the following two conditions:
(1) This device may not cause harmful interference, and (2) this device must accept any interference
received, including interference that may cause undesired operation.
This equipment has been tested and found to comply with the limits for a Class B digital device,
pursuant to Part 15 of FCC Rules. These limits are designed to provide reasonable protection against
harmful interference in a residential installation. This equipment generates, uses, and can radiate
radio frequency energy and, if not installed and used in accordance with the instructions, may cause
harmful interference to radio communications.
However, there is no guarantee that interference will not occur in a particular installation. If this
equipment does cause harmful interference to radio or television reception, which can be determined
by turning the equipment off and on, the user is encouraged to try to correct the interference by one
or more of the following measures:
• Reorient or relocate the receiving antenna.
• Increase the separation between the equipment and receiver.
• Connect the equipment into an outlet on a circuit different from that to which the receiver is
connected.
• Consult the dealer or an experienced radio/TV technician for help.
WARNING: Changes or modifications not expressly approved by the party responsible for compliance
could void the user’s authority to operate the equipment.
-1-
IMPORTANT SAFETY INSTRUCTIONS
1.
2.
3.
4.
5.
6.
7.
Read these instructions.
Keep these instructions.
Heed all warnings.
Follow all instructions.
Do not use this apparatus near water.
Clean only with a dry cloth.
Do not block any of the ventilation openings.
Install in accordance with the manufacturer’s
instructions.
8. Do not install near any heat sources such
as radiators, heat registers, stoves, or other
apparatus (including amplifiers) that produce
heat.
9. Do not defeat the safety purpose of the polarized
or grounding - type plug. A polarized plug has
two blades with one wider than the other. A
grounding type plug has two blades and a third
grounding prong. The wide blade or the third
prong is provided for your safety. When the
provided plug does not fit into your AC power
outlet, consult an electrician for replacement
of the obsolete outlet.
10. Protect the power cord from being walked on
11.
12.
13.
14.
or pinched particularly at plugs, convenience
receptacles, and the point where they exit from
the apparatus.
Only use attachments/accessories specified
by the manufacturer.
Use only with a car t,
stand, tripod, bracket,
or table specified by the
manufacturer, or sold with
the apparatus. When a cart
is used, use caution when
moving the cart/apparatus
Portable Cart
combination to avoid injury
Warning
from tip-over.
Unplug this apparatus during lightning storms
or when unused for long periods of time.
Refer all servicing to qualified service
personnel. Servicing is required when the
apparatus has been damaged in any way, such
as the power-supply cord or plug is damaged,
liquid has spilled or objects have fallen into the
apparatus, the apparatus has been exposed to
rain or moisture , does not operate normally,
or has been dropped.
ACCESSORIES
AC Adapter ............................................................................................................................... x 1
Remote Control .......................................................................................................................... x 1
AAA Batteries (for Remote Control) ............................................................................................... x 2
RF Cable ................................................................................................................................... x 1
CONTENTS
Safety Precautions ...................................... 1
Important Safety Instructions..................... 2
Accessories ................................................. 2
Contents ....................................................... 2
Remote Control............................................ 3
Quick Start Guide .....................................4-5
Control Reference Guide .........................6-7
Connections ................................................. 8
Connecting a TV (using the RF cable)........... 8
Connecting a TV (using the AV cable) ........... 8
Power Supply ............................................... 9
Using the AC Power Adapter ........................ 9
Turning on the Unit ....................................... 9
Dolby Digital .................................................. 9
Basic Operation ......................................... 10
Searching for Channels Automatically ......... 10
Viewing the TV Channel ............................ 10
Adjusting the Volume ................................... 10
Viewing the Information ............................... 10
View Signal .................................................. 10
On-Screen Menu Settings ......................... 11
Channel List ............................................... 11
AV Settings................................................. 11
Ratings ..................................................12-13
Closed Captioning ..................................... 14
Settings ...................................................... 14
Display 16:9 Contents ............................... 15
Watching Non-Digital TV ........................... 15
Closed Captioning on the Converter Box . 16
Maintenance ............................................... 17
Troubleshooting Guide ............................. 17
-2-
REMOTE CONTROL
• Point the remote control at the REMOTE SENSOR located on the unit.
• When there is a strong ambient light source, the performance of the infrared REMOTE SENSOR
may be degraded, causing unreliable operation.
• The recommended effective distance for remote operation is about 16 feet (5 meters).
To Install Batteries
1. Open the battery door.
2. Insert two AAA batteries.
Battery Replacement
When the batteries become weak, the operating distance of the remote control is greatly reduced
and you will need to replace them.
CAUTION: Danger of explosion if battery is incorrectly replaced. Replace only with the same
or equivalent type.
Notes:
• If the remote control is not going to be used for a long time, remove the batteries to avoid corrosion
damage caused by battery leakage.
• Do not mix old and new batteries. Do not mix ALKALINE, standard (CARBON-ZINC) or rechargeable
(NICKEL-CADMIUM) batteries.
• Always remove batteries as soon as they become weak.
• Weak batteries can leak and severely damage the remote control.
• WARNING: Do not dispose of batteries in a fire. Batteries may explode or leak.
-3-
QUICK START GUIDE
STEP 1: CONNECTIONS
When this converter box is powered on, digital signals from the ANTENNA RF IN jack are converted
to analog signals and output from the TV RF OUT jack or the VIDEO OUT jack.
When this converter box is in standby state, analog RF TV signals pass through the box and output
from the TV RF OUT jack.
Option One: Using the RF Cable to Connect a TV
1. Connect an antenna cable to the RF IN terminal on the rear of the unit.
2. Use the RF cable (included) to connect the unit and TV/Monitor.
3. Use the AC adapter (included) to connect a suitable wall outlet. The supplied 9V adapter operates
on AC 100-120V ~ 50/60Hz.
4. Turn on your TV and switch TV’s channel selection to CH3.
Note:
• If a local TV Station happens to broadcast on CH3, we recommend you switch the unit’s
Output Channel to Channel 4 (and switch TV to CH4), following the instructions on Page 12.
Rear of TV
Option Two: Using the AV Cable to Connect a TV
1. Connect an antenna cable to the RF IN terminal on the rear of the unit.
2. Use the AV Cable (not included) to connect the unit and TV/Monitor.
3. Use the AC adapter (included) to connect a suitable wall outlet. The supplied 9V adapter operates
on AC 100-120V ~ 50/60Hz.
4. Turn on your TV and follow the instructions included with it to select the “AV IN” function.
YELLOW
RED
WHITE
Rear of TV
YELLOW
RED
-4-
WHITE
QUICK START GUIDE
STEP 2:
TURNING ON THE UNIT
1. While the AC adapter is connected and the unit is in standby mode, power will be consumed and
the power indicator is RED.
2. Press the
STANDBY/ON button to turn on the unit. The power indicator is GREEN.
STEP 3:
SETTING THE OSD LANGUAGE
1. The right screen can be seen on your TV when
the correct channel is chosen.
2. If you can't see the right screen on your
TV set, please check: if the converter box
has been turned on or if you have correctly
connected the TV set with the Converter Box.
3. Use the
/
button then press the ENTER
button, or press 1 (for English), 2 (for Spanish)
or 3 (for French) to select the menu language.
Language
Choose the language to b e used in the menu system.
English-1_Menu text is displayed in English.
Español-2_El texto del menúse exhibe en
español.
Français-3_Le texte des menus est affichè en
français.
[
STEP 4:
] Move , [ Enter ] Choose
SEARCHING FOR CHANNELS AUTOMATICALLY
1. Press 1 button on the remote control to start
automatic channel search.
2. When the scan finishes, the Channel List
menu displays the found channels.
Channel Scan
Channel scan will search for channels available in your
area . you may have to re - adjust the antenna and
retry the scan to capture all available channels .
Begin - 1 _ Start channel search .
Done - 2 _ Show channel list.
Total number of discovered channels : 0
[ Exit ] Exit , [ Menu ] Back , [
] Move , [ Enter ] Choose
STEP 5: VIEWING THE TV CHANNEL
There are two methods to view your desired channel.
Method 1: The Channel List shows after scanning, press
press ENTER to start viewing.
/
button to highlight a channel and
Method 2: Press the CH+/CH- buttons to select a channel, or press the number button on the remote
to select the channel you want to watch.
Please read the Instruction Manual for further details on using the Converter Box.
-5-
CONTROL REFERENCE GUIDE
Remote Control
1)
1
7
2
8
3
4
9
5
10
11
6
12
MUTE Button
Press to turn off the sound.
2) MENU Button
Press to display the on-screen menu or switch
back to the previous menu screen.
3) CURSOR ( , , , ) Buttons
Use to highlight selections on a menu screen
and adjust certain settings.
ENTER Button
Confirm selection on a menu screen.
4) INFO Button
Press to display information on the current
channel.
5) VOL + / VOL - Button
Press to increase/decrease the volume.
6) CC Button
Press to change the Closed Caption
appearance. This function only works on
programs broadcasted with captions.
7) STANDBY/ON Button
Press to turn ON the unit or put it in STANDBY
(OFF) mode.
8) EXIT Button
Press to exit from the on-screen menu or a
pop-up display.
9) SIGNAL Button
Press to display TV signal quality.
/ CH
Buttons
10) CH
Press to select the channel upward or
downward.
11) NUMERIC Buttons
Press to enter numbers or go directly to a
specific channel.
12) LAST CH
Press to switch repeatedly between the last
two channels displayed.
• [dot] Button
Press to enter digital sub-channels with the
numeric buttons (i.e. 11.3 or 12.7).
-6-
CONTROL REFERENCE GUIDE
1
Front View
2
3 4
Back View
5
1)
2)
3)
4)
5)
6
7
Remote Sensor
Receives infrared signals from the remote
control.
CH-/CH+ Buttons
Press to select the channel upward or
downward.
Button
Turns the power on or restores the unit to
the standby mode.
STANDBY/ON Indicator
Green: power on
Red: standby mode
ANTENNA RF IN Terminal
Connect the AIR antenna.
8
6)
7)
8)
-7-
TV RF OUT Terminal
Use to connect your TV using a coaxial
cable. When this Converter Box is powered
on, analog RF signals output from the TV
RF OUT terminal.
When this Converter Box is in standby
mode, analog RF TV signals pass through
the box and output from the TV RF OUT
terminal.
AUDIO OUT / VIDEO OUT Jacks
Outputs audio/video signals to a connected
TV.
DC IN 9V Jack
Connect the supplied AC adapter.
CONNECTIONS
When this converter box is powered on, digital signals from the ANTENNA RF IN jack are converted
to analog signals and output from the TV RF OUT jack or the VIDEO OUT jack.
When this converter box is in standby state, analog RF TV signals pass through the box and output
from the TV RF OUT jack.
Connecting a TV (Using the RF Cable)
1. Connect an antenna cable to the RF IN terminal on the rear of the unit.
2. Use the RF cable (included) to connect the unit and TV/Monitor as shown.
3. Turn on your TV and switch TV’s channel selection to CH3.
Note:
• If a local TV Station happens to broadcast on CH3, we recommend you switch the unit’s CH3/4
Output to CH4 (and switch TV to CH4), following the instructions on Page 12.
Rear of TV
Connecting a TV (Using the AV Cable)
1. Connect an antenna cable to the RF IN terminal on the rear of the unit.
2. Use the AV Cable (not included) to connect the unit and TV/Monitor as shown.
Note:
Make sure to turn on your TV and follow the instructions included with it to select the “AV IN”
function.
YELLOW
RED
WHITE
YELLOW
RED
Rear of TV
-8-
WHITE
POWER SUPPLY
Using the AC Adapter
The supplied 9V adapter operates on AC 100-120V ~ 50/60Hz.
While the AC adapter is connected and the unit is in standby mode, power will be consumed and
the power indicator is RED.
Cautions:
• The AC adapter included with this unit is for its use only. Do not use it with other equipment.
• When the unit is not going to be used for a long period of time, disconnect the AC adapter from
the AC power outlet.
• When the AC adapter is plugged in, the apparatus is not completely disconnected from the main
power supply, even when the power is turned off.
Turning on the Unit
Press the
STANDBY/ON button to turn on the unit. The power indicator is GREEN.
Dolby Digital
Manufactured under license from Dolby Laboratories.
“Dolby” and the double-D symbol are trademarks of Dolby
Laboratories.
-9-
BASIC OPERATION
Searching for Channels Automatically
1. Press the MENU button on the remote control.
2. Use the / buttons then press ENTER button or press 5 button to select the Settings menu.
3. Use the / buttons then press ENTER button or press 1 button to select Channel Scan.
4. Repeat the similar operation to start scanning (Begin / Scan Add).
Note:
• The unit MUST be connected to an antenna in order to receive digital TV signals.
• If you wish to stop scanning in the middle of the scanning process, press the MENU button to
cancel scan or the EXIT button to exit.
Viewing the TV Channel
Choose one of the below methods to view a television station.
Method 1: Select Channel List on the menu, press
ENTER to start viewing.
/
button to highlight a channel and press
Method 2: Press the CH+ / CH - buttons to select a channel, or press the number button on the
remote to select channel you want to watch.
Adjusting the Volume
You can control the TV volume using the buttons on the remote control.
VOL - / VOL + Buttons
Using these buttons to increase or decrease the volume.
MUTE Button
This button is used to mute the sound of the unit. No audio will be heard once this button is
pressed.
To cancel the mute action, press the
MUTE button again.
Viewing the Information
You can view information of the current TV program by pressing the INFO button on the remote
control.
The INFO shows:
Press the INFO button, it shows:
• The channnel number and the channel name
• Program hours
• Signal level
• Current time and date
• Program rating
Press the INFO button again, it will show more corresponding description for current program.
To hide INFO:
Press the INFO button again.
Viewing Signal
To view the signal quality, press the SIGNAL button on the remote control. A beep sound will be
heard.
- 10 -
ON-SCREEN MENU SETTINGS
Use the menu configuration to set detailed
options for each function. Press the MENU
button on the remote control to open the
menu screen.
Main M enu
Channel List - 1 _ See channel information and
.
status.
AV Settings - 2 _ Adjust audio and video
settings .
• Press the number keys on the remote
control to access the corresponding menu
item directly.
Ratings - 3 _ Set V - Chip rating limits .
Closed Captioning - 4 _ Captions Fonts and Colors .
• To return to the previous menu, press the
MENU button on the remote control.
Settings - 5 _ Configuration .
• To exit the menu screen, press the EXIT
button on the remote control.
[ Exit ] [ Menu ] Exit ,[ ] Move , [ Enter ] Choose
CHANNEL LIST
• L i s t t h e ava i l a bl e T V c h a n n e l s a n d t h e
programs playing on each channel.
• To change channels, select a channel number
and press ENTER.
• To skip a channel when pressing the CH+/button, select “Stored” next to the channel
name and then press ENTER. The status
changes to “Skipped”.
Channel List
Channel #
5.1
5.5
Updating
Channel Name
KTLA-DT
Stored/Skipped
Stored
TheTube
Stored
[ Exit ] Exit , [ Menu ] Back , [
] Move , [ Enter ] Choose
AV SETTINGS
• Change the video display, sound output
formats and select NTSC RF output channel.
• Press 1 for Picture, 2 for Audio Controls or 3
for CH 3/4 Output.
– Picture: Press 1 for Widescreen or 2 for
Fullscreen.
– Audio Controls: Press 1 for Stereo, or 2 for
Alternate Audio (for bilingual programs). When
Alternate Audio is selected, press ENTER on
the remote control to switch between main and
alternate languages while watching TV.
– CH 3/4 Output: Switch to RF CH3 or CH4
output. Press 1 for CH3, or 2 for CH4.
- 11 -
AV Settings
Adjust audio and video settings.
Picture - 1 _ Adjust video display .
Audio Controls - 2 _ Adjust audio output .
CH3 / 4 Output - 3 _ Adjust CH3 / 4 Output .
[ Exit ] Exit , [ Menu ] Back , [
] Move , [ Enter ] Choose
RATINGS
• This feature enables you to restrict access to
certain TV programs whose content may be
deemed unsuitable for your children. Viewing
is restricted unless the password (initial default
password: 0000) that you have chosen is
entered. Password is also required before
entering the rating menu.
• Three sub-menus are available.
Ratings
V - Chip ratings can password protect programs based
on content .
Lock / Unlock - 1 _ Turn ON / OFF rating enforcement .
Rating Limits - 2 _ Set rating limits.
Change PIN-3 _ Change password number .
[ Exit ] Exit , [ Menu ] Back , [
] Move ,[ Enter ] Choose
• Press 1 for Lock/Unlock
To activate or deactivate the rating feature.
– Lock/Unlock: Press 1 to select OFF (to de-activate the rating feature, even if you have defined
certain settings in the Rating Limits menu) or press 2 to select ON (to activate the rating feature)
or press 3 to select ON/Enable (to activate the rating feature and enable downloadable ratings).
• Press 2 for Rating Limits
– Rating Limits: Press 1 for TV Shows, press 2 for Movies, press 3 for Custom (only available
when ON/Enable is selected in Lock/Unlock menu).
Movies: To change the movie parental ratings
by pressing ENTER against desired rating
level. A padlock icon tells you whether or not
a rating level is locked.
– In the below example, all movies rated PG
or above require the password for viewing.
TV Shows: To change the TV parental ratings
by pressing ENTER against desired rating
level. A padlock icon tells you whether or not
a rating level is locked.
– In the below example, all TV programs
rated above TV-PG require the password
for viewing.
G
TV-Y
PG
TV-Y7
FV
PG-13
TV-G
R
TV-PG
D
L
S
V
TV-14
D
L
S
V
L
S
V
NC-17
X
TV-MA
NR
Custom: To select downloaded rating.
Note: Rating Region Table (RRT) options are different according to the current program.
- 12 -
RATINGS
• Press 3 for Change PIN
To change the password for ratings.
The initial default password is "0000", you can change it and create your own password to
activate the rating settings.
NOTE 1:
Remember your password,If you have changed it.
If you forget the password, enter “8888” to unlock parental control.
NOTE 2:
After the rating settings are done, don’t forget to activate them by selecting ON in the
Lock/Unlock menu.
Parental Controls, popularly known as the “V-Chip,”depend on information sent by broadcasters
about specific programs. Two ratings systems are available for you to use to screen
inappropriate content for your family.
TV shows can be rated by broadcasters based on the following Age and Content-based
Guidelines:
• TV-Y (All Children – This program is designed to be appropriate for all children.)
• TV-Y7 (Directed to Older Children – This program is designed for children age 7 and above.)
The program may contain fantasy violence (FV).
• TV-G (General Audience – Most parents would find this program suitable for all ages.)
• TV-PG (Parental Guidance Suggested – This program contains material that parents may
find unsuitable for younger children.) The program may contain one or more of the following:
moderate violence (V), some sexual situations (S), infrequent coarse language (L), or some
suggestive dialogue (D).
• TV-14 (Parents Strongly Cautioned – This program contains some material that many
parents would find unsuitable for children under 14 years of age.) Parents are strongly urged
to exercise greater care in monitoring this program and are cautioned against letting children
under the age of 14 watch unattended. This program contains one or more of the following:
intense violence (V), intense sexual situations (S), strong coarse language (L), or intensely
suggestive dialogue (D).
• TV-MA (Mature Audience Only – This program is designed to be viewed by adults and
therefore may be unsuitable for children under 17.) This program contains one or more of the
following: graphic violence (V), explicit sexual activity (S), or crude indecent language (L).
Some programmers use the Movie Ratings (MPAA)
System to rate TV shows on the same scale as motion pictures:
• A G-rated motion picture contains nothing intheme, language, nudity, sex, violence or other
matters that would offend parents whose younger children view the motion picture.
• A PG-rated motion picture should be investigated by parents before they let younger children
attend.
• A PG-13 rating is a sterner warning to parents to determine whether their children under age
should view the motion picture, as some material might not be suited for them.
• An R-rated motion picture contains some adult material.
• An NC-17 rated motion picture is one that most parents would consider too adult for their
children.
• An X rated motion picture is only for adults.
• An NR rated motion picture is not rated by the MPAA.
For more information about TV ratings, visit: www.PauseParentPlay.org.
- 13 -
CLOSED CAPTIONING
• Let you change the closed caption appearance
(font, text color, text opacity, background color,
background, edge effect and edge color).
• Press 1 (Font Options) to change font color
and effects, 2 (Back Options) to change
background color and effects or 3 (Default) to
reset to default settings.
• Only digital closed captions can be changed.
• For more information, see "Advantages of
closed captioning on the Converter Box" on
Page 17.
Closed Captioning
Captioning helps the hearing impaired enjoy TV
programs.
Font Options - 1 _ Adjust font color and effects .
Back Options - 2 _Adjust background color and
effects.
Default - 3 _ Reset to default settings .
[ Exit ] Exit , [ Menu ] Back , [
] Move ,[ Enter ] Choose
SETTINGS
• Six sub-menus are available.
Settings
• Press 1 for Channel Scan
– To start automatic channel scan.
– To scan more channels (Scan Add) after
adjusting your antenna.
– Enable the "Scan Add" option if you only want
to scan more channels with keeping existing
channel list.
These functions are typically only necessary when first
setting up the system or when a problem occurs.
Channel Scan - 1 _ Search for valid channels .
Language - 2 _ Select language used in menu .
Power Saver - 3 _ Turns off power automatically .
Antenna - 4 _ Signal strength meter .
Time Zone - 5 _ Options for setting local time .
System Reset - 6 _ Return system to factory settings .
• Press 2 for Language
– To select the menu language.
[ Exit ] Exit , [ Menu ] Back , [ ] Move , [ Enter ] Choose
• Press 3 for Power Saver
– An energy saving feature to turn off the converter box automatically after 4 (default), 8 or 12
hours according to your selection. Select OFF to de-activate this feature.
– The timer is only active when the converter box remains idle (i.e. no key activation). Once any “Box”
key is pressed, the timer will be reset.
– If you have set up timer recordings for TV programs, make sure the converter box will not turn
off automatically before the recordings finish.
• Press 4 for Antenna
– To show the signal strength for receiving broadcast from a TV station. If signal is weak, you may
need to adjust the antenna.
• Press 5 for Time Zone
– This option is for time-zone identifying local time. You can select the time zone from Automatic
Eastern / Central / Mountain / Pacific / DST.
• Press 6 for System Reset
– To restore all settings to factory defaults.
- 14 -
DISPLAY 16:9 CONTENTS
When receiving a 16:9 digital broadcast signal, the Digital TV Converter will convert the 16:9
picture to fit a 4:3 TV screen. Use the "Picture" setting to select between two conversion modes.
Fullscreen Mode (Default)
This mode uses the entire screen of your TV, but the left and right end of the picture will be
removed.
Widescreen Mode
The entire picture will be displayed on your TV, but there will be unused areas (black bars) along
the top and bottom edges of your TV screen.
Using a 16:9 TV with the digital TV Converter
It is recommended that you use the widescreen option to avoid cropping the picture. Most 16:9 TVs
offer various modes for displaying 4:3 pictures, experiment to find the best setting.
To select the Fullscreen or Widescreen modes
1. Press Menu on the remote control.
2. Select "AV Settings".
3. Select "Picture".
WATCHING NON-DIGITAL TV
To continue to view non-digital TV broadcasts, if available, press the BOX on your remote to place
the Converter Box in standby mode (red light), then you can tune your TV to any available non-dig
ital channels (refer to your TV controls).
You must have the RF coaxial cable connected to your TV input, in order to watch non-digital TV
broadcasts.
- 15 -
CLOSED CAPTIONING ON THE CONVERTER BOX
Closed captions allow people who are deaf or hard of hearing to enjoy TV programming. Captions
are also a helpful tool for those learning English or watching TV in a noisy environment.
The Converter Box provides two ways for you to view captions. You should choose one method or
the other.
Method 1
First, you can continue receiving standard TV captions (basic white text on a black background)
through your analog TV set. The Converter Box will automatically send the closed-captioning in
formation to your television for the TV to decode and display. All you need to do is turn on the
closed captioning function on your TV as you always have (if your TV has this capability, as newer
TV sets do.)
Method 2
Alternatively, the Converter Box can be used to decode captions and display them on your TV
screen. If you use this method, you will be able to enjoy the enhancements made possible by digital
technology.
To use the converter box to display closed captions:
1. Turn OFF your television’s closed-caption decoder.
2. Turn on the Converter Box’s captioning decoder by pressing the CC button at the lower left-hand
side of the remote control.
• When you use the converter box to display closed captions in this way, you can choose different
types (languages) of captions, depending on what information broadcasters are sending.
Advantages of closed captioning on the Converter Box
AUsing the Converter Box to decode captions gives you more choices and more flexibility when
viewing captions on digital TV shows. If you choose this method, you can personalize your captions
by making the following choices:
• Select different types of fonts.
• Choose between eight background colors and foreground colors for the captioning text (white,
black, red, green, blue, yellow, magenta, and cyan).
• Make the caption background transparent, translucent, solid, or fashing.
• Set edges of font characters with raised edges, depressed edges, uniform edges, left shadow or
right shadow.
Each of these enhancements to standard digital captions can be accessed from the main menu of
the Converter Box by pressing the MENU button.
To use Closed Captioning, please frst try turning ON Closed Captioning feature on your TV (this
setting can normally be found in TV’s setup menu). If not satisfed with the results, try turning
OFF Closed Captioning feature on your TV, and turning ON Closed Captioning feature on your
Converter Box.
Note: DO NOT enable closed captions on both TV and the converter box. Otherwise, both captions
will be overlapped.
- 16 -
MAINTENANCE
Cleaning the Unit
• Be sure to turn the unit off and disconnect the AC adapter before maintaining the unit.
• Wipe the unit with a dry soft cloth. If the surfaces are extremely dirty, wipe clean with a cloth that
has been dipped in a weak soap-and-water solution and wrung out thoroughly. Wipe with a dry
cloth.
• Never use alcohol, benzine, thinner, cleaning fluid or other chemicals. Do NOT use compressed
air to remove dust.
TROUBLESHOOTING GUIDE
SYMPTOM
CAUSE (AND REMEDY)
Unit does not work.
• Unplug the AC power cord and plug it back in.
No picture on the TV
screen.
• Make sure the converter box is turning on.
• Make sure the connections between the converter box and TV are
properly done.
• Choose different channels or video inputs on the TV set until the
picture appears.
No sound.
• Make sure the connections between the converter box and TV are
properly done.
• Make sure the TV sound is not muted.
Remote control does not
work.
• Make sure the batteries are inserted correctly.
• Replace the batteries if they are exhausted.
• Remove any obstacles between the remote control and the converter
box.
Can not watch a bilingual
TV program in its secondary language.
• Make sure you have correctly selected the audio settings. Refer to AV
settings in the main menu.
Forgot password.
• Choose “Ratings” in the main menu and input the master password
“8888”. Create a new password. (The master password cannot be
used to unlock programs for viewing.)
The Converter Box has
turned off suddenly.
• Check if Power Saver timer is activated in the main menu. It is set to
4 hours by default.
Weak signal or channel
not available.
• Try to reposition the antenna.
TV can not receive analog
channels.
• Turn off the converter box (pass through mode) and confirm cables
are connecting correctly.
Specifications and external appearance are subject to change without notice.
- 17 -
LIMITED WARRANTY
AVC MULTIMEDIA (“AVC”) makes the following limited warranty. This limited warranty extend to the original consumer
purchaser and is limited to non-commercial use of the product.
One Year Parts & Labor Warranty
AVC products purchased in the United States are warranted to be free from defects in materials or workmanship for a period
of one year from the date of their original retail purchase. If the unit fails to conform to this warranty, we will service the
product using new or refurbished parts and products, at AVC’s sole discretion.
During a period of one year from the effective warranty date, AVC will provide, when needed, service labor to repair a
manufacturing defect at its designated Service Center. To obtain warranty service in the United States, you must first call
our Customer Support Center at 1-800-506-5746 or 1-877-252-6873, during the hours listed in the box below.
The determination of service will be made by AVC Customer Support. PLEASE DO NOT RETURN YOUR UNIT TO AVC
WITHOUT PRIOR AUTHORIZATION. New or remanufactured replacements for defective parts or products will be used for
repairs by AVC at its designated Service Center for one year from the effective warranty date. Such replacement parts or
products are warranted for an additional one year from the date of repair or replacement. The Customer will be required
to ship the unit to the Service Center indicated at the time Customer Support is contacted to make the necessary repairs.
The customer is responsible for all transportation charges to the service facility.
Packaging and Shipping Instruction
When you send the product to the AVC service facility you must use the original carton box and packing material or an
equivalent as designated by AVC.
LIMITED WARRANTY
Your Responsibility
(1) You must retain the original sale receipt to provide proof of purchase.
(2) These warranties are effective only if the product is purchased and operated in the U.S.A. or Canada.
(3) Warranties extend only to defects in material or workmanship, and do not extend to any product or parts which have
been lost or discarded, or damage to product or parts caused by misuse, accident, improper operation or maintenance,
or use in violation of instructions provided with the product, or to product which has been altered or modified without
authorization of AVC, or to products or parts thereof which have had the serial number removed or changed.
Out of Warranty
In the event your product requires repair after the limited warranty period has expired, please contact our Customer
Support Center at 1-800-506-5746, 1-877-252-6873 or www.RCAav.com
Hours: Monday–Thursday: 9am–7pm, Friday: 9am–5pm, Saturday: 9am–NOON Eastern time.
Important: You are responsible for any transportation, shipping or insurance relative to the return of product to
our Product Returns Center.
All warranties implied by state law, including the implied warranties of merchantability and fitness for a particular purpose,
are expressly limited to the duration of the limited warranties set forth above. With the exception of any warranties implied
by state law as hereby limited, the foregoing warranty is exclusive and in lieu of all other warranties, guarantees, agreements
and similar obligations of manufacturer or seller with respect to the repair or replacement of any parts. In no event shall
AVC be liable for consequential or incidental damages.
No person, agent, distributor, dealer or company is authorized to change, modify or extend the terms of these warranties
in any manner whatsoever. The time within action must be commenced to enforce any obligation of AVC arising under the
warranty or under any statute, or law of the United States or any state thereof, is hereby limited to one year from the date
of purchase. This limitation does not apply to implied warranties arising under state law.
This warranty gives you specific legal rights and you may also have other rights, which may vary, from state to state. Some
states do not allow limitation on how long an implied warranty lasts, when an action may be brought, or the exclusion or
limitation of incidental or consequential damages, so the above provisions may not apply to you.
For more information on other products and services, please visit our web site at
www.RCAav.com
Important: Also keep your “Bill of Sale” as proof of purchase.
Model no. ..............................................................................................Product name ...................................................................
Type of set ........................................................................................................................................................................................
Serial no. ...............................................................................................Invoice no. ........................................................................
Date purchased .................................................................................... Dealer name .....................................................................
FOR SERVICE AND REPAIR, PLEASE VISIT www.RCAav.com
Specifications and external appearance are subject to change without notice.
- 18 -
© 2009 AVC Multimedia
Trademark(s) ® Registered
Marca(s) ® Registrada(s)
Printed in China
811-776691W090
- 19 -