1
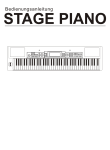
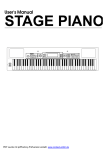
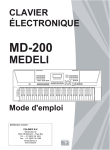
Princeton SP-88 Portable Ensemble
USER’S MANUAL
For a more musical life™
Using the Instruction Manual
Thank you for purchasing this high quality Digital Piano. Your new Piano is easy to use and
easy to transport. It has powerful and useful features that make it perfect for real-time
performance or as a versatile instrument for your home. Your piano offers powerful and useful
features including: programmable panel memories, SYNTH-feature (create your own
sounds!), multi-track record, built-in music styles, EZ-play features and lots more!!!
Before you use the piano, we recommend you read through this manual. Please keep this
manual handy for future reference.
Precautions
Please read the following carefully before use:
Do not expose the piano to high temperature, direct sunlight or excessive dust.
Do not place the piano too close to other electrical appliances such as televisions and
radios (the electronic signals from these devices may cause interference).
Avoid Liquids and excessive humidity – in particular, avoid placing liquid containers (vase,
glass, etc…) on the piano to prevent damage of the internal components (being an
electrical instrument, your piano is very sensitive to liquids!).
Always unplug your piano by gripping the AC plug firmly (near the plug) – do not pull on
the cord.
Do not apply excessive force to the switches and buttons.
When the piano is not in use or during electrical storms, please disconnect the power
supply
Avoid adjusting the volume to the maximum level or to a level that you feel uncomfortable,
it is recommended that you limit the volume level to two-thirds of the max to prevent any
damage of your auditory sense
Unplug the power cable before cleaning the piano. Do not connect or disconnect the
power cable with a wet hand.
Check and clean the power plug periodically.
To avoid damage to the piano and other devices to which it is connected, turn the power
switches of all related devices off prior to connecting or disconnecting cables.
Clean the piano and remove the dust with a dry soft cloth or a slightly damp cloth. – never
spray any cleaners directly on or into your piano.
Never use cleaners such as thinner or alcohol. To prevent any damage on the surface of
the LED display, please use lens cleaning tissue to clean the display.
If the piano power cord is damaged in any way, please do not use the piano. A damaged
power cord risks fire or electrical hazard.
In case of malfunction due to improper handling of the piano, please switch your piano off
and wait 30 seconds before turning on again.
Do not attempt to disassemble or repair the piano by yourself. If the piano does not work
properly, please contact your authorized reseller or service technician.
Main Features
Keyboard: 88 hammer action key
Modifying Parameters: Use the round DIAL & the [+/YES] / the [-/NO] buttons or numeric
keypad to select Menus & Parameters
Program (Voice): there are 350 incredible sound presets (including user-editable presets)
Synth: you can use the SYNTH feature to create your own sounds
Demo: three built-in demos
Style: 130 built-in Music Styles
Language: the large LCD display screen can be viewed in several languages
The piano has a friendly interface, especially the menu operation. You can use
BACK/NEXT/+/-/DIAL to operate all features
Chord: A.B.C mode. This is the “EZ-Play” feature that allows the keyboard to read your
chords in the left hand while playing your melody in the right hand
Record: you piano can record two songs. Each one has 4 melody tracks and an
accompaniment track.
Read and write SM (smartmedia®) card: the piano can play or record Standard MIDI files
from your SM card - save songs and other storage data onto your SM card. Supports
16MB, 32MB, 64MB, and 128MB SM cards
Panel Memories: 48 total – with 8 Banks - 6 Memories each
PitchBend & Modulation “joystick”: horizontal movement of the joystick controls Pitch
Bend., vertical movement controls the Modulation effect
Album: your piano provides a set of default parameters for 100 songs to get optimal
performance effects
Other functions: Your piano features other great features like ONE-Touch-Setup, DSP
(Digital Signal Processing) and a lot more!
MIDI: Your piano can easily be connected with other MIDI instruments through your MIDI
IN/OUT ports.
Online HELP button: virtual help menu whenever you need it!
Basic Description of Features
6
5
17 19
7
24 26
16 18
23 25
34 36 38
31
32
33 35 37 39 40 41
A LBUM
MIN
MA X
VOLUME
8 9
10 11 12 13
14
15
20 21
22
43
27 29
28 30
42
1. FRONT PANEL
1)
2)
3)
4)
5)
6)
7)
8)
9)
10)
11)
12)
13)
14)
MASTER VOLUME
ACCOMP
BRILLIANCE
SLIDER
SONG TRACKS
RECORD
PLAY
ACCOMP VOLUME
+/START/STOP
INTRO
FILL-IN A
FILL-IN B
ENDING
SYNC START
SYNC STOP
15)
16)
17)
18)
19)
20)
21)
22)
23)
24)
25)
26)
27)
28)
TEMPO +/HELP
SMC LOAD
A.B.C
(Auto
Chord)
BACK
UTILITY
NEXT
SAVE
ALBUM
STYLE
DEMO
DSP
VOICE
LOWER
VOICE
29)
30)
31)
32)
33)
34)
35)
36)
37)
38)
39)
40)
41)
42)
43)
DUAL
FUNCTION
DIAL
NUMERIC
KEYPAD
O.T.S.
FREEZE
SUSTAIN
TRANSPOSE
HARMONY
SYNTH
TOUCH
BANK
STORE
M1-M6
LCD DISPLAY
1
2
20
5
6
19
8
9
10
11
12
13
7
3
4
22
21
23
18
8
9
16
2. L.H. SIDE
3. LCD DISPLAY
1)
2)
3)
4)
5)
6)
7)
8)
9)
1) A.B.C.
2) HARMONY
3) LOWER
4) DSP
5) TOUCH
6) SUAL
7) SUSTAIN
8) METRONOME
9) TEMPO VEL
10) MEASURE
11) BEAT
12) MEMORY/O.T.S.
/TICK
13) STEP/REC
DC12V POWER JACK
POWER
MIDI IN/MIDI OUT
SUSTAIN PEDAL
VOLUME PEDAL
AUX.IN
AUX.OUT L/MONO
AUX.OUT RIGHT
PHONES1/PHONES 2
4. REAR
PANEL
15
14
14)
15)
16)
17)
18)
19)
20)
21)
22)
23)
24)
25)
MELODY 1-4
ACCOMP
PLAY
RECORD SONG 1/2
SYNTH/NOR/VAR/SMC/
DISK
CHORD
VOICE/STYLE/SONG/
DEMO/ALBUM/PHRASE
BAS CLEF
TREBLE CLEF
FILL-IN A/FILL-IN B
5. JOY STICK
3.3 SMC SLOT
Pitch bend/
modulation joystick
3.3V CARD
SMC BASE
Connections
The power jack
Your piano can be powered from a
standard household wall outlet by using the
specified AC adaptor. The power jack is located
on the left panel of the piano body. Make sure
that only the AC adaptor specified for this piano
is used. The adaptor shall be 12V DC output,
and center positive type.
Make sure to turn off the piano before you
connect the adaptor into the AC wall outlet.
DC 12V
Caution!
Use of a different type of adaptor risks
fire and/or electrical shock. For safety sake,
make sure to unplug the AC adaptor from the
wall outlet whenever leaving the piano
unattended for a long time or during an electrical
storm.
The headphone jack
There are two headphones jacks – jack “1” lets
you listen through BOTH the headphones and
internal speakers, jack “2” lets you listen
through the HEADPHONES ONLY (disconnects
the internal speakers).
Caution!
Never use the headphones with high volume,
as it may cause damage to your ears. In addition,
to prevent damage to your speakers,
ensure that the volume is set to the minimum
level before connecting any other device.
The AUX.OUT jack
When you want to listen to your piano with an
External amplifier or speaker, connect to the
AUX OUT L/MONO and R jacks on the left
panel. The volume is adjusted with the
VOLUME button. (For monaural playback, use
the L/MONO jack. For stereo playback, connect
both L/MONO and R jacks.)
The AUX.IN jack
The audio output from a CD player or other
audio equipment can be connected to the AUX
IN jack on the left panel so it can be mixed with
the sound of your piano. This function is
convenient when you want to play along with a
favorite song. The volume of the external signal
is adjusted with the MASTER VOLUME button.
The sustain jack
An optional footswitch can be plugged into the
SUSTAIN jack for sustain control. The
footswitch functions like the sustain pedal on a
piano.
CD Player
The volume jack
An optional footswitch can be plugged into the
VOLUME jack for adjusting the volume of your
piano – this is particularly useful for live
performance situations.
The MIDI IN/OUT jack
MIDI stands for “Musical Instrument Digital
Interface.”. MIDI is a world wide standard that
makes it possible for various electronic musical
instruments and devices (including computers)
to communicate with one another.
MIDI IN:
Data transmitted from other MIDI instruments
via MIDI is received by this terminal.
MIDI OUT:
Data produced by your Digital Piano is
transmitted to other MIDI instruments via MIDI
from this terminal.
Basic operations
Default & Reset Settings
1.
To reset the instrument to the FACTORY
DEFAULT (Including Memory data,
Record data, Language set, SYNTH data
etc.), press the [+]/[-] button synchronously.
2.
To clear the record data, press the
[RECORD] & the [PLAY] button at the
same time.
3.
To set all the memory data to default
settings, press the [STORE] & the [M1]
button at the same time.
4.
To reset all the SYNTH parameters, press
the [STORE] & the [SYNTH] button at the
same time.
1
2
3
4
Master volume control
Turn the VOLUME KNOB to adjust the
MASTER VOLUME.
MIN
MAX
VOLUME
Brilliance
For a brighter sound, move the BRILLIANCE
slider to the right.
For a mellower sound, move the BRILLIANCE
slider to the left.
You can change the keyboard brilliance as you
wish.
Demo
There are 3 Built-in Demos.
Press the [DEMO] button, the DEMO icon on
the LCD lights. It displays the first demo
name "World", and plays all 3 demos.
Press the [DEMO] button again or press the
[START/STOP] button to stop playing and exit
demonstration mode.
Press and hold the [DEMO] button for 3
seconds to play current demo repeatedly.
While playing, press the [+] & the [-] button
or rotate the DIAL to select the DEMO you
want. After the DEMO name flashes for 3
seconds, it plays the new demo immediately.
When playing the demo, press the [TEMPO+]
& the [TEMPO-] button or rotate the DIAL or
step TEMPO/TAP pedal to adjust the current
tempo.
Voice effect
Voice select
There are 350 VOICES. (See "APPENDIX 1
VOICE LIST") which includes 293 GM Sounds,
35 Chinese Sounds, 13 percussion Sets
and 9 User Sounds.
When the voice feature is activated, the LCD
highlights the "VOICE R1" flag and the selected
sound appears in the upper line. ex: "001
Piano). It displays the style name
"001 8 Beat 1" on a second line. Use the
[+] & the [-] button and numeric keypad to
select the voice you desire.
Note:
The keyboard will automatically check the
validity of your number choice when you use the
numeric keypad to select the voice.
Dual
Press the [DUAL] Button . The LCD lights the
DUAL and VOICE R2, and highlights the Voice
name on upper line "144 Sound Track1".
(See "APPENDIX 1 VOICE LIST")
DUAL
DUAL
Use the [+] & the [-] button or the DIAL and
numeric keypad to select the DUAL VOICE.
DUAL
Press the [DUAL] button again to exit DUAL
mode.
In DUAL mode, press the [VOICE] button to
switch to other voice modes ( VOICE R1/
LOWER)
Note:
When A.B.C and lower Voice is off, the whole
keyboard will be set as VOICE R2.Otherwise,
only the right part will be set as VOICE R2.
The piano will check the validity of number
input when you use the numeric keypad to
select the voice.
Lower voice
Press the [LOWER VOICE] button. LCD
lights the lower icon and "VOICE L" . The
LCD highlights the Voice name on upper line
"144 Sound Track1".
LO WER VOICE
LOWER
Use the [+] & the [-] button or the DIAL and
numeric keypad to select the LOWER VOICE.
In LOWER VOICE mode, press the [VOICE]
button to switch to other voice modes ( VOICE
R1/DUAL).
Note:
The piano will check the validity of your number
input when you use the numeric keypad to
select the voice.
Sustain effect
This feature applies SUSTAIN effect to the
keyboard.
SUSTAIN
The default value when you turn on the
instrument is SUSTAIN effect OFF
Press the [SUSTAIN] button to turn on the
SUSTAIN effect. LCD lights the SUSTAIN
icon. It will apply sustain effect when playing
the keyboard. Press the [SUSTAIN] button
again to turn off the SUSTAIN effect.
When the PEDAL is assigned as SUSTAIN
PEDAL (See FUNCTION menu for details),
pressing the [SUSTAIN] button and stepping
SUSTAIN PEDAL can take out their respective
sustain effect simultaneously.
Note:
SUSTAIN via the pedal is better than the
SUSTAIN EFFECT.
SUSTAIN
DSP effect
DSP effects help enhance the sounds in your
keyboard.
The default DSP setting is ON. DSP icon is
lit. Press the [DSP] to turn on/off the
DSP effect.
The DSP effect is determined by 4 parameters
including REVERB TYPE, REVERB LEVEL,
CHORUS TYPE and REVERB LEVEL.
(See FUNCTION menu for details)
It offers 8 REVERB & CHORUS TYPES. These
levels can be adjusted from 0~127. The default
REVERB TYPE
and LEVEL is HALL2 and 92;The default
CHORUS TYPE and LEVEL is CHORUS3 and
0.
Note:
Turning the DSP ON/OFF while you’re playing
will interfere with the sound
Harmony effect
There are 8 Harmony types. (See
FUNCTION menu for details)
The default HARMONY setting is OFF. Take
Harmony duet, one of 8 harmony types as an
example. Press the [HARMONY] button to
turn on the HARMONY effect and the LCD
lights the Harmony icon. It displays
"Harmony Duet" temporarily. Playing a valid
CHORD in the left/chord zone before playing
the note in the right hand zone, the DUET effect
will function.
Note:
The HARMONY effect only works when the
A.B.C is on.
HARMONY
HARMONY
Touch response
There are 3 types of Touch Response. (See
FUNCTION menu for details).
TOUC H
TOUCH
The default Touch setting is Medium. Touch
icon is lit on the LCD. Press the [TOUCH]
button. The LCD displays the current Touch
Response type "Touch Mode: Medium"
Press the [TOUCH] again to turn off the Touch
Response and displays "Touch Mode: Off".
Transpose
Press the [TRANSPOSE] button. LCD displays
"Transpose = 000? Use the [+]& [-] button or
the DIAL to adjust the transpose value.
TRANSPOSE
In TRANSPOSE setting , press the [+] & [-]
At the same time will set the value to 0.
Pitch bend/modulation joystick
Turn left and right the joystick to activate the
PITCH BEND effect. This adjusts the tuning
from -2 semitones to +2 semitones in default
range and you can also set the range from -12
semitones to -12 semitones.
(See FUNCTION menu for details)
Pushing the joystick up and down will activate
the MODULATION effect.
Style
Style select
There are 130 styles in all. (See "APPENDIX
3 STYLE LIST")
When power is on, the LCD displays the style
name "001 8 Beat 1" at the bottom line.
Press the [STYLE] button to illuminate the
STYLE icon. Style name "001 8 Beat 1"at the
upper line will appear.
Use the [+] & [-] button, the DIAL and the
numeric keypad to select the style.
Note:
The piano will check the validity of number
input when you use the numeric keypad to
select the style.
Style start
Start directly:
Press the [START/STOP] button to start playing
the style.
Start after INTRO:
When the style is not playing, press the [INTRO]
button, and then press the [START/STOP]
button to start the INTRO. The NORMAL style
will be followed by an INTRO section.
Start after ENDING:
When the style is not playing, press the
[ENDING] button, and then press the
[START/STOP] button to start the ENDING. The
NORMAL style will be followed by ENDING
section.
SYNC start:
Press the [SYNC START] button. LCD flashes
4 beats with current tempo. Press the [INTRO]
or the [ENDING] button to insert INTRO or
ENDING. In this mode, playing the keyboard
will start the style automatically.
Note:
If A.B.C mode is off, the style will start by
playing any key on keyboard.
If A.B.C mode is on, the style will start by
playing the keys in the LH chord area only.
Fill in A/B
In NORMAL mode, press the [FILL-IN A]
button to insert a 1-measure fill and LCD flashes
"NOR" icon. Then, it returns to the NORMAL
style playing.
In VARIATION mode, press the [FILL-IN B]
button to insert 1 measure fill and LCD flashes
"VAR" icon. Then, it returns to the VARIATION
style playing.
In NORMAL mode, press the [FILL-IN B]
button to insert 1 measure fill and LCD flashes
"VAR" icon. Then, it changes to the
VARIATION style
playing.
In VARIATION mode, press the [FILL-IN A]
button to insert 1 measure fill and LCD flashes
"NOR" icon. Then, it changes to the NORMAL
style playing.
Note:
If you press the [FILL-IN A] or the [FILL-IN B]
in the last beat of a measure, a fill is inserted
after the current measure finished.
Press and hold the [FILL-IN A ] or the [FILL-IN
B] button. It will play FILL A/FILL B repeatedly
until you release the button.
Press the [ENDING] button when style is
playing. It will stop the style after ENDING
playing unless you pressthe [FILL-IN A] or the
[FILL-IN B] button before it finished.
Style stop
Stop directly:
Press the [START/STOP] button to stop style.
Stop after ENDING:
Press the [ENDING] button. The style will stop
after ENDING is over.
SYNC Stop:
When A.B.C is on and style is playing, press
the [SYNC STOP] button, SYNC STOP and
SYNC START LED is lit, the style stops
playing and the 4 beats flash at the same time.
In this mode, press the keyboard to start the style
and release the keyboard to stop it.
In SYNC STOP mode, press the [SYNC STOP].
The [DEMO] or the [RECORD] button can quit
SYNC STOP mode.
Note:
When A.B.C mode is off, you cannot turn on
SYNC STOP mode.
ACCOMP volume
Press the [ACCOMP VOLUME +] or the
[ACCOMP VOLUME-] button. LCD displays
"Accomp Volume = 021 ". Press the
[ACCOMP VOLUME +] & the [ACCOMP
VOLUME -] button or the [+] & [-] button and
the DIAL can adjust the accompaniment
volume from 0 ~ 31.
Press the [ACCOMP VOLUME +] and the
[ACCOMP VOLUME -] synchronously or the
[+] and the [-] button synchronously can mute
the accompaniment. LCD displays "Accomp
Volume= off ".
Auto bass chord
Press the [A.B.C] button to turn on the Auto
Bass Chord mode. A.B.C icon is lit. In
this mode, the keys below split point are known
as the AUTO ACCOMPANIMENT section
(left / chord area).
To exit the A.B.C mode, press the [A.B.C]
button again.
There are 2 ways to detect the chord: Single
Finger Detect and Fingers Detect. If the chord
playing accords with Fingers Detect, it is
recognized as the Fingers Chord. If not, Single
Finger Chord will be recognized.
Single Finger Chord: Chords that can be
produced in single finger operation are major,
minor, seventh and minor seventh. The
illustration shows how to play the four chord
types. To play a major chord, press the root note
of the chord. To play a seventh chord,
simultaneously press the root key and a white
key to its left.To play a minor chord,
simultaneously pressthe root key and a black key
to its leftTo play a minor-seventh chord,
simultaneously press the root key and both a
white and black key to its left.
Fingered Chord: the Fingered Chord detect
mode lets you finger your own chords on the
AUTO ACCOMPANIMENT section of the
keyboard. The piano supplies appropriately
orchestrated rhythm, bass and chord
accompaniment to the selected style. The
Fingered Chord can recognize the following
chords:
Tempo
Press the the [TEMPO+] or the [TEMPO-]
button to adjust the tempo. The tempo value
will flash. It can be adjusted in the range
of 30-280.
Press the the [TEMPO+] and the [TEMPO-]
simultaneously to return to the default tempo.
When the pedal is assigned as TAP TEMPO
(See Function menu for details), the pedal can
adjust the tempo by double clicking the pedal.
(See Pedal for details)
Function
Press the [FUNCTION] button to enter the
Function menu. Use the dial, the [+] or the
[-] button to select functions. Use the [NEXT]
button to enter the next page, and use the
[BACK] button to go to previous page.
To exit the function menu, press the
[FUNCTION] button or press the [BACK] and
the [NEXT] button simultaneously.
Items which can be adjusted in the function
menu are as follows.
First series
Second series
Next
Back
Third series
Next
Back
Metronome
Hall2
Reverb Level
0~127
92
Chorus Type
Chours1/ Chours2/ Chours3/Chours4/Feedback/ Chorus 3
Flanger/ Short DElay/ FB Delay
Chorus Level
0~127
0
Duet
Harmony Type
Duet/ 1+5/ COuntry/TRio/ BLock/4 Close 1/
4 Close 2/4 Open
Tune Value
-50--50
0
Touch Type
Soft/ MEdium/Hard
Medium
-1 0 1
0
VoiceR2 Octave
VoiceL Octave
Pitch Bend Range
Split Point
Pedal Assign
、、
-1、0、1
-1、0、1
0 - 12
1-- 88 (88Keys)
Mixer
0
0
2
、
Sustain Pedal/ Soft Pedal/ Start/Stop Pedal/
Tempo/Tap
MIDI
Off
Room 1/ Room 2/ Room 3/ Hall 1/ Hall2/ Plate/
Delay/ Pan Delay
VoiceR1 Octave
Utility
、 、
Off Voice Pad
Reverb Type
Digital Effect
Default
Next
Back
Memory Select Pedal
34
Sustain
Pedal
Transmit
1~16
1
Receive
1~16 ,ALL
ALL
Orchestra1 Volume 0--31
27
Orchestra2 Volume 0--31
27
Orchestra 3 Volume 0--31
27
Vo ice R1 Volume
0--31
27
Voice R2 Volume
0--31
18
Voice L Volume
0--31
12
Bass Volume
0--31
28
Drum Volume
0--31
28
English /Chinese
English
Lang uage
Metronome
Press the [FUNCTION] button to enter the
metronome menu. Press the [NEXT] button to
enter its sub-menu. LCD displays "metronome
OFF". Use the [+] & [-] or DIAL to select the
metronome type. It includes "Metronome:Voice"
and "Metronome:Pad"
Note:
Metronome can be turned while the style is
playing.
Digital effect
Press the [FUNCTION] button to enter the
"Digital Effect" menu. Press the [NEXT] button
to enter its sub-menu. LCD highlights "Reverb
Type" and displays "Reverb Level". Choosing
"Reverb Type" /"Reverb Level"/"Chorus Type"/
"Chorus Level"/"Harmony Type" by rotating
the dial, or using the [+] button / the [-] button.
Press the [NEXT] button to enter to parameter
setting menu.
Reverb Type
A total of 8 different reverb types are available.
Use the dial, the [+] button or the [-] button to
select the reverb type. LCD take turns display
Room1/Room2/Room3/Hall1/Hall2/Plate/Delay/
Pan Delay. The default type is Hall2.
Reverb Level
It ranges from 0 to 127. Use the dial, the
numeric keypad [0]-[9] button, the [+]
button or the [-] button to adjust the level value.
The LCD displays the current level value. The
default value is 92.
Press the [+] button and the [-] button
simultaneously will set the tune value to the
default. The default value is 000.
Chorus Type
A total of 8 different chorus types are available.
Use the dial,the [+] button or the [-] button to
select the chorus type. LCD takes turns to
display Chorus1/Chorus2/Chorus3/Chorus4/
Feedback/Flanger/Short delay/FB delay. The
default type is Chorus3.
Note:
When the tune value is +50, the note has
changed 100 cents.
When the tune value is 50, the note has
changed -100 cents.
Chorus Level
It ranges from 0 to 127. Use the dial, the
numeric keypad [0]-[9] button, the [+] button or
the [-] button to adjust the level value.
The LCD displays the current level value. The
default value is 0.
Harmony Type
You can add a variety of harmony notes to your
performance in the right-hand section.
A total of 8 different harmony types are
available. Use the dial, the [+] button or the [-]
button to select the harmony type. LCD takes
to turns display Duet/1+5/Country/Trio/Block/
4 Close1/4 Close2/4 Open. The default type is
Duet.
Utility
Press the [FUNCTION] button. Select "Utility"
menu. Press the [NEXT] button to select Tune
Value/Touch Type/Voice R1 Octave/Voice R2
Octave/Voice L Octave/Pitch Bend Range/Split
Point/Pedal Assign. Use the dial, the [+] button
or the [-] button to select the utility sub-menu.
Press the [NEXT] button to enter parameter
setting.
Tune Value
In the Tune Value setting, LCD displays the
current tune value. Use the dial, the [+] button
or the [-] button to adjust the tune value. This
function can apply to the right area of keyboard.
The parameter range -50 to 50.
Touch Type
In the touch type setting, use the dial, the [+]
button or the [-] button to select the touch type.
A total of 3 different touch types are available.
They are Soft/ Medium/Hard. The default type
is Medium.
VOICE R1 OCTAVE
In the voice R1 octave setting, LCD displays
the current octave value. Use the dial, the [+]
button or the [-] button to adjust the voice R1
octave value. This function can apply to the
right area of keyboard. The parameter range -1
to 1. The default value is 0.
Press the [+] button and the [-] button
simultaneously to set the octave value to the
default.It can function after pressing the [DUAL]
button and selecting VOICE R1.
VOICE R2 OCTAVE
In the voice R2 octave setting, LCD displays
the current octave value. Use the dial, the [+]
button or the [-] button to adjust the voice R2
octave value. This function can apply to the
right area of keyboard. The parameter range -1
to 1. The default value is 0.
Press the [+] button and the [-] button
simultaneously will set the octave value to the
default one. It can function after pressing the
[DUAL] button.
VOICE L OCTAVE
In the voice L octave setting, LCD displays the
current octave value. Use the dial, the [+]
button or the [-] button to adjust the voice L
octave value. This function can apply to the
right area of keyboard. The parameter range -1
to1. The default value is 0.
Press the [+] button and the [-] button
simultaneously will set the octave value to the
default one.
It can function after pressing [LOWER VOICE]
button.
PITCH BEND RANGE
This function allows you to set the pitch bend
range. In the Pitch Bend Range setting, LCD
displays the current pitchbend range value.
Use the dial, the [+] button or the [-] button to
adjust its range. This function can apply to the
right area of keyboard. The parameter range
-12 to 12 semitones. The default value is ±2
semitones.Press the [+] button and the [-] button
simultaneously will set the range value to the
default.
SPLIT POINT
In the split point setting, the LCD displays the
current split point value. Use the dial, the [+]
button or the [-] button as well as the keyboard
to change the split point. The parameter ranges
from 1 to 88. The default value is
034. This function allows you to play different
voices with your left and right hands by setting
a split point. With the style playing mode, you
can play chords below the split point and play
the melody part in the right area on the
keyboard.Press the [+] button and the [-] button
simultaneously to set the value to the default.
PEDAL ASSIGN
In the pedal assign setting, the LCD displays the
current pedal assign name. A total of 5 different
assigned pedal are available. Use the dial, the [+]
button or the [-] button to select the pedal assign.
The LCD displays Sustain Pedal Soft Pedal
Start/Stop Pedal Tempo/tap Pedal Memory
、
、
、
、
Select Pedal circularly. The default value is
Sustain Pedal.
MIDI
Press the [FUNCTION] button and select "Midi"
menu. Press the [NEXT] button, the LCD
displays transmit and receive. Use the dial, the
[+] button or the [-] button to select the Midi
sub-menu. The default one is Transmit. Press the
[NEXT] button to enter channel setting.
Transmit
Select Transmit sub-menu. Press the [NEXT]
button to enter Transmit channel setting,
The LCD displays the current channel value.
Use the dial, the [+] button or the [-] button to
change the channel value from 1 to 16 channels.
The default value is 001.
Receive
Select Receive sub-menu. Press the [NEXT]
button to enter Receive channel setting, The
LCD displays the current Receive value.
Use the dial, the [+] button or the [-] button to
change the channel value from 1 to 16, ALL
channels. The default value is ALL.
Mixer
Press the [FUNCTION] button and select
"MIXER"menu. Press the [NEXT] button. The
LCD displays Orchestra 1 VOL Orchestra 2
VOL Orchestra 3 VOL Voice R1 Volume
Voice R2Volume
Voice L Volume
Bass
Volume Drum Volume circularly. Use the dial,
the [+] button or the [-] button to select the
mixer sub-menu. Press the [NEXT] button to
enter the parameter setting.
Style
In the accompaniment-channel setting, the LCD
displays Orchestra 1 VOL Orchestra 2 VOL
Orchestra 3 VOL Bass Volume Drum
Volume value circularly. The respective default
values are 27 27 27 28 28.
Set the value with the dial, the [+] and [-] button
from0 to 31.In this mode, press the [+] and the
[-]simultaneously to turn OFF the volume value .
、
、
、
、
、
、
、
、
、 、 、 、
、
、
、
Keyboard
In the keyboard setting, the LCD displays Voice
R1 Volume Voice R2 Volume Voice L Volume
value circularly. The default value is 27 28
12 respectively. Set the value with the dial, the
[+] button or the[-] button from 0 to 31. In this
mode, press the [+] and the [-] simultaneously to
turn off the volume value. Press them again to
resume the default value.
、
、
、 、
Language
Select language menu after entering the
function menu, press the [NEXT] button to
enter language setting mode. Use the dial,
the [+] button or the [-] button to select
English or Chinese language.
The default value is English. The language
setting would not be changed when the power
is off. When Chinese is selected before
switching off the piano, the language is set to
Chinese automatically after turning on the
piano.
Press the [+] and the [-] simultaneously while
power is on, the language will be set as the
default one.
the [-] button to cycle select the bank (1-8).
The LCD displays your selected bank number.
Store and load
Press [STORE] and hold the button, press M1
(or M2-M6) at the same timee. The data will be
stored to the M1 (M2~M6), the LCD displays
the memory number "Bank 1 Memory 1".
Press [STORE] and [M1] simultaneously while
the piano powers on, the memory data will be
set as the default value.
Note:
If current data is not the same as the current
memory data, the corresponding memory icon
on the LCD will be darkened.
Note:
The memory data can be reserved even if the
piano is switched off. To clear all memory datas
and restore the default setting, press the
[STORE] ,[M1] simultaneously before turning
on the piano. Pressing the [+],[-] button
simultaneously can also clear the memory data,
but it will clear all other saved setting such as
recorded data as well.
Date stored in memory
Memory
Memory allows you to save virtually all panel
settings to a registration memory setting, and
then instantly recall your custom panel settings
by pressing a single button.
Bank
Memory provides up to 48 complete control
panel setups (8banks,6 setups each) that can
be recalled instantly during your performance.
The default value is bank 1.Press [BANK]
button to select your desired bank. The LCD
displays BANK number. Use
the bank button again, dial, the [+] button or
Voice Data
Voice On/Off: Voice R1, Voice R2, and Voice
Lower
Voice Number: Voice R1, Voice R2, and Voice
Lower
Effect On/Off: DSP, Touch, Sustain, Harmony
Function:
Digital Effect Parameter, Utility
Parameter (except Split Point)
Transpose : Transposer Value
ACCOMP Data
Style Number, Tempo Parameter, A.B.C On/Off,
Split Point, ACCOMP Volume, Normal/Variation
Status.
Other Data
Midi Parameters & Mixer Parameters in
Function.
Freeze
When the FREEZE function is engaged,
selecting a different memory setup will not
change any of the accompaniment and Voice L
parameters (all other parameters will changes as
programmed). This allows you to use the auto
accompaniment and select different memory
setups without suddenly disturbing the flow of
the accompaniment.
Press the [FREEZE] button. The [FREEZE]
LED lights. Press the [FREEZE] button
again to exit from the FREEZE mode. The
[FREEZE] LED turns off.
When the style is playing, press the [O.T.S]
button to turn on the O.T.S. It will automatically
insert "FILL A'' or " FILL B" according to the
memory number.
Press the [O.T.S] button again to exit O.T.S
mode.
The parameters stored in the O.T.S includes
VOICE R1, VOICE R2, VOICE LOWER, their
OCTAVE and VOLUME and CHORUS
TYPE/LEVEL, REVERB TYPE/LEVEL value.
Note:
Pressing the [O.T.S] button will not insert the
"Fill in" when the user song is being recorded.
In the FREEZE setting, press one of the [1] -[6]
memory buttons. In this situation, only the
voice parameter settings memorized to each
button number are recalled.
Note:
Please refer to the MEMORY function to see the
detail accompaniment data.
One touch setting
Pedal
One touch setting is a powerful and convenient
function that lets you instantly reconfigure
virtually all auto accompaniment related panel
settings with the touch of a single button.
In this function, it can load 4 types of parameters
(M1~M4) which are suitable for the current
style.
Various functions can be assigned to the
footswitch connected to the SUSTAIN jack.
The polarity of the footswitch can also be
selected.
Press the [O.T.S] button to enter this mode and
the O.T.S icon on the LCD appears. Press the
[M1]-[M4] button, it will load four types of
parameters which are related to the style. M1
and M2 store the parameters for the normal style,
while M3 and M4 store the parameters for the
variation style. A.B.C mode is set to on
automatically while the O.T.S is on.
Foot switch
Press the [FUNCTION] button to enter the
"UTILITY " menu. Press the [NEXT] button to
select the pedal assign menu. Press the [NEXT]
button. LCD displays the " sustain pedal " .Use
the dial, the [+] button or the [-] button to select
the Soft Pedal, Start/Stop Pedal, Tempo/Tap
Pedal, Memory Select Pedal.
Sustain pedal
When pedal assign is set as "sustain pedal " ,
it has the sustain effect when stepping on the
pedal. Release it to turn off sustain effect.
Soft pedal
When pedal assign is set to "soft pedal ", it
has the dampens the sound when stepping on the
pedal.
Start/stop pedal
When pedal assign is set to "start/stop pedal",
the pedal has the same function as the
[START/STOP] button.
Tempo/Tap pedal
When pedal assign is set to "Tempo/Tap Pedal
" ,the ACCOMP tempo will be set as last two
beat tempo before you press the pedal. If the
tempo is over (below) than 280 (30), set the
tempo to 280(30).
Note:
If you step the pedal successively when the style
is playing, the keyboard will count the tap tempo
according to the last beat you stepped on the
pedal.
Memory select pedal
If pedal assign is set to "memory select pedal",
it will load the 48 memory parameter starting
from M1-M6 when stepping on the pedal.
Volume pedal. Various functiosn can be assigned
to the volume connected to the VOLUME jack.
The polarity of the foot controller can also be
changed. Step on the volume pedal to control the
volume.
Synth
The SYNTH function provides the tools for
creating new tones. Simply select one of
the 328 tones and edit its parameters to create
your own original sound.
Press the [SYNTH] button. The SYNTH icon
appears on the LCD. The User Voice number
"USER Voice = 342 " displays on the lattice
area. Then, select the desired number with
the dial, the [+]/[-] button between 342-350 for
storing your own voice.
Press the [NEXT] button. The PCM Voice
number "PCM Voice = 001 " is highlighted
on the lattice area. Then, select the desired voice
with the dial, the [+]/[-] button between 001-328
to adjust its parameters.
Press the [NEXT] or the [BACK] button to
select these parameters: Vibrate Rate, Vibrate
Depth, Vibrate Delay , Envelope. Attack,
Envelope. Decay, Envelope. Release. The name
& value of current parameter are highlighted on
the lattice area. You can adjust the parameters
with dial, the [+] & the [-], and [0]-[9] button
between 000~127.
Press the [+] & the [-] button at the same time to
reset the parameter to the default value 64 of
each parameter. You can play the keyboard to
hear the effect while changing the parameters.
(See "Parameters table for SYNTH ").
Press the [SYNTH] button or press the [NEXT]
and the [BACK] button synchronously to exit
the SYNTH function. Then the SYNTH flag on
LCD goes out. A name and its number of the
User Voice selected above will display on the
voice line of lattice area.
All the parameters in SYNTH function can be
memorized while the power is off. Press the
[STORE] & [SYNTH] button at the same time to
reset the parameters to the default value.
Note:
After entering a [SYNTH] function, you are not
allowed to exit by pressing a button.
To edit other parameters, press the [NEXT] or
the [BACK] button in edit mode.
It will quit the ABC mode automatically when
you enter the SYNTH status.
Pa rame ter Name
USER Voice
PCM Voice
Vibrate R ate
Vibrate Depth
Vibrate D elay
Envelope.At tack
Envelope.Decay
Envelope.Release
Parameters table for SYNTH as follow:
Valu e Ran ge
342-350
001-328
~127
~127
~127
~127
~127
~127
0
0
0
0
0
0
Default
342 343 344 345 346 347 348 349 350
001 021 024 033 040 050 080 029 130
64
64
64
64
64
64
Album
There are 100 album songs in all (see
"APPENDIX 6 album list" ). These parameters
can not be changed. They include VOICE R1/R2,
DSP,
accompaniment
type,
OCTAVE,
HARMONY etc.
Press the [ALBUM] button. The ALBUM icon
on the LCD is illuminated. ABC mode is turned
on and placed in the SYNC START state. The
number and its name of the current song is
highlighted on the top line of lattice area. You
can select songs with the dial,[+],[-] & [0]-[9]
button. The song starts to play after playing the
keyboard in the LH chord area.
You can change the tempo while the album song
is playing. Press the [TEMPO+] and the [Tempo-]
button simultaneously to set the tempo to the
default of each album song.
To exit the album modes, press one of the
following buttons: [STYLE], [VOICE], [DUAL],
[LOWER VOICE], [SYNTH],
[M1]~[M6],
[O.T.S.].
You can exit the ALBUM and enter the
RECORD mode by pressing the [RECORD]
button while ALBUM is not playing.
You can exit the ALBUM & enter the DEMO
mode by pressing the [DEMO] button.
But, it can not return to the STYLE status after
stopping to play the demo.
Record
There are 2 songs named User Song 1& User
Song 2 that can be recorded. Every song
includes 1 ACCOMP track & 4 MELODY tracks.
Recorded data can be stored while power is off.
Press the [RECORD] & the [PLAY] button at
the same time before turning on the power. All
the recorded data will be erased.
Note:
Record function does not function while it is in
user voice mode. The recordable voice range is
001 341.
PCM voice can be recorded..
You can not enter the RECORD function while
style & album is playing.
Reset the TUNE & TRANSPOSE parameters
while waiting for record.
Metronome can be used while recording or
playing the song.
Press the [DEMO] button during recording. It
will exit the RECORD and enter the DEMO
mode. The recorded data is not lost.
~
Record start
Prepare to record
Select user song: Press the [RECORD] button.
The REC icon on LCD is illuminated. User Song
1 or User Song 2 is displayed on the lattice area.
Its cursor on the LCD is lit, then you can select it
with dial, the [+]/the [-] button.
Wait for record: Press the [RECORD] button
after choosing User Song 1 or User Song 2.Four
beats on the LCD flash simultaneously, which
indicates that the recording is waiting. You can
select desired recording track with the
[ACCOMP],[MELODY
1]-[MELODY
4]
buttons. Its cursor flashes once selected.
Note:
You can select simultaneously an ACCOMP
track & one MELODY track, but you are not
allowed to select 2 MELODY tracks at the same
time.
MELODY 1 is automatically set to current track
while it is in waiting mode. If the first MELODY
includes data, the second MELODY is set to
record automatically.
If the track includes data, its relevant cursor on
LCD is lit. Press the track button while it's in
waiting mode. Then, the cursor on the LCD turns
off. Press the track button again. Its cursor
flashes, indicating that the track is available for
recording.
Start to record
You can start to record by playing the keyboard
and pressing the [START/STOP]button. Four
beats flash in turn and follow the current tempo.
The recorded data in current track will be
covered with new data during recording. During
recording, you can start or stop the style by
pressing the [START/STOP] button two times.
Record stop
Stop Automatically
Press the [ENDING] button when the style is
playing during recording. It will stop recording
automatically after the ending playing is over.
If the capacity is full during recording, it will
stop recording automatically with displaying
"Full Record Data!" on LCD .
Stop Manually
Press the [RECORD] button again during
recording to stop recording immediately. The
cursor of the recorded track is lightened.
Press the [DEMO] button in recording to stop
recording and enter the DEMO mode. The data
recorded will not be lost. The cursor of the
recorded track is lightened.
Record play
Song select
Press the [PLAY] button. User song 1 or user
song 2 is displayed on the LCD. You can select
the desired song with the dial, the [+] & the[-]
button.
Track select
Select the desired tracks with the [MELODY
1]-[MELODY 4] and the [ACCOMP] button
after having selected the song. The lightened
cursor indicates the track is going to be played.
If the cursor is not lit, it indicates the track is
empty .
Song play
Press the [PLAY] button to play the song after
selecting tracks. Press it again to stop playing.
If the user song is empty, "Song Empty" displays
temporarily on the LCD.
If no track is selected, "Select a Track"
displays temporarily on the LCD.
SMC
There is a standard SMC (SmartMedia Card)
external interface which supports cards of
6MB/32MB/64MB/128MB capability on the
piano. It is compatible with the file system
format of the MS-DOS FAT 12/16. Press the
[LOAD], [SAVE], [UTILITY] button separately
to enter the relative function. The SMC Icon is
illuminated on the LCD. If there is no card, "NO
SM Card" will display for three seconds, then
exit & return to the previous status.
Load file
Press the [LOAD] button. The SMC icon is
illuminated on the LCD. Three file types which
will be loaded and will be displayed on the
lattice area. The current type is highlighted. You
can select types with the dial or the [+] & the [-]
button.
If there is no file in the SMC, it will display "No
File Found", and return to previous menu by
pressing the [BACK] button.
Load MIDI File
Select the menu "Load MIDI File" & press the
[NEXT] button. The playing modes are
displayed on the lattice area. They're "Single
Play" & "Chain Play". the current mode is
highlighted. Single Play means only playing the
current file repeatedly. Chain Play means
playing all the files circularly. You can select
your desired mode with the dial or the [+] & the
[-] button.
The MEASURE and the BEAT areas display
nothing. To stop playing the files, press the
[START/STOP] button.
When the file is playing, you can select the other
files with the dial or the [+] & the [-] button,
then press the [START/STOP] button to stop or
press the [START/STOP] again to play the new
file.
When the file is playing, you can adjust the
tempo with the [TEMPO +],[TEMPO -] button.
Press the [TEMPO +],[TEMPO -] button at the
same time, the current tempo will be set to the
default tempo.
Note:
If the track number of the file is over 24,"File
Track Error" will be displayed temporarily on
LCD and it will exit SMC status.
If the tick number of one beat is over 960 or
below 24, "File Format Error" will be displayed
temporarily on LCD and it will exit SMC status.
If the file is not a MIDI format, "Not Midi File"
will be displayed temporarily on the LCD and it
will exit SMC status.
Load Memory File
Select the menu "Load Memory File" & press
the [NEXT] button. All the MEMORY files in
the root of SMC are displayed on the lattice area
with two lines. The current file is highlighted.
The main name of the file includes 8 characters.
The postfix name is MEM. You can select files
with dial or the [+] & the [-] button.
Press the [NEXT] button. All the MIDI files in
the root of SMC are displayed on the lattice area.
The main name of the current file is highlighted.
It includes 8 characters. The postfix name is
MID. You can select files with dial or the [+] &
the [-] button.
Press the [NEXT] button to load the file, then
the data will overwrite all the memories,
"Operation Completed" is displayed temporarily
on the LCD. It will exit the SMC function and
return to the previous state.
Press the [START/STOP] button to start playing
the file selected. The SMC icon flashes. The
current tempo is displayed in the TEMPO area.
Load Song File
Select the menu "Load Song File" and press the
[NEXT] button. All the RECORD files in the
root of SMC are displayed on the lattice area
with two lines. The current file is highlighted.
The main name of the file includes 8 characters,
the postfix name is REC. You can select songs
with dial or the [+] & the [-] button.
Press the [NEXT] button to affirm the desired
file. The menu of "Load Into Record 1" and
"Load Into Record 2" are displayed on the lattice
area with two lines. The current one is
highlighted. You can select them with dial or the
[+] & the [-] button.
Press the [NEXT] button. The data will be
loaded into the user song 1 or 2. "Operation
Completed" is displayed temporarily on the LCD
and it will exit SMC function and return to the
previous status. The relative user song and tracks
icon will be illuminated at the same time.
Save file
Press the [SAVE] button. The SMC icon is
lightened on LCD. Two file types that can be
saved are displayed on the lattice area with two
lines, the current type is highlighted. You can
select them with dial or the [+] & the [-] button.
Save Memory Data
Select the "menu Save Memory Data" and press
the [NEXT] button, "A_______.MEM" is
displayed on the lattice area .The letter A flashes
which indicates the input state (input method see
"3.file name input" below). Press the [NEXT]
button again to end the input.
The file includes 48 memories' data will be
saved to the root of the SMC. "Operation
Completed" is displayed temporarily on the LCD
and it will exit the SMC function and return to
the previous state.
Save Song File
Select the menu "Save Song " & press the
[NEXT] button. The menu of "Save Song 1 "
"Save Song 2 " are displayed in the lattice area
with two lines. You can select them with the dial
or the [+] & the [-] button. Then press the
[NEXT] button. "A_______.REC" is displayed
in the lattice area. The letter A flashes which
indicates the input state (input method see
"3.file name input " below). Press the [NEXT]
button again to end the input. The recording data
will be saved in the root of the SMC. "Operation
Completed" is displayed temporarily on the LCD
and it will exit the SMC function and return to
the previous state.
File name Input
File name includes 1-8 characters to be input
with the keyboard .
[SHIFT]: 26 letters will be displayed with
capital letters by pressing the
keyboard in the letter area directly.
To display small letters, press the
[SHIFT] button hold on.
[DELETE]: when the flashing cursor is at the
last character (the eighth bit),
press it to erase the current
character. Otherwise, it will erase
the left character.
[BACK ]: move the current cursor to the left.
[NEXT]: move the current cursor to the right.
In file name input state, "A_______.MEM" or
"A_______.REC" is displayed on the lattice area
and the letter A flashes.
If there's nothing input, letter A will be saved as
the file name by pressing the [NEXT] button. If
you input the first character with keyboard, it
will be displayed on LCD. The cursor moves to
the right & flashes, which indicates the input
state to be continued. When the last character &
cursor are displayed and flashed, the file name is
over 8 bits character.
You can edit the characters input with the
[SHIFT],[DELETE], [BACK ],[NEXT] button
when inputting the character .
Press the [NEXT] button to end the filename
input, "Operation Completed" is displayed
temporarily on LCD and it will exit the SMC
function to return to the previous status
Note:
If there is no file in SMC, it will display "No
File Found", you may return to previous menu
by pressing the [BACK] button.
Note:
If the filename input is same as the name that is
in the card, "Exist File Name" is displayed
temporarily on the lattice area and it will exit the
SMC mode and return to the previous status.
Format
Select the menu "Format" & press the [NEXT]
button. "Are You Sure?" is displayed on the
lattice area.
If there is nothing to be input, "Invalid File
Name" is displayed temporarily on the lattice
area and it will exit the SMC mode to return the
previous state.
If there is not enough space in the card after
input, "SMC Card Full!" is displayed
temporarily on the lattice area and it will exit the
SMC mode to return to the previous state.
Utility
Press the [UTILITY] button. The SMC icon is
illuminated on the LCD. Two tools are displayed
on the lattice area with two lines. The current
type is highlighted. You can select them with the
dial or the [+] & the [-] button.
Delete One File
Select the menu "Delete One File" & press the
"NEXT" button. All the files in the root of SMC
are displayed on the lattice area with two lines.
The current file is highlighted. You can select
them with dial or [+],[-] button.
Press the [NEXT] button again, "Are You Sure?"
is displayed on the lattice area. Press the
[NEXT], [+] button separately or dial to affirm it,
"Operation Completed" is displayed temporarily
on the LCD and it will exit the SMC mode to
return to the previous status.
If you press the [BACK], [-] button separately ,it
will exit the operation and previous mode.
Press the [NEXT], [+] button separately to
affirm it. The card will be formatted. "Operation
Completed" is displayed temporarily on the LCD
& exit the SMC mode to return the previous
state.
If you press the [BACK], [-] button separately,
it will cancel the operation.
MIDI
What is MIDI
MIDI is the abbreviation for “Musical
instrument Digital Interface”. It is a standard
interface for communication between computers,
perifpherals & digital music instruments.
There are two MIDI connections on your piano,
including MIDI IN & MIDI OUT ports.
MIDI Connection
Connection rules
Midi connection is the equipment called "Host
equipment", which controls another one called
"affiliated equipment".
The host equipment's MIDI OUT connects with
affiliated equipment's MIDI IN
Note that MIDI OUT cannot connect with MIDI
IN on the same equipment.
Sample Connection method
Connect the MIDI interface with your PC.
Connect the MIDI interface with other digital
music instruments.
Major Application
The piano as the Host
Connect the MIDI OUT port of the piano with
MIDI IN port of other equipment.
If the same MIDI channels be set to the two
devices, play the keyboard & change the
parameters on the piano, then the other device
will receive the data from it. MIDI messages are
sent from the piano. (See "appendix 7 MIDI
IMPLEMENTATION CHART".)
The piano as the slave
Connect the MIDI IN port of the piano with
MIDI OUT port of external device.
If the same MIDI channels are set to the two
devices, play the keyboard & change the
parameters on the external device, then the piano
will receive the data from it. You can play on the
piano at the same time. MIDI messages are
received by the piano. (See "appendix 7 MIDI
IMPLEMENTATION CHART".)
create new file in the sequencer software on the
PC.The piano will receive the data from the
sequencer. You can play on the piano at the same
time. MIDI messages that are recognized by the
piano.
(See
"appendix
7
MIDI
IMPLEMENTATION CHART".)
Help
The HELP function provides you a simple
operation guide for the current status – just press
and hold the [HELP] button.
Relative contents are displayed on the lattice
area & then it goes to the next screen
automatically.
You may browse the next or previous contents
with the [NEXT], [BACK] button or dial.
Release the [HELP] button to exit HELP and
back to the previous status.
Connect the MIDI interface with PC and use
sequencer software
Connect the MIDI IN & MIDI OUT port of the
piano to your PC. Record the MIDI messages on
the sequencer software on the PC by playing on
the piano. Edit the MIDI messages recorded or
Status
Procedure
Display
DEMO
Press the [DEMO] button to enter
Demo status
Press [+],[-] or use dial to select demo. Press
[DEMO] for a while to single play.
VOICE R1
VOICE R2
Press the [VOICE] button to enter
voice status, the LCD will display:
VOICE
Press the [VOICE] button to enter
voice status, then the LCD will
display: VOICE
Press [+],[-],the dial or the number button to
select voice.
VOICE L
Press the [LOWER VOICE] button
to enter VOICE L mode.
STYLE
Press the [STYLE] button to enter
STYLE mode.
Press [+],[-],the dial or the number button to
select style.
ALBUM
Press the [ALBUM] button to enter
ALBUM mode.
Press [+],[-],the dial or use dial to select song.
Then, start the style by playing a chord on the
keyboard.
Press the [SYNTH] button to enter
SYNTH mode.
SYNTH
Press the [NEXT] button after
entering SYNTH mode to select
parameter.
FUNCTION
Press the [FUNCTION] button to
enter function mode.
Press the [LOAD] button to load
the files from SMC.
LOAD
To load MIDI format files.
Press [+],[-],the dial or use dial to select an user
voice. Press [NEXT] button to set the
parameter.
Press [+],[-],the dial, the dial or the number key
to change the parameter. Press [NEXT] or
[BACK] button to change to another parameter.
Press the [NEXT] and [BACK] simultaneously
to exit the SYNTH menu.
Press [+],[-] button to select in current menu
level. Press [NEXT] to turn into current option;
Press [BACK] to back the higher level menu;
Press the [NEXT] and [BACK] will
simultaneously exit the menu.
Press [+],[-] button to select in current menu
level. Press [NEXT] to turn into current option;
Press [BACK] to back the higher level menu;
Press the [NEXT] and [BACK] will
simultaneously exit the SMC menu.
Press [+],[-] button to select a MIDI file;
Press [START/STOP] to play the MIDI file
you select; Press [BACK] to back to last step.
Press [+],[-] button to select in current menu
To load RECORD or MEMORY level. Press [NEXT] to turn into current option;
files.
Press [BACK] to back the higher level menu;
Press the [NEXT] and [BACK] will
simultaneously exit the SMC menu.
UTILITY
Press the [UTILITY] button to
enter UTILITY mode.
Delete the file.
Press [+],[-] or use dial to select the file. Press
[NEXT]/[+] to confirm deleting or formatting
the file.
Format the SMC.
Press [NEXT] to confirm the operation, press
[BACK] to exit the operation.
Press the [SAVE] button to save the
files to SMC.
Press keyboard to select letter and move the
cursor, press [NEXT] to confirm the input,
press [BACK] to last step.
Input file name.
Press [+],[-] or use the dial to select user song 1
or 2.
SAVE
RECORD
Press [+],[-] button to select in current menu
level. Press [NEXT] to turn into current option;
Press [BACK] to back the higher level menu;
Press the [NEXT] and [BACK] will
simultaneously exit the SMC menu.
Press the [RECORD] button to
enter real time record.
Press [+],[-] or use the dial to select user song 1
or 2.
Press the [RECORD] button to
prepare for recording.
PLAY
Press the [PLAY ] button first.
Press [MELODY 1-4],[ACCOMP] to select
tracks to record; Play the keyboard to start
recording and press [REC] again to quit
recording.
Press [+],[-] or use the dial to select user song 1
or 2.
Specifications
Keyboard
Voice
Style
Demo Song
Album Song
Display
Switch and Buttons
Accompaniment Control
Sequencer
Panel Memory
Pedals
Connectors
Speaker
Dimension
Weight
88 hammer action keys
350 Voices
130 Styles
3 Demo songs
100 Album songs
Multi-functional LCD display with blue backlight
POWER SWITCH, MASTER VOLUME , BRILLIANCE ,
ACCOMP VOLUME+/-,TEMPO+/-, HELP, SMC LOAD,A.B.C.
NEXT,BACK,UTILITY,SAVE,VOICE,LOWER VOICE,STYLE,
ALBUM,DEMO,DSP,DUAL,FUNCTION,O.T.S.,FREEZE,
SUSTAIN,TRANSPOSE,HARMONY,SYNTH,TOUCH,BANK
STORE,M1-M6
START/STOP, INTRO, FILL-IN A, FILL-IN B,ENDING,
SYNC START, SYNC STOP
ACCOMP, MELODY1/2/3/4, RECORD,PLAY
48 Memory Storage
SUSTAIN,VOLUME
DC 12V, PHONE1/2, AUX.IN,AUX.OUT L/MONO,
AUX.OUT R, MIDI IN/OUT,2 PEDALS
4ohm 15w x 2
1360(L)x345(W)x138(H)mm
23.5kg
Appendix 1- Voice list
Pia no
001 Piano 1
002 Piano Soft
003 Piano Tender
004 String & Piano 1
005 String & Piano 2
006 Piano MEL
007 Bright Piano
008 Stereo Piano
009 Honky Tonk
010 Dual P iano
011 AD EP 1
012 4P Piano1
013 Coffer Piano
014 Last Ye ar EP
015 EP Cu p
016 EP Air
017 Image EP
018 Snow EP
019 Electric Piano
020 EP wr
021 H&H E P
022 Digital Piano
023 El Pian o
024 U Style EP
025 Digital EP
026 Wind EP
027 Silence EP
028 Oh! Sweet EP
029 KMS E P
030 Mr. Sm ith
071 Percus sive Organ 5
072 Rock Organ
073 Pipe O rgan 2
074 Sweet Organ 2
075 Church Organ 1
076 Church Organ 2
077 Church Organ 3
078 Reed Organ
079 Accordion 1
080 Accordion 2
081 Accordion 3
082 Harmo nica 1
083 Harmo nica 2
084 Harmo nica 3
085 Accordion 4
086 Accordion 5
087 Accordion 6
088 Accordion 7
Guitar
089 Nylon Guitar 1
090 Nylon Guitar 2
091 Guitar PAD
092 Steel Guitar 1
093 Steel Guitar 2
094 Ukulele
095 Jazz G uitar
096 Bright Clean Gtr1
097 Clean Guitar
098 Bright Clean Gtr2
099 Muted Guitar 1
100 Muted Guitar 2
Ensemble
142 Strings Ensemb le1
143 Strings Ensemb le2
144 Sound Track 1
145 Sound Track 2
146 String For Melody
147 Sound Track 3
148 String Oct Down
149 Slow S trings
150 Hero S tring
151 Synth String 1
152 Synth String 2
153 Synth String 3
154 Synth String 4
155 Synth String 5
156 Synth String 6
157 Synth String 7
158 Synth String 8
159 Aahs
160 Ooh Voices
161 Voices
162 Choir
163 Poem Dream
164 Ohhhh h
165 Electric Voice
166 Doooooo
167 Dream Voice
168 humm mm
169 Vintage Vox 1
170 Vintage Vox 2
171 Sky Vox 1
213 Tenor Sax 4
214 Tenor Sax 5
215 Tenor Sax 6
216 Sax & Brass
217 Baritone Sax 1
218 Baritone Sax 2
219 Oboe
220 English Horn
221 Wood Winds 1
222 Wood Winds 2
223 Bassoon
224 Clarinet 1
225 Clarinet 2
226 Clarinet 3
227 Clarinet 4
228 Wood Winds 3
Pipe
229 Piccolo
230 Flute 1
231 Flute 2
232 Flute 3
233 China Flute
234 Recorder 1
235 Recorder 2
236 Pan Flute
237 Kawala
238 Bottle Blown
239 Shakuhachi 1
240 Shakuhachi 2
241 Shakuhachi 3
242 Hichiriki
281 Wood Bloc k
282 Taiko Drum
283 Tom Drum
284 Melodic To m
285 Reverse Cymbal
Sound effects
286 G uitar Fret Noise
287 B reath Noise
288 S eashore
289 B ird Tweet
290 Telephone Ring
291 Helicopter
292 A pplause
293 G unshot
Chines e instrument
294 P i Pa
295 Yue Qin
296 Da Ruan
297 Zhong Ruan
298 Liu Qin
299 G u Qin
300 G u Zheng
301 Yang Qin
302 Du Xian Q in
303 Re Wa Pu
304 S an Xian
305 E r Hu
306 G ao Hu
307 Zhong Hu
308 B an Hu
309 X i Pi
Appendix 2- Style list
8 Beat
039
Techn o
077
Mambo 2
116
Dai Mino rity
001
8 B e at 1
Swin g & Jazz
078
Bo unce
117
Weiwu er Min orit y
002
8 B e at 2
040
Big Ban d B allad
079
Foxt rot
118
Tibat Min orit y
003
8 B e at 3
041
Ja zz Ballad
080
Quick Step
119
Korea M inority
004
8 B e at 4
042
Big BandBoogie
081
Jive
1 20
Mongolia
005
8 B e at 5
043
Boogie
Tradit ion al
1 21
Dongbei Yangge
006
8 B e at 6
044
S wing 1
082
March 1
1 22
Dongbei E rren zhua n
007
8 B e at Rock
045
S wing2
083
March 2
1 23
Shan Do ng
008
8 B e at Pop
046
Dixieland
084
German M arch
1 24
He Nan
047
JazzTrio
085
6/8 Mar ch
1 25
An Hui
086
Polka 1
1 26
Shan Xi
16Beat
009
1 6 Beat 1
R&B
010
1 6 Beat 2
048
R&B 1
087
Polka 2
1 27
Shan Be i
011
1 6 Beat 3
049
R&B 2
088
Polka Pop 1
1 28
Yun Nan
012
Hip Ho p
050
Soul
089
Polka Pop2
1 29
Shan g H ai
013
1 6 Bea t Funk
051
Soul S huffle
Waltz
1 30
Tai Wan
014
Funk Pop
Cou ntry
015
Fusio n
052
Count ry
090
Walt z 1
091
Walt z 2
Appendix 3- Chord list
Normal Voicing
Chord(C)
Display
Major[M]
Chord Name [Abbreviation]
1-3-5
C
C
Major sixth [6]
1-(3)-5-6
C6
C6
Major seventh [M7]
1-3-(5)-7
CM7
CM7
Major seventh add sharp eleventh [M7(#11)]
1-(2)-3-#4-(5)-7
CM7(#11)
CM7(#11)
Major add ninth [M9]
1-2-3-5
CM(9)
CM(9)
Major seventh ninth [M7(9)]
1-2-3-(5)-7
CM7(9)
CM7(9)
Sixth ninth [6(9)]
1-2-3-(5)-6
C6(9)
C6(9)
Augmented [aug]
1-3-#5
Caug
Caug
Minor [m]
1-b3-5
Cm
Cm
Minor sixth [m6]
1-b3-5-6
Cm6
Cm6
Minor seventh [m7]
1-b3-(5)-b7
Cm7
Cm7
Minor seventh flatted fifth [m7b5]
1-b3-b5-b7
Cm7b5
Cm7b5
Minor add ninth [m(9)]
1-2-b3-5
Cm(9)
Cm(9)
Minor seventh ninth [m7(9)]
1-2-b3-(5)-b7
Cm7(9)
Cm7(9)
Minor seventh add eleventh [m7(11)]
1-(2)-b3-4-5-(b7)
Cm7(11)
Cm7(11)
Minor seventh [mM7]
1-b3-(5)-7
CmM7
CmM7
Minor major seventh ninth [mM7(9)]
1-2-b3-(5)-7
CmM7(9)
CmM7(9)
Diminished [dim]
1-b3-b5
Cdim
Cdim
Diminished seventh [dim7]
1-b3-b5-6
Cdim7
Cdim7
Seventh [7]
1-3-(5)-b7
C7
C7
Seventh suspended fourth [7sus4]
1-4-5-b7
C7sus4
C7sus4
Seventh flatted fifth [7b5]
1-3-b5-b7
C7b5
C7b5
Seventh ninth [7(9)]
1-2-3-(5)-b7
C7 (9)
C7(9)
Seventh add sharp eleventh [7(#11)]
1-2-3-#4-(5)-b7 or
C7(#11)
C7(#11)
C7 1(13)
C7(13)
1-(2)-3-#4-5-b7
Seventh add thirteenth [7(13)]
1-b2-3-(5)-b7 or
2-3-5-6-b7
Seventh flatted ninth [7(b9)]
1-b2-3-(5)-b7
C7(b9)
C7(b9)
Seventh add flatted thirteen [7(b13)]
1-3-5-b6-b7
C7(b13)
C7(b13)
Seventh sharp ninth [7(#9)]
1-#2-3-(5)-b7
C7(#9)
C7(#9)
Major seventh augmented [M7aug]
1-(3)-#5-7
CM7aug
CM7aug
Seventh augmented [7 aug]
1-3-#5-b7
C7aug
C7aug
Suspended fourth [sus4]
1-4-5
Csus4
Csus4
One plus two plus five [1+2+5]
1-2-5
C1+2+5
C
Appendix 4- Demo list
NO
Name
01
02
03
World
Jazz
Trance
Appendix 5- Album list
001
Blessing
002
The Moon Represents My Heart
003
May I Hug You?
004
005
Whether I Should Go Away
Quietly
Beautly And The Beast
006
Londonderry Air
007
Serenade
008
Swan Lake
009
Joy To The World
010
Pizzicato Polka
011
It Will Be Better Tomorrow
012
Canon
013
Pianosonatan Op8 IN Cm IN
Pathetique
014
Ghost
015
Will You Still Love Me Tomorrow
016
I Only Mind You
017
Foolish Child
018
I Have Nothing
019
Friend
020
Tokyo Love Story
021
Horse Race
022
Mov.2 Adagio Non Troppo Piano
Tulip
072
Mary Had A Little Lamb
038
Russian Dance Music
039
Military March
075 I've Been Working On The
Railroad
040
Barrel Polka Of Beer
036
041
Musical Moments
042
Forest Polka
043
Annen Polka
044
Wave Waltz Of The Danube
045
Mandarin Duck's Tea
046
The Entertainer
047
The Heart Is Too Soft
048
Emperor's Waltz
049
050
Brahms Waltz
The Sleeping Beauty
Living By Night
052
Our Time
053
La Traviata
054
My Heart Will Go On
055
Half A Moon Climbs Up
056
Blue Love
057
Green Sleeves
058
The Ludlows
059
Waterloo Bridge
060
Only You
061
Aura Lee
062
Oriental Cherry
063
Memory
064
Who Can Tell Me
065
Successor Of The Dragon
066
Happy Express
067
Funky Disco
Examine One Gram Of Dance
068
Health Song
Musics In The Storehouse
069
Stand At Ease And Stand At
Attention And Stand Well
Machine Cat
023
The Opposite Girl Reads Over
024
Song Without Words
025
O'Sole Mio
026
The Song Of Naples
027
Carmen
028
My Old Kentucky Home
029
Dance Music Of Samba
030
Uungarische Tanz
031
Jeanie With Blond Hair
032
Song On The Seashore
034
071
037
The Pleasant One Draws One
Dose Of Thai Nurse's Dance
Musics
The Long And Arduous Journey
Is Always A Feeling
Goodbye My Friend
051
Sonata No.9 In D
033
035
Lambada
070
073
Morning Of Miaolin
074
The Countryside Of Moscow
EVening
076
077
Small City Story
PickTtea
- leaves And Attack
Butterflies
078
Grandfather‘ s Clock
079
Jingles Bells
080
Dance Of The Crown
081
Yankee Doodle
082
Row The Boat
083
Curfew
084
Coca-cola
085
Like Rotating
086
New Mandarin Duck's
Butterfly's Dream
087
Twinkle Twinkle Little Star
088
Kuckuckswalzer
089
Raising Your Cover
090
A Girl From Altai
091
The Guest In The Distant Place
Invites You To Stay
092
There's A Nice Place
093
A La Mu Han
094
A Li Long
095
Pastoral Song
096
Weave The Basket Of Flowers
097
Fengyang Flower - drum
098
Nanniwan
099
Water Drops Down In The River
100
Sell The Stuffed Dumplings
Appendix 6- MIDI implementation chart
Function
Basic Default
Channel Changed
Default
Mode Messages
Altered
Note
Number : True voice
Velocity : Note on
Note off
After key’s
Touch Ch’s
Pitch Bend
Control
Change
0
1
5
6
7
10
11
64
65
66
67
80
81
91
93
120
121
123
Program
Change : true
System Exclusive
System :SongPosition
Common :Song Select
: Tune
System :Clock
Real Time :Commands
Aux :LOCAL ON/OFF
:All Notes Off
Messages :Active sense
:Reset
Transmitted
Transmitted
1ch
1-16ch
×
×
***********
0—127
***********
〇 9nH,V=1-127
× (9nH,V=0)
×
×
〇
○
○
Recognized
ALL
1-16ch
3
3
×
0—127
0—127
〇 9nH,V=1-127
×(9nH,V=0; 8nH,V=0-127)
×
×
〇
○
×
○
○
○
○
×
×
○
○
○
×
○
×
○
○
○
○
○
○
○
○
○
○
×
×
○
○
***********
×
×
×
×
×
× *1
×
〇
×
×
Remarks
○
○
○
〇
〇
〇
〇
○
0-127
○
×
×
×
×
× *1
×
〇
〇
〇
Bank Select
Modulation
Portamento Time
Data Entry
Volume
Pan
Expression
Sustain Pedal
Portamento ON/OFF
Sostenuto Pedal
Soft Pedal
Reverb Program
Chorus Program
Reverb Level
Chorus Level
All Sound Off
Reset All Controllers
All Notes Off
Notes:
*1
When the accompaniment is started, an FAH message is transmitted. When
accompaniment is stopped, an FCH message is transmitted. When an FAH
message is received, accompaniment is started. When an FCH message is
received, accompaniment is stopped.