1
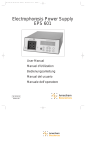
Fully Automatic Washing Machine
Operating Instructions
Model No.
Thank you very much for purchasing Panasonic Washing Machine.
Before operating this washing machine, please read these instructions completely, paying
special attentions to Safety & General Precautions.
W9901-7FWF0
PHAT0808-0
Printed in Thailand
NA-F90T1 80T1_EN.indd 1
9/9/08 5:28:51 PM
Contents
ITEM
Safety & General Precautions
Name of parts
Procedures before washing
Determining load and detergent levels with the Quick Indication
Laundry Detergent
How to use liquid detergent
How to use bleach
How to use liquid bleach for CLEAN WHITE Course
How to use softener
How to use powdered synthetic detergents
How to use powdered detergent
“Economy’’ Laundering
Laundry Tips
Operations Panel
Miscellaneous
NORMAL Course
Options
MINI Course
HYPER SPEEDY Course
BLANKET Course
DELICATE Course
CLEAN WHITE Course
SOAK Course
RESERVE Program
Manual Setting [RESERVE]
CHILD LOCK program
Cancelling end buzzer after washing
Choosing Your Own Laundry Setting
Maintenance: TUB HYGIENE Course
Maintenance: TUB DRY
Maintenance
Please observe the following Instructions
Caution
How to install
Install Washing Machine Horizontally
Connect the water supply hose
Changing the position of the drain hose
Connect external drain water hose
Bottom Cover Installation Instruction
Troubleshooting
Error Indication
Specification
PAGE
3-4
5
5
6
6
7
7
7
7
8
8
8
8
9
10
10
11
11
12
13
13
14
14
15
15
16
16
17
17
18
18
19
19
20
21
21
21
22
23
23
2
NA-F90T1 80T1_EN.indd 2
9/17/08 9:44:29 AM
Safety & General Precautions
To prevent the risk of danger or material loss or damage to the user of others, make
sure to follow the precautions described below.
CAUTION
WARNING
May cause a serious injury or death.
May cause physical injury or damage other items.
WARNING
Never disassemble, repair or remodel this
washing machine.
If you disassemble, repair or
remodel the washing machine
by yourself, it can cause fire or
irregular action that results in
injury.
When you are cleaning your washing
machine, do not apply water directly to
any part of the washing machine.
It will cause short circuit and
electric shock.
Consult your dealer for repair.
Do not place the washing machine on
a damp place such as in a bathroom or
exposed to the outside weather.
Do not place any burning object including
burning candles or cigarettes, on top or
near the washing machine.
There is risk of the insulation
deteriorating, electric
shock and overheating, or
breakdowns due to rust.
There is a danger of fire or set
deformation.
Never touch the laundry with your hand
during spin until the tub has completely
stopped spinning.
Please do not wash or spin laundry which
stained with gasoline, kerosene, benzine,
paint thinner or the likes of it.
If you touch the laundry, even if
the tub is rotating slowly, there is
a danger of injury if the laundry
becomes entangled with your hand.
Pay particular attention to protecting
children from such injury.
There is a risk of
explosion or fire burn.
Do not use power plug socket or wiring
equipment more than their rated capacity.
Never disconnect the power plug by
pulling the power cord. Hold the power
plug as you pull it out.
When you use the socket or wiring more
than its rated capacity by connecting multiple
appliances, it can cause fire due to overheating.
There is a danger of an electric
shock or short circuit which
may cause a fire.
Make sure that the ground is attached to
the power supply outlet.
Make sure to push the power plug
completely into the power supply outlet.
Otherwise, there is a danger of electric shock
at the time of machine trouble or electricity has
leaked.
If the power plug is not completely
pushed into the outlet, this may
cause electric shock and fire due
to overheating.
• Be sure to ask your dealer about
grounding work.
• Never use a damaged power
cord.
3
NA-F90T1 80T1_EN.indd 3
9/17/08 9:44:32 AM
WARNING
Do not damage the power cord and
power plug.
Remove any dust which may accumulate
around the power cord.
(Do not damage, modify, immoderately
bend, twist, pull, or bundle the power cord,
do not put the power cord and power plug
close to heating appliances, do not put
anything heavy on power cord and power
plug.)
When dust has accumulated on and
around the power plug, and the dust gets
damp or wet, the insulation plug become
defective and may causes a fire. Pull out
the power plug, and wipe off dampness
with a dry clean laundry.
• If using the damaged power cord it will cause
fire and current shortage.
• If you are not going to use the washing
machine for a long period of time, pull the
power plug out of the socket.
• Consult your dealer about power cord and
power plug repairing.
Always pull the power plug
out of the power supply before
doing cleaning or maintenance
of the washing machine.
Do not pull the power plug out
of the socket or push in the
power plug inside the socket
with wet hand.
• Otherwise, there is a risk of
electric shock or injury.
It will cause electric shock.
CAUTION
This appliance is not intended for use by persons (including children) with reduced physical,
sensory or mental capabilities, or lack of experience and knowledge, unless they have been
given supervision or instruction concerning use of the appliance by a person responsible for
their safety.
Children should be supervised to ensure that they do not play with the appliance.
Do not put your hand or foot under the
washing machine while the machine is
operating.
There is a rotating
mechanism at the bottom
of the machine, so you
could be injured.
Do not wash and spin waterproof sheets
and garments.
(Example) Raincoats, outfits
(coats/jackets and pants) for
fishing and skiing, etc.
The items could be damaged
or you could be injured due to
irregular vibration during the
spin cycle.
Do not climb up or put anything heavy on
the top of the machine.
You could be injured
due to set deformation
or breakage of the
washing machine.
Always check the hose connection by
turning on the water tap before starting
washing.
If the fixing screws are loose, it will cause water
leakage that could cause unexpected damage.
Do not use water with temperature above 50°C.
• The plastic parts will become deform, resulting
in set breakdown.
4
NA-F90T1 80T1_EN.indd 4
9/17/08 9:44:39 AM
Name of parts
Tub
Detergent & Softener/
Bleach Drawer
Leveller
Feeding Valve
Lint Filter A
Lid
Bleach / Liquid
Detergent Inlet
Lint Filter B
Pulsator
Power Cord
Operation Panel
Power Plug
Drain Hose
Adjustable Leg
Accessories
Water Supply Hose (1)
Length: 1.0 m
Water Tap Adaptor (1)
Bottom Cover (1)
Note: Water Tap Adaptor is set
to the Water Supply Hose.
Drain Hose (1)
Screw (2)
Note: For Bottom Cover
Procedures before washing
• Check the installation
[NOTE]
3
Before installation, please make sure to install
the bottom cover. See page 21 for details.
See pages 19~21 for details.
2
1
4
5
1
2
3
4
5
Level the washing machine by adjusting the
adjustable leg and using the leveller as reference.
Connect the water supply hose.
Turn on the faucet.
Plug power cord into socket outlet.
Insert the drain hose to drain.
5
NA-F90T1 80T1_EN.indd 5
9/17/08 9:44:44 AM
Determining load and detergent levels with the Quick Indication
1 Put the laundry into the
9
2 Allow the machine to churn the 3 Detergent volume indications.
machine.
laundry for 5 seconds.
Press the [POWER ON] button
and then press the [START/
HOLD] button after putting in
the laundry.
The pulsator operates for about
5 seconds without any water in
the tub to measure the amount
of laundry. If there is already
water in the tub, the machine
will not operate and the water
level will be set to 71L. (69L in
the case of NA-F80T1)
A lamp will light up indicating
the appropriate water level and
amount of detergent according
to the laundry. Add this amount
of detergent.
Detergent indicator
The
indicates the number of scoop of compact powdered laundry detergent formula to be inserted
using the measuring scoop in the detergent box (1 scoop = about 40 grams).
For information concerning other types of laundry detergent, see the table below.
7 The pulsator operates without water in the washing tub in order to measure
the amount of laundry.
• According to laundry load, put in the detergent then close the lid.
7 Change the water level setting in the following cases:
• When placing the wet laundry inside the tub, the water level will be indicated 71L
(69L in the case of NA-F80T1) even though the laundry weight is light.
• When you put in light weight laundry or laundry that doesn’t absorb water easily (laundry made of synthetic
fiber and mixed fiber, etc.).
Laundry Detergent
Detergent type
Synthetic detergents
Concentrated type
Powdered
detergent
Liquid type
(25g per 30L of water) (25ml per 30L of water) (40ml per 30L of water)
Water level
(Laundry
volume)
One
measuring
scoop (40g)
Powder
Concentrated
liquid
Non
Concentrated
liquid
Powder
(NA-F90T1)
71L
(Approx. 9.0kg)
1.5 scoops
approx. 60ml
approx. 95ml
approx. 92g
approx. 58ml
approx. 92ml
approx. 90g
approx. 50ml
approx. 80ml
approx. 78g
approx. 44ml
approx. 70ml
approx. 68g
approx. 36ml
approx. 58ml
approx. 56g
approx. 28ml
approx. 44ml
approx. 43g
approx. 15ml
approx. 24ml
approx. 24g
(NA-F80T1)
69L
(Approx. 8.0kg)
60L
(Approx. 5.0kg)
1.2 scoops
52L
(Approx. 3.5kg)
1 scoop
43L
(Approx. 1.5kg)
0.8 scoop
33L
(Approx. 0.8kg)
18L
(Approx. 0.3kg)
•
•
•
•
1.4 scoops
0.6 scoop
0.2 scoop
The figures in parentheses in the water level column indicate the approximate weight of the laundry load.
Please use the standard amount of laundry detergent as printed on the detergent container.
Some laundry detergents have their own prescribed methods of use. Please read the instructions to your laundry detergent.
When a large quantity of suds is produced, use less detergent or switch to a low-suds detergent.
6
NA-F90T1 80T1_EN.indd 6
9/17/08 9:44:46 AM
How to use liquid detergent
[NOTE]
Put in the liquid detergent according to the
water level into the bleach / liquid detergent
inlet.
• Liquid detergent, like powdered
detergent is not easily dissolved
and can leave scum along the
inside of the washing tub, so be
sure to rinse thoroughly.
Bleach / Liquid Detergent Inlet
How to use bleach
Except for CLEAN WHITE Course
■
Liquid bleach
■
• Dilute fully with water and pour in before
pressing [START/HOLD].
Powder bleach
• Place directly into the tub during fill.
• Follow the instruction on the bleach
container.
Bleach / Liquid Detergent inlet
How to use liquid bleach for CLEAN WHITE Course
w See page 13 for detail of “CLEAN WHITE” Course.
Put in liquid bleach according to the water level, at the same time as you add detergent.
(The liquid bleach is to be automatically poured in the tub during the second rinse.)
• If the machine is in operation, press the [START/
HOLD] button and add the liquid bleach.
NOTE:
When selecting the “CLEAN WHITE” Course, put the
liquid bleach into the Softener/Bleach Compartment.
Keep the level of the liquid bleach below the cap
mark (Figure A).
The indication is prevent the liquid bleach from flowing
immediately.
Cap mark level
(Insert completely)
Liquid bleach level
Figure A
How to use softener
Put in softener according to the water level, at the same time as you add detergent.
(The softener is to be automatically poured in the tub during the last rinse.)
• If the machine is in operation, press the [START/
HOLD] button and add the softener.
NOTE:
(Insert completely)
Always put the softener into the Softener Compartment.
Keep the level of the softener below the cap mark
(Figure A).
The indication is to prevent the softener from
flowing immediately.
Cap mark level
Softener level
Figure A
Table of softener quantities
(Normal) ............. 20 ml softener per 30L of water.
Water level
71L
(69L in the case
of NA-F80T1)
Approx. 48ml
Normal
(46ml)
Softener
Approx. 16ml
Concentrated
(15ml)
(Concentrated) ... 6.6 ml softener per 30L of water.
60L
52L
43L
33L
18L
Approx. 40ml
Approx. 35ml
Approx. 29ml
Approx. 22ml
Approx. 12ml
Approx. 14ml
Approx. 12ml
Approx. 10ml
Approx. 8ml
Approx. 4ml
w Softener is easy to get hard, so do not leave it in the Softener Compartment for many hours (12 hours or longer).
w Dilute the concentrated softener with the same volume of water only when using the wash with the
programmable time.
Concentrated softener
Water
7
NA-F90T1 80T1_EN.indd 7
9/17/08 9:44:54 AM
How to use powdered synthetic detergent
Put the recommended amount of powdered synthetic detergent into
the detergent drawer according to the water level.
How to use powdered detergent
How to dissolve
1. Fill the washing machine tub with water one level below the water level that will be used. (For low water
level setting, the same water level will be used.)
2. Add the powdered detergent and let the machine run for about 3 minutes.
3. Put the laundry in and begin washing at the desired level. Set the [WATER LEVEL] button.
Dissolving hard-to-dissolve detergent
1. Pour 5 liters of water at about 30°C into a container.
2. Dissolve the detergent by adding it little by little while churning the water.
• In order to keep it from hardening or sticking, mix it well and dissolve it, then pour it into the washing tub.
[Warning]
• Powdered detergent is not easily dissolved compared to synthetic detergent, be certain to rinse thoroughly.
If it is not rinsed well laundry may be tinged with yellow or smell of detergent. If too much detergent is
added, or if it is added directly to cold water, scum and clumps which are not completely dissolved will
stick to the inside of the tub and hose. These may float up and dirty the laundry.
“Economy’’ Laundering
Using wash water twice
Wash lightly soiled laundry in the first load.
1.
2.
3.
4.
Put the laundry in the tub, and press [POWER ON].
Press [WASH] button and press [START/HOLD] button.
Put in the detergent.
Wash finishes.
Take the wet laundry out.
8. Put wet laundry which has been washed back into
the tub again.
9. Press [RINSE] button and [SPIN] button, then press
[START/HOLD].
10. Close the lid and wait until laundry will be completed.
Wash heavily soiled laundry in
the second load.
5. Load the laundry.
6. Press [POWER ON] to carry out
washing, rinsing and spinning. Add the
detergent a little when you increase the
water level or refilling water.
7. Wash finishes.
Remove the laundry.
Laundry Tips
Brush off laundry before washing
them.
Turn inside out any garments which
give off lint or lint balls.
Press down lightly on
bulky items while the tub
is filling with water to get
them thoroughly soaked.
Put a little detergent on a brush and
lightly scrub the tough stains off
collars and cuffs.
Put laundry with lace attached,
lingerie, nylon stockings, chemical
fiber transparent fabrics etc. in a
washing net.
For laundry which has long cord or
clasps attached, tie the cords on
aprons, pillow covers and the like,
and fasten clasps.
8
NA-F90T1 80T1_EN.indd 8
9/17/08 9:44:59 AM
9
NA-F90T1 80T1_EN.indd 9
9/17/08 9:45:02 AM
WATER LEVEL (Water volume display)
WASH, SPIN
•
•
RINSE
Time display
Press the [RESERVE] button to set how many hours later you
would like the wash to be completed. See page 14 for details.
•
•
•
According to type of laundry
and stain, you can select
suitable course yourself.
SOAK
OFF/ON
•
•
Press this to start.
Press this to stop in
themiddle of the cycle.
START/HOLD
The power automatically turns off when total
operations is finished.
The power automatically turns off if [START/HOLD]
button is not pressed within 10 minutes after turning
on the power.
Operations course for heavily washed laundry.
You can adjust soak time based on the condition of dirt.
You can choose your soak time from 1, 3, 5, 8 hours.
•
•
•
PROGRAM (Course Select)
When the machine is in operation, the time display
shows how much time (in minutes) is left.
When the programmable timer has been set, this
display shows how much time is left until the wash
is finished by pressing the [RESERVE] button.
Timer indication on the panel will show longer time
than selected time as it includes water feeding,
draining, etc.
Press this button, and the preset laundry cycle display will
turn off allowing you to choose
your own laundry setting.
At “REFILL” selection, water
will besupplied while “RINSE”
process is in operation.
RESERVE
Press this button, and the
pre-set laundry cycle display
will turn off allowing you to
choose your own laundry
setting.
•
•
•
Fuzzy logic control is used to recommend the proper water level and amount of detergent for the
amount of laundry being done.
Caution: If you need to change the [PROGRAM] and [SOAK] settings after the cycle has already started, turn the power off and on it back.
•
•
The appropriate WATER LEVEL for the size and
type of your own laundry will be displayed
(LINEAR WATER LEVEL) If set as the
WATER LEVEL which is not in the
display, the nearest WATER LEVEL
will be displayed.
• You can adjust the WATER LEVEL
according to your desired level.
• The water level varies for models NA-F80T1.
•
Operations Panel
NORMAL Course
Suitable for normal washing of casual laundry.
1
2
1
2
Press the [POWER ON] button and put in the laundry.
Press the [START/HOLD] button.
•
•
The light will indicate “NORMAL’’ Course automatically.
The machine will measure the load size without
water (laundry sensing).
•
•
•
The water level will be indicated automatically.
You can adjust the water level according to your desire.
To change the process timing, press the [START/
HOLD] button first.
•
Different brands of detergent may have different
measuring scoops sizes. If the scoop holds other
than 40 grams, add the amount of detergent
recommended by the detergent makers for the
selected water level. See page 6 for details.
Water may not be supplied if the lid is open,
depending on the setting of a water level.
«
3
Put in the appropriate amount of detergent
into the detergent drawer for the water level.
Then close the lid.
7
•
Add softener. See page 7 for details.
The buzzer lets you know when the washing is finished.
MINI Course
For fast washing with small laundry (max. 0.3kg) with 18L water level.
1
3
2
1
2
Press the [POWER ON] button and put in the laundry.
•
The light will indicate “MINI” Course.
The time selection for this course is at minimum
washing, rinsing and spinning.
The process time cannot be changed to other selection.
3
4
Press the [START/HOLD] button.
•
•
The water level will be indicated automatically at 18L.
The water level cannot be changed to other selection.
Put in the appropriate amount of detergent
into the detergent drawer for the water
level. Then close the lid.
•
Different brands of detergent may have different
measuring scoops sizes. If the scoop holds other
than 40 grams, add the amount of detergent
recommended by the detergent makers for the
selected water level. See page 6 for details.
Press the [PROGRAM] button once for
selecting “MINI” Course.
7
Add softener. See page 7 for details.
•
•
The buzzer lets you know when the washing is finished.
10
NA-F90T1 80T1_EN.indd 10
9/17/08 9:45:05 AM
HYPER SPEEDY Course
Suitable for washing lightly soiled laundry or quick wash.
1
3
2
1
2
Press the [POWER ON] button and put in the laundry.
Press the [PROGRAM] button two times
for selecting “HYPER SPEEDY” Course.
•
•
3
Press the [START/HOLD] button.
•
The light will indicate “HYPER SPEEDY” Course.
The process time selection can be selected such
as below.
1. Wash: 3 min and 6 min
2. Rinse: cannot be changed
3. Spin: 40 sec, 3 min and 5 min
The machine will measure the load size without
water (laundry sensing).
«
•
•
4
Put in the appropriate amount of detergent
into the detergent drawer for the water level.
Then close the lid.
7
•
•
Add softener. See page 7 for details.
The water level will be indicated automatically.
You can adjust the water level according to your
desired level.
Different brands of detergent may have different
measuring scoops sizes. If the scoop holds other
than 40 grams, add the amount of detergent
recommended by the detergent makers for the
selected water level. See page 6 for details.
Water may not be supplied if the lid is open,
depending on the setting of a water level.
The buzzer lets you know when the washing is finished.
BLANKET Course
Suitable for slow and gentle washing such as blanket, using high water level.
1
3
2
1
2
3
4
Press the [POWER ON] button and put in
the laundry.
Press the [PROGRAM] button three
times for selecting “BLANKET” Course.
•
Fold the blanket or put into the laundry net as
recommended in page 12.
•
•
Press the [START/HOLD] button.
•
The light will indicate “BLANKET” Course.
The process time selection can be selected such
as below.
1. Wash: cannot be changed
2. Rinse: 2 (Refill) and 3 (Refill)
3. Spin: 3, 5, and 8 min
The water level will be indicated automatically at
high level 71L (69L in the case of NA-F80T1).
Put in the appropriate amount of detergent
into the detergent drawer for the water
level. Then close the lid.
•
7
Add softener. See page 7 for details.
Different brands of detergent may have different
measuring scoops sizes. If the scoop holds other
than 40 grams, add the amount of detergent
recommended by the detergent makers for the
selected water level. See page 6 for details.
The buzzer lets you know when the washing is finished.
11
NA-F90T1 80T1_EN.indd 11
9/17/08 9:45:08 AM
Washable Blanket
Blanket which are made of 100% synthetic fiber or 100% cotton with care symbol.
(Weight per blanket is 4.2kg or less)
Net can be bought in the market from authorized dealer. (AXW22I-8500)
Prepare Before Washing Blanket
1. How to fold Blanket:
1 Fold the blanket in half in the
lengthwise direction.
2. Put the blanket into
the laundry net.
1 Roll up the blanket as illustrated.
3. Put the appropriate
amount of detergent
into the Detergent
Drawer.
230 cm
180 cm
5 cm
2 Fold the blanket again, in thirds,
in the same direction.
2 Put the hem part of blanket into
net first, so the hem part is at
the bottom of the net, and close
the fastener.
4. Put the prepared
blanket into the tub.
180 cm
DELICATE Course
Suitable for washing soft laundry.
1
3
2
Remark: Amount of laundry that can be washed at one time : 4.2 kg
1
2
Press the [POWER ON] button and put in the laundry.
Press the [PROGRAM] button four times
for “DELICATE” Course.
•
•
The light will indicate “DELICATE’’ Course.
The process time selection can be selected such
as below.
1. Wash: 3 min only
2. Rinse: 2 and 2 (Refill)
3. Spin: 40 sec only
3
4
Press the [START/HOLD] button.
•
•
Water level will be indicated 60L automatically.
Selection for water level only at above 43L to 60L.
Put in the appropriate amount of
detergent into the detergent drawer for
the water level. Then close the lid.
•
Different brands of detergent may have different
measuring scoops sizes. If the scoop holds other
than 40 grams, add the amount of detergent
recommended by the detergent makers for the
selected water level. See page 6 for details.
7
Add softener. See page 7 for details.
The buzzer lets you know when the washing is finished.
12
NA-F90T1 80T1_EN.indd 12
9/17/08 9:45:12 AM
CLEAN WHITE Course
Sauce and condiment stain are washed out without any effort.
1
3
2
• In this course, automatic dispensing of fabric softener cannot be used.
• Do not use this course for clothes not suitable for bleach, such as colored or patterned garments.
• Oxidized bleach does not achieve the correct effect.
1
2
3
Press the [POWER ON] button and put in the laundry.
• The light will indicate “CLEAN WHITE’’ Course.
Press the [PROGRAM] button
• The process time selection can be selected such as
five times for selecting “CLEAN
below.
WHITE” Course.
1. Wash: Any selection is possible
Press the [START/HOLD] button.
•
2. Rinse: 2 min and 3 min
3. Spin: Any selection is possible
The machine will measure the load size without
water (laundry sensing).
«
•
•
4
Put in the appropriate amount of
detergent into the detergent drawer and
put appropriate amount of liquid bleach
into the softener/bleach compartment for
the water level. Then close the lid.
•
•
•
The water level will be indicated automatically.
You can adjust the water level according to your
desired level.
Different brands of detergent may have different
measuring scoops sizes. If the scoop holds other
than 40 grams, add the amount of detergent
recommended by the detergent makers for the
selected water level. See page 6 for details.
Please use the standard amount of liquid bleach as
printed on the bleach container.
Water may not be supplied if the lid is open,
depending on the setting of a water level.
The buzzer lets you know when the washing is finished.
SOAK Course
This process to wash heavily soiled laundry.
1
3
2
Remarks : The laundry will be soaked for the choosen time, to give you better washing
performance.
1
2
3
Press the [POWER ON] button and put in the laundry.
Press the [SOAK] button and select from 1, 3, 5 and 8 hours.
• The machine will measure the load size without water
Press the [START/HOLD] button.
(laundry sensing).
«
4
Put in the appropriate amount of
detergent into the detergent drawer for
the water level. Then close the lid.
•
•
•
7
Add softener. See page 7 for details.
The water level will be indicated automatically.
Different brands of detergent may have different
measuring scoops sizes. If the scoop holds
other than 40 grams, add the amount of detergent
recommended by the detergent makers for the
selected water level. See page 6 for details.
Water may not be supplied if the lid is open,
depending on the setting of a water level.
The buzzer lets you know when the washing is finished.
After soaking process is completed, it will automatically continue with “NORMAL” Course.
13
NA-F90T1 80T1_EN.indd 13
9/17/08 9:45:16 AM
RESERVE Program
You can select the finishing of the washing course between 2 to 24 hours from the current time.
(Sometimes the operation exceeding the reserve time because of the water feeding and draining
condition.) [RESERVE] program only can use for NORMAL, MINI and HYPER SPEEDY Course.
1
4
2
3
1
2
3
4
Press the [POWER ON] button and put in the laundry.
Choose the [PROGRAM] that suit to your laundry type.
Press the [RESERVE] button and select between 2 to 24 hours.
• The machine will measure the load size without
Press the [START/HOLD] button.
water (laundry sensing).
«
5
Put in the appropriate amount of
detergent into the detergent drawer for
the water level. Then close the lid.
7
•
•
•
Add softener. See page 7 for details.
The water level will be indicated automatically.
The water level indication (recommended detergent
amount) will go off 2 minutes after starting the
program, but only indicate the end time of the
selected [RESERVE] 2 to 24 hours after current time.
Check the recommended detergent amount before
the indication goes off.
To check the contents of the reserve operation, keep
pressing [RESERVE] button.
The buzzer lets you know when the washing is finished.
Manual Setting [RESERVE]
To choose manual setting under Reserve Course.
1
4
2
3
1
2
Press the [POWER ON] button and put in the laundry.
Press the [WASH] button, [RINSE] button, • Choose the process [WASH] button, [RINSE] button,
[SPIN] button, [WATER LEVEL] button that suit to
[SPIN] button, [WATER LEVEL] button.
your laundry type.
3
4
5
Press the [RESERVE] button and select between 2 to 24 hours.
Press the [START/HOLD] button.
Put in the appropriate amount of
detergent into the detergent drawer for
the water level. Then close the lid.
7
•
•
Add softener. See page 7 for details.
The water level indication (recommended
detergent amount) will go off 2 minutes after starting
the program, but only indicate the end time of the
selected [RESERVE] 2 to 24 hours after current
time. Check the recommended detergent amount
before the indication goes off.
To check the contents of the programming timer,
keep pressing [RESERVE] button.
The buzzer lets you know when the washing is finished.
14
NA-F90T1 80T1_EN.indd 14
9/17/08 9:45:20 AM
CHILD LOCK program
This is an emergency alarming mode with a continuous buzzer sounds when child open the lid
during operation to prevent a child from drowning (condition where there is a water inside the tub)
by falling into the tub which contains water.
Close the lid to stop the buzzer. If the lid is kept open for more than 10 seconds, the machine will
force drain the water inside the tub assuming that the child had fallen into the tub but make sure
that the drain hose is laid down.
• This is different from the function that lock button operation and the lid.
7 IN THE CASE OF FORCE DRAINING.
There will be an abnormal alarm (flickering of lamps and buzzer).
Please check inside the tub.
7 RESET METHOD OF ABNORMAL ALARM.
Button operation cannot be used.
At first, unplug the power cord from the outlet and re-plug it again after 5 seconds.
Please repeat the operation from the beginning because the process had been cancelled.
7 Please do not leave water inside the tub as [CHILD LOCK] mode does not function in
the following case:
• In the case of power supply off.
• In the case when forget to lay down the drain hose.
• Please close the lid immediately after press the [START/HOLD] button because when the lid is open,
there will be an abnormal alarm and force drain during water feeding.
1. Press the [POWER ON] button.
2. Press the [PROGRAM]
button for at least 5 seconds.
7 SETTING METHOD
1. Press the [POWER ON] button.
2. Press the [PROGRAM] button for at least 5 seconds.
The buzzer sounds (two times for setting) and the [CHILD LOCK] indication turns on.
Remark: CL will be indicated on time display only 2 seconds and then it will be turn off.
7 CANCELLING METHOD
Repeat the operation 1 and 2.
The buzzer sounds (4 times for cancelling) and the [CHILD LOCK] indication turns off.
[NOTE]
When you press [PROGRAM] button, it switches over, from “NORMAL” to “MINI”, for example.
To set it back to “NORMAL”, turn off the power and turn it on again.
Cancelling end buzzer after washing
2. Press
1. While pressing
1. Press [START/HOLD] button and [POWER ON] button at the same time, release [POWER ON] button
and hold [START/HOLD] button at least for 3 seconds. Two times beep sound indicates the end buzzer
of washing has been cancelled.
• Repeat step 1 to activate the end buzzer. Four times beep sound indicates the end buzzer has been
activated.
• When the power cord is unplugged or a power outage occurs, the last setting of the end buzzer will be
remained.
15
NA-F90T1 80T1_EN.indd 15
9/17/08 9:45:24 AM
Choosing Your Own Laundry Setting
You can select PROGRAM to wash your own laundry according to your preferences.
7 WASH
7 RINSE
7 SPIN
7 WASH
7 RINSE
7 WASH
7 SPIN
7 RINSE
7 SPIN
•
•
To reuse the wash water.
• After washing, the wash water is left in the tub and the machine stop operation.
• Select the time for washing as desired.
• The time selection is depend on the program chosen.
To rinse the separately washed laundry.
• After rinsing, the rinse water is left in the tub and the machine stop operation.
• Select the time for rinsing as desired.
• When choosing “REFILL”, the water will fill in (overflow) during rinsing operation.
• The time selection is depend on the program chosen.
To spin the separately washed laundry.
• If the water is left in the tub, it will drain before spinning.
• If the lid is opened, it will only drain without spin.
• Select the time for spinning as desired.
• The time selection is depend on the program chosen.
To reuse the rinse water.
• After washing and rinsing, the rinse water is left in the tub and the machine stop operation.
• Select the time for the process as desired.
• The time selection is depend on the program chosen.
To wash with water (without detergent).
• The machine will spin automatically without rinsing after washing.
• Select the time for the process as desired.
• The time selection is depend on the program chosen.
To rinse and spin the laundry soaked with detergent.
• If the water is left in the tub, it will drain and followed by the intermediate spin before start of rinsing.
• Select the time for the process as desired.
• The time selection is depend on the program chosen.
In the case, when [SPIN] or [RINSE] [SPIN] is selected, if there is water in the tub, the machine will start from draining and
if there is no water in the tub, it will start from spinning. So it will take a little while before the machine start operating.
IN THE CASE WHEN [CHILD LOCK] MODE IS SET.
In some cases, if the lid is opened when the tub contains water, the machine will start force draining. In this case, cancel
the [CHILD LOCK] mode.
Maintenance
To prevent fungus growth at the washing and spinning tub.
“TUB HYGIENE” Course
1
3
2
1
2
3
4
5
Press the [POWER ON] button.
• The [TUB HYGIENE] light will be indicated.
Press the [PROGRAM] button six times
for “TUB HYGIENE” Course.
Press the [START/HOLD] button.
When filled up with water, press the [START/HOLD] button, and pour about a cup of
chlorine system bleach for clothing use directly into the washing and spinning tub.
(Approx. 200ml per 50L of water.)
w Do not operate while clothing is in the washing tub.
Close the lid, and press the [START/
w Cancel the “CHILD LOCK” when it is active.
HOLD] button.
Refer to page 15.
Operation will be fi nished in 2 and a half hours.
This is the course to prevent fungus growth at the washing and spinning tub using the “Chlorine system
bleach for clothing use”, available in most markets, to keep the tub clean.
w Do not use the oxygen system bleach or chlorine
[NOTE]
system bleach for kitchen use. (Too much lather
• Fungus growth at the washing and
may overflow.)
spinning tub varies depending on
• Frequency for care : Once a month
ambient conditions.
• Operation will be continued for 2 and a half hours.
16
NA-F90T1 80T1_EN.indd 16
9/17/08 9:45:28 AM
Maintenance
To prevent from fungus growth at the outer tub area.
“TUB DRY”
1
4
2
3
Remark: Please be informed do not put laundry inside the tub during this program.
1
2
Press the [POWER ON] button.
3
4
Press the [WASH] button and the [RINSE] button once each to select only [SPIN].
Press the [PROGRAM] button six times
for [TUB HYGIENE] Course.
Press the [START/HOLD] button.
•
•
The [TUB HYGIENE] light will be indicated.
Spinning operation will be operated for 30 minutes
The buzzer lets you know when the washing is finished.
Maintenance
Lint filter / Water supply hose filter / Main unit and tub
Water supply hose filter
• When water supply seems constricted.
• Be absolutely sure to follow the procedures as
described, otherwise water will spray out.
1. Turn off the water faucet.
2. Press the [POWER ON] button.
3. Press the [START/HOLD] button.
The WATER LEVEL will light up a few seconds later.
4. Press the [POWER OFF] button to turn off the power.
5. Loosen the nut.
6. Take off the hose.
7. Clean the filter.
Lint filter
• When the filter is full.
1
1
(Lint filter A)
Remove the lint
filter A.
1
(Lint filter B)
Pull out the lint filter B 1
from the lock.
By using fingers to
2
press and pull out at
the upper part of the lint filter’s side.
2
filter A)
3 (Lint
Put the filter back in.
Make sure it clicks
into place.
filter B)
3 (Lint
Set it back to the
Remove the lint
from the filter.
2
1
original position.
• Insert the bottom
first as shown in the figure.
• Press down and lock as the arrow.
• When the filter is torn, etc., obtain another one from the place of purchase.
• Turn the wash tub if the filter cannot be removed easily.
Main unit and tub
• Main unit
Wipe with a soft cloth. Use a neutral dishwashing liquid or soap for
stubborn places.
Do not apply water directly.
Do not use cleanser, paint benzine, alcohol, kerosene, etc.
Follow any instructions that come with a chemically treated cloth.
• Upper part of the tub
Wipe with a damp cloth.
Do not apply water directly.
The floor could get wet.
17
NA-F90T1 80T1_EN.indd 17
9/17/08 9:45:32 AM
Please observe the following Instructions
If the spinner tub does not stop within
15 seconds after you open the lid
during spinning, immediately stop
using the machine, and contact your
dealer for repair.
Do not spray anything or pour water
over the lid.
Do not put too much laundry.
Do not hold magnets or cards with
magnetic strips near the washing
machine.
• Put laundry completely
into the tub. Never
allow the laundry to
protrude out of the tub.
(This causes torn
laundry or damage to
the plastic parts.)
Keep condensation from getting on the
floor.
•
When the air temperature is
high and the water temperature
is low, condensation will
sometimes run off onto the
floor.
Do not use a cover made of vinyl chloride.
(It could damage the plastic or paint.)
•
If you intend to use such a
cover, first place a cloth over
the washing machine to keep
it from coming in contact with
the cover.
Do not put any type of charger stand
on the washing machine.
•
When you place the
charger stand for an
electric toothbrush, etc.,
close to the washing
machine, malfunction
will result.
• Do not put water, pesticides,
hair products, deodorants, or
any other such liquids on the
lid. (To avoid electric shock and
malfunctions)
Do not hold cards with magnetic strips near
the washing machine. (The cards may become
unusable.)
• Do not hold a magnet near
the washing machine while it
is in operation.
(The tub may stop spinning.)
•
Do not put in too much detergent.
Rinsing cannot be
done sufficiently.
• The floor could be wet
by the foam flowing
out of the machine.
•
When you will not use the washing
machine for a long period of time.
•
Turn off the power and pull out the
power plug.
After finishing don’t forget:-
shut off
• Please shut off the
faucet.
• Please don’t let water
store for a long time.
w This is to prevent water
soaking.
Caution
1. It is advisable not to start the machine direct with spinning process but
to start with normal washing cycle.
2. Please be aware, when the laundry is unbalanced during spinning,
some knocking sound may occur and the spin may stop followed by an
additional automatic rinsing.
3. If the unbalance condition continue for 3 times, the washing machine
will stop functioning automatically.
Uneven Laundry
4. You can manually distribute the laundry evenly to ensure the laundry
are balanced inside the tub.
Even Laundry
Cautions on parts
If the supply power cord is damaged. It must be replaced by Service Center or a similarly qualified person in
order to avoid a hazard.
18
NA-F90T1 80T1_EN.indd 18
9/17/08 9:45:36 AM
How to install
Placement
• Do not install the washing machine in any extremely damp place such as a bathroom, or in a place
exposed to the weather. There is a danger of electric shock, fire, machine trouble and deformation of
machine.
• If machine is installed on the floor, be sure that carpet does not block any openings to prevent it from
closing any ventilation openings.
• Do not install the washing machine exposed to direct sunlight (This could cause machine trouble,
deformation and other problem.)
Power cord
• Make sure to push the power plug completely into the socket outlet. If the power plug
is not completely pushed into the outlet, this will cause electric shock and fire due to
overheating.
Socket outlet
Establish a ground (In case of two-wire power cords)
• When there is a grounding receptacle on power supply
outlet.
• When carbon ground rod (sold separately) is used.
• Do not connect to gas pipe, water pipe, or ground wire
of telephone or lighting rod.
• Reestablish a ground when you change installation
location or move.
• For further information, contact the distributor or service
technician.
WARNING
Make sure to establish a ground.
There is a risk of electric shock
caused by a leakage of electricity.
Grounding
receptacle
Ground
wire
Carbon
ground
Install Washing Machine Horizontally
1
2
Leveller
Place the washing machine on a flat and secure location.
Open the lid, leveller is already fix on the Plastic Body surface. Visually check
that the bubble of the leveller is inside the mark from the front and top.
When the bubble is inside the mark
Bubble
Mark
3
• There is no need
to make a height
adjustment.
Plastic Body
Adjust height
When the bubble is largely out of mark
• The floor is largely inclined against the
direction that the bubble is leaning.
• Let the bubble inside the mark by
placing a board under the leg on
the other side.
Board or a like
1. Turn the Adjustable Leg Knob towards
(LOOSEN) direction to loose it.
2. Turn the Adjustable Leg to adjust the levelness.
• When increasing height, turn Adjustable
Leg towards (LOOSEN) direction.
• When decreasing height, turn Adjustable
Leg towards (TIGHTEN) direction.
3. Turn the Adjustable Leg knob towards
(TIGHTEN) direction to tighten it.
Adjustable leg knob
When the bubble is a little out of mark
Loosen
Front side
Adjust using
adjustable leg
Tighten
Adjustable leg
To raise
To lower
(Bottom view)
4
Check the machine for unsteadiness and tightens the adjustable leg knob.
19
NA-F90T1 80T1_EN.indd 19
9/17/08 9:45:43 AM
Connect the water supply hose
That the appliance is to be connected to the water faucet using new water tap adaptor and water supply hose
and that old one should not be reused.
1. Loosen the 4 screws on the water tap adaptor just enough to slip the adaptor over the mouth of the faucet.
2. Slip the water tap adaptor over the faucet, keeping it in a straight line with the faucet. Tighten the screws,
applying even pressure all around. When the space behind washing machine is narrow due to a wall or
other obstacle, adjust the back screw to the proper position before slipping the connector over the faucet.
3. Remove the tape and tighten B by turning it to the right.
4. With the water supply hose cover and lever pushed down, slide the hose up onto the proper position release
them before hear it click into place.
5. Pull down on the hose to make sure it will not come off.
6. Turn on the water faucet to check for leaks.
[Note]
Screws (4)
Water faucet
Water tap
adaptor
A
B
Lever
• Firmly tighten part B of the water tap adaptor,
otherwise water leakage will result.
• If a water tap adaptor is already connected,
replace with the attached new one.
• When the hose must be reinstalled (after you
remove, for example), turn B to the left until
about 4 mm of the thread becomes visible, then
carry out the procedure described above.
Water supply
hose cover
Approx. 4 mm
B
Connect the water supply hose to the
water supply valve screw.
Elbow
Water supply valve screw
Nut
1. Push the water supply hose nut straights onto
the water supply valve screw.
2. Hold the elbow by lifting it up, screw the nut onto the
water supply valve screw, and firmly tighten the nut.
3. After the nut is tightened, check whether or not
the elbow is unsteady or loose.
4. After tightening, open the faucet to confirm that
there is no water leakage.
[Cautions]
• Firmly tighten the nut, otherwise water leakage
will result.
• Water Pressure Rating :
2.9 x 10⁴ – 9.8 x 10⁵ Pa
Water
Supply Hose
Drain hose
Hose extension
If extended external part is necessary when connecting the drain hose, the length of the drain hose should
be less than 3 m and the height should be below 10 cm.
Do not put hose tip under the
water
Below 10 cm.
Good Example
Over 10 cm
3 m max.
Install the machine 10 cm or more away from the wall.
20
NA-F90T1 80T1_EN.indd 20
9/17/08 9:45:47 AM
Changing the position of the drain hose
Depending on the drain location, the position of the drain hose can be changed to the left side of the washing
machine.
Changing the position from the right to the left side
1
Remove the screw affixing the part A connection
port.
2
3
Remove the rear panel.
4
Affix part B connection port using the screw.
w Make sure to hook the upper part of the connection
port firmly onto the washing machine.
5
Affix the rear panel using the screw and affix the
cover at part A.
3
2
Cover
1
Part A
Part A
Rear panel
Hose
3
Part B
Remove the cover and change the position of the
hose from part A to part B.
4
[NOTE]
How to remove the rear panel
The rear panel is fixed with 4 screws, 4 claws at both right and left sides and 4
hooks at top and bottom.
1. Loosen and remove the 4 screws.
2. Pull the panel while pushing the end of the claws inwards, then release the
fastened claws.
3. Hold the gap between the body and panel and warp the rear panel, then release
the upper hook.
4. Remove the lower hooks from the body.
Connect external drain water hose
Prior to installation, make sure to mount the external drain hose.
How to connect
Connection port
•
If the hose is hard to insert, attach a detergent to
the inside surface of the connection port.
2
Slide the hose band as far as it will go.
External drain water hose
1
Insert the hose into the connection port securely.
Connection port
Hose band
Bottom Cover Installation Instruction
A. Purpose
For safety precaution.
B. How to install Bottom Cover to the Base
1. Lay down the washing machine on a piece of cardboard with the back body facing to the upside. (Figure 1)
2. Insert the Bottom Cover to the Base. (Figure 2)
3. Fasten the 2 screws of the Bottom Cover to the Base. (Figure 3)
Bottom Cover
Screws
Base
Figure 1
Figure 2
Figure 3
21
NA-F90T1 80T1_EN.indd 21
9/17/08 9:45:50 AM
Troubleshooting
The following symptoms are not trouble.
Symptoms
Causes
Machine begins filling water in the
middle of the wash.
• When the laundry amount is large at the HIGH water level, the
machine sometimes fills automatically. When level goes down, the
machine fills automatically.
• When the laundry is already soaked with water before the wash is
started, or if there is water in the tub before the wash is started, the
water level will sometimes be higher.
• With light laundry made of synthetic or blended fabric, the water level
will sometimes be lower.
• When the laundry is unbalanced during spin, rinsing and automatic
correction of unbalanced laundry will begin. Later spinning will return
to normal condition.
• Do not leave more than 15 seconds while powered on. Fill the water
while powered off or after pushing the start button.
• Keep the level of the softener indicated to prevent the softener from
flowing immediately.
• If you close the softener drawer forcefully, softener may spill out of
the drawer.
• To suppress detergent suds build-up, the washing tub turns slowly
and quickly.
The water level is too high for the
amount of laundry being washed.
The water level is too low for the
amount of laundry being washed.
Midway during spinning, the
operation suddenly changes to
rinsing.
The water is drained even filled by
a bucket.
Softener spills out from softener
drawer.
During draining, the laundry and
the spinner rotates with irregular
movements.
The buttons do not work.
If you start with the rinse cycle, the
tub is not filled with water.
Water does not flow through the
lint filter. Double Cascade does not
operate.
Washing machine does not run at
all.
Water is not supplied.
Washing operation still continue even
though the expected finishing time
had passed on Reserve Program.
Buzzer sounds followed by a
draining when opening the lid
during wash and rinse.
Buzzer sounds when opening the lid
during cascade rinsing or spinning.
Tub shaking with the sound of water.
Water supply failure.
Power failure.
• Only the [WATER LEVEL] button is available after the machine
begins washing.
• To change the setting, press the [POWER OFF] button and reconfigure
the setting.
• When there is water in the tub, the operation starts with the draining.
After spin cycle is fi nished, the tub will be fi lled with water.
• When the water level is set to very low, water sometimes will not flow
through the lint filter. Double Cascade does not operate when these
settings have been selected.
• Check if there is power failure.
• Check if the power fuse has blown out or the breaker is actuated.
• Check if the power plug is plugged in thoroughly.
• Check if the “power switch’’ has been pressed.
• Has the water faucet been turned on?
• Check if the [START/HOLD] button has been pressed.
• Has the machine been programmed under [RESERVE] timer?
• Check if the water faucet is turned on.
• Is the water supply cut off?
• Check if the connection of the water supply hose is clogged with dirt.
• Please refer to page 17 for cleaning water supply hose filter.
Washing time will be longer because of laundry unbalance, water
feeding and draining condition.
In the case when open the lid after setting the [CHILD LOCK] mode, it
will force the draining process. Pull out the power plug from the outlet
and replug it after 5 seconds.
This is a reminder for a user not to put a hand and/or any object into the
tub. It is not out of order.
w To turn off the buzzer, close the lid.
This is the sound of the liquid to maintain the balance during spinning.
Normally after the water supply failure, the water will become muddy.
Detach the water feeding hose and turn on the water faucet to release to
due muddy water. Fix water hose and start washing.
In this case, [POWER ON] and [START/HOLD] buttons need to be
pressed again after electricity is restored. Then the machine will resume
operation automatically from beginning of the stopped process.
22
NA-F90T1 80T1_EN.indd 22
9/17/08 9:45:53 AM
Error Indication
If the following indications appear on the display panel (buzzer sounds, U and H Characters appear).
U11
• Check if abnormalities listed below are
seen in the external water hose.
• Is the hose connected?
• Is it clogged with lint?
• Is it crushed?
• Is the tip soaked in water?
• Is a part of hose at a height of over 10
cm midway?
• Is the extension hose longer than 3 m?
• Is the hose being used too small?
U12
• Check if the lid is opened.
• Close the lid.
U13
• Is the washing machine is an unsteady position, or is it on an
inclined floor surface?
• Is the laundry unevenly distributed in the tub?
• Arrange the laundry evenly in the tub, then close the lid.
U14
• Check if you have forgotten to connect
the water hose and to turn on the faucet.
• Is the water supply cut off?
U99
• Check if lid is open when draining operation of the [CHILD LOCK]
program is ON.
See page 15 for the reset method of an alarm.
H01
• In case of H displays such as “H01”, with no buzzer sounds pull
out the power plug, and contact your dealer for service.
Restart with
opening and
closing the lid.
Restart with opening
and closing the lid.
Specification
Model
Voltage
Power consumption
NA-F90T1
NA-F80T1
220 – 240V~
220 – 240V~
50 Hz
50 Hz
470 W
450 W
Standard water amount
71 L
69 L
Maximum capacity
9.0 kg
8.0 kg
Length of power cord
(Approx. 1.6 m)
WxLxH
643 x 637 x 1010 (mm)
Net weight
41 kg
41 kg
23
NA-F90T1 80T1_EN.indd 23
9/17/08 9:45:56 AM
NA-F90T1 80T1_EN.indd 24
9/17/08 9:45:59 AM