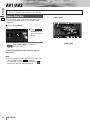
1
Dual DIN In-dash 7” Widescreen Color LCD Monitor/DVD Receiver
Moniteur vidéo couleur grand-écran à écran à cristaux liquides de 7
pouces double DIN/récepteur DVD intégrés en tableau de bord
Monitor LCD en color de pantalla panorámica de 7”/receptor y DVD DIN
doble empotrado en el tablero de instrumentos
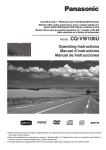
Model:
CQ-VW100U
CQ-VW100U
MUTE
VOL
DIMMER
SRC / PWR
SETUP
TUNE/TRCK
TILT
Operating Instructions
Manuel d’instructions
Manual de Instrucciones
TEXT
¡Please read these instructions (including “Limited Warranty” and “Customer Services Directory”) carefully before using this product and keep
this manual for future reference.
¡Prière de lire attentivement ces instructions (y compris la “Garantie limitée” et le “Répertoire des services à la clientèle”) avant d’utiliser ce
produit et conserver ce manuel d’utilisation pour s’y référer ultérieurement.
¡Lea estas instrucciones cuidadosamente antes de usar este producto y guarde este manual para usar como referencia futura.
English
Safety Information
1
■ Read the operating instructions for the unit and all other
components of your car audio system carefully before using
the system. They contain instructions about how to use the
system in a safe and effective manner. Panasonic assumes
no responsibility for any problems resulting from failure to
observe the instructions given in this manual.
Warning
This pictograph intends to alert you to the presence of important operating instructions and
installation instructions. Failure to heed the
instructions may result in severe injury or
death.
Warning
Observe the following warnings when using
this unit.
❑ The driver should neither watch the display nor
operate the system while driving.
Watching the display or operating the system will distract
the driver from looking ahead of the vehicle and can cause
accidents. Always stop the vehicle in a safe location and
use the parking brake before watching the display or operating the system.
❑ Use the proper power supply.
This product is designed for operation with a negative
grounded 12 V DC battery system. Never operate this
product with other battery systems, especially a 24 V DC
battery system.
❑ Protect the Deck Mechanism.
Do not insert any foreign objects into the slot of this unit.
❑ Do not disassemble or modify the unit.
Do not disassemble, modify the unit or attempt to repair
the product yourself. If the product needs to be repaired,
consult your dealer or an authorized Panasonic
Servicenter.
❑ Do not use the unit when it is out of order.
If the unit is out of order (no power, no sound) or in an
abnormal state (has foreign objects in it, is exposed to
water, is smoking, or smells), turn it off immediately and
consult your dealer.
❑ Refer fuse replacement to qualified service personnel.
When the fuse blows out, eliminate the cause and have it
replaced with the fuse prescribed for this unit by a qualified
service engineer. Incorrect replacement of the fuse may
lead to smoke, fire, and damage to the product.
■ This manual uses pictographs to show you how to use the
product safely and to alert you to potential dangers resulting
from improper connections and operations. The meanings of
the pictographs are explained below. It is important that you
fully understand the meanings of the pictographs in order to
use this manual and the system properly.
Caution
This pictograph intends to alert you to the presence of important operating instructions and
installation instructions. Failure to heed the
instructions may result in injury or material damage.
Observe the following warnings when
installing.
❑ Disconnect the lead from the negative (–) battery
terminal before installation.
Wiring and installation with the negative (–) battery terminal connected may cause electrical shock and injury due to
a short circuit.
Some cars equipped with the electrical safety system have
specific procedures of battery terminal disconnection.
FAILURE TO FOLLOW THE PROCEDURE MAY LEAD TO
THE UNINTENDED ACTIVATION OF THE ELECTRICAL
SAFETY SYSTEM RESULTING IN DAMAGE TO THE VEHICLE AND PERSONAL INJURY OR DEATH.
❑ Never use safety-related components for installation, grounding, and other such functions.
Do not use safety-related vehicle components (fuel tank,
brake, suspension, steering wheel, pedals, airbag, etc.) for
wiring or fixing the product or its accessories.
❑ Installing the product on the air bag cover or in a
location where it interferes with airbag operation
is prohibited.
❑ Check for piping, gasoline tank, electric wiring,
and other items before installing the product.
If you need to open a hole in the vehicle chassis to attach
or wire the product, first check where the wire harness,
gasoline tank, and electric wiring are located. Then open
the hole from outside if possible.
❑ Never install the product in a location where it interferes with your field of vision.
❑ Never have the power cord branched to supply
other equipment with power.
❑ After installation and wiring, you should check the
normal operation of other electrical equipment.
The continuation of their using in abnormal conditions may
cause fire, electrical shock or a traffic accident.
❑ In the case of installation to an airbag equipped
car, confirm warnings and cautions of the vehicle
manufacturer before installation.
❑ Make sure the leads do not interfere with driving
or getting in and out of the vehicle.
❑ Insulate all exposed wires to prevent short circuiting.
2
CQ-VW100U
Observe the following cautions when using
this unit.
❑ Keep the sound volume at an appropriate level.
Keep the volume level low enough to be aware of road and
traffic conditions while driving.
❑ Do not insert or allow your hand or fingers to be
caught in the unit.
To prevent injury, do not get your hand or fingers caught in
moving parts or in the disc slot. Especially watch out for
infants.
❑ This unit is designed for use exclusively in automobiles.
❑ Do not operate the unit for a prolonged period with
the engine turned off.
Operating the audio system for a long period of time with
the engine turned off will drain the battery.
❑ Do not expose the unit to direct sunlight or excessive heat.
Otherwise these will raise the interior temperature of the
unit, and it may lead to smoke, fire, or other damage to the
unit.
❑ Do not use the product where it will be exposed to
water, moisture, or dust.
Exposure of the unit to water, moisture, or dust may lead
to smoke, fire, or other damage to the unit. Make especially
sure that the unit does not get wet in car washes or on
rainy days.
❑ Use the designated parts and tools for installation.
Use the supplied or designated parts and appropriate tools
to install the product. The use of parts other than those
supplied or designated may result in internal damage to the
unit. Faulty installation may lead to an accident, a malfunction or fire.
❑ Do not block the air vent or the cooling plate of the
unit.
English
Caution
2
Blocking these parts will cause the interior of the unit to
overheat and will result in fire or other damage.
❑ Do not install the product where it is exposed to
strong vibrations or is unstable.
Avoid slanted or strongly curved surfaces for installation. If
the installation is not stable, the unit may fall down while
driving and this can lead to an accident or injury.
❑ Installation Angle
The product should be installed in a horizontal position
with the front end up at a convenient angle, but not more
than 30˚.
The user should bear in mind that in some areas there may
be restrictions on how and where this unit must be
installed. Consult your dealer for further details.
❑ Wear gloves for safety. Make sure that wiring is
completed before installation.
❑ To prevent damage to the unit, do not connect the
power connector until the whole wiring is completed.
❑ Do not connect more than one speaker to one set
of speaker leads. (except for connecting to a
tweeter)
Observe the following cautions when
installing.
❑ Refer wiring and installation to qualified service
personnel.
Installation of this unit requires special skills and experience. For maximum safety, have it installed by your dealer.
Panasonic is not liable for any problems resulting from
your own installation of the unit.
❑ Follow the instructions to install and wire the product.
Not following the instructions to properly install and wire
the product could cause an accident or fire.
❑ Take care not to damage the leads.
When wiring, take care not to damage the leads. Prevent
them from getting caught in the vehicle chassis, screws,
and moving parts such as seat rails. Do not scratch, pull,
bend or twist the leads. Do not run them near heat sources
or place heavy objects on them. If leads must be run over
sharp metal edges, protect the leads by winding them with
vinyl tape or similar protection.
CAUTION:
• PLEASE FOLLOW THE LAWS AND REGULATIONS OF YOUR STATE, PROVINCE OR COUNTRY FOR WIRING,
INSTALLATION, AND USE OF THIS UNIT AND THE DEVICES TO BE CONNECTED.
CQ-VW100U
3
English
Safety Information (continued)
3
Caution
THIS PRODUCT IS A CLASS I LASER PRODUCT.
USE OF CONTROLS OR ADJUSTMENTS OR PERFORMANCE
OF PROCEDURES OTHER THAN THOSE SPECIFIED HEREIN
MAY RESULT IN HAZARDOUS RADIATION EXPOSURE.
DO NOT OPEN COVERS AND DO NOT REPAIR BY YOURSELF. REFER SERVICING TO QUALIFIED PERSONNEL.
The following applies only in the U.S.A.
Part 15 of the FCC Rules
FCC Warning:
Any unauthorized changes or modifications to this
equipment would void the user's authority to operate
this device.
NOTICE:
This product has a fluorescent lamp that
contains mercury.
Dispose may be regulated in your community due to environmental considerations.
For disposal or recycling information,
please contact your local authorities, or the
Electronic Industries Alliance :
http://www.eiae.org
4
CQ-VW100U
This system is designed so that you
cannot see moving pictures while
you are driving.
¡Park your car in a safe place and pull the side
brake (parking brake) lever before watching the
monitor.
¡A rear monitor (option) displays moving pictures while driving.
Note:
¡Be sure to connect the side brake (parking
brake) connection lead.
(a Installation Instructions)
Liquid Crystal Panel
¡Do not cause impact to the liquid crystal panel.
¡Usage temperature range: 0 °C to 40 °C
{32 °F to 104 °F}
When the temperature is very cold or very hot, the
image may not appear clearly or may move slowly.
Also, movement of the image may seem to be out of
synchronization or the image quality may decline in
such environments. Note that this is not a malfunction
or problem.
¡In order to protect the liquid crystal panel, keep it out
of direct sunlight while the unit is not in use.
¡Sudden changes in the temperature inside the car such
as those which occur immediately after the car’s air
conditioner or heater has been turned on may cause
the inside of the liquid crystal panel to cloud over due
to water vapor or it may cause condensation (droplets
of water) to form and, as a result, the panel may not
work properly. Do not use the unit while these symptoms are in evidence but leave the unit standing for
about and hour, and then resume or start use.
English
Notes on Use
4
Components
1. Main Unit
(LCD monitor/DVD player)
CQ-VW100U
MUTE
VOL
DIMMER
SRC / PWR
SETUP
XXXXXXXXXXXXXXX
XXXXXXXXXXXXXXXXX
XXXXXXXXXXXXXX
XXXXXXXXXXXXXXXX
OO-OOOOO
TUNE/TRCK
Qty.: 1
TILT
2. Operating Instructions
<YFM264C065CA>
Note:
¡The number in parenthesis underneath each accessory
part name is the part number for maintenance and
service.
¡Accessories and their parts numbers are subject to
modification without prior notice due to improvements.
Qty.: 1
XXXXXXXXXXXXXXX
XXXXXXXXXXXXXXXXX
XXXXXXXXXXXXXX
XXXXXXXXXXXXXXXX
OO-OOOOO
3. System Upgrade Guidebook
<YFM264C066CA>
Qty.: 1
XXXXXXXXXXXXXXX
XXXXXXXXXXXXXXXXX
XXXXXXXXXXXXXX
XXXXXXXXXXXXXXXX
OO-OOOOO
4. Installation Instructions
<YFM294C128CA>
Qty.: 1
5. Product Registration Card
Qty.: 1
6. Customer Care Plan
Qty.: 1
7. Installation Hardware (screws,
cords, etc.)
(a Installation Instructions)
CQ-VW100U
5
English
Customer Services Directory
5
U.S.A.
Obtain Product Information and Operating Assistance; locate
your nearest Dealer or Servicenter; purchase Parts and
Accessories; or make Customer Service and Literature requests
by visiting our Web Site at:
http://www.panasonic.com/support
or, contact us via the web at:
http://www.panasonic.com/contactinfo
You may also contact us directly at:
1-800-211-PANA (7262),
Monday-Friday 9 am-9 pm; Saturday-Sunday 10 am-7 pm, EST.
For hearing or speech impaired TTY users,
TTY : 1-877-833-8855
Accessory Purchases:
Purchase Parts, Accessories and Instruction Books online for all
Panasonic Products by visiting our Web Site at:
http://www.pasc.panasonic.com
or, send your request by E-mail to:
[email protected]
You may also contact us directly at:
1-800-332-5368 (Phone) 1-800-237-9080 (Fax Only) (MondayFriday 9 am to 8 pm, EST.)
Panasonic Services Company
20421 84th Avenue South, Kent, WA 98032
(We accept Visa, MasterCard, Discover Card, American Express,
and Personal Checks)
For hearing or speech impaired TTY users,
TTY : 1-866-605-1277
6
CQ-VW100U
Service in Puerto Rico
Panasonic Puerto Rico, Inc.
Panasonic Sales Company
Factory Servicenter:
Ave. 65 de Infantería, Km. 9.5, San Gabriel Industrial Park,
Carolina, Puerto Rico 00985
Phone (787) 750-4300, Fax (787) 768-2910
CANADA
WARRANTY SERVICE
FOR PRODUCT OPERATION ASSISTANCE, please contact:
Our Customer Care Centre:
Telephone #:
(905) 624-5505
1-800 #:
1-800-561-5505
Fax #:
(905) 238-2360
Email link:
“Contact Us” on www.panasonic.ca
FOR PRODUCT REPAIRS, please locate your nearest Authorized
Servicentre at www.panasonic.ca:
Link : “ServicentresTM locator” under “Customer support”
IF YOU SHIP THE PRODUCT TO A SERVICENTRE
Carefully pack and send prepaid, adequately insured and preferably in the original carton.
Include details of the defect claimed, and proof of date of original
purchase.
Some states do not allow the exclusion or limitation of incidental or consequential damages, or limitations on how long an implied warranty lasts, so
the exclusions may not apply to you.
U.S.A.
PANASONIC CONSUMER ELECTRONICS COMPANY,
DIVISION OF PANASONIC CORPORATION OF NORTH AMERICA
One Panasonic Way, Secaucus, New Jersey 07094
This warranty gives you specific legal rights and you may also have other
rights which vary from state to state. If a problem with this product develops
during or after the warranty period, you may contact your dealer or
Servicenter. If the problem is not handled to your satisfaction, then write to
warrantor’s Consumer Affairs Department at the addresses of the warrantor.
PANASONIC SALES COMPANY,
DIVISION OF PANASONIC PUERTO RICO, INC.
Ave. 65 de infanteria, Km. 9.5, San Gabriel Industrial Park
Carolina, Puerto Rico 00985
LIMITED WARRANTY COVERAGE
If your product does not work properly because of defects in materials and
workmanship.
Panasonic Consumer Electronics Company or Panasonic Sales Company
(collectively referred to as “the warrantor”) will, for the length of the period
indicated in the chart below, which starts with the date of original purchase
(“warranty period”), at its option either (a) repair your product with new or
refurbished parts, or (b) replace it with a new or refurbished product. The
decision to repair or replace will be made by the warrantor.
Categories
Parts
Accessories (in exchange for defective
items)
6
PARTS AND SERVICE WHICH ARE NOT COVERED BY THIS LIMITED WARRANTY ARE YOUR RESPONSIBILITY.
PANASONIC AUTO PRODUCTS
LIMITED WARRANTY
Audio Components (except items listed
One (1) Year
below)
MXE Series Audio Components (except
Two (2) Years
items listed below)
One (1) Year
Speakers
Defective Car Audio Speakers under warranty must be exchanged at the place of
purchase. Contact your Dealer for details.
English
Limited Warranty
Labor
One (1) Year
Customer’s Record
Model
No.
Serial
No.
Dealer’s
No.
Code
No.
Dealer’s
Address
Date of
Purchase
Two (2) Years
Not Applicable
CANADA
Panasonic Canada Inc.
5770 Ambler Drive, Mississauga Ontario L4W 2T3
Ninety (90) Days Not Applicable
During the “Labor” warranty period, there will be no charge for labor. During
the “Parts” warranty period, there will be no charge for parts. You must carry
in or mail in your product prepaid during the warranty period. If nonrechargeable batteries are included, they are not warranted. This warranty
only applies to products purchased and serviced in the United States or
Puerto Rico. This warranty is extended only to the original purchaser of a
new product which was not sold “as is”. A purchase receipt or other proof of
the original purchase date is required for warranty service.
CARRY-IN OR MAIL-IN SERVICE
For Carry-In or Mail-In Service in the United States, call 1-800-211-PANA
(7262) or visit
Panasonic Web Site: http://www.panasonic.com
For assistance in Puerto Rico, call Panasonic Sales Company (787)-7504300 or fax (787)-768-2910.
LIMITED WARRANTY LIMITS AND EXCLUSIONS
This warranty ONLY COVERS failures due to defects in materials and workmanship, and DOES NOT COVER normal wear and tear or cosmetic damage.
The warranty ALSO DOES NOT COVER damages which occurred during
shipment, failures which are caused by products not supplied by the warrantor, failures which result from accident, misuse, abuse, neglect, bug infestation, mishandling, misapplication, alteration, faulty installation, set-up
adjustment, maladjustment of consumer control, improper maintenance,
improper antenna, inadequate signal reception or pickup, power line surge,
improper voltage supply, lightning, modification, commercial use (such as
use in hotels, offices, restaurants, or other business uses) or rental use of
the product, or service by anyone other than the technician from Factory
Servicenter or other authorized service centers, or damage that is attributable to acts of God.
PANASONIC PRODUCT LIMITED WARRANTY
Panasonic Canada Inc. warrants this product to be free from defects in materials and workmanship and agrees to remedy any such defect for a period as
stated below from the date of original purchase.
CAR AUDIO PRODUCT – ONE (1) YEAR, PARTS AND LABOUR
(The labour to install or remove the product is not warranted)
ACCESSORIES - NINETY (90) DAYS, (IN EXCHANGE FOR DEFECTIVE
ITEMS)
LIMITATIONS AND EXCLUSIONS
This warranty does not apply to products purchased outside Canada or to
any product which has been improperly installed, subjected to usage for
which the product was not designed, misused or abused, damaged during
shipping, or which has been altered or repaired in any way that affects the
reliability or detracts from the performance, nor does it cover any product
which is used commercially. Dry cell batteries are also excluded from coverage under this warranty.
This warranty is extended to the original end user purchaser only. A purchase receipt or other proof of the original purchase date is required before
warranty service is performed.
THIS EXPRESS, LIMITED WARRANTY IS IN LIEU OF ALL OTHER WARRANTIES, EXPRESS OR IMPLIED, INCLUDING ANY IMPLIED WARRANTIES
OF MERCHANTABILITY AND FITNESS FOR A PARTICULAR PURPOSE.
IN NO EVENT WILL PANASONIC CANADA INC. BE LIABLE FOR ANY SPECIAL, INDIRECT OR CONSEQUENTIAL DAMAGES.
In certain instances, some jurisdictions do not allow the exclusion or limitation of incidental or consequential damages, or the exclusion of implied warranties, so the above limitations and exclusions may not be applicable.
THERE ARE NO EXPRESS WARRANTIES EXCEPT AS LISTED UNDER “LIMITED WARRANTY COVERAGE”. THE WARRANTOR IS NOT LIABLE FOR
INCIDENTAL OR CONSEQUENTIAL DAMAGES RESULTING FROM THE USE
OF THIS PRODUCT, OR ARISING OUT OF ANY BREACH OF THIS WARRANTY. (As examples, this excludes damages for lost time, cost of having someone remove or re-install an installed unit if applicable, travel to and from the
servicer, and loss of media, data or other memory contents. The items listed
are not exclusive, but are for illustration only.) ALL EXPRESS AND IMPLIED
WARRANTIES, INCLUDING THE WARRANTY OF MERCHANTABILITY, ARE
LIMITED TO THE PERIOD OF THE LIMITED WARRANTY.
CQ-VW100U
7
English
Features
Panasonic welcomes you to our constantly growing family of electronic products owners.
We endeavor to give you the advantages of precise electronic and mechanical engineering, manufactured with carefully
selected components, and assembled by people who are proud of the reputation their work has built for our company.
We know this product will bring you many hours of enjoyment, and after you discover the quality, value and reliability
we have built into it, you too will be proud to be a member of our family.
7
Please refer to the separate “System Upgrade Guidebook” for how to operate this unit when optional devices are
connected.
■ No device is connected to this unit. a Basic operations are covered only by this book.
■ Optional devices are connected to this unit. a Refer to the “System Upgrade Guidebook” in addition.
■ Simultaneous Multi-Device Connection
(with Expansion Module (hub unit))
You can connect the optional Expansion Module (hub
unit) (CY-EM100U). Connection of the Expansion
Module allows you to simultaneously connect
optional devices mentioned before as well as other
AV devices. For details, refer to the operating instructions for the Expansion Module.
Connectable devices
¡CD/DVD changer (max. 1)
¡iPod® (max. 2)
¡XM Satellite Radio (max. 1)
¡Sirius Satellite Radio (max. 1)
¡Hands Free Kit with Audio Streaming featuring
Bluetooth® technology (Bluetooth unit) (max. 1)
¡TV tuner (max. 1)
Note:
¡Market conditions regarding optional devices vary
with countries and regions. For further information,
consult your dealer.
¡If a non-Panasonic product is connected to this
unit, we do not guarantee the operations of the
product.
■ Integration of the monitor, FM/AM radio,
■
8
DVD Video/Video CD player and
CD/MP3/DivX player
Built-in AV Input/Output Terminals
For more convenient connection and setup, all terminals are now provided on the unit itself.
Note:
¡If a non-Panasonic product is connected to this
unit, we do not guarantee the operations of the
product.
CQ-VW100U
■ SQ (Sound Quality)
You have 6 preset modes (Flat, Rock, Pop, Vocal,
Jazz, Club). You can customize your setting for these
(except Flat) and save them for instant recall.
SQ3 (3-Band Sound Quality)
Center frequency and level are adjustable in each of 3
bands. This lets you fine-tune sound quality for each
genre to suit car-interior acoustics and your personal
preferences. (a page 35)
■ GUI (Graphic User Interface)
GUI displays various indications with colorful symbols to enhance visibility, enjoyment, and operability.
■ Disc type auto-detection
The signal auto-detection function of this unit allows
users to be free from selection between PAL and
NTSC before use of your discs. (For output signal,
set TV Type . (a page 36))
■ Touch Panel Operation
Simply touch the screen lightly to operate virtually all
functions. Easy-to-use menus and icons let you
“touch and choose” what you want, so you can start
using your system from the very first day. That also
means that while you drive, you can concentrate on
the road.
■ DVD–R, DVD–RW Playback
(a page 18, 44 for details)
■ ID code
4-digit ID code for increased security.
Fill in the ID code memo (a page 42).
Contents
English
2
Français
48
Español
94
¢ Safety Information .......................... 2
¢ Notes on Use ................................................... 5
¢ Components .................................................... 5
¢ Customer Services Directory......................... 6
¢ Limited Warranty............................................. 7
¢ Features ........................................................... 8
¢ Preparation.................................... 10
First time power on, other settings, symbols used in
this manual
¢ Name of Controls and Functions ................ 12
¢ Touch Panel Operation Overview................ 14
¢ General .......................................... 16
Power on/power off, display open/close, source
selection, volume, mute, tilt angle
¢ Before Disc Playback..................... 18
¢ Disc Player..................................... 20
¢ Notes on MP3/DivX ....................................... 24
¢ Radio.............................................. 26
¢ AV1/AV2 ......................................... 28
¢ Settings ......................................... 30
Setup operation
Basic setting, screen, sound, disc, radio
¢ About DivX VOD Content ............................. 38
¢ Troubleshooting ........................... 39
¢ Maintenance .................................................. 43
¢ Notes on Discs .............................................. 44
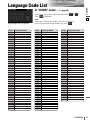
¢ Language Code List...................................... 45
¢ Definition of Terms ....................................... 46
¢ Specifications................................................ 47
CQ-VW100U
9
English
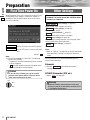
Preparation
9
First Time Power On
Other Settings
When the power of this unit is turned on for the first time,
the following screen appears. Perform the settings in
accordance with the specifications of the car on which
this unit is mounted.
Please refer to the separate “System Upgrade
Guidebook” for how to operate this unit when optional devices are connected.
Basic setting (basic settings) (a page 32)
clock, ID code, input, memory clear, other
Screen (screen settings) (a page 34)
dimmer, display, aspect
Sound (sound settings) (a page 35)
SQ3, bass/treble, balance/fader, sub-woofer
Disc
(disc settings) (a page 36)
audio language, subtitle language, menu language, video
setting, audio setting, Divx registration
Radio
On
: sets to ON if your car has ACC position.
Off
: sets to OFF if your car has no ACC position.
default: On
Note:
¡ For an ACC-equipped car, select ON. The following
functions are available.
¡ The power is turned on automatically when inserting
a disc or magazine.
¡ Off selection disables turning on the power of the
main unit through the remote control.
(radio settings) (a page 37)
FM setup
Note:
¡Refer to “Settings” (a page 30) for further information
about operations, settings, and others of the menu
screen.
You may need to set the following depending on the
devices to be connected.
Subwoofer
¡Execute
Sub-Woofer
(sub-woofer adjustment).
(a page 35)
Caution
¡Be sure to select off when your car has no ACC
position in the ignition switch. Failure to do this
could cause the battery to go dead.
OFF
ACC
IGN
10
CQ-VW100U
AV1/AV2 (Camcorder, VCR, etc.)
¡Adjust
Input
. (a page 33)
Warning
¡When you connect external devices to this unit,
be sure to connect the side brake connection lead
(aInstallation Instructions).
English
Symbols used in this manual
Pictographs
Disc Marks
You can perform some operations of this unit in one or
more methods with the touch panel or remote control.
This book explains such operations in tabular form as follows. Refer to the following for the pictographs located in
the upper part of each table.
The following pictographs are used for the descriptions
of disc operation. (a page 19-23)
Compatible
Discs
Compatible types of disc
The discs compatible with the targeted operation.
Compatible
Discs
10
DVD : DVD
VCD : VCD (Video CD)
CD : CD
MP3 : CD-Rs/RWs containing MP3 files
DivX : CD-Rs/RWs or DVD-Rs/RWs containing DivX files
Operation on the Touch Panel
YouDisques
can use the touch panel to perform the targeted
compatiblesIf the operation is not executable with the
operation.
touch panel, “––” is displayed.
Compatible
Discs
Operation on the Main Unit
You can use the Main Unit to perform the targeted operation.
If the operation is not executable with the Main Unit,
Compatible
“––”Discs
is displayed.
Compatible
Discs
Discos
compatibles
Compatible
Discs
CQ-VW100U
11
English
Name of Controls and Functions
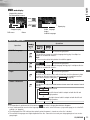
Display
CQ-VW100U
11
MUTE
VOL
q [MUTE]
DIMMER
SRC / PWR
e [DIMMER]
w [–] [+] (VOL)
r [SRC/PWR]
(SOURCE/POWER)
q [MUTE]
¡Mutes the sound temporarily.
w [–] [+] (VOL)
¡Adjusts the sound volume.
e [DIMMER]
¡The screen brightness is toggled
between the set level and maximum
luminance.
r [SRC/PWR]
¡Switches on/off the power.
¡Changes the modes such as sound
and picture.
t [SETUP]
¡Shows the setup screen.
y [s] [d]
(TUNE/TRCK)
¡Selects or searches for a track, file,
station.
¡Fast forward/fast reverse.
¡Slow playback ([d]).
CQ-VW100U
TUNE/TRCK
u [u TILT]
TILT
y [s] [d]
(TUNE/TRCK)
Reset switch
Remote control sensor
12
SETUP
u [u TILT]
t [SETUP]
¡Adjusts the monitor position.
¡Opens/closes the panel.
¡Ejects the disc.
English
(Panel Open)
12
Disc slot
CQ-VW100U
13
English
Touch Panel Operation Overview
13
❒ Notes on the Touch Panel
Before operation
¡Clean the surface of the touch panel. (a page 43)
Operation
¡Use only your fingers to operate the touch panel.
¡Do not press the panel forcefully.
¡Do not scratch the panel with fingernails or any
hard objects.
¡Do not use a pen or other sharp implements to
operate the touch panel.
¡Do not bump the front panel.
a Failure to observe the above may damage or
break the glass on the surface of the touch
panel.
The State of Operation Screen
Example: DVD mode
Note:
¡The following picture is partly darkened for explanation.
¡Displaying contents and their positions partly vary with each mode. Refer to the description of each mode for details.
Prohibition
Aspect Button
(a page 34)
(only for video source)
Input is not possible
because the user has
attempted to perform
an operation which is
not supported by the
disc contents.
Screen Button
(a page 34)
(only for video source)
Clock time
(a page 32)
Sound Button (a page 35)
Source Button
Disc indicator (a page 19)
(Lights when a disc is loaded)
Setup Button
(Content varies with each source)
Displays the Source Selection Screen.
Source Selection Screen
Source Selection Screen appears.
Touch desired source button.
Touch
to quit.
Press [SRC/PWR] to change to desired
source.
Note:
¡The screen above appears when no external device is
connected to this unit.
14
CQ-VW100U
Displays the Setup Screen.
Setup Screen
Setup Screen appears. Select desired setting.
Setup menu, (a page 30)
Press [SETUP] to let Setup Screen appear.
Please refer to the separate “System Upgrade Guidebook” for how to operate this unit when optional devices are
connected.
English
Switching the Display
14
Note:
¡ Refer to the instructions of each source.
¡ To switch Operation Screen on, touch the center of touch panel. (Touch
to cancel)
¡ If no operation takes place for more than 10 seconds when Operation Screen is ON, Operation Screen is turned off.
Audio Source
❒ CD
Touch
.
Touch
.
Operation Screen
List Screen
❒ MP3
Touch
.
Touch
Operation Screen 1
(folder/file name)
.
Operation Screen 2
(ID3 tag)
Touch
List Screen
.
Video Source
❒ DVD
Touch
.
Touch
.
Operation Screen 1
Operation Screen 2
❒ DivX
Touch
.
Touch
Touch
Operation Screen 1
.
.
Operation Screen 2
Touch
List Screen
.
CQ-VW100U
15
English
General
15
MUTE
[MUTE]
DIMMER
VOL
[–] [+] (VOL)
SETUP
SRC / PWR
TUNE/TRCK
TILT
[u TILT]
[SRC/PWR]
Preparation: Turn your car’s ignition key to the ACC or ON position.
General Operations
Operations
Power
ON :
Power
OFF :
Display Open/Close
–
[SRC/PWR]
–
[SRC/PWR]
–
[u TILT]
¡Press once to open. Press again to close.
Note:
¡The display automatically closes after a warning alarm sounds if no operation is performed for approximately 30 seconds.
¡When a disc is already loaded, the disc will be ejected.
Source selection
Note:
¡The sources AV1 and
AV2 provide the audio
and video from the
devices connected to
AV1 IN and AV2 IN of
this unit respectively,
and the source Ext. In
provides the audio and
video from the device
connected to EXT
VIDEO IN of this unit
via the expansion
module (CY-EM100U,
option).
¡If there is no external
sources connected,
AV1/AV2 mode can be
set to skip.
(a page 33)
(a page 14)
[SRC/PWR]
RADIO (AM/FM)
(a page 26)
DVD (DVD/VCD (Video CD)/CD/MP3/DivX)
(a page 20)
AV1
(a page 28)
AV2
(a page 28)
Sources connected
to the Expansion
Module
(CY-EM100U)
When the Expansion
Module (CY-EM100U,
option) is connected.
(a System Upgrade
Guidebook)
…… Touch/Press and hold for more than 2 seconds
16
CQ-VW100U
Ext. In
HUB1
HUB2
HUB3
HUB4
(a System
Upgrade
Guidebook)
English
16
General Operations (continued)
Operations
Volume
Note:
¡The sound level for
each source is
stored in memory.
Mute
Tilt Angle
1
6
[+]
[–]
–
Up
Down
Setting range: 0 to 40, default: 18
Note:
¡ The volume level can be set independently for each source and each
disc format.
–
[MUTE]
–
[u TILT]
or
–
Mutes the sound.
To cancel, press again.
q Press and hold for more than 2 seconds.
w Touch to adjust.
Setting range: 1 to 6
default: 1
Warning
¡Do not touch the unit while the display is moving. Inserting hands, fingers or foreign objects into the unit can cause injuries and damage to the unit.
Note:
¡After adjusting its angle, also adjust the brightness as well. (a page 34)
¡The car model and installation conditions may impose some restrictions on the
adjustment of the monitor's angle.
CQ-VW100U
17
English
Before Disc Playback
17
Discs that can be Played Back
❒ Disc Type
DISC
DVD
VCD
(Video CD)
CD
CD-R/RW
Recordable
¡DivX files recorded on CD-Rs/RWs and DVD-Rs/RWs
are playable. Refer to “Notes on MP3/DivX” for further
information. (a page 24)
ReWritable
❒ Symbols used on jackets
Mark/logo
TEXT
❒ About DivX
(Examples of such symbols include)
(IEC62107)
12 cm
Disc Size
Video
Format
NTSC / PAL
Audio
Format
LPCM,
MPEG1,
MPEG2,
Dolby
Digital
Region No.
1, ALL*2
LPCM
(CD-DA*1),
MPEG1,
MPEG2
(SVCD)
LPCM (CD-DA*1),
MP3
*1 CD-DA : A general music CD format.
Note:
¡Only discs with logos shown in the “Mark/logo” row of
the table above are playable.
¡About CD-Rs and CD-RWs, refer to “Notes on CDRs/RWs, DVD-Rs/RWs”. (a page 44)
¡Some copy-protected music CDs are not playable.
¡Even if you play a dts DVD or a dts CD, analog sound cannot be reproduced.
❒ Notes on DVD-Rs/RWs
¡Do not mix DVD-Video formatted data and other formatted data on the same disc.
¡Discs in the video recording (VR) format are
unplayable.
¡Unfinalized discs are unplayable.
¡Use disc-at-once recording for DVD-R DL (double-layer).
¡Some discs are unplayable depending on the disc itself,
device, drive and software that are used for disc recording.
❒ Discs not supported
The following discs are not played back on this product.
¡DVD-Audio
¡DVD-ROM
¡DVD-RAM
¡DVD+R
¡DVD+RW
¡VSD
¡CVD
¡CD-G
¡CD-ROM (except MP3)
¡CD-RW (except MP3/DivX and CD-DA)
¡CD-R (except MP3/DivX and CD-DA)
¡SACD
¡Photo CD
¡CDV
¡Hybrid SACD (except CD-DA)
¡CD-EXTRA (audio-only playback possible)
¡DVDs with a region number other than “1” or
“ALL”*2
¡Playing back a photo CD disc with this unit could
damage the data that is recorded on the disc.
18
CQ-VW100U
2
¡
: Number of subtitle languages
¡ 2
: Number of audio tracks
¡
: Number of angles
3
The numbers indicate the number of languages, tracks,
angles, etc., recorded on the disc.
Screen size (H:V aspect ratio)
¡
4:3
: 4:3 standard size
¡
LB
: Letterbox (a page 36)
¡ 16:9 wide size
16:9 LB
16:9 PS
: Playback in letterbox format on a standard
screen (4:3).
: Playback in Pan & Scan (pan and scan)
(a page 36) format on a standard screen
(4:3).
Note:
¡The size of the image that is displayed on the screen
depends on the screen mode ( Aspect a page 34), and
on the screen size for the content on the disc.
❒ Region Management Information
This product is designed and manufactured to respond to
the Region Management Information that is recorded on
a DVD disc. If the Region number described on the DVD
disc does not correspond to the Region number of this
product, this product does not play the disc.
*2The Region number for this product is “1” or “ALL”.
Example:
1 2
1 3 4
ALL
English
Disc Insert/Eject
CQ-VW100U
18
MUTE
VOL
DIMMER
SRC / PWR
SETUP
TUNE/TRCK
Warning
TILT
[u TILT] (eject)
Disc Insert
DVD VCD CD MP3 DivX
CH-C
Press [u TILT] to open the display.
Printed side
¡Do not touch the unit while the display is moving.
Inserting hands, fingers or foreign objects into the
unit can cause injuries and damage to the unit.
Caution
¡Do not use irregularly shaped discs.
¡Do not insert foreign object into the disc slot.
¡This unit does not support 8-cm disc. In case of
load such a disc, eject and remove the disc from
the slot immediately.
Disc Eject
DVD VCD CD MP3 DivX
CH-C
Press [u TILT] to stop playback and eject the disc.
(Press [u TILT] again to reload the disc.)
¡The mode that supports the disc is selected, and playback starts.
DVD VCD CD MP3 DivX
Caution
¡When the disc is inserted or ejected, to prevent disc
scratches never exert any downward force on the
disc.
DVD VCD CD MP3 DivX
Note:
¡If you leave a disc in the slot for more than 30 seconds
after its ejection, the disc will be automatically reloaded
after loud beep is energized three times.
CH-C
CH-C
¡Due to limitations of certain discs, some DVD and
VCD (Video CD) discs may not operate as described
in this manual. Refer to the disc jacket for further
details.
¡This unit does not support DVD and VCD (Video
CD) karaoke functions.
¡The audio format is automatically identified.
(a page 18)
¡When the menu screen appears, see “Chapter/title
Selection” on page 22.
When a disc is in the player, change to disc player
mode (CD, MP3, DivX, DVD or VCD (Video CD)) and
playback starts.
DVD VCD CD MP3 DivX
CH-C
¡The sound may be interrupted for a few moments
while the audio format is being identified.
CQ-VW100U
19
English
Disc Player
Source Selection
Source Button
q Touch “Source Button”.
CQ-VW100U
d
w Touch
19
(Disc)
on the Source
Selection Screen.
MUTE
Press [SRC/PWR] to change to the
desired mode.
To switch Operation Screen ON, touch the center of
touch panel.
VOL
DIMMER
SRC / PWR
[SRC/PWR]
SETUP
TUNE/TRCK
TILT
[s] [d]
Repeat/random indicator
Video Mode Display
DVD
Source Button
Playing time
Operation Buttons
VCD (Video CD)
DivX
Source Button
Source Button
Operation Buttons
Playing time
Operation Buttons
List (Folder/File/Track) Selection
Audio Mode Display
MP3
Source Button
Playing time
(Example: MP3 mode)
: Folder
Playing time
: MP3/DivX file
Title/text scroll
Folder selection
Operation Buttons
Note:
to change the display. (a page 15)
¡Touch
CD
Current track
Source Button
Playing time
Title/text scroll
Operation Buttons
20
CQ-VW100U
q Touch
(folder
name) to select a folder.
,
: scrolls up/down the file list
by 1 page.
,
: scrolls up/down the file list
by 1 line.
w Touch
(file name) to
play.
Note:
¡[d] and [s] of the main unit can scroll up and
down the file list by 1 page, respectively, too.
¡It is not possible to display the whole tree and file list
in a folder.
¡The displayed contents on the touch panel vary with
circumstances.
English
Basic Operations
Operations
Operations
Compatible
Discs
20
Track/file Selection
DVD VCD
CD
Compatible
MP3
DivX
Discs
DVD
Fast Forward/
Fast Reverse
Disques
DVD VCD
compatibles
CD
MP3 DivX
Compatible
DVD VCD DivX
Discs
[d]
Next track/file
[s]
Beginning of the current track/file
Previous track/file (Touch/press twice.)
Note:
¡When playing a DVD, there are cases where it is not possible to return to
the start of a chapter that spans 2 titles.
Fast forward
Release to resume playback.
Fast reverse
[s]
Release to resume playback.
The speeds of fast forward and fast reverse change incrementally in 4 steps
every time the corresponding button is pressed.
[d]
Folder Selection
–
MP3 DivX
Title/text Scroll
Next folder
Previous folder
Compatible
Discs
CD MP3 DivX
–
Scrolls the title/text once
–
To resume playback, touch
–
To resume playback, touch again or touch
DVD VCD
Stop
Compatible
CD
Discs
.
MP3 DivX
DVD VCD
Pause
CD
Discos
MP3 DivX
compatibles
Slow Playback
[d]
DVD VCD
DivX
Compatible
Discs
Repeat Play
.
¡Touch/press and hold in the pause mode.
Playback is at about 1/3 normal speed.
To resume normal playback, touch
.
Note:
¡Reverse slow playback is not possible.
DVD VCD
*
–
To cancel, touch again.
MP3 DivX
–
To cancel, touch and hold for more than 2 seconds again.
CD
–
To cancel, touch again.
–
To cancel, touch again.
–
To cancel, touch and hold again.
CD
MP3 DivX
Repeat Play within the
Current Folder
Scan Play
Random Play
*
CD
*
MP3 DivX
Random Play within the
Current Folder
MP3 DivX
*
…… Touch/Press and hold
* Touch panel symbols will change to indicate these current mode.
,
CQ-VW100U
21
English
Disc Player (continued)
To switch Operation Screen ON, touch the center of touch panel.
Chapter/title Selection
Operations
Operations
21
Showing menu and
selecting an item
* Note on VCD:
For VCD, touch
instead of
.
1
Compatible
Discs
Compatible
Discs
DVD
VCD
or
–
*
d
d
*1
Disques
compatibles
–
d
*2
Compatible
DVD
Discs
Starting Playback
from a specific
chapter/title
Touch the numerical
key to enter a number
directly
Compatible
Discs
DVD
Compatible
Discs
VCD
Discos
compatibles
d
to
d
q Menu appears.
1
–
w Select the desired item. (Touch
when
the direction buttons shown at left are not
displayed.).
d
e Determine the setting.
–
Toggles the position of the buttons on the screen
between upper and lower.
–
Returns to the previous display.
–
q Toggles “Chapter number input
mode”, “Title number input mode”
and “Number input mode”.
–
d
w Input desired number.
–
e Playback starts.
d
Note:
¡For retrying selection during number entry, touch
.
Note:
, the operation buttons disappear.
¡If no operation is performed for 8 seconds after you have touched
inputted and no operation is performed for 8 seconds, playback will start from the num¡If the title/chapter number is Compatible
ber of the title/chapter entered. Discs
*2 On-Screen Direct Operation (Only for DVD)
Some DVDs allow you to operate the DVD menu by
touching the screen.
22
CQ-VW100U
English
DVD mode display
Chapter/title selection
Fast forward/fast reverse
Touch
.
Touch
.
Stop/pause/play
DVD menu
22
Repeat play
Audio Language/
Angle/
Subtitle Language
Return
Useful Function
Operations
Operations
Compatible
Discs
Subtitle Language
–
Compatible
DVD
Discs
DivX
Audio Language
Angle
It is possible to change the subtitle language during play if multiple languages are recorded on the disc.
Note:
¡There may be a brief delay before the subtitles appear.
Disques
compatibles
DVD
DivX
¡Touch during playback.
–
¡Touch during playback.
It is possible to change the audio language during play if multiple audio languages are recorded on the disc.
Compatible
Discs
–
¡Touch during playback.
For DVDs which contain scenes which have been shot simultaneously from
a number of different angles the same scene can be viewed from each of
Compatible these different angles during play. ( Angle Mark a page 36)
Discs
DVD
Stereo & Monaural
–
VCD
Compatible
Discs
Discos
compatibles
It is possible to switch the audio between stereo sound and monaural sound
(L or R).
ST
d
L-ch
d
R-ch
: stereo sound
: the left channel audio is output on both the left and
right speakers.
: the right channel audio is output on both the left and
right speakers.
Compatible
Note:
Discs
is touched , the operation buttons disappear.
¡If no operation is performed for 10 seconds or
¡It may not be possible to switch the language unless the unit is at the DVD menu (a previous page) or is at the DVD
settings. (a page 36)
¡The language on the DVD settings takes priority when the power is turned on or the disc is loaded.
¡The number of languages and angles depend on the disc. Some discs have only one language/angle or have no language/angle.
CQ-VW100U
23
English
Notes on MP3/DivX
23
What is MP3/DivX?
Display Information (on the Main Unit)
MP3*: MP3 (MPEG Audio Layer-3) is the compression format
of digital audio. It is developed by MPEG (Motion Picture
Experts Group). Using this compression format, you can
record the contents of about 10 music CDs on a single CD
(This figure refers to data recorded on a 650 MB CD-R or CDRW at a fixed bit rate of 128 kbps and a sampling frequency of
44.1 kHz).
Displayed items
*MPEG Layer-3 audio coding technology licensed from
Fraunhofer IIS and Thomson.
Displayable characters
DivX: The video compression format developed by DivX, Inc.
compresses video files without any considerable loss of video
quality.
Note:
¡MP3/DivX encoding and CD writing software programs are
not supplied with this unit.
Points to remember when making MP3/DivX files
Common
¡High bit rate and high sampling frequency are recommended
for high quality sound.
¡Selecting VBR (Variable Bit Rate) is not recommended
because playing time is not displayed properly and sound
may be skipped.
¡The playback sound quality differs depending on the encoding circumstances. For details, refer to the instructions of
your own encoding software and writing software.
MP3
¡ It is recommended to set the bit rate to “128 kbps or more”
and “fixed”.
DivX
¡DivX files greater than 2 GB or having no index may not play
properly on this unit.
¡This unit supports all resolutions up to maximum of 720 x
480 (NTSC)/720 x 576 (PAL).
¡You can select up to 8 types of audios and subtitles on this
unit.
¡GMC (Global Motion Compensation) is not supported.
Caution
¡ Put only “.mp3” files on an MP3-formatted disc.
Put only “.DIVX”, “.divx”, “.AVI” and “.avi” files
on an DivX-formatted disc. Otherwise, abnormal
sound may be produced during play which can
damage the speaker and your hearing.
24
CQ-VW100U
¡ CD-TEXT
Disc title
Track title
¡ MP3/DivX
Folder name
File name
¡ MP3 (ID3 tag)
Album name
Title and artist name
¡Displayable length of file name/folder name: within 64 characters. (Unicoded file and folder names are reduced by half
in the number of displayable characters.)
¡Name files and folders in accordance with the standard of each
file system. Refer to the instructions of writing software for
details.
¡ASCII character set can be displayed.
¡Some Cyrillic characters in the Unicode can be displayed.
ASCII character set
A to Z, a to z, digits 0 to 9, and the following symbols:
(space) ! ” # $ % & ’ ( ) * + , - . / : ; < = > ? @ [ \ ] ˆ _ ` { | } ~
Note:
¡With some software in which MP3/DivX format files have been
encoded, the character information may not be displayed properly.
¡Undisplayable characters and symbols will be converted into
an asterisk ( ).
¡It is recommended that the length of the file name is less
than 8 (excluding the file extension).
*
¡ You may encounter trouble in playing MP3/DivX files or displaying the information of MP3/DivX files recorded with certain writing software or CD/DVD recorders.
¡ This unit does not have a play list function.
¡ Although Multi-session recording is supported, the use of
Disc-at-Once is recommended.
English
Recording Recording
MP3/DivX
MP3/WMA
files onfiles
a CD/DVD-media
on a CD-media
¡ It is recommended not to use a disc holding two or more
different format types of files.
¡ If CD-DA files are on the same disc as MP3 or DivX files,
the songs and the movies may not play in the intended
order, or some songs or movies may not play at all.
¡ When storing MP3 data and DivX data on the same disc,
use different folders for each data.
¡ Do not record files other than MP3/DivX files and unnecessary folder on a disc.
¡ The name of an MP3/DivX file should be added by rules as
shown in the following descriptions and also comply with
the rules of each file system.
¡ The file extension “.mp3” should be assigned to MP3 files.
¡ The file extension “.DIVX”, “.divx”, “.AVI” or “.avi” should be
assigned to DivX files.
24
Supported file systems
ISO 9660 Level 1/Level 2, Apple Extension to ISO 9660, Joliet,
Romeo
Note:
¡ Apple HFS, UDF 1.50, Mix CD and CD Extra are not supported.
Audio compression formats (Recommendation: “Points to remember when making MP3/DivX files” on the previous page)
Compression method
Bit rate
VBR
Sampling frequency
MPEG 1 audio layer 3 (MP3)
32 k – 320 kbps
Yes
32, 44.1, 48 kHz
MPEG 2 audio layer 3 (MP3)
8 k – 160 kbps
Yes
16, 22.05, 24 kHz
DivX data created using ver.3.11, 4.x, 5.x* 8 k – 320 kbps
Yes
8 k – 48 kHz
* DivX video system/MP2, MP3
Note:
¡ VBR is not recommended.
Folder selection order/file playback order
Maximum number of files/folders
¡ Maximum number of files: 999
¡ Maximum number of files in one folder: 999
¡ Maximum depth of trees: 8
¡ Maximum number of folders: 255 (Root folder is included.)
Root Folder
(Root Directory)
1
2
q
Folder Selection
3
w
In the order
1
8
File Selection
In the order
q
y
4
Note:
¡ You can shorten the duration between data read and
playback by decreasing the quantity of files or folders, or
the depth of the hierarchy.
¡ This unit counts the number of folders irrespective of the
presence or absence of an MP3/DivX file.
¡ If the selected folder does not contain any MP3/DivX files,
the nearest MP3/DivX files in the order of playback will be
played.
¡ Playback order may be different from other MP3/DivX players even if the same disc is used.
¡ “ROOT” appears when displaying the root folder name.
e
5
6
r
7
8
Tree 1
Tree 2
Tree 3
t
y
Tree 4
Tree 8
(Max.)
Copyright
No warranty
It is prohibited by copyright laws to copy, distribute and
deliver copyrighted materials such as music without the
approval of copyright holder except enjoying yourself
personally.
The above description complies with our investigations as of
December 2007. It has no warranty for reproducibility and
displayability of MP3/DivX.
CQ-VW100U
25
English
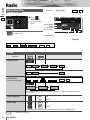
Radio
Source Selection
Frequency
Source Button
Each
/
All
indicator
q Touch “Source Button”.
d
w Touch
25
CQ-VW100U
(Radio) on the
Source Selection
Screen.
Band selection
Tuning
*List selection
Preset stations
MUTE
Press [SRC/PWR] to change to the
desired mode.
VOL
DIMMER
SRC / PWR
SETUP
TUNE/TRCK
TILT
[SRC/PWR]
Auto presetting
[s] [d]
* Appears only when
Setup e Radio e
All
FM Setup
is selected. (a page 37)
e Auto Preset e Each
/
All
Tuning
Operations
Band Selection
List Selection
Refer to the next page.
–
Each
FM 1
All
FM
FM 2
FM 3
AM
AM
Preparation: Select All . (a page 37)
Setup e Radio e FM Setup e Auto Preset
e
Each
/
All
–
FM 1 (list 1)
FM 2 (list 2)
FM 3 (list 3)
There are 6 stations in each list. You can call up next 6 stations by switching from one
list to another.
Station Selection
Seek Tuning
[d]
Up
[s]
Down
[d]
Up
[s]
Down
Touch/press and hold for more than 0.5 second then release. Seeking starts.
…… Touch/press and hold
26
CQ-VW100U
English
Preset Memory
Manual Preset Memory
Up to 6 stations can be
preset in each band.
Select a band and frequency.
to
–
blinks once
26
¡Touch and hold for more than 2 seconds.
¡The frequency blinks once, and a receiving station is saved in the memory.
New stations overwrite existing saved stations.
Auto Preset Memory
A
Preparation: Select Each . (a page 37) (default: Each )
Setup e Radio e FM Setup e Auto Preset e
Each / All
Each
Six stations are automatically preset in each band.
Select a band.
–
6 stations with first to 6th highest in signal
strength of each band will be preset.
¡Touch and hold for more than 2 seconds.
¡Once set, the preset stations are sequentially scanned for 5 seconds each. (scanning)
New stations overwrite existing saved stations.
B
All
In total 18 FM stations are
automatically preset.
Preparation: Select All . (a page 37)
Setup e Radio e FM Setup e Auto Preset
–
e
Each
/
All
18 stations with first to 18th highest in signal
strength of all FMs will be preset at once.
¡Touch and hold for more than 2 seconds.
¡Once set, the preset stations are sequentially scanned for 5 seconds each. (scanning)
New stations overwrite existing saved stations.
Preset Station Calling
Select a band or a list.
to
–
¡Touch desired preset button.
Preset Swap
A station preset is interchangeable with another
station preset.
Preparation: Select All . (a page 37)
Setup e Radio e FM Setup e Auto Preset
e
Each
/
All
q Select the list and the preset number that contains the station to be interchanged
(see “Preset station calling” above).
w Select the list and hold down the preset number that contains the targeted channel
for more than 2 seconds.
to
–
The preset station selected in the step q is
interchanged with the targeted preset channel selected in the step w (Preset Swap).
…… Touch and hold
CQ-VW100U
27
English
AV1/AV2
Preparation:
¡Connect an optional external device to the AV1/AV2.
Source Selection
27
Source Button
You can view the images and listen to the sounds from
the connected external devices in the AV1/AV2 mode
respectively.
CQ-VW100U
q Touch “Source Button”.
d
/
w Touch
(AV1/AV2) on the
Source Selection
Screen.
MUTE
Press [SRC/PWR] to change to the
desired mode.
To switch Operation Screen ON, touch the center of
touch panel.
Note:
¡You can set up the system so that the AV mode is not
selected (source skip). ( Input a page 33)
is
¡If no operation is performed for 10 seconds or
touched, the operation buttons disappear.
28
CQ-VW100U
VOL
DIMMER
SRC / PWR
SETUP
[SRC/PWR]
TUNE/TRCK
TILT
English
28
CQ-VW100U
29
English
Settings
29
Basic Setting
Clock
ID-Code
Input
Memory Clear
Other
Basic Setting
Clock setting
ID Code Setting
Input Selection
Memory clearance
Other settings
(a page 32)
(a page 32)
(a page 33)
(a page 33)
(a page 33)
Screen
Dimmer
Display
Aspect
Screen
Adjusting the brightness
Display appearance
Display aspect setting
(a page 34)
(a page 34)
(a page 34)
Sound
SQ3
Bass/Treble
Balance/Fader
Sub-Woofer
Sound
SQ3 setting
Bass/treble adjustment
Balance/fader adjustment
Subwoofer adjustment
(a page 35)
(a page 35)
(a page 35)
(a page 35)
Disc
Audio Language
Subtitle Language
Menu Language
Video Setting
Audio Setting
DivX Registration
Disc
DVD Audio Language Setting
DVD Subtitle language setting
DVD Menu language setting
DVD Video Setting
DVD Audio Setting
DivX Registration
(a page 36)
(a page 36)
(a page 36)
(a page 36)
(a page 37)
(a page 37)
Radio
FM Setup
XM Setup
SIRIUS Setup
Radio
Setting for FM stations
Setting for XM radio
Setting for Sirius satellite radio
(a page 37)
(*1)
(*1)
(*1) Please refer to the System Upgrade Guidebook.
30
CQ-VW100U
English
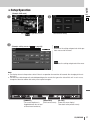
❏ Setup Operation
(Example: DVD mode)
q
w
Touch
e
in Operation Screen.
(Example: setting screen of
Input
30
Touch desired setting.
a page 33)
Determines the setting and goes back to the previous menu out of the menu.
Determines the setting and gets out of the menu.
Note:
¡ The display returns to the previous status if there is no operation for more than 60 seconds after changing to the setting menu.
¡ The item may not be temporarily selected depending on the current disc type or the state of this unit. In such a case,
change the source to another one and try to set up the item again.
MUTE
VOL
DIMMER
SRC / PWR
[DIMMER]
[SRC/PWR]
(The screen brightness is
(Exit from the menu)
toggled between the set level
and maximum luminance)
SETUP
TUNE/TRCK
TILT
[SETUP]
(Shows the menu display/
Goes back to the previous menu)
CQ-VW100U
31
English
Settings (continued)
31
Basic Setting
Screen
Sound
Disc
Radio
Clock
ID-Code
Clock setting
ID Code Setting
Display
(Clock display)
On
: clock display ON (“– –:– –” is displayed
before adjusting the clock.)
Off
: clock display OFF
default:
Adjust
Off
(Clock adjustment)
}
: Forward
{
: Backward
Note:
.
¡To start the clock, touch
¡Set the Daylight Saving Time manually.
default: Hour Adjust: AM 12
Minute Adjust: 0
Prior to operating this unit, it is advisable to assign a 4digit ID code for security. Once the ID code has been set,
the unit cannot be operated if the main power supply is
disconnected then re-connected. It is electronically locked
so that a thief cannot use the stolen unit unless that person knows the code you have set.
The ID code operation must be performed only by the
person to whom the unit belongs.
Generally, it is not necessary to enter the ID code each
time when using the unit if it has not been disconnected
from the main power supply (car battery).
0 to 9
4 digits numeric code
default: none
How to set your ID code (for the first time)
q Enter an 4 digit ID code.
w Enter the same 4 digit ID code again.
How to change your ID code
q Enter the preset (old) 4 digit ID code. If the wrong ID
code is entered, a new ID code cannot be registered.
w Enter a new 4 digit ID code.
e Enter the new 4 digit ID code again.
How to cancel the known ID code
q Enter the preset (old) 4 digit ID code. If the wrong ID
code is entered, it is not possible to cancel the ID code
function.
until “Completed!” is displayed.
w Touch and hold
The ID code cancelling procedure is completed. The unit
now works without an ID code.
Note:
¡Should your unit ever require service, cancel your ID
code before sending for repair.
¡The ID code setting cannot be eliminated even by the
memory clear function.
¡The inputted code is not displayed for your security.
Caution
¡Record your registered ID code and keep it in a
secure location. (Fill in the ID code memo
(a page 42).) If you forget it, you will be unable
to use the unit. In case you forget the ID code,
please consult your nearest Panasonic
Servicenter.
32
CQ-VW100U
Input
input selection
Note:
¡If a non-Panasonic navigation system is connected to
this unit, we do not guarantee the operations of the
navigation system.
AV1
AV1
Skip
Skip
: no memory clear.
The display returns to the previous one.
: an external device is connected to AV1.
: skips AV1.
default: AV1
(AV2 input selection)
: an external device is connected to AV2.
: Select one from among NAV1, NAV2,
and NAV3 with which images are displayed most beautifully when a nonPanasonic car navigation system is connected.
: skips AV2.
default: AV2
CH-C Video Input
Yes
English
appears when
is selected.
: proceed.
OK
Cancel
: no memory clear.
Caution
¡Be aware that this setting restores the unit to default
settings, so that all the memories and settings that
you have set will be eliminated.
Other
Other settings
(Setting ACC selection ON and
OFF)
: sets to ON if your car has ACC position.
: sets to OFF if your car has no ACC position.
On
default:
ACC Select
(a System Upgrade Guidebook)
Camera
32
Really?
(AV1 input selection)
AV2
AV2
NAV1-3
: clears the memory to default settings.
Yes
No
(Rear view camera set up)
Selection of the terminal that connects to the rear view
camera.
Preparation: Connect the reverse lead. (a Installation
Instructions)
: background camera view is always on
BGC
the display.
: connected to the CAMERA IN
On
: unconnected
Off
default: Off
Note:
¡Make sure to select Off when no rear view camera is
connected.
¡The image from the rear view camera may be blurred
in the night or a dark place.
¡CY-RC50KU is not available as a background camera.
On
Off
Note:
¡For an ACC-equipped car, select ON. The following
functions are available.
¡The power is turned on automatically when inserting
a disc or magazine.
¡ Off selection disables turning on the power of the
main unit through the remote control.
Caution
¡Be sure to select off when your car has no ACC
position in the ignition switch. Failure to do this
could cause the battery to go dead.
OFF
ACC
Ext. In
(a System Upgrade Guidebook)
IGN
Memory Clear
Memory clearance
The state of all of the current memories are returned to
default settings.
Note:
¡The ID code is not deleted by executing memory clear.
CQ-VW100U
33
English
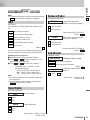
Settings (continued)
33
Basic Setting
Screen
Sound
Disc
Radio
(Display)
Note:
¡The screen setting screen can be also activated by
touching Screen when the button is displayed.
(a page 14)
Aspect
Display aspect setting
Normal
Dimmer
Adjusting the brightness
1
2
Darker
3
Full
Brighter
default: 1
Note:
¡When [DIMMER] is pressed, the screen brightness is
toggled between the set level that is adjusted by the
procedure above and the maximum luminance.
¡The conventional display image
has a 4 to 3 ratio of horizontal to
vertical.
¡In this case, a blank area remains
on the right and left sides of the
display.
¡The screen is extended horizontally
as a whole to the aspect ratio of 16
to 9.
¡The extension ratio is the same at
any point of the screen.
Zoom
¡The screen is fully extended at the
normal aspect ratio of 4 to 3.
¡The top and bottom of the screen
are slightly cut.
Just
¡The screen is extended horizontally
to the aspect ratio of 16 to 9.
¡The extension ratio increases
toward the right and left ends of
the screen.
Display
Display appearance
Contrast
(Adjust the image contrast)
] : decreases the contrast between black and white.
[ : increases the contrast between black and white.
Bright
(Adjust the image brightness)
] : darkens.
[ : lightens.
Color
(Adjust the image color depth)
] : lightens the depth of color on the display.
[ : deepens the depth of color on the display.
Tint
(Adjust the image tone or tint)
] : emphasizes green in the color image.
[ : emphasizes red in the color image.
Note:
¡When the video signal is PAL/SECAM format, adjustment cannot be performed.
Setting range: –15 to +15
default: ±0
34
CQ-VW100U
default: Normal
Note:
¡The aspect setting screen can be also activated by
touching Aspect when the button is displayed.
(a page 14)
¡This adjustment is common to video mode.
¡You cannot change the aspect in the menu screen and a
screen in the CD, MP3 and radio mode. These are fixed
to “Full”.
¡When the rear view camera is in operation with the
transmission gear shift in the reverse position, the
image is shown on the “Full” screen only.
¡In some cases, the picture looks different from the
original one due to your selection of aspect.
Caution
¡This is to remind you that compression or extension
of the screen using the aspect ratio (screen mode)
changing function of this product for commercial
purpose of profit making or viewing/listening by the
public could infringe on the rights of the author protected by the copyright law.
¡If you expand normal picture (4 to 3) by using
“Just”, “Zoom” or “Full” aspect to the full of the
screen, you might not see the periphery of the picture, or you might see a distorted picture.
Therefore, use the “Normal” mode to see the original picture as the author intended it.
Screen
Sound
Disc
English
Basic Setting
Radio
Note:
¡The sound setting screen can be also activated by touchng
Sound when the button is displayed (a page 14).
SQ3
Balance/Fader
Balance
SQ3 setting
Six SQ presets are already provided at shipment in this
unit.
34
Balance/fader adjustment
(Sound level adjustment
between right and left speakers)
[ : right enhanced
] : left enhanced
Flat : flat frequency response
Setting range: Right 15 to Left 15
default: Center
Pop : wide-ranged and deep sound
Rock : speedy and heavy sound
(Sound level adjustment between
front and rear speakers)
Fader
Jazz : jazz-specific deep sound
Club : club and disco-specific sound
[ : front enhanced
Vocal : clear sound
] : rear enhanced
default:
Flat
You may set your own SQ or modify factory presettings
in each memories by following the instructions below:
Adjusting level of each preset
q Select the preset SQ that you prefer to adjust.
to select a frequency in a freor
w Touch
quency band (BASS/MID/TRE).
to adjust each frequency.
or
e Touch
Adjustable range: – 12 dB to + 12 dB
Adjustable frequency:
BASS; 60 Hz, 80 Hz, 100 Hz, 200 Hz
MID; 500 Hz, 1 kHz, 2 kHz, 3 kHz
TRE; 10 kHz, 12 kHz, 15 kHz, 18 kHz
Note:
¡The new level adjustment will overwrite the previous
level adjustment.
¡For resuming the factory settings, touch and hold
Default for more than 2 seconds.
Setting range: Front 15 to Rear 15
default: Center
Sub-Woofer
Subwoofer setting
Sub-Woofer
(Subwoofer speaker setting)
On
: when using a subwoofer
Off
: when not using a subwoofer
default:
(Subwoofer speaker output
balance)
Level
] : down,
Off
[ : up
Setting range: –12 dB to +12 dB
default: ±0 dB
Bass/Treble
Bass/treble adjustment
Bass
(Bass adjustment)
[ : more
] : less
Treble
(Treble adjustment)
[ : more
] : less
Setting range: –12 dB to +12 dB
default: ±0 dB
CQ-VW100U
35
English
Settings (continued)
35
Basic Setting
Screen
Sound
Disc
Radio
Audio Language
DVD audio language setting
Note:
¡These adjustments being executed, playback will start
from the beginning of a disc.
English
Français
Español
Other
: English
Video Setting
Display aspect and DVD software mode
DVD Aspect
Narrow
Wide
: plays a video in 4:3 screen.
: plays a video in wide screen (16:9).
: French
default:
: other language. Input the language code.
(a page 45)
default: English
Letter Box
Note:
¡A disc supporting closed captioning and subtitles may
overlap each other on the screen. In this case, turn the
subtitle off.
: English
: French
: Spanish
: other language. Input the language code.
(a page 45)
default: English
Letter Box
mode (in which the left and right edges
of the screen are cut off).
: plays wide-screen video in letterbox
mode (in which black bands appear at
the top and bottom of the screen).
default:
PAL
DVD menu language setting
: English
NTSC
: French
(VIDEO OUT terminal setting)
: sets PAL in accordance with the equipment connected to VIDEO OUT.
: sets NTSC in accordance with the
equipment connected to VIDEO OUT.
default:
: Spanish
: other language. Input the language code.
(a page 45)
default: English
Pan & Scan
Note:
¡This function is available only when DVD Aspect is set
to Narrow .
¡Set the software setting according to the symbol used
on jacket. (a page 18)
¡DVD software mode setting is ignored if Pan & Scan
or Letter Box is already set in the software.
¡Screen aspect of the display unit is changed according
to the aspect ratio setting (a page 34) and DVD software’s aspect.
TV Type
Menu Language
(DVD software mode)
Pan & Scan : plays wide-screen video in Pan & Scan
DVD subtitle language setting
English
Français
Español
Other
Wide
: Spanish
Subtitle Language
English
Français
Español
Other
(Display aspect setting)
Angle Mark
NTSC
(Angle mark setting)
The angle mark is displayed to indicate the parts where
multi-angle data is recorded.
On
: activates angle mark.
Off
: inactivates angle mark.
default:
36
CQ-VW100U
On
Auto Preset
(Down mix setting)
: surround element decodable down mix
(Lt = Left total, Rt = Right total)
Lo/Ro
: simple stereo down mix
(Lo = Left only, Ro = Right only)
default:
Off
: DR COMP OFF
36
(Auto preset setting)
Each
: saves the preset stations in each band.
All
: saves the preset stations in all FM lists
regardless of band.
Each
XM Setup
(a System Upgrade Guidebook)
Lt/Rt
(Dynamic Range Compression
setting)
: DR COMP ON
Radio
default:
Note:
¡This function is available only when “Dolby Digital”
source is playing.
STD
MIN
Disc
Setting for FM stations
Lt/Rt
DR COMP
Sound
FM Setup
Audio Setting
Audio setting at DVD playing
Down Mix
Screen
English
Basic Setting
SIRIUS Setup
(a System Upgrade Guidebook)
: made with the greatest compression,
roughly equivalent to a TV broadcast.
Note:
¡This function is available only when “Dolby Digital”
source is playing.
default:
Off
DivX Registration
Show the DivX Registration Code (a page 38)
CQ-VW100U
37
English
About DivX VOD Content
37
DivX Video-on-Demand (VOD) content is encrypted for copyright protection. In order to play DivX VOD content on this
unit, you first need to register the unit.
Follow the on line instructions for purchasing DivX VOD content to enter the unit’s registration code and register the
unit. For more information about DivX VOD, visit www.divx.com/vod.
Display the unit’s registration
code
q Touch
w Touch
w Touch
Disc
.
.
DivX Registration
.
8 alphanumeric characters
Note:
¡ We recommend that you make a note of this code for
future reference.
¡ After playing DivX VOD content for the first time,
another registration code is then displayed in “DivX
Registration”. Do not use this registration code to purchase DivX VOD content. If you use this code to purchase DivX VOD content, and then play the content on
this unit, you will no longer be able to play any content
that you purchased using the previous code.
¡ If you purchase DivX VOD content using a registration
code different from this unit’s code, you will not be
able to play this content. (“Authorization Error” is displayed.)
38
CQ-VW100U
Regarding DivX content that
can only be played a set number of times
Some DivX VOD content can only be played a set number
of times. When you play this content, the remaining number of plays is displayed. You cannot play this content
when the number of remaining plays is zero.
(“Rental Expired” is displayed.)
When playing this content
¡ The number of remaining plays is reduced by one if
- you press [SRC/PWR].
- you press [s] / [d] (a / f)
etc. and arrive at another content or the start of the
content being played.
❑ If You Suspect Something Wrong
Check and take steps as described below.
If the described suggestions do not solve the problem, it is recommended to take the unit to your nearest authorized Panasonic
Servicenter. The product should be serviced only by qualified personnel. Please refer checking and repair to professionals.
Panasonic shall not be liable for any accidents arising out of neglect of checking the unit or your own repair after your checking.
Never take measures especially those other than indicated by
italic letters in “Possible Solution” described below because
those are too dangerous for users to handle themselves.
Warning
¡Do not use the unit in an irregular condition, for example, without sound, or with
smoke or a foul smell, which can cause
ignition or electric shock. Immediately stop
using the unit and consult your dealer.
¡Never try to repair the unit by yourself
because it is dangerous to do so.
English
Troubleshooting
38
■ Common
Problem
Possible cause a Possible solution
The power cord (battery, power and ground) is connected in the wrong way.
aCheck the wiring.
No power to the unit
Sound is not
generated.
Noise
Fuse blows out.
aEliminate the cause of fuse blowout and replace the fuse with new one.
Consult your dealer.
MUTE is set to ON.
aSet MUTE to OFF.
The wiring of speaker lines is not correct, or a break or poor contact arises.
aCheck the wiring in accordance with the wiring diagram. (Installation
Instructions)
There is an electromagnetic-wave generator such as a cellular phone near the
unit or its electrical lines.
aKeep the electromagnetic-wave generator such as a cellular phone away
from the unit and the wiring of the unit. In case noise cannot be eliminated
due to the wiring harness of the car, consult your dealer.
The contact of the ground lead is poor.
aMake sure that the ground lead is connected to an unpainted part of the
chassis securely.
Noise is made in step
with engine revolutions.
Alternator noise comes from the car.
aChange the wiring position of the ground lead.
aMount a noise filter.
Some operations are not
executable.
Some operations are not executable in particular modes such as menu mode.
aRead the operating instructions carefully and cancel the mode. If the unit is
still out of order, consult your dealer.
No sound from
speaker(s)
There is a break, a short circuit, poor contact or wrong wiring regarding the
speaker wiring.
aCheck the speaker wiring.
The speaker channels
are reversed between
right and left.
The speaker wiring is reversed between right and left.
aPerform the speaker wiring in accordance with the wiring diagram.
The power of the unit
fails unintentionally.
The safety device works.
aConsult your dealer, or your nearest Panasonic Servicenter.
CQ-VW100U
39
English
Troubleshooting (continued)
39
■ Display Settings
The picture is dark. The
picture is whitish. Something
is wrong with the picture.
The picture is light in color.
The screen is not adjusted properly.
aMake every adjustment of the screen.
■ Radio
Poor reception or noise
Antenna installation or wiring of antenna cable is faulty.
aCheck whether the antenna mounting position and its wiring are correct. In
addition, check to see whether the antenna ground is securely connected to
the chassis.
No power is supplied to the antenna amplifier (when using a film antenna, etc.).
aCheck the wiring of the antenna power lead.
The number of auto
preset stations is less
than 6.
The number of receivable stations is less than 6.
aMove to an area where receivable stations number is maximum, and try
presetting.
Preset stations cannot
be stored.
The contact of the battery lead is poor, or the battery lead is not always powered.
aMake sure that the battery lead is connected securely, and preset stations
again.
■ CD
No playback or disc
ejected
Sound skipping or noise
Sound skipping due to
vibration
Disc unejectable
40
CQ-VW100U
The disc is inserted upside down.
aInsert a disc correctly.
There is a flaw or foreign object on the disc.
aRemove the foreign object, or use a flawless disc.
There is a flaw or foreign object on the disc.
aRemove the foreign object, or use a flawless disc.
The unit is not sufficiently secured.
aSecure the unit to the console box.
The unit is tilted at over 30˚ in the front-to-end direction.
aMake the angle 30˚ or less.
Something such as a peeled label obstructs the disc coming out.
aPress and hold the [u TILT] for more than 10 seconds (disc forced ejection). In
case that the disc forced ejection does not work, consult your dealer.
The microcontroller in the unit operates abnormally due to noise or other factors.
aUnplug the power cord and plug it again. In case the unit is still out of
order, consult your dealer.
English
■ MP3/DivX
No playback or disc
ejected
The CD-Rs/RWs/DVDRs/RWs that are
playable on other
devices are not playable
on this unit.
Sound skipping or noise
The disc has unplayable formatted data.
aRefer to the description about MP3/DivX for playable formats.
40
The playability of some CD-Rs/RWs/DVD-Rs/RWs may depend on the combination of media, recording software and recorder to be used even if these CDRs/RWs/DVD-Rs/RWs are playable on other devices such as a PC.
aMake CD-Rs/RWs/DVD-Rs/RWs in a different combination of media, recording
software and recorder after referring to the description about MP3/DivX.
There is a flaw or foreign objects on the disc.
aRemove the foreign objects, or use a flawless disc. For MP3/DivX, refer to
the description about MP3/DivX.
Playing VBR (Variable Bit Rate) files may cause sound skipping.
aPlay Non-VBR files.
The picture stops.
The picture may stop if the DivX files are greater than 2 GB.
aKeep the file size under 2 GB.
Note:
¡Refer to “Notes on MP3/DivX”. (a page 24)
■ DVD
Cannot switch the audio
language/subtitle
language/angle.
¡It is not possible to switch if the disc does not have multiple audio
languages/subtitle languages/angles recorded on it. (Refer to the guide provided with your disc.)
¡Some discs permit switching through a menu screen.
¡Sometimes, switching angles is possible only with certain scenes.
The audio/subtitle
language selected in the
DVD settings is not
used.
If audio or subtitles in that language are not recorded on the disc, the audio or
subtitles do not switch to that language. (Some discs permit switching through a
menu screen. Refer to the guide provided with your disc.)
A DVD–R or DVD–RW is
not playable.
Sound is not generated.
The disc is still unfinalized.
aFinalize the disc.
Refer to “Before Disc Playback” (a page 18) or “Notes on Discs”
(a page 44) for other cases.
The disc is in the video recording (VR) format.
aPlay video formatted discs.
Refer to “Before Disc Playback” (a page 18) or “Notes on Discs”
(a page 44) for other cases.
The audio format is output disabled for this unit such as dts.
aUse output enabled discs.
Refer to “Before Disc Playback” (a page 18) or “Notes on Discs”
(a page 44) for other cases.
CQ-VW100U
41
English
Troubleshooting (continued)
41
❑ Error Display Messages
■ CD/MP3/DivX/DVD/VCD (Video CD)
Display
Non Playable Disc
Mechanism error
File error
No Disc
Region Code error
Possible cause a Possible solution
Disc is dirty, or is upside down.
aCheck disc.
Disc has scratches.
aCheck disc.
No operation by some cause.
aPress [u TILT]. If failure persists, press the reset switch. If normal operation is
not restored, call the store where you purchased the unit or the nearest
Panasonic Servicenter.
The type of the file that is selected is not supported.
aCheck disc.
No disc is in the player.
aInsert disc into the disc slot.
The region code of the disc to be used is not compatible with this unit.
aPress [u TILT] and check the disc.
You are trying to play the DivX VOD content that was purchased with a different
registration code.
aPurchase the DivX VOD content with the registration code of this unit.
(a page 38)
The DivX VOD content has no available play count.
aPurchase again the content or play another content. (a page 38)
DivX HD not supported
The selected DivX HD file is not supported.
aCheck the file. Play Non-DivX HD files.
Note:
¡There may be cases when the disc numbers affected by an error are displayed before “Non Playable Disc”.
❑ In case you forget the ID
code...
In case you forget the ID code, please consult
your nearest Panasonic Servicenter.
ID code memo
Copy the memo at right, fill in the ID code, and
keep it in a secure location.
42
CQ-VW100U
Model No. CQ-VW100U
ID CODE
If the suggestions in the charts do not solve the problem,
we recommend that you take it to your nearest authorized
Panasonic Servicenter. The product should be serviced
only by a qualified technician.
❑ Replacing the Fuse
Use fuses of the same specified rating (15 A). Using different substitutes or fuses with higher rating, or connecting the product directly without a fuse, could cause fire or
damage to this unit.
If the replacement fuse fails, contact your nearest
Panasonic Servicenter for service.
❑ If the Unit Begins to
English
❑ Product Servicing
Reset switch
Insert a hard, slender stick into the hole and push the
switch.
42
Malfunction...
Important
Push the switch only when the unit fails to operate with
any buttons. (Stored settings and adjustments are not
cleared.)
If the unit fails to return to normal condition, call the nearest Panasonic Servicenter and ask for repairs.
DIMMER
SRC / PWR
SETUP
T
Reset switch
Note:
¡If the ID-CODE has been already set, you will be asked
to enter the ID-CODE right after the unit is restarted.
Maintenance
❑ Cleaning this Unit
Your product is designed and manufactured to ensure a
minimum of maintenance. Use a dry soft cloth for routine
exterior cleaning. Never use benzine, thinner or other solvents.
To remove stubborn stains
1 Moisten the soft cloth in dishwashing
soap diluted with water and wring well.
2 Wipe lightly. Go over the same surface
with a dry cloth.
Alcohol
Alcohol
Pesticide
Pesticide
Wax
Wax
Thinner
Thinner
Note:
¡Since there is the possibility of water drops getting
inside of the unit, do not directly apply cleanser to the
surface.
¡Do not scratch the screen with your nails or other hard
objects. The resulting scratches or marks will obscure
the images.
Benzine
Benzine
Caution
¡If water drops or similar wet substances get inside
the monitor, it may cause a malfunction.
CQ-VW100U
43
English
Notes on Discs
43
How to hold the disc
¡Do not touch the underside of the disc.
¡Do not scratch the disc.
¡Do not bend disc.
¡When not in use, keep disc in the case.
Printed side
Do not use discs that fit any of the descriptions given
below. Using these discs may damage the discs or
cause the unit to malfunction.
¡Special discs in a shape which is not round
¡Partly or wholly transparent disc
Wholly transparent disc*
Partly transparent disc
*Wholly semi-transparent disc may not be played back.
Disc insert
The surfaces of new discs tend to be slippery. Therefore,
when using such a disc for the first time, it may not load
satisfactorily even when it has been inserted into the
unit. At a time like this, insert the disc into the unit as far
as it will go until it is loaded properly.
¡When inserting a disc into or ejecting and removing
it from the unit, insert it straight in or eject and
remove it straight out in parallel with the unit.
Otherwise, the disc may be scratched or marked in
the process.
¡When inserting a disc, do not put one disc on another. Failure to observe this may cause the discs to
be jammed.
Do not leave discs in the following places:
¡Direct sunlight
¡Near car heaters
¡Dirty, dusty and damp areas
¡On seats and dashboards
Disc cleaning
Use a dry, soft cloth to wipe from the center outward.
Do not attach any seals or labels to your discs.
Do not write on the disc label in a heavy pen or ballpoint
pen.
¡Discs with adhered labels, etc. on them
<Correct>
Disc with adhered stickers
or tape
Protective films or sheets
Labels created by a printer
Disc accessories (stabilizers, etc.)
¡Damaged or deformed discs
Shoddily made discs
Discs with burrs
Please remove the burrs
before use.
Discs with cracks,
scratches or parts missing
<Wrong>
Notes on CD-Rs/RWs,
DVD–Rs/RWs
¡You may have trouble playing back some CD-R/RW,
DVD–R/RW discs recorded on CD/DVD recorders (CDR/RW, DVD–R/RW drives), either due to their recording characteristics or dirt, fingerprints, scratches, etc.
on the disc surface.
¡CD-R/RW, DVD–R/RW discs are less resistant to high
temperatures and high humidity than ordinary music
CDs. Leaving them inside a car for extended periods
may damage and make playback impossible.
¡The unit may not successfully playback a CD-R/RW,
DVD–R/RW that was made by the combination of writing software, a CD/DVD recorder (CD-R/RW,
DVD–R/RW drives) and a disc if they are incompatible
with one another.
¡This player does not play CD-R/RW, DVD–R/RW discs
if the session is not closed.
¡Be sure to observe the handling instructions of CDR/RW, DVD–R/RW discs.
¡This player does not play CD-R/RW, DVD-R/RW discs
which contain other than CD-DA or MP3/DivX data.
44
CQ-VW100U
In “OTHER” cases... (a page 36)
Input the four digit language code pressing the buttons
Touch
to determine.
DVD language menu (a page 36)
to
.
English
Language Code List
44
Note:
¡Setting is finished and the display returns to the main menu.
.
¡For retrying selection during number entry, touch
Code
Language Name
Code
Language Name
Code
Language Name
6565
6566
6570
6577
6582
6583
6589
6590
6665
6669
6671
6672
6678
6679
6682
6765
6779
6783
6789
6865
6869
6890
6976
6978
6979
6983
6984
6985
7065
7073
7074
7079
7082
7089
7165
7168
7176
7178
7185
7265
7273
7282
7285
Afar
Abkhazian
Afrikaans
Ameharic
Arabic
Assamese
Aymara
Azerbaijani
Bashkir
Byelorussian
Bulgarian
Bihari
Bengali; Bangla
Tibetan
Breton
Catalan
Corsican
Czech
Welsh
Danish
German
Bhutani
Greek
English
Esperanto
Spanish
Estonian
Basque
Persian
Finnish
Fiji
Faroese
French
Frisian
Irish
Scots Gaelic
Galician
Guarani
Gujarati
Hausa
Hindi
Croatian
Hungarian
7289
7365
7378
7383
7384
7387
7465
7473
7487
7565
7575
7576
7577
7578
7579
7583
7585
7589
7665
7678
7679
7684
7686
7771
7773
7775
7776
7778
7779
7782
7783
7784
7789
7865
7869
7876
7879
7982
8065
8076
8083
8084
8185
Armenian
Interlingua
Indonesian
Icelandic
Italian
Hebrew
Japanese
Yiddish
Javanese
Georgian
Kazakh
Greenlandic
Cambodian
Kannada
Korean
Kashmiri
Kurdish
Kirghiz
Latin
Lingala
Laothian
Lithuanian
Latvian, Lettish
Malagasy
Maori
Macedonian
Malayalam
Mongolian
Moldavian
Marathi
Malay
Maltese
Burmese
Nauru
Nepali
Dutch
Norwegian
Oriya
Panjabi
Polish
Pashto, Pushto
Portuguese
Quechua
8277
8279
8285
8365
8368
8372
8373
8375
8376
8377
8378
8379
8381
8382
8385
8386
8387
8465
8469
8471
8472
8473
8475
8476
8479
8482
8484
8487
8575
8582
8590
8673
8679
8779
8872
8979
9072
9085
Rhaeto-Romance
Romanian
Russian
Sanskrit
Sindhi
Serbo-Croatian
Singhalese
Slovak
Slovenian
Samoan
Shona
Somali
Albanian
Serbian
Sundanese
Swedish
Swahili
Tamil
Telugu
Tajik
Thai
Tigrinya
Turkmen
Tagalog
Tonga
Turkish
Tatar
Twi
Ukrainian
Urdu
Uzbek
Vietnamese
Volapük
Wolof
Xhosa
Yoruba
Chinese
Zulu
CQ-VW100U
45
English
Definition of Terms
45
Dolby Digital
This fully discrete format divides the music signals
into 5.1 channels: Front Left (L), Front Right (R),
Centre (C), Left Surround (LS), Right Surround (RS)
and Subwoofer (SW: 0.1 channel) for recording and
playback. The number of channels that are recorded
depends on the software. (1 to 5.1 channels)
Manufactured under license from Dolby
Laboratories.
“Dolby” and the double-D symbol are trademarks
of Dolby Laboratories.
Confidential unpublished works. Copyright
1992–1997 Dolby Laboratories. All rights
reserved.
Interactive DVD
An interactive DVD is DVD software which includes
multiple angles, multiple plot endings, etc.
Letterbox screen
This refers to a screen on which the playback picture
of wide-screen DVDs or VCD (Video CD)s appears
with black bands running along the top and bottom.
LPCM (Linear PCM audio)
In this format, the audio signal is converted to digital
data and recorded in two channels without compression. Because the capacity of a DVD disc is large, it
can store more data with better accuracy than a CD.
Pan & Scan screen
This refers to a screen on which the playback picture
of wide-screen DVDs or VCD (Video CD)s is cut off
at the left and right sides.
46
CQ-VW100U
Playback control (VCD (Video CD))
If the VCD (Video CD) has “With Playback Control”
or others written on the disc surface or on the jacket,
the scenes or information to be viewed (or listened
to) can be selected interactively with the screen by
looking at the menu shown on the screen.
In these instructions, playback using the menu
screen is referred to as the “menu play” for video
CDs. This player supports Video CDs with playback
control.
DivX
DivX is a popular media technology created by DivX,
Inc. DivX media files contain highly compressed
video with high visual quality that maintains a relatively small file size. DivX files can also include
advanced media features like menus, subtitles, and
alternate audio tracks. Many DivX media files are
available for download online, and you can create
your own using your personal content and easy-touse tools from DivX.com.
This product incorporates copyright protection
technology that is protected by U.S. patents and
other intellectual property rights. Use of this
copyright protection technology must be authorized
by Macrovision, and is intended for home and other
limited viewing uses only unless otherwise
authorized by Macrovision. Reverse engineering or
disassembly is prohibited.
Official DivX® Certified product
Plays all versions of DivX® video with standard playback of DivX® media files
DivX,DivX Certified, and associated logos are trademarks of DivX, Inc. and are used under license.
General
Audio section
¡Power supply
¡Output voltage/
Impedance
¡Frequency
characteristics
¡Dynamic range
¡S/N ratio
: 12 V DC (11 V – 16 V), test
voltage 14.4 V, negative
ground
¡Current consumption : Less than 10 A (during disc
playback)
¡Maximum power output : 50 W x 4 ch
¡Power output
: 20 W x 4 ch
¡Compatible speaker
impedance
: 4Ω
¡Video input signal
: Composite video signal, 1.0
Vp-p (75 Ω)
¡Audio input sensitivity : 2 Vrms
¡Video output signal
: Composite video signal, 1.0
Vp-p (75 Ω)
¡Pre-Amp output voltage : 2 Vrms
¡Pre-Amp output impedance: Less than 600 Ω
¡Dimensions (W x H x D) : 178 x 100 x 160 mm
{7” x 3 15/16 ” x 6 5/16”}
¡Weight
: 2.3 kg {5 lbs. 1 oz.}
: 2 Vrms/600 Ω
: 20 Hz – 20 kHz (±1 dB)
: 96 dB (during CD playback)
: 95 dB (during CD playback)
English
Specifications
46
Monitor
¡Liquid crystal panel
¡Screen dimensions
(W x H x D)
¡Number of pixels
¡Valid pixel ratio
¡Display method
¡Drive method
: 7” wide
: 154 x 87 x 177 mm
{6 1/16 ” x 3 7/16 ” x 6 15/16”}
: 336 960 pixels (234 vertical
x 480 horizontal x 3)
: Over 99.99%
: Transparent color filter format
: TFT (Thin Film Transistor)
active matrix format
FM stereo radio
¡Frequency range
¡Usable sensitivity
¡Stereo separation
¡S/N ratio
:
:
:
:
87.9 MHz – 107.9 MHz
12.2 dBf
30 dB (1 kHz)
62 dB
AM radio
¡Frequency range
¡Usable sensitivity
¡Image rejection ratio
: 530 kHz – 1 710 kHz
: 28 dB/µV
: 50 dB
Above Specifications comply with EIA standards.
Power Output:
20 W RMS x 4 Channels at 4 Ω and ≤
1% THD+N
Signal to Noise Ratio:
80 dBA (reference: 1 W into 4 Ω)
Note:
¡Specifications and the design are subject to modification without notice due to improvements in technology.
¡Some figures and illustrations on this manual may be different from your product.
CQ-VW100U
47
Panasonic Consumer
Electronics Company,
Division of Panasonic
Corporation of North America
One Panasonic Way, Secaucus,
New Jersey 07094
http://www.panasonic.com
Panasonic Sales Company,
Division of Panasonic Puerto
Rico, Inc. (“PSC”)
Ave. 65 de Infantería, Km. 9.5
San Gabriel Industrial Park,
Carolina, Puerto Rico 00985
http://www.panasonic.com
©2007 Matsushita Electric Industrial Co., Ltd.
YFM264C065CA
Panasonic Canada Inc.
5770 Ambler Drive,
Mississauga, Ontario
L4W 2T3
http://www.panasonic.ca
PTW1107-1018
Printed in China
Imprimé en Chine
Impreso en China