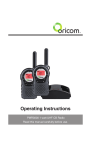
1
Information
Information on
on Safe
Safe Operation
Operation
Read This Information Before Using Your Oricom Radio.
Transmit
Transmit and
and Receive
Receive Procedure
Procedure
To assure optimal radio performance and make sure human exposure to radio
frequency electromagnetic energy is within the guidelines set out in the above standards
always adhere to the following procedures.
Radio Operation and EME Exposure
Your two-way radio contains a transmitter and a receiver. To control your exposure and
ensure compliance with the general population/uncontrolled environment exposure
limits, always adhere to the following procedure:
• Transmit no more than 50% of the time.
• To receive calls, release the PTT button.
• To transmit (talk), press the Push to Talk (PTT) button.
Transmitting 50% of the time, or less, is important because the radio generates
measurable RF energy exposure only when transmitting (in terms of measuring
standards compliance).
Unauthorized antennas, modifications, or attachments could damage the radio and
violate compliance.
Do NOT hold the antenna when the radio is “IN USE.” Holding the antenna affects the
effective range.
Do not use the radio if the antenna is damaged. If a damaged antenna makes contact
with your skin, a minor burn can result.
If you wear a radio on your body when transmitting, always fit the radio on the belt clip
(supplied). Always ensure the radio and it's antenna are at least 2.5 cm from your body
when transmitting.
Exposure to Radio Frequency Energy
Your Oricom two-way radio complies with Australian Communications Authority
Radiocommunications (Electromagnetic Radiation-Human Exposure) Standard, 2003.
1
2
Radiocommunications (Citizen Band Radio Stations) Class Licence 2002
metal powders) and any other area where you would normally be advised to turn off your
vehicle engine, such as petrol stations.
No licence is required to own or operate this radio in Australia and New Zealand.
Note areas with potentially explosive atmospheres are often-but not always-signposted.
The Radiocommunications (Citizen Band Radio Stations) Class Licence 2002 contains
the technical parameters, operating requirements, conditions of licence and relevant
standards for Citizen Band (CB) radios. CB radios must comply with the class licence
for their use to be authorised under the class licence.
Blasting Caps and Areas
To avoid possible interference with blasting operations, turn off your radio when you are
near electrical blasting caps, in a blasting area, or in areas posted “Turn off two-way
radios.” Obey all signs and instructions.
Potentially
Potentially Explosive
Explosive Atmospheres
Atmospheres
Electromagnetic
Electromagnetic Interference/Compatibility
Always turn off your radio prior to entering any area with a potentially explosive
atmosphere. Only radio types that are “Intrinsically Safe” should be used in such areas.
Do not remove, install or charge batteries in such areas. Sparks in a potentially
explosive atmosphere can cause an explosion or fire resulting in bodily injury or
even death.
Nearly every electronic device is susceptible to electromagnetic interference (EMI). To
avoid the possibility of electromagnetic interference and/or compatibility conflicts, turn
off your radio in any location where posted notices instruct you to do so such as health
care facilities.
Note: The areas with potentially explosive atmospheres referred to above, include
fueling areas such as below deck on boats, fuel or chemical transfer or storage
facilities, areas where the air contains chemicals or particles (such as grain, dust or
Aircraft
When instructed to do so, turn off your radio when onboard an aircraft. Any use of a
radio must be in accordance with applicable regulations per airline crew instructions.
3
4
Medical Devices - Pacemakers
The Advanced Medical Technology Association recommends that a minimum
separation of 6 inches (15 cm) be maintained between a handheld wireless radio and a
pacemaker. These recommendations are consistent with the independent research by
and recommendations of the U.S. Food and Drug Administration.
People with pacemakers should:
• ALWAYS keep the radio more than 15 cm from their pacemaker when the radio is
turned ON.
• Not carry the radio in the breast pocket.
• Use the ear opposite the pacemaker to minimize the potential for interference.
• Turn the radio OFF immediately if there is any reason to suspect that interference is
taking place.
Safety and General Use While Driving
Check the laws regarding the use of handheld radios whilst driving, and always obey
them.
Do not place a portable radio over an air bag or in the air bag deployment area. Air bags
inflate with extreme force. If a radio is placed in the air bag deployment area and the air
bag inflates, the radio may be propelled with great force and cause serious injury to
persons in the vehicle.
Medical Devices - Hearing Aids
Some digital wireless radios may interfere with some hearing aids. In the event of
such interference, you may want to consult your hearing aid manufacturer to
discuss alternatives.
Other Medical Devices
If you use any other personal medical device, consult the manufacturer of your device
to determine if it is adequately shielded from RF energy. Your physician may be able to
assist you in obtaining this information.
5
6
Your
Your Oricom
Oricom PMR3000R
PMR3000R radio
radio controls
controls
Headset
socket
Your
Your Oricom
Oricom PMR3000R
PMR3000R radio
radio display
display
Indicator light
RX icon
On/off button
TX icon Baby monitor
VOX
Battery level
Menu button
Push to talk
(PTT) button
Volume up and
menu settings
Key lock
Key tone
Scan/dual scan
CTCSS code
Channel
Stopwatch
Call tone
button
Volume down
and menu settings
Call tone
Squelech
Volume
Charging contacts
Scan and monitor
Keypad lock
Battery compartment
clip
7
8
Automatic power
save mode
Roger Beep
This
This pack
pack contains
contains
1. Ensure radio is turned off. Remove the belt clip on the back.
→
• 2 UHF radios
• 2 belt clips
• 2 PTT headsets
• 2 Ni-Mh rechargeable battery packs
• 1 twin desk top charger
• 1 AC adaptor
2. Locate the clip on the battery cover. Use your fingernail to gently prise open the
battery cover and remove.
Installing the batteries
→
Each radio uses a Ni-Mh rechargeable battery pack (supplied). Or for added
convenience you can choose to use 3 AAA alkaline batteries in each radio (not supplied).
Clip
Warnings
• Do not mix old and new batteries.
• Do not charge alkaline or non rechargeable batteries as they could explode and cause
injury.
• If you are not using the radios for an extended period remove the batteries.
For replacement Ni-MH battery packs (Order Part No. KEBT-079-1) contact Oricom
(02) 4574 8888.
3. Insert the battery pack supplied with charge contacts facing towards you and then
replace the battery cover.
4. Plug one end of the AC power adaptor into the charging pod and then the AC adaptor
into the power socket.
5. Slide the radios into the charging pod ensuring the charging contacts line up. The red
lights on the charge pod glow when radios are properly inserted.
6. The batteries will be fully charged within 14 hours.
9
10
IMPORTANT NOTE
1. When moving between hot/cold environments do not charge the battery until the
battery temperature acclimates (usually about 20 minutes).
2. Batteries can cause property damage and/or bodily injury such as burns if a
conductive material-like jewellery, keys or chains touch exposed terminals.
3. The conductive material may complete an electrical circuit (short circuit) and become
quite hot.
4. Exercise caution in handling any battery, particularly when placing it inside a bag,
pocket, purse or any container with metal objects.
Turning your radio on and off
Press and hold
for three seconds to turn your radio on. The radio chirps and the
display will show all feature icons for a brief period. Press and hold
button for three
seconds to turn off your radio.
Adjusting the volume level
When turned on, simply press
listening level.
or
button to adjust the volume to a comfortable
Selecting the channel
1. Press the
button, the currently selected channel number will begin to blink.
2. Press the
or
button to select a channel.
3. Press the
button to set a new channel.
Roger beep (Talk Confirmation Tone)
This feature transmits a unique tone when you finish transmitting. In the same way as
saying “Roger” or “over”, it lets others know you are finished talking.
1. Press
button until
appears. Press
or
to enable or disable
Roger beep.
2. When the roger beep is enabled,
will show in the display.
3. When you release the
button you will hear the roger beep.
11
12
Talking and listening
It is good radio etiquette to monitor the channel for activity before you transmit, to
ensure that you do not interrupt other users already on the channel.
1. Press
2. Use
3. Press
Press and hold the
button to check for channel activity. If you hear static, the
channel is clear for use. Your radio has 40 channels. If you are in a group and you wish
to talk to each other, all radios must be set to the same channel and interference
eliminator code (CTCSS). If you experience interference and need to change channel,
ensure that you change the channel and code of all radios in your group.
You can specify a different code for each channel.
1. To set a channel and CTCSS code combination, press
and then press
or
to select the channel.
2. Press
again and then press
or
to select a CTCSS code.
3. You can not select interference eliminator codes on channel 5 or channel 35. On this
channel press
. The radio shall skip the codes setting.
4. Press
to exit the menu and to save the channel and code combination.
To set another channel and code combination, repeat these steps.
1. For maximum clarity, hold radio 5 to 7cm’s from mouth.
2. Press and hold
and speak to the microphone. LED indicator light glows
continuously when transmitting.
3. To receive messages, release
.
Interference eliminator codes (CTCSS)
The radio has 38 interference eliminator codes (CTCSS) providing you with a choice of
channel/code combinations to listen to transmissions using the same CTCSS code on
the same channel, effectively blocking out unwanted conversations.
13
until the code number begins to flash.
or
to select required CTCSS code 0 (off) or 1-38.
to set the new code.
Channel scan
By scanning, you can monitor channels and codes for transmissions and lock in on the
one that interests you. More importantly, you can find someone in your group who has
accidentally changed channels and is talking during your scan.
1. To start scanning, briefly press and release the
button.
2. If you activate scan while the CTCSS code is set to 0, then the radio will check for
any activity on each channel, regardless of the CTCSS code in use on that channel.
3. If you activate scan while the CTCSS code is set at 1 to 38, then the radio will check
for any activity on each channel, except the CTCSS code 0 in use on that channel.
14
4. While the radio is scanning, the scan icon will display and the radio will scroll through
the channels.
5. When activity is detected on a channel, the radio will stop scanning and you will hear
whatever transmissions are detected. The radio’s display will show the channel and
CTCSS code on which activity was detected.
6. If you want to respond to the transmission, press
within 5 seconds and you can
respond.
7. The radio will resume scanning after 5 seconds of inactivity on the channel.
8. To stop scanning, briefly press and release
.
Keypad lock
Press and hold the
button for three seconds to lock or unlock the keypad. When
the radio is locked, the
icon will show in the display.
The keypad lock disables the
,
and
buttons. It also disables the scan
function, but allows you to use the
button to monitor the channel.
Scan advance
If scan stops on a channel that you don’t want to listen to, briefly press
or
to resume scanning for the next active channel.
Selecting a call tone
1. With the radio on, press
repeatedly, until
appears in the display.
2. The current call tone setting will begin to flash.
3. Press
or
to change and hear call tones while the setting number is flashing.
4. Press
to set the new call tone.
Nuisance delete
If scan continuously stops on an undesired channel, press and hold
or
for at
least 3 seconds, then release. This will temporarily remove the undesired channel from
the scan list.
To restore the channel to the scan list, turn the radio off and then on. You cannot remove
your home channel from the scan list (your home channel is the channel your radio was
set to when you activated scan).
15
Call tone
A call tone alerts others in your group that you want to talk. Your radio has 10 call tones
to choose from. Set the call tone to 0 to disable the function.
Note:
1. The Australian UHF CB Radio Standard restricts tone calling to 3 seconds.
This unit will only transmit for a maximum 3 seconds in any 60 seconds.
2. The radio does not support the call tone feature on channels 5 or 35.
16
Channel busy indicator
The red LED will flash twice per second to indicate that the channel is in use.
Time-out timer
The time-out timer feature helps extend battery life by preventing accidental transmission.
The radio will emit a continuous warning tone if the
button is pressed for more than
60 continuous seconds and will stop transmitting.
1. Select the repeater channel in your area (channel 1 to channel 8).
2. Press the
button to enter duplex mode, press
or
to switch between
duplex and simplex mode.
For example,
Select channel 1, duplex mode will display:
1. Simplex mode will display 1.
Dual channel scan
The battery level meter
The battery level meter located in the display indicates how much battery power you
have remaining to protect the rechargeable battery. When the battery meter has one
segment left, the radio will chirp after releasing
or every 10 minutes.
Duplex mode
Repeater stations can re-transmit your signal over a wider area giving you extended
range depending on the location, height and availability of the local repeater station. For
information on the locations of repeater sites in Australia and New Zealand visit our
website.
In stand-by, the PMR is set on one set channel with CTCSS code. The PMR will only
receive signals transmitted on that channel and CTCSS code. Dual Channel Monitor
allows you to monitor a second channel with CTCSS code.
To set dual channel and code
1. Press
until
display.
2. Pressing the
or
button will increase or decrease the dual channel.
3. Press
again and then press
or
button to increase or decrease the dual
code number.
4. Press
to exit the menu and save the dual channel and code combination.
Your radio supports duplex mode on channels 1 - 8. If the repeater channel in your area
is channel 1, when you are in duplex mode the transmit channel will be channel 31.
When the Dual Channel Monitor function is activated, the PMR will switch sequentially between the
standby channel + CTCSS and the Dual Channel + CTCSS. When there is activity on the Dual Channel
+ CTCSS, the active channel will be displayed for 5 seconds. Within this period, you have the
possibility to answer the transmission.
17
18
To disable the dual channel scan
Repeat the setup 1 and 2, and then roll-over at ‘
is disabled.
Hands-free use (IVOX)
’ which means the dual scan
This feature allows you to transmit “hands-free” by talking into the radio microphone
without using the headset.
Hands
free use
Hands-free
use (VOX)
(VOX)
This feature allows you to transmit “hands-free” by talking while using the VOX
headsets connected to the radio.
Note: When using the headsets with your radio, turn your radio off before you place the
accessory on your head or in your ear.
How to use VOX
1. Turn off your radio.
2. Insert the VOX headset into the headset socket.
3. Turn on your radio; the VOX icon will appear in the display.
4. To transmit, speak into the headset mircophone. To receive, stop talking.
5. Pressing
button or removing VOX headset will disable VOX function.
How to use the IVOX feature
1. Press
button until VOX appears.
2. Press
or
button to “
” to disable the IVOX or enable IVOX by select level
1, 2 or 3.
3. Press
button to confirm your setting.
4. At standby mode, when IVOX function activated, to transmit, speak into the radio
microphone. To receive, stop talking.
5. Press
will disable IVOX operation.
Note: There is a short delay after you start talking, before the radio transmits.
Setting VOX and IVOX sensitivity levels
Adjusting your radio’s VOX and IVOX microphone sensitivity level helps to minimize the
possibility of unintended noises triggering a transmission, and enhances the ability to
pick up quiet voices. If a headset is fitted to your radio these instructions will help you
to adjust the VOX sensitivity.
19
20
1. Press
until
and a flashing number appears in the centre of the display. With
the headset connected you will see in the top right corner of the display. Without the
headset you will see I.
2. Select sensitivity level 1, 2 or 3 by using
or
. Choose 1- If you speak loudly, or are in a noisy environment.
2- Suitable for most applications.
3- If you speak softly, or are in a quiet environment.
Note: When you connect a VOX headset, the radio will automatically be set to the last
chosen VOX sensitivity level. If IVOX is active, the radio will automatically select
IVOX level.
Monitor function
This feature allows you to listen for weak signals on the current channel.
1. Pressing and holding
allows you to monitor your channel for activity.
Note: It is good radio etiquette to monitor the channel for activity before you transmit,
to ensure that you do not interrupt other users already on the channel.
21
Baby monitor function
One of the units can be set as Baby monitor. The radio will transmit a signal when it is
activated by the crying baby or another sound in the room.
The PMR will no longer be able to receive signals to avoid that your baby is disturbed
during his/her sleep.
The other PMR must be set to the same channel and CTCSS code to receive the signal
from the Baby Monitor.
To set your radio as baby monitor
1. Press
button until
appears.
2. Press
or
button to set baby monitor sensitivity level to 1/2/3 to turn baby
monitor function ON.
3. Press
to confirm the setting.
Note:
1. In standby mode, when speaking into the microphone, the radio will automatically
transmit like IVOX does.
2. The radio can’t receive or if you press any key it will not generate key tones so that
you will not disturb the baby.
22
To disable baby monitor function
1. Press
button until
appears.
2. Press
or
until OF appears.
3. Press
to confirm the setting.
Setting squelch level
The adjustable Squelch allows you to optimize the radios sensitivity. It also allows you
to increase the sensitivity and receive weaker signals. There are 4 decreasing levels of
sensitivity.
1. Press
button until
appears.
2. Press
or
button to adjust the squelch levels.
3. Press
to confirm.
Note: Level 1 (SQL and one bar icon display) is the most sensitive level, which means
the radio can receive very weak signal. While at level 4, the radio can only receive at
strong signal.
23
Automatic energy saving mode
The radios are designed with a power saving mode. If no transmissions take place
within a certain time, the unit switches itself off automatically.
1. Repeatedly press the
button until APO appears in the display and the current
setting will flash.
2. Select the required setting of 1, 2...12 hours using the
and
buttons.
Energy saving mode is switched off with the setting
.
3. Confirm the selection with the
button.
Keypad tone
Once you enable this function, the unit will beep briefly, When a button is pressed.
1. Press
button until
appears, The current setting
/
flashes.
2. Press
or
button to turn on or off.
3. Press
to confirm.
24
UHF channels and frequencies
IMPORTANT NOTE: The operation of your PMR3000R radio in Australia and New
Zealand is subject to conditions in the following licenses:
In Australia the ACMA Radio communications (Citizen Band Radio Stations) and in New
Zealand the General User Radio License for Citizen Band Radio.
UHF Repeater operation is used when long distance communication is required, unless
specifically needed use of the repeater channels is to be avoided. Note Channels 5
and 35 are emergency channels. Channel 11 is a calling channel for establishing
communication and Channel 40 is the customary road vehicle channel. Channels 22
and 23 are for Telemetry and Telecommand use, voice communications are not allowed
on these channels by law.
25
UHF Channels and frequencies
Stopwatch
The PMR3000R has a stopwatch function (mm:ss).
1. Press
button until
appears.
2. Press
button to start the stopwatch.
3. When the stopwatch is running, press
button to stop counting and display the
lap time, the counter will continue in the background. Press
to proceed counting.
4. When the counter is stops, press
button to reset the counter.
Channel Frequency (MHz) Usage
Channel Frequency (MHz) Usage
1
476.425
Duplex RX/Simplex
21
476.925
Simplex
2
476.450
Duplex RX/Simplex
22
476.950
No Use
3
476.475
Duplex RX/Simplex
23
476.975
No Use
4
476.500
Duplex RX/Simplex
24
477.000
Simplex
5
476.525
Emergency
25
477.025
Simplex
6
476.550
Duplex RX/Simplex
26
477.050
Simplex
7
476.575
Duplex RX/Simplex
27
477.075
Simplex
8
476.600
Duplex RX/Simplex
28
477.100
Simplex
9
476.625
Simplex
29
477.125
Simplex
10
476.650
Simplex
30
477.150
Simplex
11
476.675
Simplex (Calling Channel)
31
477.175
Duplex TX/Simplex
12
476.700
Simplex
32
477.200
Duplex TX/Simplex
13
476.725
Simplex
33
477.225
Duplex TX/Simplex
14
476.750
Simplex
34
477.250
Duplex TX/Simplex
15
476.775
Simplex
35
477.275
Emergency
16
476.800
Simplex
36
477.300
Duplex TX/Simplex
17
476.825
Simplex
37
477.325
Duplex TX/Simplex
18
476.850
Simplex
38
477.350
Duplex TX/Simplex
19
476.875
Simplex
39
477.375
Simplex
20
476.900
Simplex
40
477.400
Simplex
26
Attaching the belt clips
Warranty information (Australia)
Attaching the belt clips (2 included)
Each radio is supplied with a belt clip.
(a) Warranty. Oricom International Pty Ltd (Oricom) warrants that the product is free
from defects in materials and workmanship for a period of 12 months effective from the
date of purchase. This warranty in no way affects your statutory warranty under the
Trade Practices Act 1974 or any other similar legislation. It is important that you read the
Warranty Card as it contains full and additional details of the warranty, limitation of
warranty and conditions for receiving the warranty services during the warranty period.
The Warranty Card is located in the package.
To attach, align belt clip post with hole in the back of the radio and gently push until
it clicks into place.
(b) Exclusion and limitation of liability. Oricom will not be in breach of a warranty or
condition expressly stated in this User Guide or the Warranty Card or implied by the
Trade Practices Act and excludes any liability arising under any statutory or common
law for damages or any other remedy if the damage occurs as a result of:
(i) Failure by you to follow the instructions in the User Guide for the installation and
proper functioning of the product;
(ii) Negligence on your part or misuse by you of the product;
Removing the belt clip
To remove, push release tab on top of belt clip down to release catch and pull belt clip
from the back of the radio.
(iii) Any un-controlled external cause to the phone not functioning including but not
limited to electricity failure, lighting, over voltage;
27
28
(iv) Non adherence by you to the warnings in the User Guide and the User Guide
generally; and
(v) Modification to the product or services carried out to the product by anyone other
than Oricom or on Oricom's behalf.
Oricom will not be liable for consequential losses including loss of profits arising from a
cause of action in contract, tort or any other statutory or common law (except where a
statute or any law prohibits this exclusion). The warranty does not extend to damage
caused by misuse, negligence, excessive voltage, faults on the telephone line or
lightning. This warranty in no way affects your statutory rights. Full details of the
warranty are contained in the enclosed warranty card.
Customer support
If you feel this product is not working correctly please consult the user guide and ensure
that you are using the product in accordance with the instructions.
To order spare parts additional radio, replacement batteries and in case of any
technical issues you may have with the product please consult our website for further
information or send us an email for a prompt response to your enquiry.
In the unlikely event of a fault developing, please contact us for assistance. If the
product is then found to be faulty you will be asked to return it directly to us with a copy
of the purchase receipt.
Contact us
Customer support
Email: [email protected]
Web: www.oricom.com.au
Fax: (02) 4574 8898
Phone: 1300 889 785
Australia
Oricom International Pty Ltd
Locked Bag 658
South Windsor NSW 2756
Australia
29
30