1
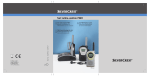
PMR Twintalker 2-Way Radio Set
TARGA GmbH
Lange Wende 41
D-59494 Soest
www.silvercrest.cc
PMR Twintalker 2-Way Radio Set
User manual and service information
Mat-No: 1549764, 1549765
GB
6
PMR-1200
1
2
14
3
13
12
4
11
10
9
6
15 16 17 18
19
5
7
8
20
30
29
28
21
22
27
26 25 24 23
2
1
31
3
Table of Contents
SilverCrest PMR-1200
Table of Contents
Table of Contents ....................................................................................................................1
1. Important Safety Instructions ............................................................................................2
1.1 Cleaning .....................................................................................................................6
2. Preface..............................................................................................................................7
3. Package Contents ............................................................................................................8
4. Introduction .......................................................................................................................9
4.1 Inserting the Rechargeable Battery / Conventional Batteries.....................................9
4.2 Removing the Rechargeable Battery .......................................................................10
4.3 Installing the Belt Clip ...............................................................................................10
4.4 Removing the Belt Clip .............................................................................................10
4.5 Preparing the Charging Cradle.................................................................................11
4.6 Charging the Battery.................................................................................................11
4.7 Battery Status Indicator ............................................................................................12
4.8 Front Panel of the PMR ............................................................................................12
4.9 LCD Display Information...........................................................................................13
5. Getting Started................................................................................................................14
5.1 Powering the PMR On/Off ........................................................................................14
5.2 Adjusting the Volume................................................................................................14
5.3 Your First RF Transmission......................................................................................15
6. Advanced Operation .......................................................................................................16
6.1 Function button.........................................................................................................16
6.2 Setting a Different Channel ......................................................................................16
6.3 CTCSS/CDCSS code ...............................................................................................17
6.4 Monitoring a Channel ...............................................................................................17
6.5 Baby monitor ............................................................................................................17
6.6 Call Tone ..................................................................................................................18
6.7 Voice-Controlled Send Function (VOX)....................................................................18
6.8 Squelch.....................................................................................................................19
6.9 Channel Scan ...........................................................................................................20
6.10 Dual Scan .................................................................................................................20
6.11 Off Timer (Auto Power Off).......................................................................................21
6.12 Button Sound............................................................................................................21
6.13 Chronometer.............................................................................................................22
6.14 Roger Beep On/Off...................................................................................................22
6.15 Button Lock...............................................................................................................22
6.16 Display Backlight ......................................................................................................23
6.17 After Using the Product ............................................................................................23
7. Earphones Receptacle ...................................................................................................24
8. Troubleshooting ..............................................................................................................25
9. Technical Specifications .................................................................................................26
10. Disposal of Old and Defective Devices and Packaging Material ....................................28
11. Warranty Information.......................................................................................................29
12. Declaration of Conformity ...............................................................................................31
English
1
SilverCrest PMR-1200
Important Safety Instructions
1. Important Safety Instructions
Note on Using this Manual
Before you use this product for the first time, please read the following notes in this manual
and heed all warnings, even if you are familiar with handling electronic devices. Keep this
manual safe for future reference. If you sell the device or pass it on, it is essential you hand
over this manual also.
The manufacturer assumes no liability for any damage resulting from the non-observance of
instructions in this User’s Manual, non-intended use, unauthorised modifications, etc.
This icon denotes important information for the safe operation of the product
and for the user’s safety.
This symbol denotes further information on the topic.
This icon alerts you about possible damage to the user’s hearing.
Copyright
The entire content of this User’s Manual is copyrighted and is provided to the reader for
information purposes only.
Copying data and information without the prior written and explicit authorization from the
author is strictly forbidden. This also applies to any commercial use of the contents and
information.
All texts and figures are up-to-date as per the date of print release. We assume no liability
for any changes.
Operating Environment
•
•
Position the charger cradle on a stable, even surface and do not place any heavy
objects on the charger cradle or the Personal Mobile Radio (PMR) radio transceivers.
Operating temperature and operating humidity: -20 °C to 55 °C, max. 85% RH
Always make sure that
• there is free circulation of air (do not place the charger cradle on shelves), and leave at
least 10 cm clearance on all sides;
• no direct heat sources (e.g. heating) can affect the charger cradle;
• no direct sunlight or bright artificial light reaches the charger cradle;
2
English
Important Safety Instructions
•
•
•
•
SilverCrest PMR-1200
contact with spray, dripping water and corrosive liquids must be avoided and the
charger cradle should never be operated near water, and it must especially never be
immersed (do not place any objects filled with liquids such as vases or drinks near the
charger cradle);
no fire sources (e.g. burning candles) are placed on or near the charger cradle;
no foreign bodies are introduced into the device;
the charger cradle must not be subject to any great temperature changes as this may
cause moisture through condensation;
If you are not using the product within the Republic of Germany, you must observe the
regulations and laws in the country of use.
Batteries and Rechargeable Batteries
•
•
•
Insert the batteries with the correct polarity. Do not try to recharge any conventional
batteries and do not throw batteries into fire. When handled incorrectly there is danger
of explosion.
Remove the batteries / rechargeable battery when you are not going to use the device
for a long period of time.
Keep batteries out of children's reach.
Cable Handling Precautions
•
•
•
Always hold all cables by the plug and never pull on the cable itself. Never hold the
plug-type power adapter with wet hands as this may cause a short circuit or electric
shock. Never place the device, heavy objects or furniture on the cable and take care
that the cord does not become trapped, especially at the plug and sockets. Never make
knots in the cable and do not tie it together with other cords. All cables should be
positioned so that nobody can trip over them or be obstructed by them.
Install the cables in a safe way. Avoid tripping over them.
Do not attempt to open the housing of the charger cradle or the radio transceivers.
otherwise you will void your warranty.
Risk of Burning Injury
•
•
Never touch the antenna if you find the antenna insulation to be damaged. When the
antenna comes in contact with the skin, minor burns may occur while transmitting.
Batteries and the rechargeable battery may cause material damage and burns if any
conductors such as jewellery, keys or chains touch the battery terminals. The
conductive material may close an electrical circuit causing a short-circuit and become
English
3
SilverCrest PMR-1200
Important Safety Instructions
very hot. Handle the rechargeable battery and any batteries carefully, especially when
storing them in a pocket, purse or another bag containing metal objects.
Risk of Injury
•
•
•
Do not place the product within the action radius of your vehicle’s airbag. Airbags inflate
very quickly. If a PMR is placed within the airbag deployment radius, the PMR may be
hurled across the vehicle and cause injury to the occupants.
Keep the radio transceivers at least 15cm (6-inch) away from any pacemakers.
Power your PMR off if you observe any interference caused to medical equipment.
Risk of Explosion
•
•
•
Never replace any batteries in an explosion-sensitive environment. While inserting or
removing the batteries (or rechargeable batteries), a spark may be produced causing an
explosion.
Power your PMR off when in a potentially explosive environment. Sparks in a such an
environment may cause explosion or fire. In addition, injury or even death may occur.
Explosion-sensitive areas will normally (but not always) be labelled. These include fuel
storage areas such as below deck on a boat, fuel line or tank areas, environments
where the air contains inflammable substances (e.g. cereals, metal dust or powder, etc.)
and any areas where you should normally switch off your car engine.
Do not throw any batteries or the rechargeable battery into fire, as they may explode.
Intended Use
•
•
•
•
4
This is a Consumer Electronics device (CE Conformity certified through the additional
application of several Information Technology standards). It may not be used in tropical
climates. Only connection cables and external devices may be used that comply with
safety standards and the electromagnetic compatibility and shielding quality of this
device.
This device fulfils all that relates to CE Conformity, relevant norms and standards.
Any modifications to the equipment other than recommended changes by the
manufacturer may result in these directives no longer being met. Only use the
accessories recommended by the manufacturer.
If you are not using the device within the Republic of Germany, you must observe the
regulations and laws in the country of use.
In some countries it is forbidden to use your PMR while driving a vehicle. In this case,
stop your vehicle beside the road before using it.
English
Important Safety Instructions
•
•
•
SilverCrest PMR-1200
Power your PMR off when onboard an aircraft and the cabin attendants instruct you to
do so. You must follow the airline flight crew and cabin crew instructions when using the
product.
Power the product off wherever you encounter any signs indicating you must do so.
Hospitals and medical facilities may use devices that are sensitive to RF fields.
Replacing or modifying the antenna or transceiver may change the PMR specifications
and void the CE regulations. Furthermore, any unauthorized antennas may damage the
PMR.
Do not touch the antenna while transmitting, as this may result in decreased
range.
Danger Through Noise Disturbance
•
Caution when using the supplied earphones. Listening at high volume can harm the
user’s auditory system.
•
Do not allow children or persons with disabilities to use electrical devices when not
under supervision. These may not comprehend the presence of potential risks.
Keep the batteries away from children as there is danger of suffocation and poisoning.
Keep the packaging away from children and persons with disabilities too. as there is
danger of suffocation.
Children and Persons with Disabilities
•
•
English
5
SilverCrest PMR-1200
Important Safety Instructions
1.1 Cleaning
•
•
•
To clean the product, power it off, and wipe it with a soft, slightly damp cloth. Do not use
any cleaners or detergents nor solvents, as these may enter the housing and cause
permanent damage to the product.
Clean the battery terminals from time to time with a dry, lint-free cloth.
If the PMR gets wet, power it off immediately and remove the rechargeable battery or
the conventional batteries. Dry the battery compartment with a soft cloth. Leave the
battery compartment open for 24 hours to allow the humidity to dry off. Do not use the
product until it is completely dry.
1.2 Repair and Maintenance
Repairs are required when this product has been damaged in any way, for example, when
liquid has entered the product, when the product has been exposed to rain or moisture,
when the product does not work normally or if the product has been dropped. If smoke,
unusual noises or smells are noticed, unplug the charger cradle immediately or remove the
rechargeable battery or conventional batteries from the radio transceiver. In this event the
product should not be used further and should be inspected by authorized service
personnel. Please contact qualified personnel when servicing is needed. Never open the
housing of the device, as you may damage it. Only use a clean, slightly damp cloth for
cleaning.
Do not attempt to repair the product yourself.
CE Declaration of Conformity Notice
This device has been tested for compliance with the relevant requirements of
the RTT&E Directive 1999/5/EC. Furthermore, the product fulfills the ecological
design criteria according to the Commission Regulation 278/2009 to implement
the Directive 2009/125/EC. The Declaration of Conformity can also be found at
the end of this User's Manual. The CE sign can be found in the battery
compartment of the handheld radio transceivers and on the bottom of the
charger cradle.
6
English
Preface
SilverCrest PMR-1200
2. Preface
Thank you for choosing a SilverCrest product.
Your PMR-1200 consists of two portable handheld radio transceivers with a maximum
range of 8 km. Using this PMR set is free of charge, therefore there is no need to pay any
license fees, etc. You can choose from 8 channels for communicating between the two
stations. The radio transceivers may be used in any country where their operation is
permitted. The handheld transceivers are protected against light rain.
Example Applications
You can use your PMR set anywhere you may need to communicate with other persons,
whether corporate or private. For example, you can keep in touch with your employees on
the company premises or stay connected to your children while they are in the garden. As
soon as you have found an interference-free channel, communication will only be limited by
obstacles and the maximum range.
English
7
SilverCrest PMR-1200
Package Contents
3. Package Contents
Take all supplied devices and accessories out of the packaging and inspect them for any
damaged or missing items:
• 2 handheld radio transceivers PMR-1200
• 2 belt clips
• 1 charger cradle
• 1 power adapter
• 2 NiMH battery packs
• 2 earphones with microphone and PTT button
• User manual with service information
Remove the protective film from the displays (3) of both transceivers. To do this, place your
fingernail below the tongue in the upper-left corner of the protective film, lift it up and
remove the film.
Keep the packaging material in case that you have to ship or transport the
product in the future.
8
English
Introduction
SilverCrest PMR-1200
4. Introduction
Before using the product for the first time, read the safety instructions starting
from page 2 carefully and completely.
4.1 Inserting the Rechargeable Battery / Conventional Batteries
1. Remove the belt clip (see page 10,
Removing the Belt Clip).
.2. Push the latch (32) of the battery
compartment cover upwards and
remove the cover.
3. Insert
the
rechargeable
battery
according to the polarity markings found
on the battery and inside the battery
compartment. The two metal strips (33)
must face outwards and the “UP” arrow
found on top of the metal strips must
point upwards. When inserting the
rechargeable battery, make sure that the
latch (34) is placed around the battery so
that you can remove the battery easily
from the compartment when required.
English
9
SilverCrest PMR-1200
Introduction
Optionally you may also use conventional alkaline AAA-sized batteries (or even
rechargeable AAA-sized batteries). Always pay attention to the polarity (+ and -)
markings inside the battery compartment.
4. Close the battery compartment. First insert the two pins on the top into the
corresponding notches on the radio transceiver housing and then swivel the cover
downwards until it clicks in place. Replace the belt clip (see page 9, Installing the Belt
Clip).4.1
4.2 Removing the Rechargeable Battery
If you want to power your handheld radio transceiver with conventional alkaline batteries
you must remove the rechargeable battery pack first. Proceed as follows:
1. Remove the belt clip (see page 10, Removing the Belt Clip).
2. Push the latch (32) of the battery compartment cover upwards (see page 9) and remove
the cover.
3. Carefully pull on the latch (34) to release the rechargeable battery and then remove the
battery from the compartment.
4.3 Installing the Belt Clip
1. To install the belt clip, insert the pin into the hole on the back panel of the handheld
radio transceiver. The belt clip must click in place.
4.4 Removing the Belt Clip
In order to insert or remove the rechargeable battery you must remove the belt clip.
1. To remove the belt clip, press on top of the belt clip (A) to release the lock and then pull
the belt clip away from the radio transceiver (B).
10
English
Introduction
SilverCrest PMR-1200
4.5 Preparing the Charging Cradle
1. Place the charging cradle onto a stable, flat surface.
2. Plug the power adapter plug into the power receptacle (31) of the charging cradle.
3. Plug the power adapter into a wall outlet.
WARNING!
Make sure that the wall outlet is nearby and easily accessible so that you can
unplug the power adapter quickly in case of an emergency. Otherwise shortcircuit or fire can occur.
The power adapter of the charging cradle consumes power even if there is
no handheld radio transceiver placed onto it. Therefore it is recommended
that you unplug the power adapter from the wall outlet to completely
separate it from the mains and to avoid any unnecessary power
consumption.
4.6 Charging the Battery
Charge the battery packs of both handheld radio transceivers completely before using them
for the first time. Charging takes approx. 12-14 hours.
As long as the rechargeable battery pack is inserted into the handheld radio transceiver
(see page 9), you can charge it by using the charging cradle.
1. Place both PMR sets on the charging cradle
(see the following figure).
2. The charging indicator (35) located on top of
the charging cradle lights red when a
transceiver has been inserted properly and its
battery is being charged.
English
11
SilverCrest PMR-1200
Introduction
There will be no indication on the charging process on the display (3).
When powering the transceiver with optional rechargeable AAA-sized batteries,
they cannot be recharged with the charging cradle. You will need an optional
charger for AAA-sized batteries.
Warning! Do not overcharge the battery!
The charger cradle supplies a constant and continuous charging current.
Therefore you should remove the handheld radio transceiver from the charger
cradle after approx. 12 hours otherwise the battery lifetime may be reduced.
4.7 Battery Status Indicator
When the transceiver is powered on, the battery status indicator (15) will appear on the
display (3) to show the level of the rechargeable battery pack or the inserted batteries.
Battery fully charged
Battery 2/3 charged
Battery 1/3 charged
Battery empty
When the rechargeable battery pack or the inserted batteries are exhausted, an acoustic
signal will be heard.
4.8 Front Panel of the PMR
See the figure on the fold-out cover page.
Send LED indicator
Lights when the PTT button is being pressed and the unit is transmitting.
Antenna
Display
Earphones receptacle (behind protective cover)
Function button
Press to display the setup menu.
Down button T
To reduce the sound volume.
To select the previous menu item.
Call button
Speaker
12
English
Introduction
SilverCrest PMR-1200
(channel monitor/scan)
Button
Microphone
Up button S
To increase the sound volume.
To select the next menu item.
Button lock
PTT button
Press this button to start transmitting your message.
ON/OFF button
4.9 LCD Display Information
See the figure on the fold-out cover page.
Battery level
Reception icon
Will be displayed in receive mode.
Transmission icon
Will be displayed in send mode.
Baby monitor icon
VOX icon
CTCSS/CDCSS code
Call tone icon
Chronometer icon
Auto power off icon (APO), power-saving function
Roger beep icon
Volume icon
Button lock icon
Squelch
Call tone icon
a. Channel scan icon
b. Dual scan icon
Channel number / Volume level
English
13
SilverCrest PMR-1200
Getting Started
5. Getting Started
In order to be able to communicate using two PMR units, these must be set to the same
channel and to the same CTCSS/CDCSS code. Furthermore, they must be located within
range (max. 8km in open field).
The RF communications take place on a free (unscrambled) channel, i.e. other people that
have a PMR or a receiver for the set channel will be able to listen to your messages. You
can choose from 8 different channels.
WARNING! Before using the product for the first time, read the safety
instructions starting from page 2 carefully and fully, otherwise material or
personal damage may occur.
5.1 Powering the PMR On/Off
How to power your PMR on
1. Press and hold the
button (14) for at least 2 seconds. An acoustic signal can be
heard and the currently set channel will appear on the display (3).
The unit will be in receive mode as long as it is powered on and not transmitting.
How to power your PMR off
button (14) for at least 2 seconds. An acoustic signal can be
1. Press and hold the
heard and the display (3) will turn blank.
5.2 Adjusting the Volume
1. In receive mode, press the S button (11) to raise the audio
volume. The current volume level (between 1 and 16) will be
displayed.
2. In receive mode, press the T button (6) to decrease the
audio volume.
14
English
Getting Started
SilverCrest PMR-1200
5.3 Your First RF Transmission
In order for other people to be able to listen to your messages, both PMR sets must be set
to the same channel and to the same CTCSS/CDCSS code (see pages 16 and 17). After
powering on the transceivers for the first time, Channel 1 and CTCSS code 1 are preset by
default.
1. Press and hold the PTT button (13). The transmission icon will
appear on the display, the unit starts sending and you can
speak your message into the microphone (8). Additionally, the
LED indicator (1) lights red.
All PMR sets tuned to the same channel and located within
range will hear your message.
2. Release the PTT button (13) when you are done with your
message.
3. Listen to the answer of the remote station.
4. Before you can answer again you have to wait until the remote
station finishes its message. If you have enabled the Roger
beep function (see page 22), the PMR will send an acoustic
signal when releasing the PTT button (13). To answer, press
and hold the PTT button (13) again and speak into the
microphone.
•
•
•
•
English
If 2 or more stations press the PTT button (13) simultaneously, the receiver
will receive the strongest signal only or both signals will mix and interference
will occur. Therefore you should press the PTT button (13) only whenever
the channel is free.
Always pay attention to the maximum range.
Hold the PMR vertically and keep the microphone approx. 10cm (4-inch)
from your mouth.
The maximum transmission time is 1 minute. For longer messages you may
have to release the PTT button (13) and press it again to continue talking.
15
SilverCrest PMR-1200
Advanced Operation
6. Advanced Operation
6.1 Function button
The function button (5) allows you to customise your PMR. The following table lists the
different functions that are available. A description of the functions can be found on the
corresponding page.
Function button
Press once
Press twice
Press three times
Press four times
Press five times
Press six times
Press seven
times
Press eight times
Press nine times
Press ten times
Press eleven
times
Function
Switch channel
Switch CTCSS/CDCSS code
Baby monitor
Call Tone
Sensitivity for voice-controlled transmit
function (VOX)
Squelch level
Dual Scan
Detailed description
See page 16
See page 17
See page 17
See page 18
See page 18
See page 19
See page 20
Power-saving function (auto power-off)
Button sound on/off
Chronometer
Roger Beep On/Off
See page 21
See page 21
See page 22
See page 22
If no button is pressed for 5 seconds while changing a setting, the unit will return
to receive mode and changes are applied.
6.2 Setting a Different Channel
When setting a different channel, this needs to be done on both PMR sets in order for you
to be able to communicate with the remote station.
1. Press the
button (5) once. The current channel number
will blink on the display.
2. Press the S or T button to set a different channel.
3. Press the PTT button (13) to confirm the setting.
16
English
Advanced Operation
SilverCrest PMR-1200
6.3 CTCSS/CDCSS code
The 3-digits CTCSS/CDCSS code is a tone frequency that the PMR will transmit. Two
stations that have been set to the same channel and to the same CTCSS/CDCSS code can
listen to each other. No other stations will be heard on the same channel, unless these
stations use the same CTCSS/CDCSS code. The PMR-1200 supports 38 analogue CTCSS
codes (1 to 38) and 83 digital CDCSS codes (39 to 121).
1. Press the
button (5) twice. The current CTCSS/CDCSS
code will blink on the display.
2. Press the S or T button to set a different code.
3. Press the PTT button (13) to confirm the setting.
•
•
•
Any receiver tuned to the same channel and using the same CTCSS/CDCSS
code can listen to your conversation.
To disable the CTCSS/CDCSS function, select the code “0”.
Using a CTCSS or CDCSS code does not protect communications from
being intercepted. Any radio transceiver or receiver tuned into the same
channel that is not using a CTCSS or CDCSS code will be able to listen to all
transmission on this channel.
6.4 Monitoring a Channel
You can search the current channel for any weak signals. To do this, use the Channel
monitoring function.
1. Press and hold the
2. Release the
button (9) to enable channel monitoring.
button (9) to stop channel monitoring.
6.5 Baby monitor
You can use your PMR set as a baby monitor. One of the transceivers will transmit a signal
whenever your baby is crying or another noise is detected in the room (VOX). This
transceiver will not receive any signals to avoid disturbing the baby’s sleep.
In order to be able to receive the signal of the baby transmitter, the second PMR must be
tuned to the same channel and the same CTCSS/CDCSS code (see pages 16 and 17).
In baby monitor mode, most transceiver functions are disabled (except button
lock, menu and power off/on). You must exit the baby monitor to gain access to
these functions again.
English
17
SilverCrest PMR-1200
Advanced Operation
How to enable the baby monitor:
1. Press the
button (5) three times. The current VOX
sensitivity will blink on the display. In addition, the BABY icon
(18) will display.
2. Press S to enable the baby monitor.
3. Press the S or T button to set a different sensitivity. You
can set sensitivity values between 1 (low) and 3 (high).
4. Press the PTT button (13) to confirm the setting.
How to disable the baby monitor:
1. Press the
button (5) three times. The current VOX
sensitivity will blink on the display. In addition, the BABY icon
(18) will display.
2. Press T to disable the baby monitor. The display will read
“OF”.
3. Press the PTT button (13) to confirm the setting.
6.6 Call Tone
The call tone is an audible signal that alerts other stations that you want to transmit a
message. The PMR-1200 supports 15 call tones.
Selecting the Call Tone
1.
2.
3.
4.
Press the
button (5) four times. The
icon will display.
Press the S or T button to set a different call tone.
Press the PTT button (13) to confirm the setting.
To disable the call tone, select “OF”.
Sending the Call Tone
1. Press
(7). The call tone will be sent over the current channel.
6.7 Voice-Controlled Send Function (VOX)
This function is similar to the hands-free feature of your mobile phone. The PMR will start
transmitting as soon as it detects your voice (or another noise). This allows you to send a
message without pressing the PTT button (13). Use of this function is not recommended
when you are located in a noisy or windy environment.
18
English
Advanced Operation
SilverCrest PMR-1200
1. Press the
button (5) five times. The current VOX
sensitivity will blink on the display. In addition, the VOX icon
(19) will display.
2. Press S to enable the VOX function.
3. Press the S or T button to set a different sensitivity. You
can set sensitivity values between 1 (low) and 3 (high).
Select “OF” to disable the VOX function.
4. Press the PTT button (13) to confirm the setting.
•
•
If you press the PTT button (13) while the VOX function is enabled, it will be
disabled.
If you insert the earphones plug into the earphones connector (see page 24)
while the VOX function is enabled, it will be disabled.
6.8 Squelch
The adjustable squelch function allows you to customize the reception sensitivity of your
PMR. Any signals stronger than the set level (trigger value) can be received, any signals
below the set level will be ignored. You can lower the trigger value to receive weaker
signals. The unit supports 4 different levels: level 1 is the lowest squelch level and is used
for receiving very weak signals. Level 4 is the most restrictive: you will only receive very
strong signals. Any interference caused by weaker stations will be dropped.
1. Press the
button (5) six times. The current squelch level
will blink on the display.
2. Press the S or T button to set a different level.
3. Press the PTT button (13) to confirm the setting.
When using a low level (high sensitivity) it is normal to hear some background
noise from time to time.
English
19
SilverCrest PMR-1200
Advanced Operation
6.9 Channel Scan
Channel scan will search all available channels for any active stations in a loop.
1. Press the
button (9) to start the channel scan. The
(29) will appear.
channel scan icon
2. If an active signal is detected on a channel, you can press
the PTT button (13) to cancel the channel scan and to
communicate on this channel: otherwise, the channel scan
will continue automatically after 5 seconds.
3. Press the S or T button to skip the found channel and
continue scanning.
4. Press the
button (9) again to stop the channel scan.
If you start the channel scan and have selected the CTCSS/CDCSS code “0”, all
transmitting stations will be found (with and without CTCSS code).
If you start the channel scan and have selected a CTCSS code between 1 and 38 or a
CDCSS code between 39 and 121, only transmitting stations with CTCSS/CDCSS code will
be found. Stations that do not transmit any CTCSS/CDCSS code will be ignored.
6.10 Dual Scan
Normally your PMR will receive one channel only (with or without CTCSS/CDCSS code).
The dual scan function allows the monitoring of a second channel with CTCSS/CDCSS
code. If a station is detected on the second channel, you can press the PTT button (13)
within the next 5 seconds to answer the received message.
How to enable dual scan:
1. Press the
button (5) seven times. The dual scan icon
will appear on the display.
2. Press the S or T button to set the second channel that you
want to monitor.
button to confirm the selected channel and to
3. Press the
display the CTCSS/CDCSS code selection.
4. Press the S or T button to set the CTCSS/CDCSS code.
5. Press the PTT button (13) to confirm the setting.
20
English
Advanced Operation
SilverCrest PMR-1200
How to disable dual scan:
1. Press the
button (5) seven times.
2. Press the S or T button until the display reads “OF”.
6.11 Off Timer (Auto Power Off)
If you have enable the Auto Power Off feature, the PMR will turn off automatically after the
set time.
1. Press the
button (5) eight times. The current power-off
delay time will blink on the display.
2. Press the S or T button to set a different delay.
3. Press the PTT button (13) to confirm the setting.
You can set a delay between 1 and 12 hours. For example, if you set “8” when starting your
work, the PMR will power off automatically at closing time. Or select “OF” to disable the
power-saving function.
6.12 Button Sound
Normally an acoustic signal can be heard each time you press a button.
1. Press the
button (5) nine times. The current button
sound setting will blink on the display.
2. Press the S or T button to enable (“ON”) or disable (“OF”)
the button sound.
3. Press the PTT button (13) to confirm the setting.
English
21
SilverCrest PMR-1200
Advanced Operation
6.13 Chronometer
Your PMR-1200 includes a chronometer function for time measurement (minutes:seconds).
1. Press the
button (5) ten times. The time counter will
appear on the display.
2. Press the S button to start the chronometer.
3. Press the S button again to pause the chronometer. The
counter will continue running in background. Press the S
button again to resume the chronometer.
4. While the chronometer is paused, press the T button to
reset the counter.
It is necessary to start the chronometer within 5 seconds after enabling it or after resetting
the counter, otherwise the unit will toggle back to receiving mode.
6.14 Roger Beep On/Off
If you release the PTT button (13) after transmitting your message, the unit will send a roger
beep to indicate the end of the transmission. If necessary, you can disable this roger beep.
1. Press the
button (5) eleven times. The current roger
beep setting will blink on the display.
2. Press the S or T button to enable (“ON”) or disable (“OF”)
the roger beep.
3. Press the PTT button (13) to confirm the setting.
6.15 Button Lock
The button lock helps you to avoid any device settings being changed when a button is
pressed accidentally. The button lock feature does not apply to the buttons
(14),
(7),
(9),
(12) nor the PTT button (13).
How to enable the button lock
1. Press and hold the
button (12) for 3 seconds. The
button lock icon (26) will appear on the display.
How to disable the button lock
button (12) again for 3 seconds. The
1. Press and hold the
button lock icon (26) will disappear.
22
English
Advanced Operation
SilverCrest PMR-1200
6.16 Display Backlight
The PMR display has a backlight to facilitate operating the device in darkness. The
backlight will switch on automatically when pressing any button except the PTT button (13)
button (7).
and the
The backlight will switch off automatically after 5 seconds.
6.17 After Using the Product
When you stop using your handheld transceivers you should recharge them in order to have
them fully read the next time you need them. To do this, proceed as described on page 11.
English
23
SilverCrest PMR-1200
Earphones Receptacle
7. Earphones Receptacle
You can use your PMR sets with the supplied earphones.
The earphones receptacle (4) is located behind a protective cover.
WARNING!
Before connecting the earphones, you must reduce the sound volume (see
page 14) otherwise you risk damaging your hearing due to the high
earphones level. We recommend that you start with the volume level set on
4 and increase it later if necessary.
1. To connect the earphones, open the rubber cover that protects the earphones
receptacle (4).
2. Insert the 2.5mm jack-type earphones plug into the earphones receptacle (4).
3. Fix the earphones cable to a piece of clothing by using the clip attached to the cable
and then insert the earpiece into your ear.
The silver PTT button on the earphones works in exactly the same way as the PTT button
(13) of your PMR. When using the PTT button of the earphones you must speak into the
microphone located on the back of the silver PTT button on the earphones cable.
Warning!
Do not connect any other headphones or earphones, otherwise you risk
seriously damaging your PMR.
Warning!
When using the earphones the IPX2 protection against vertically falling drops of
water with tilted enclosure is not guaranteed.
24
English
Troubleshooting
SilverCrest PMR-1200
8. Troubleshooting
You can solve the most common problems yourself by using the following table. If the
problem persists after checking the suggested solutions, please contact our Service Hotline
(see page 29). Do not attempt to repair the product by yourself.
Problem
Unable to power the PMR
on.
No transmission
Short range,
communications
interference
Reception interference
English
Solution
• Press and hold the On/Off button (14) for at least 2
seconds.
• Charge the battery pack of your PMR or insert charged
batteries. See page 9.
• Set both radio transceivers to the same channel and
optionally CTCSS/CDCSS code. See page 17.
• Press and hold the PTT button (13) fully down while
speaking.
• If there is interference in the transmission, switch to a
different channel. See page 16.
• The range depends on the environment. Any steel
constructions, concrete buildings or use of the unit in a
vehicle may reduce the range. If possible, try moving to a
place where you have free sight to the receiving station.
• Move away from any electromagnetic sources (highvoltage power lines, machines with electric motors, etc.).
• Set a higher squelch level. See page 19.
• Try to see if the communications quality is better on a
different channel. See page 16.
25
SilverCrest PMR-1200
Technical Specifications
9. Technical Specifications
Channels
Number of CTCSS codes
Number of CDCSS codes
Frequency range
Range
Power Supply
Transmission power
Modulation
Channel separation
Power adapter for charging
Cradle
Rechargeable battery
Earphones
Dimensions
Weight
Environment
IP standard*
Year of manufacture
8
38
83
446.00625 MHz - 446.09375 MHz
max. 8 km (open field)
NiMH battery pack or 3 optional AAA-sized batteries
<= 500 mW ERP (effective radiated power)
FM, F3E
12.5 kHz
DEE VAN ENTEPRISE CO., LTD, DSA-6E-12 EU 090020
(Europe) / DSC-6PFA-12 FUK 090020 (UK and Eire)
Input: 100-240V AC / 50/60Hz
Output: 9V DC / 200mA
LEXEL, KEBT-079-1
3.6 V, 600 mAh
Manufacturer: TARGA GmbH
Type: Earphones EP-1200
Connector: 2.5 mm jack-type
Handheld transceiver with antenna 58 x 156 x 29 mm
Charger cradle 119 x 42 x 66 mm
Plug-type power adapter 29 x 53 x 77 mm
Cable length of plug-type power adapter 1.50 m
Handheld transceiver with battery: 123 g
Handheld transceiver without battery: 90 g
Charger cradle: 78 g
Power adapter: 66 g
Operation: -20 °C to 55 °C, max. 85% RH
Storage -30 °C to 70 °C, max. 90% RH
IPX2 protection against vertically falling drops of water with
enclosure tilted 15°
(only for handheld transceivers and not for the power
adapter nor the charging cradle)
2010
* only met for operations without earphones
26
English
Technical Specifications
Frequency chart
SilverCrest PMR-1200
CTCSS code
Chan- Frequency
Code
nel
(MHz)
Frequency
Code Freq. (Hz) Code
(Hz)
Freq.
(Hz)
1
2
3
4
5
6
7
8
Disabled
67.0
71.9
74.4
77.0
79.7
82.5
85.4
88.5
91.5
131.8
136.5
141.3
146.2
151.4
156.7
162.2
167.9
173.8
179.9
446.00625
446.01875
446.03125
446.04375
446.05625
446.06875
446.08125
446.09375
CDCSS Codes
Code
Octal
39
23
40
25
41
26
42
31
43
32
44
43
45
47
56
51
47
54
48
65
49
71
50
72
51
73
52
74
53
114
54
115
55
116
English
0
1
2
3
4
5
6
7
8
9
Code
56
57
58
59
60
61
62
63
89
90
91
92
93
94
95
96
97
Octal
125
131
132
134
143
152
155
156
411
412
413
423
431
432
445
464
465
10
11
12
13
14
15
16
17
18
19
Code
98
99
100
101
102
103
104
64
65
66
67
68
69
70
71
72
73
94.8
97.4
100.0
103.5
107.2
110.9
114.8
118.8
123.0
127.3
Octal
466
503
506
516
532
546
565
162
165
172
174
205
223
226
243
244
245
Code
74
75
76
77
78
79
80
81
82
83
84
85
86
87
88
105
106
20
21
22
23
24
25
26
27
28
29
Octal
251
261
263
265
271
306
311
315
331
343
346
351
364
365
371
606
612
Code
107
108
109
110
111
112
113
114
115
116
117
118
119
120
121
Code
Freq.
(Hz)
30
31
32
33
34
35
36
37
38
186.2
192.8
203.5
210.7
218.1
225.7
233.6
241.8
250.3
Octal
624
627
631
632
654
662
664
703
712
723
731
732
734
743
754
27
SilverCrest PMR-1200
Disposal
10. Disposal of Old and Defective Devices and Packaging Material
The European Directive 2002/96/EC applies to this product. All electric and
electronic devices must be disposed of separately from household waste at
established bodies. This sign can be found in the battery compartment of the
handheld radio transceivers and on the bottom of the charger cradle.
Avoid hazards to the environment and dangers to your personal health by disposing of the
device and its packaging properly. For further information about proper disposal, contact
your local government, disposal bodies or the shop where you bought the device.
According to waste regulations, we are responsible for collecting any packaging materials
for our products whenever they do not carry the icon of a nationwide collection system (such
as the German "Grüne Punkt" ) and for taking care of their recycling and/or disposal. For
more information about product recycling, please contact our Service Hotline (see page 29).
We will inform you of public collection points or a collection company near you that will
dispose of the packaging material for free.
Batteries and Rechargeable Batteries
Old batteries and rechargeable batteries do not belong in with domestic waste.
They must be handed in to a collection point for old batteries.
28
English
Warranty Information
SilverCrest PMR-1200
11. Warranty Information
English
29
SilverCrest PMR-1200
30
Warranty Information
English
Warranty Information
SilverCrest PMR-1200
12.Declaration of Conformity
English
31
SilverCrest PMR-1200
32
Warranty Information
English
PMR Twintalker 2-Way Radio Set
0197
TARGA GmbH
Lange Wende 41
D-59494 Soest
www.silvercrest.cc
PMR Twintalker 2-Way Radio Set
User manual and service information
Mat-No: 1549764, 1549765
GB
6
PMR-1200