1
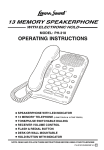
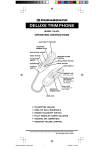
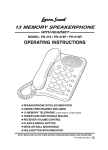
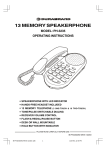
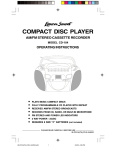
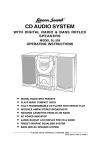
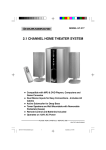
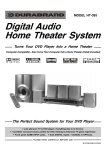
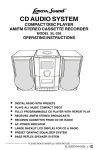
® 3 CD HOME STEREO AM/FM DUAL CASSETTE RECORDER WITH REMOTE CONTROL MODEL SL-6703 OPERATING INSTRUCTIONS PROGRAMMABLE CD PLAYER WITH REPEAT PLAY FLUORESCENT MULTI-COLOR VFD DISPLAY INCLUDES MULTI-FUNCTION REMOTE CONTROL DIGITAL KARAOKE SYSTEM RECEIVES AM/FM STEREO BROADCASTS EASY TO OPERATE CONTROLS RECORDS FROM CD, TAPE OR RADIO DELUXE DYNAMIC SPEAKER SYSTEMS PLEASE READ CAREFULLY BEFORE USE IB-SL6703(TA)-PRADO-E-091802 WARNING TO PREVENT FIRE OR SHOCK HAZARD, DO NOT USE THE PLUG WITH AN EXTENSION CORD, RECEPTACLE OR OTHER OUTLET UNLESS THE BLADES CAN BE FULLY INSERTED TO PREVENT BLADE EXPOSURE. TO PREVENT FIRE OR SHOCK HAZARD, DO NOT EXPOSE THIS APPLIANCE TO RAIN OR MOISTURE. WARNING RISK OF ELECTRIC SHOCK DO NOT OPEN The lightning flash with arrowhead symbol, within an equilateral triangle, is intended to alert the user to the presence of uninsulated dangerous voltage within the products enclosure that may be of sufficient magnitude to constitute a risk of electric shock to persons. WARNING: TO REDUCE THE RISK OF ELECTRIC SHOCK, DO NOT REMOVE COVER (OR BACK). NO USER SERVICEABLE PARTS INSIDE. REFER SERVICING TO QUALIFIED PERSONNEL. The exclamation point within an equilateral triangle is intended to alert the user to the presence of important operating and maintenance (servicing) instructions in SERVICE the literature accompanying the appliance. IMPORTANT SAFETY INSTRUCTIONS 1. 2. 3. 4. 5. 6. 7. 8. 9. 10. 11. 12. 13. 14. Read these instructions. Keep these instructions. Heed all warnings. Follow all instructions. Do not use this apparatus near water. Clean only with dry cloth. Do not block any ventilation openings, install in accordance with the manufacturers instructions. Do not install near any heat sources such as radiators, heat registers, stoves, or other apparatus (including amplifiers) that produce heat. Do not defeat the safety purpose of the polarized or grounding-type plug. A polarized plug has two blades with one wider than the other. A grounding type plug has two blades and a third grounding prong. The wide blade or the third prong are provided for your safety. If the provided plug does not fit into your outlet, consult an electrician for replacement of the obsolete outlet. Protect the power cord from being walked on or pinched particularly at plugs, convenience receptacles, and the point where they exit from the apparatus. Only use attachments/accessories specified by the manufacturer. Unplug this apparatus during lightening storms or when unused for long periods of time. Refer all servicing to qualified service personnel. Servicing is required when the apparatus has been damaged in any way, such as power-supply cord or plug is damaged, liquid has been spilled or objects have fallen into the apparatus, the apparatus has been exposed to rain or moisture, does not operate normally or has been dropped. This appliance shall not be exposed to dripping or splashing water and that no object filled with liquid such as vases shall be placed on the apparatus. 1 IB-SL6703(TA)-PRADO-E-091802 ADDITIONAL SAFETY INSTRUCTIONS 1. Power Sources - The appliance should be connected to a power supply only of the type described in the operating instructions or as marked on the appliance. 2. Wall or Ceiling Mounting - The appliance should not be mounted to a wall or ceiling. 3. Object and Liquid Entry - Care should be taken so that objects do not fall and liquids are not spilled into the enclosure through openings. 4. Servicing - The user should not attempt to service the appliance beyond that described in the operating instructions. All other servicing should be referred to qualified service personnel. 5. Do not connect FM antenna wire to any outdoor antenna. It is the intent of Lenoxx that this product be used in full compliance with the copyright laws of the United States and that prior permission be obtained from copyright owners whenever recording songs from the RADIO or CDs. Do not apply oil or petroleum products or solvents to any part of this set. CAUTION Use of controls or adjustments or performance of procedures other than those specified herein may result in hazardous radiation exposure. This compact disc player is classified as CLASS 1 LASER PRODUCT as stated on the bottom of the set. 2 IB-SL6703(TA)-PRADO-E-091802 CONNECTING THE AC POWER CORD Insert one end of the supplied AC power cord into the socket located at the back of the set, and the other end to the wall outlet. AC SOCKET TIP If the plug of the AC power cord does not match your outlet, do not force it. Reverse it and try again. The plugs are polarized and only fit one way into the wall outlet and back of the set. To a wall outlet ATTACHING THE SPEAKERS 1.Bring one of the speaker to the left side of the set. 2.Carefully unwind one piece of the speaker wire cord (included), and plug one red end into the left plug of Speaker Jack L (marked L), and the black end into the left Grounding Jack (marked G). 3.Repeat above steps 1 to 2 for the right side speaker. CONNECTING CD/AUX INPUT Simply connect the cables appropriate end (cable is not included) usually RCA JACKS to the CD/AUX INPUT of the set and the mini plug to the AUX OUT jack on your CD player. YOUR CD PLAYER TO AUX OUT JACK OPTIONAL CABLE (3.5mm) TO RCA JACKS 3 TO CD/AUX INPUT JACKS IB-SL6703(TA)-PRADO-E-091802 REMOTE CONTROL You can control the CD PLAYER with the provided REMOTE CONTROL (including the functions of POWER ON/OFF, MUTE, CONTINUOUS PLAY, DISC CHANGE, VOLUME control, CD REPEAT and PLAY features). NOTE: When you use the REMOTE CONTROL to operate the CD PLAYER, make sure the POWER switch on the main set is turned on, otherwise, the REMOTE CONTROL will have no functions to the set. 1 10 2 9 3 4 8 5 7 6 1. POWER ON/OFF 2. MUTE 3. CONTINUOUS PLAY 4. DISC CHANGE 5. REPEAT - ONE & ALL SONGS 6. VOLUME UP/DOWN 7. SKIP BACKWARD 8. SKIP FORWARD 9. STOP/PROGRAM 1 0 . PLAY/PAUSE NOTE: When you press the POWER ON/OFF switch to shut the set off, the VFD display will go out, and the STANDBY indicator on the main set will turn on. “A A A ” “A A A ” Slide the battery cover to remove. Insert 2 size AAA batteries correctly so that the + and - polarities match the polarity diagrams inside the battery compartment. NOTE: About half a year of normal operation can be expected when using the alkaline batteries. when the batteries are exhausted, the remote control will no longer operate the system. Replace both batteries with new ones. When the remote control is not to be used for a long time (2 months or more), remove the batteries to avoid possible damage that may be caused by battery leakage. Avoid keeping the remote control in extremely hot or humid locations. The remote controls operating distance is about 0.2m (8 inches) to 6m (20 feet ) away from the remote sensor. 4 IB-SL6703(TA)-PRADO-E-091802 PLAYING A CD 4 3&5 1 2 6 7 Connect the supplied AC power cord (see page 3). 1 2 Press the POWER switch, the VFD display will turn on. Slide the FUNCTION switch to CD position, the disc tray will be automatically set to DISC 1 position and read the disc on it, will show on the VFD display. 3 Open the CD DOOR by pressing the OPEN/CLOSE button and place the CD in the NO.1 disc compartment. The label side of the CD should face upward. 4 Press the DISC CHANGE button to revolve the tray clockwise. Place other disc(s) on the disk holder(s). 5 Close the CD DOOR by pushing the OPEN/ CLOSE button. The corressponding dics number indicator will be on and the display will show the corresponding dics number, such as , or . 6 Press the CD PLAY button. The player will play all the 3 discs continuously, will show steadily on the VFD. The corresponding disc indicator will flash, and the display will show the track number of current playing. 7 You may rotate the TONE control counterclockwise to intensify bass, and clockwise to intensify the treble. TIP: WILL SHOW IN THE DISPLAY IF THERE IS NO DISC IN THE CD COMPARTMENT OR IF THE DISC IS UPSIDE DOWN. 5 IB-SL6703(TA)-PRADO-E-091802 USE THESE BUTTONS FOR ADDITIONAL OPERATIONS DISC buttons DISC CHANGE TIP When CD play is paused, will flash and no music will play. FUNCTION SWITCH To Press or Adjust Adjust the volume VOLUME control Stop playback To resume play, press the PAUSE button again, will stop flashing and music will play. TIP If you bump the set or the table it is sitting on, during CD play, the music will stop or skip for a few seconds. This is normal for this type of player. STOP PLAY/PAUSE will flash during pause. Press again to resume play after pause. Pause playback Go to the next track FORWARDS Go back to the previous track BACKWARDS Locate a point in a song Change the discs TIP This set has an electronic volume control, you may raise or lower the volume by pressing the VOLUME UP and DOWM buttons. VOLUME CONTROL or Press and hold down while playing until you find the point. Press DISC CHANGE, or press the DISC button (DISC 1, DISC 2 or DISC 3) directly. Cancel 3 discs continuously Press playing function. on the REMOTE. Remove the CD Press OPEN/CLOSE (press STOP first). To turn off the sound instantly Press the MUTE button on the REMOTE. Turn off the power Press the POWER switch, the display will go off. 6 IB-SL6703(TA)-PRADO-E-091802 REPEAT PLAY PLAYING CD SONGS (TRACKS) OVER AND OVER You can play CD tracks over and over in normal or programmed play modes (see page 8). REPEAT POWER SWITCH FUNCTION SWITCH 1. 2. 3. 4. Press the POWER switch, the display will light up. Set the FUNCTION switch to CD position. Select the track by pressing or , and then press Press the CD REPEAT button. To repeat Press a single track (song) Press the REPEAT button once Display shows REP will flash. all the tracks (all songs) Press the REPEAT button twice programmed tracks . REP will be steady on During programmed play, press the REPEAT button twice REP is steady on To cancel Repeat Play Press the REPEAT button until the REP goes off. 7 IB-SL6703(TA)-PRADO-E-091802 PROGRAMMED CD PLAY SELECTING YOUR OWN MUSIC PLAYING ORDER You can make a program of up to 15 tracks to play in the order you want them to be played. NOTE: Programming is only done during stop mode. PROGRAM 1 During STOP mode, press the PROGRAM button. PRG. will flash in the display. 2 Press the SKIP/SEARCH buttons either or until the desired track shows in the display. 3 Press the PROGRAM button to confirm, PRG. will flash in the display. 4 Repeat steps 2&3 until all the desired tracks are programmed. 5 Press the PLAY button to start programmed play. , PRG. and the track number being played will show in the display. To change the current program Just create a new program following the programing procedure. To cancel Program Play Press the STOP button on the main set or STOP/PROGRAM button on the REMOTE control twice, PRG. will disappear from the display. 8 IB-SL6703(TA)-PRADO-E-091802 LISTENING TO THE RADIO 1 FM MODE 4 2 6 3 Connect the supplied AC power cord (see page 3). 1 2 3 4 5 6 Press the POWER switch, the VFD display will turn on. Set the FUNCTION switch to RADIO position. Set the BAND switch to the proper band position (AM or FM), and set the FM MODE switch to STEREO or MONO. Tune into the station you prefer using the TUNING control. Adjust for the clearest sound. This indicator will light up when receiving FM Stereo broadcasts. You may rotate the TONE control counterclockwise to intensify bass, and clockwise to intensify the treble. 9 IB-SL6703(TA)-PRADO-E-091802 USE THESE BUTTONS FOR ADDITIONAL OPERATIONS FM MODE FUNCTION TIP • If the FM broadcast is noisy, set the FM MODE switch from STEREO to MONO. set has an electronic volume control, you may raise or lower the volume by pressing the VOLUME UP and DOWN buttons. VOLUME To Press or Set Adjust the volume VOLUME control (UP or DOWN). Turn off the Radio Set the FUNCTION switch to TAPE position or press the POWER switch. • This To improve AM broadcast The AM antenna is magnetic bar within the reception system. Change position of the set for the best AM reception. To improve FM broadcast Unwrap and fully extend the FM antenna for the reception best FM reception. FM ANTENNA To turn off the sound instantly 10 Press the MUTE button on the REMOTE. IB-SL6703(TA)-PRADO-E-091802 PLAYING A TAPE 1 4 2 3 Connect the supplied AC power cord (see page 3). 1 Press the POWER switch, the VFD display will turn on. 2 Set the FUNCTION switch to TAPE position. STOP/EJECT 4 PLAY 5 AUTO STOP Press the STOP/EJECT button (DECK A or DECK B) to open the tape compartment and insert a recorded tape. Close the door. EM PTY REEL A 3 F U LL REEL IN S E R T T H IS W AY Press the PLAY button. The player turns on and starts playing. When the set finishes playing one side of the tape, the set will stop. To hear the other side of the tape, flip the tape over, then insert and press PLAY. 11 IB-SL6703(TA)-PRADO-E-091802 RELAY PLAY 1 5 2 4 3 Connect the supplied AC power cord (see page 3). To play tapes in DECK A and then DECK B, follow the steps below: 1 Press the POWER switch, the VFD display will turn on. 2 Set the FUNCTION switch to TAPE position. 3 Press the cassette PLAY button on DECK A, DECK A will play. PLAY 4 Press the cassette PAUSE button on DECK B. PAUSE 5 PLAY 6 Press the cassette PLAY button on DECK B. When DECK A finishes playing, DECK B will start playing automatically. When the tape finishes playing on DECK B, the set will stop. 12 IB-SL6703(TA)-PRADO-E-091802 USE THESE BUTTONS FOR CASSETTE TAPE OPERATIONS ADDITIONAL VOLUME CONTROL RECORD PLAY PAUSE PAUSE PLAY STOP/EJECT STOP/EJECT REWIND & FAST F. REWIND & FAST F. PHONES JACK To Press or Adjust Adjust the volume Press the VOLUME button ( UP or DOWN) Stop playback STOP/EJECT button Fast forward or rewind the tape FAST FORWARD REWIND button Pause playback PAUSE button Press again to resume play after pause. Eject the cassette STOP/EJECT button To enjoy the music without disturbing others (headphones are not included) Insert your headphone plug into the PHONES jack To shut power off Make sure cassette buttons are all up (stop) and POWER switch is off. or L button 13 IB-SL6703(TA)-PRADO-E-091802 RECORDING ON A TAPE 1 4 MICROPHONE JACK 5 3 2 Connect the supplied AC power cord (see page 3). 1 Press the POWER switch, the VFD display will turn on. 2 STOP/EJECT 3 Press the STOP/EJECT button (DECK B) to open the tape compartment and insert a blank tape. Select the program source (MW, FM, CD, or microphone) you want to record. OK NO To record from the CD player, set the FUNCTION switch to CD position, insert a CD and follow the steps to play a CD (see page 5). To record from a radio, set the FUNCTION switch to RADIO position, and tune into the station you want (see page 9). To record from the microphone, set the FUNCTION switch to the TAPE position, and plug the microphone (not included) into the MIC JACK. Speak into the microphone. To record from the DECK A, set the FUNCTION switch to the TAPE position, and follow the steps to play a TAPE (see page 11). 4 Press the RECORD button to start recording. (The PLAY button is depressed automatically.) RECORD 5 To hear what you recorded, set the FUNCTION switch to TAPE position, then press REWIND and PLAY. REWIND PLAY 14 IB-SL6703(TA)-PRADO-E-091802 USE THESE BUTTONS ADDITIONAL OPERATIONS FOR TIP • • To erase a recording, just start a new recording, and the old one is automatically replaced. see page 19 for notes on cassettes. DUBBING SPEED SWITCH STOP/EJECT PAUSE To Press or Set Stop recording STOP/EJECT button Pause recording PAUSE button Press the button again to resume recording. Adjust recording speed when copying tapes DUBBING SPEED switch from NORMAL to HIGH speed. Turn off the power Press the STOP/EJECT button and press the POWER switch, the VFD display will go off. 15 IB-SL6703(TA)-PRADO-E-091802 SINGING ALONG WITH KARAOKE FUNCTION MICROPHONE JACK 2 VOLUME Connect the supplied AC power cord (see page 3). 1 Insert microphone plug into the microphone jack. To avoid mic howling, lower the volume level setting first. NOTE: Microphone is not included, you may purchase a microphone where you bought this set. 2 To sing along with the CD player, set the FUNCTION switch to CD position, insert a KARAOKE CD disc and follow the steps to play a CD (see page 5). To sing along with the tape, set the FUNCTION switch to the TAPE position, insert a KARAOKE TAPE into deck A or B, and follow the steps to play a TAPE (see page 11). 3 Press the CD PLAY/PAUSE button on the CD player or press the PLAY button on deck A or B. PLAY 4 Adjust the volume controls (UP or DOWN) to achieve the best effect. 16 IB-SL6703(TA)-PRADO-E-091802 USE THESE OPERATIONS BUTTONS TONE FOR ADDITIONAL VOLUME CONTROL To Press or Adjust Adjust the MIC volume VOLUME control Adjust the CD or TAPE music volume VOLUME control Intensify bass Rotate the TONE control counterclockwise Intensify treble Rotate the TONE control clockwise TIP: If there is squealing or howling (feedback) noise during KARAOKE use, move the microphone away from the speakers or turn down the volume. 17 IB-SL6703(TA)-PRADO-E-091802 PRECAUTIONS On Safety On Operation the laser beam used in the CD If the set is brought directly from a As player section may be harmful to the cold to a warm location, or is placed eyes, do not attempt to disassemble the cabinet. Refer servicing to qualified personnel only. any solid object or liquid fall Should into the set, unplug the player, and have it checked by qualified personnel before operating it any further. On Placement not leave the set in a location Do near a heat source, or in a place in a very damp room, moisture may condense on the lens inside the CD player section. Should this occur, the set will not operate properly. In this case, remove the CD and wait about an hour for the moisture to evaporate. If the set has not been used for a long time, set it in the playback mode to warm it up for a few minutes before inserting a cassette. This set is designed to be played on a stable no vibration position. If you subject to direct sunlight, excessive dust or mechanical shock. bump the set during CD play, the music Do not place the set on an inclined or unstable place. This is normal for this type of player. will stop or skip for a few seconds. not place anything within 1 inch of Do the back of the cabinet. The ventilation holes must not be covered for the set to operate properly and prolong the life of its components. the set is left in a car parked in the Ifsun, be sure to choose a location in the car where the set will not be subjected to the direct rays of the sun. a strong magnet is used for the Since speakers, keep personal credit cards using magnetic coding or springwound watches away from the speakers to prevent possible damage from the magnets. 18 IB-SL6703(TA)-PRADO-E-091802 PRECAUTIONS (continued) Notes on Cassettes Notes on CDs playing, clean the CD with a Break off the cassette recording tabs Before from side A or B to prevent accidental cleaning cloth. Wipe the CD from the recording. center out. Side A not use solvents such as benzene, Do thinner, commercially available Tab for side B cleaners or anti-static spray intended for vinyl LPs. Do not expose the CD to direct sunlight or heat sources such as hot air ducts, nor leave it in a car parked in direct sunlight as there can be a considerable rise in temperature inside the car and result in a damaged CD. Do not stick paper or stickers on the CD, nor scratch the CD. After playing, store the CD in its case. If there is a scratch, dirt or fingerprints on the CD, it may cause a tracking error or skipping. Tab for side A record on a tape with its tab broken To off, cover the respective tab hole for side A or B with adhesive tape. of a cassette with more than 90 Use minutes, such as C-120 (120 19 minutes), is not recommended. The extreme thinness of this tape may damage this set. To reduce the chances of tape jamming or tangling, you should check that there are no loose layers of tape visible through the cassette center window. If any, tighten these loose layers of tape using a pencil before inserting the cassette into the set. IB-SL6703(TA)-PRADO-E-091802 MAINTENANCE Cleaning the Tape Heads Notes for Storing Wipe the heads, the pinch roller and Cassette Tapes the capstan with a cleaning swab slightly moistened with cleaning fluid or alcohol after every 10 hours of operation for optimum playback and recording quality. After cleaning, insert a tape when the areas cleaned are completely dry. COTTON SWAB ERASE HEAD 1. Do not put a tape near a magnetic field, such as a TV, or speaker. Magnetic fields may reduce the tape sensitivity or even erase the recording. 2. Do not store tape for any length of time in a hot, moist or dusty place. CAPSTAN PINCH ROLLER RECORD/PLAY BACK HEAD NOTE: In order to see and clean the head, you may have to press PLAY first. Cleaning the Cabinet Clean the cabinet, panel and controls with a soft cloth slightly moistened with water or a mild detergent solution. Do not use any type of abrasive pad, scouring powder, or solvent, such as alcohol or benzene. 20 IB-SL6703(TA)-PRADO-E-091802 TROUBLE SHOOTING Problem General The power is not on There is no sound VFD display does not light up CD player appears in the display even when a CD is in place CD does not play The sound drops out Radio CD does not play while radio may continue to play AM sound is weak or has poor quality FM is weak Tape player The RECORD button does not function/The tape does not play The tape does not erase completely The tape does not record The sound is weak/The sound quality is poor Cassette PLAY button pops up Tape jamming or tangling Remedy Connect the AC power cord to a wall outlet securely. sure the FUNCTION switch is at the right Make position as you want. the volume. Adjust the headphones when listening through Unplug speakers. the speaker cord connections. Check the MUTE button on the REMOTE to make sure Press the sound is not muted. the POWER switch, the VFD display only Press lights up when the AC power is ON. Insert the CD with the label side up. sure that the CD compartment is closed. Make the CDs with the label side up. Place the CDs. Clean out the CDs and leave the CD DOOR open Take for about an hour to dry moisture condensation. Make sure the FUNCTION switch is at CD position. the CDs, or replace it if the CDs are badly Clean damaged. Place the player in a location free from vibration. since the radio uses less power than the ItCDis normal player. Change the position of the set for better AM reception. and stretch out the FM ANTENNA for better Unwrap FM reception. Make sure the safety tab on the cassette is in place (see page 19). Make sure the FUNCTION switch is at TAPE position. Clean the erasing head (see page 20). Make sure the tape is inserted properly. Make sure the safety tab of the cassette is in place. Clean the heads, pinch roller and capstan (see page 20). tape has reached its end. Remove it, flip it to the The other side and re-insert. Use only better quality tapes. Do not use a cassette with more than 90 minutes. sure there are no loose layers of tape visible Make before inserting the cassette. 21 IB-SL6703(TA)-PRADO-E-091802 SPECIFICATION General Description Power source: AC 120V, 60Hz 28Watts DC 2 size AAA batteries for Remote Control (Alkaline batteries are recommended) Speakers (2 ways): and 2 - 5 4 ohm woofers 2 - 3 4 ohm tweeters with crossover Output power: 5.0W/channel Dimensions: Unit Width: 11 Depth: 18 15 / 16 Height: 12 13 / 16 Weight: 10LBs CD Section Plays disc type: Speaker Box Width: 8 1/ 8 Depth: 11 1 / 8 Height: 12 13 / 16 Weight: 3.3LBs Any normal CD used in portable players 760 - 800 NM Laser wavelength: 3 - spot error detection Tracking method: Frequency response: 50Hz - 15kHz +1/-2 dB 3.86 mm lens NOTE: This CD player will only play NORMAL music CDs (or CD-R CDs). This set will not play CDRW encoded discs. Tape Recorder Section Frequency response: Standard normal bias cassette tape, 70Hz - 10kHz Radio Section Frequency range: FM: 88 - 108 MHz AM: 530 - 1700 kHz LENOXX reserves the right to make design and specification changes for product improvement. PROTECT YOUR FINE FURNITURE! WE RECOMMEND A CLOTH OR OTHER PROTECTIVE MATERIAL BE PLACED UNDER THE SET WHEN PLACING IT ON SURFACE WITH A NATURAL OR LACQUER FINISH. 22 IB-SL6703(TA)-PRADO-E-091802 LIMITED WARRANTY We warrant this product to be free from defects in material and workmanship under normal use for a period of 90 days after purchase and we will repair it free of charge or replace it at no charge, should it become defective under this warranty, providing you submit proof of purchase (sales slip) with the set. During the initial 90 day period after original purchase, we will service or exchange, at no charge, the set that is returned to LENOXX ELECTRONICS CORP. After the initial 90 day period expires, and for a period of 12 months from original purchase, we will repair the unit covering any part(s) that need to be replaced at no charge, but will charge for the cost of labor, return postage paid by Lenoxx. This warranty does not apply to any products which have been subject to misuse, neglect or accident. This warranty does not cover broken cabinet. UNDER NO CIRCUMSTANCES WILL LENOXX ELECTRONICS CORP. BE LIABLE FOR ANY INCIDENTAL OR CONSEQUENTIAL DAMAGES. Some states do not allow the exclusion or limitation of incidental or consequential damages, so the above limitations or exclusions may not apply to you. This warranty gives you specific legal rights, and you may also have other rights which vary from state to state. The following charges apply to repairs beyond the warranty period: $50.00. Be sure to pack carefully and return postage paid insured together with your money order (personal checks will not be accepted) and sales receipt to : LENOXX ELECTRONICS CORP. 2 GERMAK DRIVE, CARTERET N.J. 07008 For customer service Dial 1-800-315-5885 (MONDAY - THURSDAY 9:00 AM - 5:00 PM, FRIDAY 9:00 AM - 1:00 PM EST) or Visit Our Website: http://www.lenoxx.com © 2002 LENOXX ELECTRONICS CORP. 2 GERMAK DRIVE CARTERET, N.J. 07008 MADE & PRINTED IN CHINA 23 IB-SL6703(TA)-PRADO-E-091802