1
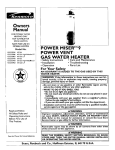
Owners
Manual
FOR POTABLEWATER
HEATING ONLY
NOT SUITABLEFOR
SPACEHEATING
NOT FOR USE IN
MOBILE HOMES
MODEL
153.332861
153.332870HA
153.332880
153.332890HA
153.332960
153.332970HA
153.332980
153.332990HA
NUMBERS:
40 Gal. L.R
40 Gal. High Altitude L.E
50 Gal. L.R
50 Gal. High Altitude L.E
40 Gal.
40 Gal. High Altitude
50 Gal.
50 Gal. High Altitude
THE
ECONOMIZER
TM6
POWER
VENT
GAS
WATER
HEATER
• Care and Maintenance
• Troubleshooting
• Parts List
• Safety Instructions
• Installation
• Operation
For Your Safety
AN ODORANT
IS ADDED
WATER HEATER
TO THE GAS USED BY THIS
WARNING: If the information in these instructions are not followed exactly, a
fire or explosionmay result, causingproperty damage, personalinjury or death.
- Do not store or use gasoline or other flammable vapors and liquids in the
vicinity of this or any other appliance.
-WHAT TO DO IF YOU SMELL GAS
• Do not try to light any appliance.
• Do not touch any electrical switch; do not use any phone in your building.
• Immediately call your gas supplier from a neighbor's phone. Follow the
gas suppliers instructions.
• If you cannot reach your gas supplier, call the fire department
-Installation and service must be performed by a qualified installer, service
agency or the gas supplier.
AWARNING
Caution:
Read and Follow
All Safety Rules and
Operating Instructions
Before First Use of
This Product,
Save this Manual for Future Reference.
Sears, Roebuck
Printed in the U.S.A. 0304
I
Improper installation, adjustment, alteration, service or maintenance can I
cause DEATH, SERIOUS BODILY INJURY, OR PROPERTY DAMAGE. Refer I
to this manual for assistance or consult the local Sears Service Center or gas
ut ty for further nformat on.
AWARNING
Flammable vapors may be drawn by air currents from other areas of the
structure to this appliance.
AWARNING
READ THE GENERAL SAFETY SECTION BEGINNING ON INSIDE
COVER AND THEN THIS ENTIRE MANUAL BEFORE INSTALLING OR
OPERATING THIS WATER HEATER.
and Co., Hoffman
www.sears.com
Estates,
IL 60179
U.S.A.
Part No. 184820_0OO
Safety
Precautions
AWARNING
AWARNING
J
Improper installation, adjustment, alteration, service
or maintenance can cause DEATH, SERIOUS BODILY
INJURY, OR PROPERTY DAMAGE. Refer to this manu- J
al for assistance or consult your local Sears Service
Center for further information.
At the time of manufacture this water heater was provided
with a combination temperature-pressure
relief valve certified by a nationally
recognized testing laboratory that
maintains periodic inspection of production of listed equipment or materials, as meeting the requirements for Relief
Valves and Automatic Gas Shutoff Devices for Hot Water
Supply Systems, and the current edition of ANSI Z21.22,
CSA 4.4 and the code requirements
of ASME. If replaced,
the valve must meet the requirements
of local codes, but
not less than a combination temperature
and pressure
relief valve certified as meeting the requirements for Relief
Valves and Automatic Gas Shutoff Devices for Hot Water
Supply Systems ANSI Z21.22 • CSA 4.4 by a nationally recognized testing laboratory that maintains periodic inspection of production of listed equipment or materials.
The valve must be marked with a maximum set pressure
not to exceed the marked hydrostatic working pressure of
the water heater (I 50 Ibs./sq. in.) and a discharge capacity
not less than the water heater input rate as shown on the
model rating plate. (Electric heaters, watts divided by
1000 x 3412 equal BTU/Hr. rate.)
Your local jurisdictional authority, while mandating the use of
a temperature-pressure
relief valve complying with ANSI
Z21.22, CSA 4.4 and ASME, may require a valve model different from the one furnished with the water heater.
Compliance with such local requirements
must be satisfied by the installer or end user of the water heater with a
locally prescribed
temperature-pressure
relief valve
installed in the designated opening in the water heater in
place of the factory furnished valve.
For safe operation of the water heater, the relief valve must
not be removed from it's designated opening or plugged.
The temperature-pressure
relief valve must be installed
directly into the fitting of the water heater designated for
the relief valve. Position the valve downward and provide
tubing so that any discharge will exit only within 6 inches
above, or at any distance below the structural floor. Be certain that no contact is made with any live electrical part.
The discharge opening must not be blocked or reduced in
size under any circumstances. Excessive length, over 30
feet, or use of more than four elbows can cause restriction
and reduce the discharge capacity of the valve.
No valve or other obstruction is to be placed between
the relief valve and the tank. Do not connect tubing
directly to discharge drain unless a 6" air gap is provided.
To prevent bodily injury, hazard to life, or property damage, the relief valve must be allowed to discharge water
in quantities should circumstances demand. If the discharge pipe is not connected to a drain or other suitable
means, the water flow may cause property damage.
The Discharge Pipe:
_Must
not be smaller in size than the outlet pipe size of
the valve, or have any reducing couplings or other
restrictions.
_Must not be plugged or blocked.
_Must be of material listed for hot water distribution.
_Must
be installed so as to allow complete drainage of
both the temperature-pressure
relief valve, and the
discharge pipe.
--Must terminate at an adequate drain.
_Must
not have any valve between the relief valve and
tank.
_;LWARNING
WATER HEATERS EQUIPPED
FOR ONE TYPE GAS
ONLY: This water heater is equipped for one type gas
only. Check the model rating plate near the gas control
valve for the correct gas. DO NOT USE THIS WATER
HEATER WITH
ANY GAS OTHER THAN THE ONE
SHOWN
ON THE MODEL RATING PLATE. Failure to
use the correct gas can cause problems which can result in
DEATH, SERIOUS
BODILY INJURY, OR PROPERTY
DAMAGE. If you have any questions or doubts consult
your gas supplier or local utility.
AWARNING
INSTALLATIONS
IN AREAS WHERE FLAMMABLE LIQUIDS (VAPORS)
ARE LIKELY TO BE PRESENT
OR
STORED (GARAGES, STORAGE, AND UTILITY AREAS,
ETC): Flammable
liquids (such as gasoline, solvents,
propane (LP) or butane, etc.), all of which emit flammable
vapors, may be improperly stored or used in such areas.
The gas water heater ignitor or main burner can ignite
such vapors. The resulting flashback and fire can cause
death or serious burns to anyone in the area, as well as
property damage.
If installation in such areas is your only option, then the
installation must be accomplished in a way that the ignitor
and main burner flame are elevated from the floor at least
18 inches. While
this may reduce the chances of
flammable vapors from a floor spill being ignited, gasoline
and other flammable substances should never be stored or
used in the same room or area containing a gas water
heater or other open flame or spark producing appliance.
NOTE: Flammable vapors may be drawn by air currents
from other areas of the structure to the appliance.
_WARNING
If this water heater will be used in beauty shops, barber
shops, cleaning establishments, or self-service laundries
with dry cleaning equipment, it is imperative that the
water heater or water heaters be installed so that combustion and ventilation air be taken from outside these areas.
Refer to the "Facts to Consider About the Location" section of this manual and also the current edition of the
National Fuel Gas Code, ANSI Z223.1, also referred to as
NFPA 54 for specifics provided concerning air required.
AWARNING
A fire can start if combustible materials such as clothing,
cleaningmaterials, or flammable liquidsare placedagainst
or next to the water heater.
2
Safety Precautions
(cont'd)
AWARNING
AWARNING
A gas water heater cannot operate properly without the
correct amount of air for combustion. Do not install in a
confined area such a closet, unless you provide air as
shown in the "Facts to Consider About the Location" section. Never obstruct the flow of ventilation air. If you have
any doubts or questions at all, call your gas company.
Failure to provide the proper amount of combustion air
can result in a fire or explosion and can cause DEATH
SERIOUS BODILY INJURY, OR PROPERTY DAMAGE.
This water heater must not be installed directly on carpeting. Carpeting must be protected by a metal or wood
panel beneath the appliance extending beyond the full
width and depth of the appliance by at least 3 inches
(76.2mm) in any direction, or if the appliance is installed
in an alcove or closet, the entire floor must be covered b
the panel. Failure to heed this warning may result in
fire hazard.
AWARNING
AWARNING
The power vent water heater requires its own (separate)
venting system. It cannot be connected to an existing vent
pipe or chimney. It must be terminated to the outdoors.
Failure to properly install the venting system can result in
asphyxiation, a fire or explosion and can cause DEATH, SERIOUS BODILY INJURY, OR PROPERTY DAMAGE.
HOTTER
WATER CAN SCALD: Water heaters are
intended to produce hot water. Water heated to a temperature which will satisfy clothes washing, dish washing,
and other sanitizing needs can scald and permanently
injure you upon contact. Some people are more likely to
be permanently injured by hot water than others. These
include the elderly, children, the infirm, or physically/men.
tally handicapped. If anyone using hot water in your home
fits into one of these groups or if there is a local code or
state law requiring a certain temperature water at the hot
water tap, then you must take special precautions. In addition to using the lowest possible temperature setting that
satisfies your hot water needs, a means such as a mixing
valve, should be used at the hot water taps used by these
people or at the water heater. Mixing valves are available
at plumbing supply or hardware stores. Follow manufacturers instructions for installation of the valves. Before
changing the factory setting on the thermostat, read the
"Temperature
Regulation" section in this manual.
AWARNING
No vent damper installation is compatible with this power
vented water heater design. No vent damper, whether it is
operated thermally or otherwise is to be installed on this
power vented water heater. Alteration of any part of the factory-furnished vent assembly could result in improper operation due to restriction
of flue gases, spillage of flue gases
and may cause carbon monoxide poisoning.
AWARNING
• The appliance and its individual shutoff valve must be disconnected from the gas supply piping system during any
pressure testing of the gas system at test pressures in
excess of I/2 pound per square inch (3.5kPa).
• The appliance must be isolated from the gas supply piping system by closing its individual manual shutoff valve
during any pressure testing of the gas supply piping system at test pressures equal or less than I/2 pound per
square inch (3.5kPa).
AWARNING
Soot build-up indicates a problem that requires correction before further use. Turn "off" gas to water heater
and leave "off" until repairs are made, because failure to
correct the cause of the sooting can result in a fire or
explosion causing DEATH, SERIOUS BODILY INJURY,
OR PROPERTY DAMAGE.
AWARNING
_,WARNING
Chemical vapor corrosion of the flue and vent system
may occur if air for combustion contains certain chemical
vapors. Spray can propellants, cleaning solvents, refrigerator and air conditioner
refrigerants,
swimming pool
chemicals, calcium and sodium chloride, waxes, bleach,
and process chemicals are typical compounds which are
potentially corrosive.
BEFORE OPERATING
[PROPANE (L.P.) GAS WATER
HEATERS]: Propane (LR) gas is heavier than air. Should
there be a leak in the system, the gas will settle near the
ground. Basements, crawl spaces, skirted areas under
mobile homes (even when ventilated), closets and areas
below ground level will serve as pockets for the accumulation of this gas. Before attempting to operate the water
heater or turning on a nearby electrical light switch, be
absolutely sure there is no accumulated gas in the area.
Search for odor of gas by sniffing at ground level in the
vicinity of the appliance. If odor is detected, follow steps
indicated at "For Your Safety" on the cover page of this
manual then leave the premises.
Obstructed or deteriorated vent systems may present
a
serioushealth risk or AWARNING
asphyxiation.
Safety Precautions continued on page 4.
3
Safety Precautions
(cont'd)
&WARNING
_,WARNING
Minimum clearances between the water heater and combustible construction are 0" at the sides and rear, 5" at the
front, and 0"from the vent pipe. Clearance from the top of
the jacket is 12". Provide 24 inches front clearance for servicing and adequate clearance between the jacket top &
ceiling for servicing the flue area. (See Figure I). Refer to
the label on the water heater adjacent to the gas control
valve for all clearances.
such termination must not be within 4 feet of any items
Vent
as gas meters, gas valves or other gas regulating
equipment.
CAUTION
WATER HEATERS EVENTUALLY
LEAK: Installation of
the water heater must be accomplished in such a manner
that if the tank or any connections should leak, the flow of
water will not cause damage to the structure. For this
reason, it is not advisable to install the water heater in an
attic or upper floor. When such locations cannot be avoided, a suitable drain pan should be installed under the
water heater. Such a drain pan must be not greater than
1½ inches deep, have a minimum
length and width of at
least 2 inches greater than the water heater dimensions
and must be piped to an adequate drain. The pan must
not restrict combustion air flow.
AWARNING
Flood damage to a water heater may not be readily visible
or immediately detectible. However, over a period of time
a flooded water heater will create dangerous conditions
which can cause DEATH, SERIOUS BODILY INJURY, OR
PROPERTY DAMAGE. Call a Sears Service Technician or
contractor
to replace a flooded water heater. Do not
attempt to repair the unit! It must be replaced!
_,WARNING
HYDROGEN GAS: Hydrogen gascan be produced in a hot
water system that has not been used for a long period of
time (generally two weeks or more). Hydrogen gas is
extremely flammable and explosive.To prevent the possibility of injury under these conditions,we recommend the
hot water faucet be opened for several minutes at the
kitchen sink before any electrical appliances which are
connected to the hot water system are used (such as a
dishwasher or washing machine). If hydrogen gas is present, there will probably be an unusualsoundsimilar to air
escaping through the pipe as the hot water faucet is
opened. There must be no smoking or open flame near
the faucet at the time it isopen.
_,WARNING
INSULATING JACKETS: When installingan external water
heater insulationjacket on a gaswater heater:
• DO NOT cover the temperature-pressurerelief valve.
• DO NOT put insulationover any part of the top of the gas
water heater.
• DO NOT put insulationover the gascontrol valveor gas
control valve/burner cover, or any access areas to the
burner.
• DO NOT let insulationaroundthe gaswater heater to get
within 8 inchesof the floor (air must get to the burner).
• DO NOT remove operating instructions,and safety related warning labels and materials affixed to the water
heater.
• DO obtain new warning and instructionlabelsfrom Sears
for placement on the jacket directly over the existing
labels.
Failure to heed this will result in the possibilityof a fire or
explosion.
4
J
Table of Contents
ec_L__oa,
cty Precautions ................................................................................................
.2-4
Table of Contents ................................................................................................
5
Customer Responsibilities .......................................................................................
.6
>d:cmgPn%atic°}ao
e ::::::::::::::::::
Materials Needed .....................................................................................................................................................................
Basic 2bols ...............................................................................................................................................................................
Installation
Instructions
27
27
.................................................................................................
8-27
Removing the Old Water Heater. ............................................................................................................................................
.8
Facts m Consider About the Location ..................................................................................................................................
9,10
Combustion Air and Ventilation ........................................................................................................................................
10,11
Venting Clearances ........................................................................................................................................................
10,11
Combustion Air and Ventilation for Appliances in Unconfined Spaces ...................................................................................
12
Combustion Air and Ventilation for Appliances in Confined Spaces .......................................................................................
12
Water Piping ...........................................................................................................................................................................
13
"l_mpemture-Pressure Relief Valve...........................................................................................................................................
14
Filling the Water Hearer ..........................................................................................................................................................
15
Wiring ...............................................................................................................................................................................
15,16
Venring. .............................................................................................................................................................................
17-23
Gas Piping .........................................................................................................................................................................
2324
Installation Checklist ..............................................................................................................................................................
25
_gpertat!n.g....!ns.t.ruc.t!_n.s..:Z_:ZZ:::::ZZ_::::::::ZZ::::::::_ZZ::::::::Z::::::
_I_mpemture Regulation .........................................................................................................................................................
Ser_vi_ceiand.lAd
229
) =============================
:::::::::::::::
::::::::::
::::::::
::::::::::::::::::::
::::::::::::::::::
::::::::::::::::::::::
..:!!:33a
Venting SystemInspection ......................................................................................................................................................30
Burner Inspection ...................................................................................................................................................................30
Burner Cleaning .....................................................................................................................................................................30
Aim& Rod Inspection ............................................................................................................................................................30
"lhnperature-Pressure Relief Valve Operation .........................................................................................................................
.31
Draining ................................................................................................................................................................................
.31
Drain Valve Washer Replacement ..........................................................................................................................................
.31
Housekeeping ........................................................................................................................................................................
.31
Service ...................................................................................................................................................................................
.31
Troubleshooting Guide .......................................................................................
32-38
Start Up Conditions ............................................................................................................................................................
Thermal Expansion ................................................................................................................................................................
Strange Stun& ......................................................................................................................................................................
Condensation .......................................................................................................................................................................
Smoke/Odor ..........................................................................................................................................................................
Operational Conditions .......................................................................................................................................................
Smelly Water ..........................................................................................................................................................................
"Air" in Hot Water Faucets ...................................................................................................................................................
Venting Manual Reset Switch ...............................................................................................................................................
High "Ihnperature Limit Switch ...........................................................................................................................................
Not Enough or No Hot Water ..............................................................................................................................................
Water Is _Ibo Hot ...................................................................................................................................................................
Leakage Checkpoints ...............................................................................................................................................................
Thermostat and Gas Supply Check ..........................................................................................................................................
Systems Check .....................................................................................................................................................................
32,33
.32
.32
.33
.33
33,34
.33
.33
.34
.34
.34
.34
.35
.36
37,38
Parts Order Lisa ...................................................................................................
40-43
Customer
•-rl
lnanK
l
Responsibilities
_r
xou for purchasing a Sears water heater. Properly
installed and maintained, it should give you years of trouble free service. If you should decide that you want the new water heater professionally installed by Sears call the local Sears Service Center or any
Sears store. They will arrange for prompt, quality installation by Sears
authorized contractors.
Abbreviations Found In This Instruction Manual
CSA - Canadian Standards Association
ANSI - American National Standards Institute
NFPA - National Fire Protection Association
•
AWARNING
This gas-fired water heater is design certified by CSA
INTERNATIONAL
under
American
National
Standard/CSA
Standard for Gas Water Heaters ANS
Z21.10.1 ° CSA 4.1 (current edition). The installation
must conform with this manual,
Local Codes and
with the current
edition of the National
Fuel Gas
Code, ANSI Z223.1.
This publication
is available from your local government or public library, gas company, or by writing
NFPA, I Batterymarch
Park, Quincy, MA 02269.
•
•
•
• Read the "Safety Precautions" section, pages 2 and 3 of this
manual first and then the entire manual carefully. If you don't
follow the sai?ty rules, the water heater will not operate properly. It could cause DEATH, SERIOUS BODILY INJURY
AND/OR PROPERTY DAMAGE.
Product
•
This manual contains instructions for the installation, operation, and maintenance of the gas-fired water heater. It also
contains warnings through out the manual that you must read
and be aware o£ All warnings and all instructions are essential
to the proper operation of the water heater and your safety.
Since we cannot put everythingon the first few pages, READ
THE ENTIRE MANUAL BEFORE ATTEMPTING TO
INSTALL OR OPERATE THE WATER HEATER.
The installation must confbrm with the instructions in this
manual; gas company rules; and Local Codes, or in the
absence of Local Codes, with the current edition of the
National Fuel Gas code, ANSI Z223.1, also referred to as
NFPA 54. This publication is available from your local government or public library or gas company or by writing
NFPA, 1 Batterymarch Park, Quincy, MA 02269.
If after reading this manual you have any questions or do not
understand any portion of the instructions, call the Sears
Service Center.
Carefully plan the place where you are going to put the water
heater. Correct combustion, vent action, and vent pipe installation are very important in preventing death from possible
carbon monoxide poisoning and fires.
Examine the location to ensure the water heater complies with
the "Locating the New Water Heater" section in this manual.
For California installation this water heater must be braced,
anchored, or strapped to avoid falling or moving during an
earthquake. See instructions for correct installation procedures. Instructions may be obtained from your local dealer,
wholesaler, public utilities or California Office of the State
Architect, 400 P Street, Sacramento, CA 95814.
Complies with SCAQMD rule #1121 and districts having
equivalent NOx requirements.
Specifications
MINIMUM
VENT
PIPE*
40,000
RECOVERY
RATE GALS.
PER HOUR
@ 90°F RISE
42.0
3"
DIAMETER
18"
40,000
42.0
3"
18"
59/"
PROPANE
40,000
41.5
3"
20"
60"
PROPANE
40,000
41.5
3"
20"
60"
153.332960
40
NKFURAL
40,000
42.0
3"
18"
59/"
153.332970HA
40
NKFURAL
40,000
42.0
3"
18"
59/"
153.332980
50
NKFURAL
40,000
41.5
3"
20"
60"
153.332990HA
50
NKFURAL
40,000
41.5
3"
20"
60"
153.332861
40
TYPE
OF
GAS
PROPANE
153.332870HA
40
PROPANE
153.332880
50
153.332890HA
50
MODEL NUMBER
TANK
CAPACITY
IN GAIA.ONS
B.ZU.
RATE
* Limited usage of 2" vent pipe - see "Venting" on pages 17-23.
6
DIMENSIONS IN INCHES
HEIGHT TO
JACKET
TOP
59/"
Materials
Materials
and Basic Tools Needed
Needed
"Ib simplify the installation Sears has available the installation
parts shown below. You may or may not need all of these materials, depending on your type of installation.
WATER HEATER STAND 24"x24"x I 8"
FOR USE WITH WATER HEATERS
INSTALLED IN RESIDENTIAL
GARAGES HAVING A DIAMETER 24"
OR LESS AND A RATED CAPACITY 75
GALLONS OR LESS
EXPANSION
TANKS FOR
THERMAL EXPANSION
CONDITIONS
AVAILABLE IN
2 GALLON AND 5 GALLON
CAPACITY THROUGH
LOCAL SEARS STORE OR
SERVICE CENTERS
WATER HEATER INSTALLATION
KIT WITH FLEXIBLE
CONNECTORS
FOR 3/4" OR I/2"
THREADED OR COPPER
PLUMBING AND FLEXIBLE GAS
CONNECTOR
WITH FITTINGS
DRAIN PANS ARE AVAILABLE IN 20",
22", 24" AND 28" DIAMETERS. SELECT A
DRAIN PAN THAT IS AT LEAST 2"
LARGER THAN THE DIAMETER OF THE
WATER HEATER.
Basic Tools
You may or may not need all of these tools, depending on your
type of installation. These tools can be purchased at your local
Sears store.
•
•
•
•
•
•
•
ADDITIONAL
TOOLS NEEDED
WHEN
SWEAT SOLDERING
• Tubing Cutters or Hacksaw
• Propane Torch
• Soft_ Solder
• Solder Flux
• EmeryCIoth
• Wire Brushes
Pipe Wrenches
(2) 14"
Screwdriver
Tin Snips
6 Foot Tape or Folding Rule
Garden Hose
Drill
Pipe dope or Teflon Tape
HACKSAW
GARDEN
HOSE
6 FOOT TAPE
SLOT-HEAD
SCREWDRIVER
3/4" WIRE
PIPE
WRENCH
BRUSH
1/2" WIRE BRUSH
PHILLIPS
SCREWDRIVER
tP
PROPANE
TORCH
TIN SNIPS
ROLL OF LEAD FREE
SOFT SOLDER
ROLL OF TEFLON TAPE
(USE ONLY ON WATER
CONNECTIONS)
PIPE DOPE (SQUEEZE TUBE)
(USE FOR WATER AND
GAS CONNECTIONS)
DRILL
ROLL OF EMERY
CLOTH
7
SOLDER FLUX
TUBING
CUTTER
Installation
Removing
Q_Iilrn
Instructions
the Old Water
Heater
"OFF" the gas supply to the water heater.
Disconnect the vent pipe from the draft hood where
they connect to the water heater. In most installations
the vent pipe can be lifted off"after any screw or other
attached devices are removed. Dispose of the draft
hood. The new water heater has the draft hood which
must be used for proper operation.
_WARNING
If the main gas line shutoff serving all gas appliances is I
used, also shut "off" the gas at each appliance. Leave all
gasappliancesshut "off" until the water heater installation
iscomplete.
Q
®
©
Turn "OFF" the water to the water
heater. Some installations require that
the water be turned off to the entire
house.
a.
If you have copper piping to the water
heater, the two copper water pipes can
be cut with a hacksaw approximately
four inches away from where they connect to the water heater. This willavoid
cutting
off the pipes too short.
Additional cuts can be made later if necessary. Disconnect the temperature-pressure relief valve drain line. When the
water heater is drained, disconnect the
hose from the drain valve. Close the
drain valve. The water heater is now
completely disconnected and ready to be
removed.
©
Check again to make sure the gas supply
is "OFF" to the water heater. Then disconnect the gas supply connection from
the gas control valve.
Attach a hose to the water heater drain
valve and put the other end in a floor
drain or outdoors. Open the water heater
drain valve. Open a nearby hot water
faucet which will relieve pressure in the
water heater and speed draining.
AWARNING
I
The water passingout of the drain valve may be extremely I
hot. To avoid being scalded,make sure all connectionsare
tight and that the water flow is directed away from any
person.
Qb.
If you have galvanized pipe to the water
heater, loosen the two galvanized pipes
with a pipe wrench at the union in each
line. Also disconnect the piping remaining to the water heater. These pieces
should be saved since they may be needed when reconnecting the new water
heater. Disconnect the temperature-pressure relief valve drain llne. When the
water heater is drained, disconnect the
hose from the drain valve. Close the
drain valve. The water heater is now
completely disconnected and ready to be
removed.
_, CAUTION
J
Mineral buildupor sediment may haveaccumulated in the
old water heater. This causesthe water heater to be much J
heavier than normal and this residue, if spilled out, could
causestaining.
Installation
Instructions
(cont'd)
Facts to Consider About the
Location
You should carefully choose an indoor location for the new water
heater, because the placement is a very important consideration
for the safety of the occupants in the building and for the most
economical use of the appliance. This water heater is not for
use in mobile homes or outdoor installation.
CAUTION
WATER HEATERS EVENTUALLY LEAK: Installation of the
water heater must be accomplished in such a manner that if
the tank or any connections should leak, the flow of water will
not cause damage to the structure. For this reason, it is not
advisable to install the water heater in an attic or upper floor.
When such locations cannot be avoided, a suitable drain pan
should be installed under the water heater. Such a drain pan
must be not greater than 1'/2 inches deep, have a minimum
length and width of at least 2 inches greater than the water
heater dimensions and must be piped to an adequate drain.
The pan must not restrict combustion air flow.
Whether replacing an old water heater or putting the water
heater in a new location, the following critical points must be
observed.
1. The location selected should be indoors as close as practical
to the vent termination point, and as centralized with the
water piping system as possible. The water heater, as all water
heaters, will eventually leak. Do not install without adequate
drainage provisions where water flow will cause damage.
6. The location selection must provide adequate clearances for
servicing and proper operation of the water heater.
2. ALL MODELS - If vented through an outside wall or
through the roof, the 3" vent piping cannot exceed a total of
115 feet (50 feet if optional 2" vent piping is used), including
vertical and horizontal runs with one 90 ° elbow. If more
elbows are required, the venting distance must be reduced 5
feet for every 90 ° elbow. See pages 19, 20 and 23 for vent
charts.
_WARNING
INSTALLATIONS
IN AREAS WHERE FLAMMABLE LIQUIDS (VAPORS) ARE LIKELY TO BE PRESENT OR STORED
(GARAGES,
STORAGE, AND UTILITY
AREAS, ETC):
Flammable liquids (such as gasoline, solvents, propane (LP) or
butane, etc.), all of which emit flammable vapors, may be
improperly stored or used in such areas. The gas water heater
ignitor or main burner can ignite such vapors. The resulting
flashback and fire can cause death or serious burns to anyone
in the area, as well as property damage.
If installation in such areas is your only option, then the installation must be accomplished in a way that the ignitor and main
burner flame are elevated from the floor at least 18 inches.
While this may reduce the chances of flammable vapors from
a floor spill being ignited, gasoline and other flammable substances should never be stored or used in the same room or
area containing a gas water heater or other open flame or
spark producing appliance.
Also, the water heater must be located andlor protected so it
is not subject to physical damage by a moving vehicle.
NOTE: Flammable vapors may be drawn by air currents from
other areas of the structure to the appliance.
3. Vent piping cannot slope downward and horizontal runs
require a minimum V_"rise per five feet. All horizontal runs
require adequate support at 3½ foot intervals and vertical
runs supported at 5 foot intervals.
4.
The water heater requires its own (separate) venting system.
It cannot be connected to an existing vent pipe or chimney.
It must terminate to the outdoors. Whenever possible terminate the vent on the leaward side of the building if vented
through an outside wall. NOTE: Condensation
may be created, at times, as the combustion
gases exit the vent cap
and discoloration
of surfaces in proximity to the vent cap
may occur.
_,WARNING
The power vent water heater requires its own (separate) venting system. It cannot be connected to an existing vent pipe or
chimney. It must be terminated to the outdoors. Failure to
properly install the venting system can result in asphyxiation,
a fire or explosion and can cause DEATH, SERIOUS BODILY
INJURY, OR PROPERTY DAMAGE.
&WARNING
Propellants of aerosol sprays and volatile compounds,
(cleaners, chlorine based chemicals, refrigerants, etc.) in
addition to being highly flammable in many cases, will also
change to corrosive hydrochloric acid when exposed to the
combustion products of the water heater. The results can
be hazardous, and also cause product failure.
5. The water heater comes equipped with a 7 foot power cord
which can be used to connect
to a 110/120 volt power
source if (1) local codes allow, and (2) there is a three prong
receptacle available.
&WARNING
I
Do not use an extension cord. If there is not a suitable receptacle and/or local codes prohibit use of a power cord, field
w r ng must be prov ded.
9
Installation
Instructions
Combustion Air and Ventilation
Facts to Consider About the
Location (cont'd)
When determining the installation location for a power vent
water heater, snow accumulation and drifting should be considered in areas where applicable.
AWARNING
VENTING
This water heater must not be installeddirectly on carpeting.
Carpeting must be protected by a metal or wood panel
beneaththe applianceextendingbeyond the full width and
depth of the applianceby at least 3 inches(76.2mm) in an)
direction,or if the applianceisinstalledin an alcoveor closet
the entire floor must be coveredby the panel. Failureto hee¢
this warningmay result in a fire hazard.
CLEARANCES
• 0" clearance for 3" (and optional 2") PVC, ABS or CPVC
Schedule 40 vent piping from combustible surfaces.
• 12" minimum from the ground, 9" ceiling overhangs. Figure 2.
• The Power Vent outlet terminal shall terminate at least 36"
above any forced air inlet located within 10 feet. Figure 3a.
• The Power Vent outlet terminal shall terminate at least 4 feet
below, 4 feet horizontally from or 1 foot above any door, window or gravity air inlet into the building. Figure 3a.
&WARNING
Minimum clearances between the water heater and combustible construction are 0" at the sides and rear, 5" at the
front, and 0" from the vent pipe. Clearance from the top of
the jacket is 12". Provide 24 inches front clearance for servicing and adequate clearance between the jacket top & ceiling
for servicing the flue area. (See Figure I). Refer to the label
on the water heater adjacent to the gas control valve for all
clearances.
• 18" minimum in all directions from any obstruction that may
interf?re. Figure 3b.
• 18" minimum from other natural draft (gravity) direct vent,
power vent or power direct vent appliance inlet and/or outlet
vent(s) when directly above or 135° to either side of center line.
Figure 3c
a 24" minimum from any appliance inlet and/or outlet vents when
directly below or 45 ° to either side of center line. Figure 3c.
12" MAX
• The location selection must provide clearances for servicing
and proper operation of the water heater. Figure 4.
V N[(A[((}N
)_
AIR
NIN 3_
TOP VIEW
OF CL{}SET
WTI OUT DOOR
_2" MAX.
Figure
(cont'd)
• Vent termination must not be within 4 feet of any items such
as gas meters, gas valves or other gas regulating equipment.
-[_" MIN.
.')_ ViEW
OF (lOSE[
WI]H D{){>}i
• The venting system must be installed in a manner which
allows inspection of the installation of the venting pipes and
joints as well as periodic inspection after installation as
required by ANSI Standards.
I ]
AIR [>LCI
&WARNING
_, WARNING
Vent termination
A gas water heater cannot operate properly without the correct amount of air for combustion. Do not install in a confined area such a closet, unless you provide air as shown in
the "Facts to Consider About the Location" section. Never
obstruct the flow of ventilation air. If you have any doubts or
questions at all, call your gas company. Failure to provide the
proper amount of combustion air can result in a fire or explosion and can cause DEATH, SERIOUS BODILY INJURY, OR
PROPERTY DAMAGE.
gas meters,
J
must not be within 4 feet of any items such as
gas valves or other gas regulating
equipment.
Failureto haverequired clearancesbetweenwater
& WARNING
combustiblematerialwill
result in a fire hazard. heater and
_,WARNING
If this water heater will be used in beauty shops, barber
shops, cleaning establishments, or self-service laundries
with dry cleaning equipment, it is imperative that the
water heater or water heaters be installed so that combustion and ventilation air be taken from outside these areas.
Refer to the "Facts to Consider About the Location" section of this manual and also the current edition of the
National Fuel Gas Code, ANSI Z223.1, also referred to as
NFPA 54 for specifics provided concerning air required.
Figure
10
2 1
Installation
Instructions
(cont'd)
Venting Through
Roof-
Clearances
• 0' clearance for Y' (or opt'onal 2") PVC, ABS, or CPVC Schedule
40 piping from combustiblesurfaces.
• "The location selection must provide clearances for servicing and
proper operation of the water heater• Figure 4.
•LESSTHAN
120"
• "The Power Vent outlet terminal shall terminate at least 18" above the
roof surface. Figure 5.
POWER VENT J
TERMINAL
12"rain.
FORCED AIR
INLET
• The venting system must be installed in a manner which allows
inspection of the installation of the venting pipes and joints as
well as periodic inspection aiier installation as required by ANSI
Standards.
Figure 3a I
45° VENT CAP
VENT TERMINAL
f
18" TO WALL OR OTHER
J_lS"
MIN. _
OBSTRUCTIONS
THAT
MAY INTERFERE WFTH
VENTING.
VENT TERMINAL
CORNER OF BUILDING
Figure 3b I
POWER VENTTERMINAL
--
_js
_
_
24"
N
-- ".
,
/
_/
DIRECT
VENT,
POWER
VENT
OR POWER D,RECT VENT
APPDANCEINLETAND/OR
_J_!--
Figure
Figure 3c]
MUST MAINTAIN
ADEQUATE SERVICE
Figure
4 ]
....
"
AVAILABLE FOR VENT
PIPEINSTALLATION.
11
5 ]
90° STREET ELL
Installation
Instructions
(cont'd)
Combustion
Air and Ventilation
for Appliances Located in
Unconfined Spaces
Unconfined Space is a space whose volume is not less than 50 cubic
feet per 1,000 Btu per hour of the aggregateinput rating of all appliances installed in that space. Rooms communicating directly witll the
space in which tile appliances are installed, through openings not furnished with doors, are considered a part of the unconfined space.
In unconfined spaces in buildings, infiltration may be adequate to
provide air for combustion, ventilation and dilution of flue gases.
However, in buildings of tight construction (for example, weather
stripping, heavilyinsulated, caulked,vapor barrier, etc.), additional air
may need to be provided using the methods described in Combustion
Air and Ventilation for AppliancesLocated in Confined Spaces.
1. When directly communicating with the outdoors, each opening
shall have a minimum free area of 1 square inch per 4,000 BTU
per hour of total input rating of all equipment in the enclosure.
(See Figm'e 7.)
2. When communicating with the outdoors through vertical ducts,
each opening shall have a minimum free area of 1 square inch
per 4,000 BTU per hour of total input rating of all equipment
in the enclosure. (See Figure 8.)
Combustion Air and Ventilation
for Appliances Located in
Confined Spaces
Confined Space is a space whose volume is less than 50 cubic feet per
1,000 Btu per hour of the aggregate input rating of all appliances
installed in that space.
a. ALL AIR FROM INSIDE BUILDINGS:
(See Page 10 Figure 1, and Figure 6 below)
"Ille confined space shall be provided with two permanent openings
communicating directly with an additional room(s) of sufficient
volume so that the combined volume of all spaces meets the criteria
lbr an unconfined space. "Ille total input of all gas utilization equipment installed in the combined space shall be considered in making
this determination. Each opening shall have a mininmm flee area of
one square inch per 1,000 BTU per hour of the total input rating of
all gas utilization equipment in the confined space, but not less than
100 square inches. One opening shall commence within 12 inches
of the top and one commencing within 12 inches of the bottom of
the endosurc.
I Figure 8 ]
3. When communicating with the outdoors through horizontal
ducts, each openingshall have a minimum free area of 1 square
inch per 2,000 BTU per hour of total input rating of all equipment in the enclosure. (See Figure 9.)
VENT THROUGH
Figure 9]
4. When ducts are used, they shall be of the same cross-sectional area
as the flee area of the openings to which they connect. The minimum short side dimension of rectangular air ducts shall not be
less than 3 inches. (See Figure 9.)
Figure 6 ]
b. ALL AIR FROM OUTDOORS:
(see Figures 7-9)
The confined space shall be provided with two permanent openings,
one commencing within 12 inches of the top and one commencing
within 12 inches from tile bottom of the enclosure. The openings
shall communicate directly, or by ducts, with the outdoors or spaces
(crawl or attic) that freely communicate with the outdoors.
VENTILATION LOUVERS_
(each end of attic)
5. Louvers and Grilles: In calculating flee area, consideration shall be
given to the blocking effect of louvers, grilles or screens protecting openings. Screens used shall not be smaller than ¼ inch mesh.
If the flee area through a design of louver or grille is known, it
should be used in calculating the size opening required to provide
the free area specified. If the design and flee area is not known, it
may be assumed that wood louvers will be 20-25 percent flee area
and metal louvers and grilles will have 60-75 percent free area.
Louvers and grilles shall be fixed in the open position or interlocked with the equipment so that they are opened automatically
during equipment operation.
VENT THROUGH
2
ROOF
VENT TO
OUTDOORS
Figure
6. Special Conditions
Created by Mechanical
Exhausting
or
Fireplaces: Operation of exhaust fans, ventilation systems, clothes
dryers or fireplaces may create conditions requiring special attention to avoid unsatisfactory operation of installed gas utilization
equipment.
7 ]
VENTILATION
LOUVERS
12
Installation
Water
Instructions
(cont'd)
Lookat the topcoverofrhe waterhearer.The hotwateroutletis markedhot.
Put twoor threeturnsofteflonrapearoundrilethreadedend ofthethreadedto-sweatcouplingand aroundbothendsofthe_" threadednipple.Usingtlexihieconnectors,
connectthehotwaterpipeto thehotwateroudetoll thewater
heater.
Piping
*A WARNING
HOTTER WATER CAN SCALD: Water heaters are intended to
_roduce hot water. Water heated to a temperature which will
satisfyclothes washing,dish washing,and other sanitizing needs
can scaldand permanently injure you upon contact. Some petfie are more likely to be permanently injured by hot water than
others. These include the elderly, children, the infirm, or physb
cally/mentally handicapped. If anyone using hot water in your
home fits into one of these groups or if there is a local code or
state law requiring a certain temperature water at the hot water
tap, then you must take special precautions. In addition to using
the lowest possibletemperature setting that satisfiesyour hot
water needs, a means such as a mixing valve, shouldbe used at
the hot water taps used by these people or at the water heater.
Mixing valves are available at plumbing supply or hardware
stores. Follow manufacturers instructions for installation of the
valves. Before changing the factory setting on the thermostat
read the "Temperature Regulation" section in this manual.
Lookat the topcoverofthewaterheater.The coldwaterinletismarkedcold.
Put twoor threeturnsofteflonrapearoundthe threadedend ofrilethreadedto-sweatcouplingand aroundbothendsofthe_" threadednipple.Usingflexibleconnectors,connectthecoldwaterpipeto thecoldwaterinletoftbewater
hearer.
NOTE:Thiswaterheateris insulatedto minimizeheat loss fromthe tank.
Furtherreductionin heat loss can be accomplishedby insulatingthe hot
waterlinesfromthe waterheater.
INSTALLATION
COMPLETED
THREADED
TO
SWEAT COUPLING
COLD INLET
SHUTOFF
WATER LINE
VALVE ._"
THREADED
TO
SWEAT
COUPLING
NIPPLE
HOT WATER
OUTLET
COLD WATER
TEMPERATUREPRESSURE
RELIEF
VALVE
HOT
TO
TEMPERED
OUTLET
HOUSE
3/4"THREADED
NIPPLE
WATER
OUTL ET
*MIXING
VALVE
t
FROM HOT
WATER
OUTLET
ON WATER
HEATER
j
TO COLDWATER
'INLET ON WATER
HEATER
PIPE
(Do not cap or
plug)
PROVIDE A 6"
AIR GAP
BETWEEN
THE
END OF THE
DISCHARGE
PIPE AND DRAIN
AWARNING
This water heater shall not be connected to any heating systems or component(s) now or previously used with a non=
potable water heating appliance.
AWARNING
Toxic chemicals such as used for treatment of boilers or
non-potablewater heating appliances shall never be introducedinto a potable water heating system.
lfa waterheateris installedin a closedwatersupplysystem;suchasone havinga
bach-flowpreventer,
checkvalve,watermeterwitha checkvalve,etc..,in thecold
watersupply;meansshallheprovidedto controlthermalexpansion.Contactthe
localutilityorlocalSearsServiceCenteron howtocontrolthissitoarion.
T&P Valve and Pipe Insulation
Removeinsulationfor T&P Valveand pipe connectionsfromcarton.
NOTE:Toprotectagainstuntimelycorrosionof hot and coldwaterfittings,
it is stronglyrecommended
thatdielectricunionsorcouplingsbeinstalledon
thiswaterheaterwhenconnectedto copperpipe.
Fit pipe insulationover the incomingcold
water line and the hot water line. Make
sure that the insulationis against the top
coverof the heater.
The illustration
showstheattachmentofthe waterpipingto thewaterheater.
The
waterheaterisequ'ppedw'th/_ 'nchwaterconnect'ons.
FitT&PValveinsulation
overvalve.Make
suredlar the insulationdoesnot interfbre
withtheleverof'theT&I) valve.
NOTE:If usingcoppertubing,solder tubingto an adapterbeforeattaching
the adapterto the coldwater inlet connection.Do not solderthe coldwater
supplyline directlyto the coldwaterinletorit willharmthe diptube.
Secureall insulationusingtape.
13
Installation
Temperature-Pressure
Instructions
(cont'd)
Relief Valve
_'LWARNING
AWARNING
The temperature-pressure relief valve must be manually
operated at least once a year. Caution shouldbe taken to
ensurethat (I) no one isin front of or around the outlet of
the temperature-pressure relief valve dischargeline, and
(2) the water manually dischargedwill not causeany bodily injury or property damage because the water may be
extremely hot.
At the time of manufacture this water heater was provided
with a combinationtemperature-pressuresrelief valvecertified bya nationallyrecognized testinglaboratory that maintains periodic inspectionof productionof listedequipment
or materials, as meeting the requirements for ReliefValves
and Automatic Gas ShutoffDevices for Hot Water Supply
Systems,and the current edition of ANSI Z21.22, CSA 4.4
Standardsand the code requirements of ASME. If replaced,
the valve must meet the requirements of local codes, but
not lessthan a combinationtemperature and pressurerelief
valvecertified as meeting the requirements for ReliefValves
and Automatic Gas ShutoffDevices for Hot Water Supply
Systems,ANSI Z21.22 • CSA 4.4 Standardsby a nationally
recognized testing laboratory that maintains periodic
inspectionof productionof listedequipmentor materials.
The valve must be marked with a maximum set pressure
not to exceed the marked hydrostaticworking pressureof
the water heater (150 Ibs./sq.in.) and a dischargecapacity
not lessthan the water heater input rate as shownon the
model rating plate. (Electric heaters- watts dividedby 1000
x 3412 equalBTU/Hr. rate.)
Your localjurisdictionalauthority, while mandatingthe use
of a temperature-pressurerelief valvecomplyingwith ANSI
Z21.22 • CSA 4.4 Standardsand ASME, may require a valve
model different from the one furnished with the water
heater.
Compliance with such localrequirements must be satisfied
by the installeror end user of the water heater with a locally
_rescribedtemperature-pressurerelief valve installedin the
designatedopeningin the water heater in placeof the factory furnishedvalve.
For safeoperation of the water heater, the relief valvemust
not beremoved from it'sdesignatedopeningor plugged.
The temperature-pressure relief valve must be installed
directly into the fitting of the water heater designatedfor
the relief valve. Positionthe valve downward and provide
tubing so that any dischargewill exit only within 6 inches
above,or at any distancebelowthe structuralfloor. Be certain that no contact is made with any live electrical part.
The dischargeopening must not be blockedor reduced in
size under anycircumstances.Excessivelength,over 30 feet,
or use of more than four elbowscan causerestriction and
reduce the dischargecapacityof the valve.
No valve or other obstructionis to be placedbetween the
relief valveand the tank. Do not connecttubing directly to
dischargedrain unlessa 6" air gap is provided.To prevent
bodily injury, hazard to life, or property damage, the relief
valve must be allowed to discharge water in quantities
shouldcircumstancesdemand. If the dischargepipe is not
connected to a drain or other suitable means, the water
flow may causeproperty damage.
The DischargePipe:
• Must not be smallerin sizethan the outlet pipesize of the
valve,or haveanyreducing couplingsor other restrictions.
• Must not be pluggedor blocked.
• Must be of material listedfor hot water distribution.
• Must be installedsoas to allowcomplete drainageof both
the temperature-pressurerelief valve, and the discharge
pipe.
• Must terminate at anadequatedrain.
• Must not haveanyvalvebetweenthe relief valveand tank.
If after manually operating the valve, it fails to completely
reset and continues to release water, immediately close
the cold water inlet to the water heater,follow the draining instructions, and replace the temperature-prossuro
relief valvewith a new one.
TEMPERATURE-PRESSURE
R_LIEF VALVE
DISCHARGE
I I_
(Do
I1\
II
II
II
I I
__
\
\
t
•
PIPE
not cap or
PROVIDEA6"AIR
GAP BETWEEN
THE END OF THE
DISCHARGE PIPE
AND DRAIN
RELIEF
VALVEOPENING
"THISWATERHEATERISAPPROVEDWITH A COMBINATIONTEMPERATUREPRESSURE
RELIEFVALVE. FOR SAFE OPERATIONOF THE WATER HEATER,
THE RELIEFVALVE(S) MUST NOT BE REMOVED FROM ITS DESIGNATED
POINTOF INSTALLATIONORPLUGGED."
YOUR LOCALJURISDICTIONALAUTHORITY,WHILE MANDATING THE USE
OF A TEMPERATURE-PRESSURE
RELIEFVALVE COMPLYING WITH ANSI
Z21.22 AND ASME, MAY REQUIREA VALVEMODEL DIFFERENTFROM THE
ONE FURNISHEDWITH THE WATERHEATER.
COMPLIANCEWITH SUCH LOCALREQUIREMENTSMUST BE SATISFIEDBY
THE INSTALLEROR END USEROF THE WATER HEATERWITH A LOCALLY
PRESCRIBEDTEMPERATURE-PRESSURE
RELIEFVALVE INSTALLED IN THE
DESIGNATEDOPENINGIN THEWATERHEATER.
SEE MANUAL HEADING - "TEMPERATURE-PRESSURE
RELIEFVALVES" FOR
INSTALLATION AND MAINTENANCE OF RELIEFVALVE, DISCHARGELINE
AND OTHERSAFETYPRECAUTIONS.
14
Installation
Filling the Water
Instructions
Heater
A CAUTION
You must provide all wiring of the proper size outside of the
water heater. You must obey local codes and electric company
requirements when you install this wiring.
J
Never usethis water heater unlessit iscompletelyfired with J
water. To preventdamageto the tank, the tank must be filled
with water. Water must flow from the hot water faucet
beforeturn ng ON gasto the water heater.
If you are not familiar with electric codes and practices, or if you
have any doubt in your ability to connect the wiring to this
water heater, obtain the service of a competent electrician or
contact your local electric utility.
"Ib fill the water heater with water:
AWARNING
• Close the water heater drain valve by turning the handle to
the right (clockwise). The drain valve is on the lower front of
the water heater.
WATER HEATERS EQUIPPED FOR ONE TYPE VOLTAGE
ONLY: Thiswater heater isequippedfor 110/120voltsonly.DO
NOT USE THIS WATER HEATER WITH ANY VOLTAGE
OTHER THAN THE ONE SHOWN ABOVE.Failureto usethe
correctvoltagecancauseproblemswhichcan result in DEATH,
SERIOUS BODILY INJURY OR PROPERTYDAMAGE. If you
haveanyquestionsor doubtsconsultyourelectriccompany.
• Open the cold water supply valve to the water heater.
NOTE: The cold water supply valve must be left open
when the water heater is in use.
• "Ib insure complete filling of the tank, allow air to exit by
opening the nearest hot water faucet. Allow water to run until
a constant flow is obtained. This will let air out of the water
heater and the piping.
CAUTION
• Check all new water piping fbr leaks. Repair as needed.
If wiring from the fuse box or circuit breaker box was aluminum for the old water heater,replace it with copper wire.
If you wish to reuse the existing aluminum wire, havethe
connectionat the water heater made by a competent electrician. Contact a localelectrical contractor and/or the local
electric utility.
Wiring
USE WITH
POWER
(cont'd)
CORD
USE WITHOUT
The water heater comes equipped with a 7 foot power cord
which can be used to connect to a 110/120 volt power source if,
(1) local codes allow, and (2) there is a three prong receptacle
available. This unit must have a grounded outlet to operate.
POWER
CORD
If power cord cannot be used, then follow these wiring instructions.
1. Provide a way to ea_silyshut off'the electric power when working on the water heater. This could be with a circuit breaker
or fuse block in the entrance box or a separate disconnect
switch.
7" MAXIMUM
CORD LENGTH
2. Install and connect a circuit directly from the main fuse or
circuit breaker box. This circuit must be the right size and
have its own fuse or circuit breaker.
i
/
WIRENUTS
/
You must provide all wiring, (1) to a receptacle or, (2) between
the water heater and junction box when the power cord is not
used.
AWARNING
I
Do not usean extensioncord.If there isnot a suitablereceptacle and/orlocalcodesprohibituseof a powercord,fieldwiring
mustbe provided.
GROUND
15
SCREW
Installation
Wiring
Instructions
(cont'd)
USE WITHOUT
POWER
CORD
(cont'd)
3. A standard 7_"conduit opening has been made in the water
heater junction box for the conduit connection.
grounded. A green ground screw has been provided on the
water heater's junction
box. Connect
ground wire to this
location. For complete grounding
details and all allowable
exceptions,
refer to the current edition of the National
Electrical Code ANSI/NFPA 70.
4. Use wire nuts and connect the power supply wiring to the
wires inside the water heater's junction box.
5. The water heater must be electrically "grounded" by the
installer. The unit will not operate unless it is properly
WIRING
(cont'd)
6. Replace the wiring junction cover using the screw provided.
DIAGRAM
ECO
LI
_H
[
[]
L2
I
J
IWIRE
NUT
GND
ON/OFF m
sw._._
THERMOSTAT
SWITCH
"<'-1
I
BLOWER
VACUUM
""x
)WEF
_LE_:EMALE
SPADE
TERMINAI,_
SWITCH
[]
I EXHAIIST
BLOCKAGE)
WIRE
NUT
!'I
-j o
,-,.
[]
FLAME SENSE ROD
NORMAL OPERATION SEQUENCE
INDICATED BY BOXED NUMERALS
A CAUTION
I
Label all wires prior to disconnection when servicing
controls. Wiring errors can cause improper and I
dangerous operation. Verify proper operation after
servicing.
16
Installation
Instructions
(cont'd)
Venting
&WARNING
_WARNING
Chemical
vapor corrosion of the flue and vent system may occur if air for combustion contains certain
chemical vapors. Spray can propellants, cleaning solvents, refrigerator
and air conditioner
refrigerants,
swimming pool chemicals, calcium and sodium chloride, waxes, bleach, and process chemicals are typical compounds which are potentially corrosive.
To insure proper
venting
of this gas-fired
water
heater, the correct vent pipe diameter
must be utilized. Any additions
of other gas appliances on vent
with this water heater will adversely affect the operation of the water heater.
The combustion
alld ventilation air flow must not be obstructed.
AWARNING
The power vent water heater requires its own (separate) venting system. It cannot be connected to an existing vent pipe or chimney. It must be terminated
to
the outdoors. Failure to properly install the venting system can result in asphyxiation,
a fire or explosion and
can cause DEATH,
SERIOUS
BODILY
INJURY, OR
PROPERTY
DAMAGE.
Obstructed
or deteriorated
vent systems
WARN I NG
sent a serious health risk or asphyxiation.
may
\
STRAPPING
Horizontal runs must be securely supported at 3V2foot intervals
and vertical runs supported at 5 foot intervals.
pre-
VENTING
The vent pipe from the water heater must
_, WARN I NG
slope
upward % inch per five linear feet.
THROUGH
AN
OUTSIDE
WALL
ALL MODELS
3" PVC,
MI vent gases must be completely vented to the outdoors of the
structure (dwelling).
ABS or CPVC
Schedule
40 vent piping:
1. A Y" PVC Schedule 40-45 ° vent cap with wire screen is supplied with the water heater.
2. A 3 I VC, ABS or CPVC Schedule 40-90 ° street ell; used to
connect the vent pipe to the water heater when the vent pipe
is to be turned horizontally directly off" the blower (supplied
locally).
MIN. RISE½'
PERFIVEFEET
3. 3 _tVC, ABS or CPVC
locally).
Schedule
40 pipe
(must be supplied
3" PVC,ABS OR CPVC
SCHEDULE
4ogOOELOOW
t
3" PVC,ABSOR CPVC
SCHEDULE40 PiPE
AWARNING
VENTCAP
SCREEN
I
Failure to have required clearances between water I
heater and combustible
material will result in a fire
hazard.
WITH
• The water heater requires its own (separate) venting system.
&WARNING
• 3 I VC, ABS or CPVC Schedule 40 piping and fittings are
acceptable materials for the vent system on all models.
I
Be sure vent pipe is properly connected to prevent I
escape of dangerous
flue gases which could cause
dead y asphyx at on.
• It cannot be connected to existing vent piping or chimney.
• It must terminate horizontally to the outdoors.
17
Installation
Venting
Instructions
(cont'd)
(cont'd)
ALL MODELS _ OPTIONAL
2"VENT PIPING
VENTING
SYSTEM
FOR ALL MODELS
2" PVC, ABS or CPVC Schedule 40 vent piping:
EXAMPLE
INSTALLATIONS
The vent piping cannot under any circumstances be run downhill.
1. A wire screen to fit a 2" PVC, ABS or CPVC Schedule 4045 ° vent cap is supplied with the water heater.
2. A 2" PVC, ABS or CPVC Schedule 40-45 ° vent cap (elbow)
(must be supplied locally).
3. A Y" PVC, ABS or CPVC Schedule 40 pipe, minimum
length of Y" (must be supplied locally), to make vent connection at the blower outlet.
4. A Y" to 2" PVC, ABS or CPVC Schedule 40 reducer (must
be supplied locally).
5. A 2" PVC, ABS or CPVC Schedule 40-90 ° street ell; used to
connect the vent pipe to the reducer when the vent pipe is to
be turned horizontally off"the blower (supplied locally).
6. 2" PVC, ABS or CPVC Schedule 40 pipe (must be supplied
locally).
2" PVC, ABS OR CPVC
SCHEDULE 40 ...---_1
The vent piping may be installed as follows:
Horizontal runs require a minimum %"rise per five feet.
2" PVC, ABS OR CPVC
SCHEDULE 40 PIPE
3
ELBOW
EXAMPLE
90° ELBOW _]_
VENT
CAP
WITH SCREEN
i_
3" TO
CPVC
2" PVC,
REDUCER
ABS OR
MIN, RISE¼"
PERFIVE FEET
3" PVC, ABS OR CPVC
SCHEDULE 40 PIPE
(MINIMUM LENGTH 3")
• The water heater requires its own (separate) venting system.
3
ELBOW
EXAMPLE
• 2" and 3" PVC, ABS or CPVC Schedule 40 piping and fittings
are acceptable materials for the vent system on all models.
MIN, RISE¼"
PERFIVE FEET
• It cannot be connected to existing vent piping or chimney.
• It must terminate horizontally to the outdoors.
NOTE: See pages 22 and 23 for vertical venting through a roof.
MIN. RISE¼"
PER FIVEFEET
18
Installation
Instructions
ALL MODELSVENTING
THROUGH
OPTIONAL
2°" VENT PIPING
3
ELBOW
EXAMPLE
2" DIA.VENT
MIN. RISEY¢'
PER FIVEFEET
MAX. LENGTH
5O
45
4O
35
3O
25
MIN. RISEY;"
PER FIVEFEET
ALL
MODELS
(cont'd)
(FT.)
_S'
MAX.
MIN. RISEY;"
PERFIVE FEET
See tables for max. length.
4' MiN.
14"MIN.
NUMBER OF 90 ° DEG.
ELBOWS*
I
2
3
4
5
6
* NOTE: Two 45 ° elbows are equivalent to one 90 ° elbow.
One 90 ° elbow equals 5 feet of equivalent vent length.
(3" VENT)
157;'MIN.
WALL
ONE ELBOW
EXAMPLE
20'
(EXAMPLE)
_l_
MIN, RISE¼"
PERFIVEFEET
3" VENT PIPE
EXAMPLE USING ONE ELBOW
WITH 3" VENT PIPE
1. The total vertical and horizontal vent run cannot exceed the
maximum length with the number of 90 ° elbows as specified
in the following tables. If more elbows are required, the venting distance must be reduced 5 feet for every 90 ° elbow:
ALL
MODELS-
VENTING
3" DIA.VENT
MAX. LENGTH
115
II0
105
100
95
9O
(FT.)
THROUGH
2. Minimum
WALL
NUMBER OF 90 ° DEG.
ELBOWS*
I
2
3
4
5
6
19
vent length Gr all models is 4 feet.
Installation
Venting
Instructions
(cont'd)
(cont'd)
VENTING
THROUGH
AN OUTSIDE
LOW GROUND
CLEARANCE
WALL
WITH
CEMENTING
FITTINGS
PVC, ABS OR CPVC
Read and observe all safety information
cleaner, and cement containers.
1. When the vent piping cannot pass through an outside wall at
a height greater than or equal to 12" above the ground (or
above snow accumulation level), then the installation can be
modified as shown below.
PIPE AND
printed on primer,
_. DANGER
I
Primer,
cleaner,
and cements are extremely I
flammable. They are harmful or fatal if swallowed. The I
vapors are harmful. They may irritate eyes and skin
and can be absorbed through the sk n.
/,%
[//_,
_. PRECAUTIONS
Always store primers, cleaner, and cements in cool,
dry, well ventilated places. Do not store them near
heat, sparks, or flames. Keep containers closed. Use
them in well ventilated areas. Wear impervious clothing while handling. Do not smoke, eat, or drink while
handling. Wash thoroughly after handling and before
eating. Wear eye protection when handling. If swallowed, drink water, do not induce vomiting, and call a
physician or poison control center immediately. If
inhaled, get fresh air and seek medical attention if ill
feelings persist. In case of eye and skin contact, immediately flush with plenty of water for 15 minutes and
seek medical attention if irritation persists. KEEP
OUT OR REACH OF CHILDREN.
/%
MIN. ABOVE
7[
>:_
_
I I GROUND
ORSNOW
ACCiNULATION
LEVEL
2. Refer to the tables below for maximum vent lengths for low
ground clearance installations. All installations assume the use
of two additional 90 ° elbows and the standard 45 ° vent cap
with screen outside of the exterior wall.
All primers, cleaners, and cements must meet all local codes and
applicable standards of the American Society For Testing
Materials Standards.
ALL
Before using primers, cleaners, and cements, stir or shake, making sure contents are liquid. Do not use if found to be lumpy or
jelly-like.
MODELS
-- LOW
3" DIA.VENT
MAX. LENGTH (FT.)
105
100
95
90
85
8O
GROUND
CLEARANCE
NUMBER OF 90 ° DEG.
ELBOWS* (inside bldg)
I
2
3
4
5
6
1. Cut pipe ends squarely removing all burrs and dirt.
2. Dry fit pipe and fittings to be connected for proper fit.
3. Clean pipe and fitting with a primer/cleaner.
4. Apply a thin coat of cement to fitting, avoiding puddling
inside.
5. Apply a liberal coat of cement to pipe leaving no voids.
ALL MODELS -- LOW GROUND
OPTIONAL
2" VENT PIPING
2" DIA.VENT
MAX. LENGTH
4O
35
3O
25
2O
15
*
CLEARANCE
6. QUICKLY assemble parts while cement is flui!! If you wait
too long, re-coat pipes.
NUMBER OF 90 ° DEG.
(FT.)
7. Push pipe completely into socket of fitting, turning as it goes
until it bottoms.
ELBOWS* (inside bldg)
I
2
3
4
5
6
8. Hold pipe and fitting together for 30 seconds. Then carefully
clean off"excess with a cloth. Allow connections a sufficient
time to cure before disturbing.
9. Remember that vent pipes must be adequately and securely
supported.
NOTE: Two 45 o elbows are equivalent to one 90 o elbow.
One 90 ° elbow equals 5 feet of equivalent vent length.
2O
Installation
APPROXIMATE
JOINTS
Instructions
SETTING
90°F to 150°F
TIME FOR 2" TO 3" PIPE
MOVEMENT
OF JOINT
% hr.
(cont'd)
INSTALLATION
CPVC PIPE
COMPLETE
SET
8 hrs.
50°F to 90°F
I hr.
15 hrs.
0°F to 50°F
1% hr.
18 hrs.
SHOWING
_.
SEALER
_//
EXTERIOR
_"_
WALL
HIN
......
EXTENSION
THROUG
H
SILICONE
J_
_/
CUTTING
OPENING
THROUGH
AN
WALL AND COLLAR INSTALLATION
USE OF PVC, ABS OR
_
_
EXTERIOR
WALL
SCREW
OUTSIDE
After reading the manual and you have determined the location
of the op,eningin the wall, (using the draw!ng below), cut a 2_"
hole for 2 vent piping or a 3_' hole for 3 vent piping through
an exterior wall.
SEALER
VENT CAP MUST
BE POSITIONIED
DOWNWARD
_
/
NOTE: When determining location of the opening in the
outside wall allow for the ¼° rise per five feet that has taken
place in the horizontal run.
CONNECTING
BLOWER
"
'" ""
I N
PVC,
ABS OR CPVC
PIPE VENT
TO
1. If making an immediate horizontal run of vent off'the blower,
a Y' PVC, ABS or CPVC Schedule 40 (supplied locally) elbow
is required. Place the elbow in the required direction on the
blower and using 3 sheet metal screws, attach the elbow.
PER FIVE FEET
L
SEAL WITH
_
_
_" _"
40 GAL.- 59½"
50 GAL.- 6(7'
N
I
2. If there is to be a vertical run of vent from the blower, the Y'
PVC, ABS or CPVC pipe must be attached to the blower using
3 sheet metal screws.
The 3" (or optional 2") PVC, ABS, or CPVC Schedule 40 vent
pipe can be run from the water heater through the wall or from
the wall to the water heater, whichever is most convenient. The
vent pipe must extend a minimum of 1_" through the exterior
wall. Extending the vent cap as far as possible from the surface
of the exterior wall will help minimize discoloration of the wall
in this area which may be caused by the flue gases. Note that the
inside collar must be slipped over the vent piping before locating the pipe through the wall. Before securing the inside and
outside collars to the wall, use a silicone sealer between pipe and
opening to insure a water and air tight seal.
SEAL WITH
RTV SEALANT
_
_"
3. If the optional 2" ventpiping is to used, the 2" street elbow, Y'
to 2" reducer and Y' (minimum) section of 3" PVC, ABS or
CPVC pipe must be supplied locally.The 3" (minimum) section
of 3' PVC, ABS or CPVC p'pe must be attached to the blower
using 3 sheet metal screws.
21
Installation
Venting
VENTING
Instructions
(cont'd)
(cont'd)
THROUGH
A ROOF
• The water heater requires its own (separate) venting system.
ALL MODELS
• lr cannot be connected to existing vent piping or chimney.
3"°PVC, ABS or CPVC Schedule 40 vent piping:
• lr must terminate vertically to the outdoors
1. A Y"PVC Schedule 40-45 ° vent cap with wire screen is supplied with the water heater.
• "I}pical installation(s) shown below.
• Refer to Cementing I VC, ABS or CI VC Pipe and Fittings
on pages 20-21 and "Connecting Vent to Blower" on page
21.
2. 3 PVC, ABS, or CI VC Schedule 40 piping and fittings are
acceptable materials for the vent system on all models and
must be supplied locally.
90_STREET
ALL MODELS
_
OPTIONAL
2" VENT
45 _VENT
2°, PVC,
ABS or CPVC
Schedule
ELL
PIPING
CAP _
SEAL AROUND
SCREEN_
40 vent piping:
FLASHING
VENT CAP MUST
BE POSITIONED
DOWNWARD
1. A wire screen to fit a 7" PVC, ABS or CPVC Schedule 4045 ° vent cap is supplied with the water heater.
MAINTAIN
11
USTED
CLEARANCE
2. A 3" PVC, ABS or CPVC Schedule 40 pipe, minimum
length of Y" (must be supplied locally), to make vent connection at the blower outlet.
45° ELBOW
3. A 3" to 2" PVC, ABS or CPVC Schedule 40 reducer (must
be supplied locally).
SUPPORT LATERALS
MIN, EVERY 3'K
4. 2" and Y" PVC, ABS, or CPVC Schedule 40 piping and fittings are acceptable materials for the vent system on all models and must be supplied locally.
f
MAINTAIN
LISTED
_
_
POSITION
FIRESTOP
H
_
CLEARANCE
SCHEDULE 40 PiPE
2" PVC, ABS OR CPVC
_ _
3" TO 2" PVC, ABS OR CPVC
REDUCER
CERTIFIED
WATER HEATER
EXHAUST
VERTICAL
TOTAL VERTICAL
AND HORIZONTAL
_
RUNS
. SEE
ITEM
BELOW.
SCHEDULE
3"
PVC, ABS40
ORPIPE
CPVC
(MINIMUM
LENGTH 3")
I
)
VENT
\
6. The total vertical and horizontal vent runs cannot exceed the
maximum length with the number of 90 ° elbows as specified
in the following tables. Ifmore elbows are required, the venting distance must be reduced 5 feet for every 90 ° elbow."
22
Installation
ALL
MODELS
Instructions
-- THROUGH
3°"DIA.VENT
MAX. LENGTH
115
II0
105
100
95
9O
(FT.)
ROOF
A gas line of sufficient size must be run to the water heater.
Consult the current edition of National Fuel Gas Code ANSI
Z223.1, also referred to as NFPA 54 and the gas company concerning pipe size.
NUMBER OF 90 ° DEG.
ELBOWS •
I
2
3
4
5
6
There must be:
• A readily accessible manual shut off"valve in the gas supply
line serving the water heater, and
• A drip leg (sediment trap) ahead of the gas control valve to
help prevent dirt and foreign materials from entering the gas
control valve.
ALL MODELS m THROUGH ROOF
OPTIONAL 2" VENT PIPING
2" DIA.VENT
MAX. LENGTH
5O
45
4O
35
3O
25
{FT.)
• A flexible gas connector or a ground joint union between the
shutoffvalve and control valve to permit servicing of the unit.
NUMBER OF 90 ° DEG.
ELBOWS •
I
2
3
4
5
6
Be sure to check all the gas piping for leaks before lighting the
water heater. Use a soapy water solution, not a match or open
flame. Rinse offsoapy solution and wipe dry.
Standard
level.
_WARNING
up to 3,300 feet above sea
AWARNING
Hake sure the gas supplied is the same type listed on
the model rating plate. The inlet gas pressure must
not exceed 10.5 in. water column (2.6 kPa) for natural gas or 13 in. water column (3.2 kPa) for Propane
(L.R) gas. The minimum
inlet gas pressure listed on
the model
rating plate is for the purpose of input
adjustment.
Failure to replace the standard
orifice with a high
altitude
orifice when installed at elevations
above
3,300 feet (or above 5,500 feet for high altitude
model),
could result
in improper
and inefficient
operation of the appliance,
producing carbon monoxide gas in excess of safe limits, which could result in
serious injury or death. Contact
the local Sears
Service Center or your gas supplier for any specific
changes which may be required
in your area.
I
If the gas control valve is subjected
to pressures
exceeding
½ pound per square inch (3.5kPa),
the I
damage to the gas control valve could result in a fire
on from
are for installation
lfa standard model is installed above 3,300 feet or a high altitude
model is installed above 5,500 feet, the input rating must be
reduced at the rate of 4 percent for each 1,O00 feet above sea level
which requires replacement of the burner orifice in accordance
with the National Fuel Gas Code Z223.1, NFPA 54. Contact the
local Sears Service Center or your local gas utility for further
information.
Gas Piping
or expos
Models
High Altitude Models are for installation from 3,300 to 5,500
feet above sea level.
* NOTE: Two 45 ° elbows are equivalent to one 90 ° elbow.
One 90 ° elbow equals 5 feet of equivalent vent length.
AWARNING
(cont'd)
AWARNING
eak ng gas.
The appliance and its gas connection
must be leak
tested before placing the appliance in operation.
AWARNING
If the main gas line shutoff serving all gas appliances
is used, also turn "off"
the gas at each appliance.
Leave all gas appliances
shut off until the water
heater installation is complete.
23
J
Installation
Instructions
(cont'd)
Gas Piping (cont'd)
,&WARNING
Connecting
the gas piping to the gas control valve of the water
heater can be accomplished by either of the two methods shown.
The appliance and its individual shutoff valve must
be disconnected
from the gas supply piping system during any pressure testing of the gas system
at test pressures in excess of I/2 pound per square
inch (3.5kPa).
The appliance must be isolated from the gas supply piping system by closing its individual manual
shutoff valve during any pressure testing of the gas
supply piping system at test pressures equal or
less than I/2 pound per square inch (3.5kPa).
GAS PIPING WITH
FLEXIBLE CONNECTOR
GAS SUPPLY PIPING
g. u"Uo
VALVE
_,WARNING
I
Use pipe joint compound or teflon tape marked as I
being resistant to the action of petroleum [Propane
(L.R)] gases.
_
GROUND
UNION
FLEXIBLE GAS CONNECTOR
LABELED AS COMPLYING
WITH ANSI STANDARDS
(OPTIONAL)
SEDIMENT
TRAP
A sediment trap shall be installed as close to the inlet of the
water heater as practical at the time of water heater installation.
The sediment trap shall he either a tee fitting with a capped nipple in the bottom outlet or other device recognized as an effective sediment trap. If a tee fitting is used, it shall be installed in
conformance with one of the methods of installation shown.
3" MIN.
DRIP LEG
(SEDIMENT
TRAP)
....._ _ _,
GAS
CONTROL
VALVE
1 CAP
_,WARNING
GAS PIPING
Contaminants
in the gas lines may cause improper
operation
of the gas control valve that may result in
fire or explosion.
Before attaching
the gas line be
sure that all gas pipe is clean on the inside. To trap
any dirt or foreign material
in the gas supply line, a
drip leg (sometimes
called a sediment trap) must be
incorporated
in the piping. The drip leg must be
readily accessible. Install in accordance with the "Gas
Piping" section. Refer to the current edition of the
National Fuel Gas Code, ANSI Z223.1, also referred
to as NFPA 54.
WITH ALL BLACK
TO GAS CONTROL
IRON
PIPE
GAS SUPPLY PIPING
gH gTUo h
VALVE _
GROUND
JOINT
UNION
BLACK PIPE
3"MIN.
24
DRIPLEG _
($EDIMENTIL_ _J
TRAP)
ICAP
_"
.1
GAS
CONTROL
VALVE
Installation
Installation
BEFORE
Instructions
(cont'd)
Checklist
OPERATING:
• Check the gas lines for leaks•
a. Use a soapy water solution• DO NOT test for gas leaks
using a match or open flame.
b. Brush the soapy water solution on all gas pipes, joints and
fittings•
c. Check for bubbling soap. This means you have a leak.
_lhrn OFF gas and make the necessary repairs.
d. Recheck for leaks•
e. Rinse off soapy solution and wipe dry.
PIPE TO
OUTDOORS
SHUTOFF
VALVE
• ls the new temperature-pressure
relief valve properly installed
and piped to an adequate drain? See "_l_mperature-Pressure
Relief Valve" section•
• Are the cold and hot water lines connected to the water
heater correctly? See "Water Piping" instructions in the
"Installation Instructions" section.
HOT
PRESSURE
RELIEF VALVE
• ls the water heater completely filled with water? See "Filling"
instructions in the "Installation Instructions" section.
• Will a water leak damage
anything?
Consider About the Location" section.
See the
"Facts
to
PiPE
(Do not cap or plug)
GAS
SUPPLY
• ls there proper clearance between the water heater and anything that might catch fire? See the "Facts to Consider About
the Location" section.
VALVE
• Do you have adequate ventilation so that the water heater
will operate properly? See "Combustion Air and Ventilation"
in the "Installation Instructions" section.
g
• ls the draft hood vent piping properly secured? See "Venting"
instructions in the "Installation Instructions" section.
DRIP LE(
[Sediment trap)
PIPE I
• ls there proper clearance between the vent pipe and anything
that might catch fire. See Ventmg mstructtons m the
"Installation Instructions" section.
• ls the vent pipe properly sloped and does the vent terminate
outdoors• See Venting mstructmns m the Installatmn
Instructions section.
• Do you need to call your gas company
and its hookup?
CHECK
FOR
SLII'I_&BLI:FOR WATER (PGTABI.E)
HEATING ONLY
to check the gas pipe
EGt_PPED
F_
LEAKS
k_PLt¢
GAS
Be sure to check all your gas pipes for leaks before operating
your water heater. Use a soapy water solution, not a match or
open flame. Check the factory gas fittings after the main burner
is turned "ON". Use a soapy water solution for this, too.
MAXIMU_
RECOVERy
I
I
BTU_
GALPAR
HyD_TATIC
,so
PNI
_IAL
Nt/MS_
I
GAS
pRE_RE
I
IN
W C
I
WC
WC
AUTOMATIC STORAGE WATER HEATER
ELECTRICAL RATING: VOLTS 115!HZ60/AMPS 2
MODEL RATING PLATE
25
_ N T_NG
WC
*
Operating
Instructions
This water heater is equipped with an electrically operated venting system and electronic control. For the burner to come on,
the water heater thermostat must call for heat. Then the system
will begin sequencing, each section proving itself before gas is
allowed to flow to the burner.
BEFORE
THE
WATER
HEATER
WILL
BLOWER
VENTING
MANUAL
RESET SWITCH
MOTOR
DRAFT HOOD
OPERATE:
1. The control system must be connected to a grounded
110/120 volt power supply. The control system has an overall rating of 2 amps. The water heater must be securely and
adequately grounded in accordance with local codes and with
the current edition of the National Electrical Code
ANS1/NFPA 70.
ON/OFF
SWITCH
AIR PRESSURE
\ CH
_
2. The ON/OFF rocker switch, located on the control box
above the thermostat must be in the "ON" position for the
electrical control system to operate allowing the gas portion
to operate (ignite burner).
AIR INTAKE
'
3. The venting manual reset switch must be in the closed
position. See "Venting Manual Reset Switch" in the
"'ii-oubleshooting Guide" section.
4. There is a non-resettable hi-limit switch in the thermostat,
which must be good (closed) for the thermostat to be operated. See "High Temperature
Limit Switch" in the
"_I_oubleshooting Guide" section.
120V GAS VALVE
OPERATION
When the thermostat calls for heat, gas is allowed to flow to a
(N/O) pressure switch closing it. An electrical circuit is then
made to the blower, turning it on. When the blower has
achieved sufficient venting, the air pressure switch will close. A
120 volt circuit will be completed through the venting manual
reset switch and on to the 120 volt gas valve. The 120 volt gas
valve will open allowing gas to flow to the burner. The hot surface ignitor will establish a main burner flame.
BURNER
_'
26
/7
HOTSURFACE
Operating
Instructions
(cont'd)
Operating
4.
AWARNING
BEFORE
OPERATING
[PROPANE
(L.P.)
GAS
WATER
HEATERS]:
Propane (L.P.) gas is heavier
than air. Should there be a leak in the system, the gas
will settle near the ground. Basements, crawl spaces,
skirted areas under mobile homes (even when ventilated), closets and areas below ground level will serve
as pockets for the accumulation
of this gas. Before
attempting
to operate the water heater or turning
on a nearby electrical light switch, be absolutely sure
there is no accumulated
gas in the area. Search for
odor of gas by sniffing at ground level in the vicinity
of the appliance. If odor is detected, follow steps indicated at "For Your Safety" on the cover page of this
manual then leave the premises.
a)
The resistance in the thermostat rises to the value
selected by the temperature control knob.
b) The control module doses the gas valve and 5 seconds
later, removes power from the blower.
5. Cycle is completed.
CONTROL SEQUENCE - HOT SURFACE DIRECT IGNITION
Pre-purge
5 sec.
HSI Warm-up
20 sec.
Ignition Activation Period
4 sec.
Flame Recognition Period
Isec.
Ignition Trial
4 sec.
lnterpurge
5 sec.
Post-purge
5 sec.
Retries
2
Reset from Lockout
I hr.
FlameSensing(Nominal)
HSI Off/Run Mode
4.0 pa DC
Operating instructions are located on front of the water heater,
above or to one side of the gas control valve. See page 28.
_,WARNING
AN ODORANT
IS ADDED TO THE GAS USED
BY THIS WATER HEATER.
FOR YOUR SAFETY
IF YOU SMELL GAS:
• Do not try to light any appliance.
• Do not touch any electrical switch; do not use any
phone in your building.
• Immediately
call your gas supplier from a neighbor's phone. Follow the gas supplier's instructions.
• If you cannot reach your gas supplier, call the fire
department.
CHECK
FOR LEAKS
Be sure to check all your gas pipes for leaks before operating
your water heater. Use a soapy water solution, not a match or
open flame. Check the factory gas fittings when the main burner
is turned "ON".
WATER HEATING
IGNITION
(Make
sure gas and electric
properly)
SEQUENCE
power are
connected
1. The ignition control module is powered and monitors the system, waiting for a call for heat from the thermostat.
2.
The thermostat calls for heat by reading a resistance value
within a given range directly proportional to water temperature.
3.
The control module:
The burner heats the water to the desired thermostat setting.
a) Checks the pressure switch for an open circuit.
b) Energizes the blower.
c) Checks the pressure switch for a closed circuit to prove
draft.
d) Sends line voltage to the hot surface igniter with a 20second warm up period.
e) Opens the gas valve and checks the sensing rod for
flame.
27
Operating
Instructions
explosion may result causing
_[,_WARNING:lfyoudonotfollowtheseinstructionsexactiy,
loss of life.
(cont'd)
property
damage,
personal
injury or
afireor_
BEFORE OPERATING: ENTIRE SYSTEM MUST BE FILLED WITH WATERAND AIR PURGED FROM ALL LINES.
A. This appliance does not have a pilot. It is equipped
with an ignition device which automatically lights the
burner. Do NOT try to light the burner by hand.
B. BEFORE
OPERATING
smell all around
the
•
If you cannot reach your gas supplier, call the fire
department.
C. Use only your hand to push in the gas control buttons. Never use tools. If the control buttons will not
appliance area for gas. Be sure to smell next to the
floor because some gas is heavier than air and will
settle on the floor.
WHAT TO DO IF YOU SMELL GAS:
push in, don't try to repair them, call a qualified service technician. Force or attempted repair may
result in a fire or explosion.
D. Do not use this appliance if any part has been
under water. Immediately call a qualified service
technician to inspect the appliance and to replace
any part of the control system and any gas control
which has been under water.
Do not try to light any appliance.
Do not touch any electric switch;
do not use any phone in your building.
Immediately call your gas supplier from a neighbor's
phone. Follow the gas supplier's instructions.
5. This appliance is equipped with a device which automatically lights the burner.
DO NOT TRY TO UGHT THE BURNER BY HAND.
.......7
WARUO
O
•
A
IJ
Ovem
O
O
O
O ,O
6. Wait five (5) minutes to if_
clear out any gas.
If you then smell gas,
_
STOP! Follow "B" in
the safety information above on this label. If you
don't smell gas, go to the next step.
......
e e ......
i
7. Turn on all electrical power to the appliance.
8. Set the ON/OFF switch on the control box to the
"ON" position.
i
9. Set the thermo_t to desired setl_ by first pressing
the COOLER k_)and HOTTER t,_,' buttons together
and hol_g
button _.
1. I_STOP!
Read the safety information
_,#'on
this label.
10. WATER TEMPERATURE
approximately 120°E
above
2. Set the ON/OFF switch on the control box to the "ON"
position.
_
3. Set the thermostat to_e lowest setting b_rst pressing the COOLER
_
and HOTTER _
buttons
together and holdi.J_ for 1 second. Then press the
COOLER button £_) until the WARM indicator light
appears.
4. Set the ON/OFF switch on the control box to the
"OFF" position.
1.
for 1 second. Then press the HOTTER
ADJUSTMENT
•
is
CAUTION:
HotterConsult
water the
increases
the risk
of
scald injury.
instruction
manual before changing temperature.
11, if the appliance will not operate, follow the instructions "TO TURN OFF GAS TO APPLIANCE" and
call your technician or gas supplier.
,_
WARNING:
POWER
BEFORE
TURN SERVICING
OFF ALL ELECTRIC
2. Set the ON/OFF switch on the control box to the
Set thermostat,_to the lowest settin_ by first pressing
the COOLER _ and HOTTER _ buttons together
and holding for 1 second. Then press the COOLER
button (_ until the WARM indicator light appears.
"OFF" position.
3. Turn off all electric power to the appliance if service
is to be performed.
28
Operating
Temperature
Instructions
(cont'd)
Regulation
2. Release both of the temperature adjustment buttons.
Short repeated heating cycles caused by small hot water uses can
cause temperatures at the point of use to exceed the thermostat setting by up to 30°E If you experience this type of use you should
consider using lower temperature settings to reduce scald hazards.
A. To decrease the temperature press and release the
"COOLER" button until the desired setting is reached.
B. To increase the temperature
press and release the
"HOTTER" button until the desired setting is reached.
Any water heater's intended purpose is to heat water. Hot water is
needed for deaning, (bodies, dishes, dothing). Hot water will present a scald hazard. Depending on the time element, and the people
involved (normal adults, children, toddlers, elderly, infirm, etc.)
scalding may occur at different temperatures.
NOTE: Holding down the button will not continue to lower or
raise the temperature setting. The button must be pressed and
released for each temperature change desired.
AWARNING
TEMPERATURE
HOTTER
WATER CAN SCALD: Water heaters are
intended to produce hot water. Water
heated to a
temperature
which will satisfy clothes washing, dish
washing, and other sanitizing needs can scald and permanently
injure you upon contact. Some people are
more likely to be permanently
injured by hot water
than others. These include the elderly, children, the
infirm, or physically/mentally
handicapped.
If anyone
using hot water in your home fits into one of these
groups or if there is a local code or state law requiring
a certain temperature
water at the hot water tap,
then you must take special precautions. In addition to
using the lowest possible temperature
setting that satisfies your hot water needs, a means such as a mixing
valve, should be used at the hot water taps used by
these people or at the water heater. Mixing valves are
available
at plumbing
supply or hardware
stores.
Follow manufacturers
instructions for installation of
the valves. Before changing the factory setting on the
thermostat,
read the "Temperature
Regulation" section in this manual.
INDICATORS
J
TEMPERATURE
AD USTMENT
BUTTONS
Display
VABC
AWARNING
I
Never allow small children to use a hot water tap, or to I
draw their own bath water. Never leave a child or handicapped person unattended n a bathtub or shower.
C- Flashing= approx. 160°F (7t°C)
O O O O O •
About 1/2 seconds
150°F (66°C)
O O O © © •
About b_/2seconds
B =approx.
140°F (60°C)
O O O © •©
Less than S seconds
A=approx.
130°F (54°C)
O © O •
Ahout30seconds
120°F(49°C)
O © •
C=approx.
Y=approx.
The thermostat of this water heater has been factory set at its lowest
position, to reduce the risk of scald injury. It is adjustable alld must
be reset to the desired temperature setting. The mark ( • ) indicative of approximately 120°F (49°(7) is preferred starting point.
Some states have a requirement for a lower setting. If you need hotter water, follow directions for temperature adjustment, but beware
of the warnings in this section.
WARM=
approx. 80°F(27°C)
©©
© ©0
More than S minutes
•©OOO©
NOTE: Water temperature range of 120°-140°F (49°-60°C)
recommended by most dishwasher manufacturers.
AWARNING
Pressing the "COOLER" _ button decreases temperature and
pressing the "HOTTER" _ button increases the temperature.
Should overheating occur or the gas supply fail to shut
off, turn "OFF" the manual gas control valve to the
appliance.
"lb avoid any unintentional changes in water temperature settings,
the control has a tamper resistallt feature for changing the temperature setting. "lb change the temperature setting follow these instructions:
1. "Wake Up" the temperature indicators by holding down both
"COOLER" and "HO'FPER" temperature adjustment buttons
at the same time for one second (See Figure below). One or two
of the temperature indicators will light up. These indicators will
only remain on for 30 seconds if no further buttons are pressed.
After 30 seconds the control will go back to "Sleep" mode.
29
Service
and Adjustment
Tank (Sediment)
Cleaning
Sediment build-up on the tank bottom may create varying
amounts of noise, and if left in the tank will cause premature tank
failure. Sediment deposits can usually be removed by draining
and flushing the tank with water. Follow the "Draining" instructions in the "Service and Adjustment" section in this manual.
Check main burner every 12 months for proper flame characteristics. This is done by removing outer and inner doors on heater.
The main burner should provide complete combustion of gas;
ignite rapidly; give reasonably quiet operation; cause no excessive
flame lifting from burner ports. Make sure that the flow of combustion andventilation air is not blocked.
Venting System Inspection
If proper flame characteristics are not evident, check for accumulation of lint or other foreign material that restricts or blocks
the air openings in the heater or burner. Also check Combustion
Air and Ventilation requirements.
At least once a year a visual inspection should be made of the
venting system. You should look for:
• Obstructions which could cause improper venting. The combustion and ventilation air flow must not be obstructed.
• Damage or deterioration which could cause improper venting
or leakage of combustion products.
• Rusted flakes around top of water heater.
AWARNING
Chemical vapor corrosionof the flue and vent system may
occur if air for combustioncontainscertain chemicalvapors.
Spray can propellants,cleaningsolvents,refrigerator and air
conditioner refrigerants, swimmingpool chemicals,calcium
and sodium chloride,waxes,bleach,and processchemicalsare
typicalcompounds
whichare potentiallycorrosive.
AWARNING
I
Soot build-up indicatesa problem that requires correction I
beforefurther use.Turn "OFF" gasto water heaterand leave
"OFF" until repairs are made, becausefailure to correct the I
causeofthe sootingcanresult in a fire.
Burner Cleaning
AE,WARNING
I
Obstructed or deterioratedvent systemsmaypresenta serious
healthr skor asphyxat on.
NOTE: Burner assembly must be handled carefully to avoid
damaging the hot surface ignitor.
In the event your burner needs cleaning, use the following
instructions:
If inspection of the burner shows that cleaning is required, turn
the ON/OFF rocker switch located on the control box to
"OFF" position and allow the burner to cool.
AWARNING
I
Be sure the vent piping is properly connected to prevent I
escape of dangerousflue gasseswhich could causedeadly
asphyxat on.
Loose deposits on or around the burner can be removed by carefully using the hose of a vacuum cleaner inserted through the
access door of the water heater. If the burner needs to be
removed for additional cleaning, call the local gas utility or local
Sears Service Center to remove and clean the burner with a soft
brush. Clean main burner orifice with a suitable soft material.
Correct the problem that required the burner to be cleaned.
AWARNING
If after inspection of the vent system you found sooting
or deterioration, something is wrong; a Sears Service
Technician must be called in, the problem corrected, and
the flue and venting cleaned or replaced before resuming
operation on the water heater.
Burner
Anode
Rod Inspection
The anode rod is used to protect the tank from corrosion. Most
hot water tanks are equipped with an anode rod. The submerged rod sacrifices itself to protect the tank. Instead of corroding the tank, water ions attack and eat away the anode rod.
This does not aflect the water's taste or color. The rod must be
maintained to keep the tank in operating condition.
Inspection
AWARNING
Flood damage to a water heater may not be readily visible
or immediately detectible. However,over a period of time
a flooded water heater will create dangerous conditions
which can cause DEATH, SERIOUS BODILY INJURY,OR
PROPERTY DAMAGE. Call a Sears Service Technicianor
contractor to replace a flooded water heater. Do not
attempt to repair the unit! It must be replaced!
Anode deterioration depends on water conductivity, not necessarily water condition. A corroded or pitted anode rod indicates
high water conductivity and should be checked and/or replaced
more often than an anode rod that appears to be intact.
Replacement of a depleted anode rod can extend the life of your
water heater. Inspection should be conducted by a Sears service
technician, and at a minimum should be checked annually after
the warranty period.
30
I
Service
and Adjustment
Temperature-Pressure
Valve Operation
The temperature-pressure
at least once a year.
Drain Valve Washer
Replacement
Relief
relief valve must be manually
(cont'd)
operated
NOTE: For replacement, use a _2" x _a" x gs" thick washer
available at your nearest hardware store. For ordering replacement washers, refer to the "Parts Order List" section.
TEM PERATU RE-PRESSURE
• _lhrn "OFF" gas supply to water heater.
• Follow "Draining" instructions.
• Turning counter clockwise, remove the hex cap below the
screw handle.
• Remove the washer and put the new one in place.
• Screw the handle and cap assembly back into the drain valve
and retighten using a wrench. DO NOT OVER TIGHTEN.
DISCHARGE PIPE
Failure to install and maintain a new properly listed temperature-pressure
relief valve will release the manufacturer
from any
claim which might result from excessive temperature or pressure.
• Follow instructions
section.
in the "Filling The Water Heater"
• Check for leaks.
• Follow the operating
instructions
in the "Operating
Instructions" section to restart the water heater.
AWARNING
If the temperature-pressure relief valve on the appliance
weepsor dischargesperiodically,this may be due to thermal
expansion. Your water heater may have a check valve
installedin the water line or a water meter with a check
valve. Consultthe SearsService Center for further information. Do not plugthe temperature-pressurerelief valve.
HANDLE
AND
CAP ASSEMBLY
_WASHER
AWARNING
When checkingthe temperature-pressurerelief valveoperation, make sure that (I) no one is in front of or around the
outlet of the temperature-pressurerelief valvedischargeline,
and (2) that the water manuallydischargedwill not causeany
propertydamagebecausethe water may beextremely hot.
If after manually operating the valve, it falls to completely
reset and continuesto release water, immediately closethe
cold water inlet to the water heater, follow the draining
instructions, and replace the temperature-pressure relief
Housekeeping
Vacuum around base of water heater for dust, dirt, and lint on a
regular basis.
Valve with a new one.
AWARNING
Draining
• _Iiarn"OFF" gas supply to water heater.
• CLOSE the cold water inlet valve to the water heater.
INSTALLED
IN SUITABLE AREA: To insure sufficient
ventilation
and combustion
air supply, proper clearances from the water heater must be maintained.
See
"Installation
Instructions" section. Combustible materials such as clothing, cleaning materials,
or flammable
liquids, etc. must not be placed against or adjacent to
the water heater which can cause a fire.
• OPEN a nearby hot water faucet and leave open to allow for
draining.
• Connect a hose to the drain valve and terminate to an adequate drain.
Service
• OPEN the water heater drain valve to allow for tank draining.
NOTE: If the water heater is going to be shot down and
drained for an extended period, the drain valve should be
left open with hose connected allowing water to terminate
to an adequate drain.
• Close the drain valve.
Before calling for repair service, read the "Start Up Conditions"
and "Operational Conditions" found in the Troubleshooting
Guide of this manual.
If a condition persists or you are uncertain about the operation
of the water heater, let a qualified person check it out.
The water heater should be drained if being shut down during
freezing temperatures. Also periodic draining and cleaning of
sediment from the tank may be necessary.
• Follow instructions in the "Filling The Water Heater" section.
Contact SEARS Repair Services at 1-800-4-MY-HOME
(1-800-469-4663).
• Follow the operating instructions
in the "Operating
Instructions" section to restart the water heater.
31
Troubleshooting
Guide
Start Up Conditions
THERMAL
EXPANSION
HOT
COLD
Water supply systems may, because of such events as high line
pressure, frequent cut-off}, the effects of water hammer among
others, have installed devices such as pressure reducing valves,
check valves, back flow preventers, etc._to control these types of
problems. When these devices are not equipped with an internal
by-pass, and no other measures are taken, the devices cause the
water system to be closed. As water is heated, it expands (thermal expansion) and closed systems do not allow for the expansion of heated water.
WATER HEATER
COLD WATER
, INLET FITTING
(0
EXPANSION
TANK
(2)
The water within the water heater tank expands as it is heated and
increases the pressure of the water system. If the relieving point of
the water heater's temperature-pressure
relief valve is reached, the
valve will relieve the excess pressure. The temperature-pressure
relief valve is not intended for the constant relief of thermal
expansion. This is an unacceptable condition and must be corrected.
PRESSUREGAUGE
WATER HEATER
COLD WATER
INLET FITTING
HOT
Model
Number
153.331020
Expansion
Tank
INLET COLD
WATER
SHUTOFF
RECOMMENDED INSTALLATION
(VERTICAL MOUNTING)
It is recommended that any devices installed which could create a
closed system have a by-pass and/or the system have an expansion tank to relieve the pressure built by thermal expansion.
Thermal expansion tanks are available from Sears stores and
through the Sears Service Centers. Contact the local plumbing
inspector, water supplier and/or the Sears Service Center for
assistance in controlling these situations.
Thermal
(3)
PRESSURE
REDUCING
VALVEWITH
BY-PASS
FLOOR, CEILING
JOIST, ETC.
COLD
STRAPPING
Specifications
(3)
PRESSURE
Tank Capacity Dimensions in Inches Pipe Fitting
In G£1ons
Diameter
Length
On "lhnk
2
8 inches 12_ inches Y4"Male
153.331050
5
11 inches
14_ inches
(0
REDUCING
VALVEWITH
BY-PASS
INLET
COLD
WATER
SHUTOFF
EXPANSION
TANK
Y4"Male
(2)_
Expansion
Expansion
"Ihnk
Capacity
Needed
Tank Sizing
Inlet*
Water
Pressure
40psi
50psi
60psi
70psi
80psi
Chart
PRESSUREGAUGE
Water Heater Capacity (Gallons)
3O
2
2
2
2
2
40
2
2
2
2
5
50
2
2
5
5
5
66
5
5
5
5
5
ALTERNATE RECOMMENDED
INSTALLATION
(HORIZONTAL MOUNTING)
82
5
5
5
5
5
STRANGE
SOUNDS
Possible noises due to expansion and contraction of some metal
parts during periods of heat-up and cool-down do not represent
harmful or dangerous conditions.
*Highest recorded inlet water pressure in a 24 hour period or
regulated water pressure.
Condensation causes sizzling and popping with the burner area
during heati,llg and coolin,g, periods and should be considered
normal. See Condensation section.
NOTE= Expansion tanks are pre-charged with a 40 psi air
charge. If the inlet water pressure is higher than 40 psi, the
expansion tank's air pressure must be adjusted to match that
pressure, but must not be higher than 80 psi.
32
Troubleshooting
Guide
(cont'd)
Operational
Conditions
CONDENSATION
SMELLY
Whenever the water heater is filled with cold water, a certain
amount of condensation
will form while the burner is on. A
water heater may appear to be leaking when in fact the water is
condensation.
This usually happens when:
• When a new water heater is filled with cold water for the
first time.
In each glasslined water heater there is installed at least one
anode rod (see parts section) for corrosion protection of the
tank. Certain water conditions will cause a reaction between this
rod and the water. The most common complaint associated with
the anode rod is one of a "rotten egg smell". This odor is derived
from hydrogen sulfide gas dissolved in the water. The smell is
the result of four factors which must all be present for the odor
to develop:
• When
gas burns
and water vapor is produced
heaters, particularly
high efficiency
models where
peratures
are lower.
• When you use large amounts
of hot
and the refill water is very cold.
Moisture
from
the
products
of combustion
water
in water
flue tem-
in a short
condense
on
WATER
a. a concentration of sulfate in the supply water.
b. little or no dissolved oxygen in the water.
time
c. a sulfate reducing bacteria within the water heater. (This
harmless bacteria is non-toxic to humans.)
the
of" water which
may.fall
to produce
a sizzling
or
d. an excess of active hydrogen in the tank. This is caused by
the corrosion protective action of the anode.
Because of the suddenness and amount of"water, condensation
water may be diagnosed as a "tank leak". After the water in the
tank warms up (about 1-2 hours), the condition should disappear.
Smelly water may be eliminated or reduced in some water heater
models by replacing the anode(s) with one of less active material,
and then chlorinating the water heater tank and all hot water
lines. Contact Sears Service for further information concerning
an Anode Replacement Kit #9001453 and this Chlorination
"fi-eatment.
cooler
tank surfaces
and form drops
onto the burner
or other hot surfaces
"frying"
noise.
Do not assume the water heater is leaking until there has been
enough time for the water in the tank to warm up.
If the smelly water persists after the anode replacement and chlorination treatment, we can only suggest that continuous chlorination and filtering conditioning equipment be considered to
eliminate the water problem.
An undersized water heater will cause more condensation. The
water heater must be sized properly to meet the family's
demands for hot water including dishwashers, washing machines
and shower heads.
Do not remove the anode leaving the tank unprotected. By
doing so, all warranty on the water heater tank is voided.
Excessive condensation may be noticed during the winter and
early spring months when incoming water temperatures are at
their lowest.
"AIR"
Good venting is essential for a gas fired water heater to operate
properly as well as to carry away products of combustion
and
water vapor.
IN
HOT
WATER
FAUCETS
AWARNING
HYDROGEN GAS: Hydrogengascan be producedin a hot
water system that has not been used for a long period of
time (generally two weeks or more). Hydrogen gas is
extremely flammableand explosive.To preventthe possibility of injury under these conditions,we recommend the hot
water faucet be opened for several minutes at the kitchen
sink before any electricalappliances which are connectedto
the hot water system are used (such as a dishwasher or
washingmachine). If hydrogengasis present,there will probably be an unusualsoundsimilar to air escapingthrough the
pipe as the hot water faucet is opened. There must be no
smokingor openflame near the faucetat the time it is open.
SMOKE/ODOR
It is not uncommon to experience a small amount of"smoke and
odor. during the initial start-up. This is due to burning offof oil
from metal parts, and will disappear in a short while.
33
Troubleshooting
Operational
VENTING
Guide
Conditions
MANUAL
RESET
(cont'd)
(cont'd)
SWITCH
NOT
There is a venting manual reset switch located on the draft
hood. If the switch is activated, it will not reset itself_ Before
resetting this switch, check for flue blockage and propriety of the
venting system. "_(breset the venting manual reset switch, press
the redreset button.
ENOUGH
OR NO
HOT
WATER
• Check the manual gas shut offvalve to be sure it is open.
• The ON/OFF switch on the control box must be "ON".
• The temperature adjustment button may be set too low. See the
"Temperature Regulation" section.
• The gas company can check the gas input to see if it is correct.
An underfired water heater will not heat water as quickly.
• Look for leaking or open hot water faucets. Make sure all are
dosed.
BLOWER
MOTOR
• The cold water inlet temperature may be colder during the
winter months. It will take longer to heat the water and seem
like less hot water.
RESET SWITCH
• lfyou cannot find what is wrong, call the Sears Service Center.
WATER
IS TOO
HOT
1. The temperature ad ustment button may be set too high. See
the "'l_mperature Adjustment" section.
NOTE: A period of time is necessary after an adjustment has
been made for the water temperature to reach the new temperature setting.
2. If lower temperature settings will not lower the water temperature, call the SearsService Center.
DRAFT HOO r
HIGH
TEMPERATURE
(Single-Use
Type
Energy
LIMIT
Cut
SWITCH
Off)
The thermostat has a built-in limit switch which will actuate in
case of excessive water temperatures. The heater cannot be relit
until the gas control valve is replaced. It is important that a serviceman be called to determine the reason for limit operation
and thus avoid repeated thermostat replacement. Lower the temperature adjustment setting on new control. Contact the Sears
Service Center.
A WARNING
J
Should overheating occur or the gas supplyfail to shut off,
turn "OFF" the manual gas control valveto the appliance. J
34
Troubleshooting
Guide
(cont'd)
Leakage Checkpoints
Use this guide to check a "Leaking" water heater. Many suspected "Leakers" are not leaking tanks. Often the source of the water
can be found and corrected.
CAUTION
J
Read this manual first. Then before checking the water J
heater make sure the gas supply has been turned
"OFF", and never turn the gas "ON" before the tank is J
completely full of water.
J
If you are not thoroughly familiar with your local gas codes your
water heater, and safety practices, contact the Sears Service
Center to check the water heater.
CAUTION
J
Never use this water heater unlessit is completely filled
with water. To prevent damage to the tank, the tank J
must be filled with water. Water must flow from the hot J
water faucet before turning "ON" gas to the water
heater.
Water at the draft hood is water vapor which has condensed out of the combustion products. This is caused by a
problem in the vent. Contact the Sears Service Center.
O
*Condensation may be seen on pipes in humid weather or
pipe connections may be leaking.
@*The
O
primary anode rod fitting may be leaking.
Small amounts of water from temperature-pressure relief
valve may be due to thermal expansion or high water pressure in your area.
O
O
*The temperature-pressure
the tank fitting.
O
Water from
slightly.
®
Q
a
relief valve may be leaking at
drain valve may be due
to
the valve opened
*The drain valve may be leaking at the tank fitting.
Combustion products contain water vapor which can condense on the cooler surfaces of the tank. Droplets form and
drip into the fire or run on the floor. This is common at
the time of startup after installation and when incoming
water is cold.
Water in the water heater bottom or on the floor may be
from condensation, loose connections, or the relief valve.
DO NOT replace the water heater until a full inspection
of all possible water sources is made and necessary corrective steps taken. Leakage from other appliances, water
lines, or ground seepage should also be checked.
NOTE= "lb check where threaded portion enters tank,
insert cotton swab between jacket opening and fitting. If
cotton is wet, follow "Draining" instructions
in the
"Periodic Maintenance" secnon" and then remove fitting.
Put pipe dope or teflon tape on the threads and replace.
Then follow "Filling the Water Heater" instructions in the
"Installing the New Water Heater" section.
35
Troubleshooting
Guide
_,WARNING
J
This troubleshootingguidehasbeen suppliedfor useby quali-J
fled servicepersonnelwho havea completeunderstanding
of
bothe ectricticandgas.
(cont'd)
_i CAUTION
PROPERTY DAMAGE.
THERMOSTAT
No
I
]*lhrn "ON"
Is gas being
thermostat?
AND
GAS SUPPLY CHECK
supplied
to the
Yes
gassuppl_
Is thermostat calling for heat? Run
(hot) water from heater and set
adjustment
button higher. Check
using a manometer
at thermostat
pressure tap.
I
Yes
Is there a minimum gas pressure
4" W.C. for natural gas or 10"
W.C. for propane (L.R) gas?
i
Call gas company
pressure.
to increase gas
_,_
NO
!
.............
J
l
I
Yes
GO TO "SYSTEMS
SECTION,
J
Label all wiring before disconnecting any wiring; to ensure J
correct reconnection.
Failure to follow this instruction J
could cause improper and possible dangerous operation,
resulting in DEATH, SERIOUS
BODILY INJURY, OR
CHECK"
PAGE 37.
36
<
I
Troubleshooting
SYSTEMS
Guide
CHECK
_,WARNING
DO NOT BY-PASS ANY CONTROLS
TO MAKE
HEATER OPERATE. OPERATE ONLY AS WIRED
FROM FACTORY.
Please check guidelines below. For your safety, water heater service
should be performed only by a qualified service technician.
VABC
An open earth ground circuit to the
ignition system.
I. Check that the earth ground connection is
properly connected.
2. Check that the ground conductor on the
water heater is properly connected.
Wiring error or a high resistance to
earth ground.
I. Check for proper connection of line
neutral and hot wires.
2. Check that the water heater is securely
connected to earth ground.
Pressure switch remained closed longer
than 5 seconds after the call for heat
h Pressureswitch wiring is incorrect.
2. Replacepressure switch.
000000
VABC
000000
VABC
000000
(cont'd)
began.
•
A B C
000000
•
0
•
•
Pressure switch remained opened longer
than 5 seconds after the combustion
blower was energized.
A B C
0 • •
Error in the hot surface ignitorcircuit,
h Check that all wiring is correct and secure.
2. Replacehot surface ignitor.
System in lockout.
I.
2.
3.
4.
Problem in the gas valve driver circuit.
I. Turn power to the water heater offfor
I0 seconds and then back on.
•ABC
000000
•ABC
h Pressureswitch wiring is incorrect.
2. Pressureswitch tubing not connected
correctly.
3. Air intake or exhaust obstructed.
000000
Gassupply isoff or too low to operate.
Hot surfaceignitor not positioned correctly.
Low voltage to the water heater.
Electric polarity to unit is incorrect - test
and correct.
2. Replace gas control valve.
•ABC
Problem with the internal circuit.
I. Turn power to the water heater off for
I0 secondsand then back on.
2. Replacegascontrol valve.
Problem with the internal circuit.
I. Turn power to the water heater off for
I0 secondsand then back on.
2. Replacegascontrol valve.
Flamesignalsensedout of proper
sequence.
I.
Replace gas control valve.
ECO activated.
I.
Replace gas control valve.
h
Press and release each of the buttons once.
000000
•ABC
000000
•
0
•
0
A B C
0 • 0
•ABC
000000
•ABC
000000
•ABC
000000
One ofthetemperatureadjust
stuck closed.
buttons
2. Replace gas control valve.
Water temperature sensor is either
open or short circuited.
37
h Check that all wiring is correct and secure.
2. Replace gas control valve.
Troubleshooting
I;,];T+]:]II :1_I
NOT ENOUGH
HOT WATER
Guide
[I¢_'Te_]=
[,,_+]ILej d[e] _.l
Blower will not run.
A) "ON/OFF" control switch turned off.
B) Blower unplugged.
C) No power at outlet.
D) Thermostat defective.
E) Control harness defective.
F) High limit control circuit open.
G) Blower motor defective.
Thermostat problems.
A) Thermostat set too low.
B) Thermostat or ECO defective.
Others
A)
B)
C)
D)
A)
Heater undersized.
Low gas pressure.
Incoming water is unusually cold.
Leaking hot water pipes or fixtures.
Not enough dilution air to mix with
flue gases.
VENT PIPE TOO HOT
(ABOVE
17O°F)
YELLOW
FLAME
B) Dilution air too hot for mixing with
flue gases.
C) Wrong burner orifice.
A) Dirt in burner ports
B) Combustion air path restricted.
C) Not enough dilution air.
CONDENSATION
WATER LEAKS
LEAKING
T&P
HOT WATER ODORS
(Refer to SMELLY WATER)
WATER TOO HOT
WATER HEATER SOUNDS
SIZZLING-RUMBLING
SOOTING
HEATER LIGHTS BUT GOES
OUT IN 4-5 SECONDS
(cont'd)
A) Water on the floor under heater.
B) Water dripping from blower assembly.
Improperly sealed, hot or cold supply
connections, relief valve, drain valve
or thermostat threads.
Turn switch to the "ON" position.
Plug blower back into 115VAC. outleL
Repair service to outlet.
Replacethermostat.
Replacecontrol harness.
Replace ECO.
Replace Blower Assembly.
Set temperature control highe_
Replacethermostat or ECO as required.
Reducehotwateruse.
Contact dealer.
Allow more time for heater to reheat.
Have plumber check and repair leaks.
Proper dilution air must be provided for dilution of flue
temp. Referto "INSTALLATION INSTRUCTIONS"
section.
Check for heat sources around and/or blockage of
dilution
air intake at draft hood (see page 28).
Install correct orifice.
Turnoffheaterand gas,
dean burnerhead.
Check dilution
airintake,
exhaustventing,
andair
openingsinbottom basepanforobstructions
or
blockage.
Check dilution air intake for obstructions or
blockage.
See "CONDENSATION" section.
Provide drip "TEE" to catch condensation from horizontal section of exhaust vent close to blower assembly.
Tighten threaded connections.
Leakagefrom other appliancesor water
lines.
Inspect other
Condensation of flue products.
Thermal expansion in closed water
system.
Improperly seated valve.
See "CONDENSATION"
High sulfate or mineral content in
water supply.
Bacteria in water supply.
Thermostat set too high.
Condensation dripping on burner.
Sediment at bottom of heater tank.
Improper combustion.
Outlet polarity is reversed.
appliances near water heate_
Chlorinate water supply.
Refer to TEMPERATURE REGULATION.
See "CONDENSATION" section.
Clean sediment from tank. Refer to DRAINING
instruction in Maintenance section of manual.
Refer to COMBUSTION AIR AND VENTILATION
on pages I0, I I, and 12.
Test polarity and correct.
38
section.
Install thermal expansion tank (DO NOT plug
T&P valve).
Check relief valve for proper operation
(DO NOT plug T&P valve).
Drain and flush heater thoroughly then refill.
Notes
39
Parts Order
List
THE ECONOMIZER TM 6 POWER VENT GAS WATER HEATER MODEL NUMBERS:
153.332861
40 Gal. L.P.
153.332870HA
40 Gal. High Altitude L.E
153.332880
50 Gal. L.P.
153.332890HA
50 Gal. High Altitude L.E
28
PVC, ABS or CPVC Items for all
models supplied locally
278
I
27
25d
b
24
7
9
lr_:j
10
2o
14
_15
19_
16_
40
8
Parts Order
List (cont'd)
THE ECONOMIZER TM 6 POWER VENT GAS WATER HEATER MODEL NUMBERS:
153.332861
40 Gal. L.P.
153.332870HA
40 Gal. High Altitude L.E
153.332880
50 Gal. L.P.
153.332890HA
50 Gal. High Altitude L.E
MODEL
KEY
NO.
I
2
3
4
5
6
7
8
9
I0
II
12
13
14
15
16
17
18
18
20
21
22
23
24
25
26
27
28
#
153.332870HA
9001957
9001993
9001957
9001993
9003082
9003081
9002365
9003892
9000071
9002402
supplied locally
supplied locally
9003082
9003082
9003081
9003081
9002365
9002546
9003892
9004035
9000071
9000071
9002402
9002402
PART DESCRIPTION
3" Vent Cap w/Screen (PVC)
Wall Collar
Schedule40 Vent Pipe
Schedule40 90° Street Elbow
Venting Manual Reset Switch
Blower/Draft Hood Assembly
Dip Tube
Anode Rod
Temperature-Pressure Relief Valve
Drain Valve
Drain Valve Washer
(_½f"x _Yd"x %"thick)*
Inner Door
Hot Surface IgnitionAssembly
Burner Assembly (L.P.)
Orifice (LR) High Altitude
Drill Size
Manifold (L.P.)
Gas Control Valve (L.R)
Wiring Harness
Manifold Cover
Air Pressure Switch Cover
On/Off Switch
Air Pressure Switch
Power Cord
Flue Baffle
Baffle Adapter Collar
Mounting Bracket
Nipple w/Heat Traps
2" Vent Cap Screen
Manual
NUMBERS
153.332861
PART
9001584
900028 I
9003627
900241 I
0230225
#50
9003686
9003692
9003628
9000358
9001971
9001773
9003090
9003095
9003093
9000275
9002512
9003719
9000031
153.332880
153.332890HA
NUMBERS
9001957
9001993
9001584
9001584
9000281
9000281
9003627
9003627
9002411
9002411
0230224
0230225
#51 (HA)
#50
9003686
9003688
9003692
9003692
9003628
9003628
9000358
9000358
9001971
9001971
9001773
9001773
9003090
9003089
9003095
9003095
9003093
9003094
9000275
9000275
9002512
9002512
9003719
9003719
9000031
9000031
184820-000
9001957
9001993
9003082
9003081
9002546
9004035
9000071
9002402
9001584
9000281
9003627
9002411
0230224
#51 (HA)
9003688
9003692
9003628
9000358
9001971
9001773
9003089
9003095
9003094
9000275
9002512
9003719
9000031
* Also available at most hardware stores.
#Not Illustrated
Now that you have purchased your Gas Water Heater, should a need ever exist for repair parts or service, simply contact any SEARS Service
Center or call 1-800-4-MY-HOME (1-800-469-4663). Be sure to provide pertinent facts when you call or visit.
All parts listed may be ordered from any SEARS Service Center, most SEARS stores and by calling 1-800-366-PART (1-800-366-7278). lftbe
parts you need are not stocked locally, your order will be electronically transmitted to a SEARS Repair Parts Distribution Center for handling.
The model number of your Gas Water Heater will be found on the model rating plate located near the gas control valve.
WHEN ORDERING REPAIR PARTS, ALWAYSGIVE THE FOLLOWING INFORiMASI'ION:
MODEL NUMBER
PART DESCRIPTION
SERIAL NUMBER
PART NUMBER
THIS IS A REPAIR PARTSLIST, NOT A PACKING LIST.
41
Parts Order
List
THE ECONOMIZER TM 6 POWER VENT GAS WATER HEATER MODEL NUMBERS:
153.332960
40 Gal.
153.332970HA
40 Gal. High Altitude
153.332980
50 Gal.
153.332990HA
50 Gal. High Altitude
28
PVC, ABS or CPVC Items for all
models supplied locally
278
I
27
25d
b
24
7
9
22_
lr_:j
10
2o
14
_15
19_
16_
42
8
Parts Order
List (cont'd)
THE ECONOMIZER TM 6 POWER VENT GAS WATER HEATER MODEL NUMBERS:
153.332960
40 Gal.
153.332970HA
40 Gal. High Altitude
153.332980
50 Gal.
153.332990HA
50 Gal. High Altitude
MODEL
KEY
NO.
I
2
3
4
5
6
7
8
9
I0
II
12
13
14
15
16
17
18
18
20
21
22
23
24
25
26
27
28
#
153.332970HA
9001957
9001993
9001957
9001993
9001957
9001993
9001957
9001993
9003082
9003081
9002365
9003892
9000071
9002402
supplied locally
supplied locally
9003082
9003082
9003081
9003081
9002365
9002546
9003892
9004035
9000071
9000071
9002402
9002402
9003082
9003081
9002546
9004035
9000071
9002402
PART DESCRIPTION
3" Vent Cap w/Screen (PVC)
Wall Collar
Schedule40 Vent Pipe
Schedule40 90° Street Elbow
Venting Manual Reset Switch
Blower/Draft Hood Assembly
Dip Tube
Anode Rod
Temperature-Pressure Relief Valve
Drain Valve
Drain Valve Washer
(%2"x _Y_"x/B" thick)*
Inner Door
Hot Surface IgnitionAssembly
Burner Assembly (Nat.)
Orifice (Nat) High Altitude
Drill Size
Manifold (Nat.)
Gas Control Valve (Nat.)
Wiring Harness
Manifold Cover
Air Pressure Switch Cover
On/Off Switch
Air Pressure Switch
Power Cord
Flue Baffle
Baffle Adapter Collar
Mounting Bracket
Nipple w/Heat Traps
2" Vent Cap Screen
Manual
NUMBERS
153.332960
PART
9001584
9000281
9003627
9002411
0230120
#33
9003689
9003691
9003628
9000358
9001971
9001773
9003090
9003095
9003093
9000275
9002512
9003719
9000031
153.332980
153.332990HA
NUMBERS
9001584
9001584
9000281
9000281
9003627
9003627
9002411
9002411
0230141
0230120
#36 (HA)
#33
9003689
9003685
9003691
9003691
9003628
9003628
9000358
9000358
9001971
9001971
9001773
9001773
9003090
9003089
9003095
9003095
9003093
9003094
9000275
9000275
9002512
9002512
9003719
9003719
9000031
9000031
184820-000
9001584
9000281
9003627
9002411
0230141
#36 (HA)
9003685
9003691
9003628
9000358
9001971
9001773
9003089
9003095
9003094
9000275
9002512
9003719
9000031
* Also available at most hardware stores.
#Not Illustrated
Now that you have purchased your Gas Water Heater, should a need ever exist for repair parts or service, simply contact any SEARS Service
Center or call 1-800-4-MY-HOME (1-800-469-4663). Be sure to provide pertinent facts when you call or visit.
All parts listed may be ordered from any SEARS Service Center, most SEARS stores and by calling 1-800-366-PART (1-800-366-7278). lftbe
parts you need are not stocked locally, your order will be electronically transmitted to a SEARS Repair Parts Distribution Center for handling.
The model number of your Gas Water Heater will be found on the model rating plate located near the gas control valve.
WHEN ORDERING REPAIR PARTS, ALWAYSGIVE THE FOLLOWING INFORiMASI'ION:
MODEL NUMBER
PART DESCRIPTION
SERIAL NUMBER
PART NUMBER
THIS IS A REPAIR PARTSLIST, NOT A PACKING LIST.
43
FULL ONE YF_R WARRANTY
ON WATER HEKFER
For one year from the date of purchase, when your Sears Kenmore water heater is installed
residence in accordance with the instructions in this manual, Sears will:
and operated
in a single-family
1. Repair defects in material or workmanship
in this water heater, free of charge.
2. Furnish and install a new current model water heater of equal capacity and quality, free of charge, ifa leak occurs in the tank.
LIMITEDWARIb_N'ITON "[ANKSTHAT LEAK
After one year and through
the tank, Sears will furnish
installation.
6 years from the date of purchase for a water heater used in a single-family residence, ifa leak occurs in
a new current model water heater of equal capacity and quality. You will be charged for any
if the water heater is subjected to commercial, institutional,
industrial or use in residences
warranty coverage for tanks that leak is effective for 2 years from the date of purchase.
"libobtain warranty service, SIMPLY CALL 1-800-4-MY-HOME
product is in use in the United States.
"]['hiswarranty
®(1-800-469-4663).
of two families or more, the above
This warranty
applies only while this
gives you specific legal rights and you may also have other rights which vary from state to state.
SEARS, ROEBUCK
AND CO., Dept. 817 WA, HOFFMAN
ES'I'ATES, 1L 6(1179
The price of your water heater does not include a free checkup service call. On water heater installations arranged by Sears, Searswarrants the installation.
A charge will be made on service calls due to poor or incomplete installation. These include:
a. Adjusting thermostat
c. Leaks in pipes or fittings
e. Condensation
b. Lighting pilot
d. Improper venting
MASTER PROTECTION
AGREEMENTS
• Fast help by phone - phone support from a Sears technician on
products requiring in-home repair, plus convenient repair s&eduling.
Congratulationson making a smart purchase.Yorenew Kenmor4_product is designedand manufactured foryearsof dependableoperation. But
llke all products, it may require preventivemaintenance or repair from
time to time. That's when having a Master Protection Agreement can
saveyou money and aggravation.
• Power surge protection against electrical damage due to power fluctuations.
• Rental reimbursement
than promised.
Purchasea Master ProtectionAgreement now and protect yourselffrom
unexpectedhassleand expense.
if repair of your covered product takes longer
Once you purchase the Agreement,a simple phone call is all that it takes
for you to scheduleservice.You can call anytime day or night, or schedule a serviceappointment on-line.
"l]le Master I)rotection Agreementalso helps extend the life of your new
product. Here'swhat's included in the Agreement:
Sears has over 12,000 professional repair spedalists, who have access to
over 4.5 million quality parts and accessories. That's file kind of professionalism you can count on to help prolong the life of your new purchase
for years to come. Purchase your Master Protection Agreement today!
• ExpertService by our 12,000 professionalrepairspecialists.
• Unlimited service and no charge for parts and labor on all covered
repairs.
Some limitations and exclusions apply. For prices and additional
information call 1-800-82%6655
• "No-lemon" _tee
- replacementof your coveredproduct if four
or more product failuresoccur within twelvemonths.
SEARS
INSTALLATION
SERVICE
• Productreplacementif your coveredproduct can't be fixed.
For Searsprofessionalinstallationof home appliances,garagedoor openers, water heaters and other major home items, in the U.S.A., call
1-800-4-MY-HOME®.
• Annual PreventiveMaintenance Check at your request - no extra
charge.
For in-home major brand repair
Call 24 hours a day, 7 days a week (USA
1-800-4-MY-HOME
service
and Canada)
®
(I-800-469.4663)
v_w.seaiws.eom
The model number of your water heater is found on the model rating plateon the front of the water heater.
Sears, Roebuck and Co., Moffman
Estates, IL 60179 U.S.A.