1
PLEASE READ THE INSTRUCTION CAREFULLY BEFORE OPERATING THIS UNIT.
WARNING
To prevent fire or shock hazard, do not expose this appliance to rain or moisture.
IMPORTANT
Since the CD circuitry may cause interference to other radio tuners nearby, switch this unit off
when not in use or move it away from the affected radio tuner.
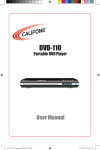
Compact Disc Player
with Anti-Shock System
JX-CD680
This device complies with Part 15 of the FCC Rules, operation is subject to the following two
conditions: (1) This device may not cause harmful interference, and (2) this device must accept
any interference received, including interference that may cause undesirable operation.
NOTE : This equipment has been tested and found to comply within the limits for a Class B
digital device, pursuant to Part 15 of the FCC Rules. These limits are designed to provide
reasonable protection against harmful interference in a residential installation. This equipment
generates, uses and can radiate radio frequency energy and, if not installed and used in accordance with the instruction, may cause harmful interference to radio communications. However,
there is no guarantee that interference will not occur in a particular installation. If this equipment
does cause harmful interference to radio or television reception, which can be determined by
tuning the equipment off and on, the user is encouraged to try to correct the interference by one
or more of the following measures:
• Reorient or relocate the receiving antenna.
• Increase the separation between the equipment and receiver.
• Connect the equipment into an outlet on a circuit different from that to which the receiver is
connected.
• Consult the dealer or an experienced radio / TV technician for help.
SAFETY CERTIFICATION
This Compact Disc Player is made and tested to meet safety standards of the FCC, requirements and compliance with safety performance of the U.S. Department of Health and Human
Services, and also with FDA Radiation Performance Standards 21 CFR Subchapter J.
DANGER
LASER SAFETY
This unit employs an optical laser beam system in the CD mechanism, designed with
built -in safeguards. Do not attempt to disassemble, refer to qualified service personnel.
Exposure to this invisible laser light beam may be harmful to the human eye.
INVISIBLE LASER RADIATION
WHEN OPEN AND INTERLOCK FAILED OR DEFEATED.
AVOID DIRECT EXPOSURE
TO LASER BEAM.
INSTRUCTION MANUAL
THIS IS A CLASS-1 LASER PRODUCT. USE OF CONTROLS, OR ADJUSTMENTS
OR PROCEDURES OTHER THAN THOSE SPECIFIED HEREIN, MAY RESULT IN
HAZARDOUS LASER LIGHT BEAM EXPOSURE.
SAFETY PRECAUTIONS
1. Do not open the cabinet. Refer servicing to qualified personnel only.
2. Do not expose to excessive heat, direct sunlight, dust, moisture, vibration or shock.
3. Use ONLY the AC adaptor provide, others may damage your unit. Disconnect from the wall
outlet when the set is not to be used for an extended period of time.
4. When cleaning your unit, use a soft dry cloth, do not use solvents or commercially available
cleaners as they may damage or discolor the finish.
5. Do not wear headphones while operating a motor vehicle, this could create a traffic hazard
and is illegal in many areas.
6. The headphones supplies with your unit provide super stereo listening while allowing you to
hear outside sounds when listening at normally low volume levels. Listening at extremely
high volume levels minimizes the intrusion of outside noise/sounds.
7. If you notice that the sound has become weak or distorted, this is an indication that your
batteries are low. Replace with new or recharged (see "BATTERY OPERATION")
1
POWER SOURCES NORMAL BATTERIES / AC ADAPTOR
LOCATION OF CONTROLS
6
7
8
9
1
2
3
4
5
10
11
12
Battery Power Operation
1. Open the battery compartment cover
and insert two "AA" alkaline batteries inside the battery compartment.
Follow the polarity as indicated in the
battery compartment.
2. Close the battery compartment
cover.
Battery Type
Alkaline "AA"
Average Playing Time
(Continuous Play)
Normal Play Anti-Skip
Mode
Play Mode
Approx. 9 hrs. Approx. 8 hrs.
Ni-CAD
Rechargeable
(min specification Approx. 3.5 hrs. Approx. 2.5 hrs.
recommended
1.2V - 650mA)
Note: Zinc/Carbon, or Zinc/Chloride type
batteries are not recommended for this unit
as their use will result in extremely short
playing times. Wherever possible and for
economy, it is recommended that the mains
adaptor supplied with this unit is used.
13
AC Operation
1. Insert the DC plug, at the end of the
AC adaptor cord into the DC input
jack.
2. Plug the AC adaptor into a 120V AC
power outlet socket.
14
1.
2.
3.
4.
5.
6.
7.
8.
Mode Button
LCD Display
Backward Skip / Search Button
Charge Indicator
Forward Skip / Search Button
Program Button
Anti Shock Button
Stop Button
15 16
9. Play / Pause Button
10. DC Jack
11. Battery Cover
12. Hold Switch
13. CD Lid Open Switch
14. Volume Control Knob
15. Phones Jack
16. Bass Boost Switch
2
Note: If the AC plug of this unit does
not fit in your AC outlet, a plug adaptor
(Not supplied) should be used.
Consult your local dealer on the type of
plug adaptor required.
LOW BATTERY ALERT
When the Batt. indicator appears in the
LCD panel, this means that the batteries are losing their charge. In this case
the CD player will not function properly
and the batteries must be replaced.
In case the Ni-cd rechargeable are being used follow the instruction on how
to recharge the batteries detailed in the
owners manual.
ON
3
CHARGING AND USE OF RECHARGEABLE BATTERIES
LISTENING WITH HEADPHONES
Rechargeable Battery Operation
This unit can fully recharge specified rechargeable batteries, in approximately 15
hours. The rechargeable batteries (NOT supplied) should be recharged before
they are used for the first time if they are low in power or they have not been used
for a long period (over 60 days).
Connect the plug of the stereo headphones into
the PHONES (GREEN) socket.
1. Open the battery compartment cover and
insert two of the recommended rechargeable batteries, matching polarity. (1.2V
650mA)
BOTH BATTERIES MUST BE OF RECHARGEABLE NICKEL-CADMIUM TYPE,
OTHERWISE THE BATTERIES MAY EXPLODE OR LEAK.
Use the type of rechargeable battery
with negative side exposed area.
2. Connect the supplied AC adaptor's plug to
the DC input jack and corresponding end
to an AC household outlet.
USE ONLY THE AC ADAPTOR SUPPLIED
WITH THE SET FOR CHARGING.
Note : Charge light will illuminate.
3. After 15 hours, please unplug the AC adaptor.
DO NOT CHARGE CONTINUOUSLY FOR 24 HOURS OR MORE. DOING SO
CAN CAUSE THE PERFORMANCE OF THE RECHARGEABLE BATTERY TO
DETERIORATE.
4. If the operating time decreases drastically even when the rechargeable nickelcadmium batteries are properly recharged, purchase a new set of rechargeable
nickel-cadmium batteries.
5. When charging for the first time or after a long time, playing time may be reduced.
In this case, charge and discharge the batteries several times.
4
TO PHONES
Caution: Avoid excessive volume levels and
listening to sound for a long period of time when
using headphones.
■ Adjust Volume to the desired level.
HANDLING COMPACT DISCS
This unit is designed to play only compact disc bearing the identification logo below.
Other disc may not conform to the CD standard and may not play properly.
• Dirty, scratched or warped disc may cause
skipping or noise.
• Handle the disc only by the edges. To keep
clean, do not touch its surface.
• Discs should be stored in their cases after use
to avoid serious scratches.
• Do not expose disc to direct sunlight, high
humidity, high temperatures or dust etc. Prolonged exposure to extreme temperatures can
warp the disc.
• Do not stick or write anything on either side of
disc. Sharp writing instruments, or the inks
used in some felttip pens, may damage its
surface.
Remove the disc
Hold the edge and gently press the centre pivot
as illustrated, to pick up the disc.
CAUTION:
Wait for the disc to stop rotating before pressing
the OPEN button.
Note: This unit can play 3" (8cm) single CD's
without an adaptor. Do not use a CD single
adaptor for these discs.
5
INSERT WITH
THE LABEL
FACING UP.
PRESS THE CLAWS
AT THE CENTER OF
THE DISC CASE.
PRESS THE
DISC GENTLY
TO INSERT IT.
LIFT OUT WITHOUT
TOUCHING THE
RECORDED SURFACE.
INCORRECT
CORRECT
FROM THE CENTER TO THE EDGE
INCORRECT
CLEANING DISCS
• Finger prints should be carefully wiped from
the surface of disc with a soft cloth. Unlike
conventional records, compact discs have no
grooves to collect dust and microscopic debris,
so gently wiping them with a soft cloth should
remove most particles. Wipe in a straight
motion from the center to the edge.
• Never use thinner, benzine, record cleaner or
anti-static spray on a compact disc. Such
chemicals can damage its plastic surface.
LCD DISPLAY INFORMATION
WHEN POWER ON
• If disc is in, starts auto adjustment. During
adjustment, display shows - -.
• If no disc, then disc is displayed.
Put the disc and close the lid, then starts auto
adjustment again.
• If the lid is opened, display shows OPEN.
Closing the lid starts auto adjustment.
BASIC DISC PLAY
This CD-player can play Audio Discs such as CD-Recordables and CD-Rewritables.
Do not try to play a CD-ROM, CDi, VCD, DVD or computer CD.
1. Connect the headphones to the PHONES (GREEN) socket.
2. Press the OPEN button to open the CD compartment lid.
3. Adjust the VOLUME to minimum.
4. Insert the disc with the label side facing up.
5. Close the lid securely until a click is heard.
6. Press the PLAY button to start playing.
To Emphasize the bass sound
Set the BASS BOOST switch to the ON position.
Note: The bass boost performance will be dependant on the
VOLUME control setting.
HOLD Switch
This switch prevents accidental selection of an unwanted
function during Playback or Stop mode. In the HOLD "ON"
position, no function button on the unit can operated
(except OPEN). Moving the switch to the "OFF" position,
the unit returns to normal operation.
• When TOC data has been read, display shows TOC
1 second.
• Starts play from track No. 1 automatically.
ANTI-SHOCK starts flashing.
BASS BOOST
ON
OFF
TO PLAY FROM STOP CONDITION
• Press PLAY/PAUSE button,
then display changes to 01 00:00 and starts play.
HOLD
OFF
ON
Turning Power on and off
This unit has no ON/OFF switch. To turn on and off, press the following buttons.
To turn on: Press >II PLAY/PAUSE (playback starts).
To turn off: Press ■ STOP button once to standby mode.
If press ■ STOP button twice, it will be turn off the power immediately.
Auto power-off function
When the unit is stopped (standby mode) for approximately 30 seconds, the power
is automatically turned off.
6
• If can't read TOC then Er is displayed.
Note: TOC means Table Of Contents.
• When the memory full condition,
ANTI-SHOCK stops flashing.
TO STOP
Press STOP key, then stops play and TOC is displayed.
TO PAUSE
Press PLAY/PAUSE button, then pause on/off
alternately. On pause condition, time display is
flashing.
7
REPEAT/PLAY MODES
INTRO PLAY
Every time the MODE button is pressed.
The corresponding mode appears in the display window.
1. Press MODE button three times, then INT is
displayed.
2. Press PLAY / PAUSE button, and starts INTRO play
from track no. 01.
MODE
MODE
MODE
MODE
REPEAT
1
NORMAL
3. Select INTRO mode during play, INT starts flash.
REPEAT
ALL
INTRO
•
•
•
Press PLAY/PAUSE button, then stops flash and
starts INTRO play from track no. 01.
Press >>I or after finish to play the current track,
stops flash and starts INTRO play from next
track.
Press I<<, then stops flash and starts INTRO
play from current track.
PROGRAM PLAY
RANDOM
Shown on the LCD display. The
current track on the disc will be
repeated.
Shown on the LCD display. All
tracks on the disc will be repeated
During playback
MODE
X 1
During playback
MODE
X 2
NOTE: In normal mode none of the above symbols show in the display.
To set the program play
• Programmes can be set in the STOP mode or normal play mode.
1. Press the PROG button, then PRG and starts flash.
2. Press I<< or >>I to select the desired track.
3. When desired track is displayed, press PROG button
to register. Then track No. display change to 00
again.
4. Repeat step 2 and 3 to program the order of more
tracks up to 20 tracks can be programmed into
memory.
To complete programming and start play
Press PLAY/PAUSE button, then PRG stops flash and
starts play soon.
NORMAL PLAYBACK
Press ANTI-SHOCK key, then
This allows selected tracks on the disc to be played in any desired order.
disappear.
A
indicator appears on the display when the
batteries need to be changed.
8
To clear programming
• Register 00 on the first program track.
• Open the door.
• Power Off
9
RANDOM PLAY
MAINTENANCE
Enables all the tracks on a disc to be played in a Random (Shuffle) sequence.
Cleaning the Cabinet
Wipe with a soft cloth. If the cabinet is very dirty, dampen the cloth with a weak
solution of neutral detergent and water, and then wipe clean.
1. Press MODE button four times, then RND is
displayed.
2. Press PLAY/PAUSE button, then the track No. is
selected at random and starts play.
3. Select RANDOM mode during play, RND starts
flash.
• Press PLAY/PAUSE button or I<< or >>I, stops
flash and starts RANDOM play.
• After finish to play the current track, stops flash
and starts RANDOM play.
Cleaning the Lens
A dirty lens will cause sound skipping and, if the lens is very dirty, the CD may not
work. Open the disc cover and clean the lens as below.
• Dust or Dry Particles
Using a camera lens brush/blower, blow on the lens couple times, then wipe it
lightly with the brush to remove dust. Then, blow on the lens once more.
• Fingerprints
If the lens cannot be cleaned by using a brush/blower, use a dry cotton swab
starting in the middle and working to the outside edge.
SKIP AND SEARCH FUNCTION
Locating a Particular track
To go back to the beginning of the current or a previous track
Press I<< lightly and repeatedly.
To go to the beginning of following
tracks
Press >>I lightly and repeatedly.
Locating a Particular Point in a track
To search backwards at high speed
Keep I<< depressed
To search forward at high speed
Keep >>I depressed
Low level audio will be heard during the search process to assist in locating the
correct point in the track.
10
11
USING ANTI-SHOCK AND SKIP FREE PROTECTION FEATURE
PRODUCT SPECIFICATIONS
Note the "
" indicator appears on display as being empty when the player first
activated. It immediately begins to store sound data in memory bank, the indicator
PICK UP
appears to be "
Laser diode
Material : GaAlAs
Properties
Wavelength: h = 780nm
" when the data buffer is full.
When the laser loses tracking due to mechanical shock, the data stream into the
memory is interrupted but the data output from the memory buffer continues, so
the sound is not interrupted. As the data is read from the memory, the indicator
changes from "
" to "
".
System
Emission duration : continuous
Laser output: < 44.6µW
Error correction
Once the laser locks again on the CD track, the data stream is fed to the memory
and joined to the previous data (see indicator changes) at higher speed, this provides
higher level shock protection than the traditional one.
Compact disc digital audio system
Cross-interleave Reed-solomon code
AUDIO
D/A conversion
DAC four times oversampling
CAUTION
If the unit is subject to excessive and continuous repeated shocks than expected,
Frequency response
20-20,000Hz (+1/-3 dB)
Wow and filter
Below measurable limits
it will cause sound skip. Also note the "
No. of channels
2 Channel (stereo)
" indicator will appear empty.
NOTES
• When the "ANTI-SHOCK" is operating, the battery consumption is higher
because the disc rotates faster than normal and also the memory circuitry is
activated.
• When the digital anti-skip function is switched "ON" or "OFF", the sound will be
interrupted, and it is normal.
• Remember that condition such as dirty, scratched or warped discs may cause
skipping or noise thereby affecting performance of "ANTI-SHOCK" system.
12
Output level
Headphones : 20mW (321)
Bass boost effect (100Hz)
+8 dB
GENERAL
Power requirements
- 2 x LR6 "AA" alkaline battery
- DC in 6V jack accepts AC power adaptor
(centre positive)
Power consumption
0.8W (DC 3V) under normal condition
Dimension
Approx. 128 (W) x 28.5 (H) x 137 (D) mm
Weight
Approx. 200g not including battery
13