1
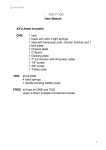
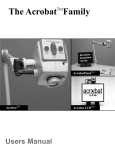
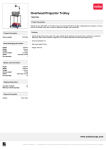
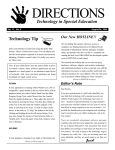
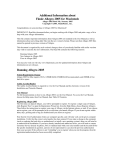
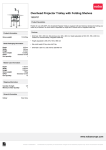
Chapter 3 Projected Visuals 1 The Digital Camera During lecture 4, we have mentioned that graphic images can be acquired through a digital camera. Digital cameras are similar to traditional cameras except that images are recorded on a disk or on a memory chip rather than on film. The digital images stored on disk can be later transferred into a computer. The digital images can be used in the preparation of your teaching resources. Digital cameras are more expensive than traditional cameras. However, unlike traditional photos, there are no expenses associated with the production of digital images. This is because the disk of a digital camera can be used over and over again to store captured images. A typical digital camera pack will include the following: 1. 2. 3. 4. 5. 6. 7. the digital camera, a memory card/disk to store photos. cable/s that connect the camera to the computer. a CD-ROM containing software that will help you transfer pictures from the camera to the computer. a set of rechargeable batteries and a battery charger. a mains power supply AC adapter. a user manual. The following sections include basic instructions that will help you use the digital camera available at the Teachers’ Resource Centre, University of Malta. Taking Pictures1 Before attempting to take any photos make sure that the memory card and rechargeable batteries are correctly inserted in the camera. 1. 2. 3. Press the Power button to turn the camera on. Turn the mode dial to the Capture setting. Adjust the appropriate camera settings. 1 This procedure may vary according to the make and model of the digital camera. Please refer to the instruction manual of your digital camera for details. Notes Compiled by James Cilia & Emile Vassallo 42 MSZ4101 ~ Projected; Non-Projected; Audio & Video Media 4. 5. Place the subject in the viewfinder. Press the Shutter button. Notes Compiled by James Cilia & Emile Vassallo 43 MSZ4101 ~ Projected; Non-Projected; Audio & Video Media Reviewing Pictures The captured pictures can be viewed instantly on a digital camera equipped with an LCD screen: 1. Turn the mode dial to the Review setting. The last picture taken appears on the LCD in a full screen view. 2. Press and release the right or left arrow to review the pictures captured. The number of pictures that you can store on the memory card depends: on the memory space of the memory card the resolution and compression of the captured pictures. High-resolution pictures are those that contain a lot of detail and colour. Such pictures use up a lot of memory. You can reduce this space by setting up the camera to take lower quality pictures – before capturing these. The low quality setting compress pictures to smaller sizes. When a picture is compressed, some colour and detail information is discarded. Connecting the Camera to the Computer This procedure will enable us to transfer the images held in the camera memory onto our computer. These can then be manipulated and stored on floppy disks or CDs. Before connecting the camera to the computer you need to install the software supplied with your camera. Close all application programs in Windows. Insert the CD and follow the installation instructions. Most digital cameras can communicate with a computer using an RS232 serial connection and a Universal Serial Bus (USB) connection. The transfer of pictures is slower if done through a RS232 serial connection (maximum data transfer rate of 115 kb/sec compared to 12 Mb/sec). Typically all computers support RS232 serial connections. To connect the camera via a serial cable: 1. 2. 3. 4. Plug on end of the serial cable into a COM port on the back of your PC. Open the serial port on the side of the camera. Plug the other end of the serial cable into the camera’s serial port. Turn on the camera. Transferring Pictures from the Camera to the Computer 1. 2. 3. 4. 5. Create a folder on the windows desktop. Double-click My Computer icon. Double-click the camera icon. Double-click the camera folder icon. A window listing individual pictures is displayed. Drag the pictures to the folder created in step 1. Notes Compiled by James Cilia & Emile Vassallo 44 MSZ4101 ~ Projected; Non-Projected; Audio & Video Media The Overhead Projector Projected visuals are defined as media formats in which text and still images are enlarged and displayed on an illuminated screen. The text and images are usually printed on a transparent film such as an overhead transparency or a slide. The printed material is projected onto a screen or wall by passing a strong light through the film and magnifying this onto a light coloured screen (whiteboard or white wall). Projection devices used in schools include the overhead projector, the slide projector and the film strip projector. Nowadays, use of the film strip projector is slowly diminishing in educational settings. There are two types of overhead projectors (OHPs): 1. Transmissive OHP – This has a box with a large ‘stage’ on the top. Light from a powerful lamp inside the box passes through a transparency or acetate (approximately 8” × 10”) placed on the stage. A lens and mirror system mounted on a bracket above the box turns the light beam 90 degrees and projects the image onto a screen or blank wall. Notes Compiled by James Cilia & Emile Vassallo 45 MSZ4101 ~ Projected; Non-Projected; Audio & Video Media 2. Reflective OHP – This projector has its light source above the stage and shines down onto the transparency. The light is reflected by a mirror-like surface beneath the transparency back up and through the lens system. This projector works well in dim settings. So it may not be the ideal projector to opt for. However, it is more portable due to its lightweight compared to the transmissive projector. Advantages of OHPs Versatility – OHP are relatively very easy to use to use once you learn some basic skills. The bright and colourful images that OHPs can generate make them ideal for day-light classroom teaching. Classroom control – The projector is operated from the front of the classroom, with the teacher facing his/her students and maintaining eye contact. This enhances class control during a lesson. Abundance of materials – Besides projection of text and still images printed on transparencies, OHPs can project cutout silhouettes and small opaque objects. In addition to these teachers can make use of commercially produced transparency packs that are becoming increasingly available with school textbooks. Notes Compiled by James Cilia & Emile Vassallo 46 MSZ4101 ~ Projected; Non-Projected; Audio & Video Media Flexibility – The teacher can manipulate projected materials, pointing to important items, highlighting them and adding details with coloured pens or covering part of the message and progressively revealing information. You can also present complex visuals in a series of transparencies one on top of the other. Transparencies that sit on top of each other are referred to as overlays. Group Work – Students can be given the opportunity to present their group work to the rest of the class by preparing transparencies themselves. Advance preparation – Sometimes teachers spend considerable time during their lessons writing or drawing on the board. Transparencies enable the teacher to prepare the material well in advance before the lesson. Thus, more lesson time is spent on the real teaching. Limitations of OHPs Teacher dependent – OHPs cannot be programmed to display information by themselves. Not self-instructional – Overhead transparencies are not ideal for independent study – students need to place these against light to use them. OHPs are designed for large group presentations. Preparation required – Printed materials and other non-transparent items, such as magazine illustrations cannot be projected immediately but must first be made into transparencies. This may involve the use of the photocopier, scanner, a word-processor etc. Expense – Some transparencies, especially those suitable for inkjet printers can be quite expensive. Use of OHPs Any subject teacher can make use of the OHP during his/her lessons. following may give you a few ideas [some are suggested by Green (1982)]: The Art – Primary and Secondary colours. Use strips of coloured transparencies to demonstrate the composition of primary and secondary colours by overlapping red, yellow and blue. Language – Colour coding. Use different coloured pens to highlight nouns, verbs and other parts of speech. Literature – Poetry. Visually compare different forms of poetry and compare rhyming patterns. Notes Compiled by James Cilia & Emile Vassallo 47 MSZ4101 ~ Projected; Non-Projected; Audio & Video Media Mathematics – Fractions. Use circles and squares that are cut into pieces to illustrate different fractions. Accounting – Balance Sheets. Use transparencies to build worksheets showing debit and credit amounts. Science – Magnetism. Show how iron filings align to poles of a magnet placed on an OHP stage. Biology – Circulation. Use overlay transparencies to show the flow of oxygenated and deoxygenated blood in different principal organs of a mammal. Geography – Map measurements. Use a clear plastic ruler over a transparency of a map; demonstrate how to measure the distance between any two points. Computer Studies – Flow diagrams. Use transparencies to display flow chart diagrams. Preparing Transparencies As indicated earlier on one advantage of the OHP is that transparencies can be produced by the teacher himself/herself. Teachers should develop the necessary skills to prepare their own transparencies. You can draw on transparencies directly or prepare them using a computer. 1. Direct Drawing – A marking pen is used to write or draw on A4 size transparencies. The lettering and drawing should be restricted to a rectangular message area of 19cm × 24cm. The lettering and drawing should be neat and legible. Spelling mistakes and illegible handwriting will be magnified to the size of the projection screen. Some OHPs are equipped with a pair of roller attachments that can carry long rolls of plastic that can be advanced or reversed by a small hand crank. This allows you to use the OHP as if you are using the whiteboard during a lesson but without the need to rub over to write or draw new content. This OHPs allow you to prepare in advance a series of images in proper sequence. The felt-tip markers used for writing and drawing on transparencies should carry the label ‘overhead projection pen’. There are two types of OHP felttip markers: Water-soluble markers – The ink produced from such markers can be erased with a damp tissue. Permanent markers – These markers are typically used for the preparation of transparencies that will be used over and over again. Notes Compiled by James Cilia & Emile Vassallo 48 MSZ4101 ~ Projected; Non-Projected; Audio & Video Media 2. Preparation of transparencies using the computer – Different computer programs can be used in the preparation of transparencies. Any word-processing software can be used to generate text based (phrases, lists, keywords etc.) transparencies. Nowadays, word-processors, such as MS Word, can be used to draw shapes, incorporate clip arts, graphs, organization charts etc. You can also use presentation graphics software, such as MS PowerPoint , to prepare transparencies. PowerPoint displays different visual styles (e.g. outline, bulleted list, graph, map or combination) to choose from. The program automatically selects legible type fonts and sizes, and organizes the pictures and text into a clean visual layout. You can output your content on plain paper and photocopy these onto transparencies. Alternatively you can print directly to a transparency by a laser or inkjet printer. Note that the transparencies use for laser and inkjet printers are different. The following table lists a number of guidelines that you should keep in mind when preparing overhead transparencies: Guidelines… Preparing Transparencies Present a single concept on each transparency. A complex transparency may be confusing and unreadable for the viewer. Design a series of transparencies rather than a crowded single transparency. Use transparencies to present visual ideas through the use of diagrams, graphs and charts. Include minimum text, with no more than six words per line and six or fewer lines per transparency. Avoid preparing a transparency directly from a paragraph of printed material. Select key points or concepts to summarise the information, and then elaborate on them verbally. Use key words to help students remember each point. Use letters at least 1cm high to ensure legibility. One quick way to check it is to lay the transparency on the floor over a piece of white paper. If you can read it from a standing position, your students should be able to read it when projected. Avoid mixing horizontal and vertical transparencies in a presentation, as this can be annoying to the students and bothersome to you. Simplify a complex diagram by dividing it into segments for separate transparencies or by using masking or overlay techniques. Overlays can explain complex ideas by adding information sequentially to the base transparency. Notes Compiled by James Cilia & Emile Vassallo 49 MSZ4101 ~ Projected; Non-Projected; Audio & Video Media Educational Resources ACTIVITY 9 Prepare a set of a minimum of two overhead projector transparencies which help you in a lesson of your choice. You may use the computer and present transparency as a document on diskette; alternatively you can produce transparencies using direct drawing. You are expected to be able to discuss techniques you have adopted. Educational Resources will the the the SUPPLEMENTARY ACTIVITY Use the internet to look for sites that can help you create better OHP transparencies. Make a list of these sites and share them with other students. Notes Compiled by James Cilia & Emile Vassallo 50