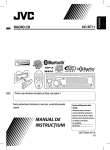
1
FRANÇAIS ENGLISH FRANÇAIS ROMÂNĂ ENGLISH CD RECEIVER CD RECEIVER RÉCEPTEUR CD RADIO CD PLAYER RÉCEPTEUR CD KD-BT22 KD-BT22 For canceling the display demonstration, see page 5. Pentru a oprithe derularea mesajelor afişaj, vezi For canceling demonstration, see page 5.pagina 5. à la page 5. Pour annuler la display démonstration despe affichages, référez-vous Pour annuler la démonstration des affichages, référez-vous à la page 5. For installation and de connections, to the separate manual. Pentru instrucţiuni instalare şirefer conectare, consultaţi manualul separat. ForPour installation and connections, refer to the separateaumanual. l’installation et les raccordements, se référer manuel séparé. Pour l’installation et les raccordements, se référer au manuel séparé. MANUAL DE INSTRUCŢIUNI INSTRUCTIONS INSTRUCTIONS MANUEL D’INSTRUCTIONS MANUEL D’INSTRUCTIONS GET0529-003A [EX/EU] GET0529-003A [EX/EU] Declaraţia de Conformitate cu Directiva R&TTE 1999/5/CE Declaration of Conformity with regard to the R&TTE Directive 1999/5/EC 0984 Prin aceasta, JVC, declară că acest English: Hereby, JVC, KD-BT22 declares that this echipament respectă KD-BT22 is incerinţe, compliance withşithe principalele precum alte essential requirements andDirectivei other prevederi importante ale relevant provisions of Directive 1999/5/ 1999/5/CE. EC. Español: Por medio de la presente JVC declara que el KD-BT22 cumple con los requisitos esenciales y cualesquiera otras disposiciones aplicables o exigibles de la Directiva 1999/5/CE Deutsch: Hiermit erklärt JVC, dass sich das Gerät KD-BT22 in Übereinstimmung mit den grundlegenden Anforderungen und den übrigen einschlägigen Bestimmungen der Richtlinie 1999/5/ EG befindet. Ελληνική: ΜΕ ΤΗΝ ΠΑΡΟΥΣΑ JVC ∆ΗΛΩΝΕΙ ΟΤΙ KD-BT22 ΣΥΜΜΟΡΦΩΝΕΤΑΙ ΠΡΟΣ ΤΙΣ ΟΥΣΙΩ∆ΕΙΣ ΑΠΑΙΤΗΣΕΙΣ ΚΑΙ ΤΙΣ ΛΟΙΠΕΣ ΣΧΕΤΙΚΕΣ ∆ΙΑΤΑΞΕΙΣ ΤΗΣ Ο∆ΗΓΙΑΣ 1999/5/ΕΚ. Hiermit erklärt JVC die Übereinstimmung des Gerätes KD-BT22 mit den grundlegenden Anforderungen und den anderen relevanten Festlegungen der Richtlinie 1999/5/EG befindet. (Wien) Italiano: Con la presente JVC dichiara che questo KD-BT22 è conforme ai requisiti essenziali ed alle altre disposizioni pertinenti stabilite dalla direttiva 1999/5/CE. Français: Par la présente JVC déclare que l’appareil KD-BT22 est conforme aux exigences essentielles et aux autres dispositions pertinentes de la directive 1999/5/CE. Malti: Hawnhekk, JVC, jiddikjara li dan KD-BT22 jikkonforma mal-ħtiġijiet essenzjali u ma provvedimenti oħrajn relevanti li hemm fid-Dirrettiva 1999/5/ EC. Nederlands: .Hierbij verklaart JVC dat het toestel KD-BT22 in overeenstemming is met de essentiële eisen en de andere relevante bepalingen van richtlijn 1999/5/EG. Português: JVC declara que este KD-BT22 está conforme com os requisitos essenciais e outras disposições da Directiva 1999/5/CE. Dansk: Undertegnede JVC erklærer herved, at følgende udstyr KD-BT22 overholder de væsentlige krav og øvrige relevante krav i direktiv 1999/5/EF Suomi: JVC vakuuttaa täten että KD-BT22 tyyppinen laite on direktiivin 1999/5/ EY oleellisten vaatimusten ja sitä koskevien direktiivin muiden ehtojen mukainen. G-1 ENGLISH Vă mulţumim că aţi ales un produs JVC. Thank you for purchasing a JVC product. Înainte utilizare, vă carefully rugăm săbefore citiţi cu atenţie toate instrucţiunile, pentru a vă asiguraand că letoînţelegeţi Please read de all instructions operation, to ensure your complete understanding obtain theînbest întregime şi pentru a beneficia de funcţionarea optimă a aparatului. possible performance from the unit. IMPORTANT FOR LASERPRODUSELE PRODUCTS CU LASER IMPORTANT PENTRU 1. PRODUS1 CU LASER CLASA 1 1. CLASS LASER PRODUCT 2. ATENŢIE: Nu În interiorul aparatului nu există nicioinside piesăthe careunit; să poată de to 2. CAUTION: Dodeschideţi not opencapacul the topsuperior. cover. There are no user serviceable parts leavefi reparată all servicing utilizator; toate reparaţiile personalului calificat. qualifiedîncredinţaţi service personnel. 3. ATENŢIE: La deschiderea aparatului se emit radiaţii laser din clasa 1M vizibile şi/sau invizibile. Nu priviţi direct în interior, 3. CAUTION: Visible and/or invisible class 1M laser radiation when open. Do not view directly with optical cu instrumente optice. instruments. 4. EXEMPLU DE ETICHETĂ: ETICHETĂ DE ATENŢIONARE, APLICATĂ PE PARTEA EXTERIOARĂ A APARATULUI. 4. REPRODUCTION OF LABEL: CAUTION LABEL, PLACED OUTSIDE THE UNIT. Acest simbol este recunoscut This symbol is only valid indoar întheUniunea Europeană. European Union. Informaţii utilizatori privind casarea Informationpentru for Users on Disposal of Old aparaturii Equipmentuzate Produsele cuthat acestthesimbol nuwith trebuie This symbolmarcate indicates product aruncate împreună cu deşeurile menajere la this symbol should not be disposed as general finalul duratei loratdeitsviaţă. Dacă doriţi aruncaţi household waste end-of-life. If yousăwish to acest produs, rugămplease să faceţi lucru în dispose of thisvăproduct, doacest so in accordance conformitate cu legislaţia naţională sau cu alte with applicabledinnational reglementări ţara saulegislation localitateaor înother carerules vă in your country and municipality. Byîndisposing of this aflaţi. Îndepărtând acest produs mod corect, product correctly, you will helpresurselor to conserve naturalşi veţi contribui la conservarea naturale laresources prevenirea efecte negative asupra andeventualelor will help prevent potential negative mediului sau aand sănătăţii effects onînconjurător the environment humanumane. health. Avertisment: Warning: dacă trebuie să manipulaţi aparatul în timp ce conduceţi If you need to operate the unit while driving, be sure to autovehiculul, menţineţi-vă privirea asupra drumului. În caz look around or you may be de involved in a traffic contrar, riscaţicarefully să provocaţi un accident circulaţie. accident. Pentru siguranţă... •For Nusafety... măriţi prea mult nivelul volumului, pentru că astfel din exterior vor fi level acoperite, punândasînthis pericol • sunetele Do not raise the volume too much, will siguranţa deplasării cu autovehiculul. block outside sounds, making driving dangerous. • Opriţi autovehiculul înainte de efectuarea unor operaţii • Stop the car before performing any complicated complexe. operations. Temperatura din interiorul autovehiculului... Temperature theo perioadă car... îndelungată în Dacă autovehicululinside a staţionat condiţii de temperatură redusă sau ridicată, If you have parked the car for a long timeînainte in hot de or acold porni aparatul, când temperatura un weather, waitaşteptaţi until thepână temperature in the caratinge becomes nivel normal. normal before operating the unit. Observaţie: utilizatorii Note: OnlyExclusiv for [EX]pentru model users inmodelului UK and [EX] din Marea Britanie şi din ţările europene European countries Din motive de siguranţă, împreună cu acest aparat se For securityo cartelă reasons, ID card is provided furnizează cu aunnumbered număr de identificare imprimat, de with this unit, and the same ID Păstraţi numbercartela is imprinted asemenea, pe carcasa aparatului. într-un on loc the unit’s chassis. Keeppoate the card a safe place, as it will sigur, pentru că aceasta ajutainautorităţile să identifice help theînauthorities aparatul caz de furt.to identify your unit if stolen. 2 CONTENTS CUPRINS INTRODUCTIONS Preparation .................................................. 5 OPERATIONS Basic operations ........................................... 6 • Toate setărileadjustments anterioare vorwill fi, dealso asemenea, (cu the Your preset be erasedşterse (except excepţia dispozitivului registered Bluetooth Bluetooth device, seeînregistrat, pages 16vezi andpaginile 17). 16 şi 17). Howsătoejectaţi forciblyforţat ejectuna disc disc Cum SOURCE (SURSĂ) [Ţineţi apăsat] Pe afişaj Eject” apare mesajul (Vă rugăm să ejectaţi). “Please appears„Please on theEject” display. • Aveţi grijă sănot nutoscăpaţi atunci este ejectat. Be careful drop discul the disc whencând it ejects. •• ÎnIf this cazuldoes în care nu are notaceastă work, metodă reset your unit.succes, resetaţi aparatul. This unit is equipped the steering Acest aparat este dotat with cu o funcţie pentru wheel telecomanda remote control function. volanului. •• ÎnSee vederea conectării, consultaţi Manualul instalare/ the Installation/Connection Manualde(separate conectare (volum separat). volume) for connection. • Using the control panel............................... • Using the remote controller (RM-RK50)...... 6 7 Listening to the radio ................................... Disc operations............................................. Listening to the USB device .......................... Using the Bluetooth ® devices....................... 8 13 15 16 • Using the Bluetooth cellular phone ............ 18 • Using the Bluetooth audio player ............... 21 EXTERNAL DEVICES Listening to the CD changer ......................... Listening to the DAB tuner ........................... Listening to the iPod .................................... Listening to the other external components.............................................. 22 23 26 28 SETTINGS Selecting a preset sound mode .................... 29 General settings — PSM .............................. 32 Bluetooth settings ....................................... 36 REFERENCES More about this unit .................................... Troubleshooting........................................... Maintenance ................................................ Specifications ............................................... 38 43 47 48 3 ENGLISH Howsătoresetaţi reset your unit Cum aparatul ENGLISH ENGLISH ENGLISH How to use the M MODE and SEL Detaching the control panel How to the M SEL Detaching control Utilizarea tastelor MODEand şi SEL Demontarea panoului de panel comandă How to use use the MMMODE MODE and SEL Detaching the the control panel buttons buttons buttons If you use M MODE or SEL (select), the display and some IfIf you use MODE or SEL the displayafişajul and some Dacă sau SELas(selectare), youutilizaţi use M M tasta MODEMcontrols orMODE SEL (select), (select), the some (such thedisplay numberand buttons, (such the number buttons, şicontrols unele comenzi tastele numerice, tastele controls (such as as(precum the number buttons, 4 /¢ buttons, 5/∞ buttons, and the 4 5//∞ buttons, buttons, and şi butonul comandă ) intră control mode. 4 //¢ ¢ control ∞ buttons, buttons, and the the dial)5de enter the corresponding în modul de comandă corespunzător. control dial) enter the corresponding control mode. control dial) enter the corresponding control mode. Ex.: When you press number button 1 after pressing De exemplu:you Când apăsaţi tasta numerică dupăpressing apăsarea Ex.: button 11 1after Ex.: When When you press press number number button afterthe pressing M MODE, to operate FM tuner. tasteiMMMODE, MODE, to pentru acţionarea operate the FMtunerului tuner. FM. M MODE, to operate the FM tuner. Avoid touching the connectors. Avoid connectors. Evitaţi atingereathe conectorilor. Avoid touching touching the connectors. Attaching the control panel Attaching the control panel de comandă Attachingpanoului the control panel To use these controls for original functions, pressMontarea To for functions, press Pentru utilizacontrols aceste comenzi cu funcţiile lor iniţiale, To use use athese these controls for original original functions, press M MODE again. M apăsaţi nou tasta MODE. pressing SEL makes the unit enters a M MODE MODEdinagain. again. • MHowever, However, SEL unit enters However, pressing SEL makes makes the unitalt enters •• Totuşi, dacăpressing apăsaţidifferent tasta SEL mode. va fithe activat mod.aa different mode. • Dacă timp mode. de 15 secunde nu for apăsaţi niciuna dintre taste, different • Waiting about 15 seconds without pressing any of •• aceasta Waiting about 15 seconds without pressing of automat. Waitingvafor forfi anulată aboutthese 15 seconds without pressing any anycancels of the control. buttons will automatically these these buttons buttons will will automatically automatically cancels cancels the the control. control. Caution: Caution on volume setting: Caution: Caution volume setting: Atenţie: Măsuri de on precauţie la reglarea volumului: Caution: Caution on volume setting: If the temperature inside the car is below 0°C, the Digital devices (CD/USB) produce very little nois Dacă temperatura din interiorul autovehiculului sethe Dispozitivele digitale (CD/USB) produc foarte puţin zgomot IfIf the temperature inside the car is below 0°C, Digital devices (CD/USB) produce very noise the temperaturemovement inside the of caranimation is below 0°C, devices (CD/USB) produce very little little noiseLower the volum andthe text scroll willînDigital becomparaţie halted compared withdeother sources. situează sub 0° C, derularea imaginilor şi a textului pe cu alte surse. Înainte a folosi astfel de surse movement of and text scroll will be compared with sources. Lower the volume before movement of animation animation and textto scroll will be halted halted compared with other other sources. the volume on the prevent the display from being playing theseLower digital sources to before avoid damaging afişaj va opri pentru a sedisplay preveni redarea neclară digitale, volumul, pentru a nu deteriora difuzoarele on the thesedisplay display to prevent prevent the display display from beinga playing micşoraţi these digital digital sources to avoid avoid damaging the on to the from being playing these sources to damaging the by sudden increasela of the output level acestora. Pe afişaj vablurred. apărea . appears on the display. ca urmare a creşteriispeakers bruşte a nivelului sunetului ieşire. appears on the display. blurred. speakers blurred. speakers by by sudden sudden increase increase of of the the output output level. level. appears the display.normal When theontemperature increases, and the operating Când temperatura creşte revenind la nivelul pentru When the temperature increases, and the operating When the temperature increases, and the operating funcţionare, aceste temperature funcţii vor fi din active.these functions will start is nou resumed, temperature these functions will start temperature isis resumed, resumed, workingthese again.functions will start working again. working again. 4 4 4 ENGLISH Preparation Pregătire Cancel derularea the display demonstration setora the clock Anulaţi mesajelor pe afişaj şiand setaţi • Vezi See de alsoasemenea pages 32paginile and 33.32 şi 33. 1 2 Porniţi Turn onaparatul. the power. Introduceţi setările PSM. Enter the PSM settings. [Ţineţi apăsat] 3 [Rotiţi] Anulaţi derularea mesajelor demonstrative Cancel the display demonstrations peSelect afişaj “Demo,” then “Off.” Selectaţi „Demo” (Mod demonstrativ) şi apoi „Off” (Dezactivare). Set the clock Setaţi ora Select “Clock Hr” (hour), then adjust the hour. Selectaţi „Clock Hr” (ora), apoi setaţi ora. Select„Clock “ClockMin” Min”(minutele), (minute),apoi thensetaţi adjust the minute. Selectaţi minutele. Selectaţi „24Hours” sau „12Hours.” Select„24H/12H”, “24H/12H,”apoi then “24Hours” or “12Hours.” Finish the operaţia. procedure. Finalizaţi 4 Schimbarea informaţiilor tipului de afişare Changing the display şiinformation and pattern Când aparatul este oprit: verificarea orei curente When the power is turned off : Check the current clock time De În timpis ce tunerulaseste Ex.:exemplu: When tuner selected theselectat sourceca sursă Afişarea selectate Source sursei operation display Afişarea audiometrului Audio nivelului level meter display (vezi“LevelMeter” secţiunea „Audiometru” la (see on page 32) pagina 32) INTRODUCTIONS INTRODUCERE 5 ENGLISH ENGLISH Basic operations Basic operations Operaţii de bază Using the control panel Utilizarea de comandă Using thepanoului control panel 1 • DAB: Select DAB service. 2 3 4 5 6 7 8 9 • Select/adjust the sound mode. •1 CD/USB/CD-CH: Select folder. ••DAB: selectează un serviciu DAB. 1 DAB: Select DAB service. Enter the main [Hold]. p • USB-iPod: ••CD/USB/CD-CH: selectează un director. CD/USB/CD-CH: Selectmenu folder. Enter the main playback/ • iPod: ••USB-iPod: accesează meniul [Ţineţi apăsat]. USB-iPod: Enter menu/Pause the mainprincipal menu [Hold]. Confirm ••iPod: accesează meniul temporar selection. iPod: Enter the mainprincipal/întrerupeţi menu/Pause playback/ redarea/confirmaţi selecţia. • Turn on the power. Confirm selection. • Porneşte alimentarea cu energie. •2 Turn off the [Hold]. 2 • Turn on power the power. • Attenuate • Opreşte alimentarea cuthe energie [Ţineţi apăsat]. q the sound (if power is on). • Turn off the power [Hold]. • Bluetooth: • Atenuează Switch sunetul the (când aparatul este deja pornit). conversation media • Attenuate the sound (if the power is on). • Bluetooth: schimbă dispozitivul de comunicare în w during a phone call conversation. • Bluetooth: Switch the conversation media timpul unei conversaţii telefonice. Display window e during a phone call conversation. 3 Afişajul •4 Enter/exit Bluetooth menu.Bluetooth. 3 window •Display Accesare/ieşire din meniul • Display thelista dialed list [Hold]. Enter/exit Bluetooth menu. 4 ••Afişează de numere apelate [Ţineţi apăsat]. Flip down the panoului control panel. 5 Rabatarea delist comandă. • Display the dialed [Hold]. • To•Flip ejectdown the disc, flipdisc, down the control 5 Pentru a ejecta un rabataţi panoulpanel de comandă *1 the control panel. then press 0 on the unit. apoi tasta de pe aparat. • To eject the disc, flip down the control panel 6 Mufa de intrare AUX (echipamente *2 AUX (auxiliary) jack then pressinput 0 on the unit. auxiliare) 7 TUNER: •AUX TUNER: caută posturi de radio. •6 Search for station. (auxiliary) input jack • DAB: • DAB: cautăfor un DAB ansamblu DAB. Search ensemble. 7 • TUNER: Search for station. • CD/USB/CD-CH/USB-iPod/iPod: • CD/USB/CD-CH/USB-iPod/iPod: selectează piesa. • DAB: Search for DAB ensemble.Select track. • BT-AUDIO: • BT-AUDIO:Reverse trece laskip/forward piesa anterioară/următoare. skip. CD/USB/CD-CH/USB-iPod/iPod: Select track. 8 ••Butonul pentru volum [Rotiţi]. • Volume control [Turn]. skip/forward skip. BT-AUDIO: ••Selectează sursaReverse [Apăsaţi]. • Select the source [Press].1 8 • Volume control TUNER DAB *11[Turn]. CD * 1 USB *1 (sau1USB-iPod) *1 = DAB * CD *EXT=IN)USB * (or TUNER 1 source • Select the [Press]. CD-CH * /iPod = *1 (sau BT-AUDIO 1 = CD-CH 1/iPod 1 (or EXT USB-iPod) *= *de IN) DAB *1 = CD *1 = USB *1 (or TUNER INTRARE AUX (înapoi la* punctul pornire) = BT-AUDIO = = AUX IN (back to the 1 1 1 USB-iPod) * = CD-CH * /iPod * (or EXT IN) beginning) = BT-AUDIO = AUX IN = (back to the beginning) 6 6 •9 Enter the PSM settings [Hold]. ••Selectează/reglează de sunet. 9 Select/adjust the modul sound mode. Selectsettings preset station/DAB • TUNER/DAB: ••Accesează PSM [Ţineţi apăsat]. service. Enter thesetările PSM [Hold]. 10 • CD/USB/CD-CH: Select (for service. CD DAB ••TUNER/DAB: selectează postul station/DAB de radio/serviciul p TUNER/DAB: Selectfolder/track/disc preset presetat. changer). • CD/USB/CD-CH: Select folder/track/disc (for CD • USB-iPod: • CD/USB/CD-CH: selectează Select preset top directorul/piesa/discul menu items. changer). (pentru schimbătorul dephone CD-uri).number *2. • Bluetooth: DialSelect preset • USB-iPod: preset top menu items. • Enter • USB-iPod: opţiunile presetate ale functionsselectează mode. •meniului. Bluetooth: Dial preset phone number *2. • Bluetooth: Activatemode. Voice Dialing [Hold]. Enter functions q ••Bluetooth: formează numerele de telefon presetate *2. ChangeBluetooth: the display Activate information pattern. Voiceand Dialing [Hold]. 11 ••Accesează modul de funcţii. •wTUNER/DAB: Select the bands. the display information andDialing” pattern. •Change Bluetooth: activează funcţia „Voice (Apelarea • USB-iPod: Start/pause e • TUNER/DAB: Selectplayback. the bands. Vocală) [Ţineţi apăsat]. • BT-AUDIO: Start/pause playback. 12 • USB-iPod: Start/pause playback. Schimbarea informaţiilor şi tipului de afişare. 13 ••TUNER/DAB: frecvenţele. BT-AUDIO:selectează Start/pause playback. You selectpornirea these sources if they areredării. not ready cannot • USB-iPod: şi întreruperea or*1notYou connected. • BT-AUDIO: pornirea şi întreruperea redării. cannot select these sources if they are not ready For storing preset phone number, see page 20. or not connected. **12 Nu puteapreset selectaphone aceste number, surse dacăsee nupage sunt activate Forveţi storing 20. sau conectate. *2 Pentru memorarea numerelor de telefon presetate, vezi pagina 20. Utilizarea (RM-RK50) Using thetelecomenzii remote controller (RM-RK50) ENGLISH Instalarea cu litiu coin (CR2025) Installingbateriei the lithium battery (CR2025) Atenţie: Caution: Bateriile nu trebuie la căldură excesivăheat precum Battery shall not beexpuse exposed to excessive such as razele solare, focul sau alte sunshine, fire, or the like.surse similare. Dacă de acţiune aoftelecomenzii reduce, If theraza effectiveness the remotesecontroller înlocuiţi bateriile. decreases, replace the battery. Înainte utilizarea telecomenzii: Before de using the remote controller: •• Îndreptaţi telecomanda directdirectly spre senzorul Aim the remote controller at thede remote telecomandă al aparatului. sensor on the unit. • NU expuneţi senzorul de telecomandă la lumină intensă • DO NOT expose the remote sensor to bright light (lumină naturală sau provenind de la surse artificiale). (direct sunlight or artificial lighting). Senzor Remotepentru sensortelecomandă Avertizare a preveni riscul deand accident şi Warning (pentru (to prevent accidents damage): deteriorare): • Do not install any battery other than CR2025 or its • Nu instalaţi niciun alt tip de baterie în afară de CR 2025 equivalent. sau baterii similare. •• Nu Dolăsaţi not leave the remote controller a place (such telecomanda în locuri expuseindirect luminii as dashboards) exposed to direct sunlightîndelungate for a long solare (cum ar fi planşa de bord) pe perioade time. de timp. Store thebateria battery in a place copiilor. where children cannot • Nu lăsaţi la îndemâna reach. • Nu reîncărcaţi, scurtcircuitaţi, dezasamblaţi ori încălziţi nu o aruncaţi în disassemble, foc. • bateria Do notşirecharge, short, heat the battery, • Nu stocaţi bateria or dispose of it inîmpreună a fire. cu alte materiale metalice. •• Nu cu pensete alte instrumente Doperforaţi not leavebateria the battery withoriother metallic similare. materials. •• Înfăşuraţi bateria bandă with adezivă şi izolaţi-o atunci când Do not poke theînbattery tweezers or similar o aruncaţi sau o puneţi la păstrare. tools. • Wrap the battery with tape and insulate when throwing away or saving it. 1 • Porneşte aparatul dacă este apăsată rapid sau 1 • Turns the power on if pressed briefly or atenuează sunetul atunci când aparatul este deja pornit. attenuates theprin sound whenprelungită. the power is on. • Opreşte aparatul apăsare Turns the power off pressed and held. unei ••Schimbă dispozitivul deifcomunicare în timpul • Switchestelefonice. the conversation media during a phone conversaţii 2 • Tasta callUconversation. ▲ alternează între frecvenţele FM/AM/DAB. Changes the FM/AM/DAB bands presetate with 5 U.(ori între 2 ••Tasta D ▼ alternează între posturile serviciile DAB). • Changes the preset stations (or DAB services) • Alternează MP3/WMA/AAC/WAV. with D ∞directoarele . ••ÎnChanges timpul redării unui disc MP3MP3/WMA/AAC/WAV. de către un schimbător the folder of the de acestdisc format: • CD-uri While compatibil playing ancuMP3 on an - apăsarea rapidă schimbă discul. MP3-compatible CD changer: - apăsarea prelungită schimbă directorul. – Changes the disc if pressed briefly. • În timpul utilizării unui aparat Apple iPod: – Changes the folder if pressed and held. Conectat la aparatul KS-PD100: While listening an Applesau iPod: –• Redarea este opritătotemporar reluată cu ajutorul Connected tastei D ▼. to KS-PD100: – Pausesmeniul or resumes playback withtastei D ∞.▲ U. – accesează principal cu ajutorul – Enters thevariantă main menu (Pentru această tastelewith ▲5 U/DU.▼ / ◄ R/F ► (Now 5caU/D R/F 3awork as the *menu funcţionează taste∞de/2 selectare meniurilor.) * ▲ Uselecting : accesează meniul anterior. buttons.)* D *▼:5confirmă opţiunea U : Returns to theselectată. previous menu. Conectat un cabluthe USB: D ∞la: Confirms selection. – prin apăsare continuă, accesează meniul principal. Connected to the USB cable: – printr-o apăsare scurtă, selectează meniul dorit. – Enter the main menu if pressed and held. – prin apăsare continuă, trece rapid prin fiecare nivel al – Select the desired menu if pressed briefly. meniului principal. – Fast skip in every layer of the main menu if 3 Reglează nivelul volumului. pressed and held. 4 Selectează modul sunet (iEQ: egalizator inteligent). 3 Adjusts thesursa. volume level. 5 Selectează 4 Selects the sound mode (iEQ: intelligent equalizer). 5 Selects the source. Continuare pe pagina Continued on theurmătoare next page OPERAŢII OPERATIONS 7 ENGLISH ENGLISH ENGLISH •listening While listening to(meniul an (inselecting menu selecting For Bluetooth phone: cellular phone: tounui an iPod iPod (in iPod menu 6 For 6 Bluetooth 6 Pentru •• ÎnWhile timpul utilizării de selectare al 6 telefonulcellular mobil Bluetooth: mode): – Answers calls if pressed briefly. mode): – Answers calls if pressed briefly. telefonice. modului): –prin apăsare scurtă, preia apelurile to KS-PD100: – calls Rejects calls ifrespinge pressed and held. Conectat laConnected aparatul KS-PD100: Connected to KS-PD100: – Rejects if pressed and held. –prin apăsare continuă, apelurile telefonice. Selects an itemoifopţiune. pressed briefly.press (Then, press –calls Holds callspune if pressed briefly phone call - Apăsarea selectează apoi –prin apăsare apelurile telefonice înacall – Selects–rapidă an item if pressed briefly.(Apăsaţi (Then, – Holds ifscurtă, pressed briefly during aduring phone D ∞ toaconfirm the selection.) conversation. tasta D∞▼ pentru confirma opţiunea selectată). aşteptare. D∞ to confirm the selection.) conversation. 7 prelungită peste opţiuni odată. Skips items atifa10 time if pressed 7apăsarea • Searches foriniţiază stations (or DABposturilor services) căutarea deif pressed - Apăsarea – Skips –10 items10atsare a time pressed and held.and held. 7 Searches for rapidă, stations (or DAB services) if pressed 7 •• Prin Conectat la un cablu USB: Connected to the USB cable: briefly. radio (sau a serviciilor DAB). Connected to the USB cable: briefly. - prin apăsarea aFtastei F ►, sestart poateplay •• Prin apăsare activează – Bycontinuă holding 3, can • Searches DAB ensembles F 3, you can you start play back începe theback the Searches forcontinuă, DAB for ensembles ifcăutarea pressedif pressed and held.and held. – By holding redarea directă a piesei selectate. ansamblurilor DAB. selected item directly. • Fast-forwards or reverses the track if pressed and selected item directly. • Fast-forwards or reverses the track if pressed and - Prin apăsarea R ◄, puteţi reveni la afişajul • Prin apăsare continuă, derulează piesa rapid înainte – Bytastei holding can go backmain to the main – By holding R 2, youR 2, can you go back to the held. held. principal. sau înapoi. display. • Changes the tracks if pressed briefly. display. •• Prin Changes the tracks if pressed briefly. • Trecere la piesa anterioară/următoare (în cazul funcţiilor apăsare rapidă, schimbă piesele. • Reverse skip/forward skip for Bluetooth • Reverse skip/forward skip for Bluetooth audio. audio. audio Bluetooth). Listening to the radioradio Listening to the radio Funcţionarea aparatului 1 1 “TUNER.” Select “TUNER.” SelectaţiSelect „TUNER.” 2 2 3 3 the bands. Select Select the bands. Selectaţi banda. Search forradio a station to automată. listen—Auto Căutaţi de – căutare Searchun forpost a station to listen—Auto Search.Search. Manual Search: Hold either one of the buttons “M”uplights updisplay, on thepe display, Căutare ţineţieither apăsată taste până „M” luminează intermitent displaythen Manualmanuală: Search: Hold oneunaofdintre the buttons untilcând “M”until lights on the then press şipress apăsaţi tasta itînrepeatedly. mod repetat. it repeatedly. •receiving When receiving anradio FMbroadcast stereo broadcast with sufficient signal strength, •• La recepţionarea unei emisii FM stereo cu semnal suficient de strength, puternic, mesajullights „ up”lights up When an FM stereo with sufficient signal apare pe ecran. on the display. on the display. on the display. When FM unei stereo broadcast When an FMan stereo broadcast isFM is 3 Când recepţionarea frecvenţe hard to receive stereoto sereceive realizează cu dificultate hard 1 1 2 2 improves, effect willstereo. be lost. Reception but stereo will be lost. RecepţiaReception vaimproves, fi îmbunătăţită, darbut seeffect vastereo pierde efectul •lights on the display. • uplights on the display. se va aprinde peupafişaj. 8 8 3from Exit from the setting. Exit the setting. Ieşire din setare. 1ceWhile to anFM... FM station... 1 ÎnWhile listening tolistening an FM station... timp ascultaţi post FMstation stationun automatic presetting FM automatic presetting 2 —SSM SSM(Strong-station (Strong-stationSequential Sequential — Memory) Memory) 2YouYoucancanpreset presetupuptotosixsixstations stationsforforeach eachband. band. Whilelistening listeningtotoananFMFMstation... station... 11 While 3 322 button 3. Follow 1 and 2the of “Using Urmaţi etapele şi 2steps „Utilizarea Follow 1 steps 1 1and 2din of secţiunea “Using numberthe number 1 tastelor numerice” din coloana dincolumn. stânga. on the left Using thePreset Preset Station list buttons” onbuttons” the left column. Using the Station list ••When Dacă apăsaţi lung tastele ▲/▼, va ficanPreset afişată şiStation List will By 5 / ∞you ,you the shown display, By holding / holding ∞ the Preset Station List will • •When is• is5 shown on,on thethedisplay, can Lista detotoposturi presetate (treceţi etapa move back previous screen4). bypressing pressing number also (go to lastep 4).4). move back thetheprevious screen by number also appear (go toappear step button3.3. button Followsteps steps1 1and and2 2ofof“Using “Usingthe thenumber number 1 Follow 21 2 buttons”ononthe theleft leftcolumn. column. buttons” holding55/ ∞ /∞ , thePreset PresetStation StationList Listwill will • •ByByholding , the alsoappear appear(go(gototostep step4).4). also ENGLISH ENGLISH You preset up topentru sixeach stations for each band. Puteţi preseta până la şase posturi fiecare bandă. You can preset upcan to six stations for band. ENGLISH Using the Preset de posturi presetate Using thelistei Preset Station listStation list FMautomată station aautomatic presetting Presetarea posturilor FM — Utilizarea FM station automatic presetting SSM (Strong-station Sequential Memory • When shown on you the display, Whenpe afişaj apareis shown on,isthe display, can you can —SSM (Strong-station Sequential • Când puteţi reveni la meniul SSM (Strong-station -— Memorarea secvenţială aSequential posturilor cu move back tonumerică the previous screennumber by pressing numbe move back to the previous screen by pressing anterior dacă apăsaţi tasta 3. Memory) semnal puternic) Memory) button 3. Display the Preset 322Afişarea Display3the Preset Station List.Station List. Listei de posturi presetate. 33 Displaythe thePreset PresetStation StationList. List. 33 Display Localcu FMcele stations with the strongest Posturile locale maistrongest puternice semnale Local FMFM stations with the signals aresuntsignals are and stored automatically in the selected căutate şi memorate în banda searched andsearched storedautomat automatically inFM. the selected band. FM band. FM Local stationswith withthethestrongest strongestsignals signalsareare Local FMFMstations searchedand andstored storedautomatically automaticallyininthetheselected selected searched band. FMFM band. Manual presetting Manual presetting Presetarea manuală Ex.: Storing station 92.5 MHz92,5 intoMHz preset number De exemplu: postului FM cuof frecvenţa Ex.: Storing memorarea FM station ofFM 92.5 MHz into preset number 4numărul Selectde thepresetare preset you want Manual presetting lawant care to doriţi să to store 4 Selectaţi Select the preset number younumber store Manual presetting 4 of the FM1 band. la numărul deFM1 presetare 4 al benzii FM1. 4 of the band. into.number you want to store Ex.:Storing StoringFMFMstation stationofof92.5 92.5MHz MHzinto intopreset presetnumber number into. 4stocaţi Selectinformaţia. the preset Ex.: 4numerice ofthethe FM1band. band. buttons Using the number 4 of FM1 Utilizarea Using thetastelor number buttons 4 Usingthe thenumber numberbuttons buttons Using 1 11 2 222 3 3 Select the preset number you want to store into. into. 1 Youcan can move tothe lists ofthetheof other FMbands bands •latoYou move to the lists of the other FM bands •• •Puteţi trece listele celorlalte frecvenţe FM prin You move lists of other FMother You can move tothecan the lists the FM bands pressing number button55(5number bybypressing number button or )) or sau 5) or apăsarea tastei (( 5 ( )button bynumerice pressing ( ) or by pressing number button )înrepeatedly. 666 ((6( ( ),) repeatedly. mod 6) repeatedly. ( repetat.) repeatedly. 33 [Ţineţi apăsat] Storethe thestation. station. 55 Store 5 5 postul. Store the station. Store the station. Memoraţi Presetnumber numberflashes flashesforfora while. a while. Preset Preset number flashes for a while. Numărul de presetare luminează Preset number flashes for a while. intermitent o perioadă de timp. Continuedononthethenext nextpage page Continued OPERATIONS OPERATIONS 99 on the next pag Continuare pagina Continued pe onContinued the nexturmătoare page OPERATIONS OPERAŢII OPERATIONS 9 9 1 ENGLISH ENGLISH • When is shown on the display, youback can to the previous screen by pressing number move move back to the previous screen pressing number button 3. List, then Apelaţi Lista debyposturi presetate, apoi select Display the Preset Station to six stations for each band. button 3. 1 radio Follow 1doriţi and 2 of “Using the number selectaţi postul de pesteps careto să-l the preset station you want listen to. ing 1 to anFollow FM station... steps 1 and 2 of “Using the buttons” number on the left column. ascultaţi. buttons” on the left column. • By holding 5 / ∞, the Preset Station List will • By holdingComutaţi 5 / ∞, theto Station List alsowill appear (go to step 4). Change the selected station. laPreset postul selectat. also appear (go to step 4). ENGLISH the Preset Station Ascultarea post de radio delist peon „Search” (Căutare). Listening unui toUsing the preset station 3 Selectaţi Select “Search.” n automatic presetting Using the Preset list • When trong-station Sequential Lista de posturi presetate theStation Preset Station Listis shown on the display, you can 2 2 2 3 Pe vorpreset apăreaPTY celecodes trei coduri PTY on presetate. Theafişaj three appears the display. 3 Display the Preset Station List. Display the Preset Station List. 4 ons with the strongest signals are Theinfollowing features are available for posturile FM RDS Următoarele funcţii sunt disponibile doaronly pentru stored automatically the selected de radio FM RDS. stations. resetting Select a PTY code. Selectaţi un cod PTY. You can selectunacod PTYPTY code fromcele the Puteţi selecta dintre presetPTY PTYpresetate codes orsau from the cele six 29 coduri dintre stored PTYPTY codes. şase coduri memorate. •• Pentru memorarea tipurilor preferate types, de programe, To store your favorite programme see the efectuaţi paşii următori şi informaţiile de pagina 11. Căutarea programului RDS — Searching for FM RDSFMprogramme following and page 11. ation of 92.5 MHz into preset number 4 Select the preset number you want to store Căutarea de program (PTY) band.4 Select the preset numbertipului you wantinto. to store ber buttons into. You can tune in to a station broadcasting your favorite Start searching for your favorite programme. — PTY Search ENGLISH 5 Începeţi căutarea programului preferat. Puteţi găsi frecvenţa postuluiforcare transmite programme by searching a PTY code. programul Using the Preset Station list utomatic presetting preferat PTY. on • Whencăutând un cod appears the display, you can • When shown onofthe can ng-station• Sequential Când afişajtoapare mesajul ,isputeţi reveni ladisplay, • You can move topressing the lists the other FMyou bands movepeback the previous display by move back to the previous screen by pressing number • You canmeniul move to the lists of the other FM bands ) or by pressing number button 5 ( anterior apăsând tasta numerică 3. number button 3. button 3. by pressing number button 5( 6 /)( or ) puteţi repeatedly. , trece la alte • Când pe afişaj apare Dacă un post de radiobroadcasting transmite un program cu acelaşi / appears on the display, • When If there is a station a programme stations for6 (each band. ) repeatedly. liste apăsând în mod1 repetat tastasteps numerică Follow 1 and5 2sau of 6.“Using the number cod PTYsame selectat decode dumneavoastră, veţi recepţiona you can move to the other lists by pressing number of the PTY as you have selected, that o an FM station... 5 buttons” Store the station. on the left column. acel post.is tuned in. station 5 Store thebutton station.5 or 6 repeatedly. • By holding 5 / ∞, the Preset Station List will also appear (go to step 4). 1 Memorarea tipurilor de programe preferate Storing your favorite programme types Preset number flashes for a while. the Preset Station list FM station automatic presetting Puteţi stoca şase tipuri Using de programe preferate. You can store six favorite programme types. 2 • When shownreveni on theladisplay, you c —SSM (Strong-station•• Sequential Când pe afişaj apare mesajul ,isputeţi When appears onback thetodisplay, you can move the previous screen by pressing n 2 meniul anterior apăsând tasta numerică 3. Memory) move back to the previous by pressing buttondisplay 3. You canthe preset up to six stations band. button 3. 3 Display Preset Station List. for eachnumber [Ţineţi 1 Follow steps 1 and 2 of “Using the num 1 While listening to an FM station... apăsat] buttons” on the left column. 1 • By holding 5 / ∞, the Preset Station List Continued on the next page Continued on the next page also appear (go to step 4). OPERATIONS 9 ith the strongest signals are OPERATIONS2 9 d automatically in the selected 2 etting of 92.5 MHz into preset number buttons 10 4 3 Select the preset number you want to store into. Local FM stations with the strongest signals are searched and stored automatically in the selected FM band. 2 [Ţineţi apăsat] 3 Display the Preset Station List. 4 Select a preset number (“Preset1”– “Preset6”) you want to store into. Select a preset (“Preset1”– 3 number Select “Memory.” “Preset6”) you want to store into. aReception tipului de program favorit (PTY) Reception 2 TA Standby Reception (Recepţia în aşteptare Funcţia Standby Reception TATA Standby Reception a informaţiilor rutiere) ENGL ENGLISH ENGLISH Select “Memory.” 3 3Selectaţi Select “Memory.” „Memory” (Memorie). 1Activarea funcţiilor de recepţie în TA/PTYStandby Standby Activating TA/PTY 2Activating aşteptare a informaţiilor rutiere (TA) şi 11 either lights up or flashes on the display. Activating TA/PTY • If lights up, the unit temporarily willStandby switch either lightsAnnouncement upReception or flashes on(TA), the ifdisplay. to Traffic available, from • If anylights up,other the unit will switch source thantemporarily AM. 2 2 to Traffic TA Standby(TA), Reception Announcement available, from The volume changes to the ifpreset TA volume anylevel source other than AM. if the current level is lower than the preset 1 The volume changes to the preset TA volume level (see page 34). 5Select Select onenumber ofnumber the PTY codes. un număr de presetare (“Preset1”– a preset (“Preset1”– 4 4Selectaţi Select a preset (“Preset1”– level is lower than theis preset flashes, TAlevel reception not yet •either If if the Indicatorul securrent aprinde fieStandby continuu, fie intermitent “Preset6”) layou care doriţi stocaţi informaţia. “Preset6”) you want store into. “Preset6”) want tosăto store into. lights or flashes display. either lights up up or34). flashes on on thethe display. levelactivated. (see page pe afişaj. Tune in to another station providing 5 Select one of the PTY codes. lights up, the unit temporarily will switch 2 • If•• IfIf lights up, the unit temporarily will switch TAaparatul Standbyvareception is not yet • Dacă theflashes, seRDS aprinde, trece, temporar, signals. to Traffic Announcement (TA), if available, from Traffic (TA), ifstation available, from întomodul deAnnouncement transmitere informaţiilor rutiere (TA), activated. Tune in toa another providing source other than AM. anyany source other than AM. selected PTY code. 6 Store the dacă acesta este disponibil, de la alte surse decât the RDS signals. [Rotiţi] deactivate TA Standby Reception, select “Off” in 4 Select a preset number (“Preset1”– Toposturile volume changes to the preset TA volume TheThe volume changes to the preset volume radio AM. Volumul trece laTAnivelul steplevel 2. ifdethe goes off. “Preset6”) you want to store into. current level isrutiere) lower than the preseton the disp either lights upthe ornivelul flashes level if the current level isReception, lower than preset 6 Store the selected PTY code. presetat pentru (informaţii dacă To deactivate TATA Standby select “Off” in level (see page •decât If acesta lights(vezi up,pagina the unit level (see page 34).34). curent este maioff. redus 34).temporarily w Select one the PTY codes. 5 5Select one of of the PTYcodurile codes. Selectaţi unul dintre PTY. stepPTY 2. Standby goes flashes, TA Standby reception isStandby not • Dacă se aprinde intermitent, funcţia to Traffic Announcement TAReception Standby reception isTAnot yetyet(TA), if availa If• If flashes, Reception nu este Căutaţi post de activated. Tune in activată. to station providing anyanother source otheralt than AM. activated. Tune inîncă to another station providing 1 PTYradio Standby Reception cuRDS semnal RDS. The volume changes to the preset TA v signals. thethe RDS signals. if the current level(Recepţia is lower than t 1 a dezactiva funcţia TAlevel Pentru Standby Reception codul PTY PTY selectat. Store selected PTY code. 6 6Memoraţi Store thethe selected code. To deactivate Standby Reception, select “Off” level (see page 34). deactivate TATA Standby Reception, select “Off” in in a informaţiilor rutiere), selectaţi opţiunea „Off” 5 Select one of the PTY codes. înToaşteptare 2 îngoes TA Standby reception is Ex.: When “Classics” is selected in step 5 (dezactivare) timpul se va stinge. stepstep 2. 2. goes off.off.etapei• 2.If flashes, activated. Tune in to another station p 2 PTY Standby Reception Funcţia (Recepţie în aşteptare a Ex.: When “Classics” is selected in step 5 PTY Standby Reception PTY Standby Reception 7 Repeat steps 4 to 6 to store other PTY codes tipului de program favorit) the RDS signals. into other6preset Storenumbers. the selected PTY code. 1 1 3 Select a PTY code. To deactivate TA Standby Reception, sele 7 Repeat steps 4 to 6 to store other PTY codes step 2. goes off. other preset numbers. 3 Select a PTY code. 8intoExit from the setting. 4 exemplu: Când se selectează „Classics” (Muzică Ex.: When “Classics” is selected in step Ex.:from When “Classics” is selected in step 5 5 8 DeExit the setting. clasică) în cadrul etapei 5 asteps memora PTY la alte poziţii Repeat steps to to store other codes 7 7Pentru Repeat 4 to4alte 6 to6coduri store other PTYPTY codes 22 PTY Standby Reception Codul PTY selectat curent (dezactivare) 1 de presetare, repetaţi etapele 4 - 6. into other preset numbers. into other preset numbers. Select a PTY code. 3 3Selectaţi Select a PTY code. un cod PTY. 2 Ex.: When “Classics” is selected in step 5 from setting. 8 8Ieşire ExitExit from thethe setting. din setare. 7 Repeat steps 4 to 6 to store other PTY codes into other preset numbers. 8 [Rotiţi] Continued on the next page OPERATIONS Continued on the next page11 3 Select a PTY code. OPERATIONS 11 Exit from the setting. Continuare pe on pagina următoare Continued on next page Continued thethe next page OPERATIONS OPERAŢII OPERATIONS 1111 ENGLISH ENGLISH 4 Exit from the setting. Ieşire din setare. 4 Exit from the setting. ENGLISH 4 Indicatorul se aprinde fie continuu, intermitent either lights up or flashes on thefie display. pe • Ifafişaj. lights up, the unit temporarily will switch • Dacă se aprinde, aparatul va trece, temporar, în to your favorite PTY programme from any source either lights up ora programul flashes ondumneavoastră the display. modul de transmitere other than AM. PTY preferat din altă sursă din bandawill AM.switch • If lights up, the unitdecât temporarily flashes, PTY Standby reception PTY is not yet • Dacă If se aprinde •Exit to from your favorite PTY intermitent, programmefuncţia from any source the setting. activated. Tune innutoeste another station (or service) Standby Reception încă activată. Căutaţi alt other than AM. providing the RDS signals. (sauPTY serviciu) cu semnal RDS.is not yet flashes, Standby reception • post If de radio activated. Tune in to another station (or service) Pentru a dezactiva PTYReception, Standby Reception To deactivate PTYfuncţia Standby select “Off” providing the RDS signals. lights or flashes on the display. (Recepţia în aşteptare a tipului de program favorit), in step 2. either goes off.up • Ifopţiunea lights the unit temporarily will switch selectaţi „Off”up, (dezactivare) în timpul etapei 2. To deactivate PTY Standby Reception, select “Off” favorite programme from any source setovaayour stinge. • When DAB tuner isPTY connected, TA/PTY Standby step 2. than goes off. DAB, funcţia de recepţie în •in La conectarea tuner other AM. Reception alsounui searches for services. (See also pages aşteptare a informaţiilor şi a tipului de program flashes, PTYrutiere Standby reception is not yet • If 24 and 25.) favorit efectuează de asemenea căutarea serviciilor DAB. • Whenactivated. a DAB tuner isinconnected, TA/PTY Standby Tune to another station (or service) • (Vezi The unit will not switch to24Traffic or de asemenea paginile şi 25).Announcement Reception also the searches for services. (See also pages providing RDS signals. PTYstabilirea programme when atelefonice call connection is established • La unei legături prin intermediul 24 and 25.) through the Bluetooth Phone. mobil nu mai trece în or •Totelefonului The unit will not switch to aparatul Traffic Announcement deactivate PTYBluetooth, Standby Reception, select “Off” modul de transmitere a informaţiilor rutiereissau a tipului PTY when a call connection established inAvailable stepprogramme 2. PTYgoes off. codes de program favorit. through the Bluetooth Phone. News, Affairs, Info, Sport, Educate, Drama, Culture, • Science, When a Varied, DAB tuner TA/PTY Standby PopisMconnected, (music), Rock M (music), Coduri PTY disponibile Available PTY searches codes for services. (See also pages Reception also Easy (ştiri), M (music), Light M (music), Classics, Other News Info (informaţii), News, Info,(afaceri), Sport, Educate, Drama,Sport, Culture, andAffairs, 25.)Affairs M24(music), Weather, Finance, Children, Social, Educate (emisiuni educative), Drama (teatru radiofonic),or Varied, Pop M (music), Rock M (music), • Science, The unit will not switch to Traffic Announcement Religion, Phone In, Travel, Leisure, Jazz, Country, Culture (ştiinţă), Varied (diverse), Pop Easy M(cultură), (music),Science Light Classics, PTY programme whenMa(music), call isOther established M pop), (music), Folkconnection M (music), MNation (muzică RockOldies, M (muzică rock), Easy MDocument (muzică Mthrough (music),theWeather, Finance, Children, Social, Bluetooth Phone. uşoară), Light M (muzică uşoară), Classics (muzică Religion, Phone In, Travel, Leisure, Jazz, Country, clasică), Other M (alte genuri de muzică), Weather Nation MFinance (music), Oldies, Folk M (music), Document Available PTY (informaţii codes (meteo), financiare), Children News, Affairs, Info, Sport, Educate, Drama, (emisiuni pentru copii), Social (emisiuni sociale),Culture, Religion Science, religioase), Varied, PopPhone M (music), Rock M (music), (emisiuni In (emisiuni interactive), Easy M (music),Leisure Light M(programe (music), de Classics, Other Travel (călătorii), divertisment), Jazz (muzică Weather, jazz), Country (muzică country),Social, Nation M M (music), Finance, Children, (muzică populară), (muzică veche), M (muzică Religion, Phone In,Oldies Travel, Leisure, Jazz,Folk Country, folk), Document (documentare) Nation M (music), Oldies, Folk M (music), Document 12 Identificarea program Tracing the aceluiaşi same programme— –Network-Tracking Network-Tracking Reception Reception (Recepţionare optimă în reţea) WhenTracing driving in the an area whereprogramme— FM reception is not same Dacă vă deplasaţi într-o zonă unde banda FM nu se sufficient enough, unit automatically in to Network-Tracking Reception recepţionează destulthis de puternic, aparatul va tunes trece imediat another FM altui RDS post station of theaparţinând same network, possibly pe frecvenţa FM RDS aceleiaşi reţele, When driving in an area where FM reception is not broadcasting the sameacelaşi programme stronger care probabil transmite program,with având însă in semnal sufficient enough, this unit automatically tunes to signals (see (vezi the illustration below). mai puternic imaginea de mai jos). another FM RDS station of the same network, possibly broadcasting the same programme with stronger Programul A transmis în spectreon dedifferent frecvenţăfrequency diferite Programme A the broadcasting Tracing same programme— signals (see the illustration below). (01 – 05) areas (01 – 05) Network-Tracking Reception Programme A broadcasting frequency When driving in an area whereonFMdifferent reception is not areas (01enough, – 05) this unit automatically tunes in to sufficient another FM RDS station of the same network, possibly broadcasting the same programme with stronger signals (see the illustration below). Programme A broadcasting on different frequency areas (01 – 05) Funcţia Network-Tracking (Recepţie optimă a When shipped from the Reception factory, Network-Tracking postului de is radio) este activată din fabrică. Reception activated. Pentru a modifica setările funcţiei Network-Tracking To change the Network-Tracking Reception When shipped from the factory, Network-Tracking Reception, secţiunea „AF-Regn’l” setting, seevezi “AF-Regn’l” on page 34.de la pagina 34. is activated. •Reception La conectarea tunerului DAB , consultaţi, de asemenea, • When the DAB tuner is connected, refer to “Tracing aceluiaşi program – Recepţia Tosecţiunea change“Identificarea the Network-Tracking Reception the same programme—Alternative Frequency unei frecvenţe alternativeon (DAB AF)”34. de la pagina 25. setting, see “AF-Regn’l” page Reception (DAB AF)” on page 25. • When the DAB tuner is connected, refer to “Tracing the same programme—Alternative Frequency Selectarea automată a postului de Automatic station Reception on page selection— 25. When shipped(DAB fromAF)” the factory, Network-Tracking radio Căutarea programului Programme Search Reception is–activated. To change Network-Tracking Reception În mod obişnuit, când apăsaţi numerice, aparatul Usually whenthe you press the tastele number buttons, the preset Automatic station selection— intră pe isfrecvenţa posturiloron de page radio 34. corespunzătoare setting, see “AF-Regn’l” station tuned in. Programme Search •Ifpresetate. When the DAB is connected, to are “Tracing the signals fromtuner the FM RDS preset refer station not Usually whenprogramme—Alternative you pressFMthe buttons, the preset Dacă postului RDSnumber presetat este suficient thesemnalul same Frequency sufficient for good reception, this unit,nuusing the AF station is tuned in. deReception puternic pentru oAF)” recepţie de calitate, aparatul, utilizând onfrequency page 25. broadcasting data, tunes in(DAB to another the Ifdate theAF,signals from RDS preset station are not va intra pe othe altăFM frecvenţă de emisie a aceluiaşi same programme as the original preset station is program transmis de postul presetat iniţial. sufficient for good reception, this unit, using the AF broadcasting. Automatic station • Acest aparat nevoie defrequency câtevaselection— momente pentru the a data, tunes in are to another broadcasting • intra TheProgramme unit takes some time to inutilizând to another pe frecvenţa altui post de tune radio funcţia Search same programme as the original preset station is de station ausing programme search. căutare programului. broadcasting. Usually when you34press the number buttons, the preset • Consultaţi See also page şi pagina • The unit takesin. some34.time to tune in to another station is tuned station using programme search. If the signals from the FM RDS preset station are not • See alsofor page 34reception, this unit, using the AF sufficient good data, tunes in to another frequency broadcasting the same programme as the original preset station is broadcasting. • The unit takes some time to tune in to another station using programme search. Toate piesele redate înrepeatedly mod repetat până schimbaţi All tracks willvorbefiplayed until youcând change the sursa discul este ejectat. sourcesauorpână ejectcând the disc. Blocarea ejectării Prohibiting discdiscului ejection operations [Ţineţi apăsat] ENGLISH ll be played repeatedly until you change the ect the disc. ENGLISH Disc operations Funcţionarea CD player-ului Prohibiting disc ejection Pentru a anula blocarea, repetaţi această operaţie. To cancel the prohibition, repeat the same Pentru şi a ejecta discul To stopa opri playredarea and eject the disc procedure. To cancel the prohibition, repeat the same procedure. ay and eject the disc •• Apăsaţi SOURCEto(SURSĂ) pentru a asculta altă sursă de Press SOURCE listen to another playback source. redare. RCE to listen to another playback source. Prin apăsarea (sau menţinerea apăsată)buttons a următoarelor Pressing (or holding) the following allows you taste to... puteţi să... After apăsarea pressing tastei M MODE, pressapăsaţi the following buttons După M MODE, următoarele tasteto... pentru a... Trece peste 10 piese Skip 10 tracks MP3/WMA/AAC: ÎnWithin cadrul aceluiaşi MP3/WMA/AAC: the same [Press] Selectaţi Selectpressing track piesa M MODE, press the following buttons After to... holding) the following buttons allows[Apăsare] you director [Apăsare CăutareSkip înapoi/ folder [Hold] continuă] Reverse/fast-forward 10 tracks track MP3/WMA/AAC: Within the same [Press] Select track rapidă înainte Repetarea piesei: Repeat Track: folder [Hold] Reverse/fast-forward 1 MP3/WMA/AAC: selectează repetă curentă MP3/WMA/AAC: Select folder * Repeatpiesa current track track directorul Repetare director: Repeat Track: Repeat Folder: MP3/WMA/AAC: directorul MP3/WMA/AAC: Select folder *1 Repeat current track MP3/WMA/AAC:repetă Repeat current curent Repeat Folder: folder Localizare directă a folder unei anumite Locate particular *3MP3/WMA/AAC: Repeat current piese sau a unui director*or3 track Redarea ordine aleatorie a tuturor RandomînFolder: (for MP3/WMA/AAC) folder 2 *3 Locate folder directoarelor: (Tasteparticular numerice) MP3/WMA/AAC) (Number buttons)* *2 (pentru MP3/WMA/AAC: Randomly play all directly Random Folder: (for MP3/WMA/AAC) or track MP3/WMA/AAC: redă în ordine aleatorie tracks of current folder, tracks 2 uttons) * *directly 11 MP3/WMA/AAC: Randomly playtoate all piesele din directorulthen curent, apoi Prin apăsareaeither continuă taste, puteţi afişadisplay Lista de By holding oneaoforicărei the buttons, you can of next folders tracks of current folder, then tracks pe cele din directoarele următoare. 14).14). thebuttons, Folder(vezi List (see page ng either one of directoare the youpagina can display Random Disc: a discului: of next folders Redare aleatorie **22 Apăsaţi selecta un între şi 6; menţineţi Press topentru selectanumber 1 tonumăr 6; hold to1select number er List (see page 14). Random Disc: Randomly play allîn tracks redă toate piesele ordine aleatorie pentru a selecta un număr între 7 şi 12. select number 1apăsat to 6; 12. hold to select number 7 to Randomly play all tracks **33 Este necesară alocarea unui număr din 2 cifre pentru • Puteţi, asemenea, anulaplayback modul demode redarebyselectând You candealso cancel the selecting It is required that folders be assigned with 2-digit director, la 2-digit începutul denumirii acestuia—01, 02,the playback • You can names—01, also cancel mode selecting ired that foldersfiecare be assigned „Off” (Dezactivare) sau apăsaţi “Off” orbypress number buttontasta 4 ( numerică ). numbers atwith the beginning of their folder 03ofş.a.m.d. “Off” or press number button 44 (( at the beginning theirand folder ).). 02, 03, so names—01, on. nd so on. Continued on the next page OPERATIONS Continuare peon pagina următoare Continued the next page 13 OPERATIONS OPERAŢII 13 5 Whenpe afişaj display, can you can • When shown on you the display, n Sequential •• Când apareis shown on,isthe puteţi reveni la meniul Changelato the selected item. Treceţi opţiunea selectată. File List (Lista de fişiere) A Dacă If Fileeste Listselectată is selected Lista dispare şi începeand redarea. The list disappears playback move back the previous screen by pressing move back the previous screen number by pressing number anterior dacătoapăsaţi tastatonumerică 3. ENGLISH ENGLISH Selectarea director/uneion piese delist pe Selectingunui a folder/track the listă (numai pentru fişierele MP3/WMA/AAC) (only for MP3/WMA/AAC file) Using the Preset Station list presetting starts. ENGLISH ENGLISH button 3. button 3. each band. Using1the Preset ation automatic presetting 1 1list Follow steps and 2 of Station “Usinglist the number B Dacă a fostList selectată Folder List (Lista de directoare) If Folder is selected Using the Preset Station • When is shown on the display, you can tion... M (Strong-station Sequential buttons” on the left column. • When is shown on the display, you canmove back to the previous screen by pressing number ory) holding 5 /3.∞, the Preset Station List will move back to the previous screen •by By pressing number button „LIST”also (Lista). et up to six stations for each band. Select “LIST.” appear (go tosteps step14). button 3. 2 Selectaţi and 2 of “Using the number 1 Follow stening to an FM station... 1 Follow steps 1 and 2 of “Using the numberbuttons” on the left column. buttons” on the left column. • By holding 5 / ∞, the Preset Station List will • Dacă fost selectat curent, apărea If theacurrent folderdirectorul is selected, FilevaList • By holding 5 / ∞, the Preset Station List will also appear (go to step 4). Lista de fişiere, apoi repetaţi etapele 4A şi 5toA appears, then repeat steps 4 and 5 also appear (go to step 4). 2 3 2 3 pentru a începe redarea. start playback. •• Dacă este selectat fişier, redarea începestarts din If another folder alt is selected, playback primul fişier selectat.folder. from the 1stdinfiledirectorul of the selected 2 Selectaţi tipul listă. Select the listde type. 3 Display the Preset Station List. Display the Preset Station List.[Rotiţi] 3 Display the Preset Station List. gest signals are Mally stations the strongest signals are in thewithselected Director Fişier d and stored automatically in theselected . opţiune. 4 Selectaţi Select anoitem. al presetting FM of 92.5 MHz into preset number 4 preset Select the preset number you want to store intostation preset number Select the number you want to store FM1 4 band. Select the preset number you want to store into. into. number into.buttons 4 De exemplu: Cândisseselected selectează „File”3 Ex.: When “File” in step (Fişier) în cadrul etapei 3 • 5 • Youlists can move to the lists of the other FM bands • You can move to the other by pressing You can move• to the liststrece of the FM bands by pressing number button ) or Puteţi laother alte liste apăsând în mod repetat tasta5 ( number button 5 ( ) or 6 ( ) FM bands move of the other by pressing number button55•(( You can))orsau 66 ((to the lists ).) repeatedly. numerică repeatedly. by pressing number button 5 ( 6( ) repeatedly. ) or the station. 6 ( 5 Store ) repeatedly. Store the station. 5 Store the station. Preset number flashes for a while. er flashes for a while. Continued on the next page Continued on the next page OPERATIONS 14 9 OPERATIONS 9 Continued on the next page Puteţi conecta la acest aparat dispozitiv USBdevice de stocare memoria player-ul digital*1HDD, , hardetc. to You can connect a USB massunstorage class such înasmasă, a USBprecum memory, DigitalUSB, Audio Playeraudio *1, portable disk-ul portabil etc. the unit. •• Puteţi, asemenea, un Apple iPod cablul USBfrom din spatele aparatului. Pentru operaţie, You candealso connectconecta an Apple iPod to thelaUSB cable the rear of the unit. Fordetalii detailsprivind of theaceastă operation, see vezi paginile 28. pages 2626––28. Acest aparat piese în format MP3/WMA/WMA-DRM10 *1/AAC *2/WAV pe un dispozitiv USB. stored in amemorate USB device. This unit canpoate play reda MP3/WMA/WMA-DRM10 *1/AAC *2/WAV tracks *11Puteţi conecta atât dispozitive MTP (Media Transfer Protocol), cât şi dispozitive USB de stocare în masă. Consultaţi şi pagina 40. * You can connect both MTP (Media Transfer Protocol) devices and USB mass storage class devices. See also page 40. *22Aparatul poate reda fişiere în format AAC înregistrate prin intermediul aplicaţiei iTunes. Acest aparat nu poate reda fişiere * înregistrate This unit can play back AAC files encoded using iTunes. This unit cannot play back FairPlay-encrypted files. prin intermediul aplicaţiei FairPlay. Toate piesele dispozitivul vor fi redate repetatthepână la schimbarea saudevice. deconectarea USB-ului. All tracks willdebepeplayed repeatedly until înyoumod change source or detach sursei the USB Cablu USB from din partea dinofspate a aparatului. USB cable the rear the unit. Memorie USB USB memory USB… IfLaaconectarea USB deviceunui hasdispozitiv been attached... Redarea începefrom din punctul care a Playbackvastarts where itînhas fost beenîntreruptă stoppedanterior. previously. •• Dacă un alt dispozitiv USB este deja If a different USB device is currently conectat, începe cu prima attached,redarea playback starts from the piesă. beginning. Pentru şi a deconecta dispozitivul To stopa opri playredarea and detach the USB device USB Scoateţi-l din unitate pe o traiectorie rectilinie. Straightly pull it out from the unit. Apăsaţi SOURCE (SURSĂ) pentru a asculta altă sursă de • Press SOURCE to listen to another playback source. redare. You can operate the USBUSB device in themod same wayutilizaţi you Puteţi utiliza dispozitivul în acelaşi în care operatedethepefiles on a(Vezi disc.paginile (See pages fişierele discuri. 13 şi 13 14.)and 14.) You can listenfişiere to WAV by following thecaMP3/ •• Puteţi asculta WAVfiles urmând aceeaşi paşi pentru WMA/AAC files operations listed on pages 13 and1314.şi fişierele de tip MP3/WMA/AAC, prezentaţi la paginile 14. Atenţie: Cautions: • Evitaţi să folosiţi dispozitivul USB dacă acest lucru ar putea • Avoid using the USB device if it might hinder your afecta siguranţa dumneavoastră la volan. safety driving. • Nu scoateţi şi nu conectaţi dispozitivul USB în mod repetat • înDotimp notcepull attach the USBmesajul device „READING” repeatedly peout afişajand apare intermitent while “Reading” is shown on the display. (Citire). Doporniţi not start the car engine USB device •• Nu autovehiculul dacă ifunadispozitiv USBiseste connected. conectat. unit de may notdebedispozitiv able to play the files depending •• ÎnThis funcţie tipul USB conectat, nu va fi posibilă redarea anumitor fişiere. on the type of USB device. •• ÎnOperation cazul anumitor dispozitive USB, alimentarea and power supply may not work cu as energie electrică funcţionarea putea fi afectate. intendedşi for some USBardevices. •• Nu conecta un computer la cablul partea Youputeţi cannot connect a computer to theUSB USBdincable from din a aparatului. thespate rear of the unit. • Pentru a evita pierderile de date, asiguraţi-vă că deţineţi • Make sure all important data has been backed up to copii după informaţiile importante. avoid losing the data. • Pentru a evita deformarea sau deteriorarea dispozitivului • USB Do not leave nu-l a USB device in the car, expose to direct conectat, lăsaţi în interiorul autovehiculului, sunlight, or high temperature to avoid nu-l expuneţi la lumina solară directă sau ladeformation temperaturi or cause damages to the device. ridicate. Somedispozitive USB devices not work immediately after •• Unele USBmay nu încep să funcţioneze imediat you turn on the power. după alimentarea cu energie electrică. •• Pentru maidetails multe detalii utilizarea unui For more aboutdespre USB operations, seedispozitiv pages 40 USB, and vezi 41. paginile 40 şi 41. OPERAŢII OPERATIONS 15 ENGLISH Listening to the USB deviceUSB Funcţionarea dispozitivului ENGLISH Using the Bluetooth ® devices Utilizarea dispozitivelor Bluetooth ® Conectarea a unui dispozitiv Connectinginiţială a Bluetooth device for Bluetooth the first time Consultaţi şi instrucţiunile furnizate împreună cu dispozitivul Bluetooth. Refer also to the instructions supplied with the Bluetooth device. Profile Bluetooth Aparatul suportă următoarele profile Bluetooth: Bluetooth profile 1.5 HFP (Profil Hands-Free) • To use the Bluetooth function, you need to turn on OPP (Profil Object Push) 1.1 This unit supports the following Bluetooth profiles; Bluetooth function of the device. A2DP de distribuţie audio Pregătire: pentru a activa funcţia Bluetooth puneţi HFP(Profil (Hands-Free Profile) 1.5avansată) 1.2 Using the Preset Station list station automatic AVRCP laFM distanţă audio/video) 1.3 presetting dispozitivul în funcţiune. OPP (Profil (Objectpentru Pushcontrol Profile)de1.1 Preparation: Operate to on turn its you can When the device shown theon display, —SSMProfile) (Strong-station Sequential • Când pe afişaj• apare ,isputeţi reveni la meniul A2DP (Advanced Audio Distribution 1.2 Bluetooth function. move back to the previous screen by pressing number Funcţii anterior dacă apăsaţi tasta numerică 3. AVRCP (Audio/Video RemoteMemory) Control Profile) 1.3 button 3. • When is shown on the display, you can Puteţi utiliza dispozitive Bluetooth prin intermediul You can preset up to six stations for each band. Follow stepsscreen 1 and 2by of “Using thenumber number move back to1the previous pressing aparatului pentru următoarele 1funcţii: While listening to an FM station... Features buttons” on the left column. button 3. • primirea unui apel • By holding 5 / ∞, the Preset Station List will You can operate Bluetooth devicestelefonică, throughdin the unit as • realizarea unui apel - din agenda timpul utilizării unei surse... 1 ÎnWhile listening a source... alsoto appear (go to step 4). istoricul de apeluri telefonice follows: 2 (numere formate/ apeluri prin formarea numărului, prin numere • recepţionate), Receiving a call 2 comandăphone vocalăbook, from call history • presetate, Making a prin call—from opţiunea „Device” (dispozitiv). 2 Selectaţi Select “Device.” • avertizarea la primirea unuicall), mesajbytext (dialed number/received dialing number, by 3command • redarea de pe un player audio cu Bluetooth 3 Display the Preset Station List. preset numbers, by voice • Informing you of the arrival of a text message • Play back a Bluetooth audio player 3 Selectaţi opţiunea „New Pairing” (conexiune nouă). Select “New Pairing.” Local FM stations with the strongest signals are searched and stored automatically in the selected FM band. [Rotiţi] Manual presetting Ex.: Storing FM station of 92.5 MHz into preset number 4 of the FM1 band. Using the number buttons 4 Select the preset number you want to store into. 1 2 16 • You can move to the lists of the other FM bands by pressing number button 5 ( ) or 6( ) repeatedly. ENGLISH Bluetooth este tehnologie wireless comunicare de Bluetooth is a oshort-range wirelessderadio proximitate, prin radio, pentrufor dispozitive mobile precum communication technology the mobile device such telefoanele mobile, calculatoarele alte as mobile phones, portable PCs,portabile and otherşi devices. The dispozitive.devices Dispozitivele Bluetooth pot without fi conectate fără and Bluetooth can be connected cables cabluri şi pot comunica între ele. communicate with each other. • Consultaţi lista (inclusă în casetă) pentru a vedea ţările în • Refer to the list (included in the box) to see the care este permisă utilizarea funcţiei Bluetooth®. countries where you may use the Bluetooth® function. Conectarea (pairing) Pairing and PIN code La conectarea unui dispozitiv Bluetooth la aparat pentru When you connect a Bluetooth device to the unit prima dată, realizaţi conexiune între unitate şi dispozitiv. for the first time, make pairing between the unit Această conexiune (pairing) permite dispozitivelor cu and the device. Pairingîntre allows Bluetooth devices to Bluetooth să comunice ele. Pentru a realiza conexiunea, communicate eachintroducerea other. s-ar putea să fiewith necesară codului PIN (Numărul To makede pairing, you may need to enter the PINpe care personal identificare) al dispozitivului Bluetooth (Personal Identification Number) code of your doriţi să-l conectaţi. deviceconexiunea you want to •Bluetooth Odată stabilită, se connect. înregistrează în aparat, chiar dacă îl resetaţi. Se pot înregistra până la cinci • dispozitive. Once the connection is established, it is registered in • Pot conectate acelaşi dispozitiv thefiunit even ifînyou resettimp thedoar unit.unUpsingur to five devices pentru Bluetooth can betelefonul registered in total.si un singur dispozitiv pentru Bluetooth. • audio Only one device for Bluetooth phone and one for • Pentru folosirea funcţiei Bluetooth, este necesară Bluetooth audio can be connected at a time. activarea funcţiei Bluetooth a aparatului. cod PIN (Număr de identificare 44 Introduceţi Enter a PINun (Personal Identification Dispozitivul înregistrat şi după 4 Enter a PINNumber) (Personal Identification Number) The device rămâne remains registeredchiar even afterremains you registered even The device Enter a PIN (Personal Identification Number) ENGLISH ENGLISH registeredacestuia. even afterFolosiţi you opţiunile „Cnnct Phone” personal) în aparat. deconectarea code to the unit. code to the unit.The device remains disconnect the device. Use Phone” disconnect theordevice. Use “Cnnct P code to the unit. disconnect the device. UseAudio” “Cnnct Phone” or “Cnnct sau „Cnnct (sau activaţi opţiunea „Auto •• •Puteţi introduce orice număr doriţi (număr cu 1-16 You can enter any number you like (1-digit to • You can enter any number you like (1-digit to You can enter any number you like (1-digit to “Cnnct Audio” (or activate “Auto Cnnct”) to(or activate “Cnnct Audio” “Auto C “Cnnct Audio” (or activate “Auto Cnnct”) to Cnnct”) pentru a conecta acelaşi dispozitiv începând cu cifre). [Setare iniţială: 0000] 16-digit number). [Initial: 0000]0000] 16-digit number). [Initial: 16-digit number). [Initial: 0000] connect the same devicethe fromsame next time on. (See connect device fromconnect next time on. (Seedevice from next the same următoarea utilizare. (Consultaţi informaţiile următoare •• •Pentru un less cod PIN puţin cifre, To enter entera aintroduce code less than 4-digit, firstly the following and4-digit, pages 36firstly and 37.)pages 36 and To aPINPIN code than firstly •cu4-digit, Tomai enter a de PIN4 code less than the following 37.) following and pages 36 and 37. precum şi cele deand la paginile 36 şithe 37.) delete theştergeţi initial PIN codePIN (0000) by pressing mai întâi codul iniţial (0000) apăsând delete the initial PIN code (0000) by pressing delete the initial PIN code (0000) by pressing number button 55( tasta numerică .). Deleting a registered device ).number number button 5 ( own PIN code. ). Some dispozitive devices haveau their Enter thebuttonîn5 ( Ştergerea unui dispozitiv înregistrat a registered device Deleting a registered device * *Unele propriul cod PIN. Introduceţi Perform stepsDeleting 1 and 2 on page 16, then... specified PIN codehave to thetheir unit. own* PIN * aparat Some devices code. Enter the Some devices have their own PIN code. Enter1 the Parcurgeţi etapele şi 2 de la pagina 16, apoi… codul PIN specificat. 1 Select “Del Pairing.” Perform steps 1 and 2 on pagePerform 16, then... steps 1 and 2 on page 16, the 1specified Move toPIN the next code(ortoprevious) the unit.number specified PIN code to the unit. „DelPairing.” Pairing” (Ştergere conexiune). 1 Selectaţi Select “Del position. 1 Select “Del Pairing.” Treceţito la the numărul (sau Move anterior). 1 Move next următor (or previous) number 1 to the next (or previous) number position. position. [Rotiţi] 2 Select a number. 2 Select a device you want to delete. Selectaţi un număr. 2 Select a number. 2 Select a number. 3 Repeat steps 1 and 2 until you finish dispozitivul pe2 caretoSelect doriţi să-l ştergeţi. 2 Selectaţi Select a device you want delete. a device you want to d 3 Delete the selection. [Rotiţi] entering a PIN code. 4 Confirm the entry. selecţia. 3 Ştergeţi Delete the selection. 3 Delete the selection. 2 până etapele şi 2 încheierea 3 Repetaţi Repeat steps 1 1and until you finish steps 1•and until button you finish 3 laRepeat Press2number 3 to select “No” or return to procedurii de introducere a codului PIN. step 1. entering a PIN code. entering a PIN code. Confirm the entry. 4 Confirm the entry. Confirmaţi selectarea. 5 4Operate the target Bluetooth device, (while Connecting a registered device 5 “Open...” is flashing on the display). Perform steps 1 and 2 on page 16, then... On the device to be connected, enter the same PIN 1 Select “Cnnct• Phone” ortasta “Cnnct Audio.”3 pentru Apăsaţi numerică a selecta (Nu) Press number button to select “No” or„No” return to 3 to selec • Press number button code you have just entered for this unit. sau pentru a reveni la etapa 1 . step 1. step 1 . “Connecting...” flashes, then “Pairing Ok” or “Connected [Device Name]” appears on the display when thedispozitivul connection is established. Now you can Utilizaţi Bluetooth ţintă, (în timp Operate the target Bluetooth device, (while Operate the target Bluetooth device, Conectarea unui dispozitiv înregistrat Connecting a(while registered device Connecting a registered device use the device through the unit. ce mesajul este intermitent pe “Open...” is„Open...” flashing onafişat the display). 5 “Open...” is flashing on the display). Parcurgeţi etapele 1 şi 2 de la pagina 16, apoi… Performyou steps 1 and 2 on pagePerform 16, then... steps 1 and 2 on page 16, the ecran). 2 Select a device want. On thewhen device toconnection be connected, the same PINconnected, Onenter the device to be enter the same PIN appears the is established. Selectaţi opţiunea „Cnnct „CnnctPhone” Audio.”or “Cnn 1 Select “Cnnct Phone” or “Cnnct Audio.” Introduceţi în dispozitivul care urmează să fie conectat 1Phone” Selectsau “Cnnct code you have just entered forcode thisşiyou unit. have just entered for this unit. acelaşi cod PIN pe care l-aţi introdus în aparat. “Connecting...” flashes, thenintermitent, “Pairing Ok” “Connecting...” flashes, then “Pairing Ok” or Mesajul „Connecting...” apare apoioreste “Connected appears on[denumirea the displayName]” appears on the display “Connected [Device afişat mesajul[Device „PairingName]” Ok” sau „Connected [Rotiţi] (and flashes, dispozitivului]” (Conectat) atunciwhen când the conexiunea when the connection is established. Now you can “Connecting...” connection is established. Nowthen you“Connected can device ause fostthe stabilită. puteţi deviceAcum through thefolosi unit. usedispozitivul the deviceprin through thename)” unit. appears on the display when the device is connected. intermediul aparatului. 2 Selectaţi Select aContinued device you on thewant. next2pageSelect a device you want. dispozitivul dorit. appears wheneste thestabilită, connectionappears established. when the connection is established. Când conexiunea vais apărea pe afişaj. OPERATIONS 17 Mesajul „Connecting...” apare apoi este “Connecting...” flashes, thenintermitent, “Connected (and “Connecting...” flashes, then “Co afişat [denumirea dispozitivului]” devicemesajul name)”„Connected appears on thedevice display when appears the name)” on the dis (Conectat) atunci când conexiunea a fostis stabilită. device is connected. device connected. Continuare pe pagina Continued on the următoare next page Continue OPERAŢII OPERATIONS 17 OPERATI ENGLISH LaYou punerea funcţiune aparatului, puteţi seta device pentru can setînthe unit toaconnect theîl Bluetooth aautomatically se conecta automat dispozitivul Bluetooth. (Vezi whenlathe unit is turned on. (See opţiunea „Auto Cnnct” pagina 37.) “Auto Cnnct” on pagela 37.) 3 Selectaţi modalitatea iniţiere a apelului telefonic. Select the method todemake a call. [Rotiţi] Deconectarea unuia dispozitiv Disconnecting device Parcurgeţi etapele 1 şi 2 de la pagina 16, apoi… Perform steps 1 and 2 on page 16, then... Selectaţi „Discn Phone” sau „Discn Audio.” • Opţiunea listanumbers numerelor Dialed *:Dialed Shows(Apelate)*: the list of afişează the phone de pe care le-aţi Treceţi lastep. pasul youtelefon have dialed. Go toformat. the following • următor. Received *: Shows the list of the received calls. • Opţiunea Go to theReceived following(Primite)*: step. afişează lista apelurilor • primite. Phonebook: Shows the name/phone number of Treceţi la pasul următor. the phone book of the unit. Go to the following • Phonebook (Agenda telefonică): afişează numele/ step. To de copy the phone book memory, numărul telefon corespunzător agendei see aparatului. page 20. Treceţi la pasul următor. Pentru a copia memoria • agendei Preset:telefonice, Shows thevezi listpagina of preset 20. numbers. Go to the following To preset seetelefon • Preset (Presetare):step. afişează lista denumbers, numere de page 20. Treceţi la pasul următor. Pentru a preseta presetate. • numere, Dial Number: Shows vezi pagina 20. the phone number entry • DIAL NUMBER (Formaţi numărul): screen. See “How to enter phone afişează number”meniul on de introducere a numărului de telefon. Vezi secţiunea page 19. unui accessible număr de telefon” de laconnected pagina 19. • „Introducerea Voice Dial (Only when the • Voice Dial (Apelare vocală) (Doar când telefonul mobil cellular phone has the voice recognition system): este prevăzut cu sistem de recunoaştere a vocii): Speak the name (registered words) you wantrostiţi to numele (cuvintele înregistrate) al persoanei pe care call. doriţi să o apelaţi. Select “Discn Phone” or “Discn Audio.” [Rotiţi] Mesajul „Disconnecting...” apare intermitent, apoi este “Disconnecting...” flashes, then “Disconnected (and afişat [denumirea devicemesajul name)”„Disconnected appears on the display dispozitivului]” when the device (Deconectat) atunci când conexiunea a fost întreruptă. is disconnected. Utilizarea telefonului mobilcellular cu Using the Bluetooth Bluetooth phone Iniţierea Making aunui callapel telefonic Cu ajutorul aparatului puteţi efectua apeluri folosind You can make hands-free calls using the unit. opţiunea hands-free. Microfonul se află în The built-inintegrat microphone is behind spatele acestui al aparatului. this corner of thecolţ unit. * Displays only when the dialed or received number * Este afişatthrough doar atunci când apelul iniţiat sau preluat a is made the unit. fost făcut prin intermediul aparatului. 4 Selectaţi numele/numărul de telefon/numărul Select the name/phone number/preset presetat persoanei care doriţi să o apelaţi. number alyou want topecall. ions with the strongest signals are 18 stored automatically in the selected ENGLISH Sunetul este comes redat deout difuzoarele The sounds from theconectate. connected speakers. Using the Preset Station list on automatic presetting • When shownreveni on the la Strong-station Sequential •• Când pe afişaj apare mesajul ,isputeţi When appears on the display, you candisplay, you can • Dacă este oprit sau întrerupt în timpul during utilizăriithe move back to the previous screen by pressing number Whensunetul the sound is stopped or interrupted meniul anterior apăsând tasta numerică 3. move back to the previous by pressing buttondisplay 3. dispozitivului Bluetooth, opriţi şi apoi porniţi din nou use of a Bluetooth device, turn off, then turn on the to six stations for each band.button 3. number 1 Follow steps 1 and 2 of “Using the numberaparatul. unit. ing to an FM station... buttons” on the left column. ––DIfacă esteyet redat corect, reconectaţi 1 thesunetul soundnu is not restored, connect the device • By holding 5 / ∞, the Preset Station List will dispozitivul. (Vezi secţiunea „Conectarea unui dispozitiv again. (See “Connecting a registered device” on also appear (go to step 4). înregistrat” de la pagina 17.) page 17.) Selectaţi „Call” (Apel). 2 Select “Call.” 2 3 Display the Preset Station List. pressing: • By holding 5 / ∞, the Preset Station List will Adjust to match the input level of the FM 5 / ∞: between the front also and rear appear (go to step 4). sound level. • Before making an adjustment, select the How to enter phone number Cum un număr de telefon How tointroduceţi enter phone number source yousăwant to adjust. right speakers. [L6 to R6] E Loudness, [Off or On] The source is automatically changed to “Bluetooth.” Dispozitivul Bluetooth devine automat sursa. The B source is automatically changed to “Bluetooth.” Subwoofer Turn the control dial to select “Off” or 1 Press number button 1 ( ) to Continued on the next pagelow and high “On.” When “On” is selected, 3 Display the Preset Station List. move to the “Subwoofer” adjustment Select a number. Continued on the next page un număr. Select a number. frequencies sound are boosted to produce a Selectaţi OPERATIONS 9[Rotiţi] display. • Phone number appears (if acquired). • Este afişat numărul de telefon (dacă este memorat). well-balanced sound at low volume level. Phone2number OPERATIONS Use 4appears /¢(if acquired). to select a cutoff 9 frequency to the subwoofer. stations with the strongest signals are 4 Exit from the setting. When Answer” activated.... • OffAnswer” *:“Auto All signals are„Auto sentistoAnswer” the Când opţiunea (Preluare Wheneste “Auto is activated.... and stored automatically inactivată the selected subwoofer.the incoming calls automatically, see The unitthe answers automată a apelurilor)... The unit answers incoming calls automatically, see a call comesthan in.... How to enter phone number • 55Hz: When 55 Hz Aparatul apelurile automat,higher vezi pagina 37. page 37. Frequencies Move theintroducere. entry position. page 37.preia Selectaţi Move thepoziţia entrydeposition. aresource cut off.is automatically changed to “Bluetooth.” The •• Când „Auto Answer” este dezactivată, oriceany • • When “Auto isthan deactivated, al presetting Whenfuncţia “Auto Answer” isAnswer” deactivated, press any press 85Hz: Frequencies higher 85 Hzapăsaţi excepţia tastei /I/butonului depreset comandă) button (except /control dial) totheanswer theto store Select a number. M station of 92.5tastă MHz (cu into(except preset number are cut off. 4/control Selectdial) the number you want button to answer pentru a prelua apelul. M1 band. • incoming 120Hz: Frequencies higher than (if 120acquired). Hz • Phone number appears into. call. incoming call. are cut off. poate fi reglat (vezi • Nivelul volumului umber buttons •adjust You canmicrofonului adjust the microphone volume • pagina You can microphone level (see level (see 337). Turn thethe control dial toAnswer” adjustvolume theis activated.... When “Auto Confirm Confirmaţi selectarea. Confirm the entry.the entry. page 37). page 37).subwoofer level. [0the to 8] Theoutput unit answers incoming calls automatically, see page 37. Move the entry position. Pentru a încheia sau respinge apelul telefonic • reject When “Auto Answer” is deactivated, • You can move to the press lists ofany the other FM bands To end the call or reject an incoming call 30 To end the call or an incoming call Menţineţi apăsată orice tastă(except (cu excepţia /control /I/ATT/dial) to answer the button number button 5( ) or How to delete phone number Hold any button (exceptby pressing /control dial). Ştergerea unui număr de number telefon Hold any de button (except How to delete phone butonului comandă). incoming call. 6 (/control )dial). repeatedly. • When “Auto Answer” is set to “Reject,” the unit Whenopţiunea “Auto Answer” is set to “Reject,” the unit • Când „Reject“ (Respinge) a funcţiei „Auto • You can adjust the microphone volume level (see 1 1 Confirm the entry. rejects any incoming calls. toate apelurile. pageaparatul 37). respinge Answer” este activată, rejects any incoming calls. 5 Store the station. speakers. [F6 to R6] ENGLISH ENGLISH 4 : betweenin.... a/¢ calltelefonic… comes La primirea unui apel When a When call comes in.... 2 the left and 2“Call.” Select(Apel). “Call.” „Call” 2 Selectaţi Select To end the call or call reject an incoming call Preluarea unui apel înaaşteptare Answering waiting Answering a waiting /control dial). Hold anycall button (except How to delete phone number Dacă telefonul mobil este cu funcţie de „apel în If your cellular phone is equipped with thethecallunitwaiting If your cellular phone is echipat equipped withis the waiting When “Auto Answer” set tocall “Reject,” Preset number flashes for a •while. 1 aşteptare”, puteţi puneţi apelul prezent aşteptare şi să and function, you put thecallcurrent calland on hold rejects any incoming calls. function, you cansăput thecan current onînhold preluaţi apelul în aşteptare. answer the waiting call. 2 Select “Call.” answer the waiting call. 3lista Display list phonecunumbers de deof telefon ajutorul Display the listnumere ofthe phone numbers using oneusing one Answering a waiting call Apăsaţi orice tastă (cu excepţia(except /I/ATT/butonului de dial). 3 Apelaţi /control button /control dial). Press any Press buttonany (except of the dialing method (see step 3 of “Making uneia dintre metodele de iniţiere a unui apel If your cellular phone is equipped with the call waiting of the dialing method (see step 3 of “Making comandă). • To restore the on-hold call, press any button (except To restore the on-hold press anyapăsaţi button (vezi etapa 3 pentru „Iniţierea function, you can put the current call on hold and call” on page 18). unui apel” de la a call” onapage 18). •• Pentru a recupera un apelcall, în aşteptare, din(except /control dial)call. again. answer the waiting /control dial) again. pagina 18). the list of phone numbers using one 3 Display nou orice tastă (cu excepţia tastei /I/ATT/butonul de Press any (except /control dial). • When youcall, endbutton onecan call, you cantoconnect to the other. of thenumele/numărul dialingthe method (seede step 3 ofnumber “Making • comandă). When you end one you connect the other. 4 Select name/phone Selectaţi telefon alwantyou 4 Select the name/phone number you to want to Continued on the next page • To restore the on-hold call, press any button (except a call” on page 18). delete. • La încheierea unei convorbiri,/control puteţidial) prelua un alt apel. persoanei pe care doriţi să-l ştergeţi. again. OPERATIONS delete. 9 Whenin.... you end onein.... call, you can connect to the other. a• SMS comes When a When SMS comes 4 Select the name/phone number you want to La primirea unui SMS.... delete. If thephone cellular phone is compatible If thetelefonul cellular is compatible with SMS with (ShortSMS (Short Dacă mobilWhen este compatibil cu serviciul a SMS comes in.... de mesaje Message Service) and “MSGis Notice” is set to “On” Message Service) and “MSG Notice” set tomesaje) “On” scurte (SMS) şi funcţia „MSG Notice” If the cellular phone(informaţii is compatible with SMS (Short (see 37),(vezi the unit rings and “Received Message” (seesetată pageopţiunea 37), page the„On” unit rings andand “Received Message” are pagina 37), aparatul emite Message Service) “MSG Notice” is set to “On” 5 selecţia. Delete the selection. Ştergeţi appears on the display to inform you of the (see page 37), the unit rings and “Received Message” appears on the display to inform you of the message un semnal sonor şi este afişat mesajul „Received Message”message5 Delete the selection. 5 Delete the selection. appears on the display to inform you of the message arrival. (primire pentru a pentru a vă informa că aţi primit arrival. mesaj) arrival. edit or send a message through the unit. • You cannot un mesaj. • You cannot edit•orYou send a message through the unit. cannot edit or send a message through the unit. • Nu puteţi edita sau trimite un mesaj prin intermediul acestui aparat. • number Press number ()delete ) all to delete all • Press button66 (((button 6)) to • Apăsaţi tasta numerică pentru aallşterge Press number button to delete the listed numbers inînstep 3. inetapei the listed numbers toate numerele afişatein timpul the listed numbers step 3. step 3. Continued on the next page the next page OPERATIONS 19onpage Continuare pe Continued pagina Continued on the următoare next OPERATIONS OPERATIONS 19 OPERAŢII 19 Copierea telefonice How to agendei copy phone book FM station... 1 1 1While annumber FM station... Follow steps and 2listening of “Usingtothe buttons” on the left column. • By holding 5 / ∞, the Preset Station List will also appear 2 (go to step 4). 2 Selectaţi opţiunea „Settings” (Setări). Select “Settings.” 3 3 3 Display the Preset Station List. Selectaţi „PhoneBook” (Agendă telefonică). 2 Select “PhoneBook.” he strongest signals are tomatically in the selected ng button 3. 1 ENGLISH ENGLISH ions for each band.button 3. 1 1 also appear (go to step 4). 2 Selectaţi un număr de telefon. Select a phone number. 2 Puteţi, asemenea, un You candealso enter amemora new phone nou număr (vezi şi secţiunea number (see also “How to „Cum enter să introduceţi un număr de telefon” la 3 Display Preset Station List. phonethe number” on page 19) todestore. pagina 19). un număr de telefon pe care doriţi să îl 3 Selectaţi Select a preset number to store. Local FM stations with the strongest signalsmemoraţi. are searched and stored automatically in the selected FM band. [Rotiţi] Follow steps 1 and 2 of “Using the number Afişaţi numărul de telefon care doriţito să-l Display the phone number want buttons” on the pe leftyou column. • folosirea By holding / ∞,opţiuni the Preset Station List will presetaţi unei „Call”. preset byprin using one of5 the “Call” items. [Ţineţi apăsat] Manual presetting 4 Ex.:atât Storing FM station 92.5 MHz into preset 4 unui Select the preset number you want to store Pentru număr presetat Introduceţi codul PIN,both pentru acest To number callapelarea a preset number Enter the PIN code for this unitofand 4 of number the FM1 band. 4 Select the preset you want to store into. În timpul utilizării dispozitivului Bluetooth… aparat, cât şiphone. pentru telefonul cu Bluetooth. Bluetooth While in Bluetooth audio.... Using the number buttons into. •• Vezi la pagina See etapa step 44ofdepage 17. 17. 2.5 MHz into preset number ons 1 5 2 • You can move to the lists of the other FM bands • You can move to the lists of the other FM bands ) or by pressing number button 5 ((În Deschideţi telefonul celular dephone. destinaţie. Operate the target cellular (While 6 ( mesajul ) repeatedly. acest pe afişaj apare „Receiving 00/50”.) • Puteţi iniţia apelabycătre unnumber număr You can alsouncall preset using 5“Preset” pressing numberpresetat button (folosindof) or funcţia „Preset” „Call” (vezi pagina 18). the “Call” itemsdin(see 6opţiunile ( page 18). ) repeatedly. “Receiving 00/50” appears on the display.) Enter 3entered 5 Store the station. Schimbarea demedia comunicare Introduceţi acelaşi (precum Switching dispozitivului conversation (the(aparatul/ unit/ the same PIN codecod(asPIN in cel stepintrodus 4) on the 5în telefonul Store thecelular, station.apoi transferaţi telefonul mobil) la pasul 4) cellular phone, then transfer the phone book cellular phone) În timpul unei conversaţii telefonice… memoria telefonice aparat. (Consultaţi memory agendei to the unit. (Refercătre to the Instructions a phone call conversation.... manualul de instrucţiuni oferit împreună cu Preset number flashesDuring for a while. manual supplied with your cellular phone.) Then,continuaţi continueconversaţia your conversation Apoi, folosind et number flashes for atelefonul while. mobil.) using the other media. celălalt dispozitiv. • Aceste operaţii potbevaria în funcţie de dispozitivul Operations may different according to the Bluetooth connectedconectat. Bluetooth device. Continued on the next page Continued on the next page OPERATIONS 20 9 OPERATIONS 9 ENGLISH Presetarea numerelor telefon Presetting the phonedenumber Puteţi copia memoria agendei aof unui telefon celularpresetting You can copy the phone booktelefonice memory a cellular Puteţi preseta la the şase numerenumbers. de telefon. Using Preset Station list You can presetpână up to six phone FM station automatic înphone aparat. Station list matic presetting into theUsing unit.the Preset— When shown on the la display, you can Whenpe afişaj• apare is shown on the display, you can SSM (Strong-station Sequential ,isputeţi reveni meniul • Când When shown on the la display, you can move back thescreen previousby by pressing number station Sequential ,isputeţi reveni meniul •• Când Whenpe afişaj• apare is shown on the display, you can anterior dacătoapăsaţi tastato numerică 3.screen move back the previous pressing number Memory) move back the previous3.screen by pressing number button 3. anterior dacătoapăsaţi tastatoYou numerică move back the previous screen byuppressing number can preset to six stations for each band.button 3. Utilizarea Bluetooth Using theplayer-ului Bluetoothaudio audiocuplayer ENGLISH •• Indicaţiile funcţionare de afişare diferă funcţie de on prezenţa lor în cadrulon player-ului audio conectat. Operationsdeand display şiindications differ îndepending their availability the connected audio player. Selectaţi “BT-AUDIO”. Select “BT-AUDIO.” Dacă redareadoes nu începe automat, utilizaţi player-ul Bluetoothaudio pentru pornirea acesteia. If playback not start automatically, operateaudio the cu Bluetooth player to start playback. [Apăsaţi] piesa anterioară/ [Press] Trecere Reversela skip/forward skip următoare [Hold] Reverse search/forward [Ţineţi apăsat] Căutare înapoi/înainte search Selectare grup/director Select group/folder Pornire şi întrerupere redare. Start/pause playback • Consultaţi şi paginile 17 şi 18 pentru informaţii privind • conectarea/deconectarea/ştergerea Refer also to pages 17 and 18 for unui connecting/ dispozitiv disconnecting/deleting a registered device. înregistrat. Bluetooth Information: Informaţii despre funcţia Bluetooth: If you wish to receive more information about Pentru mai multe informaţii despre funcţia Bluetooth, Bluetooth, visit the following JVC web site: <http:// vizitaţi site-ul JVC: www.jvc-victor.co.jp/english/car/>. www.jvc-victor.co.jp/english/car/>. După apăsarea tastei M MODE, apăsaţi următoarele taste After pressing M MODE, press the following buttons to... pentru a... Repetarea piesei: Repeat Track: repetă piesacurrent curentătrack Repeat Repetare piese: Repeat All: repetarea tuturor pieselor Repeat grup: all tracks Repetare Repeat Group: repetarea tuturor pieselor din grupul Repeat all tracks of current group current Redarea a pieselor: Randomaleatorie All: redarea tuturorplay pieselor în ordine aleatorie Randomly all tracks Redarea Randomaleatorie Group: a grupului: redarea tuturorplay pieselor din grup în ordine Randomly all tracks of the aleatorie current group •• Puteţi, dealso asemenea, modul demode redarebyselectând You can cancel anula the playback selecting „Off” “Off”.(dezactivare). OPERAŢII OPERATIONS 21 ENGLISH Listening to the CD changer de CD-uri Funcţionarea schimbătorului Se utilizarea unuia schimbător de CD-uri JVC cu formatul MP3You împreună cu acesta aparat. Puteţitoconecta It isrecomandă recommended to use JVC MP3-compatible CDcompatibil changer with your unit. can connect CD changer the un de on CD-uri mufa de CD-uri de pe partea posterioară a aparatului. CD schimbător changer jack thelarear of schimbătorului the unit. •• Puteţi redaonly doarplay CD-uri obişnuite (inclusiv CD-uri text) şi discuri You can conventional CDs (including CD Text) andMP3. MP3 discs. Pregătire: Asiguraţi-vă că este selectatăis opţiunea (Schimbător) pentru setarea intrării Preparation: Make sure “Changer” selected„Changer” for the external input setting, see page 34.externe, vezi pagina 34. Selectaţi funcţia „CD-CH” (schimbător de CD-uri). Select “CD-CH.” 1 Listening to the CD changer It is recommended to use a JVC MP3-compatible CD changer with your unit. You can connect a CD changer to the CD changer jack on the rear of the unit. Selectaţi disctopentru • You can only play conventional CDs (including CD Text) and MP3aun discs. Select disc start începerea playing. redării. 2 [Apăsaţi] a selectadisc un disc numerotat [Press] Pentru For selecting number 1 – 6.de la 1 la 6. Preparation: Make sure “Changer” is selected for the external setting, see page [Apăsaţi]input Pentru a selecta un34.disc numerotat de la 7 la 12. 1 Select “CD-CH.” [Hold] For selecting disc number 7 – 12. [Apăsare] Selectaţi piesa [Press] Select Select a disccontinuă] to starttrack playing. [Apăsare Căutare înapoi/rapidă [Hold] Reverse/fast-forward [Press] For selecting disc number 1 – 6. track înainte [Hold] For selecting disc number 7 – 12. directoarele MP3:selectaţi Select folders * MP3: 2 După apăsarea tastei M MODE, apăsaţi următoarele taste After pressing M MODE, press the following buttons to... pentru a... Trece peste 10 piese Skip 10 tracks MP3: cadrulthe aceluiaşi MP3:ÎnWithin samedirector folder Repetare piesă: Repeat Track: After pressing M MODE, press the following buttons to... piesa curentă repetă [Press] Select track Repeat current track ** [Hold] Prin apăsarea continuă taste, puteţi afişadisplay Lista By holding either one aoforicărei the you can Skipde 10 tracks Reverse/fast-forward trackbuttons, Repetare director: Repeat Folder: directoare (vezi pagina 14). MP3: Within the same folder the Disc (see page 14). MP3: repetă toate piesele din directorul SelectList folders * MP3: MP3: Repeat all tracks of current curent folder Repeat Track: Repetare disc Repeat Disc: Repeat current track repetă toate piesele de pe discul curent Selectarea unui disc/director/piesă de pe listă * By holding either one of theabuttons, you can display To select disc/folder/track on the list Repeat Folder: Repeat all tracks of the current disc the Disc List (see 14). „Selectarea unui director/unei piese de pe Vezipage secţiunea MP3: Repeat all tracks of current See “Selecting a folder/track on the list (only for MP3/ Redarea ordine aleatorie a listă (numai pentru fişierele MP3/WMA/AAC)” de la pagina RandomînFolder: folder WMA/AAC file)” on page 14. directoarelor: 14. Repeat Disc: MP3: Randomly play all tracks of To select a disc/folder/track on the “Disc” 3 tolist„Disc” displaypentru the Disc ListLista of the Repeat CD all tracks of the current MP3: în ordine aleatorie toate piesele disctheredă ÎnSelect timpul etapeiin3step selectaţi a afişa current folder, then tracks of the See “Selectingdiscurilor a folder/track on theschimbătorul list (only for MP3/ changer. dinnext directorul curent, apoi pe cele din pentru de CD-uri. Random Folder: folder WMA/AAC file)” on page 14. MP3: Randomly play all tracks ofdirectorul următor. Random Disc: Select “Disc” in step 3 to display the Disc List of the CD the current folder, then tracks ofRedare the aleatorie a discului: changer. Randomly play all tracks of current next folder redă în ordine aleatorie toate piesele de pe disccurent. Random Disc: discul Randomly play all tracks of current Randomaleatorie All: Redarea a pieselor: disc Randomly play all tracksdeofpethe discs redă aleatoriu toate piesele discurile Random All: inmagazie the magazine Randomly play all tracks of the din discs in the magazine •• Puteţi, dealso asemenea, modul demode redarebyselectând You can cancel anula the playback selecting • You can also cancel the playback mode selecting „Off” (Dezactivare) sau apăsaţi “Off” orbypress number buttontasta 4 ( numerică “Off” or press number button 44 (( ).). 22 22 ). ENGLISH ENGLISH Listening to thetuner DAB Listening to the DAB Funcţionarea tunerului DABtuner Listening to the DAB tuner Before operating, connect the JVCKT-DB1000 DAB KT-DB1000 (separately toschimbătorului thejack CDon changer jack on the re Înainte punerea în funcţiunea, conectaţi Tunerul DAB tuner, JVC, KT-DB1000 (achiziţionat separat) la mufa Before de operating, connect the JVC DAB tuner, (separately purchased) topurchased) the CD changer thederear operating, connectathe JVC DAB tuner, KT-DB1000 (separately purchased) to the CD changer jack on the rear CD-uri partea posterioară aparatului. of the unit. ofBefore the din unit. of the unit. Pregătire: Asiguraţi-vă că este selectată „Changer” (Schimbător) pentru setarea intrării vezi34.pagina 34. Preparation: Make sure “Changer” selected forinput the external input setting, see page Preparation: Make sure “Changer” is opţiunea selected foristhe external setting, see page 34. externe, Preparation: Make sure “Changer” is selected for the external input setting, see page 34. 1 1 1 Selectaţi funcţia „DAB.” Select “DAB.” Select “DAB.” 2 2 3 3 2 Selectaţi frecvenţele. Select the bands. Select the bands. 3 Căutarea unui ansamblu. Searching for an ensemble. Searching for an ensemble. Căutare manuală: ţineţi apăsată unaofdintre taste „M” luminează pe Searching for aneither ensemble. Manual Search: Hold either onepână ofuntil thecând buttons untilon“M” flashes theafişaj, display, then pres Manual Search: Hold one the buttons “M” flashes theintermitent display,onthen press apoi apăsaţiSearch: tasta înHold modeither repetat.one of the buttons until “M” flashes on the display, then press it repeatedly. it Manual repeatedly. 4 4 4 Select “DAB.” Select the bands. it repeatedly. Selectaţi serviciu (fie principal, fie secundar) pe or care îl ascultaţi. Select(either a service (either secondary) Select aun service primary or primary secondary) tosălisten to.to listen to. Select a service (either primary or secondary) to listen to. din setare. Recepţia cuWhen zgomot desounds fond are surrounding sounds are3 Ieşire When surrounding from the setting. Exit from3theExit setting. When surrounding sounds are 3 noisy noisy noisy Anumite serviciiSome furnizează, peprovide lângă semnalele program services Dynamic Control (DRC) Some services provide Dynamic Range ControldeRange (DRC) Exit from the setting. obişnuite şi semnale DRC (cu control dinamic al razei). Sometogether services provide Dynamic (DRC) signals together withRange their Control regular programme signals. signals with their regular programme signals. display.on the display. Pe afişajappears apare on the .appears Funcţia întăreşte sunetele de nivel scăzut pentru a your signals together with their regular programme signals. DRC will reinforce the low sounds to improve your DRC willDRC reinforce the low level sounds tolevel improve appears on thewill display. • va fi evidenţiat numai lahighlighted recepţionarea • beonly only when receiving will be highlighted when receiving • îmbunătăţi calitatea serviciului ascultat. DRC will reinforce the low level sounds to improve your listening. listening. semnalelor de lathe serviciul respectiv. •DRC signals willDRC beDRC highlighted only when receiving signals the tuned service. from tunedfrom service. 1listening. 1 1 DRC signals from the tuned service. dintre semnalelor DRC (1, 2, or 2unul onenivelurile of the levels DRC signals levels 2 Selectarea Select one ofSelect the DRC signals (1, 2, or 2, sauone 3). 3). 2(1, of the DRC signals levels (1, 2, or 3).Select 3). (Anulat) • Pe ce• creşte efectul maieffect becomes Asincreases, thenumărul, number increases, the Asmăsură the number the effectdevine becomes •puternic. As the number increases, the effect becomes stronger. stronger. stronger. Continuare peon pagina următoare Continued on the next pa Continued the next page Continued on the next page EXTERNAL 23 EXTERNAL DEVICES DISPOZITIVE EXTERNE DEVICES EXTERNAL DEVICES 23 2 searched and stored automatically the selected searched and stored automatically in theinselected FM band. FM band. ENGLISH ENGLISH Memorarea serviciilor DAB Storing DAB services in memory Manual presetting numărul de presetare la care 4 Selectaţi Select a preset number you want todoriţi storesă Manual presetting informaţia. Ex.: FM(primare) station of MHz 92.5for MHzeach into band. preset number 4 stocaţi into. Puteţi preseta servicii pentru fiecare 4 Select the preset number you want to store Ex.:sixStoring FMDAB station of 92.5 into preset number You can presetşase DABStoring services (primary) Select the preset number you want to store the band. Preset Station list 4Using ofFM1 the band. FM1 n automatic presetting 4 ofappears the bandă. into.into. • When on the display, you can move Using the buttons • number Whennumber shownreveni on the la display, you can the buttons Strong-station Sequential • Când pe apare mesajul ,isputeţi back to afişaj theUsing previous display by pressing number to the previous meniul tastaback numerică 3. screen by pressing number 1 move buttonanterior 3. 1 apăsând button 3. to six stations for each band. steps 1 and 2 of “Using the number 2 1unuiFollow • can You can move the ofother other FM bands De ansamblu (serviciu primar) •• Puteţi trece la altor frecvenţe DAB apăsând în ing to an FM station... You can move totolists the lists ofthethe DAB bands You move tolistele the oflists the FMother bands Ex.:exemplu: Storingmemorarea an2ensemble (primary service) the la buttons” on the leftinto column. numărul de presetare al frecvenţii • By holding 51./ ∞, the Preset Station List will preset number 44 of the DAB 1DAB band. also appear (go to step 4). Utilizarea Using thetastelor number buttons 3numerice 1 3 2 5 Store the station. 5 Store the station. 2 3 by pressing number button by number button 5 ( 55 ((5 ( ) or )) or sau) or mod repetat tasta numerică bypressing pressing number button )nu repeatedly. 666((( 6 ( )) repeatedly. dar puteţi ) repeatedly,memora but youserviciul cannotselectat store pe frecvenţe. theaceste selected service into these bands. 5 Memoraţi Store the serviciul. service. Preset number for a while. Display the Preset Station List. Preset number flashesflashes for a while. Numărul de presetare apare Preset number “P4” „P4” appears pe onafişaj. the display. Selectaţi ansamblu(primary (serviciu service). primar). Select anunensemble ons with the strongest signals are stored automatically in the selected 3 Numărul de presetare apare Preset number “P4”„P4” appears Continued onnext thepage next page Listening unui to the preset service Continued on the [Ţineţi pe afişaj. Ascultarea serviciu presetat on the display. ation of 92.5 MHz into preset number OPERATIONS apăsat] 4 Select the preset number you want to store utilizând using theLista Preset Service List OPERATIONS 9 9 de servicii presetate resetting band. ber buttons into. 1 Utilizarea deService servicii presetate Using theListei Preset List 1 ascultaţi. Parcurgeţi etapele 2 de mai sus. Follow steps 1 and1 2şiabove. •• Prin apăsarea , Lista de servicii presetate By holding 5 / ∞,•the Service Listofwill YouPreset can move to the lists the other FM bands 2 Change toserviciul the selected DAB service. Schimbaţi DAB selectat. va fi afişată etapa 4). number button 5 ( ) or by pressing appear (go(treceţi to stepla4). 6( 2 5 Preset number flashes for a while. 3 Apelaţi Lista de servicii presetate, apoi select selectaţi Display the Preset Service List, then serviciul DABDAB presetat peyou carewant doriţito să-l the preset service listen to. ) repeatedly. Store the station. Afişarea ListeiPreset de servicii presetate. Display the Service List. Using thefuncţiilor standbyde reception Utilizarea recepţie în aşteptare You can use three types of Standby Reception. Puteţi utiliza treiNews tipuri Standby de funcţiiReception—TA de recepţie în aşteptare. • Road Traffic Standby • Road Traffic News Standby Reception—TA Standby Reception Reception (Recepţie în aşteptare a ştirilor din trafic — • Recepţia Announcement Standby Reception în aşteptare a informaţiilor rutiere) •• Announcement Standby Reception (recepţia în aşteptare PTY Standby Reception anunţurilor) Continued on the nextapage • PTY Standby Reception (Recepţia în aşteptare a tipului de TA/PTY Standby OPERATIONS Activating/deactivating 9 program favorit) Reception Activarea/dezactivarea funcţiilor de recepţie în aşteptare a informaţiilor rutiere şi a tipului • Operations are exactly the same(TA) as explained onde program (PTY) favorit pages 11 and 12 for FM RDS stations. • Funcţiile sunt identice cu cele prezentate la paginile 11 şi • 12 Youpentru cannot store PTY codesFMseparately for the DAB posturile de radio RDS. • Codurile PTYfornuthe potFM fi memorate tuner and tuner. separat pentru tunerul DAB şi tunerul FM. 24 ENGLISH When dr broadcas 4 Exit fromTo thedeactivate setting. station is Funcţia de recepţie în aşteptare a anunţurilor Dezactivarea funcţiei de recepţie în aşteptare a the Announcement Standby To deactivate the Announcement Standby Announcement Reception Announcement StandbyStandby Reception in to the Funcţia de recepţie în aşteptare a anunţurilor permite anunţurilor Reception Reception Announcement Standby Reception Announcement Standby Reception allows theallows the aparatului comutarea temporară la serviciul favorit (de Selectaţi opţiunea „Announce Off” (Recepţie anunţuri To deactivate the Announcement Standby Announcement Standby Reception Select “Announce Select “Announce Off” in stepOff” 2. in step 2. unittemporarily to switch temporarily to yourservice favorite service dezactivată) unit to switch to your favorite tip anunţ). în etapa When ship Reception goes2.off. goes off. Announcement (announcement type).Reception allows the (announcement type). Standby either lights up orthe flashes seTo stinge. deactivate Announcement Standby Reception Announcement Standby Reception Select “Announce Off” in on stepthe2.playback unit to switch temporarily to your favorite service display.Reception To deactiv Activarea funcţiei de recepţie înReception aşteptareallows a the goes off. Announcement Standby (announcement type). Toşithe activate the Announcement Standby To activate Announcement Standby delights anunţuri • Tipuri If Select up, types Announcement “Announce Off” intypes stepStandby 2. anunţurilor selectarea tipului de anunţuri Reception Announcement Announcement unit to switch temporarily to your favorite service (călătorii), Warning (avertismente), News (ştiri), the announcement type Travel ReceptionReception and selectand theselect announcement type Reception is activated. goes off. Travel, Warning, News, Weather, Event, Special, Rad Travel, Warning, News, Weather, Event, Special, Rad Weather (meteo), Event (evenimente), Special (special), (announcement activate thetype). Announcement Standby To deactivate the Announcement Standby Announcement Standby Reception • Rad If (Radio flashes, Announcement Standby Inf (Informaţii radio), Sports (sport), Finance Finance (informaţii 1 1 To Announcement types Inf (Radio Information), Sports, Inf Information), Sports, Finance Reception and select the announcement type financiare)Reception Reception is not yet activated. Travel, Warning, News, Weather, Event, Special, Rad Announcement Standby Reception allows the To activate the Announcement Standby “Announce Off” service in step 2. 1 Announcement types tune in to another providing InfSelect (Radio Information), Sports, Finance unit to switch temporarily to your favorite service Reception and select the announcement type To activate, goes off. News, Travel, Warning, Weather, Event, the related signals. will stop flashing andSpecial, Rad (announcement type). funcţiei de recepţie în aşteptare aStandby 2 Activating the Announcement 2 Activarea Activating the Announcement Standby Tracing the same programme— Tracing the same programme— Identificarea aceluiaşiSports, program— 1 Inf Finance remain lit.(Radio Information), anunţurilor. Reception. Reception. Alternative Frequency Reception Alternative Frequency Reception Recepţionarea unei frecvenţe activate the Announcement Standby Apelaţi de anunţuri selectat curent. 2 Totipul Activating the Announcement Standby Tracing the same programme— Display the currently selected announcement type. Display the currently selected announcement type. Announcement types (DAB (DAB AF)AF) (DAB AF) Reception Reception.and select the announcement type alternative Alternative Travel, Warning, Frequency News, Weather,Reception Event, Special, Rad 2 1Activating the Announcement Standby Puteţi asculta acelaşi program funcţia Tracing the same programme— Display the currently selected announcement type. You can keep listening the sameFinance programme by You can keep listening to theactivând sametoprogramme by Tipul de anunţuri Inf (Radio Information), Sports, (Dezactivat) (DAB AF) Reception. Recepţionare frecvenţă alternativă. the Alternative Frequency Reception. activating activating the Alternative Frequency Reception. selectat curent Alternative Frequency Reception timpul recepţionării DAB: Display the currently selected announcement type.•• În Youreceiving keepreceiving toaserviciu the programme by • can While DABsame service: While alistening DABunui service: (DAB AF) Dacă vădriving deplasaţi într-o zonă unde anumitcannot Alternative Frequency Reception. When driving in an area where aserviciu service Whenactivating inthe an area where aunservice benucannot be tipul de anunţuri. an announcement 3 Selecting an announcement type. type. 3 Selectarea 2 Selecting Activating the Announcement Standby poateYou recepţionat, acest aparat vaservice: identifica Tracing the same can keep listening toautomatically the sameprogramme— • fiWhile receiving a DAB received, this unit tunes in tobyanother received, this unit automatically tunes inprogramme toautomat another Reception. alt ansamblu sau post de radio FM RDS care transmite activating the Alternative Frequency Reception. When driving in an area where a service cannot Frequency FM RDSbroadcasting station, broadcasting ensemble ensemble or Alternative FM RDS or station, theReception same thebesame 3 Selecting acelaşi• program. Display an theannouncement currently selectedtype. announcement type. While receiving aautomatically DAB service:tunes in to another received, this unit programme. programme. (DAB AF) • În timpul recepţionării unui post de radio FM RDS: When driving inFMRDS an area where a service cannot be [Rotiţi] ensemble or station, broadcasting the same •YouWhile receiving anstation: RDS station: While receiving anFM RDS 3 Selecting an announcement type. • Dacă văreceived, deplasaţi zonăautomatically unde unthe serviciu DAB can într-o keep listening toFM same programme by this unit tunes in to another programme. When driving in an area where DAB service is When driving inprogram an areaAlternative where a DAB isRDS, transmite acelaşi ca şi postul de service radioa FM activating the Frequency Reception. ensemble or FM RDS station, broadcasting the same •aparat While receiving ansame FM serviciul RDSasstation: the as the FM RDS broadcasting same programme the FM RDS acest vathe transmite automat DAB. • broadcasting While receiving a DABprogramme service: 4din setare. Exit the setting. 4 Ieşire Exit from the from setting. When driving in an area where aunit DABautomatically service is station is broadcasting, this stationprogramme. is broadcasting, this unit automatically tunes When driving inananFM area where a service cannottunes be •theWhile receiving RDS station: broadcasting the service. same programme as the FM RDS 3 Selecting an announcement type. in to the DAB in to DAB service. Funcţia de recepţionare athis uneiunit frecvenţe alternative estein to another received, automatically tunes 4 Exit from the setting. When driving in an area where a DAB service is station is broadcasting, this unit automatically tunes activată din fabrică. ensemble the or FM RDSprogramme station, broadcasting the same broadcasting same as the FMFrequency RDS inWhen to the DAB service. shipped from the factory, Alternative When shipped from the factory, Alternative Frequency Pentru dezactivarea acestei funcţii, vezi pagina 34. programme. 4 Exit from the setting. station is broadcasting, this unit automatically tunes either or flashes on the playback either lights orlights flashes on the fie playback Indicatorul se up aprinde fie up continuu, is activated. Reception Reception •istoactivated. While receiving an FM RDS station: in the DAB service. intermitent pe afişajul de redare. display. display. When shipped from the factory, Alternative Frequency ToWhen deactivate the To deactivate thedriving Alternative Frequency in anAlternative area where Frequency a DAB service is upup,orAnnouncement flashes onînthe playback •• Dacă se aprinde, funcţia de recepţie • Ifeither lights Standby Reception, If lights up,lights Announcement Standby Reception is activated. Reception, seethe page 34. programme as the FM RDS see page 34. broadcasting same aşteptare a anunţurilor este activată. display. When shipped from the factory, Alternative Reception is activated. Reception is activated. To deactivate the Alternative FrequencyFrequency 4 Exiteither fromlights the setting. station is broadcasting, this unit automatically tunes or flashes on de the playback •• Dacă intermitent, funcţia lights up,upAnnouncement Standby Reception is activated. • Ifse aprinde flashes, Announcement Standby If • Ifflashes, Announcement Standby Reception, see page 34. in to the DAB recepţie în aşteptare a anunţurilor nu este încă display. Reception is activated. To deactivate theservice. Alternative Frequency is not yet activated. Reception Reception is not yet activated. activată. • If Totune lights Announcement Standby flashes, Announcement Standby activate, tune in toservice another service providing Reception, see page 34. To activate, in toup, another providing Pentru activare, căutaţi alt activated. serviciu cu semnale When shipped from the factory, Alternative Frequency Reception is activated. notun yet the related signals. will on stopthe flashing and the related signals. will stop flashing and either lights up or flashes playback similare. vaflashes, lumina continuu. Reception is activated. • To Iflit.activate, Standby tuneAnnouncement in to another service providing remain lit. remain display. is not yet activated. To deactivate the Alternative Frequency Reception the related signals. will stop flashing and If lights up, Announcement Standby Reception, see page 34. To• activate, remain lit. tune in to another service providing is activated.will stop flashing and theReception related signals. • If lit. flashes, Announcement Standby remain Reception is not yet activated. To activate, tune in to another service providing the related signals. will stop flashing and remain lit. Continuare pe Continued pagina ur mătoare onpage the next page Continued on the next EXTERNAL DEVICES DISPOZITIVE EXTERNE EXTERNAL DEVICES Continued on the25 next page25 ENGLISH Afişarea Label Segment (DLS) To showinformaţiilor the Dynamicprivind Label serviciul SegmentDynamic (DLS) information În timplistening ce ascultaţi serviciul DLS.... While toun anansamblu ensemblecare thatoferă supports DLS.... Lights up when receiving a service providing Se aprinde la recepţionarea unui serviciu Dynamic Label Segment Segment(DLS)—DAB (DLS)—textradio radiotext. DAB. •• Afişajul va fi anulat când canceled utilizaţi aparatul. The DLSDLS display will betemporar temporarily when you operate the unit. Listening to the iPod Funcţionarea iPod-ului Puteţi reda muzică unuiby: Apple iPod astfel: You can play songsprin in intermediul an Apple iPod -– conectaţi-l cablului USB de care dispune cablul USBUSB situatcable în partea aparatului; Connectingcuitajutorul with the USB cable supplied with iPod yourlaiPod to the fromposterioară the rear ofathe unit. -– înainte de punerea în funcţiune, conectaţi Adaptorul de interfaţă pentrupurchased) iPod KS-PD100 (achiziţionat mufa Connecting the Interface adapter for iPod, KS-PD100 (separately to the CD changerseparat) jack onlathe rear of schimbătorului de CD-uri de pe partea posterioară a aparatului. the unit. Preparation: Make sure “Changer” is selected for the external input setting, see page 34. Pregătire: Asiguraţi-vă că este selectată opţiunea „Changer” (Schimbător) pentru setarea intrării externe, vezi pagina 34. You can control playback the unit. •• Puteţi controla redarea prin from intermediul aparatului. •• Redarea Disconnecting the iPod will stop playback. PressApăsaţi SOURCE to listen to another source. se va întrerupe la deconectarea iPod-ului. SOURCE (SURSĂ) pentru aplayback asculta altă sursă. For details, also toşithe manualdesupplied your iPod. •• Pentru detalii,refer consultaţi manualul utilizare alforiPod-ului. Atenţie: Caution: •• Evitaţi acesta vă periclitează în timpul deplasării. Avoid utilizarea using theiPod-ului iPod if itdacă might hinder your safetysiguranţa while driving. • Pentru a evita pierderile de date, asiguraţi-vă că deţineţi copii după informaţiile importante. • Make sure all important data has been backed up to avoid losing the data. 1 — Conectaţi cablul prin or intermediul Connect un aniPod iPodlato theUSB USBsau cable throughdispozitivului KS-PD100. KS-PD100. Redarea începe automat de unde a fost întreruptă anterior. Playback starts automatically from where it had been paused previously. • Dacă este conectat un iPod, apăsaţi SOURCE (SURSĂ) pentru a selecta „USB-iPod” sau • If an iPod has been connected, press SOURCE to select “USB-iPod” or “iPod” as „iPod” ca sursă pentru redare. the playback source. Selectaţi Select apiesa. track. 2 3 26 — Reglaţi şi sunetul preferinţe. 29 – 31.) Adjustvolumul the volume anddupă sound as you (Vezi want.paginile (See pages 29 – 31.) Tasta Button For iPod connected KS-PD100 For iPod to the USB cable Pentru un iPod conectatthrough prin dispozitivul KS-PD100 Pentru unconnected iPod conectat printr-un cablu USB ENGLISH Controlul prin intermediul Playbackredării control from the unitaparatului ENGLISH ENGLISH [Apăsaţi] la piesa sautrack anterioară [Apăsaţi] Trecere lacontrol piesa sautrack anterioară [Press] Go toPlayback the nexturmătoare orfrom previous [Press] Trecere Go to the nexturmătoare or previous control from the unit Playback the unit Playback control from the unit [Ţineţi Derulare rapidă înainte înapoi a [Ţineţi Derulare rapidă înaintethe sautrack înapoi a [Hold]apăsat] Fast-forward or reverse [Hold]apăsat] Fast-forward or reverse thesautrack Button For iPod connected through KS-PD100 For iPod connected to the USB cable Button For iPod For iPod connected piesei în timpul redării piesei în timpul redării Button For iPodconnected connectedthrough throughKS-PD100 KS-PD100 For iPod connectedtotothe theUSB USBcable cable during playback during playback [Press] Go to the next or previous track [Press] Go to the next or previous track [Press] Go the or track [Press] Go the ororprevious Gototoprincipal thenext next orprevious previous track [Ţineţi [Press] Gototomenu thenext next previoustrack track apăsat] Accesare meniu principal [Apăsaţi] meniului la apăsarea [Press] Accesarea Enter[Press] main menu when you press 5 . [Hold] Enter main [Hold] Fast-forward ortrack reverse the track [Hold] Fast-forward ortrack reverse the track [Hold] Fast-forward or reverse the [Hold] Fast-forward or reverse the [Hold] Fast-forward or reverse the track[Apăsaţi] [Hold] Fast-forward or reverse the track Accesarea meniului de sus“Playlists,” pentru „Playlists” tastei . Redarea este întreruptă/reluată laplayback Pause/resume playback when ∞ is [Press] Go to the top menu of during during playback during playback during playback during playback during playback (Lista de titluri) „Artists” (Artişti), „Albums” (Albume), apăsarea tastei pressed.. “Artists,” “Albums,” “Songs,” [Press] menu Enter main menu when you press 5.„Podcasts”, [Hold] Enter main menu „Songs” „Genres” (Genuri), [Hold] Enter main menu [Press] 5 [Hold] Enter“Genres,” main menu [Press] Enter Entermain main menuwhen whenyou youpress press 5. . (Piese), “Podcasts,” Pause/resume playback when[Press] ∞ is(Compozitori) [Press] Go to“Composers,” theoftop menu of “Playlists,” „Composers” sau „Audiobooks” (Cărţior ∞ is Go to the top menu “Playlists,” Pause/resume playback when [Press] Go to the top menu of “Playlists,” Pause/resume playback when ∞ is “Audiobooks” in the main menu. pressed. “Artists,” “Albums,” “Songs,” audio) din meniul principal. pressed. “Artists,” pressed. “Artists,”“Albums,” “Albums,”“Songs,” “Songs,” “Podcasts,” “Genres,” • Pressing the number buttons – 6)“Composers,” • Puteţi selecta meniurile presetate de sus şi(1 prin “Podcasts,” “Genres,” “Composers,” oror “Podcasts,” “Genres,” “Composers,” “Audiobooks” inalso the main menu. or holding 1 (7) (1 and 2the (8) can apăsarea tastelor numerice 6) sau prinmenu. “Audiobooks” in–inthe main “Audiobooks” main menu. • top the number buttons (1 – apăsarea continuă aPressing tastelor 1Pressing (7) şi 2 (8). select••the presetthe menus. Pressing number buttons the number buttons(1(1––6)6) or(7)holding 1 (7) and 2 (8) can also or holding 1 and 2 (8) can [Apăsaţi] Întrerupere/reluare redare. or holding 1 (7) and 2 (8) canalso also — [Press] Pause/resume playback. selecttop themenus. preset top menus. select the preset select the preset top menus. — [Press] Pause/resume playback. — [Press] — [Press] Pause/resume Pause/resumeplayback. playback. Selectarea piese din the meniu Selecting aunei track from menu Selecting a track unconnected iPod conectat printhe menu Pentru unconnected iPod conectat printr-un aatrack from the menu No. Funcţionare OperationSelecting For iPod through For iPod to the USB cable Nr. SelectingPentru track from thefrom menu 1 2 3 KS-PD100 For iPod connected through cablu USB No.dispozitivul OperationFor For iPod connected to the USB cab KS-PD100 No. For No. Operation Operation ForiPod iPodconnected connectedthrough through ForiPod iPodconnected connectedtotothe theUSB USBcable cable KS-PD100 Accesarea KS-PD100 Enter themeniului main KS-PD100 [Ţineţi apăsat] Enter the main principal. menu. 1 Enter the Enter1 themain main 1 menu. menu. menu. Selectarea Select the Select the 2the meniului dorit.Select Select the desired2 menu. 2 desired menu. desired desiredmenu. menu. Playlists (Lista de titluri) Artists (Artişti) Playlists (Lista de titluri) Artists (Artişti) Playlists Ô Artists Ô Albums Ô ÔAlbums Artists Albums Ô Playlists AlbumsÔ (Albume) Songs (Piese) ÔAlbums ArtistsÔ Ô Albums Ô Playlists Songs Ô Playlists Ô Artists Albums(Albume) Ô Ô Playlists Artists Ô Ô Playlists Ô Artists(Piesei) Ô Albums Ô Playlists Ô Playlists ÔArtists Artists ÔAlbums AlbumsÔ Ô Songs Ô Podcasts ÔÔ Genres ÔÔ Songs Podcasts Ô Genres Ô Genres (Genuri) Composers (Compozitori) Podcasts Genres (Genuri) Composers Songs Ô Ô Genres Composers Songs Ô Podcasts Ô Genres Songs Ô Genres Ô Composers Songs Ô Podcasts Ô Genres Ô Songs SongsÔ ÔGenres GenresÔ ÔComposers Composers(Compozitori) Audiobooks (Cărţi Composers Ô audio) Audiobooks Composers Ô Audiobooks Composers ComposersÔ ÔAudiobooks Audiobooks Confirm the Confirmarea Confirm3the Confirm 3 the Confirm the 3 selection. selection. selecţiei efectuate. selection. selection. By holding 4 , you /¢ , you •• 4 By 4 • Apăsând continuu tasta/•¢ • By holding ¢ , you can start By holding you • Prin apăsarea continuă a tastei Byholding holding 4 ,//¢ ¢ , you •• By , ,you can • puteţi Bysearch holding ¢ ¢ , you can start Byholding holding ¢ you canstart start can fastsong skip during song in the can fast skip during search redarea directă piesei play backathe selected item directly. puteţi trece rapid înduring timpul căutării can fast skip song searchininthe the începe can fast skipderula during song search in the play back the selected item directly. the selected item directly. main menu. play backplay theback selected item directly. selectate. •4 By holding 4 ,back you can go bac unei în main meniul principal. mainmenu. menu. mainpiese menu. • By holding , you can go • By holding 4 , you can go back • Prin apăsarea tastei puteţi By holding 4 to,the youmain can display. go back toafişajul main display. reveni principal. tothe thedisplay. main display. to thelamain 5/fast ∞, you •5 By/∞ holding can •• By holding , you can inin fast skip i • Prin apăsarea tastei , puteţi By holding /∞can , youfast canskip fastskip • derula By holding 5 /∞, 5 you inskipmenu. every layernivel of the rapid opţiunile latheorice al main every layer main every layerofofthe mainmenu. menu. every layer of thev-aţi mainafla. menu. meniului principal • If a trackplayback is selected, playback starts automatically. •• IfIfaatrack trackisisselected, selected, playbackstarts startsautomatically. automatically. • If the selected item has another layer, you will enter the layer. Repeat steps 2 an •• LaIf aselectarea unei piese, redarea va începe automat. track is••selected, playback starts automatically. IfIfthe theselected selecteditem itemhas hasanother anotherlayer, layer,you youwill willenter enterthe thelayer. layer.Repeat Repeatsteps steps22and and 3another until thelayer, desired track isaccesa played. •• Dacă ales mai are un track nivel ierarhic, veţi nivelul respectiv. Repetaţi paşii 2 If theelementul selected item has you will enter the layer. Repeat steps 2 and 33until the desired is played. until the desired track is played. şi33until pânăthe la redarea desiredpiesei trackdorite. is played. Continued on the next p Continued Continuedon onthe thenext nextpage page Continuare pe pagina următoare EXTERNAL DEVICES ContinuedDEVICES on the next page27 EXTERNAL 27 EXTERNAL DEVICES EXTERNAL DISPOZITIVEDEVICES EXTERNE 27 După M MODE,press apăsaţi pentruto... a... Afterapăsarea pressingtastei M MODE, theurmătoarele followingtaste buttons ENGLISH Repetarea unei piese: funcţie „Repeat Repeat One: Sameaceeaşi as “Repeat One.” One” (Repetarea unei singure piese) Repeat All: Same as “Repeat Repetare piese: aceeaşi funcţie „RepeatAll.” All” (Repetarea tuturor pieselor) Repeat Off: Cancels. Repetare dezactivată: anulează setarea. Redare aleatorie albume*: Random Album *: Albums” (Redare aceeaşi funcţie ca şi „Shuffle aleatorie Sameaasalbumelor) “Shuffle Albums.” Redare aleatorie piese: Random Song: aceeaşi funcţie ca şi „Shuffle Songs” (Redare aleatorie Sameaaspieselor) “Shuffle Songs.” Redare aleatorie dezactivată: anulează Random Off: Cancels. setarea. Modul de selectare a meniului vabe fi anulat: The menu selecting mode will canceled: •• Dacă se efectuează nicio operaţie de If no nu operations are performed fortimp about: aproximativ: – 5 seconds for iPod connected through KS-PD100. –– 515secunde este conectat prinUSB dispozitivul secondscând foriPod-ul iPod connected to the cable. KS-PD100. • When you confirm the selection of a track. – 15 secunde când iPod-ul este conectat printr-un cablu USB. • Când confirmaţi selectarea unei piese. **Funcţionează doar dacăselect selectaţi Albums” Functions only if you “Allopţiunea Albums”„All or “All” in sau „All” din submeniul „Albums” din „MENU”principal “Albums” of the main “MENU.” Listening to the other external components Funcţionarea altor componente externe Puteţi conecta o componentă la: to: You can connect an externalexternă component •• mufa schimbătorului în partea a aparatului cu ajutorul următoarelor adaptoare: CD changer jack on de theCD-uri rear ofsituată this unit usingposterioară the following adapters: ––ALine daptorul linie,KS-U57 KS-U57 Inputintrării Adapter, ––AAUX daptorul AUX,KS-U58 KS-U58 Inputintrării Adapter, Pregătire: Asiguraţi-vă că este selectată opţiunea „Ext Input” pentru setarea intrării externe, vezi pagina 34. Preparation: Make sure “Ext Input” is selected for the external input setting, see page 34. • mufa intrării AUX (auxiliare) de pe panoul de comandă. • AUX (auxiliary) input jack on the control panel. Selectaţi „EXTIN” IN” sau „AUX IN.” Select “EXT or “AUX IN.” 1 2 3 — 4 — Porniţi componenta conectată şi începeţi and redarea sursei. Turn on the connected component start playing the source. Reglaţi volumului. Adjustnivelul the volume. Reglaţi dupăas preferinţe (vezi(see paginile 29 29 – 31). Adjustsunetul the sound you want pages – 31). Conectarea unei externe la mufa intrării Connecting ancomponente external component to the AUXauxiliare input jack Audio player portabil etc. Portable audio player, etc. mufă mini stereo mm (nu este 3.5 mm stereo mini3,5plug livrată) (not supplied) 28 EXTERNAL DISPOZITIVEDEVICES EXTERNE ENGLISH Puteţi selecta presetat redaresuitable a sunetului, respectiv deequalizer). muzică (iEQ: egalizator inteligent). You can selectunamod preset sounddemode to theadecvat musicpentru genre genul (iEQ: intelligent ct a preset sound mode suitable to the music genre (iEQ: intelligent equalizer). 1 Accesaţi meniulmode de setare modul de redare a Enter sound setting. Enter sound mode sunetului. setting. 2 Select “EQ.” 3 Select “On.” [Rotiţi] Selectaţi „On” (Activare) Select “On.” •• Dacă este selectată opţiunea asculta If “Bypass” is selected, you„Bypass”, can listenputeţi to the original • If “Bypass” is selected, modul you canoriginal listen de to redare the original a sunetului înregistrat. sound mode recorded. lights up on the sound mode recorded. lights up on se aprinde pethe afişaj. display. 4 Selectaţi „EQ.” Select “EQ.” display. Selectaţi mod presetat de redare a sunetului. Select aun preset sound mode. Select a preset sound mode. Preset presetate value setting for each mode Valorile fiecărui mod sound de redare a sunetului ue setting for each soundalemode de Modul de redare a Sound mode sunetului Band 1 (100 Hz) USER 0 ROCK +3 CLASSIC +2 POPS 0 HIP HOP +4 JAZZ +3 Preset value Valori presetate Preset value Frecvenţa Frecvenţa Frecvenţa Frecvenţa Band 1 1 Band 2 2 Band 3 3 Band 4 4 Band 2 Band 3 Band 4 Band 5 (100 Hz) (320 Hz) (1 kHz) (3.2 kHz) (320 Hz) (1 kHz) (3.2 kHz) (10 kHz) 0 0 0 0 0 0 0 0 +3 +2 0 +1 +2 0 +1 +1 +2 +2 0 +1 +2 0 +1 0 0 +1 0 +1 +1 0 +1 +2 +4 +1 –2 0 +1 –2 0 +1 +3 +2 +1 +2 +2 +1 +2 +2 Frecvenţa Band 5 5 (10 kHz) 0 +1 0 +2 +1 +2 Continuare pe on pagina următoare Continued the next page Continued on the next page SETTINGS SETĂRI 29SETTINGS 29 ENGLISH Selecting aunui preset sound modede redare a sunetului mod presetat ting aSelectarea preset sound mode ENGLISH ENGLISH ENGLISH ENGLISH ENGLISH ENGLISH Songs Ô Podcasts Ô Songs Ô Genres Ô Composers layback control from the unit ess] Enter main menu when you press 5. [Hold] Enter main menu Composers Ô Audio playback when ∞ is KS-PD100 [Press] Go to top connected menu of “Playlists,” on Pause/resume For iPod connected through FortheiPod to the USB cable Confirm the 4 Press number button 1 ( 4 3 the sound“Artists,” “Albums,” “Songs,” 4 Apăsaţi Press number button11(( ) to a tasta numerică )) to pentru sunetului Adjusting theAdjusting sound pressed. Reglarea move totrack another setting selection. [Press] Go to the next orcanprevious track [Press] Go to the next orajunge previous la alt nivel desetting setare.level. move to another level. You adjust the sound characteristics to your “Composers,” or Puteţi regla caracteristicile sunetului în funcţie de“Podcasts,” “Genres,” You can adjust the sound characteristics to your 4 / ¢ : select the quality of • By holding 4 //¢ or reverse selectează [Hold] Fast-forwardpreference. or reverse the track [Hold] Fast-forward track ,::you 4LPF.the ¢ thecalitatea ofLPF. ¢ •quality By holding preferinţe. [–12dB/oct or select –24dB/oct] Using• the Preset Station liston the“Audiobooks” in the main menu. preference. matic presetting When is shown display, you can [–12dB/oct sausearch –24dB/oct] canplayback fast skip during song in the during playback during LPF. [–12dB/oct or –24dB/oct] dial: Turn the control dial toplay selectback the select When shown on the la display, can the • can Pressing number buttons (1Control – de 6) comandă: move back the display, previous screen byyou pressing number • Când Whenpe afişaj• apare is shown on the you station Sequential ,isto puteţi reveni meniul number Butonul Rotiţi butonul deor main menu. the subwoofer [0deg (normal) 4 Press button 1 ( Turnphase. ) tocontrol Control dial: the dial select 4 Adjusting the sound move back to 3numerică the previous numberEnter • Bytoholding [Hold] main menu [Press] main when 5 button orscreen 6.you press or holding 1 (7) and 2 (8) can also comandă pentru a selecta faza subwooferului. anterior dacă tasta 3screen sau 6.by. pressing moveEnter back toapăsaţi themenu previous by pressing number 180deg move to another setting(reverse)] level.phase. [0deg (normal) or button 3.sound characteristics the(normal) subwoofer You can adjust theplayback toisyour select to the main display ∞ [Press] Go to the top menu of “Playlists,” Pause/resume when [0˚ sau 180˚ (invers)] 1 the preset top menus. ions for each band.button 3 or 6. * If “Off”: select is selected in step 2 the quality of , you can only 4 /¢ preference. 1 Follow steps 1 and 2 of “Using the number “Artists,”LPF. 180deg (reverse)] • By holding 5/∞, y *[–12dB/oct Dacă în etapa 2subwoofer este selectată pressed. “Albums,” “Songs,” adjust phase.opţiunea or the –24dB/oct] FM station... 1 is shown on the you can •— When [Press] Pause/resume playback. * „Off” buttons” on the leftdisplay, column. (dezactivat), regla faza 2,numai you can onlylayer of the m Ifdial: “Off” is“Composers,” selected indialstep C HiTurn Pass (Hicontrol Passputeţi Filter) Control the toor select every “Podcasts,” “Genres,” move back •to By theholding previous5screen by pressing number / ∞, the Preset Station List will subwooferului. Turnmain the control tophase. select the subwoofer phase. [0degdial (normal) or the cutoff 2 adjust the subwoofer “Audiobooks” in the menu. button 3 or 6.also appear (go to step 4). • If a track is selected, playback starts automatically. frequency totrece-sus) the front/rear speakers. Set this (reverse)] Hi (Filtru C180deg HiPass Pass (Hibuttons Pass Filter) • Pressing the number (1can–only 6) • If* the selected item has layer, you will enter the layer. R 1 to match the2LPF setting. ,another you If “Off” is selected in step Rotiţi butonul de pentruthe a selecta a track from the menu Turn dial toareselect 2 or 3holding 1 (7) and 2phase. (8)Allcomandă can also 2 •the Off:control signals sent to thecutoff front/rear adjust the the subwoofer until desired track is played. frecvenţa-limită pentru difuzoarele faţă/spate. frequency tomenus. the front/rear speakers. Set this speakers. C Hi Pass (Hi Pass Filter) select the preset top n For iPod connected through For iPod connected to the USB cable această setare astfel • dial 62Hz: Frequencies lowerîncât thansă62corespundă Hz are Turn theEfectuaţi control to select the cutoff • For “EQ” setting, see page 29. 2 to match the LPF setting. — [Press] Pause/resume playback. KS-PD100 setării off. Set this frequency theLPF. front/rear speakers. 3 Display the Preset Station List. • toOff: All cut signals are sent to the front/rear Contin • 95Hz: 95 Hztransmise are to match setting. number OffLPF (dezactivat): e main 4 Press• the button 1Frequencies ( toate semnalele )lower to thansunt Adjusting sound 3 the Adjust the selected setting item. speakers. EXTERNAL DE cutlevel. off. • Off:move to Allanother signals are sent to the front/rear setting către difuzoarele faţă/spate. A Fad/Bal (Fader/Balance) You can adjust the sound characteristics to your 62Hz: lower than 62HzHz setarea „EQ”,see vezipage pagina • 135Hz:Frequencies Frequencies lower areare speakers. • Pentru For “EQ” setting, 29.29. /¢ : select the of 4•• 62Hz: 1 Press number button 1 ( ) frecvenţele maiquality mici dethan 62 Hz135sunt electing a track from the see menu the strongest signals arepreference. cut Frequencies lower than 62 Hz are • For “EQ” setting, pageto29. off.off. LPF. [–12dB/oct orcut –24dB/oct] move to theyou “Fad/Bal” adjustment • 62Hz: restricţionate. • When is shown on the display, can in the selected D VolAdjust, [–5 to dial +5]to select cut off. Control dial: Turn the control etomatically 95Hz: Frequencies lower than 95 Hz are display. movethe backiPod to theconnected previous screenthrough by pressing number Operation For For iPod connected to USB cable •• 95Hz: mai de 95 Hz sunt opţiunea selectată. 3 Reglaţi Adjust selected setting item. Turnfrecvenţele thethe control dial tomici adjust Frequencies lower than 95 Hz are the subwoofer phase. [0deg (normal) or the input level 2setting Adjustitem. the speaker output balance by • 95Hz: 3button Adjust the selected menu. 3 or 6. cut off. restricţionate. KS-PD100 of each source (except FM). cut off. (Atenuator/Balans) A Fad/Bal Fad/Bal (Fader/Balance) 180deg (reverse)] pressing: A Fad/Bal (Fader/Balance) 135Hz: Frequencies lower 135 Hz are Adjust match the input of135 theHz FMsunt Frequencies lower 135 Hzlevel are frecvenţele mai mici dethan ngEnter the main1 1 2,than you can only “Off”••is 135Hz: selected in to step 5 / ∞111: between the front 1 Press number button )) pentru Press number button ) anda rear *• If135Hz: 1 Apăsaţi tasta numerică ((( sound level. cut off. cut off. adjustAlbums therestricţionate. subwoofer phase. Playlists Ô Artists Ô Ô speakers. [F6 to R6] to move to the “Fad/Bal” adjustment 2.5 MHz into preset number 4 Select the preset number you want to store to move toAlbums the “Fad/Bal” adjustment menu. Playlists Ô Artists Ô Ô (Atenuator/Fader). ajunge la afişajul „Fad/Bal” making an adjustment, select the D Hi [–5• toBefore +5] [–5 Pass (Hi Pass Filter) D Genres VolAdjust, to +5] 4 /¢ Songs : between left C and VolAdjust, display. VolAdjust, (reglare volum) [între –5 şi +5] into. ÔthePodcasts Ô display. Songs Ô Ô Composers source you want to adjust. Turn the control controlÔ dial to select adjust thecutoff input level Turn the dial to the Reglaţi balansul între puterea difuzoarelor 2 2 Genres rightoutput speakers. [L6 tobyR6] 2 Adjust the speaker balance tons Rotiţi butonul de[Off comandă pentruthe a regla Turn the control dial to adjust inputnivelul level Composers Ô Audiobooks E Loudness, or On] of each source (except FM). 2 apăsând Adjust the output balance by frequency to the front/rear speakers. Set this Bspeaker Subwoofer pressing: tasta: Select the pentru fiecare sursă (cu excepţia ofthe each source (except Turn the dial select “Off” or FM). Adjust tointrării match the inputcontrol level of thetoFM). FM to match LPF setting. thedesired menu. pressing: 1 Press number button 1 ( ) to 5 /: ∞ : between the front and rear între difuzoarele din faţă şi spate. Efectuaţi astfel încât sălow corespundă “On.” When “On” isinput selected, andthe highFM sound level. Adjust toreglarea match the level of All signals are sent to the front/rear the “Subwoofer” [F6 tomove R6] . 5 -/ speakers. ∞: between the tofront and rear adjustment •• Off: [F6 R6] frequencies sound are boosted Beforenivelului making ansunetului adjustment, select the to produce a pentru FM. speakers. sound level. display. 4 / ¢ : between the left and • You can move to the lists of the other FM bands • By holding / ¢ , you • For 4 : între difuzoarele din speakers. [F6 to R6] well-balanced sound volume level. source want to adjust. Frequencies 62atHzlow are ••you Înainte de alower facethan oanreglare, selectaţi sursathe pentru “EQ” setting, see2 page By toholding ¢ • 62Hz: , youArtists can start Use 4 select cutoff right speakers. [L629.to R6] /¢ byÔ pressing number 5 (• Ô ) or aPlaylists Ô Ô Ô Albums Before making adjustment, select Playlists Artists Loudness, [Offoff. or On] can fast skip during songdreapta. search inbutton the şi din [L6 -Albums R6] 4 :Ô between left back and the E cut care faceţi reglajul. to thethe subwoofer. B stânga Subwoofer play selected item directly. repeatedly. 6 ( /¢ )frequency Podcasts Ôyou Genres Ô Songs Ô source want to95 the dial tothe select “Off” oradjust. 95Hz: Frequencies lower than Hz are Songs Ô Genres Composers main3menu. Exit from setting. 4 control •Ô Off sent to the4 •Turn 1 the Press number button 1R6] ( All signals toareholding right speakers. [L6 to*:item. Adjust selected setting • )By , you can goisback “On.” When “On” selected, lowOn] and high Composers Ô Audiobooks E Loudness, [Off or cut off. Loudness, (intensitate sonoră) [Off sau On] move(Fader/Balance) to the “Subwoofer”subwoofer. adjustment A 5 Fad/Bal B Subwoofer Subwoofer Store the station. sound are boosted to produce a “Off” to higher the main display. •frequencies 135Hz:Rotiţi Frequencies lower than 135select Hz are butonul de comandă pentru a selecta Turn the control dial to or „Off” • 55Hz: Frequencies than 55 Hz display. Confirm the 1 Press number button 1 ( ) 1 tasta numerică 11(( ) pentru 1 Apăsaţi Press number button to a 5/∞,well-balanced sound atinlow volume level. cut off. By) holding you can fast skip cut•aoff. 2 to Usemove 4to the /¢ to are select cutoff sau „On.” Când se selectează funcţia “Fad/Bal” adjustment “On.” When “On” is selected, low„On” and(activat), high selection. ajunge la afişajul de reglare „Subwoofer”. movedisplay. to the “Subwoofer” adjustment [–5 to +5] 85Hz: Frequencies higher thanof85D Hz VolAdjust, frequency to the• subwoofer. every layer the main menu. intensitatea sunetului pentru frecvenţele joaseasau frequencies sound are boosted to produce 2 •Utilizaţi By holding 4 / ¢ , you tasta pentru a Turn control dial, to adjust input level 4• ByExitholding fromthe the setting. are cut off.by • Off *:theAll signalsoutput are sent to the display. set number flashes for a while. ¢ you canthe start 2 Adjust speaker balance înalte creşte pentru a seat obţine un sunetlevel. echilibrat • If a track is selecta selected, playback starts automatically. well-balanced sound low volume (except FM). canpressing: fast skipsubwoofer. song searcha incutoff the than 120 Hzof each source o frecvenţă-limită aFrequencies subwooferului. • 120Hz: higher 2 Use 4 /during ¢ to select play back the selected item directly. la un nivel redus de volum. Adjust to match the2input level of the FM • If the selected item has another layer, you will enter the layer. Repeat steps and are cut off. •555Hz: Frequencies higher than 55 Hz • main Off */ ∞ (Dezactivat): toate semnalele sunt menu. between the front and rear frequency: to thecutTurn subwoofer. 4 , you can go back sound level. 3 the control dial to adjust the• By holding are off. 3 until the desired track[F6 iscătre played. transmise subwoofer. speakers. to R6] Ieşire din setare. Exit from the setting.select the • Off4 *:85Hz:All signals are sent tolevel. the making an adjustment, the• Before main display. subwoofer output to 8] to 4 • Frequencies higher than 85and Hz /¢ : between the • 55Hz: Frecvenţele mai mari deleft 55 Hz[0 sunt source5 you/∞ want to adjust. are cut subwoofer. • By holding , you can fast skip in right speakers. [L6off. to R6] restricţionate. E Loudness, [Off or On]page • 120Hz: Frequencies higher than 12055 Hz Hz Continued on the B •Subwoofer Frequencies higher than every layer of the next main menu. 30 Frecvenţele • 55Hz: 85Hz: mai mari de 85 Hz sunt Turn the control dial to select “Off” or are cut off. 1 ( 1 Press number button ) to are cut off. “On.” When “On” is selected, low and high •3 If arestricţionate. track is selected, playback starts automatically. 27 Continued on the next page DEVICES Turn the control dial to adjust theEXTERNAL move to the “Subwoofer” adjustment Frequencies higher 85HzHzyou will enter frequencies soundRepeat are boosted to produce 120Hz: Frecvenţele mai mari de layer, 120 subwoofer output [0another to 8] than •••If85Hz: the selected itemlevel. has the layer. steps 2 and a display. OPERATIONS 9 well-balanced sound at low volume level. are cut off. sunt restricţionate. 2 Use 4 / ¢ to select a cutoff 3 until the desired track is played. frequency to subwoofer. • 120Hz: Frequencies higher 120 Hz butonul dethe comandă pentruthan a regla 303 Rotiţi signals nivelul• Off de*:redare a subwooferului. areAllcut off.are sent to the[0 - 8] 4 Exit from the setting. subwoofer. Continued on the next page 3 Turn• the control dial to adjust the 55Hz: Frequencies higher than 55 Hz subwoofer output level. [0 to 8] EXTERNAL DEVICES 27 are cut off. 30 • 85Hz: Frequencies higher than 85 Hz are cut off. • 120Hz: Frequencies higher than 120 Hz are cut off. Playlists Ô Artists Ô Albums Ô Songs Ô Genres Ô Composers 3 3 g Display the Preset Station List. 7 Selectaţi un modmode. de redare a sunetului. Select a sound e strongest signals are matically in the selected 4 4 EXTERNAL D Memoraţi Store the reglajele. adjustments. Select Select aa frequency frequency range range to to adjust. adjust. 4 Selectaţi un depreset frecvenţă deyou reglat. Select a frequency to adjust. 5 MHz into preset number 4 interval Select therange number want to store into. ns Adjustable sound sound elements elements Adjustable Range/selectable Range/selectable items items • You can move to the lists of the other FM bands Sound elements Band 1 Band 2 Band 33 Band 44 Sound elements Band 1 Band 2 Band Band by pressing number button 5 ( ) or (100 (320 (1 (3.2 (100 Hz) Hz) (320 Hz) Hz) (1 kHz) kHz) (3.2 kHz) kHz) 6( ) repeatedly. Frequency 68 Hz Hz 210 Hz Hz 680 2.1 kHz kHz Frequency 68 210 680 Hz Hz 2.1 Adjustable sound elements Elemente sonore reglabile 100 Hz Hz 320 kHz kHz kHz 3.2 kHz kHz 100 320 11 kHz 3.2 5 Store the station. 150 Hz Hz 460 kHz kHz 1.5 kHz kHz 4.6 kHz kHz 150 460 1.5 4.6 Level Level Elementele sonore Sound elements Q number flashes for a while. Frequency Frecvenţa ENGLISH ENGLISH ENGLISH ENGLISH Songs Ô Podcasts Composers Ô Audi Memorarea modurilor personale de Reglaţi elementele sonore pentru intervalul de Storing your own sound modes 5 Adjust the sound elements of the selected Confirm the 3own sound modes Storing your 5 the sound redare sunetului frecvenţă frequency range. Storing sound 5 Adjust Adjustselectat. the sound elements elements of of the the selected selected You can adjustathe sound modesyour and own storeselection. your ownmodes frequency range. You can adjust adjust the sound sound modes and andşistore store your own own • 1 frequency range. 1 holding By 4 /¢ to,pentru you Press 4 /¢ select You can the modes your Puteţi regla propriile moduri de redare a sunetului memora Apăsaţi athe selecta adjustments in memory. By holding ¢ 1 Press 4 //¢ the adjustments in memory. 1 Press 4 ¢ to to select select the • pentru Using the Preset Station list adjustments in memory. matic presetting can banda fast skip song in/ ∞the de during frecvenţă, apoisearch apăsaţi frequency band, then press 5 / ∞ to play back the selec frequency band, then press 5 to •reglările Whenpersonale. ••isWhen shown on the display, you can is shown on the display, you can 5 / ∞ to frequency band, then press is shown the display, you can WhenWhen shown on theonla display, you can tation Sequential atinge un level nivel superior pentrufrequency banda de • Când afişajto• apare ,toisputeţi reveni meniul mainaenhanced menu. selected frequency enhanced level for the move back the screen pressing movepeback the previous by pressing enhanced levelfor forthe the selected selected frequency • By holding 4 move back toprevious the previous previous screen by bynumber pressing number number move back thescreen band. [–6 to+6] +6][între –6 şi +6] frecvenţă selectată. anterior dacă apăsaţi tastato6.numerică 6.screen by pressing number button band. [–6 to band. [–6 to +6] button 6. buttonbutton 3. 6. to the main displa 2 Press Press number button555 ((( then turn 2 Apăsaţi tasta numerică apoi rotiţi 2 number button ),),), then turn ns for each band. 2 Press number button 5 (the frequency. ), then 1 steps 1 and 2 of “Using the number 1 • Byturn holding 5/∞, the de control dial to to select select 1 Follow 1 the control dial the frequency. butonul comandă pentru a selecta frecvenţa. M station... the dial button to select the frequency. 3 control Press number number then turn turnevery layer of the buttons” on the left column. 3 Press button555 ((( ),),), then 3 Apăsaţi tasta numerică apoi rotiţi 3 Pressthe button 5 (the quality ), then thenumber control dial dial to select select quality slope slope (Q). turn • By holding 5 / ∞, the Preset Station List will control to (Q). butonul de comandă pentruthestarts a selecta curba • If a track is selected, playback automatically. 2also appear (go to step 4). 2 the control dial to select the quality slope (Q). (Q).item has another layer, you will enter the layer. • If6thecalităţii selected Repeat steps 33 and and 44 to to adjust adjust the the other other 2 6 Repeat steps 3 until the desired track is played. frequency bands. 2 frequency paşii bands. 33 şiand 4 pentru a reglathe şi celelalte 6 Repetaţi Repeat steps 4 to adjust other benzi de frecvenţă. frequency bands. 7 Store Store the the adjustments. adjustments. 7 Conti 3 Select Select aa sound sound mode. mode. 3 Q Opţiuni de gamă/selectabile Range/selectable items–6 to +6 –6 to +6 –6 to to +6 +6 –6 Frecvenţa Band 1 1Q0.7 Q0.7 (100 Hz)Q1.0 Q1.0 68 Hz 100 Hz 150 Hz Q1.4 Q1.4 Q2.0 Q2.0 –6 to to +6 +6 –6 Frecvenţa BandQ0.7 22 Q0.7 Q1.0 (320 Hz) Q1.0 210 Hz 320 kHz 460 kHz Q1.4 Q1.4 Q2.0 Q2.0 Nivel Level între –6 to–6+6şi +6 QQ the next page Q0.7 Continued onQ0.7 OPERATIONS Q1.0 9 Q1.0 Q1.4 Q1.4 Q2.0 Q2.0 între –6 to–6+6şi +6 –6 to +6 Frecvenţa 3 Band Q0.7 Q0.7 3 (1Q1.0 kHz) Q1.0 –6 to +6 Band 55 Band (10 (10 kHz) kHz) 6.8 kHz kHz 6.8 10 kHz kHz 10 15 kHz kHz 15 –6 to to +6 +6 –6 Frecvenţa Frecvenţa 5 Band 4 4 Q0.7 Q0.7 Q0.7 Q0.7 Band 5 Q1.4 680 HzQ1.4 Q2.0 Q2.0 Q1.0 (3.2 kHz) Q1.0 Q1.4 2.1Q1.4 kHz Q2.0 Q2.0 între –6 to–6+6şi +6 între +6 între şi +6 –6 to–6+6şiSETTINGS –6 to–6+6 31 SETTINGS 31 Q0.7 Q1.0 Q1.4 Q2.0 Q0.7 Q1.0 Q1.4 Q2.0 1 kHz 1.5 kHz 3.2 kHz 4.6 kHz Q1.0 Q1.0 (10 kHz) Q1.4 Q1.4 6.8 kHz Q2.0 Q2.0 10 kHz 15 kHz Q0.7 Q1.0 Q1.4 Q2.0 SETTINGS SETĂRI 31 Puteţican schimba PSM (Preferred – You changeopţiunile PSM (Preferred SettingSetting Mode)Mode items Modul de setări preferenţiale) prezentate în tabelul de mai listed in the table below and on pages 33 – 35. jos sau în tabelele de la paginile 33 şi 35. 1 4 Adjust the selected item. Reglaţi opţiunea PSMPSM selectată. Introduceţi setările PSM. Enter the PSM settings. [Rotiţi] [Ţineţi apăsat] 2 Selectaţi o categorie PSM. Select a PSM category. Pentru apela restul Toadisplay the rest 3 5 Repetaţi paşii 22 ––44pentru a regla altePSM opţiuni Repeat steps to adjust other items PSM, dacă este necesar. if necessary. 6 Finalizaţi Finish theoperaţia. procedure. Select a PSM item.PSM. Selectaţi o opţiune Prin apăsareaeither repetată taste, puteţi ajunge By pressing onea oricărei of the buttons repeatedly, şiyou la alte cancategorii. also move to the item of the other categories. MOVIE (FILM) MOVIE Categorie Indicator Category Indication Opţiune Setare, de referinţă] Item Setting,[pagină [reference page] (_: iniţială) ( setare : Initial) Demo Demo Derularea Display demonstrativă a mesajelor pe afişaj demonstration •• On On(activat): • Off (dezactivat): • Off : Derularea mesajelor pe afişaj activată automat dacă nuifeste Display demonstration willvabefiactivated automatically no efectuată operaţie timp de2020seconds, de secunde, operationnicio is done for about [5]. [5]. :: Anulează Cancels. setarea. LevelMeter LevelMeter Audiometru Audio level meter •• Contor Meter11 •• Contor Meter22 :: Selectează alte audiometrului. Select the diferitele differentmoduri level meter patterns. •• Apăsaţi DISPtopentru audiometrului selectat. Press DISP showafişarea the selected level meter. Clock Disp Clock Disp**1 Afişarea ceasului Clock display •• On On(activat): • Off (dezactivat): • Off : Ceasul apareispeshown afişaj când aparatul oprit.the power is Clock time on the displayeste when : Anulează operaţia; la apăsarea tastei DISP, ceasul va fi afişat timp turned off. aproximativ 5 secunde, atunci când estefor oprit, [5]. : de Cancels; pressing DISP will show theaparatul clock time about 1 CLOCK CLOCK (CEAS) ENGLISH General settings— —PSM PSM Setări generale 5 seconds when the power is turned off, [5]. ** Dacă alimentarea cu energie este întreruptă prin scoaterea din contact, se recomandă selectarea poziţiei „Off” pentru If the power supply is notnu interrupted by turning off the cheii ignition key of your car, it is recommended to select “Off” toa sesave economisi bateria. the car’s battery. 11 32 Clock Hr Clock Hrorei Setarea CLOCK CLOCK (CEAS) Hour adjustment Clock Min Setarea minutelor Clock Min 24H/12H Minute adjustment Formatul de afişare a24H/12H orei Clock Adj mode Time display Reglarea ceasului Opţiune Item (_: setare iniţială) ( : Initial) 0 – 23 23 (10––12AM/ 1 –(112PM) – 12AM/ 12PM) 001––59 DISPLAY DISPLAY (AFIŞAJ) Dimmer Atenuatorul intensităţii luminoase Dimmer From – To *3 Dimmer (De la – la) Contrast Contrastul LCD Type From – To *3 Tipul de afişare Contrast Contrast Tag LCD Type Afişarea Display type elementelor de informare : Setare iniţială: 0 (0:00AM), [5]. : Setare iniţială: 00 (0:00AM), [5]. : Initial: 0 (0:00AM), [5]. 00 – 59 : Initial: 00 (0:00AM), [5]. • 12Hours : See also page 5 for setting. • 12Hours (12 ore) : Vezi şi pagina 5, în vederea efectuării setării. • 24Hours (24 ore) • Auto: • 24Hours Clock Adj • Auto • Off (dezactivat): Clock adjustment *2 Scroll • Once (O dată) • Off Derulare Scroll *2 Scroll Setare, [pagină de referinţă] Setting, [reference page] ENGLISH Categorie Category Indicator Indication : Ceasul încorporat este reglat automat cu ajutorul datelor CT (oră) recepţionate prin intermediul semnalului RDS. : : The built-in clock is automatically adjusted using the CT Anulează setarea. (clock time) data privind in the RDS : Pentru informaţii piesa:signal. derulează informaţiile o singură : Cancels. dată. Pentru text DAB: derulează textul DAB detaliat. : : For trackinformaţii information: track information only(la Pentru privindscrolls piesa:the Derulează în mod repetat once. intervale de 5 secunde). For Pentru derulează textul DAB DABtext text:DAB: scrolls the detailed DABdetaliat. text. • Off (dezactivat): : : For Pentru privindrepeats piesa: anulează • Auto trackinformaţii information: the scrolloperaţia. (in 5-second Pentru text DAB: afişează titlul, dacă acesta există. intervals). • Apăsarea tastei DISP timp de peste o secundă poate declanşa For DAB text: scrollsindiferent the detailed DAB text. derularea afişajului de setări. • Off : : For track information: cancels. • Auto: Scade intensitatea luminoasă a afişajului atunci când aprindeţi farurile faţă. For DABdin text: shows only headline if any. • Off (dezactivat): •: Pressing AnuleazăDISP setarea. for more than one second can scroll the • On (activat): : Luminozitatea afişajului şi a tastelor scade. display regardless of the setting. • Time Set (Setare : Setaţi intensitatea luminoasă pentru cronometru, [35]. • Once • Auto: interval) • Auto — • Off • On 1–8 • Time Set 5 Setare iniţială: • Auto: — • Positive (Pozitiv) 1–8 • Negative Initial: 5 (Negativ) • On (activat) • Auto Orice the oră –display Orice oră : Dims when you turn on the headlights. : Setare iniţială: 18 – 7. : Cancels. : : Dims the display and button illumination. Reglaţi contrastul afişajului astfel încât indicaţiile să fie clare şi : Set the timer for dimmer, [35]. lizibile. hour – Any : Any Modul pozitiv va hour fi selectat în timpul zilei *4, iar modul negativ în : Initial: – 7.*4. timpul18 nopţii : Modul Positive al afişajului. : : Adjust display contrast to make the display indications Modul the Negative al afişajului. clear and legible. Afişeazăpattern elementele timpulthe redării pieselor : : Positive willdebeinformare selected înduring day time *4;în formatnegative MP3/WMA/AAC/WAV. while pattern will be used during the night • Off (dezactivat) : Anulează setarea. time *4. • Positive : Positive pattern of the display. • Negative : Negative pattern pe of afişaj. the display. în mod corect (sau vor fi suprimate) *2 Unele caractere sau simboluri nu vor apărea *3 Reglabil numai intensităţii luminoase) selectată opţiunea „Time Set”. Tagcând pentru „Dimmer”• (Atenuatorul On : Shows the tageste while playing MP3/WMA/AAC/WAV tracks. *4 Depinde de setarea „Dimmer”. Tag display • Off : Cancels. *2 Some characters or symbols will not be shown correctly (or will be blanked) on the display. *3 Adjustable only when “Dimmer” is set to “Time Set.” *4 Depends on the “Dimmer” setting. Continuare pe pagina Continued on theurmătoare next page SETTINGS SETĂRI 33 AUDIO AUDIO TUNER TUNER ENGLISH Categorie Indicator Category Indication Opţiune Setare, [pagină de referinţă] Item Setting, [reference page] (_: iniţială) ( setare : Initial) AF-Regn‘l • AF : Când semnalele recepţionate devin slabe, aparatul intră pe AF-Regn‘l • AF : When the currently received signals become weak, the unit Recepţionare cu frecvenţa altui post de radio sau a altui serviciu (programul Alternative switches to another station or service (the programme may frecvenţă poate fi altul decât cel transmis anterior), [12]. frequency/ differ from the one currentlydevin received), alternativă/ • AF REG : Când semnalele recepţionate slabe,[12]. aparatul va intra pe regionalization • AF REG : When the currently received signals become weak, the prin frecvenţa altui post de radio care transmite acelaşi program. reception switches to another station broadcasting the same regionalizare • Off (dezactivat) : unit Anulează acţiunea (această operaţie nu este posibilă când programme. opţiunea „DAB AF” este setată la „ON”). • Off 0 : : Cancels (not selectable when “DAB15AF” is set to “On”). Volume TA Vol Setare iniţială: Volume Volumul de redare a – Volume 30 : Initial: Volume 15 TA Vol Volume 0 informaţiilor rutiere (sau Volume 0 – Traffic – Volume 305 Volume 50)* announcement (or Volume 0 – • On (activat) P-Search volume Volume 50)*5 : Este activată funcţia Programme Search (Căutarea Căutarea programului), [12]. P-Search On(dezactivat) : : Activates • Off programului AnuleazăProgramme setarea. Search, [12]. Programme Off : : Cancels. IF Band search •• Auto: Creşte gradul de selectivitate a tunerului pentru a reduce Bandă de interferenţele dintreselectivity posturile detoradio apropiate. (Se poate IF Band • Auto : Increases the tuner reduce interference noises frecvenţă pierde efectul stereo.) Intermediate between adjacent stations. (Stereo effect may be lost.) • Wide (Largă) intermediară : Vor apărea interferenţe între posturile de radio apropiate, dar frequency band • Wide : Subject to interference noises from adjacent stations, but calitatea sunetului nu va scădea, iar efectul stereo va fi păstrat. sound quality will not be degraded and the stereo effect • On (activat) DAB AF *6 : will Identifică remain.programul în cadrul serviciilor DAB şi al posturilor de Recepţia unei radio FM RDS, [25]. 6 DAB AF *alternative On(dezactivat) : : Traces the setarea. programme among DAB services and FM RDS frecvenţe • Off Anulează Alternative Ext Input *7 • Changer : stations, Pentru a [25]. putea utiliza un schimbător de CD-uri JVC, [22], un frequency reception (Schimbător) • Off : Cancels. Intrare externă tuner DAB JVC, [23], sau un Apple iPod, [26]. • Ext In Pentru utiliza altă componentă externă, 7 Ext Input * • Changer : : To use aaJVC CD orice changer, [22], JVC DAB tuner,[28]. [23], or an • On (activat) Beep input : Apple Activează External iPod,semnalul [26]. sonor. •• Off Semnal sonor Dezactivează semnalul sonor. Ext(dezactivat) In : : To use any other external component, [28]. • Normal AudioBooks *8 : Puteţi selecta viteza de redare a fişierului audio „Audiobook” Beep • On : Activates the key-touch tone. Controlul vitezei • Faster (Mai rapid) (Carte audio) din iPod. Key-touch tone • Off : Deactivates the key-touch tone. „Audiobook” (Carte • Slower (Mai lent) • Opţiunea selectată iniţial depinde de setările iPod-ului. audio) AudioBooks *8 • Normal : You can select the playback speed of the “Audiobook” Speed control of Faster file00in–your iPod. • High PWR Amp Gain : sound Volume Volume 50 “Audiobook” • Slower ridicată) • Initial selected item depends on your iPod setting. Controlul amplificării (Putere •• Low PWR Volume00 00 –– Volume Volume 30 Amp Gain High PWR : : Volume 50(Selectaţi această opţiune dacă (Putere redusă) puterea maximă a difuzorului este mai mică de 50 W, pentru a Amplifier gain • Low PWR : Volume 00 – Volume 30 (Select if the maximum power of preveni defectarea acestuia.) control each speaker is less than 50 W to prevent damaging the speaker.) *5 În funcţie de setarea controlului amplificării. **65Este afişat doar cândamplifier tuner-ul gain DAB este conectat. Depends on the control. **76Este afişat doar când esteDAB selectată dintre următoarele surse —TUNER, DAB, CD, USB, USB-iPod, BT-AUDIO, sau AUX IN Displayed only when tuneruna is connected. **87Este afişat numai iPodofeste la cablul şi redarea este controlată aparatului. Displayed onlycând whenunone theconectat following sourcesUSBis selected—TUNER, DAB,prin CD,intermediul USB, USB-iPod, BT-AUDIO, or AUX IN. *8 Displayed only when an iPod is connected to the USB cable and playback is controlled from the unit. 34 COLOR COLOR COLOR (CULOARE) Item Opţiune Item (_ : (setare ( : Initial) :iniţială) Initial) Color Setare iniţială: ColorSel Initial: Color SelSel Initial: AllAllToate Selectarea culorii Sursă; Colorselection selection Source; Color Source; Culoare: deschisă Color:Pale Pale Color: Color Set — Color Set — Color Set — Setarea culorii Colorsetting setting Day Color Color DayColor Color zi) Day (Culoare pentru NightColor NightColor NightColor (Culoare Red —1111 pentru noapte) Red 0000— Red (roşu) 00 — Green Green 000011 ——1111 Green (Verde) 00 — Blue Blue 000011 ——1111 Blue (Albastru) 00 — 11 Dependsononthethe“Dimmer” “Dimmer”setting. setting. *9*9Depends Setting, [reference page] Setare, [pagină de referinţă] Setting, [reference page] culoarea preferată pentru afişajul fiecărei surse :Select Selectyour yourfavorite favorite display color each source :: Selectaţi display color forforeach source (or(or(sau forforallall pentru toate[35, sursele), sources), [35,36]. 36].[35, 36]. sources), : Creaţi propriile culori şi selectaţi-le pentru afişaj, [36]. Createyour yourown owncolors, colors,and andselect selectthem themforforthethedisplay display : :Create color,[36]. [36]. color, : Culoare personalizată pentru zi *9. Usercolor colorduring duringthetheday daytime time : :User *9*. 9. :User Usercolor colorduring duringthethe night time :: Culoare night time *9*9. 9. personalizată pentru noapte* Initial:Day DayColor: Color:07,07,NightColor: NightColor:0505 : :Initial: iniţială: Culoarea pentru zi: 07,05Culoarea pentru noapte: 05 :Initial: Initial: DayColor: Color: NightColor: 05 :: Setare Day 07,07,NightColor: iniţială: Culoarea pentru zi: 07,05Culoarea pentru noapte: 05 :Initial: Initial: DayColor: Color: NightColor: 05 :: Setare Day 07,07,NightColor: : Setare iniţială: Culoarea pentru zi: 07, Culoarea pentru noapte: 05 *9 Depinde de setarea „Dimmer”. button 3. Followsteps steps page 32. 32. ns for each band. Parcurgeţi Follow 1 1toto313on page 32. etapele - 3onde la pagina 1 Follow steps 1 and 2 of “Using the number step2,2,2,select select“DISP.” “DISP.” InIn step • •În etapa selectaţi opţiunea „DISP”. M station... buttons” on the left column. 11 Exitfrom from thesetting. setting. din setare. 44 Ieşire Exit the ENGLISH Setarea intervalului pentru Setting thetime timefor fordimmer dimmer Setting the atenuatorulisintensităţii luminoase When isshown shown display, youcan can • •When ononStation thethedisplay, Using the Preset list you matic presetting move back to the previous screen by pressing move back to the previous screen by pressing number • When is shown on the display, you can tation Sequential • Când pe afişaj apare , puteţi reveni la meniulnumber button3.dacă 3. apăsaţi move back the previous3.screen by pressing number button anterior tastato numerică Schimbarea culorii afişajului Changingthe thedisplay display color Changing color Puteţi selecta culoarea preferată pentrucolor afişajul fiecărei surse Youcan canselect select yourfavorite favoritedisplay display colorforfor eachsource source You your each (sau pentru toate sursele). Using the Preset Station list allsources). sources). also appear (go step 4). automatic presetting (or(orall FMtostation When shown on the la display, you When shownon on display, youcan cancan When is isshown thethedisplay, you SSM (Strong-station Sequential ,isputeţi reveni meniul •• •Când pe afişaj• apare opţiunea „Time— Set.” Select“Time “Time Set.” 22 Selectaţi Select move to numerică the previous number 2 Set.” movedacă backapăsaţi to theback previous screen3screen by pressing number anterior tasta sau 6.by pressing Memory) 3 move back to the previous screen by pressing number button 3. button3 or 3 or6.6. You can preset up to six stations for each band.button 1 Follow steps 1 and 2 of “Using the number Setting thedisplay display color culorii afişajului Setting the color 1 Preset While listening to an FM station...Setarea buttons” on the left column. [Rotiţi]the Display Station List. • By holding 5 / ∞, the Preset Station List will Parcurgeţi etapele 1 3on - 3on de la pagina 32. Followsteps steps 1toto page 32. Follow 1also 3 page 32. appear (go to step 4). 2 3 11 •• •ÎnInIn etapa 2,2,select selectaţi opţiunea „COLOR”. step2, select“COLOR.” “COLOR.” step •• •ÎnInIn etapa 3,3,select selectaţi opţiunea „Color Sel” step2 select“Color “Color Sel.” step 3, Sel.” (Selectarea culorii) 22 33 3 Display the Preset Station List. 4 Select the preset number you want to store into. Reglaţi momentul de pornire a atenuatorului. Adjustthe the dimmer starttime. time. Adjust 5 MHz into preset number 4 dimmer Select thestart preset number you want to store butonul de comandă adimmer seta start Turnthe theinto. control dialtotosetpentru setthethedimmer start 11Rotiţi Turn control dial Local FM stations ns momentul time. de pornire al atenuatorului.with the strongest signals are time. searched and stored automatically in the selected Press¢ ¢ toto select “To.”Then, Then, turnthe the 22Apăsaţi Press select turn pentru a“To.” selecta opţiunea „To” FM band. control dialtoto thedimmer dimmer endtime. time. (Până la)dial Apoi, rotiţi butonul de control pentru a control setsetthe end seta momentul de oprire atenuatorului. • You can move toa the listspresetting of the other FM bands Manual by pressing button 5 ( of 92.5 MHz ) orinto preset number Ex.: number Storing FM station 6( 4) repeatedly. of the FM1 band. 5 Using the number buttons Store the station. 1 Continuare pe on pagina următoare Continued onthethenext nextpage page Continued SETTINGS 35 SETTINGS 35 SETĂRI ENGLISH step3,3,3,select “Dimmer.” • •În etapa selectaţi opţiunea InIn step “Dimmer.” •select By holding 5 / ∞„Dimmer.” , the Preset Station List will e strongest signals are matically in the selected ng ENGLISH ENGLISH CategoryIndication Indication Categorie Indicator Category 2 Selectaţi o sursă. Select a source. 1 Ô CD All sursele) CD Changer AllSource Source**1 (Toate Ô Changer *3 (or *3 sau Ext USBFM *3 Ô FM AM ExtInIn**2 2(Schimbător) ) Ô USB *3Ô AM Ô 3 iPodiPod *3 *3Aux BTInAudio Audio (înapoi DAB ÔInAux Ô BT DAB**3Ô laÔ început) (back to the beginning) *11Când selectaţi opţiunea „All Source” puteţi utiliza * aceeaşi Whenculoare you select “Alltoate Source,” you can use the pentru sursele. 2 same color for all the sources. * Depinde de setarea „Ext Input”, vezi pagina 34. 2 Depends on the “Ext Input” setting, see page 34. afişat numai când componenta ţintă este **3 Este *3conectată. Displayed only when the target component is connected. 4 Selectaţi opţiunea Color” sau „NightColor.” Select “Day Color”„Day or “NightColor.” [Rotiţi] Culoare pentru zi Culoare pentru noapte 3 Selectaţi o culoarecolor. primară. Select a primary 4 Reglaţi (00(00 - 11)toal11) culorii primare Adjust nivelul the level of the selected selectate. primary color. 5 Repetaţi etapele 3 şi 4 pentru a regla alte culori Repeat steps 3 and to adjust other primary primare. colors. 6 Ieşire din setare. Exit from the setting. Selectaţi o culoare. Select a color. [Rotiţi] Pale Aqua SkySea Ô Sea Leaves Leaves Pale(Deschisă) Ô AquaÔ SkyÔ ÔGrass Ô Apple Rose Amber Honey Grass Apple Ô Rose Ô Amber Ô 5 Violet Grape Every *4 User (Utilizator) HoneyÔ Violet Ô Grape Ô *Every *4 Ô (înapoi început) User *5laÔ (back to the beginning) *44Culoarea se schimbă la fiecare 2 secunde. The color changes 2 seconds. **5 Pentru culorile editateevery de utilizator se vor aplica *5opţiunile The user-edited and din „Day Color”colors—“Day şi „NightColor”Color” (vezi coloana “NightColor” will be applied (see the right dreapta pentru detalii). column for details). Bluetooth settings Setările Bluetooth 5 Puteţi schimba de la pagina funcţie You can changesetările the settings listed37onînpage 37deaccording Repetaţi etapele 3 şi 4 pentru a selecta culoarea Repeat steps 3 and to select the color for Using the Preset Station list FM station automatic preferinţe. pentru fiecare(except sursă (cu excepţia cazului în care presetting to your preference. each source when selecting “All When shownreveni on the la display, you can Sequential •• Când ,isputeţi meniul se selectează „All3). Source”— în SSM etapa(Strong-station 3). Whenpe afişaj• apare is shown on the display, you can Source” in step move back to numerică the previous3.screen by pressing number anterior dacă apăsaţi tasta Memory) move back to the previous screen by pressing number 6 Ieşire din setare. Exit from the setting. You can preset up to six stations for each band.button 3. 1 While listening to an FM station... 2 Crearea propriei —Culoarea utilizatorului Creating your culori own color—User Color Vă puteţi crea propriile culori —„Day Color” (Culoare You can create your own colors—“Day Color” or pentru zi) sau „NightColor” (Culoare pentru noapte). “NightColor.” 1 1 2 3 FM band. Follow steps 1 and 2 of “Using the number buttons” on the left column. • By holding 5 / ∞, the Preset Station List will also appear (go to step 4). Selectaţi opţiunea „Settings” (Setări). Select “Settings.” Parcurgeţi etapele - 3 de la pagina Follow steps 1 to 31 on page 32. 32. •• ÎnInetapa 2, select selectaţi opţiunea „COLOR”. step 2, “COLOR.” •• ÎnInetapa 3, select selectaţi opţiunea Set” with the strongest signals are Local„Color FM stations step 3, “Color Set.” (Setarea culorii) searched and stored automatically in the selected 36 button 3. 1 2 3 Display the Preset Station List. ENGLISH ENGLISH 3 Selectaţi o opţiune de setare. Select a setting item. [Rotiţi] Auto Cnnct Auto Answer (preluare automată AutoNotice Answer Ô mesaj) Cnnct Ô aAuto apelurilor) MSG *1 (notificare *1 ÔMIC Ô PhoneBook MSG MICNotice (microfon) PhoneBook (agendă Ô Name Ô AddressÔName Version Initialize Ô telefonică) Initialize (Resetare) Ô Phone Device(Adresă) *2 Ô Audio Device *2 Ô (Nume) Address Version (back to thebeginning) (Versiune) Phone Device *2 (Telefon) Audio Device *2 (Dispozitiv audio) (înapoi la început) 4 Modificaţi setarea, după caz. Change the setting accordingly. (setarea microfonului)setting) MIC (microphone Reglaţi volumului microfonului incorporat, [Nivel Adjust nivelul the built-in microphone volume, 01/02/03]. [Level 01/02/03]. ENGLISH 3 PhoneBook PhoneBook(agendă telefonică) Încărcaţi agenda telefonică a telefonului cu Bluetooth în Load the phone book of the Bluetooth phone to the aparat. (Puteţi încărca până la 50 de numere de telefon.) unit. (You can load up to 50 phone numbers.) Initialize (Resetarea) Yes: Initialize resetează toate reglajele pe care le-aţi operat în Yes: meniulInitialize all settings you have made in the Bluetooth. Bluetooth No: revenire la afişajulmenu. anterior. No: Return to the previous screen. Name (nume) Denumirea Nameaparatului (indicat de dispozitivele cu Bluetooth). Name of the unit (as shown on Bluetooth devices). [Rotiţi] Address (adresa) adresaAddress aparatului. Address of the unit. • Dacă în etapa 3 este selectatăinopţiunea If “PhoneBook” is selected step 3, “PhoneBook”, see page 20 vezi detalii la pagina 20. for details. Meniu setare( (_: :setare Settingdemenu Initial)iniţială) Version (versiunea) versiunile hardware şi software ale modulului Bluetooth. Version Hardware software versions of the Bluetooth Phone and Device *2 (Telefon) module. telefonului cu Bluetooth conectat. denumirea Auto AutoCnnct Cnnct(conectare) (connect) La pornirea aparatului, se stabileşte automat conexiunea When the unit is turned on, the connection is cu... established automatically with... Phone Device *2 Audio Device *2 (Dispozitiv audio) denumirea player-ului audio cu Bluetooth conectat. Name of the connected Bluetooth phone. Off: *1 Dacă telefonul cu Bluetooth conectat nu suportă notificări Audio Device *2 pentru text (prin Bluetooth), nu va primi nicio Name mesaje of the connected Bluetoothaparatul audio player. notificare la primirea unui mesaj text. *21Este afişat atunci când este conectat un telefon/ player audio * If the connected Bluetooth phone does not support cu Bluetooth. No Bluetooth device. Off: dispozitiv Bluetooth.Bluetooth device. Last: niciunThe last connected Last: ultimul dispozitiv Bluetooth conectat. Auto Answer (Preluare automată a apelurilor) On:Auto Answer The unit answers the incoming calls On: aparatul preia apelurile automat. automatically. Off: aparatul nu preia apelurile automat. Preluaţi manual Off: apelulThe unit does not answer the calls telefonic. automatically. Answerprimite. the calls manually. Reject: aparatul respinge apelurile Reject: The unit rejects all incoming calls. MSG Notice (notificare mesaj) Notice (message notice) On *1MSG : aparatul vă informează în legătură cu primirea unui On *1:mesajThe unit informs arrivalmesajului of printr-un semnal you sonorofşithe afişarea „Receiving Message” (Primireand mesaj). a message by ringing displaying Off: aparatul nu vă informează “Received Message.”în legătură cu primirea Off: unui mesaj. The unit does not inform you of the arrival of text message notification (via Bluetooth), the unit will not receive any notification upon the arrival of a text message. *2 Displayed only when a Bluetooth phone/audio player is connected. a message. SETTINGS SETĂRI 37 ENGLISH Moremulte aboutinformaţii this unit despre acest aparat Mai Funcţionarea sistemului FM RDS FM RDS operations de bază out thisOperaţii unitoperations Basic • Pentru ca funcţia Network-Tracking Reception Pornirea aparatului Turning on the power • Prin apăsarea tastei SOURCE puteţi să porniţi şi aparatul. FM RDS operations • Dacă By pressing SOURCE on the unit, you can also turn on sursa este pregătită, va începe redarea. • Network-Tracking Reception requires two types of (Recepţionare optimă în reţea) să funcţioneze RDS signals—PI (Programme Identification) and AF corespunzător, este nevoie de două tipuri de semnale (Alternative Frequency) correctly.-Without • Network-Tracking Reception requires two types of to work power RDS – semnale PI (Programme Identification Identificare the power. If the source is ready, playback also starts. receivingşithese data correctly, Network-Tracking RDS signals—PI (Programme program) Identification) and AF semnale AF (Alternative Frequency – RCE on the unit, you can also turn on Oprirea aparatului Reception will not operate correctly. (Alternative Frequency) to workFrecvenţă correctly. Without alternativă). Dacă aceste date nu sunt primite în e source is ready, playback also starts. the power •Turning În cazul înoff care opriţi aparatul în timpul redării uneidata piese, If a Traffic is received by TA Standby receiving these correctly,• mod Network-Tracking corect,Announcement funcţia Network-Tracking Reception poate să va fithe repornit, va începe to dinapunctul în • când If youacesta turn off powerredarea whileReception listening Reception, thecorect. volume level automatically changes to nu funcţioneze will track, not operate correctly. a fost will întreruptă. e power care playback start from where been stopped Înthecazul în care sunt informaţii rutiere prin preset (TArecepţionate Vol) if the current level is lower • Ifitahad Traffic Announcement is •received by TAlevel Standby previously time you turn on the power. e power while listening tonext a track, intermediul funcţiei TAto Standby Reception (Recepţia than the preset level. Reception, the volume level automatically changes Informaţii generale înWhen aşteptare rutiere), volumulisvaactivated fi adus art from where it had been stopped Alternative Frequency Reception the preset level (TA Vol) if the• current levela isinformaţiilor lower Dacă schimbaţi unui disc, redarea automat nivelul presetat (TA Vol) dacă nivelul actualis time you turn•General on the power.sursa în timpul ascultării (with AFlaselected), Network-Tracking Reception than the preset level. va fi întreruptă. Următoarea dată când selectaţi CD-ul ca este mai mic decât acesta. also activated automatically. On the other hand, • vaWhen Alternative Frequency Reception is activated • sursă, If youredarea changediscului the source while listening a disc, respectiv începe detounde a fost • Când este activată funcţia Alternative Frequency Network-Tracking (with AF selected), Network-Tracking Reception isReception cannot be deactivated playback stops. întreruptă anterior. Reception (Recepţia unei frecvenţe alternative) (având o without deactivating Alternative Frequency alsoplayback activated automatically. On the other hand, selectată), Next timetoyou select as the source, e source while listening aunui disc, • După ejectarea disc“CD” sau îndepărtarea dispozitivului frecvenţă alternativă funcţia Network-Tracking Reception. 25 and 34.) automat. Pe de Reception cannot be deactivated playback will start frommesajele whereNetwork-Tracking it had been stopped USB, va apărea unul din „No Disc” sau „No USB“ , Reception va(See fi, depages asemenea, activată • TA Standby Reception and PTY Standby Reception without deactivating Alternative Frequency iar unele taste vor deveni inoperabile. Introduceţi alt disc, previously. elect “CD” as the playback source, altă parte, funcţia Network-Tracking Reception nu poate be temporarily canceled funcţiei while listening to an AM sau apăsaţi SOURCE Reception. (See(SURSĂ) pages 25 and 34.) • reconectaţi After a disc orUSB removing a USB device, art from where it hadejecting beendispozitivul stopped fiwill dezactivată fără dezactivarea de recepţionare a pentru a selecta sursă de redare. station. • TA Reception and PTYfrecvenţei Standby Reception “No Disc” or “Noaltă USB” appears andStandby you cannot alternative. (Vezi paginile 25 şi 34). want totoknow more about RDS,TA visit will beanother temporarily listening anunAM ÎnIf you timp ce ascultaţi post AM, funcţiile Standby operate disc, canceled•while disc or removing a USB some device,of the buttons. Insert <http://www.rds.org.uk>. Reception şi PTY Standby Reception vor fi întrerupte reattach a USB device, or pressstation. SOURCE to select USB” appears and you cannot Funcţionarea radioreceptorului temporar. RDS, visit another playback posturilor the buttons.Memorarea Insert another disc,source. • If you want to know more about doriţi mai multe informaţii despre sistemul RDS, <http://www.rds.org.uk>. • Dacă • ÎnSOURCE timpul to căutării evice, or press selectSSM... Disc/USB operations vizitaţi adresa de internet <http://www.rds.org.uk>. Toate posturile memorate anterior sunt şterse şi începe o k source. Tuner operations Caution for DualDisc playback rations nouă memorare a posturilor. Disc/USB operations Storing stations in memory • The Non-DVD side ofCD a “DualDisc” does not comply - Frecvenţele recepţionate sunt presetate de la nr. 1 Funcţionarea player-ului/USB-ului erations • During Caution for DualDisc with the “CompactlaDisc Digitalunui Audio” (frecvenţa mai joasă) până la nr. 6 (frecvenţa cea maiplayback SSM cea search... Măsuri de precauţie redarea discstandard. de tip s in memory– înaltă). Therefore, use of Non-DVD side of a DualDisc on • The sidetheof a “DualDisc” does notthe comply DualDisc All previously stored stations areNon-DVD erased and - La încheierea căutăriianew. SSM, aparatul va intra în mod Disc Digital this product may be recommended. • Faţa non-DVD a unuinot „DualDisc” nu corespunde with the “Compact Audio” standard. stations are stored ch... automat pe frecvenţa postului memorat la nr.1. „Compact the use of Non-DVDstandardului side of a DualDisc on Disc Digital Audio”. Prin urmare, nu Received stations in No. 1 (lowest stored stations–are erased and the are presetTherefore, • Când memorarea posturilor se realizează manual, este recomandată utilizarea feţei non-DVD a unui DualDisc product maypostul not be recommended. General frequency) to No. 6 (highestthis frequency). ored anew. memorat anterior va fi şters când frecvenţa altui post este pe acest aparat. – When SSM is over, the station stored in No. 1 will ons are preset memorată in No. 1 (lowest • This unit has been designed to reproduce la acelaşi număr de presetare. be automatically tuned in. General No. 6 (highest frequency). CDs/CD Texts, and CD-Rs (Recordable)/CD-RWs Informaţii generale • When storing over, the station stored in No.a1station will manually, • Thisthe unitpreviously has been designed to (Rewritable) reproduce in audio CD (CD-DA), MP3/WMA/AAC • Aparatul este destinat redării de CD-uri/CD-uri text şi de new station stored ally tuned in. preset station is erased when aCDs/CD formats. Texts, isand CD-Rs (Recordable)/CD-RWs CD-R (CD-uri inscriptibile) / CD-RW (CD-uri reinscriptibile) in the preset number. (Rewritable) in audio CD (CD-DA), station manually, thesame previously • înWhen a disc insertedMP3/WMA/AAC. upside down, “Please Eject” MP3/WMA/AAC format audiois (CD-DA), erased when a new station is stored appears on the greşit display. Press OPEN,pethen to eject formats. • Dacă introduceţi discul în fantă, afişaj0apare et number. the disc. • When a disc is inserted upside mesajul down, “Please Eject” rugăm să ejectaţi). Apăsaţi tasta „Please Eject”(Vă In thisthen manual, “track”discul. and “file” are appears on the display. Press• OPEN, 0 pentru towords ejecta ejecta OPEN, apoi used. „piesă” şi „fişier” sunt utilizaţi cu • Îninterchangeably acest manual, termenii the disc. acelaşi sens. • In this manual, words “track” and “file” are interchangeably used. 38 Playing a CD-R or CD-RW • Use only “finalized” or CD-RWs. Redarea unui disc CD-RCD-Rs sau CD-RW •• Utilizaţi CD-Rback sau CD-RW This unitdoar candiscuri only play files of„finalizate” the same (cu type as sesiunea de înregistrare încheiată). those which are detected first if a disc includes both • Acest poate reda de acelaşi tipfiles. cu audioaparat CD (CD-DA) filesdoar andfişiere MP3/WMA/AAC a fost în cazul în carehowever, un disc • cel Thiscare unit canidentificat play backprimul, multi-session discs; conţine atâtsessions fişiere CDwill audio (CD-DA),while cât şi fişiere MP3/ unclosed be skipped playing. • WMA/AAC. Some CD-Rs or CD-RWs may not play back on this • Acest aparat poate reda discuri multisesiune; cu toate unit because of their disc characteristics, or for the acestea, sesiunile nefinalizate vor fi ignorate în timpul following reasons: redării. – Discs are dirty scratched. • Unele CD-R-uri sauorCD-RW-uri nu pot fi redate de – Moisture condensation has occurred on the acest aparat din cauza caracteristicilor acestora saulens din inside themotive: unit. următoarele The pickup insidesauthe unit is dirty. -– discurile suntlens murdare zgâriate. -– s-a fenomenul de condensarepewritten lentila internă a Theprodus files on the CD-R/CD-RW using the aparatului. “Packet Write” method. -– lentila din interiorul aparatului este murdară. Therede arecitire improper recording conditions (missing - fişierele de peorCD-R/CD-RW sunt scrise prin metoda data, etc.) media conditions (stained, scratched, „Packet Write”. warped, etc.). condiţiile de require inscripţionare au fost improprii • CD-RWs may a longer readout time(date since the lipsă etc.) sau suportul este neadecvat (pătat, zgâriat, reflectance of CD-RWs is lower than that of regular deformat etc). CDs. • Discurile CD-RW ar putea avea nevoie de un timp de citire • mai Do not the following or de CD-RWs: lung,use pentru că indiceleCD-Rs acestora reflexie este mai – Discs with stickers, labels, or a protective seal stuck scăzut decât cel al CD-urilor obişnuite. the surface. • Nu to utilizaţi următoarele tipuri de discuri CD-R sau CD-RW: Discs on labels cansebeaflădirectly printedetichete by an -– discuri pe which suprafaţa cărora autocolante, inkpelicule jet printer. sau protectoare. -Using discurithese pe suprafaţa cărora eticheta poate fi imprimată discs under high temperature or high direct cu may ajutorul uneimalfunctions imprimante cu humidity cause orcerneală. damage to the Utilizarea unit. unor astfel de discuri în condiţii de temperatură şi umiditate poate provoca defectarea Playingridicate an MP3/WMA/AAC disc sau deteriorarea aparatului. • This unit can play back MP3/WMA/AAC files with Redarea unui disc în format MP3/WMA/AAC the extension code <.mp3>, or <.m4a> • Acest aparat poate reda fişierele în<.wma>, format MP3/WMA/ (regardless of the letter case—upper/lower). AAC care au extensia <.mp3>, <.wma> sau <.m4a> • (indiferent This unit can showliterelor the names of albums, artists de tipul - majuscule / minuscule). (performer), and afişa Tag (Version 1.0, 1.1, 2.2, 2.3, or • Acest aparat poate numele albumelor, ale artiştilor 2.4) for MP3 şifiles and show (interpreţilor) elementele deWMA/AAC identificareTag. (versiunea 1.0, saudisplay 2.4) pentru MP3 şi poate afişa • 1.1, This2.2, unit2.3can only fişierele one-byte characters. No elementele de identificare pentru fişierele WMA/AAC. other characters can be correctly displayed. •• Acest aparat caractere de unfiles bit.meeting Alte This unit canpoate playafişa backdoar MP3/WMA/AAC caractere nu pot below: fi afişate corespunzător. the conditions • Acest MP3:aparat poate reda fişiere în format MP3/WMA/AAC, în cazul în care sunt îndeplinite condiţiile de mai jos: – Bit rate: 8 kbps — 320 kbps MP3: – Sampling frequency: - Rată de transfer: 8 kbps — 320 kbps 48 kHz, 44.1 kHz, 32 kHz, 24 kHz, 22.05 kHz, - Frecvenţa de eşantionare: 48 kHz, 44.1 kHz, 32 kHz, 24 16 kHz, kHz,1611.025 kHz kHz, 8 kHz kHz, 22.0512kHz, kHz, 12kHz, kHz,811.025 WMA: WMA: Bit rate: 32 kbps32— 192 -– Rată de transfer: kbps —kbps 192 kbps Samplingdefrequency: -– Frecvenţa eşantionare: 48 kHz, 44.1 kHz, 32 kHz AAC:48 kHz, 44.1 kHz, 32 kHz -AAC: Rată de transfer: 16 kbps — 320 kbps -– Frecvenţa de eşantionare: kHz, 44,1 kHz Bit rate: 16 kbps — 32048kbps Formatul discului:frequency: ISO 9660 Level 1/ Level 2, Romeo, Joliet, – Sampling nume48 lung de 44.1 fişierekHz în Windows kHz, •Disc Numărul maxim de caractere pentru 2, denumirea format: ISO 9660 Level 1/Level Romeo, fişierelor Joliet, / directoarelor variază în funcţie de formatul discului utilizat Windows long file name (include extensiile de 4 caractere - <.mp3> sau <.wma> • sau The<.m4a>). maximum number of characters for file/folder varyLevel depending format used -names ISO 9660 1: până laon12the de disc caractere (includes 4 extension characters—<.mp3>, - ISO 9660 Level 2: până la 31 de caractere or <.m4a>). -<.wma>, Romeo *: până la 128 de caractere * ISO 9660 Level to 12 characters : până la 641:deupcaractere -– Joliet ISO 9660 2: up to 31 characters -– Nume lungLevel de fişier în Windows*: până la 128 de –caractere Romeo *: up to 128 characters * Cifra dintre*:paranteze reprezintă numărul maxim de – Joliet up to 64 characters caractere din denumirea fişierelor/directoarelor, în cazul în – Windows long file name *: up to 128 characters totalfigure al fişierelor al directoarelor este of egal * care Thenumărul parenthetic is theşimaximum number sau depăşeşte 271. characters for file/folder names in case the total • Acest aparat recunoaşte în total 512 fişiere, 200 de number of files and folders is 271 or more. directoare şi 8 niveluri ierarhice. • This unit can recognize a total of 512 files, 200 folders, and 8 hierarchical levels. Continuare pe pagina Continued on the următoare next page REFERINŢE REFERENCES 39 ENGLISH • While fast-forwarding or reversing on MP3/WMA/ • ÎnAAC/WAV timpul derulării rapide sau înapoi a fişierelor files, you canînainte only hear intermittent unui disc MP3/WMA/AAC/WAV, se pot auzi doar sunete sounds. • intermitente. File/folder list may not appear correctly if too many • Dacă se utilizează prea multe hierarchies and folders are directoare used. şi niveluri este posibil de fişiere /directoare să nu • ierarhice, If the ejected disc iscanotLista removed within 15 seconds, fie afişată corect. the disc is automatically inserted again into the • În cazul în care discul ejectat nu este îndepărtat într-un loading slot to protect it from dust. Playback starts interval de 15 secunde, acesta va fi reintrodus automat în automatically. fanta de încărcare pentru a fi protejat împotriva prafului. Redarea începe automat. ENGLISH •• Acest aparat înregistrateinînVBR format VBR This unit canpoate playreda backfişiere files recorded (variable (variable bit rate).bit rate – rată de transfer variabilă). ÎnFiles cazul acestor fişiere, întreintimpul recorded in VBRapare have oa diferenţă discrepancy the scurs afişat şi celtime real,display, acesta din nefiind În mod elapsed andurmă do not showindicat. the actual particular, această diferenţă devine observabilă după elapsed time. In particular, this difference becomes efectuarea comenzii de căutare. noticeable after performing the search function. • Acest aparat nu poate reda următoarele tipuri de fişiere: • -This unitMP3 cannot play back the following files: fişiere codate în format MP3i şi MP3 PRO. MP3 files in MP3i andneadecvat. MP3 PRO format. -–fişiere MP3encoded codate într-un format MP3 files an inappropriate -–fişiere MP3encoded codate în in format Layer 1/2. format. MP3 files Layer -–fişiere WMAencoded codate înwith format fără1/2. pierderi, profesional şi –voce. WMA files encoded in lossless, professional, and - fişiere care nu au ca bază programul Windows voice WMA format. Audio. –Media® WMA files which are not based upon Windows - fişiere protejate contra copierii ilegale prin tehnica MediaWMA ® Audio. –DRM. WMA files copy-protected with DRM. -–fişiere care conţin format etc.etc. Files which havedate dataînsuch as AIFF, AIFF,ATRAC3 ATRAC3, • Funcţia de căutare este operaţională, dar viteza de căutare • The search function works but search speed is not nu este constantă. constant. Redarea pieselor MP3/WMA/AAC/WAV de către un Playing MP3/WMA/AAC/WAV tracks from a dispozitiv USB device unui dispozitiv USB, sursa de redare se •USB La conectarea automat • schimbă Connecting a USBla „USB.” device automatically changes the • Însource cursultoredării de pe un dispozitiv USB, ordinea de redare “USB.” difere faţă de cea a altor playere. • poate Whilesăplaying from a USB device, the playback order • Unele dispozitive USB sau unele fişiere nu vor putea fi may differ from the one from other players. redate de către acest aparat, datorită caracteristicilor lor sau • aThis unit may be unable to play back some USB condiţiilor de înregistrare. devices or some due to their or • În funcţie de formafiles dispozitivelor USBcharacteristics şi a porturilor de recordingeste conditions. conectare, posibil ca unele dispozitive USB să nu • seDepending on the shapesauofcathe USB devices and ataşeze corespunzător legătura fizică dintre connection ports,săsome USB devices may not be dispozitiv şi aparat fie instabilă. • Pentru conectarea dispozitiv USB demight stocarebeînloose. attached properlyunui or the connection de asemenea, instrucţiunile de utilizare • masă, Whencitiţi, connecting a USB şimass storage class device,ale acestuia. refer also to its instructions. •• La conectarea prin cablu utilizaţi cablu When connecting withUSB, a USB cable,unuse theUSB USB2.0. 2.0 • Pentru fiecare conectare la aparat, utilizaţi un singur cable. USB de stocare în masă. Nu utilizaţi un hub USB. • dispozitiv Connect one USB mass storage class device to the unit • Puteţi conecta la acest aparat două tipuri de dispozitive at a time. Do not use a USB hub. USB — dispozitive MTP şi dispozitive de stocare în masă. • Prin Youconectarea can connect two types to MTP this cu la acest aparatofa USB unui device dispozitiv unit—MTP device and Mass storage class device. aplicaţie „USB digital media streaming”, puteţi reda fişiere If you connect(Digital an MTP device featuring achiziţionate “USB digital WMA-DRM10 Right Management) media streaming” to this unit, you can play back prin magazine de distribuţie online. the WMA-DRM10 (Digital Right Management) files purchased through the music distributing web sites, through this unit. 40 Acestunit aparat este compatibil interfaţa USB Full-Speed. •• This is compatible withcuthe USB Full-Speed. cazul în care dispozitivul USBdoes conectat nu conţine fişiere •• IfÎnthe connected USB device not have the correct compatibile, este afişat mesajul „No File” (Niciun fişier). files, “No File” appears. Acestunit aparat elementele identificare •• This canpoate showafişa ID3 Tag (Versionde1.0, 1.1, 2.2, 2.3, (versiunea 1.0, 1.1, 2.2, 2.3 sau 2.4) pentru fişierele MP3 şi or 2.4) for MP3 and WMA/AAC/WAV Tag. pentru fişierele WMA/AAC/WAV. •• This unit can play back MP3/WMA/AAC/WAV files Acest aparat poate reda fişiere în format MP3/WMA/AAC/ meeting the conditions WAV, în cazul în care suntbelow: îndeplinite condiţiile de mai jos: MP3: MP3: –- Bit 32 kbps32 —kbps 320— kbps Ratărate: de transfer: 320(MPEG-1) kbps (MPEG-1) — (MPEG-2) 160 kbps (MPEG-2) 8 kbps —8 kbps 160 kbps –- Sampling frequency: Frecvenţa de eşantionare: 48 kHz, 44,1 kHz, 32 kHz (pentru 48 kHz, MPEG-1) 44.1 kHz, 32 kHz (for MPEG-1) 24 24 kHz, 22,05 MPEG-2) 22.05kHz, kHz,1616kHz kHz(pentru (for MPEG-2) WMA: WMA: Ratărate: de transfer: 5 kbps 320 kbps –- Bit 5 kbps — 320— kbps Frecvenţa de eşantionare: 8 kHz –- Sampling frequency: 8 kHz —— 4848 kHzkHz - Canal: 1 ch/2 ch – Channel: 1 ch/2 ch AAC: AAC: - Rată de transfer: 16 kbps — 320 kbps –- Bit rate: 16dekbps — 320 48 kbps Frecvenţa eşantionare: kHz, 44,1 kHz –- Sampling frequency: 48 kHz, 44.1 kHz Canal: 1 ch/2 ch Channel: 1 ch/2 ch –WAV: WAV: - Rată de transfer: PCM linear la 705 kbps şi 1 411 kbps –- Bit rate: Linear PCM at 705 kbps Frecvenţa de eşantionare: 44,1 kHzand 1 411 kbps Canal: 1 ch/2 ch –- Sampling frequency: 44.1 kHz • –Acest aparat1poate Channel: ch/2 reda ch fişiere MP3 înregistrate în format VBR unit (variable bit rate – ratã transfer variabilã). • This can play back MP3defiles recorded in VBR • (variable Numărul maxim de caractere pentru denumirile bit rate). directoarelor şi fişierelor de 25 de caractere; • The maximum number este of characters for folder128 andde caractere pentru elementele de identificare MP3/WMA/ file names is 25 characters; 128 characters for MP3/ AAC/WAV. WMA/AAC/WAV Tag. • Acest aparat poate recunoaşte în total 20.000 de fişiere şi • This unit can recognize a total of 20 000 files and 2.000 de directoare (999 de fişiere per director). Totuşi, pe 2afişaj 000 pot folders (999 filesla per folder). However, the apărea până 9 999 de directoare/fişiere. can shows until 9 999 folders/files. • display Acest aparat nu poate recunoaşte un dispozitiv USB de • The unitîncannot a USB mass storage class stocare masă curecognize altă valoare decât cea de 5 V şi care device whose depăşeşte 500 rating mA. is other than 5 V and exceeds mA. USB prevăzute cu funcţii speciale cum sunt • 500 Dispozitivele funcţiile de protejare a informaţiilor sunt compatibile • USB devices equipped with specialnufunctions such as cu această unitate. data security functions cannot be used with the unit. Utilizaţi numai dispozitive USB cu partiţie. •• Do not use a USB device with 2 oro singură more partitions. •• This Este unit posibil ca acest aparat să nu recunoască dispozitiv may not recognized a USB deviceunconnected USB conectat cititor de carduri USB. through a USBprintr-un card reader. • În cazul în care utilizaţi un cablu de extensie USB, este • This unit may not play back files in a USB device posibil ca redarea fişierelor dintr-un dispozitiv USB să nu fie properly when using a USB extension cord. corespunzătoare. Funcţiile Bluetooth Bluetooth operations Informaţii General generale •• ÎnWhile timpdriving, ce conduceţi, nuperform realizaţi operaţii complicate, do not complicated operation precum unornumbers, numere de telefon, folosirea such asformarea dialing the using phone book, etc. agendei telefonice Dacăoperations, doriţi să realizaţi When you performetc.these stop aceste your car in operaţiuni, opriţi maşina într-un loc sigur. a safe place. • ÎnSome funcţie de versiunea Bluetooth a dispozitivului, Bluetooth devices may not be connectedeste to posibil ca unele dispozitive Bluetooth să nu fie conectate this unit depending on the Bluetooth version of the la device.aparate. aceste Someoperaţiuni operationsşi and displayafişate information mayînbe • Unele informaţii pot să difere, different to the connected phone. funcţie de according telefonul conectat. Thisposibil unit may not work •• Este ca acest aparatfor să some nu fie Bluetooth compatibil devices. cu unele • dispozitive ConnectingBluetooth. condition may vary depending on the circumstances aroundpot you. • Condiţiile de conectare varia, în funcţie de împrejurări. •• La When the unit is turned off, the device is oprirea aparatului, dispozitivul este deconectat. disconnected. Icons for phone Pictograme pentrutypes diferite tipuri de telefon Aceste pictograme indică These icons indicate the tipul de telefon setat pentru phone type of number fiecare număr din agenda entries in the Phonebook telefonică These pictograme icons indicate the Aceste indică tipul dispozitiv typede of telefon/ connected phone/ audio audioconectat devices : Telefon Cellularmobil phone : Exclusiv Phone only telefon : Telefon Household phone fix (acasă) : Telefon/dispozitiv Phone/Audio : Birou Office audio dispozitiv : Exclusiv Audio only audio : General General tip decât cele de : Alt Other than above mai sus : Necunoscut Unknown Mesaje de avertizare funcţiile Bluetooth Warning messagespentru for Bluetooth operations • Connection Error (Eroare de conectare): • Connection Error: dispozitivul este înregistrat, dar conexiunea nu a putut The device is registered but the connection has failed. fi realizată. Pentru reconectarea dispozitivului, utilizaţi Use “Connect” to (Vezi connect the 17.) device again. (See funcţia „CONNECT”. pagina • Error Error(Eroare) Efectuaţi din nou operaţiunea. Dacă mesajul Try the operation again. If “Error” appears„Error” again,este afişat nou,device verificaţi dacă dispozitivul suportă funcţia checkdin if the supports the function you have respectivă. tried. •• Please PleaseWait... Wait...(Vă rugăm aşteptaţi…) Aparatul se pregăteşte să utilizeze funcţia Bluetooth. The unit is preparing to use the Bluetooth function. If Dacă mesajul nu dispare, opriţi şi reporniţi aparatul, apoi the message does not disappear, turn off and turn on reconectaţi dispozitivul (sau resetaţi aparatul). the unit,Reset... then connect the device again • Please (Vă rugăm resetaţi ...) (or reset the unit). dispozitivul şi încercaţi din nou să realizaţi Resetaţi • operaţiunea. Please Reset... Dacă mesajul „Please Reset...” apare din Resetconsultaţi the unitcel andmai tryapropiat the operation again. If nou, dealer JVC IN-CAR “Please Reset...” appears again, consult your nearest ENTERTAINMENT. JVC IN-CAR ENTERTAINMENT dealers. DAB DABde recepţie în aşteptare a tipului de program • Funcţia favorit este compatibilă tunerulforDAB cu un only • PTY Standby Receptioncuworks thenumai DAB tuner Dynamic PTY şi nu PTY, a unuibut Static using a Dynamic notPTY. a Static PTY. • Doar serviciul primar DAB poate fi presetat, chiar dacă • Only the primary DAB service can be preset even memoraţi şi un al doilea serviciu. when you store a secondary service. • Un serviciu DAB presetat va fi şters la memorarea unui nou • serviciu A previously service is erased when a new DAB lapreset acelaşiDAB număr de presetare. DAB service is stored in the same preset number. iPod • iPodiPod controlabil (conectat prin....): • (A) KS-PD100:iPod (connected through....): Controllable -(A)iPod cu conector platformă (a treia generaţie) KS-PD100: -– iPod buton circular (a patra(3rd generaţie) iPodcuwith dock connector Generation) *1 -– iPod şi a doua ) iPodnano with(prima click wheel (4thgeneraţie Generation) -– iPod mini (prima generaţie) 1 iPod nano (1st & 2nd * Generation) -– iPod cincia generaţie) *2 iPodvideo mini(a(1st Generation) - iPod photo – iPod video (5th Generation) *2 (B) Cablu USB: – iPod photo - iPod nano (prima şi a doua generaţie) USBvideo cable: -(B)iPod (a cincia generaţie) 1 – iPod nano (1st & 2nd Generation) * La conectarea iPod-ului nano la adaptorul de interfaţă, –asiguraţi-vă iPod videocă(5th Generation) aţi deconectat căştile; în caz contrar, *1 aparatul When you connect iPod nano to the interface nu va emite the niciun sunet. adapter, be sure to disconnect headphones; *2 Nu este posibilă accesarea fişierelorthevideo din meniul „Videos” atâtanotimp cât isiPod-ul otherwise, sound heard.este conectat la adaptorul *2 deIt isinterfaţă. not possible to browse video files on the “Videos” menu while the iPod is connected to the interface adapter. page 17.) Continued the next page Continuare pe on pagina următoare REFERINŢE REFERENCES 41 ENGLISH aparat nu poate asigura funcţionarea • Acest This unit cannot assure proper functions or supply corespunzătoare sauofalimenta orice tip de dispozitiv USB. power to all types USB devices. ENGLISH • Actualizaţi iPod-ul nouăsoftware versiuneversion de software Update your iPodcutocea themai latest înainte a-l utiliza beforede using it withîmpreună this unit.cu acest aparat. -– Puteţi verifica de software You can checkversiunea the software versiondinofiPod yourîniPod submeniul „About” din meniul (Setări) under “About” in (Despre) the “Setting” menu„Setting” of the iPod. al iPod-ului. – For details about updating your iPod, visit - Pentru detalii cu privire la actualizarea iPod-ului, vizitaţi <http://www.apple.com>. <http://www.apple.com>. •• Când Whileaparatul the uniteste is being turned on, the iPod is charged pornit, iPod-ul este încărcat prin through thisacestui unit. aparat. intermediul While connecting an iPod with Video: •• La conectarea iPod-ului cu funcţie Video: No videovideo showsnuonsunt thedisponibile iPod’s display or the -– Imaginile pe afişajul externalsau monitor (only the audio partdisponibilă is available). iPod-ului pe monitorul extern (este numai – componenta It is not possible audio).to browse video files on the - Nu este posibilă fişierelorthe video meniul “Video“ menu.accesarea (If you connect iPoddinduring „Video”. (Dacă iPod-ul este conectat timpul redării sau the playback or pausing of a videoîn file, resuming când redarea întreruptă, redarea iniţială nu va playback willvideo not este work.) fi reluată.) • iPod shuffle and iPhone cannot be used with this • Modelele unit. iPod shuffle şi iPhone nu pot fi utilizate cu acest aparat. • You can control the iPod from this unit when “JVC” or • Dacă după conectare pe afişajul iPod–ului apare „JVC” sau “ ” appears on the iPod display after connection. √, puteţi controla iPod-ul prin intermediul acestui • aparat. The song order displayed on the selection menu of this unitpieselor may differ from that of thede iPod. • Ordinea prezentată pe afişajul selectare a acestui • aparat If playback stopped, a track from the poateisdiferi de ceaselect din iPod. selection menu pressalegeţi BANDotopiesă playdin back the same • Dacă redarea esteor oprită, meniul de track again. selectare sau apăsaţi BAND pentru redarea repetată a • aceleiaşi The textpiese. information may not be displayed correctly: • Este posibil ca informaţia text să nu fiecannot afişată be – Some characters suchînasformat accented letters corect. shown correctly on the display. -– Unele caractere, precum literele nu unit vor putea Communication between theaccentuate, iPod and the is finot afişate corespunzător. stable. dintre iPod şi aparat nu este stabilă. • -If Comunicarea the text information includes more than • Dacă informaţia în format text conţine mai mult de 16 16 characters, it scrolls on the display. This unit can caractere, aceasta se va derula pe afişaj. Pe afişajul acestui displaypotupapărea to 128până characters. aparat la 128 de caractere. Notice: Observaţie: When operating an iPod, operations La utilizarea unui iPod, unelesome operaţii pot să numay fie not be performed or as intended. thiscaz, case, efectuate corectcorrectly sau în condiţiile dorite. În In acest vizitaţi următorul siteJVC JVC:web <http://www.jvc.co.jp/ visit the following site: <http://www.jvc. english/car/support/ks-pd100/index.html> co.jp/english/car/support/ks-pd100/index.html> 42 Setări generale—PSM General settings—PSM • Setarea atenuatorul intensităţii “Auto” „Auto” settingpentru for “Dimmer” may not workluminoase correctly („DIMMER”) poate funcţiona necorespunzător în cazul on some vehicles, particularly on those having a unor vehicule, cu seamă al celor prevăzute cu buton control dial formai dimming. de scădere acest caz, In this case,a intensităţii change theluminoase. “Dimmer”Însetting to setaţi any altă opţiune pentru „DIMMER”; nu setaţi la „AUTO.” other than “Auto.” • Dacă pentru funcţia „LCD Type” (Tip LCD) este setată • If “LCD Type” is set to “Auto,” the display pattern opţiunea „Auto,” modul afişajului va comuta la modul will change the “Positive” or “Negative” pattern „Positive” sauto „Negative” în funcţie de setarea „Dimmer” depending on the “Dimmer” setting. (Atenuatorul intensităţii luminoase). If youschimbaţi change the “Amp Gain” setting from de •• Dacă setarea „AMP GAIN” (Amplificator) “Low ridicată) PWR” while thePWR” volume level is la“High „HIGHPWR” PWR”to(Putere la „LOW (Putere set higher thance“Volume scăzută) în timp volumul30,” este the setatunit la unautomatically nivel mai ridicat decât aparatul30.” va modifica changes thetreapta volume„Volume level to30”, “Volume automat volumul la nivelul „Volume 30”. Availabledisponibile characters Caractere Majuscule Upper case Minuscule Lower case Numere simboluri Numbersşi and symbols • Microsoft Windows MediaMedia sunt fie Microsoftşiand Windows aremărci eitherînregistrate registered ca atare, fie mărci aparţinândofcompaniei trademarks or trademarks MicrosoftMicrosoft Corporation in Corporation Statele Uniteother ale Americii şi/sau din alte the United din States and/or countries. ţări. • The Bluetooth word mark and logos are owned by • Logotipul şi siglele deţinute de Bluetooth the Bluetooth SIG,Bluetooth Inc. and sunt any use of such marks SIG, Inc. şi orice utilizare a mărcii de către compania Victor by Victor Company of Japan, Limited (JVC) is under Company of Japan, Limited (JVC) se face sub licenţă. license. Other trademarks and trade names are those Alte mărci înregistrate şi denumiri comerciale aparţin of their respective owners. proprietarilor de drept. iPodşiand iTunes trademarks Apple •• iPod iTunes suntare mărci înregistrateofale AppleInc., Inc., registered in the U.S. înregistrată în S.U.A. şi înand alteother ţări. countries. ENGLISH Troubleshooting Îndrumar de depanare FM/AM FM/AM General General Ceea pare a fitoo problemă ceva Check foarte the grav.following Verificaţi points următoarele de acenter. apela la Whatceappears be troublenuiseste notîntotdeauna always serious. beforeaspecte callingînainte a service un centru de service. Symptoms Simptome Remedies/Causes Soluţii/Cauze •• Sound cannot be heard the speakers. Difuzoarele nu emit nici unfrom sunet. • Adjust volume to theoptim. optimum level. Reglaţi the volumul la nivelul Verificaţi şi conexiunile. • Check thecablurile cords and connections. • Aparatul nu funcţionează deloc. • Pe afişaj apare mesajul „Connect Error” (Eroare de conexiune). • “Connect Error” appears on the display. • Funcţia de presetare automată a sistemului SSM nu este operabilă. • SSM automatic presetting does not work. • Se percepe zgomot de fond în timpul funcţionării aparatului de radio. • Static noise while listening to the radio. • Discul nu poate fi redat. Disculcannot CD-R/RW nu poateback. fi redat. • Disc be played • Nu se poate trece peste piesele de pe CD-R/CD• CD-R/CD-RW cannot be played back. RW. •• Tracks on the cannot be Discul nu poateCD-R/CD-RW fi nici redat, nici ejectat. • The unit does not work at all. Redare disc MP3/WMA/AAC MP3/WMA/AAC playback disc DiscRedare playback skipped. Resetaţi aparatul (vezi pagina 3). Scoateţi panoul de comandă, ştergeţi conectorul şi apoi montaţi-lthe dincontrol nou (vezipanel, paginawipe 4). the connector, then Remove attach it again (seedepage Memoraţi posturile radio4).manual. Reset the unit (see page 3). Store stations manually. Conectaţi antena bine. Connect the aerial firmly. Introduceţi discul în mod corect. • Introduceţi CD-R/CD-RW cu sesiune finalizată. Insert the discuncorrectly. • Finalizaţi CD-R/CD-RW-ul cu ajutorul componentei pe care • Insert a finalized aţi utilizat-o pentruCD-R/CD-RW. înregistrare. •• Finalize the CD-R/CD-RW Deblocaţi discul (vezi paginawith 13). the component which useddiscul for recording. • you Ejectaţi în mod forţat (vezi pagina 3). Sunetul uneori în timpul citirii Întrerupeţi în page timpul13). deplasărilor pe teren • Disc caneste neither beîntrerupt played back nor ejected. • Unlock theredarea disc (see discului. accidentat. • Eject the disc forcibly (see page 3). • Disc sound is sometimes interrupted. • Discul nu este recunoscut (apare intermitent unul dintre mesajele „No Disc”, „CD Loading Error” - Eroare încărcare CD) sau „Eject Error”• Disc cannot be recognized (“No Disc,” Eroare ejectare) “CD Loading Error,” or “Eject Error” flashes). • Pe afişaj apare mesajul „Please Eject” (Vă rugăm săEject” ejectaţi). • “Please appears on the display. • Discul nu poate fi redat. • Disc cannot be played back. • Se produc zgomote. • Noise is generated. • Schimbaţi discul. • Stop playback while driving on rough roads. Verificaţi cablurile şi conexiunile. •Ejectaţi Change theîndisc. discul mod forţat (vezi pagina 3). • Check the cords and connections. Eject the disc forcibly (see page 3). Introduceţi în fantă un disc care poate fi redat. Insert a playable disc into the loading slot. • Utilizaţi un disc cu piese în format MP3/WMA/AAC • Use a disc with MP3/WMA/AAC tracks recordedISO in 9660 înregistrate într-un format compatibil cu formatul aLevel format compliant with 9660 Level 1, Level 2, 1, Level 2, Romeo sauISO Joliet. Joliet. <.mp3>, <.wma> sau <.m4a> la • Romeo, Adăugaţiorextensia • Add the extension denumirea fişierelor.code <.mp3>, <.wma>, or to the filesaunames. • <.m4a> Treceţi la altă piesă schimbaţi discul (nu adăugaţi extensia <.mp3>, <.wma> sau <.m4a> pentru piesele Skip to another track or change the disc. (Do not add care nu sunt în format MP3/WMA/AAC). the extension code <.mp3>, <.wma>, or <.m4a> to non-MP3/WMA/AAC tracks.) Continued the next page Continuare pe on pagina următoare REFERINŢE REFERENCES 43 Remedies/Causes Soluţii/Cauze •• Mecanismul A longer readout time is required de citire lucrează mai greu (“Reading” flashing on themesajul display). (Pe display sekeeps aprinde intermitent Do not useprea too many levels and folders. Nu utilizaţi multe hierarchical niveluri ierarhice şi directoare. • Tracks do not play back in the order you • Piesele nu sunt redate în ordinea dorit de have intended them to play. dumneavoastră. The playback order is determined when the files are Ordinea citirii se stabileşte în momentul înregistrării fişierelor. recorded. de redare scurstime nu este afişat corect. • Timpul The elapsed playing is not correct. Acestsometimes lucru se întâmplă timpul redării This occursuneori duringînplayback. Thisşiisdepinde caused de by ordinea care piesele au fost înregistrate how theîntracks are recorded on the disc.pe disc. Redare disc MP3/WMA/AAC MP3/WMA/AAC playback „Reading”.) • Pe afişaj apare mesajul „Please Eject” • (Vă “Please Eject” appears on the display. rugăm să ejectaţi). afişaj apare mesajul • Pe “Not Support” appears„Not on Support” the display and (Nu suportat) şi se trece peste piesă. trackeste skips. Introduceţi un disc care conţine piese MP3/WMA/AAC. Insert a disc that contains MP3/WMA/AAC tracks. Treceţitolathe următoarea codatăinînanformatul corespunzător Skip next trackpiesă encoded appropriate format sautolathe următoare piesă în format WMAWMA care nu este protejată or next non-copy-protected track. împotriva copierii. •• Caracterele Correct characters are notcorect displayed (e.g. This canpoate only afişa display letters A – Z, nu sunt afişate (de exemplu, Acestunit aparat numai litere(capital: (majuscule: A – Z, album name). small: a – z), number of symbols denumirea albumului). minuscule: a –numbers, z), numereand şi una limited număr limitat de simbouri (see (vezi page pagina42). 42). produc zgomote. •• Se Noise is generated. • Piesele nu pot fi redate în ordinea dorită de Dispozitivul USB USB device ENGLISH Symptoms Simptome 44 redatăplayed nu esteback un fişier (MP3/WMA/ •• Piesa The track is notînaformatul playablecorect file format AAC/WAV). Treceţi la alt fişier. (MP3/WMA/AAC/WAV). Skip to another file. • Nu adăugaţi extensia <.mp3>, <.wma>, <.m4a> sau • Do not add the extension code <.mp3>, <.wma>, <.wav> pentru piesele care nu sunt în format MP3/WMA/ <.m4a>, or <.wav> to non-MP3/WMA/AAC/WAV AAC/WAV. tracks. Este posibil ca ordinea de redare să difere de cea stabilită la • dumneavoastră. Tracks cannot play back as you have intended them toapare play.intermitent pe afişaj. • Mesajul „Reading” redarea cuorder ajutorul altor playere. Playback may differs from the one played back using other • Timpul de players. citire variază în funcţie de tipul de dispozitiv USB. • “Reading” keeps flashing on the display. • goale*. Readout time varies depending on the USB device. •• Opriţi Do notşi use toodin many and empty porniţi nouhierarchy, alimentareafolders cu energie. folders.* • Nu scoateţi şi reconectaţi în mod repetat dispozitivul USB • când Turn pe offafişaj the power then onReading”. again. apare mesajul •* Director Do not pull outcare or connect the USB device repeatedly gol sau conţine date, dar nu în format MP3/ WMA/AAC/WAV. while “Reading” is displayed on the display. *Conectaţi Folder that is phisically or folder that contains un dispozitiv USBempty care conţine piese codate într-un format datacorespunzător. but does not contain valid MP3/WMA/AAC/WAV track. Piesa nu poate fi redată. • Pe afişaj apare mesajul „No File” (Niciun fişier). • Pe afişaj apare mesajul „NO USB” (Niciun USB). • Pe afişaj apare mesajul „Not Support” (Nu este suportat) şi se trece peste piesă. • “No File” flashes on the display. • Pe afişaj apare mesajul „Read failed” (Citire • “No USB” appears on the display. nefinalizată). • Nu utilizaţi prea multe ierarhii, directoare şi directoare Connect a USB device that contains tracks encoded in an Dispozitivul USB conectat poate fi defect sau poate fi formatat appropriate format. incorect. Fişierele aflate pe dispozitivul USB sunt corupte. • “Not Support” appears on the display and track skips. The track is unplayable. • “Read failed” appears on the display. The connected USB device may be malfunctioning, or may not have been formatted correctly. The files included in the USB device are corrupted. Bluetooth ® Bluetooth ® Remedies/Causes Soluţii/Cauze • Caracterele Correct characters are notcorect displayed (e.g. For available characters, see page 42. nu sunt afişate (de exemplu, Pentru informaţii privind caracterele disponibile, vezi pagina album name). denumirea albumului). 42. • Sunetul se întrerupe din când în când, în timpul Piesele nu au fost copiate corect pe dispozitivul USB. Copiaţi The tracks have not been properly copied into the USB din nou piesele pe dispozitivul USB şi încercaţi din nou. device. Copy tracks again into the USB device, and try • În timpul redării unui dispozitiv USB, sunetul • Opriţi şi reporniţi aparatul. again. este redat cu întreruperi sau nu este redat deloc. • Dacă sunetul nu este redat, conectaţi din nou dispozitivul. • Aparatul The sound interrupted skipped during •• Turn off, din thennou turn on theprin unit.intermediul dispozitivului nuiseste detectat deordispozitivul Efectuaţi căutarea playback of a USB device. • Connect Bluetooth. Bluetooth.the device again, when the sound is not yet • restored. Resetaţi aparatul. La apariţia mesajului „Open...” pe afişaj, efectuaţi din nou căutarea prin intermediul dispozitivului • The unit cannot be detected by the • Search from the Bluetooth device again. Bluetooth. Bluetooth •Introduceţi Reset theacelaşi unit. When appears display, • Aparatul nudevice. este compatibil cu dispozitivul cod PIN“Open...” atât pentru aparaton câtthe şi pentru search from the Bluetooth device again. Bluetooth. dispozitivul pe care doriţi să-l conectaţi. telefonic estethe • Reduceţi distanţa aparat telefonul mobil cu •• Calitatea The unit sunetului does not apelului make pairing with Enter the same PIN dintre code for bothşi the unit and target scăzută. Bluetooth. Bluetooth device. device. • Mergeţi într-o zonă cu semnal mai puternic. •• În Phone is poor. audio cu •• Reduce distance between unit and audio the Reduceţithe distanţa dintre aparat şithe dispozitivul timpulsound redăriiquality unui dispozitiv Bluetooth Bluetooth, sunetul este redat cu întreruperi sau Bluetooth. cellular phone. •• Move the cardispozitivul to a placeconectat where you can getutilizării a better nu este redat deloc. Deconectaţi în vederea funcţieireception. „Phone”. signal • Opriţi şi reporniţi aparatul. • The sound is interrupted or skipped during •• Reduce the distance between the unit and the Dacă sunetul nu este încă redat corect: Conectaţi playback of a Bluetooth audio player. Bluetooth player. dispozitivulaudio din nou. • While playing a track, sound is sometimes redării. interrupted. • Dispozitivul audio conectat nu răspunde la comenzi. • The connected audio player cannot be controlled. • Aparatul nu răspunde la comenzi atunci când încercaţi să copiaţi agenda telefonică în • memoria The unitaparatului. does not response when you tried to copy the phone book to the unit. • Disconnect the device connected for “Phone.” •• Turn off, dacă thendispozitivul turn on theaudio unit.conectat suportă profilul Verificaţi • When sound not yet Control restored: Connect thedeplayer AVRCP the (Audio Videois Remote Profile – Profil again. control audio-video la distanþã). (Operaţiunile depind de player-ul audio conectat.) •• Check whether the connected audio player Deconectaţi şi conectaţi din nou playerul audiosupports cu AVRCP (Audio Video Remote Control Profile). Bluetooth. (Operations depend on the connected audio player.) Este posibil să fi încercat copierea unor informaţii deja stocate •în Disconnect and connect theieşire Bluetooth again. 3. memoria aparatului. Pentru apăsaţiplayer tasta numerică You may have tried to copy the same entries (as stored) to the unit. Press number button 3 to exit. Continued the next page Continuare pe on pagina următoare REFERINŢE REFERENCES 45 ENGLISH USBDispozitivul device USB Symptoms Simptome Schimbător de CD-uri CD changer Remedies/Causes Soluţii/Cauze •• Pe “Noafişaj Disc”apare appears on “No the display. mesajul Disc” (Niciun disc). Insert a discuninto magazine. Introduceţi discthe în magazie. apare mesajul „NoonMagazine” (Nicio •• Pe “Noafişaj Magazine” appears the display. magazie). •• Pe “Reset appears on„Reset the display. afişaj08” apare mesajul 08”. Introduceţi magazia. Insert the magazine. Connect unit la and the CD changer correctly press Conectaţithis aparatul schimbătorul de CD-uri în modand corect şi the reset button of the aCDschimbătorului changer. de CD-uri. apăsaţi tasta de resetare afişaj01” apare mesajul07” „Reset 01” –on „Reset Apăsaţithe tasta de button resetareofa schimbătorului reset the CD changer.de CD-uri. •• Pe “Reset – “Reset appears the 07”. Press • Schimbătorul de CD-uri nu funcţionează. Resetaţi aparatul (vezi pagina 3). display. • Pe monitor este afişat mesajul “No DAB Signal”. Mergeţi într-o zonă cu semnal mai puternic. Reset the unit (see page 3). • Pe afişaj apare mesajul „Reset 08”. Conectaţi acest aparat şi tunerul DAB în mod corespunzător şi reporniţi 3). signals. • “No DAB Signal” appears on the display. Move toaparatul an area (vezi withpagina stronger • Tunerul DAB nu funcţionează. Reconectaţi acest aparat şi tunerul DAB în mod corespunzător • “Reset 08” appears on the display. unit and DAB3). tuner correctly and reset şiConnect reporniţithis aparatul (vezithe pagina the unit (see page 3). • Pe afişaj apare mesajul „Antenna Power NG”. Verificaţi cablurile şi conexiunile. •• iPod-ul The DABnutuner doessau notnuwork at all. porneşte funcţionează. •Reconnect Verificaţi cablul de conectare şi conexiunea. this unit and the DAB tuner correctly and •reset Actualizaţi dumneavoastră de firmware. the unitversiunea (see page 3). • Încărcaţi bateria. • “Antenna Power NG” appears on the Check the egalizatorul cords and connections. • Sunetul este distorsionat. Dezactivaţi aparatului sau cel al iPod-ului. display. • Pe afişaj apare mesajul „Disconnect”. • Verificaţi cablul de conectare şi conexiunea. • The iPod does not turn on or does not work. • Încărcaţi Check thebateria. connecting cable and its connection. •Căştile Update firmwareîn version. • Redarea este întreruptă. s-authe deconectat timpul redării. •Reluaţi Charge the battery. operaţia de redare (vezi paginile 26 şi 27). emiteisniciun sunet la conectarea unui • Deconectaţi de la either iPod-ulon nano. •• Nu Thesesound distorted. Deactivate thecăştile equalizer this unit or the iPod. iPod nano. • Actualizaţi versiunea firmware a Ipod-ului nano. •• Pe “Disconnect” on the cable and its connection. afişaj apare appears mesajul „No Files”display. (Niciun fişier). •NuCheck există the nicioconnecting piesă în memorie. Importaţi piese în iPod. • Charge the battery. • Pe afişaj apare mesajul „Reset 01” – „Reset 07”. Deconectaţi adaptorul de la aparat şi de la iPod. Apoiheadphones conectaţi-l dinare nou. • Playback stops. The disconnected during playback. • Pe afişaj apare mesajul „Reset 08”. Verificaţithe conexiunea adaptor şi acest Restart playbackdintre operation (see pagesaparat. 26 and 27). • Comenzile iPod-ului nu funcţionează după Resetaţi iPod-ul. • deconectarea No sound candebelaheard when connecting an • Disconnect the headphones from the iPod nano. acest aparat. iPod DAB DAB • The CD changer does not work at all. iPod ENGLISH Symptoms Simptome iPod nano. 46 • Update the firmware version of the iPod nano. • “No File” appears on the display. No tracks are stored. Import tracks to the iPod. • “Reset 01” – “Reset 07” appears on the display. Disconnect the adapter from both this unit and iPod. Then, connect it again. • “Reset 08” appears on the display. Check the connection between the adapter and this unit. • The iPod’s controls do not work after disconnecting from this unit. Reset the iPod. Curăţarea conectorilor How to clean the connectors Scoaterea a panoului frontal deteriorează Frequent frecventă detachment will deteriorate the connectors. conectorii. Pentru reduce la minim posibilitatea To minimize thisapossibility, periodically wipede the deteriorare, ştergeţi periodic conectorii cu o bucată de vată connectors with a cotton swab or cloth moistened with sau cu un material textil impregnat cu alcool; efectuaţi alcohol, being careful not to damage the connectors. operaţia cu atenţie, pentru a nu deteriora conectorii. Connectors Conectorii Condensul Moisture condensation Din cauza umidităţii, pe lentila din interiorul aparatului Moisture may condense on the lens inside the unit in poate apărea fenomenul de condens, în următoarele cazuri: following •the după pornireacases: sistemului de încălzire din interiorul • autovehiculului. After starting the heater in the car. becomes veryridicat humid the încar.interiorul • înIf itcazul unui grad deinside umiditate autovehiculului. Should this occur, the unit may malfunction. In this În aceste cazuri, aparatul funcţioneze case, eject the disc and poate leave să thenuunit turned on for a corespunzător. discul şihas lăsaţievaporated. aparatul pornit timp few hours untilScoateţi the moisture de câteva ore până la evaporarea umezelii. Manevrarea discurilor How to handle discs Pentru a scoate unadisc carcasa sa, When removing discdin from its case, Suport central Center holder apăsaţi în centrul carcaseiholder şi scoateţi press down the center of the discul ţinându-l margini. case and lift thededisc out, holding it by the edges. • Ţineţi întotdeauna discul Always hold the disc bydethemargini. edges.Nu Doatingeţi not touch its suprafaţa de inscripţionare. recordingsasurface. Când un disc în carcasă, apăsaţi-l uşor Whenintroduceţi storing a disc in its case, gently insert theîn suportul central faţa imprimată în sus). disc around the(cu center holder (with the printed surface • După utilizarea discurilor, puneţi-le înapoi în carcasele lor. facing up). • Make sure to store discs in cases after use. ENGLISH Maintenance Întreţinerea To keep discs clean Curăţarea discurilor Dacă discul este posibil ca A dirty disceste maymurdar, not play correctly. redarea să nu fie corespunzătoare. If a discacestuia does become dirty, wipe it with Ştergeţi-l cu in o lavetă moale, mişcări a soft cloth a straight linecufrom center liniare începând din centru spre margini. to edge. • Pentru discurilor,(for nu utilizaţi niciun tip de Do notcurăţarea use any solvents example, conventional solvent (de exemplu, agent obişnuit de curăţare record cleaner, spray, thinner, benzine, etc.) ato clean discurilor discs. de vinil, spray, diluant, benzină etc.). To play discurilor new discsnoi Redarea Discurile pot have avea bavură pe marginile New discsnoimay some rough spots interioare Dacă seedges. utilizează around theşi exterioare. inner and outer If un astfel de isdisc, aparatul îl poate such a disc used, this unit may reject respinge. the disc. Pentru a îndepărta acestespots, asperităţi, răzuiţi marginile To remove these rough rub the edges with a cu un creion sau cu unpen, pix etc. pencil or ball-point etc. Nu tipuri de discuri: Do utilizaţi not use următoarele the following discs: Single CD (8 (disc 8 cm) cmde disc) CuSticker etichetă andsau resturi deresidue etichete sticker Discuri deformate Warped disc Discuri cu etichete autocolante pe Stick-onsuprafaţă label întreaga Discuri cu o formă Unusual shape neobişnuită REFERINŢE REFERENCES 47 ENGLISH Specifications Date tehnice SECŢIUNEA AMPLIFICATORULUI AUDIO AMPLIFIER SECTION AUDIO Putere maximă de ieşire: Faţă/Spate: Maximum Power Output: Front/Rear: Putere continuă (RMS): Faţă/Spate: Continuous Power Output (RMS): Impedanţă de intrare: Load Impedance: Gamă de control al Equalizer Control Range: egalizatorului: Front/Rear: Frecvenţă: Frequency: Nivel: QLevel: (curba calităţii): Răspuns în frecvenţă: Q (Q-slope): Frequency Response: Raport Signalsemnal/zgomot: to Noise Ratio: Nivel ieşire/Impedanţă: Line-Out Level/Impedance: Impedanţă de ieşire: Output Impedance: Nivel de ieşire pentru subwoofer/Impedanţă : Subwoofer-Out Level/Impedance: Alte mufe: Other Terminal: 50 50W/canal W per channel 19 W/canal la 4 Ω, 40 – 20 000 Hz, cu o distorsiune 19 W per channel into 4 Ω, 40 Hz to 20 000 Hz at armonică totală de maxim 0,8% no more than 0.8% total harmonic distortion 4 Ω (admisibil între 4 Ω şi 8 Ω) 4 Ω (4 Ω to 8 Ω allowance) Frecvenţa 1: 68 Hz, 100 Hz, 150 Hz Band 1: 682: Hz, Hz, Hz, 150460 Hz Hz Frecvenţa 210100 Hz, 320 Band 2: 210 Hz,Hz, 3201 Hz, Hz Frecvenţa 3: 680 kHz,460 1,5 kHz Band 3: 680 Hz,kHz, 1 kHz, 1.5 kHz Frecvenţa 4: 2,1 3,2 kHz, 4,6 kHz Band 4: 2.1 kHz,kHz, 3.210kHz, Frecvenţa 5: 6,8 kHz,4.6 15kHz kHz BanddB5: 6.8 kHz, 10 kHz, 15 kHz ±12 ±12 Q0,7 dB şi Q2,0 Între Q0.7 40 Hz to - 20Q2.0 000 Hz 40 Hz to 20 000 Hz 70 70dB dB Sarcină 2,5load V/20(full kΩ (scară 2.5 V/20dekΩ scale)completă) 1 kΩ 1 kΩ Sarcină de 4,0 V/20 kΩ (scară completă) 4.0 V /20 kΩ load (full scale) mufa schimbătorului de CD-uri, mufa intrării AUX CD changercablu jack,USB, AUXintrare (auxiliary) input jack,intrare USB (auxiliare), comenzi volan, cable, Steering wheel remote input, Aerial input antenă TUNER SECTION SECŢIUNEA RADIORECEPTORULUI Frequency Range: FM: Interval de frecvenţă: FM: AM: AM: FM Tuner: Radioreceptor FM: MW Tuner: MW: Radioreceptor LW Tuner: LW: Radioreceptor 48 48 Usable Sensitivity: Sensibilitate utilă: 50 dB Quieting Sensitivity: Prag de sensibilitate de 50 dB: Alternate Channel Selectivity Selectare de canale alternative (400kHz): kHz): (400 Frequency Response: Răspuns în frecvenţă: Stereo Separation: Separare stereo: Sensitivity/Selectivity: Sensibilitate/Selectivitate: Sensitivity: Sensibilitate: 87.5MHz MHz -to108,0 108.0 MHz 87,5 MHz (MW)522 522kHz kHz- to 1 620 (MW) 1 620 kHzkHz (LW) 144 kHz to 279 kHz 11.3 dBf (1.0 μV/75 Ω) 11,3 dBf (1,0 μV/75 Ω) 16.3 dBf (1.8 μV/75 Ω) 16,3 dBf (1,8 μV/75 Ω) 65 dB (LW) 144 kHz - 279 kHz 65 dB 40 Hz Hz -to1515000 000HzHz 40 30 dB dB 30 20 μV/35 μV/35dBdB 20 50 μV μV 50 WMA (Windows Media® Audio) Decoding Format: AAC (Advanced Audio Coding) Decoding Format: Secţiunea USB-ului Standarde USB: USB SECTION Rata de transfer a datelor: USB Standards: Data Transfer Rate: Dispozitiv compatibil: Sisteme de fişiere compatibile: Compatible Device: Format audio redabil: Compatible Curent maxim:File System: Playable Audio Format: BLUETOOTH Max. Current: Versiune: Clasă de alimentare: BLUETOOTH Spaţiu de funcţionare: Version: Profil: Power Class: Service Area: INFORMAŢII GENERALE Profile: Alimentare: Sistem de legare la masă: GENERAL Temperatură admisă de funcţionare: Power Requirement: Dimensiuni (L × Î × A): (aproximativ) Compact disc player disc player Compact Citire opticăNon-contact fără contact optical mecanicpickup (laser cu semiconductori) 2 canale (stereo) (semiconductor laser) 5 Hz - 20 000 Hz 2 channels (stereo) 96 dB 5 Hz to 20 000 Hz 98 dB 96 dB sub limita măsurabilă 98 dB Rata maximă de transfer: 320 kbps Less than measurable limit Rata maximă de transfer: 192 kbps Max. Bit Rate: 320 kbps Rata maximă de transfer: 320 kbps Max. Bit Rate: 192 kbps Max. Bit Rate: 320 kbps USB 1,1, USB 2,0 Full Speed (viteză maximă): Maxim 12 Mbps USB 1.1,Low USBSpeed 2.0 (viteză redusă): Maxim 1,5 Mbps Full Speed: Maximum 12 Mbps Dispozitiv de stocare în masă Low Speed: Maximum 1.5 Mbps FAT 32/16/12 Mass storage class MP3/WMA/AAC/WAV FAT 32/16/12 500 mA/5 V MP3/WMA/AAC/WAV 500 mA/5 V Bluetooth 1.2 cu licenţă Clasa 2 Radio (distanţă posibilă, 10 m) 10 m Bluetooth 1.2 certified HFP 1.5, OPP 1.1,distance A2DP 1.2,10AVRCP Class 2 Radio (possible m) 1.3 10 m HFP 1.5, OPP 1.1, A2DP 1.2, AVRCP 1.3 Tensiune de funcţionare: 14,4 V C.C. (tolerat între 11 V - 16 V) Masă negativă între 0 °C şi +40 °C Operating Voltage: DC 14.4 V (11 V to 16 V allowance) Spaţiu necesar pentru instalare: 182 mm × 52 mm × 160 mm Negative ground Dimensiunile panoului: 188 mm × 58 mm × 12 mm 0°C to +40°C 1,4 kg (fără accesorii) Grounding System: Allowable Operating Temperature: Greutate: Dimensions (W × H × D): (approx.) Installation Size: Panel Size: Mass: 182 mm × 52 mm × 160 mm 188 mm × 58 mm × 12 mm 1.4 kg (excluding accessories) Designul şi datele tehnice se are pot schimba notificare prealabilă. Design and specifications subject tofără change without notice. REFERINŢE REFERENCES 49 ENGLISH SECŢIUNEA PLAYER-ULUI CD PLAYERCDSECTION Tip: Type: Sistem detectareSystem: a semnalului: SignaldeDetection Număr de canale: Răspuns Numberînoffrecvenţă: Channels: Interval dinamic: Frequency Response: Raport semnal/zgomot: Dynamic Range: Distorsiuni ale sunetului: Signal-to-Noise Ratio: Format de decodare MP3 (MPEG1/2 Audio Layer 3) Wow and Flutter: Format de decodare WMA (Windows Media® Audio): MP3 Decoding Format: (MPEG1/2 Audio Layer 3) Format de decodare AAC (Advanced Audio Coding): TROUBLE with operation? AveţiHaving PROBLEME deunit funcţionare? Please legate reset your Refer to page of How to reset your unit Vă rugăm să resetaţi aparatul. Vous avez des PROBLÈMES de fonctionnement? Réinitialisez votre appareil pagina „Resetarea aparatului” votre appareil Référez-vous àConsultaţi la page intitulée Comment réinitialiser Cher(e) client(e), Dear Customer, Stimate Client, Cet appareil est conforme This apparatus is in conformance with the valid European Acest aparat respectă directivele şi standardele europene în vigoareaux directives et normes vigueur concernant la compatibilité directives and standards regarding electromagneticelectromagneticăeuropéennes privind compatibilitatea şi siguranţaen electrică. électromagnétique et Japan, à la sécurité électrique. compatibility and electrical safety. Reprezentantul pentru Europa al companiei Victor Company of Représentant européen de la société Victor Company of Japan, European representative of Victor este: Company of Japan, Limited Limited is: JVC Technology Centre Europe GmbH Limited : JVC Technology Centre Europe GmbH JVC Technology Centre Europe GmbH al acesteia este: Noul nume Le nom de la compagnie a changé dans: Company name changed in: JVC Technical Services Europe GmbH JVC Technical Services Europe GmbH JVC Technical Services Europe GmbH Postfach 10 05 52 Postfach 10 05 52 Postfach 10 05 52 61145 Friedberg 61145 Friedberg 61145 Friedberg Germania Allemagne. Germany RO FR EN, © 2008 Victor Company of Japan, Limited 0108DTSMDTJEIN