1
Howto
get
I
I
I
I
I
I
I
I
I
I
I
d
t.
4
Ie Jestfrom
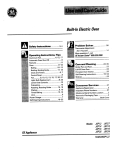
contents
Anti-TipDevice
ApplianceRegistration
3,38
2
Preheating
14, 15
Roasting,RoastingGuide 16,17
13,23,25
Shelves
ThermostatAdjustment
27
ConsumerServices
Cooktop
20–26
8,9
47
21
Features
HootingUnderRange
6,7
29,30
InstallationIns~ctions
Leveling
28-43
38
Careand Cleaning
Clockand Timer
MinorAdjustments
27
Modeland SerialNumbers 2, 30
oven
AirAdjustment
12, 13
27,35,37,42
PowerOutage
ProblemSolver
10, 12
44
SafetyInstructions
Surface Cooking
2–5
10, 11
BurnerGrates
Burners
21,25
20,25
ControlSettings
CookwareTips
Hame Size
LightingInstructions
Baking,BakingGuide
14,15
BroilerPanandRack 18,23,25
Warranty
Broiling,BroilingGuide
ControlSettings
Installation
18,19
12
DoorRemoval
22
Light;BulbReplacement 12,23
OvenBottom
OvenVents
22
~,~, ~3,21
10
11
GE Answer Center”
800.626.2000
11,44
10
BackCover
2%43
use
andcare
mtiuatio
ofModels
&
RGB52&R
RGB52@R
RGB528ER
RGB~28GER
RGB52yGEP
RGB628G
.—
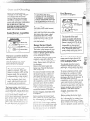
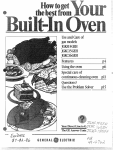
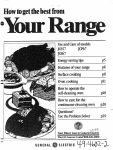
savetime
and money.
It is intendedto helpyouoperate
and maintainyour new range
properly.
Keepit handyfor answersto your
questions.
If you don’tunderstandsomething
or needmorehelp,write(include
yourphonenumber):
ConsumerAffairs
Hotpoint
AppliancePark
Louisville,KY40225
wI*itedown themode~
andserialnumbers.
Dependingon yourrange,you’ll
find the modeland serialnumbers
on a labelon the frontof therange,
behindthekickpanel,storage
draweror broilerdrawer.
Thesenumbersare alsoon the
ConsumerProductOwnership
RegistrationCard thatcame
withyourrange.Beforesending
in thiscard,pleasewritethese
numbershere:
Model Number
Serial Number
Use thesenumbersin any
correspondenceor servicecalls
concerningyourrange.
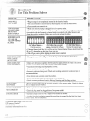
Before you request
Servitee.e
Check the ProblemSolverin this
book.It listscausesof minor
operatingproblemsthat YOU can
correct yourself.
If you need service...
Toobtainservice,seethe
ConsumerServicespagein the
backof thisbook.
Toobtainreplacementparts,
contactGE~otpoint Serviceand
PartsCenters.
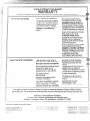
We’reproudof our serviceand
wantyou to be pleased.If for some
reasonyou arenothappywiththe
serviceyou receive,here are three
stepsto followfor furtherhelp.
FIRST,contactthepeoplewho
servicedyourappliance.Explain
whyyou are notpleased.In most
cases,this will solvethe problem.
NEXT,if you are stillnot pleased,
writeall the details-—including
yourphonenumber—to:
Manager,ConsumerRelations
Hotpoint
AppliancePark
Louisville,KY40225
FINALLY,if yourproblemis still
not resolved,write:
MajorApplianceConsumer
ActionPanel
20 North WackerDrive
Chicago,IL 60606
——
WANING: Mthe
informationin thk
manlualisnotfollowed
exactly9 a fire or explosion
cawing
may FeSuit
propetiy damage,
persona!injwy or death.
—Do notstoreor use
gasolineor other
flammablevapors and
liqtids in the tieitity
ofthis or any other
appliance.
To Do mYou
sm~~GAS
e Do nott~ to light any
appliance.
~Do nottouch any
—mT
Immediatelycontactthe dealer (or
builder)thatsold you the range.
,“:/
.-
/“
—-.=,
... . ...... .. . ..—.— —
. .==..—.=- —
.-—-.——--——.—.-.——...
..-.”
-.!.-.7
“a--.-.-—-
;.
,,:
:
-.______
1
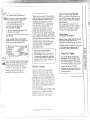
lwiPoRTANT
SAFETY NOTICX
“~heCalifornia Safe Drinking
f}~aterand Toxic Enforcement
Act requires the Governorof
Californiato publish a list of
substancesknown to the state
to cause cancer,birth defectsor
otherreproductiveharm, and
requiresbusinessesto warn
customersof potentialexposure
to such substances.
Gas appliancescan cause minor
exposureto four of these
substances,namely benzene,
carbonmonoxide,formaldehyde
and soot, caused primarily by the
incompletecombustionof natural
gas or LP fuels. Properly adjusted
burners,indicatedby a bluish
rather than a yellow flame, will
rninirnizeincompletecombustion.
Exposure to these substancescan
be minimized by ventingwith an
open window or using a
\rentilationfan or hood.
grounded,three-prongoutletin
accordancewith the National
ElectricalCode.Do ~lotuse an
extensioncord with
this appliance.
aBe sure ail packing materials
are removed from the range
before operatingit to preventfire
or smokedamageshouldthe
packingmaterialignite.
eLocate range out of Mtchen
traffic path and out of drafty
locations to prevent pilo$
Outige (on mode~swith
Shnding pilok) and poor
air circulation.
*Be sure your range is eorK’eetly
adjusted by a qualified Sertice
technician or installer for the
type of gas (natural or LP) that
is to be Msed,Yourrangecan be
convertedfor use with either
type of gas. See ~staliation
Instructions.
e After prolonged Useof a
rangeyhigh floor temperatures
may result and nlany floor
coverings
will not tithsand
US~e Never instail
the range over vinyl tile or
linoleumthat cannot withstand
such type of use. Never install it
directly over inte~iorkitchen
carpeting.
thi$ Mnd Of
.---—. —.
—..”....,,.
. .
.
. .
.
.
,.
>,.”
........_=_.
———
0 CAUTION:ITEMSOF
INTEmsT To CHILDREN
SHOULDNOTBE STOWD
IN CABINETSABOVEA
mNGE OR ONTHE
BACKSPLASHOF A
mNGE4HmDREN
CLMBNG ONTHERANGE
To REACHITEMSCOULDBE
SERIOUSLY
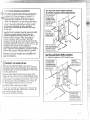
mmED.
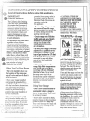
wAmING–Ani
can tip and
ranges
injury
could
result.To
prevent
accidental
tipping
of
the range?
attach an
approved
Anti-Tip
device to the
wall. (See Installation
Instructions.)To check if the
device is installedand engaged
properly,carefullytip the range
forward. me Anti-Tipdevice
shouldengage and prevent the
range from tipping over.
If you pull the Iange out from the
wall for any reason, make swe
the Anti-Tipdevice is engaged
when you push the range back
againstthe wal!.
. ...... .............
For your safety9never use
W’arllling
or
yourappliancefor
heatingtileroom.
a Do not usewater on grease
$
fires. Neverpick up a flaming
pan. TLIi~off burner,then
sn~otherflamingpan by covering
pan completelywith well-fitting
lid, cookiesheetor tlat tray.
Flaming greaseoutsidea pan can
be put out by coveringwith
bakingsoda or, if available,a
muhi-purposedry chemicalor
foam-typefire extinguisher.
s ~~ ~~~~~~~~
fl~~~~~~~
materials in an oven, a range
storage drawer or near
2 Cooktop.
*Donot store or use
Co-mbustible
materials5gasoline
or other flammablevaporsand
Mqwids
in tilevicinityof this or
any other appliance.
~Donot let cookinggrease or
other
flammable
materials
accumulatein or near
the range.
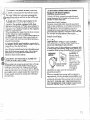
QV?hen Cooking porli9 follow
the directionsexactly and always
cook the lneat to an internal
temperatureof at least 170°F.
This assu]es that, in the remote
possibilitytha[ tricl]in~~naybe
~]resentin the n~ea[,it wi[l be
i(illed
aIId[herncatwill be safe
to eat.
,,,/,
——
.-.,.-... ..... . ..—-—----------..—.-.-..--.——-
snlokinganclgreasyspillovers
that may catch on fire.
oAdjust top bur”nerflame Sixc
so it does not extend beyond the
edge of the cooliware.Excessive
fla~neis hazardous.
ouse Oniydry pot llolders—
moistor damp pot ho]derson hot
surfaces~nayresult in burns froin
steam.Do not let pot holders
come near open flameswhen
lifting cookware.Do not use a
towel or other bulky cloth in
place of a pot holder.
*To minimize tile possibility
of burns~ignitionof flammable
materials,and spillage,turn
cookwarehandlestoward the
side or back of the range without
extendingover adjacentburners.
~Alwaysturn surfaceburner
to OFF beforeremoving
Cool{ware.
ecarefully watchfoodsbeing
fried at a highflanlesetting.
oNeverbloclithe vents(air
openings)of the range. They
provide the air inlet and outlet
that are necessary for the range
to operate properly with correct
combustion,Air openings are
located at the rear of the cooktop,
at the top and bottom of the oven
dOOr,:111~~t [he bottonl Ofthe
—-—
..............-————
—...
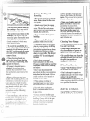
forfrying
~ Foods
“--
Shoulflbe as @
“:,$“:
(Iry as possible.Frost on frozen
foodsor ~moisture
on fresh foods
can causehot fat to bubble up
and over sidesof pan.
ouse l&astpossibleamount of
fat for effectiveshallow or
deep-fatfrying.Fillingthe pan
too full of fat can cause spil]overs
when food is added.
@If a Combinationof oils or fah
will be used in frying?stir
togetherbefore heatingor as fats
melt slowly.
~Alwaysheat fat slowly?and
watch as it heats.
QUse a deepfat thermometer
Wllelleverpossibleto prevent
overheatingfat beyondthe
smokingpoint.
~Use proper pan siz~Avoid
pans that are unstableor easily
tipped.Select cookwarehaving
flat bottomslarge enough to
cover burner grates. To avoid
spillovers,make sure cookware
is large enoughto contain the
food properly.This will both
save cleaningtime and prevent
hazardousaccumulationsof
food, since heavy spatteringor
spilloversleft on range can
ignite. Use pans with handles
that can be easily grasped and
remain cool.
-——
----.”.
. .
.
.
--—--—-
.
.
..-”. .
. ,. . ..—-.
-=.l-.
—---
. .. .
* wheKR
broiling9if meatis too
close to the flame?the fat may
ignite.Trim excessfat to prevent
,,
i
*
Y
!
when opening
the door ofa klot
oven.Thehot air and steam
that escapecan causeburns to
hands,faceand eyes.
~ Keep oven free
from
grease
Do not!eaveplasticitenlson
tl~ecoolftop—theymay melt if
left too close to the vent.
s De ~lotleaveany itemson the
cooktop.The hot air from the
buildup.
vent may ignite flammableitems
and will increasepressure in
closed containers,which may
cause them to burst.
@Place oven shelfindesired
position
whileoven isCool.
o Pullingoutshelfto the shelfstop a conveniencein lifting
heavyfoods,It is also a
is
6To avoidthe possibilityof a
burn, alwaysbe certain that the
controlsfor ail burlle?rsare at
the OFF positionand all grates
cle~ning Your Range
~ Clean
only parts listed in this
Use and Care Book.
o Keep
position
* Be careful
“R”
is not designed
range
clean and free
of accumtllations
of grease
Spilloversy
may ignite,
which
or
when you clean the
the area over
the pilot (on models so
equipped) will be hot,
to slide.
e v/hen HalRingfoods are
under the heod~turn the fan
off. The fan? if operating9 may
~If you should havea grease
firein the broiler pan9 turn
off oven, aridkeep oven door
or broilerdrawer (on models so
equipped)closedto containfire
until it burns out.
againstburns from
touchinghot surfacesof the
WaIISe The IOW~St
dOO~OrOV~~
precaution
are COOIbefore attempting to
renlove them.
excessiveflare-ups.
*Malie sure broiler pan is in
placecorrectlyto reducethe
possibilityof greasefires.
cooktop
spread the flames.
*If range is locatednear a
tvindowy
do not hang long
because
If You Need service
e Read 66The Problem
curtains that could blow over
the top burners and create a fire
hazard.
o Don9tuse aiunlinumfoil
anywhere
the oven exceptas
described in tilis boolf. Misuse
could result in a fire hazard or
damage to the range.
in
so!v@r99
intheback of this bool<e
eDon9tattelnpt to repair or
. replaceallypart of ywdrrange
u~llessit is specifically
~ecom~nended
i]~this book,.All
other servicing should.be refe~~e~
to a qualified technician.
,.
1,
... .
..”.—
--
—.-—
.————.——.
-.--——
—.—.
.—--.
-.—.—
.-..—
----
..—
..
—.—-—.—.—
..————
.———
-...—-.—
__
————.
. .— --
h
— :
-,
I
———
--l
--
e-. ‘,
,.
I
‘,.
...........-,.,....mp
__ ————_____
—
)
L._...J
—___
————--..
-_,.
——————
—._,..__.
.,_,.,_,,
r,.a-,+
---—.-—...——.——
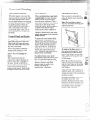
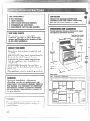
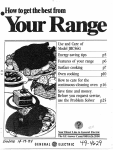
Feature Index (Not all models have all features. Appem~nceof features varies.)
See page
20,21,25,26
1 Surface Burners, Drip Pans (on some models) and Grates
2 Oven Lamp On/Off Switch (on some models)
12
3 Clock and Timer (on some models)
8,9
4,5, 13,21
4 Oven Vent
5 OvenControl
12
6 SurfaceBurnerControls
10
7 Cooktop
21
8 Broiler Pan and Rack
18,23,25
9 Oven Shelves (number of shelves varies)
13,23,25
10
Oven
13
Shelf SuppOrtS
4,21
11 Air Vent in Oven Door (located at top of Oven Door)
23
12 Broiler Drawer
13 Air Intake
4,21
14 Model and Serial Numbers (located on front frame of range,
behind Broiler Drawer)
2,30
22
15 RemovableOvenDoor
16 Anti-r~ipDevice(Locatedright rear at bottom.SeeInstallationInstructions.)
3,38
22
17 Oven Bottom
12,23
18 oven [ntcriorLight (on some models)
.---.,,..
. .. ,,?
.
r
i
. .
‘--]
J,
.-
.
—.
-—..
-+ -.. —.. .— ..
l;
ii
1:
1!
I
“-.
.
.
““-.
,..
!..
. —--------
.—
-
--———
---
.-
——...—-
-—
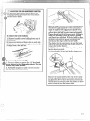
‘Fosetthe Timer
1. Press the TIMER ON/OFF pad.
“:00” appears on the display and
“SET TIMER” flashes.
2. Use the UP and DOWN pads to
set the timer. Short taps on the UP
or DOWN pad change the timer’s
setting one minute at a time.
Pressing and continuingto hold
the UP pad increasesthe setting
five minutes at a time until one
hour (“1 :00”) is displayed. After
one hour is displayed,pressing and
holding the UP pad increases the
setting 15 minutes at a time. (Short
taps on the UP and DOWN pads
will always change the setting by
1-minuteincrements.) The timer
can be set for a maximum of 9
hours and 45 minutes.
3. To start the timer, press the
TIMER ON/OFF pad. If the
TIMER ON/OFP pad is
not pressed, the timer will
automatically start after a
few seconds.
As the timer counts down, a
single beep will indicate when
one minute is left. After this beep,
the display will count down in
seconds. When the timer reaches
“:00,” you will hear three sets of
three short beeps, and then a single
beep every 10 seconds for 10
minutes or until you press any
of the Clock/Timer pads.
Foliow directions below if your
range has the clock and timer
shown above.
The electronic range clock and
timer allow you to set the timer
up to 9 hoursand45 minutes.You
havethechoiceof havingthe timer
showthe timecountingdownor
the timeof day.In eithercase,the
timerwillsignalat theend of the
timerperiodto alertyou thatthe
timeis up.
To setthe clock
NOTE: When you first plug in the
range or after a power failure,
the entire Clock/Timer display
will light up. After several
seconds “12:00” will then
flash on the display.
1. Press the CLOCK pad. “12:00”
stopsflashingand “SET TIME”
flasheson the display.
2. Pressand hold the UP or
DOWNpad and the timeof day
willchange10 minutesat a time.
Tochangethe time by single
minutes,givethe pads shorttaps.
For exa]]lple,to set the clock for
3:15,press and hold the UP pad
until “3:10” appears,and then tap
the UPpad until “3:15” is
displayed.
3. Press the CLOCKpad and the
clock will be set. If you do not
When the timer is counting down,
use the UP and DOWN pad to
change the remaining time, or
press the TIMER ON/OFF pad
to cancel the timer function. The
timer function cannot be cancelled
until “SET TIMER” stops
flashing and “TIMER” appears
on the display.
To Displaythe Time of
Day wMIe the Timer
Is operating
Pressing the CLOCK pad while the
timer is operating will not interfere
with the timer’s operation; the
display will change to show the
time of day, but the timer will
continue to count down and will
still signal when time is up. Simply
pressfie TIMERON/OF~pad
press the CLOCK pad, the clock
will automatically be set within
One miilute.
j---.,
(...,
,.,-
(“ ‘~
\lx=..‘-’”
Lc;
1( -:,
d“
_-.
-..
—
. . ... . . .... ... . . . . .... . . ...
.
——
——.
—
. . ..-. --
... . ..—---.,—
-....
-
-.
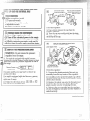
~O~~OWdi~~CtiO~S
below if yOU~
range has the clock and timer
ShOW~
above.
clock
CIock,push in the knob
and turn it to the right. Let the
knob out when the clock hands
reach the correct time. Continue
turning the knob to 0~.
To set the
Timer
The Timer has been combined with
the range clock. Use it to time all
your precise cooking operations.
You’llrecognize the Timer as the
pointer that is different in color
.== &an the clock hands.
@ ?*Y Minutesare markedup to 30, and
hours are marked up to 4 on the
center ring of the clock.
To set the Timer, turn the knob to
the left—without pushing in—until
the pointer reaches the number of
minutes or hours you want to time.
}4tthe end or the set time~a
buzzer s{)unds to tell you time
is up. Turn the knob—without
pushing in—until the pointer
reaches OFF and the buzzer stops.
..,—— ——
.-
.+.-e----
.. .
.
..
—-A.
—..
-—--.—.
.
.
.=——
,.—.
. .
------
----
. .. . . ——
—“..
-
.
.
..
—.——
.. .
...=..
~—.
..——..
—
.——
.-
Lighting Instructions for
Electric IgnitionModels
The surfaceburners on these
ranges have s~andingpilots that
must be lit initially.To light them:
1. Be sure surface burner control
knobs are in the OFF position.
2. Remove the grates and lift the
cooktop up (see the Lift-Up
Cooktop section).
3. Locate the two pilot ports and
light each of them with a match.
Note: If the pilot is too high or
low, you can adjust it. See the
“Adjust the Surface Burner Pilots
If Necessary” section of the
Installation Instructions.
4. Lower the cooktop. Your surface
burners are now ready for use.
5. Observe lightecIburners.
Compare the flames to pictures
in the Problem Solver. If any flame
is unsatisfactory, call for service.
Surface burners on these ranges
are lighted by electric ignition,
ending the need for standing pilots
with constantlyburning flames.
In ease of a polveroutige, you can
light the pilotless ignition surface
burnerson your range with a match.
Hold a lighted match to the burner,
then turn the knob to the LITE
position.Use e-me caution when
Iigbtingburners in this manner.
Surface burners in use when an
electrical Dowerfailure occurs will
continue ;Ooperate normally.
The electrodeof the spark
igniteris exposed.When one
burner is turned to LITE, all the
burners spark. Do not attempt
to disassembleor clean around
any burner while anotherburner
is on. An electric shock may
result, which could cause you
to knock over hot cookware.
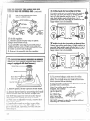
Eiectric Ignition Models:
PUSII the control knob in and
turn it to LITE. You will hear a
little clicking noise—the sound
of the electric spark igniting
the burner.
Standing Pilot Modei:
Push control knob in and turn it to
HI position. The burner should
lig~t within a few seconds.
e:
--:..
After the burner ignites, turn the
knob to adiust
the
flame
size.
.
FIame will be almost.horizontal **
md till lift slightly a%vay
from the4’
burner %Vhen
the burner is first
turned on. A blowing or hissing
sound maybeheardfor 30to 60
seeon~.This normalsoundis due to
improvedinjectionof gasandairinto
the burner.Put a pan on the burner
before lighting it, or adjust the
flame to match pan size as soo~~as
it lights, and the blowingor hissing
soundwill be much less noticeable.
n
surface
Burnercontrols
The knobs that turn the surface
burners on and off are located on
the control panel in front of the
burners.
The two knobs on the left control
the left front and left rear burners.
The two knobs on the right control
the right front and right rear
burners.
BeforeLig12ting
a Burner
GDo not operate a burner for an
s If drip pans are supplied with
your range, they should be used
at all times.
~Make sure both grates on one
side of the range are in place
before using either burner.
!
extendedperiodof timewithout
havingcookwareon tl~egrate.The
finishon the gratemay chipwitho~]t
cookwareto absorbtl~eheat.
,---
,’,,.
.:
. .. ..’
:,
—
-——.—-—.—-.----.--...—.
......
‘.
,L
;
‘
;
,
.:
~
I
;
\
..—___________
—
..——
Top”of”Rangecookware
The flame size on a gas burner
shoulcimatch the cookware you
arc using.
FOR SAFE HANDLING OF
COOKWARE NEVER LET THE
FLAME EXTEND UP THE
SIDES OF THE COOKWARE.
.4ny flame larger than the bottom
of ~hecookwa~eis wasted and only
serves to heat the handle.
JVhen using aiuminum or
aluminunl-e~ad stainless steel
pots and pans, adjust the flame so
the circle it makes is about 1/2
inch smaller than the bottom of the
cookware.
JWhenboiling, use this same
flame size—1/2 inch smaller than
the bottom of the cookware—no
matter what the cookware is made
of. Foods cook just as quickly at
ii gentle boil as they do at a
furious, rolling boil. A high boil
crcatcs steam and cooks away
moisture, ilavor and nutrition.
,~v(lidit except for the few
cooking processes that need
ii vigorous boil.
Alumi~Iun}:Medium-weight
cookware is recommended because
it heats quickly and evenly. Most
foods brown evenly in an
aluminum skillet. Minerals in food
and water will stain but will not
harm aluminum. A quick scour
with a soap-filled steel wool pad
after each use keeps aluminum
cookware looking shiny and new.
Use saucepans with tight-fitting
lids when cooking with minimum
amounts of water.
Cast Iron: If heated slowly,
most skillets will give satisfactory
results.
Enamelware: Under some
conditions, the enamel of some
cookware may melt. Follow
cookware manufacturer’s
recommendations for cooking
methods.
Glass: There are two types of
glass cookware—those for oven
use only and those for top-of-range
cooking (saucepans, coffee and
teapots). Glass conducts heat
very slowly.
Heatproof Glass Ceramic: Can
be used for either surface or oven
cooking. It conducts heat very
slowly and cools very slowly.
Check cookware manufacturer’s
directions to be sure it can be used
on gas ranges,
Stainless Steel: This metal alone
has poor heating properties and is
Llsuallycombined with copper,
aluminum or other metals for
improved heat distribution.
Combination metal skillets usually
work satisfactorily if they are used
with medium heat as the
manufacturer recommends.
-.,
;
.._._ —..--————.—-——————-..... ....-........
.
wok cooking
(on modelswith sealedburners)
—
r~
We recommend that you use only [
flat-bottomed wok. They are
available at your local retail store.
Do not use woks that have suppo17
rings. Use of these types of woks,
with or without the ring in place,
can be dangerous. Placing the ring
over the burner grate may cause
the burner to work improperly
resulting in carbon monoxide
levels above allowable current
standards. This could be dangero~
to your health. Do not try to use
such woks without the ring. You
could be seriously burned if the
wok tipped over.
use
ofstoveTopGrills
(on models with sealed burners)
Do not use stove top grills on your
sealed gas burners. If you use the
stove top grill on the sealed gas
burner it will cause incomplete
combustion and can result ii~
exposure to carbon monoxide
levels above allowable current
standards. This can be hazardo~is
to YOUI’ health.
I
..—.. . 1/
..
—..
for
Lighting Instructions
To lightthe ovenburner:
Turn the OVEN CONTROL knob
to the desired temperature.The
burner should light within 60
seconds.
Proper flame configuration:
While using the oven burner,
visually check the burner flame in
the broiler compartment.If flame
does not burn as described in the
Installation section of this book,
adjust the flame following the
directions on those pages.
Power fai~ure?An electrical
power failure will not affect a
lighted standing oven pilot.
standing Blot ModeEs
These ranges have standingoven
pilots that m~st be lit initially.
To light the oven pilot:
1. Be sure OVEN CONTROL
knob is in the 0~ position.
2. Open the broilerdoorand remove
the broilerpan and rack.This will
make it easier for you to reach inside
the broilercompfilent.
Youroven is controlled by an
OVEN CONTROL knob.
It will normally take 30-90
seconds before the flame comes
on. After the oven reaches the
selected temperature, the oven
burner cycles-off completely,
then on with a full flame-to
maintain the selected temperature.
oven Light
(on somemodels)
~
The oven light comes on
automaticallywhen the door
is opened. On some models there
is a manual on/off switch to the
left of the surface burner controls.
Lighting Instructions
for
Electric Ignition Models
e:
‘e
OVENCONTROLknobto the
desiredtemperature.The burner
shouldlightwithin30-90seconds.
outage
CAUTION:DO NOTMAKE
ANYATTEMPTTO
OPERATETHEELECTRIC
IGNITIONOVENDURING
AN ELECTRICALPOWER
FAILURE.The ovenor broiler
(on modelsso equipped)cannot
be lit duringa powerfailure.
Gas will not flowunlessthe
glowbar is hot.
If the oven is in use whena
powerfailureoccurs,the oven
burnershutsoff and cannotbe
re-lit untilpoweris restored.
3. Find the oven pilot port at the
back of the broiler compartment.
The long tube, running from front
to back, is the oven burner, The
pilot port is at the back, about one
inch below the burner.
4. Using a long matchor match
holder, reach in and light the
oven pilot.
. /.:.
L
,{J
~. -.,
__._,_.
. .
——..—.—..
..”,
.
.
..-_
.
—
...,,
.
.
.
.
-..4.
—.
.,--T
..
--..=---
-—-
—
._
M
The oven and broil burner
on these ranges is lighted by
electric ignition.
To light the burner, turn the
Power
b:
x
...
—
-&s
.—.—
..
...7
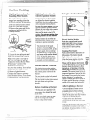
The oven is vented through duct
- “~~$i==.
openings at the rear of the cooktoP.
~
t$&:~&3--.. -,,3 =7:==”=
(See Features section.) Do not
,,;
block these openings when
cooking in the oven—it is
important that the flow of hot air
from the oven and fresh air to the
oven burners be unintempted.
‘ The Vefit openingsand nearby
surfaces may become hotsDo not
touch them.
@Handles of pots and pans on
tile eooktop may become hot if
left too close to the vent.
.
l~ote:The venton your modelmay
differ from that shown in the
illustration but all models have
vents at the rear of the cooktop.
a
~‘-’
“ Metal items will become very
hot if they are left on the Cooktop
and couldcause burns.
Q Do not leave any items on the
eooktop. The hot air from the vent
may ignite flammable items and
~villincrease pressure in closed
containers, which may cause them
to burst.
,
,-
.. .
—
-.-;.
E
F-
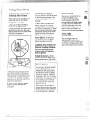
Each shelf is designed with stoplocks so when placed correctly on
the shelf supports, it will stop
before coming completely out of
the oven and will not tilt when you
are removing food from it or
placing food on it.
When placing cookware on a shelf,
pull the shelf out to the “stop”
position. Place the cookware on
the shelf, then slide the shelf back
into the oven. This will eliminate
reaching into the hot oven.
To remove a shelf from the oven,
pull the shelf toward you, tilt front
end upward and pull the shelf out.
To replace, place shelf on she!f
support with stop-locks (curved
extension of shelf) facing up and
toward rear of oven. Tilt up front
and push shelf toward back of
oven until it goes past “stop” on
oven wall. Then lower front of
shelf and push it all the way back.
The oven has five shelf supports
for normal baking and roasting—l
(bottom), B, C, D and E (top). It
also has a special low shelf
position (R) for roasting extra Iarg
items, such as a large turkey. The
shelf is not designed to slide out a
this position. Shelf positions for
cooking are suggested on Baking
and Roasting pages.
ovenMoisture
As your oven heats up, the
temperature change of the air in
the oven may cause water
droplets to form on the door
glass. These droplets are
harmless and will evaporate as
the oven continues to heat up.
must open the door, open it
partially---only3 or 4 inches-—-and
close it as quickly as possible.
~Do not disturb the heat circulation
in the oven with the use of
aluminum foil. If foil is used, place
a small sheet of it, about 10by 12
inches at the most, on a lower shelf
several inches below the food. Do
not place foil on the oven bottom.
1. Position the shelf or shelvesin
the oven. If cooking o~~two shelves
at the same time, stagger the
cookware for best heat circulatiori.
Place food in oven on center of
shelf. Allow at least 2 inches
between edge of cookware and
oven wail or adjacent cookware.
2. Close oven door. Turn OVEN
CONTROL knob to desired
temperature.
3. Check food for doneness at
minimum time on recipe. Cook
longer if necessary. T’umOVEN
CONTROL knob to OFF and
remove food.
Conlmon Baking Problems
and Possible solutions
PIES
Burningaroundedges
@Edges of crust too thin.
~Incorrect baking temperature.
Bottom crust soggy and unbaked
~Allow crust and/or filling to cool
sufficiently before filling pie shell.
~Filling may be too thin or juicy.
~Filling allowed to stand in pie
shell before baking. (Fill pie shells
and bake immediately.)
~Ingredients and proper measuring
afiect the quality of the crust. Use
a tested recipe and good technique.
i~ake sure there are no tiny holes
or tears in a bottom crust.
“Patching” a pie crust could cause
soaking.
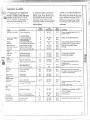
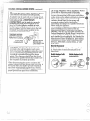
Preheating
Preheating is very important when
baking foods such as biscuits,
cookies, cakes and other pastries.
Preheat the oven for at least 10
minutes. Preheating is not
necessary when roasting or for
long-~imecooking of whole meals.
Most baking is done on the (B)
shelf position,
When baking three or four items,
use two shelves positioned on the
(B & D) supporls.
B~akeangel food cakes on the (A)
shelf position.
Pie filling runs over
* Top and bottom crust not sealed
together well.
~Edges of pie crust not built up
high enough.
~Too much filling.
~Check size of pie plate.
Pastl”y is tough; Crust Ilot flaky
~Too mtlch handlingt
GFat too soft or cut in too fine.
Roll dough lightiy and handle as
little as possible.
~ ~o~lowa tested recipe and
measure the ingredients carefully.
If you are using a package mix,
follow label directions.
~- !.l~~r
~ -p
L$.
d.dd
~c~i{erises Iligllev QE2one side
~ Butler sl]rcad unevenly in pan.
“ 01’’ellSl;~il’CS 1101 1~1’’~l.
L>yi77LI-~3tdi3[lI)S LISed,
./;
-.“
.—
-.—-..-—.
”.
-—...
.—...
-.—..
-.—..
-—-—
.———————.
-—
.———-.—
..-.
-—.
.-.
-.-..
-..—..
-”.
-.—-.—-—...
”—
-.-,,
..
oShorteningtoo softfor proper
creaming.
~Toomuchliquid.
*--—
:--=..
COOKIES & BISCUITS
=e-,
..’:‘
~
....7+-.
;,,,
Doughy center; heavy crust on
surface
,
;L
~..<.:.
!%
,:. .-2.
--
..
..
T.
:_.,[’
~-.::‘‘.~,;.“
i :::
).’
1[: ;,.,‘
j ..,,.
~. ‘L
,,
* Check
temperature.
* Check shelf position.
QCarefully follow baking
instructions as given in reliable
recipe or on convenience food
package.
~Flat cookie sheets will give more
even baking results. Don’t
overcrowd foods on a baking
sheet.
~Convenience foods used beyond
their expiration date.
L,
J;
i,
1“
\-L\’
[
/k
[
<-~, \
~ ~, ~
...”-I
BrQFvIlingInore nQtiQea!31eon
Qmeside
o Oven d[?ornot closed proper!:y.
s Check shelf position.
----
—..-
. .
.
. . .
. ..-=..—
——-—.—..=.
.——..—.—
, ,;.
.
.. . .
I
.......... . . ._._ ... ...._____—
~v
.
‘~~:~[~:~
I*IJreheating is very important
,..
--fy
‘<j::;>’when halii~lgfoods Sucilas
,r=%%
biscuits~cookies, cakes and other
- ~ {~$$pastries. Preheat the ovan for at
-=- least 10 minutes. Preheating is not
....
necessary when roasting or for
.._
-.,
..-.!.
-.,
long-time cooking of whole meals.
2. Aluminum pans conduc~heat
quickly. For most conventional
baking, light, shiny finishes give
best results because they help
prevent overbrowning.For best
browning resuits, we recommend
dull bottom surfaces for cake pans
andpie plates.
3. Dark or non-shinyfinishes and
glass cookware generally absorb
heat which may result in dry, crisp
crusts. Reduce oven heat 25”F.if
lighter crusts are desi~ed.Rapid
browning of’some foods can be
achieved by preheating cast iron
cookware,
——
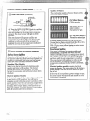
Food
Bread
Biscuits (1/2 in. thick)
Coffee cake
Corn bread or muffins
Gingerbread
Muffins
Popovers
Quick loaf bread
Yeast brefld(2 loaves)
Plain rolls
Sweet rolls
Cakes
(without shor-tcning)
Angel f~od
Jelly roll
Sponge
Cakes
Bundt cakes
Cupcakes
Fruitcakes
Layer
Loaf
Cool{ies
Brownies
Drop
Puddings. rice
and custard
E’ii!s
I:roz,l” 11
Meringue
shelf
Positions
Oven
T’cmDeratures
Time,
Minutes
Shiny Cookie Sheet
c
400°-4750
15-20
Shiny Metal Pan with
satin-finish bottom
Cast Iron or Glass Pan
Shiny Metal Pan wi”fi
satin-finish bottom
Shiny Metal Muffin Pans
Deep Glass or Cast Iron Cups
B
350°-4000
15-30
B
B
400”-450°
350°
20-40
45-55
Preheat cast iron pan for crisp crust.
B
B
400°-4250
375°
20-30
45-60
Metal or Glass Loaf Pans
Metal or Glass Loaf Pans
Shiny Oblong or Muffin Pans
Shiny Oblon~ or Muffin Pans
B
B
B
B
350°-3750
375°-4250
375°-4250
350°-3750
45-60
30-60
10-25
20-30
Decreaseabout 5 minutesfor muffin mix
or bake at 450”F.for 25 minutes,then at
350”F.for 10 to 15 minutes.
Dark metal or glass gives deepest
browning.
Aluminum Tube Pan
Metal Jelly Roll Pan
Metal or Ceramic Pan
A
B
A
325°-3750
375°-4000
325°-3500
30-55
10-15
45-60
A, B
B
A, B
325°-3500
350°-3750
275°-3000
Metal or Ceramic Pan
Shiny Metal Muffin Pans
Metal or Glass Loaf or Tube Pan
45-65
20-25
Z-4hrs.
B
350°-375’
20-35
B
350”
40-60
Metal or Glass Pans
Cookie Sheet
B, C
B, C
325°-3500
350°-4000
25-35
10-20
Cookie Sheet
Cookie Sheet
B, C
B, C
400°-4250
375°-4000
6-12
7-12
350°-4000
3000-3500”
30-60
30-60
Shiny Metal Pan with
~ satin-iir~ishbottom
Metal or Glass Loaf Pans
Glass or Metal Pans
CililSS Custard Cups or Casserole
(sc[ in pan of hot water)
Glass Custard Cups or Casserole
A, B, C
B
B
325°
50-90
FoiI Pan on Cookie Sheet
Sprctid to crust cd~es
B
B
400°-4250
q~50-3500
40-70
15-25
Glass or Satin-finish Metal
Glass (JrSatin-finish Metill
Glass or Siltin-finish Metal Pan
—.
B
B
B
400°-4250
400°-4250
40-60
40-60
10-16
Sc[onovenShelf
or h~~tiil
GlilSS P;lll
———
Gl:lss
450°
60-90
30-60
30-75
Comments
Canned,refrigeratedbiscuits take 2 to 4
minutes less time.
Two-piecepan is convenient.
Line pan with wax paper.
Paper liners produce moister crusts.
Use 300”F.and Shelf B for small or
individual cakes.
If baking four layers, use Shelves B
and D.
Bar cookies from mix use same time,
Use Shelf C and increase temperature 25°
to 50°F. for more browning.
Reduce temperature to 300”F.for large
custard.
Cook bread or rice pudding with custard
base 80 to 90 minutes.
Large pies use 400”F.and increased time.
To quickly brown meringue, use 400°F.
for 9 to 11 minutes.
Custard fillings require lower temperature
and longer time.
Increase time for large amount or size.
. ..--\-..
I
.....
-1
[.
..
-—...,.-.
.--
-..
n.
.. . . .. . . .. .
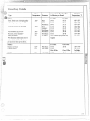
Roasting is cooking by dry heat.
Tender meat or poultry can be
roasted uncoveredin your oven.
Roasting temperatures, which
should be low and steady,keep
spatteringto a minimum. When
roasting, it is not necessary to
sear, baste, cover or add water to
your meat.
The oven has a special low shelf
(R) positionjust above the oven
bottom. Use it when extra cooking
space is needed, for example,
when roasting a large turkey. The
shelf is not designed to slide out
at this position.
Roasting is easy; just follow
these steps:
step 3: TurnOVEN CONTROL
lcnobto desired temperature.
Check the Roasting Guide for
temperatures and approximate
cooking times.
Step 4: Most meats continue to
cook slightly while standing after
being removed from the oven.
Recommended standing time for
roasts is 10 to 20 minutes. This
allows roasts to firm up and makes
them easier to carve, Internal
temperature will rise about 5° to
10°F.If you wish to compensate
for temperature rise, remove the
roast from the oven when its
internal temperature is 5° to 10°F.
less than temperature shown in the
Roasting Guide.
Remember that food will continue
to cook in the hot oven and
therefore should be removed when
the desired internal temperature
has been reached.
Step 1: Position oven shelf at (B)
position for small size roast
(3 to 5 lbs.) and at (R) position
for larger roasts.
Step 2: Check weight of roast.
Place meat fat-side-up or poultry
breast-side-up on roa~ting-rack in a
shallow pan. The melting fat will
baste the rnrat.
Select a pan as
c~f]seto the size of meat as
p{~ssiblc.(Brtliler pan with rack
is a good pan for this.)
;: ---_ ;--3
~~,’
-- .——.—
——-—— —,--— -,........ ....... .-..—-...—
Frozen Roasts
*Frozen roasts of beef, pork,
lamb, etc., can be started without
thawing, but allow 15 to 25
minutes per pound additionaltime
(15 minutes per pound for roasts
under 5 pounds, more time for
larger roasts).
~Thaw most frozen poult~ before
roasting to ensure even doneness.
Some commercial frozen poultry
can be cooked successfully without
thawing. Follow directions given
on package label.
Dual shelfcooking
This allowsmore than one food
to be cooked at the same time. For
example: While roasting a 20-lb.
turkey on shelf position R, a
second shelf (if so equipped) may
be added on position D so that
scalloped potatoes can be cooked
at thesame time.Calculatethe
totalcookingtimeto enableboth
dishesto completecookingat the
sametime.Allow15-20minutes
of additionalcooktimefor the
potatoes.
.- ..—
.“=.+
.-.
—-..,
—.—
Doneness
Meat
Beef,Tendercuts:rib,highquality
sirlointip,rumpor topround*
Lamblegor bone-inshoulder*
Vealshoulder,leg or loin*
Porkloin,rib or shoulder*
Ham,precooked
‘%
Forbonelessrolledroastsover6
inchesthick,add 5 to 10minutes
perpoundto timesgivenabove.
Poultry
Chickenor Duck
Chickenpieces
Turkey
I
‘-m
Approximate ~O~Sti~~Time
in Bfinutes per Pound
to 5 Ibs.
6 to 8 lbs.
24-35
18-25
35-39
25-31
39-45
31-33
21.25
20-23
25-30
24-28
30-35
28-33
35-45
30-40
35-45
30-40
18-23minutesperpound(any
weight)
3
325°
325°
325°
325°
325°
325°
350°
325°
Rare:
Medium:
WellDone:
Rare:
Medium:
WellDone:
WellDone:
We]lDone:
ToWarm:
3 to 5 Ibs.
WellDone: 35-40
WellDone: 35-40
10to 15lbs.
WellDone: 16-22
—--- ,
——...—.....------------.-.-—--.-———-————-———-———-———-———---..——
.-. ———
over
5 lbs.
30-35
over 15lbs.
12-19
..—
140°-150°
150°-1600
170°-1850
130°-140°
150°-1600
170°-185°
170°-1800
170°-1800
115°-1250
..—...——.
185°-1900
185°-1900
In thigh:
185°-1900
—...
...—..—.—...
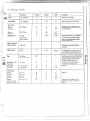
Broiling is cooking food by direct
heat from above the food. Your
range has a compartinentbelow
the oven for broiling.A specially
designedbroilerpan and rack allows
drippingfat to drain awayfrom the
foods and be kept away from the
high heat of the gas flame.
Both the oven and broiler
Compartinent doors should be
Closedduring broiling.
You can change the distance of
food from the heat sourceby
positioning the broiler pan and
rack on one of three shelf positions
in the broiler compartment-A
(bottom of broiler compartment),
B (middle) and C (top).
Ho$v to Broil
1. Preheating the broiler is not
necessary and can produce poor
results.
2. If meat has fat or gristle near the
edge, cut vertical slashes through it
about 2 inches apart, but don’t cut
into meat. We recom~mendthat you
trim fat to prevent excessive
smoking, leaving a layer about 1/8
inch thick.
3. Arrange food on rack and
position the broiler pan on the
appropriate shelf in the oven or
broiling compartment. P1acingfood
closer tc flame increases exterior
browning of food, but also increases
spattering and the possibi]ity of Fats
and meat -juicesigniting.
40Close the broiler door.
5. Turn OVEN CONTROL knob
t[?BROIL, FlOTE: Chicken and
ham are broiled at a lower setting
in order to cook through wid~ou{
overbrowning.
—.——.
—.-—..——.——
a use tongstoturn mleat over—
pierced meat losesjuices.
s Steaks and chops should be at
least 1 inch thick for best broiling
results. Pan broil thinner ones.
Questions
6. Turn most foods once during
cooking (the exception is thin
fillets of fish; oil one side, place
that side down on broiler rack and
cook without turning until done).
Time foods for about one-half the
total cooking time, turn food, then
continue to cook to preferred
doneness.
~. Turn OVEN CONTROL knob
to OFF. Remove broiler pan from
oven and serve food immediately.
Leave pan outside the oven to cool.
use
ofAlutinum
Foil
& Answers
Q. when broiling, is it necessak”y
to always use a rack in the pan?
A. Yes. Using the rack suspends
the meat over the pan. As the meat
cooks, the juices fall into the pan,
thus keeping meat drier. Juices are
protected by the rack and stay
cooler, thus preventing excessive
spatter and smoking.
Q. Should. 1 salt the meat before
broi~ing?
A. No. Salt draws out the juices and
allows them to evaporate. Always
salt after cooking.Turn meat with
tongs; piercing meat with a fork
also allowsjuices to escape. When ~-.--.
broiling poultry or fish, brush each ==side often with butter.
SIlould?
You can use aluminum foil to line
your broiler pan and broi~errack.
However, you must mold the foil
tightly {othe rack and cut slits in it
just like the rack.
Without the sli~s.the foil will
prevent rat and nleatjuices from
draining lo the broiler pan. The
juices coLildbcco]ne hot enough to
catch Onfire. ]f J’OL1
C]Onot CLltthe
slits, you are frying, not broiling.
A. Check to see if yoL~are using the
recommended shelf position. Broil
for longest period of time indicated
in the Broiling Guide, TLI~II food
only once during broiling.
:
::,.:.
i
t~
t
[
i
I
,.---..
(
‘)
~—. ./J
,.,
j
. ....——
.—
.-—
1
I
GrouE?dBeef
1 lb.
Beef Steaks
Rare
34ediunl
We]] Done
Rare
Nfedium
Well Done
Chicken (450°)
(4
patties)
1/~to ~/~ in. thick
1 in. thick
(~ to ~~ lbS.)
B, C
B
A
I
English Muffins
2, split
~[oq
A
I
9
12
13
10
I
I
.-.
7
5-6
8-9
B, C
‘Q
..=
Ham
Siices(450°)
25-30
Reduce times about 5 to 10 mi!lutes
per side for cut-up chicken. Brush
each side with melted butter. Broil
skin-side-down first.
~_3
1/2-1
Space evenly, Place English muffins
cut-side-up and brush with butter
if desired.
Do not
turn over.
Cut through back of shell and spread
open. Brush with melted butter
before broiling and after half of time.
5
Handle and turn very carefully. Brush
with lemon butter before broiling and
during broiling if desired, Preheat
broiler to increase browning.
8
Increase 5 to 10 minutes per side
for inch thick or home cured.
5
1 in. thick
Precooked
Pork Chops
Well Done
l-~
2 (1/2 in. thick)
2 ( 1 in. thick).
about 1 lb.
2 ( 1 in.),
B
1()1012 oz.
2 (lx in.j,
abo[]t 1 lb.
B
B
B
is recommended,
30-35
--’
; *=+
Steaks less than 1 inch thick cook
through before browning. Pan frying
25
1
1
1-lb. fillets
1/4 to 1/2 in. thick
Space evenly. Up to 9 patties take
Slash fat.
(6 to 8 oz. each)
Fish
4-5
6-7
10-12
16-18
12-15
c
2 to 4 slices
I pkg. (2)
Lobster Tails
10-11
Arrange in single layer.
about same time.
B
B
A
I
,
3
A
1 in. thick
(1 to lx lbs.)
(2 to 2Xlbs.),
split lengthwise
Bakery Products
Bread (Toast) or
Toaster Pastries
I
t
B
8
10
10
17
4-5
9-12
Slashfat.
4-7
Slash fat.
10
4-6
1~-14
1-2
desired, split sausages in half
lengthwise; cut into 5-to 6-inch
pieces.
If
.-
Ii I.{
.. .
—..—r...—
-
-.,.—A-.
—,,
---
-
..-
Proper care and cleaningare
importantso your range }l~iilgive
efiicient and satisfactory
dI;OLI
service. Follow these directions
carefully in caring for it to help
assure safe and proper maintenance.
.—
—..—
cl\urFIoF4: D(1 T40T
OPERATE TEIE BURNER
wlrrHouT ALL BURNER
PARTS AND DRIP PANS (IF
SO EQUIPPED) IN PLACE.
caps
Bllrner
(on modelswith sealedburners)
Wash burner caps in hot, soapy
water and rinse with clean water.
Dry them with a cloth—don’t
reassemble them wet. When
replacing burner caps, be sure
they’re properly in position
over the burners.
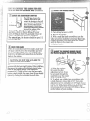
Range Bllrner Heads
(on models with sealedburners)
The burner assemblies should be
washed i-egularlyand, of course,
after spillovers.
Turn all controls OFF before
removing burner pa~tsand
drip pans (if so equipped).
I
The electrode of the spark
igniter is exposed. When one
burner is turned to LITE, all the
burners spark Do not attempt
to disassemble or clean around
any burner while another burner
is on. An electric shock may
result, which could cause yc?LI”
to knock over hot cookware.
.—
I
“~heburner grates, ca13s, [~LImer
The holes in the burners of your
range must be kept clean at all
times for proper ignition and an
even, unhampered flame.
You should clean the burner heads
routinely, especially after bad
spillovers, which could clog these
holes. Burner heads lift right OUL
for cleaning.
Remove the burner grate and
burner cap. Then lift the burner
head straight up.
To remove burned-on food, soak
the burner head in a solutionof
mild liquid detergent and water.
Soak the burner heaclfor 20 to 30
nlinu~es.If the food doesn’t rinse
off completely, scrub it with soap
and water and a brush or plastic
pad. Do not use steel wool or
abrasive cleaners because they
wi]] clog t]]eburner openings and
scraich ~heburners. If the holes
become clogged, clean them with
a toothpick.
Before putting the bLlrnerhead
i~ack,shake out excess wa~erand
dr~~it thorougl~ly b)J setting it in a
VVI~lrlll
OT1,TC~l
i.{}r30 tninutes. Then
pli~(.:i~
i{i-}i]~:l<
i~~ihc range, Inaking
~
The electrodeof the spark
igniter(on modelswith electric
ignition) is exposed.When one
burneris turnedto LITE, all the
burnersspark.Do not attemptto
disassembleor clean around
any burnerwhileanotherburner
is on. An electricshockmay
result,whichcouldcauseyou to
knockover hot cookware.
The holes in the burners of your
.+. ; range must be kept clean at all
;,;- -::--‘-- : ~
times for proper ignition and an
.
even, unhampered flame.
_—.
~=~!
.=,
L*$y;:
=--*-XT.=
::
You should clean the burners
Q,”.
..—
routinely, especially after bad
spillovers, which could clog these
holes. Burners lift out for cleaning.
‘
To remove burned-on food, soak
.—
the burner in a solution of mild
liquid detergent and water. Soak
~‘
the burner for 20 to 30 minutes. If
?. ~:::
the food doesn’t rinse off
completely, scrub it with soap and
~i’~
1water and a brush or plastic pad.
1“
~<
Do not }~sesteel wool or abrasive
[,:’
cleaners because they will clog the
:!
burner openings and scratch the
‘.
.,,_
burners+If the holes become
1;..,
clogged, clean them with
\
a toothpick.
r.
Before putting the bu~ner back,
~-”
shake out excess water and l!~en
dry it thoroughly by setting it in a
~
warm oven for 30 min~ltes.Then
[
p]:~ceit back in the ra~~ge,maki~~~
~;
sure it is properly seated and level. [-~.. !
}{
1:
{,
‘..- ._,-
_—-.-...—
.... .
-.—..-..
. .. . .. ...-——...
.
————....————
. ... .——
....-.—
....—...
-..-...-.--—.——
—.—.—
/[
, -’
.—_____
..
.——
-——
Cool<topsurface
“~oIIiake cleaning easier, the
cooktop may be lifted Lip.
1. Be sure burners are turned off.
2. Remove the grates.
3. Grasp the two front burner wells
,andlift-up.
Some models have dual support
rods that will hold the cooktop up
while yOLIclean underneath it.
There are a number of precautions
you can take to avoic!marring the
porcelain enamel surface of the
cooktop and to prevent it from
becoming dull. Don>tslide heavy
pans across it. If you spill foods
with a lot of acid (tomatoes,
sauerkraut, fruitjuices, etc.) or
foods with high sugar content,
clean them Llpas soon as possible.
If allowed to set, these foods could
cause a dull spot. Also, no matter
how stubborn the food stain, never
use harsh abrasive cleansers. They
could permanently damage the
enamel surface. We recommend
a cleanser such as Soft Scrub@
brand cleanser* or a similar
cleaning product.
Do not store Rammable
Although they’re durable, the
grates will gradually lose their
shine, regardless of the best care
you can give them. This is due to
their continual exposure to high
temperatures.
Do not operate a burner for an
extended period of time without
cookware on the grate. The finish
on the grate may chip without
cookware to absorb the heat.
Drip PaRls
(on modelsso equipped)
Remove the grates and lift out the
drip pans. Drip pans can be
cleaned in dishwasher or by hand.
After pans cool slightly,soak in
detergent and hot water, wash with
a non-abrasive scouring pad if
necessary, then rinse and dry.
in all
After ‘eIe2ningUllde%’
the Cooktop
with hot. soapy water and a clean
cloth: lower the cooktop. Be
careful not to pinch your fingers.
Lower cooktop gently to avoid
blowing out pi]ot frames (on
models with Standing Pilots).
.
materials
oven or near
the Coolitop. Do not store or use
ovenAir vents
combustiblematerials,gasoline
or other flammable vaporsand
liquidsin the vicinityof this or
any other appliance.
Never blockthe Venk (air
OpeningS)Oftl~erange. They
providethe air inlet and outlet
that are necessaryfor the range
to operateproperly with co~rect
combustion,Air openings are
located at the rear of the
cooktop, at the top and bottom
of the oven door and under the
broiler drawer.
Grates shoLIldbe washed regular]y
and, of course, after spillovers.
Wash them in hot. soapy water
and rinse Yvithclean water. After
cleaning, dry them thoroughly by
putting them in a warm oven for a
few minutes. Don>tput the grates
back on the range while they are
wet. When replacing the grates, be
SUI-C
they”re pc>sitioncclsecurely
over the l~urncrs.
.
-“”---\
:,,
‘k. .. .-
‘
.,]
!,
i.
. . . .-
f’”
)
. . .
_
_____
... .. ... ...___-———.
_ ..—.
,.-- .... —.—
——.——.
.—..-
—...—..
-.....
...—.-----——.—..
--.—.-———--—
..
______
. .. .
. .. . . . . . . . . . . .-—-——-.-----—
——--— -------
-.
—..
.
Outel”Painted Finish
When the range is cool, wash the
top, front and, if exposed, the sides
with mild soap and water. Never
use any harsh abrasivesor cleaning
powders that may scratch or mar
the painted surface. Rinse the
surface with clean water and dry
with a soft cloth. If you wish,
occasionally apply a thin coat of
mild cleaning wax to help protect
the finish.
control
Panel and mobs
It’s a good idea to wipe the control
panel after each use of the oven.
Clean with mild soap and water,
rinse with clean water and polish
dry with a soft cloth.
Do not use abrasive cleansers,
strong liquid cleaners or oven
cleaners on the control
panel—they will damage the
finish.
The control knobs may be
removed for easier cleaning. To
remove knob, pull it straight off
the stem. If knob is difficult to
remove, place a towel or dishcloth
between the knob and control
panel and pLI1l
gently. Wash knobs
in soap and water but do not soak.
ovenBottom
Lift”oR oven Door
Tile oven bottom has a porcelain
enamel finish. To make cleaning
easier, protect the oven bottom
from excessive spillovers.This is
particularly important when baking
a fruit pie or other foods with a
high acid content. Hot fruit fillings
or other foods that are highly
acidic (such as milk, tomatoes or
sauerkraut, and sauces with
vinegar or lemon juice) may cause
pitting and damage to the porcelain
enamel surface.
To protect the oven bottomfinish,
place a piece of aluminumfoil
slightlylarger than the baking dish
or a small cookie sheet on a lower
shelf or under the baking dish to
catch any boilovers,It should not
completely cover the shelf as this
would cause uneven heat in the
oven. Aluminum foil should not be
placed on the oven bottom.
If a spilloverdoes occur on the
oven bottom, allow the oven to cool
first. Youcan then clean the oven
bottom with soap and water, a mild
abrasive cleanser, soap-filled
abrasive pads or caustic oven
cleaner, following the
manufacturer’s directions,
——.
.——-.—
.-—-..........—----. ...,...==..
-m.=e.
--.
m..—.
The oven door is removable to
make the interior more accessible,
if desired.
Note: The oven door is heavy.
You may need help removing and
replacing the door.
:—.
..
-’
,:~~
K
~*—
To remove the door9open it a
few inches to the special “stop”
position that will hold the door
open. Grasp firmly on each side
and lift the door straight L~pand
off the hinges.
Note: Be careful not to place
hands between the spring hinge
and the oven frame as the spring
hinge could snap back and pinch
your fingers.
Wash with hot, soapy water. For
stubborn spots, use a solution of
vinegar and water. Do not immerse
the door in water.
To replace the door, make sure
the hinges are in the “out”
Dosition.Position the slots in the
bottomof the door squarely over
the hinges. Then lower the door
slowly and evenly over both
hinges at the same time.
..—.—..
.--..
=e—
.-
.
.
..-—
--...—..-=.—.
.—__-
.__.,-
~.
~:
,.
1~
\1
!
1r
,[
.......... ...
..” ---------
—..
ovenLamp Replacement
fron; the pan. Carefully pour out
Ihc ~rease in the pan iiltO a proper
container. Wash and rinse the
(>r~ilerpan and rack in hot,
st~apywater.
If food has burned on: sprinkle the
rack wi[h detergent while hot and
cover with wet paper towels or a
dishcloth.That way, burned-on
foods will soak loose while the
meal is being served.
Do not store a soiled broiler
pan and rack in the broiler
compartment.
Ovea shel~’es
Youmay clean the oven shelveswith
a mild abrasitrecleanser,following
manufacturer’sdirections. After
cleanjn~. rinse the shelves with
a
clean w~ter and dry with a dry
s;
cloth. To remove heavy, burned-on
soil, yOLImay use soapy metal
~~~-pads, following rnan~~facturer’s
o‘%’ directions. After scrubbing, wash
~~ithsoapy water, rinse and dry.
I{elnovableBroiler Drawer
‘ro relmove:
1. When broiler is cool, remove
rack and pan.
2. Pull the broiler drawer out until
it stops, then pLISh
it back in about
one inch.
3. Grasp handle, lift and pull
broiler drawer out.
Clean the broiler drawer with hot,
soapy water.
The oven lamp (bulb) is covered
with a removable glass cover that
is held in place with a bail-shaped
wire. Remove oven door, if
desired, to reach cover easily.
1. Hold hand under cover so it
doesn’t fall when released. With
fingers of same hand, firmly push
back wire bail until it clears cover.
Lift off cover. DO NOT REIMOVE
ANY SCREWS TO REMOVE
COVER.
2. Replace bulb with a 40-watt
household appliance bulb.
To replace cover:
1. Place it into groove of lamp
receptacle. PLIII
wire bail forward
to center of cover until it snaps into
place. When in place. wire holds
cover Ilrmly. Be certain wire bail is
in depression in center of cover.
2. Connect electrical power to
the ran:e.
To replace:
1. Hold the broiler drawer in the
raised position as you slide it
partway into the range. Then
lower the drawer and push it
completely closed,
(co]ltir7L4ed
?zexfpag
------
‘,
..
-“
. ....,
..
—.. —.—.—. -.—--—
—--“—
_.——
-----------
...—.-—.
.—
——-
”..-..— . . ..——.——.——
_—_
(on all models except those with
Contin~lous-Cle:lllillg
ovens)
Wlithproper ccare,the porcelain
enamel interior will retain its
attractive finish for many Yewis.
Soap anti water will normally do
the job. Heavy spattering or
spillovers may require cleaning
with a mild abrasive cleanser.
Soapy, wet pads may ~lSO be used.
Do not allow food spills with a
high sugar or acid content (such aS
milk, tomatoes, sauerkraut, fruit
juices or pie filling) to remain on
the surface. They may cause dull
spots even after cleaning.
Household ammonia may make the
cleaning job easier. Place 1/2 cup
ammonia in a shallow glass and
leave in a cold oven overnight. The
ammonia fumes will help loosen
the burned-on grease and food.
If necessary. you may use a caustic
cleaner. Follow the package
directions.
Be careful where the oven cleaner
is sprayed.
@Do not spray oven cleaner on the
electrical controls and switches (on
models so equipped) because it
could cause a short circuit and
result in sparking or fire.
* FJ4JIIOtallow a film from the
cleaner to remain on the temperature
sensing bulb—it could cause the
(Jven to heat improperly, (The bulb
is located at the rear of the oven.)
carefully wipe the ‘OLl]b
clea[)af(er
each oven c]ct]ning, being careful
not to move (he bulb as a change
i[l iis position coLIldaffect how
the oven bakes.
Specialcareof
continuous-cleaning
OveIlInterior
(on modelsso equipped)
The Continuous-CleaningOveIl
cleans itself while c[)ol~ing.The
oven walls carefinished with a
special coating that cannot be
cleaned in the usual manner with
soap, detergents, steel wool pads,
commercial oven cleaners, coarse
abrasive pads or coarse brushes.
Use of such cleansers and/or the
use of oven sprays will cause
permanent damage.
The special coating is a porous
ceramic material~ which is dark in
color and feels slightlyrough to
the touch. If magnified, the surface
would appear as peaks, valleys and
sub-sulfate “tunnels.” This rough
finish tends to prevent grease
spatters from forming little beads
or droplets that run down the side
walls of a hard-surface oven liner,
leaving unsightly streaks that
require hand cleaning. Instead,
when spatter hits the porous finish,
it is dispersed and partially
absorbed. This spreading action
increases the exposure of oven
soil to heated air and makes it
somewhat less noticeable.
Soil may not disappear completely
and at some time after extended
usage, stains may appear that
cannot be removed.
‘Thespecial coating works best
2. Remove shelves and cookware. -~- ---3. Soil visibility mayberedtlcedbY ‘-~”-” ~~
operatingthe oven at 4~~°F.Close
the doorand turnOWN CON~OL @ :
knobto WO”F.Timefor at least four
hours. Repeated cycles may be
necessao’before improvementin
appearance is apparent.
Remember: During the
operation of the oven~the door
and other range surfaces will get
hot enough to cause burns. Do
not touch. Let the range cool
before replacing oven shelves.
4. If a spilloveror heavy soiling
occurs on the porous surface, as
soon as the oven has cooled,
remove as much of the soil as
possible using a small amount of
water and a stiff-bristlenylon
brush. Use water sparingly and
change it frequently,keeping it as
clean as possible, and be sure to
blot it up with paper towels, cloths
or sponges. Do Ilot ~-~~b
OrscrLlb
with paper towels, cloths or
sponges, since they will leave
unsightly lint on the oven finish.
If water leaves a white ring on the
finish as it dries, apply water again
and blot it with a clean sponge,
starting at the edge of the ring and
working toward the center.
Do notuse soap, detergent,
steel wool pads9‘cOmnleraial
oven clea12eY9
silicone Qvell
sprays, Coarsepads or Coarse
brushes on the porous surface,
These products will spot, clog
and mar the porous surface and
reduce its ability to work.
Do not scrape the poToEls
011Snlall anloullts of Spatter. It
does not work well with larger
spills, especially sugars, egg or
dairy mixtures.
‘Thisspecial Coating is not used
011oven sileIves9oven bottom or
door !iller. Remove these to clean
Jvith a commercial oven cleaner to
prevent damaging the ContinuousCleaning Oven coating.
‘Fro$C!dtiilT12S
~coi%tinuous”
f:]~~~~;:~g
LI~y~ei]:
10Lci r:]n~’eoarts cool before
rubber
hiindling.“l:
iJl~ r~~c{>inmend
#
[:lo:;ji:s1:’>
~.!,.f?f’(lrll
v~’’llen
Cle:ining.
si~~face
witlI a lcnifeor spatula-—
they could permanently damage
the finish.
I
t.
I
!
1
i
1
,.,.-r,i
,: ‘\,
.’
I
‘...- .-
I
/
) ,.”,
.,,
e..
.—.——
-----
Q-.
. .
,
..--.—-—-—
---
———-
———-
—.
-—--—.-_......-———_
—
———
---
.-...
”.-.=.
..=..,
--.—
------
-
-.
.-,..
..7.,
.
.
.
,
.
GENERAL DIRECTIONS
Drain fat and cool pan and rack slightly.(Do not let soiled pan and rack stand in oven to cool.)
Sprinkle on detergent.Fill the pan with warm water and spread a damp cloth or paper towel over
the rack. Let ptn and rack stand for a few minutes.Wash; scour if necessary,Rinse and dry.
OPTION: The broiler pan and rack may also be cleaned in ii dishwasher.
Control Panel
=Damp Cloth
*Paper Towel
a ,Soapand Water
DO NOT USE abrasives,
cleaning powders, steel WOOI
or plastic balls. They will mar
the surface.
Control Knobs
*Mild
Soap andWater
Pull off knobs. Washgently,but do not soak. Dry and rctum control knobs to range,
Outside Glass Finish
DSoap and Water
Washall glass with cloth dampened in soapy water. Rinse and polish with a dry cloth. If knobs
are removed, do not allow water to run down inside openings in the glass while cleaning.
0Soap and Water
DO NOT USE steel wool,
abrasives, ammonia, acids or
commercial oven c!eaners.
To safely clean surfaces: wash, rinse, and then dry with a
soft cloth.
Porcelain Enamel and
Painted Surfaces*
Paper Towel
“ Dry Cloth
@Soap and Water
DO NOT USE oven cleaners,
cleansing powders or harsh
abrasives. These might scratch
the surface.
If acids should spill on the range while it is hot, use a dry
paper towel or cloth to wipe them tlp right away. When the
surface has cooled, wash and rinse, For other spills, such as
fat smatterings,etc., wash with soap and water when they
have cooled and then rinse. Polish with dry cloth.
Outside of Oven Door*
“ Soap and Water
DO NOT USE oven cleaners,
cleansing powders or harsh
abrasives.
To remove door for easier cleaning: open [o BROIL
position, grasp door by sides, and lift up and away from
hinges. Use soap and water to thoroughlyclean both the
inside and outside of door. Rinse well. To replace: grasp
door by sides, line up door with hinges, and push lirmly into
place. NOTE: Soap left on door liner causes additional
stains when oven is reheated.
“ Soap and Water
“ Soap-Filled Scouring Pad
e Commercial Oven Cleaner
Remove oven door (see above). DO NOT place door under running water, or immerse, Use
same directions for cleaning as for Oven Liner, on next page.
—
I
Inside of Oven Door:+:
—
——”
●
shelves
Soap and Water
I *0 Dishwasher-Safe
Wipe with a damp cloth to remove soil. Do not wipe when
oven is in use.
—
Shelves can bc cleaned in a dishwasher or by hand, using soap and water. Rinse thoroughly to
remove any soap after cleaning.
Surface Burner Grates
* Soap and Water
~Plastic Scouring Pad
Lift out when cool. Soak up to 30 minutes, if desired, in a warm solution of mild liquid de[ergent.
Scourwith a plastic pad to remove burned-on food particles. Dry in a warm oven.
Il[]rner Cil~s (on model
~Soap and Water
~Plastic Scouring Pad
Lift out when cool. Soak up to 30 minutes, if desired, in a warm solution of mild liquid detergent.
Scourwi;h a plastic pad to remove burned-on food particles. Dry in a warm oven.
s ,So!utionof Mild Liquid
Dclcrgcnt arid Water
“ Soap and Water
~Mild Ahrtisivc Cleanser
* Damp Clo[h
DONOT USE steel wool or
~brasiveCleaner&they will
:Iogthe burner openings and
;cratchthe burners.
\\!i[h scaled burners)
Surface IIurner Heads
(oil IIIodclswith
scaled burners)
Wipe off burner heads. If heavy spillover occurs, remove
burner heads from range (see Care and Cleaning section).
Soak upside-down in a solution of hot water anclpro~iuc[for
cleaning the inside of coffee makers, such as Dip-It@brand.
Rinse burner heads and wipe away any remaining soil with a
cloth or soft brush, Drain out water and dry burners in a warm
oven for
minutes before returning thcm to the range.
—
Wipe off burner heads. If heavy spillovcr occurs, remove
burners from range (see Care and Cleaning section).
Soak upside-down in a solution of hot water and product for
cleaning the inside of coffee makers, such as Dip-It(~brand.
Rinse burners and wipe away any remaining soil with a cloth
or soft brush. Drain out water and dry burners in a \vilrIn
oven for 30 minutes before returning them [o the range.
30
DO NOT USE steel WOOI
or
abrasive cleaners—tiley will
clog tl~eburner openings aI~d
scratch the burners, and may
short out the spark electrode.
o Solution of Mild Liquid
Detergent and Witlcr
~ Soapfind Wi\[cr
* iMildAbrasive Cieilnser
s Daml>Cloth
$~~illa~cof l~l:~rin:ldcs,fruit juices. tomato SilLICCSiind bas[ing rnilterials containing acids may cause discoloration and should be wiped Upimme(iiaiely.
..,;
!:.*
1<>
. ___——..—.—— .———.
__....——
.... ............
-.,.—T.
‘/,,>;
.
. .
. .
.
.
. .
.
. . . .
.
. .
. .
.
.
. ..-.——---——————
__.———.——.
.——
.——..
I
I
k
.—.
-..
.————.—.
—.—..-—
——
r40’TE:Let raige/Qven
parts COOIbefore touching or halldiing.
—
,
I’tAErr
filA~I;RIAIS TO USE
Drip Pans
(on modcis so equipped)
‘ soap and water
“ Soap-Filled ScouringPad
PorcelainEn2nlel
Oven Botioni:~
*Soap and Water
“ Soap-FilledScouring Pad
oCommercialOven Cle8ner
GENIZRAI.DIRECr~IONS
.—
Cool p:~nsslightly.Sprinklewith detergent and wash or scour pans widl warm wolcr.Rinse
and dry.
Use same directionsfor cleaningas for Oven Liner, below.
Use foiiowingdirectionsfor Standard Porcelain Enamel Oven only. See separate i~~structionsin tl~issection for Co!~tiiiuous-CleaningOven.
.
nSoap and Water
Allow to cool beforecleaning.
Oveil I.iner’<
FOR LIGHT SOIL: Frequent wiping with mild soap and water (especially after cooking meat)
CAUTION: When in
“ Soap-pilled Scouring Pad
t!s~,light bll]bs(on
will prolong (he time between major cleanings. Rinse thoroughly.NOTIC:Soap left on lir~er
‘ CommercialOven Cleaner
causes additional stains when oven is reheated.
modelsso equipped)
FOR HEA\~YSOIL: Choose a non-abrasiveoven cleaner and follow label instructions,using
can become w’arm
thin layer of cleaner.Use of rubber gloves is recommended.Wipe or rub lightly on stubborn
enough to break if
spots. Rinse well. Wipe off any oven cleaner that gets on thermostat bulb. When rinsing oven
touched w’i[hmoist
after cleaning, also wipe thermostatbulb.
cloth or lo~vel.When
cleaning. a~roid
touching ~varm!amps
with cleaningcloths.
—.
‘-G,--—.
;~..-.*..
E
=..=..
e-~.-+
—.
—
‘iSpillageof marinades, fruit juices, tomato sauces and basting materials containing acids may cause discoloration and shou!d be wiped up immediately
Take care not to touch hot portionof oven. When surface is cool, clean and rinse.
i.
I
1’
/ -., ,
,., , 1’
(
\?,
.
..—
..
10provide accurate temperatures.
Fiowever,if your new oven is
i-ep]acing one you have usedfor
severalyears,youmay noticea
c!ifference~nthe degree of
browning or the length of time
required when using your Fdvorite
recipes. This is because oven
temperature controls have a
tendency to “drift” over
a period of years.
Before attempting to have the
thermostat of your new oven
changed, be sure you have
carefully followed the baking time
and temperature recommended by
the recipe. Then, after you have
used the oven a few times and you
feel it is too hot or too cool, there
is a simple adjustment you can
make yourself on the OVEN
CONTROL knob.
PLiiIthe knob off the shaft and look
at the back side. There is a disc in
[he center of the knob skirt with a
pointer opposite one of the screws.
Cooler
Hotter
To make an adjustment,carefully
loosen (approximatelyone turn),
but do not completely remove the
two screws that hold the skirt to
the knob. Hold the knob blade in
one hand and the outer skirt in the
other hand.
To raise the oven temperature,
move the screw opposite the
pointer toward the word HOTTER.
You’llhear a click for each notch
you move the knob. To lower the
temperature, move the screw
opposite the pointer toward the
word COOLER. Each click will
change the oven temperature
approximately 10°F.(Range is plus
or minus 60° from the arrow.)
We suggest that you make the
adjustment one click from the
original setting and check oven
performance before making any
additional adjustments.
After the adjustment is made,
press skirt and knob together and
retighten screws so they are snug,
but be careful not to ove~~ighten.
Re-install knob on range and
check performance.
Air Adjustment shutter
for oven Burner
The air adjustment shutter for the
oven burner regulates the flow of
air to the flames.
See Installation Section of this
book for instructionsfor location
and proper adjustment of shutter.
,.->r
———..—.—.—.
——.— . .—.. .....-.
—.”-.
..———— ----------
[:!
....... . ---
FORYOURSAFETY
If you smell gas:
1* open tindows.
2. Don’t touch eIectical Stitches.
3* Efinguish any open flme.
4. Imlnedately call your gas supplier.
FORYOURSAFETY
Provide adequate clearances between the range
and adjacentcombustible surfaces.
Depth with Door Closed
(Includes Door Handle):
Do not store or use combustible
Inatetialsy gasotine or otierflmmable
vapors and iiquids in tie ticini~
of*is
or any Omer appliance,
I
a%-=-30”——
I1
28%”
(Glass Door)
27%”
(P&;c$in
I
See Chart
Below for
Height
Range Height:
~~,,
RGB524ER
46X” RGB528ER
RGB524PR
RGB528GER
RGB529GEP RGB628GER
I
-!
[
“\,
-—.
.—.—.
..—. _-_ —____ -—-z
- , —--—--.—-..—.—_______
o
---
....-.—.
........
...-..
A%%,L.m
..%
s.yq[~$$ ~, ~
I:iitir:k+’
d:3?Rf3BJ?
SAFETY
iHsTRucTloM$
~
x:
;j
~L
&ilswllatio12
of tiis range must Codormtith
# localcodes, or in .&e absenceof local Codes,
%Gtil+&eNatioR%d Fuel Gas code, mTsI
~ Z223. 1, latest edition.
‘-This range has been design-certifiedby the
&~~ericanGas Associationaccording to ANSI
Z21.1,latest edition.As with any applianceusing
gas and generating heat, there are certain safety
precautions you should follow.Youwillfind these
precautions in the Important SafetyInstructions
in the f~-ontof this book. Read them carefully.
QHaveyour range installedby a qualfled
installer or service technician.
~ Yourrange must be electricallygrounded
in accordance with local codes or, in the absence
of localcodes, in accordance with the National
Electrical Code (ANSI/NFPA70,latest edition).
See Electrical Connectionsin this section.
@Before installingyour range on linoleum.or any
other synthetic floor covering,make sure the
floor covering can withstand 180°Ewithout
shrinking, warping or discoloring.Do not install
the range over carpeting unless a sheet of l/4inch thick plywoodor similar insulator is placed
between the range and carpeting.
~ lflake sure the wall coverings around the range
can withstand heat generated by the range up
to 200°F
~Avoidplacing cabinets above the range. To
reduce the hazard caused by reaching over the
open flames of operating burners, install a
ventilatio~]hood over the range that projects
forward at least 5 inches beyond the front of the
Cabinets.
~ The ventilating hood must be constructed of
sheet metal not less than 0.0122inch thick (No.
?8U.S.Standard gauge). Install above the
:ooking top with a clearance of not less than 1/4
nch between the hood and the underside of the
‘combustiblematerial or metal cabinet. The hood
nust be at ieast as wide as the appliance and
entered over the appliance. Clearance between
he cooking surface and the ventilation hood
urface MUST NEWR BE ~SS m
24
NC13ES.
If cabinets are placed above the range, allow
~~~inimum
clearance of 30 inches between
le cooking surface and the bo~tomof
[protected cabinets.
)
,.>.-
)
@Ha 30-inchclearancebetween cook~ngsurface
and overhead combustiblematerialor metal
cabinets ca~~notbe maintained,protect the
underside ofthe cabinets abovethe cookingtop
with not less than l/4-inch insulatingmillboard
coveredwith sheet metal not less than 0.0122inch
thick (No.28 U.S.Standard gauge).
@Clearancebetween the cookingsurface and
protected cabinets MU~ NE~R BE WSS
M
24 INCHES. The vertical distancefrom
the plane of the cookingsurface to the bottom of
adjacentoverhead cabinets extendingcloser than
1 inch to the plane of the range sides must not be
less than 18inches. (See Dimensionsand
Clearances illustrationin this section.)
@Caution: Items of interest to children should
not be stored in cabinets abovea range or on the
backsplash of a range-children climbingon the
range to reach items could be seriously injured.
N1 ranges can tip and injury
could result. To prevent
accidentaltipping of the
range, attach an approved
Anti-Tipdeviceto the wall.
(See Installingthe Anti-Tip
Device in this section.) To
check ifthe device is
installed and engaged
properly,carefullytip the
range forward. The Anti-Tip
device should engage and
prevent the range from
tipping over.
If you pull the range out tiom the wallfor any
reason, make sure the Anti-Tipdevice is engaged
when you push the range back against the wall.
@For your safety,never use your range for
warming or heating the room. Your oven and
range top are not designed to heat your kitchen.
Top burners should not be operated without
cookware on the grate. Such abuse could result in
fire and damage to your range and willvoid your
warran~.
QDo not store or use combustible materials,
gasoline or other flammable vapors and liq~~idsin
the vicinityof this or any other appliance.
Explosions or fires could result.
QDo not use oven for a storage area. Items stored
in the oven can ignite.
GDo not let cooking grease or other flam~~~able
materials accumulate in or near the range.
;>..
-.l..
,—
.
.
. . . ..-—.—.-—.
-—.
m
-
-=—=.
——
---
—i-—-:=
-—-
——,LT
.---——==:=.
.:
- . ---d]
.- -.\
\
..-’
.-_.“
—..
~
FOOLS
You WBLL
HEEn
Q,SeeDimensions and Clearancesin this section
for all rough-in and spacing dimensions.These
dimensionsmust be met for safe use of your
range. The locationof the electricaloutlet and
pipe opening (see Gas Pipe and Electric Outlet
bcations) maybe adjusted to meet specific
requirements.
@The range may be placed with 0’1clearance
(flush) at the back walland sidewalls of
the range.
~ Phillipsand flat-bladescrewdrivers
~ Penciland ruler
~ TWOpipe wrenches (one for backup)
~ 1%[1
open-endor adjustablewrench
~ 3/161?open-end or socket wrench
@Nlutdriver
&nBITsoMak
mTER#ALs
You MY
Do not locate the range where it may be subject to
strong drafts. hy openings in the floor or wall
behind the range should be sealed. Make sure the
openings around the base of the range that supply
fresh air for combustion and ventilation are not
obstructed by carpeting or woodwork.
Your range, like many other household iterns, is
heavy and can settle into soft floor coverings such
as cushioned vinylor carpeting. Use care when
moving the range on this type of flooring. It is
recommended that the followingsimple and
inexpensive instructions be followedto protect
your floor.
The range should be installed on a sheet of
plywood (or similar material) as follows:men the
f100Ycoveyifigeflh at thefront of the range, the
area that the range willrest on should be built up
with plywood to the same level or higher than the
floor covering. This willallowthe range to be
moved for cleaning or servicing.
.-
.~..
,..
E.
~;
pc:+
..
HEEO
~ Gas line shut-offvalve
@Pipejoint sealant or UL-approvedpipe thread
tape with Teflon*that resists action of natural and
LP gases
@Flexiblemetal applianceconnector (1/2” I.D.).
A 5-footlength is recommended for ease of
installationbut other lengths are acceptable.
Never use an old connector when installinga new
range.
~ Flare union adapter for connectionto gas supply
line (3/4’1or 1/211N~x 1/211I.D.)
~ Flare union adapter for connection to pressure
regulator on range (1/2” NPT x 1/2’1I.D.)
*Teflon: Registered trademark of DuPont
PREMMTIOM
(
= Removeall tape and packaging. Li up the
;
cooktop (on models with dual burners) and
remove any packing matetial under it. Be sure to
remove plastic film that covers some chrome
parts (around oven doors, side trim).
~ Take the accessory pack out of the oven.
~ Check to be sure that no range parts have come
loose during shipping.
~
n Depending on your range, you’llfincithe model
~ and serial nui~lberson a label on the front frame
~:
‘~ oft he range, behind the storage drawer or
~ broiler drawer.
1/ .D.L.,
,,,.-,,
F””%
,.,.-.,=”...:
.Ak=—.
—.. ——.
.—..-m
----“
a~..+-.,J==
A-.-A--.-4-.-
(P’,
i.
h...d+”
-,L.—.
.
“ ‘\
(......)
mi?RY3iBEABEQUATEGM SU9PLY
~ ‘four range is designed to operate at a pressure
~’()[4 inches of water column on natural gas or, if
.Z:Itsigned for LP gas (propane or butane), 10
~lnchesoof water column. Nflakesure you are
‘)supplyln~ your range with the type of gas for
~~~hich
it is designed. If, at any time in the future,
you decide to use this range on a different type
of gas, conversion adjustments must be made
I)ya service technician or other qualtied
person before attempting to operate the range
on that gas.
I~orproper operation, the pressure of natural gas
supplied to the regulator must be between 4 and
13 inches of water column. For LP gas, the
pressure supplied must be between 10 and 13
inches of water column. When checking for
proper operation of the regulator, the inlet
pressure must beat least 1 inch greater than the
operating (manifold) pressure as given above. me
pressure regulator located at the inlet of the range
manifold must remain in the supply line
regardless of whether natural or LP gas is being
used. A flexibie metal appliance connector used to
connect the range to the gas supply line should
have an I.D. of 1/21’and be 5 feet in length
(shorter and longer lengths are acceptable) for
ease of installation.
. ..—.
.-.....
——
---—.—
mare.
/
/ 2“
I
/
./
\
>
%
A
l~ecausehard piping restricts movement of the
range, the use Gfan A.G.A.-certtied flexiblemetal
applianceconnector is recommended unless local
codes require a hard-piped connection. Never use
an old connector when installing a new range. If
{hi’har{lpiping lllethod is used, you must
careiuliy aii<qnthe pipe; the range cartnot be
~~](lvecl
ZLfteithe connection is macle.
~>~~v~nt gas leaks, pu~ pipe joint compound 011,
‘~’c~
01.wrap l]ipi~thread tape wit-h‘~eflon* around, all
ll~[de(ex(ernal) pipe threads.
~iI)tiI’{111[
‘!’,I1{JI1:
]<~~~is({~]-~{]
li-:~c~ci~larl(
1
24”
This area allows I
for flush range
instal~ationwith
through-the-wall
connection of pipe
stub/shut-off valve
and rear wall
120V outlet.
Shut off the main gas supplyvalvebefore
~isconnecting the old range and leave it off until
Iew hook-up has been completed. Don’t forget to
-e]ight the pilot on other gas appliances when you
turn the gas back o~I.
.
allows-l
for flush range
itlstallation wi!h
through-the-wall
connection of pipe
stub!shut-off valve
and rear wall
120V outlet.
/
Shortest
1
#
y“
/“’”
..——
I
- —
connector
Hookup
Pressure
Regulator
4
Adapter
L&+
a
v
Hookup
Union
Nipple
i
90°
Elbow
1+
AL_,@m
* ~
..
Black Iron Pipe+9
‘c
u
I
Manifold Pipe
.-“r,,)
-’‘.
.. ...-
Adapter +
~
-#
Union+
a
.—
m&@$!HEgT
FMEMH%ETOGM (continued)
:~,1. Install a manual gas line shut-off valve iu the
;Jgas line in an easily accessed location outside of
the range. Make sure everyone operating the
$:range knows where and how to shut off the gas
3 supply to the range.
$=’
s>
2. Install male 1/211flare union adapter to the
1/211N~ internal thread elbow at inlet of
regulator. 0~3 models equipped titi dud
burners9 install male 1/21!flare union adapter to
the I/21t NPT internal thread at inlet of pressure
regu~ator. Use a backup wrench on the regulator
fitting to avoid damage.
f~en installing the range from the front, remove
the 90° elbow for easier installation.
3. Install male 1/2’1or 3/411flare union adapter to
the NTPTinternal thread of the manual shut-off
valve, taking care to back-up the shut-off valve to
keep it from turning.
4. Connect flexible metal appliance connector to
the adapter on the range. Position range to permit
connection at the shut-off valve.
5. When all connections have been made, make
sure all range controls are in the off position and
turn on the main gas supply valve. Use a liquid
leak detector at all joints and connections to
check for leaks in the system.
e~mo~:DO ~o~usE
CHECK FOR GM
~e
A HE
To
$
~men using test pressures greater than 1/2 psig
to pressure test the gas supply systel~~of the
residence, disconnect the range and individual
shut-offvalvefrom the gas supply piping.When
using test pressures of 1/2 psig or less to test the
gas SUpplysystem, simplyisolate the ra:ge from
the gas supply system by closing the individual
shut-offvalve.
,. ...
..___
... ..%
—-.—
... ...
Because of potentialsafety hazards associated
with certain conditions,we strongly recommend
against the use of an extension cord. However, if
you still elect to use an extension cord, it is
absolutelynecessary that it be a UL-listed,3-wire
grounding-typeapplianceextension cord and that
the current carrying rating of the cord in
amperes be equivalentto, or greater than, the
branch circuit rating.
The power cord of this applianceis equipped with
a three-prong (grounding) plug which mates with
a standard three-prong grounding wallreceptacle
to minimizethe
possibilityof
PREFERRED r
rAETtioD
electric shock
<8>
hazard
from this
Q
appliance.
%
Q
The customer
m/ ~,
should have the
NSURE PROPER
wallreceptacle
ROUND EXISTS
and circuit
EFORE USE
checked by
a qualti~edelectrician to make sure the receptacle is
properly grounded.
Where a standard two-prongwall receptacle is
encountered, it is the personal responsibility and
obligation of the customer to have it replaced with
a properly grounded three-prong wall receptacle.
Do NOT, mDER m
cIRcuMwmQEs,
Cm OR ~MOW ~E m~m(GROUND)
PRONG
moMmE~Om~ cOm.
~1~~
——.
E usage
Sitiatiolls whereAppfimce Power
Cor<ltill be Disconnected Prequentiy.
An adapter maybe used only on a 15-ampcircuit,
Do not use an adapter-on a 20-ampcircuit.W%ere
~ocalcodes permit, a ~MPOWY
CONNEmON maybe made to a properly
grounded two-prongwallreceptacle by the
use of a UL-listedadapter,availableat most
hardware stores. The larger slot in the adapter
must be aligned with the larger slot in the wall
receptacle to provideproper polarityin the
connectionof the power cord.
----. ,
TEMPORARY METHOD
m~~
(ADAPTER PLUGS NOT
PERMITTED IN CANADA)
~@71
w-”
ALIGN LARGE
PRONGS/SLOTS
w
ENSURE PROPER
GROUND AND
FIRM CONNECTION
BEFORE USE
I
I
CAmON: Attachingthe adapter ground
terminal to the wallreceptacle cover screw
does not ground the applianceunless the cover
screw is metal, and not insulated, and the wall
receptacle is grounded through the house
wiring.The customer should have the circuit
checked by a qualifiedelectricianto make sure
the receptacle is properly grounded.
W%en disconnecting the power cord from the
adapter, always hold the adapter with one hand. H
this is not, done, the adapter ground terminal is
very likely to break with repeated use. Should
this happen, DO NOT USE the appliance until a
tnroper ground has again been established.
—
Do not use an adapter p’lugin these situations
t:
because disconnecting of the power cord places
undue strain on the adapter and leads to eventual
failure of the adapter .grounclterminal. The
4~
customer should have the two-prong wall
receptacle replaced with a three-prong
@rounding) receptacle by a qualified electrician
before using the appliance.
The installation of appliances designed for mobi]e
home installation must conform with the
lManufactured Home Construction and Safety
Standard, Title 24 CFR, Part 3280 (formerly the
Federal Standard for Mobile Home Construction
and Safety, Title 24, HUD, Part 280) or, when
such standard is not applicable, the Standard for
Manufactured Home Installations, latest edition
(Manufactured Home Sites, Communities and
Set-Ups), ~S1 M25.1, latest edition, or with
local codes.
Eie&fri~ois@@nne&f
1. Locate disconnect plug on the range back.
2. Finch sides of connector and pull out of
range back.
M@delsE~ui#~edwiBh
DualsuEn@Fs
ModelsEqwip#@d
W$ith
seal~d BMrn@n
(
{y
-..—
me range should be installedin its permanent
positionbefore any pilots are lit or adjusted.
CAUTION:Make sure the surface burner control
knobs are in the “OFF’ positionsbefore
attempting to light the pilots.
1. Raise the cooktop.
2. Light both pilots with a match.
3. To avoidpilot outage, use caution when closing
cooktop after fighting pilots.
2.
adj
be
smallhole near th; center
of the manifoldpanel.
3. To adjust, use a blade-typescrewdriverwith a
shaft diameter of less than 3/16”. Turn pilot
adjustment screw until pilotis 5/16’1higl~.Do not
reduce the flame to less than 5/16’1or pilotoutage
may occur.A pilotflame burning higher than
recommended may generate soot (carbon black)
on the bottom ofyour cooktop.
Lightthe OwenP;i@B
:
\
I
~ote:Do not leave standing pilot lit in a newly
obstructed or remodeled home or apartment that
rill be unoccupied for more than a month.
~ach pilot flame was acljusted at the factory to be
proximately 5/1611tail. A tinge of yellow
appearing at the upper tip is norinal. If you find
pilot adjustment is necessary, follow instructions
at right.
CAmON: Make sure the OVENCONTROL
knob is in the “OFF’ position before attempting to
fight the pilot.
1, Removethe broiler drawer by slidingthe
drawer all the way out and then ring slightlyto
remove it from its tracks.
2. Locate the pilot at the
back of the broiler
compartment. me pilot
is attached to the left
side of the oven burner.
3. Light the pilotwith a
match. No adjustments ar
required for natural gas.
For LP gas, see How to
Convert the Range for
Use with LP Gas or
Natural Gas.
‘).
.
I
I
,
I
,
\
.—
QuaIi& ofmaRnes
The combustionqualityof burner flamesneeds
to be determined visually.
(A) YeMowaames—
Callfor service
Heater
Pilot
Flame
sutia%@
Surner
#gmi#:@R
Operation of all cooktop and oven burners should
be checked after the pilots have been lighted (on
models so equipped) and range and gas supply
lines have been carefully checked for leaks.
Stindhg
Pilot
Models
Select a top burner knob and simultaneously
push in and turn to HI position.The burner
should light within a few seconds. Try each
burner in succession until all burners have been
checked.
Electic I@ition Models
Select a top burner knob and simultaneously push
in and turn to LIT’Eposition. Youwillhear a
snapping sound indicating proper operation of the
spark module. Once the air has been purged from
tl~esupply lines, burners should light within 4
seconds. After burner lights, rotate knob out of
the L~TEposition. Try each burner in succession
until all burners have been checked.
.----
6
(B) Yeuow tips 011
‘oUkr cones—
Normalfor LP gas
~–
4-. Turn the OWN CONTROLhob to a setting
above200°E The pilotflame willincrease in
size and impingeon the temperature-response
element.The oven burner willtight in 30-90
seconds.
The oven burner willoperate until the set
temperature is reached. The oven burner will
continue to cycle on and off as necessary to
maintainthe oven at the temperature indicated
by the OWiWCONTROLknob.
.
d
(c) %& blue flmee
Normalfor natiral gas
Hburner flmes look like (A),callfor service.
Normal burner flames should look like (R) or (C),
depending on the type of gas you use.
With LP gas, some yellowtipping on outer cones
is norinal.
OwanSurmsr lgm;8i@m
Youroven is designed to operate quietlyand
automatically.To operate the oven,turn the
OVENCONTROLknob to a setting above 200°R
After 30-90seconds, the oven burner willignite
and burn untilthe set temperature is reached.
;
[=
The oven burner will continue to cycle on and
off as necessary to maintain the oven at the
temperature indicated by the O~N CONTROL [
knob.
Eleetic i~ition mOdelS require electica~
power to operate. ‘Theoven cannot be lit during a
power outage. Gas willnot flowunless the glow
bar is hot.
E the oven is in use when a power outage occurs,
the oven burner will shut off and cannot be re-lit
until power is restored.
.——.-,;
-——.
.——-—...—.---——
-—--.--=
...-—.
.
r .
.-
—-
.—
..
~ ‘~odetermine if the bottom burner flamesare
burning properly,first remove the ovenbottom
,;=and the burner baffle.
1a\&
P
‘ ~>
/
<~<~
\
~J m\
/
“—
Toremove tieoven botiom:
1. Removeknurled screws holding down rear of
oven bottom.
2. Grasp oven bottom at finger slots on each side.
~, Liftrear of oven bottom enough to clear the lip
of range frame, then pull out.
To remove
With the baffle removed, properly adjusted flames
should have approximately111
blue cones and, if
range is suppliedwith natural gas, should burn
with no yellowtipping. with most LP gas, small
yellowtips at the end of outer cones are normal.)
Flames should not liftoff burner ports. E lfilng is
observed, gradually reduce air shutter opening
until flames are stabilized.With the baffle in place,
the flames should burn steady and should not
extend past the edges of the burner baffle.
The shutter for the oven burner is near the back
wall of the oven and behind the broiler drawer.To
remove the broiler drawer:
1. Pull the drawer out until it stops, then push it
back in about one inch.
2. Grasp handle, lift and pull broiler drawer out.
tieburnerbdfle:
1. Use a nut driver to remove the 1/411hex-head
screw show in tie illustration above. Do not
remove my Otier screws.
~. Pull baffle straight out until it is tiee from the
slot that holds it at rear of oven.
Remove the metal shield at the rear of the cavity.
The air adjustment shutter is behind this shield.
To adjust the flow of air to the burner, loosen the
Phillips-head screw and rotate the shutter to allow
more or less air into the burner tube.
1. Remove the storage
drawer, broiler drawer or
l<ickpanel.
2. Use a 3/1611open-end
or socket wrench to back
out both rear Ievehlg legs
approximately two turns.
~, Use a 1:%l!
open-end or
adjustable wrench to back
out the front leveling legs
two turns.
4. Install the oven
shelves in the oven
and position the range
where it will be installed.
5. Check for levelnessby placing a //
spirit level or a cup, partiallyfilledwith water, on
one of the oven racks. Husing a spirit level,take
tworeadings—with the levelplaced diagonally
first in one direction and then the other.
6. Adjust the levelinglegs until the range is level.
7. After the range is level,slide the range away
&omthe wallso that the Anti-Tipdevice can be
installed.
W~ING:
@Range must be secured with an approved
Anti-Tipdevice.
@Unless properly installed, the range could
be tipped by you or a cl]ild standing, sitting or
leaning on an open door.
@After installing the Anti-Tipdevice,verify
that it is in place by carefully attempting to tilt
the range forwarcl.
~ This range has been designed to meet all
recognized industry tip standards for all
normal conditions.
~1~l~e~]seofthis devicedoes not preclude
iippingofthe range when not properlyinstalled.
~’If the hti-Tip device supplied with the
use the
~-ailgecloesnot fit this a~3plicati0n,
u~~versaiI!nti-Tip device ‘~02X7909.
,-,.
2. hcate the outside edge ofthe device2%!’
toward the center of the range from the marked
edge of the range.
~. Using the device as a template, mark the
position of the hole for the screw.
4-.For wood construction, drill a pilothole at an
angle of 20 degrees horn the horizontal.A nail or
awl may be used if a drill is not available.
Mount the Anti-Tipdevicewith the screw
provided.
For cement or concrete construction, you will
need a 1/4” x 1%”lag bolt and a 1/21’0.D. sleeve
anchor, which are not provided. Drillthe
recommended size hole for the hardware.
Install the sleeve anchor into the drilled hole and
then install the lag bolt through the device.The {
bolts must be properly tightened as
recommended for the hardware.
A
5. Slide the range against the wall, and checl<for
proper installation by grasping the front edges of
the rear surface unit openings and caretilly
attempting to tilt the range forward.
f’>
. ... .... .-—
... -—_—_ —___.—.—.—
—..
.....—.
3;” 1/21/open-end wrench
~ Tm]n open-end or socket wrench,
I or adjustable wrench
~ Flat blade screwd~iver (small)
M PR&PmE
MH6E FOR COHWERS!OH
(1)
Twn offgas supp~
at tieWall.
(2) Ttwn offtieelectieal
power to tie
If it is this regulator:
1. Use a coin to remove the cap from the
pressure regulator.
2. Turn the cap over and hook it into the slots.
The type of gas to be used should now be visible
on the top of the cap.
rmge.
If range has not yet been connected to gas supply,
or if flexibleconnectionwas made, range maybe
pulled out horn the -wallto make conversioneasier.
❑
Note: On some models the shut-off valve
may be in a different location.
~ 1. For models equipped with sealed burners,
+-remove the storage drawer, broiler drawer or kick
~ panel and locate he pressure regulator at rear of
~ the range.
Y
)
Remove Screws
this protective cap’
except for conversion
\ fi$.
Access Cover aj%~-J
If it is this regulator:
1. Unscrew the plastic-protectedhex-nut cap
assembly from the top center of the regulator.
~. Carefullypry the protective plastic cap off the
threaded metal cap. Gently pull the plastic washer
off the other threads.
~. Replacethe plastic cap onto the threaded end
displaying the gas type you desire. Press the
plastic washer onto the remaining threads.
~. Reinsert the cap assembly into the regulator.
Do not overtighten, but make s~~rethe washer is
seated securely.
On some models, you may have to remove an
access cover also.
For models equipped with dual burners, remove
the cooktop and locate the pressure regulator at
right rear of range.
~. Follow l-hedirections in box m, E or
that match your regulator type.
❑
-.
‘.
. .
“.,
......——
-..
Cap Assembly
—
E
m
Note: On some models the shut-off valve
may be in a different location.
LP orificespuds are in a smallplasticbag packed S
~with this Use and Care book. LP orificespuds
have a 2-digitnumber and the Letter “L”on one
side. Each orificespud willalso have 1 or 2
4
grooves on one side, denotingthe locationon the
range where it is to be installed.
is this regulator:
1Hit
1. Removecap and forciblysnap out plastic
plunger from bottom of cap.
2. Turn plunger over and forcibly snap back in
original location.Note: Plunger must snap into
position;the gas type you are converting to must
be visible on lower side of plunger.
3. Reinsert the assembly into the regulator.
t of Ra
E arifi~e
s#wd*f@,c@mw@tiing~@
H@Bw,al
6as:
Natural gas orificespuds have a 3-digitnumber on
one side. Each orifice spud willalso have 1, 2 or 3
grooves on one side, denoting the locationon the
range where it is to be installed.
@
&
..II
(?,
‘j
Front of Ra
1. Remove grates, burner caps and burner heads.
5. To prevent leakage, make sure the or~~ce
spuds are securely screwed into the gas inlet
tubes. Use a small wrench to hold the inlet tube
hex to prevent it tiom twisting.
6. Put old orifice spuds back in the bag to save for
possible future conversion.
Note: Han orifice spud is aecidently
dropped, the cookbp
can be raised by
$-...
disengaging
q>fi~”
the 2 front clips
tith a large flat
blade screwdriver.
DO NOT attempt to raise the eooktop withot~t
removing all 4 bfirner bases.
.!-
1
.,
i,
\
‘.-,
/
“
~“--’)
—..
‘L . ..~
.-.—..——
. 1If
wires through the burner holes in
,,~ ‘-..-,
,.-
I
‘.k
-j~
~ wires were disconnected to remove the
--’-L.cooktop, feed
.-.
,-.3
-‘ f~~~-:;)
the cookIo~.Attach to each burner electrode
‘ terminal c~refully, making sure not to bend the
~ terminal. Then lower cooktop until it snaps
.$ over the clips.
Elec?rode
l-all Scre}v
7. Carefullyinsert burner bases straight down
with the tube over the ortice spud. Replacethe
screws, mting SUre tie ti~ screvv iS opposite
be burner elechode h each burner basee
assemblies
straight up and
set aside to gain
access to surface
burner spuds.
3. With a 5/1611 .
wrench, remove
each of the four
spuds on the
surface burner
gas inlet tubes
anclreplace them with the correct gas spuds
mounted in a holder at the right rear of the
range, above the regulator. Natural gas spuds are
brass and LP gas spuds are red. mount the
spuds that you removed from the inlet tubes back
ill the holder.) To prevent leakage, make sure
spuds are securely screwed into gas inlet tubes.
E Aa~usT@wEH
THERMOSTAT
[kr
R%@d%l$Equipped
Wiflh
SB%nwmg
Pi!@%)
1. Removethe oven
controlknob.
2. Locatethe thermostat
adjustmentscrew at left of
thermostat shaft.Turn
screw clockwiseuntilthe
smallpointer is at LP or N,
dependingon the type of
gas you are converting to.
3. Replaceoven control knob.
E COMVERT
FHEOVEMBURNER@mHFBcEs
OwenBwrner
1. Removebroiler drawer, ovenbottom and
burner baffle.The lower burner orificespud is
located behind the storage drawer,broiler drawer
or kick panel. (On some models, a metal shield
must be removed to access the ortice.)
2. TOconvert to W gaS9
use a 1/2” wrench to turn
the lower burner orifice
spud cloc~se. Tighten th
spud only until it is snug.
To prevent leakage, do
not overtighten the spud.
To convert to natird gas9 loosen the spud
about 2 turns.
~. Replace the burner assemblies.
5. Keep all spuds with your range so you have
them if yoLlmove or get a different gas hook-up.
...<->j
~,,
-_,.
....’”’
,/;-,
.
-L
m~~~us~
AI%
AOJUSTFAEMT
SMUTFER
For W
loosen the
~aS,
Phillipshead screw and
rotate the shutter to the full
Screw
open position.With baffle in
place,flames
should have
Air Shutter
approtirnately l-inch blue
cones and should not extend
beyond the edges of the
burner baffle.After 30 seconds of burner
operation,check for flames liftingoff burner
ports. If liftingis observed, graduallyreduce air
shutter opening untilflames are stabilized.
For natird gas, the shutter should be open 1/2
to 2/3 of the way.
1. Turn all top burners to LOW.
2. Removeall 4 knobs.
3. With a small flat blade screwdriver,turn the
valveset screws cloctilse to decrease flame size,
counterclockwiseto increase flame size. Adjust
until the flame is the proper size.
4. Replaceknobs.
l~en all connections have been made, make sure
all range controls are in the off position and turn
on the main gas supply valve. Use a liquid leak
detector at all joints and connections to check for
leaks in the system.
CA~ION:DO NOTUSEA FWE
mm$.
I CHECKFORGm
TO
I
l~en using test pressures greater than 1/2 psig to
pressure test the gas supply system of the residence,
disconnect the range and individual shut-off valve
from the gas supply piping. When using test
pressures of 1/2 psig or less to test the gas supply
system, simply isolate the range from the gas supply
system by closing the individual shut-off valve.
adjustment sc;ew. It can
be accessed through the
small hole near the center
of the manifold panel.
3. To adjust, use a blade-type screwdriver with
a shaft diameter of less than 3/16”.~ur~~pilot
adjustment screw until pilot is 5/1611high. Do not
reduce the flame to less than 5/16” or pilot outage
may occur. A pilot flame burning higher than.
recommended may generate soot (carbon black)
on the bottom of your cooktop.
‘ 1,
,,, .
(A)
Yellow
fla~ies—
Call for service
(B) YeElowtips on
outer
eones—
Normal for LP gas
(c)
Sofi blue flmesNorrnalfor naturalgas
/-p,+
‘,
j
,,
‘---- - -“
.——
—————————
so~ver
.-.--—
--.
.————.
TROBLENI
POSSIBLE CAUSE
.——
* Plug on range is not completely inserted in the electrical outlet.
e The circuit breaker in your house has been tripped, or a fuse has been b]own.
e Oven controls not properly set.
@Make sure electrical plug is plugged into a live power outlet.
QBurner holes on the side or around the top of burner may be clogged, Remove burners
(on models with dual burners) or burner heads (on models with sealed burners) and
clean them with a toothpick. Make sure you do not enlarge the holes.
TOP BURNERS
DO NOT LIGkIT
OR DO NOT
BURN EVENLY
“%
%$
~A
L
~&
.a..
..... .
—
—.
BU~TERS HAVE
YELLOW OR
YELLOW-TIPPED
FLAMES
(A) Yellow
on outer
names—(B) Yellowtips
Call for service
cones—Norrnal for LP gas
(~) ~Oft blue flames—
Normal for natural gas
~If burner flames look like (A), call for service. Normal burner flames should look like
(B) or (C), depending on the type of gas you use.
e With LP gas, some yellow tipping on outer cones is normal.
~~~~~
I
~If range is connected to LP gas, check all steps in the Installation Instructions.
~~AM~~
VERYLARGE
OR YELLOW
>.=.._3.5
,;**.?
g Make sure thermostat capillary bulb (located in upper portion of oven) is in correct
.=/~-.k’
**r~i
o..--%
position, not touching oven sides and not coated with anything.
~Aluminum foil being used improperly in oven.
~Oven vent blocked on top of range.
* Incorrect cookware being used. Check each cooking sectionfor cookwa~etipso~
recommendations.
GOven bottom not securely seated in position.
* OVEN CONTROL knob set incorrectly or not turned on.
~Check common problems listed in Baking, Roasting and Broiling sections.
—.
~Range electrical plug mtlst be securely seated in a live power outlet. Check for blown
iuse or tripped circuit breaker.
OVENDOESNOT
COOKPROPERLY
~Bulb may be loose or burned out.
~Electrical plug must be plugged into a live power outlet.
~ ]mproper air/gas ratio in oven, Adjust oven burner air shutter.
P~ln odor from the ins~lati~n around the oven liner is normal for the first few times
“ <)ven is used. This is tempor:try.
.
—.
I
——.
—
./:;,,~!.
.
r.
——
. ....“.....
”-————
—.
--
.—
.—
———
—.—-—..—-...-—-.
.... ..
L._.-
Whateveryourquestionabout any
Hotpoint major appliance,GEAnswer
Centel@informationserviceis available to help.Yourcall-an.clyoLIr
question-will be answeredpromptly
and courteously,And you can callany
time.GEAnswerCentex@
serviceis
open 24 hours a day 7 daysa week.
Our consumer serviceprofessionals
~~-ill
provide expert repair serviceon
--” your Hotpoint appliance, scheduled
.=.?
~.
~,.3=at
a time bat’s convenient for you.
I&R”
}iany
GE Consumer SeIwit:e compan)’o
operated iocations offer yOLIservice
today or tomorrow, or at your coI !~.enicn ce (7:00 a.m. to 7:()[) p.m. weekCIays,9:00 a.m. to 2:()() ]3.111.
Saturc]ays).
our filc{ory-trainecl technicians kno~v
~-our appliance inside ancl o It—so
rllost rep;iirs can I}e hanclle( ill jus(
You can have the secure feeling that
GE Consumer Service ;vill still be
there after your Hotpoint product
warranty expires. Purchase a GE
contract while your warranty is still in
effect and you’ll receive a substantial
discount. With a multiple-year contract, you’re assured of future service
at toclay’s prices.
Telecommunication Detice for the Deaf
t
, *.—
.
.- -i
!_
. .
—.
..-
‘‘
r?. ,?.A
5t’T,
m-
. . . .
,“,
-
-...-.”.
.
...”...
!-.
I
“.
,.
a--+.
r..—-—
,.
—...,.——
——
YOURHOTPOINTGAS RANGE
WARRANTY
.
d
Save proof of original purchase date such as your sales slip or cancelledcheck to establishwarranty period.
—
.
FULL ONE-YEAR WARRANTY
For one year from date of original
purchase, we will provide, free of
charge, parts and service labor in
your home to repair or replace
any pati of fhe range that fails
because of a manufacturing
defect.
This warranty is extended to
,theoriginal purchaser and any
succeeding owner for products
purchasedfor ordinary home use
in the 43 mainiand states, Hawaii
and Washington,D.C. In Alaska the
warranty is the same except that it
is LIMITED because you must pay
to ship the product to the service
shop or for the service technician’s
travel costs to your home.
All warranty service will be
provided by our Factory Service
Centers or by our authorized
Customer Care” servicers during
normal working hours.
Look in the White or Yellow Pages
of your telephone directory for
GENERAL ELECTRIC COMPANY,
GENERAL ELECTRIC FACTORY
SERViCE, GENERAL ELECTRICHOTPOINT FACTORY SERVICE
or GENERAL.ELECTRIC
CUSTOMER CARE@SERVICE.
@Service trips to your home to
teach you how to use the product.
Read your useand carematerial.
if you then have any questions
about operating the product please
contact your dealer or our
Consumer Affairs office at the
address below, or call, toll free:
GE Answer Cente@
800.626.2000
consumer information service
o Improper installation.
if you have an installation problem,
contact your dealer or instalier.
You are responsible for providing
adequate electrical, gas, exhausting
and other connecting facilities
as described in the Installation
Instructions provided with the
product.
~ Replacement of house fuses or
resetting of circuit breakers.
~ Failure of the product if it is used
for other than its intended purpose
or used commercially.
~ Damage to product caused
by accident, fire, floods or acts
of God.
WARRANTOR IS NOT
RESPONSIBLE FOR
CONSEQUENTIAL DAMAGES.
J
~
~
‘—--l!
Some states do not allow the exclusion or limitation of incidental or consequential damages, so the above limitation or exclusion
may not apply to you. This warranty gives you specific legal rights, and you may also have other rights which vay from state to state.
To I(now what your legal rights are in your state, consult your local or state consumer affairs office or your state’s Attorney General,
!
[,
!,
:~
{i
.
I.-—...
2-:-L-S--.,
—-—.
L . . .
...
-- . . ..—..-...-.
-. .. . . . :“ .. . . ..4JV
.. ..
.:. :.,,--+.- .. ..-.-. %-L—N.D_~:
.-—.—..—
/ ..—
~al”[
t~O.16~!D27~j
=..—
I PL}IJ
39-~;765
, .__.,
_..-r\JO.
__.—
--------
j
-_ --.-.=
=r=~_-,
-...-—.-——......——_.—..—.
—...,4.
- ,-—.
—-...-...?-:...
-=>-
i=——d-—
- --.-—
—-—
—..
-_—.—
---------- -- —--.! —————
I
,,
{
i
.---
—-.—
–..J!]
- . .
--