1
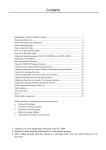
Massage Chair
CYBER-Relax
AS-888
Massage Chair AS-888
Medical Equipment Approval in Japan: No. 27BZ0878 10BZ6001
USER MANUAL
Safety precautions..................................................... 2
Features..................................................................... 6
Name and functions of components.......................... 8
Assembly (Back-rest) ............................................. 11
Preparation before use ............................................ 12
Reclining and use of foot rest ................................. 14
Use of the AUTO COURSE ................................... 16
When terminating use on the way........................... 20
Movements during the AUTO COURSE................ 21
Use of selective functions ....................................... 24
Movement adjustment of selective functions ......... 26
When changing the COURSE on the way .............. 29
When trouble is suspected ...................................... 31
Maintenance............................................................ 32
Storing..................................................................... 33
Care and inspection................................................. 34
Specifications.......................................................... 34
Be sure to read this manual thoroughly in order to ensure
(Effect
and Efficacy)
of professional
proper
use. Substitution
In particular,
make masseur
certain to read the section
•
Recovery from fatigue
•
Promotion of blood circulation
•
Removal of muscular fatigue
Keep
manual
in safe place
•
Reliefthis
of muscular
stiffness
•
Alleviation of neuralgia or muscular pain
"IMPORTANT SAFETY INSTRUCTIONS".
•
•
•
•
so that it can be found easily.
Thank you for your purchasing of our massage chair CYBER-Relax AS-888.
Read this manual carefully before use to learn about proper handling methods.
After reading though, keep this manual at a safe place where you can consult whenever it is
necessary.
Make sure you have received the warranty certificate.
Contents
IMPORTANT SAFETY
INSTRUCTIONS
Important Safety Instructions ............................................. 2
Features .............................................................................. 6
Name and functions of components ................................... 8
Assembly (Back-rest)....................................................... 11
Preparation before use...................................................... 12
Reclining and use of foot rest........................................... 14
Use of the AUTO COURSE............................................. 16
When terminating use on the way .................................... 20
Movements during the AUTO COURSE ......................... 21
Use of selective functions ................................................ 24
Movement adjustment of selective functions................... 26
When changing the COURSE on the way ....................... 29
When trouble is suspected................................................ 31
Maintenance ..................................................................... 32
Storing .............................................................................. 33
Care and inspection .......................................................... 34
Specifications ................................................................... 34
(Effect and Efficacy) Substitution of professional masseur
• Recovery from fatigue
• Promotion of blood circulation
• Removal of muscular fatigue
• Relief of muscular stiffness
• Alleviation of neuralgia or muscular pain
1
IMPORTANT SAFETY INSTRUCTIONS
When using an electrical appliance, basic precautions should always be followed, including the following:
Read all instructions before using this appliance.
DANGER
To reduce the risk of electric shock:
1.
Always unplug this appliance from electrical outlet immediately after using and before cleaning.
2.
Improper connection of the equipment-grounding conductor can result in a risk of electric shock.
Check with a qualified electrician or serviceman if you are in doubt as to whether the product is properly
grounded. Do not modify the plug provided with the product - if it will not fit outlet, have a proper outlet
installed by a qualified electrician.
WARNING
To reduce the risk of burns, fire, electric shock, or injury to persons:
1.
An appliance should never be left unattended plugged in.
Unplug from outlet when not in use, and before off parts.
2.
Do not operated under blanket or pillow.
Excessive heating can occur and cause fire, electric shock, or injury to persons.
3.
Close supervision is necessary when this appliance is used by, on, or near children, invalids, or
disabled persons.
4.
Use this appliance only for its intended use as described in this manual.
Do not use attachments not recommended by the manufacturer.
5
Never operate this appliance if it has a damaged cord or plug, if it is not working properly, if it has
been dropped or damaged, or dropped into water.
Return the appliance to a service center for examination and repair.
6.
Do not carry this appliance by supply cord or use cord as a handle.
7.
Keep the cord away from heated surfaces.
8.
Never operate the appliance with the air openings blocked.
Keep the air openings free of lint, hair, and the like.
9.
Never drop or insert any object into any opening.
10. Do not use outdoors.
11. Do not operate where aerosol (spray) products are being used or where oxygen is being
administered.
12. To disconnect, turn all controls to the off position, then remove plug from outlet.
2
IMPORTANT SAFETY INSTRUCTIONS
WARNING
13. Grounding Instructions
This product must be grounded. If it should malfunction or breakdown, grounding provides a path of least
resistance for electric current to reduce the risk of electric shock. This product is equipped with a cord
having an equipment-grounding conductor and a grounding plug. The plug must be plugged into an
appropriate outlet that is properly installed and grounded in accordance with all local codes and
ordinances.
This product is for use on a nominal 120-volt circuit, and has a grounding plug that look like the plug
illustrated in sketch A. A temporary adapter that looks like the adapter illustrated B and C may be used to
connect the plug to a 2-pole receptacle as shown in sketch B if a properly grounded outlet is not available.
The temporary adapter should be used only until a properly grounded outlet (sketch A) can be installed by
a qualified electrician. The green colored rigid ear, lug, or the like extending from the adapter must be
connected to a permanent ground such as a properly grounded outlet box cover.
Whenever the adapter is used, it must be held in place by a metal screw.
GROUNDING METHODS
- Sketch A -
- Sketch B -
Grounded
outlet
Grounding
pin
- Sketch C -
Adapter
Grounded
outlet box
Metal
screw
Tab for
grounding screw
Save these instructions
14. Massager is intended for Household Use Only.
15. Be sure to check that there is not anybody (children in particular), pet or obstacle behind prior to
inclining the back rest.
Otherwise, it may result in a cause of injury or trouble.
16. Be sure to check that there is not anybody (children in particular), pet or obstacle behind prior to
lowering the foot rest.
Otherwise, it may result in a cause of injury.
17. Be careful not to operate the back rest with the cord wound on the main unit, or with the cord
hooked to the other obstacle.
Otherwise, the unreasonable force may be applied to the cord, probably resulting in a cause of fire or
electric shock.
18. Be careful not to put the hand into the clearance at the underside of back rest or to the clearance
between the back rest and arm rest.
Otherwise, it may result in a cause of injury.
3
IMPORTANT SAFETY INSTRUCTIONS
WARNING
19. Do not attempt to stand on the arm rest, foot rest or back rest.
Otherwise, the massager may fall down, resulting in injury.
20. Do not use the massager on the head, arm, knee or abdomen. As well as, do not put your hand or
leg between knead ball.
Otherwise, the user may feel sick or an injury may occur.
21. Do not attempt to plug/unplug the power plug with wet hands.
Otherwise, it may result in injury or electric shock.
22. When the cover cloth is broken (when the built-in mechanism is exposed), do not use such
massager, but send it for repair.
Otherwise, it may result in a cause of accident, or injury.
23. Never attempt to disassemble the massager. Do not allow any personnel other than repair engineer
to disassemble or repair the massager.
Otherwise, it may result in a cause of fire, electric shock or injury.
24. The following persons are requested to consult a doctor prior to use.
Otherwise, the user may feel sick or an injury may occur.
•
•
•
•
•
•
•
•
•
Those who are under the medical treatment or particularly those who complain of indisposition
Those who have malign tumors
Those who suffer from heart trouble
Those who are in menstrual period or pregnant
Those who require complete rest
Those whose backbone is abnormal or bent
Those who desire to use the massager on a part of the body that is diseased or receiving medical
treatment
Those who are feverish (38°C or over)
Those who have weak bones (osteoporosis etc.)
25. If sickness or pain is felt during use, stop using the massager and consult a doctor immediately.
Otherwise, it may result in injury.
26. Attempt to use the massager up to 15 minutes for each use. Limit the use of massager at one point,
up to 5 minutes.
Otherwise, the use of massager at one point for a long time continuously may result in adverse effect.
27. Check the knead ball position for the sake of safety before leaning on the massager slowly. Do not
twist the body, but lean on the massager straight, so that the backbone is located at center of
knead ball.
Otherwise, leaning on the massager abruptly may injure the backbone or result in injury.
28. Do not pull the cord, but the plug, when unplugging the massager.
Otherwise, the electric shock or short-circuit may occur, resulting in fire.
29. Do not use the massager with bare skin.
Otherwise, it may result in a cause of injury.
30. Do not move the massager with a person on it.
Otherwise, the massager may fall down.
4
IMPORTANT SAFETY INSTRUCTIONS
WARNING
31. After use, be sure to set the POWER switch to [OFF] position.
Otherwise, it may result in accident or injury due to child's mischief.
32. Do not attempt to pull the back pad forcibly or hang from the back pad.
Otherwise, the back pad may come off, probably resulting in injury or broken massager.
33. Do not attempt to damage, bend, pull, twist, or bundle the cord forcibly.
Otherwise, the cord may break, resulting fire or electric shock.
34. Do not use the massager on other than the designated voltage.
Otherwise, it may result in a cause of fire or electric shock.
35. Do not use the massager in the bathroom, or places where humidity is high.
Otherwise, it may result in electric shock or damage.
36. When the massager becomes inoperative, disconnect the power plug immediately for prevention of
accident, and ask the sales agent for inspection/repair information.
Otherwise, it may result in fire due to electric shock, leaking current, short circuit, etc.
37. Switch the power [OFF] instantly at the time of power failure, as well as pull the power plug out
from the socket.
Otherwise, it would become dangerous at the time of power comeback.
38. Be careful not to fall asleep during massage.
Otherwise, it may result in a cause of accident or injury.
39. Do not use the massager with other medical instruments (excluding foot type massager).
Otherwise, it may result in an accident or injury.
40. Place the massager main unit at a level floor surface.
Otherwise, if it is placed at an unstable place, it may fall down, probably resulting in a cause of injury.
41. The maximum permissible weight of the massager is 100 kilograms.
Do not use the massager with those who weigh more than 100 kilograms.
Otherwise, an accident may happen or damage to the machine may result.
5
Features
1. Point Navi sensor
(When using the AUTO COURSE only)
• Before starting the massage,
the Point Navi scans the
body shape and the posture.
Technique to scan the
massage line along the
body shape has realized
effective massaging.
2. “3D” mode
• “Deep” and “Gentle” features have been
added to the KNEAD, TAPPING and
WAVELET functions.
Massage of new sensation relieves
stiffened and tired muscles.
3. “Stretch” mode
• Stretch function relieves strains from bottom
to top by applying rolling motions
simultaneously with the shiatsu treatment.
•
•
Three-dimension massaging that adds up
the “Fore-aft” movements to the
conventional massaging functions has
realized a stereoscopic kneading feel
emulating professional skills.
Complex massaging that adds up the
KNEAD, TAPPING and WAVELET to the
stretch function relieves stiffness or fatigue
more effectively.
4. Massaging with exquisite movements closely resembling human hands
•
10 basic movements that integrate sensations of professional masseur which are more friendly to
human being
KNEAD UP
KNEAD DOWN
TAPPING
WAVELET
SHIATSU
Relieves stiffened
muscle from
bottom to top.
Relieves stiffened
muscle from top
to bottom.
Comfortable taps Simultaneous taps Presses are
promote the blood and knead down
concentrated at a
circulation.
produce excellent particular section.
feeling of
comfort.
6
Features
DEEP KNEAD
RUBBING
STRETCH
Knead-up at a level
higher than the hard
Knead-down at a
lever lower than the
soft
Relieves stiffness
from bottom to top
with combined
massaging of shiatsu
and rolling
WHOLE
Entire back area of
the body is relieved
uniformly from
stiffness.
5. Fatigue relieving “AIR massage”
• Stimulation by air for promotion of blood
circulation on the lower half of body
AIR bags are installed for legs, thighs and bottom to
massage the lower half of body with pleasant
stimulation by air.
Blood circulation can be promoted just like the
condition of relaxation.
• Adjustable air massage
Intensity of the AIR massage can be selected from 3
levels of “Strong”, “Foot stretch” and “Gentle”.
“Foot stretch” is a massage mode with new sensation
that combines the massaging of legs with up and down
movements of the ottoman.
CAUTION Since when the “Foot stretch” is used, the
foot rest moves up and down in the condition that air is
filled in the foot rest, it must be confirmed that there is
no child, pet or object under the foot rest.
PART
Relieves stiffness
from narrow area
intensely.
Bottom
Thigh
Legs
2-step knead; Effective to
promote blood circulation
6. Four automatic courses can be selected depending on symptoms
Whole course ................. To relieve stiffness from the entire area of the back
Shoulder course ............. To relieve the neck and shoulder intensely
Waist
7 MIN
course .................. To relieve the waist intensely
course ................. Whole course is reduced to approx. 7 minutes.
* Additional 3 modes can be selected in the
Whole , Shoulder and
Waist
modes depending on your need.
* There is no body shape detection during the 7 MIN course.
7. Intensity is adjustable at 5 levels for the AUTO COURSE.
*
Although the intensity is adjustable during the COURSE, there are some points on the waist and
neck/shoulder, which are fixed and unable to adjust.
8. Letter “S” curve running along the body line
7
Name and functions of components (Main unit)
Pillow
Turn over to the back before
starting the massage.
Seat
Massages by air the bottom
and thighs.
Back rest
Back pad
Relax and lay the
back on.
Arm rest
Space for the
remote controller
Store the remote
controller here
after use.
Foot rest
Air massage is applied
to the legs.
Seat pad
Power switch
Turn the switch to
“OFF” after use.
Power supply fuse
Service receptacle
(50 W max.)
Power consumption
exceeding 50 W could
cause trouble.
Power cord
Power cord plug
Grounding terminal
8
Castor
Name and functions of components (Remote controller)
“START/RESET” button
Starts, stops massaging and stores the knead
balls at the specified position.
START/
RESET
“STOP” button
This button allows stopping the
massaging movement.
Knead balls stop at the position.
During the AUTO COURSE, they stop
temporarily at the first push and resume
the movement at the second push.
STOP
LCD display
Displays detail of setting or cautions. (Page 12)
AUTO
COURSE
WHOLE
UP
“ADJUST SHOULDER” button
This button allows the fine adjustment of
shoulder position during the shoulder
position detecting process of the AUTO
COURSE.
SHOLDER
DOWN
WAIST
ADJUST
SHOLDER
7 MIN
“AIR” button
This button allows adjustment of the “AIR”
intensity in the AUTO COURSE.
STRENGTH
AIR
FOOT REST
DOWN
UP
RICLINER
UP
DOWN
“FOOT REST” button
This button adjusts angles of the foot rest
only.
“COURSE” start button
Desired body section and type of massage
can be selected out of 10 options in the
AUTO COURSE.
“STRENGTH” button
This button allows adjusting the
massaging intensity at one of 5 levels
during the AUTO COURSE.
“RECLINER” button
This button allows adjusting angles of
the back rest and the foot rest. The
foot rest moves interlocked with the
back rest.
* Movements of “Air”, “Tapping” and
“Wavelets” stop during reclining.
<Under the remote controller lid> (Movements of selective functions)
“WHOLE ⋅ PART” button
“ADJUST SHOULDER” button
This button allows adjusting finely the shoulder
position during the Shoulder adjustment.
ADJUST
“Knead balls move” button
Knead balls moves up and down.
* This is not operable during the “WHOLE”.
“STRENGTH” adjust button
Massaging intensity can be adjusted at 7 levels.
UP
WHOLE
⋅ PART
DOWN
MASSAGE
“MASSAGE” selector button
STRETCH
Desired function can be selected from 8
types of massaging.
STRONG
GENTLE
3D
SPEED
“SPEED” adjust button
Massaging speed is adjustable at 3 levels.
* This is limited to the Knead Up, Knead Down,
Tapping and Wavelet functions.
Set the massaging area by moving up or
down along the line of back.
When the “WHOLE” is selected but the
shoulder position is not set, the “Shoulder
adjustment” is conducted.
AIR
Knead Up
Knead Down
Tapping
Wavelet
Rubbing
Deep Knead
Stretch
Shiatsu
WIDTH
STRENGTH
“STRETCH” button
Massaging function with which the
Knead Up”, “Tapping” or “Wavelet” is
added to the stretch or stretch movement
can be selected.
“WIDTH” adjust button
Width of knead balls is adjustable at 3 levels.
* This is limited to the Tapping, Stretch, Shiatsu and
WHOLE ⋅ PART.
“3D” button
Massaging function with which the
STRENGTH movement is added to the
“Knead Up”, “Knead Down”,
“Tapping” or “Wavelet” can be selected.
“STRENGTH” adjust button
Air massaging intensity is adjustable at 3 levels.
* Stimulation by air and elevation of foot rest are performed
simultaneously during the “Foot stretch”.
“AIR” button
Desired section can be selected out of
four types of air massaging.
9
Name and functions of components
Information indicated on LCD display
♦ Display during the AUTO COURSE (See page 16 for method of use.)
Displays the name of the
AUTO COURSE on the
move.
1. REJUVENATE mode
2. REFRESH mode
3. RELAX mode
Massaging function on the move
WHOLE BODY
WAVELET
Present position display of
knead balls
st:
FOOT
STRETCH
MIN
Display of STRENGTH of
massaging with knead balls
Display of 5 hardness
levels during the AUTO
COURSE
Display of remaining
massaging time, in
minute
STRENGTH increases as much as it goes to
left.
Detection level is shown during the body
shape detection.
♦ Display when selected function is operating (See page 24 for method of use.)
Display of massaging area
“WHOLE/PART/POINT”
Name of selected function
3D TAPPING POINT
3-level display of knead
ball speed
sp:
St:
w:
SHOULDER
AIR:
STRONG
MIN
7-level display of hardness of
massage
3-level display of space
between knead balls
Present position display of
knead balls
Strength display of AIR
massage
Display of air massaging of
bottom on the move
Display of remaining time of
massaging, in minute
Display of air massaging of
thigh on the move
Display of “SHOULDER” setting
Display of air massaging of
legs on the move
♦ Backlight
•
Backlight glows if any switch button is pushed.
•
Backlight extinguishes as approx. 2 minutes elapse in the stored condition.
•
It extinguishes also when no switch is pushed for approx. 2 minutes after turning on the power
switch.
10
Assembly (Back-rest)
Assembly/Folding
Raise the back rest in the arrow direction and
confirm that the stopper (enlarged view in the
circle) is locked. (You will hear a click.)
Hold down the stopper located under the back rest
(enlarged view in the circle) in the arrow direction
and slowly bring down forward the back rest.
* Take care not allow it falling down suddenly.
Fixed
Released
Stopper
Stopper
CAUTION
CAUTION
Do not insert hands or fingers
between the arm rest and the back
rest when moving the back rest.
Do not touch any section other
than the section in the circle
when operating the stopper.
Use of back pad and pillow
Attach the back pad using the fastener on the back rest. Attach the pillow using the magic tape on the
back rest.
1. Install the back pad.
2. Install the pillow.
Magic tape
Back pad
Fastener
Pillow
Back pad
•
•
•
Turn down the pillow backward before starting the massage.
If you feel the massaging too hard, return the pillow to the normal position.
When you do not use the massaging, you can use it as a reclining chair with the back pad and the
pillow attached at the specified positions.
WARNING
Always confirm before use that the cloth cover over the back rest is not broken by lifting
the back pad. Confirm also other sections of the cloth are not broken.
(If any breakage is discovered regardless how tiny it is, stop the use immediately,
disconnect the power cord plug and consult your dealer for repair.)
Using the chair without mending the breakage could cause injury or electrical shock.
11
Preparation before use
WARNING
Following persons must consult physician before using the product.
•
Who are suffering from malignant tumors
•
Who are suffering from acute sickness (with aches)
•
Who has a heart disease
•
Who uses a medical electronic device, which is embedded in the body, such as the pace-maker, or
others
•
Who has some abnormality or deformity of or on the backbone
•
Who is undergoing medical treatment or feels some physical abnormality
•
Who wishes to use the product at the section on the body, which was treated previously or is ill now
•
Who needs repose
•
Who has problems in their legs with blood circulation
•
Who is pregnant or in a period of monthly illness
•
Who is suffering from fragility and osteoporosis
•
Who has a high fever
•
Who suffers from dysesthesia
•
Who suffers from anemia
Use of the product could cause abnormal condition on the body.
Before reclining the back rest or elevating the foot rest, confirm there is nobody, pet or object at the
behind, under the foot rest, or others. It could cause accident, injury or damage on furniture.
When massaging around or periphery of neck, take care of the movement of knead balls and refrain from
massaging with excessive intensity. Accident or injury could result.
When reclining the back rest, be careful not to pinch hands, arms or feet between the back rest and the
seat/arm rest. It could cause injury.
Raise the back pad before use to check if the cloth cover on the back rest as well as other sections is not
broken. (If it is, you must stop the use immediately, disconnect the power cord plug and consult your dealer
for repair.) Using the product with the cloth cover broken could cause injury or electrical shock.
Refrain from allowing a child or person, who cannot express one’s will, to use the product alone. There is
risk of electrical shock or injury.
Do not use or store at a bathroom, or others, where the environment is highly humid. It could cause
electrical shock, fire, trouble or mold.
CAUTION
Time of use should not exceed 15 minutes, or 5 minutes when using at the same position on the body.
Using for extended period of time could damage muscles or nerves.
<Request> Refrain from using the product for more than 30 minutes a day.
If any abnormality is observed or felt on the body during using the product, stop it immediately and
consult a doctor.
Make sure to turn off the power switch after use.
There is risk of trouble as a result of abuse by children.
Insert the power cord plug securely to prevent dirt accumulating on the legs. It could cause electrical
shock, short circuit or fire.
Do not use the chair at the vicinity of source of fires such as stove, or others or while smoking. Refrain
also from using it on a heating device such as the hot carpet, or others. There is risk of fire.
Do not massage the elbow, knee, head or belly. It is also prohibited to insert hand or foot between the
knead balls. It could cause injury or disorder of physical condition.
Never place hands, head, or others under the foot rest or bottom of the chair. It could cause accident or
injury.
Do not use while wearing any hard hair ornament. You could get hurt.
12
Preparation before use
Place of installation
Secure sufficient spaces around the chair.
* Request: As the back rest is reclined, the foot rest is turned up 50 cm or more
at the opposite end. Minimum 50 cm of spaces must
be secured both at the front and the back of the chair.
* Request: Bottom of the chair may damage the tatami mattress
or floor. It is recommended to spread a piece of
mattress under the chair.
50 cm or more
Changing the place of installation
Hold down on the top of the back rest using the castors as the fulcrum.
Front part of the chair will be lifted. Move the chair in this position.
CAUTION
•
•
•
•
Do not attempt to move the chair while a person or object sitting
on the seat. There is risk of upset.
Where the floor surface is not hard enough, the chair should not
be moved using the castors or by dragging directly on the floor.
Do not hold the seat or foot rest to move the chair.
Front part of the chair is rather heavy. Take sufficient care when
lifting the front part of the chair.
Castors
Grounding connection
CAUTION
Securely connect the grounding cable at the
chair.
Unless the grounding cable is
installed, it could cause electrical
shocks when the earth leakage
occurs. Consult your dealer to
install the grounding cable.
When the grounding terminal is provided at
the wall receptacle
• Extend the grounding cable
from the grounding terminal
on the chair main unit to that
on the receptacle.
Grounding cable
Do not connect the grounding cable
at the followings:
Gas pipe … There is risk of explosion or
ignition.
Telephone cable or lightning rod … It is
dangerous when struck by lightning.
Water pipe … Earth connection is not
established if plastic pipes are connected
on the way.
When the grounding terminal is not provided
at the wall receptacle
• Consult your dealer or electrical work
contractor for the installation of grounding
cable. (Class 3 connection. Service is provided
on the charge basis.)
13
Reclining and use of foot rest
(Preparation)
•
Insert the power cord plug in the receptacle and turn on the power switch on the chair.
Reclining the chair
1. While resting your back on the back rest, press the “DOWN” of the RECLINER switch.
If you keep holding down the
“DOWN” switch, the back rest
goes down while the foot rest
comes up.
Upright condition
FOOT REST
DOWN
UP
RECLINER
UP
DOWN
Stimulation by the knead ball is
intensified as much as the back
rest is turned down.
WARNING
Before reclining the back rest or elevating the foot rest,
confirm there is nobody, pet or object at the behind, under the
foot rest, or others. It could cause accident, injury or damage
on furniture.
Reclined condition
CAUTION
Do not step on the back rest,
arm rest or foot rest. Person
stepping on or the chair itself
could upset the chair main unit
and cause accident or injury.
2. When the back rest is turned down to a desired angle, remove the hand from the
RECLINER switch.
FOOT REST
RECLINER
• Angle of the foot rest will also change along with the
DOWN
UP
UP
DOWN
reclining angle of the back rest.
Request: When changing the reclining angle during massaging, gradually recline checking the
intensity of massaging.
14
Reclining and use of foot rest
3. To raise the back rest, press the “UP” button of the RECLINER switch.
If you keep holding down the
“UP” button, the back rest goes
up while the foot rest comes
down.
FOOT REST
RECLINER
DOWN
UP
UP
DOWN
How to use the foot rest
1. Use the “UP” or “DOWN” button to adjust the angle of foot rest.
WARNING
Before reclining the back rest or elevating the foot rest, confirm
there is nobody, pet or object at the behind, under the foot rest,
or others. It could cause accident, injury or damage on
furniture.
15
FOOT REST
RECLINER
DOWN
UP
UP
DOWN
Use of the AUTO COURSE (Operate the following with the remote controller lid closed)
1. Turn ON the power switch.
(Power switch is found at the back of the left arm rest.)
“POINT NAVI SYSTEM” and “PUSH THE START SWITCH”
will be shown on the LCD display alternately.
(They are displayed regardless whether the lid is opened or
closed.)
Sit deep in the chair and recline yourself comfortably with the back
of your head rest on the back rest.
*
You should be better to recline the back rest slightly to use
well the Point Navi.
POINT NAVI
SYSTEM
PRESS THE
START SWITCH
2. Push the “START/RESET” button.
“Select a COURSE” is displayed.
Select a COURSE
AUTO
COURSE
WHOLE
UP
3. Select a desired AUTO COURSE and push the button on
the remote controller.
SHOLDER
DOWN
ADJUST
SHOLDER
WAIST
7 MIN
STRENGTH
AIR
4. When
WHOLE BODY
REJUVENATE
REFRESH
RELAX
you
have
selected
one
of
“WHOLE”,
“SHOULDER” or “WAIST”, a submenu to select from
further three modes is displayed.
The display is switched at each push on the “AUTO COURSE”
button and the selected mode starts to operate.
If you select the “7 MIN” course, the body shape detection is
bypassed.
16
Use of the AUTO COURSE (Operate the following with the remote controller lid closed)
WHOLE BODY
During
“POINT NAVI”
5. Name of selected COURSE and a message are displayed
(for example, in case of “1. REJUVENATE” of “WHOLE
BODY” course). Operation of the AUTO COURSE and the
body shape detection start simultaneously.
6. During the body shape detection, the detection point is
indicated with the lamp and the detection level is shown
WHOLE BODY
Working
“POINT NAVI”
with the detection indicator.
7. Detection of shoulder position is conducted automatically
following the body shape detection.
WHOLE BODY
Searching
Your Shoulder
8. As the shoulder position is detected, you can finely
WHOLE BODY
Adjust Roller
for Shoulder
adjust the shoulder position. Push “
” marks to
adjust while they are flickering. (It is indicated also with
the beep that sounds for approx. 5 seconds.)
UP
AUTO
COURSE
WHOLE
SHOLDER
DOWN
ADJUST
SHOLDER
WAIST
7 MIN
STRENGTH
AIR
•
If you detect the body shape by pressing the “START” button, it is
stored in the memory till the massaging is terminated. To change
the body shape after it was stored, press the “START/RESET”
CAN NOT DETECT BODY SHAPE
Press
the course mode
again
button and, after the cycle is completed, start again.
*
When nobody is sitting or it failed to detect the body shape, “CAN
NOT DETECT BODY SHAPE” is displayed. Push the COURSE
button once again, and retry the body shape detection.
17
Use of the AUTO COURSE (Operate the following with the remote controller lid closed)
WHOLE BODY
Complated
“POINT NAVI”
9. As the cycle time to accept the ADJUST SHOULDER
position elapses, Completed “POINT NAVI” is displayed.
10. After showing the CONTOUR OF YOUR BACK for approx.
10 seconds, the screen changes to the display of the
WHOLE BODY
Contour of
YOUR BACK
name of AUTO COURSE massaging at present, present
position of knead balls, type of massage, Strength of
COURSE, air setting and remaining time of massage.
Kind of massage
COURSE name
WHOLE BODY
Air setting
WAVELET
AIR:
STRONG
COURSE Strength
St:
Remaining time
MIN
Knead ball position in
the line of back direction
Knead ball thrust position
11.
AUTO
COURSE
WHOLE
UP
of massaging, the strength of COURSE can be adjusted
at 5 levels.
SHOLDER
•
DOWN
ADJUST
SHOLDER
If you press the “STRENGTH” button on the way
WAIST
7 MIN
Default setting is at “3”.
If you push the button at the next, it returns to the weakest level of
“1” and it goes up step by step at each push on the button.
STRENGTH
*
AIR
There are some positions where the strength is fixed and
unchangeable at some parts of waist, neck or shoulder.
STRENGTH
S
G
18
Use of the AUTO COURSE (Operate the following with the remote controller lid closed)
UP
AUTO
COURSE
Push the “AIR” button so that the present setting is
SHOLDER
high-lighted.
DOWN
ADJUST
SHOLDER
12. You can adjust the AIR setting during the COURSE.
WHOLE
WAIST
•
Display will be switched at each push on the “AIR” button and the
selected movement will start up.
•
Section on the move is displayed on the LCD.
♦
With the “FOOT STRETCH”, the foot rest is brought down while
the air pressure is applied to the section, in order to massage the
7 MIN
STRENGTH
AIR
entire legs.
AIR: STRONG
FOOT STRETCH
AIR: GENTLE
AIR: OFF
CAUTION
Foot rest goes down automatically. Confirm that there is not a
child or pet under the foot rest.
13.
As the cycle of AUTO COURSE completes, the
knead balls return to the Storing position automatically.
Storing
•
If you like to terminate the massage on the way, push the
“START/RESET” button.
The knead balls return to the Storing position also in this case.
Finished
14.
Turn “OFF” the power switch after use.
This prevents the massaging chair from starting when the remote
controller was operated accidentally.
CAUTION
Turn “OFF” the power switch after use.
There is risk of accident by mischief of child.
19
When terminating use on the way
1. If you push the “STOP” button during massaging after
START/
RESET
the body shape detection in the AUTO COURSE,
STOP
“PAUSE” at the display for type of massage starts to
flicker and the knead balls stop on the spot retaining its
present position.
•
To restart the massage, push again the “STOP” button.
•
To terminate the massage on the way, push the “START/RESET”
button.
♦
Knead balls return to the Storing position in this case as well. All
buttons but the “STOP” or “START/RESET” buttons are disabled
WHOLE BODY
"PAUSE"
st:
AIR:
STRONG
MIN
while it is stopped.
"PAUSE" flickers
2. As 10 minutes elapses in the stop condition, the knead
balls are retracted to the Storing position while retaining
Storing
the present position, and the display shows the “POINT
NAVI SYSTEM” and the “PRESS THE START SWITCH”
alternately.
•
“POINT NAVI SYSTEM” and the “PRESS THE START
SWITCH” will be displayed alternately also when the “STOP”
button has been pushed during the working “POINT NAVI” and
POINT NAVI
SYSTEM
“Storing”.
20
Movements during the AUTO COURSE
•
The AUTO COURSE provides preprogrammed movements only, which are not
adjustable.
(Single massaging cycle runs for approx. 15 minutes. Contents of the AUTO COURSE are
changed automatically depending on the remaining time on the timer or body shape.)
•
Following illustrations of the AUTO COURSE shows essential points only for better
understanding.
(WHOLE BODY)
(Neck, shoulders, contour of back and waist are massaged uniformly.)
<Approx. 15 minutes>
WHOLE BODY – REJUVENATE mode
(Working
POINT NAVI)
Knead up
Knead down
Wavelet
Wavelet
Stretch/Wavelet
Knead up
Knead down
Tapping
Wavelet
Knead down
Tapping
Knead up
Wavelet
Knead up
Stretch/Wavelet
Wavelet
Knead down
Knead up
Knead down
Contour of back stretch
Regularizing
“Regularizing” starts when the remaining time
becomes less than 1 minute.
WHOLE BODY – REFRESH mode
(Working
POINT NAVI)
Knead up
Tapping
Wavelet
Stretch
Tapping
Knead up
Wavelet
Tapping
Knead down
Knead up
Wavelet
Stretch/Tapping
Tapping
Knead up
Knead up
Stretch
Knead down
Wavelet
Shiatsu
Knead down
Knead up
Knead down
Contour of back stretch
Regularizing
“Regularizing” starts when the remaining time
becomes less than 1 minute.
WHOLE BODY – RELAX mode
(Working
POINT NAVI)
Knead up
Knead down
Shiatsu
Knead down
Wavelet
Knead up
Wavelet
Contour of
back stretch
Tapping
Shiatsu
Tapping
Wavelet
Stretch
Contour of
back stretch
Wavelet
Knead up
Knead up
Knead down
Contour of back stretch
Regularizing
“Regularizing” starts when the remaining time
becomes less than 1 minute.
21
Movements during the AUTO COURSE
(NECK, SHOULDER)
(Concentrated massaging on the neck and shoulders)
<Approx. 15 minutes>
NECK, SHOULDER – REJUVENATE mode
(Working
POINT NAVI)
Knead up
Knead down
Tapping
Knead down
Knead up
Wavelet
Stretch/Wavelet
Wavelet
Knead up
Knead down
Wavelet
Tapping
Knead up
Knead down
Contour of back stretch
Regularizing
“Regularizing” starts when the remaining time
becomes less than 1 minute.
NECK, SHOULDER – REFRESH mode
(Working
POINT NAVI)
Knead down
Knead up
Stretch/Tapping
Tapping
Wavelet
Knead down
Knead up
Shiatsu
Knead down
Knead up
Tapping
Wavelet
Knead up
Knead down
3D Tapping
Knead up
Knead down
Stretch/Tapping
Knead down
Knead up
Tapping
Wavelet
Tapping
Knead up
Knead down
Contour of back stretch
Regularizing
“Regularizing” starts when the remaining time
becomes less than 1 minute.
NECK, SHOULDER – RELAX mode
(Working
POINT NAVI)
Knead up
Tapping
Knead down
Contour of
back stretch
Wavelet
Knead down
Contour of
back stretch
Knead up
Knead up
Knead down
Knead down
Tapping
Tapping
Contour of back
stretch
Wavelet
Tapping
Knead up
Knead down
Contour of back stretch
Regularizing
“Regularizing” starts when the remaining time
becomes less than 1 minute.
22
Movements during the AUTO COURSE
(WAIST)
(Concentrated massaging on the waist)
<Approx. 15 minutes>
WAIST – REJUVENATE mode
(Working
POINT NAVI)
Contour of
back stretch
Knead up
Tapping
Contour of
back stretch
Stretch/Tapping
Knead up
Tapping
Contour of
back stretch
Knead up
Knead down
Stretch/Wavelet
Wavelets
Contour of back
stretch
Wavelet
Tapping
Knead up
Knead down
Contour of back stretch
Regularizing
“Regularizing” starts when the remaining time becomes less than 1 minute.
WAIST – REFRESH mode
(Working
POINT NAVI)
Contour of
back stretch
Tapping
Contour of
back stretch
Knead up
Wavelet
Contour of
back stretch
Tapping
Knead up
Stretch
Knead up
Contour of
back stretch
Knead up
Tapping
Knead down
Knead up
Wavelet
Tapping
Contour of
back stretch
(7 MIN)
Short time massaging on the whole body)
Knead down
Knead up
Contour of back
stretch
Wavelet
Tapping
Wavelet
Tapping
Knead up
Knead down
Contour of back stretch
Regularizing
“Regularizing” starts when the remaining time
becomes less than 1 minute.
<Approx. 7 minutes>
7 MIN mode
Knead down
Stretch/Tapping
Knead up
Wavelet
Wavelet
Shiatsu
Tapping
Wavelet
Knead down
Wavelet
Tapping
Knead up
Knead down
Contour of back stretch
Regularizing
“Regularizing” starts when the remaining time
becomes less than 1 minute.
WAIST – RELAX mode
(Working
POINT NAVI)
Contour of
back stretch
Wavelet
Stretch/Wavelet
Knead up
Tapping
Wavelet
Knead up
Knead down
Regularizing
“Regularizing” starts when the remaining time becomes less than 1 minute.
23
Use of selective functions (Operate the following with the remote controller lid opened)
1. Turn ON the power switch.
(Power switch is found at the back of left arm rest.)
“POINT NAVI SYSTEM” and “PRESS THE START SWITCH”
are shown alternately on the display.
(These are displayed regardless whether the lid is opened or
POINT NAVI
SYSTEM
closed.)
PRESS THE
START SWITCH
2. Open the lid and push the “START/RESET” button.
START/
RESET
STOP
3. “Preparing” is shown first and then the “Select a
Select a Course
Course”.
4. Push the “MASSAGE” selector button and select a
KNEAD UP
KNEAD DOWN
TAP
TAPPING
WAVELET
RUBBING
DEEP KNEAD
STRETCH
SHIATSU
desired function from the massage menu.
Selected function is high-lighted.
Push again to select subsequent functions, which will be
high-lighted at each push.
3D TAPPING POINT
sp:
st:
SHOULDER
MIN
w:
AIR:
STRONG
5. After showing the selected function with high-light for
approx. 2 seconds, the timer is shown and the
movement of selected function starts.
(For the display at this time, refer to Page 10.)
Each movement terminates approx. 15 minutes later according to
the message on the LCD display.
24
Use of selective functions (Operate the following with the remote controller lid opened)
6. As the massage completes, the knead balls return to the
Storing position automatically while the “Storing” is
Storing
shown on the display.
When terminating the massage on the way.
Press the “START/RESET” button. The knead balls return to the
Storing position.
7. Turn “OFF” the power switch after use.
This prevents the massaging chair from starting inadvertently when
the remote controller was operated accidentally.
CAUTION
Turn “OFF” the power switch after use.
There is risk of accident by mischief of child.
25
Movement adjustment of selective functions
(WHOLE ⋅ PART” button)
TAPPING POINT
sp:
st:
SHOULDER
w:
AIR:
STRONG
If you push the “WHOLE ⋅ PART” button while either
selected function is operating, the present setting is
displayed with high-light on the setting menu.
MIN
If you push the “WHOLE ⋅ PART” button to select, the display
changes 2 seconds later to the “WHOLE” or “PART” of the
WHOLE
PART
PART
POINT
selective function display.
When you have selected the “WHOLE” at the first time after
pressing the “START” button, the shoulder position search takes
place initially.
TAPPING POINT
sp:
st:
SHOULDER
w:
AIR:
STRONG
MIN
(When setting the SHOULDER position by selecting the “WHOLE”)
1. When you have selected the “WHOLE” at the first time after
SHOULDER ADJUSTMENT
Movement to
Standard Shoulder
Massage Point
pressing the “START” button, the SHOULDER position
adjustment takes place initially.
2. After the cycle of movement to the SHOULDER position,
SHOULDER ADJUSTMENT
Adjust Roller
for Shoulder
push the “UP” or “DOWN” button to adjust the SHOULDER
position finely.
ADJUST
SHOULDER ADJUSTMENT
Adjustment
Completed
UP
WHOLE
⋅ PART
DOWN
MASSAGE
STRONG
GENTLE
STRETCH
3D
SPEED
AIR
WIDTH
STRENGTH
26
•
Movement of selected function
is displayed approx. 2 seconds
after the SHOULDER position
setting.
Movement adjustment of selective functions
(When selecting the “ROLLING”)
WHOLE
PART
1. If you push the “WHOLE ⋅ PART” button when no
function is operating after pushing the “START” button,
“WHOLE” is displayed with high-light on the setting
menu.
2. “WHOLE” and “PART” will be displayed with high-light
alternately at each push on the “WHOLE ⋅ PART” button.
3. The display returns to the movement display of the
selected function 2 seconds later, and the line of back
stretch is conducted for the “WHOLE” or “PART”.
(“3D” button)
3D
3D
3D
3D
KNEAD UP
KNEAD DOWN
TAPPING
WAVELET
If you push the “3D” button, the 3D massage setting
menu is displayed and the massage movement currently
selected is displayed with high-light.
Display changes at each push on the “3D” button, and the selected
3D TAPPING POINT
sp:
st:
SHOULDER
w:
AIR:
STRONG
movement starts 2 seconds after the selection.
(Movement of the selected function is displayed on the LCD.)
MIN
(“STRETCH” button)
If you push the “STRETCH” button, the setting menu for
STRETCH
STRETCH KNEAD UP
STRETCH TAPPING
STRETCH WAVELET
STRETCH TAPPING POINT
st:
sp:
SHOULDER
MIN
w:
AIR:
STRONG
the “STRETCH” and “COMPLEX STRETCH” massaging
is displayed, in which the massage movement currently
selected is displayed with high-light.
The display changes at each push on the “STRETCH” button, and
the selected movement starts 2 seconds after the selection.
(Movement of the select function is displayed on the LCD.)
27
Movement adjustment of selective functions
(“AIR” button)
LEG ⋅ THIGH ⋅ BOTTOM
LEG ⋅ THIGH
LEG ⋅ BOTTOM
LEG
STOP
If you push the “AIR” button, the current setting is
high-lighted.
The display changes at each push on the “AIR” button, and the
selected movement starts 2 seconds after the selection.
(Movement of the selected function is displayed on the LCD.)
AIR:
STRONG
MIN
(AIR “STRENGTH” button)
If you push the “STRENGTH” button, the air strength
AIR: STRONG
FOOT STRETCH
AIR: GENTLE
setting menu is displayed and the currently selected
function is high-lighted.
Default setting of “STRENGTH” is “STRONG”.
The display changes at each push on the “STRENGTH” button,
and the movement starts with the selected “STRENGTH” 2
seconds after the selection.
AIR:
STRONG
MIN
(Selected “STRENGTH” is displayed on the LCD.)
(“STRENGTH” button)
If you push the “STRONG” button or “GENTLE” button,
STRENGTH
the present setting position lamp illuminates.
S
G
*
This can be set at other than the “RUBBING” and “DEEP
KNEAD”.
Illuminating lamp moves from the present position to left at each
push on the “STRONG” button while it moves to right at each
push on the “GENTLE” button.
Hardness setting value is displayed as final 2 seconds after the
setting.
28
Movement adjustment of selective functions
(“SPEED” button)
A push on the “SPEED” button displays the current
“SPEED” setting with high-light.
1 : SLOW
2 : NORMAL
3 : FAST
*
You can select the speeds for the “KNEAD UP”, “KNEAD
DOWN”, “TAPPING” and “WAVELET”.
The display changes at each push on the “SPEED” button and the
movement starts at the selected “SPEED” 2 seconds after the
selection.
(Selected “SPEED” is displayed on the LCD.)
(“WIDTH” button)
A push on the “WIDTH” button displays the current
1 : NARROW
“WIDTH” setting with high-light.
2 : REGULAR
*
You can select the speeds for the “TAPPING”, “STRETCH,
“SHIATSU” and “WHOLE ⋅ PART”.
3 : WIDE
The display changes at each push on the “WIDTH” button and the
movement starts at the selected “WIDTH” 2 seconds after the
selection.
(Selected “WIDTH” is displayed on the LCD.)
When changing the COURSE on the way
•
The COURSE may be changed on the way without waiting the termination of currently
selected AUTO COURSE.
(Change from a AUTO COURSE → another AUTO COURSE)
If you push directly a button under the AUTO COURSE
WHOLE BODY
WAVELET STRONG
button, the specified name of AUTO COURSE is
FOOT STRETCH
displayed.
MIN
UP
AUTO
COURSE
WHOLE
SHOLDER
If you change a COURSE on the way, the COURSE movement
may continue beyond 15 minutes after the start of movement.
WAIST
(However, it will stop as the maximum 30 minutes elapse
DOWN
ADJUST
SHOLDER
•
7 MIN
consecutively after the start of massage.)
STRENGTH
AIR
29
When changing the COURSE on the way
(Change from AUTO COURSE → Select function)
1. Open the lid of remote controller when the AUTO
WHOLE BODY
COURSE (for example, the WHOLE BODY course) is
WAVELET STRONG
displayed.
FOOT STRETCH
MIN
Just opening the lid causes no change on the display and
the massage movement.
2. If you push the “WHOLE⋅ PART” button and then one of
ADJUST
▲
WHOLE
⋅ PART
UP
the “MASSAGE”, “STRETCH” or “3D” and the “AIR”
button, the movements of selected functions will start.
▼DOWN
MASSAGE
(For the movement of each function, refer to the description of
STRONG
GENTLE
STRETCH
each function.)
3D
SPEED
At this time, the timer count is reset and starts the full count of 15
AIR
WIDTH
minutes. (However, it will stop as the maximum 30 minutes elapse
STRENGTH
consecutively after the start of massage.)
(Change from Select function → AUTO COURSE)
STRETCH TAPPING POINT
sp:
w:
st:
SHOULDER
AIR:
STRONG
MIN
1. Close the lid of remote controller in the state that the
select function (for example, STRETCH TAPPING) is
displayed.
2. Select a desired course from the AUTO COURSE buttons
UP
AUTO
COURSE
on the lid.
WHOLE
SHOLDER
DOWN
ADJUST
SHOLDER
3. The AUTO COURSE will start.
WAIST
At this time, the timer count is reset and starts the full count
7 MIN
STRENGTH
of 15 minutes. (However, it will stop as the maximum 30
minutes elapse consecutively after the start of massage.)
AIR
AIR
30
When trouble is suspected
WA
WARNING
Never attempt to
disassemble, repair or
modify the product.
It could cause injury by
ignition or abnormal
movement.
Phenomenon
Failure to start
Interrupted
movement
(Remote control
is disabled.)
You may hear the following noises or detect some
feeling as described below during operation. However,
these are not errors but inherent to the product so that
the service life, or others will not be affected.
• Clatters produced by the knead balls moving up or
down
• Noise of gears or motor during massaging movement
• Sound of rustling between the knead balls and the
cloth (particularly during KNEAD movement)
• Rattling noise during the TAPPING or WAVELET
movement (particularly during movement from the
shoulder to the back)
• Speed of massaging movement may vary during
KNEAD, TAPPING or WAVELET depending on the
force of reaction against kneads balls.
• Difference of noise after changing the “SPEED” setting
(Metallic noise during the slow speed)
• Beat from motor at application of load
• Noise released when the knead balls are moved fore
and after automatically to adjust to the person during
the AUTO COURSE (Clicks)
• Breathing noise of exhaust during pneumatic
movement
• Sound produced from inflating air bags
Inspection Point
Is the power cord plug inserted
properly?
Check if the power switch at
the back of arm rest is turned
on.
Did you specify massaging
functions by pressing
corresponding switches for the
AUTO COURSE and the
selective function?
Check the back rest for
interference with the wall or
other obstruction.
Check for excessive load.
(Excessive load on the knead
balls activates the safety
mechanism to stop all
functions.)
Remedy
Reference Page
Insert the plug in the receptacle 8, 16, 24
securely.
Turn ON the power switch.
8, 16, 24
Select desirable functions by
pushing corresponding
switches.
16, 24
Move the chair to avoid
13, 16, 24
obstruction.
Turn OFF the power switch
located at the back of arm chair
and back on again.
Separate your body from the
8, 16, 24
back rest. Turn “OFF” the
power switch located at the
back of arm chair and back
“ON” again. Try to set again
from the start.
31
When trouble is suspected
Phenomenon
Unable to
recline
Service
receptacle is
dead.
Inspection Point
Check the power cord plug for
disconnection.
Check the back rest for
interference with the wall or
other obstruction.
Check the power supply fuse
for blowing.
Remedy
Insert the plug in the receptacle
securely.
Move the chair to clear from
obstruction.
Replace the fuse (3A).
Reference Page
14
13
8
Request:
Turn off,
turn on,
then restart.
When the LCD of remote controller is showing “Turn off, turn on,
then restart.”, turn OFF and on again the power supply as
instructed.
* If the above action does not improve the situation, turn OFF the power switch, disconnect the power
cord plug and consult your dealer or us.
Maintenance
Main unit:
Cover cloth, back pad, pillow and seat pad (vinyl chloride leather)
Request:
To clean the leather, wipe with rags impregnated with neutral detergent. Wipe again with
rags moistened with water to remove the detergent and then dry naturally. (Refrain from
using too much detergent not to damage the leather.) Use dry rags over the painted surface.
Request:
Keep the equipment clean always and store it at a safe place free from excessive
temperatures, humidity, dirt, or others.
CAUTION
Remove the power cord plug from the
receptacle before inspection or maintenance.
It is very dangerous to handle the plug with
wet hands. It could cause electrical shock or
injury.
CAUTION
Do not use benzene, thinner, or
anything containing acetate for
cleaning . It could cause electrical
shock or ignition.
*
32
Seat pad is secured on the seat with magic
tapes. Separate the tapes to remove it.
(Main unit)
Make clean plastic parts, pipes and the arm rest with
rags impregnated with neutral detergent and squeezed
tightly. Wipe next with dry rags to remove neutral
detergent completely.
CAUTION
Do not use alcohol, other solvent,
polishing powder, or others.
It could cause damage,
discoloration or cracks.
CAUTION
(Remote controller)
Wipe the remote controller with dry rags.
Never wipe with wet towel, or
others.
It could cause trouble.
(Back pad, pillow, seat pad and other textile
products)
When they are soiled, wipe with rags impregnated with
neutral detergent, wipe again with rags moistened with
water to remove the neutral detergent and dry naturally.
CAUTION
Ironing is prohibited.
Stowing
Remove stains and dirt, and stow it at a dry place.
When stowing the chair for a long time, spread a cover
over it to protect from dirt.
33
CAUTION
When storing the product, avoid a
place exposed to direct sunlight for
a long time or high temperatures
like next to heat source such as
stove, or others.
It could discolor or deteriorate the
cover cloth.
Care and inspection
Check for the following symptoms.
Care and inspection
•
•
•
Secure a long service life
•
with occasional
inspections!
Scorching smell
Overheat on the power cord or plug
Power is turned on or off when the
power cord is moved.
Other abnormal condition
Stop to use
Turn off the switch and
remove the power cord
plug from the
receptacle to prevent
trouble or accident.
Consult always your
dealer or us for
inspection or repair.
Request: When starting to use again after storing the equipment for a long time, confirm before use
that it operates properly.
Specifications
Name
Massage chair
•
Dimensions
(approx.)
•
Model No.
AS-888
When not reclined (with foot rest stored)
71 W × 112 D × 111 H (cm)
When reclined (with foot rest extended)
71 W × 170 D × 63 H (cm)
34
Weight
Rated time
53 kg (approx.)
30 minutes
Power
86 W (50/60 Hz)
consumption
* Do not use the massager on other than
the designated voltage.
04/05/30