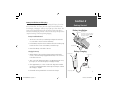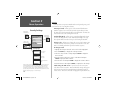
1
NavTalk
®
GSM Phone/GPS
owner’s
manual
and
reference
guide
© Copyright 2002 GARMIN Ltd. or its subsidiaries
GARMIN International, Inc.
1200 East 151st Street, Olathe, Kansas 66062, U.S.A.
Tel. 913/397.8200 or 800/800.1020
Fax 913/397.8282
GARMIN (Europe) Ltd.
Unit 5, The Quadrangle, Abbey Park Industrial Estate, Romsey, SO51 9DL, U.K.
Tel. 44/0870-8501241
Fax 44/0870-8501251
GARMIN Corporation
No. 68, Jangshu 2nd Road, Shijr, Taipei County, Taiwan
Tel. 886/2.2642.9199
Fax 886/2.2642.9099
All rights reserved. Except as expressly provided herein, no part of this manual may be reproduced, copied, transmitted, disseminated,
downloaded or stored in any storage medium, for any purpose without the express prior written consent of GARMIN. GARMIN hereby grants
permission to download a single copy of this manual onto a hard drive or other electronic storage medium to be viewed and to print one copy
of this manual or of any revision hereto, provided that such electronic or printed copy of this manual must contain the complete text of this
copyright notice and provided further that any unauthorized commercial distribution of this manual is strictly prohibited.
Information in this document is subject to change without notice. GARMIN Corporation reserves the right to change or improve its products
and to make changes in the content without obligation to notify any person or organization of such changes or improvements. Visit the
GARMIN web site (www.garmin.com) for current updates and supplemental information concerning the use and operation of this and other
GARMIN products.
GARMIN® and NavTalk® are registered trademarks of GARMIN Ltd. or its subsidiaries and may not be used without the express permission of
GARMIN.
November 2002
Part Number 190-00218-00 Rev. C
Printed in Taiwan
Section 1
Thank you for choosing the GARMIN NavTalk GSM Phone/GPS. This
product is designed for easy operation and to provide years of reliable
service.
Introduction
Please take the time to read this Owner’s Manual, and learn the operation of your new phone. This will help ensure that you get the most from
the unit.
Customer Service
Product Registration
If you encounter a problem, or just have a question, contact our
European Product Support Department, GARMIN (Europe) Ltd. at
44/0870-8501241.
In the U.S.A.: contact our Product Support Department at
913-397-8200 or 800-800-1020,
Monday — Friday 8:00 A.M. to 5:00 P.M. Central Time,
or by e-mail at [email protected].
Help us better support you by completing our
on-line registration today! Have the serial number
of your NavTalk handy and connect to our web site
(www.garmin.com). Look for the Product Registration link on the Home page.
Software License Agreement
BY USING THE NavTalk GSM Phone/GPS, YOU AGREE TO
BE BOUND BY THE TERMS AND CONDITIONS OF THE FOLLOWING SOFTWARE LICENSE AGREEMENT. PLEASE READ
THIS AGREEMENT CAREFULLY.
GARMIN grants you a limited license to use the software
embedded in this device (the “Software”) in binary executable
form in the normal operation of the product. Title, ownership
rights and intellectual property rights in and to the Software
remain in GARMIN.
You acknowledge that the Software is the property of
GARMIN and is protected under the United States of America
copyright laws and international copyright treaties. You further
acknowledge that the structure, organization and code of the
Software are valuable trade secrets of GARMIN and that the
Software in source code form remains a valuable trade secret
of GARMIN. You agree not to decompile, disassemble, modify,
reverse assemble, reverse engineer or reduce to human readable
form the Software or any part thereof or create any derivative works based on the Software. You agree not to export or
re-export the Software to any country in violation of the export
control laws of the United States of America.
i
NvTlkGSMManual copy.indd i
12/2/2002, 8:41:37 AM
Section 1
Introduction
Limited Warranty
This GARMIN product is warranted to be free
from defects in materials or workmanship for
one year from the date of purchase. Within this
period, GARMIN will at its sole option, repair or
replace any components that fail in normal use.
Such repairs or replacement will be made at no
charge to the customer for parts or labor, provided
that the customer shall be responsible for any
transportation cost. This warranty does not cover
failures due to abuse, misuse, accident or unauthorized alteration or repairs.
THE WARRANTIES AND REMEDIES CONTAINED HEREIN ARE EXCLUSIVE AND IN
LIEU OF ALL OTHER WARRANTIES EXPRESS
OR IMPLIED OR STATUTORY, INCLUDING
ANY LIABILITY ARISING UNDER ANY WARRANTY OF MERCHANTABILITY OR FITNESS
FOR A PARTICULAR PURPOSE, STATUTORY OR
OTHERWISE. THIS WARRANTY GIVES YOU
SPECIFIC LEGAL RIGHTS, WHICH MAY VARY
FROM STATE TO STATE.
ii
NvTlkGSMManual copy.indd ii
IN NO EVENT SHALL GARMIN BE LIABLE FOR ANY INCIDENTAL, SPECIAL, INDIRECT OR CONSEQUENTIAL DAMAGES,
WHETHER RESULTING FROM THE USE, MISUSE, OR INABILITY
TO USE THIS PRODUCT OR FROM DEFECTS IN THE PRODUCT.
Some states do not allow the exclusion of incidental or consequential
damages, so the above limitations may not apply to you.
GARMIN retains the exclusive right to repair or replace the unit or
software or offer a full refund of the purchase price at its sole discretion. SUCH REMEDY SHALL BE YOUR SOLE AND EXCLUSIVE
REMEDY FOR ANY BREACH OF WARRANTY.
To obtain warranty service, contact your local GARMIN authorized
dealer. Or call GARMIN Customer Service at one of the numbers
shown below, for shipping instructions and an RMA tracking number.
The unit should be securely packed with the tracking number clearly
written on the outside of the package. The unit should then be sent,
freight charges prepaid, to any GARMIN warranty service station. A
copy of the original sales receipt is required as the proof of purchase for
warranty repairs.
Products sold through online auctions are not eligible for rebates
or other special offers from GARMIN. Online auction confirmations
are not accepted for warranty verification. To obtain warranty service,
an original or copy of the sales receipt from the original retailer is
required. GARMIN will not replace missing components from any
package purchased through an online auction.
GARMIN International, Inc.
1200 East 151st Street
Olathe, Kansas 66062, U.S.A.
Phone: 913/397.8200
FAX:
913/397.0836
GARMIN (Europe) Ltd.
Unit 4, The Quadrangle, Abbey Park Industrial Estate
Romsey, SO51 9DL, U.K.
Phone:
44/0870.8501241
FAX:
44/0870.8501251
12/2/2002, 8:41:39 AM
Exposure to Radio Frequency Signals - Your wireless hand-held
portable telephone is a low power radio transmitter and receiver. When
it is ON, it receives and also sends out radio frequency (RF) signals. The
NavTalk GSM Wireless Telephone/GPS Receiver meets compliance requirements for maximum Specific Absorption Rate of radio wave emissions for
the limit given.
Efficient Phone Operation Guidelines - Do not touch the antenna
unnecessarily when the phone is in operation. Contact with the antenna
affects reception and transmission quality causing the phone to operate at a
higher power than necessary, causing possible injury.
Electronic Devices - Most modern electronic equipment is shielded from
RF signals. However, certain electronic equipment may not be shielded
against the RF signals from your wireless phone. The Health Industry Manufacturer’s Association recommends that a minimum separation of six (6”)
inches be maintained between a handheld wireless phone and a pacemaker
to avoid possible interference with the pacemaker. These recommendations
are consistent with independent research and recommendations of Wireless Technology Research. Persons with pacemakers should ALWAYS keep
the phone more than six inches from their pacemaker when the phone is
turned ON, should not carry the phone in a breast pocket, and should use
the ear opposite the pacemaker to minimize the potential for interference.
Section 1
Introduction
Warnings and Precautions
If you have any reason to suspect that interference is taking place, turn your phone OFF immediately. If you use any other personal medical
device, consult the manufacturer to determine if
it is adequately shielded from external RF energy.
Turn your phone off in health care facilities when
any regulations posted in these areas instruct you
to do so. Hospitals and health care facilities may
be using equipment that could be sensitive to
external RF energy.
Posted Facilities - Turn your phone OFF in any
facility where posted notices so require.
Blasting Areas - To avoid interfering with blasting operations, turn your phone OFF when in a
“blasting area” or in areas posted: “Turn Off Twoway Radio”. Obey all signs and instructions.
iii
NvTlkGSMManual copy.indd iii
12/2/2002, 8:41:40 AM
Section 1
Introduction
Warnings and Precautions
Potentially Explosive Atmospheres - Turn your phone
OFF when in any area with a potentially explosive atmosphere and obey all signs and instructions. Sparks in such
areas could cause an explosion or fire resulting in bodily
injury or death.
Areas with potentially explosive atmospheres are often,
but not always clearly marked. They include fueling areas
such as gasoline stations, below deck on boats, fuel or
chemical transfer or storage facilities, vehicles using liquefied petroleum gas (such as propane or butane), areas
where the air contains chemicals or particles (such as
grain dust or metal powders), and any other area where
you would be normally advised to turn off your vehicle
engine.
Aboard Aircraft - Regulatory agencies prohibit the use of
conventional wireless phones while an aircraft is in flight.
These RF signals may interfere with the operation of equipment aboard the aircraft.
Driving - Check the regulations on the use of wireless telephones
in the areas where you drive. Always obey them. Also, if using
your phone while driving, give full attention to driving. Driving
safely is your first responsibility. Pull off the road and park before
making or answering a call if driving conditions so require.
Vehicles - RF signals may affect improperly installed or inadequately shielded electronic systems in motor vehicles.
Caution - The Global Positioning System (GPS) is operated by
the government of the United States of America, which is solely
responsible for its accuracy and maintenance. The system is subject to changes that could affect the accuracy and performance of
all GPS equipment. Although this device is a precision electronic
NAVigation AID (NAVAID), any NAVAID can be misused or misinterpreted and therefore, become unsafe.
To reduce the risk of unsafe operation, carefully review
and understand all aspects of this manual and thoroughly practice
operation prior to actual use. When in actual use, carefully
compare indications from this device to all available navigation
sources including information from other NAVAIDS, visual sightings, maps, etc. For safety, always resolve any discrepancies before
continuing navigation.
iv
NvTlkGSMManual copy.indd iv
12/2/2002, 8:41:40 AM
Map Data Information - One of our goals is to provide customers with the most complete and accurate cartography that
is available to us at a reasonable cost. We use a combination
of governmental and private data sources that we identify as
required in product literature and copyright messages displayed
to the consumer. Virtually all data sources contain inaccurate
or incomplete data to some degree. This is particularly true
outside the United States where complete and accurate digital
data is not available or prohibitively expensive.
CAUTION - IT IS THE USER’S RESPONSIBILITY TO USE
THIS PRODUCT PRUDENTLY. THIS PRODUCT IS INTENDED
TO BE USED ONLY AS A TRAVEL AID AND MUST NOT BE
USED FOR ANY PURPOSE REQUIRING PRECISE MEASUREMENT OR DIRECTION, DISTANCE, LOCATION, OR
TOPOGRAPHY. THIS PRODUCT SHOULD NOT BE USED
AS AN AID TO DETERMINE GROUND PROXIMITY FOR
AIRCRAFT NAVIGATION.
Service and Repair - This product does not contain any user
serviceable parts. Repairs should be made only by an authorized
service center.
Section 1
Introduction
Warnings and Precautions
European Union Directives Conformance Statement
This product is in conformance with the requirements of the
applicable EU Council Directives.
Declarations of Conformance with the requirements are
located at:
GARMIN International, Inc.
1200 E 151st Street
Olathe, Kansas 66062, U.S.A.
Warning and Important Information Symbols
This Warning Symbol indicates conditions that may cause
possible injury to the user or damage to this equipment.
This Important Information Symbol indicates useful information that can enhance operation of this equipment.
v
NvTlkGSMManual copy.indd v
12/2/2002, 8:41:40 AM
Section 1
Introduction
Table of Contents
SECTION 1: Introduction..................................... i-viii
Customer Service - Product Registration................................... i
Limited Warranty .................................................................... ii
Warnings and Precautions ................................................... iii-v
Table of Contents .............................................................. vi-vii
Network Service Provider Information ................................. viii
SECTION 2: Getting Started................................... 1-24
Battery Installation and Charging ............................................ 1
SIM Card Installation ............................................................. 2
Using the Keypad .................................................................... 3
Turning the Unit On/Off.......................................................... 4
Adjusting the Screen Contrast ................................................. 4
Activating the Backlight Feature .............................................. 5
Adjusting the Volume .............................................................. 5
Understanding the Status Bar .................................................. 6
The Time and Date Display ..................................................... 6
Using the ‘Quick Set’ Feature................................................... 7
Using the Keyguard Feature ................................................. 7
Turning the GPS On/Off....................................................... 7
Marking your current location as a Waypoint....................... 7
Using the Profiles Feature..................................................... 8
vi
NvTlkGSMManual copy.indd vi
Using the Standby Feature....................................................... 8
How the Operating System is Structured................................. 9
Entering Data ...................................................................10-11
The Main Menu................................................................12-24
The Phone Tab ..............................................................12-16
The GPS Tab .................................................................17-18
The PDA Tab...................................................................... 19
The Settings Tab............................................................20-24
SECTION 3: Phone Operation ............................25-60
Making a Call ....................................................................25-27
Handling a Call .................................................................28-29
Answering a Call ................................................................. 28
Placing a Call on Hold ........................................................ 28
Muting a Call ...................................................................... 28
Ending a Call ...................................................................... 28
Conference Calls ................................................................. 29
Sending a Call to your Voice Mail........................................ 29
Using Contacts ..................................................................30-34
Call History.......................................................................35-36
Dialled Calls........................................................................ 35
Missed Calls........................................................................ 35
Received Calls ..................................................................... 36
Air Time.............................................................................. 36
Call Cost ............................................................................. 36
Messages ...........................................................................37-42
New Messages..................................................................... 37
Voice Mail Messages ........................................................... 38
12/2/2002, 8:41:42 AM
SECTION 3: Phone Operation (cont.)
Message Inbox .................................................................... 38
Read Messages .................................................................... 38
Using Numbers and Websites in Messages .......................... 39
Message Drafts .................................................................... 40
Sent Messages ..................................................................... 40
Templates............................................................................ 41
Reports ..........................................................................41-42
Recurrences......................................................................... 42
MiniBrowser......................................................................43-45
Personal Digital Assistant (PDA) Tab .................................46-52
Calendar ............................................................................. 46
Tasks................................................................................... 47
Notes .................................................................................. 48
Playing Games ...............................................................49-51
Calculators.......................................................................... 52
Settings Tab.......................................................................53-64
Phone.............................................................................53-60
Call Services...................................................................61-64
SECTION 4: GPS Navigation...............................65-95
GPS Tab - Features Pages........................................................ 65
Map Navigator........................................................................ 66
Data Fields.......................................................................... 67
Map Display........................................................................ 68
Panning Arrow...............................................................69-70
Zooming In and Out ........................................................... 71
Map Navigator Options..................................................72-76
Find ‘n Go.........................................................................77-83
Creating a Route To a Destination........................................... 84
Auto Routing.......................................................................... 85
NvTlkGSMManual copy.indd vii
Section 1
Introduction
Table of Contents
Trip Computer ....................................................................... 86
Waypoints .........................................................................87-91
Satellite Page .......................................................................... 92
GPS Settings......................................................................93-95
SECTION 5: System Settings Options ................96-98
Display Settings...................................................................... 96
Time Settings.......................................................................... 97
Interface Settings .................................................................... 98
SECTION 6: Appendices .......................................... 99-118
Appendix A: Accessories ............................................... 99-101
Appendix B: Specifications .................................................102
Appendix C: Messages ................................................ 103-106
Appendix D: Unit Care ......................................................107
Appendix E: UTC Offset Chart............................................108
Appendix F: Intellisync for GARMIN PC Interface ..............109
Appendix G: MapSource Data Information .........................110
Appendix H: Interface Modem Setup ..................................111
Appendix I: Troubleshooting Guide ....................................112
Appendix J: Glossary of Terminology.......................... 113-114
Appendix K: Index By Subject .................................... 115-117
vii
12/2/2002, 8:41:42 AM
Section 1
Introduction
Network Service Provider
Information
This Network Subscription Dependent Feature
symbol indicates a feature which is functional
only when supported by your Network Service
Provider. It will usually require activation and
often an additional subscription charge above the
basic service fee.
Many of the features of the NavTalk GSM are dependent on services
provided by the network used to provide wireless phone service. Whenever these features are discussed in this manual, a Network/Subscription
icon (like the one shown to the left) will be located at the beginning of the
paragraph describing how the feature functions.
If your network service provider offers these features, they may be
provided as a standard option included with your basic subscription fee
or may require an additional subscription fee. In any event, they must be
activated by your service provider in order to function with the NavTalk unit.
It is suggested that you review this manual before selecting a Network
Provider in order to determine which of NavTalk Network Dependent
features you would like to use. This will allow you to determine if a
particular provider can offer connection to the desired features. Some
network provided features, such as Voice Mail may function in a manner
unique to your provider’s system and are not discussed in detail in this
manual. The network provider will provide you with proper instruction
for their use. It is assumed that your network service provider will test the
function of network dependent features supported by this device prior to
returning it for your personal use.
Here is a list of network dependent features supported by the NavTalk:
✓
✓
✓
✓
Voice Mail
Short Message Service
Information Messaging
Call Waiting
✓ Network Selection
✓ MiniBrowser
✓ Call Barring (Restriction)
✓ Caller Line Identification (CLIP)
viii
NvTlkGSMManual copy.indd viii
12/2/2002, 8:41:42 AM
Section 2
Battery Installation and Charging
Getting Started
The unit is powered by a Lithium Ion rechargeable battery located on
the back of the unit. The battery does not require removal from the unit
for recharging. Charging at “Start Up” may require up to three hours. The
battery is already installed on the unit, but must be removed in order to
remove the insulating strip from the contacts on the battery which prevents
complete discharge of the battery during shipping.
Battery Installation
Back of Unit
Press down on the release tab to
remove the insulating strip from
the battery contacts
Battery Installation/Removal
1. Turn the unit over and use your index finger to depress the tab in the
slot on the back of the unit to release the battery.
2. Pull the battery away from the unit and then remove the insulating strip
from the electrical contacts on the battery. Discard the strip.
Insulating Strip
3. Reinstall the battery on the back of the unit.
Battery Charging
Charging the Battery
1. With the battery in place and the insulating strip removed from the
contacts, connect the charger (supplied with the unit) to the connector
on the base of the unit.
NavTalk Unit
Power Point
2. Then, connect the charger power input to an appropriate power source,
power point, etc. The unit will display a “Charging” message.
3. Allow approximately 2 to 3 hours for the initial charge and somewhat
less time for recharging thereafter. The message will change to indicate
that charging is complete.
4. The NavTalk can be operated while connected to the charger.
NvTlkGSMManual copy.indd 1
Travel Charger
Charger Plug
1
12/2/2002, 8:41:43 AM
Section 2
Getting Started
SIM Card Installation
Place this side face down with the notch at
the upper right side
89490
08997
90087
4568
Subscriber Identity Module (SIM) Card Installation
The SIM card (supplied by your cellular service provider) is a “Smart
Card” that includes your phone number, memory for storing phone numbers, messages, and service information. You can use your SIM card in any
GSM phone and you will be charged for the call. The SIM card should be
kept secure. Do not bend, scratch, expose to static electricity, or water as
damage may occur. Your SIM card is secured by a Personal Identification
Number (PIN) to discourage theft or unauthorized use. Your cellular service provider will often perform this installation for you in order to check
the phone for proper operation.
DYNE STK
SIM Card
Slide to the left and then lift up tray and
insert SIM Card
Orient card with notch to the upper right
and electrical contacts facing down.
NOTE: Switch off your unit before inserting or
removing your SIM card to prevent damage to the SIM
card memory.
SIM Card Installation/Removal
1. Switch off the unit by pressing and holding the POWER key for more
than two seconds.
2. Remove the battery pack from the back of the unit.
3. Install the SIM card by sliding and lifting the tray in the back of the
unit. Insert the card with the notch directed toward the top right side
of the opening.
4. To remove, lift up the tray and carefully extract the card.
Back of Unit with Battery Removed
2
NvTlkGSMManual copy.indd 2
5. Replace the tray and secure it in place. The tray must be closed and
moved to the right until it clicks in place in order for the SIM card to
function.
12/2/2002, 8:41:46 AM
Section 2
Remote Earpiece/Microphone
Connection
Service Status Indicator (LED)
Getting Started
Wireless Phone Antenna
Volume UP/Zoom OUT key
Using the Keypad
Press and Hold to increase earpiece
volume or to zoom out on the map
page to show more map area with
less detail. Press and Release to move
by increments.
Built-in GPS Antenna
POWER key
Press and Release to turn the unit
ON. Press and Hold to turn the unit
Off. Press and Release while the unit
is On to display the Backlight/
Contrast adjustment window.
Volume DOWN/Zoom IN
key
Press and Hold to decrease earpiece
volume or to zoom in on the map
page to show more map detail with
less area. Press and Release to move
by increments.
ENTER & Up/Down-Right/Left keys
(5 position key) Press In for ENTER to highlight,
confirm a message or select an option. Move
Up, Down, Left, or Right to move from field
to field, tab to tab, or move the map pointer.
Move Up or Down to scroll through a list
Left or Right to move from page to page of a
list. Press and Hold to display the ‘Quick Set’
Menu.
MENU key
Press and Release to display
the Main Menu or the Options
Menu for any page. Press and
Hold to display the ‘Find ‘n Go’
find menu.
CLEAR key
Press and Release to delete a previous character
or exit a data entry field. Press and Release
again to escape to the Main Menu. Press
Once from the Main Menu to place the unit on
Standby. Press and Hold to delete a field.
SEND key
Press and Release to call a
dialled number, a highlighted
number from the Contacts List,
or to display the Call History
Page.
END key
Press and Release to end a call or stop the
phone from ringing. Press Once to exit a page
or menu when not on a call.
Rechargeable Battery
on back of unit
Auxiliary Power/Data Connector
NvTlkGSMManual copy.indd 3
Dialling and Data Entry KEYPAD
Refer to Pages 99-101 for information on accessories
and how to connect them to the NavTalk Unit.
Used to dial phone numbers and enter alphanumeric characters for data entry. Also some
special key functions for speed and emergency
dialling, international prefixes, etc.
12/2/2002, 8:41:47 AM
3
Section 2
Turning the Unit On and Off
Getting Started
Turning the Unit On/Off
Unit Power Key
1. Press and hold the POWER key for more than two seconds.
A Welcome page will display and if no PIN security is active, then move
to the Main Menu when GPS is Off. If there is no SIM card installed
an “Insert SIM” message will display. Turn Off the unit and install the
SIM card as explained previously. A “SIM Not Ready” message may
also appear if you try to dial immediately after turning the unit On.
2. An “Enter PIN 1 Code” message will display if the SIM card security
is activated. Use the KEYPAD keys to enter your PIN1 code. As you
enter each character of your PIN 1 code, an * will display for number
of the code, then press the ENTER key. A “Code Accepted” message
will appear. Press ENTER to acknowlwdge and, if the GPS receiver
is enabled, a warning message will appear. Press the ENTER key to
acknowledge and display the Main Menu. Your service provider will
advise you of the preset PIN 1 code (i.e. 1234). It is recommended that
you change this code when setting up your unit. Record your new PIN
code and store in a safe place.
Press and Release to turn On
Press and Hold to turn Off
SIM PIN 1 Code Entry
SIM Code Entry Successful
SIM Code Entry Error - Re-enter correct code
SIM Blocked Message after three unsuccessful attempts.
Contrast/Backlight Settings Screen
3. If you make a mistake, press the CLEAR key and begin again. If you fail
to enter your PIN 1 code in three attempts the unit will lock and a “SIM
Blocked” message will appear. To learn how the PIN Code Security
feature is set up and how to use an unblock code (PUK), see the section
of Phone Operation, entitled “Security Settings” on page 56.
Adjusting the Screen Contrast and Backlight Settings
1. Press and release the POWER key with power On to display the Screen
Contrast/Backlight Settings panel.
Backlight
Settings
Buttons
4
NvTlkGSMManual copy.indd 4
Contrast
Adjustment
Lever
2. Use the Right and Left ARROW keys to move the contrast lever until
the desired contrast level is achieved.
3. Use the Up and Down ARROW keys to select the Backlight buttons
Refer to the following page for more Backlight details.
12/2/2002, 8:41:50 AM
Section 2
Activating the Backlight Feature
1. Press and release any key to turn on the Backlight. The Backlight will
remain on for the amount of time set. Default is 10 seconds. A small
illuminated light bulb will appear in the Status Bar at the top of the
screen. Press and release the POWER key to display the Contrast/Back
light settings window (see page 4).
Getting Started
Activating the Backlight
Press and Release the
POWER key with the
unit On to turn On the
Backlight.
2. To select from “Always On”, “Timeout”, or “Always Off” options, use
the Up/Down ARROW keys to select a button and then press ENTER.
3. To turn off the backlight before it times out, press and release the
POWER key. To reset the timeout see page 96.
The Backlight will come
On after any key press
and remain On until the
Timeout period ends.
4. The backlight timeout can be set for; 10 Seconds, 30 Seconds,
1 Minute, and 2 Minutes.
Use the Up/Down
ARROW keys to select
a backlight option and
then press ENTER.
Adjusting the Volume
The volume for the earpiece can be adjusted by pressing and holding
the UP and DOWN keys on the side of the unit.
1. Press and hold the UP key to display the volume control window
with a slider control for the earpiece.
Adjusting the Volume
2. Use the UP/DOWN Volume or ARROW keys to raise or lower the
volume. Press the CLEAR key to close the window when done or allow
it to timeout.
3. To adjust the earpiece, ringer, and key press tone volumes at the same
time, refer to the Phone Settings Profiles Page on page 53.
4. For quick adjustment of volume levels for different environments, refer
to the Profiles option of the ‘Quick Set Menu’ as described on page 8.
The UP key
The DOWN key
increases volume
decreases volume
The UP/DOWN keys
Adjust earpiece volume by
using the slider on the volume
adjustment window.
5
NvTlkGSMManual copy.indd 5
12/2/2002, 8:41:51 AM
Section 2
Understanding the Status Bar
Getting Started
In Call status
indicator
Messages
Phone Service Roaming
signal strength
indicator.
Backlight On
The Status Bar at the top of the display screen provides a constant
indicator of unit function.
GPS status
Battery Power indicator
status indicator
External Power
Silent Mode
VoiceMail
In Call Encrypted
Differential GPS
In Call Mute
No GPS Position
Fix
No Service
Incoming Call
Simulated GPS
Vibrate On
The Time and Date Display
The date and time are settable using the ‘Set Time’ page of the
‘Settings’ Time Tab.
The time can be changed to reflect daylight savings time, and time zone.
The time can also be displayed in either 12 or 24 hour format.
6
NvTlkGSMManual copy.indd 6
From left-to-right, the Status Bar displays the wireless phone signal
strength, the current status of your phone call (in- call active, In Call
Encrypted, In call Mute, Incoming Call and No Service), current messages
(indicating SMS, Info Messages, Voice Mail, and Position Reports), whether or
not you are roaming outside your service area, vibrator On/Off, backlight On,
power source (battery or external power and capacity if using the battery),
and GPS status ( Simulating, Active, Position Fix Status, Differential GPS, or Off).
The Time and Date Display
The current Time and Date are displayed only when the Main Menu
page is active.
To set the time and your current time zone, refer to Time Settings on
page 97. On the ‘Time’ page of the ‘Settings’ section you will be able to
access the ‘Set Time’ page to set the date, current time, and select the proper
time zone. The ‘Time’ settings page also allows you to select a time format
(12 or 24 hour), and to activate/deactivate daylight savings time options.
The Service Status Indicator (LED)
The current service status is indicated by an LED located at the top of the
unit next to the wireless antenna (see page 3). When the Service Status feature
is turned On, the LED will: Flash Red when no service is available, Flash
Amber when roaming, Flash Green when service is available, stay Solid Amber
when in a call while roaming, and stay Solid Green when in a call with service
from your home network provider. Refer to Network Settings on page 57 for
detailed information.
12/2/2002, 8:41:52 AM
Section 2
Using the ‘Quick Set’ Feature
The Quick Set feature allows you to quickly activate some basic operational characteristics of your unit such as Keyguard, Profiles (unit ringer
volume and call answer modes), GPS On/Off, and Mark Waypoint features.
Using the Keyguard Feature
The ‘Keyguard’ feature allows you to lock the keypad to prevent
inadvertent pressing of a key while the unit is in your pocket, purse, etc.
This prevents accidental placement of one keypress dialling options such
as speed dial and emergency dialling. Press and Hold the ENTER key
to display the Quick Set Menu, use the ARROW key to highlight the
‘Keyguard’ option and press ENTER again to activate this feature. When
‘Keyguard’ is operational, a message will appear each time a key press is
attempted. Press and Hold the CLEAR key to cancel ‘Keyguard’. Incoming calls and messages will temporarily unlock the keypad.
Synchronizing Contact Data (Begin Sync)
(Applies only to units provided with the Intellisync for GARMIN CD-ROM)
To begin synchronizing PC contact program data using Intellisync for
GARMIN, highlight this option and press ENTER. Refer to page 109.
Getting Started
Using the ‘Quick Set’ Feature
‘Mark Waypoint’
Option will appear
gray if GPS is not
active or searching
for satellites.
The Quick Set List of Options
Keyguard
“Pop-Up”
Press and Hold the
CLEAR key to Disable
Window
Keyguard On message appears whenever a key is pressed.
Turning the GPS Receiver On or Off
To turn the GPS receiver On or Off, highlight the GPS Off/On option
and press ENTER. When On the receiver will significantly reduce the
battery reserve. When Off, it will allow extended battery use.
GPS On and Off Messages
Marking Your Current Location (Mark Waypoint)
The Mark Waypoint feature allows you retain a record of your current location and save it as a waypoint which can be used as a destination when creating a route. Highlight the Mark Waypoint option and
press ENTER to display the Mark Waypoint page. Use the ARROW key
to highlight the ‘OK’ button and press ENTER to save the waypoint.
Refer to page 87 for more information.
NvTlkGSMManual copy.indd 7
The Mark Waypoint Page
12/2/2002, 8:41:53 AM
7
Section 2
Getting Started
Using Profiles
Profiles Options Menu
Profiles Settings Tab
The Standby Feature
Using the Profiles Feature
The Profiles feature allow you to determine quickly, the mode in
which the phone portion of the unit will operate when a call is received
according to the environment in which you are currently located without the need to manually adjust volume and feature settings. Use the
ARROW keys to highlight your choice and press ENTER to activate.
Profile options are:
• Normal - settings you desire for regular use of the unit.
• Silent - settings for use when you want the unit to be silent.
• Outdoor - settings for use in an outdoor (noisy) environment.
• Meeting - settings for use when in a meeting environment.
• Headset - settings for use when using a hands-free headset.
• Car - settings for use when using in a vehicle or with the HandsFree Kit. The unit switches to this profile when in the cradle.
• Personal 1 & 2 - settings for use in any other type environment.
Settings for each profile type are made from the Profiles Settings tab of
the Phone Option of the Main Menu Settings tab as described on Page 53.
When viewed on this page, each setting displays a list of custom settings
for: Calls, SMS, Alarms, Data Calls, Vibrate, Message Beeps, and Key Beeps.
Using the Standby and Power Saver Features
The Power Saver Feature
8
NvTlkGSMManual copy.indd 8
The Standby feature shuts down many operating features without
actually turning off the unit power when the display timeout is reached.
This allows you to still make and receive calls while saving on battery
power. To manually activate Standby, press the CLEAR or END key
from the Main Menu. To de-activate, press any key. The Power Saver
feature turns off the lower two-thirds of the display for maximum power
saving. Refer to page 96 for details about the Power Saver feature.
12/2/2002, 8:41:54 AM
Section 2
Understanding the Operating Software Structure
The Main Menu is the display that you see when the Welcome Page
and PIN Entry prompt are completed. It also is displayed whenever you
press and release the MENU or END key, when not on an active call.
It consists of four tabbed pages and is the starting point for access
to most of the NavTalk’s Features. Each tabbed page consists of a
listing of features related to the tab’s title. Each feature is subsequently
divided into either a single page of features and options or a set of
tabbed pages with features and options.
These pages often include an Option Menu that allows you to
customize the page’s features. Individual features on these pages contain
data fields that display useful information, most can be programmed, by
selecting options from a list, or allow you to enter specific data using
the KEYPAD keys. To move about the fields on these pages use the
ARROW keys. To activate a field for data entry, use the ENTER key. To
return to the previous page use the CLEAR key.
Getting Started
How the Operating System is
Structured
Main Menu with
Tabbed Pages
Phone Tab of the
Main Menu with
the Call History’
Feature Selected
Feature with Tabbed Pages
Page Entry Options Menu
To Select a Feature
1. Use the ARROW key to and highlight the feature on the page.
2. Press ENTER to display the feature page or tabbed pages.
3. Use the ARROW key to move from tabbed page to tabbed page.
Page Options Menu
Dialled Calls List
of the Tabbed Call History
Pages
Page Entry Option (Sub-option)
Page Entry Option
To View the Option Menus
1. With the feature page displayed, press the MENU key to display
the Page Options Menu.
2. To view options for an item on the feature page, use the ARROW
key to highlight the item and then press ENTER.
NvTlkGSMManual copy.indd 9
Go To Status Report on Page 10
9
12/2/2002, 8:41:54 AM
Section 2
Getting Started
Entering Data
Data Fields and Data Entry Techniques
Nearly every feature page contains a data field (a page item that
can be highlighted using the ARROW key and modified as desired).
There are two methods for entering data in a field:
Selecting Data from a list
Many data fields contain an options menu with a list of choices.
To use Options Lists
1. Highlight the data field and press the ENTER key to display the menu.
2. Use the ARROW key to highlight your selection and then press ENTER
to place it in the data field. To move from page to page of long lists,
use the Left/Right ARROW keys.
Data Entry Field with List of Options
Entering Data using the KEYPAD keys
The KEYPAD keys provide a dual function, when you are ready to enter
user specific data into a data field. Not only do they dial phone numbers
but they also allow you to enter alpha/numeric characters in data fields by
repeatedly pressing the key. The alpha characters are entered in sequence
starting with first letter on the key and ending with the numeral. A
character chart for each key press sequence is provided on the following page.
Data Entry Field with Keypad Entry Option
To enter data using the KEYPAD keys:
1. With the data field highlighted, press the ENTER key to isolate the first character
space in the field. If you want the first character to be upper case, press the # key
first, then cycle the key with the desired character until that character displays in
the space. If you want all upper case characters, press the # key twice. If you want
numerals only, press the # three times. Wait a few seconds for the character space
to advance, then enter your next character. To add a space press the 0 key. Use the
CLEAR key to erase and the ARROW key to back up and change.
10
Data Entry Field with Alpha Character Entry
NvTlkGSMManual copy.indd 10
2. Press ENTER when completed.
12/2/2002, 8:41:55 AM
Section 2
Text Entry - Character Chart
Getting Started
Press the # Key before pressing a number
key to switch to upper case characters
Number of key presses required to display the desired character
1 2 3 4 5 6 7 8 9 10 11 12 13 14 15
upper case characters
Key
Space Next Line
Press once before pressing a number key to shift to an upper case character for the first letter of an entry. Press twice to enter all characters in upper case characters. The status bar will display a solid arrow
for first character caps only and an arrow with a dash for
all upper case. Pressing this key will not enter a # symbol when entering text. Use the 1 Key. Use the NumLock feature for quick entry
of numerals only. To engage the NumLock feature, press this key three times until the
symbol appears in the status bar.
NvTlkGSMManual copy.indd 11
12/2/2002, 8:41:56 AM
11
Section 2
Getting Started
The Main Menu
The Main Menu
The Main Menu is a directory of the unit’s operating features. By
selecting a tab and pressing the ENTER key you can access a list of features
for that category. The Main Menu features are: Phone, GPS (Global
Positioning System), PDA (Personal Digital Assistant), and Settings.
To access the Main Menu, at any time, press and release the MENU key,
CLEAR key, or END key until the Main Menu is displayed.
Here is a quick review of the Main Menu tabbed features,
detailed instructions on their use is contained in the sections
titled “Phone Operation” and “GPS Navigation”:
Phone Tab - Contacts
Contacts List
Phone - Selecting this tab presents you with a list of phone feature
pages which allow you to manage your calls.
The first is Contacts, which is a tabbed directory of the names you
have entered and saved for future use. Names and numbers entered
in Contacts can be synchronized with those contained in PC Contact
management programs using the Intellisync for GARMIN CD-ROM,
see page 109. Options for creating a New Phone Number entry are:
First Name, Last Name, Home Phone No., Work Phone No., Car Phone
No., Mobile Phone No., Pager No., Fax No., Company, Home Address,
Work Address, e-mail Address, Web Address, Note, Waypoint, and Special
Date.
Page Options are: View SIM #’s, View Speed Dial List, View Fixed Dialling
#’s, View My Phone #’s, and Delete All.
NOTE: The SIM #’s feature, similar to Contacts, is
available on most SIM cards. Refer to the section detailing SIM card use on pages 27 and 32.
12
Phone Number New Entry Page
NvTlkGSMManual copy.indd 12
12/2/2002, 8:41:58 AM
The second is Call History, selecting this tabbed feature allows
you to access information about calls received and made
Section 2
Getting Started
• The Dialled Calls page provides you with a list of the last calls
made and allows you to redial them if desired.
The Main Menu
Page Options are: Delete All.
• The Missed Calls page provides a list of calls made to you, but
were unanswered. Those calls with CLIP (Caller Line Identification
Presentation) can be redialled.
Page Options are: Delete All.
• The Received Calls page maintains a record of the last calls
you have received, allowing you to redial them if desired.
Phone Tab - Call History
Page Options are: Delete All.
• The Air Time, in minutes, page keeps track of the number of call
minutes used for your last call and for all accumulated calls.
Page Options are: No Options.
• The Call Cost page provides you with accurate information
about your call units for the last call made and for the total of all
calls. You can also set call unit limits using this feature. The unit of
measure is ACM or Accumulated Charge Meter and will be
displayed in units that can be cost calculated using appropriate
currency values. This feature requires the PIN 2 security code.
Dialled Calls
Missed Calls
Received Calls
Page Options are: No Options.
Air Time
NvTlkGSMManual copy.indd 13
Call Cost
12/2/2002, 8:41:59 AM
13
Section 2
The third feature is Messages with tabbed pages for Short Message
Service storage, management, and creation.
Getting Started
• The New page allows you to create new messages. You can select
the name of the recipient from Contacts, write your message,
and send or save the message as desired.
The Main Menu
Page Options: Set Signature and View Info Messages
• The Voice mail page allows you to access voice mail messages.
Page Options: Set Signature and View Info Messages
Phone Tab - Messages Pages
• The Inbox page is a comprehensive listing of received messages,
information and voice mail.
Page Options: Clear Folder, Set Signature, and View Info Messages
• The Read page is a listing of received messages, that have been read
and retained for review or reference.
Page Options: Clear Folder, Set Signature, and View Info Messages
New Message
Voice mail
Inbox
• The Draft page is a comprehensive list of messages, information and voice mail to be sent at a later date.
Page Options: Clear Folder, Set Signature, and View Info Messages
• The Sent page is a comprehensive list of sent messages, information and voice mail.
Page Options: Clear Folder, Set Signature, and View Info Messages
14
Read
Draft
NvTlkGSMManual copy.indd 14
Sent
12/2/2002, 8:42:00 AM
• The Templates page allows you to create messages that can be
saved and used for multiple applications.
Section 2
Getting Started
Page Options: Clear Folder, Set Signature, and View Info Messages
• The Reports page allows you to view a record of what position
reports have been sent to recipients.
The Main Menu
Page Options: Clear Folder, Set Signature and View Info Messages
• The Recurrences page allows you to view the number of times a
particular position report has been sent.
Page Options: Clear Folder, Set Signature, and View Info Messages
Templates
Messages Page Options
The Messages Page provides three options: ‘Set Signature’ (include
a “From” signature that identifies you as the author of the message)
and ‘View Info Messages’ (which provides access to a service provider
feature page that displays information messages for service or other
type promotions). The ‘Clear Folder’ option allows you to remove
all entries from the page currently displayed. Individual entries can
be deleted by viewing the message, pressing the MENU key, and
selecting the ‘Delete’ option.
Info Messages are also known as “Cell Broadcast”
Message Page
Options
NvTlkGSMManual copy.indd 15
Info Messages
Reports
Recurrences
12/2/2002, 8:42:02 AM
15
Section 2
Getting Started
The Main Menu
The final selection is the MiniBrowser which allows you access
to the wireless web.
Page Options: Add to Bookmark, Show URL, View Air Time, Encryption,
and Restart..
This feature will not be functional unless your service
provider offers support and you add it to your subscription. Like internet service at your home or
office, there will be air time fee charges for its use.
Phone Tab - MiniBrowser
Air Time
Fee Adviser
MiniBrowser Page
16
NvTlkGSMManual copy.indd 16
12/2/2002, 8:42:03 AM
GPS - This tab presents you with a list of five Global Positioning
System related feature pages
The first on the list is the Map Navigator, which is the main
navigation display. This page provides a direction field with compass
or direction arrow, a speed field, a distance to go field, a time to go
field, a map with position icon or panning arrow and Zoom In/Out
scale.
Section 2
Getting Started
The Main Menu
Page Options: Find ‘n Go, Full Screen Map, Show Data Fields, Show Next
Street, Hide Next Street, Stop Navigation , Measure Distance, Setup Map,
Trip Computer, and Turn GPS On/Off.
The second feature is Find ‘n Go, which consists of a database of
map locations for waypoints, points of interest, cities, exits, addresses,
and junctions. Select a map item from the lists provided and then
press ENTER to view on the map, create a route and Goto it or save it
as a waypoint. You can choose from lists of “Nearest” or “By Name”.
The type of mapping information available to Find ‘n Go functions like points of interest, addresses, and junctions is dependent on
the type of MapSource map data software that is downloaded to the
NavTalk. Refer to page 110 for a detailed description of MapSource
mapping data and how it functions with the NavTalk GSM.
GPS Tab Pages
Map Navigator
Page Options: Find By Name, Find Nearest , Delete Waypoint, Delete By.
Symbol, Delete All, and Save as Waypoint.
Find ‘n Go
NvTlkGSMManual copy.indd 17
17
12/2/2002, 8:42:03 AM
Section 2
Getting Started
The Main Menu
The third item on the list is the Trip Computer, which displays
information about the navigation process using data fields to indicate:
Trip Odometer, Stopped Time, Moving Time, Moving Average, Overall
Average, Total Time, Maximum Speed, and accumulated distance
Odometer.
Page Options: Reset Trip, Reset Max Speed, and Reset Odometer.
The final feature on the list is the Satellite Information Page,
which displays both an overhead view of the GPS satellites being
tracked by the unit and the relative strength of each signal being
received. In addition, it displays your present latitude and longitude,
elevation, current speed and relative accuracy of your position.
Trip Computer
Page Options: North or Track Up, New Elevation, New Location, and Turn
GPS On/Off.
Satellite Information
18
NvTlkGSMManual copy.indd 18
12/2/2002, 8:42:04 AM
PDA - This tab displays Personal Digital Assistant style feature pages
which allows you to manage personal information.
The first feature is the Calendar which incorporates a calendar with
selectable dates and a notation page to list appointments for that day
along with a reminder alert option. Data contained in this feature can be
synchronized with PC contact management data using the Intellisync for
GARMIN CD-ROM for appointment scheduling, etc. See page 109.
Section 2
Getting Started
The Main Menu
Page Options: Delete All and Move All.
The second feature is the Tasks which allows you to create a list
of tasks with check boxes to indicate when they have been completed.
When highlighted a task on the list will display the due date for the task
at bottom of the page. Data contained in this feature can be synchronized
with contact management data for a PC as explained on page 109.
PDA Tab Pages
Page Options: Delete All.
The third feature on the list is Notes which allows you to store
important information in note form. To retrieve that information without scrolling through long lists, just use the on-screen Find key, enter
a key word and press ENTER. Data contained in this feature can be
synchronized with contact management data for a PC. See page 109.
Calendar
Tasks
Notes
Games
Page Options: Delete All.
The fourth feature on the list is the Games Page which offers a
variety of familiar games for recreational use.
Page Options: New Game, Set Level, etc..
The final feature on the list is the Calculator Page
which offers two types: standard and scientific.
Page Options: Standard, Scientific, Radians, and Degrees.
NvTlkGSMManual copy.indd 19
Calculator
19
12/2/2002, 8:42:05 AM
Section 2
Getting Started
The Main Menu
Settings Tab - Phone Pages
Profiles
Security
Network
Calls
SMS
Messages
20
NvTlkGSMManual copy.indd 20
Settings - This tab displays pages which used to manage unit features
that include the Phone pages, the Call Services pages, the System
pages, the GPS pages, and the Map pages. The first are the Phone
pages, a tabbed directory of settings that allow you to customize the phone.
• The Profiles Page allows you to volumes and tones for a variety of
call and message profiles.
Page Options: Restore Defaults. Edits : Alerts, Volume, General.
• The Security page controls PIN number entry, fixed dialling, and codes.
Page Options: None.
• The Network page allows you select a network, choose a preferred
network, and select a service operator.
Page Options: Restore Defaults.
• The Calls page allows you to setup the ways calls are handled.
Page Options: Restore Defaults.
• The SMS page allows you to enter a Service Center No., determine
the length that a message is valid, choose a format, and select how
the recipient replies.
Page Options: Restore Defaults.
• The Messages page allows you set Info message categories, choose
an Info message language, enter a Voice mail number, and an
SMS emergency number.
Page Options: None.
• The Browser page allows you to enter a home page
No. Connection Settings, and enable/disable
fee warning, require authorization, and enable
push content.
Page Options: None.
Browser
12/2/2002, 8:42:06 AM
Section 2
The second feature on the list is the Call Services pages which is a
tabbed directory of four call services.
• The Call Divert Page, allows you to divert calls to a variety of
choices: All Voice Mail, Voice if Busy, Voice if No Answer, Voice if
Out of Reach, Voice if Not Available, All Fax Calls, and All Data
Calls.
Getting Started
The Main Menu
Page Options: None.
• The Call Barring Page allows you to bar: All Outgoing Calls,
International Calls, International if not Home, All Incoming Calls,
Incoming if Roaming, and Cancel All Barrings.
Settings Tab - Call Services Pages
Page Options: None.
• The Call Waiting Page allows you to be notified of all incoming `
calls while on another call.
Page Options: None.
• The Setup Page allows you to send your own phone number and to
select settings for the Call Divert feature.
Page Options: Restore Defaults
NvTlkGSMManual copy.indd 21
Call Divert
Call Barring
Call Waiting
Setup
12/2/2002, 8:42:08 AM
21
Section 2
Getting Started
The Main Menu
The third item on this list is the System pages which is another
tabbed directory for accessing three unit features.
• The Display page with Backlight Timeout, Display Timeout, Units
of Measure, and Language options.
Page Options: Restore Defaults.
• The Time page with Time Setting, Time Format, Time Zone
options, and Daylight Savings Time options.
Page Options: Restore Defaults.
Settings Tab - System Pages
• The Interface page with Serial Data Format options, Baud Rate
options, Beacon, Frequency, Bit Rate options, and Beacon Receiver
Status Information.
Page Options: Restore Defaults.
Display
22
Time
Interface
NvTlkGSMManual copy.indd 22
12/2/2002, 8:42:09 AM
The fourth on this list is the GPS pages which is another tabbed
directory for determining the type of GPS navigation information
displayed in the Map Navigation Page.
• The General page with choices for GPS On/Off, Battery Saver, or
Simulation, Location Format, Map Datum, and Track Log selection.
Section 2
Getting Started
The Main Menu
Page Options: Restore Defaults and Setup User Datum.
• The Heading page with North Reference selections, Magnetic Variation, and Direction Displays, and Cardinal Letters or Numeric
Degrees.
Page Options: Restore Defaults and Setup User Grid.
• The Guidance page which allows re-calculation of a route after
you have traveled off the original path to a destination, an optional
pop-up message to advise you of upcoming turns on a route, and
three optional avoidance selections to make a route more efficient.
Settings Tab - GPS Pages
Page Options: Restore Defaults.
• The Routing page that allows you select the type of route desired,
an optional preferences prompt when creating a route, a choice of
methods for calculating a route, and calculation of routes most
suitable for the type of transportation you plan to use.
General Settings
Heading Settings
Guidance Settings
Routing Settings
Page Options: Restore Defaults.
23
NvTlkGSMManual copy.indd 23
12/2/2002, 8:42:10 AM
Section 23
Section
The last item on this list is the Map pages which is another tabbed
directory for customizing the map display.
Getting Started
• The Map page with setting options, Detail, Orientation, Color
Mode, and AutoZoom.
The Main Menu
Page Options: Restore Defaults and Restore All.
• The Line page with text and zoom options for: Track Log, Railroad,
and Street Label.
Page Options: Restore Defaults.
• The Point page with text and zoom options for: Waypoint, Exit,
and Point of Interest
Page Options: Restore Defaults.
Settings Tab - Map Pages
• The City page with text and zoom options for: Large City, Medium
City, Small City, and Small Town.
Page Options: Restore Defaults.
• The Area page with text and zoom options for: River, Lake, Park,
and Other.
24
Point
Line
Map
City
NvTlkGSMManual copy.indd 24
Page Options: Restore Defaults.
Area
12/2/2002, 8:42:11 AM
Section 3
Making a Call
Dialling from the Keypad
Phone Operation
1. Enter the phone number by pressing the appropriate keys on the Phone KEYPAD.
2. Observe the number displayed on the Dialling Page. Press the SEND
key when the entire number has been entered. Highlight and press
‘Find’ to locate the number in the Phonebook, highlight and press ‘SMS’
to send a short message, or press Save to place the number in Contacts
Dialling from Contacts
The Contacts List is comprised of entries downloaded from another
list or by manual entry. Detailed information on how to enter names,
numbers and other data in Contacts is contained on page 30. Information on using dialling and call information options is contained on
pages 31 through 42. To make Contact List entries easier, you may
want to install the Intellisync for GARMIN CD-ROM on your PC and
begin to synchronize Contact Data already established in your contact
management program. Intellisync is compatible with Microsoft
Outlook, ACT!, Lotus Notes, and Palm Desktop applications. Refer to
instructions provided with the CD-ROM.
Making A Call
Dial Tab
Dialling Page
Simply press the
key. to dial a number
displayed on the Dialling Page.
1. Highlight Contacts from the Main Menu ‘Phone Tab’ and press
the ENTER key to display the tabbed list of names and phone numbers.
2. Select the desired name from the list and press the ENTER key to
display the Information Page for that name.
3. With the page for that name displayed, highlight and press the
on-screen ‘Call’ button to dial.
Or... display the phone number options if more than one number is listed
on the page. Then highlight the desired number on the list and press
ENTER or the green DIAL key to dial the number.
Highlight the phone number you
want to dial and then press
ENTER.
Highlight the ‘Call’ button and press ENTER to dial or display the
options windows for multiple number listings.
Contact Name
Information Page
NOTE: Contacts will synchronize with the SIM card phone list at the
first access to Contacts after each power up.
25
NvTlkGSMManual copy.indd 25
12/2/2002, 8:42:12 AM
Section 3
Phone Operation
Making A Call
Dialling from the Call History Pages
The Call History Pages allow you maintain records of Dialled
Calls, Missed Calls (calls made to you that you did not answer), and
Received Calls. An options menu provides the ability to call those
individuals on the lists, send messages and other call management
tasks. The Call History pages won’t consist of very much call data
until you have used the phone for a while and some call activity has
been recorded.
1. Highlight Call History from the Main Menu ‘Phone Tab’ and press the
ENTER key to display tabs for the ‘Dialled’, ‘Missed’, and ‘Received’
Calls lists.
Dialled Calls List
Or...if you are on any other page and not highlighting a contact/
number, press the SEND key to display the ‘Dialled’ Calls list.
2. Use the ARROW key to select the desired tab for the list you want
to view.
Missed Calls List
Received Calls List
3. Use the ARROW key to select the desired name and number and then
press ENTER to display the list of options or the SEND key to dial
the number listed. Pressing the MENU key will display the ‘Delete All’
option to clear the list
4. If you chose the Options Menu, use the ARROW key to highlight
‘Call’ and then press ENTER. The Calling Page will display and the
number will be dialled. To use the other options from this list refer to
page 35, “Call History”.
It is important to note: that if a missed or received call originated
from a source that did not allow Caller Line Identification Presentation (CLIP), you will not be able to dial that number from the Missed
or Received Calls Lists.
26
NvTlkGSMManual copy.indd 26
12/2/2002, 8:42:13 AM
Dialling from the Speed Dial List
Section 3
Prior to using the Speed Dial List you must place phone numbers
on the list. Note that the Voice mail number is reserved for the number
one position on the list. You can enter the voice mail number directly
to the number one position on the list or enter it in the Main MenuSettings-Phone-Messages Tab-Voice Mail # field (page 60). When
entered in either location it will be automatically copied to the other.
The last number (9) on the list is reserved for an Emergency number,
which is a specific number that you have designated with an SMS message. A standard Emergency call can be dialed as you would any other
phone. An emergency call can be made when the keypad is locked. See
page 60 for entry details.
Phone Operation
1. Press and Hold the appropriate Keypad key (1-9) that corresponds to
the phone number entered in that slot on the Speed Dial List. Refer to
page 31 for setting up the Speed Dial List and page 60 for entering
your Voice mail number.
Speed Dial List
Making A Call
Dialling from the SIM Card or Fixed Dialling List
As with Speed Dialling, prior to using these two Dialling Lists
you must place phone numbers on the lists. Note that if you have
previously added numbers to your SIM card prior to installing it in
the NavTalk, those numbers will be available for use. You will also be
prompted to add them to Contacts. Fixed Dialling Numbers will always
be available for use whether or not the Fixed Dialling Feature is On or
Off. When On, only those numbers on the List may be dialled.
Fixed Dialling List
1. Access Contacts and press the MENU key to display the Options
menu. Observe “View SIM #’s” and “View Fixed Dialling #’s” options.
2. Highlight the desired option and press ENTER to display this list of numbers,
then highlight the number you want to call and press the SEND key to dial.
NvTlkGSMManual copy.indd 27
SIM Card List
12/2/2002, 8:42:14 AM
27
Section 3
Phone Operation
Handling A Call
The Active Call Page
You can employ a variety of options to perform call handling tasks from
the Active Call Page. This page displays whenever you are dialling, answering, holding, transferring or conferencing calls.
Answering a Call
1. Press the SEND key or highlight the ‘Talk’ button and press ENTER.
You may also use the Auto-Answer feature as explained on page 58.
Placing a Call on Hold
1. Highlight the on-screen ‘Hold’ button and press the ENTER key to place
a call on hold while you answer another incoming call, talk to someone
already on hold, listen to voice mail messages, or perform a task that
takes you away from the phone.
Incoming Call Page
Answering a Call
Press the
key.
2. To return to the person just placed on hold, highlight the Hold tab to
display the Hold List. Then highlight call on hold and press ENTER.
Muting a Call
1. Highlight the on-screen ‘Mute’ button and press the ENTER key to
mute the microphone in order to talk privately with someone nearby
without the person on the phone overhearing your conversation.
2. To restore the microphone to normal, highlight and press the on-screen
‘VOICE‘ button.
Ending a Call
1. Press the END key, or highlight the on-screen ‘End’ button and
press ENTER at any time.
Placing A Call On Hold
Ending a Call
Press the
28
key, or highlight the on-screen ‘END’ button
and press ENTER.
NvTlkGSMManual copy.indd 28
12/2/2002, 8:42:14 AM
Conference Calls
1. When on an active call, highlight the Hold tab on the Call Page to
display the Hold List.
2. Press the on-screen ‘Join’ button to connect all callers on the Hold list
to the conference call.
Section 3
Phone Operation
Handling A Call
3. To speak to an individual within the conference in private or to exclude
any individual temporarily from the conversation; highlight the name
of the caller from the list of callers and press the ENTER key to display
a list of options that can be performed with that caller. To exclude the
caller temporarily from the conference, select ‘Hold’ and press ENTER.
To speak with a caller in private, select ‘Private’ and press ENTER.
4. To return to the regular conference mode, return to the Hold List and
press the on-screen ‘Join’ button.
Active Call
Options Menu
Active Calls for a Conference Call
5. To end a conference call, press the END key.
Sending an Incoming Call to your Voice Mailbox
If you have voice mail service, any unanswered call will be forwarded to your voice mailbox. However, when you are using CLIP
(Caller Line Identification Presentation), the name of the caller will be
displayed on the Incoming Call Page. If you do not want to talk to the
caller at this time and would rather send the call directly to your voice
mailbox, follow the instructions below.
Individual Caller
Options Menu
Calls on Hold List
Highlight the on-screen ‘End’ button and press ENTER or press the
END key to send the call to your voice mailbox.
Forwarding A Call to Voice Mail
NvTlkGSMManual copy.indd 29
12/2/2002, 8:42:15 AM
29
Section 3
Using Contacts
Phone Operation
Contacts store names and numbers for later use and is the path to
such features as Speed Dial List, SIM Card Directory, Fixed Dialling
List, and your Own Phone Numbers.
To open Contacts
Using Contacts
1. Start from the Main Menu ‘Phone Tab’ and highlight ‘Contacts’ from
the list of options. Press ENTER and the Contacts page will be
displayed with tabbed sections for portions of the alphabet.
2. Use the ARROW keys to move from tab to tab.
To Enter a New Name and Number in Contacts
1. Highlight the ‘New’ key with Contacts page displayed and then
press ENTER to display the New Entry page.
Main Menu - Phone Tab
2. Use the ARROW key to highlight First Name entry field, then press
ENTER to isolate the first character space. Follow instructions for
entering data as described on page 10.
3. Use the ARROW key to highlight the next field and repeat the process
described in Step 2.
4. Once you reach the ‘Phone Number’ field, press ENTER to display the
‘Change Type To’ or “Swap With” option. Select one and press ENTER to
display a list of entry categories. You can select any for entry.
Contacts
New Entry Page
Entry Options
New and
Review Entry
Page Options
Menu
Contact Page
Options Menu
Reviewing an Entry
30
NvTlkGSMManual copy.indd 30
5. To edit an entry, highlight the desired field and use the KEYPAD to
enter new names, phone numbers, etc.
6. To view the Options menu for New and Review Entry Pages press the
MENU key to display the menu. Duplicating an entry will display a
number 2 after the name of in Contacts for the duplicated entry
allowing you to record more information by expanding entry options.
7. To quickly access additional data pages, move the ARROW key to the
Right. These pages hold additional information about each contact,
either synchronized from Intellisync or manually entered.
12/2/2002, 8:42:16 AM
Section 3
Contacts Options
Contacts offers several options for storing and dialling phone
numbers.
Phone Operation
Delete All
Using Contacts
This option allows you to remove all entries from Contacts.
Setting Up the Speed Dial List
Speed Dialling allows you to dial a selected Phone Number by pressing and holding a single KEYPAD key (1 through 9) for a total of nine
Speed Dial Entries. Phone Numbers can be added from the New Entry or
Edit Entry pages to the Speed Dial List page. The first entry on the list
is reserved for the number used to dial your voice mail message service,
while the ninth entry is reserved for an emergency number of your selection.
Add To Speed Dial
Option from Phone
Book Data Page
Options
Phone Book Data Page
To set up and use Speed Dialling Numbers:
1. With Contacts Data Page displayed press the MENU key to
display the Options Menu.
2. Use the ARROW key to highlight the View Speed Dial List option
and press ENTER to display the Speed Dial List page, or add a
number to the list directly from Contacts Entry page by
choosing ‘Add To Speed Dial’ from the options menu.
3. Once an entry on the list is highlighted, pressing the MENU key will
display the Entry Options Menu. From this menu, you can edit an entry,
select a number from Contacts, edit using Contacts Entry page, call
directly from the list, move the number on the list, swap the number
with another on the list, or delete the entry.
4. To dial a Speed Dialling Number, press and hold the keypad number key
corresponding to the Speed Dialling entry on the list (1-9).
NvTlkGSMManual copy.indd 31
Add Names and
Numbers to the
Speed Dialling
No’s. list using
Contacts Entry
Page Options
Press and hold the
KEYPAD number to
one-touch dial the
appropriate number
on the list.
Use the Edit Number
option to change
both the name and
number of an entry.
Speed Dialling No’s
Find the number in
Contacts
Enter a number to
the list or edit from
Contacts
Speed Dial Entry Options
Speed Dial List
Option
Use the Move To
and Swap With
options to edit
the Speed Dial
List.
31
12/2/2002, 8:42:18 AM
Section 3
Phone Operation
Using Contacts
The SIM Numbers feature allows you to dial numbers stored on the
card that can be transferred to another SIM compatible phone. The total
amount of numbers that can be stored on the SIM Card depends on the
capacity of that particular card.
To use the SIM Numbers feature:
1. With Contacts page displayed press the MENU key to display
the Options Menu.
SIM Numbers List will
recognize a number
by the first few digits.
Entry Options Menu
View SIM Numbers
Page Options Menu
SIM Dialling No’s.
Saving a Name and Number To the SIM List.
2. Use the ARROW key to highlight the ‘View SIM #’s’ option and press
ENTER to display the SIM Phone Numbers list. You can also dial a
number from this list by pressing the KEYPAD key with the corresponding number on the SIM Dialling List followed immediately by the # key.
To Save a Phone Number to the SIM Numbers List:
1. With Contacts page displayed, highlight a name from the ‘All’
tab list and press ENTER to display the information page for that name.
2. Press the MENU key to display the Options Menu for that page.
Select a Number
Editing a Name and Number from the SIM List.
3. Use the Down ARROW key to highlight the ‘Save To SIM Numbers’
option and press ENTER. If there is more than one phone number
listed on the page, a prompt window will appear for you to select the
desired number. Highlight the desired number and press ENTER to
place the name and number on the SIM Numbers List.
To Edit a SIM Name or Number:
1. With the SIM Number page displayed press the MENU key to display
the Options Menu.
2. Select ‘Edit Name’ or ‘Edit Number’ and press ENTER to display the edit
window. Press ENTER to highlight the first character.
32
NvTlkGSMManual copy.indd 32
3. Change the name or number as desired and then press ENTER.
12/2/2002, 8:42:19 AM
Section 3
View Fixed Dialling Numbers
The Fixed Dialling Numbers list allows you to dial only those numbers on the list and is controlled by a pass code (PIN 2)
Phone Operation
To set the Fixed Dialling Feature
Using Contacts
1. Highlight the ‘Settings’ tab of the Main Menu, select the ‘Phone’ option
and then press ENTER to display the tabbed index of features.
2. Use the ARROW key to select the ‘Security’ tab, then highlight the Fixed
Dial Mode field and press ENTER to display the On/Off menu.
3. Select ‘On’ and press ENTER to display the PIN 2 Code Entry box.
Fixed Dialling
Numbers are the only
numbers that can be
dialled when this
feature is active.
Page Options Menu
To insert phone numbers on the Fixed Dialling Numbers list
1. With Contacts page displayed press the MENU key to display the
Options Menu.
Fixed Dialling No’s.
Entry Options Menu
To use the Fixed Dialling Numbers feature:
1. With Contacts page displayed press the MENU key to display the
Options Menu.
2. Use the ARROW key to highlight the ‘View Fixed Dialling No’s’ option
and then press ENTER to display the Fixed Dialling No’s List.
PIN 2 Code Entry
Press ENTER to
acknowledge
Security Page
Fixed Dialling On/Off Field
33
NvTlkGSMManual copy.indd 33
12/2/2002, 8:42:20 AM
Section 3
Phone Operation
Using Contacts
My Phone Numbers
Contacts offers an option for recording your phone numbers for
reference. The My Phone Numbers List will hold two numbers (often a
business number and a personal number or two separate numbers for
two different users of the same unit).
To place numbers in Contacts ‘My Phone Numbers’ List:
Enter up to two
user Phone Numbers
Page Options Menu
My Phone No’s.
Use the Edit Name
and Edit Number
options to change
both the name and
number of an entry.
Entry Options Menu
Save a number to
Contacts by pressing
ENTER with this option
highlighted
Save as First Name or
as Last Name
Delete Prompt
Entering Dial Strings with (DTMF) Dual Tone
Multi-Frequency Tones .
To automate dialling of numbers with extensions, pass codes,
etc., you can enter Dial Strings that include DTMF Tones and 5
second pauses for recorded messages, connection delays, etc.
When entering a phone number in any directory: Contacts, Fixed
Dialling, Speed Dialling, etc., press and hold the # key while pressing
the 7 key to enter a 5 second pause (p) in the dialling sequence.
You can place as many pauses as required to allow for recorded
messages to complete before the next number sequence is dialled. It
is recommended that you do not record bank account PIN’s or credit
card numbers for reasons of security.
1. With Contacts page displayed press the MENU key to display the
Options Menu.
2. Use the ARROW key to highlight the ‘View My Phone #’s’ option and
press ENTER to display the ‘My Phone Numbers’ page. The first entry
field will be highlighted.
3. Press ENTER to display the Entry Options Menu and observe the list of
options; Edit Name, Edit Number, Save to Phonebook, and Delete.
4. Select Edit Name and press ENTER to begin entry of a name by using
the KEYPAD keys. Press ENTER when entry is completed to return
to the entry field.
5. Press ENTER again to display the option menu. Highlight ‘Edit Number’
and press ENTER to display the number entry page. Use the KEYPAD
keys to enter the desired phone number and press ENTER when finished.
6. To save the newly entered Name and Number to Contacts, press
ENTER to display the Options Menu again, select ‘Save To Phonebook’
and press ENTER.
7. To delete a Name and Number, press ENTER to display the Options
Menu, select ‘Delete’, press ENTER, select ‘Yes’ from the Delete prompt
and press ENTER.
34
NvTlkGSMManual copy.indd 34
12/2/2002, 8:42:21 AM
Section 3
Call History
You can review information about previously Dialled Calls, Missed
Calls, Received Calls, Air Time for a call, and Call Cost. Any call can be
redialled by highlighting it and pressing the SEND key.
Dialled Calls
A record of Dialled Calls are stored on this list to provide you with
information about to who and when you have made phone calls.
To view Dialled Calls
1. Highlight Call History and then press ENTER to display the ‘Dialled Calls’ list.
2. Use the Up/Down ARROW keys to scroll through the list. Each entry
lists the phone number, name of individual called (if listed in the
Phone Book), and the time and date the call was made.
Phone Operation
Icons next to a
number indicate
the location,
Home, Office,
Pager, Unknown,
etc.
Call History
Dialled Calls List
Options Menu
Dialled Number
or Name from
Contacts
Time of Call
Date of Call
Dialled Calls List
3. To redial, Send A Message, Save to Contacts, add to Speed Dial, or
Delete a highlighted entry, press ENTER to display the Entry Options Menu.
Missed Calls
Missed Calls are those which were received by the NavTalk but
not answered. If the caller had Caller Line id enabled you will see the
Name and Number of the caller as well as the time and date of the call.
Unidentified
calls will be
designated as
Unknown (?)
Call Entry Options Menu
Missed Calls List
Options Menu
To view Missed Calls
1. Highlight Call History and then press ENTER to display the ‘Call History’ tabs.
2. Use the Up/Down ARROW keys to scroll through the list. Each entry
lists the phone number, name of individual called (if listed in the
Phone Book or Caller id is enabled), and the time and date of the call.
3. To Call, Send A Message, Save to Contacts, add to Speed Dial, or Delete
a highlighted entry that displays a phone number, press ENTER to
display the Entry Options Menu.
NvTlkGSMManual copy.indd 35
Missed Calls List
Call the number
Add to the
Speed Dial List
Send a Message
Save to the
Phonebook
Delete from this list
Call Entry Options Menu
12/2/2002, 8:42:22 AM
35
Section 3
Phone Operation
Received Calls
To view Received Calls
1. Highlight Call History and press ENTER to display the ‘Received Calls’ list.
2. Use the Up/Down ARROW keys to scroll through the list. Each entry
lists the phone number, name of individual called (if listed in the
Phone Book or CLIP is available), the time and date the call was made.
Call History
Received Calls Page
Options Menu
Call Entry Options
Menu
Received Calls
3. To redial a highlighted entry, press ENTER to display the Call Options
Menu. You can choose from Call, Send Message, Save (or Edit) To
Phonebook, Add To Speed Dial, or Delete options. Highlight an option
and press ENTER to display the option page or complete the task.
Air Time
To view Air Time
1. Highlight Call History and then press ENTER to display the ‘Call History’
tabs. Highlight ‘Air Time’ and press ENTER.
Highlight the Clear
Button and press
ENTER to reset the
‘Last Call’ and ‘All
Enter Since’ data
fields.
2. Observe two time fields, one for the ‘Last Call’ and ‘All Calls Since’ the
last time you cleared the time entries, and Total Minutes.
3. Use the Up/Down ARROW key to highlight the on-screen ‘Clear’ button
to reset the ‘All Calls Since’ field.
Call Cost
Air Time History
To view Call Cost
1. Highlight Call History and then press ENTER to display the ‘Call History’
tabs. Highlight ‘Call Cost’ and press ENTER to display the Call Cost Page.
Call Cost
36
NvTlkGSMManual copy.indd 36
Before you can clear
the Last Call and
Total Call Units fields
or set the Maximum
Call Units allowed,
you must enter your
PIN 2 code.
2. Observe the Accumulated Charge Meter (ACM) fields on this page to
determine the units for the last call made, total units to date, and if
you are approaching your pre-set maximum call units limit. Before
clearing the accumulated units fields or setting a call unit limit, you
must first enter your PIN 2 code.
12/2/2002, 8:42:23 AM
Section 3
Messages
You can send, receive and save messages in both voice and text form.
Messages features are accessed from the Phone tab of the Main Menu.
Highlight ‘Messages’ on the Phone Tab Page and press ENTER to
display the Messages Page. All features on the Message Page require
support from your Network Provider, and in many cases a subscription.
Messages can only be sent to phones with Short Message Service
capability. Messages received can be from any source capable of transmitting the message, i.e., another phone or your service provider. This
includes notification of voice mail.
To send a New message:
Phone Operation
Messages
Send Message
Options Menu
Message Page
Options Menu
1. Use the ARROW key to highlight the New button on the Message Page
2. Press ENTER with the ‘New” button highlighted to display the New
Message Page.
Phone Tab - Messages
3. Use the ARROW key to highlight the “To:” field to enter a desired
name from Contacts, or...enter the desired number in the adjacent
data field using the KEYPAD. You must either enter the recipient’s
phone number or a valid name from Contacts.
4. Next move to the Message field press ENTER and begin to enter your
message using the phone KEYPAD.
New Messages
5. When the message is complete, press the SEND or SAVE button.
Note that: Information Messages are independent of this feature and are
controlled and sent by your service provider. They will appear on their own
page when you press the MENU key and select “View Info Messages’.
Select Recipient
Send Message
Save Message
Options Menu
Set Signature
Entry
Set Signature
With the Messages page displayed, press the MENU key to display the
‘Set Signature’ option. Press ENTER to display the Set Signature dialog
box. Enter a “From” type signature and press ENTER.
NvTlkGSMManual copy.indd 37
37
12/2/2002, 8:42:24 AM
Section 3
Phone Operation
Messages
Voice Mail Messages
To setup Voice Mail
Voice mail is a Network Service Provider operated feature and
instructions for setting up voice mail will be given by your provider.
Refer to page 60 for details on entering your voice mail number.
To check your Voice Mail:
1. Highlight the ‘Voice Mail’ button and press ENTER to dial your voice mail.
Or... Simply press and hold the 1 key to dial it from the Speed Dial List
2. Press the END key when finished listening to your voice mail.
Message Inbox
Voice Mail Set Up Field
The Message Inbox lists all messages received that are unread. It
may also include voice mail notification.
To view the Message Inbox
1. Highlight the Inbox tab and press ENTER to view received messages.
Dialling Voice Mail
2. To read a desired message, use the ARROW key to highlight it and
then press ENTER to display the message. You will have three options
to choose from: ‘Reply’, ‘Forward’, or ‘Delete’. Once read, the message
will move to the ‘Read’ page.
Read Messages
Once you open a message in the Message Inbox, it will automatically be saved for review in the ‘Read’ list.
To view Read Messages:
Message Inbox List
38
NvTlkGSMManual copy.indd 38
Read Message List
1. Highlight the Read tab and highlight the message you would like to
review, then press ENTER to display the message.
2. To exit the displayed message, press the END key.
12/2/2002, 8:42:25 AM
Section 3
Using Numbers and Websites included in Messages
You can extract phone numbers and website addresses included
in messages and save them to Contacts and Browser Bookmarks List
respectively.
Phone Operation
Messages
To call and save phone numbers included in Messages:
1. Highlight the desired message from the ‘Inbox’ or ‘Read’ list and press
ENTER to display the message.
2. Press the MENU key to display the Options Menu for the Message
Page. Highlight ‘Use Number’ and press ENTER to display a list of the
first four recognized numbers in the message (three or more numerical
digits).
3. Use the ARROW keys to highlight the desired number from the list and
press ENTER to display the list of ‘Use’ Options. You can ‘Call’, ‘Send a
Message’, ‘Save To Contacts’, or ‘Add To Contacts’.
Message Page
Options Menu
Message with phone
numbers
4. Highlight the option of your choice and press ENTER to initiate.
To view and bookmark websites included in Messages:
Use Number Option
Selected Number
Use Options
1. Highlight the desired message from the Inbox list and press ENTER
to display the message.
2. Press the MENU key to display the Options Menu for the Message
Page. Highlight ‘Use Web Address’ and press ENTER to move to the
Browser ‘Enter Address” window where you will be asked to enter the
displayed web address.
Use Web Address
Option
3. Highlight the on-screen ‘OK’ button and press ENTER to display the
web page on the Browser.
4. Press the MENU key to display the Browser page Options Menu, select
‘Add To Bookmarks’, and press ENTER to save the web address.
NvTlkGSMManual copy.indd 39
Number from
Message saved to
Phonebook
Website opened on
Browser
Message with website
URL
Enter Address Window
12/2/2002, 8:42:26 AM
39
Section 3
Phone Operation
Messages
Message Drafts
You can create a message and save for transmission at a later time by
storing it in the ‘Drafts’ list.
To view Message Draft:
1. Highlight the Drafts tab and then press ENTER to view the list of sent
messages.
2. To read a desired message, use the ARROW key to highlight it and
then press ENTER to display the message. You will have two options
to choose from: ‘Send’ or ‘Save’.
To send a Draft as a Message:
1. Highlight the Drafts tab and then use the ARROW keys to highlight the
desired drafted message and then press ENTER to display the message.
Message Draft List
2. Highlight the on-screen ‘Send’ key and press ENTER to send the
message.
Sent Messages
Sent Messages are those which have been forwarded to the recipient
as opposed to those which you have created and placed in the Draft
List to be sent at a later date.
To view Sent messages
1. Highlight the Sent tab.
2. Observe the list of current Sent messages.
Sent Messages List
40
NvTlkGSMManual copy.indd 40
12/2/2002, 8:42:28 AM
Section 3
Message Templates
Message templates are messages that, once created, can be used
over and over or sent to more than one recipient.
Phone Operation
To create a Message Template
1. Highlight the on-screen ‘New’ button and then press ENTER to display
the New Message dialog field.
2. Use the ARROW key to move to the field and then press ENTER to
begin entering the first character of the text message.
Messages
Signature
Message
selected
from the
Templates
List
3. Then highlight the on screen ‘Save’ button and press to display the save
options menu. Highlight ‘Save To Template’ and press ENTER.
To use a Message Template
1. Highlight the desired pre-constructed message from the Template List
and then press ENTER to display the Send Message page.
2. Highlight the ‘To’ button an press ENTER to select a recipient from the
message from Contacts or highlight the recipient field and enter
a phone number, then highlight the ‘Send’ button and press ENTER.
Or... while composing a message, press MENU and select ‘Insert Template’
and select a template to insert in your message.
Reports
Message recipient selected
from Contacts.
Select a message from the
Templates List.
Message Templates List
Template inserted in a Message
Reports List Options
Send To Entry using
Contacts
Request for a
StatusReport
Reports List
Reports allow you to report your position to another NavTalk unit.
The Reports List displays those Status Reports.
Choosing the
Repeat option
allows your position to be sent as
you move about at
set intervals until
the timeout option
ends reporting.
To create a Status Report or a Status Request
1. Access the Messages Page from the Phone Tab of the Main Menu.
2. Select the ‘New’ button and press ENTER for the New Messages Page.
3. With the New Message Page displayed, press the MENU key to display
the Options Menu, then select ‘Status Report’ and press ENTER to
display the Send Status Report Page.
NvTlkGSMManual copy.indd 41
Repeat - Timeout
Hours/Minutes Option
Status Report
41
12/2/2002, 8:42:28 AM
Section 3
Phone Operation
Messages
Repeat and
Timeout Units
Option Menu
4. Highlight the ‘To’ button and press ENTER to display Contacts
listing of names. Highlight the desired name and press ENTER and then
select the phone number desired from those displayed for that name
and press ENTER to place the name in the ‘To’ field on the New
Message Page, or... use the KEYPAD to enter a phone number manually.
5. Next Highlight the Repeat Option and press ENTER if you want to
repeat the Report. This will place a check mark next to the Repeat Option.
Choosing the Repeat
and Timeout options
allows you to receive
position reports at a set
interval and until you
no longer require them.
Status Request
6. Highlight the number field just below the repeat check mark and press
ENTER to and then use the KEYPAD to enter the number of desired
units of time (minutes or hours). Then move to the adjacent field, press
ENTER and select either Minutes or Hours then press ENTER again.
7. Move down to the Timeout field and press ENTER to place a check
mark next to the Timeout option.
8. Use the ARROW key to highlight the number field below the timeout
option and then use the KEYPAD to enter the units (minutes or hours)
before the report stops repeating. Then highlight the unit field next to it and
press ENTER, to select either minutes or hours and then press ENTER again.
9. To create a Status Request select Send Status Request from the New
Message Options menu and repeat the steps explained above.
Read Message -Status Request
Recurrences
Allows you to view outgoing reports or requests that are set to repeat.
To view Recurrences
1. Highlight the Recurrences tab to display the Recurrences Page.
2. Observe the list of recurrences.
42
Recurrences List
NvTlkGSMManual copy.indd 42
3. After selecting a recurring status report or request, you may choose to
re-send or delete it. Otherwise messages on this list will continually be
sent out at the set interval until they timeout.
12/2/2002, 8:42:29 AM
®
NavTalk
Section
3
MiniBrowser
The MiniBrowser uses Wireless Application Protocol (WAP) to provide
access to a network of wireless websites (specially designed Internet sites).
Because devices like the NavTalk have limited memory for caching (storing)
recently downloaded information the MiniBrowser cannot use plug-ins,
java-based features, or download anything. It can display some basic
graphics, but these sites are designed to be small in size, load quickly and
in general minimize waiting time. The list of sites for you to choose from is
network dependent, if your service provider does not provide a gateway to
sites, then you will need to know the URL (web address) for a site and enter
it manually.
Phone Operation
MiniBrowser
Air Time
Fee Adviser
To Set Up the MiniBrowser:
Phone Tab - MiniBrowser
1. Select the Settings Tab of the Main Menu, then highlight the
Phone feature and press ENTER to display the Phone Settings tabs.
2. Use the ARROW keys to tab over to the ‘Browser’ tab.
Back
Site address
entry
3. Refer to page 61 for detailed information on Browser Settings.
To access the MiniBrowser:
Reload
1. Select the Phone Tab of the Main Menu, then highlight the MiniBrowser
feature.
Stop
2. Press the ENTER key to display the MiniBrowser page. An ‘Air Time’
advisor window will pop-up. Select ‘OK’ and press ENTER to open
the page.
Bookmarks
Home
MiniBrowser Page
3. The MiniBrowser will display your Home Page.
4. From this Home Page you can navigate the web using the toolbar at the
top of the page.
43
NvTlkGSMManual copy.indd 43
12/2/2002, 8:42:30 AM
Section 3
To use the MiniBrowser Page Options:
Phone Operation
MiniBrowser
1. Select the Phone Tab of the Main Menu, then highlight MiniBrowser.
2. Press the ENTER key to display the MiniBrowser page. An ‘Air Time’
advisor window will pop-up. Select ‘OK’ and press ENTER to open.
Bookmarking a Site
1. With the web site open, press MENU to display the options menu.
URL
2. Highlight ‘Add To Bookmarks’ and press ENTER to place the URL or
label on the Bookmarks List.
3. To display the Options Menu for an individual entry, press ENTER.
Viewing a site URL
Options Menu
1. With the web site displayed, press MENU to display the options menu.
Air Time Meter
Bookmarks Page
2. Highlight ‘Show URL’ and then press ENTER to display the URL dialog
window. Press ENTER to close the window.
Viewing Air Time
Entry Option
Bookmarks Page
1. With the web site displayed, press MENU to display the options menu.
2. Highlight ‘View Air Time’ and press ENTER to display the Current Call
Time window. Press ENTER again to close.
Bookmark
Individual Entry
Options
Encrypting
Add To Bookmarks Entry
1. With the web site displayed, press the MENU key to display the
page options menu. Highlight ‘Encryption’ and press ENTER to begin.
Restarting the MiniBrowser
Sending Data
Indicator
Enter Site Address Window
44
NvTlkGSMManual copy.indd 44
1. From the options menu, highlight ‘Restart’ and press ENTER.
To access a site by entering an address:
1. Use the ARROW key to highlight the Enter Address icon at the top
right side of the page and then press ENTER to display the ‘Enter
Address’ window. Enter the site URL and then press the ‘OK’ button.
12/2/2002, 8:42:31 AM
Section 3
PDA (Personal Digital Assistant) Style Applications
You can use these PDA style applications to manage your time and
activities. Using the Intellisync Software Interface you can synchronize
both PDA and PhoneBook data with your PC. Refer to instructions
provided with the Intellisync CD-ROM provided with your NavTalk.
Phone Operation
Using the Calendar
Using the Calendar
You can use the Calendar to mark important dates, setup a schedule,
and place reminder messages for events on specific dates. When and
appointment time on the list has past, it will automatically be deleted
from the list. You can setup appointments for recurring events as well.
To mark a date on the calendar
PDA Tab - Calendar Page
1. Select ‘Calendar’ from the Main Menu PDA tab and press the ENTER
key to display the Calendar page calendar
Highlight the year or
month:
2. Use the ARROW key to move to the desired date on the calendar and
then press ENTER to display the Appointment page for that day.
Ґ Use the RIGHT
Arrow to move
forward in time
3. If there are no notes for that day and you want to create an entry, use
the ARROW key to highlight the ‘New’ button and then press ENTER
to display the ‘New Appointment‘ page.
Ґ Use the LEFT Arrow
to move back in
time
4. Use the ARROW key to highlight the From and To boxes and the
beginning and ending times for the appointment KEYPAD keys to enter
the beginning and ending times for the appointment. Then highlight
the appointment description box and press ENTER to begin entering
the description using the data entry methods explained on page 10.
5. Highlight and press ENTER to check the Reminders option if you want
a reminder prior to an appointment. Highlight the reminder units field
and press ENTER to access the units number entry, then use the keypad
to enter the number of minutes, hours, etc. before the appointment .
NvTlkGSMManual copy.indd 45
Use the ARROW key
to move the date box
about on the page
Page Options Menu
Calendar Page
Press ENTER with the
month highlighted to
display month options
Time
Entries
Options
Description Menu
Reminder
Units
Options
Menu
New Appointment
Appointments Page
45
12/2/2002, 8:42:32 AM
Section 3
6. Move to the units field and press ENTER to display the options list.
Highlight the desired option and press ENTER.
Phone Operation
Using the Calendar
A Reminder will
turn the unit On
, if necessary in
order to signal the
reminder note.
You must clear a
Reminder before
the next reminder
will signal.
Appointment Reminder Page
7. When completed, press the ENTER key and then move down to
highlight the ‘Save’ key and then press ENTER to save the appointment to the Appointments List Page.
8. Press the MENU key to view or use the Appointment Page options.
Using the Appointment Page Options
When setting up an appointment page you can choose from three
options: Delete, Recurrences, and Move To.
To cancel an appointment:
1. Select the appointment from the list page and press ENTER to display
the page.
2. Press the MENU key to display the options menu. Select ‘Delete’ and
press ENTER to delete the page, or... use the page ‘Delete’ button..
New Appointment Options Menu
To setup recurrences: (usually done for a new appointment)
1. With the New Appointments Page displayed, press the MENU key to
display the options menu.
End-On Options
Interval Settings Page for Appointment Reminders
2. Select ‘Recurrences’ and press ENTER to display the Recurrences setup
page. On this page you will observe and ‘Interval’ field with a default
entry of “None”. Press ENTER to display the list of interval options.
When you highlight any other option than “None” and then press
ENTER, to display the ‘Frequency’, ‘Day of the Week’, and ‘End On’ fields.
3. Highlight each field as required and enter the desired data. Press the
CLEAR key to close.
To move an appointment to a new date:
46
Appointments List Options Menu
NvTlkGSMManual copy.indd 46
1. Select the ‘Move To’ option and press ENTER to display the Calendar
Page. Use the ARROW keys to move to the new date and press ENTER.
12/2/2002, 8:42:33 AM
Section 3
Using Tasks
You can use Tasks to record tasks, list them in order of importance,
and the date by which they must be completed.
Phone Operation
To create an item on the Task List:
The Tasks List
1. Select Tasks from the Main Menu PDA tab and press the ENTER
key to display the Task List Page.
2. Use the ARROW key to move to the New on-screen button and
then press ENTER to display the New Task Details page.
3. Use the ARROW key to highlight the priority field , then press ENTER
to display the priority number list (most important item first). Use the
ARROW key to select the desired number and then press ENTER.
4. Use the ARROW key to highlight the Due Date field and then
press ENTER to display the due date option menu. Select “Choose Due
Date” and press ENTER to display a calendar page. Use the ARROW
key and ENTER key to select a month, year and day. After the day is
selected, the Task Item Details page will reappear.
5. Next, highlight the Task description box and press ENTER to begin
entering the description. Use the KEYPAD keys to enter the description.
Press the # key prior to the desired letter to create an uppercase
character. Press the 0 key to create a space between words or number
groups.
6. When completed, press the ENTER key and then move down to
highlight the ‘Done’ key and then press ENTER to save the item
to the Task List.
7. To clear the Task List of items press the MENU key to display the
‘Delete All’ option and then press ENTER.
Highlight and
press ENTER to
check-off an
entry.
PDA Tab - Tasks
Task List Option
Menu
Due Date for
Completion
Option Menu
Task List Page
Priority Setting
and Range
Data Entry
Field
New Item Entry Page
NvTlkGSMManual copy.indd 47
12/2/2002, 8:42:34 AM
47
Section 3
Using Notes
You can use Notes to store important numbers, data, personal
information, etc.
Phone Operation
To create a note in Notes:
Using Notes
1. Select ‘Notes’ from the Main Menu PDA tab and press the ENTER
key to display the Notes Page.
2. To view the contents of a note in detail, use the ARROW key to
highlight the note on the page and then press ENTER to display the
Note Detail page.
3. If there are no notes for that day and you want to create an entry, use
the ARROW key to highlight the ‘New’ button and then press ENTER
to display a new ‘Note Detail‘ page.
PDA Tab - Notes
4. Begin entering your note using the keypad as explained on page 10.
Page Options
Menu
5. When completed, press the ENTER key and then move down to
highlight the ‘Done’ key and then press ENTER to save the note to
Notes List.
6. To view the Note Detail page for any note, select the on-screen
‘Find’ key and press ENTER. Then, use the keypad to enter a key
word from the note to and then pre ENTER to display the ‘Find
Results’ page with the details of your note.
Notes Page
Find Note Option
New Note Entry Page
48
NvTlkGSMManual copy.indd 48
12/2/2002, 8:42:36 AM
Section 3
Games
Games are provided as an entertainment feature.
Phone Operation
To select and play a game:
1. Use the ARROW key to highlight the PDA Tab and display its list of
features.
Playing Games
2. Highlight the ‘Games’ feature and press ENTER to display game choices.
3. Use the ARROW key to highlight your choice then press ENTER.
Game Selection List
Blackjack - This is a classic card game of chance in which you play
against the dealer. It is also sometimes known as twenty one with the
object to see who can get as close to 21 points without going over (bust).
PDA Tab - Games
Rules of the game:
• With each new hand the first card is dealt to the dealer. The
dealer’s cards are shown at the top of the display and your cards
are shown at the bottom.
• Face cards count as 10 points, number cards count as face value,
and aces count as either 11 or 1 point.
Blackjack
Naval Assault
Beast Hunt
• An ace and face card is blackjack and automatically wins against
any other hand.
• If you and the dealer have the same score, neither wins.
To play Blackjack:
1. Use the ARROW and ENTER keys to highlight and press the on-screen
buttons for Hit, Stay, Split, and Double Down.
2. Press the MENU key for the New Game option. Press ENTER to
activate.
Blackjack Options
Menu
Blackjack “Bust”
Notice
Press ENTER to deal a
new hand.
Blackjack - playing a
Split Option
49
NvTlkGSMManual copy.indd 49
12/2/2002, 8:42:37 AM
Section 3
Phone Operation
Playing Games
Naval Assault - This is a classic game in which you compete against
the computer (the enemy) in a battle for naval superiority. By deploying
your fleet and firing at the enemy’s fleet on grid of squares (the playing
field). The object is find and sink the enemy’s fleet before they sink
yours. Each side takes turns firing a round at a selected squares on the
playing field.
To play Naval Assault:
1. Use the ARROW and ENTER to select Naval Assault from the list of
games.
Naval Assault Game Page
Rotate Ship/ New Game Prompt
End of Game Message
Play Again Prompt
2. You will be prompted to begin deployment of your fleet. An aircraft carrier (5 squares long), battleship (four squares long), destroyer (3 squares
long), submarine (3 squares long), and a gunboat (2 squares long). All
placeable on the playing field in either a horizontal of vertical orientation. Use the ARROW keys to move your ships about. Press the MENU
key to pop-up the rotation option.
3. When your ships have been deployed, press ENTER to begin firing. A
blank playing field will display with the enemy ships deployed and
hidden from view. Use the ARROW keys to select a square where you
believe an enemy ship to be hidden.
4. Press ENTER to fire. A pop-up message will tell wether you missed or
hit a ship. If a hit, it will tell you what type of ship was hit and round dot
will display on that square. Misses are marked by an “X.” After you
have fired the display will show your fleet and where the enemy has
fired.
5. Keep taking turns until either you or the enemy has sunk the other’s
entire fleet. At that point, a “Victory” or “Defeat” message will display.
6. At the end of the game you will be prompted to play another game or
to quit.
50
NvTlkGSMManual copy.indd 50
12/2/2002, 8:42:38 AM
Beast Hunt - This is a game of skill in which you must find and kill
the dragon with an arrow before it incinerates you or you fall into one
of several pits while navigating a maze of platforms. From time to time
you will be transported by slides that curve or move diagonally. The
game consists of several difficulty levels and an extended or limited
visibility option. When you lose a game the screen will display the
layout of hazards, slides and warning platforms. A scoreboard keeps
track of your wins and losses.
To play Beast Hunt:
Section 3
Phone Operation
Playing Games
Game Page and
Difficulty Selection
List
1. Use the ARROW and ENTER keys to select Beast Hunt from the Games
list. When the display screen appears it will contain a list of skill levels.
Visibility Options
2. Use the ARROW key to select the desired Difficulty level and press
ENTER to display the Visibility Option Menu. Select Extended or Limited
and press ENTER to begin the game.
3. Use the ARROW key to move about from platform to platform.
4. When you land on a light or dark grey platform you are near a pit or
the dragon. If you plunder into a pit, you will fall to the bottom. If you
move into the dragon, you will be incinerated by his fiery breath. These
hazards will almost always be surrounded by grey platforms.
5. To kill the dragon with an arrow and win the game, stop on the dark
grey platform you believe to next to the dragon. Press ENTER to place
an arrow on the platform, then use the ARROW key to point the arrow
at the dragon and then press ENTER to fire the arrow. If you are on
target, the arrow will strike and kill the dragon.
Game Symbols
Dragon
Pit Warning Platform (1 around pits) - Light Grey
Pit
Dragon Warning Platform (2 around dragon)- Dark Grey
Dragon
Pit and Dragon Warning Platform - Grey Stripes
Arrow Platform
NvTlkGSMManual copy.indd 51
Maze displayed
at the end of a
session
Maze showing
Warning and Arrow
Platforms
Falling into a Pit
Scoreboard
Hitting the Pit Bottom
Archer - Arrow Shot
Pit in Maze
Dragon
in Maze
12/2/2002, 8:42:39 AM
51
Section 3
Calculator
The calculator feature is available in two forms, Standard or
Scientific. It operates in the same manner as any other calculator.
Phone Operation
To use the calculator:
Calculator
1. Use the ARROW keys to highlight the desired calculator key and then
press ENTER keys to enter a number or function. The phone keypad #
key also performs the = function. The keypad * acts as a decimal point.
2. To select the Standard or Scientific calculator function, press the MENU
key to display the options menu.
3. From the options menu use the ARROW and ENTER keys to select
the calculator type and method of angle measurement (Radians or
Degrees).
PDA Tab - Calculator
4. To exit the calculator feature, press the CLEAR or END key.
Note that the CLEAR key clears the display if there are numbers displayed,
otherwise it will exit the Calculator Page.
Standard Calculator
Calculator Type
and Units Options
Calculator Type
and Units Options
52
Scientific Calculator
NvTlkGSMManual copy.indd 52
12/2/2002, 8:42:41 AM
Section 3
Settings- Phone Tabs
Highlight ‘Phone’ and press ENTER to display the Phone Tabs.
Phone Operation
Setting Environment Profiles
Profiles allow you to program the NavTalk to perform appropriately for
different environments by selecting the type of alert signals, volume levels
for the earpiece, ringer, key presses, and activation of beeps, prompts, autoanswer and auto-redial features.
Phone Settings
To select environment profiles:
1. Use the ARROW key to highlight the field at the top of the Profiles
Page and then press ENTER to display the list of profiles.
2. Use the ARROW keys to move up or down the list of profiles to select
the environment that you want to create custom settings for. Highlight
and press the on-screen ‘EDIT’ button to display the Alerts, Volume and
General tabs for that environment.
Settings Tab - Phone
Alerts Settings
Alerts are features that provide signals for the different types of incoming
events, such as Calls, SMS messages, Alarms, Data Calls, and Vibrate On/Off.
The Ringer choices are: Standard Ringer, Ringers 1 -5, 10 Melodies, and Off.
To set a ringer for the event type:
Options Menu
restores Profile
in this field to
factory settings
List of Unit
Environment
Profiles
Profiles Page
Display of settings
for this Profile
1. Use the ARROW key to highlight the event field.
2. Press the ENTER key to display the list of choices.
3. Use the ARROW key to highlight your choice then press ENTER. When
you select a ringer sound, it will play a sample for you to hear.
To activate/deactivate the vibrator alert feature:
1. Use the ARROW key to highlight the Vibrator text. Then press ENTER
to place a check mark in the box to active. Repeat the process to deactivate.
NvTlkGSMManual copy.indd 53
Vibrate On/Off
Alerts Tab
Select Ringer for Calls, Check Box
SMS, Alarms, Data &
Vibrator On/Off
Ringer Sounds
Options Menu
53
12/2/2002, 8:42:42 AM
Section 3
Volume Settings
Phone Operation
Ringer Volume - Allows ringer volume for the particular profile being
created.
Phone Settings
Earpiece
Volume Control
Earpiece Volume - Allows you adjust the earpiece volume to fit the
environment profile you are creating.
Key Beeps
Volume Control
Key Beeps Volume - Allows you to adjust the key beep volume as
appropriate for the environment profile being created.
To set volumes for each control:
1. Use the Down ARROW key to highlight the volume control slider for
the Earpiece.
Ringer Volume
Control
Volume Settings Tab
2. Press the ENTER key to isolate the slider bar and then use the Up/
Down ARROW key to adjust the Earpiece volume.
3. Use the Right ARROW key to highlight to the volume control slider for
the Ringer.
4. Press the ENTER key to isolate the slider bar and then use the Up/
Down ARROW key to adjust the Ringer volume.
When using the Volume
Up/Down keys to adjust
the earpiece volume, this
display will appear.
One press of the key
opens the display and
subsequent presses
adjust the volume.
The display will timeout
and close after a few
seconds.
When you change
the volume using this
method, it will reset the
earpiece volume for the
environment profile currently in use.
5. Use the Right ARROW key to highlight to the volume control slider for
the Key Beeps.
6. Press the ENTER key to isolate the slider bar and then use the Up/
Down ARROW key to adjust the Key Beep volume.
7. Press the ENTER key to isolate the slider bar and then use the Up
ARROW key to return to the Volume Tab, then press the Right ARROW
key again to move to the ‘General’ tab to complete customizing the
environment. Or...press the CLEAR key to return to the Profiles Page.
54
NvTlkGSMManual copy.indd 54
12/2/2002, 8:42:43 AM
Section 3
General Settings
Key Beeps - Allows you turn On a beep to indicate when a key has
been pressed, or use DTMF tones. Multiple beeps indicate when a
particular key is pressed that is inappropriate for the function desired.
Phone Operation
Phone Settings
Or...you can turn Off all key beeps.
To set the Key beeps:
1. Use the ARROW key to highlight the field, then press ENTER
to display the ON/OFF menu.
2. Use the ARROW key to highlight your choice and then press ENTER.
Message Beeps - Allows the NavTalk to beep when a message concerning unit operation is displayed.
Message Beeps,
Voice Navigation
Prompts,
Auto-Answer, and
Auto Redial
On/Off
check boxes.
Message Beeps
Options Menu
Voice Navigation Prompts - Allows you to turn On or Off navigation
voice prompts when using the Auto-Routing feature for notification of
turns or events in a route.
General Settings Tab
Auto Answer - Allows you to select and activate the Auto-Answer
feature. Auto-Answer automatically connects the call without the need
to manually press a key to answer an incoming call. This is of particular
convenience when using the NavTalk Hands-Free Kit.
NOTE: When an Auto-Redial number has been redialled repeatedly
without connecting, the unit assumes that the number is not in
service and places it on a blacklist. If you attempt to dial a number
that has been placed on the blacklist, a message will appear to
indicate that the number is on the blacklist and cannot be dialed.
Auto Redial - This feature allows you to redial a number you are
attempting to call when there is no answer during the initial call. The
unit will automatically redial the number up to 7 times.
Another message will appear when the list is full. The list resets
itself each time the unit is turned On.
To turn On/Off the above mentioned features:
1. Use the ARROW key to highlight the desired feature and then press
ENTER to place or remove the check mark from the adjacent box. A
check mark indicates that the feature is active.
NvTlkGSMManual copy.indd 55
55
12/2/2002, 8:42:43 AM
Section 3
Security
Phone Operation
Security features can prevent unauthorized use and provide privacy and
restrictions for use of certain phone features.
PIN Request Mode - Allows you to set the Personal Identification
Number request to On or Off. The On mode requires that you enter
the PIN code before the NavTalk will become functional. You must also
enter the PIN code before turning this mode Off.
Security Settings
PIN Request
On/Off Menu
Fixed Dialling
On/Off Menu
Change Code
Options Menu
Fixed Dialling Mode - Allows you to set Fixed Dialling Mode feature
to On or Off using the PIN 2 code. When Fixed Dialling is On, only
those phone numbers on the List may be called using the NavTalk.
Change Codes - Allows you to change the access codes for PIN 1, PIN
2 and the Network. Your service provider can set the PIN 1 code and
PIN 2 code initially and inform you of the number sequence.
To change a code
Security Page
1. Highlight the Change Code Field. “Select Code” will be highlighted.
Enter Current
PIN 1 Code
Enter New
PIN 1 Code
Confirm New PIN 1
Code
2. Press the ENTER key to display the Code Options Menu.
3. Select the code you want to change and press ENTER to display the
Enter Code Box.
4. Enter the current code for PIN 1, PIN 2, or the Network and press
ENTER to display the New Code Box.
5. Enter the new code and press ENTER to display the Confirm Code Box.
6. Re-enter the new code and press ENTER to complete the code change.
NOTE: To discourage theft of your NavTalk, each unit is assigned an
International Mobile Equipment Identity (IMEI) number that must
be recognized by service provider systems before any type call is
allowed. If your unit is stolen, report it immediately to your service
provider along with the IMEI code found in the options menu of the
Display Setting Page (Page 96 of this manual)
56
NvTlkGSMManual copy.indd 56
Unblocking the SIM Card - If you fail to enter the correct PIN
code three times in secession a “SIM Card Blocked” message will appear
and you now must enter the Pin Unblocking Code (PUK) in order to
restore service. Your Service Provider can supply the required PUK code.
12/2/2002, 8:42:44 AM
Section 3
Network
Network settings allow you to determine network preferences, view the
status of the current network operator, select a network, and enable/disable
the Service Indicator (LED).
Network Selection - When Roaming outside your home network
this feature allows you to determine whether you want the NavTalk
to select a network automatically or allow you to choose a network
of your own choice. Highlighting this field and pressing ENTER will
display the Searching for Network Page
Preferred Networks - Allows you to choose a network from a list of
preferred networks that you have created and stored in the unit or that
have been programmed into the SIM card.
Phone Operation
Network Settings
Network Selection
Options Menu
Preferred Network
Entries List
To enter preferred networks to the selection list:
1. Use the ARROW key to highlight the Preferred Network field and press
ENTER to display the Preferred Network List.
2. Use the ARROW key to move to an empty slot on the list and press
ENTER to start the entry process. Use the KEYPAD to enter the code
for the network. The network name will appear above the entered code.
To select a network from the preferred networks list:
1. Select ‘Manual’ from the Network Selection Field Options.
2. Highlight the Preferred Networks field and press ENTER to display the
list of networks. Highlight the desired network and press ENTER.
Operator - Displays the current network operator selected from the
network list or a network automatically selected while roaming.
NvTlkGSMManual copy.indd 57
Displays Currently
Selected Network
Displays Status of
Service Indicator
(LED)
Service Indicator
Options Menu
Network Page
Network Entries
List Options
Insert Options
Seaching for Network Page
Service Indicator - Controls the LED that signals
the Service Status. The Options Menu allows On
for display, On for display only when connected to
the Handsfree Kit, and Off.
57
12/2/2002, 8:42:45 AM
Section 3
Calls Settings
Phone Operation
The Calls Settings page allows you to determine, in advance, how
incoming calls are to be negotiated by the phone.
To select a call handling option:
1. Use the ARROW key to highlight the Calls tab on the Phone feature of
the Main Menu Settings Tab to display the Calls page.
2. Use the ARROW key to highlight the ‘Handle Incoming Calls’ field and
press ENTER to display the list of options.
3. When “Next Call is Data” or ”Next Call is Fax” are selected they will
default back to “All Voice Calls” after the call has been handled.
Calls Settings
Short Message Service (SMS) Settings
Short Message Service allows you to send a text message to any
individual with SMS enabled on their phone and allows you to determine
parameters for sending SMS messages.
Calls Page
To set up the SMS message service:
SMS Settings
Messages Valid
For:
Options Menu
Service Center
Number Entry Field
SMS Page
Messages Format
Options Menu
58
Recipient Replies Through:
Options Menu
SMS Page Options Menu
NvTlkGSMManual copy.indd 58
1. Use the ARROW key to highlight the SMS tab on the Phone feature of
the Main Menu Settings Tab to display the SMS page.
2. Use the ARROW key to highlight the ‘Service Center #’ field and press
ENTER and begin using the KEYPAD keys (as explained on page 10)
to enter the number of the service center providing you with SMS
service. Press ENTER when finished.
3. Use the ARROW key to move down to highlight the ‘Messages Valid
For’ field. Press ENTER to view the Options Menu. You can choose
from 1 Hour, 12 Hours, 1 Day, 1 Week, and Maximum Time. Use the
ARROW key to highlight your selection and then press ENTER.
4. Follow the instructions in Step 3 to select an option from the list
for the ‘Message Format’ field. You can choose from Text, Fax, Paging,
E-mail, Voice, X.400, and ERMES.
5. Use the ARROW key to highlight the ‘Recipient Replies Through’ field.
Press ENTER then use the ARROW key to select an option.
12/2/2002, 8:42:46 AM
Section 3
Messages Settings
Phone Operation
Info Message Categories - Allows you to enter the desired categories
for Info Messages. If this feature is available, your network provider will
supply you with a list of categories to choose from.
Info Message Languages - This feature allows you to determine the
language of received Info Messages. You can choose from ten languages.
Voice Mail Number - This feature allows you to view the Voice Mail
number provided by your service provider. This allows you to autodial
your voice mailbox by pressing and holding the #1 key and dialling from
the Speed Dial List. This number can be read off your SIM card or from
your phone and it will automatically be placed in the Voice mail # field
on the Message page and key number1 position on the Speed Dial List.
Messages Settings
List of
Info Message
Categories.
Info Message
Language
List.
SMS Emergency Number - This feature allows you to enter a specific
phone number that you want dialled when pressing and holding the
NINE key to auto-dial the number which sends an SMS message.
If you want to insert your own message, you may enter it in the
message box or insert a template from the templates list. However, if
you delete the ‘<L>’ and ‘<T>’ characters from the message, your location will not be sent with the message. When your message is actually
sent, your phone number, the time, and your current location is also
included. Note that the time and location do not update if you are
moving, unless you send the Emergency call again.
Voice mail
Number is
read off your
SIM card.
SMS Page
Info Message
Language
Options Menu.
Enter an
Emergency Number
and Message.
When the message
is sent, the time
and your location is
included.
NOTE: All of these entries are dependent on whether or
not you have subscribed to that particular service.
59
NvTlkGSMManual copy.indd 59
12/2/2002, 8:42:47 AM
Section 3
Browser Settings
Phone Operation
Home Page - Allows you to enter the home page URL or address that
you would like to call each time you use the Browser.
1. Highlight the ‘Home Page’ field and press ENTER to display the ‘Home
Page’ dialog window.
Browser Settings
Highlight each
field and then
press ENTER to
display the data
entry page for
each.
2. Use the data entry methods explained on page 10 to enter the Home
Page URL. Press ENTER when finished.
Connection Settings - This feature is controlled and set up by your
cellular service provider. You may not be able to open this page if your
service provider has already initialized these settings.
Enable Fee Warning - This feature allows you to activate/deactivate a
pop-up warning window prior to each time you use the Browser
Highlight each box
and then press
ENTER to place a
check mark to
enable these
options.
Home Page Dial
Up Number entry
page.
Connection Settings
Set Up page.
Require Authorization - This feature allows you to require an authorization code prior to active use of the Browser. The authorization code
you will be prompted to enter will be your PIN 2 code. See page 56 for
information on PIN codes.
Enable Push Content - This feature allows you to enable/disable
certain types of internet communications such as advertisements,
announcements, etc.
To enable Fee Warning, Authorization and Push Content:
1. To enable/disable the three options discussed above, use the ARROW
keys to highlight each option individually. Press ENTER to place or
remove the check mark next to the option. A check mark signifies
“enabled”.
60
NvTlkGSMManual copy.indd 60
12/2/2002, 8:42:49 AM
Section 3
Call Services
You can program a variety of call services to help you make more
efficient use of your phone such as, ‘Call Diverting’, ‘Call Barring’, ‘Call
Waiting’, and a Setup Page to set parameters for these services.
Using Call Divert
Phone Operation
Call Services
1. Highlight ‘Call Services’ from the Main Menu and press ENTER to
display the tabbed Call Services Pages.
2. Use the ARROW key to highlight the ‘Call Divert’ tab and then press
ENTER to display the Divert List.
3. Use the ARROW key to highlight options on the list. As each option is
highlighted, a description will be displayed at the bottom of the page.
Choose any or all from the list below…
• All voice calls - to send all voice calls to a number you have specified.
• Voice if busy - to divert voice calls to the specified number only
when your phone is busy.
• Voice if no answer - if you don’t want to answer your phone and
prefer to send the call to the specified number.
• Voice if out of reach - if out of your service area or the phone is Off.
• Voice if not available - if your phone is busy, there is no answer,
you are out of your service area, or the phone is turned Off.
• All fax calls - to send all fax calls to the specified number.
• All data calls - to send all data calls to the specified number.
• Cancel all diverts - to cancel all voice, fax, and data call diverts.
4. Press the ENTER key to pop-up the options menu and use the ARROW
keys to choose from ‘Activate’, ‘Cancel’, ‘Check Status’ or ‘Set Delay’.
Press the ENTER key to confirm your choice or press CLEAR to return
to the Call Divert list.
NvTlkGSMManual copy.indd 61
Settings Tab - Call Services
Call Divert Tab with
List of Options
Call Divert Activation Page
Call Divert Options Menu
Enter Divert Number Field
(i.e. Voice Mail or other number)
Set Delay Options List
61
12/2/2002, 8:42:50 AM
Section 3
Phone Operation
Call Services
Using Call Barring
1. Highlight ‘Call Services’ from the Main Menu and press ENTER to
display the tabbed Call Services Pages.
2. Use the ARROW key to highlight the ‘Call Barring’ tab and then press
ENTER to display the Call Barring List.
3. Use the ARROW key to highlight options on the list. As each option is
highlighted, a brief description of its function will be displayed in the
field at the bottom of the page.
Choose…
• All outgoing calls - to restrict any outgoing calls using the phone.
Call Barring Tab with
List of Call Types to Bar
• International calls - to restrict any outgoing international calls.
• Int’l if not home - to restrict international calls to your home country only.
• All incoming calls -to restrict all incoming calls.
Call Barring Options Menu
• Incoming if roaming - to restrict all incoming calls if roaming
outside your home network.
• Cancel all barrings - to cancel all call restrictions.
4. Press the ENTER key to pop-up the options menu and use the ARROW
keys to choose from ‘Activate’, ‘Cancel’, or ‘Check Status’. Press the
ENTER key to confirm your choice or press CLEAR to return to the list.
Call Barring Activation Page
62
NvTlkGSMManual copy.indd 62
12/2/2002, 8:42:51 AM
Using Call Waiting
Section 3
1. Highlight ‘Call Services’ from the Main Menu ‘Settings’ tab and press
ENTER to display the tabbed Call Services Pages.
Phone Operation
2. Use the ARROW key to highlight the ‘Call Waiting’ tab and then press
ENTER to display the Call Waiting Page.
Call Services
3. Use the ARROW key to highlight ‘All incoming calls’. A “Select this to notify of
all incoming calls” message will appear at the bottom of the page.
4. Press ENTER to pop-up the menu. Highlight ‘Activate’, ‘Cancel’, or
‘Check Status’ and then press ENTER to confirm.
5. An activation page will appear if you selected ‘Activate’. This page will
cycle off when the activation message has been received by your service
provider. Press CANCEL to stop activation before the page cycles off.
Call Waiting Page
Call Waiting Options Menu
Call Waiting Activation Page
63
NvTlkGSMManual copy.indd 63
12/2/2002, 8:42:52 AM
Section 3
Using the Call Services Setup Page
Phone Operation
Call Services
Send Own
Number Option
1. Highlight ‘Call Services’ from the Main Menu ‘Settings’ tab and press
ENTER to display the tabbed ‘Call Services’ Pages
2. Use the ARROW key to highlight the ‘Setup’ tab and then press
ENTER to display the call Setup Page.
3. Use the ARROW key to highlight ‘Send Own #’ field, press ENTER to
display the On and Off option. Use the ARROW key to highlight your
choice and then press ENTER.
Default Divert
Delay Options
4. Highlight the Default Divert Delay field and press ENTER to display the
list of delay options. Highlight your choice and press ENTER.
Call Services Setup Page
64
NvTlkGSMManual copy.indd 64
12/2/2002, 8:42:53 AM
GPS Overview
The GPS portion of your unit provides a method for navigation using
a system of overhead satellites to determine your location on the earth,
combined with a mapping database. Other built-in features allow you
to record waypoints (landmarks and destination points), find destination
points, (cities, points of interest, waypoints, etc.), chart your progress, and
monitor details such as speed, direction, and elapsed time.
Each time you turn on the unit, it must determine its location. The first
time you use your unit, this may take from five to fifteen minutes. After
first use, the unit should determine your location in less than one minute.
While the unit is collecting satellite information, a “searching for satellites”
window will appear in the lower left corner of the display.
Section 43
Section
GPS Navigation
The GPS Features Pages
GPS Tab - Features Page
When your location has been determined, the Map Navigator Page will
state “Ready To Navigate” and display Cardinal letters (North, South, East,
West) and your current location will be shown on the map above it.
If there are not enough satellites in view to determine its location, the
unit will display a “Poor Satellite Reception” message with four options. A
brief explanation for each option will appear when it is highlighted.
Use the ARROW keys to highlight the logical option and then press
the ENTER key to activate it.
If the time displayed in the time field on the Map Page is not correct,
you will need to set the time for your current location. Whenever the
unit is operating with GPS On, a Battery Life warning will appear. Press
ENTER to acknowledge.
Poor Satellite Reception Message with
List of Options and Instructions
Battery Life Warning Message
Searching for Satellites Window
65
NvTlkGSMManual copy.indd 65
12/2/2002, 8:42:54 AM
Section 43
Section
Using the Map Navigator Page
GPS Navigation
Using the Map Navigator Page
GPS Tab - Map Navigator Page
Directional Indicator
Speed Indicator
The Map Navigator provides graphic display for the three methods of
unit navigation:
Goto - A direct path to a map location, (waypoint, city, address, etc.)
Travel when not on a Goto - This is best described as travel without
entering a destination in the unit. The Map Navigator displays your real
time movement as you travel with the unit turned on and receiving satellites. It can be saved (logged) as a Track.
Auto-Routing - A path of travel to a selected destination using existing
roads that is automatically placed on the map. Auto-routing also provides
text directions at the top of the display indicating direction to go and when
to make turns. Using an earpiece or the Handfree Kit with remote speaker,
you can receive voice commands for each change in direction.
The Map Navigator Page Options Menu provides you with a variety
of features to enhance your navigation capabilities. You can modify the
map display to fit your needs by changing to a full screen and selecting
from a variety of setup options that control map item display, text size and
other features.
The Map Navigator Page
When Not
Navigating
When Navigating
a Route
66
The Map Navigator Options Menu
NvTlkGSMManual copy.indd 66
12/2/2002, 8:42:54 AM
Section 43
Section
Map Navigator Page Data Fields
Several Data Fields support the Map Navigator and consist of the
following elements.
Direction Field
There is one direction field, providing direction information
dependent on whether you are stopped while navigating, navigating to
a destination, or traveling without a recorded destination.
GPS Navigation
Map Page Data Fields
Direction Field
Direction To Go (N. S. E. W.) - Cardinal letters indicate the direction
to go when starting out or to resume after having stopped while on an
active Goto, Track or Route. These letters can be changed to degrees.
Direction you are heading when
navigating without a predetermined destination
Speed Field
Speed - Your rate of travel can be displayed in miles per hour, kilometers per hour, or nautical miles per hour.
Speed Data Field
Distance To Go Field
Distance - When on a route to a destination, the distance remaining to
the destination will be displayed in the left side of the field below the
map.
Current Speed
Direction Field
Time Remaining Field
Time - The time remaining until you reach your destination, at your
current speed, is displayed in the right side of the field below the map.
Route Instructions Field
Instructions - When traveling a route to a destination, the field at the
top of map will provide you with directions for streets and highways as
well as when to make turns in the route.
Distance and Time to go fields
67
NvTlkGSMManual copy.indd 67
12/2/2002, 8:42:55 AM
Section 43
GPS Navigation
Map Display
Position Icon
The Map Display
The map display shows your present position and direction of movement as a triangular ‘Position Icon’ in the center of the map. As you travel,
the map display leaves a “trail” (track log) of where you’ve been. The
map display also shows the map scale and geographic details such as lakes,
rivers, highways, and towns.
Use the UP and DOWN keys to change the map scale to show more
map area with less detail, or less map area with more detail. Press and hold
to zoom the map scale rapidly.
In many instances the map will display an ‘Accuracy Circle’ surrounding the ‘Position Icon’. The unit uses both map resolution and GPS
accuracy in defining your location to a point within the circle. The smaller
the circle, the more accurate your location.
The Position Icon displays in the center of the Map
Page and indicates your current location.
Accuracy Circle
More detailed map features as well as information about those features
can be displayed using map data transferred from a GARMIN MapSource
CD-ROM. When using MapSource data, the word “MapSource” will appear
below the map scale whenever you zoom in to view map details.
NOTE: When you use the GPS feature for the first time. It
may take up to five minutes to find your location. After that,
it will take about 15 to 45 seconds to locate your position.
The Accuracy Circle defines your location by placing
the position icon with the confines of the circle.
68
The size of the circle is determined by map resolution
and current GPS receiver accuracy. The smaller the
circle the more accurate your location.
NvTlkGSMManual copy.indd 68
12/2/2002, 8:42:56 AM
The Panning Arrow (Map Pointer)
The Panning Arrow is controlled by the ARROW keys and is used
to identify map objects and move the map in order to view areas of the
map not currently within the display. The Panning Arrow can be used
to establish a ‘Point of Reference’ when measuring distance between map
items. It can be used to create a waypoint or to move a waypoint to a new
location. Press the ARROW keys at an angle to move diagonally. Press and
hold the ARROW keys to move to new areas of the map. Press the CLEAR
key to cancel the panning arrow.
Section 43
Section
GPS Navigation
The Panning Arrow
or
(Map Pointer)
Using the Panning Arrow:
ARROW key
The Map Page pan function allows you to display an arrow to point at
and identify items on the map, and to move the map in order to view areas
beyond the current viewing area on the display.
The pan function is activated by the ARROW keys which move the
arrow in the desired direction. As the arrow moves to the edge of the display screen the map will also move to reveal more map area. When moving
to the edge of the display, the map will take some time to draw the new
area of the map. An hourglass will display in place of the panning arrow
when the map is redrawing.
The Panning Arrow
The Panning
Arrow moves
about on the Map
Page as you press
the ARROW key
in the desired
direction.
Pressing the CLEAR key cancels the pan function.
The detail of map features will be enhanced when you are using
MapSource information loaded on a map data card. When using any map
data, whenever the panning arrow is placed on a map item, the name of the
object will be highlighted. This feature applies to waypoints, roads, lakes,
rivers...almost everything that is displayed.
69
NvTlkGSMManual copy.indd 69
12/2/2002, 8:42:57 AM
Section 44
Section
To find details about a map item:
GPS Navigation
1. Move the panning arrow to the map item when you want to learn more
about that item.
The Panning Arrow
2. When the item’s name is highlighted, press and release the ENTER key
to display the Information Page for that item.
The information page is type specific with such titles as ‘Address’, ‘City’,
or ‘Exit’ followed by a name and description field, a distance field, and
on-screen buttons. Press the MENU key to display the ‘Save as Waypoint’
option to mark this item as a waypoint.
You can also use the panning arrow to measure the distance between
two map items as explained in the section titled “Measure Distance”
on page 75.
Highlighted Map Item
When the Panning Arrow is moved to a map item, it will be
highlighted for 5 seconds.
When using the panning arrow on the map page and pressing the
MENU key and then selecting ‘Find ‘n Go’ from the options menu, the
Find Menu will display items with the panning arrow (map pointer) location used as a reference for distance. The Find Menu will display “Using
Map Pointer” just beneath the page title.
Item Information Page
70
With the Panning Arrow on a map item, press the ENTER
key to display the information page for the item.
NvTlkGSMManual copy.indd 70
12/2/2002, 8:42:59 AM
Section
Section 44
Zooming In and Out
Use the IN and OUT keys to Zoom (adjust) the map scale, which is
displayed at the bottom of the Map Page.
To change the map scale:
1. Press the IN key to Zoom In and select a scale that shows more detail
for a smaller map area.
2. Press the OUT key to Zoom Out and select a scale that displays a larger
map area, but with less detail.
The map scale is shown in the lower left corner of the map display area.
The scale is shown in the unit of measure selected from the ‘Units’ field of
the ‘Display’ Settings page. Refer to page 96 for setup details.
It is possible to zoom in so far that the resolution of the map data is
exceeded and the appearance of the map will no longer be accurate. When
this occurs, the word “overzoom” will appear just below the map scale.
When using a map data downloaded from a CD, the word “MapSource”
will appear below the map scale when you zoom in to see more detailed
map features. When driving on city streets within a MetroGuide or other
MapSource coverage area, more detailed map scales (500 to 100 meters)
may be preferred since they provide a good view of all streets and not just
major roadways. When traveling on major roadways (highways and Interstates) map scales of two kilometers or more may be more practical.
With certain types of MapSource data, such as MetroGuide data, the
unit may match your location to roads on the map. In these instances, the
‘Accuracy Circle’ (discussed on page 68) will not be shown.
GPS Navigation
Zooming & Map Scales
Press and release
the Zoom IN key to
view less map area
with more detail by
increments. Press
and hold it to
zoom in rapidly.
Zoom In Key
and map scale
Zooming In
Press and release
the Zoom OUT key
to view more map
area with less detail
by increments.
Press and hold it to
zoom out rapidly.
Zoom Out Key
and map scale
Zooming Out
The Map Scale is
displayed in the
lower left corner
of the map page
If you have downloaded additional
map data, “map
source” will display
below the scale.
If you zoom in
beyond the map
data’s resolution
then “overzoom”
will appear
beneath the scale.
Map Scales
NvTlkGSMManual copy.indd 71
71
12/2/2002, 8:43:00 AM
Section 44
Section
GPS Navigation
Map Navigator Page Options
Options Menu
Find Menu
The Map Navigator Page Options
Map Navigator Page options allow a variety of operating and customizing features for the unit. Pressing the MENU key from the Map Page will
display the Map Navigator Page Options Menu. Many are replaced by
another option when they are selected, while others are methods of canceling an option when you no longer need it.
You can choose an option by highlighting it and pressing the ENTER key.
Find ‘n Go -This ‘Find’ option allows you to locate and Goto a
waypoint or other map item. Refer to “ Find ‘n Go” on page 77.
Stop Navigation - The ‘Stop Navigation’ option stops any active Goto
navigation. The option will appear gray and cannot be selected if there
is no active navigation. When activated the ‘Stop Navigation’ option
will be replaced by a ‘Resume Navigation’ option.
View Turns - This feature is only available when navigating an auto
matically generated route and displays a list of turns in the route.
Routes - This feature allows you to save a current route or to access
previously traveled routes that are stored in the unit. Refer to page 85
for more information.
Full Screen Map - The ‘Full Screen Map’ option uses the full screen
to display the map. This option is replaced by ‘Show Data Fields’.
To display a ‘Full Screen Map’:
1. With the Options Menu displayed, highlight ‘Full Screen Map’.
2. Press the ENTER key and the Map Page will display a full screen map.
72
Full Screen Map
NvTlkGSMManual copy.indd 72
3. To return to a Map Page with data fields displayed, repeat the process.
You will notice that the ‘Full Screen Map’ option now reads ‘Show Data
Fields’ When this option is highlighted and the ENTER key is pressed
the page will display the data fields again.
12/2/2002, 8:43:00 AM
Section
Section 44
Map Page Settings
GPS Navigation
The Setup Map Options displays the Map Setting Pages. Map Settings
pages determine how the map is displayed, allowing you to custom tailor
the map display.
Common Settings
Text - Specifies the text size for a displayed map item. Selecting ‘Off’
will turn off the text display for that item.
Map Navigator Page Options
Detail
Options Menu
Color Mode
Options Menu
AutoZoom (also Zoom) - Specifies the maximum map scale at which
a map item will be displayed. If ‘Auto’ is selected, the maximum map
scale will be determined by the ‘Detail’ setting to prevent map clutter.
Map Options
Map Options
Detail - Adjusts the amount of map information, such as roads, that is
displayed. ‘Most’ shows maximum detail and ‘Least’ shows minimum
detail. The higher level of detail, the slower the map redrawing time.
Orientation - Selecting ‘North Up’ will display the map with North
at the top. Selecting ‘Track Up’ will automatically rotate the map to
keep your current direction of travel at the top of the screen. A ‘North’
indicator is displayed on the map when in the ‘Track Up’ mode.
Color Mode - Allows the selection of either Land or Water Modes to
display map features on a light (Land) or dark (Water) background
Orientation
Options Menu
AutoZoom - When ‘On’, this option will automatically adjust the map
scale to show both your current location and the next item to which
you are navigating.
AutoZoom Scale
Options Menu
73
NvTlkGSMManual copy.indd 73
12/2/2002, 8:43:01 AM
Section 44
Section
Line Options
Track Log - Controls the display of the ‘Track Log’ on the map.
GPS Navigation
Railroad - Controls the display of the Railways on the map.
Map Navigator Page Options
Street Label - Controls the display of street names on the map.
Point Options
Line Options
Waypoint - Controls the method for display of waypoints on the map.
Exit - Controls the method for displaying highway exits on the map.
Points of Interest - Controls the display of points of interest on the map.
Point Options
Text Options
Menu
Zoom
Options
Menu
City Options
Large City - Controls the display of large cities on the map.
Medium City - Controls the display of medium sized cities on the map.
Small City - Controls the display of small cities on the map.
City Options
Small Town - Controls the display of small towns on the map.
Area Options
River, Lake - Controls the display of river, lakes and other bodies of
water on the map.
Park - Controls the display of parks and other public lands on the map.
Area Options
Other - Controls the display of all other land forms.
The Map Setup Options
can also be accessed from
the Settings Tab of the
Main Menu.
74
NvTlkGSMManual copy.indd 74
12/2/2002, 8:43:02 AM
Measure Distance - The ‘Measure Distance’ option allows you to view
the distance and direction from your current location to another location on the map or from one map location to another. In addition the
directional bearing from your current location is shown as well as the
coordinates for that other location.
Section
Section 44
GPS Navigation
Map Navigator Page Options
To use the ‘Measure Distance’ feature:
1. With the Map page displayed, highlight and select ‘Measure Distance’
from the list of options.
2. Press the ENTER key. A field for distance will appear at the top of the map.
3. Move the panning arrow to the location you want to measure from and
press the ENTER key.
4. Move the panning arrow to the location you want to measure to and
the distance information will be displayed in the field.
Measure Distance
5. Press the CLEAR key or select ‘Stop Measuring’ to exit this feature.
Routes - You can create a route to a destination with Turn-By-Turn
directions and then save it for reuse. Refer to page 84 for details on
creating and saving a route.
To Select a Route from the Saved Routes List:
Use the Panning Arrow to measure the
distance between two map items by
moving it to the first item, pressing ENTER,
and then moving it to the second item.
The distance is displayed in the field just
above the map.
Current Route
1. With the Map Navigator Page displayed, press the MENU key to “pop
up” the page Options Menu.
2. Use the ARROW key to highlight the “Routes” option and press
ENTER to display the Routes Page.
3. Highlight the desired saved route from the Saved Routes field and press
ENTER to display that route on the Map Navigator Page.
NvTlkGSMManual copy.indd 75
Saved Routes
Routes List
75
12/2/2002, 8:43:03 AM
Section 44
Section
GPS Navigation
Map Navigator Page Options
Show on Map
Option Check Box
MapSource Info - The ‘MapSource Info’ option allows you to view the
various maps loaded onto the unit By highlighting a MapSource title
and pressing ENTER you can activate or deactivate that map data.
When using MapSource maps, there is a hierarchy that determines
which map is displayed when geographical features on more than one
map overlap each other. Refer to page 110 for detailed information
about this subject.
MapSource Info will be grayed if there are no recognizable maps
loaded, or an unlock code is required to open the map.
MapSource Info Page
Stop Calculating - This option is available when a route is being
calculated. Choose this option if you no longer want to navigate to a
destination or if you have chosen a destination that is very difficult for
the unit to create a route to. When this occurs, a recalculating message
will be repeatedly displayed until an insufficient data message displays.
This option is
only available
while the
“Calculating
Route” widow is
displayed.
Calculating a Route
76
NvTlkGSMManual copy.indd 76
12/2/2002, 8:43:03 AM
Find ‘n Go
You can locate Waypoints, Cities, and Interstate Exits which are
included in the unit basemap. You can also locate Cities, Exits, Points of
Interest, Addresses and Junctions when using MapSource MetroGuide or
MapSource Points of Interest mapping data. If this data is not present,
these options are not available and will appear gray.
Section
Section 44
GPS Navigation
Find ‘n Go
Your current location is normally used as the reference point for the
‘Nearest’, ‘Distance’, and ‘Direction’ features. However, if you are using the
panning arrow (Map Pointer), it is used as the reference point. The Find
Menu will state either “Using Current Location” or “ Using Map Pointer”
depending on which reference point is used.
GPS Tab - Find ‘n Go Page
Using ‘By Name’ and ‘Nearest’ Lists
All items on Find Menu option lists can be viewed in two formats, ‘By
Name’ (a list of every item available for a category) or by ‘Nearest’ (a list of
only those items for a category that are nearby). The ‘Nearest’ option presents you with a much smaller list of items and speeds the selection process.
To switch back and forth between Find ‘By Name’ and by ‘Nearest,,
press the MENU key to display the Options Menu for that category page.
All map items found using the Find ‘n Go feature can be marked as a
waypoint when selecting the ‘Save as Waypoint’ option accessed by pressing the MENU key when the information page for an item is displayed.
Find Menu
77
NvTlkGSMManual copy.indd 77
12/2/2002, 8:43:04 AM
Section 44
Section
Finding a nearest item:
GPS Navigation
1. Highlight the item you want from the nearest list using the method for
selecting data from lists described on page 10.
2. Press the ENTER key to display the information page for the item.
Find ‘n Go
Finding an item by name:
1. The first character in the name field at the top of the page will be
highlighted.
2. Begin entering the name of the item you want, using the method for
entering each letter or number described on page 10.
Find By Name is
the option when
a ‘Nearest’ list
is currently being
displayed.
3. When you can see that the names of the items in the list below are
near the name of the item you want, press the ENTER key to move the
highlight to the list.
Nearest Cities List
Map Item
Information Page
4. Highlight the item you want from the list using the method for selecting
data from lists as described on page 10.
5. Press the ENTER key to display the information page for the item.
Selecting a Map:
You can select the type of map data from which to base your Find
List items by choosing from either the built-in basemap or a downloaded MapSource product, such as City Navigator or City Select.
Find Nearest &
Select Map are
options when a
‘By Name’ list
is currently being
displayed.
Item on Map
1. With a ‘By Name’ find list displayed, press the MENU key to display
the Options Menu
2. Use the ARROW key to highlight ‘Select Map’ and press ENTER to
display the list of map choices.
Cities By Name List
3. Use the ARROW key to select the map you desire and press ENTER.
Map items shown on find lists will originate from this map data base.
78
NvTlkGSMManual copy.indd 78
12/2/2002, 8:43:05 AM
Finding a Waypoint
Waypoints that you have created and stored in the unit can be found by
selecting the ‘Waypoint’ option of the Find Menu. You can find a waypoint
from a list of waypoints ‘By Name’ or by ‘Nearest’ using the procedure
explained on the previous page to display the Waypoint Information Page.
Section
Section 44
GPS Navigation
Find ‘n Go
The Waypoint Information Page displays the waypoint name, a map
symbol, the location in lat/lon, elevation and four on-screen buttons for
viewing the waypoint on the map, creating a Goto, confirming changes, or
deleting the waypoint.
Finding a City
Cities listed in the map database can be found by selecting the ‘Cities’
option of the Find Menu. You can find a city from a list of cities ‘By
Name’ or by ‘Nearest’ using the procedure explained on the previous page
to display the City Information page. You can use the options menu ‘Select
Map’ option to display the city from the maps contained in your map data
storage area.
The City Information Page for the selected city displays the city name,
the size by population and the distance from your location. You can view it
on the map or create a route to the city from your current location or from a
location defined by the panning arrow (Map Pointer).
Waypoints By Name List
Waypoint Information Page
Nearest Cities List
City Information Page
City Displayed on Map
NvTlkGSMManual copy.indd 79
12/2/2002, 8:43:06 AM
79
Section 44
Section
GPS Navigation
Find ‘n Go
Finding an Exit
You can use the Find Exit option to locate a nearby exit on an interstate
or highway. Exits are listed only by ‘Nearest’.
To find an Exit:
1. Select the Find Menu. From the Main Menu and then press the
ENTER key.
2. Use the ARROW keys to highlight ‘Exits’ and then press the ENTER
key. An Exits menu will appear with a choice of exit types.
3. Highlight the type of exits you wish to view, then press the ENTER key.
Find Exits Options List
4. A list of the nearest exits ahead of you will be displayed. The title
of the list indicates the interstate for the exits listed. At the bottom of
the list, a distance field indicates the distance from your location to the
highlighted exit. The options menu allows you to ‘Select Map’ if the
exit is shown on more than one map on your map data base.
5. Scroll through the list to highlight the desired exit.
6. Press the ENTER key to display the Info Page for that exit. This page
contains the exit description at the top of the page and a list of
services near that exit at the bottom.
7. Use the ARROW keys Up/Down keys to move the highlight into the
list of services. Press the CLEAR key to move the highlight back to
the ‘OK’ button.
8. You can select ‘Goto Exit’ to create a route to the exit on the map.
Nearest Exits List
Exit Info Page
80
NvTlkGSMManual copy.indd 80
12/2/2002, 8:43:07 AM
Finding a Point of Interest:
You must be using MapSource City Select to select “Points of Interest”
which provides this type of map data, otherwise this option will appear
gray and will not be available.
Section
Section 44
GPS Navigation
Find ‘n Go
To locate a point of interest:
1. Press the ENTER key to display the Find Feature Menu. Highlight ‘Points
of Interest’ and then, press the ENTER key to display a list of categories.
2. Highlight the category of your choice and then press the ENTER key
to display the list of types.
3. Highlight the type of your choice and then press the ENTER key to
display the list of the points of interest of that type.
Points or Interest Option
4. A ‘Select Map’ option is available if there is more than one map loaded
that has the information you are trying to find. Press the MENU key
to access the ‘Select Map’ option and then press the ENTER
key to display the map choices. Highlight the map you wish to use and
press the ENTER key to return to the list.
5. Follow instructions on page 78 to find a point of interest by name or nearest.
6. Highlight the desired point of interest on the list and press the ENTER
key to display the item information page. The information page will
include the full name, address, and often the phone number. If a phone
number is included, you can press the SEND key to call the number.
Press the MENU key to display the Options Menu for this page.
When searching for points of interest using the ‘By Name’ list,
multiple items with the same name appear only once on the list (for
example: McDonalds). When you highlight it and press ENTER, a list
of ‘Nearest’ locations for that name will appear.
NvTlkGSMManual copy.indd 81
List of Categories
List of Types
List of Items
Press Goto to navigate
to the item
Information
Page
Options
Menu
Item Information
Page
Item on Map
81
12/2/2002, 8:43:08 AM
Section 44
Section
GPS Navigation
Find ‘n Go
Finding an Address or a Junction
You must be using MapSource City Select which provides this type of
map data, otherwise these options will appear gray and will not be available.
To locate an address:
Enter the Street
Address using the
KEYPAD keys.
1. Select ‘Find’ from the Main Menu and then press the ENTER key to
display the Find Feature Menu. Highlight the ‘Address’ option and then,
press the ENTER key to display the ‘Find Address’ page.
Select the Street,
City, and Postal
Code from the
option lists.
2. Highlight the Number field and use the method for entering numbers
and letters as explained on page 10.
3. Move to the ‘Street’ field using the ARROW keys.
Use the KEYPAD
keys to enter the
first few letters or
numbers and then
use the ARROW
key to select from
the matches on the
list.
Find Address Page
Select Address Page
Highlight the Find
button and press
ENTER to display
all matching
addresses . If the
address is not
correct, a “None
Found” message
will appear. ReEnter new data.
Press Map to view on
the Map Page.
Press Goto to navigate to the address.
82
Press OK to save as a
waypoint.
Address Information Page
NvTlkGSMManual copy.indd 82
4. Press the ENTER key to display the ‘Select Street Name’ list. Find the
street you want by entering the first few letters in the name field to get
a match or scroll through the list to highlight your choice.
5. With the desired street highlighted, press the ENTER key to place the
street name on the find page.
6. Highlight the ‘Find’ button and press the ENTER key to view the
location on the Map Page.
7. If the address is incorrect or not in the map data base, a “None Found”
message will appear and you must re-enter new data.
8. If the address is accurate, Select Address page will display those
addresses that match your entry. As each is highlighted a match quality
index will display at the bottom of the page.
9. If there are many matches, use the optional city and postal code fields to
place the best matches near the top of the list.
10. Once selected, the address will appear on the Address Information page.
12/2/2002, 8:43:09 AM
Section
Section 44
Locating a Junction:
The Find Junction feature operates like the Find Address feature,
with the exception that you enter first and second street names instead
of an address and a street name.
GPS Navigation
Find ‘n Go
To Locate a Junction
1. Follow Steps 1 through 10 on page 82, substituting data entry fields on
the Find Junction page with those on page 82.
Enter the First
Street from the
options list.
Highlight the Find
button and press
ENTER to display
the Match Quality
List for the selected
Junction.
Reviewing Recently Found Places
The Find Menu includes categories for recently found map items.
This allows you to review (by category) previously found items that
you did not save as waypoints for later use. When the list becomes full,
the oldest entry is deleted to make space for the newest.
Select the Second
Street, City, and
Postal Code from
the option lists.
Find Junction Page
To Review a Recently Found Place
1. Access the ‘Find ‘n Go’ Find Menu from the Main Menu GPS Tab.
2. Use the ARROW key to move down the menu list to the ‘Recently
Found Places’ option and press ENTER to display the tabbed pages for
Points of Interest, Addresses and Junctions, Cities, and Other.
3. Use the ARROW Right or Left key to move to the tab with the desired
category, then move down the list of places to highlight your selection
and then press ENTER to display the Information Page for that item.
4. Highlight the Map or Goto key on the page and press ENTER to either
view it on the map or create a route to the item. Press the MENU key
to save it as a waypoint.
Highlight an item
on the list and
press ENTER to
display the Information page for
that item.
Direction and
Distance from
your current
location.
Recently Found Places Option - Points of Interest Tab
83
NvTlkGSMManual copy.indd 83
12/2/2002, 8:43:10 AM
Section 4
GPS Navigation
Creating A Route To A Destination
Map item
Traveling to a Map item or Find Menu item
You can create a route to guide you to a map item or Find Menu
item using the Goto feature on the Information Page for that item. A
Goto can be a straight-line from your current location to one you’ve
selected or you can choose from two options (Auto-Routes) that lay out
a graphic path to the item on the Map Navigator page using existing
roads and highways. The Map Navigator will also provide you with
directions to go, roads to use and when to make turns. It also provides
you with time and distance information. These routes can be saved
and stored in the unit memory for later use as well.
To Goto a map item location:
Map Item Located
Using the Map Pointer
Map Item Info Page
1. Use the ARROW keys to move the panning arrow to the item
(waypoint, city, exit, etc.) on the map.
2. Press the ENTER key to display an information page which contains a
‘Goto’ button.
3. Highlight the ‘Goto’ button on the page and press the ENTER key.
To Goto a Find Menu Item:
1. Use the Find Menu to display the various lists of map items. Select a
category and highlight an item on the list.
Find Menu Item Info Page
Press Goto to navigate
to the destinations.
Routes you to
destination using
all available
roads.
84
Routes you to destination
using highways.
Creates a direct line
route to destination.
Route Preference Window
NvTlkGSMManual copy.indd 84
2. Press the ENTER key to display the item’s information page which
contains the ‘Goto’ button.
2. Highlight the ‘Goto’ button on that page, and then press the ENTER key.
If GPS is Off, you will prompted to turn it On. A route cannot be
created with GPS Off. Once a Goto destination is selected, a ‘Route Preference?’ window will pop-up and offer you three choices: Faster Time,
Shorter Distance or Off Road (Direct Line) routing to the destination.
12/2/2002, 8:43:11 AM
Highlight your choice and press ENTER to begin the route calculation
and display the Map Navigator Page. While the route is being calculated a
small window depicting route waypoints will appear in the lower left corner
of the display. If there are no connecting roads to the destination from your
current location, a ‘Route Calculation Error’ message will display.
When the route has been calculated, the Map Navigator will display a
wide overlay of the route on roads leading to the destination or a direct
line to the destination. Directions to travel are displayed at the top of the
page with distance to go and time remaining at the bottom. As you move
along the route the directions to travel will update and indicate changes in
direction along with graphic turn arrows at Junctions and corners. Turns are
also indicated by a voice message, best utilized with the aid of an ear bud or
hands-free kit. Turn voice On/Off from the General Setting Tab, See page 55.
To view route options, press the MENU key with the View Turns Page
displayed. Options are: Stop Navigation, Recalculate, Use Detour, Save Route,
and Show Arrival Times/Show Time to Go.
To view the Route Turns list, press the MENU key while navigating by
selecting ‘View Turns’ from the Map page options menu. Use the ARROW
key to scroll up and down the list of turns. Press ENTER for a zoomed in
view of that turn with distance from your current location.
To save a route for future use, press the MENU key with the Map Navigator displayed and then select Routes from the Options List. Press ENTER to
display the Current Route name and all Saved Routes. With the ‘Save’ button
highlighted, press ENTER to save the current route to the list. To navigate
any saved route, highlight the route and press ENTER.
To rename a route, highlight the desired route from the routes list and
press the MENU key. Select ‘Rename’ from the Options list and press ENTER
to display the route name field. Enter the desired name using the KEYPAD
keys and press ENTER when completed.
NvTlkGSMManual copy.indd 85
Section 4
GPS Navigation
Auto-Routing
Route Calculation Window
Route Calculation Error Message
Route Displayed on Map
Direct Route on Map
Route Turns List
Route Turn on Map
Route Options
Saved Routes List
Detour Distance
Options
85
12/2/2002, 8:43:12 AM
Section 4
GPS Navigation
Trip Computer
Trip Computer
The third feature on the Main Menu GPS Tab, the Trip Computer,
provides current information read-outs about speed, distance and time
as you travel. To view the Trip Computer, highlight the Trip Computer
option on the GPS tab and press ENTER. The Trip Computer displays
a Trip Odometer, Moving Average, Overall Average, Maximum Speed,
Stopped Time, Moving Time, Total Time, and an Odometer that displays accumulated distance.
To Reset the Trip Odometer
1. With the Trip Computer page displayed, press the MENU key to display
the Options Menu.
2. Use the ARROW key to highlight the Reset Trip option.
3. Press the ENTER key to clear the Trip Odometer field.
To Reset the Maximum Speed:
Trip Computer Page
Distance units can be set from the
Settings Tab of the Main Menu by
selecting the ‘System’ option
1. Follow the steps defined above.
To Reset the Odometer:
1. Follow the steps used to reset the Trip Odometer above.
To select the Units of Measurement:
1. Distance can be set to Statute, Metric, Nautical, or Yards. See Section 5,
‘System Options’, for details on setting the Units of Measure.
Trip Computer Options Menu
86
NvTlkGSMManual copy.indd 86
12/2/2002, 8:43:13 AM
Waypoints
A waypoint is a location you have identified and stored in the unit.
The unit can store 500 waypoints in memory. Waypoints can be used as
destinations to ‘Goto’.
Marking your current location as a Waypoint:
Section 4
GPS Navigation
Waypoints
1. Press and hold the ENTER key to display the ‘Quick Set’ menu. Highlight
‘Mark Waypoint’ and press ENTER to mark a waypoint for your current
location. It will automatically be assigned a 3-digit number.
If the GPS function is turned Off or the unit is acquiring satellites, the
‘Mark Waypoint’ option will appear gray and cannot be activated.
2. To change the name of the waypoint, use the ARROW keys
to highlight the waypoint name field. Follow instructions titled
“Entering Each Letter or Number” on page 10. You can enter a
total of 10 characters in the field. This waypoint name will appear
on the Map Page, when Map Page settings are configured to do so.
3. To assign an identifying map symbol to a waypoint, use the
ARROW keys to highlight the field to the left of the waypoint
name. Follow instructions titled “Selecting Data from Lists” on
page 10 to select a symbol. The selected symbol will appear
along with the name on the Map Page.
4. To save the waypoint highlight ‘OK’ and press the ENTER key.
5. If you do not want to save it as a new waypoint, press the
CLEAR key before pressing any other keys.
Mark Waypoint Page
Press and hold the ENTER key display the
“Quick Set’ menu, then highlight ‘Mark
Waypoint’ and press ENTER again to mark
your present location as a Waypoint.
Highlight and use the on-screen buttons
to save the waypoint and place it on the
waypoints list, display the waypoint on the
map, or to delete it.
The Goto button does not function for
Mark Waypoint as you are currently at the
destination, unless you are using the Map
Pointer to mark a Map ltem.
87
NvTlkGSMManual copy.indd 87
12/2/2002, 8:43:14 AM
Section 4
To create a waypoint using the panning arrow to highlight a
map item:
GPS Navigation
1. Move the panning arrow to the item (a city, address, or Junction, road,
etc.)
Waypoints
Use the Panning
Arrow to highlight
a map item and
then press the
ENTER key to
display the item
information page.
2. Press and release the ENTER key to display the item information page.
From the
information page,
press MENU to
display the ‘Save
As Waypoint’
option..
Creating a Waypoint from a Map Item
3. With the information page displayed, press the MENU key to display
the ‘Save as Waypoint’ option and then press the ENTER key.
4. The ‘New Waypoint’ page will display the waypoint newly created from
the map item.
To create a waypoint using the panning arrow when a map
item is not highlighted:
1. Press and release the ENTER key with the panning arrow positioned
where you want to mark the waypoint (off of roads, streets or other items).
2. The ‘New Waypoint’ page will display the waypoint that was created at
the panning arrow location.
Be certain to press and release the ENTER key for these operations.
Pressing and holding the key will mark your current location. See
“Marking Your Current Location” on page 87.
To create a new waypoint by manually entering its coordinates (lat/lon):
1. Press and hold the ENTER key to access the Mark Waypoint Option
from the ‘Quick Set’ Menu.
Enter the Lat/Lon coordinates to create a waypoint for a known
location. Elevation can also be entered if known.
Creating a Waypoint by entering
new coordinates
2. Highlight the Location field on the Mark Waypoint Page and follow
instructions titled “Entering Data” on page 10.
3. If desired, you may also change the waypoint name and/or symbol.
88
NvTlkGSMManual copy.indd 88
12/2/2002, 8:43:14 AM
Section 4
To move a waypoint by dragging it on the map:
1. Use the Find Feature to display the Waypoint Page as described on
page 79.
GPS Navigation
2. Highlight and press the ‘Map’ button to display the waypoint map.
3. With the waypoint highlighted by the panning arrow, press the ENTER
key once. The word “Move” will appear beneath the panning arrow.
4. Use the panning arrow to move the waypoint to the new location and
then press the ENTER key.
5. Press the CLEAR key to cancel moving the waypoint.
Waypoints
Highlight the
waypoint you
want to move and
then drag it to the
new
location.
Using the ‘Mark Waypoint’ feature to quickly determine your
latitude and longitude:
1. Press and Hold the ENTER key to display the Quick-Set Menu. Then
highlight ‘Mark Waypoint from the list of options.
Moving a Waypoint
2. Press and hold the ENTER key to display the ‘Mark Waypoint’ page.
Your current lat/lon will be displayed in the ‘Location’ field.
3. Press the CLEAR key before pressing any other key to close the page
without storing your location as a waypoint.
Sending your latitude and longitude position data to another
NavTalk GSM Phone:
Press and hold the
ENTER key to display the Lat/Lon
coordinates for
your current
location.
Refer to the section on sending Status Reports on pages 41 and 42.
When you send a Report, you’re latitude and longitude are included
automatically.
Using Mark Waypoint to determine your
location
89
NvTlkGSMManual copy.indd 89
12/2/2002, 8:43:15 AM
Section 4
GPS Navigation
Waypoints
Editing a Waypoint
A waypoint can be edited to change the map symbol, name, coordinates, or elevation. It can also be deleted.
To edit a waypoint:
1. Use the Find ‘n Go feature to display the Waypoint Page as described on
page 79.
2. Make changes as desired to the waypoint symbol, name, location, and
elevation fields following the instructions in the section titled “How To
Enter Data” on page 10.
Highlight the field
you want to edit
and enter new
data.
3. Highlight the ‘OK’ button and press the ENTER key to save changes.
To delete a waypoint:
Editing a Waypoint
1. Use the Find ‘n Go feature to display the Waypoint Page as described on
page 79.
2. Highlight the ‘Delete’ button and press the ENTER key.
Highlight the ‘Delete’
button and press ENTER.
Highlight the ‘Yes’ or ‘No’
button and press ENTER.
Deleting a Waypoint
90
NvTlkGSMManual copy.indd 90
12/2/2002, 8:43:15 AM
Using the ‘Average Location’ Option
You can average location calculations to create a more accurate
waypoint by reducing the effects of GPS location errors. It is important
to remember that when you average a waypoint from the Waypoint
List or create a new waypoint without actually being at the site of
the waypoint, the location for that waypoint will be changed to your
current GPS location.
Section 4
GPS Navigation
Waypoints
Press MENU key to
display ‘Average
Location’ option.
To Average a Location:
1. With the waypoint page displayed, press the MENU key to display the
Waypoint Option Menu.
2. With ‘Average Location’ highlighted, press the ENTER key to display the
‘Average Location’ Page.
3. Observe the ‘Estimated Accuracy’ field and press the ENTER key with
‘Save’ highlighted when the estimated accuracy reaches the desired
value.
Average Location Option
4. Press the CLEAR key to cancel ‘Average Location’ and leave the
waypoint unchanged.
Estimated Accuracy
Field
Number of
measurements used
to calculate accuracy
Average Location Page
91
NvTlkGSMManual copy.indd 91
12/2/2002, 8:43:16 AM
Section 4
GPS Navigation
Satellite Information Page
The Satellite Information Page
The Satellite Information Page provides a visual reference of various
receiver functions. As the receiver locks onto satellites, a signal strength
bar will appear for each satellite in view, with the appropriate satellite
number (01-32) underneath.
When you first turn the unit on the page title will be “Acquiring
Satellites”. After it has determined your location the title will be “2D GPS
Location” or “3D GPS Location”.
Options
The Satellite Info Page
North Up/Track Up - You can set the Satellite Information Page
skyview orientation to either ‘North Up’ with the skyview oriented
north or ‘Track Up’ with the skyview oriented toward your current
direction of travel. These settings affect only the satellite skyview.
Elevation and Location - You can set a new elevation and new
location to help the unit obtain a position fix. ‘New Location’ will not
be available if your location has already been determined by the GPS
receiver.
Turn GPS Off - You can turn off the GPS receiver if you are not currently navigating to save on battery power. When the GPS receiver is
turned off, the page title will state “GPS Off”
Satellite Info Page Options Menu
92
NvTlkGSMManual copy.indd 92
12/2/2002, 8:43:16 AM
Section 4
GPS Settings
These features are best used by individuals with a working knowledge of
map grids and datums. To learn more about these subjects, visit the National
Imagery and Mapping Agency at http://www.nima.mil or inquire at your library.
GPS Navigation
GPS Settings
General Settings Tab
GPS Mode - Allows you select Normal GPS operation for navigation
and position reporting, Battery Saver which slows the satellite updating
process to save power, Simulate GPS to save power and yet use GPS
features to plan routes, etc. and GPS Off for maximum power savings.
Location Format - Allows you to choose from different grid formats.
The default location format ‘hdddomm.mmm’ displays the latitude and
longitude in degrees and minutes and is the one most commonly used.
Selecting a location format will cause the map datum to match that format.
Map Datum - Offers a selection of nearly all map datums in common
use. Every map is based on a map datum (a reference model of the
earth’s shape) and is usually listed in the title block of the map. If you
are comparing GPS coordinates to a paper map, chart, or other reference, the map datum in this field must match the horizontal map datum
used to generate the map or other reference. The default datum is WGS
84 (World Geodetic Survey 1984) and should only be changed when
using maps or charts specifying a different datum. If a map does not
specify a datum, use the list to find datums applicable to the region of
the map, select the one that provides the best positioning at a known
point. You may also choose the ‘User’ datum for custom designed grids.
Enable/Disable and Clear Track Log - As you move about the unit
creates an automatic track log of your movements which can be viewed for
later reference when saved to MapSource. The ‘CLEAR’ button, allows you
to record a new track logs when the current log is full.
NvTlkGSMManual copy.indd 93
GPS Mode
Options Menu
Settings Tab - GPS
General Page
Options Menu
NOTE: Whenever
GPS is first turned
On, a “Warning“
message will
display.
Press ENTER to
acknowledge.
General Tab
Location Format
Options List
Highlight the ‘Enable Track
log’ box and press ENTER
to record a track of your
movements. Highlight the
on-screen ‘CLEAR’ button
and press ENTER to clear
the track log from your unit.
Recorded tracks can be
saved to MapSource..
Map Datum
Options List
Track on
Map Page
12/2/2002, 8:43:17 AM
93
Section 4
Heading Settings Tab
North Reference - Allows control of what the unit considers ‘North’.
True - Uses True North. Magnetic - Uses Magnetic North, which is
continually updated based on your current location. Grid - Uses North
as defined by the selected grid. User - Uses the Magnetic North Offset
determined by the value entered in the Magnetic Variation Field.
GPS Navigation
GPS Settings
North Reference
Options Menu
Magnetic
Variation
Entry Field
Enter data when
User is selected for
North Reference.
Direction Display
Options Menu
Heading Tab
WARNING: If ‘User’ North Reference is selected, you
must periodically update the magnetic variation as your
position changes. When using this setting, the unit
will not automatically calculate and update the magnetic variation at your current location. Failure to
update this setting may result in substantial differences
between the information displayed on the unit and
external references, such as a magnetic compass.
Magnetic Variation - Provides the magnetic variation for “Magnetic”
north reference when selected and allows you to enter corrections for
the magnetic variation when using a ‘User’ based’ North Reference
program. “True” and “Grid” north reference selections do not display a
magnetic variation.
Direction Display - Changes the ‘Direction To Go’ field and Map
Panning box on the Map Page and Find pages from Cardinal Letters
(N, S, E, W) to Numeric Degrees (147o).
94
NvTlkGSMManual copy.indd 94
12/2/2002, 8:43:18 AM
Section 4
Guidance Settings Tab
Off-Route Recalculation - Allows the unit to recalculate and adjust
the route to your destination whenever you leave the originally calculated route. You can choose from three options: Prompted, which
tells you when you have left the route and asks you if you want to
recalculate, Automatic recalculation, and Off, which does not notify or
recalculate the route.
Next Turn Pop-Up - Allows you to control the pop-up message that alerts
you prior to a turn your route with options of Off and Automatic Only.
Avoid - Allows you to avoid calculation of a route that involves
U-Turns, Toll Roads, or Highways. Highlight the box next to each
option to activate the avoid options in your route.
Routing Settings Tab
Route Preference - Allows you to choose one of three methods for
routing you to a destination. The three options are: Faster Time,
which primarily selects freeways, highways and thoroughfares, Shorter
Distance, which uses all types of roadways to create the shortest route,
and Off Road, which projects a straight line to your destination.
Ask Me My Preference - Allows you to turn On or Off the Route Preference
Prompt when creating a new route. When No is selected, the preference in
the Route Preference field will always be used to calculate your route.
GPS Navigation
GPS Settings
Guidance Page
Options Menu
Route
Recalculation
Options
Highlight the
check box and
press ENTER to
activate ‘Avoid’
options.
NvTlkGSMManual copy.indd 95
GPS Guidance Tab
Routing Page
Options Menu
Route Preference
Options
Ask for Route
Preference Options
Calculation Method - Offers four choices for route calculation, the
Quickest being the most inefficient (shortest time to create) and the
Best the most efficient (longest time to create).
Calculate Route For - Creates a route most suitable for the selected
mode of transportation.
Next Turn
Notice Options
Calculation
Method Options
GPS Routing Tab
Method of Travel
calculation Options
95
12/2/2002, 8:43:19 AM
Section
Section 54
System Settings
Systems Settings allow you to customize the unit by selecting the settings
you desire for the Display, Time, and Interface features.
System Options
Display Settings
System Settings
Backlight
Timeout
Options Menu
Backlight Timeout - The delay can be set to stay on or to turn off
automatically 15 seconds, 30 seconds, 1 or 2 minutes after the last
time you have pressed a keypad key. When using the external power
(cigarette lighter) adapter, the backlight does not timeout.
Display Timeout - The Display Timeout allows you to conserve
battery power by limiting the amount of data displayed on the screen
to the Status Bar. The timeout can be set to Stay On, timeout after 30
seconds, 10 minutes, 1 hour, or Stay Off. The display can be reactivated by pressing any key
Settings Tab - System
Power Save Mode - Turn On for maximum power saving on Standby.
Display
Timeout
Options Menu
Power Save Mode
On/Off
Units of Measure
Options Menu
Display Tab
Display Tab Options Menu
Language
Options
Menu
Units - Units of measure can be set to Statute, Metric, or Nautical
(miles and miles per hour, kilometers and kilometers per hour, or
nautical miles and knots).
Language - You can choose from five languages to display page and
menu text: English, German, French, Italian, Swedish, Danish, and
Dutch.
Page Options - Press the MENU key to display the options for this
page: Restore Defaults, System Info (Software Version & Unit i.d.), and
Show IMEI (International Mobile Equipment Identity). Record the IMEI
code in order to provide it to your service provider if your unit is lost or
stolen to discontinue service, thus preventing use of the phone by others.
96
NvTlkGSMManual copy.indd 96
12/2/2002, 8:43:20 AM
Section
Section 54
Time Settings
Time Format - Allows you to choose from a 12 or 24 hour time
format. When you select the 12 hour time format, the clock will read
like a standard clock with 12 hour AM and PM cycles. The 24 hour
option sets the clock to display a 24 hour cycle (Military Time).
Time Zone - Can be set to one of the U.S. Time Zones, or by selecting
‘Other’ you can enter the UTC Time Offset for any other time zone.
Refer to the instructions for setting UTC Time Offset and the Time
Offset Chart on page 108.
System Settings Options
Time Settings
Time Format
Options
There are 8
Time Zone
Options. Select
‘Other’ to set
a zone from
the UTC Time
Offset Chart
on page 108.
Daylight Savings Time - Can be turned On or Off or set to Automatic.
Current Date and Current Time - Can set by highlighting the ‘Set’
button and pressing ENTER to display the ‘Set Time’ page.
Daylight Savings
Time Options
To Set the Time and Date
1. Highlight the ‘Set Time’ button and press ENTER to display the Set
Time Page.
2. With the Date field highlighted, press ENTER to display the Calendar
Page. Use the ARROW to highlight the year and then move it LEFT or
RIGHT to set the year. Do the same for the month and then move down
the correct day of the month and then press ENTER.
3. Set the Time by highlighting the Time field, then use the KEYPAD keys
to enter the time from a reliable source. When the cursor moves to the
AM/PM position, use the Up/Down ARROW key to select AM or PM.
4. Move the highlight to the Time Zone field and press ENTER to display
the Time Zone Options Menu. Use the ARROW key to move up or
down the list to highlight the desired time zone and press ENTER.
5. Move to the ‘Done’ key and press ENTER to finish.
NvTlkGSMManual copy.indd 97
Time Tab
Date Set Calendar
Set Time Button
Time Zone Options
Set Time Page
Time Set Field
97
12/2/2002, 8:43:21 AM
Section 54
Section
System Options
Interface Settings
Serial Data Format
Options Menu
The Baud rate
options are selectable only for Text
Out , RTCM In,
and RCTM In/Text
Out, Format
options.
Frequency is
selectable for only
certain Formats
Bit Rate is selectable for only certain Formats.
Beacon Options
Interface Tab
Status, SMR, and
Distance data is
independent of
menus and is displayed for only
certain Serial Data
Format options.
Select the desired Serial data Format from the list. If ‘GARMIN
DGPS’ or ‘RTCM In/NMEA Out’ format is selected, additional fields
are provided to control a GARMIN differential beacon receiver (e.g.
GBR 21) directly from your unit. Tuning is automatic with ‘Scan’ or
you can enter the beacon frequency and bit rate when you select
‘User’ from the Beacon list to manually tune the receiver. For more
information, refer to instructions supplied with the beacon receiver.
‘Interface’ Settings
The ‘Interface’ Settings Page allows you to choose from 12 different
input/output serial data formats, or none at all. This feature is used when
connecting your unit to external NMEA devices, DGPS beacon receiver, a
personal computer, etc. It is necessary to have a working knowledge of
these applications. Below is a description of each format:
GARMIN - the proprietary format used to exchange waypoint, track,
and map data with a PC.
GARMIN DGPS - Allows DGPS input using a GARMIN beacon
receiver and a standard RTCM SC-104 format and DGPS tuning.
NMEA - supports the input and output of standard NMEA 0183
version 2.3 data.
Text Out - allows simple ASCII text output of location and velocity
information, without any input capabilities.
RTCM In - allows DGPS input using a standard RTCM SC-104 format
without any output capabilities.
RTCM In/NMEA Out - allows DGPS input using a standard RTCM
SC-104 format and supports the output of standard NMEA 0183 version 2.3 data.
RTCM In/Text Out - allows DGPS input using a standard RTCM
SC-104 format and simple ASCII text output of location and velocity
information.
Modem - allows connection for data transmission using a PC. Refer to
Appendix H on page 111.
None - Provides no interfacing capabilities.
When selecting, ‘Text Out’, ‘RCTM In’, and ‘RTCM In/Text Out’
formats, a Baud Rate field with a list of options will display.
98
NvTlkGSMManual copy.indd 98
12/2/2002, 8:43:22 AM
Accessories (Included with the Unit)
Lanyard - Provides convenient method for carrying the unit.
Section 64
Appendix A
Belt Clip - Attaches to the back of the unit and clips to belt or waistband.
Travel Charger - Provides battery recharging and operation from AC power.* (Not shown)
Owner’s Manual - Start up instructions and detailed operation reference.
Quick Reference Guide - Abbreviated overview of unit operation.
Note: Refer to the list of accessories on the unit packaging for additional accessories
that may be included with your particular model of the NavTalk GSM Phone/GPS.
Optional Accessories
Accessories
(Not included with the Unit)
Carrying Case - Protects the unit from scratches and abrasion. (Not shown)
Non-Skid Vehicle Dash Mount - Used with Hands-Free Kit. (Not shown)
Cigarette Lighter Adapter - Provides power from an automobile cigarette lighter.
Hands-Free Kit - Provides operation in a vehicle with auxiliary mic and speaker
for hands-free operation.
GA 26C Remote GPS Antenna - Allows enhanced satellite acquisition.
External Antenna Cable Adapter Kit - Allows connection to remote phone and
GPS antennas from the Hands-Free Kit. (Not shown)
Hands-Free Headset - Provides privacy and hands-free operation.** (Not shown)
MapSource CD-ROMs - Allows transfer of detailed map data. (Not shown) Standard
accessory on some units.
Intellisync for GARMIN CD-ROM - Allows synchronization of contact data with
a PC. (Not shown) Standarad accessory on some units.
Replacement Battery - Replaces lost or damaged battery. (Not shown)
PC Interface Cable - Provides connection to a PC for data transfer. Standard accessory on some units.
Spare Vehicle Dash Mount Base - Allows transfer of the unit to a second vehicle.
NvTlkGSMManual copy.indd 99
Hands-Free Kit
* Charger configurations are available for the following plug
types: USA/Taiwan, Euro., UK/Ireland, Australia, and China.
**CAUTION: GARMIN Accessories have been designed and
tested specifically for use with GARMIN products. Accessories
offered for sale by other manufacturers have not necessarily
been tested or approved by GARMIN for use with GARMIN
Products. Use of such accessories might cause damage to your
GARMIN Product and void the terms of the warranty. Using
GARMIN Accessories with other manufacturer’s products is not
recommended.
See your GARMIN Dealer or website for availability.
99
12/2/2002, 8:43:23 AM
Section 64
Section
Appendix A
Accessory Ports
Hands-Free Headset Connector
and Accessory
Attachment Locations
Accessories
Antenna Port Cover
Hands-Free Headset
Port
(Lift cover to install)
Carry Lanyard Slot
Remote GPS
Antenna Port
GA 26 C Remote GPS Antenna
Remote Wireless
Antenna Port
Belt Clip
Attachment Socket
(Remove cover to install)
(These two ports require the
External Antenna Cable Kit and
Hands-Free Kit for installation.
Remove the protective cover
Cigarette Lighter Adapter
before placing the NavTalk in
Battery Release Tab
the Hands-Free Kit Cradle.)
(Press Down to remove
depleted battery and
replace with a spare, or to
access SIM Card slot.)
Belt Clip
Auxiliary Power/Data Cable
Plug Port
PC Interface Cable
100
NvTlkGSMManual copy.indd 100
Auxiliary Power or Data Cable
12/2/2002, 8:43:27 AM
Section
Section 64
The Belt Clip Accessory
Appendix A
Installing the Clip Knob:
Kit Contents:
1. Remove the plug from the
back of the NavTalk unit.
Clip Knob:
2. Insert the threaded post
into the hole in the back
of the unit and turn the
knob clockwise until snug.
Attaches to the
back of the
NavTalk Unit.
Belt Clip:
Using the Belt Clip:
1. Squeeze the Belt Clip
to open the clip and
insert over a belt or
waistband.
2. Slide the Clip Knob into
the slot on the Belt Clip
until it “clicks” into place.
3. Press Down on the
Release Tab to remove
the NavTalk from the
Belt Clip.
Clip Knob
Press this tab
to release the
Clip Knob.
Release Tab
Plug
Attaches to the
belt or waistband.
Slot accepts the
Clip Knob and
locks it into place.
Press Clip to open.
NavTalk GSM
Clip Knob Slot
101
NvTlkGSMManual copy.indd 101
12/2/2002, 8:43:35 AM
Section 64
Section
PHYSICAL
Appendix B
Case:
High-impact plastic alloy, waterproof to IPX2 standards
Size:
133 x 51 x 24mm
Specifications
Weight:
170g
Operating Range:
5° to 158°F (-15° to 70°C)
PERFORMANCE:
Specifications are subject to change without notice.
Phone Type:
GSM operating at 900/1800 MHz
1. Subject to accuracy degradation to 100m 2DRMS under the U.S.
DoD-imposed Selective Availability Program.
Receiver:
Differential ready PhaseTrac12®
Acquisition Time:
Approximately 15 seconds (warm start)
2. With optional GARMIN GBR 21 Beacon Receiver input.
3. External power can only be applied using the GARMIN Vehicular
Power Adapter or Travel Charger. Modification to these or other
applications will void the product warranty.
4. Both Talk Time and Standby Time are dependent upon the operating characteristics of each Network System and will vary from
system to system.
The maximum talk time is given for the GSM band at minimum
transmit power: Level 19 - 5 dbm. Talk time will be reduced
at higher power levels. At Power Level 8, for example, talk time is
estimated at 4 hours.
The maximum standby time is given for the GSM band with
the NavTalk “Power Save” mode enabled (a partial display mode),
service indicator Off, and DRX 9. With “Power Save” mode
disabled, service indicator On, and DRX 5, standby time is
estimated at 150 hours.
Extensive use of backlighting and/or the GPS Receiver will also
significantly increase power consumption.
102
NvTlkGSMManual copy.indd 102
Approximately 45 seconds (EzInit®/cold start)
Approximately 2 minutes (AutoLocate®)
Update Rate:
1/second, continuous
GPS Accuracy:
15 meters (49 feet) RMS 1
DGPS (USCG) Accuracy: 1-5 meters (3-15 ft) with DGPS corrections 2
Velocity Accuracy:
0.1 knots RMS steady state
Dynamics:
Performs to specifications to 6 g’s
Interfaces:
RS232 w/NMEA 0183, RTCM 104 DGPS data format,
proprietary GARMIN data formats and Modem Mode
Data Storage:
Indefinite, SIM card.
Internal Memory:
16 MB for map storage, 2.5 MB for general purpose
Antenna:
Built-In (Patch)
POWER:
Input:
Lithium-ion rechargeable battery, AC or 12 VDC Adapter 3
Battery Life:
Est. Talk Time - 8 hours
Est. Standby Time - 300 hours 4
12/2/2002, 8:43:42 AM
The unit uses “pop-up” messages to alert you to unit operating characteristics. Press the ENTER or any other keypad key
to acknowledge and return to the page you were viewing.
Address Buffer Full - Try Entering a City or Zip Code
Appointment Memory Full - Delete old data to allow space
for new data.
Approaching Turn - You are less than one minute away from
a turn in route.
Arriving at Destination - You have reached your destination.
Auto-Redial Timer Not Ready - Wait for the timer to reset.
Basemap Failed - The base map has failed. Return unit to
GARMIN for service.
Batteries Low - The batteries in your unit are low. Recharge
battery.
Batteries Too Low TX Disabled - The battery in your unit is
low and no longer capable of supporting unit phone operation.
Recharge battery.
Blackjack - You have reached 21 points.
Blacklist Full - The list of blacklisted numbers is full. Turn the
unit Off then On to reset the list.
Bookmark Memory Full - Delete old data to allow space for
new data.
Call Barred - An incoming call has been barred.
NvTlkGSMManual copy.indd 103
Section
Section 64
Appendix C
Messages
Call Barring ON - Acknowledgement that at least one Call
Barring feature is now active.
Call Cost Not Available - Contact your service provider to set
up this feature.
Call Diverted - The incoming call has been diverted.
Call Diverted, ON - Acknowledgement that a Call Divert
feature is currently active.
Call Failed - The outgoing call did not connect.
Call Service Activation OK - Confirmation that a Call Service
is now active.
Call Service Active - When checking the status of a Call
Service, this message reports “Active”.
Call Service Action Aborted - A Call Service action has been
aborted from the “Working” page.
Call Service Action Failed - The initiated action has failed
because you have not subscribed to that service or there are
network communication problems. If the service is active, try
again later.
Call Service Action OK - (USSD), Unstructured Supplementary Service Data action has been accepted. See your service
provider for details.
103
12/2/2002, 8:43:43 AM
Section 6
Code Must Be At Least Four Digits Code Not Matched - Code entry error, retry entry.
Appendix C
Cost Limit Exceeded - Cancel call or reset Cost Limit.
Database Error - There was an error in the unit’s database.
Messages
Detail Maps Don’t Support Routing - Install MetroGuide, City
Call Service Activation OK - Confirmation that a call service Select, or City Navigator MapSource mapping data.
is activated.
Dialling - The Browser session is dialling a phone number.
Call Service Cancellation OK - Confirmation that a Call
Entry Already Exists - Modify the name for the entry.
Service has been canceled.
Emergency Only - The keypad is locked and you can only dial
Call Service Not Active - When checking the Status Page this an emergency number.
message reports “Not Active”.
External Power Loss - Battery Life Will Be Reduced With
Call Service Not Available - Network Error message to indiGPS On - The unit has switched to operation from battery power
cate that service ins not available.
with the GPS receiver On
Cannot Display All Found, Use City or Postal Code - There External Power Lost - Power from an external source has been
are more matches for the address than the unit can display.
disconnected. The unit is operating on battery power.
Insert city and postal code to reduce the number of matches.
Find Produced No Results - There is no such item in the
Can’t Unlock Maps - You must use an unlock code to open the database.
maps.
GPS Off - The unit’s GPS receiver is turned off
Checking SIM for New Numbers - The unit is looking for new
GPS Turned Off (for use indoors) - The unit’s GPS receiver has
numbers to add to the Phonebook.
been turned off to conserve battery power and speed Map Page
Connected - Your Browser session has been connected.
display drawing.
Code Accepted - You have successfully entered the correct PIN Home Page Changed - Confirmation message indicates the
or PUK Code.
Browser Home Page has successfully changed.
Code Changed - Your new code number has been accepted.
Illegal Split - You cannot split and play off of these two cards .
Code Error - Code is not recognized by the cellular system.
(Blackjack Game).
104
NvTlkGSMManual copy.indd 104
12/2/2002, 8:43:43 AM
Info Message Overwritten - A cell broadcast message has been
overwritten.
Key Guard is Off - Appears when Keyguard is turned Off by
pressing and holding the CLEAR key.
Key Guard Is On - Hold CLEAR To Turn Off - Instructions on
how to turn Off Key Guard when it is active.
Lost Satellite Reception - The unit has lost satellite signals. Try
moving to another location with a clearer view of the sky.
Memory Full - The unit’s memory is full. To reduce the amount
of memory used, delete unused routes, waypoints or tracks.
Message Send Failed, Save to Drafts - Your message was not
sent and will be saved for later use in the Drafts List.
Message Sent Successfully - The intended recipient has
received your SMS message.
Message Send Failed - Your SMS message was not received by
the intended recipient.
No Differential GPS Position - The beacon receiver is not
communicating with the unit. Refer to the ‘Interface’ setup page
of the unit to view the ‘Status’ field.
No Info Messages - Displays when accessing Info Messages page
when there are no messages received.
No Phone Number - No phone number is entered in Contacts
entry for this name.
None Found - There is no such address, Junction, point of interest, or city in the map information database. Check spelling or
number entry and try again.
NvTlkGSMManual copy.indd 105
Section 6
Appendix C
Messages
Note Memory Full - Delete selected old Notebook notes to
allow space for new notes.
Number Blacklisted - You have been redialling a number that
has not responded for multiple redials and is now being sent to
the Blacklist of numbers that do not respond to dialing.
Off Route - You have traveled off the prescribed route. Move
back or allow the unit to recalculate the route.
Off Route (Recalculating) - The unit is recalculating a new
route from your current location.
Phonebook Database Full - Delete old data to allow space for
new data.
PIN 1 Will Be used For This Type Key - The Browser needs a
PIN code for security purposes.
PIN 2 Blocked - You have exceeded three attempts to enter the PIN
2 code. See your service provider for a PUK 2 number to unblock.
PIN 2 Will Be Used For This Type Key - The Browser requires
a PIN 2 code for security purposes.
Pin Request Must Be On - This action requires a PIN 1 number
for operation. Turn the PIN request feature On.
RAM Failed - The unit has detected a failure in its internal
memory. If the message persists, service is required.
105
12/2/2002, 8:43:44 AM
Section 6
SIM Memory Full - There no space for new numbers.
SMS Inbox Full - Delete Messages - Remove old messages
Appendix C
from the inbox to allow space for new messages.
SMS Invalid Number - You have entered the wrong number, re-enter.
Messages
SMS Service Center # Invalid - Re-enter the correct number.
Recurrence Memory Full - Appointment recurrence memory
SIM Memory Full - Delete old data to allow space for new data.
is full. Shorten the number of months for posting of recurring
Speed Dial Number Not Assigned - There is no number in
appointments.
this speed dial list slot.
Registration Failed - When using Manual Network Search,
To Do List Memory Full - Delete old data to a low space for
network registration has failed. Try another network entry.
new data.
ROM Failed - The permanent memory has failed and the unit
Too Many Exceptions For Recurrence - There are too many
is not operable. Service is required.
date or day mismatches to repeatedly list the event with reliRoute Already Exists - The name you selected has already
ability.
been assigned. Choose another name.
Transfer Complete - The unit has finished uploading or downRoute Memory Full - No additional route waypoints can be added. loading information to the connected device.
Route Truncated - A complete uploaded route will not fit into URL Invalid - The URL cannot be authenticated.
memory. Modify the route to reduce size.
URL Timed Out- Time allowed for display has expired.
Session Not Connected - The Browser session is not currently
URL Too Long - The URL character string is too long to be
connected to the Wireless Application Protocol (WAP). Retry.
accepted. Delete the http:// prefix and try again.
Set Voice mail - Enter a Voice mail Phone Number.
Verifying - Checking your code for validity.
SIM Access Denied - Re-enter the PIN 1 code.
Waypoint Already Exists - The name you selected has already
SIM Blocked - You have exceeded the three attempts to enter
been assigned. Choose another name.
your PIN Code. See your service provider for a PUK 1 number .
Waypoint Memory Full - All of the waypoints have been assigned.
SIM Not Ready - The SIM Card has not been completely read
You Bust - You have exceeded 21 points in the game of Blackjack.
by the phone or the SIM card is not installed or is faulty.
106
NvTlkGSMManual copy.indd 106
12/2/2002, 8:43:44 AM
Section 6
Cleaning
The unit is constructed of high quality materials and does not require
user maintenance other than cleaning. Clean the unit using a cloth
dampened (excess liquid must be expressed completely) with a mild soap
and water solution and then wipe dry. Avoid harsh detergents, chemical
cleaners, and solvents that may damage plastic components. Do not apply
cleaner to electrical contacts on the back of the unit. If using the Carrying
Case with clear plastic window, remove case periodically and clean away
any residual dust particles, that, when trapped between the window and
the display screen, can eventually abraid and scratch the surface.
Appendix D
Unit Care
Battery Care and Storage
Do not store spare battery packs in a location where the metal contacts
may become shorted by metal objects contained in a brief case, glove
compartment, etc. Do not store where exposure to temperature extremes
may occur (i.e. automobile trunk). Do not dispose of batteries in a fire as
they may explode. Batteries should be disposed of using environmentally
safe methods such as recycling.
Water Immersion
The unit is not waterproof or water resistant. If internal components get
wet, permanent damage will result. The unit may withstand splashing, rain,
spatters, etc. if quickly wiped dry. However, the battery and SIM card slot
may retain residual water and should be inspected and allowed to air dry
with the battery removed before re-use.
107
NvTlkGSMManual copy.indd 107
12/2/2002, 8:43:45 AM
Section 6
Appendix E
UTC Offset Chart
Longitudinal Zone
E007.5° to E022.5°
E022.5° to E037.5°
E052.5° to E067.5°
E067.5° to E082.5°
E082.5° to E097.5°
E097.5° to E112.5°
E112.5° to E122.5°
E122.5° to E127.5°
E127.5° to E142.5°
E142.5° to E157.5°
E157.5° to E172.5°
E172.5° to E180.5°
108
NvTlkGSMManual copy.indd 108
Offset
+01.00
+02.00
+03.00
+04.00
+05.00
+06.00
+07.00
+08.00
+09.00
+10.00
+11.00
+12.00
This chart is provided to help you determine the time offset settings
for your current location if it is not in one of the time zones listed on the
Time Setup Page. To change the UTC Offset, if necessary, press the MENU
key twice to access the Main Menu. Then scroll across to the Settings Tab,
scroll down to the ‘Systems’ option and press the ENTER key to access the
System tabs and then tab over to the ‘Time’ tab. Highlight the Time Zone
field and highlight Time Zone field and press the ENTER to display the list
of time zones. If the desired zone is not displayed, select ‘Other’ and press
the ENTER key to enter the appropriate offset value from the chart below.
To determine your longitudinal zone, press and hold the ENTER key and
observe the longitude value in the Mark Waypoint Location field. It should
fall within the sets of values on the chart. Press the CLEAR key to avoid
marking a waypoint.
Longitudinal Zone
Offset
W180.0° to W172.5°
-12.00
W172.5° to W157.5°
-11.00
W157.5° to W142.5°
-10.00
W142.5° to W127.5°
-09.00
W127.5° to W112.5°
-08.00
W112.5° to W097.5°
-07.00
W097.5° to W082.5°
-06.00
W082.5° to W067.5°
-05.00
W067.5° to W052.5°
-04.00
W052.5° to W037.5°
-03.00
W037.5° to W022.5°
-02.00
W022.5° to W007.5°
-01.00
W007.5° to E007.5°
-00.00
12/2/2002, 8:43:45 AM
The Intellisync for GARMIN PC Interface Software CD-ROM (which
may be provided with your unit, depending on the model) allows you to
synchronize PDA data from Contacts, Calendar Appointments List, the ‘To
Do’ list and Notes by interfacing with Outlook, Lotus Notes, Palm Desktop,
or ACT! PC contact management programming.
Section 6
Appendix F
Intellisync™ for GARMIN PC Interface
A PC Interface Cable is provided as a standard accessory for connecting
the NavTalk to a PC Serial Port. The Intellisync CD-ROM provides self
installation and instruction for synchronizing data between the PC and
NavTalk. To successfully synchronize data your PC must meet the minimum
requirements stated in the column to the right.
Intellisync for GARMIN allows you to speed the data entry process for
constructing a NavTalk Phone Book list of names and numbers, Calendar
Appointment entries, entering items into the ‘To Do’ list and posting notes
in Notes. By using the PC keyboard to enter data into one of the contact
management programs listed above you can eliminate the need to use the
NavTalk Keypad to enter data characters one by one. You can also transfer
existing contact data from those programs to the NavTalk.
Detailed instructions for using Intellisync are provided in the manual
shipped with the CD-ROM and in the program ‘Help’ files. Note that there
are help files to provide specific information for each of the four types of
contact management programs.
Once you have setup the Intellisync program, you must activate the
synchronization from the NavTalk by pressing and holding the ENTER key
until the Quick Set Menu is displayed, use the ARROW keys to select
“Begin Sync” and then press ENTER again. When synchronization begins,
a spinning globe will appear on the display until the synchronization is
complete.
NvTlkGSMManual copy.indd 109
Intellisync for GARMIN
Press and Hold the
ENTER key
to display the Quick Set Menu,
then use the ARROW key
to select ‘Begin Sync’ and
press ENTER to begin
synchronization
Intellisync for GARMIN PC system requirements are: IBMcompatible 486 PC or better with 133 MHz or higher Pentium®
processor, Windows 95®, Windows 98®, Windows 95 or 98
XP, Windows NT® 4.0, or Windows 2000 Professional edition
with 64 MB RAM. 16 MB minimum RAM, 30 MB free hard
disk space, CD-ROM drive, 256-color display adapter and VGA
monitor or better with 640x480 resolution.
109
12/2/2002, 8:43:46 AM
Section 6
Appendix G
MapSource™ Data Information
MapSource CD-ROM data (which may be provided with your unit, depending on the model) can be transferred to the NavTalk Unit to dramatically
increase the mapping capability of the unit in both the amount of map detail
and available maps. MetroGuide® maps contain detailed information and are
required for using the Find Menu, Points of Interest, Addresses and Junctions
options. MapSource maps can also provide U.S. Geological Survey topographical
data, local streets and roads, nautical navigation aids, political boundaries and
all major traffic routes for specified geographical areas.
The unit can display a maximum of 525 MapSource maps depending on the
size of each map to fit within the 16 MB map data capacity of the NavTalk.
You cannot view multiple types of MapSource data in the same location at
the same time (one will draw over the other). When you leave a MetroGuide
area for example and enter the area of a topographic map, the display will
change to contour lines. The same is true when moving from a topo map to
a MetroGuide map.
The City Navigator maps are at the top of the hierarchy and will replace
any other map information. Here is the list of the hierarchy for your reference
beginning with those titles that take precedence:
MapSource Info Page details those maps downloaded to the NavTalk
Check the box adjacent to the map description to Activate
MapSource PC system requirements are: Pentium® processor,
Windows 95®, Windows 98®, or Windows NT®, Windows
2000®, 16 MB minimum RAM, 300 MB free hard disk space (for
compact installation), CD-ROM drive, 256-color display adapter
and monitor, mouse or other pointing device, PC Interface cable.
Check the GARMIN website (www.garmin.com) or ask your
GARMIN dealer for MapSource product descriptions.
110
NvTlkGSMManual copy.indd 110
1. City Navigator 2. City Select 3. MetroGuide 4. Fishing Hot Spots 5. U.S.
Waterways & Lights 6. U. S. Topo 7. Roads and Recreation 8. WorldMap
You can place a check in the boxes on the MapSource Info Page to select
which maps will display. Removing the check prevents it from drawing over a
map you want to view. Refer to page 58 for details.
Your NavTalk unit is shipped with an installed Euro basemap and a
MapSource “City Select- Europe” CD-ROM with a full unlock code certificate.
Follow instructions provided with the CD-ROM and Unlock Certificate. Installation of mapping data requires the use of the PC Interface Cable set.
12/2/2002, 8:43:48 AM
Modem Setup Instructions
If you select the ‘Modem’ interface option to use the NavTalk as a modem
to communicate with devices or software, you must perform the following setup
procedure. This example shown is performed using Windows® NT or 2000.
Most Windows applications will perform in a similar manner with slight graphic
variations for the application windows displayed.
Section 6
Appendix H
Interface Modem Setup
To setup the modem:
1. Access the Interface Tab of the Main Menu Settings page. Set the serial data
field to ‘Modem’ .
2. Connect the PC Serial Data Cable Accessory to an available COM port on your
PC and to the NavTalk.
Phone & Modem Options Icon
3. Install a new modem by selecting ‘Start’, then ‘Settings’, and ‘Control Panel’.
Then click on the ‘Phone and Modem Options’ icon to display the dialog pages.
4. Select the ‘Modems’ tab. Add a 14400 bps Modem from the list displayed when
you click on the ‘Add” button. Configure this new modem to use the COM port
connected to the NavTalk .
5. Select the properties dialog and be certain to set the modem for a maximum
port speed of 19200 and Not to wait for a dial tone (uncheck the box).
Phone & Modem Options Dialog
6. For the software that will use the NavTalk as a modem...select the ‘Standard
14400 bps Modem’ that you added in Step 4. Then set the dial-up number.
Note that, it may be helpful to turn Off the modem error control if the software
allows.
7. To set the AT commands for software not already supported by the NavTalk,
access the ‘Advanced’ tab of the Modem Properties dialog and enter the desired
commands. Additional information about AT commands can be found by accessing the GARMIN web site at www.garmin.com.
Modem Properties Dialog
NvTlkGSMManual copy.indd 111
111
12/2/2002, 8:43:49 AM
Section 6
To resolve problems that cannot be remedied using this guide:
Appendix I
Contact GARMIN Product Support at
44/0870.8501241 (Europe) or 913/397.8200 or 800/800.1020 (U.S.A.)
Troubleshooting Guide
Symptom
Probable Cause
Remedy
Unit does not turn on.
Battery is not charged.
Charge battery.
The unit has been damaged by impact or internal
contact with a liquid (ie.- water).
The unit may require service or repair. Contact
your GARMIN Dealer.
Unit turns On, but then turns Off.
The battery is nearly depleted.
Recharge the battery.
A “SIM Not Ready” message is
displayed.
SIM card is not inserted or is improperly installed.
Insert the SIM card or make certain it is properly installed.
The unit has not had time to make connection with
your service provider.
Wait for the NavTalk to communicate with
your service provider. Observe the signal
strength icon on the status bar.
The unit does not ring.
Ringer control settings are set to Off.
Go to the ‘Settings’ Tab and change Phone
Ringer settings.
A “Call Failed” message is displayed.
You are outside the range of your cell or the signal
is blocked.
Your SIM card is not installed
Move to a new location and try again.
The feature is service provider dependent which
must be activated and subscribed to..
Cellular service is down or you have not subscribed to the service.
Certain features such as SMS “Short
Message Service” do not function.
Install your SIM card.
112
NvTlkGSMManual copy.indd 112
12/2/2002, 8:43:50 AM
Wireless Phone Terminology
CLIP - Caller Line Identification Presentation. A service provider supported caller identification feature.
CLIR - Caller Line Identification Restriction
Diverting - Sending a call to another phone number or voice mailbox.
Section 6
Appendix J
Glossary of Terminology
Fixed Dialling - Only phone numbers listed can be dialled.
IMEI Code - An International Mobile Equipment Identity code that is
unique to your unit
Network Code - Code designation for a particular service provider
Network Operator - The name of the service provider
PDA - Personal Digital Assistant
PIN1 Code - The first of two Personal Identification Numbers
PIN2 Code - The second of two Personal Identification Numbers
PUK1 Code - The first of two SIM PIN unblock codes
PUK2 Code - The second of two SIM PIN unblock codes
Report - A message sent to another phone or location reporting your
current position coordinates.
Recurrences - A list of the number of reports sent over a given period
of time.
SMS - Short Message Service. A service provider support messaging
feature.
SIM Card - Subscriber Identity Module, assigned for your use and the
source for subscription charges for mobile services.
NvTlkGSMManual copy.indd 113
113
12/2/2002, 8:43:51 AM
Section 6
Appendix J
Glossary of Terminology
GPS Terminology
Altitude - The height above mean sea level.
AutoZoom - The map display feature that automatically sets the
maximum scale for displaying map features in conjunction with the
map detail setting to prevent displaying too many features causing “map
clutter”.
Bearing - The compass direction from your present location to a set
destination.
Course - The direction to navigate over a straight line to your destina-
tion.
Distance to Destination - The measured distance remaining while
traveling to a set destination.
Distance to Next - The measure distance to the next turn in a route.
Max. Speed - The maximum speed attained over a given period of
time.
Odometer - The cumulative record of distance traveled.
Route - The direction of travel laid out by the unit over existing roads
and highways to a destination.
Time To - The time remaining before your reach your destination.
Based on your current speed.
Waypoint - The term used to identify a marked and recorded map
item or latitude and longitude.
114
NvTlkGSMManual copy.indd 114
12/2/2002, 8:43:51 AM
Section 6
A
Accessories ................................................................................ 99-100
Active Route................................................................................ 84-85
Accumulated Charge Module (ACM)...........................................13, 36
Air Time ......................................................................................13, 36
Alerts with Messages .........................................................................53
Alerts Tab ....................................................................................20, 53
Answering a Call ...............................................................................28
ARROW Key .......................................................................................3
Auto-Routing ....................................................................................85
B
Backlighting .............................................................................. 3-5, 96
Battery Installation/Charging ...............................................................1
Battery Capacity Display......................................................................6
Beeper ......................................................................................... 53-54
C
Calendar.......................................................................................45-46
Call Barring .......................................................................................62
Call Cost ...........................................................................................36
Call Divert.........................................................................................61
Call Timers........................................................................................36
Call Services................................................................................ 61-64
Call Waiting ......................................................................................63
Calling Line Identification Presentation (CLIP) (CLIR) ..............13, 113
Cautions and Warnings .................................................................. iii-v
Changing Volume................................................................................5
Cities ...............................................................................................79
Conference Calls ...............................................................................29
Contrast Adjustment ...........................................................................4
Appendix K
Index By Subject
D
Data Fields ........................................................................................ 10
Date and Time............................................................................... 6, 97
Dialling Errors (Call Failed)............................................................. 103
Dialling Page ..................................................................................... 25
Distance (Measuring)......................................................................... 75
E
Emergency Calls.......................................................................... 27, 59
Ending a Call..................................................................................... 28
ENTER Key ......................................................................................... 3
Entering Data .................................................................................... 10
F
Features..........................................................................................1-24
Find ‘n Go....................................................................................77-83
Fixed Dialling........................................................................ 20, 33, 56
G
Games ....................................................................................19, 49-51
Goto ............................................................................................... 84
Grid ............................................................................................... 94
115
NvTlkGSMManual copy.indd 115
12/2/2002, 8:43:51 AM
Section 6
On
Appendix
the Water
K
Index By Subject
I
Icons ................................................................................................. 6
IMEI...................................................................................................96
Inbox ............................................................................................... 38
Initializing....................................................................................... ..65
Interface Format................................................................................ 98
Junction Information......................................................................... 83
MapSource ................................................................................78, 110
Mark Present Position (As a Waypoint)..........................................7, 87
Marking Waypoints .......................................................................7, 87
MENU Key..........................................................................................3
Messages ..........................................................................37-41, 58-59
Missed Calls ......................................................................................35
Mini-Browser.......................................................................... 43-44
Modem Set-Up ...........................................................................111
N
Key Usage ...........................................................................................3
KEYPAD keys ......................................................................................3
Navigation................................................................................... 63-93
Nearest (Waypoints, Cities, etc.).................................................. 77-78
NMEA ...............................................................................................98
Normal Mode (GPS)..........................................................................93
Normal Mode (Profiles) .....................................................................53
North Up ....................................................................................73, 92
North Reference ................................................................................92
Notes .........................................................................................19, 48
L
O
Language.....................................................................................59, 96
Last Dialled (Dialled Calls) ................................................................35
Limited Warranty ................................................................................ii
Location Marking (As a Waypoint) ................................................7, 87
Lock (Keyguard)..................................................................................7
Odometer..........................................................................................86
Offset (Time) .............................................................................97, 108
Options Menus....................................................................................9
Orient Map........................................................................................73
K
M
Main Menu.................................................................................. 12-24
Maintenance....................................................................................107
Map Navigator Page .................................................................... 64-76
Map Settings................................................................................ 73-74
P
Panning (Map) ............................................................................ 69-70
Personal Digital Assistant (PDA) ............................................ 19, 45-52
Personal Identification Number (PIN) .................................2, 4, 33, 56
Personal Unblocking Code (PUK) ...........................................4, 33, 56
Placing a Call.....................................................................................25
116
NvTlkGSMManual copy.indd 116
12/2/2002, 8:43:52 AM
Section 6
Position Format (Location)................................................................93
POWER Key....................................................................................3, 4
Product Registration .............................................................................i
On
the Water
Appendix
K
R
Receiver Status (GPS) ........................................................................92
Recurrences.......................................................................................42
Redialling (Auto) ...............................................................................55
Renaming a Saved Route ...................................................................85
Reports........................................................................................ 41-42
Reset Max Speed ...............................................................................86
Restricted Calls (Fixed Dialling) ..................................................27, 56
Routes..........................................................................................84-85
.
Creating..................................................................................84
Naming...................................................................................85
Scale (Map)... ................................................................................... 71
Set Time ........................................................................................... 97
Settings Menu ...................................................... 20-24, 53-64, 93-98
Short Message Service (SMS) .................................................37-42, 58
Simulator ......................................................................................... 93
Software Version (System Info)......................................................... 96
Specifications ................................................................................. 102
Speed Dialling (One-Touch) ................................................. 27, 31, 59
Speed Display (Moving Avg., Overall Avg., Max) .............................. 86
Synchronization (Intellisync for GARMIN) ..................................... 109
T
Table of Contents ......................................................................... vi-vii
Time Format ............................................................................ 97, 108
Time Offset Chart........................................................................... 108
Tasks ........................................................................................ 19, 47
NvTlkGSMManual copy.indd 117
Index By Subject
U
Unit Features...................................................................................... 3
Units of Measure .............................................................................. 96
V
Voice Mail ................................................................................. 29, 61
Volume......................................................................................... 5, 54
W
Warranty ............................................................................................ ii
Waypoints List ................................................................................. 79
Waypoints ...............................................................................7, 87-91
Averaging Location................................................................. 91
Deleting ................................................................................. 90
Editing ................................................................................... 90
Marking ................................................................................. 87
Moving................................................................................... 89
Naming .................................................................................. 87
Nearest................................................................................... 89
Symbols ................................................................................. 87
Z
Zooming In and Out ........................................................................ 71
117
12/2/2002, 8:43:52 AM
On the Water
118
NvTlkGSMManual copy.indd 118
12/2/2002, 8:43:53 AM
© Copyright 2002 GARMIN Ltd. or its subsidiaries
GARMIN International, Inc.
1200 East 151st Street, Olathe, Kansas 66062, U.S.A.
GARMIN (Europe) Ltd.
Unit 5, The Quadrangle, Abbey Park Industrial Estate, Romsey, SO51 9DL, U.K.
GARMIN Corporation
No. 68, Jangshu 2nd Road, Shijr, Taipei County, Taiwan
www.garmin.com
Part Number 190-00218-00 Rev. C