1
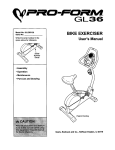
SmARSOwner's Manual
CRAFTSMAN°
6.0 HORSEPOWER
2250 PSI
2.2 GPM
HIGH PRESSURE WASHER
Model No.
580.762250
PRESSURE WASHER
CUSTOMER
HEUPUNE
CAUTION:
Before using this
product, read this manual and
follow all Safety Rules and
Operating Instructions.
HOURS:
SEARS,
ROEBUCK
PartNo.21009Draft3 (2/25/97)
Mon,-
Fri. 8 a.m. to 5 p.m. (CST)
and CO., Hoffman
Estates, IL 60179 U.S.A.
/
SAFETY RULES ..........................
2-3
STORAGE
ASSEMBLY ..............................
4-5
TROUBLESHOOTING .......................
16
OPERATION ............................
6-10
NOTES ..................................
17
MAINTENANCE
......................
SERVICE AND ADJUSTMENTS
.............
: .......
REPLACEMENT PARTS ..................
.V.!1,131 _
14
._. .....
LI'MiTI"ED ONE YE_AB_.Y'_kBBAN_;ON
.......................
18-25
HOW TO ORDER PARTS ............
CRAFTSMAN
HIGH PRESSURE
15
BACK PAGE
WASHER
For on6_ye'_Tfro"rnthe date of p__ehase, when this Craftsman High Pressure Washer is maintained and operated according to the-instruction_'h_ the oWner's-rfianual, Sears will repair, free of charge, any defect in material
and wo_mans ihip__
If this washer is used for commercial purposes, this warranty applies for only 90 days from the date of purchase, if-this high-pressureWasher is u§ed for rental purposes, this warranty applies for only 30 days after
date of purchase ..........................
This warranty does not cover:
• Expendable items such as spark plugs and air filters, which become worn during normal use.
•
Repairs necessary because of operator abuse or negligence, including damage resulting from no water being
supplied to pump or failure to maintain the equipment according to the instructions contained in the owner's manual.
WARRANTY SERVICE IS AVAILABLE BY RETURNING THE HIGH PRESSURE WASHER TO THE NEAREST SEARS STORE OR OTHER CRAFTSMAN OUTLET IN THE UNITED STATES.
This warranty gives you specific legal rights and you may also have other rights, which vary from state to
state.
SEARS,
ROEBUCK
AND CO., D/817 WA, Hoffman
Estates,
IL 60179
CAUTION: ALWAYS DISCONNECT SPARK PLUG WIRE AND PLACE WIRE WHERE IT CANNOT CON,_
TACT SPARK PLUG, TO PREVENT ACCIDENTAL STARTING WHEN SETTING UP, TRANSPORTING,
ADJUSTING OR MAKING REPAIRS TO YOUR HIGH PRESSURE WASHER.
Locate this pressure washer in areas away from combustible materials, combustible fumes or dust.
I_
read this manual and follow all Safety
AUTION:
Before using
this product,
Rules
and Operating
Instructions.
The high pressure equipment is designed to be used
with Sears authorized parts only. If you use this
equipment with parts that do not comply with minimum specifications, the user assumes all risks and
liabilities.
•
TRAINING:
• Engine exhaust gases contain DEADLY carbon
monoxide gas. This dangerous gas, if breathed in sufficient concentrations, can cause unconsciousness or
; even death. Operate this equipment only in the open
air where adequate ventilation is available.
• :-i_Gasoline is highly FLAMMABLE and its vapors are
i: EXPLOSIVE. Do not permit smoking, open flames,
i :sparks or heat in the vicinity while handling gasoline.
o: _Avoidspilling gasoline on a hot engine. Allow unit to
_i:!_€ool for 2 minutes before refueling. Comply with all
laws regulating storage and handling of gasoline.
•
Some chemicals or detergents may
inhaled or ingested, causing severe
or poisoning. The harmful elements
erty damage or severe injury.
Do not allow CHILDREN to operate
Washer at any time.
be harmful if
nausea, fainting
may cause propthe Pressure
PREPARATION:
•
•
•
Operate engine only at governed sp_'ed, Running the
engine at excessive speeds increases the hazard of
personal injury. Do not tamper with parts which may
increase or decrease the governed speed.
Do not wear loose clothing, jewelry or anything that
may be caught in the starter or other rotating parts.
Before starting the Pressure Washer in cold weather,
check all parts of the equipment and be sure ice has
not formed there,
'
•
•
•
Units with broken Ormissing parts,or without
protective housing or covers should NEVER be
operated.
The muffler and air cleaner must be installed and
in good conditionbefore operating the Pressure
Washer. These components act as spark
arrestors if the engine backfires.
Check the fuel system for leaks or signs of deterioration such as chafed or spongy hose, loose or
missing clamps or damaged tank or cap. Correct
all defects before operating the Pressure
Washer.
•
•
•
•
OPERATION:
•
•
•
•
•
•
•
•
•
•
•
•
•
•
•
Do not spray flammable liquids.
Never allow any,part of the bod.y..._come in contact with the flu_ostream, uu NU/come in contact with a fluid stream created by a leak in the
high pressure hose.
High pressure stream of fluid that this equipment
can produce can pierce skin and its underlying
tissues, leading to serious injury and possible
amputation.
Never aim the gun at people, animals or plants.
High pressure spray can cause paint chips or
other joarticlesto become airborne and fly at high
speeos.
Always wear eye protection when you use this
equipment or when you are in the vicinity where the
equipment is in use.
Operate the pressure at no more than the PSI
fluid pressure rated for your pressure washer.
Never move the machine by pulling on the high
pressure hose. Use the handle provided on the
top of the unit.
Always be certain the spray gun, nozzles and
accessories are correctly attached.
Never use a spray gun which does not have a
trigger lock or trigger guard in place and in working order.
Use a respirator or mask whenever there is a
chance that vapors may be inhaled. Read all
instructions with the mask so you are certain the
mask will provide the necessary protection
against inhaling harmful vapors.
Highpressure spray may damage fragile items
including glass. Do not point spray gun at glass
when in the jet spray mode.
Keep the hose connected to machine or the
spray gun while the system is pressurized.
Disconnecting the hose while the unit is pressurized is dangerous.
•
Hold the spraygun firmly in your hand before you
start the unit. Failure to do so could result in an
injury from a whipping spray g.un. Do not leave
the spray gun unattended while the machine is
running.
The cleaning area should have adequate slopes
and drainage to reduce the possibility of a fall
due to slippery surfaces.
Keep water spray away from electric wiring or
fatal electric shock may result.
Do not adjust unloader valve to a pressure in
excess of machine rating.
Do not secure trigger gun in the pull-back (open)
position.
Do not by-pass any safety device on this
machine.
The muffler and engine heat up during operation
and remain hot immediately after shutting it
down. Avoid contact with a hot muffler or engine
or you could be severely burned.
MAINTENANCE
•
•
AND STORAGE:
Operate and store this unit on a stable surface.
High pressure hose can develop leaks from wear,
kinking, abuse, etc. Water spraying from a leak is
capable of injecting material into skin.Inspect
hose each time before using it. Check all hoses
for cuts, leaks, abrasions or bulging of cover, or
damage or movement of couplings. If any of
these conditions exist, replace hose immediately.
Never repair high pressure hose. Replace it with
another hose that meets minimum pressure rating of your pressure washer.
Note: In the State of California a spark arrestor is
required by law (Section 4442 of the California
Public Resources Code). Other states may have
similar laws. Federal laws apply on federal lands.
Note: If you equip the engine of your pressure washer with a spark arrestor muffler, the spark arrestor
must be maintained in effective working order by the
owner/operator.
You can order a spark arrestor (part # 398067)
through your Sears Service Center.
LOOK FOR THIS SYMBOL TO POINT OUT IMPORTANT SAFETY PRECAUTIONS.
IT MEANS "ATrENTION!!!
BECOME ALERT!!! YOUR SAFETY IS INVOLVED."
I
CARTON CONTENTS
•
The following parts are shipped loose with your pressure
washer:
HOW TO SET UP YOUR PRESSURE WASHER
•
•
•
•
•
Main Unit -- pressure washer with wheels and guide
handle
Product IntroductionVideo
Nozzle Cleaner Kit
High Pressure Hose
Parts Box (which includes items listed below
• Spray Gun
• Wand Extension with Hi-Lo Adjustable Nozzle
• Wire Form
• Motor Oil
Become familiar with each piece before assemblingthe
pressure washer. Check all contents against the illustration on Page 6. If any parts are missing or damaged, call
the Pressure Washer Helpline at 1-800-222-3136.
TOOLS REQUIRED
Remove the unit by rolling it out the opening in the
carton, then check carton for additional loose parts.
For the most part, your Craftsman High Pressure Washer
has been assembled at the factory. You must, however,
attach the wire form, assemble the spray gun, and attach
the high pressure hose to the pump and spray gun.
Note: Included with your unit is a video cassette that
demonstrates how to set up your pressure washer. If
you have a viedo cassette recorder you may wish to view
the video before assemblingyour unit.
•
Insert the wire support with the longer arm positioned
on the left. From this view the hook should resemble
a "J".
FOR ASSEMBLY
2 adjustable wrenches OR the following wrenches
•
11/16" (17mm) wrench
•
7/8" (23mm) wrench
LONG
ARM
SHORT
ARM
TO REMOVE PRESSURE WASHER
CARTON
FROM
Remove loose parts and parts box included with pressure washer. The high pressure hose is packed in the
bottom of the carton on the guide handle end.
Remove the hose.
•
Slice two corners at guide handle end of carton from
top to bottom so the panel can be folded down flat,
then remove all packing material.
•
Raise guide handle and secure in place.
Loosen knobs to
,/
raise handle
Tighten knobs
when handle
straight.
Cut lie wrap on chemical injection tube. Remove chemical injectionfilter, threadchemical tube through the wire
form and reinsert filter into tube.
•
Cut tie wrap from high pressure hose. Connect
•
Place assembled spray gun on holder.
high pressure hose to gun with either two
adjustable wrenchs or one 11/16" and one 7/8"
wrench.
Remove plastic cap and connect high pressure
hose to pump.
CHECKLIST
Before you operate your new high pressure washer,
to be sure you receive the best performance and satisfaction from this quality product, please review the
following checklist:
HIGH PRESSURE
OUTLET
•
All assembly instructions have been completed.
•
The high pressure hose connections to the spray
gun and to the pump are tight and secure.
Connect nozzle extension to spray gun.
A
CAUTION: Any attempt to crank or
start the engine before it has been
properly serviced with the recommended oil may result in an engine failure.
See Page 9 for instructions on adding
oil and proper oil specifications.
While learning how to use your high pressure
washer, pay extra attention to the following important
items:
•
Engine oil is at proper level
•
Be sure gas tank is filled properlywith clean,
fresh, unleaded gasoline.
•
Become familiar with all controls- their location
and funcUon. Operate those controlsbefore starting the engine.
-
KNOW YOUR HIGH PRESSURE WASHER
READ THIS OWNER'S MANUAL AND SAFETY RULES BEFORE OPERATING YOUR HIGH PRESSURE WASHER,
Compare the illustrationswith your high pressure washer to familiarize yourself with the locations of various controls
and adjustments. Save this manual for future reference.
SPRAY GUN ASSEMBLY
GUIDE HANDLE
CHEMICAL INJECTION
TUBE AND FILTER
HIGH PRESSURE
IEL TANK
RECOIL STARTER
ENGINE THR(
CONTROL LEVER
FILL
MUFFLER
AIR CLE_
ADJUSTABLE
NOZZLE
PUMP
PRESSURE
WATER IN
HIGH PRE
OUTLET
PUMP-
Develops high pressure.
PRESSURE REGULATOR - Allows you to adjust the
pressure of the outlet stream.
ENGINE THROTTLE CONTROL LEVER - Sets engine in
starting mode for recoil starter; STOPS running engine.
RECOIL STARTER - Used for starting the engine manually.
AIR CLEANER - Dry type filter element limits the amount
of dirt and dust that gets in the engine.
CHEMICAL INJECTOR
REGULATOR
SPRAY GUN ASSEMBLY - Controls the application of
water onto cleaning surface with trigger device. Includes
safety latch.
CHEMICAL INJECTION TUBE AND FIL_ER - Mixes
water and detergent in outlet water flow.
HIGH PRESSURE OUTLET - Connection for high pressure hose.
WATER INLET - Connection for garden hose.
HOW TO USE YOUR PRESSURE WASHER
•
IF YOU HAVE ANY PROBLEMS operating your pressure washer, please call the pressure washer helpline
at 1-800-222-3136.
A
Twistingthe nozzle adjusts the spray pattem from
a narrow pattern to a fan pattern.
WARNING NEVER adjust spray pattern
when spraying. NEVER put hands in front
of spray nozzle to adjust spray pattern.
You could be injured.
HOW TO ADJUST PRESSURE AND SPRAY PATrERN
On the end of yourspray gun is a nozzle that you
can slide forward and backward and that you can
also twist from side to side. With the adjustable nozzle you can adjust the spray pattern to be either high
pressure or low pressure. You can also adjust the
spray so it is concentrated in a stream pattern or
expanded into a fan pattern.
•
TWIST NOZZLE
FOR FAN SPRAY
PATTERN
Located on the front of the pump is the pressure
control knob. You can increase the pressure of
the spray by turning the knob clockwise or
decrease the pressure by turning the knob counterclockwise,
i
TWIST NOZZLE FOR
NARROW SPRAY
PATTERN
between 8 to 24 inches away from cleaning surface.
For most effective cleaning, keep spray nozzle
If you get spray nozzle too close, especially using
high pressure mode, you may damage the cleaning surface.
APPLYING DETERGENT AND CLEANING WITH
ADJUSTABLE NOZZLE
IMPORTANT: Use soaps designed specificallyfor
pressure washers. Household detergents could damage the pump.
Slide the nozzle forward when you wish to adjust
the spray to low pressure mode. Slide the nozzle
backward to achieve high pressure (see
"Adjusting the Spray Pattern in figure below).
IMPORTANT: You must attach all hoses before you
start the engine. Starting the engine without all the
hoses connected and without the water turned ON
will damage the pump.
Note: The first step involves applying an appropriate
detergent/solvent solution to penetrate and loosen
grime. The detergent is applied at low pressure to
avoid splashing, overspraying and waste. Leave the
solutionon surface for 3 to 5 minutes to allow solution to work.
Note: The second step involves cleaning the surface
you have prepared with the pressure washe r and
then rinsing it clean.
NOZZLE IN HIGH
PRESSURE MODE
SLIDE NOZZLE FORWARD
FOR LOW PRESSURE MODE
AND DETERGENT APPLICATION
Toapplydetergent
followthesesteps:
•
Prepare the detergent solution as required by the job.
•
Hang the detergent solution on the "J" hook on the
wire form on the guide handle.
RINSING WITH THE PRESSURE WASHER
A
WARNING Be extremely careful if you must
use the pressure washer from ladder, scaffolding or any other relatively unstable location. Pressure in a running washer builds in
the wand as you climb. When you press the
trigger, the recoil from the initial spray could
force you to fall, or if you are too close to the
cleaning surface, high pressure could force
you off a climbing apparatus.
•
Hook up the water supply and start your pressure
washer (see "TO START THE PRESSURE
WASHER" on page 10).
•
Slide adjustable nozzle rearward to high pressure
position and wait for detergent to clear. Detergent will
not flow when in the high pressure mode.
When detergent has cleared you may want to expand
the spray pattem for a more gentle rinsing action.
Start at top of area to be rinsed, working down with
same action as for cleaning,
•
Place small filter of the clear, chemical injection tube
into the detergent container.
•
Slide the adjustable nozzle forward to low pressure
mode. Detergent cannot be applied with nozzle in high
pressure position.
•
You can also stop detergent from flowing by simply
removingsiphonfrom bottle.
HOW TO STOP YOUR PRESSURE
•
Review the use of the adjustable nozzle on Page 7.
WASHER
First, move the engine Throttle Control Lever to STOP
position,
Connect garden hose to water inlet (see "TO START
PRESSURE WASHER" on page 10), check that high
pressure hose is connected to spray gun and pump
(see "ASSEMBLY" on page 5), and start engine..
•
Apply detergent to a dry surface, starting from the bottom and working up.
•
Allow the detergent to soak in between 3-5 minutes
before washing and rinsing.
Note: To adjust the concentration of the mixture of
cleaning chemical and water, turn the smaller black knob
next to the pressure regulator.
CHOKE
Position
•
Simply shuttting OFF the engine will not release pressure in the system. Squeeze trigger on the spray gun
to relieve pressure in the hose.
Note: A small amount of water will squirt out when you
release the pressure.
BEFORE STARTINGTHE PRESSUREWASHER
ADD GASOUNE
To operatethe engine you will need to do the following:
A
ENGINE OIL
A 20 oz. bottle of SAE 30 weight oil is included in the
parts carton. Fill engine crankcase with recommended
oil until oil level is at FULL point on dipstick. Do not fill
above that mark. About 20 ounces is required. POUR
SLOWLY.
Note: When adding oil to the engine crankcase in the
future, use only high quality detergent oil rated with API
service classification SF and SG rated SAE 30 weight.
Use no special additives.
Select the oil's viscosity grade according to your expected operating temperature.
I
I
colder 5W30
_
32°F _
warmer
SAE
30
Although multi-viscosity oils (5W30, 10W30, etc.) improve
starting in cold weather, these multi-viscosity oils will
result in increased oil consumption when used above
32°F. Check your engine oil level more frequently to
avoid possible damage from running low on oil. Oil sump
capacity is 20 ounces.
•
Place pressure washer on a level surface
•
Clean area around oil fill and remove oil dipstick.
•
Wipe dipstick clean.
Pour oil from the enclosed bottle into the oil fill opening until oil reaches FULL mark on the dipstick.DO
NOT OVERFILL.
•
Install oil dipstick, hand tighten securely.
A
•
WARNING NEVER fill fuel tank Indoors.
NEVER fill fuel tank when engine is running
or hot. DO NOT light a cigarette or smoke
when filling the fuel tank.
CAUTION: Do not overfill the fuel tank.
Always leave room for expansion.
Use regular UNLEADED gasoline with the pressure
washer engine. Regular leaded gasoline may also be
used if UNLEADED is not available. Fuel tank capacity is 1 U.S. quart.
IMPORTANT: It is importantto prevent gum deposits
from forming in essential fuel system parts such as the
carburetor,fuel filter, fuel hose or tank during storage.
Also, experience indicatesthat alcohol-blended fuels
(called gasohol, ethanol or methanol) can attract moisture
which leads to separation and formation of acids during
storage. Acidic gas can damage the fuel system of an
engine while in storage. To avoid engine problems, the
fuel system should be emptied before storage of 30 days
or longer. See "Storage" on page 15. Never use engine
or carburetorcleaner productsin the fuel tank or permanent damage may occur.
•
Clean area around fuel fill cap, remove cap.
•
Add "UNLEADED" regular gasoline, slowly, to fuel
tank.
•
Install fuel cap and wipe up any spilled gasoline.
TO START YOUR PRESSURE
•
WASHER
You have assembled your high pressure washer and
have prepared the engine for starting. You are now ready
to clean your car, boat or the outside of a buildingor
whatever you plan to clean:
Reconnect the wand extension
Note: After reconnectingthe wand extension, you may
need to squeeze trigger again on pressure washer wand
to relieve the air pressure caused by water inlet supply.
Water will spew out of the gun in a thin stream. This will
make it easier to pull start the engine.
The best way to start your engine-powered pressure
washer for the first time is to follow these instructions
step-by-step. This starting informationalso applies whenever you start the engine after you have let the pressure
washer sit idle for at least a day.
•
Engage safety latch on spray gun to the ON position.
This disables the trigger so you cannot inadvertently
actuate a high pressure spray.
Place the pressure washer in an area close enough to
an outside water source that can flow at a rate of 3
gallons per minute. Connect a garden hose to the
water spout.
ON __
•
Check that the high pressure hose is tightly connected
to the spray gun and to the pump. See ASSEMBLY
section for illustrations.
•
Connect the garden hose to water inlet opening on
the pressure washer pump and turn ON the water.
WATER
INLET
•
Turn the pressure control knob counterclockwisetwo
turnsfrom maximum pressure (see Page 7).
•
Grasp the starter grip and pull slowly until you feel
resistance. Then pull rapidly up to two (2) times.
•
When engine starts, move the Throttle Control Lever
to the FAST position. If engine fails to start, press the
trigger to relieve the pressure, set the Throttle Control
Lever to FAST position,then pull starter handle slowly
until you again feel resistance and then pull up to two
(2) times rapidly.
•
Allow engine to run for two minutes before using.
Check inlet screen If
screen is damaged
DO not connect water.
•
Set THROTTLE CONTROL LEVER to CHOKE position (see Page 8).
•
Remove the wand extension and squeeze the trigger
to purge pump system of air and impurities.
OFF
•
Once engine has started, place Safety Latch in the
OFF position.
IMPORTANT: An internalthermal relief valve has a maximum temperature setting of 140°F (60°C). If you run the
pump for 5 minuteswithout pressingthe trigger on the
spray gun, 1/2 to I ounce of water is released through
the valve to cool the unit. The small amount of water will
drip out the bottom of pump.
SIPHONING
we recommend that you DO NOT siphon-yourwater supply. Connect only to householdwater supply.
TIPS
•
Never use the garden hose inlet to siphon detergent
or wax.
•
I0
If you have the spray nozzle too far away, the cleaning will not be as effective.
CUSTOMER
MAINTENANCE SCHEDULE
FILL IN DATES AS YOU COMPLETE
RESPONSIBILITIES
HOURLY OPERATING INTERVAL
REGULAR SERVICE
Before Each
MAINTENANCE TASK
Use
PRESSURE
WASHER
Check/clean
waterinletscreen
onquick-connect.
Xt
Checkhighpressure
hose.
X
Checkdetergent
hose.
X
Checkspraygunandassembly
for leaks.
X
Purgepumpofairandcontaminants.
X
Every25
Every50
Every100
Hours or
Hours or
Hours or
Yearly
Yearly
Yearly
SERVICE DATES
ENGINE
Checkoillevel.
X
X*
Change engine oil. _:
Service
aircleaner.
Clean/replace spark plug.
Prepare for storage.
X**
I
I
Prepare unit for storage
than30 days.
I
X
if itisto remainidleforlonger
Cleanif clogged. Replace if perforated.
oilafterfirst8 hoursof operation thenafterevery50 hours.
* Change
soonerwhenoperating under heavy loador high ambient temperature.
** Cleanmoreoftenunderdirty or dusty conditions.
t
:_ .Change
GENERAL
RECOMMENDATIONS
The warranty of the high pressure washer does not
cover items that have been subjected to operator
abuse or negligence. To receive full value from the
warranty, operator must maintain high pressure
washer as instructed in this manual.
Some adjustments will need to be made periodically
to properly maintain your high pressure,washer.
All adjustments in the Service and Adjustmentssection of this manual should be made at least once
each season.
Once a year you should clean or replace the
spark plug and clean or replace the air filter and
check the gun and wand assembly for wear. A
new spark plug and clean air filter assure proper
fuel-air mixture and help your engine run better
and last longer.
PRODUCT SPECIFICATIONS
Pressure Washer Specifications
PRESSURE
2250 psi
FLOW RATE
2.2 GPM
DETERGENTMIX
Use undiluted deterqent
WATER SUPPLY
TEMPERATURE
Not to Exceed 140°F
Engine Specifications
ENGINE MODEL
Briq,qs& Stratton
RATED HORSEPOWER
6.0
DISPLACEMENT
158cc
SPARKPLUG:Type:
Champion RJ-8C
or equivalent
0.030 inch (0.76mm)
SetGapto:
GASOLINE CAPACITY
1 U.S. quart
OIL (20 oz, capacitv_
SAE 30 weiqht
SOLIDSTATE IGNITION
AIR GAP
0.0125 inch
ENGINE MAINTENANCE
BEFORE EACH USE
•
Checkwaterinletscreenfordamage.
•
Check high pressure hose for leaks.
•
Check detergent inlet hose and filter for damage.
Check gun and wand assembly for leaks.
o
CAUTION: Disconnect spark plug wire from
spark plug and keep wire away from spark
plug.
CHECKING OIL LEVEL
Purge pump of air and contaminants.
Oil level should be checked priorto each use or at least
every 5 hours of operation. Keep oil level maintained.
Check engine oil level.
CHANGING ENGINE OIL
PRESSURE
WASHER
MAINTENANCE
Gheck and Clean Inlet Screen: Remove quick-connect
and examine inlet screen on the female connector.
Clean if it is clogged or replace if it is torn.
Check High Pressure Hose: High pressure hose can
develop leaks from wear, kinking,abuse, inspect hose
each time before using it. Check for cuts, leaks, abrasions or bulging of cover, or damage or movement of
couplings. If any of these conditionsexist, replace hose
immediately.
=t
DANGER: Water spraying from a leak is
capable of Injecting material into skin.
NEVER repair high pressure hose. Replace
with hose that meets minimum pressure rating of your pressure washer.
Change oil after first 8 hours of operation. Change oil
every 50 hours thereafter. If you are using your pressure
washer under extremely dirty or dusty conditions, or in
extremely hot weather, change oil more often.
Change oil while engine is stillwarm from running, as
follows:
•
Before you tip the pressure washer to drain oil, drain
fuel tank by runningpressure washer until fuel tank is
empty.
•
Clean area around oil fill, remove oil fill cap/dipstick.
Wipe dipstickclean.
Tip your pressure washer as shown to drain oil complelety into a suitable container. When crankcase is
empty, return the pressure washer to its upright position.
Check Detergent Hose: Examine the filter on the detergent hose and clean if clogged. Hose should fit tightly on
barbed fitting. Examine hose for leaks or tears. Replace
the filter or hose if either is damaged.
Check Gun and Wand: Examine hose connection to
gun and make sure it is secure. Test trigger by pressing
it and making sure it springs back into place when you
release it. Put safety latch in ON position and test trigger. You should not be able to press trigger.
Purge Pump of Air and Contaminants
To remove the air from the pump, follow these steps:
•
Set up the pressure washer as described in the
ASSEMBLY section and connect the water supply.
Remove the wand extension from the gun.
Pull the trigger on the gun and hold.
To remove the contaminantsfrom the pump, follow
these steps:
•
Set up the pressure washer as described in the
ASSEMBLY section, and connect the water supply.
•
Remove the nozzle attachment from the gun.
•
Start the engine accordingto instructionsin OPERATION section.
Pull the trigger on the gun and hold.
When the water supply is steady and constant,
engage the safety latch and refasten the nozzle
attachment.
Fill engine crankcase with recommended oil until oil
level is at FULL point on dipstick. Do not overfill
above that mark. About 20 ounces is required. POUR
SLOWLY.
,=p
When engine crankcase is filled to proper level,
install and tighten oil cap/dipstick.
CLEAN/REPLACE
SPARKPLUG
Change
thesparkplugevery100hoursof operation
or
onceeachyear,whichever
comesfirst. This will help
AIR
your engine to start easier and run better. Replace with
Champion RJ-8C or equivalent type spark plug. Set
spark plug gap 0.030 inch (0.76ram).
SET PLUG GAP AT 0.030 inch
(0.76 mm)
SERVICE AIR CLEANER
COVER
Your engine will not run properly and may be damaged if
you run it using a dirty air cleaner.
Clean or replace the air cleaner once every 25 hours of
operation or once each year, whichever comes first.
Clean or replace more often if operating under dirty or
dusty conditions. Replacements are available at your
local Sears Authorized Service Center.
To clean or replacethe air cleaner, follow these steps:
•
Loosen screw.
•
Remove air cleaner cover carefully, The screw will
stay with the cover.
Remove the air filter and examine it for damage,
To service the paper air filter clean it by tapping it
gently on a flat surface. If very dirty or damaged,
replace the air filter. DO NOT oil the air filter.
Reassmble all parts and fasten securely to the
engine with the screw.
CARBURETOR
Use the wire included in the kitor a small paper clip to
free the foreign materials cloggingor restrictingthe
nozzle.
If you think your carburetor needs adjusting,see your
nearest Sears Service dealer. Engine performancemay
be affected above 4,000 feet in altitude. To improve
engine performance, see your nearest Sears Service
dealer.
NOZZLE
Remove additionaldebris by back flushing water supply through wand. Back flush between 30 to 60 seconds. Turn wand to stream spray and move nozzle
from low to high pressure while flushing.
MAINTENANCE
If the nozzle becomes restricted or clogged with foreign
materials, such as dirt, excessive pump pressure may
develop. A partially clogged nozzle can cause a pulsing
sensation during use. This generally is not a pump related problem, but rather a clogged or partiallyrestricted
nozzle.
!
If the nozzle becomes clogged or partially restricted,
immediately clean the nozzle with the kit includedwith
your pressure washer by followingthese instructions:
Shut off the engine and turn off the water supply.
Separate the wand from the gun.
Rotate to stream setting.
Remove nozzle from the end of the wand using a
2mm or 5/64 allen wrench (like the one includedin the
kit).
Insertwire intonozzle and turn back and forth to clear
obstruction.
•
Reinstall nozzle into wand. DO NOT overtighten.
•
Reconnect wand extension to spray gun.
•
Reconnect the water supply, turn ON the water, and
start the engine.
•
Test the pressure washer by operating with nozzle in
the high and the low pressure positions.
AFTER EACH USE
Water should not remain in the unit for long periods of time.
Sediments of mineralscan deposit on pump parts and
"freeze" pump action. Follow these procedures after every
Use:
•
•
Flush detergent hose by placing the injector filter into
a pail of clear water while running Pressure Washer
with nozzle in low pressure mode. Flush until you can
see clear water running through the tube.
Shut off the engine and let it cool, then remove all
hoses.
A
CAUTION: Be sure throttle lever is in
"STOP" position before you continue. If
you start engine without the proper water
supply connected, you can damage the
pump.
It is important to prevent gum deposits from forming In
essential fuel system parts such as the carburetor, fuel filter, fuel hose or tank during storage. Also, experience
indicates that alcohol-blended fuels (called gasohol,
ethanol or methanol) can attract moisture which leads to
separation and formation of acids during storage. Acidic
gas can damage the fuel system of an engine while in
storage.
To avoid engine problems, the fuel system should be
emptied before storage of 30 days or longer. Follow these
instructions:
PROTECT FUEL SYSTEM
•
_1_
Empty the pump of all pumped liquids by pulling recoil
handle about 6 times. This should remove most of the
liquid in the pump.
Coil the high pressure hose and inspect it for damage.
Cuts in the hose or fraying of it could result in leaks
and loss of pressure. Should any damage be found,
replace the hose. DO NOT attempt to repair a damaged hose. Replace the hose with the genuine
Craftsman part.
Drain water from hose and properly hang it on the
wire support provided on the guide handle.
Note: To protect the unit from freezing temperatures, you
can draw windshieldwasher fluid into the pump by pouring the washer fluid into a 3-foot section of garden hose
connected to the inlet adaptor and pullingthe recoil handle twice.
•
Remove all gasoline from the fuel tank to prevent gum
deposits from forming on these parts and causing possible malfunction of engine.
•
WARNING: Drain fuel into approved container outdoors, away from open flame. Be
sure engine is cool. Do not smoke.
Run engine until engine stops from lack of fuel. Make
sure you have water supply to pump inlet connected
and turned ON.
CHANGE OIL
While engine is still warm, drain oil from crankcase. Refill
with recommended grade.
OIL CYLINDER BORE
•
Remove spark plug and pour about 1/2 ounce (15ml)
of engine oil into the cylinder. Cover spark plug hole
with rag. Crank slowly to distribute oil.
I
A
•
Install spark plug. Do not connect spark plug wire.
CAUTION!
Avoid spray
fromslowly.
spark plug
hole
when cranking
engine
Store in a clean, dry area.
A
LONG
WARNING:
NEVER store engine with fuel
in tank indoors or in enclosed, poorly ventilated areas where fumes may reach an
open flame, spark or pilot light as on a furnace, water heater, clothes dryer or other
gas appliance.
TERM
OTHER
Do not store gasoline from one season to another.
Replace your gasoline can if your can starts to rust.
Rust and/or dirt in your gasoline will cause problems.
If possible, store your unit indoors and cover it to give
protection from dust and dirt. BE SURE TO EMPTY
THE FUEL TANK.
STORAGE
If you do not plan to use the PressureWasher for morethan
30 days, you mustpreparethe enginefor longterm storage.
•
Note: As always, prepare the pressure washer pump as
you would after each use.
IMPORTANT: NEVER cover your pressure washer while
engine and exhaust area are warm.
Cover your unitwith a suitable protective._overthat
does not retain moisture.
IJ
Pump hasfollowing problems:
failureto producepressure, erratic
pressure,chattering,lossof
pressure,low watervolume.
1. Nozzlein lowpressuremode.
1. Pullnozzlebackwardfor high
2. Water inletisblocked.
pressuremode.
2. Clearinlet
3. Inadequatewatersupply
4. Inlethoseis kinkedor leaking
5.
6.
7.
8.
9.
10.
Detergentfails to mix with.
spray.
CORRECTION
CAUSE
PROBLEM
Cloggedinlethosestrainer.
Watersupplyisover 140°F.
Outlethoseisblocked.
Outlethoseleaks.
Gun leaks.
Nozzleis obstructed.
3. Provideadequatewaterflow.
4. Straighteninlethose,patchleak.
5. Chock/ cleaninlethosestrainer.
6. Provide coolerwatersupply.
7. Clearblocksin outlethose.
8. Replaceoutlethose ifleaking.
9. Replacegun.
10. Clearnozzle.
11. Pumpis faulty.
11. ContactSearsServiceDepartment.
1. Detergentlineis notsubmerged.
2. Chemicalfilter is clogged.
1. Insertchemicalline into detergent.
3. Nozzleis in high pressure mode.
2. Clean or replacefilter/detergent
line.
3. Pushnozzleforward for
lowpressuremode.
Enginerunsgoodat no-load
but "bogsdown"when load is
added
Enginespeedis too slow.
Contact SearsService Department.
Enginewillnot start; or starts
and runs rough
1.
2.
3.
4.
1. Cleanor replaceair cleaner.
2. Fillfuel tank.
Dirtyair cleaner
Outof gasoline.
Stalegasoline.
Sparkplugwire notconnected
to sparkplug
3. Draingastank;fill withfresh fuel.
4. Connectwire to sparkplug.
10. Enginehaslostcompression.
5. Replacesparkplug.
6. Draingas tank; fill with fresh fuel.
7. Set enginethrottlecontrolleverto
fast position.
8. Contact SearsServiceDepartment.
9. Contact SearsServiceDepartment.
10. Contact Sears Service Department.
Engine shuts down during
operation
1.
1.
Enginelacks power.
Dirtyairfilter.
5. Badsparkplug.
6. Water ingasoline.
7. Overchoking.
8. Excessively
rich fuel mixture.
9. Intakevalvestuckopenor closed.
Out ofgasoline.
Fillfuel tank.
Replaceairfilter.