1
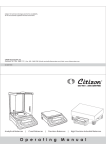
CARAT CARAT BALANCES CT103, CT503 Electronic Carat Scales Operating Instructions G ERMAN P R O D U C T 2 YEARS WARRANTY 1 Getting Started l Place the components Storage and Shipping Conditions listed below inside the chamber in the order given: Shield plate Shield ring Pan support Weighing pan Gem tray (not shown) Unpacking the Scale – – – – – l After unpacking the scale, check it immediately for any visible damage as a result of rough handling during shipment. Connecting the Scale to AC Power/Safety Precautions Do not expose the scale to shocks, vibrations, moisture or extreme temperatures. If you see any sign of damage, proceed as directed in the chapter entitled “Care and Maintenance,” under the section on “Safety Inspection.” Save the box and all parts of the packaging until you have successfully installed your scale. Only the original packaging provides the best protection for shipment. Before packing your balance, unplug all connected cables to prevent damage. – – – – for Europe: for the US: for the RSA: for Australia: 6971948 6971947 6971949 6971950 l Insert the right-angle plug into the jack l The AC adapter rated to Class 2 can be plugged Equipment Supplied The equipment supplied includes the components listed below: – – – – – – – – – Use only original AC adapters: Scale Weighing pan Pan support Shield ring Shield plate Gem tray AC adapter Dust cover Operating instructions into any wall outlet without requiring any additional safety precautions The ground is connected to the scale housing, which can be additionally grounded for operation. Leveling the Scale Level the scale any time you set it up in a new location. Use only the 2 front feet of the scale for leveling. l Turn the 2 front feet as Installation Instructions Your scale is designed to provide reliable weighing results under normal ambient conditions. When choosing a location to set up your scale, observe the following so that you will be able to work with added speed and accuracy: – Set up the scale on a stable, even surface – Avoid placing the scale in close proximity to a heater or otherwise exposing the balance to heat or direct sunlight – Protect the scale from drafts that come from open windows or doors – Avoid exposing the scale to extreme vibrations during weighing – Protect the scale from aggressive chemical vapors – Do not expose the scale to extreme moisture over long periods shown here in the illustration until the air bubble is centered in the level indicator > In most cases this will require several adjustment steps Anti-theft Locking Device To protect against theft, use the mounting lug on the rear panel of the scale. l Secure the scale at the place of installation, for example with a chain or a lock Conditioning the Scale: Moisture in the air can condense on the surfaces of a cold scale whenever it is brought into a substantially warmer place. If you transfer the scale to a warmer area, make sure to condition it for about 2 hours at room temperature, leaving it unplugged from AC power. Setting up the Scale 2 Calibration/Adjustment* Operating the Scale Always calibrate/adjust the scale after setting it up in a new location. Basic Weighing Function Available Features Available Features – Taring the scale You can tare the scale within the entire weighing range. Preparation l Turn on the scale: Press [ON/OFF] l To change configurations: See the chapter entitled Calibration/adjustment can only be performed when – there is no load on the scale, – the scale is tared, – the internal signal is stable. If these conditions are not met, an error message is displayed. The weight required for calibration/adjustment is displayed. “Configuring the Scale” Example l To load factory-set configurations: See “Configuring the Scale,” parameter 9 -1 Calibrate the scale $ To tare the scale: Press t Menu code settings: Factory-set codes Additional Functions Step Key (or instruction) Display l To turn off the scale: Press [ON/OFF] 1. Turn on the scale [ON/OFF] 2. Tare the scale t 3. Begin calibration [CAL/CF] Warmup Time To deliver exact results, the scale must warm up for at least 30 minutes after initial connection to AC power. Only after this time will the scale have reached the required operating temperature. Example After calibration, the calibration weight is displayed with wt. unit Menu code settings: Factory-set codes Step Key (or instruction) Display 1. Turn on the scale [ON/OFF] 5. Remove the calibration weight Self-test is performed 2. Place container on scale (here: 52 ct) 3. Tare the scale 4. Place sample in container on scale (here: 150.210 ct) t + 52.000 ct + 0.000 ct ct +100.000 Calibration weight is displayed without weight unit (here: 100 g) 4. Place the indicated calibration weight on the scale Basic weighing 0.000 100.000 +500.000 ct 0.000 ct * “Calibration” technically means to determine the difference between the scale readout and the actual weight on the pan to determine the accuracy. Adjustment means to bring a scale into the state of accuracy required for its use. Therefore, “calibration,” as used in this manual, actually means “adjustment.” +150.210 ct 3 Application Programs Counting Example Determine an unknown piece count; weigh the preset reference sample quantity Purpose Settings (changes in the factory settings required for this example): With the Counting program you can determine the number of parts that each have approximately equal weight. Menu: Application program: Counting (2 .1. 4) Reference sample quantity: 20 pcs (3. 3. 3) Step Available Features – Store the current weight value to have it loaded as the preset reference sample quantity next time you initialize the Counting application Key (or instruction) Display 1. Turn on the scale [ON/OFF] 2. Tare the scale t [FUNCTION] > 2 sec. 0.000 ref 20 ct – The reference sample quantity can be changed in the operating menu: See “Configuring the Scale” 3. Display the reference sample quantity (here: 20 pcs) – The average piece weight is automatically output via the optional data interface port after initialization, if the menu code for “Printout with data ID codes” is set 4. Place the reference sample quantity (20 pcs) on the scale (here: 16 ct) + 16.000 – Press [FUNCTION] to toggle the display between piece count and weight 5. Start the application; [FUNCTION] if the print format is set to include data ID codes, the following is printed + 20 pcs wRef + 0.8000 ct 6. Weigh uncounted parts (here: 174 pcs) + Factory Settings Reference sample quantity: 10 (menu code 3. 3. 2) Preparation l Configure the Counting application in the operating menu: See “Configuring the Scale” Menu code 2. 1. 4 Counting l Reference sample quantity: Menu code 3. 3. 1 Menu code 3. 3. 2 Menu code 3. 3. 3 Menu code 3. 3. 4 Menu code 3. 3. 5 5 pcs 10 pcs 20 pcs 50 pcs 100 pcs See also “Configuring the Scale” 174 (briefly) ct pcs 7. Display weight [FUNCTION] + 139.200 c t 8. Display quantity [FUNCTION] + 174 pcs 0 pcs 9. Unload the scale 10. Delete the reference value [CAL/CF] > 2 sec. 11. Repeat the procedure starting from Step 6, if desired. Weighing in Percent Purpose This application program allows you to obtain weight readouts in percent which are in proportion to a reference weight. Available Features – Store the current weight value to have it loaded as the preset reference percentage next time you initialize the Weighing in Percent application – The reference percentage can be changed in the operating menu: See “Configuring the Scale” – The reference percentage is automatically output via the optional data interface port after initialization, if the menu code for “Printout with data ID codes” is set – Press [FUNCTION] to toggle the display between percentage and weight Factory Settings Reference percentage: 10 (menu code 3. 3. 2) 4 Preparation Available Features l Configure the Weighing in percent application – The measured result displayed is the arithmetic mean shown in the selected weight unit; a triangle under the plus or minus sign indicates that this is a calculated value l Reference percentage: – You can set the number of subweighing operations performed in the operating menu: See “Configuring the Scale” – Press [FUNCTION] for at least 2 sec. to display the pre-set number of subweighing operations – Press [FUNCTION] to toggle the display between the calculated result and the weight in the operating menu: See “Configuring the Scale” Menu code 2. 1. 5 Weighing in percent Menu code 3. 3. 1 Menu code 3. 3. 2 Menu code 3. 3. 3 Menu code 3. 3. 4 Menu code 3. 3. 5 5% 10 % 20 % 50 % 100 % See also “Configuring the Scale” Example Determine an unknown percentage; store the weight on the scale as a reference percentage Settings (changes in the factory settings required for this example): Menu: Application program: Weighing in percent (2.1.5) Menu: Reference percentage 100 % (3.3.5) Step Number of subweighs for averaging:10 (3. 3. 2) Preparation l Configure the Averaging application Key (or instruction) Display – 1. Turn on the scale [ON/OFF] 2. Tare the scale t 3. Display the reference percentage [FUNCTION] > 2 sec. ref100 4. Place the reference weight for 100% on the scale (here: 222.5 ct) + 222.500 0.000 ct in the operating menu: See “Configuring the Scale” Menu code 2. 1.12 Averaging Number of subweighs for averaging: 3. 3. 1 5 subweighs 3. 3. 2 10 subweighs 3. 3. 3 20 subweighs 3. 3. 4 50 subweighs 3. 3. 5 100 subweighs See also “Configuring the Scale” ct Example 5. Start application; [FUNCTION] if the print format is set to include data ID codes, the following is printed + 6. Place an unknown weight on the scale (here: 322.5 ct) + 100.00 Wxx% + % 222.500 144.94 [FUNCTION] + 322.500 c t 8. Display percentage [FUNCTION] + 9. Unload the scale ct % 7. Display weight 10. Delete the reference percentage Factory Settings 144.94 % 0.00 % [CAL/CF] > 2 sec. 11. Repeat the procedure starting from Step 6, if desired. Averaging Determine the weight of a sample in extremely unstable ambient conditions by calculating the average of 10 subweighing operations. Settings (changes in the factory settings required for this example): Menu: Application program: Averaging (menu code 2. 1.12) Step Key (or instruction) Display 1. Turn on the scale [ON/OFF] 2. Tare the scale t 3. Display the number of subweighs (here: 10) [FUNCTION] > 2 sec. 4. Place sample on the scale (weight readout fluctuates; here: around 275 ct) 5. Start measurement [FUNCTION] 0.000 ref 10 + 8888 + 8888 10 9 8 Purpose Use this program to determine weights under unstable ambient conditions. In this program, the scale calculates the weight as the average value from a defined number of individual weighing operations. These weighing operations are also known as “subweighing operations” or “subweighs.” ct (briefly) ... 1 After 10 subweighs + 275.500 ct If the print format is set to include data ID codes, the following is printed RES + 275.500 + 275.500 ct 6. Unload the scale G g G (stable display) 7. Delete the result [CAL/CF] > 2 sec. 8. Repeat the procedure starting from Step 4, if desired. 5 Net-Total Formulation/ Second Tare Memory Toggle between Weight Units With this application program you can weigh in components for formulation of a mixture. Preparation Configure the Net-total formulation/Second tare memory application in the operating menu: See “Configuring the Scale” Menu code 2.1. 3 Key (or instruction) Display 1. Turn on the scale [ON/OFF] 2. Place an empty container on the scale 3. Tare the scale + ct t + 120,500 c t 4. Add the first component 5. Store the first component weight 65.000 0.000 [FUNCTION] If the print format is set to include data ID codes, the following is printed N1 6. Add the next component + + ctNET 120.500 70,500 0.000 ct 7. Store the 2nd component weight [FUNCTION] ctNET 8. Add further components, if desired As described for Steps 5 and 6 9. Display total weight and fill to desired final weight [CAL/CF] > 2 sec. +191,000 c t Configure the “Toggle weight units” application in the operating menu: See “Configuring the Scale” menu code 2.1. 2 Toggle weight units Menu code Example Step With this application program you can toggle the display of a weight value back and forth between two weight units. ct Unit Conversion factor Abbr. on printout 1. 7. 2 3. 1. 2o Grams 1.00000000000 g 1. 7. 3 3. 1. 3 Kilograms 0.00100000000 kg 1. 7. 4o 3. 1. 4 Carats 5.00000000000 ct 1. 7. 5 1. 7. 6 3. 1. 5 3. 1. 6 Pounds Ounces 0.00220462260 0.03527396200 lb oz 1. 7. 7 3. 1. 7 Troy ounces 0.03215074700 ozt 1. 7. 8 1. 7. 9 3. 1. 8 3. 1. 9 Hong Kong taels Singapore taels 0.02671725000 0.02645544638 tlh tls 1. 7. 10 3. 1. 10 Taiwanese taels 0.02666666000 tlt 1. 7. 11 3. 1. 11 Grains 15.43235835000 GN 1. 7. 12 1. 7. 13 3. 1. 12 3. 1. 13 Pennyweights Milligrams 1. 7. 14 3. 1. 14 Parts per pound 1.12876677120 /lb 1. 7. 15 3. 1. 15 Chinese taels 0.02645547175 tlc 1. 7. 16 1. 7. 17 3. 1. 16 3. 1. 17 Mommes Austrian carats 0.26670000000 5.00000000000 mom K 1. 7. 18 3. 1. 18 Tola 0.08573333810 tol 1. 7. 19 3. 1. 19 Baht 0.06578947437 bat 1. 7. 20 1. 7. 22 3. 1. 20 3. 1. 22 Mesghal lb/oz 0.21700000000 0.03527396200 MS o 0.64301493100 1000.00000000000 dwt mg o = Factory setting Function l To toggle the display between the 1st and 2nd weight units: Press the [FUNCTION] key 6 Scale Operating Menu (Overview) Configuring the Scale o Factory setting User setting Setting the Parameters (Menu Codes) You can configure your CT scale to meet individual requirements by selecting from the parameters available in the menu. u Men Menu leve l1 1. Scale functions Key (or instruction) Display 1. Turn off the scale [ON/OFF] 2. Turn the scale back on [ON/OFF] while all segments are displayed t briefly t repeatedly 2. 3. Select the 2nd menu level [PRINT] 1. 1. 4. Select the 3rd menu level [PRINT] 1. 1. 2 o 5. In Menu Level 3: Select the desired option t repeatedly 1. 1. 4 6. Confirm new setting; the “o” indicates the currently set option [PRINT] for 2 sec. 1. 1. 4 o … 9. 1. $ Select the next menu level (here: move from the 3rd to the 1st level) [PRINT] $ Set other menu codes, if desired [PRINT], 7. Store parameter settings and exit operating menu t for 2 sec. l2 1.3. Stability range 1.3.1 1/4 digit 1.3.2 1/2 digit 1.3.3 1 digit 1.3.4 o 2 digits 1.3.5 4 digits 1.6. Auto zero 1.6.1 o O n 1.6.2 Off 1.7. Weight unit 1 See “Toggle between Weight Units” 2. Application programs 2.1. Program selection see the desired application program description 3. Application 3.1. Weight unit 2 see “Toggle between Weight Units” 3.3. Reference qty or % see the desired application program description 5. through 7. applies only if an interface is installed; see the corresponding instructions 8. Extra functions 8.1. Menu 8.1.1 o Parameter settings alterable 8.1.2 Parameter settings read only 8.2. External switch function applies only if an interface is installed; see the corresponding instructions 8.3. Power-on mode 8.3.1 9.– Factory settings 9.– 1 Reset 9.– 2 o Do not reset 1. t or 9. Reset menu $ Exit operating menu without storing changes [ON/OFF] > Restart the application 0.000 3 4 ing vel vel sett u l e actory u le n n e e M F M 1.1.1 Minimum vibration 1.1.2 o Normal vibration 1.1.3 Strong vibration 1.1.4 Extreme vibration 1. $ To navigate within a menu level; the last menu option is followed by the first option leve 1.1. Adapt filter Example: Adapt the scale to unstable ambient conditions: Menu code 1 .1 .4 Step u Men Off/on (battery shuts off automatically after 3 min) 8.3.2 o Stand-by/on ct 7 Error Codes Error codes are shown in the main display for approx. 2 seconds, after which the program automatically returns to the weighing mode. Display Cause Solution No segments appear on the display No AC power is available The AC adapter is not plugged in Battery is dead Check the AC power supply Plug in the AC adapter h The load exceeds the scale capacity Unload the scale l The load plate is not in place Place the load plate on the scale Move the object that is touching the load place Something is touching the load plate Replace the battery Recharge the battery using an external recharging device e 01 Display capacity exceeded: Value to be output cannot be shown on the display Decrease the weight on the scale e 02 Calibration parameter not met; e.g.: – scale not zeroed – scale is loaded Calibrate only when zero is displayed Press t to tare the scale Unload the scale e 09 When gross - zero, no tare Tare the scale e 10 The t key is blocked when there is data in the second tare memory (net-total) – only 1 tare function can be used at a time Press [CAL/CF] > 2 sec. to clear the tare memory and release the tare key e 11 Value input is not allowed for second tare memory Press e 22 Weight is too light or there is no sample on the balance Increase the reference quantity e 30 Interface port for printer output is blocked Contact your local Service Center Max. weighing range is less than indicated under ”Specifications” The scale was turned on without the weighing pan in place Place the weighing pan on on the scale and press [ON/OFF] to turn on the scale The weight readout is obviously wrong The scale has not been calibrated/adjusted The scale was not tared before weighing Calibrate/adjust the scale t Tare before weighing If any other errors occur, contact your local Service Center! 8 Care and Maintenance Repairs Repair work must be performed by trained service technicians. Any attempt by untrained persons to perform repairs may lead to hazards for the user. Cleaning ! Disconnect the scale from the AC adapter and unplug any data cables that are connected to the scale Instructions for Recycling the Packaging To ensure safe shipment, your scale has been packaged using environmentally friendly materials. After successful installation of the scale, you should return this packaging for recycling. For information on recycling options, including recycling of old weighing equipment, contact your municipal waste disposal center or local recycling depot. ! Make sure that no liquid enters the scale housing ! Do not use any aggressive cleaning agents (solvents or similar agents) l Clean the scale using a piece of cloth which has been wet with a mild detergent (soap) l After cleaning, wipe down the scale with a soft, dry cloth Removing and Cleaning the Weighing Pan l Lift up and remove the weighing pan together with the pan support by gripping them from under the shield ring. Make sure that you do not damage the weighing system in doing so. Safety Inspection If there is any indication that safe operation of the scale with the AC adapter is no longer warranted: l Turn off the power and disconnect the equipment from AC power immediately > Lock the equipment in a secure place to ensure that it cannot be used for the time being Safe operation of the scale with the AC adapter is no longer ensured when: – – – there is visible damage to the AC adapter the AC adapter no longer functions properly The AC adapter has been stored for a relatively long period under unfavorable conditions In this case, notify your nearest Service Center or the International Technical Support Unit. Maintenance and repair work may only be performed by service technicians who are authorized by Citizen and who – – have access to the required maintenance manuals have attended the relevant service training courses 9 Overview Specifications Model Weighing capacity CT103 101ct/36g CT503 505ct/101g Readability Tare range (subtractive) 0.001ct/0.2mg 105ct/21g 0.001ct/0.2mg 505ct/101g Repeatability -+ 0.001ct/0.2mg 0.001ct/0.2mg Linearity -+ 0.002ct/0.4mg 0.002ct/0.4mg Operating temperature range Allowable ambient operating temperature Sensitivity drift within +10...+300C -+/K Response Time s (average) Adaptation to ambient conditions Display update (depends on the filter level selected) s External calibration weight (of at least g accuracy class...) Net weight, approx. kg/lb Pan size mm inches Weighing mm chamber height inches Dimensions mm (WxDxH) inches AC power source/ power requirements Frequency Power requirements, direct current V Power consumption (average) W +10...+300C (500F-860F) +5...+400C 2.10-6 2 By selection of 1 of 4 optimized filter levels 0.2 - 0.4 20 (F1) 100 (F1) 2.8/6.2 80Ø 3.3Ø 133 5.2 200 x 270 x 233 7.9 x 10.5 x 9.2 AC adapter, 230 V or 115 V, +15%....20% 48 - 60 Hz 10 to 20 1 1 Marking The marking affixed to the equipment indicates thatt the equipment meets the requirements of the following Directive(s): Council Directive 89/336/EEC “Electromagnetic compatibility (EMC)” Applicable European Standards: Limitation of emissions: EN 50081-1 EN 50081-2 Residential, commercial and light industry Industrial environment Defined immunity to interference: EN 50082-1 EN 50082-2 Residential, commercial and light industry Industrial environment Important Note: The operator shall be responsible for any modifications to Citizen equipment and for any connections of cables or equipment not supplied by Citizen and must check and, if necessary, correct these modifications and connections. On request, Citizen will provide information on the minimum operating specifications (in accordance with the standards listed above for defined immunity to interference). Council Directive 73/23/EEC “Electrical equipment designed for use within certain voltage limits” Applicable European Standards: EN 60950 Safety of information technology equipment including electrical business equipment EN 61010 Safety requirements for electrical equipment for measurement, control and laboratory use Part 1: General requirements If you use electrical equipment in installations and under ambient conditions requiring higher safety standards, you must comply with the provisions as specified in the applicable regulations for installation in your country. 10 WORLDWIDE MARKETING : CITIZEN SCALE INC. 75 West, 47th Street, Suite # 3B, New York, NY -10036. l USA Tel.: (212) 997-1010 Fa x : (212) 997-0110 E-mail: [email protected] www.citizeninc.com BRANCHES : UK : CITIZEN SCALE CO. LTD. 10, Osborn Cosle, Frimeley, Camberlley, Surrey. P. O. Box GU169YD Tel.: +44 - 1252 - 835644 E-mail: [email protected] INDIA : CITIZEN SCALE (I) PVT. LTD. Shop No. 3, Pushpanjali Bldg., Gaushala Lane, Malad (East), Mumbai - 400 097. Tel. : 91 - 22 - 2883 4917 / 6726 Fax : 91 - 22 - 2883 5740 E-mail: [email protected] www.citizenscales.com U. A. E. : STANDARD SCALES LLC P. O. Box 27137, Deira, Dubai, U. A. E. Tel.: 009714 - 2288430 Fax: 009714 - 2288426 E-mail: [email protected] www.standardweighing.com CITIZEN SCALE INC. reserves the right to change the specification without notice for the improvement of products. 11