1
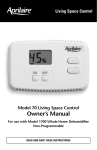
110-904
7/11/01
4:29 PM
Page 1
®
ELECTRONIC THERMOSTAT
Owner’s Manual
MODEL 8551
5-2 Day Programmable
Thermostat
110-904
7/11/01
4:29 PM
Page 2
OWNER’S MANUAL – TABLE OF CONTENTS
Setting Or Changing The Clock . . . . . . . . . . . . . . . . . . . . . . . . . . . . . . . . . . . . . . . . . . . . . . . . . . . . . . 1
Setting Or Changing The Weekday Program . . . . . . . . . . . . . . . . . . . . . . . . . . . . . . . . . . . . . . . . . . 3
Program Schedule . . . . . . . . . . . . . . . . . . . . . . . . . . . . . . . . . . . . . . . . . . . . . . . . . . . . . . . . . . . . . . . . . 4
Setting Or Changing The Weekend Program . . . . . . . . . . . . . . . . . . . . . . . . . . . . . . . . . . . . . . . . . . 7
Reviewing Programmed Time Schedules And Temperature Settings . . . . . . . . . . . . . . . . . . . . . 8
To Start Running The Program . . . . . . . . . . . . . . . . . . . . . . . . . . . . . . . . . . . . . . . . . . . . . . . . . . . . . . 8
For Best Performance . . . . . . . . . . . . . . . . . . . . . . . . . . . . . . . . . . . . . . . . . . . . . . . . . . . . . . . . . . . . . . 8
Thermostat Operation . . . . . . . . . . . . . . . . . . . . . . . . . . . . . . . . . . . . . . . . . . . . . . . . . . . . . . . . . . . . . . 9
• Temperature Control . . . . . . . . . . . . . . . . . . . . . . . . . . . . . . . . . . . . . . . . . . . . . . . . . . . . . . . . . . 9
• Time Control . . . . . . . . . . . . . . . . . . . . . . . . . . . . . . . . . . . . . . . . . . . . . . . . . . . . . . . . . . . . . . . . .12
• Equipment Control . . . . . . . . . . . . . . . . . . . . . . . . . . . . . . . . . . . . . . . . . . . . . . . . . . . . . . . . . . . 13
Optional Settings For Additional Thermostat Features . . . . . . . . . . . . . . . . . . . . . . . . . . . . . . . . . 14
In Case Of Power Failure . . . . . . . . . . . . . . . . . . . . . . . . . . . . . . . . . . . . . . . . . . . . . . . . . . . . . . . . . . 20
Cleaning . . . . . . . . . . . . . . . . . . . . . . . . . . . . . . . . . . . . . . . . . . . . . . . . . . . . . . . . . . . . . . . . . . . . . . . . . 20
Limited Warranty . . . . . . . . . . . . . . . . . . . . . . . . . . . . . . . . . . . . . . . . . . . . . . . . . . . . . . . . . . . . . . . . . 21
© Research Products Corporation 2000
110-904
7/11/01
4:29 PM
Page 3
IMPORTANT: READ ALL INSTRUCTIONS THOROUGHLY
Programming your Aprilaire® Thermostat is done in three easy steps: setting the clock, setting the event
times, and setting your desired temperatures.
Setting Or Changing The Clock
Step 1: If you are currently in Daylight Saving Time
(first Sunday in April thru fourth Sunday in October),
press the DST button and “
“ will appear in the
lower right-hand corner of the display.
Step 2: Press the CLOCK button and “Mo”
(or another day of the week) will flash. Use the
DECREASE
or INCREASE
button to
change the flashing symbol to the current day
of week.
–1–
110-904
7/11/01
4:29 PM
Page 4
Step 3: Press the CLOCK button again and “12:” (hours)
and “AM” or “PM” will flash. Use the DECREASE
INCREASE
or
button to change the flashing symbol
to the current hour making sure the hour has the proper
AM or PM designation.
Step 4: Press the CLOCK button and “:00” (minutes) will
flash. Use the DECREASE
or INCREASE
button
to change the flashing symbol to the current minute.
Step 5: Press the CLOCK button again. The clock is now
set and the current time appears on the display.
–2–
110-904
7/11/01
4:29 PM
Page 5
Setting Or Changing The Weekday Program
Programming your Aprilaire Electronic Thermostat involves selecting the temperature you want
in your home and selecting the time you want it to be that temperature. Your Aprilaire Thermostat
will allow a maximum of 4 time schedules per day. Each time schedule is known as an “event.”
The Morning event is typically when you wake up and is the first event of the day. The Day event is
typically set when you leave for work. The Evening event is typically set when you come home from
work and the Night event is set when you go to bed. Each event will have 1 cooling temperature.
Your Aprilaire Thermostat allows 1 program for Monday through Friday and 1 program for Saturday
and Sunday. Complete the chart on page 4 with your desired temperatures and time schedules
before beginning programming.
NOTE: It will take some time for your cooling system to reach the desired temperature when
returning from a setback. Therefore, it is suggested you set your program time before the actual
time you want your home to reach the desired temperature. For example, if you get up at 7:00 AM
and have a 6 degree setback, set your Morning event at 6:00 AM to be sure the desired temperature
is reached by 7:00 AM.
–3–
110-904
7/11/01
4:29 PM
Page 6
PROGRAM SCHEDULE
TIME SCHEDULE
EVENT
THERMOSTAT
SYMBOL
DESIRED
TEMPERATURE
SETTING
MONDAY –
FRIDAY
SATURDAY &
SUNDAY
Morning
Day
Evening
Night
NOTE: While programming you must press a button at least every 15 seconds or the thermostat will revert back to the
operational mode. If this happens, simply repeatedly press the PROGRAM button until you get back to where you left
off. The information you have already entered has been retained.
NOTE: If consecutive events have the same temperature, you can skip an event by simultaneously pressing the
PROGRAM and MODE buttons. Press and release the PROGRAM button to advance to the next event.
–4–
110-904
7/11/01
4:29 PM
Page 7
Step 1: Press and release the MODE button until the word
“COOL” and the “
” cooling symbol appear on the display.
Step 2: Press and release the
PROGRAM button – “Mo Tu
We Th Fr”; Morning
event symbol “
”;
flashing “12:” (or some
other hour); and flashing “AM” or “PM” will appear on the display.
You are now setting the time you want your cooling equipment to
come on in the morning.
Step 3: Press the DECREASE
button or INCREASE
button to set the desired hour for the Morning “
”
event.
Step 4: Press and release the PROGRAM button – “:00”
(or some other minutes) will flash.
–5–
110-904
7/11/01
4:29 PM
Page 8
Step 5: Press the DECREASE
button or INCREASE
button to set the desired minutes for the Morning “
”
event (program starting times are set in ten-minute
increments).
Step 6: Press and release the PROGRAM button – the current
cooling temperature will begin to flash. You are now setting
the cooling temperature you desire in the morning.
Step 7: Press the DECREASE
button to set the desired cooling temperature for the Morning “
Step 8: Press and release the PROGRAM button – the Day “
button or INCREASE
” event.
” event symbol will appear. You are
now setting the time and cooling temperature you want throughout the day.
Step 9: Repeat steps 2-6 to complete programming for the Day “
Step 10: Press and release the PROGRAM button – the Evening “
” event.
” event symbol will appear.
You are now setting the time and cooling temperature you want during the evening.
–6–
110-904
7/11/01
4:29 PM
Page 9
Step 11: Repeat steps 2-6 to complete programming for the Evening “
Step 12: Press and release the PROGRAM button – the Night “
” event.
” event symbol will appear.
You are now setting the time and cooling temperature you want at night.
Step 13: Repeat steps 2-6 to complete programming for the Night “
” event.
Setting Or Changing The Weekend Program
Step 1: After setting the Night “
“Sa Su”; the Morning “
” event Weekday program, press and release the PROGRAM button.
” event symbol; flashing
“12:” (or some other hour); and flashing “AM” or “PM” will
appear on the display. You are now programming the time
and temperatures for the weekend.
Step 2: Repeat steps 2-6 identical to Weekday
programming for Morning “
Evening “
”, and Night “
”, Day “
”,
” events for
cooling mode as applicable.
–7–
110-904
7/11/01
4:29 PM
Page 10
Reviewing Programmed Time Schedules
And Temperature Settings
Press and release the PROGRAM button repeatedly to advance to “Mo Tu We Th Fr”, or “Sa Su” and
specific event. Continue pressing the PROGRAM button to review the time schedules and temperature
settings for each desired event.
To Start Running The Program
After all temperatures and start times have been programmed, press and release the RESUME
button to start running programs. If no button is pressed, the thermostat will resume automatically in
approximately 15 seconds.
For Best Performance
The Aprilaire Model 8551 thermostat is designed for accurate temperature control and easy
operation. The following guidelines should be followed to ensure proper operation of the thermostat:
1. When the thermostat is operating, close the cover to allow for proper air circulation over the
temperature sensor.
–8–
110-904
7/11/01
4:29 PM
Page 11
2. Do not place anything which can give off warm or cool air, such as candles, lamps, or portable
humidifiers, near the thermostat.
3. Although the thermostat is internally equipped to prevent short cycling of the air conditioner,
it is possible to inadvertently override this protection. Do not start, stop, and restart the
equipment without allowing a minimum of 2 minutes between cooling cycles.
Thermostat Operation
The Model 8551 is a full-featured thermostat which allows for additional control and operations after
basic time and temperature programming is completed. In addition to the programming buttons used
to set up all event times and temperatures, additional buttons control the following functions:
TEMPERATURE CONTROL
• Reading the Actual Room Temperature: The Model 8551 normally displays the room temperature,
not the set-point temperature.
• Check the Set-Point Temperature: Press and release the DECREASE
button or INCREASE
button. The thermostat will display the programmed set-point temperature and a thermometer for
5 seconds before automatically returning to the actual room temperature display.
–9–
110-904
7/11/01
4:29 PM
Page 12
– 10 –
110-904
7/11/01
4:29 PM
Page 13
• Temporarily Override the Set Temperature: Press and hold the DECREASE
INCREASE
button or
button to change the room set-point temperature in 1 degree increments.
The new set-point temperature will be held for 3 hours, then the thermostat will automatically
return to the program.
• Hold a New Temperature Set Point: Press and hold the DECREASE
button or INCREASE
button to change the room set-point temperature in 1 degree increments. The new set-point
temperature can be maintained indefinitely by pressing and releasing the HOLD button. The word
“HOLD” will be displayed. The thermostat will maintain this new set-point temperature until the
RESUME button is pressed returning the thermostat to the original program. This procedure is
typically used during extended vacant periods (vacations, business trips, etc.), to hold an economical
set point until you return.
• Returning to Programmed Operation: At any time, press the RESUME button to return the
thermostat to operate as programmed.
– 11 –
110-904
7/11/01
4:29 PM
Page 14
• Change Between °C and °F : The thermostat has the capability of displaying either Celsius
or Fahrenheit temperatures. If the displayed temperature seems abnormally high or low
(ie: 70˚F = 21˚C) you may need to switch to ˚C or ˚F by simultaneously pressing the
DECREASE
button and the INCREASE
button.
• Checking the Outdoor Temperature: If your thermostat was installed with the optional
Aprilaire® Outdoor Temperature Sensor, simply press the OUTDOOR button and the
thermostat will display the outdoor temperature for 3 seconds before automatically returning
to the actual room temperature display.
TIME CONTROL
• Change From 12- to 24-Hour Clock: Press and release the CLOCK button, then press the MODE
button. To return to a standard clock, repeat the process.
– 12 –
110-904
7/11/01
4:29 PM
Page 15
EQUIPMENT CONTROL
• Turning on the Fan: At any time the system fan can run continuously by pressing the FAN button.
The Fan icon, “
“, will appear in the lower part of the display indicating that the fan is
operating continuously. To return the fan to the normal operating mode, press the FAN button again
which will remove the icon from the display. In the normal operating mode the fan will only run when
the air conditioning is operating. Continuous fan operation is beneficial if your system is equipped with
a high efficiency air cleaner, or to circulate air in the home when the air conditioning is not needed.
• Selecting Cooling Mode: Press the MODE button until the word "COOL" appears on the display.
In this mode the air conditioning system will maintain temperature according to the programming
previously completed unless an override temperature has been entered. Note that a Snowflake icon,
“
“, is on the display, which flashes when the air conditioning is running.
• Turning the System Off: Press the MODE button until the word "OFF" appears on the display. In this
mode, the air conditioning system will not operate regardless of the temperature. The thermostat can
still be programmed, the optional outdoor temperature sensor will work, and the fan will turn on if the
FAN button is pressed.
NOTE: After selecting a new mode, the thermostat initiates a delay of up to 4 minutes to protect the cooling equipment.
– 13 –
110-904
7/11/01
4:29 PM
Page 16
Optional Settings For
Additional Thermostat Features
The Model 8551 thermostat is equipped with 2 DIP switches located inside the thermostat on the
printed circuit board. These switches are preset by the factory to typical home air conditioning system
requirements. The installing contractor also reviewed the settings during installation to be sure the
thermostat will operate properly with your air conditioning system.
The DIP switches can however be changed to customize the thermostat’s operation to your particular
needs. This should only be done after consulting with your contractor.
The Model 8551 DIP switches control the following functions:
No. 1 – 4 min. / 2 min. Minimum Equipment On/Off Times. This switch is factory preset at 2 minutes.
This switch provides short cycle protection for the air conditioning unit. If you feel that the air
conditioning system turns on and off too many times per hour, ask your contractor about changing
the switch to a 4 minute minimum on time. Keep in mind however that this may increase the
overall temperature variation in the house due to longer run and off times. DO NOT change the
position of this switch without first consulting with your contractor.
– 14 –
110-904
7/11/01
4:29 PM
Page 17
No. 2 – Keypad Lock. If tampering with the thermostat is expected and unwanted, the keypad can
be locked by moving this switch from the factory set OFF position to the ON position. This should
not be done until all programming is finalized. In the locked position only the following functions
can be done:
•
The outdoor temperature button will display the outdoor temperature.
•
The DECREASE
button or INCREASE
button will temporarily change the
set point a maximum of plus or minus 3 degrees for a period of 1 hour, before the
thermostat automatically returns to the original program.
If the thermostat does not respond when a button is pushed it may be because the keypad has
been locked. A Lock icon “
“ will appear when pushing any buttons other than the buttons
outlined above.
– 15 –
110-904
7/11/01
4:29 PM
Page 18
To change the DIP switch settings, the thermostat must be removed from the base which is attached to
the wall. The power to the thermostat must be turned off before disassembling or the
thermostat can be permanently damaged. If you do not
know where the switch is that controls the power
to your thermostat, do not attempt to access the
DIP switches. The following procedure must be
carefully followed:
a) Turn off power to
the thermostat.
b) Completely open the
thermostat cover.
The cover will snap
into this position.
c) Carefully insert a
medium-sized
flathead
screwdriver
into the latch access
slot (see Figure 1).
Figure 1
CAUTION: TO PREVENT DAMAGE, AVOID CONTACT
WITH BLUE TEMPERATURE SENSOR ON BOTTOM RIGHTHAND CORNER OF THERMOSTAT CIRCUIT BOARD.
– 16 –
110-904
7/11/01
4:29 PM
Page 19
Figure 2
d) Gently push in and pry up on the handle of the
screwdriver until the lock tab disengages from the
catch tab (you should feel or hear a click –
see Figure 2).
e) After the latch releases, grip the thermostat panel at
the bottom corners and swing it up and away from
the base to completely separate (See Figure 3).
– 17 –
Figure 3
110-904
7/11/01
4:29 PM
Page 20
Once the thermostat panel has been opened and removed from the base, turn the thermostat over
and locate the DIP switches found on the circuit board according to the following drawing:
Be careful to change only the intended DIP
switches per the explanation given at the
beginning of this section.
After the DIP switches have been set to the desired
position, carefully reassemble the thermostat.
a) Place the cover on the base by lining up the 2
round pegs on the bottom of the cover with the
half circle cutouts on
the top of the base.
Note that the
bottom of the
cover when fully
open slides in
behind the top
of the base. Swing
the cover fully open.
The cover will stay in place.
– 18 –
110-904
7/11/01
4:29 PM
Page 21
Figure 4
b)
Align the hinge tabs on the base and
thermostat panel. Swing the panel to the
base and snap in place at bottom of
thermostat panel (see Figure 4).
c)
Turn the thermostat power back on.
CAUTION: TO PREVENT
DAMAGE, AVOID CONTACT WITH BLUE
TEMPERATURE SENSOR ON BOTTOM
RIGHT-HAND CORNER OF THERMOSTAT
CIRCUIT BOARD.
– 19 –
110-904
7/11/01
4:29 PM
Page 22
In Case Of Power Failure
The Model 8551 thermostat does not require a battery. If the power goes out the letters “AC” appear on
the display indicating power is not being supplied to the thermostat. “AC” will remain on the display for
up to approximately 30 minutes after the power goes out. During the period that the power is off, the
cooling system will not operate.
This thermostat is equipped with a continuous memory feature which does not require a battery. The
thermostat will never lose what has been programmed regardless of the length of the power outage.
If the thermostat has been set to “Hold” a particular temperature, and the power fails, the thermostat
will resume that temperature when the power is restored.
After a period of 30 minutes without power the clock will need to be reset. The clock will default to
12:00 AM. Refer to the Programming Instructions to reset the clock.
Cleaning
If the surface of the thermostat becomes dirty it can be cleaned with plain water or many non-abrasive
household cleaners, such as glass cleaner. When using any cleaner be careful not to get any into the
interior of the thermostat. Do not spray any cleaner directly onto the thermostat. Spray the cleaner onto
a soft cloth and wipe the surface of the thermostat.
– 20 –
110-904
7/11/01
4:29 PM
Page 23
Limited Warranty
Your Research Products Corporation Aprilaire® Thermostat unit is expressly warranted for two (2) years from date of
installation to be free from defects in materials and workmanship.
Research Products Corporation’s exclusive obligation under this warranty shall be to supply, without charge, a
replacement for any thermostat which is found to be defective within a two (2) year period and which is returned, together
with the date of installation, no later than thirty (30) days after said two (2) year period by you to either your original
supplier or to Research Products Corporation, Madison, Wisconsin 53701.
THIS WARRANTY SHALL NOT OBLIGATE RESEARCH PRODUCTS CORPORATION FOR ANY LABOR COSTS AND SHALL
NOT APPLY TO DEFECTS IN WORKMANSHIP OR MATERIALS FURNISHED BY YOUR INSTALLER AS CONTRASTED TO
DEFECTS IN THE THERMOSTAT ITSELF.
IMPLIED WARRANTIES OF MERCHANTABILITY OR FITNESS FOR A PARTICULAR PURPOSE SHALL
BE LIMITED IN DURATION TO THE AFORESAID TWO YEAR PERIOD. RESEARCH PRODUCTS CORPORATION’S
LIABILITY FOR INCIDENTAL OR CONSEQUENTIAL DAMAGES, OTHER THAN DAMAGES FOR PERSONAL INJURIES,
RESULTING FROM ANY BREACH OF THE AFORESAID IMPLIED WARRANTIES OR THE ABOVE LIMITED WARRANTY IS
EXPRESSLY EXCLUDED. THIS LIMITED WARRANTY IS VOID IF DEFECT(S) RESULT FROM FAILURE TO HAVE THIS
THERMOSTAT INSTALLED BY A QUALIFIED COOLING AND AIR CONDITIONING CONTRACTOR. IF THE LIMITED
WARRANTY IS VOID DUE TO FAILURE TO USE A QUALIFIED CONTRACTOR, ALL DISCLAIMERS OF IMPLIED
WARRANTIES SHALL BE EFFECTIVE UPON INSTALLATION.
Some states do not allow limitations on how long an implied warranty lasts or the exclusion or limitation of incidental or
consequential damages, so the above exclusion or limitations may not apply to you.
This warranty gives you specific legal rights and you may also have other rights which vary from state
to state.
– 21 –
110-904
7/11/01
4:29 PM
Page 24
The Aprilaire® Total Indoor Air Comfort System is an integrated group of air quality enhancement
products designed to work with your heating and cooling system to make your home more comfortable.
For the best in indoor air quality, ask your heating and cooling contractor about these fine
Aprilaire products, or visit us at www.aprilaire.com for your Indoor Air Solutions.
Automatic Humidifier
High Efficiency Air Cleaner
Fresh Air Exchanger
The Best Cure For Dryness®
Nobody Makes Clean Air Easier ®
Only The Freshest Homes Have April Air™
The world’s first computer-equipped,
completely automatic humidifier.
The economical, trouble-free, high
efficiency air cleaner for your home.
Your best value for a constant, controlled
supply of fresh air with energy-recovery.
Zone Control System
Electronic Thermostat
Custom Comfort Throughout Your Home®
Energy Efficiency Never Looked So Good™
The most reliable way to achieve temperature
control in every area of your home.
Ultra-thin, easy-to-use programmable or digital
controls featuring pinpoint accuracy.
P.O. BOX 1467 • MADISON, WI 53701-1467
Products For Better Indoor Air Quality ™
B2202104
REV. 11/99
110-904