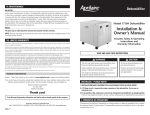
1
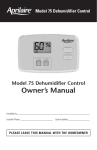
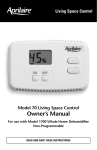
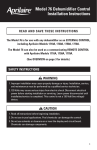
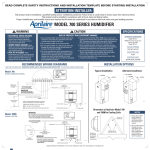
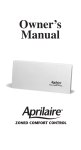
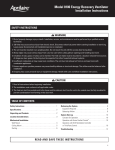
Model 76 Dehumidifier Control
Model 76 Dehumidifier Control
Owner’s Manual
Installed by:______________________________________________________________
Installer Phone:____________________________
Date Installed:___________________
PLEASE LEAVE THIS MANUAL WITH THE HOMEOWNER
Thank you for your purchase of the Aprilaire® Model 76 Dehumidifier Control. Your control
allows you to set the relative humidity level for your home and provides control of the
dehumidifier from a convenient living space location. The Model 76 uses an onboard sensor
to monitor the relative humidity in the space in which it is located and displays the measured
relative humidity on the digital display.
The Model 76 can also act as a remote control for your Aprilaire Model 1710A, 1750A, or 1770A
dehumidifier if it is located in an inconvenient or hard to access area. For example, when the
dehumidifier is located in and dehumidifying a crawl space or a basement, the Model 76 can be
installed where you spend most of your time, allowing you to make changes to the setting and
to see what the humidity is in these areas without having to access the dehumidifier.
SETTING THE DESIRED HUMIDITY LEVEL
The control will allow you to set the desired humidity level in your home and can be used to
turn dehumidification On or Off.
external Control
Begin by pressing the ON button and ON will be displayed on the LCD Screen (see LCD display
in Figure 1). Use the arrow buttons to set the control at 59% when first installed. Allow the
dehumidifier to run for 24 hours before deciding if you want to change the humidity setting.
aise the setting if you prefer the air to be less dry; this will reduce the amount of
R
time that the dehumidifier runs.
Lower the setting if you prefer the air to be more dry; this will increase the amount
of time that the dehumidifier runs.
REMOTE Control
The materials in a home act like a sponge, so the moisture in the materials of your home is at
the same level as the air. After drying the air, the materials of the home will release moisture
back into the air until they are again at the same level. As a result, it is not uncommon for the
dehumidifier to operate for an extended period of time when first installed.
Begin by pressing the ON button and ON
will be displayed on the LCD Screen (see
LCD display in Figure 1). Use the arrow
buttons to set the control to a 3 dryness
level when first installed. Allow the
dehumidifier to run for 24 hours before
deciding if you want to change the dryness
level setting.
TABLE 1 – %RH (+/-5%) Based on Dryness
Level Setting & Indoor Temperature
Dryness
Level
Setting
Indoor Temperature (°F)
65
1
70
75
80
84%
71%
60%
2
86%
73%
61%
52%
Increase the dryness level setting
if you prefer the air to be more dry;
this will increase the amount of time
that the dehumidifier runs.
3
74%
63%
53%
45%
4
64%
54%
45%
39%
5
55%
46%
39%
33%
Decrease the dryness level setting
if you prefer the air to be less dry;
this will reduce the amount of time
that the dehumidifier runs.
6
47%
39%
33%
28%
7
40%
34%
28%
24%
Note: This table is for reference only.
The dryness level settings can be approximated to relative humidity (%RH) using Table 1.
Energy Savings Tip #1: To reduce dehumidifier run time, when using the Model 76
as an external control, adjust the setting to be as high as is comfortable and when
using the Model 76 as a remote control, adjust the setting to be as low as is required
for the space. If it feels clammy or “smells damp”, change the setting to allow for drier
conditions.
Figure 1 – Control Display and User Buttons
LCD Display
Energy Savings Tip #2: When using the Model 76 as an external control, turn the
dehumidifier control OFF when you open your windows, just as you would with air
conditioning.
Energy Savings Tip #3: When using the Model 76 as an external control, and if
vacating your home for an extended period in the summer, set the RH at 59% and set your
thermostat to as high as you are comfortable setting it in the cooling mode. Consult with
appropriate professionals regarding the highest temperature that is safe for your pets or
possessions. This will keep the humidity at a controlled level to help prevent mold while
minimizing the amount of cooling energy used.
Mode Buttons – Use
to turn control On/Off.
2
Buttons – Use to view and
set humidity or dryness level setting.
3
LCD Display
TURNING CONTROL ON/OFF
•Pressing the ON button will turn on the control.
Figure 2 – External Control LCD Display
•The control will continue to display the measured
humidity when OFF.
Numbers show
current room humidity
OR humidity setting
SET is displayed
when
or is
pressed. The value
displayed is the
humidity setting.
See Figure 5.
Solid ON:
Control On
Blinking ON:
Dehumidifying
OFF: Control Off
*
Blinking ON + : Control Limit Exceeded.
See Control Limits, page 6.
90-1636
•The humidity or dryness level setting cannot be
changed when the control is OFF.
CHANGING THE HUMIDITY OR DRYNESS LEVEL SETTING
•The first press of either the
setting on the LCD.
button will display the humidity or dryness level
or
•Each subsequent push of the up or down buttons will change the setting by 1% or 1 dryness
level.
•If a button is held down, the setting will continually change by 1% or 1 dryness level every
1/2 second for as long as the button is pressed.
Figure 3 – Remote Control LCD Display
•The control will exit the setting screen 5 seconds after the last button press/release.
Numbers show remote
location humidity OR
dryness level setting
Solid ON:
Control On
Blinking ON:
Dehumidifying
Figure 4 – ON/OFF Buttons
•Pressing the OFF button will turn off the control.
SET is displayed
when
or is
pressed. The value
displayed is the
dryness level.
See Figure 7.
Figure 5 – UP/DOWN Buttons
Figure 6 – Humidity Setting Screen
OFF: Control Off
90-1637
90-1636
Figure 7 – Dryness Level
Setting Screen
90-1636
4
5
HOW DOES THE CONTROL WORK?
EXTERNAL CONTROL
•When the measured humidity is greater than the setting, the control will turn on the
dehumidifier and ON will blink on the LCD display.
•When the measured humidity falls 3% below the setting, the control will turn off the
dehumidifier and ON will stop blinking, but remain displayed on the LCD.
REMOTE CONTROL
•The control sends the dryness level to the dehumidifier.
•Once per Cycle Period (set by your installer in the dehumidifier), the dehumidifier will sample
the air in the area served by the dehumidifier.
•If the dew point of the incoming air is above the dryness level, the dehumidifier will turn on
and ON will blink on the LCD display.
•When the dew point of the incoming air falls below the setting, the dehumidifier will turn
off and ON will stop blinking, but remain displayed on the LCD.
CONTROL LIMITS
The control limits are used to make sure the dehumidifier does not run when conditions are
outside of the operating limits. Dehumidifiers are not as effective when conditions are outside
of the operating limits. For example, the dehumidifier will not remove much moisture when
conditions are cool and dry. Control limits allow the dehumidifier to work efficiently within the
operating range and turn off when conditions are outside of these limits.
•Dew Point Lower Limit:40°F External Control
•Temperature High Limit: 99°F External Control
105°F Remote Control
•Temperature Low Limit:50°F Remote Control
EXTERNAL CONTROL – SEQUENCE OF OPERATION
•The dehumidifier will turn off if one of the control limits has been exceeded.
•If the control measures a dew point below 40°F OR a temperature above 99°F, the control
will deactivate the dehumidifier output if actively dehumidifying, the dehumidifier will stop
dehumidifying, and ON and will blink on the LCD screen (see Figure 2).
*
•The control will resume normal operation when conditions fall back within the control limits.
REMOTE CONTROL – SEQUENCE OF OPERATION
•The dehumidifier will turn off if one of the control limits has been exceeded.
•If the dehumidifier measures a temperature below 50°F or above 105°F, the dehumidifier
will stop dehumidifying.
•The control will resume normal operation when conditions in the remote space fall back
within the dehumidifier control limits.
CLEANING THE CONTROL
The surface of the Model 76 Dehumidifier Control can be cleaned with water or a non-abrasive
household cleaner, including glass cleaner. Do not spray any liquid directly onto the
control. Spray water or a cleaner onto a soft cloth and gently wipe the surface of the control.
6
7
LIMITED WARRANTY
Your Research Products Corporation Aprilaire® Dehumidifier Control is expressly warranted for five (5) years
from date of installation to be free from defects in materials or workmanship.
Research Products Corporation’s exclusive obligation under this warranty shall be to supply, without charge,
a replacement for any control which is found to be defective within such five (5) year period and which is
returned not later than thirty (30) days after said five (5) year period by you to either your original supplier
or to Research Products Corporation, Madison, Wisconsin 53701, together with the installation date of the
control.
THIS WARRANTY SHALL NOT OBLIGATE RESEARCH PRODUCTS CORPORATION FOR ANY LABOR
COSTS AND SHALL NOT APPLY TO DEFECTS IN WORKMANSHIP OR MATERIALS FURNISHED BY YOUR
INSTALLER AS CONTRASTED TO DEFECTS IN THE CONTROL ITSELF.
IMPLIED WARRANTIES OF MERCHANTABILITY OR FITNESS FOR A PARTICULAR PURPOSE SHALL BE
LIMITED IN DURATION TO THE AFORESAID FIVE YEAR PERIOD. RESEARCH PRODUCTS CORPORATION’S
LIABILITY FOR INCIDENTAL OR CONSEQUENTIAL DAMAGES, OTHER THAN DAMAGES FOR PERSONAL
INJURIES, RESULTING FROM ANY BREACH OF THE AFORESAID IMPLIED WARRANTIES OR THE ABOVE
LIMITED WARRANTY IS EXPRESSLY EXCLUDED. THIS LIMITED WARRANTY IS VOID IF DEFECTS(S) RESULT
FROM FAILURE TO HAVE THIS UNIT INSTALLED BY A QUALIFIED HEATING AND AIR CONDITIONING
CONTRACTOR. IF THE LIMITED WARRANTY IS VOID DUE TO FAILURE TO USE A QUALIFIED CONTRACTOR,
ALL DISCLAIMERS OF IMPLIED WARRANTIES SHALL BE EFFECTIVE UPON INSTALLATION.
Some states do not allow limitations on how long an implied warranty lasts or the exclusion or limitation of
incidental or consequential damages so the above exclusion or limitations may not apply to you.
This warranty gives you specific legal rights and you may also have other rights which vary from state to state.
WARRANTY REGISTRATION
Visit us on-line at www.aprilaire.com to register your Aprilaire product.
If you do not have on-line access, please mail a postcard with your name,
address, phone number, email address, product purchased, date of purchase and
dealer name and address to:
Research Products Corporation, P.O. BOX 1467, Madison, WI 53701
Your Warranty Registration information
will not be sold or shared outside of this company.
P.O. Box 1467 • Madison, WI 53701-1467 • Phone: 800/334-6011 • Fax: 608/257-4357
www.aprilaire.com
61000912 2.12
B2205739A
8
Printed in U.S.A.
© 2012 Aprilaire – A division of Research Products Corporation