1
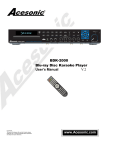
BDK-2000
Blu-Ray Karaoke Player
User’s Manual
V.1
CAUTION:
To assure this player will work at its best, please
read this user ’s manual carefully before operation
and keep for future reference.
WWW.Acesonic.com
Warnings, Cautions and Others
Mises en garde, precautions et indications diverses
Caution
Risk of Electric Shock
Do Not Open
CAUTION: TO REDUCE THE RISK OF ELECTRIC SHOCK.
DO NOT REMOVE COVER (OR BACK).
NO USER SERVICEABLE PARTS INSIDE.
REFER SERVICING TO QUALIFIED SERVICE PERSONNEL.
.
The lightning flash with arrowhead symbol, within an
equilateral triangle is intended to alert the user to the
presence of uninsulated dangerous voltage within the
product's enclosure that may be of sufficient magnitude
to constitute a risk of electric shock to persons.
The exclamation point within an equilateral triangle is
intended to alert the user to the presence of important
operating and maintenance (servicing) instructions in
the literature accompanying the appliance.
CAUTION
To reduce the risk of electrical shocks, fire, etc:
1.Do not remove screws, screws, covers or cabinet.
2.Do not expose this appliance to rain or moisture.
For Canada/Pour le Canada
CAUTION: TO PREVENT ELECTRIC SHOCK,
MATCH WIDE BLADE OF PLUG TO WIDE
SLOT,AND FULLY INSERT.
ATTENTION: POUR EVITER LES CHOCS
ELECTRIQUES, INTRODUIRE LA LAME LA PLUS
LARGE DE LA FICHE DANS LA BORNE
CORRESPONDANTE DE LA PRISE ET POUSSER
JUSQUAU FOND.
For Canada/Pour le Canada
THIS DIGITAL APPARATUS DOES NOT EXCEED THE CLASS B
LIMITS FOR RADIO NOISE EMISSIONS FORM DIGITAL
APPARATUS AS SET OUT IN THE INTERFERENCE-CAUSING
EQUIPMENT STANDARD ENTITLED DIGITAL APPARATUS,
ICES-003 OF THE DEPARTMENT OF COMMUNICATIONS. CET
APPAREIL NUMERIQUE RESPECTE LES LIMITES DE BRUITS
RADIO ELECTRIQUES APPLICABLES AUX APPAREILS
NUMERIQUES DE CLASSE B PRESCRITES DANS LA ORMESUR
LE MATERIEL BROUILLEUR: APPAREILS NUMERIQUES , NMB003 EDICTEE PAR LE MINISTRE DES COMMUNICATIONS.
FCC INFORMATION (U.S.A.)
1.This equipment has been tested and found to
comply with the limits for a Class B digital device,
pursuant to part 15 of the FCC Rules. These limits
are designed to provide reasonable protection
against harmful interference in a residential
installation.
This equipment generates, uses and can radiate
radio frequency energy and, if not installed and
used in accordance with the instructions, may
cause harmful interference to radio
communications. However, there is no guarantee
that interference will not occur in a particular
installation. If this equipment does cause harmful
interference to radio or television reception, which
can be determined by turning the equipment off and
on, the user is encouraged to try to correct the
interference by one or more of the following
measures:
Reorient or relocate the receiving antenna.
Increase the separation between the equipment
and receiver.
Connect the equipment into an outlet on a circuit
different from that to which the receiver is
connected. Consult the dealer or an experienced
radio/TV technician for help.
2.IMPORTANT: When connecting this product to
accessories and/or another product use only high
quality shielded cables. Cable(s) supplied with this
product MUST be used. Follow all installation
instructions. Failure to follow instructions could
void your FCC authorization to use product in the
U. S. A.
1. CLASS1 LASER PRODUCT
2. DANGER: Visible laser radiation when open and
interlock has failed or is defeated. Avoid direct exposure
to the beam.
3. CATION: Do not open the top cover. There are no user
service able parts inside the unit. Leave all servicing to
qualified service personnel.
4. REPRODUCTION OF LABEL: CAUTION LABEL,
PLACED INSIDE THE UNIT.
Caution
Disconnect the electrical plug to shut off the power completely. The
POWER on the unit is not off from the electrical plug when the
POWER button on the front panel is not pressed in.
A-1
1.
Important Safety Instructions
Read These Instructions.
2.
Keep These Instructions.
3.
Heed All Warnings.
4.
Follow All Instructions.
5.
Do not use this product near water.
6.
Clean only with dry cloth.
7.
Do not block any ventilation openings.
8.
Do not install near any heat sources such as radiators,
heat register, stoves, or other apparatus (including amplifiers)
that produce heat.
9.
Do not defeat the safety purpose of the polarized or
grounding-type plug. A polarized plug has two blades with one
wider than the other. A grounding type plug has two blades
and third grounding prong. The wide blade or the third prong
are provided for your safety. If the provided plug does not fit
into your outlet, consult an electrician for replacement of the
obsolete outlet.
10.
Protect the power cord from being walked on or pinched
particularly at plugs, convenience receptacles, and the point
where they exit from the apparatus.
11.
Only use attachments and accessories specified by the
manufacturer.
12.
Use only with the cart, stand, tripod, bracket, or table
specified by the manufacturer, or sold with the apparatus.
When a cart is used, use caution when moving the cart.
13.
Unplug this apparatus during lightning storms or if unused
for a long period of time. Use apparatus combination to avoid
injury from tip-cover.
14.
Refer all servicing to qualified service personnel. Servicing
is required when the apparatus has been damaged in any
way, such as power-supply cord or plug is damaged, liquid
has been spilled or objects have fallen into the apparatus, the
apparatus has been exposed to rain or moisture, does not
operate normally, or has been dropped.
15.
This product should be operated only from the type of
power source indicated on the marking label. If you are not
sure of the type of power supply to your home, consult your
product dealer or local power company. For products intended
to operate from battery power, or other sources, refer to the
operating instructions.
16.
Protective Attachment Plug
The product is equipped with an attachment plug having
overload protection. This is a safety feature. See Instruction
Manual for replacement or resetting of protective device. If
replacement of the plug is required, be sure the service
technician has used a replacement plug specified by the
manufacturer that has the same overload protection as the
original plug.
17.
Power Lines
An outside antenna system should not be located in the
vicinity of overhead power lines or other electric light or power
circuits, or where it can fall into such power lines or circuits.
When installing an outside antenna system, extreme care
should be taken to keep from touching such power lines or
circuits, as contact with them might be fatal.
18. Overloading
Do not overload wall outlets, extension cords, or integral
convenience receptacles as this can result in a risk of fire or
electric shock.
19. Object and Liquid Entry
Never push objects of any kind into this product through
openings as they may touch dangerous voltage points or
short-out parts that could result in a fire or electric shock.
Never spill liquid of any kind on the product.
20. Replacement Parts
When replacement parts are required, be sure the service
technician has used replacement parts specified by the
manufacturer or have the same characteristics as the
original part. Unauthorized substitutions may result in fire,
electric shock, or other hazards.
21. Safety Check
Upon completion of any service or repairs to this product,
ask the service technician to perform safety checks to
determine that the product is in proper operating
condition.
22. Wall or Ceiling Mounting
The product should be mounted to a wall or ceiling only as
recommended by the manufacturer. Any mounting of the
product should follow the manufacturer instructions, and
should use a mounting accessory recommended by the
manufacturer.
23. Wet location marking
Apparatus shall not be exposed to dripping or splashing
and no objects filled with liquids, such as vases, shall be
placed on the apparatus.
24. Outdoor Antenna Grounding
If an outside antenna or cable system is connected to the
product, be sure the antenna or cable system is grounded
so as to provide some protection against voltage surges
and built-up static charges. Article 810 of the National
Electrical Code, ANSI/NFPA 70, provides information with
regard to proper grounding of the mast and supporting
structure, grounding of the lead-in wire to an antenna
discharge unit, size of grounding conductors, location of
antenna discharge unit, connection to grounding
electrodes, and requirements for the grounding electrode.
See figure below.
25. Servicing
If your product is not operating correctly or exhibits a
marked change in performance and you are unable to
restore normal operation by following the detailed
procedure in its operating instructions, do not attempt to
service it yourself as operating instructions, do not attempt
to service it yourself as opening or removing covers may
expose you to dangerous voltage or other hazards. Refer
all servicing to qualified service personal.
A-2
Acesonic BDK-2000
Included Accessories
Please check that you have all of the following accessories
supplied to you. If anything is missing, please contact your
dealer immediately.
Specification:
*HDMI Cable
*Power Cable
*Remote Control
*User's Manual
*Rack-Mount Kit
*Warranty Card
About this manual
The display window information, button Presses, and On
Screen Display (OSD) menu items are all in bold lettering.
Precautions
Notes on Power Cord
*When you are away on travel or otherwise for an
extended period of time, unplug the unit from the wall
outlet.
*When unplugging the player from the wall outlet, always
pull the plug, not the cord.
*Do NOT handle the power cord with wet hands.
Avoid Moisture, Water and Dust
*Do not place the player in a moist environment or in an
area where there might be an excessive amount of dust
build up (e.g. near a fan).
*If water or any liquid should get into the unit, turn off the
power and unplug the unit from the wall outlet immediately.
Consult your dealer or an authorized repair station. Using
the unit in this state may lead to fire or electrical shock.
Avoid High Temperatures
*Do not expose the player to direct sunlight or near any
heating device.
Notes on Installation
*Select a place where the unit will be level, dry, and not too
cold or hot.
*Do not use unit on its side or where subject to vibrations
(e.g. speakers).
*Leave sufficient distance between the TV and unit.
* Do not leave heavy objects on top of unit.
*Never block the vents on the unit. Vents are used to circulate air
and keep the temperature of the player down.
Blocking the vents may result in damage of the unit.
1 Year Manufacturer Warranty
Lifetime Technical Support
NTSC/PAL Worldwide Compatible
Universal Power Supply: AC100~240V
Player Dimension: 430(W)x240(D)x55(H)mm
WARNINGS, CAUTIONS AND OTHERS
1
IMPORTANT SAFETY INSTRUCTIONS 2
BEFORE OPERATION
1
PLAYER CONNECTIONS
2
FRONT PANEL OPERATION:
3
REAR PANEL OPERATION:
4
REMOTE OPERATION
5
BASIC OPERATIONS
7
DISC
8
USB
8
SETUP MENU
9
System Setup ---------------------------------------- 9
General ------------------------------------------- 9
Screen Saver ------------------------------------ 9
Use Default Settings--------------------------- 9
BD Info Storage --------------------------------- 9
Version -------------------------------------------- 9
Software Update------------------------------- 10
BD Network Access -------------------------- 10
Language ---------------------------------------- 10
OSD (On Screen Display) Language ---- 10
Subtitle Language ----------------------------- 10
Network ------------------------------------------ 11
Wired --------------------------------------------- 11
Parental Control ------------------------------- 11
Slide ---------------------------------------------- 12
Video --------------------------------------------- 12
Audio --------------------------------------------- 13
Bass Management ---------------------------- 13
TROUBLESHOOTING
Prevent Unit Malfunction
*No parts in this unit are user-serviceable. If the unit no
longer functions, unplug it from the wall outlet and contact
your dealer for service options.
A-3
14
Before Operation
Playable Media
This unit supports the following formats:
*MP3, WAV, WMA, MPEG-1, MPEG-2 (MPG/VOB), MPEG-4
(AVI), JPEG, and MP3G files.
Above media is playable on the following discs:
*Blu-ray™ Discs, BD-ROM, BD-R, BD-RE, DVD, DVD±R,
DVD+RW, VCD, CD-DA,CD-R, CD-RW, MPSG, VCDs, CD+Gs,
CDs, and Data Discs.
Note: Any disc that is not listed above will cause the player to
display “NO DISC” in the DISPLAY WINDOW. Future media and
disc formats may be supported with firmware upgrades, when
available.
*Encoding methods of some media formats may
affect the playback (e.g. Unable to fast forward or
fast backward or load time). Be sure that the
encoding process conforms to the standards for
that particular format.
Handling and Cleaning of Discs
Handling
*At anytime, when handling discs, always hold them from their
edges and/or by the circle in the center.
*NEVER write on the any surface of the disc for it may render
the disc unreadable.
*Store discs in a clean and dry environment. Storing CD’s
vertically will also help prevent warping.
*After use, insert CD into jacket or case to minimize wear and
tear. DO NOT stack CDs on top of one another.
*Do not bend or press the disc. Do not expose the disc to direct
sunlight or any heat source.
*Dirty, scratched, warped, and defective discs may
cause a considerable time delay during the
loading and reading of the disc. In extreme cases,
this may render the disc completely unreadable by
the player.
Video Signal Formats
This player also accommodates NTSC and PAL color systems,
with automatic detection and override settings.
Digital Audio Formats
This player accommodates analog stereo, and few digital Hi-Fi
audio signals.
Notes Regarding Discs
*The image may be poor, noisy, or grainy due to actual defects
on the disc itself.
*Some functions may not be possible on all discs as described
in this manual.
1
Cleaning
*Wipe the discs from time to time using a soft cloth. Always wipe
from the center towards the edges. NOT in circular motions.
*DO NOT clean with any other cleaning solution, unless it is
specifically made for disc cleaning.
Note: CDs revolve at very high speeds inside of players. Never
attempt to play cracked or warped CDs; doing so may cause the disc to
shatter inside or the player to malfunction.
CAUTION
Power-Cord
Handle the power cord only by its plug, do not unplug the power
cord by tugging or yanking on the cord. Touching or unplugging
the cord while your hands are wet may lead to an electric shock
or a short circuit. If the cord becomes damaged or its wires
become exposed, please replace the cord as soon as possible
in order to prevent an electric fire or shock. Check the power
cord every few months to ensure it is functioning properly.
Player Connections
Audio Connections
Line Out Connections
Connect the RCA cable from the Audio L and R outputs of the BDK-2000 to the Line Ins (NOT Phono
Ins) on the stereo amplifier or TV. If using a TV that has only 1 input, only connect either the Left or Right
Channel. Under some circumstances (such as playing an MP3+G File) you can use the Audio MPX Button
to change the audio to be a mix of left and right channels (mono).
SPDIF Digital Audio
Connect either an RCA coaxial cable from SPDIF Coax Output of the BDK-2000 to the SPDIF Coax
Input of the receiver, or use an optical light pipe from the SPDIF optical out of the BDK-2000 to the Optical
in.
Video Connections
Note: Depending on the specific TV, it may be necessary to change settings in the Setup Menu for the picture to be
visible. A standard video monitor or TV hookup may be temporarily necessary in order to make those changes.
HDMI High Def
Connect the HDMI cable from the HDMI Output of the BDK-2000 to the HDMI Input of the Hi Def TV.
Component High Def
Connect the 3 RCA cables from the Component Video Outputs of the BDK-2000 to the Y, Pb, and Pr
Inputs on the High Def TV.
Standard NTSC monitor or TV
Connect the single RCA cable from the Video Output of the BDK-2000 to the Video Input on the
Standard TV.
See: Rear Panel Operations for more details.
2
Front Panel Operation:
1)
DISPLAY WINDOW - Displays player status such as
time, disc
format, and
song
number. If no
disc is in the tray, the display window will display NO
DISC. Detailed information will also be shown on the
TV screen.
2)
REMOTE SENSOR window - Receives signals from
remote control. (Underneath display bezel and so not visible
here. This is where the remote should be aimed for best
operation.)
3)
4)
Numeric Keypad - Used to enter numbers as
needed.
5)
6)
CLEAR - Press to reset any entered data.
22)
TREBLE Knob - Used to control
the amount of Treble or “Highs” in the
audio.
23)
BASS Knob - Used to control the
amount of Bass or “Lows” in the audio.
8)
KEY CONTROL Buttons # button: used to flatten by a half tone.
b button: used to sharpen by a half tone.
24)
ECHO knob - Used to control the
amount of ECHO applied to MIC
CHANNELS 1 & 2.
MPX - Selects Left/Right MONO and Stereo audio
output for CDs and audio track for DVDs.
9)
PLAY/PAUSE - Start to play the disc or
temporarily suspends playing.
MUTE - Toggles muting on or off.
STOP - Stops playing or recording.
25)
MIC 1 & 2 VOL Knob - Used to
control the volume output from MIC
CHANNEL 1& 2.
26)
MIC 1 & 2 INPUT Jacks Connects microphones with 1/4 inch plug.
12)
Pg Up - Used to scroll up through file lists
one full page at a time.
27)
Headphones Jack - Connects a
pair of headphones (With a 1/8” jack) to
the unit.
13)
CUE - Switches the Cue function on and
off. When switched on, the cue function will pause
playback at the end of the track currently playing.
14)
Direction Buttons - Press to move
through various menus and files. They also are
used as Fast Forward/Rewind buttons
(Direction Buttons [▲/▼]) and Chapter
Forward/Chapter Backwards (Direction Buttons [▲/▼])
buttons while playing media.
Note: While it is possible to use a set of headphones that have a
¼” jack through an adapter, many adapters are known to cause
intermittent problems and their use is not recommended.
28)
USB INTERFACE - Use this
interface to connect USB devices such as
flash drives or external hard drives.
29)
DISC TRAY - Press to open tray. Press or to close
the tray, it will play the disc automatically.
15)
RETURN - This button is used to return to a
menu screen while playing.
16)
19)
Pg DN - Press to scroll down
through file lists one full page at a time.
21)
POP UP MENU - Press to
activate the Blu-Ray Pop Up Menu (if available).
7)
GOTO - Used to go to a specific point
during playback.
11)
18)
MUSIC VOLUME Knob - Used to
control the music level.
20)
Disc Menu - Returns to the main
DVD menu.
EJECT - Press to open and close disc tray.
10)
17)
POWER - Press the button to
turn the unit on or off.
ENTER - Used to confirm the selection.
3
Rear Panel Operation:
AC Cord Input - Connection to the auto-detect AC power supply (100-240V,50-60 Hz).
Rear Panel Connections
1) Component Video Output (Pb) Blue Difference channel
output.
2) Component Video Output – (CVBS) Luma (Luminance)
output.
3) MIXED AUDIO OUTPUT (R) – Right channel RCA
outputs for mixed vocals and music audio output.
4) COAXIAL OUTPUT - Coaxial digital output to connect
with a digital amplifier or receiver for Dolby Digital or DTS
sound.
5) LAN (Local Area Network) – Connects the BDK-2000 to
an Ethernet port.
7) OPTICAL OUTPUT – SPDIF Optical output for
connection with a digital amplifier or receiver for Dolby
Digital or DTS sound.
8) HDMI Video Output – Used to connect the unit to a High
Def. TV through the HDMI input.
9) MIXED AUDIO OUTPUT (L) – Left channel RCA outputs
for mixed vocals and music audio output.
10) Composite Video Output – (NTSC or PAL output) used
to connect to a standard TV through the Video input.
11) Component Video Output – (Pr) Red Difference
channel output.
6) USB Port - Use this interface to connect USB devices
such as flash drives or external hard drives.
4
Remote Operation
1)
POWER BUTTON - Turns the player on or off.
Note: This just puts the unit into standby mode. To fully power the unit down, use the
power switch on the unit’s front panel.
2)
MUTE BUTTON - Turn the sound On or Off.
3)
EJECT BUTTON - Used to open and close tray
door. When it is open, the disc will come out
and indicator is on. Indicator goes off when
pressed again.
4)
Red/Green/Yellow/Blue Function
Buttons – Function varies with media.
5)
DISC MENU – Press this button to return to the
main disc Menu during playback.
6)
POP-UP MENU – Press to activate the Blu-Ray
Pop Up Menu (if available).
7)
CLEAR BUTTON - Used to delete all
programmed tracks you have entered.
8)
RETURN - This button is used to return to a
menu screen while playing.
9)
GOTO – Use to go to a specific point during
playback.
10)
DIRECTION Buttons (▲/▼/◄/►) Used for navigation in menus.
11)
STOP BUTTON - Press to STOP playback.
12)
AUDIO MPX - Switch between the left mono,
right mono or stereo sounds during playback.
13)
Rewind (<<) BUTTON - Press the Rewind
Button to shift the playing location backwards
quickly.
.
14)
Fast Forward BUTTON - Press the Fast
Forward Button to shift the playing location
forward quickly.
15)
SLOW - During playback, pressing the SLOW
button will cycle through the slow motion
settings.
16)
ZOOM BUTTON - Used to enlarge a section of
the video or picture currently being viewed.
5
17)
ANGLE BUTTON - When playing
DVDs, select view for multi-angle.
18)
SUBTITLES BUTTON - When playing
discs, press SUBTITLE repeatedly until
the desired language is selected.
19)
PAGE Up and Down Buttons - Press
to scroll down through file lists one full
page at a time.
20)
21)
Music Key Buttons - Used to raise or lower
the pitch. (Only used in Karaoke mode)
SHARP BUTTON (#) - Raises the key by a half
tone.
Flat Button (b) - Lowers the key by a half
tone.
INFO BUTTON - Show the elapsed or
remaining time for single track or the total disc.
22)
MUSIC VOL (+/-)- Used to adjust the volume
of music audio output.
23)
CUE: Switches the Cue function on and off.
When switched on, the cue function will pause
playback at the end of the track currently
playing.
24)
PIP (Picture in Picture) - Switches the PIP
feature on and off.
25)
2nd Audio - Switches the SAP on and off
(when available).
26)
REPEAT - Repeats the track currently playing.
27)
A-B BUTTON - A-B REPEAT allows you to
repeat a segment of a track until stopped. To
use this function:
1. Set a starting point A.
2. Set an end point B.
Afterwards, the unit plays from A to B.
3. Press A-B again, till A-B disappears.
28)
Skip Track Backwards - Press to go to the
beginning of the current or previous track.
29)
Skip Track Forwards Button - Press to go to
the beginning of the next track.
30)
Mode Button - Toggles the Mode Menu On
and Off.
31)
P
Play/Pause BUTTON - Press the button while
the disc is playing, to pause playback.
32)
ENTER BUTTON - Used to confirm entry or
selection.
33)
SETUP BUTTON - Press the button to SETUP
menu.
34)
Numeric Keypad (0-9) - Used to enter
numbers or letters as needed.
6
Basic Operations
Basic Playback
Turn on the BDK-2000.
After a few moments the initial menu screen
will appear.
Loading A Disc
1. Press EJECT to open the disc tray.
2. Place a disc in the disc tray.
3. Press EJECT to close the disc tray.
4. The disc will automatically play.
If A Menu Is Shown On The TV Screen
A menu may be displayed before playback
when inserting a DVD or VCD disc. From the
menu, you may select a desired item to be
played.
For DVD Video
1. Use the arrow buttons to select the track
desired.
2. Press ENTER and the player will playback
the selected track.
For Video CD
1. Press the numeric buttons to select a
desired item. The player starts playback of the
selected item.
times, 4 times, 8 times, and 20 times the
normal playback speed.
Karaoke - USING MICROPHONES
The system has 2 microphone inputs. Connect
up to 2 microphones to this player.
Karaoke - MICROPHONE MIXER
When a microphone is plugged into MIC1 or
MIC2, the system mixes the music with your
voice.
1. Press POWER to turn on the system.
2. Load a Karaoke Disc.
3. Press PLAY to start playing.
4. Adjust MASTER VOLUME Buttons on the
remote controller or the MASTER VOLUME
KNOB on the front panel.
5. Adjust the individual microphone volumes
with the Mic. Volume Knobs on the front
panel.
6. Starting singing while the song is playing.
7. Adjust ECHO level with the ECHO Volume
Knob on the front panel to the desired echo
level.
Changing the Batteries in the Remote
The battery compartment is located on the
back of the remote control.
1. Open the lid of the remote control battery
compartment.
2. Install 2 AAA batteries.
Make sure that the batteries are inserted with
the positive and negative terminals in the
correct direction corresponding to the (+) and
(-) marks in the battery compartment.
3. Install the lid of the remote control battery
compartment.
Note: To End Playback
Press STOP to end playback.
To Resume Playback
On DVDs and VCDs, you can resume playback
by pressing the PLAY button.
To Stop Playback Completely
Press the STOP button twice. Now when you
press the PLAY button, it will begin from the
beginning of the disc. Also, if you eject the
disc, playback stops completely and ejects the
disc.
To Pause Playback
Press the PAUSE button to pause playback.
To resume, press either the PLAY or PAUSE
button.
Note: *Do NOT insert a damaged disc.
*If a disc takes more than usual to read or the
DISPLAY WINDOW shows LOAD for an
extended period of time, press EJECT on the
remote or from the front of the unit and check
the disc for any dirt, fingerprints or defects.
To Advance Or Reverse Playback While
Viewing
During playback on DVDs and VCDs, press
FAST FORWARD>> or FAST BACKWARD<<
on the remote unit. You can select from 2
7
Disc
1)
Press the Direction Buttons [◄/►} to select the “Disc”.
2)
Press the ENTER to confirm it.
The disc will play automatically if present.
USB
1)
Press the Direction Buttons [◄/►} to select the “USB Menu”.
2)
Press the ENTER to confirm it.
The screen will show the root level of the USB device if a USB device is present.
Individual folders can be selected using the
Direction Buttons [▲/▼] and selecting the
desired folder pressing the ENTER Button or
Direction Button [►} to confirm it.
Individual files can be selected using the
Direction Buttons [▲/▼] and pressing the
ENTER Button or Play Button to play it.
Compatible file types are: MP3, WAV, WMA,
MPEG-1, MPEG-2 (MPG/VOB), MPEG-4
(AVI), JPEG, and MP3G.
8
Setup menu
System Setup
Note: Pressing the RETURN Button will exit to the next highest menu level.
1)
2)
Press the Direction Buttons [◄/►} to select the “Setup Menu”.
Press the ENTER Button to confirm it.
General
1)
2)
Press the Direction Buttons [▲/▼] to select “General”.
Press the ENTER Button or Direction Button [►} to confirm it.
Screen Saver
1)
Press the Direction Buttons [▲/▼] to select “Screen Saver”.
2)
Press the ENTER Button or Direction Button [►} to select the Sub-Menu.
3)
Press the Direction Buttons [▲/▼] to select “On” or “Off”.
4)
Press the ENTER Button to confirm it.
Note: The Screen Saver starts after 3 Minutes of inactivity, and the unit will go into Standby Mode after 25 Minutes
(Just like pressing power with the remote).
Use Default Settings
1)
Press the Direction Buttons [▲/▼] to select “Use Default Settings”.
2)
Press the ENTER Button or Direction Button [►} to select the Sub-Menu.
3)
Press the Direction Buttons [▲/▼] to select “Yes” or “No”.
4)
Press the ENTER Button to confirm it.
Note: This will restore all settings to their original factory defaults.
BD Info Storage
1)
Press the Direction Buttons [▲/▼] to select “BD Info Storage”.
2)
Press the ENTER Button or Direction Button [►} to select the Sub-Menu.
BD Info Storage
1)
Press the Direction Buttons [▲/▼] to select “BD Info Storage”.
2)
Press the ENTER Button or Direction Button [►} to select the Sub-Menu.
3)
Press the Direction Buttons [▲/▼] to select the device type.
Note: This menu will change according to the currently installed media (example: a USB drive).
4)
Press the ENTER Button to confirm it.
Nand
1)
2)
3)
4)
Press the Direction Buttons [▲/▼] to select “Nand”.
Press the ENTER Button or Direction Button [►} to select the Sub-Menu.
Press the Direction Buttons [▲/▼] to select the device type.
Press the ENTER Button to confirm it.
Format
Note: Use with extreme caution! This procedure will completely erase ALL previously stored information on
the device.
1)
Press the Direction Buttons [▲/▼] to select “Format”.
2)
Press the ENTER Button or Direction Button [►} to select the Sub-Menu.
3)
Press the Direction Buttons [◄/►} to select “Yes”, or “No” on the confirmation Screen.
4)
Press the ENTER Button to confirm it. Note: This screen will revert to the previous menu unless “Yes” is
selected within 30 seconds to prevent accidental erasure.
Free Space
Displays the total amount of memory available for storage in the currently selected device.
Total Space
Displays the total memory size of the currently selected device.
Version
1)
Press the Direction Buttons [▲/▼] to select “Version”
2)
Press the ENTER Button or Direction Button [►} to select the Sub-Menu
9
3)
4)
Note the Version Number on the display.
Press the “ENTER” Button to exit to the Setup>General Menu.
Software Update
1)
Press the Direction Buttons [▲/▼] to select “Software Update”
2)
Press the ENTER Button or Direction Button [►} to select the “Choose device” Sub-Menu
3)
Press the Direction Buttons [▲/▼] to select a device to load the operating system from (Disk or
USB), or Cancel to exit to the “Software Update” Submenu.
4)
Press the ENTER Button to confirm it.
5)
Press the Direction Buttons [▲/▼] to select the operating
system file to load, or Cancel to exit to the “Software Update”
Submenu.
6)
Press the ENTER Button to confirm it.
The unit will display a progress screen as it updates the internal
memory.
It is recommended that when the process is complete, the unit is
powered off then back on, and factory settings restored.
(SETUP>GENERAL>USE DEFAULT SETTINGS menu.)
BD Network Access
1)
Press the Direction Buttons [▲/▼] to select “BD Network Access”
2)
Press the ENTER Button or Direction Button [►} to select the Sub-Menu.
3)
Press the Direction Buttons [▲/▼] to select “Allowed” or “Not Allowed”
4)
Press the ENTER Button to confirm it.
Language
1)
2)
Press the Direction Buttons [▲/▼] to select “Language”
Press the ENTER Button or Direction Button [►} to confirm it.
OSD (On Screen Display) Language
1)
Press the Direction Buttons [▲/▼] to select “OSD Language”
2)
Press the ENTER Button or Direction Button [►} to select the Sub-Menu.
3)
Press the Direction Buttons [▲/▼] to select “English”, ”Francais”, or “Español”
4)
Press the ENTER Button to confirm it.
Disc Audio
1)
Press the Direction Buttons [▲/▼] to select “Disc Audio”
2)
Press the ENTER Button or Direction Button [►} to select the Sub-Menu.
3)
Press the Direction Buttons [▲/▼] to select “English”, “German”, “French”, “Italian”,
“Spanish”, “Portuguese”, “Chinese”, or “None”
4)
Press the ENTER Button to confirm it.
Subtitle Language
1)
Press the Direction Buttons [▲/▼] to select “Disc Audio”
2)
Press the ENTER Button or Direction Button [►} to select the Sub-Menu.
3)
Press the Direction Buttons [▲/▼] to select “English”, “German”, “French”, “Italian”,
“Spanish”, “Portuguese”, “Chinese”, or “None”
Note: The options available will depend on the DVD currently in the unit.
4)
Press the ENTER Button to confirm it.
10
Disc Menu
1)
Press the Direction Buttons [▲/▼] to select “Disc Menu”
2)
Press the ENTER Button or Direction Button [►} to select the Sub-Menu.
3)
Press the Direction Buttons [▲/▼] to select “English”, “German, “Portuguese”, or “Chinese”.
Note: The options available will depend on the DVD currently in the unit.
4)
Press the ENTER Button to confirm it.
Default Subtitles
1)
Press the Direction Buttons [▲/▼] to select “Default Sutitles”
2)
Press the ENTER Button or Direction Button [►} to select the Sub-Menu.
3)
Press the Direction Buttons [▲/▼] to select “Unicode”, “Central”, “Russian”, “Greek”,
“Hebrew”, “Turkish”, “Windows EU”, “Windows CR”, “GB2312”, or “BIOS”
4)
Press the ENTER Button to confirm it.
Network
1)
2)
Press the Direction Buttons [▲/▼] to select “Network”
Press the ENTER Button or Direction Button [►} to confirm it.
Wired
1)
Press the Direction Buttons [▲/▼] to select “Wired”
2)
Press the ENTER Button or Direction Button [►} to select the Sub-Menu.
Auto Configuration
1)
Press the Direction Buttons [▲/▼] to select “Auto Configuration”
2)
Press the ENTER Button or Direction Button [►} to select the Sub-Menu.
3)
The Auto configuration will run automatically.
Advanced Settings
1)
Press the Direction Buttons [▲/▼] to select “Advanced Settings”
2)
Press the ENTER Button or Direction Button [►} to select the Sub-Menu.
3)
Press the Direction Buttons [▲/▼] to select “PPPOE/ADSL”, or ”Fixed IP Address”
4)
Press the ENTER Button to confirm it.
Mac Address
Displays the current Mac Address.
IP Address
Displays the current IP Address.
Subnet Mask
Displays the current Subnet Mask.
Default Gateway
Displays the current Default Gateway.
Parental Control
1)
Press the Direction Buttons [▲/▼] to select “Parental Control”.
2)
Press the ENTER Button or Direction Button [►} to select the Sub-Menu.
3)
Press the Numeric Buttons to enter the current password (default is 66666).
4)
Press the ENTER Button to confirm it.
Rating Level
1)
Press the Direction Buttons [▲/▼] to select “Rating Level”.
2)
Press the ENTER Button or Direction Button [►} to select the Sub-Menu.
3)
Press the Direction Buttons [▲/▼] to select “1 (Kids)”, ”2 (G)”, “3 (PG)”, “4 (PG-13)”, “5 (PGR)”, “6 (R)”, “7 (NC-17)”, or “8 (Adults)”.
4)
Press the ENTER Button to confirm it.
Change Password
1)
Press the Direction Buttons [▲/▼] to select “Change Password”.
2)
Press the ENTER Button or Direction Button [►} to select the Sub-Menu.
3)
Press the Numeric Buttons to enter the new password.
4)
Press the ENTER Button to confirm it.
5)
Press the Numeric Buttons to re-enter the new password.
6)
Press the ENTER Button to confirm it.
Note: Pressing the RETURN Button will exit the password entry screen and return to the Parental Control Sub
Menu.
11
Slide
1)
2)
Press the Direction Buttons [▲/▼] to select “Slide”
Press the ENTER Button or Direction Button [►} to confirm it.
Transition Mode
1)
Press the Direction Buttons [▲/▼] to select “Transition Mode”
2)
Press the ENTER Button or Direction Button [►} to select the Sub-Menu.
3)
Press the Direction Buttons [▲/▼] to select “None”, “Slide”, “Stripes”, “Fade”, “Wipe”, or
“Random”
4)
Press the ENTER Button to confirm it.
Slide Interval Time
1)
Press the Direction Buttons [▲/▼] to select “Slide”
2)
Press the ENTER Button or Direction Button [►} to select the Sub-Menu.
3)
Press the Direction Buttons [▲/▼] to select “5 Seconds”, “10 Seconds”, “30 Seconds”, or
“1 Minute”
4)
Press the ENTER Button to confirm it.
Video
Note: Use these features with extreme CAUTION! Incorrect settings can cause the picture to
become unstable and impossible to read.
1)
2)
Press the Direction Buttons [▲/▼] to select “Video”.
Press the ENTER Button or Direction Button [►} to confirm it.
TV System
1)
Press the Direction Buttons [▲/▼] to select “TV System”.
2)
Press the ENTER Button or Direction Button [►} to select the Sub-Menu.
3)
Press the Direction Buttons [▲/▼] to select “NTSC”, “PAL”, or “Auto”.
4)
Press the Direction Buttons [◄/►} to select “Yes”, or “No” on the confirmation Screen.
5)
Press the ENTER Button to confirm it.
Resolution
1)
Press the Direction Buttons [▲/▼] to select “Resolution”
2)
Press the ENTER Button or Direction Button [►} to select the Sub-Menu.
Press the Direction Buttons [▲/▼] to select “480i/480p”’ “720p/1080i”, “1080p”’, or “HDMI
Native٠1080i”.
3)
Press the ENTER Button to confirm it.
Video Out
1)
Press the Direction Buttons [▲/▼] to select “Video Out”.
2)
Press the ENTER Button or Direction Button [►} to select the Sub-Menu.
3)
Press the Direction Buttons [▲/▼] to select “RGB”, “Component SD”, or “Component HD”.
4)
Press the ENTER Button to confirm it.
Subtitle Setup
1)
Press the Direction Buttons [▲/▼] to select “Subtitle Setup”.
2)
Press the ENTER Button or Direction Button [►} to select the Sub-Menu.
Font Size
1)
Press the Direction Buttons [▲/▼] to select “Font Size”.
2)
Press the ENTER Button or Direction Button [►} to select the Sub-Menu.
3)
Press the Direction Buttons [▲/▼] to select “Big”, ”Middle”, or ”Small”.
4)
Press the ENTER Button to confirm it.
Font Colour
1)
Press the Direction Buttons [▲/▼] to select “Font Colour”.
2)
Press the ENTER Button or Direction Button [►} to select the Sub-Menu.
3)
Press the Direction Buttons [▲/▼] to select “White”, ”Red”, ”Yellow”, ”Green”, ”Blue”, or
”Gray”.
4)
Press the ENTER Button to confirm it.
5)
Press the Direction Button [◄} to return to the Subtitle Setup Sub Menu.
Time Shift
1)
Press the Direction Buttons [▲/▼] to select “Font Colour”.
2)
Press the ENTER Button or Direction Button [►} to select the Sub-Menu
12
3)
Press the Direction Buttons [▲/▼] to adjust –99 to +99 seconds.
TV Display
1)
2)
3)
4)
Press the Direction Buttons [▲/▼] to select “TV Display”.
Press the ENTER Button or Direction Button [►} to select the Sub-Menu.
Press the Direction Buttons [▲/▼] to select “4:3 Letterbox”, ”4:3 Pan Scan”, or ”16:9”.
Press the ENTER Button to confirm it.
Audio
1)
2)
Press the Direction Buttons [▲/▼] to select “Audio”.
Press the ENTER Button or Direction Button [►} to confirm it.
Bass Management
Note: (Only available if 5.1 or 2.1 surround sound is active)
1)
Press the Direction Buttons [▲/▼] to select “Bass Management”.
2)
Press the ENTER Button or Direction Button [►} to select the Sub-Menu.
3)
Press the Direction Buttons [▲/▼] to select “On” or “Off”.
4)
Press the ENTER Button to confirm it.
Center Speaker Note: (only available if 5.1 surround sound is active)
1)
Press the Direction Buttons [▲/▼] to select “Center Speaker”.
2)
Press the ENTER Button or Direction Button [►} to select the Sub-Menu.
3)
Press the Direction Buttons [▲/▼] to select “Large” or “None”.
4)
Press the ENTER Button to confirm it.
Surround Speakers Note: (only available if 5.1surround sound is active)
1)
Press the Direction Buttons [▲/▼] to select “Surround Speakers”.
2)
Press the ENTER Button or Direction Button [►} to select the Sub-Menu.
3)
Press the Direction Buttons [▲/▼] to select “Large” or “None”.
4)
Press the ENTER Button to confirm it.
Subwoofer Note: (only available if 5.1 or 2.1 surround sound is active)
1)
Press the Direction Buttons [▲/▼] to select “Subwoofer”.
2)
Press the ENTER Button or Direction Button [►} to select the Sub-Menu.
3)
Press the Direction Buttons [▲/▼] to select “Present” or “None”.
4)
Press the ENTER Button to confirm it.
Test Tones
1)
Press the Direction Buttons [▲/▼] to select “Test Tones”.
2)
Press the ENTER Button or Direction Button [►} to select the Sub-Menu.
3)
Press the Direction Buttons [▲/▼] to select “On” or “Off”.
4)
Press the ENTER Button to confirm it.
Digital Output
1)
Press the Direction Buttons [▲/▼] to select “Digital Output”.
2)
Press the ENTER Button or Direction Button [►} to select the Sub-Menu.
3)
Press the Direction Buttons [▲/▼] to select “Off”, “PCM” (Pulse Code Modulation), or “Raw”.
4)
Press the ENTER Button to confirm it.
Dynamic Range
1)
Press the Direction Buttons [▲/▼] to select “Dynamic Range”.
2)
Press the ENTER Button or Direction Button [►} to select the Sub-Menu.
3)
Press the Direction Buttons [▲/▼] to select “On”, “Off”, or “Auto”.
4)
Press the ENTER Button to confirm it.
Audio Output
1)
Press the Direction Buttons [▲/▼] to select “Audio Output”.
2)
Press the ENTER Button or Direction Button [►} to select the Sub-Menu.
3)
Press the Direction Buttons [▲/▼] to select “5.1 Channel”, “2.1 Channel”, or “2.0 Channel”.
4)
Press the ENTER Button to confirm it.
13
Troubleshooting
Incorrect operations are often mistaken for trouble and malfunctions. If you suspect that something is wrong with the unit,
check the list below for sometimes the troubles lie within another component. Remember to try inspecting other components
and electrical appliances in use. If the trouble cannot be rectified even after exercising the steps listed below, call our
Acesonic service center +1-626-820-0670 to inquire about repairs.
Reset to Factory Settings
Operation
Symptom
Resetting the unit to factory
defaults will likely solve more
than 90% of problems
encountered.
Possible Causes and Solutions
1. Remove any disc from Disc Tray.
2. Power the unit down then back up using the front
panel Power Switch (not the remote).
3. Power the unit back up.
4. Restore the factory settings through the setup menu.
Setup>Use Default Settings
Dirty or Warped Disc.
The Disc was not seated properly on the Disc Tray.
Region No. on the disc does not conform to the unit.
Condensation has formed inside the player
Press the STOP button.
Press the PLAY button to restart playback.
The Disc automatically ejects
back out when the DVD tray is
closed.
Cannot execute playback.
Video playback stops and the
operation buttons cannot be
used.
Picture disturbance during
playback.
When recorded on a VCR there
is a disturbance in the playback
picture.
Remote is not functioning.
Improper operation of TV set,
etc, occurs.
No audio or distorted sound.
Noticeable difference in DVD and
CD volume.
Karaoke Operations.
Video
USB devices.
There’s no sound from the
microphone.
There’s feedback and
screeching.
Screen is black and white,
wavey, or contains static.
The unit cannot read the devices.
This player is compatible with Macro-Vision System
copy guard. Some discs include a copy prevention
signal, and when this type of disc is played back, stripes
etc., may appear on some sections of the picture
depending on the TV. (This is not a malfunction)
This player is compatible with copy prevention
technology. Some discs include a copy prevention
signal and the copy guard system will prevent proper
playback.
The remote control is too far from the player or the
angle with the remote sensor is too sharp.
The batteries are exhausted (dead). Try fresh batteries.
There is an object between the remote control and the
sensor.
The batteries are incorrectly positioned in the remote.
Remove and reseat the batteries.
Some TVs that have wireless remote control functions
may not operate properly with this remote control.
Digital signal is prohibited for some discs.
The connection plugs are not inserted fully into the jacks
or are not connected at all.
The connection plug or jack is dirty. Check the jacks and
plugs for dirt.
Audio cable connection is incorrect.
Connection is made to the stereo amplifier’s PHONO
connection. Try connecting to a LINE in connection
instead.
The PAUSE mode is engaged.
Stereo amplifier operation is incorrect. Check the
settings for the stereo (Input source, volume, etc.)
Although you may notice a difference in volume
between CDs and DVDs, this is a result of differences in
disc recording methods.
Unit is not correctly connected to a stereo amplifier or
TV. See Player Connections. PAGE 4
The Mic. Level is too low. Adjust the level for the Mic
that is plugged in.
The mic. is turned off. Many mics. have an on/off switch.
The Microphone is too close to the speakers. Move the
mic further away or lower the volume of the mic input.
The unit is in the wrong video mode.
The device may be incompatible.
*Caution
Abnormal activity of the unit can be caused by static electricity, or other external interference.
To restore normal operation, unplug the AC power cord and plug it in again.
14
NOTES
15
ACESONIC USA CORP.
City of Industry CA, U.S.A
Customer service:
+1626 820 0670
www.acesonic.com
16