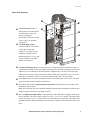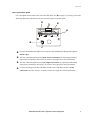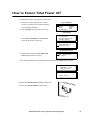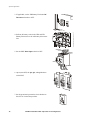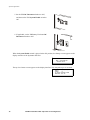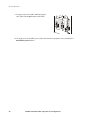
1
40kW InfraStruXure PDU PD40H5HK1-M PDRPP1000-M Operation and Configuration 400/230V APXXXX APYYYYi This manual is available in English on the enclosed CD. Este manual está disponible en español en el CD-ROM adjunto. Dieses Handbuch ist in Deutsch auf der beiliegenden CD-ROM verfügbar. Ce manuel est disponible en français sur le CD-ROM ci-inclus. Questo manuale è disponibile in italiano nel CD-ROM allegato. Instrukcja Obslugi w jêzyku polskim jest dostêpna na CD. Deze handleiding staat in het Nederlands op de bijgesloten cd. 您可以从包含的 CD 上获得本手册的中文版本。 About This Manual Audience This manual is intended for end-users of a 40kW InfraStruXure PDU. It covers the operation, configuration, and customization of the InfraStruXure PDU, and includes basic InfraStruXure system operation. Companion manuals For additional information about the InfraStruXure system, see the following manuals that were included with the PDU: • 40kW InfraStruXure System Installation and Start-Up (990-1593A) covers the installation and start-up of InfraStruXure UPS power distribution to the rack and power distribution within the rack. • Certified Electrician’s Instructions (990-1595A) provides specific instructions for the electrician connecting mains and an Emergency Power Off (EPO) switch to the InfraStruXure PDU. For information about specific components in your InfraStruXure system, see the documentation included with each component. Before installing or operating any component, refer to the safety instructions in the component’s manual. The illustrations of products in this manual may vary slightly from the products in your InfraStruXure system. How to find updates to this manual The content in this manual is based on the latest information available at the time of publication. You can check for updates to this manual by clicking on the User Manuals link on the Support page of the APC Web site (www.apc.com). In the list of InfraStruXure Power Distribution Unit manuals, look for the latest letter revision (A, B, etc.) of the part number on this manual. 40kW InfraStruXure PDU—Operation and Configuration i Contents Safety ......................................................................1 Overview . . . . . . . . . . . . . . . . . . . . . . . . . . . . . . . . . . . . . . . . . 1 Save these instructions . . . . . . . . . . . . . . . . . . . . . . . . . . . . 1 Safety symbols used in this manual . . . . . . . . . . . . . . . . . . . 1 Cross-reference symbols used in this manual . . . . . . . . . . . . . 1 Warnings . . . . . . . . . . . . . . . . . . . . . . . . . . . . . . . . . . . . . . . . . 2 Installation/Maintenance . . . . . . . . . . . . . . . . . . . . . . . . . . 2 Maintenance performed while the PDU is receiving input power . . . . . . . . . . . . . . . . . . . . . . . 2 Total power off procedure . . . . . . . . . . . . . . . . . . . . . . . . . 3 DANGER—Risk of Electric Shock! . . . . . . . . . . . . . . . . . . . . . 3 Emergency Power Off (EPO) . . . . . . . . . . . . . . . . . . . . . . . . 3 EMI . . . . . . . . . . . . . . . . . . . . . . . . . . . . . . . . . . . . . . . . . 3 Overview .................................................................5 InfraStruXure PDU Components . . . . . . . . . . . . . . . . . . . . . . . . . 5 Front view . . . . . . . . . . . . . . . . . . . . . . . . . . . . . . . . . . . . 5 Front view (interior) . . . . . . . . . . . . . . . . . . . . . . . . . . . . . . 6 Rear view (interior) . . . . . . . . . . . . . . . . . . . . . . . . . . . . . . 7 PDU monitoring unit . . . . . . . . . . . . . . . . . . . . . . . . . . . . . 8 User connection plate . . . . . . . . . . . . . . . . . . . . . . . . . . . . 9 PDU Display Interface.............................................11 Overview . . . . . . . . . . . . . . . . . . . . . . . . . . . . . . . . . . . . . . . . 11 Top-level status screens . . . . . . . . . . . . . . . . . . . . . . . . . . 12 Top-level menu screen . . . . . . . . . . . . . . . . . . . . . . . . . . . 12 Navigating through screens . . . . . . . . . . . . . . . . . . . . . . . 12 Password-protected screens . . . . . . . . . . . . . . . . . . . . . . . 13 Load-Meter Screen. . . . . . . . . . . . . . . . . . . . . . . . . . . . . . . . . . 14 Volt-Meter Screen . . . . . . . . . . . . . . . . . . . . . . . . . . . . . . . . . . 15 40kW InfraStruXure PDU—Operation and Configuration iii Contacts Screen . . . . . . . . . . . . . . . . . . . . . . . . . . . . . . . . . . . . 16 Overview . . . . . . . . . . . . . . . . . . . . . . . . . . . . . . . . . . . . 16 How to connect contacts to the PDU monitoring unit . . . . . . 18 Breakers Screen . . . . . . . . . . . . . . . . . . . . . . . . . . . . . . . . . . . . 19 Alarms Screen . . . . . . . . . . . . . . . . . . . . . . . . . . . . . . . . . . . . . 20 View Active Alarms . . . . . . . . . . . . . . . . . . . . . . . . . . . . . 20 Alarm/Event Log . . . . . . . . . . . . . . . . . . . . . . . . . . . . . . . 20 Alarm Setup . . . . . . . . . . . . . . . . . . . . . . . . . . . . . . . . . . 21 Alarm Beeper . . . . . . . . . . . . . . . . . . . . . . . . . . . . . . . . . 21 PDU Alarms . . . . . . . . . . . . . . . . . . . . . . . . . . . . . . . . . . 22 Panel Screen . . . . . . . . . . . . . . . . . . . . . . . . . . . . . . . . . . . . . . 23 Branch Ckt Loading . . . . . . . . . . . . . . . . . . . . . . . . . . . . . 23 Branch Ckt Limits . . . . . . . . . . . . . . . . . . . . . . . . . . . . . . 23 Panel Configuration . . . . . . . . . . . . . . . . . . . . . . . . . . . . 24 Global Panel Config . . . . . . . . . . . . . . . . . . . . . . . . . . . . . 25 Config Screen . . . . . . . . . . . . . . . . . . . . . . . . . . . . . . . . . . . . . 26 System/Network . . . . . . . . . . . . . . . . . . . . . . . . . . . . . . . 26 Electrical Config . . . . . . . . . . . . . . . . . . . . . . . . . . . . . . . 27 Manufacturer Data . . . . . . . . . . . . . . . . . . . . . . . . . . . . . 28 System ID . . . . . . . . . . . . . . . . . . . . . . . . . . . . . . . . . . . 28 Factory Defaults . . . . . . . . . . . . . . . . . . . . . . . . . . . . . . . 28 Firmware Updates . . . . . . . . . . . . . . . . . . . . . . . . . . . . . . 28 System Operation .................................................. 29 How to Transfer the UPS into Maintenance Bypass Operation . . . . . . . . . . . . . . . . . . . . . . . . 29 How to Return from Maintenance Bypass Operation . . . . . . . . 32 How to Ensure Total Power Off . . . . . . . . . . . . . . . . . . . . . . . . 35 How to Apply Power to the System . . . . . . . . . . . . . . . . . . . . . 37 Communication Configuration ............................... 41 InfraStruXure PDU Management Options . . . . . . . . . . . . . . . . . 41 Overview . . . . . . . . . . . . . . . . . . . . . . . . . . . . . . . . . . . . 41 InfraStruXure Manager . . . . . . . . . . . . . . . . . . . . . . . . . . . 41 Network management interfaces . . . . . . . . . . . . . . . . . . . . 41 Configuring the InfraStruXure Manager . . . . . . . . . . . . . . . . . . 42 iv 40kW InfraStruXure PDU—Operation and Configuration Configuring the Network Management Interface . . . . . . . . . . . 43 Connect the PDU to your network . . . . . . . . . . . . . . . . . . . 43 Configuration Overview . . . . . . . . . . . . . . . . . . . . . . . . . . 44 TCP/IP configuration methods . . . . . . . . . . . . . . . . . . . . . . 44 Device IP Configuration Wizard . . . . . . . . . . . . . . . . . . . . . 44 BOOTP & DHCP configuration . . . . . . . . . . . . . . . . . . . . . . 45 Local access to the control console . . . . . . . . . . . . . . . . . . . 47 Remote access to the control console . . . . . . . . . . . . . . . . . 47 Control console . . . . . . . . . . . . . . . . . . . . . . . . . . . . . . . . 48 How to Access a Network Management Interface on a Configured PDU . . . . . . . . . . . . . . . . . . . . . . . . 49 Web interface . . . . . . . . . . . . . . . . . . . . . . . . . . . . . . . . . 49 Telnet and SSH . . . . . . . . . . . . . . . . . . . . . . . . . . . . . . . . 49 SNMP . . . . . . . . . . . . . . . . . . . . . . . . . . . . . . . . . . . . . . 50 FTP and SCP . . . . . . . . . . . . . . . . . . . . . . . . . . . . . . . . . . 51 How to Recover From a Lost Network Management Interface Password. . . . . . . . . . . . . . . . 52 Customizing and Updating the PDU .......................53 Important Safety Instructions. . . . . . . . . . . . . . . . . . . . . . . . . . 53 PDU Orderable Part List. . . . . . . . . . . . . . . . . . . . . . . . . . . . . . 54 How to Add Circuit Breakers and Power Cables . . . . . . . . . . . . 55 Add a circuit breaker on the PDU . . . . . . . . . . . . . . . . . . . . 55 Add a power cable to the PDU . . . . . . . . . . . . . . . . . . . . . 55 How to Connect User Input Contacts and Relay Outputs to the PDU User Connection Plate . . . . . . . . . . . 57 Overview . . . . . . . . . . . . . . . . . . . . . . . . . . . . . . . . . . . . 57 How to connect contacts to the PDU monitoring unit . . . . . . 58 How to Test the Emergency Power Off Switch . . . . . . . . . . . . . 59 Overview . . . . . . . . . . . . . . . . . . . . . . . . . . . . . . . . . . . . 59 Testing the switch . . . . . . . . . . . . . . . . . . . . . . . . . . . . . . 60 Safety warnings . . . . . . . . . . . . . . . . . . . . . . . . . . . . . . . 62 How to Download Firmware Upgrades . . . . . . . . . . . . . . . . . . . 63 40kW InfraStruXure PDU—Operation and Configuration v Specifications ........................................................ 65 Product Information .............................................. 69 InfraStruXure Standard Warranty . . . . . . . . . . . . . . . . . . . . . . . 69 Life-Support Policy . . . . . . . . . . . . . . . . . . . . . . . . . . . . . . . . . . 71 How to Obtain Service. . . . . . . . . . . . . . . . . . . . . . . . . . . . . . . 72 Appendix A: Changes in This Manual..................... 73 Overview . . . . . . . . . . . . . . . . . . . . . . . . . . . . . . . . . . . . 73 General changes . . . . . . . . . . . . . . . . . . . . . . . . . . . . . . . 73 Changes by page number . . . . . . . . . . . . . . . . . . . . . . . . . 73 vi 40kW InfraStruXure PDU—Operation and Configuration Safety Overview Save these instructions This manual contains important instructions that must be followed during installation, operation, and maintenance of the InfraStruXure PDU. Safety symbols used in this manual Electrical Hazard Indicates an electrical hazard, which, if not avoided, could result in injury or death. Indicates a hazard, which, if not avoided, could result in personal injury or damage to product or other property. Warning Indicates a potential hazard which could result in damage to product or other property. Caution Indicates important information. Note Indicates a heavy load that should not be lifted without assistance. Heavy Indicates a standby state. When in standby, the unit is not operating, but it may still contain hazardous voltage. It is not safe to service until the equipment is disconnected from all sources of electrical power. Cross-reference symbols used in this manual Indicates that more information is available on the same subject in a different manual. See also Indicates that more information is available on the same subject in a different section of this manual. 40kW InfraStruXure PDU—Operation and Configuration 1 Warnings Installation/Maintenance Only a certified electrician can: • Connect the InfraStruXure PDU to Mains • Connect a switch to the EPO interface on the InfraStruXure PDU Only a certified electrician or an APC Field Service Engineer can: • Connect the InfraStruXure PDU to the Symmetra PX UPS • Perform maintenance of the InfraStruXure PDU When you connect the InfraStruXure PDU to Mains, you must install a 100A (minimum) circuit breaker to protect the InfraStruXure PDU against over-current. This circuit breaker must have a CE Mark and a certification mark by a certified body such as VDE, SEV, BSE, KEMA, or Semko. Maintenance performed while the PDU is receiving input power APC does not recommend that you perform maintenance of the PDU while it is receiving input power. However, due to the critical nature of data center loads, this may occur. If you must perform maintenance while the PDU is receiving input power, observe the following precautions to reduce the risk of electric shock: 1. Never work alone. 2. Perform the maintenance only if you are a certified electrician who is trained in the hazards of live electrical installation. 3. Know the procedure for disconnecting electricity to the PDU and the data center in case of an emergency. 4. Wear appropriate personal protective equipment. 5. Use double-insulated tools. 6. Always follow local and site regulations when working on the PDU. 2 40kW InfraStruXure PDU—Operation and Configuration Safety Total power off procedure 1. Set the Symmetra PX UPS System Enable switch to Standby. 2. Set the Symmetra PX UPS DC Disconnect switch to Off. 3. Set the InfraStruXure PDU Main Input breaker (or switch) to Off. 4. Set the DC Disconnect breaker of each XR Battery Enclosure to Off. 5. Set the upstream Mains circuit breaker to Off. 6. Disconnect the batteries in the UPS by pulling them out approximately one inch (25.4mm) from their normal position. 7. Disconnect the batteries in the XR Battery Enclosure by pulling them out approximately one inch (25.4mm) from their normal position. DANGER—Risk of Electric Shock! Hazardous, live parts inside the Symmetra PX UPS are energized from the battery supply even when the AC power is disconnected. Electrical Hazard Hazardous, live parts may exist inside the InfraStruXure PDU because of the Symmetra PX UPS inverter even when the AC power is disconnected. Test any electrical parts before touching them. Emergency Power Off (EPO) This InfraStruXure PDU and Symmetra PX UPS are provided with an Emergency Power Off switch connection. When this EPO switch is energized, electrical power to the units is de-energized and the system will not transfer to on-battery operation. EPO can be achieved with either a contact closure or application of an external 24VAC or 24VDC from a SELV or PELV source. It’s important to note that hazardous voltage from the Mains voltage must be isolated from the contact closure or 24VAC, 24VDC. The EPO circuit contact closure, the 24VAC or the 24VDC are considered a SELV circuit as defined in EN 60950 Safety of Information Technology Equipment or PELV circuit as defined in IEC 60364-4-41 Electrical Installations of Buildings, Protection for Safety—Protection Against Electric Shock. SELV is an abbreviation for Safety Extra Low Voltage. PELV is an abbreviation for Protective Extra Low Voltage. SELV and PELV circuits are isolated from the Mains through a safety isolating transformer, and are designed so that under normal conditions the voltage is limited to 42.4 Vpeak or 60 VDC. EMI WARNING –- This is a Class A product. In a domestic environment, this product may cause radio interference in which case, the user may be required to take adequate measures. This equipment has been tested and found to comply with EN55022 (1998) and EN55024. 40kW InfraStruXure PDU—Operation and Configuration 3 Overview InfraStruXure PDU Components Front view The PDU Shielding Trough accommodates the power cables exiting the roof of the PDU, and it separates power cables from data cables. The PDU power cables supply power to equipment racks; they are fed through knockouts on the top of the PDU. The number of power cables installed in the PDU depends on your system configuration. Each power cable terminates with an IEC 309 outlet, which accepts a variety of APC InfraStruXure rack-mount power distribution accessories. Cable access holes allow access for Symmetra PX UPS input and output wiring. During installation, the APC Field Service Engineer exchanges side panels between the PDU and the UPS so that the adjacent sides of the two units have panels with cable access holes. Leveling feet adjust to level the enclosure. All enclosures must be level before installation of the system begins. The display interface provides a local interface for viewing status data. It has an LCD, fivebutton interface, basic status lights, and a beeper. 40kW InfraStruXure PDU—Operation and Configuration 5 Overview Front view (interior) ! ! ! The 42-position circuit breaker panels provide 84 total single pole positions. Each single pole provides power at 230 volts L-N. The amperage each position provides depends on the size of the circuit breaker used. The document pocket provides storage of documents relating to the circuit breaker panels, such as the PDU Panel Board Schedules (provided). The wraparound maintenance bypass panel holds three circuit breakers that allow the UPS to be electrically isolated from the mains, while maintaining the power panels. The input circuit breaker is labeled Q1, the output circuit breaker is labeled Q2, and the maintenance bypass circuit breaker is labeled Q3. The label on the maintenance bypass panel of the PDU illustrates the power flow, and the H2 and H3 LEDs indicate when it is safe to operate the Q2 and Q3 circuit breakers. The user connection plate is connected to the PDU monitoring unit, and provides easy access to input contact, relay output, network, and EPO connections. Make connections from inside the enclosure, and route wires through the knockout provided on the plate. 6 40kW InfraStruXure PDU—Operation and Configuration Overview Rear view (interior) The load test port allows a UPS system to be load-tested to ensure that the system will operate according to specifications if a power outage occurs. (This is an optional component.) The Main Input switch connects to Mains. The switch accepts 400V input and requires L1, L2, and L3 input conductors for PDUs with a transformer and L1, L2, L3, and N input conductors for PDUs without a transformer. The PDU monitoring unit has several current and voltage monitoring boards that report to a central board assembly located in the PDU monitoring unit. The PDU monitoring unit has one 10BaseT (Cat-5) connection to the Information Controller hub (or switch), four output relay connections, four input contact connections, and one EPO input connection. For easier access make these connections at the user connection plate located on the roof of the PDU. These fuses protect the silicon-controlled rectifiers in the UPS bypass static switch. The fuses are present only on PDUs without a transformer. The output of the optional isolation input transformer feeds the input circuit breaker of the maintenance bypass panel. Note: The secondary side of the optional isolation input transformer should be provided with a suitable separate connection to an earth electrode. The UPS input and output cables connect the PDU to the UPS and are shipped coiled on the floor of the PDU. The input cables consist of 5 wires: L1, L2, L3, N, and PE. The output cable consist of 4 wires: L1, L2, L3, and N. Each wire is labeled and corresponds to a terminal on the Symmetra PX UPS. During installation, the Field Service Engineer will connect the PDU to the UPS. 40kW InfraStruXure PDU—Operation and Configuration 7 Overview PDU monitoring unit This connection provides the input power for the PDU monitoring unit. The power is supplied by the monitoring unit circuit breaker on the front of the PDU. If the panel is on, and the monitoring unit circuit breaker is closed, the monitoring unit is powered. Connects to sensors monitoring values such as, voltage, current, and power. Digital input sensing for monitoring such as circuit breaker status, 8 8 5- 22 8 8 1 14 2 5 18 6 19 7 20 8 21 10 22 monitoring unit using an appropriate communication cable (APC part number 940-0103). This port is used to configure items relating to servicing the PDU. 9 Use the Console port (DB-9) to connect a laptop computer to the 17 power from the AC output of the UPS. If the UPS is powered off, the LED remains lit—the EPO function is still available; however the monitoring unit is not powered. 15 The Power LED indicates whether the monitoring unit is receiving 3 PDU display interface. 16 U S ER / E PO C O N TA C TS The Display port (RJ-45) connects the PDU monitoring unit to the 4 TO U P S transformer temperature, fans, etc. 11 24 12 25 STATU S TR IPP ED 13 D ISP L AY R S-2 3 2 C O N S O LE PO R T EPO TE ST NC A R M ED NO PO W ER 9 6 00 -8 -N -1 10 = G R N 1 00 = O R N When the EPO Arm/Test rocker is in the Test position, engaging N ET W O R K R E SE T switch that is connected—Normally Open (NO) or Normally Closed (NC). the EPO switch will not cause the load to be powered off. When the rocker is in the Armed position, engaging the EPO switch will cause the PDU’s main input switch and the Symmetra PX UPS to be switched OFF. See “How to Test the Emergency Power Off Switch” on page 59 for more information on testing the EPO switch. 23 LIN K R X /TX EPO DIP switches configure the EPO input for the type of EPO The EPO Armed LED is green when the rocker is in the Armed position. The LED is dark when the rocker is in the Test position. The EPO Tripped LED is red when the EPO switch is engaged (the EPO button is pressed), regardless of the state of the EPO Arm/Test rocker. The Reset button resets the network processor; it does not reset the PDU or the PDU monitoring unit. Connect to the InfraStruXure Manager through the network port. The To UPS port connects the PDU monitoring unit to the Maintenance Bypass/PCB board and the EPO board inside the Symmetra PX UPS. This port is connected to wire harnesses secured inside the PDU that are connected to the Symmetra PX UPS during installation of the system. The optional User/EPO Contacts port is connected to wire harnesses that connect to the User Connection Plate in the roof (or floor) of the PDU. The port allows for relay outputs (4), input contacts (4), and an EPO input (1). See “Contacts Screen” on page 16 and “How to Test the Emergency Power Off Switch” on page 59. Note 8 The branch current monitoring boards connect to the Branch Current Monitor ports (RJ-11). These ports are on the top side of the PDU monitoring unit, and are labeled on the face of the unit. Each port corresponds to a section of circuit breakers on the PDU distribution circuit breaker panel: upper left=[01..41]; upper right=[02..42]; lower left=[43..83]; lower right=[44..84]. 40kW InfraStruXure PDU—Operation and Configuration Overview User connection plate For a description and location of the user connection plate, see () on page 6. For clarity, refer to the following illustration which shows the user connection plate in greater detail. ! USER INTERFACE © 2001 APC MADE IN USA ATS 1 Contact Outputs ATS 2 4 ATS EN 2 3 Contact Inputs ATS 0 1 ! – + EPO 24V EPO AC/DC Contact ! Connect the InfraStruXure PDU to the network or the InfraStruXure Manager through the ethernet port. The user connection plate has four input contact connections for monitoring Normally Open (NO) or Normally Closed (NC) dry contacts. See page 58 for more information. The user connection plate has four relay output connections for connection of Normally Open (NO) or Normally Closed (NC) dry contacts. See page 58 for more information. Connect an Emergency Power Off (EPO) switch at one of the three choices of EPO connections (24VDC, 24VAC, or contact closure). See page 59 for more information. 40kW InfraStruXure PDU—Operation and Configuration 9 PDU Display Interface Overview You can use the display interface to configure settings, set alarm thresholds, and provide audible and visual alarms. Load Powered ESC Check Log ? Bypass Alarm Load Powered LED When green, all output phases are within the limits specified by the output alarm limit thresholds. Check Log LED When yellow, at least one new alarm condition has been detected. Bypass LED When yellow, power to the load is being supplied directly by the utility power source—the UPS has been removed from the circuit for maintenance or replacement. Bypass breakers on the PDU function as input circuit breakers to protect the load equipment. Alarm LED When red, an alarm condition exists. LCD View alarms, status data, instructional help, and configuration items. Up and Down navigation keys Selects menu items and accesses information. ENTER key Opens menu items and inputs changes to system parameters. HELP key Launches context-sensitive help. Press the HELP key for information about each item on the screen and for instructions on how to perform certain tasks (i.e. placing the UPS into Maintenance Bypass operation.) ESC key Returns to previous screen displayed. 40kW InfraStruXure PDU—Operation and Configuration 11 PDU Display Interface Top-level status screens After displaying a brief start-up screen after system start-up, the display interface scrolls automatically and continuously through four screens of basic status information. Press the Up and Down arrow keys to interrupt the automatic scrolling to view a specific status screen. Volts In L1-2: 000 L2-3: 000 L3-1: 000 Volts Out L1: 000 L2: 000 L3: 000 Load L1: L2: L3: Total Output Loading kW: 000 PF: 000 kVA: 000 %LD: 000 Freq: 00.0 Current 000 000 000 Neut:000 No Active Alarms System Date/Time: Jun-24 2003 07:58 Top-level menu screen On any top-level status screen, press the ENTER key to open the top-level menu screen. Load-Meter Volt-Meter Contacts Breakers Alarms Panel Config Help If the display interface is inactive for the time specified as the Time-out setting, the interface reverts to the initial basic monitoring screens. Note For descriptions of the top-level menu choices, see the individual sections starting on page 14. Navigating through screens To open any screen, press the Up and Down arrow keys until the selector arrow ( rests next to your desired selection. Press the ENTER key to view the selected screen. Load-Meter Volt-Meter Contacts Breakers Alarms Panel Config Help Contacts In: 02of04 Name: User Switch #2 Normal: Open Status: Open When configuring settings, press the Up and Down arrow keys until the selector arrow ( rests next to the setting you want to change, and press the ENTER key. If the setting is a list of choices, an input arrow ( will appear next to the setting. Press the Up and Down arrow keys until your desired change is listed. Press the ENTER key to select the setting. 12 Contacts In: 02of04 Name: User Switch #2 Normal: Open Status: Open 40kW InfraStruXure PDU—Operation and Configuration PDU Display Interface On some screens, continue arrows ( indicate that there are additional screens to view in the category. Press the Up or Down arrow key to view the additional screens. System/Network Electrical Configuration Panel Configuration Manufacturer Data Product Data Factory Defaults Firmware Updates Password-protected screens When configuring or changing settings, you will be prompted for your password. To enter your password: 1. Press the Up or Down arrow key until the correct letter is displayed, and then press the ENTER key. Note Enter Password: ******* After you press the ENTER key, the character you entered is displayed as an asterisk and the input arrow moves to the next space for you to select the next password character. 2. Press the ENTER key twice after you enter your password. See “System Password” on page 26 to change your password. 40kW InfraStruXure PDU—Operation and Configuration 13 Load-Meter Screen From the Load-Meter screen, you can select the following items: Total Load by Phase The load supported by each phase in kVA, in RMS current (Irms), and as a percentage of the maximum allowable load (%LD). Total Load Summary For the total load supported: • kW: The power provided, in kilowatts. • kVA: The actual power drawn by the load, in kilovolt-amperes. • Freq: Frequency. • PF: The power factor (kW/KVA), which affects the power available to the load. • %LD: The load as a percentage of the maximum allowable load. Power Factor For each phase: • kVA: The actual power drawn by the load, in kilovolt-amperes. • kW: The power, in kilowatts, provided by the phase. • PF: The power factor (kW/kVA), which affects the power available to the load. 14 40kW InfraStruXure PDU—Operation and Configuration Volt-Meter Screen From the Volt-Meter screen, you can select the following items: Output Voltage Displays each phase-to-phase output voltage (e.g., L1-2 for phase L1 to phase L2) and each phase-to-neutral output voltage (e.g., L1 for phase L1 to neutral). Input Voltage Displays each phase-to-phase input voltage (e.g., L1-2 for phase L1 to L2), or each phase-to-neutral input voltage (e.g., L1 for phase L1 to neutral). 40kW InfraStruXure PDU—Operation and Configuration 15 Contacts Screen Overview The PDU can monitor external contact closure events. Possible applications include the following: • Magnetic contact switches • Window foil • Tamper switches • Heat detectors • Water sensors • Pressure sensors • Building smoke and fire detection systems You can set input contacts to cause alarm conditions based on their current state and a user-defined normal state. Relay outputs can map internal alarms and events to outside devices. Use the Contacts screen to display and configure information about input contacts and relay outputs. Input Contacts Scroll through the list to display information about each of the installed contact inputs. For example, 02of04 displays information about the second of four installed contact inputs. • Name—The name of this input contact (Maximum: 14 alphanumeric characters.) • Normal—The normal position of this input contact, either Open or Closed. • Status—The position of this input contact. If the position is not the normal position, an alarm condition occurs. Relay Outputs Scroll through the list to display information about each of the installed relay outputs. For example, 04of04 displays information about the fourth of the four available relay outputs. • Name—The name of this relay output (Maximum: 14 alphanumeric characters). • Normal—The normal position of this relay output, either Open or Closed. • Status—The position of this relay output. 16 40kW InfraStruXure PDU—Operation and Configuration PDU Display Interface Alarm Relay Map Configure the relay outputs, using Alarm Map: 01 of 04 the Alarm Relay Map. Each [Vo, By, C4] Map: Input Voltage Alarm Map corresponds to an Apply Now output relay. For example, Alarm map 01of04 corresponds to the first of four relay outputs. The second line, in brackets [ ], lists the items that you have selected to map to the selected relay. The third line allows you to select the alarms to which you want to map the relay: • Any Load (L)—Maps to over- or under-current alarms for circuit breaker panels and branch circuits. • Overload (O)—Maps to over-current alarms for circuit breaker panels, branch circuits, and SYSGND. • Input Voltage (Vi)—Maps to any input voltage alarm. • Output Voltage (Vo)—Maps to any output voltage alarm. • PDU in Bypass (By)—Mapping this option will cause the relay output to actuate when the Q3 breaker is closed. • Any Breaker (Br)—Mapping this option will cause the relay output to actuate when the input, bypass input (Q10), or crosstie output breaker is not in its normal state. • Contacts 1–4 (C1, C2, C3, C4)—Maps to the input contact alarms. Before exiting the screen, to save your changes, select the Apply Now option on the bottom line of the screen. 40kW InfraStruXure PDU—Operation and Configuration 17 PDU Display Interface How to connect contacts to the PDU monitoring unit 1. Choose one or more contact number(s) on the User/EPO contacts port on the user connection plate to which you will connect the contacts. The user connection plate connects to the PDU monitoring unit. 2. From the PDU display interface: a. Press the ESC or ENTER key to go to the top-level menu screen. b. Select Contacts on the top-level menu screen, and press the ENTER key. Load-Meter Volt-Meter Contacts Breakers Alarms Panel Config Help c. Select Contact Inputs (or Relay Outputs) and press ENTER to display the contact inputs (or relay outputs) screen. >Contact Inputs >Relay Outputs >Alarm Relay Map d. Select Contact In and press the ENTER key to select the number of the contact you are connecting. The continue arrow will appear next to the contact number. Contact In:01of04 Name: User Contact1 Normal:Open Status: Closed e. Press the Up or Down arrow key to select the appropriate contact number, and press the ENTER key. f. Press the Down arrow key to enter a unique Name for the contact and to configure the Normal state of the contact (Open or Closed). The default Normal state is Open. Press the ENTER key to select the item to configure. You will be prompted for your password to configure these items. Note 3. Connect contact wires (300V-rated cabling required) to the User Contacts terminal block on the user connection plate. You will need a 2.5-mm standard screwdriver. 4. Run the wires from the terminal block out the roof or under the floor of the PDU to your contact’s location. Ensure that wires are properly retained and away from high voltage lines and breakers. Warning See “Relay Outputs” on page 66 for relay output specifications. 18 40kW InfraStruXure PDU—Operation and Configuration Breakers Screen Use the Breakers screen to view the status of the system and PDU circuit breakers. UPS & System Bypass Reports the operation mode of the UPS and the state of the Q1, Q2, and Q3 circuit breakers on the PDU. Main Input Reports status of PDU Main Input Switch (Open or Closed). Under normal operation, this switch is Closed. 40kW InfraStruXure PDU—Operation and Configuration 19 Alarms Screen View Active Alarms Use this option of the Alarms screen to display active alarms (alarms that have not been resolved). Scroll through the list to view each active alarm. Alarm/Event Log Use this selection of the Alarms screen to access the following options: New Logged Items Display a description and the date and time of each alarm that occurred since the last time this option was used. The date/time format is mm/dd/yyyy hh:mm:ss. • The most recent alarm is displayed initially. • If the log contains no alarms, the screen displays Alarm Log Empty. Entire Log Display a description and the date and time of each alarm in the alarm log. The date/time format is mm/dd/yyyy hh:mm:ss. • The most recent alarm is displayed initially. To move to the previous alarm press the Down arrow key. To move to the next most recent alarm, press the Up arrow key. • If the log contains no alarms, the screen displays Alarm Log Empty. Clear Log 20 Delete the contents of the alarm log. 40kW InfraStruXure PDU—Operation and Configuration PDU Display Interface Alarm Setup Use this option of the Alarms screen to access the following options: Loading Limits Configure the following in amps and as a percentage of full load: • Out High: The upper limit for output current. • Out Low: The lower limit for output current. • Out Neut: The upper limit for current on the neutral wire for the output phases. Voltage Limits Configure the following as a percentage under or over the rated voltage: • Input: The allowed range for input voltage. • Output: The allowed range for output voltage. Other Limits Configure these limits: Frequency: The frequency variation, in hertz, that is acceptable for the output current. Global Alarm Config Set all the loading limits or all the voltage limits simultaneously as a percentage of full load: • Load Limits: Set the same percentage for the upper limit for output current, the lower limit for output current, and the upper limit for current on the neutral wire for the output phases. (Use the Loading Limits option to set these thresholds individually.) • Volt Limits: Set the same percentage for the high and low thresholds for input and output voltage. (Use the Voltage Limits option to set these thresholds individually.) Select Apply Now and then YES to implement your changes. Alarm Beeper Use this option of the Alarms screen to turn the alarm beeper ON or OFF. 40kW InfraStruXure PDU—Operation and Configuration 21 PDU Display Interface PDU Alarms This table lists all alarms that can be generated by the InfraStruXure PDU, as displayed by the All Possible Alarms option, with numeric variables between the < > characters. Logged alarms will display specific numbers instead. Alarm Condition 22 Explanation Input V <Ln-N> =<Value> Voltage Under Limit Input voltage of the phase indicated has dropped below the configured lower limit. Input V <Ln-N> =<Value> Voltage Over Limit Input voltage of the phase indicated exceeded the configured upper limit. Output V <Ln-N> =<Value> Voltage Under Limit Phase-to-neutral output voltage for phase <L-N> dropped below the configured limit. Output V <Ln-N>=<Value> Voltage Over Limit Phase-to-neutral output voltage for phase <L-N> exceeded the configured limit. Output I L<n>=<Value> Current Over Limit Current of output phase <n> exceeded the configured limit. Output I L<n>=<Value> Current Under Limit Current of output phase <n> dropped below the configured limit. Output Neut=<Value> Current Over Limit Current on the neutral wire for the output phases exceeded the configured limit. Output FDev=<Value> Freq Out of Range Frequency of the output current is above or below the range that is configured as acceptable. Input Transformer Temperature Too High The temperature of the PDU transformer exceeded the normal limit (if applicable). Main Breaker Open Alarm Active The Main Input switch is Off. <User Contact Name> Alarm Active A user-configured contact connected to the PDU monitoring unit is reporting an alarm condition. No UPS Input Breaker Q1 Open The Q1 circuit breaker is open, and the PDU is not receiving power from the UPS. No Panel Feed Breakers Q2 & Q3 Open The Q2 & Q3 circuit breakers are open, and the PDU is not supporting connected equipment. Atypical Bypass Mode Alarm Active The system state as set by the Q1, Q2, & Q3 breakers is in a bypass mode. Branch Ckt Pos: <nn> Current Over Limit Current on one of the poles of branch circuit breaker <nn> exceeded the configured limit. Branch Ckt Pos: <nn> Current Under Limit Current on one of the poles of branch circuit breaker <nn> dropped below the configured limit. Fan Rotation Failure Alarm Active There is a failure in one of the fans. The fan needs to be replaced (if applicable). 40kW InfraStruXure PDU—Operation and Configuration Panel Screen Branch Ckt Loading You can display Branch Ckt Loading (Branch Circuit Loading) status if the option to measure current at the distribution circuit breakers is installed. You can view data for each individual panel position on the distribution panel. To view status of a panel position, select the range that includes the position. Branch Ckt Loading Select Range: [01..41] [02..42] [43..83] [44..84] The top line of selections on the screen applies to the top distribution circuit breaker panel on the PDU. The bottom line of selections applies to the bottom distribution circuit breaker panel on the PDU. The panel position numbers on the screen correspond to the numbers on the distribution panel. (Odd numbers are on the left; even numbers are on the right.) Once you have selected the correct range, press the Up and Down arrow keys to scroll through the list of circuit breakers in the selected range. Poles that are tied together will be shown on the same screen. Ckt: 03of21 Irms %LD 05: 16A 11.3 56.5 In the example above, the screen shows the third circuit breaker of 21 circuit breakers in the selected range. This is a single-pole circuit breaker, occupying panel position 05. The circuit breaker is rated at 16 amps. The following data are displayed for each pole: • Irms: Measured root mean square (RMS) current of the pole position. • %LD: Present load as a percentage of rated load of the panel position. Branch Ckt Limits Available only if the option to measure individual currents is installed, Branch Ckt Limits (Branch Circuit Limits) accesses a scrollable list of the circuit breakers in the panel. For each circuit breaker, the screen displays, in the Loading column, the current on each panel position as a percentage of the rated current. In the Load Alarm column, you can configure the high and low thresholds for the circuit breaker as a percentage of its rated current. For example, if you set 80% as the high threshold for a single-pole 16-amp circuit breaker, an alarm condition occurs if the current reaches 12.8 amps. 40kW InfraStruXure PDU—Operation and Configuration 23 PDU Display Interface Panel Configuration Configure the branch metering settings for each circuit breaker on Panel Configuration the distribution panel, or configure both panels simultaneously. Select Range: [01..41] [02..42] To configure a circuit breaker, select the range that includes the circuit breaker. The top line of selections on the screen applies to the top distribution circuit breaker panel on the PDU. The bottom line of selections applies to the bottom distribution circuit breaker panel on the PDU. The panel position numbers on the screen correspond to the numbers on the distribution panel. (Odd numbers are on the left; even numbers are on the right.) Once you have selected the correct range, configure the settings for each circuit breaker in the range: Pos: The panel positions in the selected range. Breaker: Two configurable items: • The circuit breaker rating, in amps. • The circuit breaker tie indicator: Define the number of panel positions associated. You can associate positions with circuit breakers, which enables you to view status about each circuit breaker and receive alarm notification when any of a circuit breaker’s poles are above or below the configured branch circuit limit. You can also associate panel positions that are logically tied together. For example, you can associate together panel positions for three separate circuit breakers that are connected to the same PDU power cord and that feed power to the same equipment enclosure. To configure the values on this screen: 1. From the first column, use the arrow keys to scroll up or down to the pole position you want to configure. 2. Press the ENTER key to move to the item you want to configure in the third column (the circuit breaker rating or the circuit breaker tie indicator). 3. Scroll again to select the value you want for the circuit breaker rating or the circuit breaker tie indicator. To associate one panel position with the next position in the list, choose the + character as the tie indicator immediately following the circuit breaker rating. To indicate that the position is not associated with the next panel position in the list, choose the ] character as the tie indicator immediately following the circuit breaker rating. When you change the + or ] character that follows the circuit breaker rating in one row, the + or [ character before the circuit breaker rating in the next row also changes to indicate the changed association between the panel positions. For example, this screen shows three, single-pole, 16A, associated circuit breakers occupying positions 08, 10, and 12 on the top right distribution panel. 24 Pos 08 10 12 40kW InfraStruXure PDU—Operation and Configuration Breaker [ 16A + + 16A + + 16A ] PDU Display Interface Global Panel Config Configures the same number of poles or circuit breaker ratings for all circuit breakers in both distribution panels simultaneously. For example, if your system uses only 3-pole, 16-amp circuit breakers, choose this option, scroll to the value 3 for Poles and 16 for Amp Rating, and then select Apply Now and YES to implement your changes. 40kW InfraStruXure PDU—Operation and Configuration 25 Config Screen System/Network Use this option of the Config screen to access these options: System Password • Password: Change the system password required to access protected screens and fields in the display interface. Enter a string of up to eight alphanumeric characters, followed by the underline character ( _ ) to indicate the end of the string. The default password is APC. • Time-out: Set the time that the display interface waits for user input before it reverts to the initial scrolling of status screens. Select 1, 2, 5, 10 (the default), or 30 minutes; or 1, 2, or 4 hours, or Forever. • Invalidate NOW: Re-enter the system password for viewing password-protected screens. Date/Time • Date: Set in the following format: dd/mm/yyyy. • Time: Set in the following format: hh:mm:ss. Local Interface • Contrast: Set the screen contrast for the LCD. Select from 1 (high contrast) to 8 (low contrast). • Key Click: Choose On for an audible click whenever you press a navigation key. Choose Off to disable the key click. • Beeper: Select High, Medium, Low, or Off to adjust the loudness of the audible beeper and the key click. Network Address The following values are set by the Information Controller during initial configuration: • IP: The System IP address, which the domain name server translates into a domain name. • Mask: The subnet mask, which identifies the subnetwork on which the InfraStruXure PDU operates. • GW: The Gateway address. This is the physical address of the InfraStruXure PDU, expressed as a 48-bit hexadecimal number. 26 40kW InfraStruXure PDU—Operation and Configuration PDU Display Interface Electrical Config This option of the Config screen displays information about the electrical service that provides input to the InfraStruXure PDU. All of the values displayed on this screen are set at the factory. Use this information when viewing and setting alarms. Input Config Configure the following items: • Main Input: The voltage from the building’s electrical service coming into the PDU main input switch. • 3W: 3-phase Delta, measured line-to-line • 4W: 3-phase Wye, measured line-to-neutral • Transformer: Indicates whether the InfraStruXure PDU has the optional isolation input transformer. • Bypass Input: Indicates whether the PDU has a bypass input switch (B). • Fuse: Indicates whether the PDU has fuses protecting the SCRs in the UPS. The fuses are present only on single-feed PDUs without a transformer. Output Config Configure the following items: • Panel Voltage: The nominal voltage of the distribution panels supplying power to the load equipment. (This is measured line-to-neutral.) • Panel Breaker: The rating, in amps, of the circuit breaker feeding the distribution panels. Other Config Items Configure the following items: • Load Test Port: Indicates whether the PDU has a load test port installed. • Max. Power: Maximum power of your InfraStruXure PDU (40kW or 80kW). 40kW InfraStruXure PDU—Operation and Configuration 27 PDU Display Interface Manufacturer Data Use this option of the Config screen to display a scrollable list containing information about the InfraStruXure PDU. This information is useful when requesting service or product updates. The following information is displayed: • Manufacturer Name • Date of Manufacture • Date of Calibration • Hardware Revision • Firmware Revision (for PDU monitoring and metering) • Serial Number • Model Number System ID Use this option of the Config screen to identify your InfraStruXure PDU. The following fields can be configured: Device Name Set a unique name for your InfraStruXure PDU. Product Location Name the physical location of the product in your data center. Product Contact Identify the person to notify concerning questions or problems with regard to the product. Factory Defaults Use this option of the Config screen to reset all InfraStruXure PDU settings to their factory default values. Firmware Updates Use this option of the Config screen to download updated firmware to the InfraStruXure PDU. 28 40kW InfraStruXure PDU—Operation and Configuration System Operation How to Transfer the UPS into Maintenance Bypass Operation Note Select Help from the top-level menu screen of the PDU display interface and select the first help topic, Putting the PDU into Maintenance Bypass, or follow the procedure below. When servicing the System, transfer the System into maintenance bypass operation. When the System is operating in maintenance bypass, input power flows directly to the PDU and out to the load equipment. 1. Command the UPS into static bypass operation through the UPS display interface: a. Press the ESC key at the top-level status screen to open the top-level menu. b. Select Control on the top-level menu, and press the ENTER key. Top-Level Menu Control Status Setup Accessories Logging Display Diags Help Control Menu c. Select UPS Into Bypass on the Control menu and press the ENTER key. UPS Into Bypass Do Self Test Simulate Power Fail Graceful Reboot Graceful Turn Off Start Runtime Cal Turn Load On Confirmation Screen d. Confirm the selection on the next screen: select Yes, UPS into Bypass, and press the ENTER key. Confirm Yes, UPS into Bypass No, Abort 40kW InfraStruXure PDU—Operation and Configuration 29 System Operation The UPS BYPASS LED illuminates and the following screens appear: UPS has been commanded to go into Bypass... UPS load is in Bypass Press any key... The H3 LED above the Q3 breaker illuminates, indicating that it is safe to operate the Q3 breaker. Note 2. Close (turn ON) the Q3 breaker on the PDU. The H2 LED above the Q2 breaker illuminates, indicating that it is safe to operate the Q2 breaker. Note 3. Open (turn OFF) the Q2 breaker on the PDU. The UPS will show a Forced Bypass message on the display interface, and the Fault LED will be red. 30 40kW InfraStruXure PDU—Operation and Configuration System Operation 4. Set the UPS System Enable switch to OFF, and then open (turn OFF) the UPS DC Disconnect breaker. 5. If applicable, open (turn OFF) the XR Battery Enclosure DC Disconnect breaker. 6. Open (turn OFF) the Q1 breaker on the PDU. The UPS is now in maintenance bypass operation. 40kW InfraStruXure PDU—Operation and Configuration 31 How to Return from Maintenance Bypass Operation Note Select Help from the top-level menu screen on the PDU display interface and select the second help topic, Returning from PDU Maintenance Bypass, or follow the procedure below: 1. Close (turn ON) the Q1 breaker on the PDU. 2. If applicable, close (turn ON) the XR Battery Enclosure DC Disconnect breaker. 3. Set the UPS DC Disconnect breaker to ON and then set the UPS System Enable switch to ON. The UPS will show a Forced Bypass message on the display interface, and the Fault LED will be red. 32 40kW InfraStruXure PDU—Operation and Configuration System Operation 4. Command the UPS to apply power to the load: a. Press the ESC key at the top-level status screen to open the top-level menu and have access to eight submenus. b. Select Control, and press the ENTER key. Top-Level Menu Control Status Setup Accessories Logging Display Diags Help Control Menu c. Select Turn Load On from the Control menu, and press the ENTER key. UPS Into Bypass Do Self Test Simulate Power Fail Graceful Reboot Graceful Turn Off Start Runtime Cal Turn Load On Confirmation Screen d. On the next screen select Yes, UPS Load ON, and press the ENTER key. Confirm Yes, UPS Load ON No, Abort The LOAD ON LED illuminates and the interface displays the following two screens: UPS has been commanded to turn load power on... UPS load is on Press any key... 5. Command the UPS into static bypass operation through the UPS display interface: a. Press the ESC key at the top-level status screen to open the top-level menu. b. Select Control on the top-level menu, and press the ENTER key. Top-Level Menu Control Status Setup Accessories 40kW InfraStruXure PDU—Operation and Configuration Logging Display Diags Help 33 System Operation c. Select UPS Into Bypass on the Control menu, and press the ENTER key. Control Menu UPS Into Bypass Do Self Test Simulate Power Fail Graceful Reboot Graceful Turn Off Start Runtime Cal Turn Load On Confirmation Screen d. Confirm the selection on the next screen: select Yes, UPS into Bypass, and press the ENTER key. Confirm Yes, UPS into Bypass No, Abort The H2 LED above the Q2 breaker illuminates, indicating that it is safe to operate the Q2 breaker. Note 6. Close (turn ON) the Q2 breaker on the PDU. The H3 LED above the Q3 breaker illuminates, indicating that it is safe to operate the Q3 breaker Note 7. Open (turn OFF) the Q3 breaker on the PDU. The UPS automatically comes out of Static Bypass operation. 34 40kW InfraStruXure PDU—Operation and Configuration How to Ensure Total Power Off 1. Command the UPS to turn off power to the load: a. Press the ESC key at the top-level status screen to open the top-level menu and have access to eight submenus. b. Select Control, and press the ENTER key. Top-Level Menu Control Status Setup Accessories Logging Display Diags Help Control Menu c. Select Turn Load Off from the Control menu, and press the ENTER key. UPS Into Bypass Do Self Test Simulate Power Fail Graceful Reboot Graceful Turn Off Start Runtime Cal Turn Load Off Confirmation Screen d. On the next screen select Yes, UPS Load OFF, and press the ENTER key. Confirm Yes, UPS Load OFF No, Abort The LOAD ON LED turns off and the interface displays the following two screens: UPS has been commanded to turn load power off... UPS load is off Press any key... 2. Set the UPS DC Disconnect breaker to OFF, and then set the System Enable switch to OFF. 40kW InfraStruXure PDU—Operation and Configuration 35 System Operation 3. If applicable, set the XR Battery Enclosure DC Disconnect breaker to OFF. 4. Pull out all battery units in the UPS and XR Battery Enclosures to the red battery disconnect line. 5. Set the PDU Main Input switch to OFF. 6. Open (turn OFF) the Q1, Q2, and Q3 breakers on the PDU. 7. Set the upstream input mains circuit breaker to the OFF or Locked Out position. 36 40kW InfraStruXure PDU—Operation and Configuration How to Apply Power to the System This procedure instructs how to apply power to a system that has already been installed. For initial start-up instructions, see the InfraStruXure System Installation and Start-Up manual. 1. Set the upstream mains circuit breaker to ON. 2. Set the Main Input switch on the PDU to ON. 3. Close (turn ON) the Q1 breaker on the PDU to apply power to the UPS. 4. Ensure that all battery units are pushed all the way into the Symmetra PX UPS and XR Battery Enclosures and locked into position. 40kW InfraStruXure PDU—Operation and Configuration 37 System Operation 5. Set the UPS DC Disconnect breaker to ON, and then set the UPS System Enable switch to ON. 6. If applicable, set the XR Battery Enclosure DC Disconnect breaker to ON. When the System Enable switch is placed in the ON position, the Startup screen appears on the display interface of the Symmetra PX UPS. PowerView RM Rev: 000 English Please wait... The top-level status screen appears on the display interface. This may take up to 30 seconds. |||||||||||| Fuel% ||| Load% In 400V out000V 50Hz Runtime: 1hr 2m 38 40kW InfraStruXure PDU—Operation and Configuration System Operation 7. Read the messages displayed on the UPS display interface: a. Note any alarms, and verify that they are appropriate for start-up conditions. b. Verify that the UPS accepts the input. Top-Level Status Screen |||||||||||| Fuel% ||| Load% In 400V out000V 50Hz Runtime: 1hr 2m 8. Command the UPS to apply power to the load: a. Press the ESC key at the top-level status screen to open the top-level menu and have access to eight submenus. b. Select Control, and press the ENTER key. Top-Level Menu Control Status Setup Accessories Logging Display Diags Help Control Menu c. Select Turn Load On from the Control menu, and press the ENTER key. d. On the next screen select Yes, UPS Load ON, and press the ENTER key. UPS Into Bypass Do Self Test Simulate Power Fail Graceful Reboot Graceful Turn Off Start Runtime Cal Turn Load On Confirmation Screen Confirm Yes, UPS Load ON No, Abort The LOAD ON LED illuminates, and the interface displays the following two screens: UPS has been commanded to turn load power on... UPS load is on Press any key... 40kW InfraStruXure PDU—Operation and Configuration 39 System Operation 9. To apply power to the PDU distribution panel, close (turn ON) the Q2 breaker on the PDU. 10.To apply power to the PDU power cables and connected equipment, close (turn ON) the distribution panel breakers. 40 40kW InfraStruXure PDU—Operation and Configuration Communication Configuration InfraStruXure PDU Management Options Overview You have two management options for the InfraStruXure PDU. You can manage the PDU along with the rest of your InfraStruXure equipment through the InfraStruXure Manager, or you can manage your PDU through APC’s network management interfaces. InfraStruXure Manager The InfraStruXure Manager is a rack-mount management device that coordinates the management functions of APC InfraStruXure-Certified devices installed in your data center. It provides one single interface to view and configure all APC InfraStruXure-Certified devices. See “Configuring the InfraStruXure Manager” on page 42 for configuration instructions. For more information about the InfraStruXure Manager, see the Installation and Configuration manual included with the InfraStruXure Manager. See also Network management interfaces The control console and Web interfaces provide menus with options that allow you to manage the InfraStruXure PDU. See “Configuring the Network Management Interface” on page 43 for configuration instructions. For more information about the internal user interfaces, see the InfraStruXure Power Distribution Unit online Network Management User’s Guide. See also The SNMP interface allows you to use an SNMP browser with the PowerNet® Management Information Base (MIB) to manage the InfraStruXure PDU. See “Configuring the Network Management Interface” on page 43 for configuration instructions. See also To use the PowerNet MIB with an SNMP browser, see the PowerNet® SNMP Management Information Base (MIB) Reference Guide, which is provided on the InfraStruXure Power Distribution Unit. 40kW InfraStruXure PDU—Operation and Configuration 41 Configuring the InfraStruXure Manager Connect the PDU to the InfraStruXure Manager 1. Connect a Cat-5 network cable to the ethernet port on the PDU user connection plate. You can make connections from inside the enclosure, or you can remove the user connection plate and make your connections. Remove the plate using a Phillips or standard screwdriver to loosen the two captive screws. Use the knockout in the plate to route cables to and from the user connections on the plate. If you remove the plate, make sure that you do not disturb the existing connections. 2. Run the connected Cat-5 network cable through the knockout in the user connection plate to the InfraStruXure Manager Hub. 3. Once all APC InfraStruXure-Certified equipment is installed, the network cables are connected to the InfraStruXure Manager Hub, and start-up of the system is complete, configure the InfraStruXure Manager. For detailed configuration instructions, see the InfraStruXure Manager Installation and Quick-Start manual included with your InfraStruXure Manager. See also 42 40kW InfraStruXure PDU—Operation and Configuration Configuring the Network Management Interface Disregard the procedures in this section if you have APC InfraStruXure Manager as part of your system. Warning Connect the PDU to your network 1. Connect a Cat-5 network cable to the ethernet port on the PDU user connection plate. You can make connections from inside the enclosure, or you can remove the user connection plate and make your connections. Remove the plate using a Phillips or standard screw driver to loosen the two captive screws. Use the knockout in the plate to route cables to and from the user connections on the plate. If you remove the plate, make sure that you do not disturb the existing connections. 2. Run the connected Cat-5 network cable through the knockout in the user connection plate to your network connection. 3. Configure the TCP/IP settings of the PDU. See “Configuration Overview” on page 44 for further instructions. 40kW InfraStruXure PDU—Operation and Configuration 43 Communication Configuration Configuration Overview You must configure the following TCP/IP settings before the PDU can operate on a network: • IP address of the PDU • Subnet mask • Default gateway Note If a default gateway is unavailable, use the IP address of a computer that is located on the same subnet as the PDU and that is usually running. The PDU uses the default gateway to test the network when traffic is very light. See “Watchdog Features” in the “Introduction” of the InfraStruXure Power Distribution Unit’s online Network Management User’s Guide for more information about the watchdog role of the default gateway. TCP/IP configuration methods Use one of the following methods to define the TCP/IP settings needed by the PDU: • Device IP Configuration Wizard (See “Device IP Configuration Wizard” on page 44.) • BOOTP or DHCP server (See “BOOTP & DHCP configuration” on page 45.) • Local computer (See “Local access to the control console” on page 47.) • Networked computer (See “Remote access to the control console” on page 47.) Device IP Configuration Wizard You can use the Device IP Configuration Wizard on a Windows NT® 4.0, Windows 2000, or Windows XP computer to discover unconfigured InfraStruXure PDUs and configure their basic TCP/IP settings. To configure one or more PDUs by exporting configuration settings from a configured PDU, see “How to Export Configuration Settings” in the online Network Management See also User’s Guide on the Utility CD. 1. Insert the InfraStruXure Power Distribution Unit Utility CD into a computer on your network. 2. Launch the Wizard when prompted, or, if prompted to restart the computer, access the Wizard from the Start menu after the computer has restarted. 3. Wait for the Wizard to discover the first unconfigured PDU, then follow the on-screen instructions. If you leave the Start a Web browser when finished option enabled, you can use apc for both the User Name and Password to access the PDU through your browser. Note 44 40kW InfraStruXure PDU—Operation and Configuration Communication Configuration BOOTP & DHCP configuration The Boot Mode Setting, a TCP/IP option in the PDU’s Network menu, identifies how the TCP/IP settings will be defined. The possible settings are Manual, DHCP only, BOOTP only, and DHCP & BOOTP (the default setting). Note The DHCP & BOOTP setting assumes that a properly configured DHCP or BOOTP server is available to provide TCP/IP settings to PDUs. If these servers are unavailable, see “Device IP Configuration Wizard” on page 44, “Local access to the control console” on page 47, or “Remote access to the control console” on page 47 to configure the needed TCP/IP settings. With Boot Mode set to DHCP & BOOTP, the PDU attempts to discover a properly configured server. It first searches for a BOOTP server, then a DHCP server, and repeats this pattern until it discovers a BOOTP or DHCP server. For more information, see “BOOTP” on page 45 or “DHCP” on page 46. Note BOOTP. You can use an RFC951-compliant BOOTP server to configure the TCP/IP settings for the PDU. Note The BOOTP setting assumes that a properly configured BOOTP server is available to provide TCP/IP settings to APC PDUs. If a BOOTP server is unavailable, see “Device IP Configuration Wizard” on page 44, “Local access to the control console” on page 47, or “Remote access to the control console” on page 47 to configure the TCP/IP settings. 1. Make sure that the BOOTP setting, a TCP/IP option in the PDU’s Network menu, is enabled. 2. Enter the PDU’s MAC and IP addresses, the subnet mask and default gateway settings, and an optional Bootup file name in the BOOTPTAB file of the BOOTP server. For the MAC address, look on the Quality Assurance slip included with the PDU. See also 3. When the PDU reboots, the BOOTP server provides it with the TCP/IP settings. – If you specified a bootup file name, the PDU attempts to transfer that file from the BOOTP server using TFTP or FTP. The PDU assumes all settings specified in the bootup file. – If you did not specify a bootup file name, the PDU can be configured remotely by using Telnet or by using the Web interface: User Name and Password are both apc, by default. To create the bootup file, see your BOOTP server documentation. See also 40kW InfraStruXure PDU—Operation and Configuration 45 Communication Configuration DHCP. You can use a RFC2131/RFC2132-compliant DHCP server to configure the TCP/IP settings for the PDU. See also This section briefly summarizes the PDU communication with a DHCP server. For more detail about how a DHCP server is used to configure the network settings for a PDU, see “DHCP Configuration” in the InfraStruXure Power Distribution Unit’s online Network Management User’s Guide. 1. An InfraStruXure PDU sends out a DHCP request that uses the following to identify itself: – A Vendor Class Identifier (APC by default) – A Client Identifier (by default, the PDU’s MAC address value) – A User Class Identifier (by default, the identification of the PDU’s application firmware) 2. A properly configured DHCP server responds with a DHCP offer that includes all of the settings that the PDU needs for network communication. The DHCP offer also includes the Vendor Specific Information option (DHCP option 43). By default, the PDU will ignore DHCP offers that do not encapsulate the APC cookie in the Vendor Specific Information option using the following hexidecimal format: Option 43 = 01 04 31 41 50 43 where – the first byte (01) is the code – the second byte (04) is the length – the remaining bytes (31 41 50 43) are the APC cookies See your DHCP server documentation to add code to the Vendor Specific Information option. To disable the APC cookie requirement, see “Local access to the control console” on page 47. To change the control console’s DHCP Cookie Is setting, use the Advanced option in the TCP/IP menu. See “Remote access to the control console” on page 47. 46 40kW InfraStruXure PDU—Operation and Configuration Communication Configuration Local access to the control console You can use a local computer that connects to the PDU through the console port on the PDU monitoring unit to access the control console. 1. Select a serial port at the local computer, and disable any service that uses that port. 2. Use the configuration cable (APC part number 940-0103) to connect the selected port to the console port on the PDU monitoring unit. 3. Run a terminal program (such as HyperTerminal®) on your computer and configure the selected port for 9600 bps, 8 data bits, no parity, 1 stop bit, and no flow control, and save the changes. 4. Press ENTER to display the User Name prompt. 5. Use apc for the User Name and Password. 6. See “Control console” on page 48 to finish the configuration. Remote access to the control console From any computer on the same subnet as the PDU, you can use ARP and Ping to assign an IP address to an InfraStruXure PDU, and then use Telnet to access that PDU’s control console and configure the needed TCP/IP settings. After an InfraStruXure PDU has its IP address configured, you can use Telnet, without first using ARP and Ping, to access that PDU. Note 1. Use ARP to define an IP address for the PDU, and use the PDU’s MAC address in the ARP command. For example, to define an IP address of 156.205.14.141 for an InfraStruXure PDU that has a MAC address of 00 c0 b7 63 9f 67, use one of the following commands: – Windows command format: arp -s 156.205.14.141 00-c0-b7-63-9f-67 – LINUX command format: arp -s 156.205.14.141 00:c0:b7:63:9f:67 For the MAC address, look on the Quality Assurance slip included with the PDU. See also 2. Use Ping with a size of 113 bytes to assign the IP address defined by the ARP command. For the IP address defined in step 1, use one of the following Ping commands: – Windows command format: ping 156.205.14.141 -l 113 – LINUX command format: ping 156.205.14.141 -s 113 40kW InfraStruXure PDU—Operation and Configuration 47 Communication Configuration 3. Use Telnet to access the PDU at its newly assigned IP address. For example: telnet 156.205.14.141 4. Use apc for both User Name and Password. 5. See “Control console” on this page to finish the configuration. Control console After you log on at the control console, as described in “Local access to the control console” on page 47 or “Remote access to the control console” on page 47: 1. Choose Network from the Control Console menu. 2. Choose TCP/IP from the Network menu. 3. If you are not using a BOOTP or DHCP server to configure the TCP/IP settings, select the Boot Mode menu. Select Manual boot mode, and then press ESC to return to the TCP/IP menu. (Changes will take effect when you log out.) 4. Set the System IP, Subnet Mask, and Default Gateway address values. 5. Press CTRL-C to exit to the Control Console menu. 6. Log out (option 4 in the Control Console menu). If you disconnected a cable during the procedure described in “Local access to the control console” on page 47, reconnect that cable and restart the associated service. Note 48 40kW InfraStruXure PDU—Operation and Configuration How to Access a Network Management Interface on a Configured PDU Note Disregard the procedures in this section if you have the APC InfraStruXure Manager as part of your system. See the InfraStruXure Manager’s Installation and Quick-Start manual for access information. Web interface As your browser, you can use Microsoft® Internet Explorer 5.0 (and higher) or Netscape® 4.0.8 (and higher, except Netscape 6.x) to access the PDU through its Web interface. Other commonly available browsers may also work but have not been fully tested by APC. To use the Web browser to configure PDU options or to view the event log, you can use either of the following: • The HTTP protocol (enabled by default), which provides authentication by user name and password but no encryption. • The more secure HTTPS protocol, which provides extra security through Secure Socket Layer (SSL) and encrypts user names, passwords, and data being transmitted. It also provides authentication of Network Management Cards by means of digital certificates. To access the Web interface and configure the security of your device on the network: 1. Address the PDU by its IP address or DNS name (if configured). 2. Enter the user name and password (by default, apc and apc for an Administrator, or device and apc for a Device Manager). 3. Select and configure the type of security you want. (This option is available only for Administrators.) See also See the chapter entitled “Security” in the InfraStruXure Power Distribution Unit’s online Network Management User’s Guide for information on choosing and setting up your network security. Use the Web/SSL option of the Network menu to enable or disable the HTTP or HTTPS protocols. Telnet and SSH You can access the control console through Telnet or Secure SHell (SSH), depending on which is enabled. (An Administrator can enable these access methods through the Telnet/SSH option of the Network menu.) By default, Telnet is enabled. Enabling SSH automatically disables Telnet. 40kW InfraStruXure PDU—Operation and Configuration 49 Communication Configuration Telnet for basic access. Telnet provides the basic security of authentication by user name and password, but not the high-security benefits of encryption. To use Telnet to access an PDU’s control console from any computer on the same subnet: 1. At a command prompt, use the following command line, and press ENTER: telnet address As address, use the PDU’s IP address or DNS name (if configured). 2. Enter the user name and password (by default, apc and apc for an Administrator, or device and apc for a Device Manager). SSH for high-security access. If you use the high security of SSL for the Web interface, use Secure SHell (SSH) for access to the control console. SSH encrypts user names, passwords, and transmitted data. The interface, user accounts, and user access rights are the same whether you access the control console through SSH or Telnet, but to use SSH, you must first configure SSH and have an SSH client program installed on your computer. See the InfraStruXure Power Distribution Unit’s online Network Management User’s Guide for more information on configuring and using SSH. See also SNMP After you add the PowerNet MIB to a standard SNMP MIB browser, you can use that browser for SNMP access to the PDU. The default read community name is public; the default read/write community name is private. Note 50 If you enable SSL and SSH for their high-security authentication and encryption, disable SNMP. Allowing SNMP access to the PDU compromises the high security you implement by choosing SSL and SSH. To disable SNMP, you must be an Administrator; use the SNMP option of the Network menu. 40kW InfraStruXure PDU—Operation and Configuration Communication Configuration FTP and SCP You can use FTP (enabled by default) or Secure CoPy (SCP) to transfer new firmware to the PDU, or to access a copy of the PDU’s event logs. SCP provides the higher security of encrypted data transmission and is enabled automatically when you enable SSH. Note If you enable SSL and SSH for their high-security authentication and encryption, disable FTP. Allowing file transfer to the PDU through FTP compromises the high security you implement by choosing SSL and SSH. To disable FTP, you must be an Administrator; use the FTP Server option of the Network menu. To access the PDU through FTP or SCP, the default user name and password are apc and apc for an Administrator, or device and apc for a Device Manager. In the command line, use the IP address of the unit. See also See the InfraStruXure Power Distribution Unit’s online Network Management User’s Guide to use FTP or SCP to retrieve log files from the PDU or to transfer firmware files to the PDU. 40kW InfraStruXure PDU—Operation and Configuration 51 How to Recover From a Lost Network Management Interface Password Note Disregard the procedures in this section if you have the APC InfraStruXure Manager as part of your system. See the InfraStruXure Manager’s Installation and Quick-Start manual for information on recovering from a lost password. 1. Select a serial port at the local computer, and disable any service that uses that port. 2. Connect the serial cable (APC part number 940-0103) to the selected port on the computer and to the console port on the PDU monitoring unit. 3. Run a terminal program (such as HyperTerminal®) on your computer and configure the selected port as follows: – 9600 bps – 8 data bits – no parity – 1 stop bit – no flow control 4. Press ENTER, repeatedly if necessary, to display the User Name prompt. If you are unable to display the User Name prompt, verify the following: – The serial port is not in use by another application. – The terminal settings are correct as specified in step 3. – The correct cable is being used as specified in step 2. 5. Press the Reset button on the PDU monitoring unit. The Status LED will flash alternately orange and green. Press the Reset button on the PDU monitoring unit a second time immediately while the LED is flashing to reset the user name and password to their defaults temporarily. 6. Press ENTER as many times as necessary to redisplay the User Name prompt, then use the default, apc, for the user name and password. (If you take longer than 30 seconds to log on after the User Name prompt is redisplayed, you must repeat step 5 and log on again.) 7. From the Control Console menu, select System, then User Manager. 8. Select Administrator, and change the User Name and Password settings, both of which are now defined as apc. 9. Press CTRL-C, log off, reconnect any serial cable you disconnected, and restart any service you disabled. 52 40kW InfraStruXure PDU—Operation and Configuration Customizing and Updating the PDU Important Safety Instructions Electrical Hazard APC does not recommend that you perform maintenance of the PDU while it is receiving input power. However, due to the critical nature of data center loads, this may occur. If you must perform maintenance while the PDU is receiving input power, observe the following precautions to reduce the risk of electric shock: 1. Never work alone. 2. Perform the maintenance only if you are a certified electrician who is trained in the hazards of live electrical installation. 3. Know the procedure for disconnecting electricity to the PDU and the data center in case of an emergency. 4. Wear appropriate personal protective equipment. 5. Use double-insulated tools. 6. Always follow local and site regulations when working on the PDU. 40kW InfraStruXure PDU—Operation and Configuration 53 PDU Orderable Part List Circuit Breakers 0M-1293 10A, single-pole breaker 0M-1706 32A with 100mA ELCB, three-pole breaker 0M-1304 16A, single-pole breaker 0M-1707 32A with 30mA ELCB, three-pole breaker 0M-1703 16A with 30mA ELCB, two-pole breaker 0M-1708 16A with 100mA ELCB, three-pole breaker 0M-1704 10A with 30mA ELCB, single-pole breaker 0M-1709 10A with 100mA ELCB, three-pole breaker 0M-1705 32A, single-pole breaker Power Cables PDW15EC309R PDW100EC309R PDW21EC309R PDW107EC309R PDW27EC309R PDW113EC309R PDW33EC309R PDW119EC309R PDW40EC309R PDW125EC309R PDW46EC309R PDW131EC309R PDW52EC309R PDW137EC309R PDW58EC309R PDW143EC309R PDW64EC309R PDW149EC309R PDW70EC309R PDW155EC309R PDW76EC309R PDW161EC309R PDW82EC309R PDW167EC309R PDW88EC309R PDW173EC309R PDW94EC309R PDW180EC309R 54 40kW InfraStruXure PDU—Operation and Configuration How to Add Circuit Breakers and Power Cables Add a circuit breaker on the PDU 1. Move the clip on the back of the breaker to correspond to the phase to which you are connecting to (L1, L2, or L3). 2. Snap the new single-pole circuit breaker into position on the panel. 3. Remove the corresponding plastic blanking plate on the front panel of the PDU. Add a power cable to the PDU Before adding a power cable, add a circuit breaker. 1. Install a strain-relief connect in any available knockout on the roof of the PDU. 2. Slide enough of the power cable through the strain-relief connector to reach the new circuit breaker. 3. Tighten the strain-relief connector. 40kW InfraStruXure PDU—Operation and Configuration 55 Customizing and Updating the PDU 4. At the front of the PDU, connect the power cord’s individual wires: a. If you have branch current monitoring installed, route the phase conductor through a current sensor. b. Connect the line wire to the circuit breaker. c. Connect the neutral wire to the closest open termination point on the Neutral Bar (N). d. Connect the PE wire to the closest open termination point on the PE Bar (PE). N PE 56 40kW InfraStruXure PDU—Operation and Configuration How to Connect User Input Contacts and Relay Outputs to the PDU User Connection Plate Overview 4 Contact Outputs ATS 1 2 3 Contact Inputs ATS 2 1 ATS 0 USER INTERFACE © 2001 APC MADE IN USA ATS EN Make contact closure connections (NO or NC) at the user connection plate to monitor dry contacts. You can make eight connections—four input contacts and four relay outputs. – + EPO 24V EPO AC/DC Contact The figure at the right shows the location of the user connection plate on the roof of the PDU enclosure. You can make connections from inside the enclosure, or you can remove the user connection plate and make your connections. Remove the plate using a Phillips or standard screwdriver to loosen the two captive screws. Use the knockout in the plate to route cables to and from the user connection on the plate. If you remove the plate, make sure that you do not disturb the existing connections. 40kW InfraStruXure PDU—Operation and Configuration 57 Customizing and Updating the PDU How to connect contacts to the PDU monitoring unit 1. Choose one or more contact number(s) on the User/EPO contacts port on the user connection plate to which you will connect the contacts. The user connection plate connects to the PDU monitoring unit. 2. From the PDU display interface: a. Press the ESC or ENTER key to go to the top-level menu screen. b. Select Contacts on the top-level menu screen, and press the ENTER key. Load-Meter Volt-Meter Contacts Breakers Alarms Panel Config Help c. Select Contact Inputs (or Relay Outputs) and press ENTER to display the contact inputs (or relay outputs) screen. >Contact Inputs >Relay Outputs >Alarm Relay Map d. Select Contact In and press the ENTER key to select the number of the contact you are connecting. The continue arrow will appear next to the contact number. Contact In:01of04 Name: User Contact1 Normal:Open Status: Closed e. Press the Up or Down arrow key to select the appropriate contact number, and press the ENTER key. f. Press the Down arrow key to enter a unique Name for the contact and to configure the Normal state of the contact (Open or Closed). The default Normal state is Open. Press the ENTER key to select the item to configure. You will be prompted for your password to configure these items. Note 3. Connect contact wires (300V-rated cabling required) to the User Contacts terminal block on the user connection plate. You will need a 2.5-mm standard screwdriver. 4. Run the wires from the terminal block out the roof or under the floor of the PDU to your contact’s location. Ensure that wires are properly retained and away from high voltage lines and breakers. Warning See “Relay Outputs” on page 66 for relay output specifications. 58 40kW InfraStruXure PDU—Operation and Configuration How to Test the Emergency Power Off Switch APC offers an optional InfraStruXure EPO System (EPW9). Contact your APC sales representative, or visit the APC Web site (www.apc.com) for more information. Note If you are not connecting an Emergency Power Off switch to the PDU, leave the Arm/Test rocker switch on the PDU monitoring unit to the Test position. Caution Overview Connecting the switch. The Emergency 4 Contact Outputs ATS 1 2 3 Contact Inputs ATS 2 1 ATS 0 USER INTERFACE © 2001 APC MADE IN USA ATS EN Power Off (EPO) switch connects to the PDU user connection plate. The figure on the right shows the location of the user connection plate on the roof of the PDU. Connect a switch using one of three following connections: – + EPO 24V EPO AC/DC Contact • Contact closure • 24VAC • 24VDC Contact closure is recommended. Note 40kW InfraStruXure PDU—Operation and Configuration 59 Customizing and Updating the PDU Configuring and testing. Configuring and testing of the switch is done through the EPO interface on the PDU monitoring unit. The figure to the right shows the PDU monitoring unit and the location of the EPO LEDs and DIP switches. TRIPPED 19 6 18 5 17 4 16 3 15 2 14 TO UPS 8 20 7 TEST 10 22 9 21 EPO ARMED 1 USE R / EPO C ONTACTS 885 -22 88 23 11 24 12 25 POWER TRIPPED DISPLAY STATUS 13 10=G RN 100= ORN N ETWOR K RE SE T NO NC LINK R X/TX 9600-8-N -1 NO R S-232 CON SOLE POR T TEST NC EPO AR ME D Testing the switch Normally Closed 1. Before testing the EPO switch, verify that the EPO DIP switches on the PDU monitoring unit are configured properly for the signal type you are using. The labels above the switches and the figure below show the correct settings for both the Normally Open (NO) and Normally Closed (NC) position. TRIPPED Location of switches on PDU monitoring unit NC TEST NO Normally Open or 24V AC/DC EPO ARMED The default setting on the EPO interface on the PDU monitoring unit is for a Normally Open (NO) switch. Note 60 40kW InfraStruXure PDU—Operation and Configuration Customizing and Updating the PDU 2. Test the EPO switch to ensure that it is wired and working correctly: a. Place the Arm/Test rocker switch in the Test position. The EPO state LEDs will be off and the PDU display interface will show the following alarm (in addition to any other active alarms): Active Alarm xxofxx EPO Ready To Test b. Engage the EPO switch. (If your switch is momentary, engage it with one person watching the EPO state LEDs, and another at the EPO switch.) c. Observe the EPO LEDs. If the switch is wired and working properly, when the switch is engaged, both of the EPO state LEDs are red. d. If the test was successful, place the Arm/Test rocker switch back to the Arm position. The PDU display interface will clear the EPO test mode alarm. If the test was not successful, see the troubleshooting chart: Problem Action Neither state LED was red when EPO switch was engaged • Check the wiring to your EPO switch. Only one of the state LEDs was red when EPO switch was engaged • Check to make sure the EPO DIP switch configuration is correct for your switch (NO or NC) and test again. See step 1 on the previous page for proper configuration instructions. • Check to make sure the EPO DIP switch configuration is correct for your switch (NO or NC). See step 1 on the previous page for proper configuration instructions. • If the switch is configured correctly and both LEDs are not red after testing again, contact customer support at a number on the back cover of this manual. e. Repeat this test for each EPO switch installed. 3. Ensure that the Arm/Test rocker switch is in the Arm position on the monitoring unit. 40kW InfraStruXure PDU—Operation and Configuration 61 Customizing and Updating the PDU Safety warnings This InfraStruXure PDU and Symmetra PX UPS are provided with an Emergency Power Off switch connection. When this EPO switch is energized, electrical power to the units is de-energized and the system will not transfer to on-battery operation. EPO can be achieved with either a contact closure or application of an external 24 VAC or 24 VDC from a SELV or PELV source. It is important to note that hazardous voltage from the Mains voltage must be isolated from the contact closure or 24 VAC, 24 VDC. The EPO circuit contact closure, the 24 VAC, or the 24 VDC is considered a SELV circuit as defined in EN 60950 Safety of Information Technology Equipment or PELV circuit as defined in IEC 60364-4-41 Electrical Installations of Buildings, Protection for Safety—Protection Against Electric Shock. SELV is an abbreviation for Safety Extra Low Voltage. PELV is an abbreviation for Protective Extra Low Voltage. SELV and PELV circuits are isolated from the Mains through a safety isolating transformer, and are designed so that under normal conditions the voltage is limited to 42.4 Vpeak or 60 VDC. 62 40kW InfraStruXure PDU—Operation and Configuration How to Download Firmware Upgrades Upgrading the PDU monitor processor You can download available PDU monitor processor upgrades through the PDU display interface. The most obvious indication that a firmware upgrade is necessary occurs when the Network Management Card and monitor processor stop communicating. This lack of communication causes the PDU’s data to no longer be accessible through the display interface and a SysData Mismatch alarm to occur. When this alarm occurs, perform the following steps to upgrade the PDU monitor processor firmware. 1. Upgrade the PDU Network Management Card. See also For instructions on how to upgrade the PDU’s Network Management Card, refer to the online Network Management User’s Guide on the Utility CD provided with your InfraStruXure PDU. 2. At the PDU display interface, select Config, and then Firmware Updates. You will receive the following screen: Press any key to download the update. Note If you do not receive the SysData Mismatch alarm, but want to check for available firmware upgrades, you can do so by performing step 2 in the procedure above. From a local computer To download a firmware upgrade and transfer it to your PDU, see “File Transfers” in the InfraStruXure PDU’s online Network Management User’s Guide on the Utility CD. See also 1. Select a serial port at the local computer, and disable any service that uses that port. 2. Use the configuration cable to connect the selected port to the console port on the PDU monitoring unit. 3. Run a terminal program (such as HyperTerminal®) and configure the selected port for 9600 bps, 8 data bits, no parity, 1 stop bit, and no flow control. Save the changes. 4. Press ENTER twice to display the User Name prompt. 5. Enter your User Name and Password (both apc, for administrators only) and press the ENTER key. 40kW InfraStruXure PDU—Operation and Configuration 63 Customizing and Updating the PDU 6. From the Control Console menu, select System, then Tools, then File Transfer, then XMODEM. 7. The system will prompt you with Perform transfer with XMODEM –CRC? Type Yes and press ENTER. 8. The system will then prompt you to choose a transfer rate and to change your terminal settings to match the transfer rate. Press ENTER to set the PDU to accept the download. 9. In the terminal program, send the file using XMODEM protocol. Upon completion of the transfer, the console will prompt you to restore the baud rate to normal. Do not interrupt the download. Caution The PDU network management interface will reboot when the download is complete. 64 40kW InfraStruXure PDU—Operation and Configuration Specifications 40kW InfraStruXure PDU Electrical Output Nominal Output Voltage AC 3 × 400/230V Frequency 50 or 60Hz Nominal Output Current 111A Maximum Continuous Output Current (+ 125% Overload) 139A (Bypass mode only) Grounding Separately derived neutral/ground bond Full Load Output Rating 40 kW External Output Breaker 150A Transformer (if installed) Type Isolation Configuration Dy Maximum Power Rating 60kVa Maximum Current Rating 87A Construction Cu windings, open core Efficiency 98% Input Voltages Transformer: 3 × 400V; No Transformer 3 × 400/230V Nominal Input Voltage AC 3 × 400V Frequency 50 or 60Hz Nominal Input Current 65.7A Maximum Continuous Input Current 155A at minimum mains Grounding PE node (from AC feed or floor grid) Conductors to Main Input Switch Transformer: L1, L2, L3, + PE ; No Transformer: L1, L2, L3, N + PE Wiring Main Input Power Feed Top or bottom entry PDU to UPS wiring L1, L2, L3, N+ PE UPS to PDU wiring L1, L2, L3, N PDU to Distribution Panels L1, L2, L3, N+PE (1/0awg) Distribution Panels to Racks/Power Strips L1, L2, L3, N+ PE (12awg) 40kW InfraStruXure PDU—Operation and Configuration 65 Specifications Electrical Cable Connections IEC 309, 16A Cable Lengths Various, determined by CTO Power Cable Wiring—top Accommodates 28, 3-phase power cables (42 knock-outs) Power Cable Wiring—bottom Accommodates 28, 3-phase power cables (48 knock-outs) Panel Boards Panel Style 3-phase Number of Panels (per PDU) 2 maximum Positions per Panel 42, double row Breakers per Panel 42 1-phase breakers per panel 42 maximum Panel rating 240V/ 225A per phase Breaker Pitch 19mm Accessibility Through front of unit Over-current Protection Main Input Breaker 125A UPS Input Breaker 125A Maintenance Breaker 100A UPS Output Breaker 100A Distribution Breakers 1-pole or 3-pole with or without ELCB, 10A, 16A, and 32A Relay Outputs Nominal Switching Capacity 1A at 30VDC Maximum Switching Power 30W Maximum Switching Voltage 60VDC Maximum Switching Current 2ADC Maximum Carrying Current 2ADC Surge Ratings 2kV per Bellcore TA-NWT-001089 1.5kV per FCC part 68 Physical Dimensions (H×W×D) PDU 2070 × 597 × 902 mm (81 × 24 × 36in) Shipping 2184 × 914 × 1219 mm (86 × 36 × 48in) Shielding Trough 191 × 579 × 323 mm (7.5 × 23 × 13in) Weight 66 PDU with Transformer 844kg (1861lb) PDU without Transformer 590kg (1301lb) Shipping with Transformer 867kg (1911lb) Shipping without Transformer 613kg (1351lb) 40kW InfraStruXure PDU—Operation and Configuration Specifications Physical Service Access Front and rear Service Clearance Greater than or equal to 914mm Environmental Operating Environment Indoor use only, protected from water and conductive contaminates Temperature Operating 0 to 40°C Storage 0 to 45°C Class Class H (220°C) Humidity Operating 0–95%, non-condensing Storage 0–95%, non-condensing Elevation Storage 10 000 m (for aircraft transportation) Acoustic Noise Emission Maximum 50dB(A) at 1 m Heat Dissipation 1.7kW (with transformer) Compliance Approvals CE, EN, TUV 40kW InfraStruXure PDU—Operation and Configuration 67 Product Information InfraStruXure Standard Warranty APC warrants that all components of the InfraStruXure system will be free from defect in material and workmanship for a period of two years from the date of start up when start up has been performed by APC authorized service personnel*. If assembly services are included in the original purchase and are also performed by APC authorized service personnel, APC offers an additional year of parts warranty and the first year of on site coverage at no additional charge. In the event that the system fails to meet the forgoing warranty, APC shall repair or replace, at its sole discretion, any such defective parts. Under this warranty, APC will ship all parts to your site at no cost to be available for you the next business day after APC is notified of this requirement. If you choose to upgrade the system to include an on site contract, APC offers modular service packages to match your needs. Each point product incorporated into the system has a separate factory warranty that is applied when sold as a standalone unit. When incorporated into an InfraStruXure solution, the unit will be covered by the InfraStruXure warranty. In cases where one warranty favors the customer over the other, the stronger of the two warranties will take precedence. The InfraStruXure factory warranty covers only those parts appearing on the bill of materials for that solution. Megawatt UPS systems are not covered under the InfraStruXure factory warranty. Battery functionality is typically impacted by age and environmental conditions, and therefore certain requirements must be met by the end-user. Failure to adhere to these requirements may put the battery warranty at risk. APC-supplied batteries must always be kept (whether stored or installed) in a climate-controlled environment, and should be re-charged at a minimum of every three (3) months. The battery environment must be free of excessive moisture, construction dirt, corrosive elements, or other contaminants. The temperature range must be maintained at 41 to 95° F (5 to 35° C). *All warranties are null and void unless startup is performed by authorized an APC Global Services service center. APC SHALL NOT BE LIABLE UNDER THIS WARRANTY IF ITS TESTING AND EXAMINATION DISCLOSE THAT THE ALLEGED DEFECT IN THE PRODUCT DOES NOT EXIST OR WAS CAUSED BY PURCHASER'S OR ANY THIRD PERSON'S MISUSE, NEGLIGENCE, IMPROPER INSTALLATION OR TESTING, UNAUTHORIZED ATTEMPTS TO REPAIR OR MODIFY, OR ANY OTHER CAUSE BEYOND THE RANGE OF THE INTENDED USE, OR BY ACCIDENT, FIRE, LIGHTNING OR OTHER HAZARD. THERE ARE NO WARRANTIES, EXPRESS OR IMPLIED, BY OPERATION OF LAW OR OTHERWISE, OF PRODUCTS SOLD, SERVICED OR FURNISHED UNDER THIS AGREEMENT OR IN CONNECTION HEREWITH. APC DISCLAIMS ALL IMPLIED WARRANTIES OF MERCHANTABILITY, SATISFACTION AND FITNESS FOR A 40kW InfraStruXure PDU—Operation and Configuration 69 Product Information PARTICULAR PURPOSE. APC'S EXPRESS WARRANTIES WILL NOT BE ENLARGED, DIMINISHED, OR AFFECTED BY AND NO OBLIGATION OR LIABILITY WILL ARISE OUT OF, APC'S RENDERING OF TECHNICAL OR OTHER ADVICE OR SERVICE IN CONNECTION WITH THE PRODUCTS. THE FOREGOING WARRANTIES AND REMEDIES ARE EXCLUSIVE AND IN LIEU OF ALL OTHER WARRANTIES AND REMEDIES. THE WARRANTIES SET FORTH ABOVE. CONSTITUTE APC'S SOLE LIABILITY AND PURCHASER' EXCLUSIVE REMEDY FOR ANY BREACH OF SUCH WARRANTIES. APC'S WARRANTIES RUN ONLY TO PURCHASER AND ARE NOT EXTENDED TO ANY THIRD PARTIES. IN NO EVENT SHALL APC, ITS OFFICERS, DIRECTORS, AFFILIATES OR EMPLOYEES BE LIABLE FOR ANY FORM OF INDIRECT, SPECIAL, CONSEQUENTIAL OR PUNITIVE DAMAGES, ARISING OUT OF THE USE, SERVICE OR INSTALLATION, OF THE PRODUCTS, WHETHER SUCH DAMAGES ARISE IN CONTRACT OR TORT, IRRESPECTIVE OF FAULT, NEGLIGENCE OR STRICT LIABILITY OR WHETHER APC HAS BEEN ADVISED IN ADVANCE OF THE POSSIBILITY OF SUCH DAMAGES. 70 40kW InfraStruXure PDU—Operation and Configuration Life-Support Policy APC Three-Phase Systems American Power Conversion Corporation (APC) and its affiliates and subsidiaries worldwide do not recommend the use of any of their products in life-support applications where failure or malfunction of the APC product can be reasonably expected to cause failure of the life-support device or to significantly affect its safety or effectiveness. APC does not permit the use of any of its products in direct patient care. APC will not knowingly sell its products for use in such applications unless the life-support system or direct patient care device is part of a whole facility/building into which the UPS is integrated, and unless APC receives, in writing, assurances satisfactory to APC that: a. The UPS system will be configured in a manner that will provide N+1 power redundancy to the critical load, b. The end-user customer assumes all risks and signs the APC System Configuration and Use Form, and c. The customer and operators of the APC UPS system agree to indemnify and hold APC and its affiliates and subsidiaries harmless for any and all claims arising out of the systems use in such applications. The term life-support device includes but is not limited to neonatal oxygen analyzers, nerve stimulators (whether used for anesthesia, pain relief, or other purposes), autotransfusion devices, blood pumps, defibrillators, arrhythmia detectors and alarms, pacemakers, hemodialysis systems, peritoneal dialysis systems, neonatal ventilator incubators, ventilators (for adults and infants), anesthesia ventilators, infusion pumps, and any other devices designated as “critical” by the U.S. FDA. Hospital-grade wiring devices and leakage current protection may be ordered as options on many APC UPS systems. APC does not claim that units with these modifications are certified or listed as hospital-grade by APC or any other organization. Therefore these units do not meet the requirements for use in direct patient care. 40kW InfraStruXure PDU—Operation and Configuration 71 How to Obtain Service Note If you ordered on-site service, see your entitlement certificate and the terms and conditions of the service before following the procedure described below. An on-site service contract entitles you to an on-site visit by an APC technician to assess the issue, determine the problem, and replace parts, if needed. (Response time varies per contract.) How to contact APC Customer support for this or any other APC product is available at no charge in any of the following ways: • Visit the APC Web site to access documents in the APC Knowledge Base and to submit customer support requests. – www.apc.com (Corporate Headquarters) Connect to localized APC Web sites for specific countries, each of which provides customer support information. – www.apc.com/support/ Global support searching APC Knowledge Base and using e-support. • Contact an APC Customer Support center by telephone or e-mail. – Regional centers: Direct InfraStruXure Customer Support Line (1) (877) 537-0607 (toll free) APC Headquarters U.S., Canada (1) (800) 800-4272 (toll free) Latin America (1) (401) 789-5735 (USA) Europe, Middle East, Africa (353) (91) 702000 (Ireland) Japan (0) 3 5434-2021 Australia, New Zealand, South Pacific area (61) (2) 9955 9366 (Australia) – Local, country-specific centers: go to www.apc.com/support/contact for contact information. Contact the APC representative or other distributor from whom you purchased your APC product for information on how to obtain local customer support. 72 40kW InfraStruXure PDU—Operation and Configuration Appendix A: Changes in This Manual Overview The following list references the specific changes made to this manual since its last release (9901597A). General changes • Communication configuration instructions were added. See pages 43–52. • Maintenance chapter was expanded and renamed as “Customizing and Updating the PDU.” Changes by page number Page 9 Added detailed description of the user connection plate. Page 41 Added “InfraStruXure PDU Management Options.” Page 42 Added “Configuring the InfraStruXure Manager.” Pages 43–52 Added “Configuring the Network Management Interface.” Pages 49–51 Added “How to Access a Network Management Interface on a Configured PDU.” Page 52 Added “How to Recover from a Lost Network Management Interface Password.” Pages 57–58 Added “How to Connect User Input Contacts and Relay Outputs to the PDU User Connection Plate.” Pages 59–60 Added How to Connect an EPO Switch to the PDU and Test the Switch.” Page 63 Added “How to Download Firmware.” 40kW InfraStruXure PDU—Operation and Configuration 73 Index A Agency approvals, 67 Alarm beeper, 21 Alarm LED, location of, 11 Alarm relay map, 17 Alarm setup, 21 Alarm types. See entry of specific alarm. Alarm/event log, 20 Alarms screen, 20 – 22 Arm/test rocker switch on PDU monitoring unit, 8 Armed LED on PDU monitoring unit, 8 B BOOTP configuration, 45 Branch current monitor ports on PDU monitoring unit, 8 Breakers screen, 19 Bypass LED, location of, 11 C Cables access holes, location of, 5 adding to the PDU, 55 – 56 input and output, location of, 7 location of, 5 Caution symbol, 1 Check log LED, location of, 11 Circuit breaker panels, location of, 6 Circuit breakers adding to the PDU, 55 orderable options, 54 Q1, location of, 6 Q2, location of, 6 Q3, location of, 6 Config screen, 26 – 28 Configuration BOOTP, 45 DHCP, 45 – 46 electrical, 27 factory defaults, 28 firmware updates, 28 load test port, 27 manufacturer data, 28 max. power, 27 network address, 26 of communication devices, 41 – 52 of date/time, 26 of global panel, 25 of input, 27 of local interface, 26 of output, 27 of panel, 24 of the EPO switch, 59 product data, 28 TCP/IP, 44 Console port on PDU monitoring unit, 8 Contacts screen, 16 – 58 Control console for PDU management, 41 local and remote access to, 47 – 48 Current over limit alarm, 22 Current under limit alarm, 22 Customizing the PDU, 53 adding circuit breakers and power cables, 55 – 56 orderable part list, 54 D DC disconnect circuit breaker, 31 – 32, 35 – 36, 38 DHCP configuration, 45 – 46 Dimensions, of InfraStruXure PDU, 66 DIP switches on PDU monitoring unit, 8 Display interface location of, 5 overview, 11 screens, 12 – 28 alarms, 20 – 22 breakers, 19 config, 26 – 28 contacts, 16 – 58 load-meter, 14 navigating through, 12 panel, 23 – 25 password-protected, 13 top-level menu, 12 top-level status, 12 volt-meter, 15 Display port on PDU monitoring unit, 8 Document pocket, location of, 6 E Electrical configuration, 27 Electrical hazard symbol, 1 Emergency Power Off (EPO) configuring and testing, 59 connecting to the PDU, 59 – 62 problems with, 61 safety warnings, 3 EMI warnings, 3 Enter key, location of, 11 EPO contacts port on PDU monitoring unit, 8 EPO. See Emergency Power Off (EPO). Esc key, location of, 11 F Factory defaults, restoring, 28 Fan rotation failure alarm, 22 Firmware downloading updates, 63 transferring through FTP or SCP, 51 Frequency out of range alarm, 22 40kW InfraStruXure PDU—Operation and Configuration 75 FTP access to the PDU, 51 Fuses, location of, 7 IP configuration wizard, 44 K H Keys, navigation, location of, 11 H2 LED, 30, 34 H3 LED, 34 Heavy symbol, 1 Help key, location of, 11 L I InfraStruXure Manager as a PDU management option, 41 configuration, 42 InfraStruXure PDU agency approvals, 67 alarm types, 22 components, 5 connecting to the network, 43 dimensions, 66 elevation, 66 heat dissipation, 67 humidity (operating and storage), 66 monitoring unit detailed description, 8 location of, 7 orderable parts, 54 service access and clearance, 66 specifications, 65 – 67 temperature (operating and storage), 66 warranty, 69 – 70 weight, 66 Input configuration of, 27 frequency, 65 nominal current, 65 nominal voltage AC, 65 voltage, where displayed, 15 voltages, 65 Input contacts connecting, ??– 18, ??– 58 Input contacts, connecting to the user connection plate, 57 Input power connection, PDU monitoring unit, 8 Input transformer, location of, 7 76 LCD, location of, 11 LEDs. See invidual LED name. Leveling feet, location of, 5 Life-support policy, 71 Load powered LED, location of, 11 Load test port configuration, 27 Load test port, location of, 7 Load-meter screen, 14 Local interface configuration, 26 M Main breaker open alarm, 22 Main input switch, 7, 37 main input switch, 36 Maintenance safety during, 53 Maintenance bypass operation returning from, 32 – 34 transferring the UPS into, 29 – 31 Maintenance bypass panel, location of, 6 Management options, 41 – 52 InfraStruXure Manager, 41 Network management interfaces, 41 Max. power configuration, 27 Monitoring unit connecting contacts to, 18, 58 N Navigation keys, location of, 11 Network address configuration, 26 Network management interface accessing on a configured PDU, 49 configuration, 43 – 52 recovering from a lost password, 52 Network port on PDU monitoring unit, 8 Neutral bar, location of, 56 Neutral wire, location of, 56 No panel feed alarm, 22 No UPS input alarm, 22 Note symbol, 1 O Operating environment, 66 Operation, 29 – 40 applying power to the system, 37 – 40 returning from maintenance bypass, 32 – 34 total power off, ensuring, 35 – 36 transferring the UPS into maintenance bypass, 29 – 31 Output configuration of, 27 frequency, 65 nominal current, 65 nominal voltage AC, 65 voltage, where displayed, 15 P Panel configuration, 24 Panel screen, 23 – 25 Panels 1-phase breakers per, 66 accessibility, 66 breaker pitch, 66 breakers per, 66 number of, 66 positions per, 66 rating, 66 style, 66 Password how to change, 26 Passwords network management interface, recovering from a lost password, 52 PDU monitoring unit detailed description, 8 location of, 7 PDU. See InfraStruXure PDU. PE bar, location of, 56 PE wire, location of, 56 40kW InfraStruXure PDU—Operation and Configuration Power LED on PDU monitoring unit, 8 Q Q1 circuit breaker, 6, 19, 31 – 32, 36 – 37 Q2 circuit breaker, 6, 19, 30, 34, 36, 40 Q3 circuit breaker, 6, 19, 30, 34, 36 R Relay outputs connecting to the user connection plate, 57 Reset button on PDU monitoring unit, 8 S Safety, 1 – 3 overview, 1 symbols used in this manual, 1 warnings, 2 – 3 electric shock risk, 3 Emergency Power Off (EPO), 3 EMI, 3 for maintenence while the PDU is receiving input power, 2 installation maintenance, 2 total power off, 3 safety symbols used in this manual, 1 SCP access to the PDU, 51 Screens. See display interface or individual screen name. Service, how to obtain, 72 Shielding trough, location of, 5 SNMP access to the PDU, 50 SSH for accessing a network management interface, 49 – 50 Standby state, 1 System enable switch, 31, 35, 38 T TCP/IP configuration options, 44 Telnet for accessing a network management interface, 49 – 50 Temperature, 66 Temperature too high alarm, 22 To UPS port on PDU monitoring unit, 8 Top-level menu screen, 12 Top-level status screens, 12 Total Power Off ensuring, 35 – 36 Total power off warnings, 3 Tripped LED on PDU monitoring unit, 8 Web interface accessing a Network management interface through, 49 for PDU management, 41 Weight, of InfraStruXure PDU, 66 Wiring cable connections, 66 cable lengths, 66 distribution panels to racks, 65 main input power feed, 65 PDU to distribution panels, 65 PDU to UPS, 65 power cable wiring, bottom, 66 power cable wiring, top, 66 UPS to PDU, 65 U Updates in this manual, 73 to firmware, 28, 63 to the PDU, 53 to this manual, i User connection plate detailed description, 9 User contacts port on PDU monitoring unit, 8 V Voltage input, where displayed, 15 nominal input AC, 65 nominal output AC, 65 output, where displayed, 15 Voltage over limit alarm, 22 Voltage under limit alarm, 22 Volt-meter screen, 15 W Warning symbol, 1 Warnings, 2 – 3 electric shock risk, 3 EMI, 3 for maintnenance while the PDU is receiving input power, 2 installation/maintenance, 2 total power off, 3 Warranty, 69 – 70 40kW InfraStruXure PDU—Operation and Configuration 77 APC Worldwide Customer Support Customer support for this or any other APC product is available at no charge in any of the following ways: • Visit the APC Web site to access documents in the APC Knowledge Base and to submit customer support requests. – www.apc.com (Corporate Headquarters) Connect to localized APC Web sites for specific countries, each of which provides customer support information. – www.apc.com/support/ Global support searching APC Knowledge Base and using e-support. • Contact an APC Customer Support center by telephone or e-mail. – Regional centers: APC headquarters U.S., Canada (1)(800)800-4272 (toll free) InfraStruXure Technical Support (1)(877)537-0607 (toll free) Latin America (1)(401)789-5735 (USA) Europe, Middle East, Africa (353)(91)702020 (Ireland) Japan (0) 35434-2021 – Local, country-specific centers: go to www.apc.com/support/contact for contact information. Contact the APC representative or other distributor from whom you purchased your APC product for information on how to obtain local customer support. Entire contents © 2004 American Power Conversion. All rights reserved. Reproduction in whole or in part without permission is prohibited. APC, the APC logo, InfraStruXure, NetShelter, and Symmetra are trademarks of American Power Conversion Corporation and may be registered in some jurisdictions. All other trademarks, product names, and corporate names are the property of their respective owners and are used for informational purposes only. 990-1597B-001 *990-1597B-001* 12/2004