1
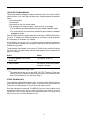
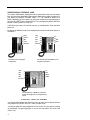
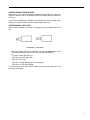
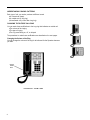
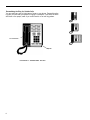
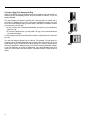
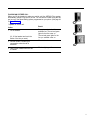
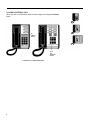
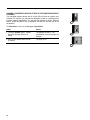
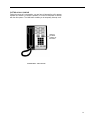
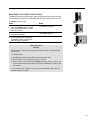
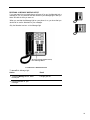
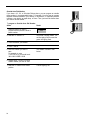
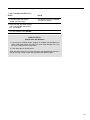
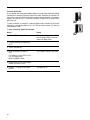
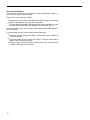
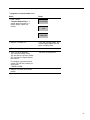
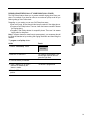
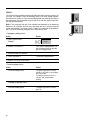
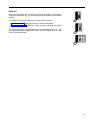
AT&T
®
MERLIN Plus
COMMUNICATIONS SYSTEM
Training Manual
©1986 AT&T
All Rights Reserved
Printed in USA
Issue 1
December 1986
NOTICE
The information in this document is subject to change without notice. AT&T assumes no responsibility
for any errors that may appear in this document.
MERLIN is a registered trademark of AT&T
Contents
Welcome
i
Getting Started
Using the Training Manual
Other Training Aids
ii
iii
iii
Your Merlin Plus Phone
Understanding Telephone Lines
Understanding Intercom Lines
Understanding Line Lights
Understanding Ringing Patterns
Changing the Outside Call Ring
Changing the Volume of the Ring
Personalizing the Ring for Outside Calls
Turning the Ring Off or Delaying the Ring
1
2
3
3
4
4
4
6
8
Basic Telephone Features
Placing an Outside Call
Placing an Internal Call
Answering a Call
Joining Another Call (Bridging)
Waiting for a Particular Line (Line Request)
Placing a Call Without Lifting the Handset (On-Hook) Dialing
Listening Without Lifting the Handset
Sharing a Conversation with Others in the Same Room (Group Listening)
Putting a Call on Hold
Monitoring a Call When You’re on Hold
Ending a Call and Beginning Another Without Hanging Up (Recall)
Transferring a Call
Temporarily Turning Off the Speaker (Voice Announcement Disable)
Conducting a Conference Call
Dropping a Call from a Conference
Receiving a Message Waiting Notice
10
11
12
14
15
16
17
19
20
21
23
24
26
29
30
33
35
Programmable Features
Auto Dial and Speed Dial Numbers
Outside Auto Dial Number
Personal Speed Dial
Intercom Auto Dial
System Speed Dial
Special Characters with Auto Dial and Speed Dial
Manually Signaling a Co-worker
Returning to a Call (Hold Retrieve)
Using Account Numbers
Picking Up Another’s Call at Your Phone (Call Pickup)
Ring Option Override
Do Not Disturb
Privacy
Redialing
Redialing the Last Number You Called (Last Number Redial)
Saving a Number to Redial (Saved Number Redial)
Enabling Touch-Tone
Automatically Answering Intercom Calls (Auto Answer-Intercom)
Automatically Answering All Calls (Auto Answer-All)
Paging a Group through the lntercom (Group Page)
Paging through the Loudspeaker (Loudspeaker Page)
36
37
38
40
42
44
47
48
49
50
53
55
56
58
59
60
62
64
65
67
69
72
Welcome
Welcome to the “magic” of the AT&T MERLIN Plus Communications System. Your
new MERLIN Plus system will give you the “power” of efficient communications.
● The power is in the many features that have been designed to meet your most
critical telephone communications needs: from speed dialing to conference
calling.
● The magic is simplicity of setup and use. The MERLIN Plus system is ready to
use as soon as you connect the phone to the phone jack. The system is also
rich in features that you can select and use as you need them. Many of the
system’s features allow you to customize the telephone just for you.
i
Getting Started
This training manual introduces you to the MERLIN Plus features and leads you
through the steps involved in the use of each feature. Take a minute now to look
through the manual to see how it’s organized.
The training manual consists of three major sections:
● Your MERLIN Plus Phone: This introduces you to the MERLIN Plus and
presents general information about how the system works.
● Basic Telephone Features: This explains how to perform standard office
telephoning.
● Programmable Features: This explains how to program and use MERLIN Plus
features to customize the phone for your needs.
You can read about as many (or few) features as you need to get started–and you
can read about the features in any order. Then you can come back to the manual as
often as necessary to learn about other features. You’ll find that the more you use
your MERLIN Plus phone system, the more features you’ll want to use.
ii
USING THE TRAINING MANUAL
This training manual is designed to help you teach yourself. As you work with the
training manual, you’ll notice that the features are usually presented as described
below:
● A brief description.
● An illustration.
● An example of how you use the feature.
● The procedures for using the feature. These could be in two stages:
● For alI features, the manual presents the steps needed to use the feature.
For some features, the manual also presents the steps needed to set up or
program the feature.
Some procedures will vary slightly depending on the type of MERLIN Plus phone
you have. To enable you to find the procedures for your phone, look at the phones
at the beginning of the feature. For example:
●
In this example, you can use a 10-, or a 34-button phone to perform the procedure.
If your phone doesn’t appear at the beginning of the feature, then the feature is not
available for your phone.
The procedures are arranged in two columns: The left column contains the steps
that you’ll follow. The right column describes what happens when you perform the
steps. For example:
Action
Result
1. Touch the Speaker button below
the dial pad.
The Speaker comes on.
2. Dial the number.
You hear the number being dialed
through the Speaker.
Most procedures are brief–a page or less.
●
Throughout the training you will see NOW YOU TRY IT sections. These sections provide you a chance to practice using a feature. Don’t hesitate to refer
back to the procedures if you need help “trying it.”
OTHER TRAINING AIDS
Your telephone System Administrator has a complete System Manual that describes the entire MERLIN Plus phone system. If you want to know more about the
feature, ask your Administrator to let you review the system manual.
One other training aid is essential. The MERLIN Plus User Card contains a brief
explanation of each feature. Once you finish the training in this manual, you’ll find
that the User Card is a quick way to review a particular feature. If you don’t have a
User Card, be sure to ask the Attendant for one.
iii
Your Merlin Plus Phone
ILLUSTRATION 1: MERLIN PLUS PHONES
Your MERLIN Plus phone looks like one of these shown in Illustration 1. Each
phone has:
● Buttons to access telephone lines.
● A dial pad for dialing numbers and programming features.
● A handset with a coil cord.
● A T/P (Test/Program) switch that enables you to program features.
● A volume control lever.
● Factory-programmed buttons for frequently used features (e.g., Intercom,
Hold, Transfer, Recall, and Speaker). These buttons represent features that
are constant. The buttons can’t be changed.
● User-programmable buttons that enable you to store frequently dialed phone
numbers (either internal intercom numbers or outside numbers) and/or set up
special features (e.g., Account Numbers, Privacy, Do Not Disturb, etc.). A
programmable button is one you can define and use according to your
needs.
Although there are a variety of 10- and 34-button phones, the main differences
among the different phones are:
● The number of telephone lines.
● The number of programmable buttons.
1
UNDERSTANDING TELEPHONE LINES
Your System Administrator should have told you which phone lines you can access
from your phone and what kind of lines they are. Each phone number that goes into
your phone (for example, 555-9999, -8888, -7777, etc.) should be written on a
button. Depending on your needs, you may have a special line type assigned to
you such as a WATS line or a personal line. The corresponding button should be
labeled to identify what kind of line it is.
If the phone you have is for internal use only, no outside phone lines should be
listed on it.
Examples of different kinds of line assignments could include those shown in
Illustration 2.
Page
1904
–
Privacy
1903
Bill
1902
–
1906
Judy
1901
Wats
Intercom
Intercom
No outside lines are assigned
to this phone.
Five outside lines and a WATS line are
assigned to this phone.
1904
—
1903
FX
1902
Wats
1901
1905
Intercom
Five outside lines, a WATS line, and an FX
(foreign exchange) line are assigned to this
phone.
ILLUSTRATION 2: SAMPLE LINE ASSIGNMENT
Your System Administrator also should have set up which line the system automatically selects first, second, third, etc., when you place a call.
You can see which line was programmed as “first choice” for your phone by picking
up the handset. The green light goes on next to the “first choice” line (or the “next
choice” line).
2
UNDERSTANDING INTERCOM LINES
Each phone in the system is assigned a 2-digit Intercom Number. An Intercom
Number is what you use to call someone within the company and what others use
to call you.
If you have a receptionist (or Attendant), s/he will alert you of an incoming call by
dialing your Intercom Number and then transferring the call to you.
UNDERSTANDING LINE LIGHTS
Next to each line button are two lights. The lights give you information about that
line.
ILLUSTRATION 3: LINE LIGHTS
The red, triangular light tells you what line you’re on, or will get when you lift
the handset. When you touch a line button, the red light comes on.
● The green, square light tells you:
● The line is free (the light is off).
● The line is busy (on).
● The line is ringing (flashing) for an incoming call.
● The line is on hold (fast flashing).
If you have access to the same lines as others, you can tell which lines are in use
by looking at the lights.
●
3
UNDERSTANDING RINGING PATTERNS
Each type of call you receive produces a different sound:
● An internal call (beep).
● An outside call (a long ring).
● A transferred call (a short then long ring).
CHANGING THE OUTSIDE CALL RING
You can make three modifications to the long ring that indicates an outside call:
● The volume of the ringing.
● The type of ringing.
● The ring sound being on, off, or delayed.
The procedures to make these modifications are described on the next pages.
Changing the Volume of the Ring
You can change the volume of the ring for all calls and for the Speaker whenever
you want.
Volume
Control
Lever
ILLUSTRATION 4: VOLUME LEVER
4
Action
Result
To increase the volume:
Slide the Volume Control lever on
the bottom, left side of the phone
up (HI) to increase the volume.
When the phone rings, or when
you hear a voice through the
Speaker, it will be louder.
To decrease the volume:
Slide the Volume Control lever
down (LO) to decrease the volume.
When the phone rings, or when
you hear a voice through the
Speaker, it will be softer.
NOW YOU TRY IT!
Adjusting the Volume
Ask someone who isn't busy to help you.
1. Ask the person to call you and to let the phone ring several times.
2. While your phone is ringing, slide the Volume Control lever up and down
until the sound is just right for you.
5
Personalizing the Ring for Outside Calls
You can select any one of eight types of rings on your phone. Personalizing the
ring lets you know that your phone is ringing. For example, if you share an office
with three or four people, each of you could have his or her own ring pattern.
The T/P Switch
Speaker
ILLUSTRATION 5: PERSONALIZING THE RING
6
To change the ring pattern:
Action
Result
1. Slide the T/P switch to P. (This
Test/Program switch allows you to
change the system.)
You’ll hear a ringing pattern.
Depending on the type of phone
you have, the red line light(s) come
on and the green line light(s) flash.
2. Touch the Speaker button, below
the dial pad, on the right side.
The ringing sound changes to
another ring pattern.
3. Continue to touch Speaker until
you hear the ring pattern you want.
Each time you touch Speaker, the
ring pattern will change.
4. Slide the T/P switch to the center
position.
The line lights go off.
NOW YOU TRY IT!
Changing the Ringing Pattern
1. Change the ringing pattern for your phone.
2. Ask someone outside the office to call you.
3. To note the difference in ringing patterns, change the pattern again, then
receive another outside call.
7
Turning the Ring Off or Delaying the Ring
When your MERLIN Plus phone system was first installed, every phone with an
outside line rang immediately when a call was received on that line. This is not
always desirable.
You can program your phone to specify how it will ring when an outside call is
received on a particular line. (In fact, the System Administrator already may have
set up the On/Off/Delayed ringing for each phone.) Examples of situations in which
you might want to do this are:
● If your company has a Receptionist/Attendant and wants only the Attendant’s
phone to ring.
● If you have a personal line, you may want it to ring, but not outside lines that
you share with others.
Turning ringing on/off does not affect internal calls or transferred calls. These will
still ring.
You also can assign a delayed ring to a phone. For example, if a work group (or
company) has a Secretary/Attendant who screens calls for the others, his or her
phone should ring for all calls while the others should not. However, another phone
can be programmed for delayed ringing, so that if the Secretary/Attendant is away,
or can’t be disturbed, no call will go unanswered. If you select delayed ringing for a
phone line, the second phone will ring after a specified number of rings at the first
phone.
8
To change the line ringing (OFF/ON/DELAYED):
Result
Action
1. Slide the T/P switch to P.
You’ll hear the ringing pattern. the
red line light(s) come on and the
green line light(s) flash.
2. Touch the button of the phone line
you want to change.
The red light may come on, flash,
or be off.
3. Enter the following codes until the
desired affect appears:
*35–No ring
*36–Delayed ring
*37–Ring
No ring–light off
Delayed ring–light on
Ring–light flashing
4. Repeat steps 2 and 3 for each line
you want to change.
5. Slide the T/P switch to the center
position.
The line lights go off.
Note: If you often change the ringing pattern for your phone, you may want to
program an Override button. For example, if you cover for a co-worker every day at
lunch time, you can set up your phone for delayed or no ring. Whenever you want
the phone to ring, you can touch the Override button and the phone will ring until
you touch Override again. (See page 55 for the procedures to program and use
Ring Override.)
NOW YOU TRY IT!
Ringing Changes
1. If you are the back-up person for an Attendant, change the ringing on all
lines from Off to Delayed while the Attendant is on a coffee break or at
lunch. (Pay attention to the lights next to the line buttons while you do this.)
2. Remember to change the ringing to Off after the Attendant returns.
9
Basic Telephone Features
With your MERLIN Plus system, basic telephone features are very easy to use.
Your MERLIN Plus system has features that improve your efficiency when placing
and receiving calls.
These telephone features include:
● Placing an outside call.
● Placing an internal call.
● Answering a call.
● Joining another call.
● Waiting for a particular line.
● Placing a call without lifting the handset.
● Listening without lifting the handset.
● Sharing a conversation with others in the same room.
● Putting a call on hold.
● Listening to a call when you’re on hold.
● Ending a call and beginning another without hanging up.
● Transferring a call.
● Temporarily turning off the Speaker.
● Conducting a conference call.
● Receiving a message waiting notice.
10
PLACING AN OUTSIDE CALL
When you lift the handset to place an outside call, the MERLIN Plus system
automatically selects a free line for the call. You can dial the number using the dial
pad or any of the Speed Dialing options programmed on your phone. (See page 44
for Speed Dialing.)
To place an outside call:
Action
Result
1. Lift the handset.
The system selects the first
available line. The red and green
lights for that line come on.
(Or, lift the handset and touch the
button of the line you want.)
The red and green lights for the
line you selected come on.
2. Dial the number. Conduct your
conversation when the call is
answered.
The call is made.
3. Hang up the handset when the call
is finished.
The line lights go off.
11
PLACING AN INTERNAL CALL
When you want to call someone within the office, begin by touching the Intercom
button.
On
5-Button
Phones
On 10
And
34-Deluxe
Phones
ILLUSTRATION 6: INTERCOM BUTTON
12
To place an internal call:
Action
1. Touch the Intercom button.
(If the green light next to the
Intercom button is on, the Intercom
line is in use. Wait until the light
goes off to make your call.)
2. Lift the handset.
3. Dial the intercom number. The
Telephone Administrator or the
Attendant has a list of Intercom
numbers for the office.
4. Conduct the conversation, then
hang up.
Result
The red light next to the Intercom
button comes on.
The green Intercom light comes
on. (Both lights are on.)
The call is made.
When you hang up, the Intercom
lights go off.
Note: If you begin dialing an Intercom Number, but don’t complete the call within 15
seconds from the time you lift the handset, the call is cancelled and the Intercom
lights go off.
13
ANSWERING A CALL
Answering a phone call, whether an internal or outside call, is easy—you lift the
handset.
If you are busy on one call and receive another call, the phone will only ring once.
This way you know you have another call, but you aren’t distracted by the rings.
After the first ring, the green light flashes to remind you of the other call. If you want,
you can put the first call on hold, and then go to second call.
To answer a call:
Action
Result
Lift the handset when you hear the
phone ring.
The system automatically connects
you to the ringing line. While the
line is ringing, the green light
flashes. The light remains on from
the time you answer the call until
you hang up.
NOW YOU TRY IT!
Placing/Receiving Calls
Find another person in the office who has the time to practice. Pay attention
to the lights next to the line buttons while you:
●
●
Call that person.
Ask her/him to call you.
Think of a friend or business associate outside the office whom you know
won't mind being disturbed. Call him/her. (If you dont want to disturb anyone,
dial the time or weather.)
14
JOINING ANOTHER CALL (BRIDGING)
If you share an outside line with another person, you can join in a conversation by
touching the line button and picking up the handset. This is called “bridging.” Up to
three people can share a call—the person who placed the call (the originator) and
two others. The originator knows that others are on the line because the red and
green line lights on her/his phone flash while the others are bridged to the call.
Bridging is often used with conference calls.
To join another conversation (bridge into the call):
Result
Action
1. Touch the line button of the call.
The red light comes on (The green
light is already on.).
2. Lift the handset.
The line lights on the originating
phone will flash while others are
bridged to the call.
NOW YOU TRY IT!
Bridging a Call
Find another person in your office who has the time to practice and who has
the same outside lines as you do.
1. Make an outside call.
2. Ask the other person to pick up the line and join in the conversation. Notice
how the line lights flash on your phone while the other person is bridged to
the call.
15
WAITING FOR A PARTICULAR LINE (LINE REQUEST)
If you want to use a particular outside line and someone else is using it, you can
instruct the system to alert you when the line is free.
For example, if several people use the company’s WATS line, the line may not
always be free.
You can tell that a line is in use because the green light is on.
To instruct the phone to signal you when a particular line is free:
Action
Result
1. Touch the button of the line that is
busy.
The busy line has the green light
on. When you touch the line
button, the red light also comes on.
2. The line becomes free.
You hear a beep. Only the red light
is on.
3. Lift the handset and make your
call.
The green light comes on.
Note: If you touch another line button or receive a call, or if someone else uses the
line before you, your line request is canceled.
NOW YOU TRY IT!
Waiting for a Particular Line
Ask someone in the office who isn't busy to help you practice. The person
should have the same outside lines (or at least one line) as you.
1. Ask the person to make an outside call.
2. While s/he is on the line, touch the line button used to make the call.
3. When the other person hangs up, you'll hear a beep.
4. Lift the handset and make a call.
If you don't hear the beep, review the procedures on the previous page and try
again.
16
PLACING A CALL WITHOUT LIFTING THE HANDSET (ON-HOOK DIALING)
Many people prefer not to lift the handset until their call has been answered. For
example, if you make an internal call, you may not want to lift the handset until the
person has answered the call. This leaves both hands free to do your work while
you wait for the person to answer. With your MERLIN Plus phone, there’s no need
to hold the handset until the person you’ve called has answered.
On
5-Button
Phones
On 10 And
34-Button Deluxe
Phones
ILLUSTRATION 7: SPEAKER BUTTON
17
To place a call without lifting the handset:
Action
Result
1. Touch the Speaker button that is
located below the dial pad.
You’ll hear a dial tone through the
Speaker and the green light next to
the Speaker button comes on.
2. Dial the number.
You’ll hear the call being made
through the Speaker.
3. Lift the handset when you hear the
other person answer (through the
Speaker).
You won’t hear anything more
through the Speaker and the
Speaker light goes off.
If no one answers or if the line is
busy, touch Speaker again to
cancel the call.
4. Hang up the handset when the call
is finished.
The lights go off.
Note: If your phone has the optional Hands Free Unit, you don’t need to lift the
handset. Check with the Attendant for more information about the Hands Free Unit.
If necessary, refer to the Accessories/Options Section of the System Manual.
18
LISTENING WITHOUT LIFTING THE HANDSET
Various kinds of information services are available as recorded messages: stock
market reports, sports, medical/scientific research summaries, horoscopes,
weather, etc. Also, many companies that have hotlines, 800-numbers, or that receive a heavy volume of incoming calls answer calls with a recorded message. For
example, if you call an airline to make a reservation, you often will hear a recorded
message (“All our representatives are busy. Your call will be answered as soon as
one is free.”) followed by a long wait until your call is answered.
With your MERLIN Plus phone, you can dial and listen to all or part of a call. You
don’t need to lift the handset until you want to talk.
To dial and listen to all or part of a call without lifting the handset:
Result
Action
1. Touch the Speaker button that is
located below the dial pad.
You’ll hear a dial tone through the
Speaker.
2. Dial the number.
You’ll hear the call being made
through the Speaker.
3. Listen to the call through the
Speaker. (Adjust the Volume
Control lever as necessary.)
If someone answers, lift the
handset, and conduct the
conversation.
4. Hang up the handset when the call
is finished or press Speaker to
cancel the call.
The lights go off.
Note: If you're using a 34-button Deluxe Speaker phone, you can conduct your
conversation without lifting the handset. Check with the System Administrator for
more information about this phone.
NOW YOU TRY IT!
Dialing and Listening
1. Dial the number of a recorded information service such as the weather
without lifting the handset.
2. Listen to the call through the Speaker. Adjust the volume as necessary.
19
SHARING A CONVERSATION WITH OTHERS IN THE SAME ROOM (GROUP
LISTENING)
You may want another person who is in your office to listen to a phone conversation. For example, you may want an associate to listen to a discussion that
involves complex negotiations. You can use the Speaker to do this. With this
feature, others can listen to the conversation, but they can not take part in the
conversation.
To allow others in the room to hear your conversation:
Action
Result
1. Touch the Speaker button, located
below the dial pad, while you’re
talking.
The Speaker comes on. The
conversation will come through the
Speaker.
2. Hang up the handset when the call
is finished.
The lights go off.
20
PUTTING A CALL ON HOLD
During the course of a conversation, you may have to interrupt the call to answer
another call, answer a co-worker’s question, or to look for information to discuss
with the other person. The Hold button enables you to temporarily interrupt a call.
Hold Is In
The Same
Location On
All Phones
ILLUSTRATION 8: HOLD BUTTON
21
To put a call on hold:
Action
Result
1. Touch the Hold button, located
above the dial pad on the right
side.
The green light next to the line you
are on begins to flash and the red
light goes off. You are temporarily
“disconnected” from that call.
(Your phone will ring periodically if
you keep the line on hold for more
than a minute.)
2. When you want to return to the call
that is on hold, press the line
button that has the flashing green
light.
You are “reconnected” to the line.
The red and green lights are on.
Note: If the phone you’re using does not have a line button (for example, if the
phone is an internal use only phone with no outside lines assigned to it), you can
receive an outside call and put it on hold. To resume the call that is on hold, touch #
and then *.
If you find that you regularly need to return to a call that is on hold and your phone
does not have line buttons, you can program an “unhold” (Hold Retrieve) button to
use instead of # *. Refer to the Programmable Features section for the procedures
to program and use a Hold Retrieve button.
22
MONITORING A CALL WHEN YOU’RE ON HOLD
If someone puts you on hold, and you want to continue your work while you wait,
you can hang up and listen on the Speaker until the caller comes back on the line.
To monitor a call on hold:
Action
Result
1. Touch the Speaker button located
under the dial pad when you have
been put on hold.
The Speaker comes on.
2. Hang up the handset.
The Speaker goes off.
3. Lift the handset and continue the
conversation when you hear the
caller through the Speaker.
NOW YOU TRY IT!
Holding
Find someone to help you while you practice putting a call on hold and being
put on hold.
1. Call the person.
2. Pay attention to the line lights when you put the call on hold.
3. Ask the person to call you and then put you on hold.
4. When you are put on hold, touch Speaker and then hang up. When you
hear the caller through the Speaker, pick up the handset and continue your
conversation.
If you disconnect the person, or if you are disconnected, review the procedures and then try again.
23
ENDING A CALL AND BEGINNING ANOTHER WITHOUT HANGING UP
(RECALL)
Touching Recall is a convenient way to end a call and make another without
hanging up. Recall also has another function. If your company has a Centrex, PBX,
or a custom calling service, you normally signal that system by a switchhook
flash. For example, when you transfer a call, you begin by pressing the switchhook. (A switchhook is the button that is depressed when the handset is resting in
the cradle.)
With the MERLIN Plus system, you touch the Recall button when you want a
switchhook flash.
Recall
On A
5-Button
Phone
ILLUSTRATION 9: RECALL BUTTON
24
Recall
On A 10
And 34-Button
Deluxe Phone
To end/begin a call (or to use a switchhook flash):
Action
Result
1. Touch the Recall button below the
dial pad.
If Recall was used to finish a call,
the call is disconnected and you’ll
hear a dial tone.
If Recall was used as a
switchhook, the line sounds like it
is on hold.
2. Begin the next call or continue with
the switchhook operation.
25
TRANSFERRING A CALL
Transferring enables a caller to speak to several people in a company with one
phone call. For example, if a sales representative calls from a customer's office,
s/he may want to speak with the sales manager, the service manager, and the
receptionist. The call can be transferred from one person to the next.
With the MERLIN Plus system, you can transfer a call three ways:
● Transfer the call directly.
● Announce the call before you transfer it.
● Screen the call before you transfer it.
An important aspect of transferring a call is being sure the other person answers it.
If a transferred call is unanswered after a specified number of rings, the call
automatically returns to the one who transferred it.
Note: If your phone has Auto Intercom buttons, you’ll find it easier to transfer calls.
Refer to the Programmable Features section for information about Auto Intercom
buttons.
Transfer Is Located
In The Same Place
On All Phones
ILLUSTRATION 10: THE TRANSFER BUTTON
26
To transfer a call directly:
Action
Result
1. Touch the Transfer button above
the dial pad. Then, dial the
Intercom Number (don’t touch
INTERCOM) and hang up.
Or,
While the call is in progress, touch
the Auto Intercom button of the
person to whom you want to
transfer the call.
This puts the call on hold. The
green light flashes quickly. The call
is transferred.
If the call is not answered, it
returns to your phone (you’ll hear a
2-ring call signal).
To announce a call when you transfer it:
Action
Result
1. Touch the Transfer button, above
the dial pad. Then, touch Intercom
and dial the Intercom number.
This puts the call on hold. The
green light flashes quickly.
You’ll hear a beep when the
connection is made.
2. Announce the call and hang up.
Your announcement comes
through the Speaker and the call is
transferred.
If the call is not answered, it
returns to your phone.
27
To screen a call before you transfer it:
Action
Result
1. Touch Hold.
The call is put on hold.
2. Touch Intercom and dial the
Intercom number.
The green Intercom light comes on
and the call is made.
3. Announce the call and ask if it
should be accepted.
If yes, hang up. Go back to the call
(touch the line button that is on
hold). Touch the Auto Intercom
button (or touch Transfer,
Intercom, and then dial the
Intercom number and hang up.)
If not, touch the line button of the
person on hold. Advise him/her
that the call can’t be transferred.
Then hang up.
The call is transferred.
The call comes off hold.
NOW YOU TRY IT!
Transferring Calls
Ask two people who have time to practice to help you–an outside caller and
an internal person. Pay attention to the lights on your phone while you:
1. Ask the first person to call you. Then transfer the call directly to the second
person.
2. Repeat the call/transfer process but this time announce the call.
3. Repeat the call/transfer process but this time screen the call before it is
transferred.
If the line you’re transferring the call to is busy, the call will be returned to you.
If the call is disconnected during the transfer, review the procedures on pages
26-28. Then try again.
28
TEMPORARILY TURNING OFF THE SPEAKER (VOICE ANNOUNCEMENT
DISABLE)
The Speaker is a valuable tool that enables you to listen to an announcement, a
conversation, or a recording.
There are times, though, when you don’t want to be interrupted by an announcement through the Speaker. For example, if you are conducting an interview, you
may not want to be interrupted by another employee’s announcement.
If you don’t want an announcement to interrupt you, you can turn off the “announce” part of the Speaker. If a call is transferred to you, your phone will ring, but
no announcement will come through the Speaker. (The person trying to announce
a call will hear the phone ring.)
To turn off/on the announce part of the Speaker:
Action
Result
1. Slide the T/P switch to P.
You’ll hear a ringing pattern. The
red line light(s) come on and the
green line light(s) flash.
2. Touch the Intercom button until
the green light next to the button is
on (Speaker on) or off (Speaker
off).
Green on–Speaker on
Green off–Speaker off
3. Slide the T/P switch to the center
position.
NOW YOU TRY IT!
Disabling the Speaker
Ask someone who has the time to help you practice.
1. Disable the “announce” part of the Speaker.
2. Ask the other person to try to announce something (e.g., a transferred call)
to you through the Speaker. The call will ring.
3. Return the Speaker to normal, then ask the other person to disable the
“announce” part of his/her Speaker. Then repeat Step 2. Remind the person to return the Speaker to normal when you finish practicing.
29
CONDUCTING A CONFERENCE CALL
A conference call enables you to speak with two outside callers at the same time.
For example, if you are talking with a graphic artist who is preparing a design for a
client, you can add the client onto the call and conduct a three-way conversation.
In addition, once the three of you have finished discussing your common business,
the client and the graphic artist can continue the conversation without you.
Or you can set up a conference call among the client, the graphic artist, and you,
and then have two other internal staff people join the conference by picking up the
conference lines at their phones. (This is called “bridging”.) The conference limits
are two outside lines and a total of three inside lines.
30
Conference
Is Located In
The Same Place
On All Phones
ILLUSTRATION 11: CONFERENCE BUTTON
To setup a conference call:
Action
Result
1. Advise the first person that you are
going to add on the second
person.
2. Touch Hold, then touch a free line
button and dial the second person.
3. When the second call is answered,
touch the Conference button,
above the dial pad.
4. Touch the line that is on hold.
The conference is established.
Note: If the second person isn’t available, or the call is unanswered, just press the
line button of the first call to disconnect the second call.
31
To bridge into the conference call (to include one or two internal people),
each internal person should:
Action
Result
1. Lift the handset.
Each internal person will hear a
dial tone.
2. Touch one of the line buttons
associated with the conference
call.
Each internal person is connected
to the conference.
To put a conference call on hold (so you can do something else while the
others continue the discussion):
Action
32
Result
Touch Hold.
The conference is put on hold.
If you want to return to the
conference, touch either line button
associated with the conference.
You’re reconnected to the
conference.
Dropping a Call from a Conference
Once you’ve touched Conference, you’ve begun a conference call. If the line you
want to add to the conference is busy or unanswered, or if one of the participants in
the conference hangs up, you can remove the line from the conference.
Drop Is Located
In The Same
Place On All Phones
ILLUSTRATION 12: DROP BUTTON
33
To drop a call from a conference:
Result
Action
1. Touch the Drop button, above the
dial pad.
2. Touch the line of the call you want
to drop.
The call is dropped from the
conference.
NOW YOU TRY IT!
Conference Calling
Find two helpers outside the office who you know have the time to help you
practice.
1. Call the first person and explain that you’re going to call another person
and the three of you will have a conference. Put the first person on hold,
dial the second person, and then connect the first person to the
conference.
(If you can’t find helpers, make the second call to a recorded information
service such as the time or weather.)
2. If you can find another person in the office who has the same outside lines,
and has the time to practice, ask him/her to join the conference.
3. Drop one of the outside lines from the conference.
Your conference call should be a success. However, if you had problems
making the conference call, review pages 30-34 and then try again.
34
RECEIVING A MESSAGE WAITING NOTICE
If you were away from your desk when a call came in for you, the Attendant took a
message for you. As a reminder s/he also turned on your Message light to alert you
that a call came in while you were out.
When you see that the Message light on your phone is on, you know that you
should call or see the Attendant for your messages.
Only the Attendant can turn on the Message light.
All Phones (except 5-Button Phones)
Have A Message Button
ILLUSTRATION 13: MESSAGE BUTTON
To turn off the Message light:
Action
Result
1. Touch the Message button, below
the dial pad.
The light goes off.
2. Call the Attendant for your
messages.
35
Programmable Features
Programmable features allow you to customize your MERLIN Plus system according to your specific needs. A programmable feature is one that you set up. For
example, you can save a phone number in a button or in a 3-character dial code
and then dial the number by pressing the button or entering the dial code.
One of the most useful programmable features, Auto Dial/Speed Dial, allows you to
store frequently dialed numbers in one button. However, your MERLIN Plus system
has many other programmable features that will enable you to use your phone
more efficiently.
The MERLIN Plus CS programmable features include:
●
●
●
●
●
●
●
●
●
Auto Dial and Speed Dial Numbers
Outside Auto Dial
Personal Speed Dial
Intercom Autodial
System Speed Dial
Manually Signalling a Co-Worker
Returning to a call (Hold Retrieve)
Using Account Numbers
Picking up another’s call at your phone (Call Pickup)
Ring Option Override
Do Not Disturb
Privacy
Redialing
● The last number you dialed.
● Saving and redialing a number you dialed.
Enabling Touch-Tone.
Automatically answering intercom calls. (Requires the Hands Free Unit or the
Hands Free Answer on Intercom phone.)
● Automatically answering all calls (Requires an answering machine, modem, or
the Hands Free Unit.)
● Paging a group through the Speaker (Group Page)
● Paging through the Loudspeaker. (Requires loudspeaker equipment.)
The procedures for each programmable feature have two sets of steps:
● Programming the feature.
● Using the feature.
You can program (or reprogram) any button except those that are factory-defined
(Intercom, Hold, etc.) or those that have outside numbers assigned to them.
●
●
Once you’ve programmed a feature, using it is as easy as pressing a button.
Note: You also can use a dial code (two or three characters entered from the dial
pad) to use a feature. This ensures that even if you have few available buttons to
program, you can still use the programmable features.
36
AUTO DIAL AND SPEED DIAL NUMBERS
Setting up and using programmed phone numbers have two key benefits:
● You can quickly dial a number you frequently use. For example, you can store
your home phone number into a programmable button.
● The company can program special phone numbers that it wants to keep
confidential (e.g., access or identification codes). For example, if your company utilizes a time-sharing service, the number and access code can be
stored in a programmable button. Many people in the company can then use
the service even though they don’t know what the actual numbers are.
The frequently dialed numbers can include:
● Outside Auto Dial Numbers — Outside numbers that you program into one
button.
● Personal Speed Dial Numbers — Outside numbers that you program into a
3-character dial code.
● Intercom Auto Dial Numbers — Intercom numbers that you program into one
button.
● System Speed Dial Numbers — Numbers that are frequently used by many
people in your company. ( The Attendant will tell you the System Speed Dial
numbers that have been programmed and the 3-character codes to access
them.)
The following procedures are shown with the typical phones that would use the
feature. However, you can use a 5-, 10-, or 34-button phone to program a frequently
dialed number as a one button code or a 3-character code.
37
Outside Auto Dial Number
If you have a 10-, 34-, or 34-button Deluxe phone, you can program an outside
phone number in a programmable button. For example: You may want to program
important business numbers—your attorney or accountant—or important personal
numbers—your dentist, car repair shop, or home. Then, just touch the button when
you want to dial the number.
To program an Outside Auto Dial Number:
Action
1. Label the button you want to
program with the person’s name or
phone number.
2. Slide the T/P switch to P.
Result
John
You’ll hear a ringing pattern. The
red line light(s) come on and the
green line light(s) flash.
3. Touch the button you Iabelled.
4. Touch * and 90.
5. Enter the number you want to
save.
For example, to save
1-212-555-1212, you would touch:
*9012125551212
The number is saved in that
button.
6. Repeat Steps 1, and 3-5 for each
outside number you want to save.
7. Slide the T/P switch to the center
position.
38
The line lights go off.
To use an Outside Auto Dial Button:
Action
Result
1. Touch the button that has the
number you want to dial.
The system turns on the Speaker
and dials the number.
2. When you hear the person answer,
pick up the handset and conduct
your conversation.
If no one answers, touch Speaker.
The system cancels the call.
NOW YOU TRY IT!
Outside Auto Dial Numbers
1. If you have an available button, program an Outside Auto Dial Button so
that it contains the number of a person you know will be available now. (You
can store 1-800-555-1212 if you want.)
2. Touch the button to dial the person.
When the person answers, you know the button was programmed properly. If
you get a wrong number, review the procedures and then try again.
39
Personal Speed Dial
If your phone has few programmable buttons, you can store frequently dialed
numbers as 3-character Personal Speed Dial codes. Examples of numbers you
may want to store as a Speed Dial code include business numbers—a temporary
agency, the local deli, etc.—or personal numbers—a health club, nursery school,
baby sitter, etc.
To store a number, you assign it a code that begins with a pound sign (#), and is
followed by a two-digit number from 01 to 22. Then to dial the number, you enter the
three-character code.
To store a Personal Speed Dial Number:
Action
Result
1. Slide the T/P switch to P.
You’ll hear a ringing pattern. The
red line light(s) come on and the
green line light(s) flash.
2. Touch # and then a number from
01-22.
3. Touch * and then 90.
4. Enter the number you want to
save.
For example, to save 555-1212 as
#12, you would touch:
#12*905551212
The number is saved in that code.
5. Repeat Steps 2-4 for each outside
number you want to save.
6. Slide the T/P switch to the center
position
40
The lights go off.
To use a Personal Speed Dial Number:
Action
Result
1. Touch the 3-character code that
contains the number you want to
dial, e.g., #12.
The system turns on the Speaker
and dials the number.
2. When you hear the person answer,
pick up the handset and conduct
your conversation.
3. If no one answers, touch Speaker.
The system cancels the call.
NOW YOU TRY IT!
Personal Speed Dial
1. Program dial code #15 with the phone number of your dentist's office.
2. Touch the dial code to dial the number.
When the dentist's receptionist or answering service answers, you know
you've programmed the correct number. If you get a wrong number, review
the procedures and then try again.
41
Intercom Auto Dial
Although you can dial an intercom number by pressing Intercom and then touching
the 2-digit intercom number, you may want to program Intercom Auto Dial Numbers
of people you often speak with in your office.
A major benefit of an Intercom Auto Dial button is that it also allows you to verify
whether that person is on the phone. If s/he is on the phone, the green light next to
the Auto Dial button will be on.
To program an Intercom Auto Dial Number:
Action
1. Label the button you want to
program with the person’s name or
intercom number.
2. Slide the T/P switch to P.
Result
Joan
You’ll hear a ringing pattern. The
red line light(s) come on and the
green line light(s) flash.
3. Touch the button you Iabelled.
4. Touch * and then 91.
5. Enter the number you want to
save.
For example, to save intercom
number 18, you would touch:
*9118
The number is saved in that
button.
6. Repeat steps 1 and 3-5 for each
intercom number you want to save.
7. Slide the T/P switch to the center
position.
Note: You can’t program an Auto Intercom and a Manual Signal button for the
same person—one cancels the other.
42
To use an Intercom Auto Dial Number:
Action
Result
1. Touch the Intercom Auto Dial
button.
The Speaker goes on and you
hear a beep.
2. When you hear the person answer,
lift the handset and conduct your
conversation.
The green light next to the
Intercom Auto Dial button also
comes on.
If the line is busy or no one
answers—touch Speaker to
cancel the call.
NOW YOU TRY IT!
Intercom Auto Dial
1. If you have an available button, program the Attendant's Intercom Number.
(The Attendant phone is always “10.”)
2. Touch the button to call the Attendant.
When the Attendant answers, you know you've programmed the correct
number. If someone else answered, you probably programmed a different
Intercom Number. Review the procedures on page 42 and then try again.
43
System Speed Dial
When your MERLIN Plus system was first installed, the Attendant may have programmed System Speed Dial numbers that many people in the company use on a
regular basis. Examples of System Speed Dial numbers might include:
● Other company locations
● Printers
● Suppliers
● Computer services
● Major clients
A System Speed Dial number is a 3-character dial code that begins with the pound
sign (#) and is followed by a number from 60-99. You dial a System Speed Dial
number by entering the 3-character code.
44
To program a system speed dial number in a programmable button:
Result
Action
1. Label the button you want to
program.
2. Slide the T/P switch to P.
Copy Center
You’ll hear a ringing pattern. The
red line light(s) come on and the
green line light(s) flash.
3. Touch the button you Iabelled.
4. Touch * and then 95.
5. Touch # and then the dial code for
the System Speed Dial number
you want to program, from 60-99.
For example, to program System
Speed Dial number 69 in a
programmable button, you would
touch:
*95#69
The number is saved in that
button.
6. Repeat Steps 1 and 3-5 for each
System Speed Dial number you
want to program.
7. Slide the T/P switch to the center
position.
45
To use a system speed dial number:
Action
Result
1. Touch the 3-character code that
contains the System Speed Dial
number you want to dial, e.g., #69.
Or, use the programmed System
Speed Dial number in the same
way you would an Outside Auto
Dial button.
The system turns on the Speaker
and dials the number.
2. When you hear the person answer,
pick up the handset and conduct
your conversation.
If no one answers, touch Speaker.
The system cancels the call.
NOW YOU TRY IT!
System Speed Dial Numbers
Ask the Attendant if any System Speed Dial numbers were programmed.
If so, enter the dial code for one of the System Speed Dial Numbers.
If you didn’t reach the correct number, check with the Attendant to be sure you
have the correct System Speed Dial number. Then try again.
46
Special Characters with Auto Dial and Speed Dial
You can program the following special instructions in an outside Auto Dial button or
Speed Dial Number:
● Touch Hold (pause).
The system will pause for 1.5
seconds. This allows for
connection with a PBX or
computer-based service.
● Touch Drop (stop).
The system will stop until it is
reactivated. This allows for
connection with a computer-based
service.
● Touch Recall and then Hold
The system puts a switchhook
flash
at the beginning of an Auto
(switchhook flash).
Dial sequence. This initiates a
Centrex/PBX feature.
● Touch Transfer (switch to TouchIf you have rotary phone lines, the
system switches to Touch-Tone
Tone pulse).
pulses. This allows your phone to
“talk” with a computer-based
service.
47
Manually Signaling a Co-worker
Manually signaling enables you to “buzz” a co-worker at any time—even while you
are on the phone with someone else. The buzz (a beep) sounds at the co-worker's
phone even if s/he is on the phone.
To program a Signal button:
Action
Result
1. Label a button “Signal... ”
(include the person’s name or
intercom number).
2. Slide the T/P switch to P.
Signal Mary
You’ll hear a ringing pattern. The
red line light(s) come on and the
green line light(s) flash.
3. Touch the button you Iabelled.
4. Touch * and then 6.
5. Enter the intercom number. For
example, if you want to signal
intercom 12, you would touch:
*612
6. Slide the T/P switch to the center
position.
Note: You can program a Signal button or an Auto Intercom button, but not both for
the same person.
To “buzz” a co-worker (don’t lift the handset):
Action
Touch the Signal button you
programmed.
48
Result
The person will hear a beep
through the Speaker.
Returning to a Call (Hold Retrieve)
If you have a 5-button phone that has no line assignments, you still can have an
outside call transferred to your phone. If you need to put the call on hold, you just
press Hold. Then to return to the call, you dial # *.
If you find that you often put calls on hold, you may find it convenient to program an
Off Hold button so you can quickly return to a call.
To program an “off hold” (Hold Retrieve) button:
Action
Result
1. Label a button “Off Hold.”
Off Hold
2. Slide the T/P switch to P.
You’ll hear a ringing pattern. The
red line light(s) come on and the
green line light(s) flash.
3. Touch the button you Iabelled.
4. Touch * and then 95.
5. Touch *.
The button is programmed.
6. Slide the T/P switch to the center
position.
To use “off hold”:
Touch Off Hold when you’re ready
to return to the call that you put on
hold.
The call is reconnected.
NOW YOU TRY IT!
Hold Retrieve
If you're using a 5-button phone, practice returning to a call that is on hold.
(You'll need an outside caller to help you.)
1. Program a Hold Retrieve button if you have an available button.
2. When you receive a call, put it on hold.
3. Return to the call by pressing Hold Retrieve or by touching # *.
If something happened to the call and you were disconnected, review the
procedures and try again.
49
Using Account Numbers
Your company may use account numbers to identify departments, projects, or
clients to whom calls should be charged.
There are two kinds of account numbers:
● An actual account number associated with a specific project, for example
450374 could represent Jones and Wong Associates.
● A System Speed Dial number that represents the account number. For example, System Speed Dial #62 could represent account number 450374.
An account number can be up to 16 digits. Check with the System Administrator for
account numbers.
You can program and use account number buttons three ways:
● Program an Account Number Entry button. Then touch this button followed by
the account number.
● Program a specific account number into a button. Then touch this button to
charge a call to this account number.
● Program a System Speed Dial account number button. Then touch this button
to charge a call to this account number.
50
To program an account number button:
Action
1. Label a button
“Account Number Entry,” a
specific account number, or a
specific System Speed Dial
number.
Result
Account Number
07362
Herald Federal
2. Slide the T/P switch to P.
You’ll hear a ringing pattern. The
red line light(s) come on and the
green line light(s) flash.
3. Touch the button you Iabelled.
4. Touch one of the following:
*82—(Account Number Entry)
*88—and then the account number
*95—and then the System Speed
Dial number
The button is programmed.
For example, to program account
number 7643190 into a button you
would touch:
*887643190
5. Slide the T/P switch to the center
position.
51
To use an account number button:
While a call is in progress, touch
Account Number Entry, dial the
account number, and then touch
Account Number Entry.
Or,
Touch the specific account number
button.
The call is “coded” with the
account number, When the phone
report is printed, the call will have
the account number.
NOW YOU TRY IT!
Account Numbers
If you have an available programmable button and your company is printing
phone records,
1. Program an Account Number button with this account number: 000001.
2. Call the weather, time, or 1-800-555-1212. While the call is in progress,
touch the account number button you programmed.
3. Check the phone report to note that the call was charged to the account
number.
If you don't see your call in the phone report, try the call again. If you still have
a problem, review the procedures and try the practice again.
52
PICKING UP ANOTHER’S CALL AT YOUR PHONE (CALL PICKUP)
The Call Pickup feature allows you to answer another ringing phone from your
phone. For example, if you share an office, a co-worker can pick up a call for you
without getting up from his/her desk.
Depending on your needs, you can use Call Pickup three ways:
● Enter a dial code, #3, and then dial the intercom number of the ringing phone.
● Program a Call Pickup button. Then use it with the intercom number to answer
the ringing phone.
● Program a Call Pickup button for a specific phone. Then use it to answer
ringing calls for that phone.
Note: If everyone shares the same lines (a square system), you can answer the call
by lifting the handset or by touching the ringing line button and then lifting the
handset.
To program a call pickup button:
Action
Result
1. Label a “Call Pickup” button.
Call Pickup
2. Slide the T/P switch to P.
You’ll hear a ringing pattern. The
red line lights come on and the
green line light flash.
3. Touch the button you Iabelled.
4. Touch * and then 85, Or touch *
and then 85 followed by the
intercom number.
The button is programmed.
5. Slide the T/P switch to the center
position.
53
To use call pickup:
Action
Result
1. Lift the handset.
The red and green lights for the
first available outside line come on.
2. Touch the “Call Pickup” button.
Or, touch # and then 3.
3. Touch the Intercom button then
touch the Intercom Number of the
ringing phone, e.g., 12
Or, just touch the Intercom Auto
Dial button.
The call is transferred to your
phone.
Note: If you programmed a Call Pickup button for a specific phone, just lift the
handset and touch the Call Pickup button for that phone.
NOW YOU TRY IT!
Call Pickup
Ask someone in the office to help you practice.
When the person's phone rings, use Call Pickup to answer the call on your
phone. Be sure to transfer the call back to the correct person. If the call
continues to ring on the first phone, try Call Pickup again.
54
RING OPTION OVERRIDE
You can set your phone so it:
● Rings for all outside calls.
● Rings for no outside calls (no ring).
● Or, has a delayed ring.
If you’ve set the phone for no ring or delayed ring, you may find that at times you’ll
need to change it back so it rings. For example, if you are the regular back-up
person for the Attendant when s/he is away from the phone, you will need to set
your phone so it rings.
If you regularly need to change the phone so it rings, you can program an “override” button to switch your phone to ring immediately.
To program a ring override button:
Action
Result
1. Label a button “Override.”
Override
2. Slide the T/P switch to P.
You’ll hear a ringing pattern. The
red line light(s) come on and the
green line light(s) flash.
3. Touch the button you Iabelled.
4. Touch * and then 78.
The button is programmed.
5. Slide the T/P switch to the center
position.
To use ring override:
Action
Result
1. Touch the Override button. All
calls will ring at your phone.
If the button has lights, the green
light comes on.
To cancel using ring override:
2. Touch the Override button. The
original ringing pattern—either no
ring or delayed ring—returns.
The green light goes off.
55
DO NOT DISTURB
The Do Not Disturb feature enable you to “turn off” your telephone ring temporarily
so you can work without phone interruptions. While your phone is set up for Do Not
Disturb, you will not receive incoming calls.
To program a do not disturb button:
Action
1. Label a lighted button “Do Not
Disturb.”
2. Slide the T/P switch to P.
Result
Do Not Disturb
You’ll hear a ringing pattern. The
red line light(s) come on and the
green line light(s) flash.
3. Touch the Iabelled button.
4. Touch * and then 71.
5. Slide the T/P switch to the center
position.
56
The button is programmed.
To use the do not disturb button:
Action
Touch the Do Not Disturb button.
Result
The green light next to Do Not
Disturb comes on.
● An internal caller will hear a
busy signal if they try to call your
intercom number.
● A transferred call will return to
the previous intercom number.
● An outside call will not ring at
the Do Not Disturb phone (Any
other phone that has this line,
however, will still ring.)
To cancel do not disturb:
Touch the Do Not Disturb button.
The green light next to Do Not
Disturb goes off.
57
PRIVACY
The Privacy feature prevents anyone who shares the same line from joining in on
your calls. For example, Privacy is particularly useful if you must discuss confidential matters with a client, or if you are transmitting data to a computer and want to
prevent anyone from accidentally trying to dial out on that line (which could interfere with the transmission).
Note: If your company has one or two outside lines dedicated to an answering
machine or to a modem, the lines may have been set up as “private” when the
system was installed. If you seem to have a “dead” line, check with the Attendant to
see if you were accidentally assigned one of these privacy lines.
To program a privacy button:
Action
Result
1. Label a lighted button
“Privacy.”
2. Slide the T/P switch to P.
Privacy
You’ll hear a ringing pattern. The
red line light(s) come on and the
green line light(s) flash.
3. Touch the button you Iabelled.
4. Touch * and then 72.
The button is programmed.
5. Slide the T/P switch to the center.
To use the privacy feature:
Action
Touch the Privacy button.
Result
The green light next to Privacy
comes on. All lines for your phone
are now private.
If someone tries to join in on a
“private” call, s/he will hear
nothing.
To cancel the privacy feature:
Touch the Privacy button.
58
The green light next to Privacy
goes off.
REDIALING
When you place outside calls, the number you dialed may be busy or unanswered.
If the call is important to you, you will continue to dial the number until the person
answers.
Two MERLIN Plus features enable you to quickly redial the number:
● Last Number Redial redials the number you most recently dialed.
● Saved Number Redial enables you to save a number and redial it at another
time.
You can program each of these features into a programmable button. Or, if you
don’t have an available programmable button, you can program and use a dial
code for each redial feature.
59
Redialing the Last Number You Called (Last Number Redial)
The Last Number Redial feature allows you to redial the number you most recently
dialed. For example, if you dialed your bank and the line was busy, you could
quickly redial the number by pressing one programmable button or by dialing #24
from the dial pad.
To program a last number redial button:
Action
Result
1. Label a button “Last Number.”
Last Number
2. Slide the T/P switch to P.
You’ll hear a ringing pattern. The
red line light(s) come on and the
green line light(s) flash.
3. Touch the button you Iabelled.
4. Touch * and then 73.
5. Slide the T/P switch to the center.
60
The button is programmed.
To use the last number redial feature:
Result
Action
1. Before you hang up from the call,
touch the Last Number button.
Or, touch #24.
2. When you’re ready to call again,
touch the Last Number button or
touch #24.
The system redials the last number
you dialed. You’ll hear the call
being made through the Speaker.
When you hear the person answer,
lift the handset and conduct the
call.
If the line is still busy, or if no one
answers, touch Speaker to cancel
the call.
NOW YOU TRY IT!
Last Number Redial
1. Program a Last Number button if you have an available programmable
button.
2. Dial an outside number.
3. Before hanging up, save the Last Number.
4. Redial the last number using the Last Number button or the dial code.
Keep trying Last Number until the person answers. If you don't hear the
number being redialed, review the procedures and try again.
61
Saving a Number to Redial (Saved Number Redial)
The Saved Number Redial feature enables you to save any phone number that you
dial so that you can automatically dial it at a later time.
To program a saved number redial button:
Action
Result
1. Label a button “Save Number.”
Save Number
2. Slide the T/P switch to P.
You’ll hear a ringing pattern. The
red line light(s) come on and the
green line light(s) flash.
3. Touch the button you Iabelled.
4. Touch * and then 74.
5. Slide the T/P switch to the center.
62
The button is programmed.
To use the saved number redial feature:
Action
Result
1. Touch the Save Number button
before hanging up.
Or, touch #23 before hanging up.
The system saves the number.
2. When you’re ready to place the call
again, touch Save Number.
When you hear the person answer,
lift the handset and conduct the
call.
If the line is busy, or if no one
answers, touch Speaker to cancel
the call.
The system redials the saved
number you dialed. You’ll hear the
call being made through the
Speaker.
NOW YOU TRY lT!
Saved Number Redial
1. Program a Save Number button if you have an available programmable
button.
2. Dial an outside number.
3. Before hanging up, save the number.
4. Dial another outside number and then hang up.
5. Redial the saved number.
Keep trying Save Number until the person answers. If you don’t hear the
number being redialed, review the procedures and then try again.
63
ENABLING TOUCH-TONE
Although your MERLIN Plus system uses phones with Touch-Tone dial pads, your
company may have rotary phone lines. You can change to Touch-Tone service in
the middle of a call if you need to access computer services that require tone
signals, such as bank-by-phone, credit card authorization, etc.
To program a touch-tone enable button:
Action
1. Label a button “Touch-Tone.”
2. Slide the T/P switch to P.
Result
Touch-Tone
You’ll hear a ringing pattern. The
red line lights come on and the
green line lights flash.
3. Touch the button you Iabelled.
4. Touch * and then 76.
The button is programmed.
5. Slide the T/P switch to the center.
To use the touch-tone enable feature:
Action
Result
1. Dial the phone number.
The system places the call.
2. Touch the Touch-Tone button.
3. Dial the additional numbers
necessary to use the service.
These are sent as tone signals.
4. When you finish the call, hang up.
The call is disconnected. TouchTone service is cancelled.
64
AUTOMATICALLY ANSWERING INTERCOM CALLS
(AUTO ANSWER-INTERCOM)
If your phone has the optional Hands-Free unit, you can program a button to turn
on the unit whenever you receive an intercom call. (You can leave the feature on
indefinitely.) Whenever you receive an intercom call, the system will turn on the
Hands-Free Unit.
ILLUSTRATION 14: HANDS-FREE OPTION
Note: If your phone is a Built-In Speaker Phone, you can talk and listen through the
Speaker. See the Attendant for more information about the Built-In Speaker
Phone.
65
To program an auto answer-Intercom button:
Action
1. Label a lighted button
“Auto Answer-lnt”.
2. Slide the T/P switch to P.
Result
Auto AnswerInt
You’ll hear a ringing pattern. The
red line light(s) come on and the
green line light(s) flash.
3. Touch the button you Iabelled.
4. Touch * and then 70.
The button is programmed.
5. Slide the T/P switch to the center
position.
To use the auto answer feature:
Touch the Auto Answer-lnt
button.
The green light next to Auto
Answer-lnt comes on.
To cancel auto answer:
Touch the Auto Answer-lnt
button.
The green light next to Auto
Answer goes off.
Note: You can program both an Auto Answer-Intercom button and an Auto
Answer-All button, but you can use only one at a time.
66
AUTOMATICALLY ANSWERING ALL CALLS (AUTO ANSWER-ALL)
If your phone has a modem, an answering machine, or a Hands-Free unit connected to it, you can program a button to turn on the unit whenever you receive an
outside call or an internal call.
For example, if your phone has an answering machine, you would use the button
to activate the machine whenever you leave the office. Any call you receive is
recorded on the answering machine.
To program an auto answer-all button:
Action
1. Label a lighted button
“Auto Answer-AII”.
2. Slide the T/P switch to P.
Result
Auto AnswerAll
You’ll hear a ringing pattern. The
red line light(s) come on and the
green line light(s) flash.
3. Touch the button you Iabelled.
4. Touch * and then 75.
The button is programmed.
5. Slide the T/P switch to the center
position.
67
To use auto answer-all:
Action
Touch the Auto Answer-All
button.
Result
If the button has lights, the green
light will come on.
The external unit is turned on.
Whenever a call is received, it will
be picked up by the external unit.
To cancel auto answer-all:
Touch the Auto Answer-All
button.
The green light goes off.
Note: You can program both an Auto Answer-Intercom button and an Auto
Answer-All button, but you can use only one at a time.
68
PAGING A GROUP THROUGH THE INTERCOM (GROUP PAGE)
You can page several co-workers at one time through the Speaker. For example, if
a project leader wants the other members of the project to meet in the Conference
Room to discuss a new aspect of the project, s/he can page everyone at one time.
Up to three paging groups may have been defined when your system was installed:
● Page All–a group that includes all phones.
● Group 1–a group that can include phones with intercom numbers from 10
to 19.
● Group 2–a group that can include phones with intercom numbers from 20 to
29.
Check with the Attendant to see if paging groups were defined and who is included
in the groups.
You can page a group by using a programmable button or by using a dial code.
69
To program a group page button:
Action
1. Label a button:
“Page All,”
“Page Group 1,”
or “Page Group 2”.
Result
Page All
Page Grp 1
Page Grp 2
2. Slide the T/P switch to P.
You’ll hear a ringing pattern. The
red line light(s) come on and the
green line light(s) flash.
3. Touch the button you Iabelled.
4. Touch * and then 91.
5. Touch the group page code:
Page all–70
Group 1–71
Group 2–72
For example, to program Group 2,
you would touch:
*9172
6. Slide the T/P switch to the center
position.
70
The button is programmed.
To page a group:
Action
Result
1. Touch the appropriate Group Page
button.
You’ll hear a beep in the Speaker
and the Intercom and Speaker
lights come on.
2. Lift the handset and make the
announcement.
Each person in the group will hear
your announcement through the
Speaker on the phone.
Or,
1. Lift the handset.
The green light comes on.
2. Touch Intercom.
3. Dial the group code:
Page all–70
Group 1–71
Group 2–72
You’ll hear a beep.
4. Make the announcement.
Each person in the group will hear
your announcement through the
Speaker on the phone.
71
PAGING THROUGH THE LOUDSPEAKER (LOUDSPEAKER PAGE)
The Loudspeaker Page feature enables you to make an announcement over your
company’s existing loudspeaker equipment. This feature is particularly useful if
your company has a warehouse, shop, or assembly area where people don’t have
access to individual phones. The feature is also a big help when an Attendant is
trying to locate someone who is away from his/her desk.
To program a loudspeaker page button:
Action
Result
1. Label a button “Page.”
Page
2. Slide the T/P switch to P.
You’ll hear a ringing pattern. The
red line lights come on and the
green line lights flash.
3. Touch the button you Iabelled.
4. Touch * 91 and then 6.
The button is programmed.
5. Slide the T/P switch to the center
position.
To use the loudspeaker page feature:
Action
Result
1. Lift the handset.
Or,
Touch the Intercom button, and
then touch 6.
The red light for the next available
phone line comes on.
The red intercom light comes on.
2. Touch the Page button.
The loudspeaker turns on.
You’ll hear a beep.
3. Make your announcement.
The announcement is heard
through the loudspeaker.
4. Hang up.
The loudspeaker is disconnected.
72
999-505-144