1
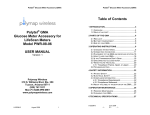
Polytel® Glucose Meter Accessory (GMA) Polytel® Glucose Meter Accessory (GMA) Table of Contents 1 INTRODUCTION..........................................................4 Polytel® GMA Glucose Meter Accessory for Abbott® FreeStyle® Lite and FreeStyle® Freedom® Lite Model PWR-08-09 USER MANUAL Version: B 1.1 OVERVIEW ..............................................................4 1.2 WHO IS THIS FOR?...................................................5 2 PARTS OF THE GMA .................................................6 2.1 RED LIGHT ..............................................................6 2.2 BATTERY COMPARTMENT ........................................8 2.3 SIZE OF YOUR GMA ................................................8 3 OPERATING INSTRUCTIONS....................................8 3.1 CHANGING THE BATTERIES.......................................8 3.2 PREPARING THE CARRYING CASE ...........................11 3.3 CONNECTING THE DEVICES ....................................12 3.4 PLACEMENT OF THE GMA AND RECEIVING STATION.13 3.5 HOW TO USE YOUR GMA.......................................14 3.6 IF THE READING DIDN’T SEND ................................17 3.7 DISCONNECTED GLUCOSE METER...........................18 3.8 WHEN YOU’RE TRAVELING .....................................18 3.8.1 Traveling in France, Spain, or Japan ..........18 3.9 TROUBLESHOOTING ...............................................19 4 SAFETY INFORMATION...........................................20 4.1 PATIENT SAFETY ...................................................20 4.2 ELECTRICAL SAFETY .............................................21 4.3 COMPLIANCE INFORMATION ...................................21 4.3.1 Compliance Requirements ..........................22 4.3.2 Compliance Statement ................................22 4.4 ABOUT THE LABEL AT THE BOTTOM OF THE GMA.....23 Polymap Wireless 310 S. Williams Blvd. Ste. 350 Tucson, Arizona 85711 (520) 747-1811 Mon-Fri 9AM-5PM MST www.polymapwireless.com 8-25207-B June 2009 5 OPERATOR MAINTENANCE ...................................24 5.1 PERIODIC MAINTENANCE .......................................24 5.2 CLEANING YOUR GMA...........................................25 1 8-25207-B -1- -June 1 - 2009- 1 - 2 Polytel® Glucose Meter Accessory (GMA) Polytel® Glucose Meter Accessory (GMA) 6 TECHNICAL SPECIFICATIONS ...............................25 6.1 BATTERIES ............................................................25 6.2 TEMPERATURES ....................................................26 6.3 COMPATIBILITY WITH OTHER ELECTRICAL MEDICAL EQUIPMENT .................................................................26 6.4 SYSTEM AVAILABILITY............................................27 7 TRADEMARKS..........................................................27 8 INDEX ........................................................................28 1 Introduction 1.1 Overview Welcome to the world of wireless medical monitoring. In this pamphlet, you will learn how to use and maintain your Polytel® GMA Glucose Meter Accessory. The GMA is an easy-to-use accessory that lets you send the glucose readings you take with your FreeStyle® glucose meter wirelessly to a receiving station. This GMA is designed for the FreeStyle® Lite and FreeStyle® Freedom® Lite glucose meters. No more worrying about writing down the test results and carrying them in to your doctor every visit—it is all done automatically in your own home. There are three parts to sending your readings wirelessly: You measure your glucose on the FreeStyle® glucose meter. The GMA receives the reading from the meter and sends it wirelessly to the receiving station. The receiving station receives, stores, and sends your readings to your service provider – usually your doctor’s office or a 8-25207-B June 2009 3 8-25207-B June 2009 4 Polytel® Glucose Meter Accessory (GMA) monitoring service. The station is a separate device that is either a self-contained box, called an “access point,” or your personal computer, cell phone, or handheld computer provided by your monitoring service. Your monitoring service can explain how to use the receiving station. To use the GMA, all you have to do is take the reading using your FreeStyle meter as usual. Everything else is done automatically for you. Polytel® Glucose Meter Accessory (GMA) 2 Parts of the GMA Your GMA is easy to maintain, set up and use. The most important part to pay attention to is the red light at the bottom right edge of the device. Different blinking patterns tell you when the GMA is sending data, whether it was sent successfully or not, and when it is time to change the batteries. 2.1 Red light To make sure all data is sent to your provider, if the GMA is unable to find a receiving station, it will save the reading along with the date and time you took it. The old reading will be sent along with the next reading. The GMA has a small red indicator light that blinks in different patterns when it is doing different things. It also has a START () button. 1.2 Who is this for? The GMA is intended for diabetic patients who want to monitor their glucose levels remotely. It can be used by patients in their homes and in their daily lives. Figure 1: Red light on lower right indicates status of the GMA. Square button with white triangle is “Start” button. 8-25207-B June 2009 5 8-25207-B June 2009 6 Polytel® Glucose Meter Accessory (GMA) Here are the possible light patterns and their meanings: Light Looks Like… Speed / Length On (no blinking) Up to 20 seconds Blinking 1 blink per second Very fast blinking Very fast blinking Slow blinking Off 8-25207-B 2 blinks per second for 1-2 seconds 2 blinks per second for 10+ seconds 1 blink per 10 seconds n/a June 2009 Polytel® Glucose Meter Accessory (GMA) 2.2 Battery Compartment It means… GMA is receiving reading from glucose meter GMA connecting to receiving station. Please be patient. GMA sending data to receiving station. Replace batteries. (See p. 8.) Last attempt to send data unsuccessful, waiting to retry. Either: Successfully sent data. or: Data not successfully sent, will send with next reading. (See p. 17.) 7 You can open the battery compartment by sliding the lid in the direction of the arrow then allowing it to swing open: Figure 2: Battery lid. Slide lid in direction of arrow and allow it to swing open 2.3 Size of your GMA 2.85 inches x 0.8 inches x 1.8 inches (72mm x 20mm x 45mm) 3 Operating Instructions 3.1 Changing the batteries The GMA uses two Lithium CR2-size cell batteries that should last several months. You can buy new Lithium CR2-size batteries at most drugstores or grocery stores. Tip: Your batteries will last longer if you remove them if you will not be using the GMA for a month or longer. 8-25207-B -7- June - 7 2009 - -7- 8 Polytel® Glucose Meter Accessory (GMA) It is time to change the batteries when the red light on the GMA blinks fast for at least 10 seconds after a new reading. Here is how you change the batteries 1. Open the battery compartment by sliding the lid in the direction indicated by the arrow labeled OPEN on the lid and let the lid open. Polytel® Glucose Meter Accessory (GMA) Putting the batteries in backwards could make the device get hot or make the batteries leak. Please pay attention to the instructions. 4. Close the battery compartment by bringing the lid gently down toward the batteries and sliding it in the direction opposite the OPEN arrow until the lid stops. 5. If the red light still flashes for 10 seconds or longer, repeat steps 1 through 4 and: Check that you inserted the batteries in the right direction. Try replacing with a different pair of Lithium CR2-size batteries. If you are still having trouble, see the “Troubleshooting” section on page 19. Figure 3: Slide open the lid to change the batteries 2. the first Lithium CR2-size battery with the negative end () down and the positive end (+) up. 3. Repeat step 2 for the second battery. Note: Always replace both batteries at the same time and make sure the batteries are from the same manufacturer. 8-25207-B June 2009 9 8-25207-B June 2009 10 Polytel® Glucose Meter Accessory (GMA) 3.2 Preparing the carrying case 3.3 Connecting the devices The meter has a hole in the side for the GMA connector, but the part of the case that holds it covers the hole, so we need to prepare the case first. 1) Cut a small slit (no more than ¼“in the mesh near the point shown by the arrow. Before you can start using the GMA, you need to connect it to the glucose meter. 1) Insert the glucose meter 2) Insert the GMA into the zippered pouch Figure 5: glucose meter and GMA in carrying case. Above: FreeStyle Lite and FreeStyle Freedom Lite. Note different position of GMA to make closing cover easier with larger meter Figure 4: modification to the carrying case. Please note different position of slit for FreeStyle Freedom case. 8-25207-B June 2009 Polytel® Glucose Meter Accessory (GMA) 11 8-25207-B June 2009 12 Polytel® Glucose Meter Accessory (GMA) Polytel® Glucose Meter Accessory (GMA) 3) Thread the cable through the mesh pocket, in through the zippered opening and out through a hole in the mesh near the meter. goes out when the reading is sent. See page 7 to learn more about the red light. 4) Plug the cable from the GMA into the side of the glucose meter and press firmly into place. 3.5 How to use your GMA NOTE: Connect the GMA ONLY to a FreeStyle® Lite or FreeStyle® Freedom® Lite meter. Connecting it to any other device may make your readings inaccurate or damage one or both devices. 2) Close and zip the case. The next step is setting up the receiving station if this has not already been done. 3.4 Placement of the GMA and receiving station Various types of barriers, such as walls, can reduce the range of wireless devices. Your GMA will work best if it is in the same room as the receiving station. (Remember: your receiving station is the separate box, personal computer, cell phone, or handheld device.) 1. Insert the glucose test strip into the glucose meter and take your reading as you normally would. Instructions on using your FreeStyle® meter should have come with the original box. 2. Remove the test strip as usual. 3. After you remove the test strip: a. Press the START () button on the GMA b. The FreeStyle® meter lights up all of its display (see below) then transitions to a simpler display with a single reading. This shows that it is sending the reading to the GMA. Warning: Do not put the GMA on a metal surface or in a metal box or enclosure. This may interfere with its ability to send data. When the devices are working together correctly, the red light on the GMA comes on and starts blinking right after you take a new reading, then 8-25207-B June 2009 13 8-25207-B June 2009 14 Polytel® Glucose Meter Accessory (GMA) Figure 6 All display segments light up, then a single reading shows on the meter when the GMA is receiving your readings. Polytel® Glucose Meter Accessory (GMA) After taking your glucose reading, it may take a minute or two to send the reading to the receiving station. Please be patient—do not press any buttons or disconnect the GMA until the light has completely stopped blinking or your results may not be sent. c. The GMA red light begins blinking off and on. This means that it is sending your reading to the receiving station. Figure 7: Blinking light usually means your information is being sent. Please be patient. IMPORTANT: If glucose meter screen does not look like Figure 6 or the red light does not come on shortly after taking a new reading: Check that the GMA cable is firmly plugged into the glucose meter. Try replacing both batteries (see page 8). 8-25207-B June 2009 15 8-25207-B June 2009 16 Polytel® Glucose Meter Accessory (GMA) See page 19 if you are still having problems. Polytel® Glucose Meter Accessory (GMA) 3.7 Disconnected glucose meter When the GMA sends your information, the power level of the batteries is sent along with your reading. Your monitoring service may tell you it is time to replace the batteries, even before you notice any problems. That’s it—you don’t have to do anything more. After the reading reaches the receiving station, the GMA light turns off. A couple of minutes later, the glucose meter display turns off. Any readings taken when the GMA is not connected to the glucose meter are stored along with the date and time taken. The next time you take a new reading after the devices are connected again, both the stored and new readings are sent to the receiving station. 3.8 When You’re Traveling If you are not at home or near your regular receiving station, the GMA can send the readings to a different access point. Please speak with your monitoring service to set this up. 3.6 If the Reading Didn’t Send If your reading was not sent successfully, the GMA will try again 1 minute later and then again 2 minutes later. If all three tries fail, the GMA saves the reading along with the time and date it was taken and turns itself off. The next time you take a new reading, it sends both the new and the stored readings. 3.8.1 Traveling in France, Spain, or Japan The device uses several radio channels. Some of these are not allowed in France, Spain, or Japan. If you live in or plan to travel to these countries, please contact Polymap Wireless. Tip: If you want to send the stored reading(s) without taking a new one: 1. Press the START () button on the GMA You will see the display come on, as during a normal transmission 8-25207-B June 2009 17 8-25207-B June 2009 18 Polytel® Glucose Meter Accessory (GMA) 4 Safety Information 3.9 Troubleshooting What’s Wrong? Red light doesn’t come on What Caused It? Weak/missing batteries Disconnected cable Can’t send even after several tries (light is on) Receiving station may not be working properly Weak/missing batteries Disconnected cable Meter display does not come on as in Figure 6 Damaged or frayed cable Polytel® Glucose Meter Accessory (GMA) We are committed to your safety. Please read these warnings and cautions. What To Do Replace batteries (see p. 8). Plug cable firmly into glucose meter (see p. 12). Move receiving station closer to GMA or see manual for receiving station. Replace batteries (see p. 8). Plug cable firmly into glucose meter (see p. 11). Send GMA to Polymap Wireless for repair. 4.1 Patient Safety CAUTION! Do not share your glucose meter or GMA with anyone else. Letting someone else use your GMA will cause his or her readings to be mistaken for yours. NOTE: Polymap Wireless is not responsible for the reading, diagnosis, or electrical safety of the FreeStyle® glucose meter itself. The Polytel GMA is a data transmission system only. WARNING: Changes made to the product, unless expressly approved by Polymap Wireless, LLC could void the user’s license for and the warranty of the device. CAUTION! Only use Lithium CR2-size batteries. Using any other type of battery may cause an explosion. 8-25207-B June 2009 19 8-25207-B June 2009 20 Polytel® Glucose Meter Accessory (GMA) 4.3.1 Compliance Requirements 4.2 Electrical Safety Polymap Wireless is responsible for the effects of safety, reliability, and performance of the GMA as long as: You use the equipment according to the instructions in this manual. All repairs, changes, assembly operations, and extensions are done only by Polymap Wireless. Only authorized maintenance staff should disassemble the GMA. (This does not include changing the batteries.) The GMA is classified as CLASS II equipment as per IEC60601-1 and Class II Medical Devices per 21CFR. The FreeStyle® meters are approved for use by their manufacturer. Polymap Wireless is not responsible for their diagnostic accuracy or their electrical safety. 4.3.2 Compliance Statement WARNING! Never operate this device in an area where there is a risk of explosion. Using electrical equipment in the presence of flammable anesthetics or oxygen may cause an explosion. Polymap Wireless personnel must do all servicing of your GMA. 4.3 Compliance Information This section is about the telemetry system regulatory compliance requirements and the manufacturer’s responsibilities. 8-25207-B June 2009 Polytel® Glucose Meter Accessory (GMA) 21 Polymap Wireless states that this device conforms to: FDA 21 CFR Parts 820 IEC 60601-1: Medical Electrical Equipment – General Requirements for Safety IEC 60601-1-1: Medical Electrical Equipment – Collateral standard: Safety requirements for medical electrical systems IEC 60601-1-2: Medical Electrical Equipment – Collateral standard: Electromagnetic compatibility for medical electrical systems IEC 60601-1-4: Medical Electrical Equipment – Collateral standard: Programmable medical electrical systems UL 60601: Medical Electrical Equipment, Part 1 – General Requirements for Safety 8-25207-B June 2009 22 Polytel® Glucose Meter Accessory (GMA) CSA: Medical Electrical Equipment, Part 1: C22.2601 No. 601.1 – M9 – General Requirements for Safety The manufacturer of this device complied with the following requirements applicable at time of manufacture: o ISO 13485:2003 o ISO 13485/8 under Canadian Medical Device Conformity Assessment System (CMDCAS) Polytel® Glucose Meter Accessory (GMA) Seal / Mark Meaning Device was tested to comply with the U.S. and Canadian safety directives. Device was tested to comply with the CE MDD directive. You should read accompanying documents before use. 4.4 About the label at the bottom of the GMA The label on the side of your GMA shows the unique ID number (serial number) of your device as well as some other things you might need to know: IEC/UL/CAN/CSA 60601-1 60601-1-2 FCC: R47F2M03GL IC: 8229A-F2M03GL S/N: 0015B4010204 Device complies with both the safety and the radio requirements of these respective standards. FCC listing number for the device. Industry Canada listing number for the device Unique serial number 5 Operator Maintenance 5.1 Periodic Maintenance Check your GMA now and then to make sure it is working properly and nothing is damaged. Make sure the cord that connects from your GMA to the glucose meter is not frayed or damaged. Figure 8: Label on the bottom of the GMA 8-25207-B June 2009 23 8-25207-B June 2009 24 Polytel® Glucose Meter Accessory (GMA) If your GMA needs repair or is not working right, contact Polymap Wireless for service right away. 6.2 Temperatures 5.2 Cleaning your GMA Although you should not need to clean your GMA very often, here is how to do it: 1. Unplug the GMA from the glucose meter and remove it from the mesh pocket. 2. Take a soft cloth and dampen it with water or a weak solution of household dishwashing liquid mixed with water. Wring out the cloth. Warning: Do not use any sprays or put your GMA in any liquid. Sprays and liquids may penetrate and damage the unit. 3. Gently wipe the outside of the unit with the damp cloth. 4. Reconnect the GMA to the glucose meter (see page 11), and close the mesh pocket (see page 13). . 6 Technical Specifications The GMA uses two CR2 Lithium cells (3V each). Max. Power consumption: 1W. If you move your GMA from a cold location to a warm location, please allow it to come up to room temperature before using it. 6.3 Compatibility with other electrical medical equipment Like other electrical medical equipment, the GMA unit requires special precautions to make sure that it works with other electrical medical devices. This is called electromagnetic compatibility (EMC). As long as you install and use your GMA as noted in this manual, you should be fine. This device complies with part 15 of the FCC Rules. Operation is subject to the following two conditions: (1) This device may not cause harmful interference, and (2) This device must accept any interference received, including interference that may cause undesired operation. A few things to remember: Only use CR2 Lithium batteries. Replace both batteries at the same time, preferably from the same manufacturer. June 2009 Use your GMA in temperatures ranging from 10 to 40 Celsius (50 to 104 Fahrenheit). Store your GMA in temperatures ranging from -40 to +70 Celsius (-40 to 158 Fahrenheit). NOTE: The GMA device has been tested to comply with IEC 60601-1-2:2001 requirements for EMC with other devices. 6.1 Batteries 8-25207-B Polytel® Glucose Meter Accessory (GMA) 25 8-25207-B June 2009 26 Polytel® Glucose Meter Accessory (GMA) 6.4 System Availability If you end up needing to take a second reading shortly after a first reading, it is probably easiest to wait until the meter display has turned off which could take two minutes. There is no problem with taking several readings while out of range of the receiving station. The stored readings will all be sent the next time you take a new reading within range of the receiving station. 7 Trademarks Bluetooth® word mark and logos are owned by the Bluetooth SIG, Inc. Polytel® is a registered trademark of Polymap Wireless LLC. This product was designed solely by Polymap Wireless, independent of Abbott, maker of the FreeStyle® glucose meters. 8-25207-B June 2009 27 Polytel® Glucose Meter Accessory (GMA) 8 Index access points changing, 18 defined, 5 availability, 27 batteries, 8, 9 blinking light, 6, 7 Carrying case, modifying, 11 Case, preparing, 11 cleaning, 25 compliance, 21, 22 connecting, 12 devices cleaning, 25 connecting, 12 disconnecting, 18 sharing, 20 troubleshooting, 19 using, 14 disconnecting, 18 electrical safety, 21 electromagnetic compatibility, 26 EMC, 26 indicator light, 6, 7 installing, 12 8-25207-B intended use, 5 legal compliance, 21, 22 light indicator, 6, 7 major parts, 6 Meter carrying case, 11 other devices, 13 receiving station. See access points regulatory compliance, 21, 22 repair, 25 replacing batteries, 8, 9 retries, 17 safety electrical, 21 service, 25 setting up, 12 sharing devices, 20 temperatures, 26 trademarks, 27 traveling, 18 troubleshooting, 19 using devices, 14 June 2009 28