1
TECHNICAL MANUAL
FOR
DYNA 8000, 8200 & 8400
ELECTRONIC GOVERNOR
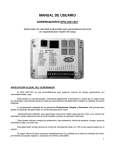
DYNA 8000
DYNA 8400
DYNA 8200
DYNA 8000-400 & DYNA 8400-400
F-23721-5
CONTENTS
SECTION
DESCRIPTION
PAGE
1
GENERAL INFORMATION ........................... 3
2
SPECIFICATIONS......................................... 3
3
FUNCTIONAL DESCRIPTION ..................... 5
4
INSTALLATION ............................................. 6
5
CALIBRATION OF DYN1-1065X .................. 9
6
CALIBRATION OF DYN1-1068X ................ 11
7
TROUBLESHOOTING ................................ 13
8
INSTALLATION DIMENSIONS ................... 15
2
1. GENERAL INFORMATION
2.1.10 DYNA 8000 CONTROLLER
1.1 INTRODUCTION
Output Current
@ 12 VDC
The DYNA 8000, DYNA 8200 and DYNA 8400 governor system
provides an engine governor for speed and power control of
piston and gas turbine engines or steam and water turbines.
Output Current
@ 24 VDC
Weight
The actuator is a simple, proportional, electric solenoid having
a sliding armature whose magnetic force is proportional to input
coil current. The armature glides on anti-friction bearings and is
balanced between the force of its return spring and the magnetic force, thus providing a hysteresis-free linear movement.
The linear motion is converted to an output shaft rotation by a
crank arm.
Input Signal =
Frequency in Hertz
Engine RPM x Number of Gear
Teeth on Flywheel
60 Seconds
Select controller for the correct input signal frequency range
generated by the magnetic pickup at the maximum engine
operated (RPM) speed.
2.1.12 AVAILABLE CONTROLLER MODELS
Controllers: Speed
• DYN1-10652-000-0-12/24
• DYN1-10653-000-0-12/24
• DYN1-10654-000-0-12/24
• DYN1-10656-000-0-12/24
1.2 TYPICAL APPLICATIONS
Typical applications are speed governing, remote throttle control, generator sets, power carts and pump set applications.
1.3 STANDARD FEATURES
•
80 mA
13 amps
80 mA
13 amps
0.863
1.9
2.1.11 DYNA 8000 CONTROLLER
INPUT SIGNAL FREQUENCY
The hazardous duty DYNA 8000 and DYNA 8400 actuators
provide units that are UL listed for Class I, Division 2, Group D,
hazardous duty applications that are often encountered in the
petroleum or chemical industries. The hazardous duty actuators can be used to provide an engine governor for speed and
power control of piston and gas turbine engines.
•
•
•
•
•
•
•
•
•
Nominal Quiescent Current
Maximum Amperes @ Stall
Nominal Quiescent Current
Maximum Amperes @ Stall
Kilograms
Pounds
•
•
•
•
All electric
All engine compatible
Mounts in any position
Engine mounted (actuator only)
High reliability due to few moving parts
Proportional actuator
No hydraulic or oil lines
No special maintenance
Spring returns output shaft to minimum position on removal
of power or loss of magnetic pickup signal
Precise repeatability
Input Signal Frequency
250 - 1200 Hz
1200 - 2500 Hz
2500 - 5000 Hz
5000 - 9500 Hz
DYN1-10682-000-0-12/24
DYN1-10683-000-0-12/24
DYN1-10684-000-0-12/24
DYN1-10686-000-0-12/24
250 - 1200 Hz
1200 - 2500 Hz
2500 - 5000 Hz
5000 - 9500 Hz
2.2. DYNA 8000 & DYNA 8000 UL APPROVAL,
HAZARDOUS DUTY, CLASS 1, DIVISION 2, GROUP D
ACTUATOR SPECIFICATIONS
2.2.1 Operating Voltage: 12 VDC or 25 VDC ±20%
2.2.2 Ambient Operating Temperature:
-65 to +255°F (-55 to +125°C).
2. SPECIFICATIONS
2.1 CONTROLLER SPECIFICATIONS
2.1.1 Operating Voltage: 12 VDC or 24 VDC ±20%
2.1.2 Ambient Operating Temperature:
-40 to +180°F (-40 to +85°C).
2.1.3 Temperature Stability: Better than ±0.5% over a
temperature range of -40 to +167°F (-40 to +75°C).
2.1.4 Steady State Speed Band: ±0.25%
2.1.5 Adjustments: Speed, Gain, Integral, and Droop.
2.1.6 Circuit Boards: Boards are covered with a heavy
conformal coating for moisture and vibration protection.
2.1.7 Connection: Terminal strip.
2.1.8 Mechanical Vibration: Withstands the following vibration without failure of degraded performance: 0.06 inch double
amplitude at 5 to 18 Hz; 1 G at 18 to 30 Hz; 0.02 inch double
amplitude at 30 to 48 Hz; 2.5 G's at 48 to 70 Hz.
2.1.9 The same DYN1-1065X or DYN1-1068X Series can be
used on a DYNA 8000, DYNA 8200 or DYNA 8400 actuator.
The DYN1-1068X governor control box provides a wider range
of adjustment than the DYN1-1065X. The DYN1-1068X can be
used where maximum performance is desired or for some
engines which are possibly more difficult to control.
2.2.3 Sealed Unit: Oil, water and dust tight.
2.2.4 Connection: Terminal strip or "MS" Connector.
2.2.5 Mechanical Vibration: 5 to 500 Hz, Curve F, per
MIL-STD. 810D, Method 514-2.
2.2.6 DYNA 8000 ACTUATORS
Work
Torque
Output
Weight
Current @
12 VDC
Current @
24 VDC
Joules
Foot-Pounds
Newton-Meters
Pound-Foot
Rotary
Kilograms
Pounds
Maximum Amperes @ Stall
Nominal Steady State Amperes
Maximum Amperes @ Stall
Nominal Steady State Amperes
Nominal Response Time for 63% of Stroke
(Seconds)
3
1.2
0.9
1.4
1.0
35°
5
11.0
12.5
3.5
9.5
1.5
0.030
2.2.7 AVAILABLE DYNA 8000 ACTUATOR MODELS
WITH CLOCKWISE OUTPUT SHAFT ROTATION
(Standard Mounted Units)
• DYNC-11020-000-0-12 Standard Clockwise
DYNC-11020-000-0-24 Output Shaft Rotation
2.2.11 AVAILABLE DYNA 8000 HAZARDOUS DUTY
ACTUATOR MODELS WITH CLOCKWISE OUTPUT SHAFT
ROTATION (Standard Mounted Units)
• DYNC-11020-400-0-12 Standard Clockwise
DYNC-11020-400-0-24 Output Shaft Rotation
•
DYNC-11021-000-0-12 Actuator Head Positioned 180°
DYNC-11021-000-0-24 from Standard DYNC-11020
•
DYNC-11021-400-0-12 Actuator Head Positioned 180°
DYNC-11021-400-0-24 from Standard DYNC-11020
•
DYNC-11022-000-0-12 Actuator Head Positioned 90°
DYNC-11022-000-0-24 CCW from Standard DYNC-11020
•
DYNC-11022-400-0-12 Actuator Head Positioned 90°
DYNC-11022-400-0-24 CCW from Standard DYNC-11020
•
DYNC-11023-000-0-12 Actuator Head Positioned 90°
DYNC-11023-000-0-24 CW from Standard DYNC-11020
2.2.12 AVAILABLE DYNA 8000 HAZARDOUS DUTY
ACTUATOR MODELS WITH COUNTERCLOCKWISE
OUTPUT SHAFT ROTATION (Standard Mounted Units)
2.2.8 AVAILABLE DYNA 8000 ACTUATOR MODELS
WITH CLOCKWISE OUTPUT SHAFT ROTATION
(Side Mounted Units)
• DYNC-11020-300-0-12 Standard Clockwise
DYNC-11020-300-0-24 Output Shaft Rotation
•
DYNC-11021-300-0-12 Actuator Head Positioned 180°
DYNC-11021-300-0-24 from Standard DYNC-11020
•
DYNC-11022-300-0-12 Actuator Head Positioned 90°
DYNC-11022-300-0-24 CCW from Standard DYNC-11020
•
DYNC-11023-300-0-12 Actuator Head Positioned 90°
DYNC-11023-300-0-24 CW from Standard DYNC-11020
DYNC-11025-000-0-12 Actuator Head Positioned 90°
DYNC-11025-000-0-24 CW from Standard DYNC-11024
•
DYNC-11026-000-0-12 Actuator Head Positioned 180°
DYNC-11026-000-0-24 CCW from Standard DYNC-11024
•
DYNC-11028-000-0-12 Actuator Head Positioned 90°
DYNC-11028-000-0-24 CCW from Standard DYNC-11024
DYNC-11024-300-0-12 Standard Clockwise
DYNC-11024-300-0-24 Output Shaft Rotation
•
DYNC-11025-300-0-12 Actuator Head Positioned 90°
DYNC-11025-300-0-24 CW from Standard DYNC-11024
•
•
•
•
DYNC-11025-400-0-12 Actuator Head Positioned 90°
DYNC-11025-400-0-24 CW from Standard DYNC-11024
•
DYNC-11026-400-0-12 Actuator Head Positioned 180°
DYNC-11026-400-0-24 CCW from Standard DYNC-11024
•
DYNC-11021-401-0-12 Actuator Head Positioned 180°
DYNC-11021-401-0-24 from Standard DYNC-11020
•
DYNC-11022-401-0-12 Actuator Head Positioned 90°
DYNC-11022-401-0-24 CCW from Standard DYNC-11020
2.2.14 AVAILABLE DYNA 8000 HAZARDOUS DUTY
ACTUATOR MODELS WITH COUNTERCLOCKWISE
OUTPUT SHAFT ROTATION (Side Mounted Units)
• DYNC-11024-401-0-12 Standard Clockwise
DYNC-11024-401-0-24 Output Shaft Rotation
2.2.10 AVAILABLE DYNA 8000 ACTUATOR MODELS
WITH COUNTERCLOCKWISE OUTPUT SHAFT
ROTATION (Side Mounted Units)
•
DYNC-11024-400-0-12 Standard Clockwise
DYNC-11024-400-0-24 Output Shaft Rotation
2.2.13 AVAILABLE DYNA 8000 HAZARDOUS DUTY
ACTUATOR MODELS WITH CLOCKWISE OUTPUT SHAFT
ROTATION (Side Mounted Units)
• DYNC-11020-401-0-12 Standard Clockwise
DYNC-11020-401-0-24 Output Shaft Rotation
2.2.9 AVAILABLE DYNA 8000 ACTUATOR MODELS
WITH COUNTERCLOCKWISE OUTPUT SHAFT
ROTATION (Standard Mounted Units)
• DYNC-11024-000-0-12 Standard Clockwise
DYNC-11024-000-0-24 Output Shaft Rotation
•
•
•
DYNC-11025-401-0-12 Actuator Head Positioned 90°
DYNC-11025-401-0-24 CW from Standard DYNC-11024
•
DYNC-11026-401-0-12 Actuator Head Positioned 180°
DYNC-11026-401-0-24 CCW from Standard DYNC-11024
2.3 DYNA 8200 ACTUATORS
2.3.1 Operating Voltage: 12 or 24 VDC ±20%.
2.3.2 Ambient Operating Temperature:
-65 to +255F (-55 to +125°C).
DYNC-11026-300-0-12 Actuator Head Positioned 180°
DYNC-11026-300-0-24 CCW from Standard DYNC-11024
2.3.3 Sealed Unit: Oil, water and dust tight.
2.3.4 Connection: Terminal strip or "MS Connector.
DYNC-11028-300-0-12 Actuator Head Positioned 90°
DYNC-11028-300-0-24 CCW from Standard DYNC-11024
2.3.5 Mechanical Vibration: 5 to 500 Hz, Curve F, per MILSTD. 810D, Method 514-2.
4
Work
Torque
Output
Weight
Current@
12 VDC
Current @
24 VDC
Joules
Foot-Pounds
Newton-Meters
Pound-Foot
Rotary
Kilograms
Pounds
Maximum Amperes @ Stall
Nominal Steady State Amperes
Maximum Amperes @ Stall
Nominal Steady State Amperes
2.4.7 AVAILABLE DYNA 8400 ACTUATOR MODELS
WITH TERMINAL STRIP CONNECTION
2.85
2.10
4.07
3.00
45°
8.4
18.5
14.75
4.5
14.0
3.5
Nominal Response Time for 63% of Stroke
(Seconds)
•
2.4.8 AVAILABLE DYNA 8400 ACTUATOR MODELS
WITH 2-PIN MS SCREW ON CONNECTOR
•
2.3.6 AVAILABLE DYNA 8200 ACTUATOR MODELS
WITH CLOCKWISE OUTPUT SHAFT ROTATION
DYNC-12000-000-0-12 Standard Clockwise
DYNC-12000-000-0-24 Output Shaft Rotation
•
DYNC-12001-000-0-12 Actuator Head Positioned 180°
DYNC-12001-000-0-24 from Standard DYNC-12000
•
DYNC-12002-000-0-12 Actuator Head Positioned 90°
DYNC-12002-000-0-24 CCW from Standard DYNC-12000
•
DYNC-12003-000-0-12 Actuator Head Positioned 90°
DYNC-12003-000-0-24 CW from Standard DYNC-12000
DYNC-14801-000-0-24 Through Output Shaft Making
Available CW and CCW Output
2.4.9 AVAILABLE DYNA 8400 HAZARDOUS DUTY
ACTUATOR WITH TERMINAL STRIP CONNECTION
INSIDE CAST IRON JUNCTION BOX
.138
•
DYNC-14800-000-0-24 Through Output Shaft Making
Available CW and CCW Output
•
DYNC-14800-400-0-24 Through Output Shaft Making
Available CW and CCW Output
3. FUNCTIONAL DESCRIPTION
3.1 ACTUATOR
The actuator consists of an electro-magnet with an iron
armature rolling on the center shaft bearings. The actuator is
provided with a return spring which balances the magnetic
force of the armature. When DC current flows in the coil, the
magnetic force tends to move the armature in the stator and
this linear motion is transformed into rotary motion through a
crank arm that forms part of the output shaft.
2.4 DYNA 8400 & DYNA 8400 UL APPROVAL,
HAZARDOUS DUTY, CLASS 1, DIVISION 2, GROUP D
ACTUATOR SPECIFICATIONS
3.2 CONTROLLER
The electronic controller is the information processing unit of
the governor assembly. It contains electronic components
which process the input signal from the magnetic pickup and
control the engine to the desired speed/RPM set into the
controller. Electronic adjustments are available on the controller for field adjusting the unit as necessary.
2.4.1 Operating Voltage: 24 VDC ±20%.
2.4.2 Ambient Operating Temperature:
-65 to +255F (-55 to +125°C).
2.4.3 Sealed Unit: Oil, water and dust tight.
3.3 DC POWER SOURCE
2.4.4 Connection: Terminal strip or "MS Connector.
The governor system receives its power from a battery or an
AC to DC power supply supplying 12 or 24 VDC ±20% to
match the governor voltage. The average operating current
consumption is 2.5 to 3.5 amperes and the highest consumption is 14.75 amperes during engine start-up or during a large
load change. The power source must be rated above maximum stall current.
2.4.5 Mechanical Vibration: 5 to 500 Hz, Curve F, per MILSTD. 810D, Method 514-2.
2.4.6 DYNA 8400 ACTUATORS
Work
Torque
Output
Weight
Current @
24 VDC
Joules
Foot-Pounds
Newton-Meters
Pound-Foot
Rotary
Kilograms
Pounds
Maximum Amperes @ Stall
Nominal Steady State Amperes
Nominal Response Time for 63% of Stroke
(Seconds)
5.8
4.3
7.3
5.4
45°
12.2
27
13
2.0
3.4 COMPONENT LOCATION
The actuator of the governor assembly is mounted on the
engine next to the fuel system. The magnetic pickup is
normally mounted in the flywheel housing in such a way that
it can count the teeth on the starter ring gear. The controller is
off-mounted or installed in the engine control panel or cabinet.
0.104
5
3.5 ISOCHRONOUS OPERATION
3.7 REMOTE SPEED ADJUSTMENT
Isochronous operation is obtained by setting droop potentiometer fully counterclockwise. The DYNA governor is all electric,
and it is normally operated in the isochronous mode; i.e.,
engine RPM is constant (±0.25%) under steady state load
conditions, up to the engine's maximum capability, regardless
of load on the engine.
An optional remote speed selector (DYNS-10000) is available
for adjusting engine RPM from up to 90 meters (300 ft.) from the
engine. See the Electrical Wiring Schematic. The potentiometer can be connected for a narrow (fine) or wide speed range
control.
4. INSTALLATION
4.1 PROCEDURE
4.1.1 Mount the actuator on a suitable rigid steel bracket or
plate.
Desired
Engine RPM
Engine
RPM
NOTE
Mounting information and kits are usually available for
a particular engine. Contact Sales Representative.
Isochronous
Operation Mode
4.1.2 Set up the linkage and rod end bearings (see 4.2).
4.1.3 Install the speed sensor with SAE threads (magnetic
pickup)*.
100%
Engine Load
*Magnetic pickups with metric threads are available.
Thread — M16 x 1.5 — 6 g. Tap Drill Size — 14.5 0 mm.
3.6 DROOP OPERATION
4.1.3.1 Remove the inspection cover over the ring gear teeth.
The teeth should be free of burrs, excessive grease or dirt.
Droop operation is obtained by setting the droop potentiometer. Clockwise increases the droop. The amount of droop for
a given setting depends on the magnetic pickup frequency
and no load to full load actuator shaft rotation. A droop
potentiometer setting of 10 o'clock will give about 4% droop,
no load to full load when the pickup frequency is 4260 Hz and
actuator shaft rotation is approximately 30 degrees from no
load to full load. Lower pickup frequency or smaller shaft
rotation results in less droop for the system.
4.1.3.2 The magnetic pickup should not be installed in inspection covers. Inspect the ring gear housing and pick a location
where a 37/64" hole can be drilled such that the ring gear teeth
will pass in front of the pickup pole face. After the 37/64" hole
is drilled, use a 5/8-18 starting tap to cut threads for the
magnetic pickup, then run a bottom tap through the hole.
NOTE
The tapped hole should be drilled as nearly perpendicular
as possible over the center of the ring gear teeth.
No Load
Engine RPM
Adjustable
Full Load
Engine RPM
4.1.3.3 Manually rotate the ring gear until a tooth face is directly
in the center of the tapped hole. Gently turn the magnetic pickup
clockwise into the hole until it bottoms on the tooth, and back off
1/4 turn. Tighten the jam nut firmly, maintaining the 1/4 turn
position.
Engine
RPM
0%
% of Engine Load
100%
6
2 Pin Connector
No.MS3106A 10-SL-4S
Magnetic Pickup
has 5/8-18 Threads
Jam Nut
Speed Sensor
Engine
Housing
Gap
Ring Gear
.37 ± .127 mm
[.015 ± .005]
INSTALLATION OF MAGNETIC PICKUP
4.1.4 Mount the controller in the control panel.
4.1.5 Connect the wiring as shown in section 4.3 or according to your particular wiring diagram.
4.2 TYPICAL LINKAGE ARRANGEMENTS FOR THE ACTUATOR AND FUEL SYSTEM
4.2.1 ROTARY ACTUATOR TO ROTARY FUEL PUMP
2
Rod End
Bearing
AAA
AAA
AAA
AAA
Max
Fuel
Lever
Assembly
Rod End
Bearing
Min
Fuel
1
Rod
Lever
Assembly
Fuel
Pump
Actuator
Min
Fuel
AAA
AAA
AAA
Max
Fuel
4.2.2 ROTARY ACTUATOR TO LINEAR FUEL PUMP
AAA
AAA
AAA
AAA
Max
Fuel
2
Rod End
Bearing
Min
Fuel
Rod End
Bearing
Lever
Assembly
Fuel
Pump
1
Min
Fuel
Rod
Max
Fuel
Actuator
1
Choose hole in actuator lever which causes actuator to rotate through its maximum rotation to provide
minimum to maximum fuel.
2
Non-Linear linkage to actuator is proper for best operation. Provides low GAIN at light loads and high
GAIN at heavy loads.
7
4.3 TYPICAL WIRING DIAGRAM & CONTROLLER INSTALLATION DIMENSIONS
DIMENSIONS -- DYNA 8000 CONTROLLER -- DYN1 1065X and DYN1 1068X
Dimensions are in mm except as otherwise noted.
Dimensions in [ ] are in inches.
I
Chassis ground
screw
Cable A -Cable B -Cable C -Cable C --
Wiring Diagram for
DYNK-44-XX
E26-22
DYNZ-70-4
DYNK-210
(specify length) (90° connector)
(specify length)
(specify length) (terminal strip)
(specify length) (MS connector)
* Shielded cable -- Should be purchased from Barber-Colman or
customer should purchase a cable with a wrapped mylar supported
aluminum foil shield with a drain wire.
Controllers
Failsafe
1
TP1
TP2
2
3
4
5
** Remote speed potentiometer and 499K ohm resistor is B-C P/N
(DYNS-10000).
AAAA
AAAA
AAAAAAA
AAAA
AA
AAAAAAAA AAAA
6
7
8
9
10
11
† The 5K remote speed potentiometer can be wired two different ways:
ILS
Blk
+8V
-
+
Actuator
Battery
+4V
Chassis
Gnd
Screw
External
Speed
Adjust
1. As shown by the solid line from the wiper of the 5K potentiometer
and then connected to terminal #9 (no resistor required). Adjustable range is approximately ±5% at 1800 RPM.
Wht
Chassis
Gnd
Screw
Magnetic Pick-up
2. As shown by the dashed line from the wiper of the 5K potentiometer through resistor R and then connected to terminal #8.
Reducing the value of R increases the remote adjustable speed
range.
8
5. CALIBRATION OF DYNA 8000 SERIES CONTROLLER — DYN1-1065X
Input Signal
Frequency
Maximum
Part Number
Input Signal
Frequency
Maximum
Part Number
DYN1-10652-000-0-12/24
DYN1-10652-001-0-12/24*
]
250 to 1200 Hz
DYN1-10654-000-0-12/24
DYN1-10654-001-0-12/24*
]
2500 to 5000 Hz
DYN1-10653-000-0-12/24
DYN1-10653-001-0-12/24*
]
1200 to 2500 Hz
DYN1-10656-000-0-12/24
DYN1-10656-001-0-12/24*
]
5000 to 9000 Hz
NOTE
*
See Step 5.3 for proper procedures for setting switches S1
and S2, if you have a controller that has the two switches
located on top of the controller.
5.1 CONNECTION INFORMATION
5.2.5 Start the engine.
5.1.1 When using an ILS unit, the remote speed potentiometer may be left connected to the controller as shown.
5.2.5.1 Adjust the controller speed potentiometer until the
engine is operating at the desired engine RPM. Clockwise
increases engine RPM.
5.1.2 When an ILS unit is used, connect 3-wire shielded cable
to terminals 6, 7 and 8. Connect drain shield wire to terminal 10
at the controller only. Other end of drain shield wire is to be cut
off and taped.
5.2.5.2 If the governor system is unstable, slightly reduce the
GAIN setting.
5.2 CALIBRATION AND ADJUSTMENTS
NOTE
Except for the speed adjustment, the potentiometers
have internal stops at the 0 and 100% positions.
5.2.1 See diagram on page 8 for a reference guide before
making any adjustments of the potentiometers, DROOP, I,
GAIN and SPEED.
5.2.6 With the engine unloaded, finalize the settings, I and
GAIN adjustments as follows:
5.2.2 Power OFF - engine not operating.
5.2.6.1 Turn the GAIN adjustment clockwise slowly until the
actuator lever oscillates. (One may need to disturb actuator
lever to cause oscillation.) Reduce the GAIN adjustment slowly
counterclockwise until the lever is stable. Upset the lever by
hand. If the lever oscillates 3 to 5 diminishing oscillations and
stops, the setting is correct.
5.2.3 Initial potentiometer settings:
5.2.3.1 Set the I adjustment three divisions from zero and
the GAIN at the second division from zero.
5.2.3.2 For isochronous operation, set DROOP counterclockwise to minimum position as shown in paragraphs 3.5
and 3.6.
If system performance to load changes is satisfactory, omit step
5.2.6.2.
5.2.3.3 For DROOP operation, set DROOP potentiometer
clockwise to obtain desired amount of DROOP from no-load to
full load. Turning potentiometer clockwise increases DROOP.
5.2.6.2 Reduce the GAIN setting counterclockwise one division. Next, turn the I adjustment fully clockwise while observing
the actuator lever. If the lever does not become unstable, upset
it by hand. When the lever slowly oscillates, turn the adjustment
counterclockwise slowly until the lever is stable. Upset the lever
again; it should oscillate 3 to 5 times and then become stable
for optimum response.
NOTE
If the full 35° rotation of the actuator shaft is used and
the linkage adjusted to use only the active fuel range,
the maximum obtainable DROOP would be approximately 12% at full load.
NOTE
Use the settings of step 5.2.6.1 or step 5.2.6.2,
whichever provides the best performance.
5.3.3.4 See step 5.3 for setting switches S1 and S2.
5.2.4 If a remote speed potentiometer is used for narrow
range, set it to mid-range. If the remote speed potentiometer is
connected to terminals 6, 7 and 9, a resistor "R" in the wiper is
not needed. This will provide approximately a ±5% adjustable
speed range.
5.2.6.3 Unit is now calibrated.
9
5.3 ALL CONTROLLERS WITH REVISION J AND ABOVE
HAVE SWITCHES S1 AND S2
5.5 PROPER PROCEDURES FOR SETTING SWITCHES S1
AND S2
These units have two new features now added to the DYN1
1065X series controllers. They are:
Question: How do I know if the switches in the dual-in-line
packages are correctly set as far as being in the OFF position
or the ON position?
5.3.1 Two response ranges, for matching either the diesel or
gas engine dynamics.
Top View
•
Set S1 to the OFF position for diesel engine applications.
•
Set S1 to the ON position for gas/gasoline engine
applications.
O
N
ON
O
F
F
5.3.2 Two actuator selections, so the same controller can be
used on the DYNA 8000, DYNA 8200 or DYNA 8400 actuator.*
Set S2 to the OFF position when using a DYNA 8000
actuator.
•
Side View
"On"
S1
•
OFF
ON
OFF
Side View
"Off"
S2
Answer: The drawings above should clarify any confusion
about switch settings. The easiest way to set the switches is to
apply pressure with a small pointed object until the switch clicks
into position.
Set S2 to the ON position when using a DYNA 8200 or DYNA
8400 actuator.
5.4. GENERAL INFORMATION ON S1 AND S2
•
•
Switch S1 selects one of two integrating rate ranges. The
diesel version integrates at twice the rate of the gas version
CAUTION
As a safety measure, the engine should be equipped with
an independent overspeed shutdown device in the event
of failure which may render the governor inoperative.
Switch S2 selects the point at which actuator coil current
level causes the integrator limit to be actuated. This level
is nominally 6.3 amperes for the DYNA 8000 and 7.3 amperes for the DYNA 8200 and 8400 actuator.
* DYNA 8000 -- DYNC 11020 Series
DYNA 8200 -- DYNC 12000 Series
DYNA 8400 -- DYNC 14800 Series
These actuators do not have a potentiometer feedback
transducer.
NOTE
For some diesel engines, better operation may be
obtained by placing SW1 in "ON" position. If
difficulty is experienced in "OFF" position, try SW1
ON and recalibrate.
10
6. CALIBRATION PROCEDURE FOR 8000 GOVERNOR CONTROLLER —
DYN1-10682, 10683, 10684, 10686
Input Signal
Frequency
Maximum
Part Number
Input Signal
Frequency
Maximum
Part Number
DYN1-10682-000-0-12/24
DYN1-10682-001-0-12/24*
]
250 to 1200 Hz
DYN1-10684-000-0-12/24
DYN1-10684-001-0-12/24*
]
2500 to 5000 Hz
DYN1-10683-000-0-12/24
DYN1-10683-001-0-12/24*
]
1200 to 2500 Hz
DYN1-10686-000-0-12/24
DYN1-10686-001-0-12/24*
]
5000 to 9000 Hz
NOTE
*
See Step 6.4 for proper procedures for setting switches S1
and S2, if you have a controller that has the two switches
located on top of the controller.
6.1 CALIBRATION PROCEDURE
6.3.5 After calibration, it may be necessary to readjust the
speed.
6.1.1 Observe that potentiometer settings are adjustable from
zero to 100%. Each small division is 10%. The speed potentiometer is 10K, 20 turn.
6.3.6 Following the above calibration, conduct the following
test. With the engine operating at rated speed, turn the electric
governor off. When engine speed slows to approximately half
of rated speed, turn the electric governor back on. Observe the
overshoot. If there is a small hunt at steady state, slightly turn
the "I" potentiometer counterclockwise until stable. In some
cases, 2 to 3 Hz overshoot may be acceptable.
6.1.2 Set the small dip switch, S1, for the correct engine. (See
paragraph 6.4) Set switch S2 in the "OFF" position for actuator
DYNA 8000 or in the "ON" position for DYNA 8200 and 8400.
6.1.3 If a remote speed potentiometer is used for narrow
range, set to mid range.
WARNING
For gas engines, make certain that method used
does not put gas in exhaust which might result in
an explosion.
6.2 INITIAL POTENTIOMETER SETTINGS
GAIN
I
D
DROOP
20%
20%
30%
Zero
If possible, operate the unit through various load ranges up to
100% to ensure stability.
6.4 CONTROLLERS HAVE SWITCHES S1 AND S2
6.2.1 For isochronous operation, set DROOP counterclockwise to minimum position as shown in paragraphs 3.5 and 3.6.
These units have two new features now added to the DYN1
1068X series controllers. They are:
6.2.2 For DROOP operation, set DROOP potentiometer clockwise to obtain desired amount of DROOP from no-load to full
load. Turning potentiometer clockwise increases DROOP.
6.4.1 Two response ranges for matching either the diesel or
gas engine dynamics.
6.3 START ENGINE (NO LOAD)
6.3.1 Adjust the controller speed potentiometer for desired
engine speed.
6.3.2 Adjust the GAIN potentiometer clockwise until the engine begins to hunt. (If the engine remains stable at 100%
GAIN, physically disrupt the actuator linkage by hand.) With
the engine hunting, turn the GAIN potentiometer counterclockwise until stable.
•
Set S1 to the OFF position for diesel engine applications.
•
Set S1 to the ON position for gas/gasoline engine
applications.
6.4.2 Two actuator selections, so the same controller can be
used on the DYNA 8000, DYNA 8200 or DYNA 8400 actuator.*
•
Set S2 to the OFF position when using a DYNA 8000
actuator.
•
Set S2 to the ON position when using a DYNA 8200 or DYNA
8400 actuator.
6.3.3 Repeat step 6.3.2 for the "D" setting.
6.3.4 Repeat step 6.3.2 for the "I" setting.
11
6.5 GENERAL INFORMATION ON S1 AND S2
•
Switch S1 selects one of two integrating rate ranges. The
diesel version integrates at twice the rate of the gas version.
•
Switch S2 selects the point at which actuator coil current
level causes the integrator limit to be actuated. This level is
nominally 6.3 amperes for the DYNA 8000 and 7.3 amperes
for the DYNA 8200 and 8400 actuator.
6.6 PROPER PROCEDURES FOR SETTING SWITCHES S1
AND S2
Question: How do I know if the switches in the dual-in-line
packages are correctly set as far as being in the OFF position
or the ON position?
Top View
O
N
ON
O
F
F
OFF
Side View
"On"
S1
ON
OFF
Side View
"Off"
S2
Answer: The drawings above should clarify any confusion
about switch settings. The easiest way to set the switches is to
apply pressure with a small pointed object until the switch
clicks into position.
* DYNA 8000 -- DYNC 11020 Series
DYNA 8200 -- DYNC 12000 Series
DYNA 8400 -- DYNC 14800 Series
These actuators do not have a potentiometer feedback
transducer.
NOTE
A warm engine is normally more stable than a cold one. If the
governor is adjusted on a warm engine, turn the adjustment
potentiometers counterclockwise 5% (1/2 div.) to ensure a
stable engine when started cold.
CAUTION
As a safety measure, the engine should be equipped with an
independent overspeed shutdown device in the event of failure
which may render the governor inoperative.
12
7. DYNA 8000 SERIES TROUBLESHOOTING CHART
7.1 PROBLEM: GOVERNOR IS COMPLETELY DEAD AND ACTUATOR LEVER STAYS AT MINIMUM POSITION
WHEN POWER IS APPLIED TO GOVERNOR.
Means of Detection
Corrective Action
7.1.1
Check battery voltage at terminals 1 and 2 on
controller. Terminal 1 is positive.
Check battery connections and contacts for turning power
ON to the controller.
7.1.2
Check for proper linkage setup.
Correct and free linkage.
7.1.3
Magnetic pickup signal absent or too low.
Measure AC voltage across terminals 10 and 11
while cranking the engine. Voltage should be
min. 2.5 VAC. Note: The voltmeter should have
an impedance of 5000 ohms/volts or higher.
Check pole tip gap over gear tooth. Should be
.037 mm ±0.127 mm (0.015" ±0.005").
7.1.4
Measure the resistance of the magnetic pickup
coil. This should be above 150 ohms.
If there is an open or shorted coil, replace the magnetic
pickup.
7.1.5
Measure the resistance of each pin to the metal
case of the magnetic pickup. No continuity
should be evident.
If there is continuity to case, replace the magnetic pickup.
7.1.6
DC SUPPLY OFF. Place an insulated jumper
between terminals 2 and 3 (TP1 & TP2). With DC
ON, the actuator should go to full stroke. DC
voltage at terminals 4 and 5 should be within 3
volts of the supply.
If the actuator still does not move to full stroke, continue
with steps below.
7.1.7
Measure actuator coil resistance:
If actuator coil is open or shorted to case, replace actuator.
DYNA 8000
If governor still does not operate, continue with steps below.
12 VDC unit. Coil resistance 0.75 ±0.2 ohms.
24 VDC unit. Coil resistance 2.3 ±0.4 ohms.
DYNA 8200
12 VDC unit. Coil resistance .710 ±0.2 ohms.
24 VDC unit. Coil resistance 1.600 ±0.4 ohms.
DYNA 8400
24 VDC unit. Coil resistance 1.630 ±0.4 ohms.
7.1.8
Measuring the resistance of each coil lead to
the actuator case should indicate an open circuit
on a low scale of the ohm meter.
If continuity is detected, replace the actuator.
7.1.9
With the DC to the governor ON and the engine
OFF, measure the DC voltage from terminal 6 (+)
to terminal 2 (-). This should be approx. 8 VDC.
If 8 VDC is not present, replace the controller.
7.1.10
Between terminal 7 (+) to terminal 2 (-), the
voltage should be approx. 4 VDC.
If 4 VDC is not present, replace the controller.
13
7.2 PROBLEM: ACTUATOR GOES TO FULL STROKE WHEN DC POWER IS TURNED ON
(ENGINE IS NOT OPERATING).
Means of Detection
Corrective Action
7.2.1
Check magnetic pickup leads for proper
shielded wire or open shield.
Verify and correct wiring as necessary.
7.2.2
Be sure there is no jumper between terminals
2 and 3.
Verify and correct wiring as necessary.
7.2.3
Failsafe circuit in the controller may be
damaged or defective.
Replace controller.
7.2.4
With DC power OFF remove leads at actuator.
Check continuity of each terminal to case.
There should be no continuity between any
terminal and case of the controller.
If continuity is detected, replace the controller.
7.2.5
If remote speed potentiometer has been
connected to terminals 6, 7 and 9 of the
controller, DISCONNECT THESE LEADS.
Turn DC power ON to the governor if the actuator is now
normal. Proceed to step 7.3.1.
7.3 PROBLEM: IMPROPER OPERATION FROM REMOTE SPEED POTENTIOMETER
Corrective Action
Means of Detection
7.3.1
Investigate wiring to remote speed
potentiometer for open or shorted circuits.
Check wiring.
7.3.2
If the leads at terminals 6 and 7 to the remote
speed potentiometer are reversed, speed
control by the remote speed potentiometer
will be reversed.
Correct wiring.
7.3.3
Lead wire to remote speed setting potentiometer
should be 3-wire shielded cable.
Verify that the drain shield wire is isolated from ground
at the potentiometer.
7.3.4
If terminal 7 lead to the remote speed
potentiometer is open, engine speed will go high.
Correct the wiring.
7.3.5
If lead 9 (wiper lead to remote potentiometer) is
open, there will be no control by the remote
speed potentiometer.
Verify and correct wiring.
7.3.6
If lead 6 to the clockwise terminal of the remote
speed potentiometer is open, speed will remain
at the value set in the controller.
7.4 PROBLEM: ERRATIC GOVERNOR OPERATION
Means of Detection
Corrective Action
7.4.1
Measure DC voltage at 1 and 2 on controller
terminal strip. Normal battery voltage should
be indicated.
If nominal voltage is present, wiring is correct.
7.4.2
Low battery voltage 20% below rated can
cause erratic operation.
Check battery and charging system.
7.4.3
RFI noise due to incorrect shielding.
Correct wiring.
7.4.4
RFI noise fed through power supply leads.
Connect power leads directly to the battery.
14
7.5 PROBLEM: SLOW, SMALL AMPLITUDE HUNTING OF SPEED OR FREQUENCY
Corrective Action
Means of Detection
7.5.1
Correct Linkage.
Sticking or very loose linkage.
7.6 PROBLEM: FAST OSCILLATION OF GOVERNOR LINKAGE
Means of Detection
7.6.1
Corrective Action
Verify calibration settings of the controller.
Readjust settings as necessary.
7.7 PROBLEM: ENGINE WILL NOT START -- ACTUATOR GOES TO FULL FUEL DURING CRANKING
Means of Detection
Corrective Action
7.7.1
Make sure fuel is available.
Check fuel to engine. Check for correct wiring to the
automatic shutdown circuits.
7.7.2
Air may be trapped in fuel line.
Check fuel lines for leaks.
7.7.3
Try to operate engine manually.
8. ACTUATOR INSTALLATION DIMENSIONS
DYNC-11020-000
STANDARD
ACTUATOR —
CLOCKWISE
ROTATION
DYNC-11020-300
SIDE MOUNTED
ACTUATOR —
CLOCKWISE
ROTATION
15
DYNC-11024-000
ACTUATOR —
COUNTERCLOCKWISE
ROTATION
DYNC-11024-300
SIDE MOUNTED
ACTUATOR —
COUNTERCLOCKWISE
ROTATION
DYNC-12000-000
16
DYNC-14800-000
TERMINAL STRIP CONNECTION
DYNC-14801-000
2-PIN MS CONNECTOR CONNECTION
DYNC-11020-401
UL APPROVAL, HAZARDOUS DUTY, CLASS 1, DIVISION 2, GROUP D
CLOCKWISE UNIT
17
DYNC-11024-400
UL APPROVAL, HAZARDOUS DUTY, CLASS 1, DIVISION 2, GROUP D
COUNTERCLOCKWISE UNIT
DYNC-14800-400
UL APPROVAL, HAZARDOUS DUTY, CLASS 1, DIVISION 2, GROUP D
Barber-Colman DYNA Products
1354 Clifford Avenue (Zip 61111) Telephone (815) 637-3000
P.O. Box 2940
Facsimile (815) 877-0150
Loves Park, IL 61132-2940
www.dynaproducts.com
United States of America
In Europe contact: Barber-Colman GmbH
Am Neuen Rheinhafen 4, D-67346 Speyer, Germany
Telephone (49) 6232 29903, Facsimile (49) 6232 299155
In Japan contact: Ranco Japan Ltd.
Shiozaki Bldg. 7-1, 2-chome, Hirakawa-Cho, Chiyoda-Ku
Tokyo 102, Japan
Telephone (81) 3 3261 4293, Facsimile (81) 3 3264 4691
An Invensys company
F-23721-5