1
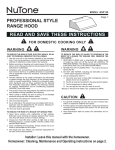
MODELS QP330BL•QP330SS•QP330WW
QP336BL•QP336SS•QP336WW
QP342BL•QP342SS•QP342WW
Page 1
EVOLUTION 3
QP3SeriesRangeHoods
TM
READANDSAVETHESEINSTRUCTIONS
FORDOMESTICCOOKINGONLY
WARNING
TOREDUCETHERISKOFFIRE,ELECTRICSHOCK,ORINJURYTOPERSONS,OBSERVETHEFOLLOWING:
1. Usethisunitonlyinthemannerintendedbythemanufacturer.
If you have questions, contact the manufacturer at the addressortelephonenumberlistedinthewarranty.
2. Beforeservicingorcleaningunit,switchpoweroffatservice
panel and lock the service disconnecting means to prevent
powerfrombeingswitchedonaccidentally.Whentheservice
disconnecting means cannot be locked, securely fasten a
prominentwarningdevice,suchasatag,totheservicepanel.
3. Installationworkandelectricalwiringmustbedonebyaqualified person(s) in accordance with all applicable codes and
standards,includingfire-ratedconstruction.
4. Sufficientairisneededforpropercombustionandexhaustingofgasesthroughtheflue(chimney)offuelburningequipment to prevent backdrafting. Follow the heating equipment
manufacturer’sguidelineandsafetystandardssuchasthose
publishedbytheNationalFireProtectionAssociation(NFPA),
and theAmerican Society of Heating, Refrigeration andAir
Conditioning Engineers (ASHRAE), and the local code authorities.
5. Thisproductmayhavesharpedges.Becarefultoavoidcuts
andabrasionsduringinstallationandcleaning.
6. When cutting or drilling into wall or ceiling, do not damage
electricalwiringandotherhiddenutilities.
7. Ductedfansmustalwaysbeventedtotheoutdoors.
8. Useonlymetalductwork.
9. Donotusethisfanwithanysolid-statespeedcontroldevice.
10.Asanalternative,thisproductmaybeinstalledwiththeULapproved cord kit designated for the product, following instructionspackedwiththecordkit.
11.Thisunitmustbegrounded.
TOREDUCETHERISKOFARANGETOPGREASEFIRE:
1. Never leave surface units unattended at high settings.
Boiloverscausesmokingandgreasyspilloversthatmayignite.Heatoilsslowlyonlowormediumsettings.
2. Always turn hood ON when cooking at high heat or when
cookingflamingfoods(i.e.CrepesSuzette,CherriesJubilee,
PeppercornBeefFlambé).
3. Clean ventilating fans frequently. Grease should not be allowedtoaccumulateonfanorfilter.
4. Useproperpansize.Alwaysusecookwareappropriateforthe
sizeofthesurfaceelement.
TO REDUCE THE RISK OF INJURY TO PERSONS IN THE
EVENT OF A RANGE TOP GREASE FIRE, OBSERVE THE
FOLLOWING:*
1. SMOTHERFLAMESwithaclose-fittinglid,cookiesheet,or
metaltray,thenturnofftheburner.BECAREFULTOPREVENT BURNS. If the flames do not go out immediately,
EVACUATEANDCALLTHEFIREDEPARTMENT.
WARNING
2. NEVERPICKUPAFLAMINGPAN—Youmaybeburnedor
spreadthefire.
3. DONOTUSEWATER,includingwetdishclothsortowels-
violentsteamexplosionwillresult.
4. UseanextinguisherONLYif:
A. You know you have a ClassABC extinguisher and you
alreadyknowhowtooperateit.
B. Thefireissmallandcontainedintheareawhereitstarted.
C. Thefiredepartmentisbeingcalled.
D. Youcanfightthefirewithyourbacktoanexit.
*Basedon“KitchenFireSafetyTips”publishedbyNFPA.
CAUTION
1. Forindooruseonly.
2. Forgeneralventilatinguseonly.Donotusetoexhausthazardousorexplosivematerialsandvapors.
3. To avoid motor bearing damage and noisy and/or unbalanced impeller, keep drywall spray, construction dust, etc.,
offpowerunit.
4. Do not use over cooking equipment greater than 60,000
BTU/hr.astheblowermotorwillshutdownintermittantly.
5. Yourhoodmotorhasathermaloverloadwhichwillautomaticallyshutoffthemotorifitbecomesoverheated.Themotor
willrestartwhenitcoolsdown.Ifthemotorcontinuestoshut
offandrestart,havethehoodserviced.
6. ThetopofthehoodMUSTNOTBELESSthan24”andata
maximumof30”abovecooktopforbestcaptureofcooking
impurities.
7. Thishoodisnotintendedtobeusedasashelf.
8. Please read specification label on product for further informationandrequirements.
NOTE Ifhoodistobeinstallednon-ducted:
Purchaseasetof(2)non-ductedfiltersfor30”wide
hoods(ModelBPPF30)&36”widehoods(Model
BPPF36)orasetof(3)non-ductedfiltersfor42”wide
hoods(ModelBPPF42)fromyourlocaldistributoror
retailerandattachthemtothealuminummeshfilters.
Installer: Leave this manual
with the homeowner.
Homeowner: Cleaning, Maintenance and
Operating instructions on page 2.
MODELS QP330BL•QP330SS•QP330WW
QP336BL•QP336SS•QP336WW
QP342BL•QP342SS•QP342WW
Page 2
CONTENTS
OPERATION
INCLUDED WITH THE HOOD:
(1) 3¼” X 10”
DAMPER / DUCT
CONNECTOR
AlwaysturnthehoodONbeforecookinginordertoestablishan
airflowinthekitchen.Afterturningofftherange,letthehoodrun
forafewminutestocleartheair.
Operatethehoodasfollows:
GREASE
FILTERS
(2 - FOR 30” & 36” HOODS)
3 - FOR 42” HOODS)
(1) 7” ROUND
DUCT
CONNECTOR
(4)
HALOGEN
BULBS
NOTE
The and
buttonsareusedtoadjustandtogglethemenu
andtimersettings.
(1) PARTS BAG CONTAINING:
(3)
WIRE
NUTS
(9)
#8 X 1/4”
DUCT
CONNECTOR
SCREWS
(1)
BULB
SUCTION
CUP TOOL
(5)
#10 X 5/8”
RD. HD.
MOUNTING
SCREWS
(1)
NON-DUCT
DIVERTER
LIGHT(3-PushbuttonSwitches4-lightSettings)
Turnsthelightonthelowsettingandactivatesagreenindicator
abovethebutton.Pressingthe buttonasecondtimeactivates
thenighttimesettingandilluminatesthe indicator.
(2)
#8 X 5/16”
MACHINE
SCREWS
&
(2)
#8 WASHERS
FOR NON-DUCT
DIVERTER
CLEANING&MAINTENANCE
Forperformance,appearance,andhealthreasons,cleanfilter,
fanandgrease-ladensurfaces.Useonlyacleanclothandmild
detergentsolutiononstainlessandpaintedsurfaces.
Cleanall-metalfiltersinthedishwasherusinganon-phosphate
detergent.Discolorationofthefiltermayoccurifusingphosphate
detergents,orasaresultoflocalwaterconditions-butthiswill
notaffectfilterperformance.Thisdiscolorationisnotcoveredby
thewarranty.
Clean the non-duct recirculating filter surfaces frequently with
adampclothandamilddetergent.DONOTimmersefiltersin
waterorputindishwasher.Thespecial“CleanSense”feature
indicateswhenthefilteristobereplaced.Theblueandyellow
stripswillblendtogreenwhenitistimetochangethefilter.The
“CleanSense”featureworksbestwhenfacingtowardthecooking surface. Change the non-duct recirculating filters every 6
months.Forreplacementnon-ductrecirculatingfilters-purchase
S99010353 or Model BPPF30 for 30 wide hoods”, S99010354
orModelBPPF36for36”widehoods,orS99010360orModel
BPPF42for42”widehoods.
Themotorispermanentlylubricatedandneverneedsoiling.If
themotorbearingsmakeexcessiveorunusualnoise,replace
themotorwiththeexactservicemotor.Theimpellershouldalso
bereplaced.
Use120V,50W,shieldedhalogenbulbs-MR16withGU10base.
Turnsthelightonthemediumsettingandactivatesagreen
indicatorabovethebutton.
Turnsthelightonthehighsettingandactivatesagreenindicatorabovethebutton.
Pressingandholdingthesamelightbuttonagainwillturnthelights
off.
Whenthenighttimesettingisactive,pressingandholdingthelow
lightsettingbutton willturnthenighttimesettingoff.
FAN(3-PushbuttonSwitches4-fanspeeds)
Turnsthefanonthelowspeedandactivatesagreenindicator
abovethebutton.
Turns the fan on the medium speed and activates a green
indicatorabovethebutton.
Turnsthefanonthehighspeedandactivatesagreenindicatorabovethebutton.Pressingthe
buttonasecondtimeacti-
vatestheboostfanspeedandilluminatesthe
indicator.
Pressingandholdingthesamefanbuttonagainwillturnthefanoff.
When the boost speed is active, pressing and holding the high
speedbuttonwillturntheboostspeedoff.
NOTE
This hood utilizes an offset blower design to achieve greater
performanceandlowersoundlevels.Asaresult,youmaynotice
thatcookingimpuritiesaremoreattractedtoonesideorappear
tobepulled-infasterthantheyappearontheoppositeside.This
iscompletelynormal.Thehoodhasbeendesignedandtested
toprovidegoodcaptureofcookingimpuritiesandodorsunder
all normalcookingconditionsregardlessofthecookinglocation
onthecooktop.Pleasenotethatcookingontherearburnerswill
alwaysresultinthebestcaptureofcookingimpurities,regardless
ofthehooddesign.
MODELS QP330BL•QP330SS•QP330WW
QP336BL•QP336SS•QP336WW
QP342BL•QP342SS•QP342WW
Page 3
CLOCKSETTING
10-MINUTEDELAYOFF
Whenyourhoodfanison(anyspeed)pressthe
buttonto
activatethedelayofffeature.Whenactivated,thehoodfanwill
automaticallyturnoffafter10-minuteshaselapsed.Thedelay
featureisactivewhenthefollowingappearontheLEDscreen:
Agreenindicatorilluminatedabovethedelay
button,anu-
mericcountdown“10-0”,andaclockwiserotatingLED.Thedelay
buttoncanbepressedonceagain,tostopthedelaycountdown.
Pressingthe
buttonagainwillresumethedelaycountdown.
Pressingandholdingthebuttonwillturnoffthefeature.
Pressthe
buttontoactivatethetimersettingfeature.Use
the and
buttonstoreduceoradvancethetimersettingto
thedesiredduration.Whenthedesiredtimersettingisreached,
allow3secondswithoutpressinganyadditionalbuttonorpress
button once again. The timer will then activate, and
thecountdownwillbedisplayedontheLEDscreenalongwith
button. After the timer has
an green indicator above the
reached “0:00”, an audible beep will be heard. The beep will
ispressedonceagain.The
continueuntilthetimerbutton
timer countdown can be stopped at any time by pressing the
once again. Pressing the
button again will resume
thetimercountdown.Pressingandholdingthe
buttonwill
turnoffthefeature.Notethatwhenboththetimeranddelayoff
featuresareactivetogether,thetimerfunctionwillbeilluminated
ontheLEDdisplay,andthedelayoffcountdownwillbeactive,
butnotdisplayed.
buttonstosettheappropriate
hours for the clock. A small indicator will illuminate in the left
corneroftheLEDscreentodesignate“pm”.Afterthehoursare
set,pressthe
buttontoadvancethemenutotheminutese-
lection.TheminuteswillbeginblinkingintheLEDscreen.Use
the and
buttonstosettheminutes.Pressthe
button
againtoadvancethemenutoselect“display”settings.
DISPLAY(default from factory - display ON)
Your hood offers many settings that can be accessed and adjusted by scrolling through the feature menu. Your hood fan
mustbeofftobeabletoactivateandaccessthefeaturemenu.
buttonwhenthehoodfanisoffwillactivatethe
featuremenu.Pressingthe
or
buttontotoggletheLEDscreenon(don)oroff(doFF).
Whenthedisplayoff(doFF)featureisselected,theLEDdisplay
clockilluminationisdisabled.Pressthe
buttonagaintoad-
vancethemenutoselectthe“Sleep”setting.
SLEEPMODE(default from factory - OFF)
TheLEDscreenwilldisplaythe“Sleep”feature-S-.Usethe
or
buttontotoggletheSleepfeatureon(Son)oroff(Soff).
WhentheSleepon(Son)featureisselected,theLEDscreen
andfan/lightLEDindicatorsaredisabled.Theambientlightsensor,delay-offandtimerfeatureswillalsobedisabled.Allcontrols
for the fan and light operation, including Heat Sentry, are still
active.Pressthe
buttonagaintoadvancethefeaturemenu
toselectthe“AmbientLightSensor”setting.Note:Toaccessthe
featuremenuwhentheSleepModeisactive,pressandholdthe
buttonfor2seconds.
AMBIENTLIGHTSENSOR(default from factory - Level 1 ON)
FEATUREMENU
Pressingthe
buttononce,the“hours”willbeginblinkinginthe
TheLEDscreenwilldisplaythedisplayfeature-d-.Usethe
TIMER
the
Pressthe
LEDscreen.Usethe and
buttonagainwhenthefeature
menuisactivewillscrollthroughthevariousfeaturesthatcan
beadjusted/set.Whenthefeaturemenuisactive,ifabuttonis
notpressedwithin10secondsorafterscrollingthroughallmenu
settings, the feature menu will automatically be exited, and all
selectedsettingswillbesaved.Agreenindicatorabovethe
iconwillilluminatewhenthefeaturemenuisactive.Thefollowingfeaturescanbeadjustedsequentially:
Therearetwolevelsettingsfortheambientlightsensor.When
either of the two settings is active, the light sensor will detect
a low level of light in your kitchen, and will automatically turn
thetasklightsonthehoodtothenighttimesetting.Theother
light settings are still functional. If selected when the ambient
lightsensorisactive,theywilltemporarilyoveridetheambient
lightsensoruntiltheyareturnedoff.Thelevel1(Aon1)ambient
lightsensorsettingwillrequireyourkitchentobemoredarkthan
thelevel2(Aon2)settingbeforeactivatingthenighttimesetting.
The LED screen will display the ambient light sensor function
-A-.Usethe or
buttontoselectthelightsensorsetting
Aon1,Aon2, orAoFF. The Off (AoFF) setting deactivates the
automatic ambient light sensor feature so the night time light
operationismanual.
Notethatthefeaturemenucanbeexitedanytimebynotpressinganybutton(s)for10secondsorbyscrollingthroughtheentire
featuremenu.
MODELS QP330BL•QP330SS•QP330WW
QP336BL•QP336SS•QP336WW
QP342BL•QP342SS•QP342WW
Page 4
HEATSENTRYSYSTEM
This range hood is equipped with an advanced Heat Sentry
system that monitors excessive temperature and automatically
adjuststhefantotheappropriatesetting.
1)Ifthefanison,theHeatSentrysystemwillincreasethefan
settingwhenthetemperatureiselevated.Ifthetemperaturecontinuestorise,theHeatSentrysystemwillcontinuetoincrease
thefansettinguntilthetemperatureisstabilizedorreduced.The
flashinglightabovethefanbuttonshowstheHeatSentrysystem
fansetting.Oncethetemperaturehasreduced,theHeatSentry
systemwillchangethefantotheoriginalsetting.
MAKE-UPAIRDAMPER
ThehoodiscompatiblewithBroanMake-UpAirDamperModel
MD6TorModelMD8T(optional).Purchaseseparately.
MaketheconnectiontotheMake-UpAirDamperwithlowvoltagewiring,asshown.SeeMake-UpAirDamperinstructionsfor
additionalinformation.
BACKOFHOOD
2)Ifthefanisoff,theHeatSentrysystemwillautomaticallyturn
thefanontoitshighestspeedwhenthetemperatureisabove
normal.WhentheHeatSentrysystemison,thelightabovethe
highspeedfanbuttonwillflashonandoff.Afterthetemperature
hasloweredtonormal,thefanspeedwillbereduceduntilthe
temperaturehasstabilized,thenthefanwillturnoff.
LOW-VOLTAGECONNECTOR
FORMAKE-UPAIRDAMPER
RANGE
HOOD
MAKE-UP AIR
DAMPER
LOW-VOLTAGE
WIRES
Note:Canadianversiondoesnothavethisfunction.
120
VAC
FUSES
RANGEHOODCONTROLBOARD
MAIN
FUSE
24
VAC
DAMPER
MOTOR
LIGHT
FUSE
REMOTECONTROL
The hood is compatible with Broan RF Remote Control Model
BCR1(optional).Purchaseseparately.
PREPAREHOODLOCATION
ROOF CAP
TheRangeHoodControlBoardcontainsaMainFuseanda
LightFusetoprotectthecontrolsfrompowersurges.Ifafusehas
opened(blown),thegreenfansettingorlightsettingindicatorswill
notoperateproperlywhenthefanorlightbuttonsarepressed,and
thefanandlightswillnotturnon.
3¼" X 10" or
7" ROUND DUCT
(For vertical
discharge)
SOFFIT
Newfusescanbepurchasedatyourlocalelectronicsupplystore.
Use8A,120V,5mmdiameter,20mmlong,fast-acting,cartridgetypefuses.
HOUSE WIRING
(Top or Back of hood)
CABINET
Toreplaceafuse:
1. Disconnectpoweratserviceentrance.
2. Removefiltersandbottompan.
3. Removeandinspectfuse.Ifitisnotopen(blown),additional
diagnosticsareneeded.
WALL CAP
HOOD
24" - 30" ABOVE
COOKING SURFACE
1
3¼" X 10" DUCT
(For horizontal discharge)
Determinewhetherhoodwilldischargevertically(3¼”
x10”or7”Round),orhorizontally(3¼”x10”only).For
verticalorhorizontaldischarge,runductworkbetween
thehoodlocationandaroofcaporwallcap.Forbest
results,useaminimumnumberoftransitionsandelbows.
MODELS QP330BL•QP330SS•QP330WW
QP336BL•QP336SS•QP336WW
QP342BL•QP342SS•QP342WW
Page 5
Usetheproperdiagrambelow,forplacementofductwork
andelectricalcutoutincabinetorwall.Foranon-ducted
installation,DONOTcutaductaccesshole.
3¼”X10”
VERTICALDUCTING
HOOD MOUNTING SCREWS (5)
11 5/8" (30" hood)
11 5/8" (30" hood)
14 5/8" (36" hood)
14 5/8" (36" hood)
17 5/8" (42" hood)
17 5/8" (42" hood)
CABINET FRONT
CABINET
BOTTOM
5¼"
4½"
*
67/8"
5¼"
VERTICAL DUCT
ACCESS HOLE
3
Removepartsbagfrominsidethefoampackagingend
cap.
4
Removeallprotectivepolyfilmfromthehood(stainless
steelhoodsonly).
107/8"
11" 21/8"
25/8"
¾"
WOOD SHIMS
(recessed-bottom
cabinets only)
WOOD SHIMS
(recessed-bottom
cabinets only)
CABINET
BOTTOM
PREPARETHEHOOD
ç
2
ELECTRICAL
ACCESS HOLE
(in cabinet bottom)
CENTER
LINE
(2)
LIFT
OUT
3¼”X10”
HORIZONTALDUCTING
ç
(1)
PULL
DOWN
ALUMINUM
FILTERS
5
RemovetheAluminumFiltersfromthehood.
6
Remove6ScrewsholdingBottomPantohood.Setbottompanandscrewsaside.
35/8"
CABINET FRONT
13/8"
3/8"
*
4"
HORIZONTAL DUCT
ACCESS HOLE
ELECTRICAL
ACCESS
HOLE
(in wall)
5¼"
67/8"
11 5/8" (30" hood)
11 5/8" (30" hood)
14 5/8" (36" hood)
14 5/8" (36" hood)
17 5/8" (42" hood)
17 5/8" (42" hood)
MAKE-UP AIR
HOOD
DAMPER ELECTRICAL
MOUNTING
CENTER
CONNECTION HOLE
SCREWS (5)
LINE
(in wall)
5¼"
HOOD MOUNTING SCREWS (5)
11 5/8" (30" hood)
11 5/8" (30" hood)
14 5/8" (36" hood)
14 5/8" (36" hood)
17 5/8" (42" hood)
17 5/8" (42" hood)
8" DIA.
HOLE
45/8"
7-IN.ROUND
DUCTING
* 6 /"
7-IN. ROUND
DUCT
ACCESS
HOLE
7 8
11"
107/8"
21/8"
25/8"
ELECTRICAL
ACCESS HOLE
(in cabinet bottom)
* Notetheextrawoodshimandmountingscrewnearthe
cabinetfront,onthecabinetcenterline.
DAMPER/
DUCTCONNECTOR
7
Remove2ScrewsholdingDamper/DuctConnector
tohood.Removedamper/ductconnectorfrominsidethe
hood.
FORDUCTEDINSTALLATIONS-SkiptoStep12.
MODELS QP330BL•QP330SS•QP330WW
QP336BL•QP336SS•QP336WW
QP342BL•QP342SS•QP342WW
Page 6
11 NON-DUCTEDINSTALLATIONONLY:
Purchaseasetof(2)non-ductedfiltersfor30”widehoods
(ModelBPPF30)&36”widehoods(ModelBPPF36)or
asetof(3)non-ductedfiltersfor42”widehoods(Model
BPPF42)fromyourlocaldistributororretailer.Attachthe
non-ductedfilterstothealuminummeshfiltersfollowing
instructionspackedwiththenon-ductedfilters.
NON-DUCT
DIVERTER
8
FORNON-DUCTEDINSTALLATIONS-Skipto“INSTALL
THE HOOD”.
7”ROUND
KNOCKOUT
PLATE(also
remove3¼”x10”
verticalplate)
NON-DUCTEDINSTALLATIONONLY:
Frompartsbag:AttachNon-DuctDivertertoAirBox
with2Screwsand2Washers.
SCREWS
3¼”X10”
VERTICAL
KNOCKOUT
PLATE
3¼”X10”
HORIZONTAL
KNOCKOUT
PLATE
12 DUCTEDINSTALLATIONONLY:
Remove3¼”x10vertical,3¼”x10”horizontal,or7-inch
roundknockoutplate(s)asappropriateforyourducting
method.
NON-DUCT
PLATE
NON-DUCT
PLATE
TOP/BACK
EDGEOF
HOOD
3¼”X10”
DAMPER/DUCTCONNECTOR
DAMPER
FLAP
PIVOT
ç
SLOT
NON-DUCT
PLENUM
9
NON-DUCTEDINSTALLATIONONLY:
Remove2ScrewsholdingNon-DuctPlatetoNon-Duct
Plenumandremoveplate.
7”ROUND
DUCT
PLATE
SCREWS
NON-DUCT
PLATE
10 NON-DUCTEDINSTALLATIONONLY:
InsertshortendofNon-DuctPlateintoNon-Duct
PlenumSlot.Attachwith2ScrewsremovedinStep9.
13 DUCTEDINSTALLATIONONLY:
Attach3¼”x10”Damper/DuctConnector(ifusing3¼”
x10”duct)or7”RoundDuctPlate(ifusing7-inchround
duct)overtheknockoutopening.
Notes:
Toaccomodateoff-centerductwork,the3¼”x10”damper/
ductconnectorcanbeinstalledupto½”oneitherside
ofthehoodcenterandthe7”roundductplatecanbe
installedupto½”oneithersideofthehoodcenter.
Installthe3¼”x10”Damper/DuctConnectorwiththe
DamperFlapPivotnearesttheTop/BackEdgeofHood.