1
I
IC
us@r
100%
manual
\
Recycled
Paper_
Lh100oYorecyclea paper,
e the possibilities
ENGLISH
Thank you for purchasing this Samsung
product, Please register your product at
www.samsung.com/register
1-800-SAMSUNG (726-7864]
SMH1611
XAA 03898A
EN-02.indd
1
2011-10-13
4:04:51
safety
nforrnat on
©ongratulations on your new Samsung
microwave oven, This manual contains important
information on the installation, use and care of
your appliance, Please take time to read this
manual to take full advantage of your microwave
oven s many benefits and features,
IMPORTANT
SAFETYSYMBOLS
ANDPRECAUTIONS
What the icons
manual
mean:
¥
PRECAUTIONS
TOAVOID
POSSIBLEEXPOSURE
TO
EXCESSIVE
MICROWAVE
ENERGY
A. Do not attempt to operate this oven with the door
open since open-door operation can result in harmful
exposure to microwave energy. It is important not to
defeat or tamper with the safety interlocks.
B. Do not place any object between the oven front
face and the door or allow soil or cleaner residue to
accumulate on the sealing surface.
C. Do not operate the oven if it is damaged. It is
particularly important that the oven door close
properly and that there is no damage to the:
1. Door (bent),
2. Hinges and latches, (broken or loosened),
3. Door seals and sealing surface.
D. Only properly qualified service personnel should adjust
or repair the oven. Do not attempt to adjust or repair
the oven yourself.
in this
user
Hazards or unsafe practices
WARNING
¥
CAUTION
WHATYOUNEEDTOKNOW
ABOUTSAFETYINSTRUCTIONS
Warnings and Important Safety Instructions in this manual
do not cover all possible conditions and situations that
may occur. It is your responsibility to use common sense,
caution, and care when installing, maintaining, and
operating your microwave oven.
and signs
CAUTION
may result in severe
injury or death.
that
personal
Hazards or unsafe practices that
may result in minor personal
injury or property
damage.
To reduce the risk of fire,
explosion, electric shock, or
personal injury when using your
microwave oven, follow these
basic safety precautions.
Do NOT attempt.
Do NOT disassemble.
Do NOT touch.
Follow directions
explicitly.
Unplug the power plug from the wall
socket.
Make sure the machine is grounded
prevent electric shock.
to
Call the service center for help.
Note
These warning signs are here toprevent
injury to you and others. Please follow them
explicitly. After reading this section, keep it
in a safe place for future reference.
SAVETHESEINSTRUCTIONS
2
SMH1611
safety
irfformaton
XAA 03898A
EN-02.indd
2
2011-10-13
4:04:52
iMPORTANT
SAFETY
iNSTRUCTiONS
When using any electrical appliance, basic safety
precautions should be followed, including the following:
Ak WARNING
WARNING
1.
2.
3.
4.
5.
To reduce risk of burns, electric shock, fire, personal
injury or exposure to excessive microwave energy:
Read all safety instructions before using the
appliance.
Read and follow the specific "Precautions to avoid
possible exposure to excessive microwave energy" on
this page.
This appliance must be grounded. Connect only to
properly grounded outlets. See Important "Grounding
instructions" on page 4 of this manual.
Install or locate this appliance only in accordance with
the provided installation instructions.
Some products such as whole eggs and sealed
containers, for example, closed glass jars, can
explode if heated rapidly. Never heat them in a
microwave oven.
6. Use this appliance only for its intended use as
described in the manual. Do not put corrosive
chemicals or vapors in or on this appliance. This type
of oven is specifically designed to heat, cook, or dry
food. It is not designed for industrial or laboratory use.
7. As with any appliance, close supervision is necessary
when it is used by children.
8. Do not operate this appliance if it has a damaged cord
or plug, if it is not working properly, or if it has been
damaged or dropped.
9. This appliance should be repaired or serviced only
by qualified service personnel. Contact the nearest
authorized service facility for examination, repair, or
adjustment.
10. Do not cover or block any openings on the appliance.
11. Do not tamper with or make any adjustments or
repairs to the door.
12. Do not store this appliance outdoors. Do not use this
product near water, for example, near a kitchen sink,
in a wet basement, near a swimming pool, or similar
locations.
17. To reduce the risk of fire in the oven cavity.
ao Do not overcook food. Carefully attend appliance
when paper, plastic, or other combustible materials
are placed inside the oven to facilitate cooking.
b. Remove wire twist-ties from paper or plastic bags
before placing the bags in oven.
co If materials inside the oven
door closed, turn the oven
power cord, or shut off the
circuit breaker panel. If the
may spread.
ignite, keep the oven
off, and disconnect the
power at the fuse or
door is opened, the fire
do Do not use the cavity for storage purposes. Do not
leave paper products, cooking utensils, or food in
the cavity when not in use.
18. Liquids, such as water, milk, coffee, or tea can
be overheated beyond the boiling point without
appearing to be boiling. Visible bubbling or boiling
when the container is removed from the microwave
oven is not always present. THIS COULD RESULT
IN VERY HOT LIQUIDS SUDDENLY BOILING OVER
WHEN THE CONTAINER IS DISTURBED OR A
SPOON OR OTHER UTENSIL IS INSERTED INTO
THE LIQUID. To reduce the risk of injury:
ao Do not overheat liquid.
bo Stir liquid both before and halfway through heating
it.
co Do not use straight-sided containers with narrow
necks.
do After heating, allow the container to stand in the
microwave oven for a short time before removing
the container.
e. Use extreme care when inserting a spoon or other
utensil into the container.
A CAUTION
CAUTION
1. Clean Ventilating Hoods Frequently - Grease should
not be allowed to accumulate on hood of filter.
2. When flaming foods under the hood, turn the fan on.
3. Use care when cleaning the vent-hood filter. Corrosive
cleaning agent, such as lye-based oven cleaner, may
damage the filter.
13. Do not immerse the cord or plug in water.
14. Keep the cord away from heated surfaces. (including
the back of the oven).
15. Do not let the cord hang over edge of table or
counter.
16. When cleaning surfaces of the door and oven that
come together when the door closes, use only mild,
nonabrasive soaps, or detergents applied with a
sponge or soft cloth. Unplug the plug before cleaning.
SAVETHESEINSTRUCTI0NS
safety
8MH1611
XAA 03898A
EN-02.indd
3
informaton
2011-10-13
3
4:04:52
GROUNDING
INSTRUCTIONS
This appliance must be grounded. In the event of an
electrical short circuit, grounding reduces the risk of
electric shock by providing an escape wire for the
electrical current. This appliance is equipped with a cord
that includes a grounding wire and a grounding plug.
The plug must be plugged into an outlet that is properly
installed and grounded.
WARNING
WARNING
Improper use of the grounding plug can result in a risk of
electric shock.
,, Plug into a grounded 3 prong outlet. Do not remove
the third (grounding) prong. Do not use an adaptor or
otherwise defeat the grounding plug.
,, Consult a qualified electrician or service person if you
do not understand the grounding instructions or if you
are not sure if the appliance is properly grounded.
,, We do not recommend using an extension cord with
this appliance. If the power-supply cord is too short,
have a qualified electrician or serviceman install an
outlet near the appliance. However, if it is necessary
to use an extension cord, read and follow the "Use of
Extension Cords" section below.
Use of Extension Cords
A short power-supply cord is provided to reduce the risk
of your becoming entangled in or tripping over a longer
cord. Longer cord sets or extension cords are available
and you can use them if you exercise care. If you use a
long cord or extension cord:
1, The marked electrical rating of the cord set or
extension cord should be at least as great as the
electrical rating of the appliance.
2, The extension cord must be a grounding-type 3-wire
cord and it must be plugged into a 3-slot outlet.
3, The longer cord should be arranged so that it will not
drape over the counter top or tabletop where it can
be pulled on by children or tripped over accidentally. If
you use an extension cord, the interior light may flicker
and the speed of the blower may vary when the
microwave oven is on. Cooking times may be longer,
too.
WARNING
CRITICAL
INSTALLATION
WARNINGS
The installation of this appliance must be performed
by a qualified technician or service company.
,, Failing to have a qualified technician install
the oven may result in electric shock, fire, an
explosion, problems with the product, or injury.
Unpack the oven, remove all packaging material and
examine the oven for any damage such as dents
on the interior or exterior of the oven, broken door
latches, cracks in the door, or a door that is not lined
up correctly. If there is any damage, do not operate
the oven and notify your dealer immediately.
Make sure to install your oven in a location with
adequate space.
Remove all foreign substances such as dust or water
from the power plug terminals and contact points
using a dry cloth on a regular basis.
,, Unplug the power plug and clean it with a dry
cloth.
Failing to do so may result in electric shock or fire.
Plug the power cord into a properly grounded
3 pronged outlet. Your oven should be the only
appliance connected to this circuit.
,, Sharing a wall socket with other appliances, using
a power strip, or extending the power cord may
result in electric shock or fire.
Do not use an electric transformer. It may result in
electric shock or fire.
,, Ensure that the voltage, frequency and current
provided match the product's specifications.
Failing to do so may result in electric shock or fire.
Keep all packaging materials out of the reach of
children. Children may use them for play.
appliance must be properly grounded. Read
@This
and follow the specific "Grounding instructions"
found in the beginning of this Section. Do not ground
the appliance to a gas pipe, plastic water pipe, or
telephone line.
This may result in electric shock, fire, an
explosion, or problems with the product
,, Never plug the power cord into a socket that is
not grounded correctly and make sure that it is in
accordance with local and national codes.
Do not cut or remove the third (ground) prong from
the power cord under any circumstances.
Connect the oven to a 20A circuit. If you connect the
oven to a 15A circuit, make sure that circuit breaker
is operable.
not install this appliance in a humid, oily, or dusty
@Do
location, or in a location exposed to direct sunlight or
water (rain drops).
This may result in electric shock or fire.
Plug the power plug into the wall socket firmly. Do
not use a damaged power plug, damaged power
cord, or loose wall socket.
This may result in electric shock or fire.
Do not mount over a sink.
Do not pull or excessively bend the power cord.
Do not twist or tie the power cord.
Do not hook the power cord over a metal object,
place a heavy object on the power cord, insert the
power cord between objects, or push the power
cord into the space behind the appliance.
This may result in electric shock or fire.
Do not pull the power cord when you unplug the oven.
,, Unplug the oven by pulling the plug only.
Failing to do so may result in electric shock or fire.
When the power plug or power cord is damaged,
contact your nearest service center for a
replacement or repair.
SAVETHESEINSTRUCTI0NS
4
SMH1611
safety
informaton
XAA 03898A
EN-02.indd
4
2011-10-13
4:04:52
INSTALLATION
CAUTIONS
CAUTION
_
osition the oven so that the plug is easily
accessible.
Failing to do so may result in electric shock or fire
due to electric leakage.
_
Unplug the oven when it is not being used for long
periods of time or during a thunder/lightning storm.
Failing to do so may result in electric shock or
fire.
WARNING
CRITICAL USAGE
WARNINGS
If the microwave is flooded, please contact your
nearest service center : Failing to do so may result in
electric shock or fire.
Read and follow the specific "Precautions to Avoid
Possible Exposure to Excessive Microwave Energy",
found in the beginning of this Section.
If the microwave generates a strange noise, a
burning smell or smoke, unplug it immediately and
contact your nearest service center.
Failing to do so may result in electric shock or fire.
In the event of a gas leak (propane gas, LP gas,
etc.), ventilate the room immediately. Do not touch
the microwave, power cord, or plug.
,, Do not use a ventilating fan.
A spark may result in an explosion or fire.
Take care that the door or any of the other parts do
not come into contact with the body while cooking or
just after cooking.
Failing to do so may result in burns.
In the event of a grease fire on the surface units
below the oven, smother the flaming pan on the
surface unit by covering the pan completely with a
lid, a cookie sheet or a flat tray.
Never leave surface units beneath your oven
unattended at high heat settings. Boil over cause
smoking and greasy spillovers that may ignite and
spread if the vent fan is operating. To minimize
automatic fan operation, use adequate sized
cookware and use high heat on surface units only
when necessary.
If materials inside the oven should ignite, keep the
oven door closed, turn the oven off and disconnect
the power cord, or shut off power at the fuse or
circuit breaker panel. If the door is opened, the fire
may spread.
,, Always observe Safety Precautions when using
your oven. Never try to repair the oven on your
own there is dangerous voltage inside. If the
oven needs to be repaired, contact an authorized
service center near you.
Do not attempt to repair, disassemble, or modify the
appliance yourself.
,, Because a high voltage current enters the product
chassis during operation, opening the chassis can
result in electric shock or fire.
You may be exposed to electromagnetic waves.
When the oven requires repair, contact your
nearest service center.
any foreign substance such as water enters the
@ Ifmicrowave,
unplug the it and contact your nearest
service center.
Failing to do so may result in electric shock or fire.
not touch the power plug with wet hands.
G Do,, This
may result in electric shock.
Do not turn the appliance off by unplugging the
power plug while the appliance is in operation.
,, Plugging the power plug into the wall socket again
may cause a spark and result in electric shock or
fire.
Keep all packaging materials well out of the reach of
children. Packaging materials can be dangerous to
children.
,, If a child places a bag over its head, the child can
suffocate.
Do not let children or any person with reduced
physical, sensory or mental capabilities use this
appliance unsupervised.
Make sure that the appliance is out of the reach of
children.
Failing to do so may result in electric shock, burns
or injury.
Do not touch the inside of the appliance immediately
after cooking. The inside of the appliance will be hot.
,, The heat on the inside of the oven can cause
burns.
Do not put aluminum foil (except as specifically
directed in this manual), metal objects (such as
containers, forks, etc.) or containers with golden or
silver rims into the microwave.
,, These objects can cause sparks or a fire.
Do not use or place flammable sprays or objects
near the oven.
,, Heat from the microwave can cause flammable
sprays to explode or burn.
Failing to do so may result in electric shock or
injury.
Do not tamper with or make any adjustments or
repairs to the door. Under no circumstances should
you remove the outer cabinet.
Do not store or use the oven outdoors.
SAVETHESEINSTRUCTIONS
safety
SMH1611
XAA 03898A
EN-02.indd
5
informat
on ....5
2011-10-13
4:04:52
CAUTION
®
USAGE CAUTIONS
If the surface of the microwave is cracked, turn it off.
Failing to do so may result in electric shock.
Dishes and containers can become hot. Handle with
care.
Hot foods and steam can cause burns. Carefully
remove container coverings, directing steam away
from your hands and face.
Remove lids from baby food before heating. After
heating baby food, stir well to distribute the heat
evenly. Always test the temperature by tasting before
feeding the baby. The glass jar or surface of the food
may appear to be cooler than the food in the interior,
which can be so hot that it will burn the infant's
mouth.
Make sure all cookware used in the oven is suitable
for microwaving.
Use microwavable cookware in strict compliance
with such manufacturer's recommendations.
not stand on top of the microwave or place
G Do
objects (such as laundry, oven covers, lighted
candles, lighted cigarettes, dishes, chemicals, metal
objects, etc.) on the appliance.
,, Items, such as a cloth, may get caught in the
door.
This may result in electric shock, fire, problems
with the product, or injury.
Do not operate the appliance with wet hands.
This may result in electric shock.
Do not spray volatile material such as insecticide
onto the surface of the appliance.
,, As well as being harmful to humans, it may also
result in electric shock, fire or problems with the
product.
Do not place the appliance over a fragile object such
as a sink or glass object.
,, This may result in damage to the sink or glass
object.
Do not put your face or body close to the appliance
while cooking or when opening the door just after
cooking.
,, Take care that children do not come too close to
the appliance.
,, Failing to do so may result in children burning
themselves.
Do
not defrost
frozen beverages
bottles.
The containers
can break.in narrow-necked
Do not scratch the glass of the oven door with a
sharp object.
,, This may result in the glass being damaged or
broken.
Do not store anything directly on top of the appliance
when it is in operation.
Do not use sealed containers. Remove seals and
lids before use. Sealed containers can explode due
to buildup of pressure even after oven has been
turned off.
/t,, CRITICAL CLEANING
WAONINo
INSTRUCTIONS
Do not clean the appliance by spraying water directly
onto it.
Do not use benzene, thinner or alcohol to clean the
appliance.
This may result in discoloration, deformation,
damage, electric shock or fire.
Before cleaning or performing maintenance, unplug
the appliance from the wall socket and remove food
waste from the door and cooking compartment.
Failing to do so may result in electric shock or fire.
Take care not to hurt yourself when cleaning the
appliance (external/internal)
You may hurt yourself on the sharp edges of the
appliance.
Do not clean the appliance with a steam cleaner.
This may result in corrosion.
Keep the inside of the oven clean. Food particles or
spattered oils stuck to the oven walls or floor can
cause paint damage and reduce the efficiency of the
oven.
Do not place food or heavy objects over the door
when opening the door.
The food or object may fall and this may result in
burns or injury.
Do not abruptly cool the door, the inside of the
appliance, or the dish by pouring water over it during
or just after cooking.
,, This may result in damage to the appliance. The
steam or water spray may result in burns or injury.
Do not try to preheat the oven or operate it while
empty.
Do not cook without the glass tray in place on the
oven floor. Food will not cook properly without the
tray.
SAVETHESEINSTRUCTI0NS
6
SMH1611
safety
informaton
XAA 03898A
EN-02.indd
6
2011-10-13
4:04:52
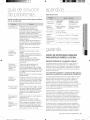
cont nt
SETTING UP YOUR MICROWAVE
8
8
8
9
10
10
OVEN
Checking the parts
Warranty and service information
Setting up your microwave oven
Checking the control panel
Setting the time
Child Lock
USING YOUR MICROWAVE
19
19
19
19
19
19
20
20
OVEN
10
10
10
10
10
11
12
13
Kitchen Timer button
Add 30 sec. button
Vent buttons (2 Speed & On/Off)
Light Hi/Lo/Off button
Cooking Presets buttons
Auto Reheat button
Auto Defrost button
Soften/Melt button
14
Microwave Cooking Times &
Power Levels
Eco Mode
14
CLEANING AND MAINTAINING
OVEN
YOUR MICROWAVE
Cleaning the exterior
Cleaning the interior
Cleaning the turntable and roller
rings
Storing and repairing your
microwave oven
Replacing the cooktop/night light
Replacing the oven light
Cleaning the grease filter
Replacing the charcoal filter
TROUBLESHOOTING
APPENDIX
WARRANTY
COOKWARE GUIDE
_
15
Microwave-safe utensils
i
COOKING GUIDE
16
....... 16
17
17
17
17
18
General microwave tips
Cooking meat
Cooking poultry
Cooking seafood
Cooking eggs
Cooking vegetables
Recipes
contents 7
SMH1611
XAA 03898A
EN-02.indd
7
2011-10-13
4:04:52
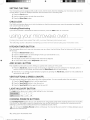
WARRANTY AND SERVICE
INFORMATION
sort ncj UD
I
Be sure to follow these instructions closely so
that your new microwave oven works properly,
CHECKING
THE PARTS
Carefully unpack your microwave oven, and make
sure you've received all the parts shown below. If your
microwave oven was damaged during shipping, or if you
do not have all the parts, contact Samsung Customer
Service. (Refer to the "Warranty and service information"
on page 8.)
To help us to serve you better, please complete the
enclosed registration card and promptly return it by mail.
If the registration card is missing, you can call Samsung
Electronics, Inc., at 1-800-SAMSUNG (726-7864}
or register online at www.samsung.com/global/
register.
When contacting Samsung, please provide the specific
model and serial number information which is usually
located on the back or bottom of the product. Please
record these numbers in the spaces provided below,
along with the other requested information. Keep this
information in a safe place as a permanent record of
your purchase to aid in identification in case of theft or
loss. Also keep a copy of your sales receipt as a proof of
purchase if warranty service is needed.
MODEL NUMBER
SERIAL NUMBER
DATE PURCHASED
PURCHASED
Microwave
oven (SM H1611, SM H 1622}
Warranty service can only be performed by a Samsung
Authorized Service Center. If you should require warranty
service, provide the above information with a copy of your
sales receipt to the Samsung Authorized Service Center.
For service assistance and the location of the nearest
service center, please call 1-800-SAMSUNG (726-7864).
SETTING
OVEN
Glass Tray
Grease Filters
(2ca}
Registration
Card
Roller Guide
Ring
Charcoal
filter
Manuals
(User &
Installation}
Exhaust adaptor
FROM
UP YOUR MICROWAVE
1. Open the door by pulling the handle on the right side
of the door.
2. Wipe the inside of the oven with a damp cloth.
Hardware kit
(Screws &
Brackets}
3.
Install the pre-assembled ring into the indentation at
the center of the microwave oven.
4.
Place the glass tray securely in the center of the preassembled roller ring.
Templates
(Top & Wail}
i
8 setting up your new m orowave oven
SMH1611
XAA 03898A
EN-02.indd
8
2011-10-13
4:04:53
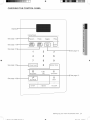
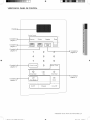
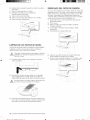
CHECKING
THE CONTROL
PANEL
Display I
Cooking Presets
See page 11 I
See page 11 1
1
See page 12 1
See page 14 1
t See page 13
1
2
4
5
6
7
8
9
I Power Level }
O
--[-----StopiCMear
Sec.
Enter/Start
See page 10
See page 14 1
I EcoMode I
Clock
i
On/Off
i/LoiOff
setting up your new microwave oven 9
SMH1611
XAA 03898A
EN-02.indd
9
2011-10-13
4:04:54
SETTING
THE TIME
Your microwave oven is equipped with a built-in clock. Set the clock when first installing your microwave oven and after
a power failure. The time is displayed whenever the microwave oven is not being used.
1, Press the Clock button.
2, Use the number buttons to enter the current time.
3. Press the Enter/Start
button.
CHILD LOCK
The Child Lock function allows you to lock the buttons so that the microwave oven cannot be operated accidentally. The
oven can be locked at any time.
Activating/Deactivating
If you want to activate or deactivate the child lock function, press the Start button for 3 seconds.
Cooking has iqever been easier than with your iqew Samsung
The following section describes
microwave oven,
everything you iqeed to know about using your microwave oven,
KITCHEN TIMER BUTTON
This microwave allows you to use your microwave oven as a timer. Use the Kitchen Timer for timing up to 99 minutes,
99 seconds.
1, Press the Kitchen
Timer button.
2, Use the number buttons to set the length of time you want the timer to run.
3, Press the Enter/Start button.
4o The display counts down and beeps when the time has elapsed.
5, To cancel timer setting: Press Stop/Clear
button once.
ADD 30 SEC. BUTTON
This simplified control saves you time, letting you quickly start cooking at 100% power.
1, Press the Add 30 seco button for each 30 seconds you wish the food to be cooked for. For example, press it
twice to cook it for one minute, and then press the Enter/Start button to start cooking.
2, Add 30 sec. to a cooking program already in progress by pressing the Add 30 sec, button for every additional 30
seconds you wish to add.
VENT BUTTONS
(2 SPEED & ON/OFF)
The vent removes steam and other vapors from the cooking surface. You can manually select the vent setting.
1. Press the Vent 2 Speed button to set the speed level.
2. Press the Vent On/Off button to turn the vent on.
3. Press the Vent On/Off button again to turn the vent off.
LIGHT Hi/LO/OFF
BUTTON
The Light button allows you to select a light setting for your microwave.
1
2
3
H ghLow
COOKING
PRESETS
BUTTONS
The Cooking Presets buttons let you cook favorite foods using preset power levels and times at the touch of a button.
If the food is not thoroughly cooked or reheated when you use the Preset buttons, complete the cooking process by
selecting a power level and cooking the food for an additional amount of time.
A
Do not use the Cooking
....... the food will overcook.
Presets buttons continuously. You must let the oven cool for 5 minutes between uses or
10 usng your microwave oven
SMH1611
XAA 03898A
EN-02.indd
10
2011-10-13
4:04:54
Auto cook table
Popcorn
3.0 oz.
1 package
once
3.0-3.5 oz.
1 package
twice
once
Bacon
Display: Ac-2
twice
Place 2 paper towels on a plate and arrange bacon on towels. Do not
overlap. Cover with additional paper towel. Remove the paper towels
immediately after cooking.
Amount : 2 to 6 slices.
Frozen
Dinner
Display: Ac-3
three times
Remove food from outer wrapping and follow box instructions for covering
and standing. Let oven cool for at least 5 minutes before using again.
Amount ' 8 to 14 oz.
four times
Follow the package instructions for covering and standing. Use this button
for frozen sandwiches, breakfast entrees, etc. Let oven cool for at least 5
minutes before using again.
Amount : 4 to 8 oz.
Frozen
Breakfast
Display: Ac-4
Veggies
Potato
z_
Do not leave the microwave oven unattended while popcorn is being
oAoT,o,
cooked!
Use measuring cup or mug. Do not cover. Place the beverage in the oven.
After heating, stir well. Let oven cool for at least 5 minutes before using again.
Note: • Reheat times based on an 8 ounce cup.
Beverages heated with the beverage feature may be very hot.
Remove container with care.
Amount : 0.5 cup, 1 cup, 2 cup.
Beverage
Display: Ac-1
Cook
Cook only one microwave popcorn bag at a time. Be careful when removing
and opening the heated bag from the oven. Let the oven cool for at least 5
minutes before using it again.
Fresh
vegetables
once
Frozen
vegetables
twice
1 potato
once
2 potatoes
twice
3 potatoes
three times
4 potatoes
fourtimes
1 slice
once
2 slice
twice
3 slice
three times
Pizza
Place 1 to 4 servings of fresh / frozen vegetables in a microwave-safe
ceramic, glass or plastic dish and add 2-4 Tbs. water. Cover with lid or vented
plastic wrap to cook. Stir before letting stand for 3 to 5 minutes. Let oven cool
for at least 5 minutes before using again.
Pierce each potato several times with a fork. Place them on the turntable in a
spoke-like fashion. After cooking, let the potatoes stand for 3-5 minutes. Let
the oven cool for at least 5 minutes before using it again.
[_
ierce the potatoes with a fork several times before putting them in the
microwave oven. The cooking times are based on average 8-10 oz.
potatoes.
Put 1-3 slices of pizza on a microwave-safe plate with the wide end of each
slice toward the outside edge of the plate. Do not let slices overlap. Do not
cover. Let the oven cool for at least 5 minutes before using again.
AUTO REHEAT BUTTON
The Auto Reheat button provides three preset reheating categories.
Plate of food
Casserole
Pasta
Example: Reheating 3 servings
of casserole.
1. Press the Auto Reheat button twice.
2. Use the number buttons to enter the quantity or number of servings.
3. Press the Enter/Start button.
4. When the cooking time is over, four beeps will sound and/-,.'-_dis displayed.
usng your m crowave oven 11
SMH1611
XAA 03898A
EN-02.indd
11
2011-10-13
4:04:54
Auto reheating
table
Follow the instructions below when reheating different types of food.
Use only pre-cooked, refrigerated foods. Cover the plate with a vented plastic wrap or
waxed paper tucked under the plate. If the food is not as hot as you would like after
using the reheat function, continue heating using additional time and power.
Plate of food
1 serving
(1 plate)
Casserole
1 to4
servings
Pasta
(_The
Contents:
3-4 oz. meat, poultry or fish (up to 6 oz. with bone)
14_cup starch (potatoes, pasta, rice, etc.)
14_cup vegetables (about 3-4 oz.)
Cover the plate with a lid or vented plastic wrap. If the food is not as hot as you would
like after using the reheat function, continue heating using additional time and power.
Stir the food once before serving.
Contents:
3-4 oz. meat, poultry or fish (up to 6 oz. with bone)
_4_cup starch (potatoes, pasta, rice, etc.)
_4_cup vegetables (about 3-4 oz.)
'right' temperature of the food varies from person to person. Allow food to stand 1 to 5 minutes before serving.
AUTO DEFROST BUTTON
The defrost choices are preset in the oven. The defrost cycle provides you with the best defrosting method for
frozen foods, because the oven automatically sets the defrosting times according to the weight you enter. For added
convenience, the auto defrost function beeps to remind you to check or turn over the food during the defrost cycle.
Press the Auto Defrost button once and select the food weight. The available weight ranges from 0.1 to 6.0 Ibs.
1. Press the Auto Defrost button.
2. Use the number buttons to enter the weight.
3.
[_
Press the Enter/Start
button.
After pressing the Enter/Start button, the display counts down the defrosting time. The oven will beep twice during
the defrost cycle. At this time, open the door and turn the food as needed. Remove any thawed portions, then
return the frozen portions to the oven and press the Enter/Start button to resume the defrost cycle. The defrost
cycle continues while the oven is beeping and only stops when the door is opened.
Defrosting
tips
When using auto defrost, the entered weight is the net weight in pounds and tenths of pounds (the weight of the food
minus the container).
Use the auto defrost cycle for raw food only. The auto defrost cycle gives best results when the food you want to thaw
is no colder than 0°F (taken directly from a true freeze0. If food has been stored in a refrigerator-freezer that does not
maintain a temperature of 5°F or below, always program a lower food weight (for a shorter defrosting time) to prevent
the food from cooking.
If the food is stored outside the freezer for up to 20 minutes, enter a lower food weight.
The shape of the package alters the defrosting time. Shallow rectangular packets defrost more quickly than a thick
block.
Separate the pieces as they begin to defrost. Separated pieces defrost more easily.
Shield areas of food with small pieces of foil if they start to become warm.
You can use small pieces of aluminum foil to shield foods such as chicken wings, leg tips, and fish tails, but the foil must
not touch the sides of the oven as foil causes arcing, which can damage the oven lining.
12 usng your microwave oven
SMH1611
XAA 03898A
EN-02.indd
12
2011-10-13
4:04:54
Auto defrosting
table
Follow the instructions below when defrosting different types of food.
Roast Beef,
Pork
2.5-6.0 Ibs.
Start with the food placed fat side down. After each stage, turn the food over and shield
any warm portions with narrow strips of aluminum foil.
Steaks,
Chops,
Fish
0.5-3.0 Ibs.
After each stage, rearrange the food. If there are any warm or thawed portions of food,
shield them with narrow, flat pieces of aluminum foil. Remove any pieces of food that are
nearly defrosted. Let stand, covered for 5 - 10 minutes.
Ground
Meat
0.5-3.0 Ibs.
After each stage, remove any pieces of food that are nearly defrosted. Let stand covered
with foil for 5 - 10 minutes.
Whole
Chicken
2.5-6.0 Ibs.
Remove giblets before defrosting poultry. Start defrosting with the breast side down. After
the first stage, turn the chicken over and shield any warm portions with narrow strips of
aluminum foil. After the second stage, again shield any warm portions with narrow strips
of aluminum foil. Let stand, covered, for 30 - 60 minutes in the refrigerator.
Chicken
Pieces
0.5-3.0 Ibs.
After each stage, rearrange or remove any pieces of food that are nearly defrosted. Let
stand for 10 - 20 minutes.
Bread
0.1 - 2.0 Ibs.
Arrange the rolls in a circle on kitchen paper in the middle of the turntable.
Turn over halfway through the defrosting time.
SOFTEN/MELT
BUTTON
SOFTEN/MELT lets you melt chocolate, soften cream cheese, and melt butter.
Example: To melt chocolate.
1. Touch the SOFTEN/MELT
button.
2. Choose the food category (1,2,or 3) by pressing a number button.
3. Touch the Enter/Start button.
Soften / Melt table
Melt chocolate
2 squares or 1 cup chips
Place chocolate chips or square in a microwave-safe dish.
Stir well at half time when the oven beeps, and re-start the oven.
Unless stirred, the chocolate keeps its shape even when heating time is
over.
Soften cream
cheese
1 package (8 oz.)
Unwrap the cream cheese and place on microwave-safe dish.
Let stand 1-2 minutes.
1 stick (1/4 lb.)
Melt butter
2 sticks (1/2 lb.)
Remove wrapping and cut butter in half vertically.
Place butter in dish, cover with wax paper.
Stir well after finishing and let stand 1-2 minutes.
usng your microwave oven 13
SMH1611
XAA 03898A
EN-02.indd
13
2011-10-13
4:04:54
MICROWAVE COOKING
POWER LEVELS
TIMES &
The power level lets you control the heating intensity from
Warm (1) to High (10).
Cooking
at high power
Power Levels
The 10 power levels allow you to choose the optimal
power level for your cooking needs.
levels
1. Use the number buttons to enter the cooking time.
2. Press the Enter/Start button.
3. When the cooking time is over, four beeps will
sound and End is displayed.
10
(High)
100 %
Boiling water.
Cooking ground beef.
Making candy.
Cooking fresh fruit and
vegetables.
Cooking fish and poultry.
Preheating browning dish.
Reheating beverages.
Bacon slices.
9
90 %
Reheating meat slices quickly.
Sauteing onions, celery, and
green pepper
80 %
Reheating all types of items
(Dinner plate, pasta, meat,
soup or sauce, etc,).
Cooking scrambled eggs.
7O %
Cooking breads and cereal
products.
Cooking cheese dishes, veal.
Cooking cakes, muffins,
brownies, cupcakes.
60 %
Cooking pasta.
5O %
Cooking meats, whole poultry.
Heating custard
Cooking whole chickens,
turkey, spare ribs, rib roasts,
sirloin roasts.
4O %
Cooking less tender cuts of
meat.
Reheating frozen convenience
foods.
3
3O %
Thawing meat, poultry, and
seafood.
Cooking small quantities of
food.
Finishing cooking casserole,
stew, and some sauces.
2
20 %
Softening butter and cream
cheese.
Heating small amounts of food.
1
10 %
Softening ice cream.
Raising yeast dough.
If you cooks
do not atenter
a power
level,
the by
microwave
oven
the High
Power
Level
default.
Cooking
at lower
power
levels
Cooking at high power does not always give you the
best results with foods that require slower cooking, such
as roasts, baked goods, or custards. Your oven has 9
additional power settings in addition to high.
8
1. Use the number buttons to enter the cooking time.
(_
henpress
selecting
more than
onebutton
cooking
stage,
must
the Power
Level
before
youyou
can
enter the second cooking stage.
[_
ress the Power Level button twice to set the
power level to High for a cooking stage.
6
2. Press the Power Level button.
3. Use the number buttons to enter the power level.
4. Press the START button.
5
5. When the cooking time is over, four beeps will
sound and End is displayed.
Cooking
with more than one cook cycle
For best results, some recipes call for one Power Level
for a certain length of time, and another Power Level for
another length of time. Your oven can be set to change
from one to another automatically, if the first cycle is the
defrost cycle.
1. Use the number buttons to enter the cook time.
4
2. Press the Power Level button.
3. Use the number buttons to enter the power level.
4. Use the number buttons to enter the second cook
time.
5. Press the Power Level button.
6. Use the number buttons to enter the power level.
7. Press the Enter/Start button.
8. When the cooking time is over, four beeps will
sound and End is displayed.
ECO MODE
Eco Mode reduces standby power usage.
When you press the ECO MODE button once, the
display will go out and the microwave shifts to the mode
which minimizes power usage.
To cancel the ECO MODE, press ECO MODE button
once again, or press any other button.
14 usn9 your microwave oven
SMH1611
XAA 03898A
EN-02.indd
14
2011-10-13
4:04:54
Glassware
For food to cook in the microwave oven, the
microwaves must be abb to penetrate the food
without being reflected or absorbed by the dish,
It is important to choose the correct cookware,
therefore, look for cookware that is marked
microwave-safe,
Oven-to-table
ware
Fine
glassware
Can be used to warm foods or
liquids. Delicate glass may break
or crack if heated suddenly.
The following table lists various types of
cookware and indicates if and how they should
be used in a microwave oven,
Glass jars
Regular glass is too thin to be
used in a microwave, and can
shatter.
x ¸¸
i [
ci
,/
Can be used, unless decorated
with a metal trim.
Metal
Dishes,
Utensils
May cause arcing or fire.
Freezer bag
twist ties
May cause arcing or fire.
Paper
MICROWAVE-SAFE
UTENSILS
If you are not sure whether an item is microwave-safe or
not, you can perform the following simple test:
1, Place 1 cup of water (in a glass-measuring cup) inside
your oven next to the item to be tested.
2, Press the Add 30 Seco button twice to heat them
both for one minute at high power.
After one minute, the water should be warm and the item
you are testing should be cool. If the dish is warm, then
it is absorbing microwave energy and is not microwavesafe.
Aluminum
foil
Browning
plate
A
Can be used in small quantities
to protect areas against
overcooking. Arcing can occur
if the foil is too close to the oven
wall or you use too much foil.
Do not preheat for more than
eight minutes.
Ceramic,
porcelain,
and
stoneware
Porcelain, pottery, glazed
earthenware and bone china are
usually suitable, unless decorated
with a metal trim.
Disposable
polyester
cardboard
Some frozen foods are packaged
in these materials.
Fast-food
packaging
Polystyrene
cups/
containers
Can be used to warm food.
Overheating may cause the
polystyrene to melt.
Paper bags or
newspaper
May catch fire.
Recycled
paper or metal
trims
May cause arcing.
Plates, cups,
napkins and
kitchen paper
Recycled
paper
For short cooking times and
warming. Also to absorb excess
moisture.
,/
Do not use recycled paper towels,
which may contain metal and may
catch fire or cause arcing.
Plastic
Containers
Can be used if heat-resistant
thermoplastic. Some plastics
may warp or discolor at high
temperatures. Do not use
Melamine plastic.
Cling film
Can be used to retain moisture.
Avoid wrapping the food too
tightly. Take care when removing
the film as hot steam will escape.
Freezer bags
Wax
Z&
or
grease-proof
paper
Only if boilable or oven-proof.
Should not be airtight. Pierce with
a fork if necessary.
Can be used to retain moisture
and prevent spattering.
Thermometer
Use only those marked
"Microwave-safe" and follow the
directions. Check the temperature
in several places. You can use
conventional thermometers once
the food has been removed from
the oven.
Straw,
wicker, and
wood
Use only for short-term heating,
as these materials can be
flammable.
v/
' Recommended to use
A
' Use with Caution
_
' Unsafe to use / Do not use
cookware gude 15
SMH1611
XAA 03898A
EN-02.indd
15
2011-10-13
4:04:55
Turning
Microwave energy actually penetrates food,
attracted and ak_sorbed by the water, fat and
sugar in the food, The microwaves cause the
mc}lecubs in the food to move rapidly, The rapid
movement of these molecules creates friction
and the resulting heat cooks the food,
GENERAL
MICROWAVE
TIPS
Dense foods, such as potatoes, take longer to heat than
lighter foods. Foods with a delicate texture should be
heated at a low power level to avoid becoming tough.
Foods with a non-porous skin such as potatoes or hot
dogs, should be pierced to prevent bursting.
Putting heating oil or fat in the microwave is not
recommended. Fat and oil can suddenly boil over and
cause severe burns.
Some ingredients heat faster than others. For example,
the jelly in the jelly doughnut will be hotter than the dough.
Keep this in mind to avoid burns.
The altitude and the type of cookware you are using
can affect the cooking time. When trying a new recipe,
use the minimum cooking time and check the food
occasionally to prevent overcooking.
Home canning in the microwave oven is not
recommended because not all harmful bacteria may be
destroyed by the microwave heating process.
Although microwaves do not heat the cookware, the heat
from the food is often transferred to the cookware. Always
use pot holders when removing food from the microwave
and instruct children to do the same.
Making candy in the microwave is not recommended as
candy can be heated to very high temperatures. Keep this
in mind to avoid injury.
Cooking
Turn foods over midway through the cooking cycle
to expose all parts to the microwave energy. This is
especially important with large items such as roasts.
Standing
Foods cooked in the microwave build up internal heat
and continue to cook for a few minutes after the oven
stops. Let foods stand to complete the cooking process,
especially foods such as roasts and whole vegetables.
Roasts need this time to complete cooking in the center
without overcooking the outer areas. All liquids, such as
soup or hot chocolate should be shaken or stirred when
cooking is complete. Let liquids stand a moment before
serving. When heating baby food, stir well and test the
temperature before serving.
Adding
moisture
Microwave energy is attracted to water molecules. Food
that is uneven in moisture content should be covered or
allowed to stand so that the heat disperses evenly. Add a
small amount of water to dry food to help it cook.
Venting
After covering a dish with plastic wrap, vent the plastic
wrap by turning back one corner to let excess steam
escape.
COOKING
MEAT
Place the meat fat side down on a microwave-safe
roasting rack in a microwave-safe dish. Use narrow strips
of aluminum foil to shield any bone tips or thin pieces of
meat. Check the temperature in several places before
letting the meat stand the recommended time.
The following temperatures are the removal temperatures.
The temperature of the food will rise during standing time.
techniques
lf the oven is set to cook for more than 25 minutes, it
will automatically adjust to 70 percent power after 25
minutes to avoid overcooking.
Stirring
Open the microwave door and stir foods such as
casseroles and vegetables occasionally while cooking
to distribute heat evenly. Food at the outside of the dish
absorbs more energy and heats more quickly, so stir
from the outside towards the center. The oven will turn off
when you open the door to stir your food.
Arrangement
Arrange unevenly shaped foods, such as chicken pieces
or chops, with the thicker, meatier parts toward the
outside of the turntable where they can receive more
microwave energy. To prevent overcooking, place thin or
delicate parts towards the center of the turntable.
Shielding
Shield food with narrow strips of aluminum foil to prevent
overcooking. Areas that need shielding include poultry
wing-tips, the ends of poultry legs, and corners of square
baking dishes. Use only small amounts of aluminum foil.
Larger amounts can damage your oven.
Roast beef Cooking Time:
10-15 min./Ib, for
(boneless)
Up to 4 Ibs. 145 °F - Rare
12-17 min./Ib, for
160 °F - Medium
14-19 min./Ib, for
170 °F - Well Done
Power Level:
High (10) for first
5 minutes, then
Medium (5).
Pork
Cooking Time:
15-20 min./Ib, at
(boneless
170 °F Well Done
or bone-in)
Up to 4 Ibs.
Power Level:
High (10) for first
5 minutes, then
Medium (5).
Place the roast fatside down on the
roasting rack and
cover with wax paper.
Turn over halfway
through the cooking
srocess. Let stand for
10 to 15 minutes.
Place the roast fatside down on the
roasting rack and
cover with wax paper.
Turn over halfway
through cooking
srocess. Let stand for
10 to 15 minutes.
The following temperatures are the removal temperatures.
The temperature of the food will rise during standing time.
Expect a 10 °F rise in temperature during the standing
time.
16 cookng gude
SMH1611
XAA 03898A
EN-02.indd
16
2011-10-13
4:04:55
COOKING
Beef
Pork
Poultry
Rare
135 °F
145 °F
Medium
150 °F
160 °F
Well Done
160 °F
170 °F
Medium
150 °F
160 °F
Well Done
160 °F
170 °F
Dark meat
170 °F
180 °F
Light meat
160 °F
170 °F
COOKING
Whole
chicken
Up to 4
Ibs.
Cooking Time:
6-10 min./Ib.
180 °F dark
meat
17O °F light
meat
Power Level:
Medium High
(7).
Chicken
pieces
Up to 2
Ibs.
Place the fish on a microwave-safe roasting rack in a
microwave-safe dish. Use a tight cover to steam the fish.
A lighter cover of wax paper or paper towel will decrease
steaming. Cook the fish until it flakes easily with a fork.
Do not overcook fish. check it after the minimum cooking
time.
Tuna steaks
and salmon
steaks
Up to 1.5
Ibs.
Cooking
Time:
7-11 min./Ib.
Fillets
Up to 1.5
Ibs.
Cooking
Time:
4-8 min./Ib.
POULTRY
Place the poultry on a microwave-safe roasting rack in a
microwave-safe dish and cover with wax paper to prevent
spattering. Use aluminum foil to shield the bone tips, thin
pieces of meat, or areas that may start to overcook.
Check the temperature in several places before letting the
poultry stand the recommended time.
Cooking Time:
6-9 min./Ib.
180 °F dark
meat
17O °F light
meat
Power Level:
Medium High
(7).
Place the chicken breastside down on the roasting
rack. Cover with wax paper.
Turn over half way through
cooking process. Cook until
the juices run clear and the
meat near the bone is no
longer pink. Let stand for
5-10 minutes.
Place the chicken bone-side
down on the dish, with the
thickest portions towards
the outside of the dish.
Cover with wax paper. Turn
over halfway through the
cooking process. Cook until
the juices run clear and the
meat near the bone is no
longer pink. Let stand for
5-10 minutes.
SEAFOOD
Power Level:
Medium-High
(7).
Power Level:
Medium-High
(7).
Shrimp
Up to 1.5
Ibs.
Cooking
Time:
4- 61/2min./Ib.
Power Level:
Medium-High
(7).
COOKING
Arrange the steaks on
a roasting rack with the
meaty portions towards
the outside of the rack.
Cover with wax paper.
Turn them over halfway
through the cooking
)rocess. Cook until the
fish flakes easily with a
fork. Let stand for 3-5
minutes.
Arrange the fillets in a
baking dish, tucking any
thin pieces under. Cover
with wax paper. If the
fillets are thicker than 1/2
in., turn them over halfway
through the cooking
)rocess. Cook until the
fish flakes easily with a
fork. Let stand for 2-3
minutes.
Arrange the shrimp in
a baking dish without
overlapping or layering
them. Cover with wax
paper. Cook until firm
and opaque, stirring 2 or
3 times. Let stand for 5
minutes.
EGGS
You can use your microwave oven to cook eggs. Cook
them until they are just set as they become tough if they
are overcooked.
z_
.......
Never cook eggs in their shells and never warm
up hard-boiled eggs in their shells. Eggs cooked
or warmed up in their shells can explode. Always
pierce whole eggs to keep them from bursting.
COOKING
VEGETABLES
Vegetables should be washed prior to cooking. Usually,
no extra water is needed. When cooking dense
vegetables such as potatoes, carrots and green beans,
add about 1_ cup water.
Small vegetables (sliced carrots, peas, lima beans, etc.)
will cook faster than larger ones.
Whole vegetables, such as potatoes, acorn squash or
corn on the cob, should be arranged in a circle on the
turntable before cooking. They will cook more evenly if
turned over halfway through the cooking process.
Always place vegetables such as asparagus and broccoli
with the stems pointing towards the edge of the dish and
cooknggude
SMH1611
XAA 03898AEN-02.indd
17
17
2011-10-13
4:04:55
the tips toward the center.
When cooking cut vegetables, always cover the dish with
a lid or vented microwavable plastic wrap.
Whole, unpeeled vegetables such as potatoes, squash,
eggplant, etc., should have their skins pierced in several
spots before cooking to prevent them from bursting.
For a more even cooking result, stir or rearrange whole
vegetables halfway through the cook time.
Generally, the denser the food, the longer the standing
time. (The standing time refers to the time necessary for
dense, large foods and vegetables to finish cooking after
they come out of the oven.) A baked potato can stand on
the counter for five minutes before cooking is completed,
while a dish of peas can be served immediately.
RECIPES
Beef and barley stew
11_Ibs. beef stew cubes, cut into l_-inch pieces
_2 cup chopped onion
2 Tbs. all-purpose flour
1 Tbs. Worcestershire sauce
1 can (13.75-14.5 oz.) beef broth
2 medium carrots, cut into _-inch slices (about 1 cup)
_ cup barley
1 bay leaf
_Atsp. pepper
1 pkg. (9-10 oz.) frozen peas, thawed
1. In a 2-quart casserole, combine the beef, onion, flour,
and Worcestershire sauce and mix well. Cover with
lid. Cook at High for 6 to 8 minutes until the beef is no
longer pink, stirring once.
2. Stir in beef broth, carrots, barley, bay leaves, and
pepper. Cover with lid. Cook at Medium for 1 to 11_
hours until carrots and beef are tender, stirring 2 to 3
times.
3.
Stir in peas. Cover with lid. Cook at Medium for 10
minutes. Let stand for 10 minutes. Remove bay leaves
before serving.
Makes 6 servings.
Broccoli
and cheese
casserole
_Acup butter or margarine
_Acup chopped onion
1_/2Tbs. flour
_ tsp. salt
1Atsp. dry mustard
1/8 tsp. pepper
1_ cups milk
_Acup chopped red pepper
8 oz. (2 cups) cheddar cheese, shredded
1 pkg. (9-10 oz.) frozen chopped broccoli, thawed
4 cups cooked spiral shaped pasta (8 oz. dry)
1. In a 2-quart casserole, cook butter and onion at High
for 1 to 2 minutes until the onion is soft, stirring once.
2. Add flour, salt, mustard, and pepper; mix well. Cook
at High for 30 to 60 seconds until mixture boils. Stir in
milk until smooth.
3. Stir in red pepper. Cook at High for 2 to 3 minutes
until mixture boils and thickens slightly, stirring twice.
Stir in cheese until melted.
4. Add broccoli and pasta, mix well. Cover with lid. Cook
at High for 4 to 6 minutes until heated through, stirring
once. Stir before serving.
Warm potato
salad
2 Ibs. small red potatoes, cut into _-inch pieces
4 slices bacon (uncooked), cut into _-inch pieces
1Acup chopped onion
2 tsp. sugar
1 tsp. salt
1 tsp. flour
_ tsp. celery seed
1/8 tsp. pepper
2_ Tbs. apple cider vinegar
1. In a 2-quart casserole, combine the potatoes and
_Acup water. Cover with lid. Cook at High until the
potatoes are tender (7-10 minutes); stir twice. Drain
and set aside to cool slightly.
2. In a medium bowl, cook the bacon at High until crisp
(2_/2-31/2minutes); stir once. Place the bacon on a
paper towel. Reserve 1 Tbs. drippings.
3. Combine the drippings and onion. Cover with plastic
wrap; turn a corner back to vent steam. Cook at High
until tender (1_/_-2_ minutes); stir once.
4. Stir in sugar, salt, flour, celery seed, and pepper.
Cook at High until mixture boils (30-40 seconds). Stir
in vinegar and 1/2cup water. Cook at High until liquid
boils and thickens slightly (1-2 minutes); stir once.
Add bacon to dressing. Pour dressing over potatoes.
Stir well.
Makes 6 servings.
Black bean soup
1 cup chopped onion
1 clove garlic, minced
2 cans (15 oz. each) black beans, drained
1 can (14-16 oz.) stewed tomatoes, chopped
1 can (13.75-14.5 oz.) chicken broth
1 can (7-8.5 oz.) corn
1 can (4 oz.) chopped green chilies
1-2 tsp. ground cumin
1. Place the onion and garlic in a 3-quart casserole.
Cover with lid. Cook at High for 2 to 4 minutes until
tender.
2. Add one can of beans, and mash the beans with a
fork. Add remaining ingredients and mix well.
3. Cook uncovered at High for 10 minutes; stir. Reduce
power to Medium and cook for 5 minutes. Stir before
serving.
Makes about 2 quarts.
Makes 6 servings.
18 cookn9 9ude
SMH1611
XAA 03898AEN-02.indd
18
2011-10-13
4:04:55
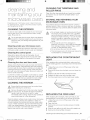
CLEANING THE TURNTABLE
ROLLER RINGS
F
Keeping your microwave oven clean improves
its performance, wards off unnecessary repairs,
and lengthens its life,
CLEANING
THE EXTERIOR
It's best to clean spills on the outside of your microwave
oven as they occur. Use a soft cloth and warm, soapy
water. Rinse and dry.
Do not get water into the vents. Never use abrasive
....... products or chemical solvents such as ammonia or
alcohol as they can damage the appearance of your
microwave.
Cleaning
under your microwave
oven
Regularly clean grease and dust from the bottom of your
microwave using a solution of warm water and detergent.
Cleaning
the control
panel
Wipe with a damp cloth and dry thoroughly. Do not
use cleaning sprays, large amounts of soap and water,
abrasives or sharp objects on the panel as it is easily
damaged.
Cleaning
the door and door seals
Always ensure that the door seals are clean and that the
door closes properly. Take particular care when cleaning
the door seals to ensure that no particles accumulate and
prevent the door from closing correctly. Wash the glass
door with very mild soap and water. Be sure to use a soft
cloth to avoid scratching.
If a thin film of water accumulates on the inside or outside
of the oven door, wipe it off with a soft cloth. A thin water
film can accumulate when you operate the oven at high
humidity and in no way indicates microwave leakage.
CLEANING
AND
Clean the roller rings periodically and wash the turntable
as required. You can wash the turntable safely in your
dishwasher.
STORING AND REPAIRING
MICROWAVE OVEN
YOUR
If you need to store your microwave oven for a short or
extended period of time, choose a dust-free, dry location.
Dust and dampness may adversely affect the ability of the
microwave parts.
A
WARNING
Do not repair, replace or service any part of your
microwave oven yourself. Allow only a qualified
service technician to perform repairs. If the oven
is faulty and needs servicing, or you are in doubt
about its condition, unplug the oven from the
power outlet and contact your nearest service
center.
Do not use the oven if it is damaged, in
particular, if the door or door seals are damaged.
Door damage includes a broken hinge, a worn
out seal, or distorted/bent casing.
Do not remove the oven from its casing.
This microwave oven is for home use only and is
not intended for commercial use.
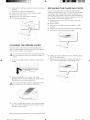
REPLACING
LIGHT
THE COOKTOP/NIGHT
When replacing the cooktop/night light, make sure that
you are wearing gloves to avoid injury from the heat of the
bulb.
1. Unplug the oven or turn off the power at the main
power supply.
2. Remove the screw from the light cover and lower the
cover.
3. Replace bulb with 40 watt incandescent bulb.
4. Replace the light cover and mounting screw.
5 Turn the power back on at the main power supply.
THE INTERIOR
Ensure that the microwave oven has cooled down
....... before cleaning it to avoid injury.
Remove the glass tray from the oven when cleaning
....... the oven or tray. To prevent the tray from breaking,
handle it with care and do not put it in water
immediately after cooking. Wash the tray carefully in
warm sudsy water or in the dishwasher.
Clean the interior surfaces (oven cavity) of your microwave
oven periodically to remove any splashes or stains. To
remove hardened food articles and remove smells, place
2 cups of water (add lemon juice for extra freshness) into
a four-cup measuring glass. Run the microwave at High
power for 5 minutes or until the water boils. Let water
stand in the oven for one or two minutes.
REPLACING
THE OVEN LIGHT
When replacing the oven light, make sure that you are
wearing gloves to avoid injury from the heat of the bulb.
1. Unplug the oven or turn off the power at the main
power supply.
2. Open the door.
3. Remove the vent cover mounting screws (3 middle
screws).
4. Slide the vent grille to the left, then pull it straight out.
5. Remove the charcoal filter, if present.
c ean ng and maintain ng your m crowave oven 19
SMH1611
XAA 03898A
EN-02.indd
19
2011-10-13
4:04:56
6.
Remove the cover by pushing the hook and pulling up
the lever.
REPLACING
7.
8.
9.
10.
11.
Remove
Replace
Replace
Replace
Turn the
If your oven is vented to the inside, the charcoal filter
should be replaced every 6 to 12 months and more often
if necessary. The charcoal filter cannot be cleaned. To
order a new charcoal filter, contact the Parts Department
at 1-800-627-4368 or your Samsung dealer. You can also
order online at www.samsungparts.com
1. Unplug the oven or turn off the power at the main
power supply.
2. Open the door.
3. Remove the vent grille mounting screws (3 middle
screws).
4. Slide the vent grille to the left, then pull it straight out.
5. Push the hook and remove the old filter.
the bulb by turning it gently.
the bulb with a 40 watt appliance bulb.
the bulb holder.
the vent grille and the 3 screws.
power back on.
t. Push
CLEANING
THE GREASE
THE CHARCOAL
FILTER
FILTER
Your microwave oven has two metal reusable grease
filters. The grease filters should be removed and cleaned
at least once a month, or as required.
A
To avoid risk of personal injury or property damage,
.......
_
do not operate the oven hood without the filters in
place.
1=
To remove the filter, slide it to the left (or right) using
the tab.
2.
Soak the grease filter in hot water and a mild
detergent. Rinse well and shake to dry. Brushing the
filter lightly can remove embedded dirt.
6. Slide a new charcoal filter into place. The filter should
rest at the angle shown.
7. Replace the vent grille and 3 screws and close the
door. Turn the power back on and set the clock.
z_Do
not use ammonia or put the grease filter in the
....... microwave oven. The aluminum will darken.
3. To return the filter to its position, slide it into the frame
slot on the left (or right), then push it upwards and to
the right (or left) to lock it.
20 c ean ng and maintain ng your m crowave oven
SMH1611
XAA 03898A
EN-02.indd
20
2011-10-13
4:04:57
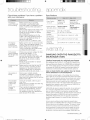
troLAbe hootna
Check these solutions
with your microwave:
The display
and/or the oven
is not working.
if you have a problem
Make sure the plug is properly
connected to a grounded outlet.
If the wall outlet is controlled by a wall
switch, make sure the wall switch is
turned on.
Remove the plug from the outlet, wait
ten seconds, and plug it in again.
Reset the circuit breaker or replace
any blown fuses.
Plug a different appliance into the
outlet. If the other appliance doesn't
work, call a qualified electrician to
repair the wall outlet.
Plug the oven into a different outlet.
The display
is working,
but the power
won't come on.
Make sure the door is closed securely.
Check if any packaging material or
anything else is stuck in the door seal.
Check if the door is damaged.
Touch Cancel twice and enter all the
cooking instructions again.
Is the power
going off before
the set time has
elapsed?
If there was a power outage, the time
indicator will display: 88:88.
If no power outage occurred,
remove the plug from the outlet, wait
ten seconds, and plug it in again.
Reset the clock and any cooking
instructions.
Reset the circuit breaker or replace
any blown fuses.
Cooks food too
slowly.
Make sure the oven has its own 20
amp circuit line. Operating another
appliance on the same circuit can
cause a voltage drop. If necessary,
move the oven to its own circuit.
Has sparks or
arcing.
Remove any metallic utensils,
cookware, or metal ties. If using foil,
use only narrow strips and allow at
least one inch between the foil and the
interior oven walls.
The turntable
makes noise
or becomes
stuck.
Clean the turntable, roller ring and
oven floor.
Make sure the turntable and roller ring
are positioned correctly.
Causes TV
or radio
interference.
This is similar to interference caused
by other small appliances, such as
hair dryers. Move your microwave
(or appliance) away from appliances,
such as your TV or radio.
Specifications
Oven Cavity '
1.6 cu ft
Timer : 99
minutes, 99
seconds
Controls : 10
power levels,
including defrost
Power
Consumption :
1580 Watts
Power Source '
120 VAC, 60 Hz
Power Output :
1000 Watts
Net/Shipping
Weight
ST ' 44.2 / 51.8 Ibs
B / W ' 43.3 / 50.8 Ibs
Outside
Dimensions
29 7/s"(W)X 16 I//'(H) X 15 l/s"(D)
Oven Cavity
Dimensions
19 5/16"(W)X 9 5/s"(H)X 14 :Ys"(D)
Shipping
Dimensions
33 s/s"(W) X 19 WIi'(H) X 19 Ws2"(D)
\
SAMSUNG OVER-THE-RANGE(OTR)
MICROWAVE OVEN
Limited
warranty
to original
purchaser
This SAMSUNGbrand product, as supplied and distributed by
Samsung ElectronicsAmerica, Inc. (SAMSUNG)and delivered
new, inthe original carton to the originalconsumer purchaser,
is warranted by SAMSUNGagainst manufacturingdefects in
materialsand workmanship for a limited warranty period of:
ONE (1) YEAR PARTS AND LABOR, TEN (10) YEARS
PARTS WARRANTY FOR MAGNETRON
This limited warranty begins on the original date of purchase,
and is valid only on products purchased and used in the United
States. To receive warranty service, the purchaser must contact
SAMSUNG for problem determination and service procedures.
Warranty service can only be performed by a SAMSUNG
authorized service center. The original dated bill of sale must be
presented upon request as proof of purchase to SAMSUNG or
SAMSUNG's authorized service center.
SAMSUNG will repair or replace this product, at our option and
at no charge as stipulated herein, with new or reconditioned
parts or products if found to be defective during the limited
warranty period specified above. All replaced parts and products
become the property of SAMSUNG and must be returned to
SAMSUNG. Replacement parts and products assume the
remaining original warranty, or ninety (90) days, whichever is
longer.
In-home service will be provided during the warranty labor
period subject to availability within the contiguous United States.
In-home service is not available in aii areas. To receive in-home
service, the product must be unobstructed and accessible to
service personnel. If during in-home service repair can not be
completed, it may be necessary to remove, repair and return
the product. If in-home service is unavailable, SAMSUNG may
troubleshooting
SMH1611
XAA 03898A
EN-02.indd
21
21
2011-10-13
4:04:57
elect, at our option, to provide for transportation of our choice
to and from a SAMSUNG authorized service center. Otherwise,
transportation to and from the SAMSUNG authorized service
center is the responsibility of the purchaser.
This limited warranty covers manufacturing defects in materials
and workmanship encountered in normal, noncommercial use of
this product and shall not apply to the following, including, but
not limited to: damage which occurs in shipment; delivery and
installation; applications and uses for which this product was not
intended; altered product or serial numbers; cosmetic damage
or exterior finish; accidents, abuse, neglect, fire, water, lightning
or other acts of nature; use of products, equipment, systems,
utilities, services, parts, supplies, accessories, applications,
installations, repairs, external wiring or connectors not supplied
or authorized by SAMSUNG which damage this product or result
in service problems; incorrect electrical line voltage, fluctuations
and surges; customer adjustments and failure to follow
operating instructions, cleaning, maintenance and environmental
instructions that are covered and prescribed in the instruction
book; problems caused by pest infestations, and overheating or
overcooking by user; glass tray or turntable; reduced magnetron
power output related to normal aging. SAMSUNG does not
warrant uninterrupted or error-free operation of the product.
THERE ARE NO EXPRESS WARRANTIES OTHER THAN
THOSE LISTED AND DESCRIBED ABOVE, AND NO
WARRANTIES WHETHER EXPRESS OR IMPLIED, INCLUDING,
BUT NOT LIMITED TO, ANY IMPLIED WARRANTIES OF
MERCHANTABILITY OR FITNESS FOR A PARTICULAR
PURPOSE, SHALL APPLY AFTER THE EXPRESS WARRANTY
PERIODS STATED ABOVE, AND NO OTHER EXPRESS
WARRANTY OR GUARANTY GIVEN BY ANY PERSON, FIRM
OR CORPORATION WITH RESPECT TO THIS PRODUCT
SHALL BE BINDING ON SAMSUNG. SAMSUNG SHALL
NOT BE LIABLE FOR LOSS OF REVENUE OR PROFITS,
FAILURE TO REALIZE SAVINGS OR OTHER BENEFITS, OR
ANY OTHER SPECIAL, INCIDENTAL OR CONSEQUENTIAL
DAMAGES CAUSED BY THE USE, MISUSE OR INABILITY
TO USE THIS PRODUCT, REGARDLESS OF THE LEGAL
THEORY ON WHICH THE CLAIM IS BASED, AND EVEN IF
SAMSUNG HAS BEEN ADVISED OF THE POSSIBILITY OF
SUCH DAMAGES. NOR SHALL RECOVERY OF ANY KIND
AGAINST SAMSUNG BE GREATER IN AMOUNT THAN THE
PURCHASE PRICE OF THE PRODUCT SOLD BY SAMSUNG
AND CAUSING THE ALLEGED DAMAGE. WITHOUT LIMITING
THE FOREGOING, PURCHASER ASSUMES ALL RISK AND
LIABILITY FOR LOSS, DAMAGE OR INJURY TO PURCHASER
AND PURCHASER'S PROPERTY AND TO OTHERS AND THEIR
PROPERTY ARISING OUT OF THE USE, MISUSE OR INABILITY
TO USE THIS PRODUCT SOLD BY SAMSUNG NOT CAUSED
DIRECTLY BY THE NEGLIGENCE OF SAMSUNG. THIS LIMITED
WARRANTY SHALL NOT EXTEND TO ANYONE OTHER
THAN THE ORIGINAL PURCHASER OF THIS PRODUCT,
IS NONTRANSFERABLE AND STATES YOUR EXCLUSIVE
REMEDY.
Some states do not allow limitations on how long an implied
warranty lasts, or the exclusion or limitation of incidental or
consequential damages, so the above limitations or exclusions
may not apply to you. This warranty gives you specific legal
rights, and you may also have other rights which vary from state
to state.
To obtain warranty service, please contact SAMSUNG at:
1-800-SAMSUNG
(726-7864)
or www.
samsung.oom
22 warranty
SMH1611
XAA 03898A
EN-02.indd
22
2011-10-13
4:04:57
II
II
I
I
SMH1611
XAA 03898AEN-02.indd
23
2011-10-13
4:04:57
I
I
Scan the QR code* or visit
www.samsung.com/spsn
to view our helpful
How-to Videos and Live Shows
*Requires reader to be instaLLed on your smartphone
Scan this
with your
smartphone
QUESTIONS OR COMMENTS
CANADA
1-800-SAMSUNG(726-7864)
MEXICO
01-800-SAMSUNG(726-7864)
U.S,A
1-800-SAMSUNG(726-7864)
www.samsung.com
Code No,: DE68-03898A-02
SMH1611
XAA 03898A
EN-02.indd
24
2011-10-13
4:04:58
manual del usuario
100%
Recycled
Paper)
ec_clado_
las posibilidades
ESPAnOL
Graciaspot nauer escog_doeste producto
Samsung. Pot favor, registre su producto er"
www,samsung.com/register
1-800-SAMSUNG {726-7864)
8MH1611
XAA 03898A
Mes-02.indd
1
2011-10-13
4:06:47
i
/
QLArdad
,,j
Felicitaciones pot haber adquirido su nuevo homo
de mioroondas Samsung. Este manual oontiene
intormaciOn importante acerca de la instalaciOn,
el usov el ouidado de su electrodom6stioo. Lea
detenidamente el manual y podr_,asf aproveohar
todas las ventajas y las funoiones del tiorno de
mioroondas.
LOQUENECESiTA
SABER
SOBRE
LASINSTRUCCiONES
DE
SEGURIDAD
SiMBOLOS
YPRECAUCiONES
DE
SEGURIDAD
iMPORTANTES
Significado de iconos y simbolos en este
manual dei usuario:
ADVERTENClA
A
PRECAUCiON
Las advertencias y las instrucciones de seguridad importantes
de este manual no cubren todos los problemas y situaciones que
podrian ocurrir. Es su responsabilidad usar el sentido comQn, ser
precavido y cuidadoso al instalar, mantener y manejar su homo de
microondas.
PRECAUCiONES
PARAEViTARLA
POSlBLE
EXPOSiCiON
A ENERGiA
Peiigros o procedimientos
inseguros que pueden
ocasionar graves
lesiones en las
personas
e_ incluso_
provocar
la muerte.
Peiigros o procedimientos
inseguros que pueden
ocasionar lesiones leves
en las personas
en la propiedad.
o daSos
Para reducir el riesgo
de incendio, explosi6n,
descarga electrica o
PRECAUCiON
lesiones personales
cuando utilice el homo de
microondas, siga estas
instrucciones basicas de
DEMiCROONDAS
EXCESiVA
seguridad.
Ao No intente hacer funcionar este homo con la puerta abierta
dado que el funcionamiento con la puerta abierta puede
dar como resultado una exposicion nociva a energia de
microondas. Es importante no alterar ni modificar las trabas de
seguridad.
[_
NO intentar.
[_
NO desarmar.
Bo No coloque ningOn objeto entre la parte delantera del homo
y la puerta ni deje que se acumule suciedad o residuos de
limpiadores en la superficie de sellado.
_}
NO tocar.
Seguir las instrucciones fielmente.
Co No haga funcionar el homo siesta, da_ado. Es de especial
importancia que la puerta del homo cierre correctamente y que
no haya da_os en:
Desenchufe el cable de alimentaci6n
del tomacorriente.
1. la puerta (doblada),
2. las bisagras y los pestillos (rotos o sueltos),
AsegOrese de que el aparato tenga
conexi6n a tierra para evitar una
descarga electrica.
3o Las juntas de la puerta y la superficie de sellado.
Do $61o personal del servicio tecnico adecuadamente calificado
debe ajustar o reparar este homo. No intente ajustar o reparar
este homo usted mismo.
Comunfquese con el Centro de Servicio
Tecnico para obtener ayuda.
[_
Nota
Estos simbolos de advertencia est_.n aqui
para evitar que usted u otras personas sufran
lesiones. Sigalos explicitamente. Una vez que
haya leido esta secci6n, cons6rvela en un lugar
seguro para consultas futuras.
CONSERVE
ESTAS
INSTRUCCIONES
2 informaci6n sobre seguridad
SMH1611
XAA 03898A
Mes-02.indd
2
2011-10-13
4:06:48
INSTRUCCIONES
DESEGURIDAD
IMPORTANTES
AI utilizar cualquier electrodom_stico,
se deben
precauciones
de seguridad
bb.sicas, a saber:
17. Para reducir el riesgo de incendio en el interior del homo.
ao No cocine los alimentos en exceso. Preste atenci6n al
electrodomestico cuando coloque en su interior papel,
plastico u otros materiales combustibles para facilitar la
cocci6n.
seguir
bo Retire las ataduras de alambre de las bolsas de papel o
plastico antes de colocar las bolsas en el homo.
/i',, ADVERTENCIA
co Si los materiales en el interior del horno se prenden fuego,
mantenga la puerta cerrada, apague el homo y desconecte
el cable de alimentaci6n o corte la alimentaci6n en el panel
del disyuntor o fusible. Si abre la puerta, el fuego puede
expandirse.
ADVERTENCIA
Para reducir el riesgo de quemaduras, descargas el@tricas,
incendio, lesiones personales o exposici6n a energia de
microondas excesiva:
1.
Lea todas las instrucciones de seguridad antes de usar este
electrodomestico.
Lea y siga las "Precauciones para evitar la posible exposici6n a
energia de microondas excesiva" especificadas en esta pagina.
3o Este electrodomestico debe conectarse a tierra. Con@telo s61o
a los tomacorrientes adecuadamente conectados a tierra. Es
do No utilice el interior para almacenar alimentos u objetos. No
deje productos de papel, utensilios de cocina ni alimentos
en el interior cuando no utiliza el homo.
2.
importante que consulte "lnstrucciones de conexi6n a tierra" en
la pagina 4 de este manual.
4.
5.
6.
7.
8.
Instale o coloque este electrodomestico solo de acuerdo con
las instrucciones de instalaci6n proporcionadas.
Algunos productos tales como los huevos enteros y los
recipientes sellados, por ejemplo, frascos de vidrio cerrados,
pueden explotar si se los calienta r@idamente. Nunca los
caliente en un homo de microondas.
18. Los liquidos tales come el agua, la leche, el cafe o el te pueden
recalentarse mas alia del punto de ebullici6n sin que parezca
que estan hirviendo. No siempre se veran las burbujas o el
hervor cuando se retira el recipiente del horno de microondas.
ESTO PUEDE HACER QUE LOS L[QUIDOS MUY CALIENTES
SE DERRAMEN REPENTINAMENTE CUANDO SE MUEVE
EL RECIPIENTE O SE OOLOCA UNA CUCHARA U OTRO
UTENSILIO EN EL L[QUIDO. Para reducir el riesgo de lesiones:
ao No recaliente el liquido.
bo Revuelva el liquido antes y durante la etapa de
calentamiento.
Utilice este electrodomestico Linicamente para el uso que fue
destinado como se describe en el manual. No utilice vapores ni
productos quimicos corrosives en el interior o en el exterior de
este electrodomestico. Este tipo de homo esta especificamente
diseRado para calentar, cocinar o secar alimentos. No esta
diseRado para uso industrial o de laboratorio.
AI igual que con cualquier electrodom&stico, se requiere de
supervisi6n cuando es utilizado por niRos.
No haga funcionar este electrodomestico si tiene un cable o
enchufe daRado, si no funciona correctamente o si fue daRado
o se cay6.
9.
Este electrodomestico debe ser reparado s61o por personal
t@nico calificado. Comuniquese con la oficina del servicio
t@nico autorizado mas cercana para que examinen, reparen o
ajusten el equipo.
10. No tape ni bloquee ninguna de las aberturas del
electrodomestico.
co No utilice recipientes con lados rectos y cuellos estrechos.
do Despues de calentar, deje reposar el recipiente en el homo
de microondas durante un tiempo breve antes de sacarlo.
eo Sea muy cuidadoso cuando inserte una cuchara u otro
utensilio en el recipiente.
PRECAUCION
1,
Limpie las campanas de ventilaci6n con frecuencia: no se debe
acumular grasa en la campana del filtro.
2o Cuando cocine alimentos con fuego debajo de la campana,
encienda el ventilador.
3o Tenga cuidado al limpiar el filtro de la campana de ventilaci6n.
Los agentes de limpieza corrosivos tales como los limpiadores
de homo a base de lejia pueden daRar el filtro.
11. No altere ni haga ajustes ni reparaciones en la puerta.
12. No almacene este electrodomestico al aire libre. No utilice este
producto cerca del agua, per ejemplo, cerca del fregadero de
la cocina, en un s6tano hLimedo, cerca de una piscina o en
lugares similares.
18. No sumerja el cable ni el enchufe en agua.
14. Mantenga el cable alejado de superficies calientes. (incluso la
parte posterior del homo).
15. No permita que el cable cuelgue del borde de una mesa o
mesada.
16. Cuando limpie las superficies de la puerta y del homo que se
ensamblan al cerrar la puerta, utilice s61ojabones o detergentes
suaves, no abrasivos, aplicados con una esponja o pare suave.
Desench@elo antes de limpiarlo.
CONSERVE
ESTAS
INSTRUCCIONES
informaci6n sobre seguridad 3
SMH1611
XAA 03898A
Mes-02.indd
3
2011-10-13
4:06:48
INSTRUCClONES
DECONEXION
A
TIERRA
Este electrodomestico debe conectarse a tierra. En caso de
cortocircuito, la conexi6n a tierra reduce el riesgo de descarga
el@trica ya que ofrece un cable de escape para la corriente
el@trica. Este electrodomestico esta equipado con un cable que
inchye un cable y un enchufe de conexi6n a tierra. El enchufe debe
conectarse a un tomacorriente que este correctamente instalado y
conectado a tierra.
A ADVERTENCIA
ADVERTENCIA
El uso inadecuado del enchufe de conexi6n a tierra puede conducir
a un riesgo de descarga el@trica.
• EnchLifelo a un tomacorriente de 3 clavijas conectado a tierra.
No retire el tercer pin (a tierra). No utilice un adaptador ni altere
de otro mode el enchufe con conexi6n a tierra.
• Consulte a un electricista o t@nico calificado si no entiende las
instrucciones de conexi6n a tierra o si no esta seguro de si el
electrodomestico esta bien conectado a tierra.
• No recomendamos utilizar un cable prolongador con este
electrodomestico. Si el cable de alimentaci6n es demasiado
corto, Ilame a un electricista calificado o a un t@nico autorizado
para que instale un tomacorriente cerca del electrodomestico.
No obstante, si es necesario utilizar un cable prolongador, lea la
secci6n "Use de cables prolongadores" que se describe abajo y
siga Io que alli se indic&
Usode los cablesprolongadores
Se suministra un cable de alimentaci6n corto para reducir el riesgo
de enredarse o tropezar con un cable mas largo y caerse. Los
juegos de cables mas largos o cables prolongadores se encuentran
disponibles y puede utilizarlos con cuidado. Si utiliza un cable largo
o un cable prolongador:
1.
La especificaci6n el&ctrica marcada del juego de cables o cable
prolongador debe ser come minimo igual a la especificacbn
el@trica del electrodomestico.
2.
El cable prolongador debe ser un cable de 3 hilos de conexbn
a tierra y se Io debe enchufar en un tomacorriente de 3 ranuras.
3.
El cable mas largo debe disponerse de manera tal que no
quede colgando de la mesada o mesa en donde los niSos
pueden tirar de 61o tropezarse con 61accidentalmente. Si
utiliza un cable prolongador, la hz interior puede parpadear
y la velocidad del ventilador puede variar cuando el homo de
microondas esta encendido. Los tiempos de coccbn tambien
pueden ser mas largos.
ADVERTENCIAS
AOVERTE'O'A
FUNDAM ENTALES PARA
LA INSTALACION
La instalaciOnde este electrodomestico debe estar a cargo
de un t@nico o una compan[a de servicio calificados.
• Si el homo no es instaladoper un t@nico calificado,
puedenproducirsedescargasel@tricas,incendios,
explosiones,problemascon el productoo lesiones.
Desembaleel homo, quite todo el materialde embalaje y
examineel homo para determinarsi hay danos tales como
abolladurasen el interior o exterior del electrodomestico,
pestillos de la puerta rotos, rajadurasen la puerta o una
puerta que no este correctamente alineada.Si hay algun
dano, no ponga el homo en funcionamiento y notifiquede
inmediato al distribuidor.
Asegurese de instalar su homo en un lugar con espacio
suficiente.
®
Retire todas las sustancias extranas como polvo o agua
de los terminales y puntos de contacto del enchufe con un
pano seco regularmente.
• Desenchufe la alimentaci6n y limpie el enchufe con un
paso seco.
• No hacerlo puede provocar descarga el@trica o incendio.
Enchufe el cable de alimentaciOn en un tomacorriente
de 3
clavijas conectado a tierra adecuadamente. Su homo debe
set el unico electrodomestico conectado en este circuito.
,, Compartir un tomacorriente de pared con otros
electrodomesticos utilizando un enchufe mQItiple o
prolongar el cable de alimentaci6n puede provocar
descargas electricas o incendios.
_, No utilice un transformador electrico. Esto puede provocar
descarga electrica o incendio.
_, AsegQrese de que el voltaje, la frecuencia y la corriente
provistas coincidan con las especificaciones del producto.
No hacerlo puede provocar descarga electrica o incendio.
Mantenga todos los materiales de embalaje fuera del
alcance de los ninos. Podrian utilizarlos para jugar.
Este electrodomestico debe conectarse a tierra
@correctamente.
Leay siga las "lnstrucciones de conexbn a
tierra" especificadasal comienzo de esta seccbn. No Ileve
la conexbn a tierra a una tuberia de gas, ni a unatuberia
pla.sticade agua ni a una lineade telefono.
,, Esto puedeprovocardescargael@trica,incendio,
explosi6no problemascon elproducto.
,, Nuncaenchufeelcable de alimentaci6na un
tomacorrienteque no tenga conexi6na tierradirectay
asegOresede que laconexi6neste de acuerdocon los
c6digoslocalesy nacionales.
No corte ni retirela tercera clavija(a tierra)del cable de
alimentacbn bajo ningunacircunstancia.
Conecte el homo a un circuito de 20 A. Si conecta el
homo a un circuito de 15 A, aseguresede que el disyuntor
funcione.
No instale este electrodomestico en un lugar humedo,
@engrasado
o cubierto de polvo, ni en un lugar expuesto a
la luz solar directa o al agua (gotas de Iluvia).
,, Esto puedeprovocardescargael@tricao incendio.
Enchufela alimentaciOnaltomacorriente de la pared
con firmeza. No utilice un enchufe danado, un cable de
alimentacbn danado ni un tomacorriente de pared flojo.
,, Esto puedeprovocardescargael@tricao incendio.
No Io coloque sobre un fregadero.
No hale ni doble excesivamenteel cable de alimentacbn.
No retuerzani ate el cable de alimentacbn.
No enganche el cable de alimentaciOnde un objeto
meta.lico,ni coloque un objeto pesado sobre el cable de
alimentacbn, ni introduzca el cable de alimentacbn entre
objetos ni Io empuje dentro del espacio que hay detra.sdel
electrodomestico.
,, Esto puedeprovocardescargael@tricao incendio.
No tire del cable de alimentacbn al desenchufar el homo.
,, Desenchufe el homo tirando Linicamente del enchufe.
,, No hacerlo puede provocar descarga el@trica o incendio.
CONSERVE
ESTAS
INSTRUCCIONES
4 informaci6n sobre seguridad
SMH1611
XAA 03898A
Mes-O2.indd
4
2011-10-13
4:06:48
Cuando se dane el enchufe o el cable de alimentaciOn,
comun[quese con elcentro de servicio tecnico mb.s
cercano para solicitar un repuesto o una reparaciOn.
PRECAUCIONES PARA LA
P°EcAuc'°N
INSTALACI6
N
_
oloquefb.cilmente.
el homo de manera tal que se pueda acceder al
enchufe
• No hacerlopuedeprovocar descargaelectricao incendio
debido a fugas electricas.
Desenchufe el homo cuando no se utilice pot perbdos
prolongados o durante unatormenta electrica.
• No hacerlopuedeprovocardescargaelectricao incendio.
ADVERTENCIAS
AOVEOTENC"
FUNDAM ENTALES PARA
EL USO
Si el homo se inunda,comun[quese con el centro de
servicio tecnico mb.scercano: No hacerlo puede provocar
descarga electrica o incendio.
Lea y siga las "Precaucionespara evitar la posible
exposiciOna energ[ade microondas excesiva"
especificadas al comienzo de esta secciOn.
Si el microondas genera un ruido extrano, olor a quemado
o humo, desenchofelo de inmediato y comun[quese con el
centro de servicio tecnico mb.scercano.
• No hacerlopuedeprovocar descargaelectricao incendio.
En caso de producirse una fuga de gas (como gas
propano, gas LP, etc.), ventile el ambiente de inmediato.
No toque el microondas, ni el cable de alimentaciOn,niel
enchufe.
• No utiliceun ventilador.
• Una chispa podriaprovocarunaexplosiono un incendio.
Procure que la puerta ni ningunaotra parte entre en
contacto con el cuerpo mientras cocina o cuando acaba
de cocinar.
• No hacerlopuedeprovocar quemaduras.
En caso de un incendio provocado pot grasa en las
unidades de supefficie debajo del homo, extinga la charola
en llamas sobre la supefficie cubriendola pot completo con
una tapa, una bandeja para hornear o una bandeja plana.
Nunca descuide las unidades de supefficie debajo
de su homo en ambientes con altas temperaturas. El
sobrecalentamiento puede ocasionar humo y derrames de
grasa que pueden incendiarsey expandirse si el ventilador
se encuentra encendido. Para minimizarel funcionamiento
automb.ticodel ventilador, utilicerecipientes de tamano
adecuado y programe altas temperaturas sobre las
unidades de supefficie solo cuando sea necesario.
Si los materiales en el interior del homo se prendieran
fuego, mantenga la puerta cerrada, apague el homo
y desconecte el cable de alimentaciOno corte la
alimentaciOnen el panel del disyuntor o fusible. Si abre la
puerta, el fuego puede expandirse.
• Siempre respete las Precauciones de seguridad cuando
utilice su horno. Nunca intente reparar el homo: contiene
voltaje peligroso en el interior. Si se debe reparar el homo,
comuniquese con un centro de servicio tecnico autorizado
cercano.
No
intente reparar, desarmar ni modificar el
electrodomestico.
• Dado que una corriente de alta tension ingresa en el chasis
del producto durante su funcionamiento, abrir el producto
puede provocar descargas electricas o incendios.
• Podria estar expuesto a ondas electromagn&ticas.
• Ouando sea necesario reparar el homo, comuniquese con
el centro de servicio tecnico mas cercano.
Si alguna sustancia extrana, por ejemplo, agua, ingresaen
el homo, desenchufeloy comun[quese con el centro de
servicio tecnico mb.scercano.
• No hacerlopuedeprovocardescargaelectricao incendio.
toque el enchufe de alimentaciOncon las manos
@ No
homedas.
• Esto puedeprovocardescargaelectrica.
No desenchufe la alimentaciOnpara apagar el
electrodomestico cuando este este en funcionamiento.
• Volvera enchufarla alimentaci6naltomacorrientede la
pared puedeprovocarunachispay generaruna descarga
electricao un incendio.
Mantenga todos los materiales de embalajefuera del
alcance de los ninos. Los materiales de embalajepueden
set peligrosos para los ninos.
,, Si un ni_o se coloca unabolsa en la cabeza,puede
asfixiarse.
No deje que los ninos ni ninguna persona con
capacidades fisicas, sensorialeso mentales reducidas
utilice el electrodomestico sin supervision.
AsegLkesede que el electrodomestico este fuera del
alcance de los ninos.
,, No hacerlopuedeprovocar unadescargaelectrica,
quemaduraso lesiones.
No toque el interiordel electrodomestico inmediatamente
despues de cocinar. El interiordel electrodomestico estarb.
caliente.
,, El calor del interiordel homo puedeprovocarquemaduras.
No utilicepapel de aluminio (excepto en los casos
particulates especificados en este manual), objetos
metb.licos(tales como recipientes, tenedores, etc.)
ni recipientes con bordes dorados o plateados en el
microondas.
,, Estos objetospuedenprovocarchispas o un incendio.
No utiliceni coloque objetos ni aerosoles inflamablescerca
del homo.
,, El calor del microondaspuedehacer quelos aerosoles
inflamablesexploteno ardan.
,, No hacerlopuedeprovocardescargaelectricao lesiones.
No altere ni haga ajustes ni reparacionesen la puerta. Bajo
ninguna circunstancia debe quitar el gabinete exterior.
No almacene ni utiliceel homo al airelibre.
CONSERVE
ESTAS
INSTRUCClONES
informaci6n
SMH1611
XAA 03898A
Mes-O2.indd
5
sobre seguridad 5
2011-10-13
4:06:48
ik PRECAUCIONESPARAEL
P°EoA°°'°°
US0
la superficie del microondas esta.rajada,apague el
® Sielectrodomestico.
• No hacerlopuedeprovocardescargaelectrica.
La vajillay los envases pueden calentarse. Manipuleloscon
cuidado.
Los alimentos calientesy el vapor pueden provocar
quemaduras. Retirecuidadosamente las tapas de los
envases, dirigiendo el vapor lejosde las manos y la cara.
Retirelastapas de los alimentos para bebe antes de
calentarlos. Despuesde calentar los alimentos para
beb& revuelvabien para distribuir elcalor en forma
pareja. Siempre pruebe los alimentos para corroborar la
temperatura antes de alimentar al beb& Los fiascos de
vidrio o la superficiede losalimentos pueden parecer ma.s
frbs que el interiorde los alimentos,los cuales pueden
estar tan calientes como para quemar la boca del nino.
Aseguresede que todos los utensiliosde cocina que se
utilicen en el microondas sean los adecuados para este fin.
Cuando utilice utensiliosde cocina aptos para microondas,
cumpla estrictamente las recomendaciones del fabricante.
No se pare sobre el microondas ni coloque objetos
@(tales
como ropa, velas o cigarrillosencendidos,
platos, qu[micos, objetos meta.licos,etc.) sobre el
electrodomestico.
• Articulostales como paros puedenquedar enganchados
en la puerta.
• Esto puedeprovocardescargaelectrica,incendio,
problemascon el productoo lesiones.
No ponga en funcionamientoel electrodomestico con las
manos humedas.
• Esto puedeprovocardescargaelectrica.
No rode materialesvola.tilescomo insecticidas en la
superficie del electrodomestico.
• Adem_tsde ser nocivospara loshumanos,tambien
puedenprovocarunadescargaelectrica,un incendioo
problemascon el producto.
No coloque el electrodomestico sobre un objeto fra.gil
como un fregadero o un objeto de vidrio.
• HacerlopuedeprovocardaRosalfregaderoo al objetode
vidrio.
No cocine sin la charola de vidrio en su lugar, sobre el piso
del homo. Los alimentosno se cocinara.ncorrectamente
sin la chard&
No descongele bebidas congeladas en botellasde cuello
@angosto.
Los envases pueden romperse.
No rayeel vidrio de lapuerta del homo con un objeto
puntiagudo.
• Esto puedeprovocarqueelvidrio se dare o se rompa.
No almacene nada directamente encima del
electrodomestico cuando esta.en funcionamiento.
No utilice recipientessellados. Qu[teleslos sellos y las
tapas antes de utilizarlos. Los recipientes sellados pueden
explotar debido a la acumulacbn de presiOnincluso
despues de que el homo se ha apagado.
ADVERTENCIA
INSTRUCCIONES
FUNDAMENTALESPARA
LA LIMPIEZA
No rode agua directamente sobre el electrodomestico
para limpiarlo.
No utilice benceno, diluyente ni alcohol para limpiarel
electrodomestico.
,, Esto puedeprovocardecoloraci6n,deformaci6n,da5os,
descargaelectricao incendio.
Antes de limpiaro realizarel mantenimiento,desenchufe
el electrodomestico del tomacorriente de la pared y quite
los restos de comida de la puerta y del compartimiento de
cocciOn.
,, No hacerlo puede provocar descarga electrica o incendio.
Tenga cuidado de no lastimarse cuando limpia el
electrodomestico (exterior/interior)
,, Puede lastimarse con los bordes puntiagudos del
electrodomestico.
No limpie el electrodomestico con un limpiador a vapor.
,, Esto puedeprovocarcorrosi6n.
Mantenga limpia la parte internadel homo. Las part[culas
de alimentos o los aceitessalpicados que se adhieren a
las paredes o al piso pueden causar danos en la pintura y
reducir laeficiencia del homo.
No acerque el rostro ni el cuerpo al electrodomestico
mientras esta.cocinando o alabrir la puerta
inmediatamente despues de lacocciOn.
• AsegOresede que losniRosno se acerquendemasiadoal
electrodomestico.
• No hacerlopuedeprovocarquemadurasen los niRos.
No coloque alimentosni objetos pesados sobre la puerta
del homo cuando la abra.
• Los alimentoso elobjeto podriancaersey provocar
quemaduraso lesiones.
No enfr[eabruptamente la puerta, el interiordel
electrodomestico ni el plato vertiendo agua sobre estas
partes durante o despues de la coccbn.
• Esto puedeprovocarda_osen el electrodomestico.El
vapor o elrocio de agua puedenprovocarquemaduraso
lesiones.
No intente precalentar el homo ni hacerlofuncionar cuando
esta.vacb.
CONSERVE
ESTAS
INSTRUCCIONES
6
SMH1611
informaci6n sobre seguridad
XAA 03898A
Mes-O2.indd
6
2011-10-13
4:06:48
ont ndo
INSTALACION DE SU HORNO DE MICROONDAS
8
8
8
9
10
10
Control de las piezas
Informaci0n sobre garantia y
servicio tecnico
Instalaci0n de su homo de
microondas
Verificar el panel de control
Configurar la hora
Seguro para ninos
USO DEL HORNO DE MICROONDAS
10
10
10
10
10
11
12
13
14
14
GUiA oE COCCI6N
Bot0n Kitchen Timer
16
16
17
17
17
17
18
LIMPIEZA Y MANTENIMIENTO
M IC ROON DAS
19
19
19
(Temporizador de la cocina)
BotOn Add 30 sec. (Agregar 30
seg.)
Botones de ventilaci0n (2
velocidadesy encender/apagar)
Bot0n Light Hi/Lo/Off (Luz alta/
baja/apagada)
Botones de programas de
cocci0n
bot0n Auto Reheat
(Recalentamiento automatico)
BotOn Auto Defrost
(Descongelamiento automatico)
Bot0n Soften/Melt (Ablandar/
derretir)
Tiempos de cocci0n y niveles de
potencia del microondas
Eco mode (Modo Eco)
GUIA DE RECIPIENTES Y UTENSILIGS DE COCINA
Sugerencias generales para
cocinar en microondas
Cocinar came
Cocinar came de ave
Cocinar mariscos
Cocinar huevos
Cocinar verduras
Recetas
19
19
19
20
20
DE SU HORNO DE
Limpieza del exterior
Limpieza del interior
Limpieza del anillo y el plato
giratorio
Almacenamiento y reparaci0n de
su homo de microondas
Reemplazo de la luz de la
cubierta/luz de noche
Reemplazo de la luz del homo
Limpieza de los filtros de grasa
Reemplazo del filtro de carbon
GUIA DE SOLUCION DE PROBLEMAS
"I
APi_NDICE
"I
GARANTIA
"I
15 Recipientes
yutensilios
aptos
para microondas
contenido 7
SMH1611
XAA 03898A
Mes-02.indd
7
2011-10-13
4:06:48
INFORMACION SOBRE GARANT[A Y
SERVICIO TI_CNICO
cu homode
AsegOrese de seguir estas instrucciones atentamente
para que su nuevo homo de mioroondas funoione de
manera adeouada,
CONTROL DE LAS PLEAS
Desembale su homo de microondas con cuidado y asegOrese de
haber recibido todas las piezas que se indican a continuaci6n. Si
su homo de microondas ha sido da_ado durante el envio, o si no
ha recibido todas las piezas, comuniquese con el Servicio al Cliente
de Samsung; (Consulte la "INFORMACION SOBRE GARANT[A Y
SERVICIO TECNICO" en la pagina 8).
Para ayudarnos a brindarle un mejor servicio, complete la tarjeta de
registro adjunta y enviela por correo a la brevedad. Si no recibi6 la
tarjeta de registro, puede comunicarse con Samsung Electronics,
Inc., al 1-800-SAMSUNG (726-7864) o registrarse en linea en
www.samsung.com/global/register.
Cuando se comunique con Samsung, indique el modelo especifico
y el nOmero de serie que, por Io general, se encuentra en la parte
posterior o inferior del producto, Registre los nOmeros en los
espacios provistos a continuaci6n, junto con la demas informaci6n
solicitada, Conserve esta informacbn en un hgar seguro como
un registro permanente de su compra para ayudarlo en la
identificaci6n, en caso de robo o perdida. Tambien conserve una
copia de su recibo como prueba de compra, en caso de que sea
necesario usar el servicio de garantia,
NUMERO DE MODELO
NOMERO DE SERIE
FECHA DE COMPRA
ADQUIRIDO EN
El servicio de garantia solo puede ser prestado por un Centro de
Servicio Tecnico Autorizado de Samsung. Si requiere un servicio
tecnico de garantia, proporcione la informaci6n antes detallada con
una copia de su recibo al Centro de Servicio Tecnico Autorizado de
Samsung.
Para recibir asistencia del servicio tecnico y averiguar la ubicaci6n
de los centros de servicio tecnico mas cercanos, Ilame al
1-800- SAMSUNG (726-7864),
Homo de microondas
Charola de vidrio
Filtro de carb6n
(SMH1611, SMH1622)
Anillo guia
giratorio
Adaptador
del
extractor
INSTALACION DE SU HORNO DE
MICROONDAS
1.
Abra la puerta del homo tirando de la manija en el lado derecho
de la puerta.
2.
Limpie el interior del homo con un pa5o hOmedo.
3.
Instale el anillo premontado en la muesca del centro del homo
de microondas.
4.
Coloque la charola de vidrio en el centro del anillo giratorio
premontado para que quede bien sujeta.
Filtros de grasa
(2ea)
Equipo de
herramientas
(Tornillos y
m_nsulas)
Manuales
Plantillas
{Del Usuario y de
Instalaci6n)
Tadeta
de registro
(Superior y de
pared)
8 instalaciOnde su homo de microondas
SMH1611
XAA 03898A
Mes-02.indd
8
2011-10-13
4:06:49
VERIFICAR EL PANEL DE CONTROL
Pantalla I
Cooking Presets
Consulte la I
p_.gina 11
Consulte la I
p_.gina 11
Consulte la I
p_.gina 12
1
2
J
4
5
6
Consulte la
p_.gina 13
9
Consulte la I
p_.gina 14
PowerLevel )
Stop/Clear
0
Sec°
kitchen Timer
Enter/Sta_
I Consulte la
p_.gina 10
Consulte la I
p_.gina 14
On!Off
HiiLo/Off
instalaciOnde su homo de microondas 9
SMH1611
XAA 03898A
Mes-02.indd
9
2011-10-13
4:06:49
CONFIGURAR LA HORA
Su horno de microondas cuenta con un reloj incorporado. Configure el reloj al instalar su horno de microondas por primera vez y despues de
una interrupci6n de energia electrica. La hora aparece siempre que el homo de microondas no este en uso.
1. Presione el bot6n Clock (Reloj).
2. Use los botones numericos para ingresar la hora del dia.
3. Presione el bot6n Enter/Start
(Ingresar/Inicio) nuevamente.
SEGURO PARA NINOS
La funcbn de Seguro para ni_os le permite bloquear los botones para que el homo de microondas no pueda funcionar accidentalmente. El
horno puede bloquearse en cualquier momento.
Activaci6n/Desactivaci6n
Si desea activar o desactivar la funci6n de seguro para ni5os, presione el bot6n Start (Inicio) durante 3 segundos.
Cooinar nunoa ha sido mS,s sendllo que con su nuevo homo de mioroondas Samsung,
La siguiente seccbn descrbe todo Io que debe saber acerca del uso de su homo de microondas,
BOTON KITCHEN TIMER (TEMPORIZADOR DE LA COCINA)
Este microondas le permite usar su homo de microondas como temporizador,
Utilice el temporizador de la cocina para programar hasta 99 minutos, 99 segundos.
1. Presione el bot6n Kitchen Timer (Temporizador de la cocina).
2. Use los botones numericos para programar la cantidad de tiempo que quiere que el temporizador corra,
3. Presione el bot6n Enter/Start
(Ingresar/Inicio).
4. La pantalla cuenta regresivamente y emite se5ales sonoras cuando el tiempo ha Ilegado a su fin,
5. Para cancelar la configuraci6n del temporizador: Presione una vez el bot6n Stop/Clear
(Detener/Eliminar).
BOTON ADD 30 SEC. (AGREGAR 30 SEG.)
Este control simplificado le ahorra tiempo, permitiendole iniciar rapidamente la cocci6n a1100% de potencia.
1. Presione el boton Add 30 sec. (Agregar 30 segundos) por cada 30 segundos que desee cocinar los alimentos.
Por ejemplo, presi6nelo dos veces para programar un minuto de cocci6n y luego presione el bot6n Enter/Start (Ingresar/Inicio) para
comenzar la coccbn.
2. Agregue 30 segundos a un programa de cocci6n ya iniciado al presionar el bot6n Add 30 sec. (Agregar 30 seg.) por cada
30 segundos que desee agregar,
BOTONES DE VENTILACION (2 VELOCIDADES Y ENCENDER/APAGAR)
La ventilaci6n elimina los vapores de la superficie de cocci6n, Puede seleccionar la configuraci6n de ventilaci6n manualmente,
1. Presione el bot6n Vent 2 Speed (Ventilacbn 2 velocidades) para configurar la velocidad del ventilador,
2. Presione el bot6n Vent On/Off (Encender/Apagar laventilaci6n) para encender el ventilador,
3. Presione el bot6n Vent On/Off (Encender/Apagar laventilaci6n) para apagar el ventilador,
BOTON LIGHT HI/LO/OFF (LUZ ALTA/BAJA/APAGADA)
El bot6n Light (Luz) le permite seleccionar un ajuste de luz para su homo de microondas,
2
3
A,to Bajo o÷sactiwdo
BOTONES DE PROGRAMAS DE COCCION
Los botones Cooking Presets (Programas de cocci6n) le permiten cocinar sus comidas favoritas usando tiempos de cocci6n y niveles de
potencia predeterminados con s61o presionar un bot6n. Si los alimentos no se cocinan o se recalientan bien cuando usa los botones de
programas de cocci6n, complete el proceso de cocci6n seleccionando un nivel de potencia y cocinando los alimentos un tiempo adicional.
Z_
No utilice los botones Cooking Presets (Programas de cocci6n) de manera continua. Debe dejar que el horno
PRE_A0_,6,
minutos entre cada uso o los alimentos se cocinaran de mas.
se
enfrie durante 5
10 instalaciOnde su homo de microondas
SMH1611
XAA 03898A
Mes-02.indd
10
2011-10-13
4:06:50
Tabla de cocci6n autom_.tica
rora
:
a
3,0 oz.
una vez
1 paquete
Palomitas
3,0-3.5 oz.
dos
1 paquete
veces
iNo descuide el microondas mientras las palomitas se estb.n cociendo!
Utilice una taza o jarro para medir; no Io cubra. Coloque la bebida en el homo. Despues
de calentar, revuelva bien. Deje enfriar el homo durante al menos 5 minutos antes de
utilizarlo nuevamente.
una vez
Bacon
dos
(Tocino)
Pantalla: Ac-2
veces
Comidas
tres veces
congeladas
Pantalla: Ac-3
Desayunos
congelados
Pantalla: Ac-4
cuatro veces
Verdu_s
frescas
una vez
Verduras
Verdums
congeladas
dos
1 papa
veces
una vez
2 papas
dos
3 papas
tres veces
4 papas
cuatro veces
1 porci6n
una vez
2 porci6n
dos veces
3 porci6n
tres veces
veces
Papas
Pizza
//_
PRECAUCJ6N
Bebidas
Pantalla:Ac-1
Cocinar
Prepare s61o una bolsa de palomitas para microondas por vez. Tenga cuidado tanto
al retirar la bolsa del homo como al abrirla. Deje que el homo se enfrie por al menos 5
minutos antes de volver a usarlo.
Nota:
• Los tiempos de recalentamiento estan basados en una taza de 8 onzas.
• La bebida recalentada con esta funci6n puede estar muy caliente,
• Retire el recipiente con cuidado,
Cantidad: 0,5 taza, 1 taza, 2 tazas,
Coloque 2 toallas de papel sobre el plato y acomode el tocino sobre las toallas, No
las superponga. Cubra con una toalla de papel adicionak Quite las toallas de papel de
inmediato despues de la cocci6n,
Cantidad: 2 a 6 rebanadas.
Quite el envoltorio externo de la comida y siga las instrucciones de la caja para cubrirla
y dejarla reposar, Deje enfriar el homo durante al menos 5 minutos antes de utilizarlo
nuevamente.
Cantidad: 8 a 14 oz.
Siga las instrucciones del paquete para cubrir y reposar. Utilice este bot6n para
emparedados congelados, platos principales del desayuno, etc, Deje enfriar el homo
durante al menos 5 minutos antes de utilizarlo nuevamente.
Cantidad: 4 a 8 oz.
Coloque 1 a 4 porciones de verduras frescas/congeladas en una fuente de plb.stico,
vidrio o cerb.mica para microondas y agregue 2-4 cucharadas de agua. Cubra con una
tapa o envoltorio plb.stico con ventilaci6n para cocinar. Revuelva antes de dejar reposar
por 3 a 5 minutos, Deje enfriar el homo durante al menos 5 minutos antes de utilizarlo
nuevamente,
Pinche cada papa varias veces con un tenedor. Col6quelas en el plato giratorio al estilo
de los rayos de una rued& Despues de cocinar las papas, dejelas reposar de 3 a
5 minutos, Deje que el homo se enfrie por al menos 5 minutos antes de volver a usarlo.
[_
inche las papas varias veces con un tenedor antes de ponerlas en el homo
microondas, Los tiempos de cocci6n estan basados en papas de 8-10 onzas
promedio.
Coloque 1-3 rebanadas de pizza en un plato para microondas con el extremo ancho
de cada porci6n hacia el borde exterior del plato. No permita que las porciones se
superpongan. No las cubra. Deje enfriar el homo durante al menos 5 minutos antes de
utilizarlo nuevamente,
BOTON AUTO REHEAT(RECALENTAMIENTOAUTOMATICO)
El bot6n Auto Reheat (Recalentamiento automatico) ofrece tres categorias programadas para cocinar,
Plato de comlda
una vez
rh-1
Cazuela
dos veces
rh-2
Pastas
tres veces
rh-3
Ejemplo: Recalentamiento
de 3 porcJones de guiso.
1. Presione el bot6n Auto Reheat (Recalentamiento
automa.tico) dos veces,
2. Use los botones numericos para ingresar la cantidad o nOmero de porciones,
3. Presione el bot6n ENTER/START
(INGRESAWINICIO),
4. Cuando haya transcurrido el tiempo de cocci6n, escuchara cuatro seBales sonoras y aparecera la palabra ,_,_df/hn).
uso del homo de microondas 11
SMH1611
XAA 03898A
Mes-02.indd
11
2011-10-13
4:06:50
Tabla de recalentamiento autom_.tico
Siga las instrucciones a continuaci6n cuando recaliente distintos tipos de alimentos.
Plato de
comida
1 porci6n
(1 plato)
Cazuela
Pastas
1 a 4 porciones
Utilice s61o alimentos precocidos refrigerados. Cubra el plato con un envoltorio de plastico ventilado o
papel encerado metido debajo del plato. Si la comida no esta tan caliente como quisiera despues de usar
la funci6n de recalentamiento, contin0e calentandola con mas tiempo y potencia.
Contenido:
3-4 oz. de came, ave o pescado (hasta 6 oz. con hueso)
1/2taza de almid6n (papas, pasta, arroz, etc.)
1/2taza de vegetales (alrededor de 3 a 4 oz)
Cubra el plato con una tapa o un envoltorio plastico ventilado. Si la comida no esta tan caliente como
quisiera despues de usar la funci6n de recalentamiento, continOe calentandola con mas tiempo y potencia.
Revuelva una vez antes de servir.
Contenido:
3-4 oz. de came, ave o pescado (hasta 6 oz. con hueso)
1/2taza de almid6n (papas, pasta, arroz, etc.)
1/2taza de vegetales (alrededor de 3 a 4 oz)
_La
temperatura correcta para los alimentos depende de cada persona. Deje reposar los alimentos de 1 a 5 minutos antes de servirlos.
BOTON AUTO DEFROST (DESCONGELAMIENTOAUTOMATICO)
Las opciones de descongelamiento estan programadas en el homo. La ciclo de descongelamiento le ofrece el mejor metodo de
descongelamiento para alimentos congelados, dado que el horno configura automaticamente los tiempos de descongelamiento de acuerdo
con el peso que usted ingresa. Para mayor comodidad, la funci6n descongelamiento automatico emite seBales sonoras que le recuerdan
controlar o dar vuelta los alimentos durante el ciclo de descongelamiento.
Presione el bot6n Auto Defrost (Descongelamiento automatico) una vez y seleccione el peso del alimento. Los rangos de peso disponibles
son de 0.1 a 6.0 lb.
1. Presione el bot6n Auto Defrost (Descongelamiento automatico).
2. Use los botones numericos para ingresar el peso.
&
Presione el bot6n ENTER/START
%
(INGRESAR/INICIO).
Despues de oprimir el bot6n ENTER/START (INGRESAWINIOIO), la pantalla cuenta el tiempo de descongelamiento en forma regresiva.
El homo emitira la seBal sonora dos veces durante el ciclo de descongelamiento. En ese memento, abra la puerta y de vuelta los
alimentos seg0n sea necesario. Saque las porciones que se hayan descongelado, luego coloque las porciones congeladas en el homo
y presione el bot6n ENTER/START (INGRESAR/INICIO) para reanudar el ciclo de descongelamiento.
El ciclo de descongelamiento contin0a mientras el homo emite pitidos y se detiene s61o cuando se abre la puerta.
Consejos para el descongelamiento
Cuando utiliza la funci6n de descongelamiento automatico, el peso que se debe ingresar es el peso neto en librasy decimas de libras (el peso del
alimento menos el del recipiente).
Utilice el ciclo de descongelamiento automatico s61o para alimentos crudos. El ciclo de descongelamiento automatico obtiene mejores resultados
cuando los alimentos que desea descongelar no estan a una temperatura inferior a 0 °F (sacados directamente de un autentico congelador). Si el
alimento se almacen6 en un refrigerador-congelador que no mantiene una temperatura de 5 °F o menos, siempre programe un peso inferior del
alimento (durante un tiempo de descongelamiento mas reducido) para evitar cocinar el alimento.
Si el alimento queda hasta 20 minutes fuera del freezer, ingrese un peso inferior del alimento.
La forma del envase alterael tiempo de descongelamiento. Los paquetes rectangulares chatos se descongelan mas r_.pidamenteque un bloque
grueso.
Separe los pedazos a medida que comienzan a descongelarse. Los pedazos separados se descongelan con mas facilidad.
Cubra areas de los alimentos con pedacitos pequeBos de papel de aluminio si comienzan a calentarse.
Puede utilizar pequeBos pedazos de papel de aluminio para proteger alimentos come las alas de polio, los extremes de las patas y las colas de
pescado, pero el papel no debe tocar los lateralesdel homo ya que produce chispas, Io que puede daBar el revestimiento del homo.
12 uso del homo de microondas
SMH1611
XAA 03898A
Mes-02.indd
12
2011-10-13
4:06:50
Tabla de descongelamiento
autom_.tico
Siga estas instrucciones cuando descongele distintos tipos de alimentos.
Rosbif,
puerco
2.5-6.0 Ib.
Comience con el alimento ubicado con el lado de la grasa hacia abajo. Despues de cada etapa, gire el
alimento y cubra cualquier parte caliente con tiras finas de papel de aluminio.
Steaks,
chuletas,
pescado
0.5-3.0 Ib.
Despues de cada etapa, reacomode el alimento. Si hay alguna parte caliente o descongelada, cObrala
con pedacitos finos de papel de aluminio. Quite cualquier parte del alimento que este casi descongelada.
Dejelo reposar, cubierto, durante 5 a 10 minutos.
Came molida
0.5-3.0 Ib.
Despues de cada etapa, retire cualquier parte del alimento que este casi descongelada. Deje reposar la
came, cubierta con papel de aluminio, durante 5 a 10 minutos.
Polio entero
2.5-6.0 Ib.
Retire los menudos antes de descongelar aves. Comience descongelando con el lado de la pechuga
hacia abajo. Despues de la primera etapa, gire el polio y cubra cualquier parte caliente con tiras finas de
papel de aluminio. Despues de la segunda etapa, vuelva a cubrir cualquier parte caliente con tiras finas
de papel de aluminio. Dejelo reposar, cubierto, durante 30 a 60 minutos en la never&
Presas de
polio
0.5-3.0 Ib.
Despues de cada etapa, reacomode o retire cualquier parte del alimento que este casi descongelada.
Deje reposar durante 10 a 20 minutos.
Pan
0.1-2.0 Ib.
Acomode los bollos en un circulo sobre papel de cocina en la mitad del plato giratorio.
De vuelta a la mitad del proceso de descongelamiento.
BOTON SOFTEN/MELT (ABLANDAR/DERRETIR)
SOFTEN/MELT (ABLANDAR/DERRETIR) le permite derretir chocolate
ablandar queso crema y derretir manteca.
Ejemplo: Para derretir chocolate.
1. Oprima la tecla SOFI'EN/MELT
(ABLANDAR/DERRETIR).
2. Elija la categoria de alimento (1,2 o 3) presionando un bot6n numerico.
3. Oprima la tecla ENTER/START (INGRESAR/INICIO).
Tabla de Ablandar/Derretir
i_i_i_i
_i_i_i_i
_i_i_i_i
_i_i_i_i_i
_i_i_i_i_i_i
_i_i
_i_i_:i_i!'ii_i_i_!_!i!_!_'_i'_i'_i'_i'_i
'_i'_i'_i'
_i'_i'_i'_i'_i'_
i'_i'_i'
_i'_i'_i'_i'_i'_
i'_i'_i'
_i_
i'_i
_i_
i_i!i!i
!i!i!i!i!i!i!i!i
!i!i!i!i!i!i!i!i
!i!i!i!i!
_!_!_!!
i!!i_:_
_!!_!i!!
i!!:_i!
i_!
i_!i_i!_ii!_i!i_i
i_!!
!!!!!!
!!!!!!!!!!!!!!!!!!
!!!!!!!!!!!!!!!!
!'!!!!
_!_!_
!i!i!
i!i!i!
i!i!i
!i!!!
!!!!!!
!!!!!
!!!!!
!!!!!!!!!!i
!i!i!
i!i!i!i!i!i
!i!_!
_!_!_!_!!!!
!!!!!
!!!!!!!!!!!
!!!!!
!!!!!!!!!!!
!!!!!
!!!!!!!!!!i
!i!_!
!!!!!!
!!!!!
!!!!!
!!!!!!
!!!!!
!!!!!
!!!!!!
!!!!!
!!!!!!!
!!!!!
!!!
!!!!!!!
!!!!!
!!!
!!!!!
!!i!_!_!_!_
!!!!!
!!!!!!
!!!!!
!ii!i!i!i!_!!
!i!
!!!!!!!
!!!!!
!!!
!!!!!
!!!!!!!!!!i
!i!_!
_!_!_!_!_!_
!_!_!
_!_!_!_!_!_
!i_,_
!_!_!_!_i
_!_ili!_i,_
i,_i,_i,
_i,_i,_i,_i,_i,_
i,_i,_i,
_i,_i,_i,_i_!i_!i_!i_!i_;_i_i_
i_i_!i_
!i_!i_!i_!i_!i_!i,!_i,
!_!_!_!_
!_!_!,i,
!,_J!,
!!!
2 cuadrados o 1 taza de
Derretir chocolate
pepitas
Ablandarqueso
crema
1 paquete (8 oz.)
1 barra (1/4 Ib.)
Derretir manteca
2 barras (1/2 Ib.)
Coloque los cuadrados o las pepitas de chocolate en un recipiente apto para
microondas.
Revuelva bien en la mitad del tiempo cuando el homo emita una seRal sonora, y
vuelva a iniciar el homo.
A menos que se revuelva, el chocolate mantiene su forma incluso cuando termina el
tiempo de calentamiento.
Desenvuelva el queso crema y col6quelo en un recipiente apto para microondas.
Deje reposar 1-2 minutos.
Quite el envoltorio y corte la manteca a la mitad en forma vertical.
Coloque la manteca en el recipiente, cObralo con papel encerado.
Revuelva bien despues de finalizar y deje reposar 1-2 minutos.
uso del homo de microondas 13
SMH1611
XAA 03898A
Mes-02.indd
13
2011-10-13
4:06:50
TEMPOS DE COCCION Y NIVELES DE
POTENCIA DEL MICROONDAS
Niveles de potencia
Los 10 niveles le permiten escoger el mejor nivel de potencia para
sus necesidades a la hora de cocinar.
El nivel de potencia le permite controlar la intensidad de la cocciOn,
desde Tibia (1) hasta Alta (10),
Cocci6n con altos niveles de potencia
Agua hirviendo,
Cocinar came molida,
Hacer dulces,
1. Use los botones numericos para ingresar el tiempo de
cocci6n,
2. Presione el bot6n ENTER/START (INGRESAR/INICIO),
3. Cuando haya transcurrido el tiempo de cocciOn, escuchar_t
cuatro sehales sonoras y aparecera la palabra End (Fin),
10
(alto)
100%
9
90 %
Si no ingresa un nivel de potencia, el homo de microondas
cuece en el nivel de potencia Alta de manera predeterminada,
Cocci6n con bajos niveles de potencia
La coccbn con el nivel de potencia alto no siempre le brinda los
mejores resultados con los alimentos que necesitan una cocciOn
m_ts lent& tales como las cames asadas, los alimentos homeados
o los flanes, Su homo tiene 9 ajustes de potencia ademas de la alta,
Recalentar rebanadas de came
8
80 %
1. Use los botones numericos para ingresar el tiempo de
cocci6n,
[_
Cuando selecciona mas de una etapa de cocciOn, debe
presionar el botOn Power Level (Nivel de potencia) antes de
ingresar la segunda etapa de coccbn,
[_
resione dos veces el botOn Power Level
(Nivel de potencia) a fin de programar el nivel de potencia Alta
para una etapa de cocciOn.
2. Oprima el bot6n Power
70 %
Cocinar platos con queso, temera,
Cocinar toltas, muffins, brownies,
pastelillos individuales,
6
60 %
Cocinar pasta,
5
50 %
Cocinar cames, polio entero,
Calentar budines
Cocinar pollos enteros, pavo, costillas,
costillas asadas, solomillo asado
4
40 %
3O%
Cocinar con m_.s de un ciclo de cocci6n
Para obtener mejores resultados, algunas recetas requieren un nivel
Cocinar pequehas cantidades de
alimentos,
Terminar de cocinar guiso, estofado y
algunas salsas,
20 %
Ablandar manteca y queso crema,
Calentar pequehas cantidades de
alimentos,
1
10%
Ablandar helado,
Leudar masa con levadura,
Level (Nivel de potencia),
3. Use los botones numericos para ingresar el nivel de
potencia,
4. Use los botones numericos para ingresar el segundo tiempo
de cocciOn.
5. Oprima el bot6n Power
Recalentar comidas ra.pidascongeladas,
2
descongelamiento.
2. Oprima el bot6n Power
Cocinar cortes de came menos tiemos,
Descongelar came de res, de ave y
mariscos,
5. Cuando haya transcurrido el tiempo de cocciOn, escuchar_t
cuatro sehales sonoras y aparecera la palabra End (Fin),
1. Use los botones numericos para ingresar el tiempo de
coccbn,
Recalentar todo tipo de alimentos (plato
de mesa, pasta, came, sopa o salsa,
etc,),
Cocinar huevos revueltos,
7
4. Presione el bot6n START (INICIO).
de potencia durante un tiempo y otro nivel de potencia durante
otro tiempo. Su homo puede configurarse para pasar de uno a
otro autom_tticamente, si el primer ciclo de calentamiento es el de
rapidamente,
Saltear cebollas, apio y pimiento verde,
Cocinar panes y productos a base de
cereales,
Level (Nivel de potencia),
3. Use los botones numericos para ingresar el nivel de
potencia,
Cocinar frutas y verduras frescas,
Cocinar pescado y came de ave,
Precalentar una bandeja doradora,
Recalentar bebidas,
Rebanadas de tocino,
Level (Nivel de potencia),
6. Use los botones numericos para ingresar el nivel de
potencia.
7. Presione el bot6n ENTER/START (INGRESAR/INICIO),
ECO MODE (MODO ECO)
Eco mode (Modo Eco) reduce el uso de potencia en el estado de
espera.
Cuando presiona una vez el bot6n ECO MODE (MODO ECO), la
pantalla se apaga y se conecta el modo que minimiza el uso de la
potencia.
Para cancelar este modo, presione el bot6n EOO MODE (MODO
ECO} nuevamente o presione cualquier otro bot6n.
8. Cuando haya transcurrido el tiempo de cocciOn, escuchar_t
cuatro se5ales sonoras y aparecera la palabra End (Fin),
14 uso del homo de microondas
SMH1611
XAA 03898A
Mes-02.indd
14
2011-10-13
4:06:50
gL de pente
LAten,s
o,s
n&
AI codnar alimentos en el homo de microondas, las
mioroondas deben ser oapaoes de Renetrar en los
alimentos sin que sean refbjadas o absorbidas pot el
recipbnte,
iEsimportante esooger los reoipientes oorreotos, pot
o tanto busque reolpientes que sean aptos para
m croondas,
La siguiente tabla enumera diver_os tipos de
reoiplentes e indioa si pueden utilizarse en un homo
de mioroondas y oOmo,
teiii
:: i
Papel reciclado o
ribetes de metal
_
Pueden provocar un arco el@trico.
Recipientes de
vidrio
Vajilla de mesa
Puede utilizarse, a menos que este
decorada con un ribete de metal.
Cristaleria fina
Puede utilizarse para calentar alimentos
o I[quidos. La cristaleria delicada puede
romperse o agrietarse si se calienta
repentinamente.
Frascos de vidrio
,/
El vidrio normal es demasiado delgado
sara usar en un microondas y puede
romperse.
Metal
RECIPIENTESY UTENSILIOS APTOS PARA
MICROONDAS
Si no esta. seguro de que un recipiente sea apto para microondas o
no, puede realizar la siguiente prueba:
1.
Coloque 1 taza de agua (en una taza medidora de vidrio) dentro
del homo, junto al recipiente que desea probar.
2.
Presione el botOn Add 30 See. (Agregar 30 seg.) dos veces
para calentarlos durante un minuto en el nivel de potencia alto.
Despues de un minuto, el agua debe estar caliente y el recipiente
que esta probando debe estar frio. Si el recipiente esta caliente,
entonces absorbe la energia de microondas y no es apto para usar
en este homo.
Papel de
aluminio
Zk
Puede utilizarseen pequefias cantidades
para evitar que algunas partes del plato
se cocinen de ma.s.Se puede produdr un
arco el@trico si el papel esta.demasiado
cerca de la pared del homo o si utiliza
demasiado.
Plato dorador
No precabntar durante ma.sde ocho
minutos.
Cer&mica,
porcelana y
cer_.mica de
La porcelana, ceramba, vajilla de barro
con vidrio y la porcelana fria suebn ser
aptas para homos de microondas, a
menos que esten decoradas con un rbete
de metal.
gres
Cajas de cart6n
y poli_ster
desechables
Recipientes,
utensilios
Pueden provocar un arco el@trico o un
incendio.
Precintos de
alambre de
Pueden provocar un arco el@trico o un
incendio.
bolsas para
freezer
Papel
Platos, vasos,
servilletas de
papel y papel de
cocina
Papel reciclado
Bolsas de papel
o periOdicos
No utilice toallas de papel reciclado, ya
que pueden contener metal y producir un
incendio o un arco el@trico.
Pl_.stico
Recipientes
Pueden utilizarse si son de termopBstico
resistente al calor. AIgunos plb.sticos
sueden deformarse o perder el color
expuestos a altas temperaturas. No utilice
sla.sticode melamina.
Film transparente
Puede utilizarse para retener la humedad.
No envuelva la comida demasiado
ajustada. Tenga cuidado al retirar elfilm,
ya que puede liberarvapor caliente.
Bolsas para
freezer
SOlosi son aptas para homo o pueden
hervirse. No deben ser hermeticas.
Pinchelas con un tenedor, si es necesario.
Papel encerado
o parafinado
Puede utilizarse para retener la humedad y
evitar las salpbaduras.
TermOmetro
Use solamente aquellos marcados
"Microwave Safe" (Aptos para microondas)
y siga las indicaciones. Controb la
temperatura en varios lugares. Puede
utilizar los termometros convencionabs
una vez que los alimentos hayan sido
retirados del horno.
Envases de
recipientes de
poliestireno
,/
AIgunos alimentos congehdos vbnen
envasados en estos materiabs.
Paja, mimbre y
madera
comida r#.pida
Vasos/
SOlopara una coccion corta o cabntar
los alimentos. Tambien para absorber los
excesos de humedad.
zk
Pueden utilizarse para cabntar alimentos.
El sobrecabntamiento puede provocar
que el poliestireno se derrita.
Oselos solo para cabntar durante periodos
breves, dado que estos materiabs son
inflamables.
: Uso recomendado
Puedenprendersefuego.
,_
: Usar con precauciOn
j
: Inseguro/No usar
guia de recipientes y utensilios de cocina 15
SMH1611
XAA 03898A
Mes-02.indd
15
2011-10-13
4:06:51
de papel de aluminio. Las cantidades mayores pueden da_ar su homo.
Dar vueita
La energfa de microondas penetra verdaderamente
en los alimentos, atrafda y absorbida pot el agua
los oontenidos de grasa y, azLioar,Las mioroondas
provocan que las mol6culas de los alimentos se
muevan con ratqidez,El movimiento veloz de estas
mol6culas orea fdoobn y el oalor resultante oooina os
alimentos,
SUGERENCIAS GENERALES PARA
COCINAR EN MICROONDAS
Los alimentos densos como, por ejemplo, las patatas, demoran
mas tiempo en calentarse que los alimentos mas livianos. Los
alimentos con una textura delicada deben calentarse a un nivel de
potencia bajo para evitar que se endurezcan.
Los alimentos con una piel no porosa, tales como las papas o las
salchichas, deben pincharse para evitar que exploten.
No se recomienda freir con aceite caliente o grasa en el
microondas. La grasa y el aceite pueden hervir de repente y causar
quemaduras graves.
Algunos ingredientes se calientan mas rapido que otros. Por
ejemplo, la jalea dentro de una dona se calentara mas que la dona
misma. Recuerdelo para evitar quemaduras.
El alto y el tipo de recipiente de cocci6n que utiliza puede afectar el
tiempo de cocci6n. Cuando pruebe una receta nueva, use el tiempo
de cocci6n minimo y controle los alimentos de vez en cuando para
evitar el exceso de cocci6n.
No se recomienda el enlatado casero en el horno de microondas
porque es posible que no todas las bacterias nocivas se destruyan
como consecuencia del proceso de calentamiento del microondas.
Si bien las microondas no calientan los recipientes de cocci6n,
el calor de los alimentos suele transferirse a dichos recipientes.
Siempre use guantes protectores contra el calor cuando retire
alimentos del microondas e indique a los niRos que hagan Io
mismo.
No se recomienda hacer caramelo en el microondas, ya que puede
calentarse hasta Ilegar a temperaturas muy altas. Recuerde esto
para evitar lesiones.
De vuelta los alimentos en la etapa intermedia del ciclo de cocci6n
para exponer todas las partes a la energia de microondas. Esto
es de especial importancia para productos grandes como, por
ejemplo, carnes asadas.
Dejar reposar
Los alimentos cocidos en el microondas acumulan calor interno y
continQan cocinandose durante algunos minutos despues de que
el horno se detiene. Deje que los alimentos reposen para completar
el proceso de cocci6n, en especial aquellos alimentos como, por
ejemplo, carnes asadas y vegetales enteros. Las carnes asadas
necesitan este tiempo para completar la cocci6n en el centro sin
cocinar en exceso las areas exteriores. Todos los liquidos como,
por ejemplo, la sopa o el chocolate caliente, deben agitarse o
revolverse cuando finaliza la cocci6n. Deje que los liquidos reposen
un momento antes de servirlos. Cuando calienta alimentos para
bebes, revuelvalos bien y controle la temperatura antes de servirlos.
Agregar humedad
La energia de microondas es atraida hacia las moleculas de agua.
Los alimentos con un contenido de humedad irregular deben
cubrirse o dejarse reposar de modo que el calor se disperse
uniformemente. Agregue una peque_a cantidad de agua a los
alimentos secos para ayudarlos a cocinarse.
Ventilaci6n
Despues de cubrir un recipiente con un envoltorio plastico, ventilelo
al destapar un extremo y permitir que se libere el exceso de vapor.
COClNAR CARNE
Coloque el lado de la grasa de la came hacia abajo, sobre una
asadera para microondas, en una fuente apta para microondas.
Utilice tiras finas de papel de aluminio para proteger cualquier punta
de hueso o trozos de came delgados. Controle la temperatura
en varios lugares antes de dejar reposar la came el tiempo
recomendado. Las siguientes son las temperaturas alas que se
deben retirar los alimentos. La temperatura del alimento aumentara
durante el tiempo de reposo.
T@cnicas de cocci6n
Si el homo esta. programado para cocinar durante mas
de 25 minutos, despues de los 25 minutos se ajustara
automa.ticamente a una potencia del 70 por ciento para evitar
que se pase la comida.
Rosbif(sin
hueso)
Hasta4 lb.
Revolver
Abra la puerta del microondas y revuelva los alimentos, tales como
guisos y verduras, mientras los cocina para distribuir el calor en
forma pareja. Los alimentos en la parte exterior del recipiente
absorben mas energia y se calientan con mayor rapidez, por Io
tanto, revuelvalos desde el exterior hacia el centro. El horno se
apagara cuando usted abra la puerta para revolver sus alimentos.
Nivel de potencia:
Alta (10) durante los primeros
5 minutos, luego Media (5).
Puerco (sin
hueso o con
hueso)
Hasta 4lb.
Disposici6n
Disponga los alimentos, tales como presas de polio o chuletas,
de forma irregular con las partes mas gruesas y carnosas hacia el
exterior del plato giratorio, en donde pueden recibir mas energia del
microondas. Para evitar el exceso de cocci6n, coloque las partes
delgadas o delicadas hacia el centro del plato giratorio.
Tiempo de cocci6n:
10-15 min./Ib, pa_ 145 °F
-Jugoso
12-17 min./Ib, pa_ 160°F
-A punto
14-19 min./Ib, pa_ 170°F
- Cocido
Tiempo de cocci6n:
15-20 rain. / Ib. a 170 °F Cocido
Nivel de potencia:
Alta (10) durante los primeros
5 minutos, luego Media (5).
Coloque el lado
de la grasa
hacia abajo en
la asadera y
cObralo con papel
encerado. De
vuelta a la mitad
del proceso de
cocci6n.
Deje reposar de
10-15 minutos.
Coloque el lado
de la grasa
hacia abajo en
la asadera y
cObralo con papel
encerado. De
vuelta a la mitad
del proceso de
cocci6n.
Deje reposar de
10-15 minutos.
Proteger
Proteja los alimentos con tiras angostas de papel de aluminio para evitar
el exceso de cocci6n. Las areasque requieren protecci6n son las puntas
de las alas de las aves, los extremos de las patas de aves y las esquinas
de recipientes para hornear cuadrados. Uses61opeque5as cantidades
Las siguientes son las temperaturas alas que se deben retirar los
alimentos. La temperatura del alimento aumentara durante el tiempo
de reposo. Considere que se producira un incremento de 10 °F en
la temperatura durante el tiempo de reposo.
16 gu[a de cocci6n
SMH1611
XAA 03898A
Mes-O2.indd
16
2011-10-13
4:06:51
COCINAR MARISCOS
Came de
Jugoso
135 °F
145 °F
Media
150 °F
160 °F
Cocida
160 °F
170 °F
Media
150 °F
160 °F
Cocida
160 °F
170 °F
Came oscura
170 °F
180 °F
res
Came de
Coloque el pescado sobre una asadera para microondas en una
fuente para microondas, Utilice una cubierta ceRida para cocinar
el pescado al vapor, Una cubierta m_ts liviana de papel encerado
o toalla de papel disminuira el vapor. Cocine el pescado hasta que
se pueda desmenuzar facilmente con un tenedor. No deje que
el pescado se pase, contr61elo una vez que haya transcurrido el
tiempo de cocci6n minimo.
puerco
Came de
ave
160 °F
Came blanca
170 °F
Filetes de atLin Tiempo de
cocci6n:
7-11 min. / lb.
y salm6n
Hasta 1.5 Ib,
COClNAR CARNE DE AVE
Coloque la came de ave sobre una asadera para microondas
en una fuente para microondas y cObrala con papel encerado
para evitar salpicaduras, Utilice papel de aluminio para cubrir las
puntas de los huesos, los trozos de came delgada o las areas que
comienzan a cocinarse demasiado.
Filetes
Hasta 1.5 Ib,
Tiempo de
cocci6n:
4-8 rain. /Ib,
Camarones
Hasta1.5 Ib,
Tiempo de
cocci6n:
4-61/2min, /lb.
Controle la temperatura en varios lugares antes de dejar reposar la
came de ave el tiempo recomendado,
Polio entero
Hasta 4 lb.
Tiempo de
cocci6n:
6-10 min. /Ib,
180 °F para came
oscura
170 °F pars came
blanca
Nivel de
_otencia:
Coloque el lado de la pechuga
del polio hacia abajo en la
asadera. Cubra con papel
encerado. De vuelta a la mitad
del proceso de cocciOn.
Oocine hasta que los jugos se
aclaren y la came cerca del
hueso ya no sea rosada. Deje
reposar durante 5-10 minutos,
Mediana alta (7),
Piezas de
polio
Hasta 2 lb.
Tiempo de
cocci6n:
6-10 rain. /Ib,
180 °F para came
oscura
170 °F para came
blanca
Nivel de
_otencia:
Mediana alta (7),
Coloque el lado del hueso del
)ollo hacia abajo en la fuente,
con las porciones mas gruesas
hacia la parte externa del plato.
Cubra con papel encerado. De
vuelta a la mitad del proceso
de cocci6n. Cocine hasta que
los jugos se aclaren y la came
cerca del hueso ya no sea
rosada. Deje reposar durante
5-10 minutos,
Acomode los filetes en la
asadera con las porciones mas
carnosas hacia la parte exterior
de la misma. Cubra con papel
Nivel de
encerado, Delos vuelta a la
potencia:
mitad del proceso de coccbn.
Medians alta (7). Codne el pescado hasta que se
)ueda desmenuzarfb.cilmente
con un tenedor, Deje reposar
durante 3% minutos.
Acomode los filetes en una
fuente pars homo, introduciendo
cualquier pedazo finito debajo
del mismo. Cubra con papel
Nivel de
encerado. Si los filetes tienen
potencia:
mas de 1/2pulg, de espesor,
Medians alta (7). delos vuelta a la mitad del
)roceso de coccbn, Cocine el
)escado hasta que se pueda
desmenuzar facilmente con un
tenedor, Dejereposar durante
2-3 minutos.
Acomode los camarones en
una fuente para homo sin
superponerlos ni formar capas.
Cubra con papel encerado,
Nivel de
Cocine hasta que esten firmes y
potencia:
opacos, revolviendo 2-3 veces.
Medians alta (7). Deje reposar durante 5 minutos.
COClNAR HUEVOS
Puede utilizar el homo de microondas para cocinar huevos,
Cocinelos hasta que apenas se endurezcan, ya que quedan
demasiado duros si se pasan,
Z_
ADVERTENCIA
Nunca cocine huevos con cb.scara y nunca caliente los
huevos duros con la cb.scara. Los huevos cocidos o
calentados con la cb.scara pueden explotar. Siempre
perfore los huevos enteros pars evitar que estallen.
COClNAR VERDURAS
Las verduras deben lavarse antes de cocinarlas. Pot Io general, no
se necesita agua adicional. Agregue alrededor de ¼ de taza de agua
cuando cocine verduras densas tales como papas, zanahorias y judas
verdes,
Los vegetales pequeSos(zanahorias rebanadas, chicharos, frijoles, etc.)
se cocinaran mas rapido que los vegetales de mayor tamaSo.
Los vegetales enteros, tales como las patatas, calabazas o mazorca,
deben acomodarse en circulo sobre el plato giratorio antes de
cocinarlos. Se cocinaran de manera mas uniforme si se los da vuelta
una vez transcurrida la mitad del proceso de coccbn,
Siempre coloque los vegetales como esparragos y brocoli con los tallos
apuntando hacia el borde de la fuente y las puntas hacia el centro.
Cuando cocine vegetales cottados, siempre cubra la fuente con una
tapa o envoltorio plastico para microondas con ventilacbn,
Los vegetales enteros sin pelar, tales como las patatas, calabazas,
berenjenas, etc,, deben pincharse en varios lugares antes de cocinarlos
pars evitar que estallen.
guia de cocciOn 17
SMH1611
XAA 03898AMes-O2.indd
17
2011-10-13
4:06:51
Para obtener resultados de coccion mas parejos, revuelvao reacomode
los vegetales enteros a la mitad del tbmpo de cocciOn.
Por Io general, cuanto mas denso es el alimento, mayor sera el tbmpo
de reposo. (Eltbmpo de reposo hace referenda al tbmpo necesario
para que los vegetales y los alimentos densos y grandes terminen de
cocinarse una vez que salen del homo). Una papa al homo puede
reposar en la mesada durante cinco minutos antes de que se complete
la cocciOn, mientras que una fuente de arvejas puede servirse de
inmediato.
RECETAS
Ensalada tibia de patatas
2 lb. de peque5as patatas rojas, cortadas en trozos de 1/2pulg.
4 rodajas de panceta (sin cocinar), cortadas en trozos de 1/2pulg.
X taza de cebolla picada
2 cucharadas de azOcar
1 cucharada de sal
1 cucharada de harina
Y2cucharada de semillas de apio
1/8 cucharada de pimienta
21/2cucharadas de vinagre de manzana
1.
En una fuente de 2 cuartos de gabn, mezcle las patatas y 1/4
taza de agua. Cubra con una tapa. Cocine a potencia Alta
hasta que las patatas esten tiernas (7 a 10 minutos); revuelva
dos veces. EscLirralas y apartelas para que se enfrien un poco.
2.
En un recipiente mediano, cocine la panceta a potencia Alta
hasta que se vea crocante (21/2- 31/2minutos); revuelva una vez.
Coloque la panceta sobre una toalla de papel.
Reserve 1 cucharada de grasa.
3.
Mezcle la grasa con la cebolla. Cubra con un envoltorio de
pBstico, destape un extremo para ventilar el vapor. Cocine a
potencia Alta hasta que se ablande (1Y2- 21/2minutos); revuelva
una vez.
4.
Incorpore el azOcar, la sal, la harina, las semillas de apio y la
pimienta. Cocine a potencia Alta hasta que la mezcla hierva
(30 a 40 segundos). Incorpore el vinagre y Y2taza de agua.
Cocine a potencia Alta hasta que el liquido hierva y se espese
ligeramente (1 a 2 minutos); revuelva una vez. Agregue panceta
al aderezo. Sirva el aderezo sobre las patatas. Mezcle bien.
Estofado de came y cebada
1b Ib. de cubos de came para estofado, cortados en trozos de 1/_pulg.
1/ptaza de cebolla picada
2 cucharadas de harina comun
1 cda. salsa inglesa
1 lata (13.75-14.5 oz.) de caldo de came
2 zanahoriasmedianas,cortadas en rodajasde _/2pulg. (alrededorde 1 taza)
1/ptaza de cebada
1 hoja de laurel
1Acucharada de pimienta
1 paquete (9-I 0 oz.) de arvejas descongeladas
1.
En una fuente de 2 cuartos de gabn, incorpore la came, la
cebolla, la harina y la salsa inglesa, y mezcle bien. Cubra con
una tapa. Cocine a potencia Alta durante 6 a 8 minutos hasta
que la came ya no este rosa, revolviendo una vez.
2.
Incorpore el caldo de came, las zanahorias, la cebada, las
hojas de laurel y la pimienta; revuelva todo. Cubra con una
tapa. Cocine a potencia Media durante 1 hora a 1 hora y media
hasta que las zanahorias y la carne esten tiernas, y revuelva
2 6 3 veces.
3.
Incorpore las arvejas. Cubra con una tap& Cocine a potencia
Media durante 10 minutos. Deje reposar durante 10 minutos.
Quite las hojas de laurel antes de servir.
Se obtienen 6 porciones.
Guisado de br6coli y queso
X taza de manteca o margarina
¼ taza de cebolla picada
11/2cucharadas de harina
Y2cucharada de sal
¼ cucharada de mostaza en polvo
1/8 cucharada de pimienta
11/2tazas de leche
¼ taza de pimiento rojo picado
8 oz. (2 tazas) de queso cheddar rallado
1 paquete (9-10 oz.) de br6coli picado y descongelado
4 tazas de fideos tirabuz6n cocidos (8 oz. secos)
1.
En una fuente de 2 cuartos de gabn, cocine la manteca y la
cebolla a potencia Alta durante 1 a 2 minutos hasta que la
cebolla este blanda y revuelva una vez.
2.
Agregue la harina, la sal, la mostaza y la pimienta; mezcle bien.
Cocine a potencia Alta durante 30 a 60 segundos hasta que la
mezcla hierva. Incorpore la leche revolviendo hasta obtener una
mezcla uniforme.
3.
Incorpore el pimiento rojo. Cocine a potencia Alta de 2 a
3 minutos hasta que la mezcle hierva y se espese ligeramente;
revuelva dos veces. Incorpore el queso y revuelva hasta que se
derrita.
4.
Agregue los br6colis y los fideos, mezcle bien. Cubra con una
tapa. Cocine a potencia Alta de 4 a 6 minutos hasta que se
caliente toda la preparaci6n, y revuelva una vez. Revuelva antes
de servir.
Se obtienen 6 porciones.
Sopa de frijoles negros
1
1
2
1
1
1
1
1
taza de cebolla picada
diente de ajo, picado
latas (de 15 oz cada una) de frijoles negros, escurridos
lata (14 -16 oz.) de tomates guisados, picados
lata (13.75-14.5 oz.) de caldo de gallina
lata (7-8.5 oz.) de maiz
lata (4 oz.) de chile verde picado
6 2 cucharadas de comino molido
1.
Coloque la cebolla y el ajo en una fuente de 3 cuartos de gal6n.
Cubra con una tap& Cocine a potencia Alta durante 2 a
4 minutos hasta que se ablanden.
2.
Agregue una lata de frijoles y piselos con un tenedor. Agregue
el resto de los ingredientes y mezcle bien.
3.
Cocine sin tapa a potencia Alta durante 10 minutos; revuelva.
Disminuya la potencia a Media y cocine durante 5 minutos.
Revuelva antes de servir.
Rinde aproximadamente
2 cuartos.
Se obtienen 6 porciones.
18 guia de cocci@
SMH1611
XAA 03898AMes-02.indd
18
2011-10-13
4:06:51
LIMPIEZA DEL ANILLO Y EL PLATO
GIRATORIO
Limpie los anillos giratorios peri6dicamente y lave el plato giratorio
tanto como sea necesario. El plato giratorio puede lavarse
perfectamente en el lavavajillas.
ALMACENAMIENTO Y REPARACION DE SU
HORNO DE MICROONDAS
Mantener limpio su homo de microondas mejora su
desempe_o, previene reparaciones innecesanas y
prolonga su vlda Litil,
LIMPIEZA DEL EXTERIOR
Lo mejor es limpiarlos derramesen laparteexternade su
microondasno bien ocurren,Utiliceun patio suavey tibio, aguacon
jab6n, Equaguey seque,
Z_
No permita que el agua Ilegue a los orificios de
pRECAUCJON
ventilaciOn.No utilice nunca productos abrasivoso
solventes qdmicos, como amonfaco o alcohol, ya que
pueden daflar el aspecto de su microondas.
Limpieza debajo de su homo de microondas
Limpie peri6dicamente la grasa y el polvo en la parte inferior de su
microondas utilizando una soluci6n de agua tibia y detergente.
Si debe guardar su horno de microondas durante un periodo
corto o prolongado, escoja un lugar seco y sin polvo. El polvo y
la humedad pueden afectar el funcionamiento de las piezas del
microondas.
,, No repare, reemplace ni realice el mantenimiento
ADVERTENCIA
de ninguna pieza de su microondas sin asistencia
profesionak Llame 0nicamente a un tecnico calificado
para realizar reparaciones. Si el horno presenta fallas
y requiere servicio tecnico, o si tiene dudas sobre su
funcionamiento, desenchufe el homo del tomacorriente
y comuniquese con su centro de servicio t@nico mas
cercano.
,, No utilice el homo siesta datiado, en especial cuando
la puerta o los burletes de la puerta se encuentran
daRados. Entre los da_os de la puerta se incluyen:
bisagras rotas, burletes desgastados o cubiertas
deformadas/dobladas.
,, No retire el homo de su cubierta.
,, Este homo de microondas es Onicamente para
uso domestico y no ha sido diseRado para un uso
comercial.
Limpieza del panel de control
Limpielo con un patio hLimedo y sequelo bien. No utilice productos
de limpieza en aerosol, grandes cantidades de agua y jab6n ni
objetos abrasivos o puntiagudos sobre el panel ya que puede
datiarse facilmente.
Limpieza de ia puerta y ias trabas de ia misma
Siempre asegurese de que las trabas de la puerta esten limpias
y de que la puerta se cierre adecuadamente. Tenga especial
cuidado al limpiar las trabas de la puerta para asegurarse de que
no se acumulen partfculas que impidan que la puerta se cierre
correctamente. Lave la puerta de vidrio con un detergente muy suave
y agua. Asegurese de utilizar un patio suave para evitar rayarla.
Si se acumula una delgada pelicula de agua dentro o fuera de la
puerta del homo, limpielo con un patio suave. Se puede acumular
una delgada pelicula de agua cuando el homo funciona con mucha
humedad y esto no indica una fuga del microondas de ninguna
manera.
REEMPLAZO DE LA LUZ DE LA CUBIERTA/
LUZ DE NOCHE
AI reemplazar la luz de la cubierta!luz de noche, asegOrese de usar
guantes para evitar lesiones por el calor del foco.
1. Desenchufe el homo o corte la electricidad de la fuente de
alimentaci6n principal.
2.
Retire el tornillo de la cubierta de la luz y baje la tapa.
3o Reemplace el foco con una bombilla incandescente de
40 vatios.
4.
5
Vuelva a colocar la cubierta y el tornillo.
Vuelva a encender la electricidad en la fuente de alimentaci6n
principal.
LIMPIEZA DEL INTERIOR
/_
Aseguresede que el homo de microondas se haya
pRECAUClON''"
enfriado antes de limpiarlo para evitar lesiones.
Retirela charolade vidrio del horno cuando limpie tanto
pRECAUCJ0N
el homo, como la charola.
Paraevitar que lacharola se rompa, sostengala
con cuidado y no la coloque debajo del agua
inmediatamente despues de cocinar. Lave la charola
con cuidado en agua jabonosa tibia o el en lavavajillas.
Limpie las superficies del interior (cavidad del homo) de su homo
de microondas peri6dicamente para quitar cualquier salpicadura
o mancha. Para quitar trozos de comida endurecidos y eliminar
olores, coloque 2 tazas de agua (agregue jugo de lim6n para
obtener una mayor frescura) en un vaso medidor de cuatro tazas
(_,por que un vaso medidor de 4 tazas?) a potencia Alta durante
5 minutos o hasta que hiervan. Deje reposar en el homo durante
uno o dos minutos.
REEMPLAZO DE LA LUZ DEL HORNO
AI reemplazar la luz del homo, asegOrese de usar guantes para
evitar lesiones por el calor del foco.
1. Desenchufe el homo o corte la electricidad de la fuente de
alimentaci6n principal.
2.
Abrala puerta.
3o Retire los tornillos de montaje de la cubierta de ventilaci6n
(3 tornillos del medio).
4. Corra la rejilla de ventilaci6n hacia la izquierda y retirela
directamente.
5.
Retire el filtro de carb6n, si Io hubiere.
Limpiezaymantenimiento desu homo de microondas 19
SMH1611
XAA 03898A
Mes-02.indd
19
2011-10-13
4:06:51
6.
Retire la cubierta empujando el gancho y tirando de la palanca
hacia arriba,
REEMPLAZO DEL FILTRODE CARBON
7.
Retire la bombilla gir_tndola con cuidado.
8.
Reemplace la bombilla con una bombilla para
electrodomesticos de 40 watts.
9.
Vuelva a colocar el portabombilla,
Si su horno tiene ventilaci6n hacia el interior, el filtro de carb6n debe
reemplazarse cada 6 a 12 meses, y m_ts a menudo si es necesario.
El filtro de carb6n no puede limpiarse, Para solicitar un nuevo filtro
de carb6n, comuniquese con el Departamento de piezas en el
1-800-627-4368 o el distribuidor Samsung mas cercano, Tambien
puede solicitar en linea en www,samsungparts.com
1. Desenchufe el horno o corte la electricidad de la fuente de
10. Vuelva a colocar la tapa de la ventilaci6n
11. Vuelva a encender la electricidad.
los 3 tomillos.
alimentaci6n principal.
2.
3.
Abrala puerta,
Retire los tomillos de montaje de la rejilla de ventilaci6n
(3 tornillos del medio).
4.
Corra la rejilla de ventilaci6n hacia la izquierda y retirela
directamente,
5.
Oprima el gancho y extraiga el filtro viejo.
f ...............................................................................................................................................
il
iii
LIMPIEZA DE LOS FILTROS DE GRASA
Su horno de microondas cuenta con dos filtros de grasa metalicos
reutilizables. Los filtros de grasa deben retirarse y limpiarse al
menos una vez per rues, o cuando sea necesario.
Z_
Para evitar el riesgo de lesiones personales o de daflos
ADVERTENCJA
materiales, no encienda la campana del homo sin los
filtros en su lugar.
1.
Para retirar el filtro, deslicelo hacia la izquierda (o derecha)
usando la leng_Jeta.
6.
Inserte un nuevo filtro de carb6n en su lugar. El filtro debe
quedar instalado en el angulo que se muestra,
7.
Vuelva a colocar la rejilla de ventilaci6n y los 3 tornillos y cierre
la puerta, Vuelva a conectar la corriente y configure el reloj.
/
i
2.
J!_i!ii!
..... /
Remoje el filtro de grasa en agua caliente con un detergente
suave, Enjuaguelo bien y sacLidalo hasta que se seque, AI
cepillar el filtro ligeramente, podr_t quitar la suciedad incrustada,
A
No utilice amoniaco ni coloque el filtro de grasa dentro del
ADVERTENCJA
horno de microondas, El aluminio se oscurecer&
3.
Para colocar nuevamente el filtro en su posici6n, deslicelo en la
ranura del marco sobre la izquierda (o derecha), luego empqelo
hacia arriba y hacia la derecha (o izquierda) para trabarlo,
20 Limpiezay mantenimiento desu homo demicroondas
SMH1611
XAA 03898A
Mes-02.indd
20
2011-10-13
4:06:52
cju ade
/
uc
Especificaciones
Verifique estas soluciones si tiene alg0n problema
con su microondas:
La pantalla y/o el
homo no funciona,
AsegOrese de que el enchufe este
conectado adecuadamente a un
tomacorriente con conexiOn a tierra.
Si el tomacorriente est£t controlado por un
interrupter de pared, asegOrese de que el
interrupter de pared este encendido.
Retire el enchufe del tomacorriente, espere
diez segundos y vuelva a enchufarlo.
Reinicie el disyuntor o reemplace cualquier
fusible quemado.
Enchufe un electrodomestico distinto en
La pantalla
funciona, pero
el homo no se
enciende.
_,EIhomo se
apaga antes de
que transcurra
el tiempo
programado?
Cavidaddelhomo:
1.6piescubicos
Fuentede
alimentaciOn:
120VCA,60 Hz
Tempodzador:
99 minutos,
99 segundos
Controles: 10niveles
de potenciae incluye
descongelamiento
Salidade potencia:
1000Vatios
Consumode potencia:
1580Vatios
Pesonetdenvb
ST:44.2/ 51.8Ibs
B/W : 43.3/50.8 Ibs
Dimensiones
extemas
29 7/8"(Ancho)
X 16_/2"(Alto)
X 151/8"(Profundidad)
Dimensiones
de la
cavidaddelhomo
19 5/_6"(Ancho)
X9 5&"(Alto)
X 14 s/s"(Profundidad)
ese tomacorriente. Si el otro aparato no
funciona, Ilame a un electricista calificado
para que repare el tomacorriente de la
pared.
Enchufe el homo en un tomacorriente
diferente.
Dimensiones
para
el env[o
33 s/s"(Ancho)
X 19_5/_e"(Alto)
X 19 _s/s2"(Profundidad)
AsegOrese de que la puerta este bien
cerrada.
Verifique si algOn material del envoltorio o
cualquier otro elemento esta trabado en el
cierre de la puerta.
Verifique si la puerta esterda_ada.
Presione Cancelar dos veces e ingrese
todas las instrucciones de coccion
nuevamente.
L_J
Si hubo un corte de electricidad, el
indicador de tiempo mostrara: 88.'88.
Si no se produjo ningOn corte de energia,
retire el enchufe del tomacorriente, espere
diez segundos y vuelva a enchufarlo. Vuelva
a configurar el reloj y cualquier instrucciOn
de cocciOn.
Reinicie el disyuntor o reemplace cualquier
fusible quemado.
Cocina los
alimentos muy
lentamente.
AsegOrese de que el homo tenga su propio
circuito de 20 A. Poner en funcionamiento
otro electrodomestico en el mismo circuito
puede causar una caida de tension. Si es
necesario, enchufe el homo en su propio
circuito.
Presenta chispas
o arco electrico.
Retire cualquier utensilio metalico, articulos
de cocina o cierres de metal. Si usa papel
de aluminio, utilice solo tiras pequeRas y
deje al menos una pulgada entre el papel
de aluminio y las paredes internas del
homo.
El plato giratorio
hace ruido o se
atora.
Limpie el plato giratorio, el anillo giratorio y
el piso del homo.
AsegOrese de que el plato y el anillo
giratorio esten colocados correctamente.
Provoca
interferencias con
la television o la
radio.
Esto es similar a la interferencia causada
per otros artefactos peque_os, como, per
ejemplo, los secadores de cabello. Aleje
m_ts su microondas (o electrodomestico) de
otros aparatos, como su TV o radio.
HORNO DE MICROONDAS SAMSUNG
PARA INSTALAR SOBRE LA COCINA
Garantia limitada al comprador original
El presente producto de lamarca SAMSUNG,tal como Io provee
y distribuye Samsung Electronics America, Inc. (SAMSUNG)y Io
entrega como nuevo, en su embalajede carton original al comprador o
consumidor original, esta garantizado por SAMSUNGcontra defectos
de fabricacion de los materiales y la mano de obra durante el periodo
limitado de la garantia de:
UN (1) AI_JOPARA LAS PLEAS Y LA MANO DE OBRA, DIEZ (.10)
ANOS PARA LAS PIEZAS DE LA GARANTiA DEL MAGNETRON
La presente garant[alimitada comienza en lafecha original de compra
yes valida unicamente para productos comprados y usados en los
Estados Unidos. Para recibir el servicio tecnico de la garantia, el
comprador debe comunicarse con SAMSUNGcon elfin de que se
determine el problema y los procedimientos del servicio. El servicio
tecnico de lagarant[a solo puede ser prestado por un centro de servicio
tecnico autorizado de SAMSUNG.Se debe presentar la factura de
compra original como prueba de compra a SAMSUNGo al servicio
tecnico autorizado de SAMSUNG.
SAMSUNGreparar_,o reempl_ar_t el producto a nuestra discrecion
y sin cargo tal como se establece en la presente garant[a, con piezas
o productos nuevos o reacondicionados si se comprueba que es
defectuoso durante el perFodoIimitadode la garant[aespecificado
anteriormente. Todaslas piezas y los productos reemplazadospasan a
ser propiedad de SAMSUNGy deben ser devueltos a SAMSUNG.Las
piezas y los productos reemplazados asumen la garantia original que
resta, o noventa (90)dias, el periodo que sea el mb.sprolongado.
Se brindar_tnservicios a domicilio durante el periodo de garantia de
mano de obra sujeto a la disponibilidad dentro de los Estados Unidos
contiguos. El servicio a domicilio no esterdisponible en todas las zonas.
Para recibir servicio a domicilio, el producto debe estar despejado y
accesible para el personal de servicio tecnico. Si durante el servicio a
domicilio, no puede completarse la reparacion, puede ser necesario
guia de soluciOn de problemas 21
SMH1611
XAA 03898A
Mes-02.indd
21
2011-10-13
4:06:52
retirar, reparary devolver el producto. En caso de que el servicio
a domidlio no este disponible, SAMSUNG podra elegir,a nuestra
discrecion, proveerel transporte que escojamos de un centro de servicio
SAMSUNGautorizado. De Iocontrario, el transporte haciay desde el
Centro de Servido Tecnico SAMSUNGautorizado es responsabilidad del
comprador.
La presente garant[a limitada cubre defectos de fabricacbn de los
materiales y la mano de obra encontrados durante el uso normal y
domestico de este producto y no ser_.valida para Io siguiente, sin
limitarse a ello: daRos que ocurran durante el env[o; entrega e instalaci6n;
aplicadones y usos para los cuales el presente producto no rue
destinado; producto o numeros de serie alterados; dano cosmetico o
acabado exterior; accidentes, abuso, descuido, incendio, inundacion,
cdda de rayos, u otros casos fortuitos o de fuerza mayor; uso de
productos, equipo, sistemas, utilidades, servidos, piezas, suministros,
accesorios, aplicaciones, instalaciones,reparaciones,cableado externo
o conectores no provistos ni autorizados por SAMSUNG que dahen
este producto o que acarreen problemas en el servicio;voltaje de la
Ifneaelectrica incorrecto, fiuctuaciones y sobretensi6n; ajustes del
cliente e incumplimientode Io establecido en el manual de instrucciones,
instrucciones de limpieza, mantenimientoy ambientales que estan
cubiertas y recomendadas en el manual de instrucciones; problemas
causados por plagas; recalentamiento o exceso de cocci6n causado
por el usuario; charola de vidrio o plato giratorio; menor potencia del
magnetr6n relacionadacon el envejecimientonormal. SAMSUNG no
garantiza elfuncionamiento ininterrumpidoo sin errores del producto.
NO EXISTENGARANT[ASEXPRESAS,SALVOAQUELLAS
ENUMERADASY DESCRITASANTERIORMENTE,Y NINGUNA
GARANT[AYA SEA EXPRESA0 T_,CITA,INCLUIDA,AUNQUE
NO EN CARACTERTAXATIVO,TODAGARANT[AT_,CITADE
COMERCIABILIDAD0 APTITUD PARAUN PROPOSITOESPECIAL,
SE APLICARADESPUESDE LOS PER[ODOSDE GARANT[A
ESTABLECIDOSM_,SARRIBA, Y NINGUNA OTRAGARANT[A
EXPRESA0 GARANT[AOTORGADAPOR PERSONA, COMPANiA
0 CORPORACIONALGUNA CON RESPECTOAL PRESENTE
PRODUOTOREVESTIR_,CAR_,OTERVINCULANTEPARA SAMSUNG.
SAMSUNG NO SER/I,RESPONSABLEPOR PERDIDADE INGRESOS
0 LUCROCESANTE, IMPOSIBILIDADDE GENERARAHORROSU
OBTENEROTROS BENEFICIOS,0 CUALQUIERDANO DERIVADODE
CIRCUNSTANCIASESPECIALES,DA_IO IMPREVISTO0 DERIVADO
CAUSADO POR EL USO, USO INCORRECTO,0 INCAPACIDADPARA
USAR EL PRESENTEPRODUCTO,INDEPENDIENTEMENTEDE LA
TEORiA LEGALEN QUE SE FUNDEEL RECLAMOY AUN CUANDO SE
LE HAYA NOTIFICADOA SAMSUNG DE LA POSIBILIDADDE TALES
DANOS. NINGON RESARCIMIENTODE NINGUNA [NDOLE CONTRA
SAMSUNG SUPERAR/_,
EL MONTO DEL PRECIODE COMPRA DEL
PRODUCTOVENDIDOPOR SAMSUNGY CAUSANTEDEL PRESUNTO
DANO. SIN LIMITARLO PRECEDENTE,EL COMPRADORASUME
TODO ELRIESGO Y LA RESPONSABILIDADPOR PERDIDA,DANO
0 LESIONAL COMPRADOR Y A LOS BIENESDEL COMPRADOR
Y A TERCEROSY A SUS BIENES DERIVADOSDEL USO, USO
INCORRECTO0 INCAPACIDADPARAUSAR EL PRESENTE
PRODUCTOVENDIDOPOR SAMSUNG,QUE NO HAYASIDO
OCASIONADODIRECTAMENTEPOR NEGLIGENCIADESAMSUNG.
LA PRESENTEGARANT[ALIMITADANO SE EXTENDERAA NINGUNA
PERSONA DISTINTADEL COMPRADOR ORIGINALDEL PRESENTE
PRODUCTO,ES INTRANSFERIBLEY ESTABLECESU EXCLUSIVA
REPARACION.
Algunos Estados no permiten limitaciones en cuanto al pl_o de una
garant[a impl[cita,o la exclusi6n o Iimitacionde dahos imprevistoso
derivados, por Io tanto las Iimitacioneso exclusionesantedichas pueden
no aplicarse en su caso. Esta garant[ale otorga derechos legales
especificos, y adembs puede tener otros derechos que varian segun el
Estado en el que se encuentre.
Para recibirel serviciotecnico de garantia,comuniquese con SAMSUNGa:
1-800-SAMSUNG
www.samsung.com
(726-7864)
o en
22 garantia
SMH1611
XAA 03898A
Mes-02.indd
22
2011-10-13
4:06:53
II
II
I
I
SMH1611
XAA 03898AMes-02.indd
23
2011-10-13
4:06:53
I
I
QUESTIONS
OR ©OMMENTS
CANADA
1-800-SAMSUNG(726-7864)
MEXICO
01-800-SAMSUNG(726-7864)
U.S.A
1-800-SAMSUNG(726-7864)
www, samsung.com
N°. de cOdigo: DE68-03898A-02
SMH1611
XAA 03898A
Mes-02.indd
24
2011-10-13
4:06:53