1
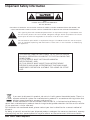
MXS3000 4600 Watt Stereo Power Amplifier
MXS3500 5400 Watt Stereo Power Amplifier
OWNER'S MANUAL
Copyright 2014, Samson Technologies Corp.
v1.1
Samson Technologies Corp.
45 Gilpin Ave
Hauppauge, NY 11788
www.samsontech.com
Important Safety Information
1. Read these instructions.
2. Keep these instructions.
3. Heed all warnings.
4. Follow all instructions.
5. This apparatus shall not be exposed to dripping or splashing liquid and no object
filled with liquid, such as a vase, should be placed on the apparatus.
6. Clean only with a dry cloth.
7. Do not block any of the ventilation openings. Install in accordance with the
manufacturer's instructions.
8. Do not install near any heat sources such as radiators, heat registers, stoves, or
other apparatuses (including amplifiers) that produce heat.
9. Only use attachments/accessories specified by the manufacturer.
10. Unplug this apparatus during lightning storms or when not in use for long periods of
time.
11. Do not override the intended purpose of the polarized or grounding-type plug. A
polarized plug has two blades, with one wider than the other. A grounding-type
plug has two blades and a third grounding prong. The wide blade, or third prong,
is provided for your safety. If the provided plug does not fit your outlet, consult an
electrician to replace the obsolete outlet.
12. Protect the power cord from being walked on or pinched, particularly at the prongs,
convenience receptacles, the point where they exit from the apparatus.
13. Use only with the cart stand, tripod bracket, or table specified by
the manufacture, or sold with the apparatus. When a cart is used,
utilize caution when moving the cart/apparatus combination to
avoid injury from tip-over.
14. Refer all servicing to qualified service personnel. Servicing is
required if the apparatus has been damaged in any way, such as
power-supply cord or plug breakage, damage due to liquid or objects falling onto
the apparatus, exposure to rain or moisture, or if the apparatus does not operate
normally, or has been dropped.
15. MAINS DISCONNECT: The plug should remain readily operable. For rack-mount or
installation where plug is not accessible, an all-pole mains switch with a contact
separation of at least 3 mm in each pole shall be incorporated into the electrical
installation of the rack or building.
16. FOR UNITS EQUIPPED WITH EXTERNALLY ACCESSIBLE FUSE RECEPTACLE:
Replace fuse with same type and rating only.
17. MULTIPLE-INPUT VOLTAGE: This equipment may require the use of a different
line cord, attachment plug, or both, depending on the available power source at
installation. Connect this equipment only to the power source indicated on the
equipment rear panel. To reduce the risk of fire or electric shock, refer servicing to
qualified service personnel or equivalent.
4
Important Safety Information
AVIS
RISQUE DE CHOC ÉLECTRONIQUE NE PAS OUVRIR
CAUTION: TO REDUCE THE RISK OF ELECTRIC SHOCK, DO NOT REMOVE COVER (OR BACK). NO
USER-SERVICEABLE PARTS INSIDE. REFER SERVICING TO QUALIFIED SERVICE PERSONNEL.
This lightning flash with arrowhead symbol within an equilateral triangle is intended to alert
the user to the presence of non-insulated “dangerous voltage” within the product’s enclosure
that may be of sufficient magnitude to constitute a risk of electric shock.
The exclamation point within an equilateral triangle is intended to alert the user to the presence of important operating and maintenance instructions in the literature accompanying
the appliance.
THIS DEVICE COMPLIES WITH PART 15 OF THE FCC RULES
CLASS B. OPERATION IS SUBJECT TO THE FOLLOWING TWO
CONDITIONS:
(1) THIS DEVICE MUST NOT CAUSE HARMFUL
INTERFERENCE, AND
(2) THIS DEVICE MUST ACCEPT ANY INTERFERENCE
RECEIVED INCLUDING INTERFERENCE THAT MAY CAUSE
UNDESIRED OPERATION. SUITABLE FOR HOME OR OFFICE
USE. If you want to dispose this product, do not mix it with general household waste. There is a
separate collection system for used electronic products in accordance with legislation that
requires proper treatment, recovery and recycling.
Private household in the 28 member states of the EU, in Switzerland and Norway may
return their used electronic products free of charge to designated collection facilities or to a retailer
(if you purchase a similar new one).
For Countries not mentioned above, please contact your local authorities for a correct method of
disposal.
By doing so you will ensure that your disposed product undergoes the necessary treatment, recovery
and recycling and thus prevent potential negative effects on the environment and human health.
MXS Series Power Amplifiers
5
Contents
Introduction . . . . . . . . . . . . . . . . . . . . . . . . . . . . . . . . . 7
Features . . . . . . . . . . . . . . . . . . . . . . . . . . . . . . . . . . 8
Getting Started with the MXS Power Amplifier . . . . . . . . . . . . . . . . . 9
Front Callouts . . . . . . . . . . . . . . . . . . . . . . . . . . . . . . . 10
Rear Callouts . . . . . . . . . . . . . . . . . . . . . . . . . . . . . . .
11
Bridge and Parallel Modes . . . . . . . . . . . . . . . . . . . . . . . . . 12
System Setup Examples . . . . . . . . . . . . . . . . . . . . . . . . . . 13
Specifications . . . . . . . . . . . . . . . . . . . . . . . . . . . . . . . 14
Wiring Guide . . . . . . . . . . . . . . . . . . . . . . . . . . . . . . .
6
15
Introduction
The Samson MXS Series stereo power amplifiers have been designed to provide solid,
clean output with low distortion and wide dynamic range, along with the dependability
demanded by professional front-of-house engineers and installers.
The efficient Class H design provides an abundance of power safely into loads as low
as 2 ohms, over the full frequency band, from 20 Hz to 20 kHz. Input connections are
made via both balanced XLR and balanced ¼” TRS connections. For the outputs, the
MXS Series provides standard binding posts as well as a Speakon® connectors. To help
you set the correct operating levels, the MXS amplifiers include front panel Signal,
Output Level, and Peak LED indicators.
Like all Samson power amplifiers, the MXS Series’ internal electronics are based around
a serious power-core, with robust power supply’s built to handle large current demand
from bass frequencies. To keep the MXS amplifiers running cool, the design employs
forced-air cooling via a temperature-sensitive, variable speed fan, which greatly reduces
the chance of thermal and overheating problems. Multi-stage protection for power-up,
short circuit, DC output, over current, and thermal, assures high reliability under the
most grueling situations.
Optimized for live sound venues, houses of worship, commercial installations, and for
driving live PA systems, the MXS amplifiers will deliver reliable power from gig-to-gig
and venue-to-venue. In the following pages, you’ll find a detailed description of the
many features of the MXS Series power amplifier, as well as a guided tour through
its front and rear panels, step-by-step instructions for its setup and use, and full
specifications.
We recommend you keep the following records for reference, as well as a copy of your
sales receipt.
Serial number: ____________________________________________
Date of purchase: __________________________________________
Dealer name: _____________________________________________
With proper care and maintenance, your MXS power amplifier will operate trouble-free
for many years. Should your amplifier ever require servicing, a Return Authorization (RA)
number must be obtained before shipping your unit to Samson. Without this number,
the unit will not be accepted. Please call Samson at 1-800-3SAMSON (1-800-3726766) for an RA number prior to shipping your unit. Please retain the original packing
materials and, if possible, return the unit in its original carton. If your MXS amplifier
was purchased outside of the United States, contact your local distributor for warranty
details and service information.
MXS Series Power Amplifiers
7
Features
•
Lightweight, high-power amplifier for performance and installation speaker configurations:
MXS3000:2 x 1850 Watts at 2Ω, 2 x 1550 Watts at 4Ω
4600 Watts at 4Ω, 3100 Watts at 8Ω bridged mono
MXS3500: 2 x 2700 Watts at 2Ω, 2 x 1900 Watts at 4Ω
5400 Watts at 4Ω, 3700 Watts at 8Ω bridged mono
•
Clean, crisp sound, 0.02% THD, dynamic range of 100 dB, and frequency response
of 20 Hz to 20 kHz, guaranty ultra-clean sound quality
•
Independent input level controls for each channel allow precision adjustments
•
Three-position Mode (Mono, Stereo, Bridge Mono) and Filter (28Hz, Full, 120Hz)
selector switches
•
LED signal indicators for each channel continuously display input signals and output levels
•
Four-point protection circuitry (Short Circuit, DC Output, Over Current, Thermal)
•
Temperature-sensitive, variable speed fan provides reliable performance without
thermal and overheating problems
•
Protection relay circuitry that guards against overheating or faulty wiring conditions
and also prevents “thumps” when powering on or off
•
Input connectors for each channel accommodate both balanced XLR or balanced
¼” TRS plugs
•
Output connections are made via binding posts and Speakon® connectors
•
The MXS Series can be mounted in any standard 19” rack, making it easy to integrate the amp into any fixed or traveling PA rig
•
Rugged construction makes the MXS Series completely roadworthy
8
Getting Started with the MXS Power Amplifier
Setting up your MXS Series is a simple procedure which takes only a few minutes:
Remove all packing materials (save them in case your units needs future service) and
decide where the amplifier is to be physically placed—it can be used free-standing or
mounted in a standard 19” rack, requiring two rack spaces. When installed, make sure
that both the front and rear panels are unobstructed and that there is good ventilation
around the entire unit.
When making speaker connections, use the
binding posts, or Speakon® output connectors
on the rear panel. It is never a good idea to
power up any amplifier that is not connected to
loudspeakers.
To make the signal input connections, use the
input connectors on the rear panel (if operating the
amplifier in Parallel mode, use the Ch A input only).
On the front panel of the MXS Series, turn both Channel level controls fully
counterclockwise (to their minimum setting). Then connect the supplied heavy-gauge
3-pin power cable to the rear panel AC input and to any grounded AC socket.
Turn the Power switch ON.
Apply an input signal to the
MXS Series at or about +4dBu
(if sending signal from a mixer,
drive the output meters at
approximately 0 vu). While the
input signal is present, slowly
raise the Channel level controls
until the desired sound level is
achieved. For the best signalto-noise ratio, the MXS Series
should normally be run with the
Channel Input controls at or
near maximum (fully clockwise)
and the PEAK segments should
light occasionally (but not
frequently) during maximum
levels.
MXS Series Power Amplifiers
9
Front Callouts
1
2
3
5
4
5
2
1. Power Switch - Use this switch to power the MXS amplifier on or off
2. Channel Level Controls - Two detent controls to precisely adjust and the match the
output level of each channel
3. MODE Indicators - The corresponding indicator lights based off of the setting of the
rear panel MODE switch (Stereo, Bridge, Parallel).
4. FILTER Indicators - These LED indicators light depending on the setting of the rear
panel FILTER switch (Full, 28Hz, 120Hz).
5. Audio Indicators - The front panel LED indicators monitor the power output level for
the corresponding channel:
PEAK:
The PEAK indicator lights whenever the channel is outputting signal
at full strength. For the best signal-to-noise ratio, the right (PEAK)
segment should light occasionally during peak levels; if it lights
frequently, you may be overloading the amplifier and a distorted
(“clipped”) signal is probably being output. If this occurs and backing
off the Input Level control delivers too low an output level for your
application.
-10: Lights whenever the output level reaches -10dB below the distortion or
clipping
SIGNAL: These LED indicators continuously monitor the input level for the
corresponding channel. The SIGNAL LED lights whenever signal is
present.
10
Rear Callouts
1
3
1
2
4
5
6
5
6
4
7
1. Input Connectors - Connect incoming signals to these electronically balanced connectors, using either XLR or ¼” TRS (Tip/Ring/Sleeve) plugs. The amplifier accepts
input levels of any strength but needs at least +4 dBu to achieve maximum power.
The inputs are wired in parallel, so they can be used to daisy chain out of each
channel to a second power amplifier.
2. FILTER Switch - This switch selects the setting of the internal high-pass filter on
the audio outputs. When set to the FULL position, the filter is bypassed and the
amplifier passes the full frequency bandwidth (20Hz to 20kHz) to each output
channel. In the
28Hz position, it sets a high-pass filter at 28Hz on the speaker outputs. This setting
is useful for protecting speakers from over-excursion. The 120Hz position sets a
high-pass filter at 120Hz on the speaker outputs. This setting can be used as a
crossover for satellite speakers when adding subwoofers to your audio system.
3. MODE Switch - For normal operation, place this three-way switch in the STEREO position. When placed in the PARALLEL position, the signal arriving at the Ch A input
only is routed to the power amplifiers of both Ch A and Ch B (the Ch B input is
ignored). When placed in its BRIDGE position, the signal arriving at the Ch A input
only is again routed to both power amplifiers (the Ch B input is ignored), but the
two power amplifiers are bridged together.
4. Exhaust Fan - This variable-speed fan provides cooling to amplifier. Make sure that
both the front and rear panels are kept free of all obstructions and that cool, fresh
air is accessible at all times.
5. Speakon® Output Connectors - Use these to connect each channel of the amplifier to
your loudspeakers.
6. Binding Post-Use these to connect each channel of the amplifier to your loudspeakers. Be sure to connect the loudspeaker correctly, with the red (+) terminal normally
connected to the positive input of the speaker and the black (ground) terminal normally connected to the negative input of the speaker.
7. AC Input - Connect the supplied heavy-gauge 3-pin “IEC” power cable here
MXS Series Power Amplifiers
11
Bridge and Parallel Modes
The MXS amplifiers provide a rear-panel switch that allows it to
be used in either a Bridge or Parallel mode. When this switch is
placed in the STEREO position, the MXS amplifier functions as a
true stereo amplifier, where both of the two independent amplifier
channels (Ch A and Ch B) can receive different input signals and
produce independent output signals. However, when the switch is
placed in the BRIDGE position, the Ch A input signal is routed to
both power amplifiers bridged together, producing a single output signal.
Bridge Mode
The illustration on the left shows how this works. In Bridge
mode, the polarity (phase) of the Ch B output signal is
reversed relative to that of the Ch A output signal. Both
channels then process the same input signal, with the
speaker load connected so that power is derived from both
channels. The effective voltage swing seen by the load is
thus doubled, so that the power output is multiplied by more
four.
INPUT
CHANNEL
1(+) OUTPUT
CHANNEL
2(+) OUTPUT
When using the binding post outputs in Bridge mode, be sure to connect your
loudspeaker with the red (+) terminal of the Ch A output connected to the positive input
of the speaker and the red (+) terminal of the Ch B output connected to the negative
input of the speaker. Do not use the black ground (-) output terminal of either channel.
Bridge Wiring
1- 1+
You can also use an Speakon® connector,
plugged into the CH A output, wired +1 for
the positive input of the speaker and +2 for
the negative input of the speaker.
2+ 2-
+1 +2 Connected
When the rear panel switch is placed in the PARALLEL position, the MXS Series operates
in an input parallel mode. In this mode, only the signal present at the Ch A input is
used. This signal is then routed to both the Ch A and Ch B power amplifiers, thus
producing a dual mono output.
12
System Setup Examples
Typical MXS amplifier and speaker configurations:
Stereo Input: Stereo Full Range Speakers
Mode Switch: Stereo
Filter Switch: Full
Mono Input: Bridge Mono Output
Mode Switch: Bridge
Filter Switch: 28Hz
Mono Input: Parallel Full Range Speakers
Mode Switch: Parallel
Filter Switch: Full
MXS Series Power Amplifiers
13
Specifications
Model
MXS3000
MXS3500
8 ohms
950W
1100W
4 ohms
1550W
1900W
2 ohms
1850W
2700W
8 ohms
3100W
3700W
4 ohms
4600W
5400W
Rated Output Power
Stereo both channel driven
Bridged mono
Signal to Noise Ratio (20Hz-20k)
>103dB
Distortion (SMPTE-IM)
0.02%
Input sensitivity @8ohms Voltage Gain
Voltage Gain @ 8 ohm
0dBu
38dB
39dB
Output Circuitry
Class H
Current Consumption (115VAC/230VAC)
@1/8 rated power 4ohms
670W
850W
@1/3 rated power 4ohms
1400W
1700W
@ rated power 4ohms, max.
2600W
3300W
Distortion (typical @4 ohms)
20Hz-20kHz,10dB below rated power
1kHz,rated power
0.007%
Frequency Response @8ohms 1Watt
Damping Factor (400Hz)
20Hz to 20KHz +0/-0.2dB
4Hz to 50kHz ±3dB
>300
Input Impedance
Balanced 20K/Unbalanced 10K
Input Clipping
0dB
Cooling
Connectors (each channel)
0.003%
Dual continuously variable speed fan;
Back-to-Front air flow
Inputs
Outputs
3-pin XLR and ¼” TRS, balanced
Binding post and Speakon®
Indicators
Signal, -20dB, -10dB, Limit, Thermal
Protection
Amplifier protection: Thermal,Short,DC
output, mismatched loads
Amplifier protection: On/off muting and
Delay, Locked the power amplifiers
Dimensions (LxWxH)
Net Weight
14
19” x 14.7” x 3.5”
482mm x 375mm x 88mm
21.6lb / 9.8kg
Wiring Guide
Unbalanced ¼” Connector
Signal
Signal
Tip (signal)
Ground
Ground
Sleeve (ground)
Balanced TRS ¼” Connector
-Signal (tip)
Tip (-signal)
Ring (+signal)
+Signal (tip)
+Signal (tip)
-Signal (ring) Ground
Ground
Sleeve (ground)
XLR Balanced Connector
+Hot
Common (1)
(ground)
Common (ground)
+Hot (2)
Solder Points End View
Female XLR
-Cold
+Hot (2)
-Cold (3)
Common (1)
(ground)
Common (ground) +Hot
End View Solder Points
-Cold (3)
Male XLR
-Cold
Speakon® Wiring Guide
1- 1+
Stereo Operation
+1 -1 Connected
2+ 21- 1+
Mono Operation
+1 +2 Connected
2+ 2-
MXS Series Power Amplifiers
15
Samson Technologies Corp.
45 Gilpin Avenue
Hauppauge, New York 11788-8816
Phone: 1-800-3-SAMSON (1-800-372-6766)
Fax: 631-784-2201
www.samsontech.com