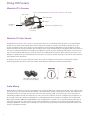
1
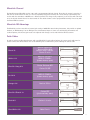
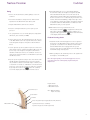
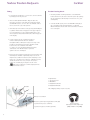
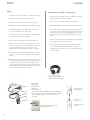
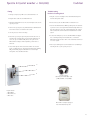
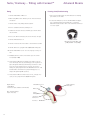
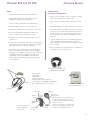
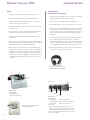
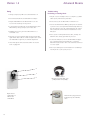
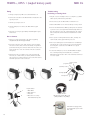
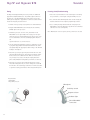
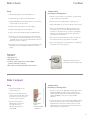
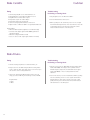
Platinum Processor (PSP)
Fitting
1. Turn speech processor, FM receiver and transmitter off.
2. Insert the blue-red short cable into the MicroLink CI S.
3. Plug the MicroMLxS into the MicroLink CI S. Leave the receiver in the double green dot position.
Advanced Bionics
Troubleshooting
Performing a Listening Check
1. Plug the receiver and adapter into a test amplifier, e.g. Radio
Shack speaker, with the blue-red patch cable.
2. Insert a battery into the MicroLink CI S and turn it on.
3. Put the MicroMLxS receiver in the double green dot position.
4. Plug the MicroLink CI S into the external input socket on the
speech processor.
5. To avoid transient sounds, turn on the FM transmitter, then
MicroLink CI S, then speech processor in that order.
6. Gradually increase the gain of the MicroLink CI S to a comfortable level.
7. Determine speech recognition ability in quiet with the FM signal. Ensure that results are similar to implant alone condition.
MicroLink CI S gain may need further adjustment.
8. Determine speech recognition in noise with the FM system.
The default microphone mixing ratio in the map is 50/50 (CI
headpiece mic and FM). The ratio may need to be changed to
30/70 (CI head- piece mic and FM) to realize FM benefit. If
this change is needed, the 30/70 ratio should be implemented
in the third program and this program will need to be used
with FM.
4. Turn on the FM transmitter. While speaking into the transmitter, listen for the clear signal with minimal background noise.
This check will not reflect the sound quality that the patient
will hear but will confirm function and transmission of the
FM system.
5. To check the FM system, remove the MicroMLxS and plug it
into a working hearing aid and audioshoe or a Phonak
MicroLink Headset checker. Turn on the transmitter and listen
for a clear signal. Follow your audiologist’s recommendations
for conducting a listening check of your speech processor.
6. Follow your audiologist’s recommendations for conducting a
listening check of your speech processor.
Headset Checker
(Phonak part number 052-3126
[110V] and 052-3122 [220V])
1
3
2
PSP Controls
Required Parts:
1. MicroMLxS
2. MicroLink CI S
3. Blue-Red short cable
Program
MicroLink CI S plugged into the
RadioShack speaker
16
LED
Volume
Sensitivity
LED Indicator
Battery status:
4 quick blinks
battery fully charged
2-3 quick blinks battery sufficiently charged
1 quick blink
battery near depletion
Lock status:
LED will synchronously flash red if lock is lost
Mic/System status: Green LED flickers in response
to loud input (Verifies that mic received sound,
data transmitted to implant & processor received
data from implant)