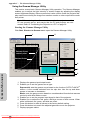
1
Chapter 1 – Introduction
INTRODUCTION
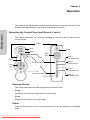
Remote Control
Power on/ Standby
Menu
OSD
Exit
Menu
Controls
Input 1 (Computer/DVI)
Input 2 (Component 1)
Input 3 (Component 2)
Input 4 (S/ Composite -Video)
Color Temperature
Gamma Correction
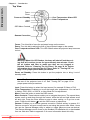
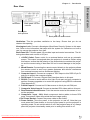
Power: Press this button to put the projector into or bring it out of standby mode.
Note: The Power button does not turn all power off. The power switch at
the rear of the projector turns it off. See "Turning Off" on page 13 for
more information.
Menu: Press this button to enter the OSD menus.
Menu Controls: These buttons enable you to navigate the menus. The up and down
arrows scroll up and down through menus, while the left and right arrows scroll left
and right. Press the Enter button to enter a value or setting.
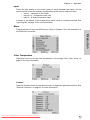
Color Temperature: Enables you to set the image color temperature. You can set it
to Native, 5500, 6500, 9300 K or User Mode.
Input: Press this button to select the type of input signal connected to the projector
– Input 1 – computer or DVI
– Input 2&3 – component 1&2
– Input 4 – S-Video/composite Video
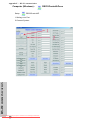
Gamma: Enables you to set the gamma correction. Default setting is gamma 2.2.
There is gamma user mode for users to define their own gamma curve for all input
sources. Users can use the Gamma Manager utility to adjust or create gamma
curves as desired. The Gamma Manager can be found on the bundled CD installation kit or downloaded from our Web site. Refer to appendix C for more information
about this utility.
This concludes this chapter. The next chapter explains how to connect the projector
to power and different types of input devices.
Downloaded From projector-manual.com Boxlight Manuals
6