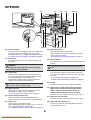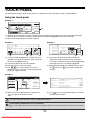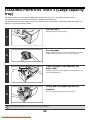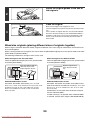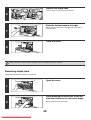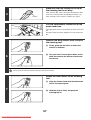
1
MODEL: MX-2300G
MX-2300N
MX-2700G
MX-2700N
User's Guide
Downloaded From ManualsPrinter.com Manuals
MX-3500N
MX-3501N
MX-4500N
MX-4501N
TABLE OF CONTENTS
ABOUT THIS MANUAL . . . . . . . . . . . . . . . . . . . . . . . . 2
• MANUALS PROVIDED WITH THE MACHINE . . . 2
4
PERIPHERAL DEVICES
PERIPHERAL DEVICES . . . . . . . . . . . . . . . . . . . . . . 38
1
FINISHER . . . . . . . . . . . . . . . . . . . . . . . . . . . . . . . . . . 40
• PART NAMES . . . . . . . . . . . . . . . . . . . . . . . . . . . 40
• SUPPLIES . . . . . . . . . . . . . . . . . . . . . . . . . . . . . . 40
• FINISHER MAINTENANCE . . . . . . . . . . . . . . . . . 41
BEFORE USING THE MACHINE
PART NAMES AND FUNCTIONS . . . . . . . . . . . . . . . . 4
• EXTERIOR . . . . . . . . . . . . . . . . . . . . . . . . . . . . . . . 4
• INTERIOR . . . . . . . . . . . . . . . . . . . . . . . . . . . . . . . 6
• AUTOMATIC DOCUMENT FEEDER AND
DOCUMENT COVER . . . . . . . . . . . . . . . . . . . . . . . 7
• CONNECTORS . . . . . . . . . . . . . . . . . . . . . . . . . . . 8
• OPERATION PANEL . . . . . . . . . . . . . . . . . . . . . . . 9
SADDLE STITCH FINISHER . . . . . . . . . . . . . . . . . . . 45
• PART NAMES . . . . . . . . . . . . . . . . . . . . . . . . . . . 45
• SUPPLIES . . . . . . . . . . . . . . . . . . . . . . . . . . . . . . 45
• SADDLE STITCH FINISHER MAINTENANCE . . 46
TOUCH PANEL . . . . . . . . . . . . . . . . . . . . . . . . . . . . . 11
5
PRINT/SEND STATUS (JOB STATUS) . . . . . . . . . . . 12
REGULAR MAINTENANCE . . . . . . . . . . . . . . . . . . . . 52
• CLEANING THE DOCUMENT GLASS AND
AUTOMATIC DOCUMENT FEEDER . . . . . . . . . . 52
• CLEANING THE MAIN CHARGER OF THE
PHOTOCONDUCTIVE DRUM . . . . . . . . . . . . . . . 55
• CLEANING THE BYPASS FEED ROLLER . . . . . 55
• CLEANING THE ORIGINAL FEED ROLLER . . . . 55
• CLEANING THE LASER UNIT . . . . . . . . . . . . . . . 56
TURNING THE POWER ON AND OFF . . . . . . . . . . . 13
• ENERGY SAVE FUNCTIONS . . . . . . . . . . . . . . . 14
• [POWER SAVE] KEY . . . . . . . . . . . . . . . . . . . . . . 14
USER AUTHENTICATION . . . . . . . . . . . . . . . . . . . . . 15
• AUTHENTICATION BY USER NUMBER. . . . . . . 15
• AUTHENTICATION BY LOGIN NAME /
PASSWORD. . . . . . . . . . . . . . . . . . . . . . . . . . . . . 17
2
REPLACING THE TONER CARTRIDGES. . . . . . . . . 60
LOADING PAPER
REPLACING THE WASTE TONER BOX. . . . . . . . . . 63
IMPORTANT POINTS ABOUT PAPER . . . . . . . . . . . 20
• NAMES AND LOCATIONS OF TRAYS . . . . . . . . 20
• THE MEANING OF "R" IN PAPER SIZES . . . . . . 21
• USEABLE PAPER . . . . . . . . . . . . . . . . . . . . . . . . 21
6
LOADING PAPER IN TRAY 5 (Large capacity
tray) . . . . . . . . . . . . . . . . . . . . . . . . . . . . . . . . . . . . . . 26
LOADING PAPER IN THE BYPASS TRAY . . . . . . . . 28
• IMPORTANT POINTS WHEN USING THE
BYPASS TRAY. . . . . . . . . . . . . . . . . . . . . . . . . . . 30
ORIGINALS
PLACING THE ORIGINAL . . . . . . . . . . . . . . . . . . . . . 33
• PLACING ORIGINALS IN THE AUTOMATIC
DOCUMENT FEEDER . . . . . . . . . . . . . . . . . . . . . 33
• PLACING THE ORIGINAL ON THE
DOCUMENT GLASS . . . . . . . . . . . . . . . . . . . . . . 36
1
Downloaded From ManualsPrinter.com Manuals
ENTERING TEXT
FUNCTIONS OF THE MAIN KEYS . . . . . . . . . . . . . . 66
• CHANGING THE ENTRY MODE . . . . . . . . . . . . . 67
• ENTERING TEXT FROM AN EXTERNAL
KEYBOARD . . . . . . . . . . . . . . . . . . . . . . . . . . . . . 67
TRAY SETTINGS FOR TRAYS 1 TO 4 . . . . . . . . . . . 23
• LOADING PAPER . . . . . . . . . . . . . . . . . . . . . . . . 23
• CHANGING THE PAPER SIZE . . . . . . . . . . . . . . 24
3
MAINTENANCE
ABOUT THIS MANUAL
Please note
• Where this manual shows the "MX-2300/2700 series" or the "MX-3500/4500 series", the following models are indicated:
MX-2300/2700 series: MX-2300G, MX-2300N, MX-2700G, MX-2700N
MX-3500/4500 series: MX-3500N, MX-3501N, MX-4500N, MX-4501N
• This manual contains references to the fax function. However, please note that the fax function is not available in some
countries and regions.
• Considerable care has been taken in preparing this manual. If you have any comments or concerns about the manual, please
contact your dealer or nearest authorised service representative.
• This product has undergone strict quality control and inspection procedures. In the unlikely event that a defect or other problem
is discovered, please contact your dealer or nearest authorised service representative.
• Aside from instances provided for by law, SHARP is not responsible for failures occurring during the use of the product or its
options, or failures due to incorrect operation of the product and its options, or other failures, or for any damage that occurs due
to use of the product.
Warning
• Reproduction, adaptation or translation of the contents of manual without prior written permission is prohibited, except as
allowed under copyright laws.
• All information in this manual is subject to change without notice.
Illustrations and the operation panel and touch panel shown in this manual
The peripheral devices are generally optional, however, some models include certain peripheral devices as standard equipment.
The explanations in this manual assume that a right tray and stand/2 x 500 sheet paper drawer are installed on the MX-2700N
(equipped standard with an automatic document feeder).
To further explain certain functions and uses, some explanations assume that additional peripheral devices are installed.
The display screens, messages, and key names shown in the manual may differ from those on the actual machine
due to product improvements and modifications.
MANUALS PROVIDED WITH THE MACHINE
Printed manuals and manuals stored in PDF format on the machine's hard drive are provided with the machine. When
using the machine, read the appropriate manual for the feature you are using.
Printed manuals
Manual name
Contents
Safety Guide
This manual contains instructions for using the machine safely and lists the specifications of the machine
and its peripheral devices.
Software Setup
Guide
This manual explains how to install the software and configure settings to use the machine as a printer
or scanner.
Quick Start Guide
This manual provides easy-to-understand explanations of all the functions of the machine in a single
volume.
Detailed explanations of each of the functions can be found in the manuals in PDF format.
Troubleshooting
This manual explains how to remove paper misfeeds and provides answers to frequently asked
questions regarding the operation of the machine in each mode. Refer to this manual when you have
difficulty using the machine.
Facsimile Quick
Reference Guide
This manual explains the basic procedures for using the fax function of the machine, and provides an
overview of the features of the fax function, troubleshooting procedures, and specifications.
For detailed information on using the fax function and the system settings for fax, see the "Facsimile
Guide" in PDF format.
2
Downloaded From ManualsPrinter.com Manuals
Operation manuals in PDF format
The manuals in PDF format provide detailed explanations of the procedures for using the machine in each mode. To
view the PDF manuals, download them from the hard drive in the machine. The procedure for downloading the manuals
is explained in "How to download the manuals in PDF format" in the Quick Start Guide.
Manual name
Contents
User's Guide
(This manual)
This manual provides information, such as basic operation procedures, how to load paper, and machine
maintenance.
Copier Guide
This manual provides detailed explanations of the procedures for using copy function.
Printer Guide
This manual provides detailed explanations of the procedures for using print function.
Facsimile Guide
This manual provides detailed explanations of the procedures for using fax function and the "System
Settings" that are related to fax.
Scanner Guide
This manual provides detailed explanations of the procedures for using scan function and Internet Fax
function.
Document Filing
Guide
This manual provides detailed explanations of the procedures for using the document filing function. The
document filing function allows you to save the document data of a copy or fax job, or the data of a print
job, as a file on the machine's hard disk. The file can be called up as needed.
System Settings
Guide
This manual explains the "System Settings", which are used to configure a variety of parameters to suit
the aims and the needs of your workplace. Current settings can be displayed or printed out from the
System Settings.
Icons used in the manuals
The icons in the manuals indicate the following types of information:
Warning
This alerts you to a situation where there is a risk of human death or injury.
Caution
This alerts you to a situation where there is a risk of human injury or property damage.
This alerts you to a situation where
there is a risk of machine damage or
failure.
This provides a supplemental
explanation of a function or procedure.
This explains how to cancel or correct
an operation.
This indicates the name of a system setting and a provides a brief
explanation of the setting. For detailed information on each system
setting, see the System Settings Guide.
When "System Settings:" appears:
A general setting is explained.
When "System Settings (Administrator):" appears:
A setting that can only be configured by an administrator is
explained.
3
Downloaded From ManualsPrinter.com Manuals
1
BEFORE USING THE MACHINE
This chapter provides basic information about the machine. Please read this chapter before using the machine.
PART NAMES AND FUNCTIONS
EXTERIOR
(1)
(2)
(3)
(4) (5)
(6)
When using the
MX-3501N/4501N
(7)
(8)
When a finisher, paper pass unit and
saddle stitch finisher (peripheral
devices) are not installed.
(9)
When an automatic
document feeder is not
installed.
(1)
(2)
(3)
(4)
When a finisher (peripheral
device) is installed.
Document cover*1, *2
This holds down the original.
Duplex single pass feeder
(automatic document feeder)
This automatically feeds and scans multiple originals. Both
sides of two-sided originals can be automatically scanned.
Installed standard on the MX-3501N/4501N. Cannot be
installed on other models.
☞ PLACING THE ORIGINAL (page 33)
Reversing single pass feeder*1, *2
(automatic document feeder)
This automatically feeds and scans multiple originals. Both
sides of two-sided originals can be automatically scanned.
☞ PLACING THE ORIGINAL (page 33)
Front cover
Open this cover to switch the main power switch to "On"
or "Off" or to replace a toner cartridge.
☞ TURNING THE POWER ON AND OFF (page 13)
☞ REPLACING THE TONER CARTRIDGES (page 60)
(5)
(6)
(7)
(8)
(9)
Paper pass unit*1
This transfers output to the saddle stitch finisher.
Operation panel
This is used to select functions and enter the number of
copies.
☞ OPERATION PANEL (page 9)
Exit tray unit (right tray)*1
When installed, output can be delivered to this tray.
Output tray (centre tray)
Copy jobs and print jobs are delivered to this tray.
Finisher*1
This can be used to staple output. A punch module can
also be installed to punch holes in output.
☞ FINISHER (page 40)
*1 Peripheral Devices
The peripheral devices are generally optional, however, some models include certain peripheral devices as standard equipment.
*2 The MX-2300G/2300N/2700G/2700N/3500N/4500N are equipped as standard with peripheral devices. On the
MX-2300G/MX-2700G, you can select whether to equip the machine with a document cover or a reversing single pass feeder.
4
Downloaded From ManualsPrinter.com Manuals
(10) (11) (12) (13)
(10) Saddle stitch finisher*
(14)
(15)
(13) Tray 3 (when a stand/1 x 500 sheet paper drawer or a
stand/2 x 500 sheet paper drawer is installed)*
This can be used to staple output. The saddle stitch
finisher can automatically staple output at the centre line
and fold the pages to create a pamphlet. A punch module
can also be installed to punch holes in output.
☞ SADDLE STITCH FINISHER (page 45)
This holds paper. Up to 500 sheets of paper can be
loaded.
☞ TRAY SETTINGS FOR TRAYS 1 TO 4 (page 23)
(14) Tray 4 (when a stand/2 x 500 sheet paper drawer is
installed)*
(11) Tray 1
This holds paper. Up to 500 sheets of paper can be
loaded.
☞ TRAY SETTINGS FOR TRAYS 1 TO 4 (page 23)
This holds paper. Up to 500 sheets of paper can be
loaded.
☞ TRAY SETTINGS FOR TRAYS 1 TO 4 (page 23)
(12) Tray 2
(15) Tray 5 (when a large capacity tray is installed)*
This holds paper. Up to 500 sheets of paper can be
loaded.
☞ TRAY SETTINGS FOR TRAYS 1 TO 4 (page 23)
This holds paper. Up to 3500 sheets of paper can be
loaded.
☞ LOADING PAPER IN TRAY 5 (Large capacity tray)
(page 26)
* Peripheral Devices
The peripheral devices are generally optional, however, some models include certain peripheral devices as standard
equipment.
5
Downloaded From ManualsPrinter.com Manuals
INTERIOR
(16)
(17)
(18)
(19)
(20) (21)
When using the MX-3500/4500 Series
(22)
(23) (24)
(25) (26) (27) (28)
(22) Main power switch
(16) Toner cartridges
This is used to power on the machine.
When using the fax or Internet fax functions, keep this
switch in the "On" position.
☞ TURNING THE POWER ON AND OFF (page 13)
When the toner in a cartridge runs out, the cartridge must
be replaced with a new cartridge of the same colour.
The shape of the toner cartridge varies slightly by model.
☞ REPLACING THE TONER CARTRIDGES (page 60)
(17) Fusing area
(23) Waste toner box
Heat is applied here to fuse the transferred image onto
the paper.
This collects excess toner that remains after copying and
printing.
Caution
Your service technician will collect the waste toner
box.
The fusing unit is hot. Take care not to burn yourself
when removing a paper misfeed.
(24) Waste toner box release button
Press this button when you need to release the waste
toner box lock to replace the waste toner box or clean the
laser unit.
☞ CLEANING THE LASER UNIT (page 56)
☞ REPLACING THE WASTE TONER BOX (page 63)
(18) Transfer belt
During full colour copying, the toner images of each of
the four colours on each of the photoconductive drums
are combined together on the transfer belt.
During black and white copying, only the black toner
image is transferred onto the transfer belt.
(25) Handle
Do not touch or damage the transfer belt.
This may cause a defective image.
Pull this out and grasp it when moving the machine.
(26) Right cover of stand/1 x 500 sheet paper drawer
Right cover of stand/2 x 500 sheet paper drawer
(when a stand/1 x 500 sheet paper drawer or a
stand/2 x 500 sheet paper drawer is installed)
(19) Right side cover
Open this cover to operate the fusing area pressure
adjustment lever and to remove a misfeed.
☞ Fusing unit pressure adjusting levers (page 32)
Open this to remove a paper misfeed in tray 3 or tray 4.
(20) Paper reversing section cover
(27) Paper tray right side cover
This is used when 2-sided copying and printing is
performed. Open this cover to remove a paper misfeed.
Open this to remove a paper misfeed in tray 1 or tray 2.
(21) Bypass tray
(28) Right side cover release lever
Use this tray to feed paper manually.
When loading paper larger than A4R or 8-1/2" x 11"R, be
sure to pull out the bypass tray extension.
☞ LOADING PAPER IN THE BYPASS TRAY (page 28)
To remove a paper jam, pull and hold this knob up to
open the right side cover.
6
Downloaded From ManualsPrinter.com Manuals
AUTOMATIC DOCUMENT FEEDER AND DOCUMENT COVER
Automatic document feeder
(1)
(2)
(3)
(4)
(5)
(6)
(7)
(10)
(8)
Document cover
Automatic document feeder
(MX-3501N/4501N)
(2)
(1)
(9)
(3)
(4)
(5)
Paper feed roller
(7)
This roller rotates to automatically feed the original.
(2)
Document feeding area cover
Open this cover to remove an original misfeed or clean
the paper feed roller.
(3)
(8)
Original guides
(9)
Document feeder tray
(10) Document glass
Use this to scan a book or other thick original that cannot
be fed through the automatic document feeder.
☞ PLACING THE ORIGINAL ON THE DOCUMENT
GLASS (page 36)
Original exit tray
Originals are delivered to this tray after scanning.
(6)
Scanning area
Originals placed in the document feeder tray are scanned
here.
☞ REGULAR MAINTENANCE (page 52)
7
Downloaded From ManualsPrinter.com Manuals
Original holder
Originals can be placed here.
Place originals in this tray. 1-sided originals must be
placed face up.
☞ PLACING THE ORIGINAL (page 33)
(5)
Reversing tray
During scanning of a 2-sided original, the original is
temporarily output to this tray in order to be turned over
for scanning of the reverse side.
These help ensure that the original is scanned correctly.
Adjust the guides to the width of the original.
☞ PLACING THE ORIGINAL (page 33)
(4)
Original size detector
This detects the size of an original placed on the
document glass.
☞ PLACING THE ORIGINAL ON THE DOCUMENT
GLASS (page 36)
CONNECTORS
(1)
(2)
(3)
(4)
(1)
When the fax expansion kit is installed
USB connecter (A type)
This is used to connect a USB hub or USB memory
device to the machine.
For the USB cable, use a shielded type cable.
(2)
USB connecter (B type )
(5)
A computer can be connected to this connector to use
the machine as a printer.
For the USB cable, use a shielded type cable.
(3)
(6)
LAN connecter
Connect the LAN cable to this connector when the
machine is used on a network.
For the LAN cable, use a shielded type cable.
(4)
Service-only connector
Caution
Connecting a cable to this connector may cause the
machine to malfunction.
Important note for service technicians:
The cable connected to the service connector must be
less than 3 m (118") in length.
(5)
Extension phone socket
When the fax function of the machine is used, an
extension phone can be connected to this socket.
(6)
Telephone line socket
When the fax function of the machine is used, the
telephone line is connected to this socket.
8
Downloaded From ManualsPrinter.com Manuals
OPERATION PANEL
(1)
(2)
(4)
(5)
PRINT
READY
DATA
DOCUMENT
FILING
LINE
DATA
IMAGE SEND
COPY
(3)
SYSTEM
JOB STATUS SETTINGS
LOGOUT
(6)
(1)
(7)
(8)
Touch panel
(9)
(3)
Messages and keys appear in the touch panel display.
Touch the displayed keys to perform a variety of operations.
When a key is touched, a beep sounds and the selected
item is highlighted. This provides confirmation as you
perform an operation.
☞ TOUCH PANEL (page 11)
(2)
• READY indicator
Print data can be received when this indicator is lit.
• DATA indicator
This blinks while print data is being received and lights
steadily while printing is taking place.
(4)
Mode select keys and indicators
Numeric keys
These are used to enter the number of copies and fax
numbers.
Use these keys to change the mode displayed in the
touch panel.
The indicator of a key lights when the key is selected.
(5)
[DOCUMENT FILING] key
Press this key to switch to document filing mode when
you wish to store a document as an image file on the
hard drive or print or transmit an image stored on the
hard drive.
☞ Document Filing Guide
[CLEAR] key (
)
Press this key to return the number of copies to "0".
(6)
[JOB STATUS] key
Press this key to display the job status screen. The job
status screen is used to check information on jobs and
cancel jobs.
The indicator in the key lights up when the job status
screen is displayed.
☞ PRINT/SEND STATUS (JOB STATUS) (page 12)
[IMAGE SEND] key
Press this key to select network scanner / fax mode to
use the scanner function or fax function.
☞ Facsimile Guide
☞ Scanner Guide
• LINE indicator
This lights up during transmission or reception in fax or
Internet fax, and during transmission in scan.
• DATA indicator
This lights up during reception in fax or Internet fax.
This blinks when a received fax cannot be printed
because of a problem such as out of paper. This lights
up when an image is being sent in scan mode.
(7)
[SYSTEM SETTINGS] key
Press this key to display the system settings menu
screen. The system settings can be adjusted to make the
machine easier to use, such as configuring paper tray
settings and storing addresses.
☞ System Settings Guide
(8)
[LOGOUT] key (
)
Press this key to log out after you have logged in and used
the machine. When using the fax function, this key can
also be pressed to send tone signals on a pulse dial line.
☞ USER AUTHENTICATION (page 15)
[COPY] key
Press this key to select copy mode. Hold the [COPY] key
down to view the machine's total page use count and
amount of toner remaining.
☞ Copier Guide
(9)
[PROGRAM] key (
)
When using the copy function, press this key to use a job
program. When using the fax function, this key can be
used for dialing.
9
Downloaded From ManualsPrinter.com Manuals
PRINT mode indicators (READY indicator / DATA
indicator)
PRINT
READY
DATA
DOCUMENT
FILING
LINE
DATA
IMAGE SEND
COPY
SYSTEM
JOB STATUS SETTINGS
LOGOUT
(10)
(10) [CLEAR ALL] key (
(11)
)
Press this key to return to the initial operation state.
Use this key when you wish to cancel all settings that
have been selected and start operation from the initial
state.
(11) [STOP] key (
)
Press this key to stop a copy job or scanning of an
original.
(12) [BLACK & WHITE START] key (
)
Press this key to copy or scan an original in black and
white. This key is also used to send a fax in fax mode.
(13) [COLOUR START] key (
)
Press this key to copy or scan an original in colour.
This key cannot be used for fax or Internet fax.
(14) [POWER SAVE] key (
) / indicator
Use this key to put the machine into auto power shut-off
mode to save energy.
The [POWER SAVE] key blinks when the machine is in
auto power shut-off mode.
☞ [POWER SAVE] KEY (page 14)
(15) [POWER] key (
)
Use this key to turn the machine power on and off.
☞ TURNING THE POWER ON AND OFF (page 13)
(16) Main power indicator
This lights up when the machine's main power switch is
in the "On" position.
☞ TURNING THE POWER ON AND OFF (page 13)
The indicators of the operation panel may differ depending on the country and region.
10
Downloaded From ManualsPrinter.com Manuals
(12)
(13)
(14) (15) (16)
TOUCH PANEL
The touch panel (screen) shown in this manual is a descriptive image. The actual screen is slightly different.
Using the touch panel
Example 1
Job Queue
Sets / Progress
Spool
Status
Copy
020 / 001
Copying
Copy
020 / 000
Paper Empty
BBB BBB
020Beep
/ 000
Waiting
0312345678
002 / 000
1/1
Job Queue
Complete
(1)
Detail
Tone
Print Job
Waiting
Scan to
(2)
Priority
Stop/Delete
Fax Job
Internet Fax
(1) Settings for each function are easily selected and cancelled by touching the keys on the screen with your finger.
When an item is selected, a beep will sound and the item will be highlighted to confirm the selection.
(2) Keys which are greyed out cannot be selected.
Example 3
Example 2
OK
Special Modes
Cancel
Margin Shift
Side 1
Right
Left
OK
Special Modes
1/4
OK
Margin Shift
Side 2
Erase
Down
10
(0
mm
20)
10
(0
mm
20)
Job
Build
Pamphlet Copy
(1)
(4)
Dual Page
Copy
(3)
Tandem
Copy
(2)
(1)
(2)
(1) Some items in the special modes screen are
selected by simply touching the key of the item.
To cancel a selected item, touch the highlighted key
once again so that it is no longer highlighted.
(2) When settings extend over multiple screens, touch
the
key or the
key to switch through the
screens.
(1) If a key is initially highlighted in a screen, the key is
selected. To change the selection, touch one of the
other keys to highlight that key.
(2) Touch the [OK] key to enter the selection.
(3) Touch this key to cancel the setting.
(4) The
keys can be used to increase or
decrease a value. To make a value change quickly,
keep your finger on the key.
Example 4
Ready to scan for copy.
0
OK
Function Review
Full Colour
Colour Mode
Original A4
2-Sided Copy
Output
Job Detail
Settings
Plain
A4
Auto
Exposure
1.
2.
3.
100%
Copy Ratio
4.
A4
A4R
B4
A3
Special Modes
File
Margin Shift
:
Shift:Right
Front:10mm/Back:10mm
Erase
:
Edge:10mm
Centre:10mm
Covers/Inserts :
1/3
Front:2-Sided/Back:Insert
Insertion A:10Page/B:10Page
Quick File
(1)
(1) When at least one special mode is selected, the
key appears in the base screen.
(2) The
key can be touched to display a list of the
selected special modes.
If a key that cannot be selected is touched, a double beep will sound.
System Settings (Administrator): Keys Touch Sound
This is used to adjust the volume of the beep that sounds when keys are touched. The key touch sound can also be turned
off.
11
Downloaded From ManualsPrinter.com Manuals
PRINT/SEND STATUS (JOB STATUS)
This screen appears when the [JOB STATUS] key on the operation panel is pressed.
The screen shows lists of the jobs that are reserved and in progress, and jobs that have been completed. This screen is
used to check jobs, move a job to the top of the job queue, or delete a job.
(1)
Job Queue
Sets / Progress
Spool
Spool
Job Queue
Job Queue
Complete
Complete
Detail
Detail
020 / 001
Copying
Copy
020 / 000
Paper Empty
BBB BBB
020 / 000
Waiting
0312345678
002 / 000
Waiting
Scan to
1/1
Priority
Stop/Delete
Fax Job
(4)
(1)
(5)
(9)
keys
These change the page of the displayed job list.
(6)
[Stop/Delete] key
Use this key to cancel the job currently in progress or a
selected reserved job. Note that printing of received
faxes and received Internet faxes cannot be cancelled.
Job list
(7)
[Priority] key
A reserved job in the "Job Queue" screen can be printed
ahead of all other reserved jobs by selecting the job and
then touching this key.
In the print job queue, you can select a print or copy job
to which you wish to give priority and touch this key. The
job in progress stops and printing of the selected job
begins. When the selected job is completed, the
interrupted job resumes.
Job status screen selector key
[Detail] key
This shows detailed information on a selected job.
When a job has been stored using Quick File or File in
document filing mode, or when a broadcast transmission
has been performed in image send mode, the job
appears as a key in the [Complete] screen. You can
touch this key to show details on the completed job, and
you can also touch the [Call] key that appears to reprint
or resend the job.
This switches the job list display to spooled jobs, the job
queue, or completed jobs.
[Spool]: This shows encrypted PDF jobs printed by direct
printing. The [Spool] key can be displayed when
print jobs are displayed.
[Job Queue]: This shows reserved jobs and the job in
progress.
[Complete]: This shows completed jobs.
(9)
Mode switch keys
[Call] key
A job that appears in the completed jobs screen as a key
can be touched followed by the [Call] key to reprint or
resend the job. This is the same [Call] key that appears
when the [Detail] key is touched.
Use these keys to switch to print mode, scan mode, fax
mode, or Internet fax mode.
• The [Print Job] key shows the list of copy, print,
received fax, received Internet fax, and self print jobs.
12
Downloaded From ManualsPrinter.com Manuals
(6) (7) (8)
• The [Scan to] key shows the list of transmission jobs
that use the scanner function.
• The [Fax Job] key shows the list of transmission jobs
that use the fax and PC-Fax functions.
• The [Internet Fax] key shows the list of transmission
jobs that use the Internet fax and PC-I-fax functions.
For more information on the job status screen in each
mode, see the manual for each mode.
(8)
(4)
Internet Fax
Internet Fax
"Paper Empty" display
• Lists are displayed of jobs that are reserved and in
progress (the job queue), and completed.
When the [Print Job] key is touched in the mode switch
keys, the job status screen selector key changes to
show the "Spool" list.
Each job key in the lists shows a brief description of
the job and its status.
• The "Spool" screen shows spooled print jobs and
encrypted PDF direct print jobs. To move an encrypted
PDF job from the spool list to the "Job Queue", touch
the key of the job and enter the job password.
(3)
Call
(5)
Add paper.
When the status is "Paper Empty", the specified size of
paper for the job is not loaded in any of the trays. In this
case, the job will be held until the required size of paper
is loaded. Other jobs that are waiting will be printed (if
possible) ahead of the held job. (However, other jobs will
not be printed if the paper ran out while printing was in
progress.)
If you need to change the paper size because the
specified paper size is not available, touch the key of the
job in the list to select it, touch the [Detail] key described
in (8), and select a different paper size.
(2)
"Complete"
job screen
Status
Copy
Print Job
(3)
(2)
TURNING THE POWER ON AND OFF
The machine has two power switches. The main power switch is at the lower left after the front cover is opened. The
other power switch is the [POWER] key (
) on the operation panel at the top right.
[POWER] key
Main power switch
When the main power switch is switched on, the main
power indicator on the operation panel lights up.
Main power indicator
"On" position
[POWER] key
"Off" position
Turning on the power
(1) Switch the main power switch to the "On" position.
(2) Press the [POWER] key (
) to turn on the power.
Turning off the power
(1) Press the [POWER] key (
) to turn off the power.
(2) Switch the main power switch to the "Off" position.
When using the fax or Internet fax functions
Always keep the main power switch in the "On" position.
Keep the main power switch in the "On" position and press the [POWER] key (
) to turn off the power.
The power should be turned off in this way at night or at other times when the machine is not being used.
The touch panel cannot be used, but the following functions will operate:
Fax functions:
Faxes can be received automatically, and timer transmission jobs and other previously reserved fax jobs can be
transmitted. In addition, functions that send faxes at the request of other machines (remote transmission, relay
transmission when a relay request is received) can also be used.
Internet fax functions:
Internet faxes can be received automatically, and timer transmission jobs and other previously reserved fax jobs can
be transmitted.
• Before switching off the main power switch, make sure that the DATA indicator for printing and the DATA and LINE
indicators for image transmission and fax transmission and reception are not lit or blinking.
Switching off the main power switch or removing the power cord from the outlet while any of the indicators are lit or blinking
may damage the hard drive and cause data to be lost.
• Switch off both the main power switch and the [POWER] key (
) and unplug the power cord if you suspect a machine
failure, if there is a bad thunderstorm nearby, or when you are moving the machine.
• If the main power is switched off more than approximately one minute after the power has been turned off by pressing the
[POWER] key (
) on the operation panel, the main power indicator on the operation panel will not turn off immediately.
(The indicator will remain on for approximately another minute. This is normal and does not indicate a failure.)
13
Downloaded From ManualsPrinter.com Manuals
ENERGY SAVE FUNCTIONS
This product has the following two energy save functions that conform to the Energy Star guidelines to help conserve
natural resources and reduce environmental pollution.
Preheat Mode
Preheat mode automatically lowers the temperature of the fuser unit and thereby reduces power consumption if the
machine remains in the standby state for the interval of time set in "Preheat Mode" in the system settings
(administrator).
The machine automatically wakes up and returns to normal operation when a print job is received, a key is pressed on
the operation panel, or an original is placed.
Auto power shut-off mode (Sleep mode)
Auto power shut-off mode automatically shuts off power to the display and the fusing unit if the machine remains in the
standby state for the interval of time set in "Auto Power Shut-Off" in the system settings (administrator). This mode
provides the lowest level of power consumption. Considerably more power is saved than in preheat mode, however, the
wakeup time is longer. This mode can be disabled in the system settings (administrator).
The machine automatically wakes up and resumes normal operation when a print job is received or when the blinking
[POWER SAVE] key is pressed.
[POWER SAVE] KEY
Press the [POWER SAVE] key to put the machine in auto power shut-off mode or wake it up from auto power shut-off
mode. The [POWER SAVE] key has an indicator that indicates whether or not the machine is in auto power shut-off
mode.
When the [POWER SAVE]
key indicator is off in the
standby state
The machine is ready to be used.
If the [POWER SAVE] key is pressed when the indicator is off, the indicator will blink and
the machine will enter auto power shut-off mode after a brief interval.
When the [POWER SAVE]
key indicator light is blinking.
The machine is in auto power shut-off mode.
If the [POWER SAVE] key is pressed when the indicator is blinking, the indicator will turn
off and the machine will return to the ready state after a brief interval.
[POWER SAVE] key / indicator
LOGOUT
14
Downloaded From ManualsPrinter.com Manuals
USER AUTHENTICATION
When the administrator of the machine has enabled user authentication, one of two screens shown below will appear. If
either screen appears, enter the user number or login name and password that you received from the administrator.
Please enter your login name /
password.
Enter your user number.
User Authentication
OK
OK
Login Name
User Name
Password
Auth to:
Login Locally
Admin Login
When controlled by user number
When controlled by login name and password
(Different items will appear in the screen when LDAP
authentication is used.)
AUTHENTICATION BY USER NUMBER
The following procedure is used to log in using a user number received from the administrator of the machine.
Enter your user number (5 to 8 digits)
with the numeric keys.
Enter your user number.
Each entered digit will be displayed as "
1
".
Touch the [OK] key.
Enter your user number.
OK
After the entered user number is authenticated, the user count
screen will appear briefly.
Usage status
Black-white
Full colour
2-colour
Single colour
Admin Login
: used/remaining pages
:87,654,321/12,345,678
:87,654,321/12,345,678
:87,654,321/12,345,678
:87,654,321/12,345,678
The number of pages remaining appears when page limits
have been set in "Pages Limit Group Registration" in the
system settings (administrator). (The remaining number of
pages that the user can use in each mode (copy, scan, etc.)
appears.) The amount of time that this screen appears can be
changed using "Message Time Setting" in the system settings
(administrator).
2
When the user number is an 8-digit number, this step is not necessary. (Login takes place automatically after the user
number is entered.)
15
Downloaded From ManualsPrinter.com Manuals
When you have finished using the
machine and are ready to log out, press
the [LOGOUT] key (
).
LOGOUT
3
• Note that the [LOGOUT] key (
) cannot be used to log out when a fax number is being entered in fax mode, as
[LOGOUT] key (
) input is treated as part of a fax number.
• If a preset duration of time elapses after the machine is last used, the Auto Clear function will activate. When Auto
Clear activates, logout automatically takes place. However, when PC Scan mode is used, logout does not take
place when the [LOGOUT] key (
) is pressed and Auto Clear does not operate. Change to a different mode on
the machine and then log out.
If an incorrect user number is entered 3 times in a row...
If "A Warning when Login Fails" is enabled in the system settings (administrator), the machine will lock for 5 minutes if
an incorrect user number is entered 3 times in a row.
Verify the user number that you should use with the administrator of the machine.
The administrator can clear the locked state. This is done from [User Control] and then [Default Settings] in the Web page
menu.
16
Downloaded From ManualsPrinter.com Manuals
AUTHENTICATION BY LOGIN NAME / PASSWORD
The following procedure is used to log in using a login name and password received from the administrator of the
machine or the administrator of the LDAP server.
Touch the [Login Name] key or the
key.
Please enter your login name /
password.
User Authentication
OK
Login Name
If the [Login Name] key is touched, a screen for selecting the
user name appears. Go to the next step.
If the
key is touched, [---] (the registration number
display) appears in the 2-line message display.
Use the numeric keys to enter your registration number that
has been stored in "User Registration" in the system settings
(administrator). After entering the registration number, go to
step 3.
User Name
Password
1
Auth to:
Login Locally
(A)
(C)
Please select a user
to be logged in.
Back
User 0001
User 0002
User 0003
User 0004
User 0005
User 0006
User 0007
User 0008
All Users
ABCD
Select your user name.
(D)
EFGHI
JKLMN
Admin Login
1
25
OPQRST UVWXYZ
2
(B)
Direct Entry
ABC
User
(A) User selection keys
Touch your user name that has been stored in "User
Registration" in the system settings (administrator).
(B) Index tabs
All users appear on the [All Users] tab. Touch a tab to
display the users whose leading initials match the tab
index.
(C) [Direct Entry] key
Use this key if you have not been stored in "User
Registration" in the system settings (administrator) and
have only been stored for LDAP authentication.
A text entry screen will appear. Enter your login name that
is stored on the LDAP server.
To enter text, see "6. ENTERING TEXT" (page 66).
(D) [Back] key
Touch this key to return to the login screen.
LDAP authentication can be used when the administrator of the server provides LDAP service on the LAN (local area
network).
17
Downloaded From ManualsPrinter.com Manuals
Touch the [Password] key.
Please enter your login name /
password.
User Authentication
A text entry screen for entering the password will appear.
Enter your password that is stored in "User Registration" in the
system settings (administrator).
OK
Login Name
User Name
Password
User 0001
Auth to:
Login Locally
If you are logging in to an LDAP server, enter the password that
is stored with your LDAP server login name.
Each entered character will be displayed as " ". When you
have finished entering the password, touch the [OK] key.
When authentication is by LDAP server and you have different
passwords stored in "User Registration" in the system settings
(administrator) and in the LDAP server, use the password
stored in the LDAP server.
• When an LDAP server has been stored, [Auth to:] can be changed.
3
• If you are logging in using a user selection key...
If you are logging in using a user selection key, the LDAP server was stored when your user information was stored,
and thus the LDAP server will appear in an authenticated server when you select your login name. Go to step 4.
• When logging in using the [Direct Entry] key...
Touch the [Auth to:] key.
Please enter your login name /
password.
User Authentication
Login Name
OK
User Name
Password
Direct Entry
Auth to:
Login Locally
Select the LDAP server and touch the [OK] key.
Select the authentication system of registered user.
Authenticate to:
OK
Login Locally
1/2
Server 1
Server 2
Server 3
Touch the [OK] key.
Please enter your login name /
password.
User Authentication
After the entered login name and password are authenticated,
the user count screen will appear briefly.
OK
Login Name
4
User Name
Password
User 0001
Auth to:
Login Locally
Usage status
Black-white
Full colour
2-colour
Single colour
(Different items will appear in the screen when LDAP
authentication is used.)
The number of pages remaining appears when page limits
have been set in "Pages Limit Group Registration" in the
system settings (administrator). (The remaining number of
pages that the user can use in each mode (copy, scan, etc.)
appears.) The amount of time that this screen appears can be
changed using "Message Time Setting" in the system settings
(administrator).
18
Downloaded From ManualsPrinter.com Manuals
: used/remaining pages
:87,654,321/12,345,678
:87,654,321/12,345,678
:87,654,321/12,345,678
:87,654,321/12,345,678
When you have finished using the
machine and are ready to log out, press
the [LOGOUT] key (
).
LOGOUT
5
• Note that the [LOGOUT] key (
) cannot be used to log out when a fax number is being entered in fax mode, as
[LOGOUT] key (
) input is treated as part of a fax number.
• If a preset duration of time elapses after the machine is last used, the Auto Clear function will activate. When Auto
Clear activates, logout automatically takes place. However, when PC Scan mode is used, logout does not take
place when the [LOGOUT] key (
) is pressed and Auto Clear does not operate. Change to a different mode on
the machine and then log out.
If an incorrect login name or password is entered 3 times in a row...
If "A Warning when Login Fails" is enabled in the system settings (administrator), the machine will lock for 5 minutes if an
incorrect login name or password is entered 3 times in a row.
Verify the login name and password that you should use with the administrator of the machine.
• The administrator can clear the locked state. This is done from [User Control] and then [Default Settings] in the Web page
menu.
• Depending on the LDAP authentication method, the [E-mail Address] key may appear. If the [E-mail Address] key appears
in step 3, touch it.
A text entry screen will appear.
Enter your e-mail address. To enter text, see "6. ENTERING TEXT" (page 66).
Please enter your login name /
E-mail address / password.
User Authentication
OK
Login Name
User 0002
User Name
E-mail Address
Password
Auth to:
Server 2
System Settings (Administrator): User Registration
A user name is stored when a user is registered in "User Registration". Detailed information such as the login name, user
number, and password are also stored. Ask the administrator of the machine for the information that you need to use the
machine.
19
Downloaded From ManualsPrinter.com Manuals
2
LOADING PAPER
This chapter explains how to load paper in the machine's trays.
IMPORTANT POINTS ABOUT PAPER
This section provides information that you should know before loading paper in the paper trays.
Be sure to read this section before loading paper.
NAMES AND LOCATIONS OF TRAYS
The trays are identified by the names indicated below. For the sizes and types of paper that can be loaded in each tray,
see the Safety Guide.
Bypass tray
Tray 1
Tray 2
Tray 3 (when a stand/1 x 500 sheet
paper drawer or a stand/2 x 500
sheet paper drawer is installed)
Tray 4 (when a stand/2 x 500 sheet
paper drawer is installed)
Tray 5 (when a large capacity tray is installed)
Tray numbers
The tray numbers vary depending on the peripheral devices that are installed.
Peripheral devices
installed
The machine
First tray
Second tray
Stand/1 x 500
sheet paper
drawer
Stand/1 x 500 sheet paper
drawer + Large capacity
tray
Stand/2 x 500 sheet paper
drawer + Large capacity
tray
Tray 1
Stand/2 x 500 sheet paper
drawer
Large
capacity tray
First tray
Second tray
Tray 3
–
–
Tray 4
–
Tray 3
Tray 4
Tray 5
–
–
–
–
Tray 2
None installed
The explanations in this manual assume that a stand/2 x 500 sheet paper drawer and large capacity tray are installed.
If your machine has a stand/1 x 500 sheet paper drawer and a large capacity tray installed, substitute "Tray 4" wherever "Tray 5"
appears in this manual.
20
Downloaded From ManualsPrinter.com Manuals
THE MEANING OF "R" IN PAPER SIZES
Some original and paper sizes can be placed in either the vertical or the horizontal orientation. To differentiate between
vertical and horizontal orientations, paper sizes in the horizontal orientation will be followed by an "R" (for example, A4R,
B5R, 8-1/2" x 11"R, 5-1/2" x 8-1/2"R).
Sizes that can be placed only in the horizontal orientation (A3, B4, 11" x 17", 8-1/2" x 14", 8-1/2" x 13") do not include
"R" in their size indication.
Horizontal orientation
"R" is appended.
A3
(11" x 17")
A4
(8-1/2" x 11")
A4R
(8-1/2" x 11"R)
Can be placed only in the
horizontal orientation
"R" is not appended.
Vertical orientation
"R" is not appended.
USEABLE PAPER
Various types of paper are sold. This section separately explains the plain paper and the special media that can be used
with the machine. For detailed information on the sizes and types of paper that can be loaded in each tray of the
machine, see the specifications in the Safety Guide and "Paper Tray Settings" in the System Settings Guide.
Useable paper
Tray 1 to tray 5
Plain paper
Bypass tray
Plain paper
Special paper
Remarks
See "More information on plain paper
and special paper" below.
More information on plain paper and special paper
Plain paper that can be used in tray 1 to tray 5
• SHARP standard paper (see the Safety Guide for the specifications of (64 g/m2 (17 lbs.)) SHARP standard paper).
• Pain paper other than SHARP standard paper (60 g/m2 to 105 g/m2 (16 lbs. to 28 lbs.))
• Recycled paper, coloured paper and pre-punched paper must meet the same specifications as plain paper.
Contact your dealer or nearest authorised service representative for advice on using these types of paper.
Special media that can be used in the bypass tray
• Transparency film
• Heavy paper, label sheets, envelopes, glossy paper, tab paper, and other special media
21
Downloaded From ManualsPrinter.com Manuals
Paper that cannot be used
• Thin paper less than 55 g/m2 (15 lbs.)
• Heavy paper 210 g/m2 (57 lbs.) or over
• Irregularly shaped paper
• Stapled paper
• Damp paper
• Curled paper
• Paper with a wave-like pattern due to moisture absorption
• Special media for inkjet printers (fine paper, glossy
paper, glossy film, etc.)
• Carbon paper or thermal paper
• Pasted paper
• Paper with clips
• Paper with fold marks
• Torn paper
• Oil-feed transparency film
Paper that is not recommended
• Perforated paper
• Iron-on transfer paper
• Japanese paper
• The reverse side of paper already printed on by
another printer or copier.
• Various types of plain paper and special media are sold. Some types cannot be used with the machine. Contact your
dealer or nearest authorised service representative for advice on suitable paper.
• The image quality and toner fusibility of paper may change due to ambient conditions, operating conditions, and paper
characteristics, resulting in image quality inferior to that of SHARP standard paper. Contact your dealer or nearest
authorised service representative for advice on suitable paper.
• The use of non-recommended or prohibited paper may result in skewed feeding, misfeeds, poor toner fusing (the toner
does not adhere to the paper well and can be rubbed off), or machine failure.
• The use of non-recommended paper may result in misfeeds or poor image quality. Before using non-recommended paper,
check if printing can be performed properly.
22
Downloaded From ManualsPrinter.com Manuals
TRAY SETTINGS FOR TRAYS 1 TO 4
LOADING PAPER
A maximum of 500 sheets of paper from size A5R to size A3 (5-1/2" x 8-1/2"R to 11" x 17") can be loaded in trays 1 and 2.
A maximum of 500 sheets of paper from size B5R to size A3 (7-1/4" x 10-1/2"R to 11" x 17") can be loaded in trays 3 and 4.
For detailed information on the paper that can be loaded, see the specifications in the Safety Guide and "Paper Tray
Settings" in the System Settings Guide.
Pull out the paper tray.
Gently pull the tray out until it stops.
1
Fan the paper.
Before loading the paper, fan it well. If the paper is not fanned,
multiple sheets may feed at once and cause a misfeed.
2
Insert the paper into the tray.
Indicator
line
3
Insert the paper with the print side face up.
However, letterhead and pre-printed paper should be inserted
with the print side face down.
The paper stack must not be higher than the indicator line (no
more than 500 sheets).
If "Disabling of Duplex" is enabled in the system settings (administrator), insert letterhead and pre-printed paper with
the print side face up.
Gently push the paper tray into the
machine.
Push the tray firmly all the way into the machine.
4
When loading paper, if you change the paper size from an inch size to an AB size, or from an AB size to an inch size,
or if you change the paper type, be sure to change the paper type setting as explained in "Paper Tray Settings" in the
System Settings Guide.
Do not place heavy objects on the tray or press down on the tray.
23
Downloaded From ManualsPrinter.com Manuals
CHANGING THE PAPER SIZE
Pull out the paper tray.
Gently pull the tray out until it stops.
If paper remains in the tray, remove it.
1
Adjust the guide plates A and B by
squeezing their lock levers and sliding
them to match the vertical and
horizontal dimensions of the paper to be
loaded.
A
2
The guide plates A and B are slidable. Slide each guide plate
while squeezing its lock lever.
B
Fan the paper.
Before loading the paper, fan it well. If the paper is not fanned,
multiple sheets may feed at once and cause a misfeed.
3
Insert the paper into the tray.
Indicator
line
4
Insert the paper with the print side face up.
However, letterhead and pre-printed paper should be inserted
with the print side face down.
The paper stack must not be higher than the indicator line (no
more than 500 sheets).
If "Disabling of Duplex" is enabled in the system settings (administrator), insert letterhead and pre-printed paper with
the print side face up.
Gently push the paper tray into the
machine.
5
Push the tray firmly all the way into the machine.
24
Downloaded From ManualsPrinter.com Manuals
Set the paper size and paper type.
System Settings
SYSTEM
SETTINGS
6
Total Count
Defau
Paper Tray
Settings
Addr
Printer Condition
Settings
Docu
Be sure to change the paper size and paper type settings as
explained in "Paper Tray Settings" in the System Settings
Guide.
When the size of paper used in a tray is changed, the correct
paper size setting must be selected. If the paper size setting is
incorrect, the wrong size of paper will be selected when
automatic paper selection operates, preventing printing or
causing a misfeed or other problem.
Do not place heavy objects on the tray or press down on the tray.
If you changed the paper loaded in tray 1 to tray 4...
See the System Settings Guide to change the paper size setting and paper type setting.
System Settings: Paper Tray Settings
Change these settings when you change the size or type of paper loaded in a tray.
25
Downloaded From ManualsPrinter.com Manuals
LOADING PAPER IN TRAY 5 (Large capacity
tray)
The large capacity tray can hold up to 3500 sheets of A4, B5 or 8-1/2" x 11" size paper (80 g/m2 (20 lbs.)).
The paper size of tray 5 can only be changed by a SHARP service technician.
For detailed information on the paper that can be loaded, see the specifications in the Safety Guide and "Paper Tray
Settings" in the System Settings Guide.
Pull out tray 5.
Gently pull the tray out until it stops.
1
Fan the paper.
Before loading the paper, fan it well. If the paper is not fanned,
multiple sheets may feed at once and cause a misfeed.
2
Indicator
line
3
Place the paper in the centre of the
paper table.
The paper stack must not be higher than the indicator line (no
more than 3500 sheets).
Gently push the paper tray into the
machine.
Push the tray firmly all the way into the machine.
4
Do not place heavy objects on the tray or press down on the tray.
26
Downloaded From ManualsPrinter.com Manuals
When you change the type of paper loaded in tray 5, change the paper type setting in "Paper Tray Settings" in the system
settings. See the System Settings Guide to change the paper type setting.
System Settings: Paper Tray Settings
Change these settings when you change the type of paper loaded in the tray.
27
Downloaded From ManualsPrinter.com Manuals
LOADING PAPER IN THE BYPASS TRAY
The bypass tray can be used to print and copy on plain paper, envelopes, label sheets, tab paper, and other special
types of paper. Up to 100 sheets of paper can be loaded (up to 40 sheets of heavy paper) for continuous printing similar
to the other trays.
For detailed information on the paper that can be loaded, see the specifications in the Safety Guide and "Paper Tray
Settings" in the System Settings Guide.
Open the bypass tray.
1
When loading paper larger than A4R or 8-1/2" x 11"R, be sure
to pull out the bypass tray extension. Pull the bypass tray
extension all the way out. If the bypass tray extension is not
pulled all the way out, the size of the loaded paper will not be
correctly displayed.
Set the bypass tray guides to the width
of the paper.
2
Insert the paper along the bypass tray
guides all the way into the bypass tray
until it stops.
Insert the paper with the print side face down.
3
• Do not force the paper in.
• If the bypass tray guides are set wider than the paper, move the bypass tray guides in until they correctly fit the
width of the paper. If the bypass guides are set too wide, the paper may skew or be creased.
28
Downloaded From ManualsPrinter.com Manuals
Full Colour
Colour Mode
Auto
Original
Job Detail
Settings
4
2-Sided Copy
Auto
A4
Paper Select
Output
Plain
Special Modes A4
(1) Touch the [Job Detail Settings] key.
Special Modes
Auto
Exposure
(2) Touch the [Paper Select] key.
File
100%
Copy Ratio
Quick File
(2)
(1)
Paper Select
5
Open the paper settings screen.
Touch the paper type key of the bypass
tray.
OK
A4
Plain
A4R
Plain
B4
Plain
A3
Plain
A4
Plain
(A) Shows the size of paper loaded in the bypass tray.
(B) The currently selected paper type will be displayed.
(A) (B)
Cancel
Bypass Tray Type/Size Setting
Select the paper type.
1/2
6
Plain
Letter Head
Thin Paper
Transparency
Pre-Printed
Pre-Punched
Heavy Paper
Tab Paper
Recycled
Colour
Labels
Envelope
Select the type of paper used in the
bypass tray.
Select the paper type to be used.
1/2
Type
Bypass Tray Type/Size Setting
Type
Recycled
Auto-Inch
Auto-AB
Custom Size
Set the paper size.
OK
Size
12x18,11x17,81/2x14
81/2x11,81/2x11R,51/2x81/2R
71/4x101/2R,A3,A4,B4,B5
A3W,A3,A4,A4R,A5R,B4
B5,B5R,216x330(81/2x13)
11x17,81/2x11
8K
16K
16KR
X420 Y297
2/2
OK
Type
Bypass Tray Type/Size Setting
Type
7
Recycled
OK
Auto-Inch
X
420
((148
mm
432)
297
(100
mm
297)
Auto-AB
Y
Custom Size
AB
Inch
To use a paper size used in China on the MX-2300/2700
series, touch the [8K], [16K], or [16KR] key to select the paper
size.
On the MX-3500/4500 series, touch the [Manual] key, touch the
[8K], [16K], or [16KR] key in the screen that appears, and then
touch the [OK] key.
[Auto-Inch] key
When the paper inserted in the bypass tray is an inch size
(8-1/2" x 11", etc.), the paper size will be detected automatically
and the appropriate paper size set.
[Auto-AB] key
When the paper inserted in the bypass tray is an AB size (A4
size, etc.), the paper size will be detected automatically and the
appropriate paper size set.
[Custom Size] key
Touch this key when you know the size of the inserted paper
but it is not one of the inch or AB sizes.
When the key is touched, the paper size entry screen appears.
Touch the [X] key and enter the horizontal dimension of the
paper with the
keys, and then touch the [Y] key and
enter the vertical dimension. When finished, touch the [OK]
key.
• When [Envelope] is selected, touch the envelopes size key. When finished, touch the [OK] key.
• When [Tab Paper] is selected, check the tab paper size, or touch the [Auto-Inch] key or the [Auto-AB] key. When
finished , touch the [OK] key.
29
Downloaded From ManualsPrinter.com Manuals
Paper Select
8
OK
A4
Plain
A4R
Plain
B4
Plain
A3
Plain
Select the bypass tray.
A4
(1) Touch the paper size key of the bypass tray.
Recycled
(2) Touch the [OK] key.
(1)
(2)
Do not place heavy objects on the bypass tray or press down on the tray.
IMPORTANT POINTS WHEN USING THE BYPASS TRAY
• When using plain paper other than SHARP standard paper or special types of paper other than
SHARP-recommended transparency film, or are printing on the reverse side of previously used paper, the paper must
be loaded one sheet at a time. Loading more than one sheet at a time will cause misfeeds.
• Before loading paper, straighten any curling in the paper.
• When adding paper, remove any paper remaining in the tray, combine it with the paper to be added, and reload as a
single stack. If paper is added without removing the remaining paper, a misfeed may result.
• When using glossy paper, set the paper type to [Heavy Paper]. This will bring out the glossy quality of the paper.
Inserting paper
A5, 7-1/4" x 10-1/2" or less size paper must be inserted in the horizontal
orientation as shown at left.
Inserting tab paper
When copying on tab paper, orient the paper so that the side with the tabs enters the machine last. The bottom side of
the inserted paper will be printed on.
Place the tab paper and original as shown below.
Original
Automatic document feeder
Leading edge
of original
Tab paper
Copy
Document glass
1
2
3
4
5
Paper feed
direction
5
4
3
2
1
1
2
3
4
5
When copying onto tab paper, insert the tab paper with the side to be copied on face down in the bypass tray.
Face down
Use only tab paper that is made of paper. Tab sheets made of film or other material cannot be used.
30
Downloaded From ManualsPrinter.com Manuals
Inserting transparency film
Oriented
horizontally
Oriented
vertically
• Use SHARP-recommended transparency film. When inserting
transparency film in the bypass tray, the rounded corner should be at
the front left when the film is oriented horizontally, or at the far left
when the film is oriented vertically.
• When loading multiple sheets of transparency film in the bypass tray,
be sure to fan the sheets several times before loading.
• When printing or copying on transparency film, be sure to remove
each sheet as it exits the machine. Allowing sheets to stack in the
output tray may result in curling.
Inserting envelopes
When inserting envelopes in the bypass tray, set them in the orientation shown below.
Example of loading a envelope
Only the address side of an envelope can be printed on or copied on. Be sure to place the address side face down.
Important points when using envelopes
• Do not print or copy on both sides of the envelope. This may result in misfeeds or poor print quality.
• Restrictions apply to some types of envelopes. For more information, consult a qualified service technician.
• Some operating environments may cause creasing, smudging, misfeeds, poor toner fusing, or machine failure.
• Do not use the following envelopes:
Envelopes with metal clasps, plastic hooks, or ribbon hooks; envelopes closed with string, envelopes with windows
or backing, envelopes with an uneven front surface due to embossing, double-layer envelopes, envelopes with an
adhesive for sealing, hand-made envelopes, envelopes with air inside, envelopes with creases or fold marks, torn
or damaged envelopes
• Envelopes with an incorrectly aligned corner gluing position on the back cannot be used as creasing may result.
• Print quality is not guaranteed in the area 10 mm or 13/32" around the edges of
the envelope.
• Print quality is not guaranteed on parts of envelopes where there is a large
step-like change of thickness, such as on four-layer parts or parts less than 3
layers.
• Print quality is not guaranteed on envelopes having peel off flaps for sealing the
envelopes.
Can be used
Cannot be used
31
Downloaded From ManualsPrinter.com Manuals
Fusing unit pressure adjusting levers
In some cases damage to the envelopes, colour deviations, or smudging may occur even if envelopes within the
specifications are used. This problem may be alleviated by shifting the fusing unit pressure adjusting levers from their
"normal pressure position" to the "lower pressure position". Follow the procedure on the this page.
Pull out the right side cover.
While pushing up the open/close lever on the right side cover,
gently open the cover.
1
B
Move the fusing unit pressure adjusting
levers (two) to the lower pressure
position as shown.
A
Lower pressure
position
2
A: Front side of
fusing unit
Normal
position
B: Rear side of
fusing unit
Close the right side cover.
3
Caution
The fusing unit is hot. Take care not to burn yourself when operating the fusing unit pressure adjusting levers.
Be sure to return the levers to the "normal pressure position" before printing or copying on paper other than envelopes.
Otherwise, fusing problems, paper misfeeds, or equipment failure may occur.
32
Downloaded From ManualsPrinter.com Manuals
3
ORIGINALS
This chapter explains how to place originals in the automatic document feeder and on the document glass.
PLACING THE ORIGINAL
PLACING ORIGINALS IN THE AUTOMATIC DOCUMENT
FEEDER
This section explains how to place originals in the automatic document feeder.
Allowed original sizes
Minimum original size
Standard sizes
(minimum size that can be automatically detected)
A5: 210 mm (width) x 148 mm (length)
8-1/2" (width) x 5-1/2" (length)
Non-standard sizes
(minimum size that can be specified manually)
131 mm (width) x 140 mm (length)
5-1/8" (width) x 5-1/2" (length)
Maximum original size
Standard sizes
(maximum size that can be automatically detected)
A3: 297 mm (width) x 420 mm (length)
11" (width) x 17" (length)
A3W (12" x 18" size paper) cannot be used.
Non-standard sizes
(maximum size that can be specified manually)
Copy mode: 297 mm (width) x 432 mm (length)
In image send mode, up to 297 mm (width) x 800 mm (length)
(11"(width) x 13-1/2" (length)) is possible.
When a non-standard size original is placed in copy mode, see "SPECIFYING THE ORIGINAL SIZE" in the Copier
Guide.
When a non-standard size original is placed for a fax or scanner transmission, see "SPECIFYING THE SCAN SIZE OF
THE ORIGINAL" in the Facsimile Guide or Scanner Guide.
Allowed original weights
MX-3501N/4501N
1-sided copying: 35 g/m2 to 128 g/m2 (9 Ibs. to 34 Ibs.)
2-sided copying: 50 g/m2 to 128 g/m2 (15 Ibs. to 34 Ibs.)
Models other than the above
1-sided copying: 35 g/m2 to 128 g/m2 (9 Ibs. to 34 Ibs.)
2-sided copying: 50 g/m2 to 105 g/m2 (15 Ibs. to 28 Ibs.)
To scan originals from 35 g/m2 to 49 g/m2 (9 Ibs. to 14 Ibs.), use "Slow Scan Mode" in the special modes. Scanning
without using "Slow Scan Mode" may result in original misfeeds.
When "Slow Scan Mode" is selected, automatic two-sided scanning is not possible.
Make sure an original does not remain
on the document glass.
1
Open the automatic document feeder, make sure that an
original is not on the document glass, and then gently close the
automatic document feeder.
33
Downloaded From ManualsPrinter.com Manuals
Adjust the original guides to the size of
the originals.
2
Place the original.
1
Indicator
line
3
Make sure the edges of the originals are even.
Insert the originals face up all the way into the document feeder
tray.
Insert a number of originals that does not exceed the indicator
line on the document feeder tray. On the MX-3501N/4501N, a
maximum of 150 sheets can be inserted. A maximum of 100
sheets can be inserted in the automatic document feeder of
other models.
Mixed size originals (placing different sizes of originals together)
When using the automatic document feeder, originals of different sizes in the range of combinations shown below can
be scanned together.
When scanning mixed sizes of originals, be sure to touch the [Mixed Size Original] key in the special modes and select
[Same Width] or [Different Width].
The following combinations of original sizes can be used.
When the originals are different widths
Touch the [Mixed Size Original] key in the special modes
and select [Different Width].
When the originals are the same width
Touch the [Mixed Size Original] key in the special modes
and select [Same Width].
Place the originals with the
sides that are the same
length aligned on the left.
Align the originals here
in the document feeder
tray.
B4
(8-1/2" x 14")
A3 (11" x 17")
A4 (8-1/2" x 11")
A3 (11" x 17")
Allowed combinations of sizes
A3 and B4, A3 and B5, A4 and B4, A4 and B5, B4 and
A4R, B4 and A5, B5 and A4R, B5 and A5 (11" x 17" and
8-1/2" x 14", 11" x 17" and 8-1/2" x 13", 11" x 17" and
5-1/2" x 8-1/2")
Combinations of sizes other than the above cannot be
used for "Different Width".
2-sided scanning is not possible when "Different Width"
is selected. (except when using the MX-3501N/4501N)
Allowed combinations of sizes
A3 and A4, B4 and B5, A4R and A5 (11" x 17" and
8-1/2" x 11", 8-1/2" x 14" and 8-1/2" x 11"R, 8-1/2" x 14"
and 5-1/2" x 8-1/2", 8-1/2" x 13" and 8-1/2" x 11"R,
8-1/2" x 13" and 5-1/2" x 8-1/2", 8-1/2" x 11"R and
5-1/2" x 8-1/2")
34
Downloaded From ManualsPrinter.com Manuals
B4
(8-1/2" x 14")
• Before inserting originals into the document feeder tray, be sure to remove any staples or paper clips.
• If originals have damp spots due to correction fluid, ink or pasteup glue, wait until the originals are dry before making
copies. Otherwise the interior of the document feeder or the document glass may be soiled.
• Do not use the following originals. Incorrect original size detection, original misfeeds, and smudges may result.
Transparency film, tracing paper, carbon paper, thermal paper or
originals printed with thermal transfer ink ribbon should not be fed
through the document feeder. Originals to be fed through the
feeder should not be damaged, crumpled, folded, loosely pasted
Hole
Feed slot
together, or have cut-out holes. Originals with multiple punched
positions
holes other than two-hole or three-hole punched paper may not
feed correctly.
• When using originals with two or three holes, place them so that the
punched edge is at a position away from the feed slot.
35
Downloaded From ManualsPrinter.com Manuals
PLACING THE ORIGINAL ON THE DOCUMENT GLASS
This section explains how to place the original on the document glass.
Allowed original sizes
When a non-standard size original is placed in copy
mode, see "SPECIFYING THE ORIGINAL SIZE" in the
Copier Guide.
When a non-standard size original is placed for a fax or
scanner transmission, see "SPECIFYING THE SCAN
SIZE OF THE ORIGINAL" in the Facsimile Guide or
Scanner Guide.
Maximum original size
Standard sizes
A3: 297 mm (width) x 420 mm (length)
11" (width) x 17" (length)
Non-standard sizes
297 mm (width) x 432 mm (length)
Open the automatic document feeder.
1
Place the original.
Place the original face down in the far left corner of the
document glass.
Document glass scale
mark
Original size
detector
A5 or
5-1/2" x 8-1/2"
B4 or
B5
8-1/2" x 14"
A4 or 8-1/2" x 11" A3 or 11" x 17"
2
Document glass scale
mark
B5R
A4R or 8-1/2" x 11"R
The original should always be placed in the far left corner,
regardless of the size.
Align the top left corner of the original with the tip of the
mark.
• Do not place any objects under the original size detector.
Closing the automatic document feeder with an object underneath may damage the original size detector and
prevent correct detection of the original size.
• If you are placing a small original on the document glass, it is convenient to place a blank sheet of A4 or B5
(8-1/2" x 11" or 5-1/2" x 8-1/2") paper on top of the original.
Close the automatic document feeder.
3
36
Downloaded From ManualsPrinter.com Manuals
Placing a thick book
When scanning a thick book or other thick original, follow the steps below to press the book down.
(1) Push up the far side of the automatic
document feeder.
The hinges supporting the automatic document feeder
will release and the rear side of the automatic document
feeder will rise.
(2)
(2) Gently close the automatic document
feeder.
(1)
Caution
• Do not close the automatic document feeder suddenly. This may damage the automatic document feeder and your
hand may become caught between the automatic document feeder and the machine.
• Do not place your hands inside the automatic document feeder. Your hand may become caught between the automatic
document feeder and the machine.
The automatic document feeder cannot be closed correctly in this state. To return the automatic document feeder to its
normal state, open it completely and then close it.
37
Downloaded From ManualsPrinter.com Manuals
4
PERIPHERAL DEVICES
This chapter describes the peripheral devices that can be used with the machine and explains how to use the finisher
and saddle stitch finisher.
PERIPHERAL DEVICES
Peripheral devices can be installed on the machine to increase its range of functionality.
The peripheral devices are generally optional, however, some models include certain peripheral devices as standard equipment.
(As of November, 2005)
Product name
Product number
Description
Original cover
MX-VRX1*1
This holds down the original.
Reversing single pass feeder
(Automatic document feeder)
MX-RPX1*1
This automatically turns the original over to enable scanning of
both sides.
MX-DEX1*2
Stand/1x500 sheet paper drawer
MX-DEX3*3
MX-DEX2*2
Additional tray. A maximum 500 sheets of paper can be loaded
in each tray.
Stand/2x500 sheet paper drawer
MX-DEX4*3
Large capacity tray
MX-LCX1
Exit tray unit
(Right tray)
MX-TRX1*2
Finisher
MX-FNX1
Additional tray. A maximum of 3500 sheets of paper can be
loaded in the tray.
To install the tray, a stand/1 x 500 sheet paper drawer or
stand/2 x 500 sheet paper drawer is required.
This can be added to the right side of the machine.
MX-TRX2*3
Output device that enables the use of the staple function and
offset function.
MX-PNX1A
MX-PNX1B
Punch module
Punches holes in copies and other output. Requires a finisher.
MX-PNX1C
MX-PNX1D
Saddle stitch finisher
MX-FNX2
Output device that enables use of the staple function, offset
function and pamphlet copy function.
To install the saddle stitch finisher, a stand/1 x 500 sheet paper
drawer or stand/2 x 500 sheet paper drawer is required.
Paper pass unit
MX-RBX1
Required when a saddle stitch finisher is installed.
38
Downloaded From ManualsPrinter.com Manuals
Product name
Product number
Description
AR-PN1A
AR-PN1B
Punches holes in copies and other output. Requires a saddle
stitch finisher.
Punch module
AR-PN1C
AR-PN1D
Barcode font kit
AR-PF1
Adds barcode fonts to the machine.
Printer expansion kit
MX-PBX1*1
Adds a PCL6 or PCL5c printer function.
Network scanner expansion kit
MX-NSX1*1
Adds a network scanner function.
PS3 expansion kit
MX-PKX1
Enables the machine to be used as a Postscript compatible
printer.
To use the PS3 expansion kit on the MX-2300G/MX-2700G, the
printer expansion kit is required.
Internet fax expansion kit
MX-FWX1
Enables Internet Fax.
Facsimile expansion kit
MX-FXX1
Adds a fax function.
MX-SMX1*1
On the MX-2300G/MX-2700G, this memory is required to use
any or all of the following kits: the printer expansion kit, the
network scanner kit, the PS3 expansion kit, or the Internet fax
expansion kit. On the other models, this memory is not needed.
256 MB expansion memory board
*1 Can be installed when using the MX-2300G/2700G.
*2 Can be installed when using the MX-2300/2700 Series.
*3 Can be installed when using the MX-3500/4500 Series.
Some options may not be available in some countries and regions.
39
Downloaded From ManualsPrinter.com Manuals
FINISHER
The finisher is equipped with the offset function, which offsets each set of output from the previous set.
In addition, each set of sorted output can be stapled.
An optional hole punching unit can also be installed to punch holes in output.
PART NAMES
The following parts can be accessed when the finisher is open.
(1)
(2)
(4)
(1)
(3)
(5)
(6)
(4)
Output tray
(2)
(5)
Lever
Staple case
This holds the staple cartridge. Pull the case out to
replace the staple cartridge or remove a staple jam.
Use this to move the finisher in order to remove a paper
misfeed, replace staples, or remove a staple jam.
(3)
Front cover
Open this cover to remove a paper misfeed, replace
staples, remove a staple jam, or remove the punch scrap
case.
Stapled and offset output is delivered to this tray.
The tray is slidable. Extend the tray for large output
(A3W, A3, B4, 12" x 18", 11" x 17", 8-1/2" x 14" and
8-1/2" x 13" sizes).
(6)
Punch waste box (when a punch module is installed)
Staple case release lever
Use this to remove the staple case.
This holds punch waste.
• A finisher and a saddle stitch finisher cannot be installed simultaneously.
• Use caution when you turn on the power and when printing is taking place, as the tray may move up and down.
SUPPLIES
The finisher requires the following staple cartridge:
• Staple cartridge
(approx. 5000 staples per cartridge x 3 cartridges)
MX-SCX1
40
Downloaded From ManualsPrinter.com Manuals
FINISHER MAINTENANCE
When the staple cartridge runs out of staples, a message will appear in the operation panel. Follow the procedure below
to replace the staple cartridge.
Replacing the staple cartridge
Open the cover.
1
While pressing the lever over to the left,
slide the finisher to the left until it stops.
2
Gently slide the finisher until it stops.
Lower the staple case release lever and
remove the staple case.
3
Pull the staple case out to the right.
Remove the empty staple cartridge from
the staple case.
4
Insert a new staple cartridge into the
staple case as shown.
5
Push the staple cartridge in until it clicks into place.
41
Downloaded From ManualsPrinter.com Manuals
Replace the staple case.
Push the staple case in until it clicks into place.
6
Slide the finisher back to the right.
Gently slide the finisher back to the right until it locks into its
original position.
7
Close the cover.
8
Make a test print or copy in staple sort mode to verify that stapling takes place correctly.
Removing staple jams
Follow the steps below to remove a staple jam.
Open the cover.
1
While pressing the lever over to the left,
slide the finisher to the left until it stops.
2
Gently slide the finisher until it stops.
42
Downloaded From ManualsPrinter.com Manuals
Lower the staple case release lever and
remove the staple case.
3
4
Pull the staple case out to the right.
Raise the lever at the front end of the
staple case and remove the jammed
staple.
Remove the leading staple if it is bent. If bent staples remain, a
staple jam will occur again.
Lower the lever at the front end of the
staple case.
5
Replace the staple case.
Push the staple case in until it clicks into place.
6
Slide the finisher back to the right.
7
Gently slide the finisher back to the right until it locks into its
original position.
Close the cover.
8
43
Downloaded From ManualsPrinter.com Manuals
Discarding punch waste (when a punch module is installed)
Open the cover.
1
2
Grasp the punch waste box handle,
gently pull out the box, and discard the
punch waste.
Discard the punch waste in a plastic bag or other container,
taking care not to let the waste scatter.
Gently push the box back in.
3
Close the cover.
4
44
Downloaded From ManualsPrinter.com Manuals
SADDLE STITCH FINISHER
The saddle stitch finisher is equipped with the offset function that offsets each set of output from the previous set, the
staple sort function that staples each set of output, and the saddle stitch function that automatically staples and folds
each set of output at the centreline.
An optional hole punching unit can also be installed to punch holes in output.
PART NAMES
(1)
(4)
(2)
(5)
(6)
(3)
(7)
(1)
(5)
Stapler compiler
To remove a staple jam or paper misfeed, pull this lever
and slide the saddle stitch finisher to the left until it stops.
This temporarily stacks paper to be stapled.
(2)
Output tray
(6)
Stapled and offset output is delivered to this tray.
The tray is slidable. Extend the tray for large output
(A3W, A3, B4, 12" x18", 11" x 17", 8-1/2" x 14" and
8-1/2" x 13" sizes).
(3)
Stapler section
Open the front cover and pull out this section to replace
the staple cartridge or remove a staple jam.
(7)
Saddle stitch tray
Front cover
Open this cover to replace the staple cartridge or remove
a staple jam.
Stapled and folded output is delivered to this tray.
(4)
Lever
Top cover
Open this cover to remove a paper misfeed.
• A paper pass unit is required to install a saddle stitch finisher.
• Do not place heavy objects on the saddle stitch finisher or press down on the saddle stitch finisher.
• Use caution when you turn on the power and when printing is taking place, as the tray may move up and down.
• A saddle stitch finisher and a finisher cannot be installed simultaneously.
SUPPLIES
The saddle stitch finisher requires the following staple cartridge:
• Staple cartridge
(approx. 5000 staples per cartridge x 3 cartridges)
AR-SC2
45
Downloaded From ManualsPrinter.com Manuals
SADDLE STITCH FINISHER MAINTENANCE
When the staple cartridge runs out of staples, a message will appear in the operation panel. Follow the procedure below
to replace the staple cartridge.
Replacing the staple cartridge
Open the front cover.
1
Pull out the stapler section.
Pull out until the stapler section until it stops.
2
3
Turn roller rotating knob A in the
direction of the arrow to move the staple
unit out to the front.
Roller rotating knob A
Staple unit
Turn the roller rotating knob as shown until the triangle mark is
aligned with the indicator.
Remove the empty staple case.
4
Remove the empty staple cartridge.
Press the lock button to release the staple case cover and then
remove the staple cartridge.
5
When staples remain, the staple cartridge cannot be removed.
46
Downloaded From ManualsPrinter.com Manuals
Insert a new staple cartridge into the
staple case.
Push the staple cartridge in until it clicks into place.
6
Do not remove the seal from the cartridge before inserting the cartridge into the case.
Pull the seal that holds the staples
straight out.
7
Replace the staple case.
Push the staple case in until it clicks into place.
8
Push the stapler section back in.
Push the stapler section back in until it locks into its original
position.
9
Close the front cover.
10
Make a test print or copy in staple sort mode to verify that stapling takes place correctly.
47
Downloaded From ManualsPrinter.com Manuals
Removing staple jams
Follow the steps below to remove a staple jam.
While pulling the lever, slide the saddle
stitch finisher to the left until it stops.
1
Open the front cover.
2
Turn roller rotating knob B as shown
until the blue indicator is visible.
3
Blue
Roller rotating knob B
Remove any paper from the stapler
compiler.
4
5
Be careful not to tear the paper during removal.
If the saddle stitch function was being
used, open the saddle stitch section
cover.
48
Downloaded From ManualsPrinter.com Manuals
Remove the misfed paper.
Be careful not to tear the paper during removal.
6
Close the saddle stitch section cover.
7
Pull out the stapler section.
Pull out until the stapler section until it stops.
8
9
Turn roller rotating knob A in the
direction of the arrow to move the staple
unit out to the front.
Roller rotating knob A
Staple unit
Turn the roller rotating knob until the triangle mark is aligned
with the indicator.
Remove the staple case.
10
11
Raise the lever at the front end of the
staple case and remove the jammed
staple.
Remove the leading staple if it is bent. If bent staples remain, a
staple jam will occur again.
49
Downloaded From ManualsPrinter.com Manuals
Return the lever to its original position.
12
Replace the staple case.
Push the staple case in until it clicks into place.
13
Push the stapler section back in.
Push the stapler section back in until it locks into its original
position.
14
Close the front cover.
15
Push the saddle stitch finisher back and
latch it to the machine.
16
Make a test print or copy in staple sort mode to verify that stapling takes place correctly.
50
Downloaded From ManualsPrinter.com Manuals
Discarding punch waste (when a punch module is installed)
While pulling the lever, slide the saddle
stitch finisher to the left until it stops.
1
Pull out the punch waste box and
discard the punch waste.
2
Discard the punch waste in a plastic bag or other container,
taking care not to let the waste scatter.
Return the punch waste box to its
original position.
3
Push the saddle stitch finisher back and
latch it to the machine.
4
51
Downloaded From ManualsPrinter.com Manuals
5
MAINTENANCE
This chapter explains how to clean the machine and replace the toner cartridge or waste toner box.
REGULAR MAINTENANCE
To ensure that the machine continues to provide top quality performance, periodically clean the machine.
Warning
Do not use a flammable spray to clean the machine. If gas from the spray comes in contact with hot electrical
components or the fusing unit inside the machine, fire or electrical shock may result.
Do not use thinner, benzene, or similar volatile cleaning agents to clean the machine. These may degrade or discoloured the housing.
CLEANING THE DOCUMENT GLASS AND AUTOMATIC
DOCUMENT FEEDER
If the document glass, document backplate sheet, or automatic document scanning area becomes dirty, the dirt will
appear as dirty spots or coloured lines or white lines in the scanned image. Always keep these parts clean.
Wipe the parts with a clean, soft cloth.
If necessary, moisten the cloth with water or a small amount of neutral detergent. After wiping with the moistened cloth,
wipe the parts dry with a clean dry cloth.
Document glass
Document backplate sheet
52
Downloaded From ManualsPrinter.com Manuals
Scanning area
If coloured lines or white lines appear in images scanned using the automatic document feeder, clean the scanning area
(the thin long glass next to the document glass).
To clean this area, use the glass cleaner that is stored in the automatic document feeder. After using the glass cleaner,
be sure to return it to its storage position.
Examples of lines in the image
Black lines
White lines
MX-3501N/4501N
(1) Open the automatic document feeder and remove the glass cleaner.
(2) Clean the scanning areas with the glass cleaner.
One scanning area is the document glass and the other is inside the automatic document feeder.
Document glass
Automatic document feeder
Open the scanning area cover on the automatic document feeder. Push in the release switch to release the cover.
53
Downloaded From ManualsPrinter.com Manuals
Clean the scanning area in the automatic document feeder. When you have finished cleaning, close the cover.
(3) Replace the glass cleaner.
Other models
(1) Open the automatic document feeder and remove the glass cleaner.
(2) Clean the scanning area with the glass cleaner.
(3) Replace the glass cleaner.
54
Downloaded From ManualsPrinter.com Manuals
CLEANING THE MAIN CHARGER OF THE
PHOTOCONDUCTIVE DRUM
If black lines or coloured lines appear even after you have cleaned the document glass and document feeder, use the
charger cleaner to clean the main charger that charges the drum.
(1) Open the front cover.
Figure 1
(2) Release the waste toner box lock and let
the waste toner box fall forward.
For the steps to follow when letting the waste toner box
fall forward, see step 3 of "CLEANING THE LASER
UNIT" (page 56).
(3) Slowly pull out the green knob (charger cleaner).
Charger cleaner
Pull out the knob as shown in Figure 2.
(4) Once the green knob (charger cleaner) is
pulled out, slowly push it back in.
Waste toner outlet
Push the knob as shown in Figure 2.
Figure 2
(5) Repeat steps (3) and (4) for each of the
other charger cleaners.
There are a total of 4 places to be cleaned in the machine
as shown in Figure 1.
(6) Push the waste toner box into the machine.
Push the waste toner box firmly in until it clicks into place.
(7) Close the front cover.
• If this does not solve the problem, pull the knob out and push it back in 2 more times.
• When pulling and pushing the knob to clean the charger, pull and push the knob slowly from one end to the other.
• Touching the waste toner outlet or the waste toner box may soil your hands and clothes. Exercise caution when cleaning
the charger.
CLEANING THE BYPASS
FEED ROLLER
CLEANING THE
ORIGINAL FEED ROLLER
If paper misfeeds frequently occur when feeding
envelopes, or thick paper through the bypass tray, wipe
the surface of the feed roller with a clean soft cloth
moistened with water or a neutral detergent.
If lines or other dirt appear on the scanned original when
the automatic document feeder is used, wipe the surface
of the roller with a clean soft cloth moistened with water
or a neutral detergent.
On the MX-3501N/4501N, this cleaning is not
necessary.
55
Downloaded From ManualsPrinter.com Manuals
CLEANING THE LASER UNIT
When the laser unit inside the machine becomes dirty, line-like colour irregularities (coloured lines) may appear in the
print image. When the following conditions appear, clean the laser unit.
Identifying lines (coloured lines) caused by a dirty laser unit
• Coloured lines always appear in the same place. (The lines are never black.)
• The coloured lines are parallel to the direction of paper feeding.
• Coloured lines appear not only when the copy function is used but also when the printer function is used. (The
problem appears during both printing and copying.)
Open the front cover.
1
Take out the cleaning tool for the laser
unit.
The cleaning tool is attached to the front cover.
2
Release the waste toner box.
Press the waste toner box release button.
3
The waste toner box will fall forward as shown.
Gently support the box with your hands as you let it fall forward
as far as it will go.
56
Downloaded From ManualsPrinter.com Manuals
Make sure that the cleaner at the tip of
the cleaning tool is not dirty.
4
Cleaner
If the cleaner is dirty, remove the cleaner and replace it with a
clean one. For the procedure for replacing the cleaner, see
steps 5 through 7. If the cleaner is not dirty, go to step 8.
Pull the replacement cleaner out of the
waste toner box.
The replacement cleaner is stored at the top of the waste toner
box.
Grasp the end of the cleaner and pull it out of the waste toner
box.
5
Remove the dirty cleaner from the tip of
the cleaning tool.
(1) Firmly grasp the tool close to where the
cleaner is attached.
(2) Use your other hand to press down on the
hook that secures the cleaner and remove
the cleaner.
6
Do not return the removed cleaner to the top of the waste toner box.
Attach the new cleaner to the cleaning
tool.
(1) Align the cleaner hook with the attachment
hole in the cleaning tool.
7
(2) Hold the cleaner firmly and push the
cleaning tool in.
57
Downloaded From ManualsPrinter.com Manuals
Clean the laser unit.
(1) Point the cleaner down and slowly insert
the tool into the hole that you wish to clean.
Be sure to point the cleaner down.
(2) Insert the cleaning tool all the way into the
hole and then pull it back out.
Pull the cleaning tool out until you feel the tip of the tool
leave the cleaning surface of the laser unit.
8
(3) Repeat step (2) two or three times and then
remove the cleaning tool.
Repeat step 8 to clean all holes in the
laser unit (4 holes).
There are a total of 4 holes to be cleaned in the laser unit,
including the hole cleaned in step 8. Clean all holes.
9
Holes
Push the waste toner box into the
machine.
10
Push the waste toner box firmly in until it clicks into place.
58
Downloaded From ManualsPrinter.com Manuals
Replace the cleaning tool.
(1) Point the cleaner up and hook the end of the
tool (the end without the cleaner) onto the
holder on the right.
11
(2) Align the holder with the hole in the centre
of the cleaning tool and slowly press down
from above.
(3) Fit the holder into the hole in the tip (the end
with the cleaner) of the cleaning tool.
Close the front cover.
12
59
Downloaded From ManualsPrinter.com Manuals
REPLACING THE TONER CARTRIDGES
When toner runs lower than 25%, "(
)" appears in the display. When toner runs even lower, "(
Toner
supply is low.)" appears. It is recommended that you keep a set of new toner cartridges so that you can replace them
quickly when toner runs out.
When toner runs lower than 25%, a message similar to the following will appear.
Ready to scan for copy.
(
)
When toner runs even lower, a message similar to the following will appear.
Ready to scan for copy.
(
Depending on your conditions of usage, the colour may change
or the output may become faint.
Toner supply is low.)
If you continue to use the toner cartridge, the toner will eventually run out, the machine will stop and the following message will
appear.
Change the toner cartridge.
(
)
Colours that are running low or have run out of toner are indicated in (
Y :Yellow M : Magenta C : Cyan Bk : Black
Replace the toner cartridges of the indicated colours.
).
Open the front cover.
Locations of colour toner cartridges
MX-3500/4500 Series
1
(A)
(B)
(C)
MX-2300/2700 Series
(A): Yellow (B): Magenta
(C): Cyan (D): Black
60
Downloaded From ManualsPrinter.com Manuals
(D)
Pull the toner cartridge toward you.
Raise the toner cartridge lever and gently pull the toner
cartridge horizontally toward you.
When pulling out the toner cartridge, pull it out gently. If the
cartridge is pulled out abruptly, toner may spill out.
2
Example: Replacing the yellow toner cartridge
Hold the toner cartridge with both hands as shown and pull it
out of the machine.
Remove a new toner cartridge from its
package and shake it horizontally five or
six times.
3
When shaking the toner cartridge, be sure to shake with the
protective material inserted in the cartridge.
Remove the protective material from the
new toner cartridge.
Hold the toner cartridge firmly while removing the protective
material.
After the protective material has been removed, do not point
the toner cartridge down or shake it.
4
Insert the new toner cartridge
horizontally.
Align the cartridge with the insert hole as shown and then push
the cartridge in until it clicks into place.
5
A toner cartridge of a different colour cannot be installed. Be sure to install a toner cartridge of the same colour.
Push the cartridge in until it locks
securely in place.
6
Push the cartridge firmly in until it clicks into place.
61
Downloaded From ManualsPrinter.com Manuals
Close the front cover.
After the toner cartridge is replaced, the machine automatically
enters image adjustment mode.
7
Caution
• Do not throw a toner cartridge into a fire. Toner may fly and cause burns.
• Store toner cartridges out of the reach of small children.
• If a toner cartridge other than a SHARP-recommended toner cartridge is used, the machine may not attain full quality
and performance and there is a risk of damage to the machine. Be sure to use a SHARP-recommended toner cartridge.
• If any one of the toner colours runs out (including black toner), colour copying will not be possible. If Y, M, or C toner runs
out but Bk toner remains, black and white copying will still be possible.
• Keep the used toner cartridge in a plastic bag (do not discard it). The service technician will collect the used toner cartridge
at the time of maintenance.
• To view the approximate amount of toner remaining, hold down the [COPY] key during copying, printing, or when the
machine is idle. The percentage of toner remaining will appear in the display while you hold down the key. When the
percentage falls to "25-0%", obtain a new toner cartridge and keep it ready for replacement.
62
Downloaded From ManualsPrinter.com Manuals
REPLACING THE WASTE TONER BOX
The waste toner box collects residual toner that is produced during printing. When the used toner box is full, the display
will show "Replace used toner container.". Follow the procedure below to replace the used toner box.
Open the front cover.
1
Release the used waste toner box.
Press the waste toner box release button.
The waste toner box will fall forward as shown at left. Wait until
the box comes to a stop.
2
Keep the replacement cleaner that has not been used.
Store it at the top of the waste toner box.
Remove the waste toner box.
3
Hold the box by both hands and lift it up slowly.
If the waste toner box falls too far forward, it will not be possible
to remove it. (Remove the box when it is at an angle of about
30 degrees.)
63
Downloaded From ManualsPrinter.com Manuals
Place the box on a flat surface.
Place a sheet of newspaper on the surface before placing the
box.
4
Do not point the holes down as used toner will spill out.
Remove the seals around the holes.
Grasp the edge of each seal and pull it out toward you.
5
There are 5 seals. Remove all of the seals.
Plug the holes.
Grasp the edge of each black seal and insert it into a hole in the
box to plug the hole.
6
• There are 5 seals. Plug all of the holes.
• Do not discard the waste toner box. Place it in a plastic bag and keep it until your service technician comes to
perform maintenance. Your service technician will collect the waste toner box.
Install the new waste toner box.
7
Insert the box from above at a slant. (The direction opposite to
when you removed it.)
64
Downloaded From ManualsPrinter.com Manuals
Push the waste toner box into the
machine.
Push the box in until it clicks into place.
8
Close the front cover.
9
Caution
• Do not throw a waste toner box into a fire. Toner may fly and cause burns.
• Store waste toner box out of the reach of small children.
When replacing the waste toner box, be aware that it may soil your clothes or the place where you remove it.
65
Downloaded From ManualsPrinter.com Manuals
6
ENTERING TEXT
This chapter explains the text entry screen.
FUNCTIONS OF THE MAIN KEYS
Key
Description
This changes the text entry screen from the lower case screen to the upper case screen. The upper case screen will
continue to appear until the [Caps] key is touched again so that it is no longer highlighted. The [Caps] key is
convenient when you wish to enter all capital letters. (This key will vary depending on your country or region.)
Caps
This key temporarily changes the keys in the text entry screen to upper case when lower case letters
appear, or to lower case when upper case letters appear.
Touch a letter key after touching the [Shift] key to enter that letter. After the letter is entered, the [Shift]
key will no longer be highlighted and the original text entry screen will appear.
The [Shift] key is convenient when you only need to enter one upper case letter or one lower case letter,
or when you need to enter one of the symbols assigned to the numeric keys.
To cancel selection of the [Shift] key, touch the [Shift] key again. The [Shift] key will no longer be
highlighted. (This key will vary depending on your country or region.)
Shift
Touch this key to enter a line break when entering the body text of an e-mail message. (This key will
vary depending on your country or region.)
Enter
Touch this key to delete the characters to the left of the cursor one character at a time.
Mode
Touch this key to change the entry mode.
When this key is touched, the [Characters] key, [Symbols] key, and [Other Language] key appear. Touch
one of the keys to select a different entry mode.
☞ "CHANGING THE ENTRY MODE" (page 67)
Space
Touch this key to enter a space between letters.
AltGr
This temporarily changes the entry screen to the accented letter and symbol entry screen. Touch a letter
key after touching the [AltGr] key to enter that letter. After the letter is entered, the [AltGr] key will no
longer be highlighted and the original text entry screen will appear.
To cancel selection of the [AltGr] key, touch the [AltGr] key again. The [AltGr] key will no longer be highlighted.
These keys move the cursor left and right.
These keys move the cursor to the line above or below the current line during entry of the body text of an
e-mail message.
Cancel
OK
Touch this key to return to the previous setting screen without entering text.
Touch this key to enter the text that currently appears and return to the previous setting screen.
• Some keys described above may not appear in certain key layouts or in the keyboards of certain countries or regions.
• " " in the text entry screen indicates how many characters can be entered. A number of characters greater than " " cannot be entered.
• On some keyboards that show the English alphabet, the [AltGr] screen continues to appear until the [AltGr] key is touched
to remove the highlighting.
• The ABC/abc key is only displayed in limited countries and regions. The ABC/abc key is a shortcut key to switch the
keyboard between the language of your region and English.
66
Downloaded From ManualsPrinter.com Manuals
CHANGING THE ENTRY MODE
Touch the [Mode] key to temporarily change the key layout of the keyboard to a different language. Select the desired
key layout from the following keys.
[Characters] key
Touch this key to select character entry mode.
[Symbols] key
Touch this key to select symbol entry mode. Symbol mode is used to enter symbols and accented letters.
[Other Language] key
Touch this key to temporarily change the key layout of character entry mode to a different language. Select the key
layout that you wish to use.
• The key layouts that can be selected vary depending on your country or region.
• The key layouts that can be selected vary depending on the language selected in "Display Language Setting" in the
system settings (administrator).
ENTERING TEXT FROM AN EXTERNAL KEYBOARD
An external keyboard can only be used as a alternative for the text entry screen that appears in the machine's touch
panel.
The layout of the keys in the text entry screen in the touch panel differs slightly from the layout of the keys on the
external keyboard.
Use a SHARP-recommended external keyboard.
For the recommended keyboards, please contact your dealer or nearest authorised service representative.
67
Downloaded From ManualsPrinter.com Manuals
User's Guide
MODEL: MX-2300G
MX-2300N
MX-2700G
MX-2700N
MX-3500N
MX-3501N
MX-4500N
MX-4501N
MX4500-EX-USR-Z1
Downloaded From ManualsPrinter.com Manuals