1
Park Avenue
@
The 1995 Buick Park Avenue Owner's Manual
Seats and Restraint Systems .............................................................
This section tells you how t o use your seats and safety belts properly. It also explains "SRS" system.
FeaturesandControls ..................................................................
This section explains how t o start and operate your Buick.
Comfort Controls and Audio Systems .....................................................
This section tells you how t o adjust the ventilation and comfort controls and how to operate your
sound system.
YourDrivingandtheRoad ..............................................................
Here ycyu'll find helpful information and tips about the road and hc.)w to drive under different conditions.
..............................
Problems on the Road ....................................
This section tells you what t o do if you have a problem while d riving, such as a f'1at tire or
overheated engine, etc.
Service and Appearance Care............................................................
Here the manual tells you how to keep your- Buick running properly and looking good.
Maintenanceschedule ..................................................................
This section tells ~ O L Iwhen t o perform vehicle maintenance and what fluids and lubricants t o L W .
Customer Assistance Information ........................................................
This section tells you how to contact Buick for-assistance and how t o get service publications. It also
gives you information on "Reporting Safety Defects" on page 8-4.
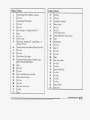
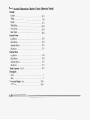
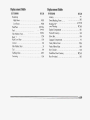
Index ................................................................................
Here's an alphabetical listing of almost every subject i n this mtnual. You can use it t o quickly find
something you want t o reqd&.
1-1
2-1
3- 1
4- 1
5- 1
6- 1
7- 1
8-1
9- 1
i
We support voluntary
technician certification.
GENERAL MOTORS, GM and the GM Emblem,
BUICK, and the BUICK Emblem are registered
tradernarks of General Motors Corporation.
WE SUPPORT
VOLUNTARY TECHNICIAN
CERTIFICATION THROUGH
Nallonal lnstllule for
AUTOMOTIVE
SERVICE
EXCELLENCE
This manual includes the latest informition a t the time it
was printed. We reserve the right to make changes in the
product after that time without further notice. For
vehicles first sold i n Canada, substitute the name
“General Motors of Canada Limited” for Buick Motor
Division whenever it appears i n this manual.
For Canadian Owners Who Prefer a
French Language Manual:
Please keep this manual in your Buick, so it will be there
if you ever need it when you’re on the road. If you sell
the vehicle, please leave this manual i n it so the new
owner can use it.
Aux propriktaires canadiens: Vous pouvez vous procurer
un exemplaire de ce guide en franpis chez votre
concessionaire OLI a11 DGN Marketing Services Ltd.,
1500 Ronhill Rd.. Mississauga, Ontario LST 1C7.
Litho i n U.S.A.
Part No. 2562060SB First Edition
ii
0
Copyright General Motors Corporation 1994
All Rights Reserved
P
iii
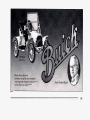
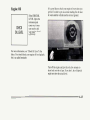
“valve-in-head” engine, a light, powerful and reliable
engine which would eventually influence the entire
automotive industry.
William C. Durant was instrumental in promoting
Buicks across the country using his Durant-Dort
Carriage Co. outlets and salespeople a s the nucleus of a
giant distribution system. He knew the Buick as a
“self-seller.” If automobiles could be this good, he
thought, maybe it was time to switch from the horse and
buggy business to automobiles.
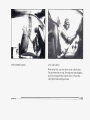
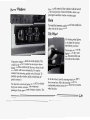
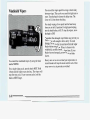
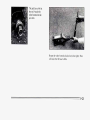
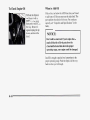
Walter Mcxrr and Tlmnzus Buick
Buick’s chief engineer, Walter L. Marr (left), and
Thomas D. Buick,son of founder David Dunbar Buick,
drove the first Flint Buick in a successful Flint-Detroit
round trip in July 1904.
David Buick was building gasoline enginesby 1899,
and Marr, his engineer, apparently built the first autoto
be called a Buick in 1900. However, Buick traditionally
dates its beginnings to 1903. That was the year the
company was reorganized, refinanced and moved from
Detroit to Flint. Buick has always been a product
innovator. Buick engineers developed the
iv
At the I905 New York
Auto Show, Durant took
orders for 1,000 Buicks
before the company had
built 40. On Buick’s
success, Durant created a
holding company,
September 16, 1908. He
called it General Motors.
Durant also created aracing team that won 500 racing
trophies in 1909 and 1910, including successes at
Indianapolis two years beforethe Indy 500 began.
The success of Buick engines was visible not only on
the race track, but in endurance tests across the country
and around the world. Buick was the only car to
complete a I ,000-mile Chicago-to-New York race in
1906. And a Buick was the first car totravel across
South America, driven from Buenos Aires, Argentina,
over the Andes to Santiago, Chilein 1914.
I
Buick drew plenty of attention because it could climb
hills and run through mud like no other car. Buick’s
endurance and reliability were world famous.
During World War I, Buick built Liberty aircraft engines
as well as Red Cross ambulances so successfully that
one Buick ambulance was awarded the Croix de Guerre
by the French government.
As a builder of premier automobiles, Buick was hard hit
by the Great Depression.However, new General
Manager Harlow H. Curtice created popular new models
including the Special and the Roadmaster. Buick sales
soon flourished.
1.911Model 21 Touring Car 0 1 1 Buick’s Test Hill
First Buick Factory
V
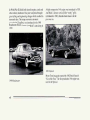
In World Wdr 11, Buick built aircraft engines, tanks and
other military hardware. This post-war period brought
great styling and engineering changes which resulted in
increased sales. The torque converter automatic
transmission, Dynaflow, was introduced in the 1948
Roadmaster. Buick’s famous “portholes” came along in
1949.
A high-compression V-8 engine was introduced in 1953.
And Buick’s Famous vertical pillar “toothy” grille,
(introduced in 1942), became more massive in the
post-war era.
1953 Skylark
I949 Roadmaster
vi
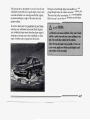
Motor Trend magazine named the 1962 Buick Special
“Car of the Year.” The first production V-6 engine was
used in the Special.
I962 Buick Special
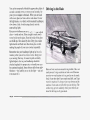
Built inside the walls of the old buildings in Buick’s
former Flint complex, which formed the cornerstone of
General Motors, Buick City is a state-of-the-art
assembly facility with more than 200 robots and other
high-tech equipment. It was completed in the fall of
1985.
Buicks are, and will continue to be, premium American
motorcars with smooth power, high performance, rich
detail and comfortable accommodation.
“Buick will provide Premium American Motorcars
backed with services that exceed our customers?
expectations, throughout the purchase, ownership,
service and repurchase experience.“
Buicks are SUBSTANTIAL.
Buicks are DISTINCTIVE.
Buicks are POWERFUL.
Buicks are MATURE.
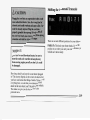
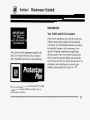
How to Usethis Manual
Many people read their owner’s manual from beginning
to end when they first receive their new vehicle. This
will help you learn about the featuresand controls for
your vehicle. In this manual, you’ll find that pictures
and words work together to explain things quickly.
Index
A good place to look for what you need is the Index in
the back of the manual. It’s an alphabetical list of all
that’s in the manual, and the page number where you’ll
find it.
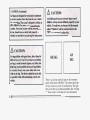
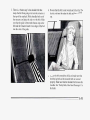
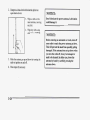
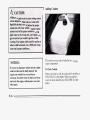
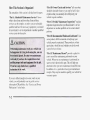
Safety Warnings and Symbols
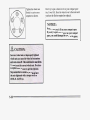
You will find a number of safety cautions in this book.
We use a box with gray background and the word
CAUTION to tell you about things that could hurt you if
you were to ignore the warning.
viii
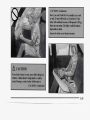
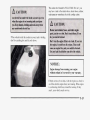
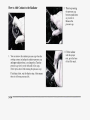
In the gray caution area, we tell you whatthe hazard is.
Then we tell you what to do to helpavoid or reducethe
hazard. Please read these cautions. If you don’t, you or
others could be hurt.
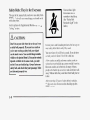
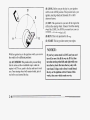
You will also find a circle
with a slash through it in
this book.
This safety symbol means
“Don’t,” “Don’t do this,’’ or
“Don’t let this happen.”
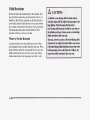
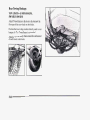
Vehicle Damage Warnings
Also, in this book you will find these notices:
NOTICE:
These mean there is something that
could damage your vehicle.
In the notice area, we tell you about something that can
damage your vehicle. Many times, this damage would
not be covered by your warranty, and it couldbe costly.
But the notice will tell you what to do to help avoid the
damage.
When you read other manuals, you might see
CAUTION and NOTICE warnings in different colors or
in different words.
You’ll also see warning labels on your vehicle. They use
yellow for cautions,blue for notices and the words
CAUTION or NOTICE.
ix
-
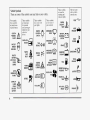
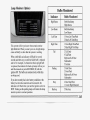
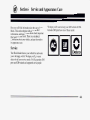
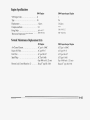
Vehicle Symbols
These are some of the symbols you may find on your vehicle.
For example,
these symbols
are used on an
original battery:
CAUTION
POSSIBLE
INJURY
A
Thesc symbols
are 011 some o f
your controls:
These symbols
are important
for you and
your passengers
whenever your
vehicle is
driven:
45
PROTECT
EYES BY
SHIELDING
FASTEN
CAUSTIC
BATTERY
ACID COULD
CAUSE
BURNS
X
TURN
SIGNALS
e9
WINDOW
DEFOGGER
-F-
RADIATOR
COOLANT
RADIO
VOLUME
(a)
a
,111,
FOG LAMPS
-0
=
$0
ak
33
CONDITIONING
AIR
FUEL
ENGINE OIL
PRESSURE W
LAMPSoR
BEAM
HIGH
FUSE
1 ’1
BRAKE
WINDSHIELD
DEFROSTER
SEAT
e5
BATTERY
CHARGING
SYSTEM
BELTS
AVOID
SPARKS OR
FLAMES
SPARK OR
FLAME
COULD
EXPLODE
BATTERY
&
.
ENGINE
COOLANT
TEMP
WINDSHIELD
WIPER
DOOR LOCK
Here are some
other symbols
you may see:
These symbols
are used on
warning and
indicator lights:
VENTILATING
FAN
TEMP b& OIL
ANTI-LOCK
BRAKE
b
LIGHTER
HORN
)tT
(a) b
SPEAKER
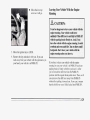
Section 1 Seats and Restraint Systems
Here you’ll find information about the seatsin your
Buick and how to use your safety belts properly. You
can also learn about some things you should not do with
air bags and safety belts.
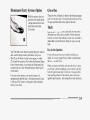
Manual Seat
Seats and Seat Controls
This part tells you about the seats -- how to adjust them,
and also about memory seats, reclining seatbacks and
head restraints.
Move the lever under the front seat to unlock it. Slide
the seat to where you want it. Then release the lever and
try to move the seat with your body, to make sure the
seat is locked into place.
1-1
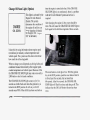
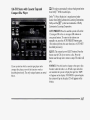
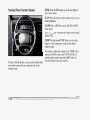
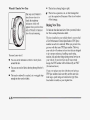
Power Seat
Controls
Center
(C): Move the seat forward by
or back
holding the control to the front or back. Raise the seat
by holding the control to the left. Hold the control to the
right to lower the seat.
Rear Tilt Control (R):Raise the rear of the seat by
holding the switch to the left. Holding the switch to the
right lowers the rear of the seat.
Front Tilt Control (F):Raise the front of the seat by
pushing on the left side of the switch. Push on the right
side of the switch to lower the front of the seat.
1-2
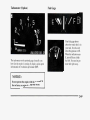
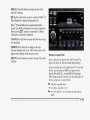
Memory Seat andMirrors (Option)
If your Ruick has this option, the control on the driver’s
door armrest looks like this:
3. Press one of the two MEMORY buttons within five
seconds. You will hear two beeps to confirm that the
mirror and seat positions are entered in memory.
Now it’s set. When your Buick is in PARK (P) with the
ignition ON, push the MEMORY button you just stored
and the seat and mirrors will go to where you’ve just set
them. With the ignition OFF, the system will work in
any shift lever position.
To do the same thing for a second driver, follow the
steps above but use the other MEMORY button.
If you hit the wrong MEMORY setting, orif there is a
third driver, the seat adjuster will still work, so you can
adjust the seat to where you want it.
You can use this when you’wantto save a seat and
mirror ad-justment.
Here’s how to make it work:
The EXITbutton allows you to get out of the car more
easily. Push it while you’re in PARK (P) with the
ignition ON, or anytime with the ignition OFF, to make
the seat go all the way down and back. You will hear a
beep when the EXIT button is pushed.
I . Adjust the driver’s seat, including the recliner, to a
comfortable position. Adjust both outside mirrors to
suit you. See “Outside Mirrors’’ in the Index.
2. Press the SET button. You will hear one beep.
1-3
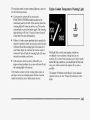
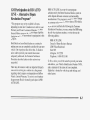
Remote Keyless Entry Personalization
Feature (Option)
To program the system:
1. Adjust the driver’s seat, including the recliner, to a
comfortable position. Adjust both outside mirrors to
suit you. See “Outside Mirron” in the Index.
2. Press the SET button on the driver’s door armrest.
You will hear one beep.
3. Press one of the two MEMORY buttons on the
armrest within five seconds.You will hear two beeps
to confirm that the mirror and seat positions are
entered in memory.
4. Press the UNLOCK button on the appropriate fob
within five seconds. You will hear two beeps.
The second key fob can be programmed to record a
different seat and mirror position by following the same
steps.
If your Park Avenue is equipped with this personalization
feature, each key fob can be programmed to move the
driver’s seat andoutside mirrors to a set memory position
when the key fob’s UNLOCK button is pressed.
1-4
Tf you prefer to program the EXIT seat position on one
of the key fobs, follow these steps:
1. Press the SET button. You will hear one beep.
2. Press the EXIT button on the armrest. The EXIT seat
position is pre-set to go completely down and back.
You will hear one beep, but the seat will not move at
this time.
3. Press the UNLOCK button on the appropriate fob
within five seconds. You will hear two beeps.
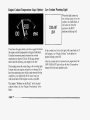
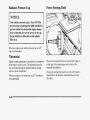
Reclining Front Seatbacks
To adjust the seatback, lift
the lever on the outer side
of the seat. Release the lever
to lock the seatback where
you want it. Pull up on the
lever and the seat will go to
its upright position.
This personalization featurewill work only when the
vehicle is in the PARK (P) position. A beep will sound
inside the vehicle when the UNLOCK button on the fob
is pressed to move the seat and mirrors.
To turn off this feature, press SET, then UNLOCK
within 5 seconds.
If you have the power
recline option, it works with
the switch on the side of the
seat. Push it back to recline
the seat, push it forward to
return the seatback to the up
position.
A CAUTION:
But don’t have a seatback reclined if your vehicle is
moving.
1-6
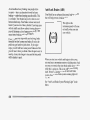
Heated Seats (Option)
Push the switch closest tothe front of the driver’s seat
forward and the driver’s seat will start to warm up.
Push the switch closest tothe front of the front
passenger’s seat forward and the front passenger seat
will begin to warm up.
The light on top of the switch will turn orange for low or
red for high. Push the switch rearward to stop the seat
from warming.
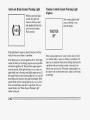
Head Restraints
Slide the head restraint up or down so that the top of the
restraint is closest to the top of your ears. This position
reduces the chance of a neck injury in a crash.
If your vehicle has this option, the controls are located
to the side of the driver and front passenger seats.
1-7
Safety Belts: They’re for Everyone
This part of the rnarlual tells you how to use safety belts
properly. It also tells you some things you should not d o
with safety belts.
And it explains the Supplemental Restraint System, o r
“air bag” system.
Your car has a light
that comes on as a
reminder to buckle up.
(See “Safety Belt
Reminder Light” in the
Index.)
A CAUTION:
Don’t let anyoneride where heor she can’t wear
a safety belt properly.If you are in a crash and
you’re not wearinga safety belt,your injuries
can be much worse.You can hitthings insidethe
vehicle or be ejected from it. You can be seriously
injured orkilled. In the same crash, you might
not beif you are buckled up.Always fasten your
safety belt,and check that your passengers’ belts
are fastened properly too.
In many states and Canadian provinces, the law says to
wear safety belts. Here’s why: They work.
You never know if you’ll be in a crash. If you do have
a crash, you don’t know if it will be a bad one.
A few crashes are mild, and some crashes can be so
serious that even buckled up a person wouldn’t survive.
But most crashes are in between. In many of them,
people who buckle up can survive and sometimes walk
away. Without belts they could have been badly hurt or
killed.
After more than 25 years of safety belts in vehicles,
the hcts are clear. In most crashes buckling up does
matter ... a lot!
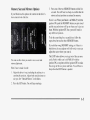
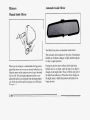
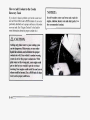
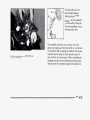
Why Safety Belts Work
When you ride in or on anything, you go as fast as it
goes.
e
I
I
Put someone on it.
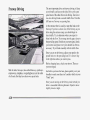
Take the simplest vehicle. Suppose it’s just a seat on
wheels.
1-9
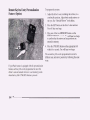
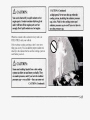
f
I
Get it up to speed. Then stop the vehicle. The rider
doesn't stop.
1-10
The person keeps going until stopped by something.
In a real vehicle, i t could b.e the windshield ...
or the instrument panel
or the safety belts!
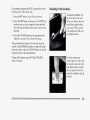
With safety belts, you slow down as the vehicle does.
You get more time to stop. You stop over more distance,
and your strongest bones take the forces. That’s why
safety belts make such good sense.
1-11
Here Are QuestionsMany People Ask
About Safety Belts -- and the Answers
Q: Won’t I be trapped in the vehicle after an
accident if I’m wearing a safety belt?
A:
You could be -- whether you’re wearing a safety
belt or not. But you can unbuckle a safety belt,
even if you’re upside down. And your chance of
being conscious during and after an accident, so
you can unbuckle and get out, is much greater if
you are belted.
Why don’t theyjust put in air bagsso people
won’t haveto wear safety belts?
A:
Air bags are in many vehicles today and will be in
more of them in the future. But they are
supplemental systems only; so they work with,
safety belts -- not instead of them. Every air bag
system ever offered for sale has required the use of
safety belts,.Even if you’re in a vehicle that has air
bags, you still have to buckle up to get the most
protection. That’s true not only in frontal collisions,
but especially in side and other collisions.
1-12
Q:
If I’m a good driver, andI never drive far from
home, why shouldI wear safety belts?
A:
You may be an excellent driver, but if you’re in an
accident -- even one that isn’t your fault -- you and
your passengers can be hurt. Being a good driver
doesn’t protect you from things beyond your
control, such as bad drivers.
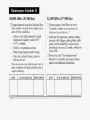
Most accidents occur within 25 miles (40 km) of
home. And the greatest number of serious injuries
and deaths occur at speeds of less than 40 mph
(65 km/h).
Safety belts are for everyone.
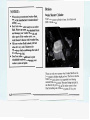
How to Wear Safety Belts Properly
Adults
This part is only for people of adult size.
Be aware that there are specialthings to know about
safety belts and children. And there are different rules
for smaller children and babies. If a child will be riding
in your Buick, see the part of this manual called
“Children.” Follow those rules for everyone’s
protection.
First, you’ll want to know which restraint systems your
vehicle has.
We‘ll start with the driver position.
Driver Position
This part describes the driver’s restraint system.
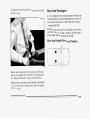
Lap-Shoulder Belt
The driver has a lap-shoulder belt. Here‘s how to wear it
properly.
1. Close and lock the door.
2. Adjust the seat (to see how, see “Seats” in the Index)
so you can sit up straight.
3. Pick up the latch plate and pull the belt across you.
Don’t let it get twisted.
4. Push the latch plate into the buckle until it clicks.
Pull up on the latch plate to make sure it is secure. If
the belt isn’t long enough, see “Safety Belt
Extender’’ at the end of this section.
Make sure the release button on the buckle is
positioned so you would be able to unbuckle the
safety belt quickly if you ever had to.
1-13
n
1
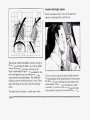
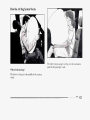
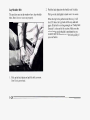
Shoulder Belt Height Adjuster
Before you begin to drive, move the shoulder belt
adjuster to the height that is right for you.
I
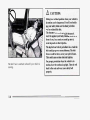
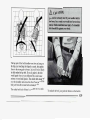
rhe lap part of the belt should be worn low and snug on
the hips, just touchingthe thighs. In a crash,this applies
force to the strong pelvic bones. And you’d be less
likely to slide under the lap belt. If you slid under it, the
belt would apply force at your abdomen. This could
cause serious or’evenfatal injuries. Theshoulder belt
should go overthe shoulder and across the chest. These
parts of the body are best able to takebelt restraining
forces.
The safety belt locks if there’s a sudden stop or crash.
1-14
To move it down, squeeze the release handle and move
the height adjuster to the desired position. You can move
the adjuster up just by pushing up on the bottom of the
release handle. After you move the adjuster to where
you want it, try to move it down without squeezing the
release handle to make sure it has locked into position.
Adjust the height so that the shoulder portion of the belt
is centered on your shoulder. The belt should be away
from your face and neck, but not falling off your
shoulder.
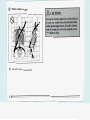
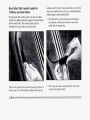
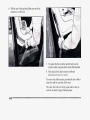
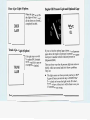
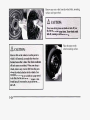
What’s wrong with this?
A:
The shoulder belt is too loose. It won’t give nearly
as much protection this way.
@
What’s wrong with this?
I
I
I
A:
I
I
I
I
I
I
I
The belt is buckled in the wrong place.
1-16
1
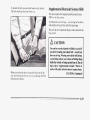
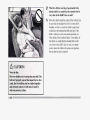
&:
What's wrong with this?
I
A:
I
I
I
I
I
The shoulder belt is worn under the arm. It should
be worn over the shoulder atall times.
1-17
What’s wrong with this?
A:
The belt is twisted across the body.
1-18
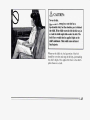
To unlatch the belt, just push the button on the buckle.
The belt should go back out of the way.
Supplemental Restraint System (SRS)
?‘his part explains the Supplemental Restraint System
(,SRS),or air bag system.
Your Buick has two air bags -- one air bag for the driver
and another airbag for the right front passenger.
Here are the most important things to know about the air
bag system:
A CAUTION:
You can be severelyinjured or killed ina crash if
you aren’t wearing your safety belt even if you
have an air bag. Wearingyour safety beltduring
a crash helps reduce your chance of hitting things
inside the vehicle or being ejectedfrom it. The air
bag is only a “supplemental restraint.” That is, it
works with safety belts
but doesn’t replace them.
CAUTION: (Continued)
--
Before you close the door, be sure the belt is out of the
way. If you slam the door on it, YOLIcan damage both the
belt and your vehicle.
AIRBAG
AIR
BAG
There is an air bag readiness light on the instrument
panel, which shows AIR BAG. The system checks the
air bag’s electrical system for malfunctions. The light
tells you if there is an electrical problem. See “Air Bag
Readiness Light” in the Index for more information.
1-20
How the Air Bag System Works
The right front passenger’s air bag is in the instrument
panel on the passenger’s side.
Where is the air bag?
The driver’s air bag is i n the middle of the steering
wheel.
1-21
In any particular crash, no one can say whether an air
bag should have inflated simply because of the damage
to a vehicle or because of what the repair costs were.
Inflation is determined by the angle of the impact and
the vehicle’s deceleration. Vehicle damage is only one
indication of this.
What makes an airbag inflate?
When should anair bag inflate?
The air bag is designed to inflate in moderate to severe
frontal or near-frontal crashes. The air bag will inflate
only if the impact speed is above the system’s designed
“threshold level.” If your vehicle goes straight into a
wall that doesn’t move or deform,the threshold level is
about 9 to 15 mph (14 to 24 km/h). The threshold level
can vary, however, with specific vehicle design, so that
it can be somewhat above or below this range. If your
vehicle strikes something that will move or deform, such
as a parked car, the threshold level will be higher. The
air bag is not designed to inflate in rollovers, side
impacts, or rear impacts, because inflation would not
help the occupant.
In a frontal or near-frontal impact of sufficient severity,
the air bag sensing system detects that the vehicle is
suddenly stopping as a result of a crash. The sensing
system triggers a chemical reaction of the sodium azide
sealed in the inflator. The reaction produces nitrogen
gas, which inflates the air bag. The inflator, air bag, and
related hardware are all part ofthe air bag modules
packed inside the steering wheel and in the instrument
panel in front of the right front passenger.
How does an airbag restrain?
In moderate to severe frontal 01- near-frontal collisions,
even belted occupants can contact the steering wheel or
the instrument panel. The air bag supplements the
protection provided by safety belts. Air bags distribute
the force of the impact more evenly over the occupant’s
upper body, stopping the occupant more gradually. But
air bags would not help you in many types of collisions,
including rollovers and rear and side impacts, primarily
because an occupant’s motion is not toward the air bag.
Air bags should never -beregarded as anythingmore
than a supplementto safety belts, andthen only in
moderate to severe frontal or near-frontal collisions.
What will you see after anair bag inflates?
After the airbag inflates, itquickly deflates. Thisoccurs
so quickly that some people may not even realize the air
bag inflated. Some componentsof the air bag module in
the steering wheel hub for the driver’s air bag, or the
instrument panel for the right front
passenger’s bag, will
be hot for a short time,
but the partof the bag that comes
into contactwith you will not be hot to thetouch. There
will be some smokeand dust coming from vents in the
deflated air bags. Air bag inflation willnot prevent the
driver from seeing or from
being able to steer the
vehicle, norwill it stop people from leaving the
vehicle.
0
The airbags are designed to inflate only once.
After
they inflate, you’ll need some new parts foryour air
bag system.If you don’t get them, the air bag system
won’t be there to help protectyou in another crash.
A new system will include airbag modules and
possibly other parts. The service
manual for your
vehicle covers theneed to replace other parts.
0
Your vehicle is equipped with a diagnosticmodule,
which records informationabout the air bag system.
The module records information about readiness
the
of the system,when the sensors are activatedand
driver’s safety belt usageat deployment.
1-23
0
Let only qualified technicians work on your air bag
system. Improper service can mean that your air bag
system won’t work properly. See your dealer for
service.
~
NOTICE:
If you damage the cover for thedriver’s or the
right front passenger’s air bag, they may not
work properly. You may haveto replace the air
bag module inthe steering wheel or both the air
bag moduleand the instrument panel for the
right frontpassenger’s air bag. Do not openor
break the air bag covers.
1-24
Servicing Your Air Bag-Equipped Buick
Air bags affect how your Buick should be serviced.
There are parts of the air bag system in several places
around your vehicle. You don’t want the system to
inflate while someone is working on your vehicle. Your
Buick dealer and the 1995 Park Avenue Service Manual
have information about servicing your vehicle and the
air bag system. To purchase a service manual, see
“Service and Owner Publications” in the Index.
The air bag system does not need regular maintenance.
Safety Belt Use During Pregnancy
Safety belts work for everyone, includingpregnant
women. Like all occupants, they are more likely to be
seriously injured if they don’t wear safety belts.
A pregnant woman should wear a lap-shoulder belt, and
the lap portion should be worn as low as possible
throughout the pregnancy.
The best way to protect the fetus isto protect the
mother. When a safety belt is worn properly, it’s more
likely that the fetus won’t be hurt in a crash. For
pregnant women, as for anyone,the key to making
safety belts effective is wearing them properly.
Right Front Passenger Position
The right front passenger’s safety belt works the same
way as the driver’s safety belt. See “Driver Position,”
earlier in this section.
When the lap portion of the belt is pulled out all the
way, it will lock. If it does, let itgo back all the way and
start again.
Be sure to use the correct bucklewhen buckling your
lap-shoulder belt. If you find that the latch plate will not
go fully into the buckle, seeif you are using the buckle
for the center passengerposition.
1-25
Center Passenger Position
Lap Belt
If your vehicle has a frontsplit seat and a rear bench
seat, someone can sit in the center positions.
When you sit in a center seatingposition, you have a lap
safety belt, which has no retractor. To make the belt
longer, tilt the latch plate and pull it along the belt.
1-26
h
I
1
Rear Seat Outside Passenger Positions
I
U
Buckle, position and release it the same way as the lap
part of a lap-shoulder belt. If the belt isn't long enough,
see "Safety Belt Extender" at the end of this section.
Make sure the release button on the buckle is positioned
so you would be able to unbuckle the safety belt quickly
if you ever had to.
1-27
Lap-Shoulder Belt
The positions next to the windows have lap-shoulder
belts. Here’s how to wear one properly.
1. Pick up the latch plate and pull the belt across you.
Don’t let it get twisted.
1-28
2. Push the latch plate into the buckle until it clicks.
Pull up on the latch plate to make sure it is secure.
When the lap belt is pulled out all the way, it will
lock. If it does, let it go back all the way and start
again. If the belt is not long enough, see “Safety Belt
Extender” at the end of this section. Make sure the
release button on the buckle is positioned so you
would be able tounbuckle the safety belt quickly if
you ever had to.
The lap part of the belt should be worn low and snug on
the hips,just touching the thighs.In a crash, this applies
force to the strong pelvic bones. And you’d be less likely
to slide under the lap belt. If you slid under it, the belt
would apply force at your abdomen. This could cause
serious or even fatal injuries. The shoulder belt shouldgo
over the shoulder and across the chest. These parts of the
body are best able to take belt restraining forces.
The safety belt locks if there’s a sudden stop or a crash.
..
To unlatch the belt, just push the button on the buckle.
1-29
Rear Safety BeltComfort Guides for
Children and Small Adults
Rear shoulder belt comfort guides will provide added
comfort for children who have outgrown child restraints
and for small adults. The comfort guides pull the
shoulder belts away from the neck and head.
There is one guide for each outside passenger position in
the rear seat. You will find them tucked in between the
1-30
seatback and the interior body, about half-way down the
edge of the seatback. Here is how you should install the
comfort guides on the shoulder belts:
1. Pull the elastic cord out from between the edge of
the seatback and the interior body to remove the
guide from its storage clip.
2. Slide the guide under and past the belt. The elastic
cord must beunder the belt.
3. There is a “button stop” on the shoulder belt that
keeps the belt from going too far intothe retractor at
the top of the seatback. Pull the shoulder belt out of
the retractor, and place the guide over thebelt. Make
sure that the guide is between the button stop on the
belt and the retractor. Insert the two edges of the belt
into the slotsof the guide.
4. Be sure that the belt is not twisted and it lies flat. The
elastic cord must be under the belt and the guide on
top.
5 . Buckle the belt around the chfId, and make sure that
both the lap belt and the shoulderbelt are secured
properly. Make sure thatthe shoulder belt crosses the
shoulder. See “Safety Belts, Rear Seat Passengers” in
the Index.
1-31
To remove and store the comfort guides, justperform
these steps in reverse order. Squeeze the belt edges
together s o that you can take them out fro111 the guides.
Pull the guide upward to expose its storage clip, and
then slide the guide onto the clip. Rotate the guide and
clip inward and in between the seatback and the interior
body, leaving only the loop of elastic cord exposed.
Children
Everyone in a vehicle needs protection! That includes
infants and all children smaller than adult size. In fact,
the law in every state in the United States and in every
Canadian province says children up to some age must be
restrained while in a vehicle.
1-32
Smaller Children and Babies
1-33
Child Restraints
Be sure to followthe instructions for the restraint. You
may find these instructions on the restraint itself or in a
booklet, or both. These restraints use the belt system in
your vehicle, but the child also has to be secured within
the restraint to help reduce the chance of personal injury.
The instructions that come with the infant or child
restraint will show you how to do that.
Where to Put the Restraint
Accident statistics show that children are safer if they
are restrained in the rear rather than the front seat. We at
General Motors therefore recommend that you put your
child restraint in the rear seat. Never put a rear-facing
child restraint in the front passenger seat. Here’s why:
1-34
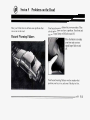
Top Strap
Wherever you install it, be sure to secure the child
restraint properly.
Keep in mind that an unsecured child restraint can move
around in a collision or sudden stop and injure people in
the vehicle. Be sure to properly secure any child
restraint in your vehicle -- even when no child is in it.
,
If your child restraint has a top strap, it should be
anchored.
1-35
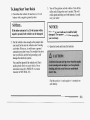
If you need to have an anchor installed, you can ask
your Buick dealer to put it in for you. If you want to
install an anchor yourself, your dealer can tell you how
to do it.
Securing a Child Restraint ina Rear
Outside Seat Position
For cars firstsold in Canada, child restraints with a top
strap must be anchored according toCanadian Law.
Your dealer can obtain the hardware kit and install it for
you, or you may install it yourself using the instructions
provided in the kit.
Use the tether hardware kit available from the dealer.
The hardware and installation instructions were
specifically designed for thisvehicle.
You’ll be using the lap-shoulder belt. See the earlier part
about the top strap if the child restraint has one.
1. Put the restraint on the seat. Follow the instructions
for the child restraint.
2. Secure the child in the child restraint as the
instructions say.
3. Pick up the latch plate, and run the lap and shoulder
portions of the vehicle’s safety belt through or
around the restraint. The child restraint instructions
will show you how.
If the shoulder belt goes in front of the child’s face or
neck, put it behind the child restraint.
1-36
4. Buckle the belt. Make sure the release button
is
positioned so you would be able to unbuckle the
safety belt quickly if you ever had to.
5. Pull the rest of the lap belt all the way out of the
retractor to set the lock.
1-37
6. To tighten the belt, feed the lap belt into the retractor
while you push down on the child restraint.
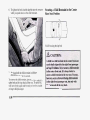
Securing a Child Restraint in the Center
Rear Seat Position
U
You’ll be using the lap belt.
7. Push and pull the child restraint in different
directions to be sure it is secure.
To remove the child restraint, just unbuckle the vehicle’s
safety belt and let it go back all the way. The safety belt
will move freely again and be ready to work for an adult
or larger child passenger.
1-38
See the earlier part about the top strap if the child
restraint has one.
1. Make the belt as long as possible by tilting the latch
plate and pulling it along the belt.
2. Put the restraint on the seat. Follow the instructions
for thechild restraint.
3. Secure the child in the child restraint as the
instructions say.
4. Run the vehicle’s safety belt through or around the
restraint. The child restraint instructions will show
you how.
5. Buckle the belt. Make sure the release button is
positioned so you would be able to unbuckle the
safety belt quickly if you ever had to.
6. To tighten the belt, pull its free end while you push
down on the child restraint.
1-39
7. Push and pull the child restraint in different
directions to be sure it is secure. If the child restraint
isn’t secure, turn the latch plate over and buckle it
again. Then see if it is secure. If it isn’t, secure the
restraint in a different place in the vehicle and
contact the child restraint maker for their advice
about how to attach the child restraint properly.
To remove the child restraint, just unbuckle the vehicle’s
safety belt. It will be ready to work for an adult or larger
child passenger.
Securing a Child Restraint in the Right
Front Seat Position
u
Your vehicle has a right front passenger airbag. Never
put a rear-facing child restraint in this seat. Here’s why:
1-40
You’ll be using the lap-shoulder belt. See the earlier part
about the top strap if the child restraint has one.
1. Because your vehicle has a right front passenger air
bag, always move the seat as far back as it will go
before securing a forward-facing child restraint. (See
“Seats” in the Index.)
2. Put the restraint on the seat. Follow the instructions
for the child restraint.
3. Secure the child in the child restraint as the
instructions say.
4. Pick up the latch plate, and run the lap and shoulder
portions of the vehicle’s safety belt through or
around the restraint. The child restraint instructions
will show you how.
If the shoulder belt goes in front of the child’s face or
neck, put it behind the child restraint.
5. Buckle the belt.
Make sure the release button is positioned so you
would be able to unbuckle the safety belt quickly if
you ever had to.
1-41
6. Pull the rest of the lap belt all the way out of the
retractor to set the lock.
7. To tighten the belt, feed the lap belt back into the
retractor while you push down on the child restraint.
8. Push and pull the child restraint in different
directions to be sure it is secure.
To remove the child restraint, just unbuckle the vehicle’s
safety belt and let it go back all the way.
The safety belt will move freely again and be ready to
work for an adult or larger child passenger.
1-42
Larger Children
Accident statistics show that children are safer if they
are restrained in the rear seat. But they need to use the
safety belts properly.
Children who aren’t buckled up can be thrown out in
a crash.
Children who aren’t buckled up can strike other
people who are.
Children who have outgrown child restraints should
wear the vehicle’s safety belts.
If you have the choice, a child should sit next to a
window so the child can wear a lap-shoulder belt and
get the additional restraint a shoulder beltcan provide.
1-43
Q.’ What if a child is wearing a lap-shoulder belt,
but the child isso small that the shoulder beltis
very close to the child’s face
or neck?
A:
1-44
Move the child toward the center of the vehicle, but
be sure that the shoulder belt still is on the child’s
shoulder, so that in a crash the child’s upper body
would have the restraint that belts provide. Tf the
child is sitting in a rear seat outside position, see
“Rear Safety Belt Comfort Guides” in the Index. If
the child is so small that the shoulder belt is still
very close to the child’s face or neck, you might
want to place the child in the center seat position,
the one that has only a lap belt.
Wherever the child sits, the lap portion of the belt
should be worn low and snug on the hips, just touching
the child’s thighs. This applies belt force to the child’s
pelvic bones in a crash.
1-45
Safety Belt Extender
If the vehicle’s safety belt will fasten around you, you
should use it.
But if a safety belt isn’t longenough to fasten,your
dealer will order you an extender. It’s free. When you go
in to order it, take the heaviest coatyou will wear, so the
extender will be long enough for you. The extenderwill
be just foryou, and just forthe seat in your vehicle that
you choose. Don’t let someone else use it, and use it
only for the seat it is made to fit. To wear it, justattach it
to the regular safety belt.
Checking Your Restraint Systems
Now and then, make sure all your belts, buckles, latch
plates, retractors, anchorages and reminder systems are
working properly. Look for any other loose ordamaged
restraint system parts. If you see anything that might
keep a restraint system from doing its job,have it
repaired.
Torn or frayedbelts may not protect you in a crash.
They can rip apart under impact forces. If a belt is torn
or frayed,get a new one right away.
1-46
Replacing Seat and Restraint System
Parts After a Crash
If you’ve had a crash, do you need new belts?
After a very minor collision, nothing may be necessary.
But if the belts were stretched, as they would be if worn
during a more severe crash,then you need new belts.
If belts are cut or damaged, replace them. Collision
damage also may mean you will need to have safety belt
or seat parts repaired or replaced. New parts and repairs
may be necessary even if the belt wasn’t being used at
the time of the collision.
If your seat adjuster won’t work after a crash, the special
part of the safety belt that goes through the seat to the
adjuster may need to be replaced.
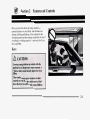
Section 2 FeaturesandControls
Here you can learn about the many standard and
optional features o n your Buick, and information on
starting, shifting and braking. Also explained are the
instrument panel and the warning systemsthat tell you if
everything is working properly -- and what to do if you
have a problem.
Keys
2-1
The ignition keys are for the
ignition only.
a:’
When a new Park Avenue is delivered, the dealer
removes the plugs from the keys, and gives them to the
first owner. However, if the ignition key does not have a
plug, there may be a bar-coded key tag instead.
Each plug has a code on it that tells your dealer or a
qualified locksmith how to make extra keys. Keep the
plugs in a safe place. If you lose your keys, you’ll be
able to have new ones made easily using these plugs. If
your ignition keys don’t have plugs, go to your Buick
dealer for the correct key code if you need a new
ignition key.
B
The door keys are forthe
doars and all other locks.
NOTICE:
Your Buick has a numberof new features that
can help prevent theft. But you can have a lot of
trouble getting into your vehicle if you ever lock
your keys inside.You may even haveto damage
So be sure you have extra
your vehicle to get in.
keys.
Key Reminder Warning
If you leave your keys in the ignition, you will hear a
warning chime when you turn off the ignition and open
the driver’s door.
Door Locks
There are several ways to
lock and unlock your
vehicle:
From the outside, useyour
door key.
If your vehicle has a theft-deterrent system and it is
activated, unlock the doors only with the key or Remote
Keyless Entry System. This will avoid setting off the
alarm.
2-3
To lock the door from the
inside, move the lock
control on the door down.
To unlock the door, move
the lock control on the
door up.
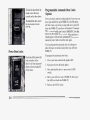
Power Door Locks
Push one of the power door
lock switches on the
driver’s or frontpassenger’s
doors to lock or unlock all
of the doors.
Programmable AutomaticDoor Locks
(Option)
Close your doors and turn on the ignition. Every time you
move your shiftlever out of PARK (P), all of the doors
will lock. And, every time you stop and move your shift
lever into PARK (P), your doors will unlock. If someone
needs to get out while you’re not in PARK (P), have that
person use the manualor power lock. When the door is
closed again, it will not lock automatically. Just use the
manual or power lock to lock the door again.
You can program the automatic door lock feature to
allow the doors toremain locked after you shift into
PARK (P).
To program the automatic door locks:
1. Close your doors and turn the ignition ON.
2 . Keep your foot on the brake pedal.
3. Press and hold the driver’s power door LOCK
switch.
4. Move your shift lever out of PARK (P), then move
the shift lever back into PARK (P).
5. Release the LOCK switch.
2-4
Your doors will now lock when you shift out of
PARK (Pj, and remain locked until you use the
manual or power door unlock switch.
The rear doors of your vehicle cannot be opened from
inside when this feature is in use. If you want to open a
rear door when the security lock is on:
To reprogram the door locks to unlock and lock when
you shift in and out of PARK (PI do the following:
I . Unlock the door from the inside.
1. Close your doors and turn the ignition ON.
2. Keep your foot on the brake pedal.
3. Press and hold the driver’s power door UNLOCK
switch.
4. Move the shift lever out of PARK (P), then move the
shift lever back into PARK (P).
2. Then open the door from the outside.
If you don’t cancel the security lock feature, adults or
older childrenwho ride in the rear won’t be able to open
the rear door from the inside. You should let adults and
older children know how these security locks work, and
how to cancel the locks.
To cancel the rear door security lock:
5 . Release the UNLOCK switch.
CHILD
Rear Door Security Locks
Your Buick is equipped with rear door security locks
that help prevent passengers from opening the rear doors
of your car from the inside. To use one of these locks:
1. Open one of the rear doors.
SEClJRlTY
LOCK
SET LEVER
O N BOTH
REAP DOORS
1. Unlock the door from
the inside and open the
door from the outside.
2. Move the lever all the
way down.
3. Do the same for the
other rear door.
2. Move the lever on the door all the way up to the
ENGAGED position.
3. Close the door.
4. Do the same thing to the other rear door lock.
The rear door locks will now work normally.
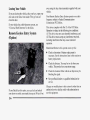
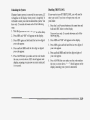
Leaving Your Vehicle
If you are leaving the vehicle, take your keys, open your
door and set the locks from inside. Then get out and
close thedoor.
If your vehicle has a theft-deterrent system, see
“Universal Theft Deterrent” in the Index.
Remote Keyless Entry System
(Option)
away using the key chain transmitter supplied with your
vehicle.
Your Remote Keyless Entry System operates on a radio
frequency subject to Federal Communications
Commission (FCC) Rules.
This devicecomplies with Part 15 of the FCC Rules.
Operation is subject to the following two conditions:
(1) This devicemay not cause harmful interference, and
(2) This devicemust accept any interference received,
including interference that may cause undesired
operation.
Should interference to this system occur, try this:
If your Buick has this option, you can lock and unlock
your doors or unlock your trunk from up to 30 feet (9 m)
2-6
0
Check to determine if battery replacement is
necessary. See the instructions later in this section on
battery replacement.
0
Check the distance. You may be too far from y6uf
vehicle. This product has a maximum range.
0
Check the location. Other vehicles or objects may be
blocking the signal.
0
See your Buick dealer or a qualified technician for
service.
Changes or modifications to this system by other thanan
authorized service facility could void authorization to
use this equipment-
Operation
Matching Transmitter(s)To Your Vehicle
The driver’s doorwill unlock automatically when
UNLOCK is pressed. If quickly pressed again, all doors
will unlock. All doors will lock when LOCK is pressed.
The trunk will unlock when the opened trunk symbol is
pressed, but only when the ignition is OFF.
Each key chain transmitter is coded to prevent another
transmitter from unlocking your vehicle. If a transmitter
is lost or stolen, areplacement can be purchased through
your dealer. Remember to bring any remaining
transmitters with you when you go to your dealer. When
the dealer matches the replacement transmitter to your
vehicle, the remaining transmitters must also be
matched. Once the new transmitter is coded, the lost
transmitter will not unlock your vehicle.
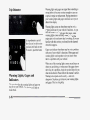
Personalization Feature (Option)
If your vehicle is equipped with this option,each key
fob can be programmed to move the driver’s seat and
outside mirrors to a set memory position. For directions
on how to program and use this system, see
“Personalization Feature” in the Index.
Illuminated Entry System
If your Buick also has this option, the key tag will make
it work. Touch any button on the key chain transmitter
to light up the door locks and the inside of your car. The
lamps will stay on for 15 to 30 seconds.
Theft-Deterrent System
You can match a transmitter to as many different
vehicles as you own, provided they are equipped with
exactly the snnle model system. (General Motors offers
several different models of these systems on their
vehicles.) Each vehicle can have only two transmitters
matched to it.
To match a transmitter, use the following instructions.
1. Have both transmitters that will be matched to the
car present, even if only one is new. Remove the car
keys from the ignition and have them with you.
If your vehicle also has this option, the key tag will arm
it whenever the doors are closedand you push the
LOCK button. It will disarm the system when you push
UNLOCK.
2-7
2. Find the 16-pin diagnostic connector above the
accelerator pedal.
press the
4. Keeping the program terminal gro~~nded,
UNLOCK button on the first transmitter. The door
locks will lock and unlock again to indicate the
transmitter is now matched. If there is 110 response.
check the transmitter batteries. If you d o not want to
match a second transmitter. proceed to Step 6.
a ~ n grounded, repeat
S . Still keeping the ~ ~ " o g rterminal
Step 4 with the second transmitter. If you disconnect
the ground wire before completing this step, o n l y the
first transmitter is matched. If you make a mistake,
disconnect the jumper wire and start over a t Step 3.
BLK
ASSEMBLY LINE DIAGNOSTIC
LINK (ALDL) CONNECTOR
6. Remove the jumper wire. (Note: The system will not
operate if the jumper wire is still connected.)
7 . Test the operation of both transmitters with the
vehicle.
3. Connect a fuse jumper wire with alligator clips at
both ends from the program circuit (Terminal 8) t o
the g r o ~ ~ ncircuit
d
(Terminal 4). Grounding the
program terminal erases the system memc>ry and
causes the doors to lock and unlock once. This
means the system is ready to be matched to the
transmitter.
2-8
-
If the lock control does not work as it should. see your
Buick dealer.
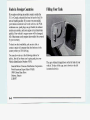
Battery Replacement
Under normal use, the batteries in your key chain
transmitter should last about two years.
You can tell the batteries are weak if the transmitter
won’t work at the normal range in any location. If you
have to get closeto your vehicle before the transmitter
works, it’s probably time to change the batteries.
For battery replacement,
use two Duracell@ batteries,
type DL-20 16, or a similar
tY Pes
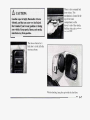
4. Replace the front cover. Make sure the cover is on
tightly, so water won’t get in. Replace the screw in
the back cover.
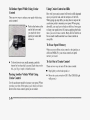
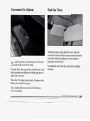
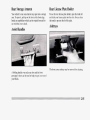
Automatic Pull-Down Feature (Option)
If you have this feature, it pulls the trunk lid closed. This
allows you to gently push the trunk lid down, then the
pull-down feature securesit completely.
1
I
I NOTICE:
Do not slam your trunk lid down
if you have this
pull-down feature. If you do, you may damage
the pull-down system.
To replace the batteries:
1. Remove the screw from the back cover.
2. Lift off the front cover, bottom half first.
3. Remove and replace the batteries. Put them in as
the instructions under the batteries indicate.
2-9
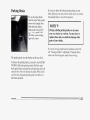
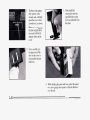
Trunk
Remote Trunk Release
The trunk release switch in
the glove box must be ON
for the TRUNK button to
work. This featureallows
you to secure items in the
trunk. To secure, turn the
TRUNK RELEASE to OFF,
lock the glove box, then
take the door key with you.
The TRUNK button is on the
instrument panel to the left of
the steering column. Itwill
release the trunk lock when
the transaxle isin PARK (I?)
or NEUTRAL (N).If you
have the Remote Keyless
Entry- System,
it willalso
unlock yourtrunk.
2-10
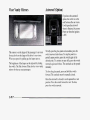
Illuminated Entry System (Option)
You’ll be able to see where to put the door key when it’s
dark, and the lamps inside your Buick will go on.
They’ll go off when you start your engine, or when
25 seconds have passed. If you have the Remote Keyless
Entry System option, it can make the illuminated entry
system work too. (See “Remote Keyless Entry System”
in the Index.)
If you have this option, your interior lamps will
automatically shut off after a 10 minute period if a door
is left ajar. This feature is designed to help eliminate
battery wear down.
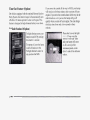
Glove Box
Key in the Ignition
If you walk away from your vehicle with the keys
inside, it’s an easy target for joy riders or professional
thieves -- so don’t do it.
When you park your Buick and open the driver’s door,
you’ll hear a chime reminding you to remove your key
from the ignition and take it with you. Always do this.
Your steering wheel will be locked, and so will your
ignition and transaxle. And remember to lock the doors.
2-11
Parking at Night
Park in a lighted spot, closeall windows and lock your
vehicle. Remember to keep your valuables out of sight.
Put them in a storage area, or takethem with you.
Parking Lots
If you park in a lot where someone will be watching
your vehicle, it’s best to lock itup and take your keys.
But what if you have to leaveyour ignition key? What if
you have to leave something valuable in your vehicle?
1. Put your valuables in a storage area, like your trunk
or glove box.
2. Lock the glove box.
driver’s.
3. Lock all the doors except the
4. Then take the door key with you.
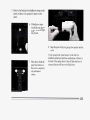
Universal Theft-Deterrent (Option)
If your Buick has this option,it has a theft-deterrent
alarm system. With this system, theSECURITY light
will flash as you open the door (if your ignition is OFF).
This light reminds you to activate the theft-deterrent
system. Here’s how to do it:
1. Open the door.
2-12
2. Lock the door with the power door lock switch or
Remote Keyless Entry System. The SECURITY
light should come on and stay on.
3. Close all doors. The SECURITY light should go off
after approximately 30 seconds. The alarm is not
armed until the SECURITY light goes off.
If a door or the trunk is opened without the key or
Remote Keyless Entry System, thealarm will go off. It
will also go off if a door lock or thetrunk lock is
damaged. Your vehicle’s lamps will flash and the horn
will sound for several minutes, then will go off to save
battery power.
Remember, the theft-deterrent system won’t activate if
you lock the doors with a key or manual door lock. It
activates only if you use a power door lock switch or
Remote Keyless Entry System. You should also
remember that you can start your vehicle with thecorrect
ignition key if the alarm has been set off. You must still
shut off the alarm by inserting the key in the door lock.
Here’s how to avoid setting off the alarm by accident:
If you don’t want to activate the theft-deterrent system,
the vehicle shouldbe locked ufter the doors are closed.
0
Always unlock a door with a key, or use the Remote
Keyless Entry System. Unlocking a door any other
way will set off the alarm.
If you set off the alarm by accident, unlock any door
with your key.
You can also turn off the alarm by using the Keyless
Entry System, if you have it. The alarm won’t stop if
you try to unlock a door any other way.
How to Test The Alarm
The alarm can be tested by first having t he driver’s
window down. Activate the system by locking the doors
with the power door lock switch or the Remote Keyless
Entry System. Get out of the car, close the door and wait
for the SECURITY light to go out. Then x-each in
through the window, unlock the door with the manual
door lock and open the door. This should set off the
a1arln .
If the alarm does not sound when it should, check to see
if the horn works. The horn fuse may be blown. To
replace the fuse, see “Fuses and Circuit Breakers’‘ in the
Index.
Your vehicle is equi ped
with the PASS-Key I1
(Personalized Automotive
Security System)
theft-deterrent system.
8
PASS-Key% is a passive theft-deterrent system. It
works when you insert or remove the key from the
ignition. PASS-Key% uses a resistor pellet in the
ignition key that lnatches a decoder in your vehicle.
To reduce the possibility of theft, always activate the
theft-deterrent system when leaving your vehicle.
2-13
When the PASS-Key% system senses that someone is
using the wrong key, it shutsdown the vehicle’s starter
and fuel systems. For about three minutes, the starter
won’t work and fuel won’t go to the engine. If someone
tries to start your vehicle again or uses another key
during this time, the vehicle will not start. This
discourages someone from randomly trying different
keys with different resistor pellets in an attempt to make
a match.
The ignition key must be clean and dry before it’s
inserted in the ignition or the engine may not start. If the
engine doesnot start and the SECURITY light comes
on, the key may be dirty or wet. Turn the ignition off.
Clean and dry the key. Wait about three minutes and try
again. The security light may remain on during this
time. If the starter still won’t work, and the key appears
to be clean and dry, wait about three minutes and try
another ignition key. At this time, you may also want to
check the fuse (see“Fuses and Circuit Breakers” in the
Index). If the starter won’t work with the other key, your
vehicle needs service. If your vehicle does start, the first
ignition key may be faulty. See your Buick dealer or a
locksmith who can service the PASS-Key%.
2-14
If you accidentally use a key that has a damaged or
missing resistor pellet, the starter won’t work and the
SECURITY light will flash. But you don’t have to wait
three minutes before trying another ignition key.
See your Buick dealer or alocksmith who can service
the PASS-Key% to have a new key made.
If you’re ever driving and the SECURITY light comes
on and stays on, you will be able torestart your engine if
you turn it off. Your PASS-Key% system, however, is
not working properly and must be serviced by your
Buick dealer. Your vehicle is not protected by the
PASS-Key% system.
If you lose ordamage a PASS-Key@% ignition key, see
your Buick dealer or a locksmith who can service
PASS-Key% to have a new key made.
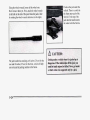
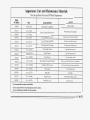
Ignition Key Positions
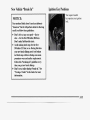
New Vehicle “Break-In”
NOTICE:
Your modern Buick doesn’t needan elaborate
“break-in.’’ But it will perform better in the
long
run if you follow these guidelines:
8 Don’t drive at any one speed fast or
slow for thefirst 500 miles (804 km).
Don’t make full-throttle starts.
8 Avoid making hard stops for the first
200 miles (322km) or so. During this time
your new brake linings aren’t yet broken
in. Hard stops with new liningscan mean
premature wear and earlierreplacement.
Follow this “breaking-in” guideline every
time you get newbrake linings.
8 Don’t towa trailer during“break-in.” See
“Towing a Trailer” in the Index for more
information.
Your square-headed
key operates your ignition
lock.
9-
-9
2-15
(B) LOCK: Before you put the key in, your ignition
will be in the LOCK position. This position locks your
ignition, steering wheel and transaxle. It’s a theft
deterrent feature.
(C) OFF: This position lets you turn off the engine but
still turn the steering wheel. It doesn’t lock the steering
wheel like LOCK. Use OFF if you must have your car
in motion while the engine is off.
A -
-
E
(D) RUN: This is the position for driving.
(E) START This key position starts your engine.
NOTICE:
With the ignition key in the ignition switch, you can turn
the switch to five different positions:
(A) ACCESSORY: This position lets you use things
like the radio and the windshield wipers when the
engine is off. To use, push in the key and turn it toward
you. Your steering wheel will remain locked, just asit
was before you inserted the key.
2-16
If your key seems stuck inLOCK and you can’t
turn it, be sure it all
is the way in. If it is, then
turn the steeringwheel left and rightwhile you
turn thekey hard. But turn thekey only with
your hand. Using a tool to force it could break
the key or theignition switch.If none of this
works, then yourvehicle needs service.
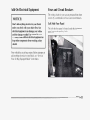
Retained Accessory Power (Option)
After the ignition is turned off, and before any door is
opened, the following systems will work for 10 minutes:
1. Without pushing the accelerator pedal, turn your
ignition key to START. When the engine starts, let
go of the key. The idle speed will go down as your
engine gets warm.
Power Windows
Radio
Optional Astroroof
Starting Your Engine
Move your shift leverto PARK (P) or NEUTRAL (N).
Your engine won’t start in any other position -- that’s a
safety feature.To restart when you’re already moving,
use NEUTRAL (N) only.
NOTICE:
NOTICE:
Holding your key in START
for longer than
15 seconds at a time will cause yourbattery to be
drained much sooner. Andthe excessive heat can
damage your starter motor.
2. If it doesn’t startright away, hold your key in
START for aboutthree to five secondsat a timeuntil
your engine starts.Wait about 15 seconds between
each try to help avoid drainingyour battery.
Don’t try to shift to PARK (P) if your Buick is
moving. If you do, you coulddamage the
transaxle. Shift to PARK (P) only when your
vehicle is stopped.
2-17
3. If your engine still won’t start (or starts but then
stops), it could be flooded with too much gasoline.
Try pushing your accelerator pedal all the way to the
floor and holding it there as you hold the key in
START for about three seconds, If the car starts
briefly but then stops again, do the same thing, but
this time keep the pedal down for five or six seconds.
This clears the extra gasoline from the engine. After
waiting about 15 seconds, repeat the normal starting
procedure.
NOTICE:
Your engine is designed to workwith the
electronics in your vehicle.If you add electrical
parts oraccessories, you could change theway
the fuel injection system operates. Before adding
electrical equipment, check with your dealer.If
you don’t, your engine might not perform
properly.
If you ever have to have your vehicle towed, see
the part of this manual thattells how to do it
without damaging yourvehicle. See “Towing
Your Vehicle’’ in the Index.
2-18
Driving ThroughDeep Standing Water
NOTICE:
If you drive too quickly through deep puddles or
standing water, water can
come in through your
engine’s air intake and badly damage your
engine. Never drive through water that
is slightly
of your vehicle. If you
lower than the underbody
can’t avoid deep puddles or standing water, drive
through them veryslowly.
Engine Coolant Heater (CanadaOnly)
In very cold weather, 0°F (- 1SOC) or colder, the engine
coolant heater can help. You’ll get easier starting and
better fuel economy during engine warm-up. Usually,
the coolant heater should be plugged in a minimum of
four hours prior to starting your vehicle.
To use the coolant heater:
1. Turn off the engine.
2. Open the hood and unwrap the electrical cord.
3. Plug it into a normal, grounded 1 IO-volt outlet.
Shifting the Automatic Transaxle
7
There are severaldifferent positions for your shift lever.
NOTICE:
PARK (P): This locksyour front wheels. It’s the best
position to usewhen you start your engine becauseyour
vehicle can’t move easily.
After you’ve used the coolant heater, be sure to
store the cord asit was before to keepit away
from moving engine parts. If you don’t, it could
be damaged.
How long shouldyou keep the coolant heater plugged
in? Theanswer depends on the weather, the kindof oil
you have, and some other things. Instead
of trying tolist
everything here,we ask that you contact your Buick
dealer in the areawhere you’ll be parkingyour vehicle.
The dealercan give you the best advice for that
particular area.
2-19
ignition key is in the RUN position. If you cannot shift
out of PARK (P), easepressure on the shift lever -- push
the shift leverall the way into PARK (P) as you
maintain brake application. Then move the shift lever
into thegear you wish. See “Shifting Out of PARK (P)”
in this part.
REVERSE (R):Use this gear to backup.
NOTICE:
Shifting to REVERSE(R) while your vehicleis
moving forward could damage your transaxle.
Shift to REVERSE (R)only after your vehicle is
stopped.
Ensure theshift lever is fullyin PARK (P) range before
starting theengine. Your Buick has a brake-transaxle
shift interlock.You have to fully apply your regular
brakes before you can shift fromPARK (P) when the
2-20
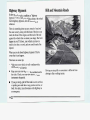
To rock your vehicle back and forth to get out of snow,
ice orsand without damaging your transaxle, see “If
You’re Stuck in Sand, Mud, Iceor Snow” in the Index.
NEUTRAL (N): In this position,your engine doesn’t
connect with the wheels. To restart when you’re already
moving, use NEUTRAL (N) only. Also, use NEUTRAL
(N) when your vehicle is being towed.
(a):
This position is for
AUTOMATIC OVERDRIVE
normal driving. If you need more power for passing,and
you’re:
Going less than about 35 mph (56 km/h), push your
accelerator pedal about halfway down.
Going about 35 mph (56 km/h) or more, push the
accelerator allthe way down.
You’ll shift downto the next gear and have more
power.
1 NOTICE:
THIRD GEAR(3): This is likeOVERDRIVE (@),but
you never go intoOverdrive.
Here are some timesyou might chooseTHIRD (3)
instead of OVERDRIVE
(a):
When driving on hilly, winding roads
Damage to your transaxle caused
by shifting out
of PARK (P) or NEUTRAL(N) with the engine
racing isn’t covered by your warranty.
When towing atrailer, so there is less shifting
between gears
0
When going down a steephill
1
1
SECOND GEAR(2): This position gives you more
power but lower fuel economy. You can use SECOND
(2) on hills. It can help control your speed as you go
down steep mountain roads, but then you would also
want to use yourbrakes off and on.
I
1
NOTICE:
i
I
I
ji
!
1
Don't drive in SECOND (2) for more than
5 miles (8 km), or at speeds over55 mph
(88 km/h), or you can damage your transaxle.
Use OVERDRIVE (@)or THIRD (3) as much as
possible.
Don't shift into SECOND (2) unless you are going
slower than 65 mph (105 km/h), or you can
damage your engine.
2-22
FIRST GEAR (1): This position gives you even more
power (but lower fueleconomy) than SECOND (2). You
can use it on very steep hills, orin deep snow or mud. If
the selector lever is put inFIRST (l),the transaxle
won't shift into first gear
until the vehicle is going
slowly enough.
NOTICE:
If your front wheels can't rotate, don't try to
drive. This might happen if you werestuck in
very deepsand or mud or were up against a solid
object. You could damage your transaxle.
Also, if you stop when going uphill,don't hold
your vehicle there with onlythe accelerator
pedal. This could overheat and damage the
transaxle. Use your brakes or shift into PARK (P)
to hold your vehicle in position on
a hill.
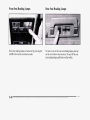
Parking Brake
To set the parking brake,
hold the regular brake pedal
down with your right foot.
Push down the parking
brake pedal with your left
foot. If the ignition is on,
the brake system warning
light will come on.
n e parking brake uses the brakes on the rear wheels.
If you try to drive off with the parking brake on, the
brake light stays on and a chime sounds until you release
the parking brake or recycle the ignition.
I NOTICE:
Driving with the parking brake
on can cause
your rear brakesto overheat. You may haveto
replace them, and you could also damage other
parts of your vehicle.
If you are towing a trailer and are parking on any hill,
see “Towing a Trailer” in the Index. That part shows
what to do first to keep the trailer from moving.
To release the parking brake, you need to use the PUSH
TO RELEASE parking brake pedal. Hold the regular
brake pedal down and push the parking brake pedal with
your left foot. This will unlock the pedal. When you lift
your left foot, the parking brake pedal will follow it to
the release position.
2-23
Shifting IntoPARK (P)
2. Move the shift lever into PARK (P) position like this:
I
I . Hold the brake pedal down with your right foot and
set the parking brake.
2-24
0
Pull the lever toward
YOU.
0
Move the lever up
as far as it will go.
Leaving Your Vehicle With the Engine
Running
I
3. Move the ignition key to LOCK.
4. Remove the key and take it with you. If you can
walk away from your vehicle with the ignition key in
your hand, your vehicle is in PARK (P).
If you have to leave your vehicle with the engine
running, be sure your vehicle is in PARK (P) and your
parking brake is firmly set before you leave it. After
you've moved the shift lever into the PARK (P)
position, hold the regular brake pedal down. Then, see if
you can move the shift lever away from PARK (P)
without first pulling it toward you. If you can, it means
that the shift lever wasn't fully locked into PARK (P).
2-25
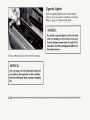
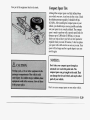
Torque Lock
Shifting Out of PARK (P)
If you are parking on a hill and you don’t shift your
transaxle into PARK (P) properly, the weight of the
vehicle may put too much force on the parking pawl i n
the transaxle. You may find it difficult to pull the shift
lever out of PARK (P). This is called “torque lock.” To
prevent torque lock,set the parking brake and then shift
into PARK (P) properly before you leave the driver’s
seat. To find out how, see “Shifting Into PARK (P)” in
the Index.
Your Buick has a brake-transaxle shift interlock. You
have to fully u p p l y your regular brake beJi,re you can
shift from PARK (P) when the ignition is in the RUN
position. See “Automatic Transaxle” in the Index.
When you are ready to drive, move the shift lever out of
PARK (P) before you release the parking brake.
If “torque lock” does occur, you may need to have
another vehicle push yours a little uphill to take some of
the pressure from the transaxle, so you can pull the shift
lever out of PARK (P).
If you cannot shift out of PARK (P), ease pressure on
the shift lever -- push the shift lever all the way into
PARK (P) as you maintain brake application. Then
move the shift lever into the gear you want. If you ever
hold the brake pedal down but still can’t shift out of
PARK (P), try this:
1 . TLWIthe key to OFF. Open and close the driver’s
door to turn off the Retained Accessory Power
feature, if you have it.
2. Apply and hold the brake until the end of Step 4.
3. Shift to NEUTRAL (N)
4. Start the vehicle and then shift to the drive gear you
want.
5 . Have the vehicle fixed as soon as you can.
2-26
Parking Over Things That Burn
Engine Exhaust
Running Your Engine While You’re
Parked
It’s better not to park with the enginerunning. But if you
ever have to, here are some things to know.
Follow the proper steps to be sureyour vehicle won’t
move. See “Shifting Into PARK (P)” in the Index.
If you are parking on a hilland if you’re pulling a
trailer, also see“Towing a Trailer” in the Index.
2-28
Power Windows
driver canstill control all the windows with the switch
in the locked position. PushUNLOCK to allow your
passengers touse their window switches again.
Horn
To sound the horn, press apad with the horn symbol on
either sideof the steeringwheel.
Tilt Wheel
A tilt steeringwheel allows
you to adjust the steering
wheel before you drive.
Your power window controls are on the armrest. The
switch for the driver’s window
has an express-down
feature. Pull the switch
back all theway, release itand
the window will lowerautomatically. To stop the
window from lowering,push the switch forward.To
partially open the window, pull theswitch back and
quickly release it.
Push LOCK to disable
You also have a lock out button.
the power window switches. This will prevent
passengers from openingand closing thewindows. The
You can also raise to
it the
highest level togive your
legs more room when you
exit and enter the vehicle.
To tilt the wheel, hold the steering wheel and pull the
lever toward you. Move the steeringwheel to a
comfortable position,then release the leverto lock the
wheel in place.
2-29
Turn SignaVMultifunction Lever
Turn Signal and Lane Change Indicator
The leveron the left side of the steering column
includes your:
The turn signal has two upward (for right) and two
downward (for left) positions. These positions allow you
to signal a turn or tt lane change.
0
Turn Signal and Lane Change Indicator
0
Headlamp High-Low Beam and Passing Signal
Windshield Wipers
0
Windshield Washer
0
Cruise Control
2-30
To signal a turn, move the lever all the way up or down.
When the turn is finished, the lever will return
automatically.
A green arrow on the
instrument panel will flash
in the direction of the turn
or lane change.
If you have a trailer towing option with added wiring for
the trailer lamps, a different turn signal flasher is used.
With this flasher installed,the signal indicator will flash
even if a turn signal bulb is burned out. Check the front
and rear turn signal lamps regularly to make sure they
are working.
Headlamp High-Low Beam
To signal a lane change, justraise or lower the lever
until the green arrow starts to flash.Hold it there until
you complete your lane change. The leverwill return by
itself when you release it.
As you signal a turn or a lane change,if the arrows don’t
flash but just stay on, a signal bulb may be burned out
and other drivers won’t see your turn signal.
To change the headlamps
from low beam to high or
high to low, pull the turn
signal lever toward you,
then release it. When the
high beams are on, this blue
light on the instrument
panel also will be on.
If a bulb is burned out, replace it to help avoid an
accident. If the green arrows don’t go on at all when you
signal a turn, check the fuse (see “Fuses” in the Index)
and for burned-out bulbs.
2-31
Windshield Wipers
You can set the wiper speed for a long or short delay
between wipes. This can be very useful in light rain or
snow. Turn the band to choose the delay time. The
closer to LO, the shorter the delay.
For steady wiping at low speed, turn the band away
from you to the LO position. For high speed wiping,
turn the band further, to HI. To stop the wipers, move
the band to OFF.
Remember that damaged wiper blades may prevent you
from seeing well enough to drive safely. To avoid
damage, be sure to clear ice and snow from the wiper
blades before using them. If they’re frozen to the
windshield, carefully loosen or thaw them. If your
blades become damaged, get new blades or blade
inserts.
You control the windshield wipers by turning the band
marked WIPER.
For a single wiping cycle, turn the band to MIST. Hold
it there until the wipers start, then let go. The wipers will
stop after one cycle. If you want more cycles, hold the
band on MIST longer.
Heavy snow or icecan overload your wiper motor. A
circuit breaker will stop the motor until it cools. Clear
away snow or ice to prevent an overload.
Windshield Washer
At the top of the multifunction leverthere’s a paddle
with the word PUSH on it. To spray washer fluid on the
windshield, push the paddle for lessthan a second. The
washer will spray several times, then stop. Unless they
are already turned on, the wipers will operate at low
speed for several sweeps,then turn off.
Driving without washer fluid can be dangerous. A bad
mud splash can block your vision. You could hit another
vehicle or go off the road. Check your washer fluid level
often.
To get more fluid on the windshield, push and hold the
paddle. Spraying will continue as longas the paddle is
held.
If this light comes on,
it means you’re low on
washer fluid.
WASHER
FLUID LOW
2-33
NOTICE:
a When using concentrated washer fluid,
follow the manufacturer’s instructions for
adding water.
a Don’t mix water with ready-to-use washer
fluid. Water can cause the solution to freeze
and damage your washer fluid tank and
other partsof the washer system.Also,
water doesn’t clean aswell as washer fluid.
a Fill your washer fluid tank only
3/4 full
when it’s very cold. This allows for
expansion, which could damage the tankif
it is completely full.
a Don’t use radiator antifreeze in your
windshield washer. It can damage your
paint.
2-34
Cruise Control
With cruise control, you can
maintain a speed of about
25 mph (40 km/h) or more
without keeping your foot
on the accelerator. This can
really help on long trips.
Cruise control does not
work at speeds below about
25 mph (40 k d h ) .
When you apply your brakes, the cruise control shuts
off.
To Set Cruise Control
If your vehicle is in cruise control
when the optional
traction control system begins
to limit wheel spin, the
cruise control will automatically disengage.
(See
“Traction Control System”in the Index.) When road
conditions allow you to safelyuse it again,you may turn
the cruise control back on.
2-35
2. Get up to the speed you want.
To Resume a Set Speed
Suppose you set your cruise control at a desired speed
and then you apply the brake. This, of course, shuts off
the cruise control,But you don’t need to reset it.
3. Push in the SET button at the end of the lever and
release it. (The CRUISE light onthe instrument
panel will come on.)
4. Take your foot off the accelerator pedal.
2-36
Once you’re going about
25 nlph (40 km/h) or more,
you can move the cruise
control switch from ON to
R/A (ResumelAccelerate)
for abouthalf a second.
You’ll go right back up to
your chosenspeed and stay
there.
Remember if you hold the switch at R/A longer than
half a second, the vehicle will keep going faster until
you release the switch or apply the brake. You could be
startled and even lose control. So unless you want to go
faster, don’t hold the switch at WA.
To Increase Speed While Using Cruise
Control
Here’s the second way to go to a higher speed:
0
There are twoways to go to a higher speed. Here’s the
first:
1. Use the accelerator pedal toget to the higher speed.
0
2. Push the SET button at the end of the lever, then
release the button and the acceleratorpedal. You’ll
now cruise at the higher speed.
Move the cruise switch
from ON to WA. Hold it
there until you get up to
the speed you want, and
then release the switch.
To increase your speed in very small amounts, move
the switch to R/A for lessthan half a second and then
release it. Each time you do this, your vehicle will go
about 1 mph (1.6 k d h ) faster.
The accelerate featurewill only work after you have set
the cruise controlspeed by pushing the SET button.
2-37
To Reduce Speed While Using Cruise
Control
There are two ways to reduce your speed while using
cruise control:
0
Push in the button at the
end of the lever until
you reach the lower
speed you want, then
release it.
Using Cruise Controlon Hills
How well your cruise controlwill work on hills depends
upon your speed, load, and the steepness of the hills.
When going up steep hills, you may have to step on the
accelerator pedal to maintain your speed. When going
downhill, you may have to brake or shift to a lower gear
to keep your speed down. Of course, applying the brake
takes you out of cruise control. Many drivers find this to
be too much trouble and don’t use cruise control on
steep hills.
To Erase Speed Memory
When you turn offthe cruise control or the ignition, or
shift into PARK (P), your cruise control set speed
memory is erased.
0
To slow down in very small amounts, push the
button for less than half a second. Each time you do
this, you’ll go1 mph (1.6 km/h) slower.
Passing Another Vehicle While Using
Cruise Control
Use the accelerator pedal to increase your speed. When
you take your foot off the pedal, your vehicle will slow
down to the cruise control speed you set earlier.
2-38
To Get Out of Cruise Control
There are two ways to turn off the cruise control:
Step lightly on the brake pedal, or
0
Move the cruise switch to OFF. (The CRUISE light
will go out.)
Lamps ON Warning
Lamps
I
This switch controlsthese
systems:
Headlamps
Taillamps
If the parking lamp or headlamp switch is left on you'll
hear a warning tone when you turn the ignition off and
open the driver's door.
Panel Lights
Instrument panel light
brightness can be adjusted
by moving this lever
between LO and HI. Interior
courtesy lamps can be
turned on by sliding the
lever all the way to the
right.
Parking Lamps
LicenseLamps
0
Sidemarker Lamps
Tnstrument Panel Lights
Press the LIGHTS switch to turn the headlamps on.
Press it again to turn them off.
Press the PARK switch to turn the parking lamps on.
Press it again to turn them off. (Tf the parking lamps
were turned on with the PARK switch, they must be
turned off with that switch).
Courtesy Lamps
When any door is opened, several lamps go on. They
make it easy for you to enter and leave the car. You also
can turn these lamps on by sliding the panel lamps lever
to INT (interior).
-
2-39
Time Out Feature (Option)
On vehicles equipped with the optional Remote Keyless
Entry System, the interior lamps will automatically turn
off after a 10 minute period if a door is left open. This
feature is designed to help eliminate battery wear down.
Twilight Sentinel (Option)
Twilight Sentinel turns your
lamps on and off by sensing
how dark it is outside.
To operate it, leave the lamp
switch off and move the
Twilight Sentinel control to
any position but MIN.
2-40
If you move the control all the way to MAX, your lamps
will remain on for three minutes after you turn off your
engine. If you move the control almost all the way in the
other direction, so it’s just on, the lamps will go off
quickly when you turn off your engine. You can change
this delay time from only a few seconds to three
minutes.
Please don’t coverthe light
sensor. If you cover the
sensor, it will read “dark”
and your lamps will come
on. It is on top of the
instrument panel, on the
driver’s sideof the defroster
outlets.
Daytime Running Lamps (Canada Only)
Daytime Running Lamps (DRL) can make it easier to
see the front of your vehicle duringthe day. DRL can be
helpful in many different driving conditions,but they
can be especially helpful in the short periods after dawn
and before sunset.
A light sensoron top of the instrument panel makes the
DRL work, so be sure it isn’t covered.
The DRL system will make your low beam headlamps
come on at reduced brightness in daylight when:
The ignition is ON,
The headlamp switch is OFF, and
When it’s dark enough outside, your low beam
headlamps will change to full brightness. The other
lamps that come on with your headlamps will also come
on. When it’s bright enough outside, the regular lamps
will go off, and your low beam headlamps change to the
reduced brightness of DRL.
At night, you can turn off all exterior lamps when you
are in PARK (P) by moving the Twilight Sentinel
control all the way to OFF. If it was off, move the
control to the right to turn it on, then back off. The
lamps will come back on when you put the transaxle in
gear.
As with any vehicle, you should turn on the regular
headlamp system when you need it.
The transaxle is not in PARK (P).
When the DRL are on, only your low beam headlamps
will be on. The parking lamps, taillamps, sidemarker
and other lamps won’t be on. Your instrument panel
won’t be lit up either.
2-41
Front Seat Reading Lamps
Rear Seat Reading Lamps
Front seat reading lamps are turned on by pressing the
LAMP switch on the overhead console.
To turn on one of the rear seat reading lamps, push up
on the switch above the rear door. To turn off the rear
seat reading lamps, pull down on the switch.
2-42
Lamp Monitors (Option)
Bulbs Monitored
Indicator
Bulbs Monitored
High Beam
Both Headlamp
High Beams
Low Beam
Both Headlamp
Low Beams
1 Front LeftT d a r k
2 Rear LeftTudStop
1 Front Right Turn/Park
2 Rear Right TudStop
Left Turn
~~
This systemwill let you know when certain exterior
light bulbs fail. When
you start your car, all eight lamps
come on briefly to show that the system
is working.
When a bulb fails
an indicator will flash for several
is replaced
seconds and thenstay on until the failed bulb
and lit. For example,if a burned out back-up light bulb
is replaced, the indicator for back-up lamps will on
stay
until the transaxle is
put in REVERSE (R) with the
ignition ON. The bulbs aremonitored only while they
are being used.
If you have recentlyhad a low battery condition or the
battery hasbeen disconnected and reconnected, the
indicators will flash when you turn the ignitionswitch to
RUN. Turningon the parkinglamps will return the lamp
monitor system to normal operation.
Right Turn
Tail
Parking
stop
Back-up
2 Tail Only
4 TaiYTurn
Right and Left Rear
Sidemarker
2 License
2 parmurn
2 Front Park
Right and Left Front
Sidemarker
4 Rear Stop/Turn
1 Center High Mounted
2 Back-up
Mirrors
Automatic Inside Mirror
Manual Inside Mirror
Your Buick may have an automatic insidemirror.
The automatic mirror adjusts for the glare of headlamps
behind you. It detects changes in light, and then adjusts
for day or night operation.
When you are sitting in a comfortabledriving position,
adjust the mirror so you can seeclearly behind your car.
Grip the mirror in the center to move it up or downand
side to side. Theday-night adjustment allows you to
adjust themirror to avoid glare from the lamps behind
you. Push the tab forward for daytime use. Pull it back
for nightuse.
2-44
During the day the mirror reflects all the light from
behind your car. At night, when the glare is too high, it
changes to the night mode. Then, it reflects only part of
the light from behind you. When the mirror changes to
the night mode, it holds that position until glare is no
longer present.
Automatic Mirror Settings
There is an automatic and an off position. When the
button on the bottom of the mirror is pressed up and has
a green halo, the mirror is on automatic. Press it again to
turn off.
Time Delay
Automatic Inside Mirror With Compass
(Option)
'/'
/-
.....:.
-..., - .._.
. ._.
' .,., ... ............................................
-..-'.:*..-.:.*.-.;::..'.:;:..
. .' :;. .:..,..
..(...
:.' . .. ......._
,,:.;/.'-:
. - _.:
... ...
. . ..:.
.....~.,.:.:'::....~.,_
.,:..:...
:.,::.. ',.-.::'~::,I~'.',.'.:-'
::. .. . . .
.,,_..__._..,._..
,,..:.
:- . .
.
.
.
.: ....., . . ... , . .. , .. ~:.~.~..~.::~.~:,~.~,::.'.~,~'~~::~:~,~.~~.:~.'.;:,~,~.~~
"
The mirror delays before changing from the night to the
day position. This delay prevents rapid changing of the
mirror as you drive under lights and through traffic.
Reverse Gear Day Mode
The reversemode is another important featureof the
automatic mirror. When the shift lever is placed in
REVERSE (R), the mirror changes to the day mode.
This gives you a bright image in the mirror as you back
UP.
Cleaning Photocells
Use a cotton swab and glass cleaner to clean the two
photocells thatmake the mirror work.
This mirror automatically changes to reduce glarewhen
set in the M (Mirror) orC/M (Compass/Mirror)
positions. One photocell on the back of the mirror senses
when it is becoming dark outside. Another photocell is
built into the mirror surface to sense headlamps behind
you.
Time Delay
The mirror delays beforechanging from the night to the
day position. This delay prevents rapid changing of the
mirror as you drive under lights and through traffic.
2-45
Reverse Gear Day Mode
Compass Calibration
The reverse mode is another important feature of this
mirror. When the shift lever is placed in REVERSE (R),
the mirror changes to the day mode. This gives you a
bright image in the mirror as you back up.
Once the compass is calibrated, it does not need to be
recalibrated as long as the mirror is left in your vehicle
and the vehicle remains in the same geographical zone.
To calibrate the compass:
Mirror Settings
1. Set the switch on the mirror control to C M .
OFF: This setting turns off the dayhight function and
compass. The mirror will stay in the day mode.
2. Turn the vehicle ignition switch to ON. The letter C
should be displayed in the mirror compass window.
If not, hold the CAL switch (on the bottom of the
mirror) for more than 10 seconds, and the letter C
should appear. To hold i n the CAL switch, insert a
paper clip into the small hole on the bottom of the
mirror housing. The display will show a number
first, but keep holding until the letter C appears.
M: This turns on the dayhight portion of the mirror to
automatically reduce glare.
C/M: This setting turns on the compass in addition to
the dayhight function. The letter or letters displayed in
the top right corner of the mirror indicate the direction
in which you are traveling.
3. For quick calibration, drive the vehicle in a
360-degree circle at less than 5 mph (8 km/h) until
the display reads a compass direction.
For normal calibration, drive the vehicle on your
everyday routine, and the compass will eventually
calibrate.
2-46
Compass Variance
1. Find your location on the zone map. Note your zone
number.
2. Hold in the CAL switch (on the bottom of the mirror
housing) for five secondsuntil the currentzone entry
number appears on the display. To hold in the CAL
switch, insert a paper clip intothe small hole on the
bottom of the mirror housing.
3. Repeatedly press the CAL switch until the number
for the new zone entry is displayed.
Once the desired zone number is displayed, stop
pressing the CAL switch and the display will show
compass direction within a few seconds.
Variance is the difference between magnetic north and
geographic north. In some areas the difference between
the two can be greatenough to cause falsecompass
readings. If this happens, follow these instructions to
set
the variance foryour particular location:
2-47
Outside Mirrors
Remote Mirror Control
Your Buick has an electric
mirror control located on
the driver’s door armrest.
Automatic Dimming Outside Mirror
(Option)
If you have this option, the driver’s side outside mirror
will adjust for the glare of headlamps behind you. This
feature is controlled by the on and off settings on the
automatic insidemirror. See “Automatic Inside Mirror”
earlier in this section.
Convex Outside Mirror
Your passenger’s side mirror is convex.
A convex mirror’s surface is curved so you can see more
from the driver’s seat.
Move the switchin the middle of the control to choose
the right or leftmirror. To adjust themirror, push the
arrow control in the directionyou want the mirror to go.
Adjust each mirror so you can just see the side of your
car and the area behind your vehicle.
Heated Outside Rearview Mirror(Option)
If you have this option, the left and right outside mirrors
are heated when you activate the rearwindow defogger.
2-48
Convenience Net (Option)
Your vehicle may have a convenience net.
You’ll see it
just inside theback wall of the trunk.
Put small loads, like grocery bags,
behind the net. It can
help keep them from falling overduring sharp turns or
quick starts and stops.
Dual Sun Visors
To block out glare, swing down the
visors. Each’sun
visor can beremoved from the center mount and moved
to the side, while the auxiliary
sun visor remains to
block glare from the front.
To extend thevisor at the sides,pull out thesunshade
extension.
The net isn’t forlarger, heavier loads. Storethem in the
trunk as far forwardas you can.
You can unhook the netso that it will lie flat
when
you’re not using it.
2-49
Visor Vanity Mirrors
Astroroof (Option)
If you have the astroroof
option, theswitch is on the
roof between the sun visors.
It will open the astroroof
when in Retained Accessory
Power or when the ignition
is ON.
This mirror is on the larger of the passenger’s sun visors.
It may also be on the larger of the driver’s sun visors.
When you open it by pulling up, the lamps turn on.
The brightness of the lamps can be adjusted by sliding
the switch. ThePark Avenue Ultra alsohas visor vanity
mirrors for the rear seat passengers.
To fully open the glass panel and sunshade, press the
switch rearward and release. To stop thepanel in a
partially open position, press the switch again at the
desired point. To continue toopen fully, press the switch
rearward again and release. The sunshade can be opened
manually.
To close the glass panel, press and hold the switch
forward. Thesunshade must be manually closed.
Once the astroroof is closed, itcan be opened to a vent
position. Press the switch forward to vent. To close,
press the switch rearward.
2-50
Garage Door Opener Storage
The garage door opener
storage area islocated in the
1 headliner.
To use your garage door opener in the storage area, see
the following chart tofind the properpin and hole
combination. If your garage dooropener is not listed on
the chart you still may be able to find a combination that
will work. Once you have found a pin and hole
combination, follow these instructions:
Chamberlain
50
53
54LM
EZ-Lift
1089
3089
Genie
AT-35A
AT-85/AT-95
AT-90
MAT 85/90
Moore-O-Matic
DT
DT2
Ladybug (MIN)
Sears
652030
53706/53707
53708/53718
53738
Stanley
1047
1050
1052
1075
1077
1079
Tru-Guard
50TV
54TV
Hole Location
1
4
-
B C
-
Model
X
X
X
X
X
X
X
X
X
X
X
X
X
X
X
X
X
X
X
X
X
X
X
X
X
X
X
X
X
X
X
X
X
X
X
X
X
X
X
-
X
2-51
'
1. To place your garage
door opener in the
storage area, carefully
open the cover with a
screwdriver, as shown.
Insert a screwdriver in
the slot located above
the word GARAGE
and pry down on the
cover.
I
3. Now install the
selected pin into the
specified hole on the
lever as indicated from
the chart.
I
2. Next, carefully pry
the panel out of the
slots in the cover to
disassemble the panel
and lever.
4. While holding the panel and lever, place the panel
over your garage door opener so that the button is
over the pin.
2-52
5. Remove the backing from the adhesive strips on the
panel and place your garage door openeron the
panel.
I 6.
If the adhesive strips
won’t hold your opener
in place, tie down loops
may be used.
8. Snap the panel with your garage door opener intothe
cover.
I 7.
Place the tabs from the
panel into the slots on
the cover so that pivots
are positioned as
shown.
If your garage door opener doesn’t work after it is
installed, anotherpin and hole combination will have to
be tried. If the opener doesn’t turn off after the lever is
released, the pin will have to be filed down.
2-53
Automatic Ride Control
Front Storage Armrest
Your Park Avenue Automatic Ride Control provides a
comfortable, controlled ride. This suspension system
keeps adjusting your car's ride and handling depending
upon speed and road conditions. Automatic Ride
Control uses three levelsof control to ensure a
combination of balance and stability.
Electronic Level Control
This featurekeeps the rear of your car level as the load
changes. It is automatic-- you don't need to adjust
anything.
The armrest between the front seats opens into a storage
area. To open it, pull up on the lever at the front edge.
Inside are cupholders which can be rotated forward for
use with the cover closed. There is also aremovable
coinholder and a storage area forcassette tapes and
compact discs.
2-54
Rear Storage Armrest
Rear License Plate Holder
Your vehicle’s rear seat armrest may open into a storage
area. To open it, pull up on the lever at the front edge.
Inside are cupholderswhich can be rotated forward for
use with the cover closed.
To use the rear license plate holder, open the trunk lid
and slide your license plate into the slot. Always close
the trunk to prevent theft of the plate,
Assist Handles
Ashtrays
The front centerashtray may be removed for cleaning.
A folding handle overeach rear door and the front
passenger’s door can be used to help you get in or out of
your Buick.
2-55
Cigarette Lighter
There are cigarettelighters near the front and rear
ashtrays. To use one, push it in all the way and let go.
When it’s ready, it will pop back by itself.
I NOTICE:
If you hold a cigarette lighter in with your hand
away
while it is heating, it won’t be able to back
from the heating element when
it’s ready. That
can make it overheat, damaging the lighter and
the heating element.
The rear ashtrays may also beremoved for cleaning.
I NOTICE:
Don’t put papers or other flammable things into
your ashtrays. Hot cigarettesor other smoking
materials could ignite them, causing a damaging
2-56
The Instrument Panel:
Your Information System
Speedometer and Odometer
Your speedometer lets you see your speed in both miles
per hour (mph) and kilometers per hour (km/hj. Your
odometer shows how far your vehicle has been driven,
in either miles (used in the United States) or kilometers
(used in Canada).
Your Buick has a “tamper-resistant odometer.” If you
can see very noticeable bright silver lines between the
numbers, probably someone has tried to turn it back.
The numbers may not be true.
You may wonder what happens if a car has to have a
new odometer installed. If possible, the new one has to
be set to the same reading the old one had. If it can’t be,
then it‘s set at zero, and a label on the driver’s door must
show the old reading and when the new one was
installed.
Your instrument panel is designed to let you know at a
glance how your car is running. You’ll know how fast
you’re going, how much fuel you’re using, and many
other things you’ll need to know to drive safely and
economically.
2-57
Warning lights and gages can signal that something is
wrong before it becomes serious enough to causean
expensive repair or replacement. Paying attention to
your warning lights and gages could also saveyou or
others frominjury.
Trip Odometer
A trip odometer can tell
how far you’ve driven since
you last set it back to zero.
To reset it, push the button.
Warning Lights, Gages and
Indicators
This part describes the warning lights and gages that
may be on your vehicle. The pictures will help you
locate them.
2-58
Warning lights come on when there may be or is a
problem with one of your vehicle’s functions. As you
will see in the details on the next few pages, some
warning lights come on briefly when you start the
engine justto let you know they’re working. If you are
familiar with this section, you should not be alarmed
when this happens.
Gages can indicate when there may be or is a problem
with one of your vehicle’s functions. Often gages and
warning lights work together to let you know when
there’s a problem with your vehicle.
When one of the warning lights comes on and stays on
when you are driving, orwhen one of the gages shows
there may be a problem, check the section that tells you
what to do aboutit. Please followthis manual’s advice.
Waiting to do repairs can be costly -- and even
dangerous. So please get to know your warning lights
and gages. They’re a big help.
Safety Beit Reminder Light
Air Bag Readiness Light
AIR BAG
When the key is turned to RUN or START, a chime will
come on for about eight seconds to remind people to
fasten their safety belts. The safety belt light will also
come on and stay on for about 70 seconds. If the driver’s
belt is already buckled, neither the chime nor the light
will come on.
AIR
BAG
There is an air bag readiness light on the instrument
panel, which shows AIR BAG. The system checks the
air bag’s electrical system for malfunctions. The light
tells you if there is an electrical problem.The system
check includes the airbag sensors and modules, the
wiring and the diagnostic module. For more information
on the air bag system, see“Air Bag” in the Index.
You will see one of these lightsflash for a few seconds
when you turn your ignition to RUN or START. Then
the light should go out. This means the system is ready.
If the air bag readiness light doesn’t come on when you
start your vehicle, or stays on, orcomes on when you
are driving,your air bag system may not work properly.
Have your vehicle serviced right away.
2-59
Battery Warning Light
Voltage Indicator (Option)
VOLT
When you turn the key to RUN, this lightwill come on
briefly, to show that your alternator and battery charging
systems are working. If the lightstays on, you need
service, and you should take your Buick to the dealer at
once. To save your battery until you get there, turn off
all accessories and set your air system to OFF.
2-60
If you have the optional gage cluster, thisgage shows
voltage in the electricalsystem. The normal range is
11 to 15 volts. If the reading stays outside the normal
range, have your Buick dealer check the electrical
system.
Brake System Warning Light
. _. .
BRAKE
Your Buick’s hydraulic
brake system is divided into
two parts.If one part isn’t
working, the otherpart can
still workand stop you. For
good braking, though,you
need both parts working
well.
(0)
If the warning light comes on, there could abebrake
problem. Haveyour brake system inspected right
away.
This light should come on briefly asyou start the
vehicle. If it doesn’t comeon then, haveit fixed so it
will be ready to
warn you if there’s a problem.
If the lightand chime come onwhile you are driving,
pull off the roadand stop carefully. You may notice that
the pedal is harder to
push. Or, the pedalmay go closer
If the light is still
to the floor. It may take longer to stop.
on, have the vehicletowed for service. (See“Towing
Your Vehicle” in the Index.)
The brake systemwarning light willalso come on when
you set your parking brake,and it will stay onif your
parking brake doesn’t releasefully. If you try to drive
off with the parking brake set, a chime will
also come on
until you release the parking brake.
If the lightand
chime stay on after your parking brakeis fully released,
it means you have a brakeproblem.
Anti-Lock Brake System Warning Light
’
With the anti-lockbrake
system, this light will
come on when you start
your engine and may stay
on for several seconds.
That’s normal.
If the light doesn’t come on, have it fixed so it will be
ready to warn you if there is a problem.
If the light stays on, turn the ignition off. Or, if the light
comes on when you’re driving, stopas soon as possible
and turn the ignition off. Then start the engine again to
reset the system. If the light still stays on, comes
or
on
again while you’re driving,your Buick needs service. If
the regular brakesystem warning light isn’t on, you still
have brakes, but‘ you don’t have anti-lock brakes. If the
regular brake system warning light is also on,you don’t
have anti-lock brakes and there’s a problem with your
regular brakes. See “Brake System Warning Light”
earlier in thispart.
2-62
Traction Control System Warning Light
(Option)
This warning light should
come on briefly as you
start the engine.
TRACTION
OFF
If the warning light doesn’t come on then, have it fixed
so it will be ready to warn you if there’s a problem. If it
stays on, or comes on when you’re driving, there may be
a problem with your traction control system and your
vehicle may need service. When this warning light is on,
the system will not limit wheel spin. Adjust your driving
accordingly.
The traction control system warning light may come on
for the following reasons:
0
0
0
Engine Coolant Temperature Warning Ligh
If you turn the system off by pressing the
TRACTION CONTROLbutton located on the
instrument panel to the left
of the steeringwheel the
warning light will come on and stay on. To turn the
system back on, press the button again. The warning
light should go off. (See “Traction Control System”
in the Index for more information.)
If there’s a brakesystem problem that is specifically
related to traction control, thetraction control system
will turn off and the warning light will come on.If
your brakes begin to overheat, the traction control
system will turn off and the warning light will Come
on until your brakes
cool
down.
If the traction control system is affected by an
engine-related problem, the system Will turn off and
the warning light
possible.
will
on.come
If the traction control system warning light comes on
and stays on for an extended period of time when the
system is turned on, your vehicle needs service.
TEMP
I
1
This light tells You that your engine coolant has
overheated
or
your radiator
cooling
fans are not
working. If you have been operating your vehicle under
normal drivingconditions, you should pull off the road,
stop your vehicle and turn the engine off as Soon as
The chapter “Problems on the Road,” in this manual
explains what to do. See“Engine Overheating” in the
Index.
2-63
Engine Coolant Temperature Gage (Option) Low Coolant Warning Light
COOLANT
LOW
If you have the gage cluster, you have a gage that shows
the enginecoolant temperature in degreesFahrenheit.
Canadian instrument panels measure the coolant
temperature in degrees Celsius.If the gage pointer
moves into the red area, your engine is too hot!
That readingmeans the same thing as the warning light.
It means that your engine coolanthas overheated. If you
have been operating your vehicle under normal driving
conditions, you should pull off the road, stop your
vehicle and turn off the engine as soon as possible.
The chapter “Problems on the Road,” in this manual
explains what to do. See “Engine Overheating” in the
Index.
2-64
When this light comes on,
the cooling system is low on
coolant. As a bulb check, it
will come on when the
ignition in the RUN
position and then go off.
If the coolant level is low, the light will come back on. If
this happens, see “Engine Coolant” in the Index for
proper cooling system fill.
After the coolant level is returned to its proper level, the
LOW COOLANT light will go off after 20 seconds or
remain off on the next ignition cycle.
Malfunction Indicator Lamp(Service
Engine Soon Light)
NOTICE:
If you keep driving your vehicle with this light
on, after a while the emission controls won’t
work as well, your fuel economy won’t be
as good
and your engine may not run
as smoothly. This
could leadto costly repairs not covered by your
warranty.
CHECK
A computer monitors operation of your fuel, ignition
and emission controlsystems. This light should come on
when the ignitionis on and the engineis not running,as
a checkto show you it is working. If it does not comeon
at all, have it fixed right
away. If it stays on, or comes
on
while you are driving,the computer is indicatingthat
you have a problem. You should take your vehicle in for
service soon.
2-65
Door Ajar Light (Option)
DOOR
AJAR
When the ignition is ON,
this light will stay on until
all the doors are closed and
completely latched.
OIL-
Trunk Ajar Light (Option)
TRUNK
AJAR
Engine Oil Pressure Light and Optional Gage
If this light stays on with
the ignition ON, it means
that the trunk lid is open or
not completely latched.
If your car has the optional gage cluster, the oil pressure
gage shows the engine oil pressure in pounds per square
inch (psi). Canadian vehicles indicate pressure in
kilopascals (Wa).
There are three ways the oil pressure light can come on
briefly, which are normal and don’t show a problem.
They are:
0
The light comes on when you turn your key to RUN.
It goes off once you turn the key to START. That’s
just a check to be sure the light works. If it doesn’t,
be sure to have it fixed so it will be there to warn you
if something goes wrong.
If you’re “idling” at a stop sign, the light may blink
on and then off.
If you make a hard stop, the lightmay come on for a
moment.
When this light comes on and stays on, itmeans oil isn’t
going through your engine properly. You could be low
on oil, or you might have some other oil problem.
Check Oil Level Light (Option)
1
1 The CHECK OIL LEVEL
CHECK
OIL LEVEL
light comeson for three
seconds as a bulb check
each time the ignitionkey is
turned to the RUN position.
If the light doesn’t comeon,
have your vehicle serviced.
If the engine oil is more than one quartlow, the light
will come on briefly, then go off for 15-25 seconds, and
then come back on for 20-40 seconds.
However, the system will not registerlow engine oilif it
has not been more than eight minutes since the engine
was last shut off.
NOTICE:
Damage to your engine from neglected oil
problems can be costly andis not covered by your
warranty.
If the CHECK OIL LEVEL lightcomes back on, the
engine oilshould be checked at the dipstick then
brought up tothe proper levelif necessary. See “Engine
Oil” in the Index.
2-67
Change Oil Soon Light (Option)
CHANGE
OIL SOON
This light isactivated by the
Engine Oil Life Monitor
System. The system
determines the condition of
the engine oiland lets you
know when the oil should
be changed. (See“Engine
Oil” in the Index).
time the engine is started after that. If the CHANGE
OIL SOON light is on continuously, there is a problem
with the Oil Life Monitor System and service is
required.
After changing the engine oil,the system should be
reset. This will cause the CHANGE OIL SOON light to
be lit again for the bulb check period of three seconds.
It does this by using information about enginespeed
(revolutions per minute), coolanttemperature and
vehicle speed. The system uses thisdata to determine
how much the oil has degraded.
When to change your oil depends on driving habits and
conditions because these directly affect engine speed,
coolant temperature and vehicle speed.Because of this,
the CHANGE OIL SOON light
may come on as early as
2,000 miles or less for harsh conditions.
The CHANGE OIL SOON lightcomes on for five
seconds as a bulb check each timethe ignition key is
turned to theRUN position. It will stay on for 60
seconds once 90% of the oil lifehas been used and each
2-68
The reset button is in the glovebox. With the ignition
key in the RUN position, push the reset button. Hold it
in for atleast five seconds,but not more than
60 seconds. After five seconds,the CHANGE OIL
SOON light will flash four times and then go off. This
indicates that the Oil Life Monitor System has been
reset.
Tachometer (Option)
The tachometer on the optional gage cluster tells you
how fast the engine is running. It displays enginespeed
in thousands of revolutions per minute (RPM).
Fuel Gage
Your fuel gage shows
about how much fuel is in
your tank. It works only
when the ignition is ON.
When the indicator nears
E, you still have a little
fuel left. You need to get
more fuel right away.
I NOTICE:
Do not operate the engine with the tachometer
in
the red area,or engine damage may occur.
2-69
Here are some concerns owners have had about the fuel
gage. All these situations are normal and indicate
nothing wrong with the fuel gage:
a At the gas station, the gas pump shuts off before the
gage reads E
a It takes more (or less) gas tofill up than the gage
indicated. For example, the gage may have indicated
1/2 full, but it took more (or less) than half of the
tank’s capacity to fill it.
a The gage moves a little when you turn a corner,
speed up, or stopyour vehicle.
a When you turn the engine off, the gage doesn’t go all
the way back to E.
2-70
Low Fuel Light (Option)
If your Buick has this
option, a yellow light near
the fuel gage will go on
when you are low on fuel.
You should get more fuel as
soon as you can.
Section 3 Comfort Controls and Audio Systems
In this section you’ll find out how to operate the comfort
control systems and audio systems offered with your
Buick. Be sureto read about the particularsystem
supplied with your vehicle.
Your Buick Comfort Control System
Air Outlets
Adjust the direction of air
flow by moving the
louvered vents.
This part tells you how to make your air system work
for you. The Comfort Control Systemuses the new
ozone-friendly R- 134a refrigerant.
Fresh air from outsideyour vehicle flowsthrough your
Buick when the car is moving. When the vehicle is not
moving, you can get outside air toflow through by
selecting any upper buttons (exceptthe rear window
defogger) and the HI fan speed.
3-1
Rear Passenger ComforTemp (Option)
Dual Automatic ComforTemp Climate
Control (Option)
If your Buick has the Dual Automatic ComforTemp
Climate Control option, the following information tells
you how it works.
If you have this option, you can adjust the direction of
the air flow to the rear seating area.
I
You will hear a beep each time a button is pushed and a
small light on the button will indicate which buttons are
active. The lights are on all buttons except TEMP, FAN
and AIR FLOW. The display will show fan, temperature
and mode settings for a few seconds whenever AUTO is
selected, and then display the outside temperature. The
outside temperature reading is most accurate when
3-2
driving. During stops, the displayshows the previous
temperature for best accuracyand system control.
If the display is flashing afterthe system is started, you
should see your dealer for service.
temperature, and time since the enginewas last started.
Pushing the FAN, AIR FLOW or FRONT buttonswill
override this delay, turn off the AUTO setting, and
change the fan speed.
Sun and temperature sensors automaticallyadjust air
temperature to maintain your temperature setting.The
system may supply cooler air tothe side towards the
sun. Be careful not to put anything overthe sensors on
top of the dash. Thesystem may not respond correctly.
TEMP: To adjust the temperature you want maintained
inside the car, push the TEMP button. If you want
warmer air push the red arrow. If you want cooler air
push the blue arrow. Note the degree selection in the
di spl ay.
AUTO: Press the AUTO button when you want
the system to adjust automatically tochanges in
temperature. When the system is set for automatic, air
will come from the floor, middle, or windshield outlets.
Fan speed will vary as the system gets to and maintains
the temperature setting you have selected.
To find your comfort zone, start with 75" AUTO, give
the car about 20 minutes to stabilize, and adjust the
temperature settingif necessary. The display will show
the set temperature and fan speed for a few secondsand
then display the outside temperature.If you want to see
what automatic temperature setting hasbeen chosen,
press the AUTO button.
In cold weather the system will delay turning on the fan,
to avoidblowing cold air. The length of the delay
depends on engine coolant temperature, outside
You can choose between 60°F ( 16°C) for maximum
cooling, to 90°F (33°C) for maximum heating. The
system does not cool or warm faster with 60°F (16" C)
or 90°F (33°C) selected, so it is not necessary to choose
the extreme temperature to get the system to heat or cool
at the maximum. The system does it automatically.
FAN: The speed of the blower fan is controlled
automatically if you have the system set forAUTO.
Pressing the FAN button will display and hold the
current blower fan setting.
If you want the blower fan to run at a lower speed, push
the bottom of the FAN button. The fan speed will
decrease with every push of the button until the lowest
speed is reached. If you want to increase the fan speed,
push the top of the fan button. Notice the fan indicators
in the display.
3-3
AIR FLOW This button is used to change the
direction of the air flow.The air flow choices available
are WINDSHIELD, MID and FLOOR. If the system is
set for AUTO, pressing the AIR FLOW button will
display the current air flow direction. Press the AIR
FLOW up or down arrows again to change the direction
of the air flow.
If the up AIR FLOW button is selected while in the
FRONT defrost mode, the system will direct the air
toward the FLOOR and the WINDSHIELD. If the down
AIR FLOW button is selected while in the FRONT
defrost mode, the system will send the air toward the
FLOOR, and FRONT will cancel. Notice the arrows in
the display.
VENT: The VENT button allows fresh air to flow
through your Buick without the air conditioning
compressor working. AUTO and VENT may be selected
at the same timeso the system will continue tomaintain
the temperature selected. To turn off the VENT selection
push the button again.
RECIRC: When RECIRC is selected, the system will
limit the amount of fresh air enteringyour vehicle. This
is helpful when you are trying to cool the air quickly or
limit the amount of air enteringyour vehicle for some
3-4
other reason. If the system was previously in AUTO,
RECIRC can be selected. The system will be in
RECIRC for 10 minutes, then remain in AUTO but
return to the EXT temperature display. RECIRC can
also be selected in manual air flow positions.
P F R O N T This selection
is used to defrost the
windshield by directing the
air flow toward the
windshield.
If FRONT is selected while in the AUTO mode, the fan
speed will vary. If a manual fan speed setting is selected,
the fan speed will remain at that selection until the
engine is turned off or another selection has been made.
To turn off FRONT, press AUTO or AIR FLOW.
FRONT defrost will work better if any ice or snow is
cleared from the hood and the air inlet area between the
hood and windshield.
@ REAR: The lines you
see on the rear window
warm the glass. Press the
button to start warming
your window.
Q
REAR
.#g
x
A"
OFF: The ventilation system always allows fresh air to
flow through your Buick when the vehicle is moving.
The system will try to keep the air at a previously
chosen temperature. The outside temperature will show
in the display when the system is OFF.
If the passenger control has been turned on, it can be
turned off by pressing the OFF button once. Pressing the
OFF button a second time will turn off the tnain system.
Passenger Control
After 10 minutes, the system, will go off by itself.
Pressing the button again during the heating cycle will
also turn it off. If you need additional warming time,
push the button again. The system will then operate for
five minutes before going off by itself.
NOTICE:
Scraping the insideof your rear window could
cut and damage the heater.Your warranty would
not cover this damage. Don't put decals there,
off.
you might have to scrape them
The frontseat passenger can
control the air temperature
in their seating area. This
can be set up to 5°F cooler
or warmer than the primary
setting by pressing the
WARM or COOL buttons
on the passenger door.
The indicator lights above the control will show the
difference from the main temperature setting. To turn off
this part of the system, push the OFF button on the main
control panel once.
3-5
Electronic Touch Climate Control System
RECIRC: The amount of fresh air enteringthe vehicle
is limited when RECIRC is selected. This ishelpful
when you are trying to coolthe air in your vehicle or
limit the air enteringthe vehicle forsome other reason.
To turn off RECIRC press the button again. If you select
FRONT defrost orBLEND while RECIRC is selected,
the system will automatically turn off RECIRC to
prevent fogging.
TEMPERATURE: Moving the TEMPERATURE lever
changes the temperature of the air coming through your
outlets. Moving the lever between COOL and WARM
will lower or raise the temperature.
If your Buick has this climate controlsystem, the
following information tells you how it works.
OFF: The ventilation system always allows fresh air to
flow through your Buick when the vehicle is moving.
The system will try to keep the air at a previously
chosen temperature. When the system is off, the blower
fan is also off.
3-6
sf FAN: The FAN control is used to select the speed of
the blower fan. There are four speeds to choose from.
Moving the lever betweenLOW and HIGH will decrease
or increase the fan speed. The fan will be off when the
system is off.
VENT For mild outside temperatures, when little
heating or cooling is needed, use the VENT setting. Air
will flow through the middle instrument panel outlets.
Use the air outlets to adjust and direct the air flow.
Adjust the temperature leverto the desired temperature.
The airconditioning compressor is not working when
VENT is selected.
HTR: To direct air out of the heater outlets, press HTR
Air Conditioning
and adjust the temperature and fan speeds for your
comfort. Most of the air will come from the floor
outlets. Some of the air will flow through the windshield
and side window outlets. The air conditioning
compressor is not working when HTR is selected.
MAX: This setting provides maximum cooling with the
least amount of work. MAX recirculates much of the air
inside your vehicle so it cools quickly. Adjust the
temperature and fan speed to COOL and HIGH. Air is
directed through the middle instrument panel outlets.
BLEND: When BLEND is selected the air flow will be
split between the windshield and the floor outlets. The
air conditioningcompressor will be operating. Adjust
the temperature and fan speed for your comfort.
NORM: Use NORM for normal cooling on hot days.
This setting coolsthe air enteringyour vehicle and
directs it through the middle instrument panel outlets.
Adjust the temperature and fan speed for your comfort.
If RECIRC is selected while in the NORM air
conditioning mode the system works like MAX and
recirculates the air.
Defrost
FRONT The FRONT defrost setting directsmost
of the air flow toward the windshield. Use defrost when
you want to remove fog or icefrom the windshield.
Adjust the temperature controltoward WARM and the
fan control toward HIGH. FRONT defrost will work
better if heavy snow and ice are clearedaway from the
hood, windshield and the air inlet area between the hood
and windshield.
BI-LEV This setting is designed for use on sunny days
when the air is moderately warm or cool. On days like
these, the sun may adequately warm your upper body,
but your lower body may not be warmenough.
BI-LEV directs outside air into your vehicle in two
ways. Cool air is directed toward your upper body
through the middle instrument panel outlets, while
slightly warmed air is directed to the floor.
3-7
Rear Window Defogger (Option)
@REAR: The lines you
see onthe rear window
warm the glass.Press the
button to start warming
your window.
Audio Systems
Your Delco@audio system has been designed to operate
easily and give years of listening pleasure. You will get
the most enjoyment out of it if you ac uaint yourself
with it first. Find out what your Delco% system can do
and how to operateall its controlsto be sure you’re
getting themost out of the advanced engineering that
went into it.
Setting the Clock
After 10 minutes, the system will turn off by itself.
Pressing the button during theheating cycle will also
turn it off. If you need additional warming time, push
the button again. The system will then operate for five
minutes before going off by itself.
I NOTICE:
Scraping the insideof your rear window could
cut and damage the heater.
Your warranty would
not cover this damage. Don’t put decals there,
you might have to scrape them
off.
3-8
To set the clock, press and hold the HRS or MIN buttons
until the correct timeis displayed. This can be done with
the ignition off if RECALL is first pressed. The colon
will flash while in the set mode. Flashing will stop when
no clock buttons are pressed for afew seconds.
AM-FM Stereo Radio with CassetteTape
Player
RECALL: Press the upper knob briefly to recall the
station being played or the clockdisplay. To change
what is normally shown on the display (station or time),
press the knob until you see the display you want, then
hold the knob until the display flashes. If you press the
knob when the ignition is off, the clock will show for a
few seconds.
Finding a Station
AM-FM: Press the lower knob to select AM, FM1 or
FM2. The display shows your selection.
TUNE: Turn the lower knob tochoose radio stations.
SEEK: Press the forward or backward arrow to go to
the next higher or lower station. The sound will be
muted while seeking.
Playing the Radio
Turn the VOLUME knob to turn the system on and off.
VOLUME: Turn the upper knob clockwise to increase
volume. Turn it counterclockwise to decrease volume.
SCAN: Press one of the SEEK arrows fortwo seconds,
and SCAN will appear in the display. Use SCAN to
listen to stations for afew seconds. The radiowill go to
a station, stop for few
a seconds, then go on to the next
station. PressSEEK again to stop scanning.
3-9
Presets: The six pushbuttons letyou return to your
favorite stations. You can set up to 18 stations (six AM,
six FMl and six FM2).
TREB: Press this button lightly so it extends.Turn the
knob to increase or decrease
treble. The middle position
is a detent.
1. Press the lower knob to select AM, FM 1 or FM2.
Push the knobs back in when you’re not using them.
2. Find the station you want.
Adjusting the Speakers
3. Press and hold one of the six numbered buttons.
BAL: Turn the control behind the upper knob tomove
4. The sound will mute. When itreturns, release the
button.
the sound to the left orright speakers. The middle
position is a detent and balances the speakers.
Whenever you press that numbered button, the station
you set will return.
FADE: Turn the control behind the lower knob to move
the sound to the front or rear speakers.The middle
position is a detent and balances the speakers.
P SCAN: Press P SCAN to listen to each of your preset
stations for a few seconds. The radio will go to the first
preset station, stop for a few seconds, then go on to the
next preset station. Press P SCAN again to stop scanning.
Setting theTone
BASS: Press this knob lightly so it extends. Turn the
knob to increase or decreasebass. The middle position is
a detent.
3-10
Playing a Cassette Tape
The longer sideof the cassettewith the tape visible
should face tothe right. The tape will begin playing as
soon as you insert it. If you hear nothing or hear a
garbled sound,the tape may not be in squarely. Press
EJECT to remove the tape and start over.
SIDE (5): Press this button to change the side of the
While the tape is playing, use the VOL, FADE, BAL,
TREB and BASS controls just as you do forthe radio.
Other controls may have different functions when a tape
is inserted. The display will show an arrow to show
which side of the tape playing.
00 (6): Press this button to select or deselect Dolby@B
If you want to insert a tape when the ignition or radio is
off, first press EJECT or RECALL.Note that cassette
tape adapter kits for portable compact disc players will
not work in your cassette player. These adapters will
produce an error message in the display, and the adapter
cassette will be ejected.
Dolby@B Noise Reduction is manufactured under
license from Dolby Laboratories Licensing Corporation.
Dolby and the no@
symbol are trademarks of Dolby
Laboratories Licensing Corporation.
SEEK: Press the forward or backward arrow to search
for the next or previous selection on the tape. Your tape
must have at leastthree seconds of silence between each
selection for SEEK to work.
REVERSE (3): Press this button to reverse the tape
rapidly. Press it again to return to playing speed. The
radio will play while the tape reverses.
FORWARD (4): Press this button to advance quickly to
another part of the tape. Press the button again to return
to playing speed. The radio will play while the tape
advances.
tape that is playing.
Noise Reduction to reduce background noise. The
display will show either OFF or ON for
a few seconds
when you press the button.
EJECT: Press this button to remove the tape. The radio
will play.
CLN: This message may appear on the display. If it
does, your cassette tape player needs to be cleaned. It
will still play tapes, but you should clean it as soon as
possible to prevent damage to your tapes and player. See
“Cassette Tape Player Care” in the Index. After you
clean the player, press and hold EJECT for five seconds
to reset the CLN indicator. “- - -” will appear
in the display to show the indicator was reset.
3-11
AM-FM Stereo Radios with Automatic
Tone Control
TUNE: Press the up or down arrow to choose radio
If your Buick has a radiowith Automatic Tone Control,
the instructions below will explain how to use the radio.
To find out if your radio hasAutomatic Tone Control,
look for aTONE button. If the system has one, you have
Automatic Tone Control. If not, see the systems
explained earlierin this section.
SEEK: Press the up or down arrow to go to the next
higher or lower station. The sound will be muted while
seeking.
Playing the Radio
Press theVOLUME knob to turn the system on and off.
VOLUME: Turn this knob clockwise to increase
volume. Turn it counterclockwiseto decrease volume
RECALL: Press this button briefly to recall the station
being played or the clock display. To change what is
normally shown on the display (station or time), press
the button until you see the display you want, then hold
the button until the display flashes. If you press the
button when the ignition is off, the clock will show for a
few seconds.
Finding a Station
AM-FM: Press this button to get AM, FM1 or FM2.
The display shows your selection.
3-12
stations.
SCAN: Press one of the SEEK arrows for twoseconds,
and SCAN will appear in the display. Use SCAN to
listen to stations for a few seconds. The radio will go to
a station, stop fora few seconds, then go on to the next
station. Press SEEK again to stop scanning.
Presets: The six pushbuttons let you return to your
favorite stations.You can set up to 18 stations (six AM,
six FMl and six FM2). You can also set an equalization
setting with each preset station.
1. Press AM-FM to select the band.
2. Find the station you want.
3. Press TONE to choose the equalization setting for
the station.
4. Press and hold one of the six numbered buttons.
5. The sound will mute. When it returns, release the
button.
Whenever you press that numbered button, the station
you set will return.
AUTO SET:Press this button and the system will set
the 12 strongest FM orthe six strongestAM stations on
your preset buttons.To return to the stationsyou
manually set, press the AUTO SET button again.
P SCAN: Press P SCAN to listen to
each of your preset
stations for a few seconds.
The radio will go to the first
preset station, stop for a few seconds, then
go on to the
next preset station. Press P SCAN again to stop
scanning.
Setting the Tone
BASS: Press this knob lightly so it extends.Turn the
knob to increaseor decrease bass. The middle position is
a detent.
TREB: Press thisbutton lightly so it extends.Turn the
knob to increaseor decrease treble. Themiddle position
is a detent.
Push the knobs back in when you’re not using them.
TONE: This featureallows you to choose preset treble
and bass equalizationsettings designed for classical,
pop, rock, jazz, talk and country/western stations.
CLASS will appear on the display when you first press
TONE. Each time you press it, another setting will
appear on the display. Press it again after “C&W’
appears and MANUAL will appear. Tone control will
return to thetreble and bass knobs. Also,if you use the
treble and bass knobs, controlwill return to them and
MANUAL will appear.
Adjusting the Speakers
BAL: Press this button lightly so it extends.Turn the
knob to move the sound to the left or right speakers. The
middle position is a detentand balances the speakers.
FADE: Press thisbutton lightly so it extends.Turn the
knob to move the sound to the front or rear speakers.
The middle position is a detentand balances the
speakers.
Push the knobs back in when you’re not using them.
3-13
Other controls may have different functions when a tape
is inserted. Thedisplay will show TAPE and an arrow to
show which side of the tape isplaying.
Your tape bias is set automatically.
PREV (1): Press this button to search for the previous
selection on the tape. Your tape must have at least three
seconds of silence between each selection for PREV to
work.
NEXT (2): Press this button to search for the next selection
on the tape. Your tape must have at least three secondsof
silence between each selection forNEXT to work.
Playing a Cassette Tape
The longer sidewith the tape visible should face tothe
right. The tape will begin playing as soon as you insert
it. If you hear nothing or hear agarbled sound, the tape
may not be in squarely. Press EJECT to remove the tape
and start over. If you want to insert atape when the
ignition is off, first press EJECT orRECALL.
While the tape is playing, use the VOL, FADE, BAL,
TREB and BASS controls just asyou do forthe radio.
The SEEK down and up arrows will also find the
previous and next selections on the tape.
REVERSE (3): Press this button to reverse the tape
rapidly. Press it again to return to playing speed. The
radio will play while the tape reverses.
FORWARD (4): Press this button to advance quickly to
another part of the tape. Press the button again to return
to playing speed. The radio will play while the tape
advances.
SIDE (5): Press this button to change the sideof the
tape that is playing.
00 (6): Press
this button to select or deselect Dolby@
B
Noise Reduction to reduce background noise.
Dolby@B Noise Reduction is manufactured under
license fromDolby Laboratories Licensing Corporation.
symbol are trademarks of Dolby
Dolby and the On@
Laboratories Licensing Corporation.
AM-FM: Press thisbutton to play the radio when a tape
is in the player.
SOURCE: Press this knob to change to the tape
function when the radio is on. TAPE with an arrow will
appear on the display when the tape is active.
Playing a Compact Disc
EJECT: Press thisbutton to remove the tape. The radio
will play.
Insert a disc partway into the slot, label side up. The
player will pull it in. Thedisc should begin playing.
If you’re drivingon a very rough road or if it’s very hot,
the disc may not play and ERR may appear on the
display. Press RECALL to take ERR off the display.
When things get back to normal, the disc should play. If
the disc comes out, it could be that:
The disc is upside down.
0 It is dirty, scratched or wet.
It is very humid. If so, wait about an hour and try
again.
3-15
RECALL: Press this button to see
which track is
playing. Press it again within five seconds to seehow
long it has been playing. To change what is normally
shown on the display (track or elapsed time), press the
button until you see thedisplay you want, then hold the
button until thedisplay flashes.
PREV (1): Press this button to go tothe start of the
current track,if more than eight seconds have played. If
you hold the button or press it more than once, the
player will continue moving back through the disc.
NEXT (2): Press this buttonto go to the next track. If
you hold the button or press it more than once, the
player will continue moving forward through the disc.
REVERSE (3): Press and hold this button to return to a
passage quickly. You will Ahear sound.
FORWARD (4): Press and hold this button to advance
to apassage quickly. You will hear sound.
3-16
RAND (6): Press this button to hear the tracks in
random order.
AM-FM: Press this button to play the radiowhen a disc
is in the player.
SOURCE: Press this knob tochange to the disc
function when the radio is on. CD PLAY will appearon
the display when the discis active.
EJECT: Press this button to remove the disc. The radio
will play.
If you turn off the ignition or radiowith a discin the
player, it willstay in theplayer. When you turn on the
ignition or system, the disc
will start playing where it
was stopped. If you press EJECT but don’t remove the
disc within 25 seconds, the player will pull the discback
in to protect it.
AM-FM Stereo with Cassette Tape and
Compact Disc Player
00:The pla
er automatically reduces background noise
d
from Dolby B NR encoded tapes.
Dolby' B Noise Reduction is manufactured under
license fromDolby Laboratories Licensing Corporation.
symbol are trademarksof Dolby
Dolby and the
Laboratories Licensing Corporation.
uno
AUTO PRESET Press this and the system will set the
12 strongestFM or the six strongest AM stationson
your preset buttons.To return to the stationsyou
manually set, press the AUTO PRESET button again.
(This button performs the same function as AUTO SET
described previously.)
If your system has both a cassettetape player and a
compact disc player, most of the functions work as
described previously. The only unique features are noted
below.
EJECT The system has two EJECTbuttons. Press the
button near the CD slot to remove a disc. Pressthe
button near the tape slot to remove a tape. The radiowill
Play*
SOURCE: Press this knob to change to the tape or disc
function when the radio is on. If both a tapeand a disc
are installed,the system will play the tape first.TAPE
will appear on the display. If SOURCE is pressed again,
the system will go to disc play. CD will appear on the
display.
3-17
THEFTLOCK
TM
Your system has this feature if the word THEFTLOCK
appears on the faceplate. THEFTLOCK is a
theft-deterrent feature that can be used or ignored. If
you ignore it,your system will play normally. If you use
it, your system can’t be turned on if it is stolen because
it locksanytime battery power is removed. To unlock it,
a code must be entered.
These instructionswill tell you how to enter acode into
your system. They also tell you how to unlock the
system with your code and how to turn off the
THEFTLOCK system.
Entering a Code
1. Write down any number from 000 to 1999. This is
your code.
2. Turn the ignition to ACC or RUN.
3. Turn the radio off.
3-18
4. Press the 1 and 4 preset buttons at the same time and
hold until “- - -” shows on the display.
You have only 15 seconds between each of the
following steps.
5. Press MIN and “000” will appear on the display.
6. Press MIN again and hold until the last two digitsof
your code appear.
7. Press and hold HRS until the first digit ordigits of
your code appear.
8. Press AM-FM after you make sure thecode matches
the one you wrote down. “rEP” will appear on the
display, meaning you must repeat steps 5 through 7.
9. After you repeat the steps, press AM-FM. SEC
should appear on the display, meaning your system is
secured. When your ignition is off, the
THEFTLOCK light will flash.
Store the paper with your code written on it in a safe
place.
Unlocking the System
Disabling THEFTLOCK
If battery battery power is removed for any reason, LOC
will appear on the display when power is reapplied. You
will need to enter your code to unlock the system. You
have only 15 seconds between each of the following
steps.
If you want to turn off THEFTLOCK, you will need to
enter your code. If you lose orforget your code, see
your dealer.
1. Turn the ignition on. LOC will appear on the display.
You now have only 15 seconds between each of the
following steps.
2. Press MIN and “000” will appear on the display.
3. Press MIN again and hold until the last two digits of
your code appear.
4. Press and hold HRS until the first digit or digits of
your code appear.
5 . Press AM-FM after you make sure the code matches
the one you wrote down. SEC should appear on the
display, meaning you can now use your system, and
it is secured.
1 . Press the 1 and 4 preset buttons at the same time and
hold until SEC shows on the display.
2. Press MIN and “000” will appear on the display.
3. Press MIN again and hold until the last two digits of
your code appear.
4. Press and hold HRS until the first digit or digits of
your code appear.
5. Press AM-FM after you make sure the code matches
the one you wrote down. “- - -” should appear on the
display, meaning your system is unsecured.
Steering Wheel Controls(Option)
SEEK: Press the SEEK pad to go to thenext higher or
lower radio station.
SCAN: Press this pad to scan the stations preset on your
radio pushbuttons.
AM FM: Press AM FM to receiveAM, FM1 or FM2
radio signals.
VOL: To increase or decreasethe volume, press the pad
marked VOL.
TEMP: The pad marked TEMP allowsyou to select a
higher or lower temperature setting for theclimate
control system.
If your car has this feature, you can control certain radio
and comfort control functions using the pads on the
steering wheel.
3-20
You may have radio-only controls. If so, TEMP will be
replaced by SRCE (source) and MUTE. MUTE will
mute the audio sound in any mode. SRCE works as
described earlier in the radio sections.
Understanding Radio Reception
FM Stereo
FM stereo will give you the best sound. But FM signals
will reach only about 10 to 40 miles (16 to 65 km). And,
adjusting the volume control on your radio to a safe
sound level before your hearing adapts to it.
To help avoid hearing loss or damage:
0
Increase volume slowly until you hear comfortably
and clearly.
tall buildings or hillscan interfere with FM signals,
causing the sound to comeand go.
AM
The range formost AM stations is greater than for FM,
especially at night. The longer range,however, can
cause stations to interferewith each other. AM can pick
up noise from things like storms
and power lines. Try
reducing thetreble to reduce this noise.
I NOTICE:
Be aware that hearing damage from loud noise is almost
undetectable until it is too late. Your hearing can adapt to
higher volumes of sound. Sound that seems normal can
be loud and harmful to your hearing. Take precautions by
Before you add any sound equipment to your
vehicle like a tape player, CB radio, mobile
telephone or two-way radio be sure you can
add what you want. If you can, it’s very
important to do itproperly. Added sound
equipment may interfere with the operation of
your vehicle’s engine, Delco@
radio or other
systems, and even damage them. And, your
vehicle’s systems mayinterfere with the
operation of sound equipment that has been
added improperly.
So, before adding sound equipment, check with
your dealer and be sure to checkFederal rules
covering mobileradio andtelephone units.
--
AM Stereo
This means the Delco@ system can fgteive C-QUAM@
stereo broadcasts.Many AM stations around the country
use C-QUAM@ to produce stereo,
though some do not.
(C-QUAM@ is a registeredtrademark of Motorola, Inc.)
If your Delco@ system can get C-QUAM@,your
STEREO light will come on when you’re receivingit.
Adjust the volume control to the lowest setting.
~
--
3-21
Cassette Tape Player Care
A tape player that is not cleaned regularly can cause
reduced sound quality, ruined cassettes, ora damaged
mechanism. Cassette tapes should be stored in their
cases away from contaminants, directsunlight, and
extreme heat. If they aren’t, they may not operate
properly ormay cause failureof the tape player.
Your tape player should be cleaned regularly after every
50 hours of use. If you notice a reduction in sound
quality, try a known good cassette to see if the tape or
the tape player is at fault. If this other cassette has no
improvement in sound quality, clean the tape player.
The recommended tape playercleaning method is with a
scrubbing-action, non-abrasive cleaning cassette. Thisis
a wet-type cleaning system that uses a cleaning cassette
with pads which scrub the tapehead as the hubs of the
cleaner cassette turn.If you use this typeof cleaner, the
radio may eject the cartridge. Thisis normal and is the
result of an added feature in thetape player that detects
broken tapes. If the cleaning cassette is ejected,you will
need to insert it a total of at least threetimes to
thoroughly clean the tape player.
You may prefer to use a non-scrubbing action, wet-type
cleaner. This type of cleaner uses a cassette with a fabric
belt which cleans the tape head. This typeof cleaning
cassette will not be ejected, but it may not clean the tape
player as thoroughly as the scrubbing-type cleaner
described above.
Cassettes are subject to wear and the sound quality may
degrade over time. Always make sure that the cassette
tape is in good condition before you have your tape
player serviced.
Compact Disc Care
Antenna Care
Handle discs carefully. Store them in their original cases
or other protective casesand away from direct sunlight
and dust. If the surface of a disc is soiled, dampen a
clean, soft cloth in a mild, neutral detergent solution
and
clean it, wiping only from the center to
the edge.
The fixedmast antenna canwithstand most car washes
without being damaged. If the mast should everbecome
slightly bent, you can straightenit out by hand. If the
mast is badly bent, as itmight be by vandals, you should
replace it.
Be sure never to touch thesignal surface when handling
discs. Pick up discs by grasping the outer edges or the
edge of the holeand the outer edge.
Check every once in a while to
be sure the mast is still
tightened to thefender.
If you have a power antenna, itwill look itsbest and
work well if it’s cleaned from time to time.
If the mast
portion of your antenna isdamaged, you can easily
replace it. See your dealer for areplacement kit and
follow the instructions in the kit.
1, Turn on the ignition and radio to raisethe antenna to
full mast extension.
3-23
2. Dampen a clean cloth withmineral spirits or an
equivalent solvent.
a
3. Wipe a cloth over the
mast sections, removing
any dirt.
I NOTICE:
Don’t lubricate the power antenna. Lubrication
could damageit.
4. Wipe dry with a clean
cloth before retracting.
5. Make the antennago up and down by turning the
radio orignition on and off.
6. Then repeat if necessary.
3-24
NOTICE:
Before entering an automatic car wash, turn
off
your radio to make the power antenna
go down.
This will prevent the mast frompossibly getting
damaged. If the antenna does notgo down when
you turn the radiooff, it may be damaged or
need to be cleaned. In either
case, lower the
antenna by hand by carefully pressing the
antenna down.
n
Section 4 Your Driving and the Road
Defensive Driving
The best adviceanyone can give about driving is: Drive
defensively.
Please startwith a very important safety device in your
Buick: Buckle up. (See “Safety Belts’’ in the Index.)
Defensive driving really means “be ready for anything.”
On city streets,rural roads, or freeways, it means
“always expect the unexpected.”
Assume that pedestrians or other drivers aregoing to be
careless and make mistakes. Anticipate what they might
do. Be ready for their mistakes.
Here you’ll find information about drivingon different
kinds of roads and in varying weather conditions. We’ve
also included many other useful tips on driving.
Rear-end collisions areabout the most preventable of
accidents. Yet they are common.Allow enough
following distance.It’s the best defensive driving
maneuver, in both city and rural driving. You never
know when the vehiclein front of you is going to brake
or turn suddenly.
4-1
Death and injury associated with drinking and driving is
a national tragedy. It’s the number one contributor tothe
highway death toll, claiming thousandsof victims every
year.
The obvious way to solvethis highway safety problem
is for people never to drink alcohol and then drive. But
what if people do? How much is “too much” if the
driver plans to drive?It’s a lot lessthan many might
think. Although it depends on each person and situation,
here is some general information on the problem.
Alcohol affects four thingsthat anyone needs to drive a
vehicle:
The Blood Alcohol Concentration (BAC) of someone
who is drinking depends upon four things:
Drunken Driving
Judgment
0
Muscular Coordination
Vision
0
Attentiveness
Police records show that almost half of all motor
vehicle-related deaths involve alcohol.In most cases,
these deaths are the result of someone who was drinking
and driving. In recent years, some 18,000 annual motor
vehicle-related deaths have been associated with the use
of alcohol, with more than 300,000 people injured.
Many adults -- by some estimates, nearly half the adult
population -- ch’oose never to drink alcohol, so they
never drive afterdrinking. For persons under 2 1, it’s
against the law in every U.S. state to drink alcohol.
There are good medical, psychological and
developmental reasons for these laws.
4-2
How much alcohol consumed
0
The drinker’s body weight
The amount of food that is consumed before and
during drinking
The length of time it has taken the drinker to
consume the alcohol
According to the American Medical Association, a
180-pound (82 kg) person who drinks three 12-ounce
(355 ml) bottles of beer in an hour will end up with a
BAC of about 0.06 percent. The person would reach the
same BAC by drinking three 4-ounce (120 ml) glasses
of wine or three mixed drinks if each had 1- 1/2 ounces
(45 ml) of a 1iquQIllke whiskey, gin or vodka.
woman generally will reach a higher BAC level than a
man of her same body weight when each has the same
number of drinks.
The law in many U.S. states sets the legal limit at a BAC
of 0.10 percent. In a growing number of U.S. states, and
throughout Canada, the limit is 0.08 percent. In some
other countriesit’s even lower. The BAC limit for all
commercial drivers in the U.S. is 0.04 percent.
The BAC will be over 0.10 percent after three to six
drinks (in one hour). Of course, as we’ve seen, it
depends on how much alcohol is in the drinks, and how
quickly the person drinks them.
It’s the amount of alcohol that counts. For example, if
the same person drank three double martinis (3 ounces
or 90 ml of liquor each) within an hour, the person’s
BAC would be close to 0.12 percent.A person who
consumes food just before or during drinking
will have a
somewhat lower BAC level.
There is a gender difference, too.Women generally have
a lower relative percentageof body water than men.
Since alcohol is carried in body water, this means that a
But the ability to drive is affected well below a BAC
of 0.10 percent. Research shows that the driving skills
of many people are impaired at a BAC approaching
0.05 percent, and that the effects are worse at night. All
drivers are impaired at BAC levels above 0.05 percent.
Statistics show that the chance of being in a collision
increases sharply for driverswho have a BAC of
0.05 percent or above. A driver with a BAC level of
0.06 percent has doubled his or her chance of having
a collision. At a BAC level of 0.10 percent, the chance
of this driverhaving a collision is twelve times greater;
at a level of 0.15 percent, the chance is twenty-five
times greater!
4-3
The body takes about an hour torid itself of the alcohol
in one drink. No amount of coffee or number of cold
showers will speed that up. “I’ll be careful” isn’t the
right answer. What if there’s an emergency, a need to
take sudden action, as when a child darts into the street?
A person with even a moderate BAC might not be able
to react quickly enough to avoid the collision.
There’s something else about drinkingand driving that
many people don’t know. Medical research shows that
alcohol in a person’s system can makecrash injuries
worse, especially injuries to the brain,
spinal cord or
heart. This means that when anyone who has been
drinking -- driver or passenger -- is in a crash, that
person’s chance of being killed orpermanently disabled
is higher than if the person had not been drinking.
4-4
Control of a Vehicle
Braking
You have three systems that make your vehicle go where
you want it to go. They are the brakes,the steering and
the accelerator. All three systems have to do their work
at the places where the tires meet the road.
Braking action involvesperception time and reaction
time.
First, you have to decide topush on thebrake pedal.
That’s perception time.Then you have to bring up your
foot and do it.That’s reaction time.
Average reaction time is about 3/4 of a second.But
that’s only an average. It might be less with one driver
and as long as two or three secondsmore
or with
another. Age, physical condition, alertness, coordination,
and eyesight all play a part. So do alcohol, drugs and
frustration. But even in 3/4 of a second, avehicle
moving at 60 mph (100 km/h) travels 66 feet (20 m).
That could bea lot of distance in an emergency, so
keeping enough space between your vehicle and others
is important.
And, of course, actual stopping distances varygreatly
with the surface of the road (whether it’s pavement or
gravel); the condition of the road (wet, dry, icy); tire
tread; and the conditionof your brakes.
Sometimes, as when you’re driving on snow or ice,it’s
easy to ask more of those control systems than the tires
and road can provide. That means you can lose control
of your vehicle.
4-5
Avoid needless heavy braking. Some people drive
in spurts -- heavy acceleration followed by heavy
braking -- rather than keeping pace with traffic. This
is a mistake. Your brakes may not have time to cool
between hard stops. Your brakes will wear out much
faster if you do a lot of heavy braking. If you keep pace
with the traffic and allow realistic followingdistances,
you will eliminate a lot of unnecessary braking. That
means better braking and longer brake life.
If your engine ever stops while you’re
driving, brake
normally but don’t pump your brakes. If you do, the
pedal may get harder to push down. If your engine
stops, you will still have some power brake assist. But
you will use it when you brake. Once the power assist is
used up, it may take longer to stopand the brake pedal
will be harder to push.
Anti-Lock Brakes (ABS)
Your Buick has an advanced electronic braking system
that will help prevent a braking skid.
This lighton the
instrument panel will come
on briefly when you start
your vehicle.
When you start your vehicle and begin to drive away,
you may hear a momentary motor or clickingnoise. And
you may even notice that your brake pedal moves a little
while this is going on. This is the ABS system testing
itself. If there’s a problem with the anti-lock brake
system, the anti-lock brake system warning light will
stay on.
See “Anti-Lock Brake System Warning Light” in the
Index.
4-6
The anti-lock system can change the brake pressure
faster than any driver could. Thecomputer is
programmed to make the most of available tireand road
conditions.
Here’s how anti-lock works. Let’ssay the road is wet.
You’re driving safely. Suddenly an animal jumps out in
front of you.
You slam on the brakes. Here’s what happens with ABS.
A computer senses that wheels are slowing down. If one
of the wheels is about to stop rolling,the computer will
separately work the brakes at each front wheel and at the
rear wheels.
You can steer around the obstacle while braking hard.
As you brake, your computer keeps receiving updates on
wheel speed and controls braking pressure accordingly.
4-7
Remember: Anti-lock doesn’t change the timeyou need
to get your foot up to the brake pedal. If you get too
close tothe vehicle in frontof you, you won’t have time
to apply your brakes if that vehicle suddenly slows or
stops. Always leave enough room up ahead to stop, even
though you have anti-lock brakes.
To Use Anti-Lock
Don’t pump the brakes. Just hold the brake pedal down
and let anti-lock work for you. You may hear a motor or
clicking noise during a hard stop, but this is normal.
Traction ControlSystem (Option)
Your vehicle may have a traction control system that
limits wheel spin. Thisis especially useful in slippery
road conditions. The system operates only if it senses
that one orboth of the front wheels are spinning or
beginning to lose traction. When this happens, the
system works the frontbrakes and reduces engine p orer~
(by shutting off fuel injectors and managing engine
spark) to limitwheel spin.
You may feel the system working, or you may notice
some noise, but this is normal. If your vehicle is in
cruise controlwhen the traction control system begins to
limit wheel spin, the cruisecontrol will automatically
disengage. When road conditions allow you to safely
use it again, you may re-engage the cruise control. (See
“Cruise Control” in the Index.)
4-8
TRACTION
OFF
When the system is on, the
TRACTION OFF warning
light will come on to let
you know if there’s a
problem with your traction
control system.
See “Traction Control System Warning Light” in the
Index. When this warning light is on,the system will not
limit wheel spin. Adjust your driving accordingly.
The traction control system automatically comes on
whenever you start your vehicle. To limit wheel spin,
especially in slippery road conditions, you should
always leave the system on. But you can turn the
traction control system off if you ever need to. (You
should turn the system off if your vehicle ever gets stuck
in sand, mud, ice or snow. See “Rocking Your Vehicle”
in the Index.)
To turn the system off,
press the TRACTION
CONTROL button on the
instrument panel to the left
of the steering wheel.
Steering
Power Steering
If you lose power steering assist because the engine
stops orthe system is not functioning, you can steer but
it will take much more effort.
Steering Tips
Driving on Curves
It’s important totake curves at a reasonable speed.
The TRACTION OFF warning light will come on and
stay on. If the system is limiting wheel spin when you
press the button, thesystem won’t turn off right away. It
will wait until there’s no longer a current need to limit
wheel spin.
You can turn the system back on at any time by pressing
the button again. The TRACTION OFF warning light
should go off.
Braking in Emergencies
Use your anti-lock braking system when you need to.
With anti-lock, you can steer and brake at the same
time. In many emergencies, steeringcan help you more
than even the very best braking.
A lot of the “driver lost control” accidentsmentioned on
the news happen on curves. Here’s why:
Experienced driver orbeginner, each of us is subject to
the same laws of physics when driving on curves. The
traction of the tires against the road surface makes it
possible forthe vehicle to change its path when you turn
the front wheels.If there’s no traction, inertia will keep
the vehicle going in the same direction.If you’ve ever
tried to steer a vehicle on wet ice, you’ll understand this.
The traction you can get in a curve depends on the
condition of your tires and the road surface, the angle at
which the curve is banked, and your speed. While you’re
in a curve, speed is the one factor you can control.
4-9
Suppose you’re steering through a sharp curve.Then
you suddenly accelerate. Both control systems -steering and acceleration -- have to do their work where
the tires meet the road. Unless you have traction control
and the system is on,adding the sudden acceleration can
demand too much of those places. You can lose control.
What should you do if this everhappens? Ease upon the
accelerator pedal, steer the vehicle the way you want it
to go, and slow down.
Speed limit signs near curves warn that you should
adjust your speed. Of course, the posted speeds are
based on good weather and road conditions. Under less
favorable conditions you’ll want to go slower.
If you need to reduce your speed as you approach a
curve, do it before you enter the curve, while your front
wheels are straight ahead.
Try to adjust your speed so you can “drive” through the
curve. Maintain a reasonable, steady speed. Wait to
accelerate until you are out of the curve, and then
accelerate gently into thestraightaway.
4-10
Steering in Emergencies
There are times when steering can be more effective
than bralung. For example, you come over a hill and
find a truck stopped in your lane, or acar suddenly pulls
out from nowhere, or achild darts out from between
parked cars and stops right in front of you. You can
avoid these problems by braking -- if you can stop in
time. But sometimes you can’t; there isn’t room. That’s
the time for evasive action -- steering around the
problem.
Your Buick can perform very well in emergencies like
these. First apply your brakes. It is better to remove as
much speed as you can from a possiblecollision. Then
steer around the problem, to the left orright depending
on the space available.
An emergency like this requires close attention and a
quick decision. If you are holding the steering wheel at
the recommended 9 and 3 o’clock positions, you can
turn it a full 180 degrees very quickly without removing
either hand. But you have to act fast, steerquickly, and
just as quickly straighten the wheel once you have
avoided the object.
Off-Road Recovery
You may find sometime that your right wheels have
dropped off the edge of a road onto the shoulder while
you’re driving.
If the level of the shoulder is only slightly below the
pavement, recovery should be fairly easy. Ease off the
accelerator and then, if there is nothing in the way, steer
so that your vehicle straddles the edge of the pavement.
You can turn the steering wheel up to 1/4 turn until the
right front tire contacts the pavement edge. Then turn
your steering wheel to go straight down the roadway.
The fact that such emerge.ncy situations arealways
possible is a good reason to practice defensive driving at
all times and wear safety belts properly.
4-11
Passing
The driver of a vehicle about to pass another on a
two-lane highway waits for justthe right moment,
accelerates, moves around the vehicle ahead, then goes
back into the right lane again.A simple maneuver‘?
Not necessarily! Passing another vehicle on a two-lane
highway is a potentially dangerous move, since the
passing vehicle occupies thesame lane as oncoming
traffic for several seconds. A miscalculation, an error in
judgment, or a brief surrender to frustration or angercan
suddenly put the passing driver f x e to f x e with the
worst of all traffic accidents -- the head-on collision.
So here are some tips for passing:
0
“Drive ahead.” Look down the road, to the sides, and
to crossroads for situationsthat might affect your
passing patterns. If you have any doubt whatsoever
about making a successful pass, wait for a better
time.
Watch for traffic signs, pavement markings, and lines.
If you can see a sign up ahead that might indicate a
turn or an intersection, delay your pass. A broken
center line usually indicates it’s all right to pass
(providing the road ahead is clear). Never cross
a solid
line on your side of the lane or a double solid line,
even if the road seems empty of approaching traffic.
Do not get too close tothe vehicle you want to pass
while you’re awaiting an opportunity. For one thing,
following too closely reduces your area of vision,
especially if you’re following a larger vehicle. Also,
you won’t have adequate space if the vehicle ahead
suddenly slows or stops. Keep back a reasonable
distance.
When it looks like a chance to pass is coming up,
start to accelerate but stay in the right lane and don’t
get too close.Time your move so you will be
increasing speed as the time comes to move into the
other lane. If the way is clear to pass, you will have a
“running start” that more than makes up for the
distance you would lose by dropping back. And if
something happens to cause you to cancel your pass,
you need only slow down and drop back again and
wait for another opportunity.
If other cars are lined up to pass a slow vehicle, wait
your turn. But take care that someone isn’t trying to
pass you as you pull out to pass the slow vehicle.
Remember to glance overyour shoulder and check
the blind spot.
0
Check your mirrors, glance over your shoulder, and
start your left lane change signal before moving out
of the right lane topass. When you are farenough
ahead of the passed vehicle to see its front in your
inside mirror, activate your right lane change signal
and move back into the right lane. (Remember that
your right outside mirror is convex. The vehicle you
just passed may seem to be farther away from you
than it really is.)
Try not to pass more than one vehicle at a time on
two-lane roads. Reconsider before passing the next
vehicle.
0
Don’t overtake a slowly rnoving vehicle too rapidly.
Even though the brake lights are not flashing, it may
be slowing down or starting to turn.
If you’re being passed, make it easy for the
following driverto get ahead of you. Perhaps you
can ease a little to the right.
Loss of Control
Let’s review what driving experts say about what
happens when the three control systems (brakes, steering
and acceleration) don’thave enough friction where the
tires meet the road to do what the driver has asked.
In any emergency, don’t give up. Keep trying to steer
and constantly seek an escape route or area of less
danger.
Skidding
In a skid, a driver can lose control of the vehicle.
Defensive drivers avoid most skids by taking reasonable
care suited to existing conditions,and by not
“overdriving” those conditions. But skids are always
possible.
The three types of skids correspond to your Buick’s
three control systems. In the braking skid your wheels
aren’t rolling. In the steering or cornering skid, too
much speed or steering in a curve causes tires to slip and
lose cornering force.And in the acceleration skid too
much throttle causes the driving wheels to spin.
- 4-13
A cornering skid is best handled by easing your foot off
the accelerator pedal.
If you have the traction control system, remember: It
helps avoid only the acceleration skid.
If you do not have traction control, orif the system is
off, then an acceleration skid is also best handled by
easing your foot off the accelerator pedal.
If your vehicle starts to slide, ease
your foot off the
accelerator pedal and quickly steer the way you want the
vehicle to go. If you start steering quickly enough, your
vehicle may straighten out. Always be ready for a
second skid if it occurs.
Of course, traction is reduced when water, snow, ice,
gravel, orother material is on the road. For safety, you’ll
want to slow down and adjust your driving to these
conditions. Itis important to slow down on slippery
surfaces because stopping distance will be longer and
vehicle control more limited.
4-14
While driving on a surface with reduced traction, try
your best to avoid sudden steering, acceleration, or
braking (including engine braking by shifting to a lower
gear). Any sudden changes could cause the tires to slide.
You may not realize the surface is slippery until your
vehicle is skidding. Learn to recognize warning clues -such as enough water, ice orpacked snow on the road to
make a “mirrored surface” -- and slow down when you
have any doubt.
Remember: Any anti-lock brake system (ABS) helps
avoid only the braking skid.
Driving at Night
Adjust your inside rearview mirror to reduce the
glare from headlamps behind you.
Since you can’t see as well, you may need to slow
down and keep more space between you and other
vehicles.
Slow down, especially on higher speed roads. Your
headlamps can light up only so much road ahead.
In remote areas, watch for animals.
If you’re tired, pull off the road in a safe place and
rest.
Night Vision
No one can see as well at night as in the daytime. But as
we get older these differences increase.
A 50-year-old
driver may require at least twice as much light to see the
same thing at night as a20-year-old.
Night driving is more dangerous than day driving. One
reason is that some drivers are likely to be impaired -by alcohol or drugs, with night vision problems, or by
htigue.
Here are some tips on night driving.
0
Drive defensively.
Don’t drink and drive.
What you do in the daytime can also affect your night
vision. For example, if you spend the day in bright
sunshine you are wise to wear sunglasses. Your eyes will
have less trouble adjusting to night.
But if you’re
driving, don’twear sunglasses at night. They may cut
down on glare from headlamps, but they also make a lot
of things invisible.
You can be temporarily blinded by approaching lights. It
can take a second or two, or even several seconds, for
your eyes toreadjust to the dark. When you are fixed
with severe glare (as from a driver who doesn’t lower
the high beams, or a vehicle with misaimed headlamps),
slow down a little. Avoid staring directly into the
approaching lights.
Driving in the Rain
Keep your windshield and all the glass on your vehicle
clean -- inside and out. Glare at night is made much
worse by dirt on the glass. Even the inside of the glass
can build up a film caused by dust. Dirty glass makes
lights dazzle and flash more than clean glass would,
making the pupils of your eyes contractrepeatedly.
Remember that your headlamps light up far less of a
roadway when you are in a turn or curve. Keep your
eyes moving; that way, it’s easier to pick out dimly
lighted objects. Just as your headlamps should be
checked regularly for proper aim, so should your eyes
be examined regularly. Some drivers suffer from night
blindness -- the inability to see in dim light -- and aren’t
even aware of it.
4-16
Rain and wet roads can mean driving trouble. On a wet
road you can’t stop, accelerate or turn as well because
your tire-to-road traction isn’t as good as on dry roads.
And, if your tires don’t have much tread left, you’ll get
even less traction. It’s always wise to go slower and be
cautious if rain starts to fall while you are driving. The
surface may get wet suddenly when your reflexes are
tuned for driving on dry pavement.
,
The heavier the rain, the harder it is to see. ifEven
your
windshield wiper blades are in good shape, aheavy rain
can make itharder to see road signs
and traffic signals,
pavement markings, the edgeof the road, and even
people walking.
Driving too fast through large
water puddles or even
going through some car washes can cause problems, too.
The water may affect your brakes. Try to avoid puddles.
But if you can’t, try to slow down beforeyou hit them.
It’s wise to keep your wiping equipment in good shape
and keep your windshield washer tank filled. Replace
your windshield wiper inserts when they show signsof
streaking or missing areas on the windshield, orwhen
strips of rubber startto separate fromthe inserts.
4-17
Hydroplaning
Hydroplaning is dangerous. So much water can build up
under your tires that they can actually ride on the water.
This can happen if the road is wet enough and you’re
going fast enough.When your vehicle is hydroplaning,
it has little or no contact with the road.
Hydroplaning doesn’t happen often. But it can if your
tires haven’t much tread or if the pressure in one or
more is low. It can happen if a lot of water is standing on
the road. If you can see reflections from trees, telephone
poles, or other vehicles, and raindrops “dimple” the
water’s surface, there could be hydroplaning.
Hydroplaning usually happens at higher speeds. There
just isn’t a hard and fast rule abouthydroplaning. The
best advice is to slow down when it is raining.
4-18
Some Other Rainy Weather Tips
Turn on your low-beam headlamps -- not just your
parking lights -- to help make you more visible to
others.
0
Besides slowing down, allow some extra following
distance. And be especially careful when you pass
another vehicle. Allow yourself more clear room
ahead, and be prepared to have your view restricted
by road spray.
0
Have good tires with proper tread depth. (See
“Tires” in the Index.)
City Driving
Here are ways to increaseyour safety in city driving:
Know the best way to get to where you are going.
Get a city map and plan your trip into an unknown
part of the city just asyou would for a cross-country
trip.
Try to use the freeways that rim and crisscross most
large cities. You’ll save time and energy. (See the
next part, “Freeway Driving.”)
0
Treat a green light as a warning signal. A traffic light
is there because the corner is busy enough to need it.
When a light turns green,and just before you start to
move, check both ways for vehicles that have not
cleared the intersection or may be running the red
light.
One of the biggest problems with city streets is the
amount of traffic on them. You’ll want to watch out for
what the other drivers are doing and pay attention to
traffic signals.
4-19
Freeway Driving
The most important advice on freeway driving is: Keep
up with traffic and keep to the right. Drive at the same
speed most of the other drivers are driving. Too-fast or
too-slow driving breaks a smooth traffic flow. Treat the
left lane on a freeway as a passing lane.
At the entrance there is usually a ramp that leads to the
freeway. If you have a clear view of the freeway as you
drive along the entrance ramp, you should begin to
check traffic. Try to determine where you expect to
blend with the flow. Try to merge into the gap at close to
the prevailing speed. Switch on your turn signal, check
your mirrors and glance over your shoulder as often as
necessary. Try to blend smoothly with the traffic flow.
Once you are on the freeway, adjust your speed to the
posted limit or to the prevailing rate if it’s slower. Stay
in the right lane unless you want to pass.
Before changing lanes, check your mirrors. Then use
your turn signal.
Mile for mile, freeways (also called thruways, parkways,
expressways, turnpikes, or superhighways) are the safest
of all roads. But they have their own special rules.
Just before you leave the lane, glance quickly over your
shoulder to make sure there isn’t another vehicle in your
“blind” spot.
Once you are moving on the freeway, make certain you
allow a reasonable following distance. Expect to move
slightly slower at night.
4-20
When you want to leave the freeway, move to the proper
lane well in advance. If you miss your exit do not,under
any circumstances, stopand back up. Drive on to the
next exit.
The exit ramp can be curved, sometimes quite sharply.
The exit speed is usually posted.
Reduce your speed according toyour speedometer, not
to your sense of motion. After driving for any distance
at higher speeds, you may tend to think you are going
slower than you actually are.
Here are some things you can check before a trip:
0
Windshield Washer Fluid: Is the reservoir full? Are
all windows clean inside and outside?
0
Wiper Blades: Are they in good shape?
0
Fuel, Engine Oil, Other Fluids: Have you checked
all levels?
0
Lights: Are they all working? Are the lenses clean?
0
Tires: They are vitally important to a safe,
trouble-free trip. Is the tread good enough for
long-distance driving? Are the tires all inflated to the
recommended pressure?
0
W e h e r Forecasts: What’s the weather outlook
along your route? Should you delay your trip a short
time to avoid a major storm system‘?
0
Mq9s: Do you have up-to-date maps?
Before Leaving ona Long Trip
Make sure you’re ready. Try to be well rested. If you
must start when you’re not fresh -- such as after a day’s
work -- don’t plan to make too many miles that first part
of the journey. Wear comfortable clothingand shoes you
can easily drive in.
Is your vehicle ready for a longtrip’?If you keep it
serviced and maintained, it’s ready to go. If it needs
service, have it done before starting out. Of course,
you‘ll find experienced and able service expertsi n
Buick dealers all across North America. They’ll be
ready and willing to help if you need it.
4-21
Highway Hypnosis
Hill and MountainRoads
Is there actually such a conditionas “highway
hypnosis”? Or is it justplain falling asleep at thewheel?
Call ithighway hypnosis, lack of awareness, or
whatever.
There is something about an easy stretch of road with
the same scenery, along with the hum of the tireson the
road, the drone of the engine,and the rush of the wind
against the vehicle that can makeyou sleepy. Don’t let it
happen to you! If it does,your vehicle can leave the
road in less than a second, and you could crash and be
injured.
What can you do about highway hypnosis? First, be
aware that it can happen.
Then here are some tips:
0
Make sure your vehicle is well ventilated, with a
comfortably cool interior.
0
Keep your eyes moving. Scan the road ahead and to
the sides. Check your rearview mirrors and your
instruments frequently.
If you get sleepy, pull off the road into a rest, service,
or parking area and take anap, get some exercise, or
both. For safety, treat drowsiness on the highway as
an emergency.
4-22
P
Driving on steep hills or mountains is different from
driving in flat or rolling terrain.
If you drive regularlyin steep country, or if you’re
planning to visit there, here are sometips that can make
your trips safer and more enjoyable.
a Keep your vehicle in good shape. Check all fluid
levels and also the brakes, tires, cooling system and
transaxle. These partscan work hard on mountain
roads.
0
Know how to go down hills. The most important
thing to know is this: letyour engine do someof the
slowing down. Shift to a lower gear when you go
down a steep or long hill.
Know how to go uphill. Shift down to THIRD (3).
This will help cool your engine and transaxle, and
you can climb the hill better.
Stay in your own lane when driving on two-lane
roads in hills or mountains. Don’t swing wide or cut
across the center of the road. Drive at speeds thatlet
you stay in your own lane.
As you go over the top of a hill, be alert. Therecould
be something in your lane, likea stalled carQT an
accident.
You may see highway signs on mountains that warn
of special problems.Examples are long grades,
passing or no-passing zones, a falling rocksarea, or
winding roads. Bealert to these and take appropriate
action.
4-23
Winter Driving
Here are some tips for winter driving:
Have your Buick in good shape for winter. Be sure
your engine coolant mix is correct.
You may want to put winter emergency supplies in
your trunk.
4-24
Include an ice scraper, a small brush or broom, a supply
of windshield washer fluid, a rag, some winter outer
clothing, a small shovel, a flashlight, ared cloth, and a
couple of reflective warning triangles. And, if you will
be driving under severe conditions, include a small bag
of sand, apiece of old carpet or a couple of burlap bags
to help provide traction. Be sure you properly secure
these items in your vehicle.
Driving on Snow or Ice
Most of the time, those places where your tires meet the
road probably have good traction.
However, if there is snow or ice between your tires and
the road, you can have a very slippery situation. You’ll
have a lot less traction or “grip” and will need to be very
careful.
What’s the worst time for this? “Wet ice.” Very cold
snow or ice can be slick and hard to drive on. But wet
ice can be even more trouble because it may offer the
least traction of all. You can get “wet ice” when it’s
about freezing (32°F; OOC) and freezing rain begins to
f d l . Try to avoid drivingon wet ice until salt and sand
crews can get there.
Whatever the condition -- smooth ice, packed, blowing
or loose snow -- drive with caution.
If you have traction control, keep the system on. It will
improve your ability to accelerate when driving on a
slippery road. Even though your vehicle has a traction
control system, you’ll want to slow down and adjust
your driving to the road conditions. See“Traction
Control System” in the Index.
4-25
If you don’t have the traction control system, accelerate
gently. Try not to break the fragiletraction. If you
accelerate too fast, the drive wheels will spin and polish
the surface under the tires even more.
Your anti-lock brakes improve your ability to make a
hard stop on a slippery road. Even though you have the
anti-lock braking system, you’ll want to begin stopping
sooner than you would on dry pavement. See
“Anti-Lock‘’ in the Index.
0
Allow greater following distance on any slippery
road.
0
Watch for slippery spots. The road might be fine
until you hit a spot that’s covered with ice. On an
otherwise clearroad, ice patches may appear in
shaded areas where the sun can’t reach: around
clumps of trees, behind buildings, or under bridges.
Sometimes the surface of a curve oran overpass may
remain icy when the surrounding roads are clear. If
you see apatch of ice ahead of you, brake before you
are on it. Try not to brake while you’re actually on
the ice, and avoid sudden steering maneuvers.
4-26
If You’re Caught in a Blizzard
If you are stopped by heavy snow, you could be in a
serious situation.You should probably stay with your
vehicle unless you know for surethat you are near help
and you can hike through the snow. Here are some
things to do to summon help and keep yourself and your
passengers safe: Turn on your hazard flashers. Tie a red
cloth to your vehicle to alert police that you’ve been
stopped by the snow. Put on extra clothingor wrap a
blanket around you. If you have no blankets or extra
clothing, make body insulators from newspapers, burlap
bags, rags, floor mats -- anything you can wrap around
yourself or tuck under your clothing tokeep warm.
You can run the engine to keep warm, but be careful.
4-27
Loading Your Vehicle
cm
Y
TIRE-LOADING INFORMATION
OCCUPANTS
VEHICLE CAP. WT.
RR.
TOTAL LBS.
KG
CTR.
FRT.
Run your engine only as long as you must. This saves
fuel. When you run the engine, make it go a little faster
than just idle. That is, push the accelerator slightly. This
uses less fuel for the heat that you get and it keeps the
battery charged. You will need a well-charged battery to
restart the vehicle, and possibly for signaling later on
with your headlamps. Let the heater run for awhile.
Then, shut the engine off and close the window almost
all the way to preserve the heat. Start the engine again
and repeat this only when you feel really uncomfortable
from the cold. But do it as little as possible. Preserve the
fuel as long as you can. To help keep warm, you can get
out of the vehicle and do some fairly vigorous exercises
every half hour or so until help comes.
4-28
\
MAX. LOADING & GVWR SAME AS VEHICLE
CAPACITY WEIGHT
XXX
COLD TIRE
TIRE SIZE
PRESSURE
SPEED
PSI/KPa
RTG
FRT.
RR.
SPA.
IF TIRES ARE HOT, ADD 4PSli28KPa
SEE OWNER’S MANUAL FOR ADDITIONAL
INFORMATION
Two labels on your vehicle show how much weight it
may properly carry. The Tire Loading Information
label found on the rear edge of the driver’s door tells
you the proper size, speed rating and recommended
inflation pressures for the tires on your vehicle. It also
gives you important information about the number of
people that can be in your vehicle and the total weight
that you can carry. This weight is called the Vehicle
Capacity Weight and includes the weight of all
occupants, cargo, and all nonfactory-installed options.
MFD BY GENERAL MOTORS CORP
DATE GVWR GAWR FRT GAWR RR
THIS VEHICLE CONFORMS TO ALL APPLICABLE U.S. FEDERAL MOTOR VEHICLE
SAFETY, BUMPER, AND THEFT PREVENTION
STANDARDS IN EFFECT ON THE DATE OF
MANUFACTURE SHOWN ABOVE.
I
The other labelis the Certification Label, found
on the
NOTICE:
rear edgeof the driver’sdoor. It tellsyou the gross
Your warranty does not cover parts or
weight capacityof your vehicle, called the GVWR
of overloading.
components that fail because
(Gross Vehicle Weight Rating). The GVWR includes the
weight of the vehicle, all occupants, fuel and cargo.
Never exceed theGVWR for your vehicle, orthe Gross
If you put things insideyour vehicle -- like suitcases,
or rear
Axle Weight Rating (GAWR) for either the front
-- they will go as fast
tools, packages, or anything else
axle.
turn quickly,
as thevehicle goes. If you have to stop or
or if there is a crash, they’llkeep going.
And, if you do have a heavy load, you should spread it
out. Don’t carry morethan 176 pounds (80 kilograms) in
your trunk.
4-29
Towing a Trailer
NOTICE:
Pulling a trailer improperly can damage your
vehicle and result in costly repairs not covered
by
your warranty.To pull a trailer correctly, follow
the advice in this part, and see your
Buick dealer
a trailer
for important information about towing
with your vehicle.
4-30
Your car can tow a trailer if i t is equipped with the
3800 (1,67) Supercharged engine or the 3800 (L36)
engine and proper trailer towing equipment. To identify
what the vehicle trailering capacity is foryour vehicle,
you should read the information in “Weight of the
Trailer” that appears later in this section. Rut trailering
is different than just driving your vehicle by itself.
Trailering means changes in handling, durability, and
fuel economy. Successful, safe trailering takes correct
equipment, and it has to be used properly.
That’s the reason for this part. In it are many
time-tested. important trailering tips and safety rules.
Many of these are important for your safety and that of
your passengers. So please read this section carefully
before you pull a trailer.
T_,oad-pullingcomponents such as the engine, transaxle,
wheel assemblies. and tires are forced to work harder
against the drag of the added weight. The engine is
required to operate at relatively higher speeds and under
greater loads, generating extra heat. What’s more, the
trailer adds considerably to wind resistance, increasing
the pulling requirements.
If You Do Decide To Pull A Trailer
If you do, here are some important points.
There are many different laws, including speed limit
restrictions, having to do with trailering. Make sure
your rig will be legal, not only where you live but
also where you’ll be driving. A good source forthis
information can be state or provincial police.
e Consider using a sway control if your trailer will
weigh 2,000 pounds (900 kg) or less.You should
always use a sway control if your trailer will weigh
more than 2,000 pounds (900 kg).
You can ask a hitch dealer about sway controls.
0
Don’t tow a trailer at all during the first 1,000miles
(1 600 km) your new vehicle is driven. Your engine,
axle or otherparts could be damaged.
0
Then, during the first 500 miles (800 km) that you
tow a trailer, don’t drive over 50 mph (80 k d h ) and
don’t make starts at full throttle. This helps your
engine and other parts of your vehicle wear in at the
heavier loads.
0
Obey speed limit restrictions when towing a trailer.
Don’t drive fasterthan the maximum posted speed
for trailers (or no more than 55 mph (90 km/h)) to
save wear on your vehicle’s parts.
4-31
Three important considerationshave to dowith weight:
Weight of the Trailer Tongue
Weight of the Trailer
The tongue load (A) of any trailer is an important
weight to measure because it affects the total capacity
weight of your vehicle. The capacity weight includes the
curb weight of the vehicle, any cargo you may carry in
it, and the people who will be riding in the vehicle. And
if you will tow a trailer, you must subtract the tongue
load from your vehicle’s capacity weight because your
vehicle will be carrying that weight, too. See “Loading
Your Vehicle” in the Index for more information about
your vehicle’s maximum load capacity.
How heavy can a trailer safely be?
It should never weigh more than 1,000 pounds (450 kg),
unless you have the optional 3,000 pound (1350 kg)
trailer towing package. But even that can be too heavy.
It depends on how you plan to use your rig. For
example, speed, altitude, road grades, outside
temperature and how much your vehicle is used to pull a
trailer are all important. And, it can also depend on any
special equipment that you have on your vehicle.
You can ask your dealer for ourtrailering information or
advice, or you can write us at Buick Motor Division,
Customer Assistance Center, 902 E. Hamilton Avenue,
Flint, MI 48550.
In Canada, write to General Motors of Canada Limited,
Customer Assistance Center, 1908 Colonel Sam Drive,
Oshawa, Ontario L1H 8P7.
A
4-32
B
If you’re using a “dead-weight” hitch, the trailer tongue Hitches
(A) should weigh 10%of the total loaded trailerweight
It’s important to have the correcthitch equipment.
(B). If you have a “weight-distributing” hitch, the trailer
Crosswinds, largetrucks going by, ‘andrough roads are
tongue (A) should weigh 12% of the total loaded trailer
a few reasonswhy you’ll need the right hitch. Here are
weight (B).
some rules to follow:
After you’ve loaded
your trailer, weigh the trailerand
If you’ll be pulling a trailer that,
when loaded, will
then the tongue,separately, to see if the weights are
weigh
more
than
2,000
pounds
(900
kg), be sure to
proper. If they aren’t, you may be able toget them right
use a properly mounted, weight-distributing
hitch
simply by moving some items aroundin the trailer.
and sway control of the proper size. This
equipment
is very important forproper vehicle loading and
Total Weight on Your Vehicle’s Tires
good handling when you’re driving.
Be sure your vehicle’s tires are inflated to the
0 Will you have to makeany holes in the body of your
recommended pressure for cold tires.
You’ll find these
vehicle when you install a trailer hitch?
If you do,
numbers on the Certification label atthe rear edgeof the
then be sure toseal the holes later when you remove
driver’s door or see “Loading
Your Vehicle” in the
the hitch. If you don’t seal them,deadly carbon
Index. Then be sureyou don’t go over theGVW limit
monoxide (CO) from your exhaust canget into your
for your vehicle, including theweight of the trailer
vehicle
(see “Carbon Monoxide” in the Index).Dirt
tongue.
and water can, too.
The bumpers on your vehicle are not intended for
hitches. Do not attach rental hitches or other
bumper-type hitches to them. Use only a
frame-mounted hitchthat does not attach to the
bumper.
4-33
Safety Chains
Driving with a Trailer
You should always attach chains between your vehicle
and your trailer. Cross the safety chains under the tongue
of the trailer so that the tongue will not drop tothe road
if it becomes separated from the hitch. Instructions
about safety chains may be provided by the hitch
manufacturer or by the trailer manufacturer. Follow the
manufacturer’s recommendation for attaching safety
chains and do not attach them to the bumper. Always
leave justenough slack so you can turn with your rig.
And, never allow safety chains to drag on the ground.
Towing a trailer requires a certain amount of experience.
Before setting out for theopen road, you’ll want to get
to know your rig. Acquaint yourself with the feel of
handling and braking with the added weight of the
trailer. And always keep in mind that the vehicle you are
driving is now a good deal longer and not nearly as
responsive as your vehicle is by itself.
Trailer Brakes
If your trailer weighs more than 1,000 pounds (450 kg)
loaded, then it needs its own brakes -- and they must be
adequate. Be sure to read and follow the instructions for
the trailer brakes so you’ll be able to install, adjust and
maintain them properly. Because you have anti-lock
brakes, do not try to tap into you vehicle’s brake system.
If you do, both brake systems won’t work well, or at all.
Before you start, check the trailer hitch and platform
(and attachments), safety chains, electrical connector,
lights, tires and mirror adjustment. If the trailer has
electric brakes, start your vehicle and trailer moving and
then apply the trailer brake controller by hand to be sure
the brakes are working. This lets you check your
electrical connection at the same time.
During your trip, check occasionally to be sure that the
load is secure, and that the lights and any trailer brakes
are still working.
Following Distance
Stay at least twice as far behind the vehicle ahead as you
would when driving your vehicle without a trailer. This
can help you avoid situations that require heavy braking
and sudden turns.
Passing
Turn Signals When Towing a Trailer
You’ll need more passing distance up ahead when
you’re towing a trailer. And, because you’re a good deal
longer, you’ll need to go much farther beyond the
passed vehicle before you can return to your lane.
When you tow a trailer, your vehicle has to have a
different turn signal flasher and extra wiring. The green
arrows on your instrument panel will flash whenever
you signal a turn or lane change.Properly hooked up,
the trailer lamps will also flash, telling other drivers
you’re about to turn, change lanes or stop.
Backing Up
Hold the bottom of the steering wheel with one hand.
Then, to move the trailer to theleft, just move that hand
to the left. To move the trailer to the right, move your
hand to the right. Always back up slowly and, if
Possible, have someone guide you.
Making Turns
I NOTICE:
Making very sharp turns while trailering could
cause the trailer to come in contact with the
vehicle. Your vehicle could be damaged. Avoid
making very sharp turns while trailering.
When towing a trailer, the green arrows on your
instrument panel will flash for turns even if the bulbs on
the trailer areburned out. Thus,you may think drivers
behind you are seeingyour signal when they are not. It’s
important to check occasionally to be sure the trailer
bulbs are still working.
Your vehicle has bulb warning lights. When you plug a
trailer lighting system into your vehicle’s lighting
system, its bulb warning lights may not let you know if
one of your lamps goes out. So, when you have a trailer
lighting system plugged in, be sure to check your
vehicle and trailer lamps from time to time to be sure
they’re all working. Once you disconnect the trailer
lamps, the bulb warning lights again can tell you if one
of your vehicle lamps is out.
When you’re turning with a trailer, make wider turns than
normal. Do this so your trailer won’t strike soft shoulders,
curbs, road signs, trees, or other objects. Avoid jerky or
sudden maneuvers. Signal well in advance.
4-35
Driving On Grades
Reduce speed and shift to a lower gear bejbre you start
down a longos steep downgrade. If you don’t shift
down, you might have to use your brakes so much that
they would get hot and no longer work well.
When You Are Ready to Leave After
Parking on aHill
1 - Apply your regular brakes and hold the pedal down
while you:
0
On a long uphill grade, shift down toTHIRD GEAR (3)
and reduce your speedto around 45 mph (70 kmh) to
reduce the possibility of engine and transaxle overheating.
Start your engine;
Shift into a gear; and
Release the parking brake.
Parking on Hills
2. Let up on the brake pedal.
You really should not park your vehicle, with a trailer
attached, on a hill. If something goes wrong, your rig
could start to move. People can be injured, and both
your vehicle and the trailer can be damaged.
3. Drive slowly until the trailer is clear of the chocks.
But if you ever have to park your rig on a hill, here’s
how to do it:
1. Apply your regular brakes, but don’t shift into
PARK (P) yet.
2. Have someone place chocks under the trailer wheels.
3. When the wheel chocks are in place, release the
regular brakes until the chocks absorb the load.
4. Reapply the regular brakes. Then apply your parking
brake, and the shift to PARK (P).
5. Release the regular brakes.
4. Stop and have someone pick up and store the chocks.
Maintenance When Trailer Towing
Your vehicle will need service more often when you’re
pulling a trailer. See the Maintenance Schedule for more
on this. Things that are especially important in trailer
operation are automatic transaxle fluid (don’t overfill),
engine oil, belts, cooling system, and brake adjustment.
Each of these is covered in this manual, and the Index
will help you find them quickly. If you’re trailering, it’s
a good idea to review these sections before you start
your trip.
Check periodically to see that all hitch nuts and bolts are
tight.
(@
Section 5 Problems onthe Road
Here you‘ll find what to do about some problems that
can occur on the road.
Hazard Warning: Flashers
U
Your hazard warning flashers letyou warn others. They
also let police know you have a problem. Your front and
rear turn signal lamps will flash on and off.
Press the button in to make
your front and rear turn
signal lamps flash on and
off.
Your hazard warning flashers work no matter what
position your key is in, and even if the key isn’t in.
5-1
To turn off the flashers, pull
out on the collar. When the
hazard warning flashers are
on, your turn signals won’t
work.
Batteries can hurtyou. They can be dangerous
because:
0 They contain acid that can burnyou.
0 They contain gas that can explode
or ignite.
0 They contain enough electricity toburn
you.
If you don’t follow these stepsexactly, someor all
of these things can hurt
you.
Other Warning Devices
If you carry reflective triangles, you can set one up at
the side of the road about 300 feet (100m) behind your
vehicle.
J urnp
Starting
If your battery has run down, you may want to use
another vehicle and some jumper cables to start your
Buick. But please follow the steps on the next pages to
do it safely.
5-2
NOTICE:
Ignoring these steps could resultcostly
in damage
to your vehicle that wouldn’t be coveredby your
warranty.
by pushing or pulling
Trying to start your Buick
it won’t work, and it could damage your
vehicle.
_____
..
-
To Jump Start Your Buick
1. Check the other vehicle. It must have a 12-volt
battery with a negativeground system.
NOTICE:
If’the other system isn’t 12-volt
a
system with a
negative ground, both vehicles can be damaged.
2. Get the vehicles close enoughso the jumper cables
can reach, butbe sure the vehiclesaren’t touching
each other. If they are, it could cause aground
connection you don’t want. You wouldn’t be ableto
start your Buick, and the bad grounding could
damage the electrical systems.
3. Turn off the ignitionon both vehicles. Turn off the
radios and all lamps that aren’t needed. This will
avoid sparks and help save both batteries. Itcould
save your radio!
I NOTICE:
If you leave your radio on,
it could be badly
by
damaged. The repairs wouldn’t be covered
your warranty.
4. Open the hoods and locate the batteries.
You could be injuredif the vehicles roll.Set the
parking brake firmly on each vehicle.Put an
automatic transaxle inPARK (P) or a manual
transaxle in NEUTRAL (N).
Find the positive(+) and negative (-) terminals on
each battery.
~
5-3
5. Check that the jumper cables don’t have loose or
missing insulation. If they do, you could get a shock
and the vehicles could be damaged.
Before you connect the cables, here are some basic
things you should know. Positive (+) will go to
positive (+) and negative (-) will go to negative (-)
or a metal engine part. Don’t connect (+) to (-) or
you’ll get a short that would damage the battery and
maybe other parts, too.
8. Now connect the black
negative (-) cable tothe
good battery's negative
(-) terminal.
6. Connect the red positive
(+) cable to the positive
(+) terminal of the
vehicle with the dead
battery. Use a remote
positive (+) terminal if
the vehicle hasone.
I
I
7. Don't let the otherend
touch metal. Connectit
to the positive(+)
terminal of the good
battery. Use a remote
positive (+>terminal if
the vehicle has one.
Don't let theother end touch anything until thenext
step. The other endof the negative cabledoesn 't go to
the dead battery. It goes to aheavy unpainted metal part
on the engineof the vehicle with the dead battery.
5-5
11. Try to startthe vehicle with the dead battery.
If it won’t start after afew tries, itprobably needs
service.
12. Remove thecables in reverseorder to prevent
electrical shorting. Take care that they don’t touch
each other or any other metal.
9. Attach the cable at least18 inches (45 cm) away
from thedead battery, but not near engine partsthat
move. The electricalconnection is just as good
there, but the chanceof sparks getting back to the
battery is much less.
10. Now start thevehicle with the good battery and run
the enginefor a while.
DEAD BAITERY
!
Remove the cables in this order.
5-6
I
Towing Your Vehicle
Try to have a GM dealer or aprofessional towing
service tow your Buick. The usual towing equipment is
a sling-type (A), wheel-lift (B) or car carrier(C) tow
truck.
If your vehicle has been changed or modified since it
was factory-new by adding after-market items like fog
lamps, aero skirting, or special
tires and wheels, these
instructions and illustrations may not be correct.
Before you do anything, turn on the hazard warning
fl ashers.
When you call, tell the towing service:
That your vehicle has front-wheel drive.
The make, model and year of your vehicle.
Whether you can still move the shift lever.
If there was an accident, what was damaged.
When the towing service arrives,let the tow operator
know that this manual contains detailed towing
instructions and illustrations. The operator may want to
see them.
3-I
When your vehicle is being towed, have the ignition key
off. The steering wheel should be clamped in a
straight-ahead position, with a clampingdevice
designed for towing service. Do not use the vehicle’s
steering column lock for this. The transaxle
should be in
NEUTRAL (N) and the parking brake released.
Don’t have your vehicle towed on the frontwheels,
unless you must. If the vehicle must be towed on the
front wheels, don’t go more than 55 mph (88 km/h) or
farther than 500 miles (800 km)or your transaxle will
be damaged. If these limits must be exceeded, then the
front wheels have to be supported on a dolly.
5-8
Front Towing Hookups
Attach T-hook chains behind the front wheels into the
bottom slots of the cradlerails on both sides.
Position a 4” x 4” wood beam across the sling chains
contacting thebottom of the radiator support. Position
the lower sling crossbar justbehind the rear edgeof the
front bumper.
Attach a separate safety chain around the outboard end
of each lower control arm.
5-9
Rear Towing Hookups
TOW LIMITS-55 MPH (88 KPH),
500 MILES (800 KM)
Attach T-hook chains to the slots in the bottom of the
floor pan of the rear wheels on both sides.
Position the lower sling crossbardirectly under the rear
bumper. A 4” x 4”wood beam is not needed,
Attach a separate safety chain around the outboard end
of each lower control arm.
I
5-10
w
Engine Overheating
You will find a warning light about a hot engine on your
Buick instrument panel and if you have the optional
gage cluster, a coolant temperature gage. You will also
find a low coolant warning light.
If Steam Is Coming From Your Engine
I NOTICE:
I
If your engine catches fire because you keep
driving with no coolant, your vehicle can
be
badly damaged. The costly repairs would be
not
covered by your warranty.
If No Steam Is Coming FromYour Engine
If you get the overheat warning but see or hear no
steam, the problem may not be too serious. Sometimes
the engine can get a littletoo hot when you:
Climb a long hill on a hot day.
0 Stop after high speed driving.
Idle for long periods in traffic.
Tow a trailer.
If you get the overheat warning with no sign of steam,
try this for a minute or so:
1. Turn off your air conditioner.
2. Turn on your heater to full hot at the highest fan
speed and open the window as necessary.
3. If you’re in a traffic jam, shift to NEUTRAL (N);
otherwise, shift to the highest gear while driving -AUTOMATIC OVERDRIVE (@) or THIRD (3).
If you no longer have the overheat warning, you can
drive. Just to be safe, drive slower for about 10 minutes.
If the warning doesn’t come back on, you can drive
normally.
If the warning continues, pull over, stop, and park your
vehicle right away.
If there’s still no sign of steam, you can idle the engine
for two or three minutes while you’re parked, to see if
the warning stops. But then, if you still have the
warning, turn off the engine and get eveqyone out crftize
vehicle until it cools down.
You may decide not to lift the hood but to get service
help right away.
5-12
When you decide it’s safe to lift the hood, here’s what
you’ll see:
0
Coolant recovery tank
Radiator pressure cap
Electric engine fans
The coolant level should beFULL COLD. If it isn't, you
may have a leak in the radiator hoses, heater hoses, radiator,
water pump or somewhere else in the cooling system.
If the coolant inside the coolant recovery tank is boiling,
don't do anything else until it cools down.
NOTICE:
I
Engine damage from running your engine
without coolant isn't coveredby your warranty.
If there seems to be no leak. with the engine on, check to
see if the electric enginefan(s) are running. If the engine
is overheating, both fan(s) should be running. If they
aren't, your vehicle needs service.
5-13
How to Add Coolant to the Coolant
Recovery Tank
If you haven’t found a problem yet, but the coolant level
isn’t at FULL COLD, add a 50/50 mixture of clean water
(preferably distilled) and a proper antifreeze at the coolant
recovery tank. (See “Engine Coolant”in the Index for
more information aboutthe proper coolant mix.)
NOTICE:
In cold weather, water can freeze and crack the
engine, radiator, heater core and other parts. Use
the recommended coolant.
y.
’,
5-14
,
k:.,
When the coolant in the coolant recovery tank is at
FULL COLD, start your vehicle.
If the overheat warning continues, there’s one more
thing you can try. You can add the proper coolant mix
directly to the radiatorbut be sure the coolingsystem is
cool before you do it.
5-15
How to Add Coolant to the Radiator
.
I
,A
' j '
"
'
.
1. You can remove the radiator pressure cap when the
cooling system, including the radiator pressure cap
and upper radiator hose, is no longer hot. Turn the
pressure cap slowly to the left until it first stops.
(Don't press down while turning the pressure cap.)
If you hear a hiss, wait for that to stop. A hiss means
there is still some pressure left.
5-16
3. Fill the radiator
with the proper
mix, up to the base
of the filler neck.
-
6. Start the engine
and let itrun until
you can feel the
upper radiator hose
getting hot. Watch
out for the engine
fans.
4. Then fill the coolantrecovery tank to FULL COLD.
5 . Put the cap back
on the coolantrecovery tank, but
off.
leave the radiator pressure cap
7. By this time the coolant level inside the radiator
filler neck may be lower. If the level islower, add
more of the propermix through the fillerneck until
the level reaches the
base of the fillerneck.
5-17
I
,
“ 3
c
8. Then replace the
pressure cap. At
any time during
this procedure if
coolant begins to
flow out of the
filler neck,reinstall
the pressure cap.
Be sure the arrows
on the pressure cap
line up likethis.
If a Tire Goes Flat
It’s unusual for a tire to“blow out” while you’re driving,
especially if you maintain your tires properly. If air goes
out of a tire, it’s much more likely to leak out slowly.
But if you should ever have a “blowout,” here are afew
tips about what to expect and what to do:
If a front tirefails, the flat tirewill create a dragthat
pulls the vehicle toward that side. Take your foot off the
accelerator pedal and grip the steering wheel firmly.
Steer to maintain lane position, then gently brake to a
stop well out of the traffic lane.
A rear blowout, particularly on a curve, acts much like a
skid and may require the same correction you’d use in a
skid. Inany rear blowout, remove your foot from the
accelerator pedal. Get the vehicle under control by
steering the way you want the vehicle togo. It may be
very bumpy and noisy, but you can still steer. Gently
brake to a stop,well off the road if possible.
If a tiregoes flat, the next part shows how to use your
jacking equipment to change a flat tire safely.
5-18
Changing a Flat Tire
If a tire goes flat, avoid further tire and wheel damage
by driving slowly to a level place. Turn on your hazard
warning flashers.
The following steps will tell you how to use the jack and
change a tire.
5-19
Start with the jack and the
wheel wrench.
The equipment you’ll need is in the trunk.
5-20
The jackhas a bolt at
the end. Attach the
wheel wrench to the
jack bolt.
Rotate the wheel wrench clockwise (to the right). That
will raise the lift head a little.
5-21
If your Buick has a wheel cover, you must take it off to
reach the wheel nuts.
If your vehicle has this
aluminum wheel, you may
have plastic wheel nut caps.
Use the wheel nut wrench to
remove the wheel nut caps
and to loosen the wheel
nuts.
When reinstalling the decorative nut caps, tighten the
caps snug with the wheel wrench, then continue 1/8
rotation for steel caps and 1/4 rotation for plastic caps.
If your vehicle has an aluminum wheel with a center
cover, remove it using the flatend of the wheel wrench.
5-22
If your vehiclehas wire
wheel covers, removethem
as follows:
I-
Use thewire wheel key
wrench to remove the wire
wheel cover.
Using the flat endof the key
wrench handle between the
wire wheel cover and the
center cap,pry off the
center cap.
Remove the theft-deterrent
wheel nut by placing the
key end of the wirewheel
key wrench over the nut and
turning itto the left. Pulloff
the wire wheel cover. Note:
When replacing the wheel
cover, carefully lineup the
tire valve stemand the
notch in the wheel cover.
5-23
Using the wheel wrench, loosen all the wheel nuts.
Don't remove them yet. Next, attach the wheel wrench
to the bolt on the end of the jack.Raise the jack alittle
bv rotating the wheel wrench clockwise (to the right).
.
..
,
.
The jack handlehas markings at 8 inches (20 cm) for the
rear and 10 inches (25 cm) for the front, which will help
you to locate the jacking
notches in the frame.
5-24
Position the jack under the
vehicle. There is a notch in
the frame near each of the
wheels. Fit the top of the
jack into thenotch nearest
the wheel with the flat tire.
NOTICE:
Raising your vehicle with the jack improperly
positioned will damage the vehicleor may allow
the vehicle to falloff the jack. Be sure to fit the
jack lift head into the proper location before
raising your vehicle.
Raise the vehicle by rotating the wheel wrench
clockwise. Raise the vehicle far enough off the ground
so there is enough room for the spare tireto fit.
Remove all the wheel nuts and take off the flat tire.
5-25
Place the spare on the
wheel mounting surface.
5-26
Replace the wheel nuts with
the rounded end of the nuts
toward the wheel.Tighten
each nut by hand until the
wheel is held against the
hub.
Lower the vehicle by rotating the wheel wrench
counterclockwise. Lower the jack completely.
5-27
Tighten the wheel nuts
firmly in a criss-cross
sequence as shown.
Don’t try to put a wheel cover on your compact spare
tire. It won’t fit. Storethe wheel cover in the trunk until
you have the flat tire repaired or replaced.
NOTICE:
Wheel covers won’tfit on your compact spare.
If you try to puta wheel coveron your compact
spare, you could damage the cover or the spare.
5-28
Now put all the equipmentback in the trunk.
Compact Spare Tire
Although the compact sparewas fully inflatedwhen
your vehicle was new, it can lose airafter a time. Check
the inflation pressureregularly. It should be 60 psi
(420 P a ) . After installing thecompact spare on your
vehicle, you should stop as soon as possible and make
sure your spare tireis correctly inflated. Thecompact
spare is made toperform well at posted speed limits for
distances up to 3,000 miles (5 000 km), so you can
finish your trip and have your full-size tire repaired or
replaced where you want. Of course, it’s best to replace
your spare with a full-size tire assoon as you can. Your
spare will last longerand be in good shape in caseyou
need it again.
NOTICE:
Don’t take your compact spare through an
automatic car wash with guide rails. The
compact spare can get caught
on the rails. That
can damage the tire and wheel, and maybe other
parts of your vehicle.
Don’t use your compact spareon some other vehicle.
5-29
And don’t mix your compact spare orwheel with other
wheels or tires. They won’t fit. Keep your spare and its
wheel together.
NOTICE:
Tire chains won’tfit your compact spare. Using
them will damage your vehicleand destroy the
on your compact
chains too. Don’t use tire chains
spare.
If You’re Stuck: In Sand,Mud, Ice or
Snow
What you don’t want to do when your vehicle is stuck is
to spin your wheels too fast. Themethod known as
“rocking” can help you get outwhen you’re stuck, but
you must use caution.
5-30
I NOTICE:
Spinning your wheels can destroy parts
of your
vehicle as well as the tires.If you spin the wheels
too fast while shifting your transaxle back and
forth, you can destroy your transaxle.
For information aboutusing tire chainson your vehicle,
see “Tire Chains” in the Index.
Rocking your vehicle to get it out:
First, turn your steering wheel left and right. Thatwill
clear the area around your front wheels. If your vehicle
has traction control, you should turn the system off. (See
“Traction Control System” in the Index.) Then shift
back and forth between REVERSE (R) and a forward
gear, spinning the wheels as little as possible. Release
the acceleratorpedal while you shift, and press lightly
on the accelerator pedal when the transaxleis in gear. If
that doesn’t getyou out after a few tries, you may need
to be towed out. If you do need to betowed out, see
“Towing Your Car” in the Index.
5-31
NOTES
5-32
(@ Section 6 ServiceandAppearance Care
Here you will find information aboutthe care of your
Buick. This section beginswith service and fuel
information, and then it shows how to check important
fluid and lubricant levels. Thereis also technical
information about your vehicle, and a part devoted to
its appearance care.
We hope you’ll want to keep your GM vehicle all GM.
Genuine GM parts have one of these marks:
Service
Your Buick dealer knows your vehicle best and wants
you to be happy with it. We hope you’ll go to your
dealer for allyour service needs. You’ll get genuine GM
parts and GM-trained and supported service people.
6-1
Doing Your Own Service Work
If you want to do some of y o u f m n service work, you’ll
want to getthe proper Buick Service Manual. It tells you
much more about how to serviceyour Buick than this
manual can. To order the proper servicemanual, see
“Service and Owner Publications” inthe Index.
Your vehicle has an air bag system. Before attempting to
do your own service work, see “Servicing Your Air
Bag-Equipped Buick” in the Index.
You should keep a record with all parts receipts and list
the mileage and the date of any service work you
perform. See “Maintenance Record” in the Index.
NOTICE:
If you try to do your own service work without
knowing enough aboutit, your vehicle could be
damaged.
6-2
Fuel
3800 L36 Engine (Code K)
The 8th digit of your vehicle identification number
(VIN) showsthe code letter foryour engine. You will
find the VIN at the top left of your instrument panel.
(See “Vehicle Identification Number” in the Index.)
Use regular unleaded gasoline rated at 87 octane or
higher. It should meet specifications ASTM D48 14 in
the United States and CGSB 3.5-92 in Canada. These
fuels should have the proper additives, so you should not
have to add anything tothe fuel.
In the United States and Canada, it’s easy to be sure you
get the right kind of gasoline (unleaded).You’ll see
UNLEADED righton the pump. And only unleaded
nozzles will fit intoyour vehicle’s filler neck.
Be sure theposted octane is at least 87.If the octane is
less than 87, you may get a heavy knocking noise when
you drive. If it’s bad enough, it can damage your engine.
If you’re using fuel rated at 87 octane or higher and you
still hear heavy knocking, your engine needs service.
But don’t worry if you hear a little pingingnoise when
you’re accelerating or drivingup a hill. That’s normal,
and you don’t have to buy a higher octane fuel to getrid
of pinging. It’s the heavy, constant knock that means
you have a problem.
What about gasoline with blending materials that
contain oxygen (oxygenates), such as MTBE or alcohol?
MTBE is “methyl tertiary-butyl ether.” Fuel that is no
more than 15% MTBE is fine for your vehicle.
Ethanol is ethyl or grain alcohol. Properly-blended fuel
that is no more than 10% ethanol is fine for your
vehicle.
Methanol is methyl or wood alcohol.
-
NOTICE:
Fuel that is more than5% methanol is bad for
your vehicle. Don’t useit. It can corrode metal
parts in your fuel system and also damage plastic
and rubber parts. That damage wouldn’t be
covered under your warranty. And even 5%
at or
less, there must be “cosolvents” and corrosion
preventers in this fuel to help avoid these
problems.
6-3
Gasolines for Cleaner Air
your use of gasoline with deposit control additives will
help prevent deposits from forming i n your engine and
fuel system. That helps keep your engine in tune and
your emission control system working properly. It’s
b
oood for your vehicle, and you’ll be doing your part for
cleaner air.
3800 Supercharged L67 Engine (Code 1)
The 8th digit of your vehicle identification number
(VIN) shows the code letter for your engine. You will
find the VIN at the top left of your instrument panel.
(See “Vehicle Identification Number’’ in the Index.)
Many gasolines are now blended with oxygenates.
General Motors recommends that you use gasalines with
these blending materials, such a s MTBE and ethanol. By
doing so. you can help clean the air, especially i n those
parts of the country that have high carbon monoxide
levels.
Use premium unleaded gasoline rated at9 1 octane or higher
for best performance. You may use middle grade
or regular
unleaded gasolines, but your vehiclemay not accelerate as
well. The gasoline you use should meet specifications
ASTM D48 14 in the United States and CGSB 3.5-92 in
Canada. These fuels should have the proper additives, so
you should not have to add anything to the fuel.
I n addition, some gasoline suppliers are now producing
reformulated gasolines. These gasolines are specially
designed to reduce vehicle emissions. General Motors
recommends that you use re.formulatedgasoline. By
doing so, you can help clean the air, especially in those
parts of the country that have high ozone levels.
I n the United States and Canada, it’s easy to be sure you
get the right kind of gasoline (unleaded). You’ll see
UNLEADED right on the pump. And only unleaded
nozzles will fit into your vehicle’s filler neck.
You should ask your service station operators if their
gasolines contain deposit control additives and
oxygenates: and if they have been reformulated to
reduce vehicle emissions.
Be sure the posted octane for premium is at least 91
(at least 89 for middle grade and 87 for regular). If the
octane is less than 87, you may get a heavy knocking
noise when you drive. If it’s bad enough, it can damage
your engine.
If you’re using fuel rated at 91 octane or higher and you
still hear heavy knocking, your engine needs service.
6-4
But don’t worry if you hear a little pingingnoise when
you’re accelerating or drivingup a hill. That’s normal
and you don’t have to buy a higher octane fuel to get rid
of pinging. It’s the heavy, constant knock that means
you have a problem.
What about gasoline with blending
materials that
contain oxygen (oxygenates), such as MTBE or alcohol?
MTBE is “methyl tertiary-butyl ether.” Fuel that is no
more than 15% MTBE is fine for your vehicle.
Ethanol is ethyl or grain alcohol. Properly-blended fuel
that is no more than 10% ethanol is fine for your
vehicle.
Methanol is methyl or wood alcohol.
NOTICE:
Fuel that is more than5% methanol is bad for
your vehicle. Don’t useit. It can corrode metal
parts in your fuel system and also damage plastic
and rubber parts. That damage wouldn’t be
covered under your warranty. And even at5% or
less, there must be “cosolvents” and corrosion
preventers in this fuel to help avoid these
problems.
Gasolines for Cleaner Air
Your use of gasoline with deposit controladditives will
help prevent deposits from forming in your engine and
fuel system. That helpskeep your engine in tune and
your emission control system working properly. It’s
good for your vehicle, and you’ll be doing your part for
cleaner air.
Many gasolines arenow blended with oxygenates.
General Motors recommends that you use gasolines with
these blending materials, such as MTBE and ethanol. By
doing so, you can help clean the air, especially in those
parts of the countrythat have high carbon monoxide
levels.
In addition, some gasoline suppliers arenow producing
reformulated gasolines. These gasolines arespecially
designed to reducevehicle emissions. General Motors
recommends that you use reformulated gasoline. By
doing so, you can help clean the air, especially in those
parts of the country that have high ozone levels.
You should askyour service station operatorsif their
gasolines contain deposit control additives
and
oxygenates, and if they have been reformulated to
reduce vehicle emissions.
6-5
Fuels in Foreign Countries
Filling Your Tank
If you plan on driving in another country outside the
U.S. or Canada, unleaded fuel may be hard to find. Do
not use leaded gasoline. If you use even one tankful,
your emission controls won’t work well or at all. With
continuous use, spark plugs can get fouled, the exhaust
system can corrode, and your engine oil can deteriorate
quickly. Your vehicle’s oxygen sensor will be damaged.
All of that means costly repairs that wouldn’t be covered
by your warranty.
To check on fuel availability, ask an auto club, or
contact a major oil company that does business in the
country where you’ll be driving.
You can also write us at the following address for
advice. Just tell us where you’re going and give your
Vehicle Identification Number (VIN).
General Motors Overseas Distribution Corporation
North American Export Sales (NAES)
1908 Colonel Sam Drive
Oshawa, Ontario
L1H 8P7
6-6
The cap is behind a hinged door on the left side of your
vehicle. To take off the cap, turn it slowly to the left
(counterclockwise).
There is also a manual fuel
door release. This
mechanism is located in the
top of the trunk
compartment, on the
driver's side of the vehicle.
Pull the white tab to release
the fuel door.
The release button for the
fuel door is to the left of the
steering column.
While refueling, hang the cap inside the fueldoor.
6-7
NOTICE:
If you need a new cap, be sure to get the right
type. Your dealer can get one for you.
If you get
the wrong type,it may notfit or have proper
tank and emissions system
venting, and your fuel
might be damaged.
Be carefd not to spill gasoline.Clean gasoline from
painted surfaces as soonas possible. See “Cleaning the
Outside of Your Buick” in the Index.
When you put the cap back on, turn it to the right until
you hear at least threeclicks.
Checking Things Under the Hood
Hood Release
To open the hood, pull the
handle inside thevehicle. It
is located on the lower left
side of the instrument panel.
Then go to the front of the vehicle and locate the
secondary hood release. It is under the front edge of the
grille.
6-9
I
DroDerlv. Then ~ u l the
l hood down and close itfirmlv.
6-10
3800 Supercharged (L67) Engine
(Option)
L36 Engine Accessory Belt
Your Park Avenue Ultra has a 3800 Supercharged
engine. Buick chose supercharging rather than
turbocharging because Buick emphasizes smooth,
refined power.
B
F
A-
C
The 3800 (L36) engine uses an engine accessory belt.
This diagram shows the features connected by thl: belt
routing. See “Maintenance Schedule” in the Index for
when to check the belt.
A. Power Steering
B, Alternator
C. Air Conditioning
D. Crank
E. Coolant Pump
F. Tensioner
The Supercharger is a device which is designed topump
more air into the engine than it would normally use.
This air mixed with fuel creates increased engine power.
Since the Supercharger is a pump and is driven from an
engine accessory drive belt, increased pressure is
available at all driving conditions.
The powertrain control module (PCM) works with a
vacuum control to regulate the increased pressure
required during specific driving conditions.When this
increased pressure or boost is not desired, such as during
idling and light throttle cruising, the excess air that the
Supercharger is pumping is routed through a bypass. All
of these controls working together provide high
performance character and fuel efficiency in the 3800
V6 Supercharged Buick engine.
The power steering pump uses a remote reservoir
mounted on the throttle and cruise control cable bracket.
See “Maintenance Schedule” in the Index for when you
should check the fluid.
6-11
L67 Engine Accessory Belt
The Supercharged 3800 engine uses two accessory drive
belts. Onebelt drives the generatorand the power
steering pump. The second belt drives thesupercharger,
coolant pumpand air conditioning compressor. Each
belt has its own tensioner and idler pulley. See
“Maintenance Schedule”in the Indexfor when to check
the accessorydrive belts and Supercharger oil level.
Have your dealer check the oil level
in the Supercharger.
F
1. Front Belt
2. Back Belt
A. Alternator
B. Power Steering Pump
C. Crank
D. Supercharger
E. Coolant Pump
E Air Conditioning
6-12
Engine Oil
If the CHECK OIL
LEVEL light on the
CHECK
OIL LEVEL
It’s a good idea to check your engine oil every timeyou
get fuel. In order to get an accurate reading,the oil must
be warm and the vehicle must be on level ground.
instrument panel
comes on, it means
you need to check
your engine oil level
right away.
For more information, see “Check Oil Level” in the
Index. You should check your engine oil level regularly;
this is an added reminder.
Turn off the engine and give the oil a few minutes to
drain back into the oil pan. If you don’t, the oil dipstick
might not show the actual level.
6-13
To Check Engine Oil
When to Add Oil
Pull out the dipstick
and clean itwith a
mDer towel or cloth.
;bin push it back in all
the way. Remove it
again, keeping the tip
down, and check the
level.
If the oil is at or below the ADD line, then you’ll need
to add some oil. But you must use the right kind. This
part explains what kind of oil to use. For crankcase
capacity, see “Capacities and Specifications” in the
Index.
NOTICE:
Don’t add too much oil.If your engine hasso
much oil that the oil level gets above the
cross-hatched area that shows the proper
operating range, your engine could be damaged.
Just fill it enough to put the level somewhere in the
proper operating range. Push the dipstick all the way
back in when you’re through.
6-14
What Kind of Oil to Use
Oils of the proper quality for your vehicle can be
identified by looking for the "Starburst" symbol. The
"Starburst" symbol indicates that the oil has been
certified by the American Petroleum Institute (API), and
is preferred for use i n your gasoline engine.
RECOMMENDED SAE VISCOSITY GRADE ENGINE OILS
FOR BEST FUEL ECONOMY AND COLD STARTING, SELECT THE LOWEST
SAE VISCOSITY GRADE OIL FOR THE EXPECTED TEMPERATURE RANGE.
~~
LOOK
FOR THIS
SYMBOL
HOT
WEATHER
'F
!
t
1001
I
+
so;
I
+ 601.
I
7 1
,
0,
18 ! -
SAE 1OW-30
PREFERRED
1.f you change your own oil, be sure you use oil that has
the "Starburst" symbol on the front of the oil container.
If you have your oil changed for YOLI, be sure the oil put
into your engine is American Petroleum Institute
certified for gasoline engines.
You should also use the proper viscosity oil for your
vehicle, as shown i n the following chart:
above 0°F
SAE 5W-30
I
'
I
:,'
DO NOT USE SAE 2OW-50 OR ANY OTHER
GRADE OIL NOT RECOMMENDED
6-15
Engine Oil Additives
As shown in the chart, SAE 1OW-30 is best for your
vehicle. However, you can use SAE 5W-30 if it’s going
to be colder than 60”F (I 6 O C) before your next oil
change. When it’s very cold, you should use SAE
5W-30. These numbers on an oil container show its
viscosity, or thickness. Do not use otherviscosity oils,
such as SAE 2OW-50.
I NOTICE:
Don’t add anything to your oil. Your Buick dealer is
ready to advise if you think something should be added.
When to Change Engine Oil
See if any one of these is true for you:
i
I
I
v
I
Use only engine oil with the American Petroleum
Institute Certified For Gasoline Engines
“Starburst” symbol. Failure to use the proper oil
can result in engine damage not covered
by your
warranty.
-
GM Goodwrench@oil (in Canada, GM Engine Oil)
meets all the requirements for your vehicle.
6-16
I
0
Most trips are less than 5 to 10 miles (8 to 16 km).
This is particularly important when outside
temperatures are below freezing.
Most trips include extensive idling (such as frequent
driving in stop and go traffic).
0
Most trips are through dusty areas.
0
YOU
frequently tow a trailer or use a carrier on top of
your car.
If any one of these is true foryour vehicle, then you
need to change your oil and filter every 3,000 miles
( 5 000 km) or 3 months -- whichever comes first. (See
“Change Oil Soon” in the Index.)
If none of them is true, change the oil and filter every
7,500 miles (12 500 k m ) or 12 months -- whichever
comes first.
If the optional CHANGE OIL SOON light comes on
you will need to change your oil sooner than either
mileage specified. Depending upon driving habits, the
CHANGE OIL SOON light
may come on as early as
2,000 miles or less from the last time the oil life monitor
was reset. (See “Oil Life Monitor” in the Index.) Always
reset the oil life monitor after every oil change.
Engine Coolant Heater (CanadaOnly)
An engine coolant heater can be a big help if you have
to park outside in very cold weather, 0 OF (- 18 C) or
colder. If your vehicle has this option, see “Engine
Coolant Heater” in the Index.
O
What to Do with Used Oil
Did you know that used engine oilcontains certain
elements that may be unhealthy for your skin and could
even cause cancer?Don’t let used oil stay on your skin
for very long. Clean your skin and nails with soap and
water, or a good hand cleaner. Wash or properly throw
away clothing or rags containing used engine oil. (See
the manufacturer’s warnings about the use and disposal
of oil products.)
Used oil can be a real threat to the environment. If you
change your own oil, be sure to drain all free-flowing oil
from the filter before disposal. Don’t ever dispose of oil
by putting it in the trash, pouring it on the ground, into
sewers, or intostreams or bodies of water. Instead,
recycle it by taking it to a place that collects used oil. If
you have a problem properly disposing of your used oil,
ask your dealer, a service station or a local recycling
center for help.
6-17
Air Cleaner
The air cleaner is
in the frontright section of the engine
compartment.
To Check or Replace the Air Cleaner
2. Unscrew the clamp on the air intake hose where the
hose attaches to the throttle body near the top of the
engine. Detach the hose from the throttle body, then
pull back the rear of the housing cover.
1. Undo the two screwsin the housing cover and
pull back.
If you have the 3800 Supercharged Engine, unsnap
the three clipson the housing cover.
6-18
3. Remove the air filter.
4. Be sure to install theair filter and replace the cover
tightly.
5. Reattach the air intake hose and tighten the clamp.
Refer to the Maintenance Schedule to determine
when to
replace the airfilter.
See “Scheduled Maintenance Services”in the Index.
I NOTICE:
If the air cleaner is off, a backfire can cause a
damaging engine fire. And, dirt can easily get
into your engine, which will damage it. Always
have the air cleaner in place when you’re driving.
6-19
Supercharger Oil
How to Check and AddOil
Check oil only when the engineis cold. Allow the
engine to cool two to three hours after running.
1. Remove the wiring harness shield.
Unless you are technically qualified and have the proper
tools, you should let your dealer or a qualifiedservice
center perform this maintenance.
When to Check
Check oil level every 30,000 miles (50 000 km)or every
36 months.
What Kind of Oil to Use
See "Recommended Fluids and Lubricants" in the Index
and use onlythe recommended oil.
6-20
2. Clean the areaaround the oil fillplug before
removing it.
plug using a 3/16-inch Allen
3. Remove the oil fill
wrench.
correct when it justreaches the
4. The oil level is
bottom of the threads of the inspection hole.
5. Replace the oilplug with the O-ring in place.Torque
to 88 lb. in. (10 N-m).
6. Replace the wiring harness shield.
Automatic Transaxle Fluid
When to Check and Change
A good time tocheck your automatic transaxle fluid
level is when the engine oilis changed. Refer to the
Maintenance Schedule to determine when to change
your fluid. See “Scheduled Maintenance Services” in the
Index.
How to Check
Because this operationcan be a littledifficult, you may
choose to havethis done at your Buick dealer Service
Department.
If you do it yourself, be sure to followall the
instructions here, oryou could get a false reading on
the
dipstick.
Wait at least 30 minutes before checking the transaxle
fluid level if you have been driving:
When outside temperatures are above 90°F (32°C).
At high speed for quite a while.
In heavy traffic -- especially in hot weather.
While pulling a trailer.
To get the right reading, the fluid should be at normal
operating temperature, which is 180°Fto 200°F
(82°C to 93°C).
Get the vehicle warmed up by driving about 15 miles
(24 km) when outside temperatures are above 50°F
(10°C). If it’s colder than 50°F (lO°C),YOU may have
to drive longer.
NOTICE:
Too much or too little fluid can damage your
transaxle. Too much can mean that some
of the
fluid could come out and fall
on hot engine parts
or exhaust system parts, starting
a fire. Be sure to
get an accurate reading
if you check your
transaxle fluid.
6-21
To check the fluid level
1. Park your vehicle on a level place. Keep the engine
running.
2 . With the parking brake applied, place the shift lever
in PARK (P).
3. With your foot on the brake pedal, move the shift
lever through each gear range, pausing for about
three seconds in each range. Then, position the shift
lever in PARK (P).
2. Push it back in all the way, wait three seconds and
then pull it back out again.
3. Check both sides of
the dipstick, and
read the lower
level. Thefluid
level must be in the
cross-hatched area.
4. Let the enginerun at idle for three to five
minutes.
Then, without shutting off the engine, follow these
steps:
1. Pull out the
dipstick and wipe it
with a clean rag or
paper towel.
U
6-22
4. If the fluid level is in the acceptable range, push the
dipstick back in all the way.
How to Add Fluid
Engine Coolant
Refer to the Maintenance Schedule to determinewhat
kind of transaxle fluid touse. See “Recommended
Fluids and Lubricants” in the Index.
The following explainsyour cooling system and how to
add coolant when it is low. If you have a problem with
engine overheating, see“Engine Overheating” in the
Index.
If the fluid level is low, add only enough of the proper
fluid to bring the level into the cross-hatched area on the
dipstick.
1. Pull out the dipstick.
2. Using a long-neck funnel, add enough fluid at the
dipstick hole to bringit to the proper level.It doesn’t
take much fluid, generally lessthan a pint (OSL).
Don’t overfill. We recommend you use only fluid
labeled DEXRON@-111,because fluid with that label
is made especially foryour automatic transaxle.
Damage caused by fluid other than DEXRON@-111
is not covered by your new vehicle warranty.
After adding fluid, recheck the fluid level as
described earlierunder “How to Check.”
When the correct fluid level is obtained, push the
dipstick back in all the way.
The proper coolantfor your Buick will:
0 Give freezing protection down to -34°F (-37°C).
0
Give boiling protection up to 262°F (128°C).
Protect against rust and corrosion.
0
Help keep the proper engine temperature.
0
Let the warning lights work as they should.
What to Use
Use a mixture of one-half clean water (preferably
distilled) and one-half antifreeze that meets “GM
Specification 1825-M,” which won’t damage aluminum
parts. You can also use a recycled coolant conforming to
GM Specification 1825-M with a complete coolant flush
and refill. Use GM Engine Coolant Supplement (sealer)
with any complete coolant flush and refill. If you use
this mixture, you don’t need to add anything else.
6-23
Adding Coolant
NOTICE:
If you use an improper coolant mix, your engine
could overheat and be badly damaged. The
repair cost wouldn’t be covered
by your
warranty. Too much water in the mix can freeze
and crack the engine, radiator, heater core and
other parts.
6-24
The coolant recovery tank is located at the left of the
engine compartment.
To Check Coolant
When your engine is cold, the coolant level should be at
FULL COLD or alittle higher. When your engine is
warm, the level should be up toFULL HOT or a little
higher.
If this lightcomes on,
it means you’re low on
engine coolant.
COOLANT
LOW
To Add Coolant
If you need more coolant, add the propermix at the
coolant recovery tank.
Add coolant mix at therecovery tank, but be careful not
to spill it.
6-25
Radiator Pressure Cap
Power Steering Fluid
NOTICE:
Your radiator pressure cap isa 15 psi (105 kPa)
pressure-type cap and mustbe tightly installed to
prevent coolant loss and possible engine damage
from overheating. Be sure the arrows on the cap
line up with the overflow tube on the radiator
filler neck.
When you replace your radiator pressure cap, an AC@
cap is recommended.
Thermostat
Engine coolant temperature is controlled by a thermostat
in the engine coolantsystem. The thermostat stops the
flow of coolant through the radiator until the coolant
reaches a preset temperature.
When you replace your thermostat, an AC@thermostat
is recommended.
6-26
The power steering fluid reservoir on the L67 engine is
to the right of the supercharger and in front of the
transaxle fluid dipstick.
The power steering fluid reservoir on the L36 engine is
located below the alternator and behind the accessory
drive belt.
How To Check Power SteeringFluid
Windshield Washer Fluid
When the engine compartment is cool, unscrew the cap
and wipe the dipstick with a clean rag. Replace the cap
and completely tighten it. Then remove the cap again
and look at the fluid level on the dipstick.
What to Use
The level should be at the FULL COLD mark. Add
enough fluid to bring the level up to the mark.
A fluid loss in this system could indicate aproblem.
Have the system inspected and repaired.
When you need windshield washer fluid, be sure to read
the manufacturer’s instructions before use. If you will be
operating your vehicle in an area where the temperature
may fall below freezing, use a fluid that has sufficient
protection against freezing.
To Add
What to Add
Refer to the Maintenance Schedule to determine what
kind of fluid to use. See “Recommended Fluids and
Lubricants” in the Index.
NOTICE:
When adding power steering fluid
or making a
complete fluid change, always use the proper
fluid. Failure to use the proper fluid can cause
leaks and damage hoses and seals.
Open the cap labeled WASHER FLUID ONLY. Add
washer fluid until the tank is full.
6-27
NOTICE:
0
0
0
0
When usingconcentrated washer fluid,
follow the manufacturer’s instructions for
adding water.
Don’t mixwater with ready-to-use washer
fluid. Watercan cause the solution to freeze
and damage your washer fluid
tank and
other partsof the washer system. Also,
water doesn’t cleanas well as washer fluid.
Fill your washer fluid
tank only 314 full
when it’s very cold.This allowsfor
expansion, which could damage
the tank if
it is completely full.
Don’t use radiator antifreeze in your
windshield washer.It can damage your
washer systemand paint.
Brakes
Brake Master Cylinder
Your brake master cylinder is here. It is filled with
DOT-3 brake fluid.
There are only two reasons why the brake fluid level in
your master cylinder might go down. The first isthat the
brake fluid goes down to an acceptable level during
normal brake lining wear. When new linings are put in,
the fluid level goes back up. Theother reason is that
fluid is leaking out of the brake system. If it is, you
6-28
should have your brake system fixed, since a.means
leak
that sooner or lateryour brakes won’t work well, or
won’t work at all.So, it isn’t agood idea to“top off’
your brake fluid.Adding brake fluidwon’t correct a
leak. If you add fluid when your linings are worn, then
you’ll have too much fluid when you get new brake
linings. You should add (or remove) brake fluid,as
necessary, only when work is done on the brake
hydraulic system.
What to Add
When you do need brake fluid,use only DOT-3 brake
fluid -- such as Delco Supreme ll@(GM Part
No. 1052535).Use new brake fluid from a sealed
container only, and always clean thebrake fluid
reservoir capbefore removing it.
I NOTICE:
0
Don’t let someone put in thewrong kind of
fluid. For example, just a few drops of
mineral-based oil, suchas engine oil,in
your brake system can damage brake
system parts so badly that they’ll haveto be
replaced.
Brake fluid can damage paint, so be careful
not to spill brake fluid on your vehicle. If
you do, washit off immediately. See
“Appearance Care” in theIndex.
When your brake fluid falls to low
a level, your brake
warning light will come on.
A chime willsound if you
try to drivewith this warning light on. See ‘,‘Brake
System Warning Light” in the Index.
6-29
Brake Wear
Your Buick has front disc brakes and rear drum brakes.
Disc brake pads have built-in wear indicators that make
a high-pitched warning sound when the brake pads are
worn and new pads are needed. The sound may come
and go orbe heard all the timeyour vehicle is moving
(except when you are pushing on the brake pedal
firmly).
Some driving conditions or climates may cause a brake
squeal when the brakes are first applied ur lightly
applied. This does not mean something is wrong with
your brakes.
Your rear drum brakes don’t have wear indicators, but if
you ever hear a rear brake rubbing noise, have the rear
brake linings inspected. Also, the rear brake drums
should be removed and inspected each time the tires are
removed for rotation or changing. When you have the
front brakes replaced, have the rear brakes inspected,
too.
Brake linings should always be replaced as complete
axle sets.
Brake Pedal Travel
See your dealer if the brake pedal does not return to
normal height, or if there is a rapid increase in pedal
travel. This could be a sign of brake trouble.
Brake Adjustment
NOTICE:
Continuing to drive with worn-out brake pads
could result in costly brake repair.
6-30
Every time you apply the brakes moderately, with or
without the vehicle moving, your brakes adjust for wear.
Replacing Brake System Parts
Vehicle Storage
The braking system on a modern vehicle is complex. Its
many parts have tobe of top qualityand work well
together if the vehicle is to have really
good braking.
Vehicles we design and test havetop-quality GM brake
parts in them, as your Buick does when it isnew. When
you replace partsof your braking system-- for example,
when your brake liningswear down and you have to
have new ones put in -- be sureyou get new genuine
GM replacement parts.If you don’t, your brakes may no
longer work properly. For example,if someone puts in
brake linings thatare wrong for your vehicle, the
balance between your front and rear brakes can change
-- for the worse. Thebraking performance you’ve come
to expectcan change inmany other ways if someone
puts in the wrong replacement brake parts.
If you’re not going to drive your vehicle for25 days or
more, take off the black, negative(-) cable from the
battery. This will help keep your battery from running
down.
Battery
Contact your dealer to learnhow to prepare your vehicle
for longer storageperiods.
Every new Buick has a Delco Freedom@battery. You
never have toadd water to one of these. When it’s time
for anew battery, we recommend a Delco Freedom@
battery. Get onethat has the replacementnumber shown
on the originalbattery’s label.
6-31
Halogen Bulbs
Headlamp Bulb Replacement
Each headlamp is attached by retainers with round
plastic knobs.
6-32
Remove the retainersby turning in acounterclockwise
direction.
Turn the bulb socket 1/4
turn counterclockwise,
while pressing itfirmly.
Remove the wire connector
from the bulbby lifting the
lock tab and pulling it away
from the plastic base.
rn
.
I
A
B
Lift the headlamp away from the car.
To reassemble, attach the wire connector(A) to the
plastic base making sure the lock tab (B) is over the lock
( C ) .Install the bulb by putting the small tab (D) into the
small notch in the lamp (E). Turn the bulb socket 1/4
turn clockwise to lock into place.When reinstalling the
headlamp assembly into the headlamp mounting panel,
make sure the tab is properly engaged in the panel slot.
Taillamp Bulb Replacement
~
~
~
6-34
Open the trunk. On either
side of the rear of the trunk
are two plastic nuts.
Remove only the side that
you need to access. Pull the
carpet back away from the
rear area.The taillamp,
sidemarker and back-up
lamps can now be accessed.
Two taillamp bulbs are a tabbed assembly. Squeeze the
release in and pull the assembly out. Pull the bulb
straight out from the socket. To replace the assembly,
insert the tabs into the slots and push in until it locks
into place.
To replace the third taillamp bulband sidemarker bulb,
turn the socket 1/4 turn and pull it out. Pull the bulb
straight out from the socket.
The back-up bulb can be replaced by squeezing the lock
on the socket, turning it 1/4 turn and pulling it out. Pull
the bulb straight out. Reverse the above steps to
reassemble the lamp and the trunk trim.
Tires
We don’t make tires.Your new vehicle comeswith high
quality tires madeby a leading tiremanufacturer. These
tires arewarranted by the tire manufacturersand their
warranties are deliveredwith every new Buick. If your
spare tireis a differentbrand than your road tires,you
will have a tire
warranty folder from eachof these
manufacturers.
6-35
Inflation - Tire Pressure
The Tire-Loading Information label which is located on
the rear edge of the driver’s door shows the correct
inflation pressures for your tires, when they’re cold.
“Cold” means your vehicle has been sitting for at least
three hours ordriven no more than a mile.
NOTICE:
Don’t let anyone tell you that underinflation or
overinflation is all right. It’s not. If your tires don’t
have enough air (underinflation) you can get:
Too much flexing
Too much heat
Tireoverloading
Badwear
0 Bad handling
Bad fuel economy.
If your tires have too much air (overinflation),
you can get:
Unusualwear
Badhandling
0 Roughride
Needless damage from road hazards.
6-36
When to Check
Check your tires once a month or more.
Don’t forget your compact spare tire. It should be at
60 psi (420 kPa).
How to Check
Use a good quality pocket-type gage to check tire
pressure. Simply looking at the tires will not tell you the
pressure, especiallyif you have radial tires -- which
may look properly inflated even if they’re underinflated.
If your tires have valve caps, be sure to put them back
on. They help prevent leaks by keeping out dirt and
moisture.
Tire Inspection andRotation
Tires should be inspected every 6,000 to 8,000 miles
( 1 0 000 to 13 000 km) for any signs of unusual wear. If
unusual wear is present, rotate your tires as soon as
possible and check wheel alignment. Also check for
damaged tires or wheels. See “When it’s Time for New
Tires” and ”Wheel Replacement’’ later in this section for
more information.
The purposeof regular rotation is to achieve
more
uniform wear for all tireson the vehicle. Thef i s t
rotation is themost important. See “Scheduled
Maintenance Services”in the Index forscheduled
rotation intervals.
After the tireshave been rotated, adjust the front
and
rear inflation pressuresas shown on the Tire-Loading
Information label. Make certain
that all wheel nuts are
properly tightened. See “WheelNut Torque’’ in the
Index.
When rotatingyour tires, always use the correct rotation
pattern shownhere.
Don’t include the compact spare tire your
in tire
rotation.
6-37
When it’s Time forNew Tires
One way to tell when it’s
time fornew tires is to
check the treadwear
indicators, which will
appear when your tires have
only 1/16 inch (1.6 mm) or
less of tread remaining.
You need a new tire if
You can see the indicators at three ormore places
around the tire.
0
You can see cord or fabric showing through the tire’s
rubber.
The tread or sidewall is cracked, cutor snagged deep
enough to show cord or fabric.
6-38
0
The tire has a bump, bulge or split.
The tire has a puncture, cut, or other damage that
can’t be repaired well because of the size orlocation
of the damage.
Buying New Tires
To find outwhat kind and size of tires you need, look at
the Tire-Loading Information label.
The tires installed on your vehicle when it was new had
a Tire Performance Criteria Specification (TPC Spec)
number on each tire’s sidewall. When you get new tires,
get ones with that same TPC Spec number. That way,
your vehicle will continue to have tires that are designed
to give proper endurance, handling,speed rating,
traction, ride and other things during normal service on
your vehicle. If your tires have an all-season tread
design, the TPC number will be followed by an “MS”
(for mud and snow).
If you ever replace your tires with those not having a
TPC Spec number, make sure they are the same size,
load range, speed rating and construction type (bias,
bias-belted or radial) as your original tires.
A CAUTION:
Treadwear
The treadwear grade is a comparative rating based on
the wear rate of the tire when tested under controlled
conditions on a specified government test course. For
example, a tire graded 150 would wear one and a half
( 1 1/2) times as well on the government course as a tire
graded 100. The relative performance of tires depends
upon the actual conditions of their use, however, and
may depart significantly from the norm due to variations
in driving habits, service practices and differences in
road characteristics and climate.
-
Traction A, B, C
Uniform Tire Quality Grading.
The following information relates to tne system
developed by the United States National Highway
Traffic Safety Administration which grades tires by
treadwear, traction and temperature performance. (This
applies only to vehicles sold in the United States.)
The traction grades, from highest to lowest are: A, B,
and C. They represent the tire’s ability to stop on wet
pavement as measured under controlled conditions on
specified government test surfacesof asphalt and
concrete. A tire marked C may have poor traction
performance.
Warning: The traction grade assigned to this tire is based
on braking (straight-ahead) traction tests and does not
include cornering (turning)traction.
6-39
-
Temperature A, B, C
The temperature grades are A (the highest), B, and C,
representing the tire’s resistance to the generation of
heat and its ability to dissipate heat when tested under
controlled conditions on a specified indoor laboratory
test wheel. Sustained high temperature can cause the
material of the tire to degenerateand reduce tire life, and
excessive temperature can lead to sudden tire failure.
The grade C corresponds to a level of performance
which all passenger car tires must meet under the
Federal Motor Vehicle Safety Standard No. 109. Grades
B and A represent higher levels of performance on the
laboratory test wheel than the minimum required by law.
Warning: The temperature grade for this tire is
established for a tire that is properly inflated and not
overloaded. Excessive speed,underinflation, or
excessive loading, either separately or i n combination,
can cause heat buildup and possible tire failure.
While the tires available as standard or optional
equipment on General Motors vehicles may vary with
respect to these grades, all such tires meet General
Motors performance standards and have been approved
for use on General Motors vehicles. All passenger type
(P Metric) tires must conform to Federal safety
requirements in addition to these grades.
Wheel Alignment andTire Balance
The wheels on your vehicle were aligned and balanced
carefully at the factory to give you the longest tire life
and best overall performance.
In most cases, you will not need to have your wheels
aligned again. However, if you notice unusual tire wear
or your vehicle pulling one way or the other, the
alignment may need to be reset. If you notice your
vehicle vibrating when driving on a smooth road, your
wheels may need to be rebalanced.
These grades are molded on the sidewalls of passenger
car tires.
6-40
~
Wheel Replacement
Replace any wheel that is bent, cracked, or badly rusted
or corroded. If wheel nuts keep coming loose, the wheel,
wheel bolts, and wheel nuts should be replaced. If the
wheel leaks air, replace it (except some aluminum
wheels, which can sometimes be repaired). See your
Buick dealer if any of these conditions exist.
Your dealer will know the kind of wheel you need.
Each new wheel should have the same load carrying
capacity, diameter, width, offset, and be mounted the
same way as the one it replaces.
If you need to replace any of your wheels, wheel bolts,
or wheel nuts, replace them only with new GM original
equipment parts. This way, you will be sure to have the
right wheel, wheel bolts, and wheel nuts for your Buick
model.
I NOTICE:
The wrong wheel can also cause problems with
bearing life, brake cooling,
speedometer/odometer calibration, headlamp
aim, bumper height, vehicle ground clearance,
and tire or tire chain clearance to the body and
chassis.
6-41
Used Replacement Wheels
Tire Chains
NOTICE:
If your Buick hasP215MOR15 size tires, don’t use
tire chains; they can damage your
vehicle.
If you have other tires, use tire chains
only where
legal and only when you must. Use only SAE
Class “S” type chains that are the proper
size for
your tires. Install them on the front tires and
tighten them as tightly as possible with the ends
securely fastened. Driveslowly and follow the
chain manufacturer’s instructions.If you can
hear the chains contacting your
vehicle, stop and
retighten them. If the contact continues,slow
down until it stops. Driving too fast
or spinning
the wheels with chains onwill damage your
vehicle.
6-42
Appearance Care
Remember, cleaning productscan be hazardous. Some
are toxic. Otherscan burst into flame if you strike a
match or get them on a hot part of the vehicle. Some are
dangerous if you breathe their fumes in a closed space.
When you use anything from a container toclean your
Buick, be sure to follow the manufacturer’s warnings
and instructions. And always open your doors or
windows when you’re cleaningthe inside.
Never use these to clean your vehicle:
Gasoline
Benzene
0
Naphtha
Carbon Tetrachloride
Acetone
0
Paint Thinner
Turpentine
0
Lacquer Thinner
Nail Polish Remover
They can all be hazardous -- some more than others -and they can all damage your vehicle, too.
Don’t use any of these unless this manual says you can.
In many uses, these will damage your vehicle:
Alcohol
Laundry Soap
0
Bleach
Reducing Agents
Cleaning the Insideof Your Buick
Use a vacuum cleaner often to get rid of dust and loosz
dirt. Wipe vinyl or leather with a clean, damp cloth.
Your Buick dealer has two GM cleaners, a solvent-type
spot lifter and a foam-type powdered cleaner. They will
clean normal spots and stains very well. Do not use
them on vinyl or leather.
Here are some cleaning tips:
Always read the instructions on the cleaner label.
Clean up stains as soon as you can -- before they set.
Use a clean cloth or sponge, and change to a clean area
often. A soft brush may be used if stains are stubborn.
Use solvent-type cleaners in a well-ventilated area
only. If you use them, don’t saturatethe stained area.
If a ring forms after spot cleaning, clean the entire
area immediately or it will set.
6-43
Using Foam-Type Cleaner on Fabric
0
Vacuunl and brush the area to remove any loose dirt.
0
Always clean a whole trim panel or section. Mask
surrounding trim along stitch or welt lines.
0
Mix Multi-Purpose Powdered Cleaner following the
directions on the container label.
0
Use suds only and apply with a clean sponge.
0
Don’t saturate the material.
0
Don’t rub it roughly.
0
As soon as you’ve cleaned the section, use a sponge
to remove the suds.
0
Rinse the section with a clean, wet sponge.
0
Wipe off what’s left with a slightly damp paper towel
or cloth.
0
Then dry it immediately with a blow dryer or a heat
lamp.
6-44
NOTICE:
Be careful. A blow dryer may scorch the fabric.
0
Wipe with a clean cloth.
Using Solvent-Type Cleaner on Fabric
First, see if you have to use solvent-type cleaner at all.
Some spots and stains will clean off better with just
water and mild soap.
If you need to use a solvent:
0
Gently scrape excess soil from the trim material with
a clean, dull knife or scraper. Use very little cleaner,.
light pressure and clean cloths (preferably
cheesecloth). Cleaning should start at the outside of
the stain, “feathering” toward the center. Keep
changing to a clean section of the cloth.
0
When you clean a stain from fabric, immediately dry
the area with a blow dryer to help prevent a cleaning
ring. (See the previous NOTICE.)
Special Cleaning Problems
I f an odor lingers after cleaning vomit or urine, treat
the area with a watedbaking soda solution:
1 teaspoon ( 5 ml j of baking soda to 1 cup (250 mlj
of lukewarm water.
Greasy orOily Stains
Stains caused by grease, oil, butter. margarine, shoe
polish, coffee with cream, chewing gum, cosmetic
creams, vegetable oils, wax crayon, tar and asphalt can
be removed as follows:
Carefully scrape off excess stain.
Follow the solvent-type instructions described
earlier.
Shoe polish, wax crayon, tar and asphalt will stain if
left on a vehicle seat fabric. They should be removed
as soon as possible. Be careful, because the cleaner
will dissolve them and may cause them to spread.
Non-Greasy Stains
Stains caused by catsup, coffee (black), egg, fruit, fruit
juice, milk, soft drinks, wine, vomit, urine and blood can
be removed as follows:
0
Carefully scrape off excess stain. then sponge the
soiled area with cool water.
If needed, clean lightly with solvent-type cleaner.
Combination Stains
Stains caused by candy, ice cream, mayonnaise. chili
sauce and unknown stains can be removed as follows:
Carefully scrape off excess stain, then clean with
cool water and allow to dry.
If a stain remains, clean it with solvent-type cleaner.
Cleaning Vinyl
Use warm water and a clean cloth.
Rub with a clean, damp cloth to remove dirt. You
may have to do it more than once.
0
Things like tar, asphalt and shoe polish will stain if
you don't get them off quickly. Use a clean cloth and
a GM Vinyl/Leather Cleaner or equivalentproduct.
If a stain remains. follow the foam-type instructions
described earlier.
6-45
Cleaning Leather
Cleaning Speaker Covers
Use a soft cloth with lukewarm water and a mild soap or
saddle soap.
Vacuum around a spcakcr cover gently, so that the
speaker won't be damaged. 1.F something gets on one of
them, follow the steps earlier under "Using
Solvent-Type Cleaner on Fabric." Use as little solvent as
you can.
For stubborn stains, use a GM Vinyl/Leather Cleaner
or equivalent product.
Never use oils, varnishes, solvent-based or abrasive
cleaners, furniturepolish or shoe polish on leather.
Care of Safety Belts
Soiled leather should be cleaned immediately. If dirt
is allowed to work into the finish, it can harm the
leather.
Keep belts clean and dry.
Cleaning theTop of the Instrument Panel
Use only mild soap and water to clean the top surfaces
of the instrument panel. Sprays containingsilicones or
waxes may cause annoying reflections in the windshield
and even make it difficult to see through the windshield
under certain conditions.
6-46
Glass
Glass should be cleaned often. GM Glass Cleaner (GM
Part No. 1050427) or a liquid household glass cleaner
will remove normal tobacco smoke and dust films.
Don’t use abrasive cleaners on glass, because they may
cause scratches.Avoid placing decals on the inside rear
window, since they may have to be scraped off later. If
abrasive cleaners areused on the inside of the rear
window, an electric defogger element may be damaged.
Any temporary license should not be attached across the
defogger grid.
Cleaning the Outsideof the
Windshield and Wiper Blades
If the windshield is not clear afterusing the windshield
washer, or if the wiper blade chatters when running, wax
or othermaterial may be on the blade or windshield.
Clean the outside of the windshield with GM
Windshield Cleaner, Bon-Ami Powder@ (GM Part
No. 1050011). The windshield is clean if beads do not
form when you rinse it with water.
Clean the blade by wiping vigorously with a cloth
soaked in full strength windshield washer solvent. Then
rinse the blade with water.
Wiper blades should be checked on a regular basis and
replaced when worn.
Weatherstrips
Silicone greaseon weatherstrips will make them last
longer, seal better, and not stick or squeak. Apply
silicone greasewith a clean cloth at least every six
months. During very cold, damp weather more frequent
application may be required. (See “Recommended
Fluids and Lubricants” in the Index.)
6-47
Cleaning the Outsideof Your Buick
The paint finish on your vehicle provides beauty, depth
of color, gloss retention and durability.
Washing Your Vehicle
The best way to preserve your vehicle’s finish is to keep
it clean by washing it often with lukewarm or cold water.
Don’t wash your vehicle in the direct rays of the sun.
Don’t use strong soaps or chemical detergents. Use
liquid hand, dish or car washing (mild detergent) soaps.
Don’t use cleaning agents that are petroleum based, or
that contain acid or abrasives.All cleaning agents
should be flushed promptly and not allowed to dry on
the surface, or they could stain. Dry the finish with a
soft, clean chamois or a 100% cotton towel to avoid
surface scratchesand water spotting.
High pressure car washes may cause water to enter your
vehicle.
Finish Care
Occasional waxing or mild polishing of your Buick by
hand may be necessary to remove residue from the paint
finish. You can get GM approved cleaning products
from your dealer. (See “Appearance Care and Materials”
in the Index.)
6-48
paint finish. The
Your Buick has a “basecoatlclearc~at’~
clearcoat gives more depth and gloss to the colored
basecoat. Always use waxes and polishes that are
non-abrasive and made for a basecoatklearcoatpaint
finish.
NOTICE:
Machine compounding or aggressive polishing on
a basecoatklearcoat paint finish
may dull the
finish or leave swirl marks.
Foreign matetials such as calcium chloride and other
salts, ice melting agents, road oil and tar, tree sap, bird
droppings, chemicals from industrial chimneys, etc. can
damage your vehicle’s finish if they remain on painted
surfaces. Wash the vehicle as soon as possible. If
necessary, use non-abrasive cleaners that are marked
safe for painted surfaces to remove foreign matter.
Exterior painted surfaces are subject to aging, weather
and chemical fallout that can take their toll over a period
of years. You can help to keep the paint finish looking
new by keeping your Buick garaged or covered
whenever possible.
Aluminum Wheels (IfSo Equipped)
Tires
Your aluminum wheels have a protective coating similar
to the painted surfxe of your car. Don’t use strong
soaps, chemicals, chrome polish, abrasive cleaners or
abrasive cleaningbrushes on them because you could
damage this coating. Afterrinsing thoroughly, a wax
may be applied.
To clean your tires, use a stiff brush with a tire cleaner.
I NOTICE:
If you have aluminum wheels,don’t use an
automatic car wash that has hard silicon carbide
cleaning brushes. These brushes can take the
protective coatingoff your aluminum wheels.
When applying a tire dressingalways take care towipe
off any overspray or splashfrom painted surfaces.
Petroleum-based products may damage the paint finish.
Sheet Metal Damage
If your vehicle is damaged and requires sheet metal
repair or replacement,make sure the body repair shop
applies anti-corrosjon material to the parts repaired or
replaced to restore corrosion protection.
Finish Damage
Any stone chips, fractures or deep scratches
in the finish
should be repaired right away. Bare metal will corrode
quickly and may develop into a major repair expense.
Minor chips and scratches can be repaired with touch-up
materials available from your dealer or other service
outlets. Larger areas of finish damage can be corrected
in your dealer’s body and paint shop.
6-49
Underbody Maintenance
Chemical Paint Spotting
Chemicals used for ice and snow removal and dust control
can collecton the underbody. If these are not removed,
accelerated corrosion (rust)can occur on the underbody
parts such as fuel lines, frame, floor pan, and exhaust
system even though they have corrosion protection.
Some weather and at~nospheric conditions
can create a
chemical fallout. Airborne pollutants can fall upon and
attack painted surfaces on your vehicle. This damage
can take two forms: blotchy, ringlet-shaped
discolorations, and small irregular dark spots etched into
the paint surface.
At least every spring, flush thesematerials from the
underbody with plain water. Clean any areas where mud
and other debriscan collect. Dirtpacked in closed areas
of the frame should be loosened before being flushed.
Your dealer oran underbody car washing system can do
this foryou.
6-50
Although no defect in the paint job causes this, Buick
will repair, at no charge to the owner, the surfaces of
new vehicles damaged by this fallout condition within
12 months or 12,000 miles (20 000 km) of purchase,
whichever comes first.
Appearance Care and Maintenance Materials
I
1
You can get thesefrom your GM Parts Department.
PART
I
I
I
Spray-A-Squeak
Silicone
Grease
Weatherstrips. Stops squeaks
* Not recommended for pigskin suede leather.
See your General Motors Parts Departments for these products.
6-51
Vehicle Identification Number (VIN)
Service Parts Identification Label
You’ll find this label on the spare tire cover. It’s very
helpful if you ever need to order parts. On this label is:
your VIN,
the model designation,
ENGINE
CODE
ASSEMBLY
/ YEAR
’gg5
\ PLANT
MODEL
This is the legal identifier foryour Buick. It appears on
a plate in the front cornerof the instrument panel, on the
driver’s side. You can see it if you look through the
windshield from outside your vehicle. The VIN also
appears on the Vehicle Certification and Service Parts
labels and the certificates of title and registration.
Engine Identification
The eighth character in your VIN is the engine code.
This code will help you identify your engine,
specifications, and replacement parts.
0
paint information, and
0
a list of all production options and special
equipment.
Be sure that this label is not removed from the vehicle.
Add-on Electrical Equipment
NOTICE:
Don’t add anything electricalto your Buick
unless you check with your dealer first. Some
electrical equipment can damage your vehicle
and the damage wouldn’t be covered
by your
warranty. Someadd-on electrical equipment can
keep other components from working
as they
should.
Your vehicle has an air bag system. Before attempting t o
add anything electrical to your Buick, see “Servicing
Your Air Bag-Equipped Buick” in the Index.
Fuses and Circuit Breakers
The wiring circuits in your car are protected from short
circuits by a combination of fuses and circuit breakers.
Left Side Fuse Panel
The left side fuse panel is located under the instrument
panel, next to the parking brake.
Remove the cover to access t.he fuses. To put the cover
on, insert the tabs into the lower part of the fuse panel
and snap it in place.
1
6-54
6
7
8
9
o"0 0 0
0 O B U0 0 0
000
0 0
0 0 O"0 0 0
0 0 0.0 D 0
[I
Look at the silver-colored band inside the fuse. If the
band is broken or melted, replace the fuse. Be sure you
replace a bad fuse with a new one of the identical size
and rating.
5
II
(Position
1
2
3
4
5
1A
2A
3A
4A
SA
6A
7A
8A
9A
1B
2B
3B
4B
SB
6B
7B
8B
9B
1c
2c
Circuitry
Circuit Breaker-Power Windows, Astroroof
Not Used
Circuit Breaker-Power Seats
Not Used
Not Used
Start-up Signal - Air Bag. PASS-Kep‘”’I1
Spare
Not Used
Interior Lamps
Base Cluster, Automatic A/C, Lamp Monitors - Low
Coolant, Oil Level
Courtesy Lamps, Power Mirrors, Memory Seat Switch
Not Used
Not Used
Front Ashtray Cigar Lighter
Turn Signal, Back-up Lamps? Cornering Lamps,
Brake-Transaxle Shift Interlock
Spare
Not Used
Not Used
Anti-Lock Brake System. Firm Ride
Brake and Hazard Lamps
Not Used
Not Used
Electronic Level Control
Air Bag
Spase
Position Circuitry
3c
4c
5c
6C
7c
8C
9c
ID
2D
3D
4D
5D
6D
7D
8D
9D
1E
2E
3E
4E
5E
6E
7E
8E
9E
Not Used
Not Used
Cooling Fans, Transaxle
Parking Lamps
Not Used
Not Used
Chime. Radio, Cluster
Ignition (RunKrank), Chime, Cluster
Spare
Heated Mirror
Not Used
Base N C
Not Used
Not Used
Radio
Rear Cigar Lighters
Not Used
Not Used
Ignition (Off/Unlock)
Not Used
Not Used
Not Used
Not Used
Wipers, Washer
Rear Defog
6-55
Right Side Fuse Panel
Additional fuses are located in the relay center, on the
far right side, below the instrument panel. You must
remove the sound insulator on the right side of the
passenger foot well to replace these fuses.
Replacing these fuses is dil’ficult. We recommend that
you see your dealer if you need one replaced.
Position
I
2
3
Circuitry
Door Locks. Trunk Pull-Down. Fuel Door Release
Power Antenna. Lock Switch. Trunk Release
HQ~IIS
4
Not Used
5
Cruise Control. Misc. Engine Controls
r---------1
I
I
6
7
Fuel Pump
8
Powertrain Control Module, PASS-Key’ 11
9
Not Used
10
N o t Used
11
A/C Proglamrner
12
Not Used
6-56
Injectors
I
HJSE
f’OSl-lOtlS
I
I
I
MaxifuseDtelay Center
Windshield Wipers
To check the fuses in this underhood fuse center, turn
the two knobs 1/4 turn counterclockwise and remove the
cover. There is a chart insidethe cover that explains the
features and controls governed by each fuse and relay.
The windshield wiper motor is protected by a circuit
breaker and a fuse. If the motor overheats due to heavy
snow, etc., the wiper will stop until the motor cools. If
the overload is caused by some electrical problem and
not snow, etc., be sure to get it fixed.
The PASS-Key II@ fuseis located in the right side relay
center.
Headlamps
The headlamp wiring is protected by a circuit breaker in
the underhood fuse center. An electrical overload will
cause the lamps to go on and off, or in some cases to
remain off. If this happens, have your headlamp wiring
checked right away.
Power Windows and Other Power Options
Circuit breakers in the fuse panel protect the power
windows and other power accessories. When the current
load is too heavy, the circuit breaker opens and closes,
protecting the circuit until the problem is fixed or goes
away.
6-57
Park Avenue Dimensions (Inches Unless Otherwise Noted)
Overan:
Length . . . . . . . . . . . . . . . . . . . . . . . . . . . . . . . . . . . . . . .
205.2
Width . . . . . . . . . . . . . . . . . . . . . . . . . . . . . . . . . . . . . . . . . 73.6
Height . . . . . . . . . . . . . . . . . . . . . . . . . . . . . . . . . . . . . . . . 55.1
110.8
Wheel Base . . . . . . . . . . . . . . . . . . . . . . . . . . . . . . . . . . .
FrontTread . . . . . . . . . . . . . . . . . . . . . . . . . . . . . . . . . . . .
60.5
Rear Tread . . . . . . . . . . . . . . . . . . . . . . . . . . . . . . . . . . . . . 60.2
Interior Front:
LegRoom . . . . . . . . . . . . . . . . . . . . . . . . . . . . . . . . . . . . . 4
2.0
. 38.8
Head Room . . . . . . . . . . . . . . . . . . . . . . . . . . . . . . . . . . .
Shoulder Room . . . . . . . . . . . . . . . . . . . . . . . . . . . . . . . . .
59.1
Hip Room . . . . . . . . . . . . . . . . . . . . . . . . . . . . . . . . . . . . . 5 5.1
Interior Rear:
LegRoom . . . . . . . . . . . . . . . . . . . . . . . . . . . . . . . . . . . . . 4
1.6
Head Room . . . . . . . . . . . . . . . . . . . . . . . . . . . . . . . . . . . . 38.8
Shoulder Room . . . . . . . . . . . . . . . . . . . . . . . . . . . . . . . . . 5 9.1
Hip Room . . . . . . . . . . . . . . . . . . . . . . . . . . . . . . . . . . . . . 5 5.1
Trunk Capacity - Cu . Ft . . . . . . . . . . . . . . . . . . . . . . . . . . .
20.3
Passengers:
Front . . . . . . . . . . . . . . . . . . . . . . . . . . . . . . . . . . . . . . . . . .
3
Rear . . . . . . . . . . . . . . . . . . . . . . . . . . . . . . . . . . . . . . . . . . . 3
Base Curb Weight- Lbs . . . . . . . . . . . . . . . . . . . . . . . . . 3536
(ULTRA) . . . . . . . . . . . . . . . . . . . . . . . . . . . . . . . . . . . .3639
Replacement Bulbs
BULB
EXTERIOR
Headlamp
9005
HighBeam . . . . . . . . . . . . . . . . . . . . . . . . . . . . . . .
LowBearn . . . . . . . . . . . . . . . . . . . . . . . . . . . . . . .
9006
2057NA
Park/Turn . . . . . . . . . . . . . . . . . . . . . . . . . . . . . .
Park . . . . . . . . . . . . . . . . . . . . . . . . . . . . . . . . . . . .
194NA
194NA
Side Marker. Front . . . . . . . . . . . . . . . . . . . . . . . .
3156
Back-up . . . . . . . . . . . . . . . . . . . . . . . . . . . . . . . . . .
HighLevelStop . . . . . . . . . . . . . . . . . . . . . . . . . . . .
1156
194
License . . . . . . . . . . . . . . . . . . . . . . . . . . . . . . . . . . . .
Side Marker. Rear . . . . . . . . . . . . . . . . . . . . . . . . . . . . .
24
194
Tail . . . . . . . . . . . . . . . . . . . . . . . . . . . . . . . . . . . . . . .
Tail/Stop/Turn . . . . . . . . . . . . . . . . . . . . . . . . . . . . . .
3057
Cornering . . . . . . . . . . . . . . . . . . . . . . . . . . . . . . . . .
1156
Replacement Bulbs
INTERIOR
Ashtray . . . . . . . . . . . . . . . . . . . . . . . . . . . . . . . . . . . .
161
Dome/Reading. Front . . . . . . . . . . . . . . . . . . . . . . . . . 563
Reading. Rear . . . . . . . . . . . . . . . . . . . . . . . . . . .
A3173B
Door Warning . . . . . . . . . . . . . . . . . . . . . . . . . . . . PC168
Engine Compartment . . . . . . . . . . . . . . . . . . . . . . . . .
561
Footwell Courtesy . . . . . . . . . . . . . . . . . . . . . . . . . . . . 168
GloveBox . . . . . . . . . . . . . . . . . . . . . . . . . . . . . . . . . .
194
Luggage Compartment . . . . . . . . . . . . . . . . . . . . . . . . .
93
VanityMirror. Front . . . . . . . . . . . . . . . . . . . . . . . . . 7056
Vanity Mirror. Rear . . . . . . . . . . . . . . . . . . . . . . . . . . . 564
Key Cylinder . . . . . . . . . . . . . . . . . . . . . . . . . . . . . . . . 168
FrontRear Door Courtesy . . . . . . . . . . . . . . . . . . PC 168
Rearoverhead . . . . . . . . . . . . . . . . . . . . . . . . . . . . . .
563
6-59
BULB
Capacities and Specifications
Belt Tensions
Automatically controlled by a Self-Tension idler pulley. Tension ad.justment sl1ouId never be necessary.
Automatic Transaxle AT (Overdrive)
When draining or replacing torque converter, more fluid may bc needed.
Removal
Pan
and Replacement . . . . . . . . . . . . . . . . . . . . . . . . . . . . . . . .
6 quarts
5.6 L
After Complete Overhaul . . . . . . . . . . . . . . . . . . . . . . . . . . . . . . . . . . . . .
1 1 c]uarts
10.4 L
Coolingsystem . . . . . . . . . . . . . . . . . . . . . . . . . . . . . . . . . . . . . . . . . . . . . .
13 quarts
12.3 L
Refrigerant (R-l34a), Air Conditioning . . . . . . . . . . . . . . . . . . . . . . . . .
2.0 pounds
0.91 kg
Not a l l air conditioning refrigerants are the same. If the air conditioning systcn~i n your velicle needs refrigerant. be sure the
proper refrigerant is used. If you’re not sure, ask your Buick dealer. For additional information, see your “Warranty and Owner
Assistance Information” booklet.
Engine Crankcase
Oil change with filter change . . . . . . . . . . . . . . . . . . . . . . . . . . . . . . . . . .
4.75 L
5 quarts
FuelTank . . . . . . . . . . . . . . . . . . . . . . . . . . . . . . . . . . . . . . . . . . . . . . . . . .
I8 gallons
68 L
Power Steering
PumpOnly . . . . . . . . . . . . . . . . . . . . . . . . . . . . . . . . . . . . . . . . . . . . . . . .
I pint
0.5 L
1
1/2
pints
0.7
L
Complete System . . . . . . . . . . . . . . . . . . . . . . . . . . . . . . . . . . . . . . . . . . .
Tire Pressures, Sizes . . . . . . . . . . . . . . . . . . . . . . . . . . . . . . . . . . . . . . . . . .
See Tire-Loading Information label on
driver’s door.
Wheel Nut Torque . . . . . . . . . . . . . . . . . . . . . . . . . . . . . . . . . . . . . . . . . . .
I O 0 Ib-ft ( 140 N-111)
NOTE: All capacities are approximate. When adding, be sure to fill t o the appropriate level, as recommended i n this manual.
6-60
Engine Specifications
3800 Engine
VIN Engine Code . . . . . . . . . . . . . . . . . . . . . .
K
Type . . . . . . . . . . . . . . . . . . . . . . . . . . . . . . . .
V6
Displacement . . . . . . . . . . . . . . . . . . . . . . . . .
3.8 Liters
Compression Ratio . . . . . . . . . . . . . . . . . . . . .
9:4: 1
Firing Order . . . . . . . . . . . . . . . . . . . . . . . . . .
1-6-5-4-3-2
Thermostat Temperature Specification . . . . . 195 "F (91 "Cj
3800 Supercharged Engine
1
V6
3.8 Liters
8:s:I
1-6-5-4-3-2
195°F (91°C)
Normal Maintenance Replacement Parts
3800 Engine
AC Type A- 1096C
Air Cleaner Element . . . . . . . . . . . . . . . . . . . .
AC Type PF-47
Engine Oil Filter. . . . . . . . . . . . . . . . . . . . . . .
Fuel Filter . . . . . . . . . . . . . . . . . . . . . . . . . . . . AC Type CF-627
AC Type 4 1-606
Spark Plugs . . . . . . . . . . . . . . . . . . . . . . . . . .
Gap: 0.060 inch ( 1 3 2 m m )
Remote Lock Control Batteries (2) . . . . . . . . Duracell"' type DL-2016
3800 Supercharged Engine
AC Type A- 1096C
AC Type PF-47
AC Type CF-627
AC Type 4 1-60 I
Gap: 0.060 inch ( 1.52 n m )
Duracell"" type DL-201 6
6-61
NOTES
6-62
Section 7 MaintenanceSchedule
Introduction
IMPORTANT:
KEEP ENGINE OIL
AT THE PROPER
LEVEL AND CHANGE AS
RECOMMENDED
This section covers the maintenance requiredfor your
Buick. Your vehicle needs these services to retainits
safety, dependability and emission control performance.
Protection
Plan
Your Vehicle and the Environment
Proper vehicle maintenance not only helps to keep your
vehicle in good working condition, but also helps the
environment. All recommended maintenance procedures
are important.Improper vehicle maintenance or the
removal of important components can significantly
affect the qualityof the airwe breathe. Improper fluid
levels or even the wrong tire inflation can increase the
level of emissions fromyour vehicle. To help protect our
environment, and to helpkeep your vehicle in good
condition, please maintainyour vehicle properly.
Have you purchased the GM Protection Plan? The Plan
supplements your new vehicle warranties. Seeyour
Buick dealerfor details.
7-1
How This Section is Organized
The remainder of this scction is divided into five parts:
“Part A: Scheduled Maintenance Services” shows
wlmt t o have done and how often. Some of these
services can be complex, so unless you are technically
qualified and have the necessary equipment. you should
let your dealer‘s service department or another- qualified
service center dothese jobs.
“Part B: Owner Checks and Services” tells you what
should be checked whencvcr you stop for fuel. It also
explains what you can easily do to help keep your
vehicle i n good condition.
“Part C: Periodic Maintenance Inspections” explains
ilnportant inspections that your Buick dealer‘s service
department or another qualified service center should
perform.
“Part D: Reconmended Fluids and Lubricants”lists
some products GM recommends to help keep your
vehicle properly maintained. These products, or their
equivalents, should be 11sed whether you do the work
yourself or have it done.
“Part E: Maintenance Record” provides a place for
you to record the maintenance performed on your
vehicle. Whenever any maintenance is performed, be
sure to write it down i n this part. This will help you
determine when your next maintenance should be done.
I n addition. i t is a good idea to keep your maintenance
receipts. They may be needed to qualify your vehicle for
warranty repairs.
7-2
Part A: Scheduled Maintenance
Services
Using Your Maintenance Schedule
We at General Motors want to help you keep your
vehicle in good working condition. But we don’t know
exactly how you’ll drive it. You may drive very short
distances only a few times a week. Or you may drive
long distancesall the time in very hot, dusty weather.
You may use your vehicle in making deliveries. Oryou
may drive it to work, to do errands orin many other
ways.
Because of all the different ways people use their GM
vehicles, maintenance needs vary. You may even need
more frequent checks and replacements than you’ll find
in the schedules in this section. So please read this
section and note how you drive. If you have any
questions on how to keep your vehicle in good
condition, seeyour Buick dealer.
This part tells you the maintenance services you should
have done and when you should schedule them.If you
go to your dealer for your service needs,you’ll know
that GM-trained and supported service peoplewill
perform the work using genuine GM parts.
The proper fluids and lubricants to use are listed in
Part D. Make sure whoever services your vehicle uses
these. All parts should be replaced and all necessary
repairs done before you or anyone else drivesthe
vehicle.
These schedules are forvehicles that:
0
carry passengers and cargo within recommended
limits. You will find these limits on your vehicle’s
Tire-Loading Information label. See “Loading Your
Vehicle” in the Index.
0
are driven on reasonable road surfaces within legal
driving limits.
use the recommended unleaded fuel. See “Fuel” in
the Index.
Selecting the Right Schedule
First you’ll need to decidewhich of the two schedulesis
right for your vehicle. Here’s how to decide which
schedule to follow:
7-3
Maintenance Schedule
rSchedule I Definition
Follow Maintenance Schedule I if any one of these is
true foryour vehicle:
Most trips are less than 5 to 10 miles (8 to 16 km).
This is particularly important when outside
temperatures are below freezing.
0
Most trips include extensive idling (such as frequent
driving in stop-and-go traffic).
0
Most trips are through dusty areas.
0
You frequently tow a trailer or use a carrier on top of
your vehicle.
Schedule I should also be followed if the vehicle is used
for delivery service, police, taxi, or other commercial
application.
7-4
I Schedule I Intervals
Every 3,000 Miles (5 000 km) or3 Months,
Whichever Occurs First
Engine Oil and Filter Change
Every 6,000 Miles (10 000 km) or 6 Months,
Whichever Occurs First
Chassis Lubrication
At 6,000 Miles (10 000 km) Then Every
12,000 Miles (25000 km)
Tire Rotation
Every 15,000 Miles (25 000 km)
Air Cleaner Filter Inspection,
if driving in dusty conditions
Every 30,000 Miles (50 000 km)
Air Cleaner Filter Replacement
Spark Plug Replacement
Spark Plug Wire Inspection
Fuel Tank, Cap and Lines Inspection
Engine Accessory Drive Belt Inspection (or every
24 months, whichever occurs first)
Cooling System Service (or every 24 months,
whichever occurs first)
Supercharger Oil Check (or every 36 months,
whichever occurs first) (3.8L Code 1 engine only)
Every 50,000 Miles (83 000 km)
Automatic Transaxle Service (severe conditions only)
-
Maintenance Schedule
Follow Schedule I1 or.ll~*
if none of the conditions from
Schcdule I is true.
Every 7,500 Miles (12 500 km)
Engine Oil and Filter Change (or every 12 months,
whichever occurs first)
Chassis Lubrication (or every 12 months, whichever
occurs first)
At 7,500 Miles (12 500 km) Then Every
15,000 Miles (25 000 km)
Tire Rotation
Every 30,000 Miles(50 000 km)
Engine Accessory Drive Belt Inspection (or every
24 months, whichever occurs first)
Cooling System Service (or every 24 months,
whichever occurs first)
Spark Plug Replacement
Spark Plug Wire Inspection
Supercharger Oil Check (or every 36 months.
whichever occurs first) (3.8L Code 1 engine only)
Air Cleaner Filter Replacement
Fuel Tank, Cap and Lines Inspection
Every 50,000 Miles(83 000 km)
Automatic Transaxle Service (severe conditions only)
-
7-5
Maintenance Schedule I
The services shown in this schedule up to 100,000miles
(166 000 km) should be performed after 100.000 miles
(166 000 km) at the same intervals.
Footnotes
The U.S. Environmental Protection Agency or the
California Air Resources Board has determined that the
failure toperform this maintenance item will not nullify
the emission warranty or limit recallliability prior to the
completion of vehicle useful life.We, however, urge that
all recommended maintenance services be performed at
the indicated intervals and the maintenance be recorded.
* If your vehicle has an Engine Oil Life Monitor, the
monitor will show you when to change the oil -- usually
between 3,000 miles ( 5 000 km) and 7,500 miles
(12 500 km) since your last oil change. Under severe
conditions the indicator may come on before 3,000 miles
(5 000 km). Never drive your vehicle more than 7,500
miles (12 500 km)or 12 months without an oil change.
7-6
The system won’t detect dust in the oil. So if you
drive in a dusty area be sure tochange your oil every
3,000 miles ( 5 000 km) or sooner if the CHANGE OIL
light comes on. Remember to reset the Oil Life Monitor
when the oilhas been changed. For more information,
see “Engine Oil Life Monitor” in the Index.
I
MaintenanceSchedule I
I
3,000 Miles (5 000 kin)
6,000 Miles (10 000 km)
0Change engine oil and filter (or every
Change engine oil and filter (or every
3 months, whichever occurs first). An
Emission Control Service. *
DATE
ACTUAL MILEAGE
3 months, whichever occurs first). An
Emission Control Service. .!.
0 Lubricate the suspension, steering linkage,
transaxle shift linkage, parking brake cable
guides and the underbody contact points
and linkage (or every 6 months, whichever
occurs first).
0 Rotate tires. See “Tire Inspection and
Rotation” in the Index for proper rotation
pattern and additional information.
-6-
SERVICED BY:
-
.
.-
--
7-7
I
MaintenanceSchedule I
I
9,000 Miles (15 000 km)
12,000 Miles (20 000 km)
0Change engine oil and filter (or every
0Change engine oil and filter (or every
3 months, whichever occurs first). An
Emission Control Service. *
I
DATE
ACTUAL
7-8
MILEAGE
SERVICED B Y
3 months, whichever occurs first). An
Emission Control Service. *
0Lubricate the suspension, steering linkage,
transaxle shift linkage, parking brake cable
guides and the underbody contact points
and linkage (or every 6 months, whichever
occurs first).
I
MaintenanceSchedule I
I
15,000 Miles (25 000 kmj
18,000 Miles (30 000 kmj
0Change engine oil and filter (or every
0Change engine oil and filter (or every
3 months, whichever occurs first). An
Emission Control Service. <’
0 Inspect air cleaner filter if you are driving
in dusty conditions. Replace filterif
necessary. An Emission Contml Service.
3 months, whichever occurs first). An
Emission Control Service. ‘i:
U Lubricate the suspension, steering linkage,
transaxle shift linkage, parking brake cable
guides and the underbody contact points
and linkage (or every 6 months, whichever
occurs first).
0Rotate tires. See “Tire Inspection and
Rotation” in the Index for proper rotation
pattern and additional information.
DATE
ACTUAL MILEAGE
SERVICED B Y
I
Maintenance Schedule I
21,000 Miles (35 000 km)
24,000 Miles (40 000 km)
0Change engine oiland filter (or every
0Change engine oil and filter (or every
3 months, whichever occurs first). An
Emission Control Service. *
DATE
7-10
A.CTUALMILEAGE
SERVICED B Y
3 months, whichever occurs first). An
Emission Control Service. *
0Lubricate the suspension, steering linkage,
transaxle shift linkage, parking brake cable
guides and the underbody contact points
and linkage (or every 6 months, whichever
occurs first).
DATE SERVICED
ACTUAL MILEAGE
BY
I
MaintenanceSchedule I
~
I
~~~~
27,000 Miles (45 000 km)
30,000 Miles (50 000 km)
0Change engine oil and filter (or every
0Change engine oil and filter (or every
3 months, whichever occurs first).An
Emission Control Service. ‘k
DATE
ACTUAL MILEAGE
SERVICED B Y
3 months, whichever occurs first). An
Emission Control Service. .!.
0Lubricate the suspension, steering linkage,
transaxle shift linkage, parking brake cable
guides and the underbody contact points
and linkage (or every 6 months, whichever
OCCUTS first).
0Inspect engine accessory drive belt (or
every 24 months, whichever occurs first).
A n Emission Control Service.
0Drain, flush and refill cooling system (or
every 24 months, whichever occurs first).
See “Engine Coolant”in the Index for what
to use. Inspect hoses. Clean radiator,
condenser, pressure cap and neck.
-8-
(Continued)
7-11
Maintenance Schedule I
30,000 Miles (50 000 km) (Continued)
Pressure test the coolingsystem and
pressure cap. An Emission Control Sewice.
0Replace spark plugs. An Emission Control
Sewice.
0Inspect spark plug wires. An Emission
Control Service. -f0Replace air cleaner filter. Replace filter
more often under dusty conditions. An
Emission Control Sewice.
0Inspect fuel tank, cap and lines for damage
or leaks. Inspect fuel capgasket for any
damage. Replace parts as needed. An
Emission Control Sewice.
7-12
0For supercharged engines only: Check the
supercharger oil level and add oil asneeded
(or every 36 months, whichever occurs
first). See “Recommended Fluids and
Lubricants” in this section. An Emission
Control Sewice. -f0Rotate tires. See “Tire Inspection and
Rotation” in the Index for proper rotation
pattern and additional information.
I
I
MaintenanceSchedule I
33,000 Miles (55 000 km)
36,000 Miles (60 000 km)
0Change engine oil and filter (or every
0Change
engine oil and filter (or every
3 months, whichever occurs first).An
Emission Control Service. ‘k
Lubricate the suspension, steering linkage,
transaxle shift linkage, parking brake cable
guides and the underbody contact points
and linkage (or every 6 months, whichever
occurs first).
3 months, whichever occurs first).An
Emission Control Sewice. *
DATE
ACTUAL MILEAGE
SERVICED B Y
-
~~
~~
I
I
DATE
I
ACTUAL MILEAGE SERVICED B Y
~.
7-13
I MaintenanceSchedule I I
39,000 Miles (65 000 km)
42,000 Miles (70000 km)
0Change engine oil and filter
(or every
0Change engine oiland filter (or every
3 months, whichever occurs first).
An
Emission Control Service. *
3 months, whichever occurs first). An
Emission Control Service. *
0Lubricate the suspension, steering linkage,
transaxle shift linkage, parking brake cable
guides and the underbody contact points
and linkage (or every 6 months, whichever
occurs first).
0Rotate tires. See “Tire Inspection and
Rotation” in the Index forproper rotation
pattern and additional information.
DATE
7-14
ACTUAL MILEAGE
SERVICED BY:
I
MaintenanceSchedule I
I
45,000 Miles (75 000 km)
48,000 Miles (80 000 km)
0Change engine oil and filter (or every
0Change engine oil and filter (or every
3 months, whichever occurs first).An
Emission Control Service. *
0Inspect air cleaner filter if you are driving
in dusty conditions. Replace filterif
necessarv. An Emission Control Sewice.
3 months, whichever occurs first).An
Emission Control Service. *
0 Lubricate the suspension, steering linkage,
transaxle shift linkage, parking brake cable
guides and the underbody contact points
and linkage (or every 6 months, whichever
occurs first).
I
I
DATE
1
I
ACTUAL MILEAGE
SERVICED B Y
DATE
ACTUAL MILEAGE
SERVICED B Y
7-15
I
I
MaintenanceSchedule I
I
54,000 Miles (90 000 km)
57,000 Miles (95 000 km)
0Change
I7 Change engine oiland filter (or every
engine oiland filter (or every
3 months, whichever occurs first).An
Emission Control Service.*
0Lubricate the suspension, steering linkage,
transaxle shift linkage, parking brake cable
guides and the underbody contact
points
and linkage (or every 6 months, whichever
occurs first).
0Rotate tires. See “Tire Inspection and
Rotation’’ in the Index for proper
rotation
pattern and additional information.
DATE
ACTUAL MILEAGE
SERVICED BY:
3 months, whichever occurs first).An
Emission Control Service. *
DATE
ACTUAL MILEAGE
SERVICED BY:
7-17
Maintenance ScheduleI
60,000 Miles (100 000 km)
0Change engineoil and filter (or every
0Inspect spark plug wires. An Emissiotz
3 months, whichever occurs first).An
Emission Cor1trol Service. ‘$
0Lubricate the suspension, steering linkage,
transaxle shift linkage, parking brake cable
guides and the underbody contact points
and linkage (or every 6 months, whichever
occurs first).
Tnspect engine accessory drive belt (or
every 24 months, whichever occurs first).
An Enzission Contrd Service.
0Drain, flush and refill cooling system (or
every 24 months, whichever occurs first).
See “Engine Coolant” in the Index for what
to use. Inspect hoses. Clean radiator,
condenser, pressure cap and neck. Pressure
test the cooling system and pressure cap. An
Elnissiorz Contml Service.
0Replace spark plugs. AH Emis,siolz Corztrol
Service.
7-18
Control Service.
0Replace air cleaner filter. Replace filter
more often under dusty conditions. An
Elnission Control Service.
El Inspect fuel tank, cap and lines for damage
or leaks. Inspect fuel cap gasket for any
damage. Replace parts as needed. An
Emission Corl.tro1Service.?
0For supercharged engines only: Checkthe
supercharger oil level and add oil as needed (or
every 36 months, whichever occursfirst). See
“Recommended Fluids and Lubricants”
in this
section. An Emission Control Service.
I
MaintenanceSchedule I
I
63,000 Miles (105 000 km)
66,000 Miles (110 000 km)
0Change engine oiland filter (or every
0Change engineoil and filter (or every
3 months, whichever occurs first).An
Emission Control Sewice. *
I
DATE
ACTUAL MILEAGE
3 months, whichever occurs first).
An
Emission Control Sewice. *
0Lubricate the suspension, steering linkage,
transaxle shift linkage, parking brake cable
guides and the underbody
contact points
and linkage (or every 6 months, whichever
occurs first).
0Rotate tires. See “Tire Inspection and
Rotation’’ in the Index for properrotation
pattern and additional information.
7
I
SERVICED BY:
DATE
I
I
ACTUAL MILEAGE
SERVICED BY:
7-19
I
MaintenanceSchedule I
I
69,000 Miles (115 000 km)
72,000 Miles (120 000 km)
0Change
c7 Change
engineoil and filter (or every
3 months, whichever occurs first).An
Emission Control Service. *
0Lubricate the suspension, steeringlinkage,
transaxle shift linkage, parking brake cable
guides and the underbody contact points
and linkage (or every 6 months, whichever
occurs first).
engine oiland filter (or every
3 months, whichever occurs first).An
Emission Control Service. *
I
DATE
7-20
I
ACTUAL MILEAGE
ISERVICED
BYI
DATE
ACTUAL MILEAGE
SERVICED BY:
I
MaintenanceSchedule I
I
75,000 Miles (125 000 km)
78,000 Miles (130 000 km)
0Change engine oil and filter (or every
0Change engine oiland filter (or every
3 months, whichever occurs first). An
Emission Control Sewice.
0Inspect air cleaner filterif you are driving
in dusty conditions. Replace filterif
necessary. An Emission Control Service.
3 months, whichever occurs first).An
Enzission Control Service. *
0Lubricate the suspension, steering linkage,
transaxle shift linkage, parking brake cable
guides and the underbody contact points
and linkage (or every 6 months, whichever
occurs first).
0Rotate tires. See“Tire Inspection and
Rotation’’ in the Index for proper rotation
pattern and additional information.
DATE
ACTUAL MILEAGE
SERVICED BY:
DATE
ACTUAL MILEAGE
SERVICED B Y
7-21
I
MaintenanceSchedule I
I
81,000 Miles (135 000 km)
84,000 Miles (140 000 km)
0Change engine oil and filter (or every
0Change engine oil and filter (or every
3 months, whichever occurs first). An
Emission Control Service. *
DATE
7-22
ACTUAL MILEAGE
SERVICED B Y
3 months, whichever occurs first). An
Emission Control Service. *
0Lubricate the suspension, steering linkage,
transaxle shift linkage, parking brake cable
guides and the underbody contact points
and linkage (or every 6 months, whichever
occurs first).
DATE
ACTUAL MILEAGE
SERVICED B Y
I
MaintenanceSchedule I
I
87,000 Miles (145 000 km)
90,000 Miles (150 000 km)
0Change engine oil and filter (or every
0Change engine oil and filter (or every
3 months, whichever occurs first).AI?
Emission C o n t d Service. :i:
DL4TE
ACTUAL MILEAGE
SERVICED BY:
3 months. whichever occurs first). A I Z
Ewkyiolz Cotztrol Scwico,. ‘I’
0 Lubricate the suspension, steering linkage.
transaxle shift linkage, parking brake cable
i
Ouides
2
and the underbody contact points
and linkage ( o r e w - y 6 months, whichever
occurs first).
0 Inspect engine accessory drive belt (or
every 24 months, whichever occurs first).
Arz Emissim C‘orltrol Stmicx
0 Drain, flush and refill cooling system (or
every 24 months, whichever occurs first).
See “Engine Coolant”in the Index for what
to use. Inspect hoses. Clean radiator,
condenser. pressure cap and neck. Pressure
7-23
I
MaintenanceSchedule I
I
90,000 Miles (1.50 000 kin) (Continued)
test the cooling system and pressure cap.
A n Emission CoI;ztml Service.
0Replace spark plugs. An Emissior? Co11t1d
Service.
0Inspect spark plug wires. An Emissiolz
Corltrd Senjice. -i
0Replace air cleaner filter. Replace filter
more often under dusty conditions. An
Emission Control Service.
0Inspect fuel tank, cap and lines for damage
or leaks. Inspect fuel cap gasket forany
damage. Replace parts as needed. An
Emission Corztml Service.
0For supercharged engines only: Check the
supercharger oil level and add oil as needed
(or every 36 months, whichever occurs
first). See “Recommended Fluids and
Lubricants” in this section. An Emissim
Co1?tmiService.
0Rotate tires. See “Tire Inspection and
Rotation” in the Index for proper rotation
pattern and additional information.
DATE
I
ACTUALMILEAGE
ISERVICED B Y I
I
MaintenanceSchedule I
I
93,000 Miles (155 000 km)
96,000 Miles (I60 000 km)
0Change engine oil and filter (or every
0Change engine oil and filter (or every
3 months, whichever occurs first). An
Emission Control Service. ‘g
DATE
ACTUAL MILEAGE
SERVICED B Y
3 months, whichever occurs first). An
Emission Control Service. *
0Lubricate the suspension, steering linkage,
transaxle shift linkage, parking brake cable
guides and the underbody contact poi.nts
and linkage (or every 6 months, whichever
occurs first).
I
I
DATE ACTUAL
MILEAGE
1
SERVICED B Y
7-25
I MaintenanceSchedule I I
99,000 Miles (165 000 km)
100,000 Miles (166 000 km)
0Change engine oil and filter (or every
0Change automatic transaxle fluid and filter
if the vehicle is mainly driven under one or
more of these conditions:
- In heavy city traffic where the outside
temperature regularly reaches 90"F
(32°C) orhigher.
- In hilly or mountainous terrain.
- When doing frequent trailer towing.
- Uses such as found in taxi, police or
deli veryservice.
J~YOM
do not use your vehicle under any of
th& conditions, the,fluid and filter not
do
require changing.
3 months, whichever occurs first). An.
Emission Control Service. *
DATE
7-26
ACTUAL MILEAGE
SERVICED B Y
I
DATE
I
ACTUAL MILEAGE
SERVICED B Y I
The services shown in this schedule up to 100,000 miles
( I 66 000 km) should be performed after I00,000 miles
(166 000 km) at the same intervals.
Footnotes
-1- The U.S. Environmental Protection Agency or the
The system won’t detect dust in the oil. So if you
drive in a dusty area, be sure to change your oil every
3,000 miles ( 5 000 km) or sooner if the CHANGE OIL
light comes on. Remember to reset the Oil Life Monitor
when the oil has been changed. For more information,
see “Engine Oil Life Monitol-” in the Index.
California Air Resources Board has determined that the
failure to perform this maintenance item will not nullify
the emission warranty or limit recall liability prior to the
completion of vehicle useful life. We, however, urge that
all recommended maintenance services be performed at
the indicated intervals and the maintenance be recorded.
If your vehicle has an Engine Oil Life Monitor, the
monitor will show you when to change the oil -- usually
between 3,000 miles ( 5 000 k m ) and 7,500 miles
( 12 500 km) since your last oil change. Under severe
conditions, thc indicator may come on before
3,000 miles ( 5 000 k m ) . Never drive your vehicle more
than 7,500 miles ( 12 500 k m ) or 12 months without
an o i l change.
’j:
7-27
I
Maintenance Schedule I1
7,500 Miles (12 500 km)
15,000 Miles (25 000 km)
0Change engineoil and filter (or every
17 Change engine oil and filter (or every
12 months, whichever occurs first).An
Emission Control Service. *
0Lubricate the suspension, steering linkage,
transaxle shift linkage, parking brake cable
guides and the underbody contact points
and linkage (or every 12 months, whichever
occurs first).
0Rotate tires. See “Tire Inspection and
Rotation’’ in the Index for proper rotation
pattern and additional information.
12 months, whichever occurs first).An
Emission Control Service. ’I‘
0Lubricate the suspension, steering linkage,
transaxle shift linkage, parking brake cable
guides and the underbody contact points
and linkage (or every 12 months, whichever
occurs first).
DATE
7-28
ACTUAL MILEAGE
SERVICED B Y
I
L
DATE
I
ACTUAL MILEAGE
lSERVlCED
BY
I
1 Maintenance Schedule I1
22,500 Miles (37 500 km)
30,000 Miles (50 000 km)
Change engine oil and filter (or every
12 months, whichever occursfirst). An
Emission Control Service.*
0Lubricate the suspension, steering linkage,
transaxle shift linkage, parking brake cable
guides and the underbody contact points
and linkage (or every 12 months, whichever
occurs first).
0Rotate tires. See “Tire Inspection and
Rotation” in the Index for proper rotation
pattern and additional information.
0Change engine oil and filter (or every
DATE
ACTUAL
MILEAGE
SERVICED
BY:
12 months, whichever occursfirst). An
Emission Control Service.*
0Lubricate the suspension, steering linkage,
transaxle shift linkage, parking brake cable
guides and the underbody contact points
and linkage (or every 12 months, whichever
occurs first).
17 Inspect engine accessory drive belt (or
every 24 months, whichever occursfirst).
An Emission ControlSewice.
0Drain, flush and refill cooling system (or
every 24 months, whichever occursfirst).
See “Engine Coolant’’in the Index for what
to use. Inspect hoses. Clean radiator,
condenser, pressure cap and neck. Pressure
test the cooling system andpressure cap. An
Emission Control Service.
(Continued)
30,000 Miles (50 000 km) (Contimed)
0Replace spark plugs. An Emission Control
Service.
0Inspect spark plug wires. An Emission
Control Service. T
0Replace air cleaner filter. An Emission
Control Service.
0Inspect fuel tank, cap and lines for damage
or leaks. Inspect fuel cap gasketfor any
damage. Replace partsas needed. An
Emission Control Service. T
0For supercharged engines only: Check the
supercharger oil level and add oil as needed
(or every 36 months, whichever occurs
first). See “Recommended Fluids and
Lubricants” in this section. An Emission
Control Service.
DATE
7-30
ACTUALMILEAGESERVICED
BY
I
MaintenanceSchedule I1
I
37,500 Miles (62 500 km)
45,000 Miles (75 000 km)
0Change engine oil and filter (or every
0Change engine oil and filter (or every
12 months, whichever occurs first).An
Emission Control Sewice. *
0Lubricate the suspension,steering linkage,
transaxle shift linkage, parking brake cable
guides and the underbody contact points
and linkage (or every 12 months, whichever
occurs first).
0Rotate tires. See “Tire Inspection and
Rotation” in the Index for proper rotation
pattern and additional information.
12 months, whichever occurs first).An
Ernission Control Service. *
Cl Lubricate the suspension, steering linkage,
transaxle shift linkage, parking brake cable
guides and the underbody contact points
and linkage (or every 12 months, whichever
occurs first).
DATE
ACTUAL MILEAGE
SERVICED BY.
7-31
50,000 Miles (83 000 km)
52,500 Miles (87500 km)
0Change automatic transaxle fluid and filter
0Change engine oil and filter (or every
if the vehicle is mainly driven under one or
more of these conditions:
- In heavy city traffic where the outside
temperature regularly reaches 90 O F
(32°C) or higher.
- In hilly or mountainous terrain.
- When doing frequent trailer towing.
- Uses such as found in taxi, police or
delivery service.
l f y o u do not use your vehicle under anyof
these conditions, the fluid
and filter do not
require changing.
DATE
ACTUAL MILEAGE
SERVICED B Y
12 months, whichever occurs first). An
Emission Control Service. *
0Lubricate the suspension, steering ].inkage,
transaxle shift linkage, parking brake cable
guides and the underbody contact points
and linkage (or every 12 months, whichever
occurs first).
CI Rotate tires. See “Tire Inspection and
Rotation” in the Index for proper rotation
pattern and additional information.
DATE
ACTUAL MILEAGE
SERVICED B Y
I
Maintenance Schedule I1
60,000 Miles (100 000 km)
0Change engine oil and filter (or every
12 months, whichever occurs first).An
EmissioF1 C o ~ ~ t rSm-vicv.
ol
1‘:
0Lubricate the suspension, steering linkage,
transaxle shift linkage, parking brake cable
guides and the underbody contact points
and linkage (or every 12 months, whichever
occurs first).
0 For supercharged engines only: Check the
supercharger oil level and add oil as needed
(or every 36 months, whichever occurs
first). See “Recommended Fluidsand
Lubricants’’ in this section. An Emissio~1
Contrd Sen?ice.
0Inspect engine accessory drive belt (or
every 24 months, whichever occurs first).
Arz E1~1issionCorztrol Service.
0Drain, flush and refill cooling system (or
every 24 months, whichever occurs first).
See “Engine Coolant”in the Index for what
to use. Inspect hoses. Clean radiator,
condenser, pressure cap and neck. Pressure
test the cooling system and pressure cap. A11
Emissiorz Cor1tm1 Senvie.
Replace spark plugs. APIEmissiorz Cor?trol
Service.
Inspect spark plug wires. Ar1 Emission
1ter. A H EnI.issiolz
(Continued)
7-33
I Maintenance Schedule I1
60,000 Miles (100 000 km) (Continued)
67,500 Miles (112 500 km)
0Inspect fuel tank, cap and lines for damage
Change engine oil and filter (or every
12 months, whichever occurs first). An
Emission Control Service. *
0Lubricate the suspension, steering linkage,
transaxle shift linkage, parking brake cable
guides and the underbody contact points
and linkage (or every 12 months, whichever
occurs first).
0Rotate tires. See “Tire Inspection and
Rotation” in the Index for proper rotation
pattern and additional information.
or leaks. Inspect fuel cap gasket for any
damage. Replace parts as needed. An
Emission Control Service. -{-
DATE
7-34
ACTUAL MILEAGE
SERVICED B E
DATE
ACTUAL MILEAGE
SERVICED B Y I
1
75,000 Miles (125 000 km)
82,500 Miles (137 500 km)
0Change engine oil and filter (or every
fl Change
12 months, whichever occurs first).An
Emission Control Service. ‘k
0Lubricate the suspension, steering linkage,
transaxle shift linkage, parking brake cable
guides and the underbody contact points
and linkage (or every 12 months, whichever
occurs first).
engine oil and filter (or every
12 months, whichever occurs first).An
Emission Control Service. !‘:
0Lubricate the suspension, steering linkage,
transaxle shift linkage, parking brake cable
a
wides and the underbody contact points
and linkage (or every 12 months, whichever
occurs first).
0Rotate tires. See “Tire Inspection and
Rotation” in the Index for proper rotation
pattern and additional information.
DATE
ACTUAL MILEAGE
SERVICED B Y
7-35
90,000 Miles (150 000 km)
0Change engine oil and filter(or every
0Inspect spark plug wires. An Emission
12 months, whichever occurs first).An
Emission Control Service. ‘k
0Lubricate the suspension, steering linkage,
transaxle shift linkage, parking brake cable
b
Ouides and the underbody contact points
and linkage (or every 12 months, whichever
occurs first).
0Inspect engine accessory drive belt (or
every 24 months, whichever occurs first).
An Emission Control Service.
0Drain, flush and refill cooling system (or
every 24 months, whichever occurs first).
See “Engine Coolant” in the Index for what
to use. Inspect hoses. Clean radiator,
condenser, pressure cap and neck. Pressure
test the cooling system and pressure cap.An
Emission Control Service.
0Replace spark plugs. An Emissiolz Control
Service.
7-36
Control Service.
Replace air cleaner filter.An Emission
Control Ser-vice.
0 Inspect fuel tank. cap and lines fordanlage
or leaks. Inspect fuel cap gasket forany
damage. Replace parts as needed. An
Emission Contml S u v i c z *f
0For supercharged engines only: Check the
supercharger oil level and add oil as needed
(or every 36 months, whichever occurs first).
See “Recommended Fluids and Lubricants’’
in this section. An E1nission Control Service.
97,500 Miles (162 500 km)
100,000 Miles (166 000 km)
0Change engine oil and filter (or every
0Change automat:ic transaxle fluid and filter
12 months, whichever occurs first).An
Emission Control Service. ‘I’
0 Lubricate the suspension, steering linkage,
transaxle shift linkage, parking brake cable
guides and the underbody contact points
and linkage (or every 12 months, whichever
occurs first).
0 Rotate tires. See“Tire Inspection and
Rotation” in the Index for properrotation
pattern and additional information.
I
1
I
1
DATE
ACTUAL MILEAGE
if the vehicle is mainly driven under one or
more of these conditions:
- In heavy city traffic where the outside
temperature regularly reaches90”F
(32°C) or higher.
- In hilly or mountainous terrain.
- When doing frequent trailer towing.
- Uses such as found in taxi, police or
delivery service.
If you do not use your vehicle under anyof
these conditions, the fluid and filter do not
require changing.
SERVICED B Y
7-37
Part B: Owner Checks and Services
Engine Coolant Level
Listed below are owner checksand services which
should be performed at the intervals specified to help
ensure the safety, dependability and emission control
performance of your vehicle.
Check the engine coolant level and add the proper
coolant mix if necessary. See “Coolant” in the Index for
further details.
Be sure any necessary repairs are completed atonce.
Whenever any fluids or lubricants areadded to your
vehicle, make sure they are the proper ones, as shown
in Part D.
At Each Fuel Fill
It is importantfor you or u service station attendant to
perform theseunderhood checks at each
fuel fill.
Engine Oil Level
Check the engine oil level and add the proper oil if
necessary. See “Engine Oil”in the Index for further
details.
7-3s
Windshield Washer Fluid Level
Check the windshield washer fluid level in the
windshield washer tank and add the proper fluid if
necessary. See “Windshield Washer Fluid” in the Index
for further details.
At Least Once a Month
Tire Inflation
Check tire inflation. Make sure
tires are inflated to the
pressures specified on the Tire-Loading Information
label located on the rear edge of the driver’s door. See
“Tires” in the Index for further details.
Cassette Deck
Starter Switch
Clean cassette deck. Cleaningshould be done every 50
hours of tape play. See “Audio Systems”in the Index for
further details.
Power Antenna
Clean power antenna mast. See “Audio Systems” in the
Index for further details.
At Least Oncea Year
Key Lock Cylinders
Lubricate the key lock cylinders with the lubricant
specified in Part D.
Body Lubrication
Lubricate all body door hinges. Alsolubricate all hinges
and latches, including those for the hood, glove box
door and console door. Part D tells you what to use.
More frequent lubrication may be required when
exposed to a corrosive environment.
1. Before you start, be sure you have enough room
around the vehicle.
2. Firmly apply both the parking brake (see “Parking
Brake” in the Index if necessary) and the regular
brake.
NOTE: Do not use the accelerator pedal, and be
ready to turn off the engine immediately if it starts.
3. Try to start the engine in each gear. The starter
should work only in PARK (P) or NEUTRAL (N). If
the starter works in any other position, your vehicle
needs service.
7-39
Brake-Transaxle Shift Interlock -- BTSI
Steering Column Lock
While parked, and with the parking brake set, try to turn
the key to LOCK in each shift lever position.
The key should turn to LOCK only when the shift
lever is in PARK (P).
The key should come out only in LOCK.
I . Before you start, be sure you have enough room
around the vehicle. It should be parked on a level
surface.
2. Firmly apply the parking brake (see “Parking Brake”
in the Index if necessary).
NOTE: Be ready to apply the regular brake
immediately if the vehicle begins to move.
3. With the engine off, turn the key to the RUN position,
but don’t start theengine. Without applying the
regular brake, try to move the shift lever out of
PARK (P) with normal effort. If the shift lever moves
out of PARK (P), your vehicle’s BTSI needs service.
7-40
Parking Brake and Automatic Transaxle PARK (P)
Mechanism Check
Park on a fairly steep hill, with the vehicle facing
downhill. Keeping your foot on the regular brake, set
the parking brake.
To check the parking brake: With the engine running
and transaxle i n NEUTRAL (N), slowly remove foot
pressure from the regular brake pedal. Do this until
the vehicle is held by the parking brake only.
0
Underbody Flushing
At least every spring, use plain water to flush any
corrosive materials from the underbody. Take care to
clean thoroughly any areas where mud and other debris
can collect.
To check the PARK (P) mechanism's holding ability:
Shift to PARK (P). Then release a l l brakes.
7-41
Part C: Periodic Maintenance
Inspections
Exhaust System Inspection
Inspect the complete exhaust system. Inspect the body near
the cxh;lust system. Look for broken, damaged, missing or
out-ot-position parts a s well as open seams, holes, loose
connections, or other conditions which could cause a heat
build-up i n the tloor pan or could let exhaust fumes into
the vehicle. See "Engine Exhaust" in the Index.
Throttle Linkage Inspection
Restraint Systems
Now and then, make sure d l your belts. buckles. latch
plates, retractors. anchorages and reminder systems are
working properly. Look tor any loose parts o r damage.
If you see anything thitl might keep a restraint system
from doing its job. have it repaired.
Steering, Suspension and Front-WheelDrive Axle Boot and Seal Inspection
Inspect the front and ear suspension il11d steering
sysrem for damaged, loose o r 1nissing parts. signs o f '
wear, o r lack of lubrication. Inspect the power steering
lines and hoses for proper hookup, binding,leaks.
cracks, chafing. etc. Clean and then inspect the drive
axle boot seals for darrlagts, tears or leakage. Replace
seals if necess~try.
7-42
Brake System Inspection
Inspect the complete system. Inspect brake lines and
hoses f o r proper hookup. binding, leaks, cracks. chafing.
etc. Inspect disc brake pads for wear and rotors for
surface condition. Also inspect drum brake linings for
wear and cracks. Inspe.ct other brake parts. including
drums. wheel cylinders, calipers, parking brake, etc.
Check parkins brake adjustment. You may need t o have
yoltr brakes inspected more often if your driving habits
or conditions result i n frequent braking.
Part D: Recommended Fluids and
Lubricants
USAGE
NOTE: Fluids and lubricants identified below by name,
part nunlber or specification may be obtained from y o ~ ~ r
GM dealer.
USAGE
Engine Oil
Engine Coolant
Coolant
Supplement
FLUID/L,UBRICANT
Engine oil with the American
Petroleum Institute Certified For
Gasoline Engines "Starburst"
symbol of the proper viscosity. To
determine the preferredviscosity
for y o ~ vehicle's
~r
engine, see
"Engine Oil" i n the Index.
5O/50 mixture of water (preferably
distilled) and good quality
ethylene glycol base antifreeze
(GM Part No. 1052753 or
equivalent) conformingt o GM
Specification 182SM or approved
recycled coolant conforming to
GM Specification 1825M.
GM Part No. 363462 I or
equivalent with a complete flush
and refill.
L
FI,UID/LUBRICANT
Hydraulic Brake
System
Delco Supreme 11 ' ' Brake Fluid
(GM Part No. 1052535 or
equivalent DOT-3 brake fluid).
Parking Brake
Guides
Chassis lubricant (GM Part
No. 1 OS2497 or equivalent) or
lubricant meeting requirements of
NLGI Grade 2. Category LB or
GC-LB.
Power Steering
System
GM Hydraulic Power Steering
Fluid (GM Part No. 1052884 or
equivalent).
Automatic
Transaxle
DEXRON@-111Automatic
Transmission Fluid.
Key Lock
Cylinders
Lubricate with Multi-Purpose
Lubricant (GM Part No. 12345120)
or synthetic SAE SW-30 engine
oil.
Supercharger
Supercharger Oil (GM Part
No. 12345982). See "Supercharger
Oil" in the Index.
Automatic
Transaxle Shift
Linkage
Engine o i l .
7-43
USAGE
FLUIDLUBRICANT
Floor Shift
Linkage
Engine oil.
Chassis
Lubrication
Chassis lubricant (GM Past
No. 1052497 or equivalent) or
lubricant meeting requirements of
NLGI Grade 2, Category LB os
GC-LB.
~~~
Windshield
Washer Solvent
GM Optikleen@Washer Solvent
(GM Part No. 1051 5 1 5 ) or
equivalent.
Hood Latch
Assembly
a. Pivots and
Spring
Anchor
a. Engine oil.
b, Release Pawl
b. Chassis lubricant (GM Part
No. 1052497 os equivalent) or
lubricant meeting requirements
of NLGI Grade 2, Category LB
or GC-LB.
7-44
FLUIDLUBRICANT
USAGE
Hood and Door
Hinges, Fuel
Filler Door
Hinge, Rear
Compartment
Lid Hinges
Engine oil or Lubriplate Lubricant
(GM Part No. 10S0109).
Weatherstrip
Conditioning
Dielectric Silicone
Grease (GM
Part No. 12345579 or equivalent).
See “Replacement Parts’’ i n the Index for recommended
replacement filters, valves and spark plugs.
Part E: Maintenance Record
After the scheduled services are performed,record the
date, odometer readingand who performed the service
in the boxes provided after the maintenance interval.
Any additional information from “Owner Checksand
Services” or “Periodic Maintenance” can be added on
the following record pages. Also, you should retain all
maintenance receipts. Your owner information portfolio
is a convenient placeto store them.
Maintenance Record
DATE
ODOMETER
READING
SERVICED BY
MAINTENANCE PERFORMED
7-45
Maintenance Record
7-46
Maintenance Record
SERVICED BY
MAINTENANCE PERFORMED
7-47
Maintenance Record
DATE
7-48
ODOMETER
READING
SERVICED BY
MAINTENANCE PERFORMED
Section 8 CustomerAssistanceInformation
Here you will find out how to contact Buick if you need
assistance. This section also tells you how to obtain
service publications and how to report any safety
defects. This section includes information on: Customer
Satisfxtion Procedure, Customer Assistance for
Hearing or Speech Impaired,BBB Auto Line -Alternative Dispute Resolution Program, Reporting
Safety Defects, Roadside Assistance,and Service
Publications.
Customer Satisfaction Procedure
Your satisfaction and goodwill are important to your
dealer and Buick. Normally, any concern with the sales
transaction or the operation of your vehicle will be
resolved by your dealer’s Sales or Service Departments.
Sometimes, however, despitethe best intentions of all
concerned, misunderstandings canoccur. If your
concern has not been resolved to your satisfaction, the
following steps should be taken:
STEP ONE -- Discuss your concern with a member of
dealership 1nanagement. Normally, concerns can often
be quickly resolved at that level. If the matter has
already been reviewed with the Sales, Service, or Parts
Manager, contact the owner of the dealership orthe
General Manager.
STEP TWO -- If after contacting amember of
dealership manage.ment, it appears your concern cannot
be resolved by the dealership without further help,
contact the Buick Customer Assistance Center by
calling 1-800-52 1-7300. In Canada, contact GM of
Canada Customer Assistance Center in Oshawa by
calling 1-800-263-3777 (English) or 1-800-263-7854
French ) .
In Mexico, call (525) 254-3777. In Puerto Rico, call
1-800-496-9992 (English) or 1-800-496-9993 (Spanish).
In the U S . Virgin Islands, call 1-800-496-9994. In all
other overseas locations,contact GM North American
Export Sales in Canada by calling 1-905-644-41 12.
For prompt assistance, please have the following
information available to give the Customer Assistance
Representative:
0
Your name, address, home and business telephone
numbers
0
Vehicle Identification Number (This is available
from the vehicle registration or title, or the plate at
the left top of the instrument panel and visible
through the windshield.)
0
Dealership name and location
0
Vehicle delivery date and present mileage
0
Nature of concern
We encourage you to call the toll-free number listed
previously in order to give your inquiry prompt
attention. However, if you wish to write Buick, write to:
Buick MotorDivision
Customer Assistance Center
902 E. Hamilton Avenue
Flint, MI 48550
8-2
Refer to your Warranty and Owner Assistance
Information booklet for addresses of Canadian and GM
Overseas offices.
When contacting Buick, please remember that your
concern will likely be resolved in the dealership, using the
dealership’s facilities, equipment and personnel. That is why
we suggest you follow Step One first if you have a concern.
Customer Assistance for the Hearing
or Speech Impaired (TDD)
To assist customers who have hearing difficulties, Buick
has installed special TDD (Telecommunication Devices
for the Deaf) equipment at its Customer Assistance
Center. Any hearing or speech impaired customer who
has access to a TDD or aconventional teletypewriter
(TTY) can communicate with Buick by dialing:
1 -800-TD-BUICK. (TDD users in Canada candial
1-800-263-3830.)
GM Participation in BBB AUTO
LINE -- Alternative Dispute
Resolution Program*
"This program may not be available in all states,
depending on state law. Canadian owners refer to your
Warranty and Owner Assistance Information booklet.
General Motors reservesthe right to change eligibility
limitations and/orto discontinue itsparticipation in this
program.
Both Buick and your Buick dealer are committed to
making sure you are completely satisfied with your new
vehicle. Our experience has shown that, if a situation
arises where you feel your concern has not been
adequately addressed,the Customer Satisfaction
Procedure described earlierin this section is very
successful.
There may be instances where an impartial third-party
can assist in arriving at a solution to a disagreement
regarding vehicle repairs or interpretation of the New
Vehicle Limited Warranty. To assist in resolving these
disagreements Buick voluntarily participates in BBB
AUTO LINE.
BBB AUTO LINE is an out-of-court program
administered by the Better BusinessBureau system to
settle disputes between customers and automobile
manufacturers. Thisprogram is available freeof charge
to customers who currentlyown or lease a GM vehicle.
If you are not satisfied after followingthe Customer
Satisfaction Procedure,you may contact the BBBusing
the toll-free telephone number, or write them at the
following address:
BBB AUTO LINE
Council of Better Business Bureaus
4200 Wilson Boulevard
Suite 800
Arlington, VA 22203
Telephone: 1-800-955-5 100
To file a claim,you will be asked to provide your name
and address, your Vehicle Identification Number (VIN),
and a statement of the nature of your complaint.
Eligibility is limited by vehicle age and mileage, and
other factors.
We prefer you utilize the Customer Satisfaction
Procedure before you resort to AUTO LINE,but you
may contact the BBB at any time. The BBB will attempt
to resolve the complaint serving as
an intermediary
between you and Buick. If this mediation is
unsuccessful, an informal hearing will be scheduled
where eligible customersmay present their case to an
impartial third-party arbitrator.
The arbitrator will make a decision which you may
accept or reject. If you accept the decision, GM will be
bound by that decision. The entiredispute resolution
procedure should ordinarily take about forty days from
the time you file a claim until a decision is made.
Some statelaws may require you to use this program
before filing a claim with a state-run arbitration program
or in the courts. For further information, contact the
BBB at 1-800-955-5 100 or the Buick Customer
Assistance Center at 1-800-52 1-7300.
REPORTING SAFETY DEFECTS
TO THE UNITED STATES
GOVERNMENT
If you believe that your vehicle has a defect which could
cause a crash or could cause injury or death,you should
immediately inform the National Highway Traffic
Safety Administration (NHTSA), in addition to
notifying General Motors.
If NHTSA receives similar complaints, it may open an
investigation, and if it finds that a safety defect exists in
a group of vehicles, it may order a recall and remedy
campaign. However, NHTSA cannot become involved
in individual problems between you, your dealer, or
General Motors.
To contact NHTSA, you may either call the Auto Safety
Hotline toll-free at 1-800-424-9393 (or 366-0123 in the
Washington, D.C. area) or write to:
NHTSA, U.S. Department of Transportation
Washington, D.C. 20590
You can also obtain other information about motor
vehicle safety from the Hotline.
8-4
REPORTING SAFETY DEFECTS
TO
THE CANADIAN GOVERNMENT
If you live in Canada, and you believe that your vehicle
has a safety defect, you should immediately notify
Transport Canada, in addition to notifying General
Motors of Canada Limited. You may write to:
Transport Canada
Box 8880
Ottawa, OntarioK l G 352.
Courtesy Transportation
To Buick Motor Division, Quality Means Service -- and
service means “keeping you on the road.”
Included with your 1995 Buick new car warranty,
(36 months, or 36,000 miles), is Courtesy
Transportation, a program which will provide
Buick retail customers with:
-
Reimbursement toward a loaner vehicle, courtesy of
Buick Motor Division, for up to five daysfor
vehicles requiring overnight warranty repairs. Also,
reimbursement up to $30 aday (five days maximum)
may be available forthe cost of a rental car, bus or
even a cab.
-
A free one-way shuttle ride up to 10 miles from the
dealership is available for customers whose vehicles
require same-day warranty repairs.
REPORTING SAFETY DEFECTS
TO GENERAL MOTORS
In addition to notifying NHTSA (or Transport Canada)
in a situation like this, we certainly hope you’ll notify
us. Please call LIS at 1-800-52 1-7300, or write:
Buick Motor Division
Customer Assistance Center
902 E. Hamilton Avenue
Flint. MI 48550.
In Canada, please call us at 1-800-263-3777 (English)
or 1-800-263-7854 (French). Or, write:
General Motors of Canada Limited
Customer Assistance Center
1908 Colonel Sam Drive
Oshawa, Ontario Ll H 8P7
Courtesy Transportation is Buick’s way of extending the
Premium Service you’ve come to expect fromBuick
and its 3,000 dealers. Please review the Courtesy
Transportation glove-box card contained in your
vehicle, or consult your Buick dealer for details.
In Canada, please consult your GM dealer for
information on Courtesy Transportation.
8-5
Roadside Assistance
Canada Roadside Assistance
Buick Motor Division is proud to offer Buick Roadside
Assistance to customers for vehicles covered under the
36 month/36,000 mile new car warranty (whichever
comes first).
Vehicles purchased in Canada have an extensive
Roadside Assistance program accessible from anywhere
in Canada or the United States. Pleaserefer to the
separate brochure provided by the dealer or call
1-800-268-6800 for emergency services.
Our commitmentto Buick owners has always included
superior service through our network of 3,000 Buick
dealers. Buick Roadside Assistance provides an extra
measure of convenience and security.
Buick Roadside Assistance:
-
Provides owners with access to minor repairs or
towing for disabled vehicles.
-
Takes the anxiety out of uncertain situations by
providing easy access to service professionals trained
to work with Buick owners, 24 hours a day, 365 days
a year, including weekends and holidays.
For details on Buick Roadside Assistance, please consult
your Buick Roadside Assistance owner booklet included
with your owner’s manual. For needed assistance, call
the Buick Roadside Assistance toll-free hotline:
1-800-252- 1 112.
Service and Owner Publications
Service manuals, service bulletins, owner’s manuals and
other service literature are available forpurchase for all
current and many past model General Motors vehicles.
Toll-free telephone numbers for ordering information:
United States 1-800-55 1-4123
Canada 1-800-668-5539
Service manuals contain diagnostic and repair
information for all chassis and body systems. They may
be useful for owners whowish to get a greater
understanding of their vehicle. They are also useful for
owners with the appropriate skill level or training who
wish to perform “do-it-yourself’ service. Theseare
authentic General Motors service manuals meant for
professional, qualified technicians. In some cases they
refer to specialized tools, equipmentand safety
procedures necessary to service the vehicle.
technician perform better service. Service bulletins may
irwolve any number of vehicles. Some w i l l describe
inexpensive service, others w i l l describe expensive
service. Some will advise new or unexpected conditions,
and others may help avoid future costly repairs. An
important reminder ... service bulletins are meant for
qualified technicians. Since these bulletins are issued
throughout the model year and beyond. a n index is
required and published quarterly to help identify specific
bulletins. Subscriptions are avaiIable. You can order an
index at the toll-free nwlbers listed previously, or ask a
GM dealer/retailer-to see an index 01- individual bulletin.
Service Bulletins
Owner Publications
Service bulletins covering various subjects are regularly
sent to a l l General Motors dealerships/retail facilities.
GM monitors product performance in the field. When
service methods are found which promote better service
on GM vehicles, bulletins are created to help the
Owner’s nlanuals, warranty folders and various owner
assistance booklets provide owners with general
operation and maintenance inl’orrnation.
Service Manuals
-
8-7
NOTES
8-8
NOTES
8-9
NOTES
8-10
NOTES
8-11
NOTES
Section 9 Index
Adding
Automatic Transaxle Fluid . . . . . . . . . . . . . . . . . . . . . 6-23
BrakeFluid . . . . . . . . . . . . . . . . . . . . . . . . . . . . . . . . .
6-29
Electrical Equipment . . . . . . . . . . . . . . . 2-1 8. 3.21. 6-53
Engine Coolant . . . . . . . . . . . . . . . . . . . . . . . . . . . . . . 6-25
6-14
Engineoil . . . . . . . . . . . . . . . . . . . . . . . . . . . . . . . . . .
Power Steering Fluid . . . . . . . . . . . . . . . . . . . . . . . . .
6-27
3-21
SoundEquipment . . . . . . . . . . . . . . . . . . . . . . . . . . . .
Windshield Washer Fluid . . . . . . . . . . . . . . . . . 2.34. 6-27
Air Bag
HowDoesitRestrain
.........................
1-22
1-21
How it Works . . . . . . . . . . . . . . . . . . . . . . . . . . . . . . .
Location . . . . . . . . . . . . . . . . . . . . . . . . . . . . . . . . . . .
1-21
Readiness Light . . . . . . . . . . . . . . . . . . . . . . . .
1.20. 2-59
Servicing . . . . . . . . . . . . . . . . . . . . . . . . . . . . . . . . . . .
1-24
What Makes it Inflate . . . . . . . . . . . . . . . . . . . . . . . . .
1-22
What Will You See After it Inflates . . . . . . . . . . . . . . 1-23
When Should it Inflate . . . . . . . . . . . . . . . . . . . . . . . .
1-22
Aircleaner . . . . . . . . . . . . . . . . . . . . . . . . . . . . . . . . . . . .
6-18
Air Cleaner Filter Replacement . . . . . . . . . . . . . . . . . . . . 6- 18
Air Conditioning. Dual Automatic ComforTemp
3-7
Climate Control . . . . . . . . . . . . . . . . . . . . . . . . . . . . . . . .
Air Conditioning. Electronic Touch Climate Control . . . . 3-7
3- 1
Air Outlets . . . . . . . . . . . . . . . . . . . . . . . . . . . . . . . . . . . . .
Alarm. Theft-Deterrent System . . . . . . . . . . . . . . . . . . . . 2- 12
Alignment and Balance. Tires . . . . . . . . . . . . . . . . . . . . .
6-40
Aluminum Wheels. Cleaning . . . . . . . . . . . . . . . . . . . . . . 6-49
Antenna Care . . . . . . . . . . . . . . . . . . . . . . . . . . . . . . . . . .
3-23
Antifreeze . . . . . . . . . . . . . . . . . . . . . . . . . . . . . . . . . . . . .
6-23
Adding . . . . . . . . . . . . . . . . . . . . . . . . . . . . . . . . . . . .
6-25
Checking . . . . . . . . . . . . . . . . . . . . . . . . . . . . . . . . . . . 6-24
Anti-Lock . . . . . . . . . . . . . . . . . . . . . . . . . . . . . . . . . . . . .
4-6
Anti-Lock Brake System Warning Light . . . . . . . . . 2.62.4.6
Anti-Lock Brakes . . . . . . . . . . . . . . . . . . . . . . . . . . . . . . .
4-6
3-18
Anti-Theft Feature. Theftlock . . . . . . . . . . . . . . . . . . . . .
6-43
Appearancecare . . . . . . . . . . . . . . . . . . . . . . . . . . . . . . .
Appearance Care and Materials . . . . . . . . . . . . . . . . . . . .
6-51
Armrest. Rear Storage . . . . . . . . . . . . . . . . . . . . . . . . . . .
2-55
2-54
Armrest. Storage . . . . . . . . . . . . . . . . . . . . . . . . . . . . . . .
Ashtrays
Center Console . . . . . . . . . . . . . . . . . . . . . . . . . . . . . . 2-55
Rear . . . . . . . . . . . . . . . . . . . . . . . . . . . . . . . . . . . . . . .
2-56
Assist Handles . . . . . . . . . . . . . . . . . . . . . . . . . . . . . . . . .
2-55
Astroroof . . . . . . . . . . . . . . . . . . . . . . . . . . . . . . . . . . . . . 2-50
Audio Systems . . . . . . . . . . . . . . . . . . . . . . . . . . . . . . . . . .
3-8
Automatic Dimming Outside Mirror . . . . . . . . . . . . . . . .2-48
Automatic Door Locks . . . . . . . . . . . . . . . . . . . . . . . . . . . .
2-4
Automatic Inside Mirror . . . . . . . . . . . . . . . . . . . . . . . . .
2-44
Automatic Inside Mirror with Compass . . . . . . . . . . . . . . 2-45
Automatic Overdrive Position . . . . . . . . . . . . . . . . . . . . .
2-21
9-1
Automatic Pull-Down Feature ......................
2-9
Automatic Ride Control . . . . . . . . . . . . . . . . . . . . . . . . . .
2-54
Automatic Transaxle ............................
2- 19
Automatic Overdrive Position . . . . . . . . . . . . . . . . . . 2-2 1
First Gear (1) Position ........................
2-22
Neutral (N)Position . . . . . . . . . . . . . . . . . . . . . . . . . . 2-20
Park (P) Position . . . . . . . . . . . . . . . . . . . . . . . . . . . . .
2-19
Reverse (R) Position ..........................
2-20
Second Gear (2) Position . . . . . . . . . . . . . . . . . . . . . . 2-22
Shifting . . . . . . . . . . . . . . . . . . . . . . . . . . . . . . . . . . . . 2-19
Third Gear (3) Position . . . . . . . . . . . . . . . . . . . . . . . . 2-21
Automatic Transaxle Fluid ........................
6-2 1
Adding . . . . . . . . . . . . . . . . . . . . . . . . . . . . . . . . . . . . 6-23
Checking . . . . . . . . . . . . . . . . . . . . . . . . . . . . . . . . .
6-21
Battery . . . . . . . . . . . . . . . . . . . . . . . . . . . . . . . . . . . . . . 6-3 1
Replacement. Remote Keyless Entry . . . . . . . . . . . . . . 2-9
Warning Light . . . . . . . . . . . . . . . . . . . . . . . . . . . . . . . 2-60
Warnings . . . . . . . . . . . . . . . . . . . . . . . . . . . . . . . . 5-2. 5.4
BBBAutoLine . . . . . . . . . . . . . . . . . . . . . . . . . . . . . . . . .
8-3
6-1 1
Belt. Engine Accessory (L36) .....................
Belt. Engine Accessory (L67) .....................
6-12
Blizzard . . . . . . . . . . . . . . . . . . . . . . . . . . . . . . . . . . . . . . 4-26
Brake
Adjustment . . . . . . . . . . . . . . . . . . . . . . . . . . . . . . . . . 6-30
6-29
Fluid, Adding . . . . . . . . . . . . . . . . . . . . . . . . . . . . . . .
Master Cylinder .............................
6-28
PedalTravel . . . . . . . . . . . . . . . . . . . . . . . . . . . . . . . .
6-30
System Parts, Replacing . . . . . . . . . . . . . . . . . . . . . . .
6-3 1
System Warning Light . . . . . . . . . . . . . . . . . . . . . . . .
2-61
7-40
Transaxle Shift Interlock .......................
Wear . . . . . . . . . . . . . . . . . . . . . . . . . . . . . . . . . . . . . . 6-30
9-2
.
Brake.Parking . . . . . . . . .........................
2-23
Brakes. Anti-Lock . . . . . . . . . . . . . . . . . . . . . . . . . . . . . . .
4-6
Brakes. Trailer .................................
4-34
4-5
Braking . . . . . . . . . . . . . . . . . . . . . . . . . . . . . . . . . . . . . . . .
Braking In Emergencies ...........................
4-9
“Break-In,” New Vehicle .........................
2-15
BTSI (Brake-Transaxle Shift Interlock) . . . . . . . . . . . . . . 7-40
Bulb Replacement
Headlamps . . . . . . . . . . . . . . . . . . . . . . . . . . . . . . . . .
6-32
Taillamps . . . . . . . . . . . . . . . . . . . . . . . . . . . . . . . . . . .
6-34
6-59
Bulb Replacement Chart . . . . . . . . . . . . . . . . . . . . . . . . .
Calibration. Compass . . . . . . . . . . . . . . . . . . . . . . . . . .
2-46
Canadian Roadside Assistance ......................
8-6
Capacities and Specifications ......................
6-60
Carbon Monoxide . . . . . . . . . . . . . . . 2-10.2-27.4-27. 4.33
Cassette Tape Player . . . . . . . . . . . . . . . . . . . . . . . . . . . . .
3-9
Cassette Tape Player Care ........................
3-22
3-17
CDPlayer . . . . . . . . . . . . . . . . . . . . . . . . . . . . . . . . . . . . .
Center Passenger Position . . . . . . . . . . . . . . . . . . . . . . . . 1-26
4-29
Certificatiomire Label ...........................
4-34
Chains.Safety . . . . . . . . . . . . . . . . . . . . . . . . . . . . . . . . .
Chains.Tire . . . . . . . . . . . . . . . . . . . . . . . . . . . . . . . . . . .
6-42
ChangeOilSoon . . . . . . . . . . . . . . . . . . . . . . . . . . . . . . .
2-68
5-19
Changing a Flat Tire . . . . . . . . . . . . . . . . . . . . . . . . . . . . .
Check Oil ‘LevelLight . . . . . . . . . . . . . . . . . . . . . . . . . . .
2-67
Check Oil Light . . . . . . . . . . . . . . . . . . . . . . . . . . . . . . . .
2-67
Checking Your Restraint Systems . . . . . . . . . . . . . . . . . . 1-46
Checking
6-2 1
Automatic Transaxle Fluid . . . . . . . . . . . . . . . . . . . . .
BrakeFluid . . . . . . . . . . . . . . . . . . . . . . . . . . . . . . . . . 6-29
Engine Coolant . . . . . . . . . . . . . . . . . . . . . . . . . . . . . .
6-24
6-14
Engineoil . . . . . . . . . . . . . . . . . . . . . . . . . . . . . . . . . .
Power Steering Fluid . . . . . . . . . . . . . . . . . . . . . . . . . 6-27
1-46
Restraint Systems . . . . . . . . . . . . . . . . . . . . . . . . . . . .
Things Under the Hood . . . . . . . . . . . . . . . . . . . . . . . .
6-9
Chemical Paint Spotting . . . . . . . . . . . . . . . . . . . . . . . . . .
6-50
Child Restraints . . . . . . . . . . . . . . . . . . . . . . . . . . . . . . . . 1-34
Securing in a Rear Outside Seat Position . . . . . . . . . . 1-36
Securing i n the Center Rear Seat Position . . . . . . . . . 1-38
Securing in the Right Front Seat Position . . . . . . . . . . 1-40
TopStrap . . . . . . . . . . . . . . . . . . . . . . . . . . . . . . . . . . .
1-35
WheretoPut . . . . . . . . . . . . . . . . . . . . . . . . . . . . . . . .
1-34
Cigarette Lighter . . . . . . . . . . . . . . . . . . . . . . . . . . . . . . . 2-56
Circuit Breaker. Power Windows and Power Options . . . . . 6-57
Cleaner. Air . . . . . . . . . . . . . . . . . . . . . . . . . . . . . . . . . . . 6-18
Cleaning
Aluminum Wheels . . . . . . . . . . . . . . . . . . . . . . . . . . . 6-49
Fabric . . . . . . . . . . . . . . . . . . . . . . . . . . . . . . . . . . . . . 6-44
Glass . . . . . . . . . . . . . . . . . . . . . . . . . . . . . . . . . . . . . . 6-47
6-46
Leather . . . . . . . . . . . . . . . . . . . . . . . . . . . . . . . . . . . .
Outside of the Windshield and Wiper Blades . . . . . . . 6-47
Speaker Covers . . . . . . . . . . . . . . . . . . . . . . . . . . . . . . 6-46
Special Problems . . . . . . . . . . . . . . . . . . . . . . . . . . . .
6-45
Staills . . . . . . . . . . . . . . . . . . . . . . . . . . . . . . . . . . . . . . 6-45
The Inside of Your Buick . . . . . . . . . . . . . . . . . . . . . .
6-43
The Outside of Your Buick . . . . . . . . . . . . . . . . . . . . .
6-48
Tires . . . . . . . . . . . . . . . . . . . . . . . . . . . . . . . . . . . . . . 6-49
Top of the Instrument Panel . . . . . . . . . . . . . . . . . . . . 6-46
Vinyl . . . . . . . . . . . . . . . . . . . . . . . . . . . . . . . . . . . . . . 6-45
Climate Control . Electronic Touch . . . . . . . . . . . . . . . . . . 3-6
Clock. Setting the . . . . . . . . . . . . . . . . . . . . . . . . . . . . . . . . 3-8
3-1
Comfort Controls . . . . . . . . . . . . . . . . . . . . . . . . . . . . . . . .
Compact Disc Player . . . . . . . . . . . . . . . . . . . . . . . . . . . .
3-17
Compact Disc Player Care . . . . . . . . . . . . . . . . . . . . . . . .
3-23
Compact Spare Tire . . . . . . . . . . . . . . . . . . . . . . . . . . . . . 5-29
Compass. Calibration . . . . . . . . . . . . . . . . . . . . . . . . . . . . 2-47
Compass. Automatic Inside Mirror with . . . . . . . . . . . . . 2-45
Control of a Vehicle . . . . . . . . . . . . . . . . . . . . . . . . . . . . . .
4-5
Control. LOSSof . . . . . . . . . . . . . . . . . . . . . . . . . . . . . . . .
4-13
Convenience Net . . . . . . . . . . . . . . . . . . . . . . . . . . . . . . . 2-49
Convex Outside Mirror . . . . . . . . . . . . . . . . . . . . . . . . . .
2-48
Coolant . . . . . . . . . . . . . . . . . . . . . . . . . . . . . . . . . . . . . . . 6-23
Coolant Heater. Engine . . . . . . . . . . . . . . . . . . . . .
2- 18. 6-17
Coolant Recovery Tank . . . . . . . . . . . . . . . . . . . . . . . . . . 5-14
Coolant Temperature Gage . . . . . . . . . . . . . . . . . . . . . . . 2-64
Coolant. How to Add t o the Coolant Recovery Tank . . . 5-14
Coolant. How to Add t o the Radiator . . . . . . . . . . . . . . . 5-16
Cooling Systcm . . . . . . . . . . . . . . . . . . . . . . . . . . . . . . . .
5-12
Courtesy Lamps . . . . . . . . . . . . . . . . . . . . . . . . . . . . . . . . 2-39
Courtesy Transportation . . . . . . . . . . . . . . . . . . . . . . . . . . .
8-5
Cruise Control . . . . . . . . . . . . . . . . . . . . . . . . . . . . . . . . .
2-34
Erasing Speed Memory . . . . . . . . . . . . . . . . . . . . . . . . 2-38
Getting Out of . . . . . . . . . . . . . . . . . . . . . . . . . . . . . . . 2-38
Passing Another Vehicle While Using . . . . . . . . . . . . 2-38
To Increase Speed . . . . . . . . . . . . . . . . . . . . . . . . . . . .
2-37
To Reduce Speed . . . . . . . . . . . . . . . . . . . . . . . . . . . . 2-38
To Resume a Set Speed . . . . . . . . . . . . . . . . . . . . . . . .
2-36
ToSet . . . . . . . . . . . . . . . . . . . . . . . . . . . . . . . . . . . . . 2-35
Traction Control Activated . . . . . . . . . . . . . . . . . . . . .
2-35
UseonHills . . . . . . . . . . . . . . . . . . . . . . . . . . . . . . . .
2-38
9-3
Cupholders . . . . . . . . . . . . . . . . . . . . . . . . . . . . . . .
2.54. 2.55
Customer Assistance for the Hearing or
Speech Impaired . . . . . . . . . . . . . . . . . . . . . . . . . . . . . . .
8-2
Customer Assistance Information . . . . . . . . . . . . . . . . . . . 8- 1
Customer Satisfaction Procedure . . . . . . . . . . . . . . . . . . . .
X- 1
.
D a m a g e Finish . . . . . . . . . . . . . . . . . . . . . . . . . . . . . . .
6-49
Damage . Sheet Metal . . . . . . . . . . . . . . . . . . . . . . . . . . . . 6-49
Daytime Running Lamps . . . . . . . . . . . . . . . . . . . . . . . . . 2-4 1
Dead Battery . . . . . . . . . . . . . . . . . . . . . . . . . . . . . . . . . . .
5-3
Defects . Reporting . . . . . . . . . . . . . . . . . . . . . . . . . . . . . . . 8-4
Defensive Driving . . . . . . . . . . . . . . . . . . . . . . . . . . . . . . .
4- 1
Defogger . Rear Window (Dual Automatic ComforTemp
ClimateControl) . . . . . . . . . . . . . . . . . . . . . . . . . . . . . . .
3-S
Defogger Rear Window (Electronic Touch
ClimateControl) . . . . . . . . . . . . . . . . . . . . . . . . . . . . . . .
3-8
Defrosting . . . . . . . . . . . . . . . . . . . . . . . . . . . . . . . . .
3-1.3-7
Dimensions . . . . . . . . . . . . . . . . . . . . . . . . . . . . . . . . . . . 6-58
Door Ajar Light . . . . . . . . . . . . . . . . . . . . . . . . . . . . . . . .
2-66
DoorLock~. . . . . . . . . . . . . . . . . . . . . . . . . . . . . . . . . . . . .
2-3
Driver Position . . . . . . . . . . . . . . . . . . . . . . . . . . . . . . . . .
I - 13
Driving
AtNight . . . . . . . . . . . . . . . . . . . . . . . . . . . . . . . . . . . 4-15
City . . . . . . . . . . . . . . . . . . . . . . . . . . . . . . . . . . . . . . .
4-19
Defensive . . . . . . . . . . . . . . . . . . . . . . . . . . . . . . . . . . . 4-1
Drunken . . . . . . . . . . . . . . . . . . . . . . . . . . . . . . . . . . . . 4-7Freeway . . . . . . . . . . . . . . . . . . . . . . . . . . . . . . . . . . . . 4-20
In a Blizzard . . . . . . . . . . . . . . . . . . . . . . . . . . . . . . . . 4-26
I n Foreign Countries . . . . . . . . . . . . . . . . . . . . . . . . . . . 6-6
In the Rain . . . . . . . . . . . . . . . . . . . . . . . . . . . . . . . . . .
4- 16
.
9-4
OnCLIrves . . . . . . . . . . . . . . . . . . . . . . . . . . . . . . . . . . . 4-9
OnGrades . . . . . . . . . . . . . . . . . . . . . . . . . . . . . . . . . . 4-36
On Hill and Mountain Roads . . . . . . . . . . . . . . . . . . . 4-22
On Snow and Ice . . . . . . . . . . . . . . . . . . . . . . . . . . . . . 4-25
Through Deep Standing Watcr . . . . . . . . . . . . . . . . . . 2-18
Winter . . . . . . . . . . . . . . . . . . . . . . . . . . . . . . . . . . . . . 4-24
With a Trailer . . . . . . . . . . . . . . . . . . . . . . . . . . . . . . .
4-34
Drunken Dri\ins . . . . . . . . . . . . . . . . . . . . . . . . . . . . . . . .
4-2
Dual Automatic Con1fc)rTemp Climate Control . . . . . . . . . 3-2
Electrical Equipnxnt. Adding . . . . . . . . . . 2- I 8. 3-2 I .6-53
Electronic Le\;el Control . . . . . . . . . . . . . . . . . . . . . . . . .
2-54
Electronic Touch Climate Control . . . . . . . . . . . . . . . . . . . 3-6
Engine Acccssorp Belt. (L36) . . . . . . . . . . . . . . . . . . . . .
6-11
Engine Accessory Bell . (L67) . . . . . . . . . . . . . . . . . . . . .
6-12
Engine Coolant . . . . . . . . . . . . . . . . . . . . . . . . . . . . . . . . .
6-23
Adding . . . . . . . . . . . . . . . . . . . . . . . . . . . . . . . . . . . . 6-25
Chccking . . . . . . . . . . . . . . . . . . . . . . . . . . . . . . . . . . .
6-24
Heater . . . . . . . . . . . . . . . . . . . . . . . . . . . . . . . . 2- 18.6- 17
Temperature Gage . . . . . . . . . . . . . . . . . . . . . . . . . . . .
2-64
Temperature Warning Light . . . . . . . . . . . . . . . . . . . . 2-63
Engine
Exhallst . . . . . . . . . . . . . . . . . . . . . . . . . . . . . . . . . . . . 2-27
Idcntification . . . . . . . . . . . . . . . . . . . . . . . . . . . . . . . .
6-52
Overheating . . . . . . . . . . . . . . . . . . . . . . . . . . . . . . . . .
5-11
Running it While You're Parked . . . . . . . . . . . . . . . . . 2-28
Specifications . . . . . . . . . . . . . . . . . . . . . . . . . . . . . . . 6-61
Starting . . . . . . . . . . . . . . . . . . . . . . . . . . . . . . . . . . . .
2-17
3800 Sllperctlargcd (L67) . . . . . . . . . . . . . . . . . . . . . .
6-11
Engineoil . . . . . . . . . . . . . . . . . . . . . . . . . . . . . . . . . . . . 6-13
Adding . . . . . . . . . . . . . . . . . . . . . . . . . . . . . . . . . . . . 6- I 4
Additives . . . . . . . . . . . . . . . . . . . . . . . . . . . . . . . . . . . 6-16
6- 14
Checking . . . . . . . . . . . . . . . . . . . . . . . . . . . . . . . . . . .
What Kind to Use . . . . . . . . . . . . . . . . . . . . . . . . . . . .
6- I5
What to do with Used Oil . . . . . . . . . . . . . . . . . . . . . .
6- 17
When to Change . . . . . . . . . . . . . . . . . . . . . . . . . . . . .
6- 16
Ethanol ( I n Fuel) . . . . . . . . . . . . . . . . . . . . . . . . . . . .
6-3.6-5
Expectant Mothers. Use 0 1 Safety Belts . . . . . . . . . . . . . 1-25
Express Down Window . . . . . . . . . . . . . . . . . . . . . . . . . . 2-29
Exlender.Safety Belt . . . . . . . . . . . . . . . . . . . . . . . . . . . .
1-46
Language
F a b r i c Cleaning . . . . . . . . . . . . . . . . . . . . . . . . . . . . . . .
6-44
Filling Your Tank . . . . . . . . . . . . . . . . . . . . . . . . . . . . . . . . 6-6
Filter
Aircleaner . . . . . . . . . . . . . . . . . . . . . . . . . . . . . . . . . 6-18
Engine Oil . . . . . . . . . . . . . . . . . . . . . . . . . . . . . . . . . .
6- I 6
Finish Care . . . . . . . . . . . . . . . . . . . . . . . . . . . . . . . . . . . .
6-48
Finish Damage . . . . . . . . . . . . . . . . . . . . . . . . . . . . . . . . . 6-49
First Gear ( I ) Position . . . . . . . . . . . . . . . . . . . . . . . . . . .
2-22
5- 1
Flashers . Hazard W m i n g . . . . . . . . . . . . . . . . . . . . . . . . .
5-18
FlatTirc . . . . . . . . . . . . . . . . . . . . . . . . . . . . . . . . . . . . . .
Flat Tire . Changing . . . . . . . . . . . . . . . . . . . . . . . . . . . . . 5- 19
Foreign Countries. Fuel . . . . . . . . . . . . . . . . . . . . . . . . . . . 6-6..
French
...........................
11
FrontTowingHookups . . . . . . . . . . . . . . . . . . . . . . . . . . .
5-9
Fuel . . . . . . . . . . . . . . . . . . . . . . . . . . . . . . . . . . . . . . . . . . 6-3
Door Manual Release. Re.rnote
. . . . . . . . . . . . . . . . . . . 6-7
Pages
DoorRelease.Remote
.........................
6-7
Filling YourTilnk . . . . . . . . . . . . . . . . . . . . . . . . . . . . .
6-6
Gage . . . . . . . . . . . . . . . . . . . . . . . . . . . . . . . . . . . . . .
2-69
I n Foreign Countries . . . . . . . . . . . . . . . . . . . . . . . . . . . 6-6
.
Fuse Panel . Left Side . . . . . . . . . . . . . . . . . . . . . . . . . . . .
Fuse Panel. Right Side . . . . . . . . . . . . . . . . . . . . . . . . . . .
FusesandCircuitBreakers
.......................
6-53
6-56
6-53
G a g e. Engine Coolanl . . . . . . . . . . . . . . . . . . . . . . . . . . 2-64
Gage.Fuel . . . . . . . . . . . . . . . . . . . . . . . . . . . . . . . . . . . . 2-69
Gage . Oil Pressure . . . . . . . . . . . . . . . . . . . . . . . . . . . . . . 2-66
Garage Door Opener Storage . . . . . . . . . . . . . . . . . . . . . . 2-51
6-4 . 6-5
Gasollnes for Cleaner Air . . . . . . . . . . . . . . . . . . . . .
CAWR (Gross Axle Weight Rating) . . . . . . . . . . . . . . . . 4-29
Ccar Positions . . . . . . . . . . . . . . . . . . . . . . . . . . . . . . . . .
2-19
Glass.Cleaning . . . . . . . . . . . . . . . . . . . . . . . . . . . . . . . .
6-47
GloveBo~. . . . . . . . . . . . . . . . . . . . . . . . . . . . . . . . . . . .
2-11
GVWR (Gross Vehicle Weigh1 Rating) . . . . . . . . . . . . . . 4-29
H a l o g e n Bulbs . . . . . . . . . . . . . . . . . . . . . . . . . . . . . . . . 6-32
Handles. Assist . . . . . . . . . . . . . . . . . . . . . . . . . . . . . . . . . 2-55
Hazard Warning Flashers . . . . . . . . . . . . . . . . . . . . . . . . . .
5-1
Head Restraints . . . . . . . . . . . . . . . . . . . . . . . . . . . . . . . . . 1-7
Headlamp High-Low Beam Changer . . . . . . . . . . . . . . . 2-31
Headlamp Wiring . . . . . . . . . . . . . . . . . . . . . . . . . . . . . . .
6-57
Headlarnps . . . . . . . . . . . . . . . . . . . . . . . . . . . . . . . . . . . .
2-39
Headlamp Bulb Replacement . . . . . . . . . . . . . . . . . . . . . . 6-32
Hearing or Speech Impaired. Customer Assistance . . . . . . 8-2
Heated Outside Rearview Mirror . . . . . . . . . . . . . . . . . . . 2-48
Heated Seats . . . . . . . . . . . . . . . . . . . . . . . . . . . . . . . . . . . .
1-7
Heritage
...
...................................
111
High Beam L.amps, How t o Change . . . . . . . . . . . . . . . . 2-31
Highway Hypnosis . . . . . . . . . . . . . . . . . . . . . . . . . . . . . .
4-22
9-5
Hill and Mountain Roads . . . . . . . . . . . . . . . . . . . . . . . . .
Hitches. Trailer . . . . . . . . . . . . . . . . . . . . . . . . . . . . . . . . .
Hood Release . . . . . . . . . . . . . . . . . . . . . . . . . . . . . . . . . . .
Horn . . . . . . . . . . . . . . . . . . . . . . . . . . . . . . . . . . . . . . . . .
Hydroplaning . . . . . . . . . . . . . . . . . . . . . . . . . . . . . . . . . .
4-22
4-33
6-9
2-29
4- 18
If You're Stuck: In Sand. Mud. Ice or Snow
. . . . . . . . . 5-30
Ignition Key Positions . . . . . . . . . . . . . . . . . . . . . . . . . . . 2- 15
Ignition Switch . . . . . . . . . . . . . . . . . . . . . . . . . . . . . . . . .
2- IS
Illuminated Entry System . . . . . . . . . . . . . . . . . . . . .
2-7.2- I I
Inspections
Brake System . . . . . . . . . . . . . . . . . . . . . . . . . . . . . . . 7-42
Exhaust Systems . . . . . . . . . . . . . . . . . . . . . . . . . . . . .
7-42
Restraint Systems . . . . . . . . . . . . . . . . . . . . . . . . . . . . 7-42
Steering. Suspension and Front-Wheel-Drive
AxleBoot and Seal . . . . . . . . . . . . . . . . . . . . . . . . . 7-42
Throttle Linkage . . . . . . . . . . . . . . . . . . . . . . . . . . . . .
7-42
Instrument Panel . . . . . . . . . . . . . . . . . . . . . . . . . . . . . . .
2-57
Instrument Panel Lights Control . . . . . . . . . . . . . . . . . . . 2-39
Instrument Panel. Cleaning . . . . . . . . . . . . . . . . . . . . . . .
6-46
Jack. Tire . . . . . . . . . . . . . . . . . . . . . . . . . . . . . . . . . .
Jump Starting . . . . . . . . . . . . . . . . . . . . . . . . . . . . . . . . . . .
5-20
5-2
K e y Lock Cylinders . . . . . . . . . . . . . . . . . . . . . . . . . . . .
Key Reminder Warning . . . . . . . . . . . . . . . . . . . . . . . . . . .
Keys . . . . . . . . . . . . . . . . . . . . . . . . . . . . . . . . . . . . . . . . . .
7-39
2-3
2-1
9-6
L a m p Monitors . . . . . . . . . . . . . . . . . . . . . . . . . . . . . . .
2-43
Lamps . . . . . . . . . . . . . . . . . . . . . . . . . . . . . . . . . . . . . . . .
2-39
2-39
Lamps OnWarning . . . . . . . . . . . . . . . . . . . . . . . . . . . . .
2-30
Lane Change Indicator . . . . . . . . . . . . . . . . . . . . . . . . . . .
Larger Children. Safety Belt Use . . . . . . . . . . . . . . . . . . . 1-43
Leaving Your Vehicle . . . . . . . . . . . . . . . . . . . . . . . . . . . . . 2-6
Leaving Your Vehicle With the Engine Running . . . . . . . 2-25
Level Control. Electronic . . . . . . . . . . . . . . . . . . . . . . . . . 2-54
License Plate Holder. Rear . . . . . . . . . . . . . . . . . . . . . . . .
2-55
Lights
AirBag Readiness . . . . . . . . . . . . . . . . . . . . . .
1-20? 2-59
Anti-Lock Brake System Warning . . . . . . . . . . . 2-62. 4-6
BatteryWarning . . . . . . . . . . . . . . . . . . . . . . . . . . . . .
2-60
Brake System Warning . . . . . . . . . . . . . . . . . . . . . . . .
2-61
ChangeOilSoon . . . . . . . . . . . . . . . . . . . . . . . . . . . . . 2-68
CheckOil Level . . . . . . . . . . . . . . . . . . . . . . . . . . . . .
2-67
Door Ajar . . . . . . . . . . . . . . . . . . . . . . . . . . . . . . . . . . 2-66
Engine Coolant Temperature Warning . . . . . . . . . . . . 2-63
Engine Oil Pressure . . . . . . . . . . . . . . . . . . . . . . . . . .
2-66
Low Coolant Warning . . . . . . . . . . . . . . . . . . . . . . . . .
2-64
Low Fuel . . . . . . . . . . . . . . . . . . . . . . . . . . . . . . . . . . .
2-70
Low Washer Fluid Warning . . . . . . . . . . . . . . . . . . . . 2-33
Oil Pressure . . . . . . . . . . . . . . . . . . . . . . . . . . . . . . . . .
2-66
Safety Belt Reminder . . . . . . . . . . . . . . . . . . . . .
1-8. 2-59
Service Engine Soon . . . . . . . . . . . . . . . . . . . . . . . . . .
2-65
Traction Control System Warning . . . . . . . . . . . . . . . 2-62
Traction Oft' Warning . . . . . . . . . . . . . . . . . . . . . . . . . .
4-8
Trunk Ajar Warning . . . . . . . . . . . . . . . . . . . . . . . . . . 2-66
Lighter . . . . . . . . . . . . . . . . . . . . . . . . . . . . . . . . . . . . . . .
2-56
Lights. Panel . . . . . . . . . . . . . . . . . . . . . . . . . . . . . . . . . .
2-39
Loading YourVehicle . . . . . . . . . . . . . . . . . . . . . . . . . . .
4-28
Locks
Automatic Door ..............................
2-4
Door . . . . . . . . . . . . . . . . . . . . . . . . . . . . . . . . . . . . . . .
2-3
2-4
PowerDoor . . . . . . . . . . . . . . . . . . . . . . . . . . . . . . . . . .
Rear Door Security ............................
2-5
7-40
Steering Column .............................
Window . . . . . . . . . . . . . . . . . . . . . . . . . . . . . . . . . . . .
2-29
Loss of Control . . . . . . . . . . . . . . . . . . . . . . . . . . . . . . . .
4- 13
Low Coolant Warning Light ......................
2-64
Low Fuel Light ................................
2-70
Low Washer Fluid Warning Light . . . . . . . . . . . . . . . . . . 2-33
Lubrication,Body . . . . . . . . . . . . . . . . . . . . . . . . . . . . . .
7-39
7-45
Maintenance Record . . . . . . . . . . . . . . . . . . . . . . . . . . .
Maintenance Schedule . . . . . . . . . . . . . . . . . . . . . . . . . . . .
7- 1
Owner Checks and Services ....................
7-38
Periodic Maintenance Inspections . . . . . . . . . . . . . . . 7-42
Recommended Fluids and Lubricants . . . . . . . . . . . . 7-43
7-6
Schedule1 . . . . . . . . . . . . . . . . . . . . . . . . . . . . . . . . . . .
Schedule I Definition ..........................
7-4
Schedule11 . . . . . . . . . . . . . . . . . . . . . . . . . . . . . . . . .
7-27
Schedule II Definition . . . . . . . . . . . . . . . . . . . . . . . . . .
7-5
Scheduled Maintenance Services . . . . . . . . . . . . . . . . . 7-3
Maintenance, Normal Replacement Parts . . . . . . . . . . . . 6-61
Maintenance, Underbody . . . . . . . . . . . . . . . . . . . . . . . . .
6-50
Maintenance, When Trailer Towing . . . . . . . . . . . . . . . . . 4-36
Malfunction Indicator Lamp (Service Engine
SoonLight) . . . . . . . . . . . . . . . . . . . . . . . . . . . . . . . . . .
2-65
Manual Front Seat . . . . . . . . . . . . . . . . . . . . . . . . . . . . . . .
1- 1
Manual Inside Mirror . . . . . . . . . . . . . . . . . . . . . . . . . . . .
2-44
Maxifuse/RelayCenter . . . . . . . . . . . . . . . . . . . . . . . . . .
6-57
Memory Seats and Mirrors ........................
1-3
6.3.6.5
Methanol (In Fuel) . . . . . . . . . . . . . . . . . . . . . . . . . . .
Mirrors
Automatic Dimming Outside . . . . . . . . . . . . . . . . . . . 2-48
Automatic Inside . . . . . . . . . . . . . . . . . . . . . . . . . . . . .
2-44
Automatic Inside with Compass . . . . . . . . . . . . . . . . . 2-45
ConvexOutside .............................
2-48
Heated Outside Rearview ......................
2-48
ManualInside . . . . . . . . . . . . . . . . . . . . . . . . . . . . . . .
2-44
Manual Remote Control .......................
2-48
VisorVanity . . . . . . . . . . . . . . . . . . . . . . . . . . . . . . . .
2-50
Monitors. Lamp . . . . . . . . . . . . . . . . . . . . . . . . . . . . . . . .
2-43
MTBE (In Fuel) . . . . . . . . . . . . . . . . . . . . . . . . . . . . .
6-3. 6-5
N e t . Convenience . . . . . . . . . . . . . . . . . . . . . . . . . . . . . .
Neutral (N) Position . . . . . . . . . . . . . . . . . . . . . . . . . . . . .
NewVehicle “Break-In” .........................
Nightvision . . . . . . . . . . . . . . . . . . . . . . . . . . . . . . . . . . .
2-49
2-20
2-15
4-15
Odometer . . . . . . . . . . . . . . . . . . . . . . . . . . . . . . . . . . . . 2-57
Off-Road Recovery . . . . . . . . . . . . . . . . . . . . . . . . . . . . .
4-11
Oil
Engine . . . . . . . . . . . . . . . . . . . . . . . . . . . . . . . . . . . . .
6-13
Life Monitor . . . . . . . . . . . . . . . . . . . . . . . . . . . . . . . .
2-68
Pressure Gage . . . . . . . . . . . . . . . . . . . . . . . . . . . . . . .
2-66
Pressure Light . . . . . . . . . . . . . . . . . . . . . . . . . . . . . . .
2-66
Supercharger . . . . . . . . . . . . . . . . . . . . . . . . . . . . . . . .
6-20
Opener. Garage Door . . . . . . . . . . . . . . . . . . . . . . . . . . . .
2-51
Order Form. Service Publications . . . . . . . . . . . . . . . . . . . 8-9
9-7
Ordering
Owner Publications . . . . . . . . . . . . . . . . . . . . . . . . . . . .
8-7
Service and Owner Publications . . . . . . . . . . . . . . . . . . 8-6
Service Bulletins . . . . . . . . . . . . . . . . . . . . . . . . . . . . . . 8-7
ServiceManuals . . . . . . . . . . . . . . . . . . . . . . . . . . . . . .
8-7
Overdrive Position. Automatic Transaxle . . . . . . . . . . . . 2-2 I
Overheated Engine . . . . . . . . . . . . . . . . . . . . . . . . . . . . . .
5- 1 I
Owner Checks and Services . . . . . . . . . . . . . . . . . . . . . . .
7-38
Owner Publications. Ordering . . . . . . . . . . . . . . . . . . . . . .
8-7
6-50
P a i n t Spotting. Chemical . . . . . . . . . . . . . . . . . . . . . . . .
PanelLights . . . . . . . . . . . . . . . . . . . . . . . . . . . . . . . . . . . 2-39
Park (P). Shifting Into . . . . . . . . . . . . . . . . . . . . . . . . . . .
2-23
Park (P). Shifting Out of . . . . . . . . . . . . . . . . . . . . . . . . .
2-26
2- 19
Park (P) Position . . . . . . . . . . . . . . . . . . . . . . . . . . . . . . .
Parking
AtNight . . . . . . . . . . . . . . . . . . . . . . . . . . . . . . . . . . .
2-12
Lots . . . . . . . . . . . . . . . . . . . . . . . . . . . . . . . . . . . . . . .
2-12
On Hills While Towing a Trailer . . . . . . . . . . . . . . . . 4-36
Over Things That Burn . . . . . . . . . . . . . . . . . . . . . . . .
2-27
Parking Brake . . . . . . . . . . . . . . . . . . . . . . . . . . . . . . . . . .
2-23
PASS-Key 8 I1 . . . . . . . . . . . . . . . . . . . . . . . . . . . . . . . . . 2-13
Passenger Temperature Control . . . . . . . . . . . . . . . . . . . . .
3-5
Passing . . . . . . . . . . . . . . . . . . . . . . . . . . . . . . . . . . . . . . .
4-12
Periodic Maintenance Inspections . . . . . . . . . . . . . . . . . . 7-42
Personalization Feature . . . . . . . . . . . . . . . . . . . . . . . . . . .
1-4
Power Door Locks . . . . . . . . . . . . . . . . . . . . . . . . . . . . . . .
2-4
Powerseat . . . . . . . . . . . . . . . . . . . . . . . . . . . . . . . . . . . . .
1-2
Adjusting . . . . . . . . . . . . . . . . . . . . . . . . . . . . . . . . . . . .
1-2
Memory Function . . . . . . . . . . . . . . . . . . . . . . . . . . . . .
1-3
7'0
Power Seatback Recliner . . . . . . . . . . . . . . . . . . . . . . . . . .
Power Steering . . . . . . . . . . . . . . . . . . . . . . . . . . . . . . . . . .
Power Steering Fluid . . . . . . . . . . . . . . . . . . . . . . . . . . . .
Adding . . . . . . . . . . . . . . . . . . . . . . . . . . . . . . . . . . . .
Checking . . . . . . . . . . . . . . . . . . . . . . . . . . . . . . . . . . .
Power Windows . . . . . . . . . . . . . . . . . . . . . . . . . . . . . . . .
Power. Retained Accessory . . . . . . . . . . . . . . . . . . . . . . .
Pregnancy. Useof Safety Belts . . . . . . . . . . . . . . . . . . . .
Problems on the Road . . . . . . . . . . . . . . . . . . . . . . . . . . . .
Publications. Service and Owner . . . . . . . . . . . . . . . . . . . .
P~~ll-Down
Feature . Automatic . . . . . . . . . . . . . . . . . . . . .
1-5
4-9
6-26
6-27
6-27
2-29
2-17
1-25
5-1
8-6
2-9
5-16
Radiator . . . . . . . . . . . . . . . . . . . . . . . . . . . . . . . . . . . . .
Radiator Pressure Cap . . . . . . . . . . . . . . . . . . . . . . . . . . . 6-26
Radio Reception . Understanding . . . . . . . . . . . . . . . . . . . 3-21
Radios
AM-FM Stereo Radios with Automatic
Tonecontrol . . . . . . . . . . . . . . . . . . . . . . . . . . . . . .
3-12
AM-FM Stereo with Cassette Tape and Compact
Disc Players . . . . . . . . . . . . . . . . . . . . . . . . . . . . . . .
3-17
AM-FM Stereo with Cassette Trlpe Player . . . . . . . . . . 3-9
Rain . Driving I n . . . . . . . . . . . . . . . . . . . . . . . . . . . . . . . .
4-16
Reading Lamps
Front . . . . . . . . . . . . . . . . . . . . . . . . . . . . . . . . . . . . . .
2-42
Rear . . . . . . . . . . . . . . . . . . . . . . . . . . . . . . . . . . . . . . . 2-42
Rear Door Security Locks . . . . . . . . . . . . . . . . . . . . . . . . .
2-5
Rear License Plate Holder . . . . . . . . . . . . . . . . . . . . . . . .
2-55
Rear Passenger ComforTemp . . . . . . . . . . . . . . . . . . . . . . . 3-2
Rear Safety Belt Comfort Guides . . . . . . . . . . . . . . . . . . 1-30
Rear Seat Outside Position . . . . . . . . . . . . . . . . . . . . . . . .
1-27
Rear Seat Passengers ............................
1-27
2-55
Rear Storage Armrest ............................
5-10
Rear Towing Hookups ...........................
Rear Window Defogger (Dual Automatic ComforTemp
Climate Control) ...............................
3-5
Rear Window Defogger (Electronic Touch
Climate Control) ...............................
3-8
Rearview Mirror
2-44
Automatic ..................................
Heated Outside ..............................
2-48
2-44
Manual . . . . . . . . . . . . . . . . . . . . . . . . . . . . . . . . . . . .
1-5
Reclining Front Seatbacks .........................
Recommended Fluids and Lubricants . . . . . . . . . . . . . . . 7-43
Remote Fuel Door Manual Release. . . . . . . . . . . . . . . . . . 6-7
Remote Fuel Door Release ........................
6-7
2-6
Remote Keyless Entry ............................
Battery Replacement ...........................
2-9
'2-7
Matching Transmitters .........................
2-7
Operation ...................................
2-48
Remote Mirror Control ..........................
2-10
Remote Tmnk Release ...........................
ReplacementBulbs .............................
6-59
Replacement Parts ..............................
6-61
6-41
Replacement.Wheel ............................
Replacing Safety Belts ............................
1-46
Replacing Seat and Restraint System Parts
1-46
After a Crash .................................
Restraints. Checking Your ........................
1-46
1-34
Restraints. Child ................................
Restraints. Head .................................
1-7
Restraints. Replacing Parts After a Crash . . . . . . . . . . . . 1-46
Retained Accessory Power ........................
Reverse (R) Position ............................
Ride Control. Automatic .........................
Right Front Passenger Position ....................
Roadside Assistance ..............................
Roadside Assistance. Canadian .....................
Rocking Your Vehicle ...........................
Rotation. Tire ..................................
2-17
2-20
2-54
1-25
8-6
8-6
5-31
6-36
safety Belt Extender ............................
1-46
Safety Belt Reminder Light . . . . . . . . . . . . . . . . . . . 1.8.2.59
SafetyBelts ....................................
1-8
Adults .....................................
1-13
6-46
Careof ....................................
Center Passenger Position ......................
1-26
Driver Position ..............................
1.13
'
Extender ...................................
1-46
1.13
How to Wear Properly ........................
1 15.44.
- 4 5
Incorrect Usage ........................
LapBelt ...................................
1-26
Lap-Shoulder ..........................
1.13.1.28
1-12
Questions People Ask .........................
Rear Comfort Guides .........................
1-30
Rear Seat Outside Passenger Positions . . . . . . . . . . . . 1-27
Rear Seat Passengers .........................
1-27
1-46
Replacing After a Crash .......................
Right Front Passenger Position. . . . . . . . . . . . . . . . . . 1-25
Shoulder Belt Height Adjuster . . . . . . . . . . . . . . . . . . 1-14
Use by Children .............................
1-32
9-9
Use by Larger Children ........................
1-43
Use by Smaller Children and Babies . . . . . . . . . . . . . 1-32
Use During Pregnancy ........................
1-25
1-9
WhyTheyWork ..............................
Safety Chains ..................................
4-34
Safety Defects
8-5
Reporting to General Motors ....................
Reporting to the Canadian Government . . . . . . . . . . . . 8-5
Reporting to the United States Government . . . . . . . . . 8-4
...
vu1
Safety Warnings and Symbols ......................
ScheduledLMaintenance Services....................
7-3
Seat.Power ....................................
1-2
Seatback. Power Recliner . . . . . . . . . . : . . . . . . . . . . . . . . 1-5
Seats . . . . . . . . . . . . . . . . . . . . . . . . . . . . . . . . . . . . . . . . . .
1-1
1-7
Heated ......................................
1-1
ManualFront ................................
Reclining Front ...............................
1-5
Securing a Child Restraint . . . . . . . . . . . . . . . 1-36.38. 40
1- 1
Seats and Restraint Systems........................
Seats and Seat Controls ...........................
1-1
Second Gear (2) Position . . .....................
2-22
11) . . . . . . . . . . . . . . . . . . 2-13
SecuritySystem(PASS-Key
Service . . . . . . . . . . . . . . . . . . . . . . . . . . . . . . . . . . . . . . . .
6-1
Service and Appearance Care ......................
6- 1
Service and Owner Publications ....................
8-6
Service Bulletins. Ordering ........................
8-7
Service Engine Soon Light.......................
2-65
Service Manuals. Ordering ........................
8-7
Service Parts Identification Label . . . . . . . . . . . . . . . . . . 6-52
Service Publication Order Form ....................
8-9
Service Work. Doing Your Own ....................
6-2
9-10
Servicing Your Air Bag-Equipped Buick . . . . . . . . . . . . 1-24
6-49
Sheet Metal Damage ............................
2-24
Shifting Into Park (P) ............................
2-26
Shifting Out of Park (P) ..........................
2-19
Shifting. Automatic Transaxle .....................
1-14
Shoulder Belt Height Adjuster .....................
2-30
SignalingTurns ................................
Skidding . . . . . . . . . . . . . . . . . . . . . . . . . . . . . . . . . . . . . .
4-13
Sound Equipment, Adding ........................
3-21
5-29
Spare Tire, Compact .............................
Speaker Covers, Cleaning ........................
6-46
6-60
Specifications Chart .............................
Speedometer ...................................
2-57
6-45
Stains, Cleaning ................................
Starterswitch ..................................
7-39
2-17
Starting Your Engine ............................
Steam, If Coming From Your Engine . . . . . . . . . . . . . . . 5-11
4-9
Steering ........................................
Steering Column Lock ...........................
7-40
4-10
Steering In Emergencies .........................
Steering Wheel, Tilt .............................
2-29
4-10
Steering, In Emergencies .........................
4-9
Steering,Power .................................
Steering, Tips ................................... 4-9
2-54
Storage Armrest ................................
Storage, Of Your Vehicle . . . . . . . . . . . . . . . . . . . . . . . . . 6-31
Stuck, IfYouAre ...............................
5-30
2-49
Sunvisors . . . . . . . . . . . . . . . . . . . . . . . . . . . . . . . . . . . .
Sun Visors, Dual . . . . . . . . . . . . . . . . . . . . . . . . . . . . . . .
2-49
Supercharged Engine, 3800 (L67) . . . . . . . . . . . . . . . . . . 6-11
Supercharger Oil
Adding . . . . . . . . . . . . . . . . . . . . . . . . . . . . . . . . . . . .
6-20
Checking . . . . . . . . . . . . . . . . . . . . . . . . . . . . . . . . . . .
6-20
What Kind to Use . . . . . . . . . . . . . . . . . . . . . . . . . . . .
7-43
Supplemental Restraint System (SRS) . . . . . . . . . . . . . . . 1-19
Symbols, Vehicle . . . . . . . . . . . . . . . . . . . . . . . . . . . . . . . . . .
x
Tachometer . . . . . . . . . . . . . . . . . . . . . . . . . . . . . . . . . .
2-69
Taillamps. Bulb Replacement .....................
6-34
3-9
TapePlayer . . . . . . . . . . . . . . . . . . . . . . . . . . . . . . . . . . . . .
TapePlayerCare . . . . . . . . . . . . . . . . . . . . . . . . . . . . . . .
3-22
Temperature Control, Passenger ....................
3-5
Theft . . . . . . . . . . . . . . . . . . . . . . . . . . . . . . . . . . . . . . . . .
2-11
Theft-Deterrent Alarm System . . . . . . . . . . . . . . . . . . . . .
2- 12
Theft-Deterrent, Universal ........................
2- 12
THEFTLOCK Feature . . . . . . . . . . . . . . . . . . . . . . . . .
3- 18
Thermostat . . . . . . . . . . . . . . . . . . . . . . . . . . . . . . . . . . . .
6-26
Third Gear (3) Position . . . . . . . . . . . . . . . . . . . . . . . . . .
2-21
Tilt Steering Wheel . . . . . . . . . . . . . . . . . . . . . . . . . . . . . 2-29
Time Out Feature . . . . . . . . . . . . . . . . . . . . . . . . . . . . . . .
2-40
Time, Setting the . . . . . . . . . . . . . . . . . . . . . . . . . . . . . . . . 3-8
Tire Chains . . . . . . . . . . . . . . . . . . . . . . . . . . . . . . . . . . . . 6-42
Tire Inspection and Rotation . . . . . . . . . . . . . . . . . . . . . .
6-36
TireLoading . . . . . . . . . . . . . . . . . . . . . . . . . . . . . . . . . . .
4-28
Tires . . . . . . . . . . . . . . . . . . . . . . . . . . . . . . . . . . . . . . . . .
6-35
Alignment and Balance . . . . . . . . . . . . . . . . . . . . . . . .
6-40
BuyingNew . . . . . . . . . . . . . . . . . . . . . . . . . . . . . . . . 6-38
ChangingaFlat . . . . . . . . . . . . . . . . . . . . . . . . . . . . . .
5-19
Inflation . . . . . . . . . . . . . . . . . . . . . . . . . . . . . . . . . . . . 6-36
Inspection and Rotation . . . . . . . . . . . . . . . . . . . . . . . 6-36
TM
Spare. Compact . . . . . . . . . . . . . . . . . . . . . . . . . . . . . .
5-29
Temperature . . . . . . . . . . . . . . . . . . . . . . . . . . . . . . . .
6-40
6-39
Traction . . . . . . . . . . . . . . . . . . . . . . . . . . . . . . . . . . . .
Treadwear . . . . . . . . . . . . . . . . . . . . . . . . . . . . . . . . . .
6-39
Uniform Quality Grading . . . . . . . . . . . . . . . . . . . . . .
6-39
Wear Indicators . . . . . . . . . . . . . . . . . . . . . . . . . . . . . .
6-38
6-41
Wheel Replacement ..........................
When It’s Time for New . . . . . . . . . . . . . . . . . . . . . . . 6-38
TopStrap . . . . . . . . . . . . . . . . . . . . . . . . . . . . . . . . . . . . . 1-35
TorqueLock . . . . . . . . . . . . . . . . . . . . . . . . . . . . . . . . . . .
2-26
Torque, Wheel Nut . . . . . . . . . . . . . . . . . . . . . . . . . . . . . .
5-28
Towing a Trailer . . . . . . . . . . . . . . . . . . . . . . . . . . . . . . . .
4-30
Towing Your Vehicle . . . . . . . . . . . . . . . . . . . . . . . . . . . . . 5-7
Front . . . . . . . . . . . . . . . . . . . . . . . . . . . . . . . . . . . . . . .
5-9
Rear . . . . . . . . . . . . . . . . . . . . . . . . . . . . . . . . . . . . . . .
5-10
TractionControlSystem . . . . . . . . . . . . . . . . . . . . . . . . . . 4-8
Traction Control System Warning Light . . . . . . . . . . . . . 2-62
Traction Off Warning Light . . . . . . . . . . . . . . . . . . . . . . . . 4-8
Trailer Tongue Weight . . . . . . . . . . . . . . . . . . . . . . . . . . .
4-32
Trailer Towing
Brakes . . . . . . . . . . . . . . . . . . . . . . . . . . . . . . . . . . . . .
4-34
Driving on Grades . . . . . . . . . . . . . . . . . . . . . . . . . . . .
4-36
Driving with a Trailer . . . . . . . . . . . . . . . . . . . . . . . . .
4-34
Hitches . . . . . . . . . . . . . . . . . . . . . . . . . . . . . . . . . . . .
4-33
Maintenance . . . . . . . . . . . . . . . . . . . . . . . . . . . . . . . .
4-36
Parking on Hills . . . . . . . . . . . . . . . . . . . . . . . . . . . . .
4-36
SafetyChains . . . . . . . . . . . . . . . . . . . . . . . . . . . . . . .
4-34
Total Weight on Your Vehicle’s Tires . . . . . . . . . . . . . 4-33
Towing a Trailer . . . . . . . . . . . . . . . . . . . . . . . . . . . . . 4-30
Turnsignals . . . . . . . . . . . . . . . . . . . . . . . . . . . . . . . .
4-35
Weight of a Trailer . . . . . . . . . . . . . . . . . . . . . . . . . . .
4-32
9-11
Transaxle Fluid, Automatic .......................
6-21
Transmitters, Matching to Your Vehicle . . . . . . . . . . . . . . 2-7
Trunk Ajar Light ...............................
2-66
Trunk Release, Remote ..........................
2-10
Turn Signal and Lane Change Indicator . . . . . . . . . . . . . 2-30
Turn SignaVMultifunction Lever . . . . . . . . . . . . . . . . . . . 2-30
Turn Signals When Towing a Trailer . . . . . . . . . . . . . . . . 4-35
Twilight Senthe1 ...............................
2-40
!
Underbody Maintenance ........................
Universal Theft-Deterrent ........................
6-50
2- 12
ix
Vehicle Damage Warnings .........................
Vehicle Dimensions Chart ........................
6-58
Vehicle Identification Number .....................
6-52
4-28
Vehicle Loading ................................
Vehicle Storage ................................ 6-3 1
Vehicle Symbols ....................................
x
Vehicle, Control of a .............................
4-5
Vehicle, Leaving Your ............................
2-6
Vision,Night . . . . . . . . . . . . . . . . . . . . . . . . . . . . . . . . . . . . . .
VisorVanity Mirrors ............................
2-50
Visors,Sun . . . . . . . . . . . . . . . . . . . . . . . . . . . . . . . . . . . . . . . .
VoltageIndicator ...............................
2-60
9-12
w a r n i n g Devices ...............................
5-2
Warning Flashers, Hazard .........................
5-1
Warning Lights, Gages and Indicators . . . . . . . . . . . . . . . 2-58
Washing Your Vehicle ...........................
6-48
Water, Driving Through Deep Standing . . . . . . . . . . . . . 2- 18
Weatherstrips ..................................
6-47
WheelNutTorque . . . . . . . , , . . . . . . . . . . . . . . . . . . . . . 5 - 2 8
6-41
Wheel Replacement .............................
Wheel Replacement, Used . . . . . . . . . . . . . . . . . . . . . . . .6-42
WindowLock . . . . . . . . . . . . . . . . . . . . . . . . . . . . . . . . . . . . . .
2-29
Window, Express Down ..........................
Windows,Power ...............................
2-29
WindshieldWasher . . . . . . . . . . . . . . . . . . . . . . . . . . . . .2-33
Windshield Washer Fluid ....................
2-34,6-27
Windshield Wiper, Circuit Breaker . . . . . . . . . . . . . . . . . 6-57
Windshield Wipers ..............................
2-32
Winter, Driving in . . . . . . . . . . . . . . . . . . . . . . . . . . . . . . 4-24
Wiring,Headlamp . . , . . . . . . . . . . . . . . . . . . . . . . . . . . . 6 - 5 7
WreckerTowing . . . . . . . . . . . . . . . . . . . . . . . . . . . . . . . . . 5 - 7
THIS MANUAL IS PRINTED ON RECYCLED PAPER USING
MINIMUM 50% WASTEPAPER, 10% POST CONSUMER WASTE