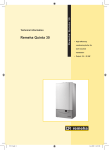
Download REMEHA 24v Technical data

Transcript
remeha
W40/60-m ECO
High-efficiency
condensing boiler
for free standing (frame
mounted) or wall
mounted installation
Suitable for room sealed
fanned flue or open flue
fan assisted operation
Installation and
maintenance instructions
remeha W40/60-m ECO
CONTENTS
Preface
7. Installation instructions
7.1 General
7.2 Location
7.3 Dimensions of wall mounting bracket
7.4 Ventilation requirements
7.5 Flue gas discharge and air supply
7.5.1 General
7.5.2 Single boiler,
non room sealed applications
7.5.3 Single boiler,
room sealed applications
7.5.4 Cascade configurations
7.6 Installation details
7.6.1 Condensate discharge
7.6.2 Cold feed and expansion tank
height for open vented systems
7.6.3 Water treatment
7.6.4 Safety valve
7.6.5 Circulation pump
7.7 D.H.W. application
7.7.1 D.H.W. control
7.7.2 Schematic sketch of connections
4
1. General description of the boiler
4
2. Construction
4
3. Technical data and dimensions
3.1 Dimensions
3.2 Technical data
3.3 Delivery package
5
5
6
6
4. Efficiency information
4.1 Annual efficiency
4.2 Heat to water efficiency
7
7
7
5. Installation applications
5.1 General
5.1.1 Installation of single boilers
5.1.2 Installation of multiple boilers
7
7
7
8
6. Boiler layout
9
6.1 Equipment diagram
9
6.2 Operating principle
10
6.3 Control panel
10
6.4 Control system
11
6.4.1 General
11
6.4.2 Operating mode
12
6.4.3 Setting mode (with dot)
13
6.4.4 Read-out mode (with blinking dot) 14
6.4.5 Forced 'HIGH' mode
14
6.4.6 Forced 'LOW' mode
14
6.4.7 Speed mode (half digits)
14
6.4.8 Failure mode (blinking 'code' display)15
6.4.9 Service code
15
6.4.10 User settings
16
2
17
17
17
17
18
19
19
20
21
21
22
22
22
22
23
23
23
23
24
8. Electrical installation
8.1 General
8.2 Electrical supply
8.3 Connection to the control system
8.3.1 Modulating control
8.3.2 Room thermostat 24V
8.3.3 Room thermostat in combination
with an outdoor temperature sensor
8.3.4 Two-stage external weather
compensator
8.3.5 D.H.W. control
8.3.6 Frost protection
8.3.7 Signals
8.4 Water temperature control
8.5 Low-water protection
8.6 High limit temperature protection
8.7 Differential air pressure switch (LD2)
8.8 Control box
8.9 Fuse specification
8.10 Electrical wiring diagram
25
25
25
25
25
26
26
26
27
27
28
28
28
28
28
28
29
9. Installation instructions for the gas Installer
9.1 Gas connection
9.2 Gas pressures
9.3 Gas/air ratio control
30
30
30
30
26
3
10. Commissioning
10.1 Initial lighting
10.2 Shut-down
10.3 Settings
10.3.1 General
10.3.2 Setting the required flow
temperature
10.3.3 Setting the required flow
temperature when using an
outdoor sensor
10.3.4 Changing the cut-in temperature
differential
10.3.5 Setting the pump control
10.3.6 Setting the burner control
10.3.7 Setting D.H.W. temperature
10.3.8 Switching D.H.W. operation
on and off
10.3.9 Changing D.H.W. operating cut-in
differential (service level)
10.3.10 Changing maximum flow
temperature during D.H.W.
operation
10.3.11 Changing three-way valve/boiler
pump setting
31
31
32
33
33
11. Fault-finding
11.1 General
11.2 Faults in appliances in combination with
the rematic® weather-compensated
boiler control
11.3 Faults in appliances without a modulating
rematic® weather-compensated
boiler control
11.4 Fault codes
35
35
12. Inspection and servicing instructions
12.1 General
12.2 Inspection
12.3 Maintenance
12.4 Draining and filling
12.5 Venting
37
37
37
38
39
39
33
33
33
33
33
34
34
34
34
34
35
35
35
remeha W40/60-m ECO
PREFACE
These technical instructions contain useful and important
information for the correct operation and maintenance of
the remeha central heating boiler, models W40/60-m
ECO.
Furthermore, important instructions are given to ensure
safe and trouble free boiler operation.
Read these instructions carefully before putting the boiler into operation, familiarize yourself with its operation
and control and strictly observe the instructions given.
If you have any questions, or if you need more information about specific subjects relating to this boiler,
please do not hesitate to contact us.
The data published in these technical instructions is
based on the latest information and is subject to revisions.
We reserve the right to modify the design and/or configuration of our products at any moment without being
obliged to adjust earlier supplies accordingly.
1. GENERAL DESCRIPTION OF THE BOILER
The remeha W40/60-m ECO can be easily programmed
and controlled using the built in microprocessor. Actual
and set values can be checked from the read-out display.
Gas and water connections are sited at the bottom of
the boiler whilst combustion air inlet and flue discharge
connections are located at the top of the casing.
For multiple boiler applications refer to the Technical
Information "Multiple units".
The remeha W40/60-m ECO is a condensing boiler
which may be installed free standing on a frame or wall
mounted on a bracket. The boiler is suitable for room
sealed fanned flue or open flue fan assisted applications.
The boiler is designed for central heating and indirect
hot water supply at working pressures not exceeding 3
bar. It should be installed on a pumped water circulation
system and is suitable for both open and unvented system operation.
The remeha W40/60-m ECO is fitted with a top mounted
premix gas burner firing downwards into an aluminium
heat exchanger. The application of the premix burner,
with its carefully controlled gas/air ratio, water heating
efficiencies of 110.4% (NCV) are obtained in the condensing mode with very low CO and NOx emissions.
A condensate collector and a siphon for the condensate
drain is fitted at the bottom of the boiler.
Quick connect latches on the air box cover make the
unit easy to service and maintain.
The boiler meets the requirements of the EC regulations
of the directives:
- 90-m/396/EEC Gas appliances directive
- 92/42/EEC Efficiency directive
- 73/23/EEC Electrical low voltage directive
- 89/392/EEC Machinery directive
- 89/336/EEC E.M.C. directive
W40-m ECO - PIN-number: 63/AO/6520.
W60-m ECO - PIN-number: 63/AP/6520.
For further advice or information contact Broag Ltd.
2. CONSTRUCTION
A DC fan has been mounted on the combustion air
supply side, which guarantees the supply of the correct
quantity of combustion air. Gas injection takes place in a
special mixing section at the inlet of the fan.
As a result, the optimum mixture of gas and air is
achieved in the fan. A pre-mix burner, placed in the top
of the appliance, guarantees optimum combustion.
The remeha W40/60-m ECO heat exchanger is manufactured in aluminium, and equipped with conducting
panels for optimum heat transfer.
At the bottom of the appliance, a condensate collector
tray and a siphon are responsible for discharging
condensed water.
The closed air box increases safety, and facilitates
installation in practically any room.
Through the use of microprocessor technology, the
remeha W40/60-m ECO is simple to set and control.
Display windows make it possible to check the current
and target settings.
The gas and water connections are clearly mounted on
the underside of the appliance. The combustion air
supply and flue gas discharge are mounted on the top
of the boiler (100 mm I/D socket).
By using quick connect latches on the air box cover (no
screws), the appliance is also easy to service and
maintain.
4
3. TECHNICAL DATA AND DIMENSIONS
3.1 Dimensions
remeha W40-m ECO
Top
view
Side view
1
2
3
4
5
6
Flow boiler
Return boiler
Gas
Condensate discharge
Flue gas discharge
Combustion air supply
*
Low loss header for single boiler only
Flow/return connections 11/4 BSP (F)
Front view
28 mm dia.
28 mm dia.
3/4" male thread
32 mm dia.
100 mm dia.
100 mm dia.
Fig. 01 remeha W40-m ECO
remeha W60-m ECO
Top
view
Side view
Front view
Fig. 02 remeha W60-m ECO
5
1
2
3
4
5
6
Flow boiler
Return boiler
Gas
Condensate discharge
Flue gas discharge
Combustion air supply
11/4" male thread
11/4" male thread
3/4" male thread
32 mm dia.
100 mm dia.
100 mm dia.
*
Low loss header for single boiler only
Flow/return connections 11/2 BSP (F)
remeha W40/60-m ECO
3.2 Technical data
Boiler type
remeha
W40-m ECO
modulating
high - low
on - off
12,4
41.0
14.0
44.3
14.1
47.0
12.7
42.3
II 2H 3P
17 - 30
1.3 - 4.5
51
29
0,8
71
B23, C13, C33,
C43, C53, C63
240/50
150
2
20
100
20 - 90
0.3
3
5
400
350
67
Load control: adjustable
Output
Input (GCV)
Input (NCV)
(80/60˚C) (40/30˚C) - min.
- max
- min.
- max
Category
Inlet pressure gas
Gasrate (natural gas)
NOx emission
Operating pressure
kW
kW
kW
kW
kW
kW
kW
kW
mbar
m3/h
mg/kWh
ppm
mbar
kg/h
Residual fan duty
Mass flue rate
Appliance (flue) type
Main supply
Electric rating
Fuse rating
Isolation class
Watertemperature
min.
max.
min.
max.
-
max.
control
min.
max.
Water contents
Waterresistance (∆T = 10˚C)
Residual pump duty (∆T = 20˚C)
Assembly weight
V/Hz
VA
A
IP
°C
°C
bar
bar
ltr
mbar
mbar
kg
3.3 Delivery package
- circulation pump
- low loss header
- pressure gauge
- filling and drain cock
- air supply fan
- electronic control and protection equipment: 24V
- interface for rematic® weather-compensated boiler
control
- temperature regulation: adjustable from 20 to 90°C
- differential air pressure switch
- low-water protection via temperature sensors
- aluminium heat exchanger
- red spray-coated sheet steel casing
- pump switch
-
remeha
W60-m ECO
modulating
high - low
on - off
18.2
60.5
20.3
66.4
20.7
69.0
18.6
62.1
II 2H 3P
17 - 30
2.0 - 6.6
18
10
0,8
104
B23, C13, C33,
C43, C53, C63
240/50
100
2
20
100
20 - 90
0.3
3
6
900
not applicable
75
frost protection
easy-to-read control panel with display
siphon trap
hanging bracket
automatic vent.
Accessories
- conversion set for propane
- connection set for calorifier
- outdoor temperature sensor
- modulating rematic® weather-compensated boiler
control
- interface for modulating room control (Honeywell
Chronotherm Modulation).
6
4. EFFICIENCY INFORMATION
4.2 Heat to water efficiency
a. Up to 99.0% (NCV), 89.1% (GCV) at an average
water temperature of 76.5˚C.
b. Up to 110.4% (NCV), 99.4% (GCV) at an average
water temperature of 45˚C.
4.1 Annual efficiency
a. 103.3% (NCV), 93.0% (GCV) at an average water
temperature of 45˚C (55/35˚C).
5. INSTALLATION APPLICATIONS
5.1 General
The boiler may be used with a fully pumped sealed or
open vented central heating system and pumped heating combined with pumped indirect domestic hot water
supply systems.
The remeha W40/60-m ECO is not suitable for systems
which include any gravity circulation, bathroom installations or connection to unlined brick chimneys.
5.1.1 Installation of single boilers
The low noise level emission of 48 dBA measured at 1
m from the boiler makes the remeha W40/60-m ECO
ideal for installation as a single boiler in large domestic
dwellings and smaller commercial premises.
The single boiler should be supplied with a header
(available from Broag).
Fig. 03 Header dimensions remeha W40-m ECO
Fig. 04 Header dimensions remeha W60-m ECO
7
remeha W40/60-m ECO
5.1.2 Installation of multiple boilers
Multiple boilers are idealy suited for use in larger commercial buildings and offer a wide variety of application
possibilities (see principle drawing).
D.H.W.
Fig. 05 Principle drawing multiple boilers
For further advice or information refer to the Technical
Information "Multiple Units".
Contact Broag Ltd.
Table
1. rematic® 4-step weather compensator (Master)
Step 1 till 4
2. rematic® 4-step modular controller (Slave)
Step 5 till 8
3. Pump (to be set at position 1)
4. Safety valve
5. Three-way valve, 230 V (D.H.W.)
6. Non-return valve
7. Expansion vessel (if required)
8. Manual isolating valve
9. Automatic vent
10. Open header (neutral header)
11. Drain cock
12. Installation pump
13. Installation expansion vessel
14. Flow sensor
15. Outdoor sensor
16. D.H.W. storage
remeha W40-m ECO
No. of units
'd'
'D'
H
2
3
4
32
38
50
80
100
125
250
250
300
No. of units
'd'
'D'
H
2
3
4
50
63
63
100
125
150
300
400
500
remeha W60-m ECO
8
6. BOILER LAYOUT
6.1 Equipment diagram
2
1
1. Air supply
2. Flue gas discharge
3. Measure point O2 /CO2
4. Air box
5. Slide connector
6. Differential air pressure switch
7. Spring loaded damper
8. Gas injector (behind fan)
9. Fan
10. Automatic vent
11. Burner
12. Ignition/ionisation probe
13. Sight glass
14. Manual air vent
15. Gas combi-block
16. Heat exchanger
17. Flow temperature sensor
18. Inspection cover
19. Return temperature sensor
20. Condense collector
21. Instrument panel
22. Electrical connection strip (X15)
23. Facility for incorporating a
rematic® weather compensated
boiler control
24. Condensate discharge
25. Setting keys
26. Read-out display and reset key
27. Burner switch
28. Interface for rematic® weather
compensated boiler control
29. Gas connection
30. Pump (only W40-m ECO)
31. Pressure gauge
32. Filling and drain cock
33. Return connection
34. Electrical connection pump and
three-way valve
35. Flow connection
3
6
5
4
9
10
8
7
11
14
12
13
15
16
17
18
19
20
21
26
22
30
23
34
28
31
24
25
27
29
32
33
Fig. 06 Boiler layout remeha W40-m ECO
9
35
remeha W40/60-m ECO
6.3 Control panel
The remeha W40/60-m ECO is equipped with an
advanced control system comprising:
a. an automatic microprocessor control system
b. a control panel with setting keys and read-out display.
6.2 Operating principle
The appliance is equipped with a closed air box. Via a
fan, air is drawn in. On the intake side of the fan, an intake unit has been mounted where the gas is injected.
Depending on the settings and the ambient temperatures measured by the temperature sensors, the fan
speed is regulated. The gas/air ratio control adjusts the
quantity of gas to the quantity of air.
The gas/air mixture is achieved in the fan, and then
transported to the burner.
Various values can be set and read, using the setting
keyboard and read-out displays.
The two levels for setting and read-out are:
- user level
- free access
- service level - access by service code.
Following combustion, the hot flue gases are conducted
via the aluminium heat exchanger. At the heat exchanger, the flue gases give off heat to the central heating
water in the heat exchanger. The water vapour in the flue
gases condenses against the finned pipes at the base.
The heat released during this condensation process (the
so-called latent or condensation heat) is also transferred
to the central heating water.
The condensed water thus formed is discharged via a
siphon at the base of the heat exchanger.
The control panel accommodates the following components (fig. 07):
a. 'code'-display
display of: - operating mode 1 digit
- setting mode
1. digit and dot
- read-out mode 1. digit and blinking dot
in service level:
- speed mode
- failure mode
i
a
d
e
b. temperature display ( )
display of: - temperatures
- settings
- malfunctions
c
b
f
g
half digits
1 blinking digit
c. 'reset'-key:
- to reset after a malfunction
h
d. 'mode'-key:
- key to select the required mode
Fig. 07 Control panel
e. 'step'-key:
- key to select the required program within the
selected mode
f. 'store'-key:
- key to save the settings
g. '▲'-key
- to select a higher setting
h. '▼'-key:
- to select a lower setting
i. burner switch:
- to switch the boiler on/off.
10
6.4 Control system
6.4.1 General
Press the 'mode'-key
Press the 'step'-key
'Code'-display
Operating
mode (see
para. 6.4.2)
Temperature display
0-9
H,L
Flow temperature
digit
Setting
mode (see
para. 6.4.3)
.
digit and
dot
1.
2.
3.
A.
Required flow temperature
Pump setting
D.H.W. setting
Boiler control operation
On service level (C 12):
Read-out
mode (see
para. 6.4.4)
.
digit and
blinking dot
6.
7.
8.
9.
b.
C.
d.
E.
F.
G.
H.
I.
J.
L.
n.
P.
Fan speed at full load (hundreds)
Fan speed at full load (units)
Fan speed at part load (hundreds)
Fan speed at part load (units)
D.H.W. cut-in temperature differential
Max. fan speed D.H.W.
Not applicable
Monitoring fan speed LD2
Forced part load after start
Fan speed at start
Max. flow temperature D.H.W.
D.H.W. control
Reserve
Heating cut-in temperature differential
Security type
1.
2.
3.
4.
5.
6.
7.
8.
9.
Flow temperature
Return temperature
D.H.W. temperature
Outdoor temperature
Not applicable
Flow temperature (setpoint)
Room thermostat status and air pressure switch status
Reserve
Not applicable
On service level (C 12):
Speed
mode (see
para. 6.4.7)
Fan speed
or
half digits
Failure
mode (see
para. 6.4.8)
blinking
digit
1
2
3
4
5
6
Failure code
Operating mode during failure
Flow temperature during failure
Return temperature during failure
D.H.W. temperature during failure
Outdoor temperature during failure
Fig. 08 Flow diagram microprocessor
11
remeha W40/60-m ECO
6.4.2 Operating mode
During operation the 'code'-display shows the status
(position in cycle) of the boiler, while the temperature
displays indicates the measured water temperature.
5 Waiting mode; the fan runs and the boiler waits until
this has been proved or waits until the three-way
valve has returned to the central heating position.
7 Continued pump operation in the central heating
mode: after heat demand is met, the pump continues
to operate for the time selected (if continuous pump
operation has not been selected).
8 Continued pump operation in the D.H.W. mode; after
D.H.W. demand is met, the three-way valve will be
energized for another 5 minutes and the pump keeps
running.
9 Control stop
- flow temperature > 95˚C
- flow temperature > setpoint +5˚C
- return temperature > max. flow temp. -10˚C
- rise in flow temperature exceeded.
H Forced full load.
L Forced part load.
The digits in the 'code'-display have the following meaning:
0 Standby; there is no heat demand from the heating or
hot water controls.
1 Pre-purging; before start-up, the boiler is purged for
0,3 seconds. When the heat demand has been met,
the fan continues to operate for another 10 seconds.
2 Ignition: ignition is activated for 2.4 seconds while the
gas valve is opened.
3 Central heating mode; the boiler operates in the central heating mode.
4 D.H.W. operation: the boiler operates when the threeway valve serving the calorifier is actuated by a
demand from the D.H.W. temperature sensor.
12
6.4.3 Setting mode (with dot)
Various settings can be changed as required in the setting mode.
a. on user level
- Select the setting mode by pressing the 'mode'-key
until 1. appears in the 'code' read-out display.
- Now select the required code, using the 'step'-key.
Code
Description
Setting
1.
2.
Required flow temperature
Pump setting
3.
A.
D.H.W. setting
Boiler control operation
( X = don't care)
- 20
- 00
01
99
- 20
- 1X
- 2X
- X0
- X1
- X2
- X3
Preset
- 9 0 ˚C
pump operation 10 sec.
- 1 5 pump operation in minutes
continuous pump operation
- 6 5 ˚C (with sensor)
central heating modulating (or on/off)
central heating high/low
central heating off, D.H.W. off
central heating on, D.H.W. on
central heating on, D.H.W. off
central heating off, D.H.W. on
80
05
65
11
b. on service level for the heating contractor
- Select the service code C 1 2 (see para. 6.4.9)
- Select the setting mode by pressing the 'mode'-key
until 1. appears in the 'code'-read-out display.
- Now select the required code, using the 'step'-key.
Code
Description
Setting
6.
7.
8.
9.
b.
Fan speed at full load
Fan speed at part load
D.H.W. cut-in temp. differential
-
C.
d.
E.
F.
G.
H.
I.
J.
Max. fan speed D.H.W.
Reserve
Monitoring fan speed LD2
Forced part load after start
Fan speed at start
Max. flow temperature at D.H.W.
D.H.W. control
n.
P.
Heating cut-in temp differential
Security type
10
00
10
00
01
06
07
08
- 10
- 00
-
Preset
- 6 0 hundreds
- 9 9 units
- 6 0 hundreds
- 9 9 units
- 0 5 ˚C
= 10 ˚C
= 15 ˚C
= 20 ˚C
- 6 0 hundreds
- 9 9 units
May not be changed !!!
0 0 - 1 5 minuten
May not be changed !!!
7 0 - 9 0 ˚C
0 0 three-way valve
0 1 D.H.W. pump
0 2 inverted three-way valve
0 5 - 2 0 ˚C
May not be changed !!!
13
4
0
3
0
0
9
0
0
0
5
49
00
4
0
3
8
0
5
0
5
0
0
10
14
remeha W40/60-m ECO
6.4.4 Read-out mode (with blinking dot)
Various values can be read in the read-out mode.
On user level.
- Select the read-out mode by pressing the 'mode'-key
until 1. (blinking dot) appears in the 'code'-display.
- Now select the required code, using the 'step'-key.
Code
Description
Read-out (example)
1.
2.
3.
4.
5.
6.
7.
Flow temperature
Return temperature
D.H.W. temperature
Outdoor temperature
Not applicable
Flow temperature set point
Room thermostat status
and air pressure switch status
Flow sensor temperature
-
8.
8
7
6
0
4
0
0
5 (with sensor)
5 (with sensor)
0
- 0
open 1
closed
0 open
1 closed
- 80
6.4.5 Forced 'HIGH' mode
By pressing the 'mode' and '▲' key simultaneously in
operating mode, the appliance will burn at maximum
power.
The flow temperature, however, cannot exceed the preset maximum, in order to protect the appliance and the
installation.
By pressing the '▲' and '▼' keys simultaneously, the
appliance will return to operating mode, or will switch to
that mode automatically after 15 minutes.
6.4.6 Forced 'LOW' mode
By pressing the 'mode' and '▼' key simultaneously in
operating mode, the appliance will burn at minimum
power.
The flow temperature, however, cannot exceed the preset maximum, in order to protect the appliance and the
installation.
By pressing the '▲' and '▼' keys simultaneously, the
appliance will return to operating mode, or will switch to
that mode automatically after 15 minutes.
6.4.7 Speed mode (half digits)
(On service level for the heating contractor.)
The fan speed can be read in parts in the speed mode.
- Select the service code C 1 2 (see para. 6.4.9).
- Now select the fan speed code, using the 'mode'-key
(half digits).
Code
Description
Example 4900 r/m
Fan speed
Fan speed
- 4 9 hundreds
- 0 0 units
14
6.4.9 Service code
Only for the heating contractor.
To avoid incorrect settings several operation levels have
protection codes. For service purposes you can program
code C 1 2 .
- Press the 'mode'- and 'step'-keys simultaneously and
the 'code'-display now shows C .
- Holding both keys pressed, set the temperature display to 1 2 , using the '▲'- and '▼'-keys.
6.4.8 Failure mode (blinking 'code' display)
Only for the heating contractor.
Malfunctions of the boiler control occurring during operation are shown on the read-out displays (see failure
table in chapter 11). The latest failure is stored in the microprocessor memory and can be read at service level,
code C 1 2 (see para. 6.4.9).
- Press the 'mode'-key until the digit 1 (blinking)
appears in the 'code'-display.
- Press the 'step'-key for the required code.
Code
Description
1
2
37
03
3
4
5
6
5
4
6
1
3
0
0
0
Display of failure code (chapter 11)
Operating mode during failure
(para. 6.4.2)
Flow temperature during failure
Return temperature during failure
D.H.W. temperature during failure
Outdoor temperature during failure
⇑
⇑
⇑ ⇑
- Keep both keys pressed and press the 'store'-key.
The temperature display is blinking to acknowledge
your access to the service setting.
Example:
The return temperature sensor has failed during central
heating operation at a flow temperature of 53°C, a return
temperature of 40°C, a D.H.W. temperature of 60°C and
an outdoor temperature of 10°C.
⇑
⇑ ⇑
- Press the 'store'-key to store the service code (the
temperature display will blink twice for acknowledgement).
- Release the 'mode' and 'step' keys.
You are in the service mode and are able to change settings and to read out values.
After using the service code you have to delete the service code by pressing the 'reset'-key once or after 10
minutes when no further alterations have been made the
service code will delete automatically.
15
remeha W40/60-m ECO
3. D.H.W. setting (basic setting 65˚C). Only with sensor.
- Press the 'mode'-key until the digit 1. (with dot)
appears in the 'code'-display.
- Press the 'step'-key until the digit 3. appears in the
'code'-display.
- Set the required value, using the '▲'- and '▼'-keys.
6.4.10 User settings
The user can set the following parameters to the
required values.
1. Flow temperature (basic setting 80˚C).
- Press the 'mode'-key until the digit 1. (with dot)
appears in the 'code'-display.
- The set value 8 0 is shown in the temperature
display.
- Now set the required flow temperature, using the
'▲'- and '▼'-keys.
Code
1.
Code
3.
Required flow temperature
2. Pump switching (basic setting: pump continues to
operate for 5 minutes)
- Press the 'mode'-key until the digit 1. (with dot)
appears in the 'code'-display.
- Press the 'step'-key until the digit 2. appears in the
'code'-display.
- Set the required value, using the '▲'- and '▼'-keys.
Description
2.
2.
00
XX
2.
99
required temperature
Operation is as follows:
Imagine: the setpoint for D.H.W. temperature has been
preset at 65°C, the D.H.W. cut-in temperature differential at 5°C, and the maximum flow temperature during
D.H.W. operation at 80°C (factory settings).
The appliance will modulate at the preset maximum flow
temperature during D.H.W. operation, and will shut down
at a D.H.W. temperature of 70°C (preset value +5°C).
The appliance will cut back in at a D.H.W. temperature
of 65°C (preset D.H.W. temperature
+5°C - D.H.W. cut-in temperature differential).
Both the D.H.W. cut-in differential and the maximum flow
temperature during D.H.W. operation can only be set via
the service menu (para. 10.3.9 and 10.3.10).
- Press the 'store'-key to store the new value (value
will blink twice).
- Press the 'mode'-key until the digit without dot
appears in the 'code'-display.
Code
65
- Press the 'store'-key to store the new value (value
will blink twice).
- Press the 'reset'-key to return into the operating
mode.
Description
70
Description
Pump continues to operate for 10 sec.
Pump continues to operate for
1 - 15 min. (example: X X = 05)
Continuous pump operation
- Press the 'store'-key to store the new value (value
will blink twice).
- Press the 'mode'-key until the digit without dot
appears in the 'code'-display.
16
7. INSTALLATION INSTRUCTIONS
7.3 Dimensions of wall mounting bracket
7.1 General
All gas appliances must, by law, be installed by competent persons (e.g. Corgi). Failure to install appliances
correctly could lead to prosecution.
It is in your own interest and that of safety to ensure that
the law is complied with.
The following instructions must be adhered to when the
remeha W40/60-m ECO is installed:
Gas Safety (Installation and Use) Regulations 1984 (as
amended).
Current I.E.E. Regulations for electrical installations
Local building regulations.
The Building Standards (Scotland) (Consolidation)
Regulations, by-laws of the local water undertaking.
Health and Safety Document No 635 'The Electricity at
Work Regulations 1989'.
The requirements of Guidance Note PM 5 issued by the
Health & Safety Executive 'Automatically controlled
steam and hot water boilers'.
Depending on the type and size of installation i.e. large
domestic or commercial the requirements of the following publications should be complied with:
Domestic:
BS 5449, BS 5546, BS 6644,
BS 6891, CP 3006 and BG DM2.
Commercial:
BS 6644, BS 6700, BS 6880
Pts 1, 2 and 3, CP 342.2
IM2, IM5, IM11, IM16 and IM22.
Manufacturers Instructions must NOT be taken as overriding statutory obligations.
A = Drill hole
Fig. 09 Template for wall bracket remeha W40-m ECO
Important:
The remeha W40/60-m ECO is a certified appliance and
must not be modified or installed in any way contrary to
these "Installation and Maintenance Instructions".
7.2 Location
The remeha W40/60-m ECO may be mounted free standing (on a frame supplied) or wall mounted (on a bracket supplied). The floor should be level and strong
enough to support the weight of the boilers full of water.
The wall should be sound and flat and capable of supporting the weight of the boiler full of water.
The following minimum clearances are required:
Front:
450 mm
Sides:
50 mm
Bottom: 250 mm
Top:
400 mm.
A = Drill hole
Fig. 10 Template for wall bracket remeha W60-m ECO
17
remeha W40/60-m ECO
7.4 Ventilation requirements
a. Open flue installations
The requirements for high and low level ventilation openings which MUST be provided are contained in detail
within BS 6644.
Openings must be permanent, communicate direct to
outside and be positioned so as to avoid blockage,
flooding or high velocity draughts within the boilerhouse.
The minimum free area of openings are shown in the
table:
b. Room sealed installations
Boilers require no air for combustion but air may be
required to ventilate the boiler house and remove any
excess heat generated by auxiliary equipment. BS 6644
requires that boiler house temperatures shall not
exceed:
- at floor level (or 100 mm above floor level) 25˚C
- at mid level (1.5 m above floor level) 30˚C
- at ceiling level (or 100 mm below ceiling level) 40˚C.
Total input rating Position of air Minimum air vent area
(direct from outside)
vents
of boilers
up to 2 MW
High level
270 cm2 plus 25 cm2
per kW in excess of
60 kW total input
up to 2 MW
Low level
540 cm2 plus 4.5 cm2
per kW in excess of
60 kW total input
These recommendations are considered to be adequate
unless plant is to be operated at, or near, maximum output during summer months when additional ventilation
may be required.
18
7.5 Flue gas discharge and air supply
Purpose designed flue and air systems for all applications are available from: - Rite-Vent Ltd
Crowther Industrial Estate
Washington NE 38 OAB
Tel.no.: 0191 - 4161150
Fax.no.: 0191 - 4151263
7.5.1 General
The remeha W40/60-m ECO is suitable for room sealed
fanned flue or open flue fan assisted operation.
Separate flue discharge and combustion air inlet connections are located on top of the appliance.
These are sealed with dust caps which MUST be removed just before the flue discharge and any air supply
ducts are fitted.
The boiler, in either single or multiple configurations is
suitable for operation with a wide variety of flue systems
(see section 7.5.2). Any horizontal runs of flue ducting
MUST slope back towards the boiler. Horizontal runs of
air ducting MUST slope towards the outside supply
opening. The flue duct termination must be located such
that when exposed to wind it will remain under suction
when the appliance is out of operation.
The flue should be constructed from single walled aluminium or stainless steel (316) and any air supply ducts
from either single walled aluminium, stainless steel or
plastic. All seams and joints in the flue shall be air and
watertight. When room sealed applications are adopted
all seams and joints in the air supply ductwork must be
airtight.
or
Fig. 11 Flue gas discharge and air supply
19
- Selkirk Manufacturing Ltd
Bassett House
High Street
Banstead SM7 2LZ
Tel.no.: 01737 - 353388
Fax.no.: 01737 - 362501.
remeha W40/60-m ECO
7.5.2 Single boiler, non room sealed applications
H
Construction of flue gas discharge duct
1 = flue gas discharge duct without bends
2 = flue gas discharge duct with two 45˚ bends
3 = flue gas discharge duct with two 90˚ bends
4 = flue gas discharge duct with T inlet and 90˚ bend, or
flue gas discharge duct with two 45˚ bends
Fig. 12 Examples of flue gas discharge duct, single
boiler, non room sealed applications.
remeha W40-m ECO
D (in mm)
Min. and max. allowable lengths of the flue gas discharge piping 'H' in m
80
100
Outlet with Terminal
Outlet without Terminal
'free outlet'
Ø
1
2
3
4
1
2
3
4
26
40
23
40
13
40
10
40
24
40
21
40
11
40
8
40
Lengths over 40 metres: consult Broag Ltd.
NB: deduct 2 metres of piping length for each 90˚ bend.
remeha W60-m ECO
D (in mm)
Min. and max. allowable lengths of the flue gas discharge piping 'H' in m
80
100
Outlet with Terminal
Outlet without Terminal
'free outlet'
Ø
1
2
3
4
1
2
3
4
9
36
7
34
22
18
7
34
5
32
20
16
Lengths over 40 metres: consult Broag Ltd.
NB: deduct 2 metres of piping length for each 90˚ bend.
20
7.5.3 Single boiler, room sealed applications
Construction of flue gas discharge duct
5 = air supply and flue gas discharge piping horizontally
6 = air supply and flue gas discharge piping without
bends
7 = air supply and flue gas discharge piping with two
90˚ bends
H
@@@@@@@@@@@@@@f
@@@@@@@@@@@@@@f
@@hf
@@hf
@@hf
@@hf
@@@@@?h
@@@@@?h
@@@@@?h
@@@@@?h
@@@@@?h
@@@@@?h
@@@@@?h
@@@@@?h
@@hf
@@hf
@@hf
@@hf
@@hf
@@hf
@@hf
@@hf
@@hf
@@hf
@@hf
@@hf
@@hf
@@hf
@@hf
@@hf
@@hf
@@hf
@@hf
@@hf
@@hf
@@hf
@@hf
@@hf
@@hf
@@hf
@@hf
@@hf
@@hf
@@hf
@@hf
@@hf
@@hf
@@hf
@@hf
@@hf
@@hf
@@hf
@@hf
@@hf
@@hf
@@hf
@@hf
@@hf
@@hf
@@hf
@@hf
@@hf
@@hf
@@hf
@@hf
@@hf
@@hf
@@hf
@@hf
@@hf
@@hf
@@hf
@@hf
@@hf
@@hf
@@hf
@@hf
@@hf
@@hf
@@hf
@@hf
@@hf
@@hf
@@hf
@@hf
@@hf
@@hf
@@hf
@@hf
@@hf
@@hf
@@hf
@@hf
@@hf
@@hf
@@hf
@@hf
@@hf
@@hf
@@hf
@@hf
@@hf
@@hf
@@hf
@@hf
@@hf
@@hf
@@hf
@@hf
@@hf
@@hf
@@hf
@@hf
@@hf
@@hf
@@hf
@@hf
@@hf
@@hf
@@hf
@@hf
@@hf
@@hf
@@hf
@@hf
@@hf
@@hf
@@hf
@@hf
@@hf
@@hf
@@@@@@hf
@@@@@@hf
@@@@@@hf
@@@@@@hf
@@@@@@hf
@@hf
@@hf
@@@@hf
@@@@hf
@@@@hf
@@@@@@hf
@@@@@@hf
@@@@hf
@@@@hf
@@@@hf
@@hf
@@hf
@@hf
@@hf
@@hf
@@hf
@@hf
@@hf
@@hf
@@hf
@@hf
@@hf
@@hf
@@hf
@@hf
@@hf
@@hf
@@hf
@@hf
@@hf
@@hf
@@hf
@@hf
@@hf
@@hf
@@hf
@@hf
@@hf
@@hf
@@hf
@@hf
@@hf
@@hf
@@hf
@@hf
@@hf
@@hf
@@hf
@@hf
@@hf
@@hf
@@hf
@@hf
@@hf
@@hf
@@hf
@@hf
@@hf
@@hf
@@hf
@@hf
@@hf
@@hf
@@hf
@@hf
@@hf
@@hf
@@hf
@@hf
@@hf
@@hf
@@hf
@@hf
@@hf
@@hf
@@hf
@@hf
@@hf
@@hf
@@hf
@@hf
@@hf
@@hf
@@hf
@@hf
@@hf
@@hf
@@hf
@@hf
@@hf
@@hf
@@hf
@@hf
@@hf
@@hf
@@hf
@@hf
@@hf
@@hf
@@hf
@@hf
@@hf
@@hf
@@hf
@@hf
@@hf
@@hf
@@hf
@@hf
@@hf
@@hf
@@hf
@@hf
@@hf
@@hf
@@hf
@@hf
@@hf
@@hf
@@hf
@@hf
@@hf
@@hf
@@hf
@@hf
@@@@@?h
@@@@@?h
@@@@@?h
@@@@@?h
@@@@@?h
@@@@@?h
@@@@@?h
@@hf
@@hf
@@hf
@@hf
@@hf
@@@@@@@@@@f
@@@@@@@@@@f
Fig. 13 Examples of flue gas discharge duct, single
boiler, room sealed applications.
remeha W40-m ECO
D (in mm)
Min. and max. allowable total lengths of the flue gas discharge and air supply piping 'H' in m together
Ø
5 +)
6 +)
7 +)
80
100
2
30
7
20
20
+
) Lengths over 20 metres: consult Broag Ltd.
NB: deduct 2 metres of piping length for each 90˚ bend.
remeha W60-m ECO
D (in mm)
Min. and max. allowable total lengths of the flue gas discharge and air supply piping 'H' in m
Ø
5 +)
6 +)
7 +)
100
110 *
6
20
16
20
18
+
) Lengths over 20 metres: consult Broag Ltd.
NB: deduct 2 metres of piping length for each 90˚ bend.
* = Concentric outlet Ø 100 mm.
7.5.4 Cascade configurations
For flue gas-side and air-side connections for multiple
boilers in cascade configuration, refer to our specific
documentation on that subject.
21
remeha W40/60-m ECO
7.6.2 Cold feed and expansion tank height for open
vented systems
The cold feed and expansion tank heights for all open
vented systems must comply with the requirements laid
down in the Health and Safety Executive publication
PM5. For the remeha W40/60-m ECO installations this
requirement is met providing the tank height is at least 3
meters above the highest circulating point of the system
(see para. 7.7.2, fig. 15).
7.6 Installation details
7.6.1 Condensate discharge
Discharge the condensate directly into a drain. Only use
synthetic material for the connecting piping, because of
the acidity (pH 3 - 5). Fill the siphon with water after fitting. With an open connection to the drain (see fig.14).
The discharge piping shall slope at least 30 mm/m. It is
not permitted to discharge condensate into a gutter,
because of the risk of freezing.
7.6.3 Water treatment
Water treatment of all systems, but in particular open
vented systems used with the remeha W40/60-m ECO,
is considered necessary good practice in order to:
a. avoid metallic corrosion within the system
b. avoid sludge and scale information
c. reduce to a minimum the risk of microbiological
contamination of the system
d. minimise chemical action and changes which take
place over a period of time when system water is
untreated.
The boiler contains an aluminium heat exchanger and
the system will also contain a variety of metals. Ferrous
metals - cast iron and steel, and non-ferrous metals copper, brass and gunmetal, may be present, so it is
essential that treatment is suitable for all of them.
Suitable chemicals and the extent of treatment should
be discussed with specialist manufacturers prior to any
work commencing. The specification of new systems
and general condition of older existing systems must be
carefully considered. The removal of debris, flux residue,
grease, metal, swarf etc. from new systems, and any
black magnetic iron oxide sludge and other corrosive
residue from old systems is essential.
Most important
Water treatment must not allow the system water to
exceed a ph of 9.
The boiler must be isolated from the system when using
chemicals to clean the system prior to use.
drain
For information on water treatment we advise direct contact with either:
Fernox Manufacturing Company Ltd.
Britannia Works
Clavering
Essex, CB1L 4QZ
Tel No: 0799 550811
Fig. 14 Condensate discharge drain
or:
22
Sentinal
Grace Dearborn Ltd
Widnes
Cheshire WA8 8UD
Tel No: 051 495 1861.
7.6.4 Safety valve
A safety valve should be fitted in the flow pipe between
the boiler and any isolating valves but in any case within
0.5 m of the appliance. The safety valve should be sized
according to the requirements given in the current
edition of BS 6644.
7.7 D.H.W. application
An indirect calorifier can be connected to the remeha
W40/60-m ECO in accordance with the schematic
sketch shown (fig. 15 and 16) and the wiring diagram in
para. 8.10.
7.7.1 D.H.W. control
The remeha W40/60-m ECO is supplied as standard
with a D.H.W. control suitable for activating a 230 V
spring loaded three-way valve. The three-way valve is
de-energized in the central heating position.
The control features priority D.H.W., which means that
when heat demand comes simultaneously from both the
D.H.W. and the central heating, the D.H.W. takes precedence and is available 24 hours a day completely independant of the heating control.
When the D.H.W. demand has been met, the circulation
pump will continue to operate in the D.H.W. position for
approximately 5 minutes, if no heat demand.
The D.H.W. temperature can be controlled by:
a. thermostat (24 V)
b. temperature sensor
For starting up the D.H.W. see para. 10.3.7 - 10.3.11.
7.6.5 Circulation pump
The remeha W40-m ECO is equipped with a circulation
pump, manufactured by Wilo, model RS 25/70 r.
The running power of this circulation pump is:
95 W (position 1) at 2400 rpm.
The pump is adjusted at position 1.
Note:
Pump positions 2, 3 and 4 cannot be used because the
pressure head is too low. This may lead to temperature
faults.
The remeha W60-m ECO is supplied with a circulation
pump, manufactured by Wilo, model RS 30/80 and a
L.L.H. header (see fig. 04).
The microprocessor programm allows a choice as to
whether the pump operates continuously or whether
there is a pump over-run of 1 - 15 minutes after the
boiler ceases firing.
Both pumps have been selected based on a primary
circulation of 15˚C ∆t.
Notes:
- To avoid uncontrolled flow in the central heating circuit, the D.H.W. return piping must never be connected
to the central heating circuit, but should always be connected directly to the return piping on the remeha
W40/60-m ECO.
- Fit the calorifier in accordance to the local authority
requirements.
23
remeha W40/60-m ECO
7.7.2 Schematic sketch of connections
▼
HR
Fig. 15 Schematic sketch of an open system
Fig. 16 Schematic sketch of a sealed system
24
▲
8. ELECTRICAL INSTALLATION
8.1 General
The remeha W40/60-m ECO is equipped with electronic
control and safety equipment, and flame ionisation
control. A microprocessor is at the heart of the remeha
W40/60-m ECO.
The boiler is pre-wired as shown in the wiring diagram in
para. 8.10. All controls on the boiler are 24V.
Installation and connection
1a. rematic® SR 5240 C1 (no possibility for post-regulation of central heating groups)
Installation in the boiler or in a reference room. In
the latter case, room compensation can be applied.
Connection via a two-core cable to plug K2 in the instrument box.
1b. rematic® 2945 C1 UMU (in addition to weather-compensated pre-regulation of the boiler, also control of
one mixed and one unmixed central heating group)
and rematic® 2945 C1 MUMU (in addition to weather-compensated pre-regulation of the boiler, control
of two mixed central heating groups).
Installation in the boiler. Connection via the rematic®
adapter supplied.
2. Honeywell Chronotherm Modulation.
Installation in the reference room. Connection via a
two-core cable on terminals 13 and 14 of the X15
16-pole wire connector.
The standard interface should be exchanged.
8.2 Electrical supply
The remeha W40/60-m ECO must have a permanent
240V-50Hz single phase supply.
8.3 Connection to the control system
8.3.1 Modulating control
Using a modulating control, the modulating character of
the boiler is used to the optimum level. The control
continuously demands a flow temperature from the
boiler, on the basis of the room and/or outdoor
temperature, and the boiler then modulates at this
temperature.
As a result, the number of operating hours increases
and the number of start-ups is drastically reduced. In
combination with the gas/air ratio control, on balance
this means a higher yield and lower maintenance costs.
Two types of modulating controls can be connected:
1. Modulating weather-compensated boiler control.
2. Modulating room control.
The communication between the modulating control and
the protection system is always via an interface PCB.
The appliance is equipped as standard with an interface
for one of the rematic® modulating weather-compensated controls: SR 5240 C1, 2945 C1 UMU and 2945 C1
MUMU.
When using a modulating room control (Honeywell
Chronotherm Modulation), the interface must be
exchanged.
For detailed information: see the documentation relating
to the control in question.
25
remeha W40/60-m ECO
8.3.2 Room thermostat 24V
The remeha W40/60-m ECO is suitable for a 2- or 4wire standard room thermostat.
Proceed as follows:
a. Connect the room thermostat to terminals 1 and 2 of
the 16-pole wire connector.
8.3.4 Two-stage external weather compensator
The remeha W40/60-m ECO can be connected to a twostage external weather-compensator. The boiler can run
on high/low.
Proceed as follows:
a. Connect the first stage (low) to terminals 1 and 2 of
the 16-pole wire connector and the second stage
(low/high) to terminals 8 and 9.
b. Set the anticipated current of the room thermostat at
0.11 A.
b. Set the internal control to high/low (see para 10.3.6).
8.3.5 D.H.W. control
The D.H.W. can be connected in two different ways:
Either with a standard D.H.W. thermostat (Tdhw) or with
a Remeha temperature sensor (Sdhw).
The installation procedure is as follows:
8.3.3 Room thermostat in combination with an outdoor temperature sensor
In order to use the modulating operation of the appliance
throughout the entire heating season using a room
thermostat, it is possible to install an outdoor temperature sensor (0S). Connect the wires to terminals 10 and
11 of the 16-pole wire connector. The earth slider should
be connected to the earth lip on the instrument panel.
The appliance will now modulate at a flow temperature
relative to the outdoor temperature (see stoking line
graph para. 10.3.3) in the event of heat demand (from
the room thermostat).
A. Installation with a D.H.W. thermostat
a. Connect the D.H.W. thermostat to terminals 3 and 4 of
the 16-pole wire connector.
Installation of the outdoor temperature sensor
Fit the outdoor sensor on a north or northwest facing
wall, at a height of at least 2.5 metres from ground level.
Do not install close to windows, doors or air vents,
kitchen extractor, etc. and make sure the sensor is protected from direct sunlight.
Lay the cable to the boiler. The cable is supplied in a
standard 15 metre length, and may not be extended. If
the cable is extended, problem-free operation cannot be
guaranteed.
b. Connect the three-way valve (230V) to the Euro-connector at the side of the terminal box.
c. Set the D.H.W. control (see para. 10.3.7 - 10.3.11).
B. Installation with a D.H.W. sensor
a. Connect the D.H.W. sensor to 11 and 12 of the 16pole wire connector. Connections may be interchanged.
b. Connect the three-way valve (230V) to the Euro-connector at the side of the terminal box.
c. Set the D.H.W. control (see para. 10.3.7 - 10.3.11).
26
8.3.6 Frost protection
Install the boiler in a frost-free room. If the temperature
of the central heating water drops too low, the built-in
frost protection is activated.
Water temperature:
- below 7˚C
- circulation pump is switched on;
- below 3˚C
- boiler is switched on;
- higher than 10˚C - boiler and circulation pump are
switched off.
Attention:
This is only a protection of the boiler.
It is recommended to install a frost thermostat (Tf) in
frost-sensitive rooms and connect it to terminals 13 and
14 of the 16-pole wire connector.
8.3.7 Signals
The boiler is supplied with remote alarm and boiler run
signalling facility. The alarm signal operates via terminals 6 and 7 and whilst the boiler is operational a 24V
AC signal (power 4 VA) is available to energise a relay.
In case of failure of any electrical interlock or mains
failure the 24V supply will be switched off. The alarm,
which is de-activated whilst there is a power supply
from the relay during normal operation, is now activated
by the failure of this supply.
The boiler run light is operated via terminals 15 and 16
which can also provide a 24V (4VA power) supply to a
relay. The light is illuminated at the start of the pre-purge
(code 1) and goes out on closure of the gas valve (code
7 or 8).
Tf
When the frost thermostat cuts in, the circulation pump
will also be switched on.
The frost protection can be connected parallel to the
modulating room control.
27
remeha W40/60-m ECO
8.4 Water temperature control
The remeha W40/60-m ECO is supplied with an electronic temperature control (basic setting 80˚C) with flow
and return temperature sensors. The flow temperature
can be adjusted between 20 and 90˚C.
8.9 Fuse specification
Fuse: F1
3.15 A T
F2
3.15 A T
F3
2 A F (sand-filled)
8.5 Low-water protection
The remeha W40/60-m ECO is supplied with a lowwater protection device.
Protection is provided in this appliance on the basis of
temperature measurement. By modulating back at the
moment that the water flow threatens to fall too low, the
appliance is kept operating for as long as possible. In
the event of low flow, the appliance is switched off.
ignition
transformer
printed circuit board
8.6 High limit temperature protection
The high limit temperature protection device switches off
and locks out the boiler when the water temperature is
too high (100˚C). When the malfunction is corrected, the
boiler can be restarted by using the 'reset'-key on the
control panel.
Fig. 17 Gasmodul control box
There is a glass type fuse F4 - 2 A T in the socket.
8.7 Differential air pressure switch (LD2)
At the start of a heat demand, the appliance first checks
whether the LD2 is open. If so, the fan switches to a
monitoring speed, and waits until the LD2 is closed.
Subsequently, the LD2 function will no longer be active.
8.8 Control box
Manufacture:
Model:
Supply voltage:
Electrical rating:
Pre-purge time:
Post-purge time:
Safety time:
Anti-hunting time:
Pump operation in central heating
mode continued for:
Pump operation in D.H.W. mode
continued for:
Gasmodul
MCBA 1460 D - V.2.0
240 V/50 Hz
10 VA
0,3 seconds
10 seconds
3 seconds
150 seconds
Fig. 18 Sticker on socket
1 - 15 minutes
5 minutes
28
8.10 Electrical wiring diagram
Fig. 19 Electrical wiring diagram
29
remeha W40/60-m ECO
9. INSTALLATION INSTRUCTIONS FOR THE GAS INSTALLER
9.1 Gas connection
The boiler is suitable for firing on natural gas and
propane.
Category II2H 3P.
Connect the boiler to the incoming gas in accordance
with the requirements of the Gas supply company. Install
the main gas cock near the boiler. The gas connection is
located at the bottom of the boiler (see fig. 6, para. 6.1,
item 29). Fit a gas filter in the gas supply piping to avoid
fouling of the gas control unit.
9.3 Gas/air ratio control
The boiler is equipped with a gas/air ratio control.
The purpose of this control is to keep the ratio between
gas and air quantities in the burner within safe limits, at
varying loads. This ensures clean and reliable combustion over the entire load range.
The air flow is controlled by the differential pressure
across the fan.
The gas flow will be adjusted proportionally according to
changes in the air flow.
The ratio between gas and air flow can be adjusted to
suit the installation (see para. 10.1).
9.2 Gas pressures
The required initial inlet pressure is 17-30 mbar. The
burner pressure has been factory-set but must be
checked and re-adjusted to site conditions by an
approved engineer. Consult our Technical Sales Department for other types of natural gas.
30
10. COMMISSIONING
10.1 Initial lighting
1. Check that the electric power to the boiler is
switched off.
2. Remove the front panel and the two side panels.
3. Check that the gas supply is correctly fitted.
4. Check that the electrical connections are correct.
5. Open the cap of the automatic air vent (fig. 6, no 10).
6. Fill the boiler and the installation with water and
check the water pressure (recommended 1.5 bar).
7. Only remeha W40-m ECO: Check the pump; this
may be stuck. If necessary, release with a screwdriver.
8. If necessary, vent the heat exchanger; the manual air
vent is mounted inside the air box (fig. 06, no. 14).
Only remeha W40-m ECO: Also remember the built-in
circulation pump. This should be vented separately.
9. Vent the installation.
10. Fill the siphon with water.
11. Check the flue and the air inlet ducting.
12. Open the gas cock and vent the piping.
13. Switch the electric power switch on ('1').
14. Set the room thermostat or external boiler controls to
call for heat or over-ride.
15. Switch on the boiler burner switch ('1').
16. The following run sequence will show in the 'code'display:
5 = Check air transport: after checking the air
pressure switch in rest mode, the fan will turn,
and the appliance will wait until air transport is
sufficient, or until the three-way valve has been
bypassed, in the event of heat demand.
1 = Pre-ventilation: 0.3 seconds (post-ventilation:
following operation of the appliance, postventilation will be carried out for 10 seconds).
2 = Ignition: for 2.4 seconds ignition will be
switched on and the gas valve opened, thus
igniting the burner.
3 = Appliance in central heating operation.
4 = Appliance in boiler operation; the three-way
valve to the boiler or the boiler pump has been
activated.
The following operating situations are now possible:
16a.Modulating operation:
The appliance will modulate at the flow temperature
requested by the modulating regulator (see also
'Note' under 16c).
16b.High/low operation: The appliance is operating at
part-load or full-load depending on the heat
demand.
16c.On/off operation: The appliance will modulate
between minimum and maximum load on the basis
of the flow temperature preset on the appliance.
Fig. 20 Measurement points
Note:
Except immediately after the power has been
switched on and if the appliance has had no heat
demand for more than 2 hours, the appliance will
first burn at forced part-load. The factory setting for
forced part-load time is 0 minutes. This setting is
correct if use is made of modulating regulators (see
16a). For on/off operation, a forced part-load time of
3 minutes is recommended (setting mode, step G,
see para. 6.4.1 and 6.4.3).
16d.D.H.W. operation: The warm water production takes
precedence. The appliance modulates on the basis
of a preset flow temperature (setting range 70 to
90°C).
17a.Check the boiler for correct function in full load and
part load.
The best way to check whether the gas/air ratio
con-trol is functioning correctly, is to measure O2 in
the flue gas discharge pipe P7, see fig. 20 (CO2
measuring based on O2 measurement is also possible). Direct measurement of CO2 can lead to deviation of the reading due to mixing CO2 in the natural
gas.
Proceed as follows:
Connect the measurement equipment (check for air
tight).
17b.Run appliance at full-load (forced mode ‘HIGH’
paragraph 6.4.5).
- Press 'mode'and '▲' keys simultaneously.
31
remeha W40/60-m ECO
17d.Run the appliance at part-load (forced mode ‘LOW’,
see par. 6.4.6)
- Press the 'mode' and '▼' keys simultaneously.
17e.Once the part-load speed is reached, compare the
measured result with the table above (see 17c).
If necessary, correct the gas to air ratio using screw
B on the gas combination block (see fig. 21).
Check via the inspection opening:
- the flame (should not blow out)
- the burner surface (should show a regular flame
distribution).
17f. Once you have adjusted gas flow in part-load, the
setting values for full-load should be checked.
These values are subject to minimal variations; if
necessary, correct the values and repeat this
process from point 17b onwards, as often as is
neccessary, until the desired effect is achieved.
17g.Remove the measurement connections. Close the
measurement openings. Fit the boiler panels.
18. Heat the installation up to 80˚C and shut-off the
boiler.
19. Vent the piping and check the water pressure.
20. Set the room thermostat or weather compensator at
the required value.
21. The boiler is now ready for use.
A - Setting screw full load
B - Setting screw part load
Note:
The remeha W40/60-m ECO is supplied with a number
of basic settings:
- burner control
- on/off or
modulating
- flow temperature
- 80°C
- post-running time pump
- 5 minutes
- D.H.W. control
- operating
- D.H.W. temperature
- 65°C
- D.H.W. cut-in temperature differential - 5°C
If other setting values are required: see alteration of settings, par. 10.3.
Fig. 21 Setting screws
17c.When full-load speed is reached, you should compare the measured result with the figures in the
table below:
- If necessary, correct the gas/air ratio using screw
A on the gas combination block (see fig. 21).
Check the flame via the inspection opening:
- the flame should not blow out
- the burner surface should not glow red.
boiler
model
input
kW
rpm
%
%
W40-m
12.7
42.3
approx. 3000
approx. 4900
4.8
4.8
9.0
9.0
W60-m
18.6
62.1
approx. 3000
approx. 4900
4.8
4.8
9.0
9.0
fan
speed
O2
CO2
10.2 Shut-down
1. Switch off the boiler burner switch ('0').
2. Close the gas cock.
3. Switch the electric power switch off.
Note:
When the boiler is shut-down, it is not protected against
frost!
32
10.3 Settings
10.3.6 Setting the burner control
Setting mode, step A.
The basic setting is modulating burner control.
To alter burner control, you should carry out the following actions.
- Press the 'mode' key to call up setting mode. The dot
in the ‘code’ window will light up continuously.
10.3.1 General
In this paragraph a number of further setting options are
explained briefly. In most cases reference is merely
made to the diagram in par. 6.4.1.
10.3.2 Setting the required flow temperature
Setting mode, step 1.
Preset 80˚C.
Change setting: see para. 6.4.1 and 6.4.10.
⇑
- Press the 'step' key until the letter A. appears in the
‘code’ window. This is the setting for appliance control.
The temperature window indicates 1 1 . This is modulating control, warm water supply 'on'.
⇑
adjustable
flow temperature ˚C
10.3.3 Setting the required flow temperature when
using an outdoor sensor
Setting mode, step 1.
If an outdoor temperature sensor is connected, you
should input the peak value of the stoking line here, i.e.
the required flow temperature at an outdoor temperature
of -10°C. The base value of the stoking line is a fixed
value of 25°C flow temperature at 20°C outdoor temperature. See the graph below.
-Change the setting using the '▲' and '▼'-keys:
Code
A.
outdoor temperature ˚C
Description ('X' = don't care)
1X
2X
X0
X1
X2
X3
central
central
central
central
central
central
heating
heating
heating
heating
heating
heating
modulating
high/low ext. input
off, D.H.W. off
on, D.H.W. on
on, D.H.W. off
off, D.H.W. on
Fig. 22 Stoking line graph
If under certain circumstances the flow temperature
according to this stoking line is too low (e.g. restoking
following nighttime shutdown), a so-called “booster
function” ensures that the flow temperature is raised by
10°C if heat demand (from the room thermostat)
continues for longer than 10 minutes. This is repeated
every 10 minutes until the room thermostat switches off
(or a flow temperature of 80°C is achieved).
Once the room thermostat has switched, the required
flow temperature will once again fall by 1°C per minute
until the stoking line is regained.
⇑
⇑
- Store the new setting in the memory, by pressing the
'store' key. The temperature window will flash as a sign
that the value has been stored.
10.3.4 Changing the cut-in temperature differential
Setting mode, step n.
Preset 10˚C.
Change setting: see para. 6.4.1 and 6.4.3.
⇑
- Press the 'reset' key once to return to operating mode.
10.3.5 Setting the pump control
Setting mode, step 2.
Preset 5 minutes.
Change setting: see para. 6.4.1 and 6.4.10.
The burner control has now been set to high/low control.
33
remeha W40/60-m ECO
10.3.7 Setting D.H.W. temperature
Setting mode, step 3.
Setting this value is only important if a remeha D.H.W.
sensor is used.
The basic setting is: D.H.W. operation with a D.H.W. temperature of 65°C.
To make alterations, see para. 6.4.1 and 6.4.10.
- Press the 'reset' key to return to operating mode.
⇑
10.3.8 Switching D.H.W. operation on and off
Setting mode, step A.
The basic setting is: boiler operation on. To switch off the
D.H.W. function, you should carry out the actions below:
- Using the 'mode' key, go to setting mode (the dot in
the 'code' display will light up continuously).
Note:
In the factory, the control has been set so that the appliance will switch off if the measured D.H.W. temperature
is 5°C (preset value) above the preset boiler temperature. The appliance switches back on at a temperature
5°C below the shutoff point, i.e. at the boiler temperature set by yourself. This cut-in temperature differential
can be adjusted to a maximum of 20°C. To alter this
value, follow the instructions in par. 10.3.9.
If you do not wish to change the value, installation is
now finished.
⇑
10.3.9 Changing D.H.W. operating cut-in temperature differential (service level)
Setting mode, step b.
Preset 5˚C.
Change setting: see para. 6.4.1 and 6.4.3.
- Press the 'step' key until the letter A. appears in the
'code' display.
Note:
When using a D.H.W. thermostat, the value of the cut-in
differential is used as a switch differential for flow temperature in the event of an appliance control stop in
D.H.W. operation.
⇑
- Change the setting using the '▲' and '▼' keys:
Code
A.
10.3.10 Changing maximum flow temperature
during D.H.W. operation
(service level)
Setting mode, step I.
Preset 80˚C.
Change setting: see para. 6.4.1 and 6.4.3.
Description ('X' = don't care)
1X
2X
X0
X1
X2
X3
central
central
central
central
central
central
heating
heating
heating
heating
heating
heating
⇑
modulating
high/low ext. input
off, D.H.W. off
on, D.H.W. on
on, D.H.W. off
off, D.H.W. on
10.3.11 Changing three-way valve/boiler pump
setting
(service level)
Setting mode, step J.
Preset three-way valve.
Change setting: see para. 6.4.1 and 6.4.3.
⇑
- Store the new setting in the memory by pressing the
'store' key. The temperature window will flash as a
sign that the value has been stored.
⇑
⇑
34
11. FAULT-FINDING
11.1 General
This chapter differentiates between appliances with the
modulating rematic® weather-compensated control and
appliances controlled in some other way.
In those cases where a modulating room control
(Honeywell Chronotherm Modulation with relevant
interface) is used, follow par. 11.2.
11.2 Faults in appliances in combination with the
rematic® weather-compensated boiler control
Carry out the steps listed below in the order given:
1. No figures appear in the appliance display.
Check: - the mains voltage 240 V
- the control box fuses
2. Is there a fault code on the appliance display (figures
flashing)?
If yes, continue at par. 11.4.
3. Check the operating mode of the appliance (see par.
6.4.2).
- ‘0’ (no heat demand): continue with point 4.
- ‘1’ to ‘9’, ‘H’, ‘L’: try to find the cause of the fault,
according to the operating mode shown.
4. Check the operation of the appliance by connecting a
wire bridge to the 16-pole wire connector X15
between terminals 1 and 2 (B1).
Does the appliance start up?
Yes, go on to point 5.
No, check the wiring of the wire connector. If the wiring
is correct, replace the control box.
5. Open the instrument cupboard. This cupboard contains an interface PCB (see fig. 23) for the modulating
rematic® control. The PCB also includes two LEDs.
There are now four possibilities:
1. Neither LED is flashing:
Check whether connections L and N of the PCB
(screw clamp X1) are being fed 230V.
No: check the wiring.
Yes: replace the interface PCB.
2. LED B (see fig. 23) is not flashing.
First check the wiring between the appliance and the
rematic® control.
Then, if necessary, replace the rematic® control. If the
fault has still not been corrected, replace the interface
PCB.
3. LED A (see fig. 23) is not flashing:
Check whether the tape cable connector (X7) is correctly mounted in the interface PCB and in the control
box.
Then, if necessary, replace the interface PCB. If the
fault has still not been corrected, replace the control
box.
4. Both LEDS are flashing. This indicates that the installation is operating correctly.
Check the settings of the rematic® control. Refer to the
instructions for the control.
Fig. 23 Interface PCB for modulating rematic® control
11.3 Faults in appliances without a modulating
rematic® weather-compensated boiler control
In the event of faults the following situations may occur:
1.No figures appear on the display.
Check: - mains voltage 240V
- fuses in the control box.
2.The appliance will not start up (no error message):
Check whether the room thermostat or weather-compensated boiler control:
- are correctly connected
- are correctly set
- are faulty.
3.Check the operation of the appliance by connecting a
wire bridge to the 16-pole wire connector X15
between terminals 1 and 2 (B1).
Does the appliance start up?
- Yes, continue at par. 11.4
- No, check the wiring of the wire connector. If the
wiring is correct, replace the control box.
11.4 Fault codes
In the event of an error message, both the 'code' display and the ' ' display will flash.
For an explanation of the various fault codes and their
possible causes, refer to the table on the next page.
Note:
For a readout of the most recent faults, see par. 6.4.8.
Important:
Before resetting, accurately record the fault code
(figures, including flashes and dots) and always pass on
this information if you request assistance. The fault code
is important for correctly and rapidly tracing the nature
of the fault.
35
remeha W40/60-m ECO
0 0.
0 1.
0 2.
Description
Flame simulation
Short-circuit 24V
No flame
or no ionisation
(after 3 starts)
0 4
0 8.
Control fault
Air transport
1
1
1
2
Control fault
Max. water
temperature
Temperature
sensor fault
2.
8.
9.
4.
2 5.
Maximum water
temperature
2 8.
Fan does not run
2 9.
Fan keeps running
3
3
3
3
3
4
Max. water temp.
Temp.sensor fault
0.
1.
2.
6.
7.
3.
6 1.
Parameters out
of reach
Air transport
Cause/checkpoints
Check ionisation probe (distance 3 - 4 mm).
Check wiring.
a. no ignition spark (visible through inspection glass).
Check:
- connection of ignition cable and spark plug cap.
- ignition cable and electrode for breakdown.
- electrode distance; must be 3-4 mm.
b. ignition spark, but no flame.
Check if:
- gas cock is open.
- inlet gas pressure is sufficient.
- gas pipe is vented.
- gas valve is energized during ignition.
- electrode is fitted properly.
- the gas/air ratio is not correct (see para. 10.1)
- the gas pipe is not clogged or shows an assembly fault.
c. flame, but no ionisation.
Voltage failure when malfunction causes interlock.
a. Fouling/clogging of the air supply, flue gas discharge or heat exchanger;
b. Differential air pressure switch does not function:
- differential air pressure switch defective.
- gas/air connections loose or clogged.
- gas/air connections mixed up.
- spring loaded damper (fig. 06, pos. 7) does not open.
Fuse F1 (3.15 AT) defective.
Flow temperature too high.
Return temperature too high.
a. Flow and return temperature sensors mixed up.
b. Flow and return connections mixed up.
c. Water flow in D.H.W. mode not correct.
Rise in flow temperature too fast.
Check:
- circulation pump (position 1 or 2)
- water flow through the unit (sufficient number of radiators opened)
- water pressure (0.8 bar min).
Fan defective or improperly fitted (mechanically or electrically).
Fuse F2 (3.15 AT) defective.
Transformer defective (power on X3?)
a. electrical connections mixed up.
b. electrical connections interrupted.
Difference between flow and return temperature too high
Short-circuit in flow temperature sensor.
Short-circuit in return temperature sensor.
Flow temperature sensor defective or not connected.
Return temperature sensor defective or not connected.
Check the parameter settings.
Air differential switch does not open:
- Air differential switch defective
- Extreme draft through flue gas discharge duct
- Short-circuit in wiring.
Note:
Not mentioned codes refer to internal control errors,
requiring the control box to be changed.
36
12. INSPECTION AND SERVICING INSTRUCTIONS
12.1 General
The remeha W40/60-m ECO is practically maintenancefree. Once a year, the appliance should be checked and
if necessary cleaned.
12.2 Inspection
The annual inspection of the remeha W40/60-m ECO
can be limited to:
- inspection of the boilers combustion characteristics
- cleaning the siphon
- setting the ignition electrode
- check for leaks (water side, flue gas side and gas side)
- water pressure check.
Checking the boiler combustion characteristics
This can be done by measuring the O2 level in the flue
gas (P7, fig 24). The boiler should be in equilibrium with
an average boiler water temperature of approximately
70°C.
The flue gas temperature can also be taken at P7.
This flue gas temperature must not exceed the return
water temperature by more than 30°C.
If this check shows the operation of the unit to have
deteriorated clean the boiler as detailed in para. 12.3.
boiler
model
input
(NCV)
fan
speed
O2
CO2
kW
rpm
%
%
W40-m
12.7
42.3
approx. 3000
approx. 4900
4.8
4.8
9.0
9.0
W60-m
18.6
62.1
approx. 3000
approx. 4900
4.8
4.8
9.0
9.0
Fig. 24 Measuring points
Cleaning the siphon
Remove the siphon and clean it. Fill the siphon with
clean water and fit it.
Setting the ignition electrode
Check the setting of the ignition electrode (3-4 mm).
Water pressure check
The water pressure should be at least 0.8 bar. You are
recommended to fill the appliance to approx. 1.5 bar.
The above values apply to a closed air box.
See also para. 10.1 for initial settings.
37
remeha W40/60-m ECO
12.3 Maintenance
If the appliance is checked for technical combustion
problems and the result is that either combustion or
heat exchanger are no longer at the optimum level,
maintenance should be carried out. This maintenance
will consist of:
- cleaning the heat exchanger with a nylon brush or
compressed air and possibly rinsing with water
- cleaning the fan
- cleaning the siphon.
A2
A1
Work order (see fig. 26):
- Switch off the appliance via the burner switch on the
instrument panel on the front.
- Disconnect the electrical power supply to the
appliance.
- Close the cock in the gas pipe to the appliance.
- Remove the front cover and the two side covers.
- Open the catch on the instrument panel and tilt the
panel forwards.
Attention:
To prevent a short-circuit in the external connections or
in the instrument panel as a result of the unexpected
penetration of leak water, you are advised to cover the
instrument panel.
Fig. 25 ((Dis)assembly of the gas pipe
- Remove the bolts from the attachment strips (B). The
fastening strips can then be removed.
- Remove the electrical connection from the fan (D).
- Lift the burner from the fan carefully upwards and
remove the burner from the appliance.
- Check the burner seal on the heat exchanger.
If damaged or hardened, replace the seal
(recommended: replace every 3 years).
- Remove the cover from the air box.
- Remove the pipes (E) from the inlet mixer.
- Open the union nut for the gas pipe in the air box (A).
Remember!!!
To prevent the flexible gas pipe twisting, when slackening and tightening the union nut (A1), the hexagon nut
(A2) should be held in place with a spanner, see fig. 25.
Attention:
The metal-fibre layer on the burner is susceptible to
mechanical damage and should therefore be handled
with care. Do not touch with brushes or other sharp
objects.
- To inspect/clean the heat exchanger, the hold-down
strips (F) on the underside and sides must be removed
(brass wing nuts). Also remove the 3 metal screws on
the underside of the inspection plate (G).
- Now remove the inspection plate (H).
- If necessary, remove the 3 guide plates (I) between the
aluminium finned pipes, in order to clean the finned
pipes.
38
E
A
B
M
B
D
C
G
I
G
H
G
F
J
K
A
B
C
D
E
F
G
H
I
J
K
L
M
Fig. 26 Servicing points remeha W40/60-m ECO
- To inspect or clean the fan, it must be disconnected
from the gas injector.
- Remove the screws at the rear of the fan.
For cleaning purposes, use a plastic brush; remove
any loose dust particles from the fan, before reassembling the system.
- Reassemble all parts removed in reverse order.
Attention:
Check that all control hoses are properly fitted following
assembly: in the event of incorrect assembly, it is not
possible to guarantee the correct setting of the gas/air
ratio.
- Check the setting of the ignition electrode (between 3
and 4 mm).
- Restart the appliance.
12.4 Draining and filling
The fill and drain cock is fitted at the bottom of the boiler.
12.5 Venting
The boiler is equipped with an air separator with automatic vent. Give the sealing cap a quarter turn.
A manual vent is fitted top right on the heat exchanger.
39
Union nut
Fastening strips
Ignition cable
Connecting plug
Hose connection
Hold down strips
Metal screws
Inspection plate
Guide plate
Condense collector
Filling and drain cock
Automatic vent.
Manual air vent.
L
remeha W40/60-m ECO
ISO 9001
since 1988
Broag Ltd.
Head Office
Remeha house,
Molly Millars Lane,
Wokingham,
Berkshire RG 41 2QP.
Tel. 0118 9786977
Fax 0118 9783434
Email address:
[email protected].
© Copyright
All technical and technological information contained in these technical
instructions, as well as any drawings
and technical descriptions furnished
by us remain our property and shall
not be multiplied without our prior
consent in writing.
Subject to alterations
Art. nr. 51.794/2500/05.97/Ho.
Branch Office
Unit 3,Kestrel Close,
Quarry Hill Industrial Estate,
Ilkeston
Derbyshire DE7 4RD
Tel. 0115 9440778
Fax 0115 9440588