Download Vicon VDR4-DVC Product specifications
Transcript
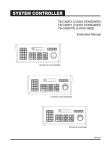
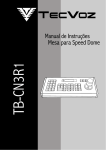
VDR4-DVC
Keypad Controller
Vicon Industries Inc. does not warrant that the functions contained in this equipment will meet your
requirements or that the operation will be entirely error free or perform precisely as described in the
documentation. This system has not been designed to be used in life-critical situations and must
not be used for this purpose.
Warning: To prevent fire or shock hazard, do not expose the unit to rain or
moisture.
Copyright © 2009 Vicon Industries Inc. All rights reserved.
Product specifications subject to change without notice.
Vicon and its logo are registered trademarks of Vicon Industries Inc.
VICON INDUSTRIES LTD., BRUNEL WAY, FAREHAM, HAMPSHIRE, PO15 5TX, UK.
TEL: +44 (0)1489 566300 FAX: +44 (0)1489 566322
WEB: www.vicon-cctv.com
CONTENTS
What’s in the box …………………..……………………………………………………………………………..
2
Warning & Caution ……...………………………………………………………………………………………...
3
General descriptions……….……………………………………………………………………………………...
5
A. General descriptions……………………………………………………………………….……………
5
B. Features……………………………………………………………………………………………….….
5
Installation……………………………………………………………………………………………………….….
6
Part names & functions…………………………………………………………………………………………...
9
A. General description……………………………………………………………………………..…….…
9
B. Part names & functions (rear side)………………………………………………………………….....
10
C. Drawing of console desk……………..…….…………………………………………………………..
10
Access to the camera menu……………………………………………………………………………………...
11
A. Display LCD window………………………………………………………………………………..…...
11
B. How to select address……………………………………………………………………………….….
11
C. Easy preset save and call………………………………………………………………………………
12
D. How to use tour function…………………………………………………………………………….....
12
E. How to use pattern function………………………………………………………………….………...
12
F. How to use scan function………………………………………………………………….……………
13
G. How to use AUX1…………………………………… …………………………………………….……
13
H. How to use AUX2……………………………………………………………………………….……….
14
I. Easy function save and run…………………… ………………………………………………….……
14
Access to the DVR menu………………………………………………………………………………………...
15
A. Display selection…………………………………… ………………………………………..………..
15
B. DVR function……………………………………………………………………………..………………
15
C. Matrix function ………..…………………………… ……………………………….………………….
16
How to use setup menu………………………………………………………………………..…………………
18
Example of camera/DVR setting & operation…………… …………………………………………………….
21
Specification…..…………………………………………………………………………………………………...
23
Dimension……………………………………….………………………………………………………………....
23
What’s in the box ?
1. Controller
2. Junction Box
3. RJ11 8Pin Modular Cable 1EA
4. Manual
-2-
WARNING & CAUTION
WARNING
TO REDUCE THE RISK OF FIRE OR ELECTIC SHOCK, DO NOT EXPOSE THIS PRODUCT TO RAIN
OR MOISTURE. DO NOT INSERT ANY METALLIC OBJECTS THROUGH THE VENTILATION GRILLS OR
OTHER OPENINGS ON THE EQUIPMENT
CAUTION
CAUTION
RISK OF ELECTRIC SHOCK
DO NOT OPEN
CAUTION: TO REDUCE THE RISK OF ELECTRIC SHOCK,
DO NOT REMOVE COVER(OR BACK).
NO USER-SERVICEABLE PARTS IN SIDE.
REFER SERVICING TO QUALIFILED SERVICE PERSONNEL.
GRAPHICAL SYMBOL EXPLANATION
The Lightning flash with arrowhead symbol, within an equilateral triangle, is
Intended to alert the user to the presence of un-insulated “dangerous voltage”
within the product’s enclosure that may be of sufficient magnitude to
constitute a risk of electric shock to persons.
!
The exclamation point within an equilateral triangle is intended to alert the
user to the presence of important operating and maintenance (servicing)
instructions in the literature accompanying the product.
-3-
FCC COMPLIANCE STATEMNET
INFORMATION TO THE USER : THIS EQUIOMENT HAS BEEN TESTED AND FOUND
TO COMPLY WITH THE LIMITS FOR A CLASS A DIGITAL DEVICE. PURSUANT TO
PART 15 OF THE FCC RULES, THESE LIMITS ARE DESIGENED TO PROVIDE
REASONABLE PROTECTION AGAINST HARMFUL INTERFERENCE WHEN THE
EQUIPMENT IS OPERATED IN A COMMERCIAL ENVIRONMENT. THIS EQUIPMENT
GENERATES. USERS. AND CAN RADIATE RADIO PREQUENCY ENERGY AND IF
NOT INSTALLED AND USED IN ACCORDANCE WITH THE INSTRUCTION MANUAL
MAY CAUSE HARMFUL INTERFERENCE TO RADIO COMMUNICATIONS.
OPERATION OF THIS EQUIPMENT IN A RESIDENTIAL AREA IS LIKELY TO CAUSE
HARMFUL INTERFERENCE IN WHICH CASE THE USER WILL BE REQUIRED TO
CORRECT THE INTERFERENCE AT HIS OWN EXPENSE.
CAUTION : CHANGES OR MODIFICATIONS NOT EXPRESSLY APPROVED BY THE
PARTY RESPONSIBLE FOR COMPLIANCE COULD VOID THE USER’S AUTORITY TO
OPERATE THE EQUIPMENT
CE COMPLIANCE STATMENT
THIS IS A CLASS A PRODUCT. IN A DOMESTIC ENVIRONMENT THIS PRODUCT MAY
CAUSE RADIO INTERFERENCE IN WHICH CASE THE USER MAY BE REQUIRED TO
TAKE ADEQUATE MEASURES.
-4-
GENERAL DESCRIPTIONS
GENERAL DESCRIPTIONS
* Keyboard Controller is DVR & Camera controller and it allows how to operate the functions easily.
* This controller controls DVR and Camera such as DVR setup, Playback, PTZ function.
* The LCD shows display current status as well as provides a menu to set up operational parameters.
* This controller is designed for desktop operation and interface connectors are located in the junction box.
FEATURES
* To control all DVR functions such as Live display, Playback, DVR Setup, PTZ and Matrix.
* To control up to 255 DVRs from one keyboard controller.
* To control up to 255 cameras from one keyboard controller.
* Multi-protocol supported ( PELCO-D, VICON ).
* Preset position control.
* Maximum speed can be changed according to zoom ratio.
* To recall the programmed auto-scan from selected dome camera
* Built in LCD Display with blue screen.
* User password and system hold function
-5-
INSTALLATION
Open the box and check if all below items are included in the box.
. keyboard controller…………...……… 1
. Junction box …………………….……. 1
. 8P RJ45 Modular Cable (2m) ……… 1
1. Jump
2. Junction Box
3. To Key Board
(inside box)
5. CAM1,CAM2
6. DVR
1. Jumper setting
2. Junction box
3. Junction box data In/Out port (To Keyboard)
4. Keyboard data In/Out port (To Junction Box)
5. Master RS485 D+/D- (To CAM1, CAM2 )
6. Slave RS485 D-/D+ (To DVR)
-6-
4. Key Board #
INSTALLATION
A. Single DVR configuration
1. Connect RJ45 to the rear of keyboard controller and data on the junction box and plug in
DC12V power to DC jack.
2. Connect CAM1 or CAM2 (RS485(D+),RS485(D-)) to Junction box terminal and
communication Jack on PTZ camera (Please make sure of polarity)
3. Turn on the power and then you will be on the starting mode
4. Connect DVR (RS485(D+),RS485(D-)) to the Junction box terminal and the RS-485 A port of
DVR. Please make sure of the polarity.
5. Connect Daisy-out port of DVR to the Monitor.
MONITOR
CAM 1
Juntion
Box
UKB-400
RS-485
RS-485
CAM 16
A
A port of RS -485 con.
L
O
Z
C
O
F
K
O
R
S
M
Z
E
M
Q
UL
TI
DVR_ID = 1
PO
W
P
ER
TI
M
Z
SC/
SE
M
SH
AR
E
CH
N
U
1
5
2
6
1
9
0/
0
1
1
3
4
PO R AL
WE E AR
R C M
3
4
7
1
1
1
5
8
1
2
1
6
R
E
R.
S
C
PL
T
AY
P
O
L
PA
P
A
US
Y
E
R
E
W
< Example of using single DVR Configuration >
-7-
F
F
Daisy Out
INSTALLATION
B. Multiple DVR configuration
1. Connect RJ45 to the rear of keyboard controller and data on the junction box and plug in
DC12V power to DC jack.
2. Connect CAM1 or CAM2 (RS485(D+),RS485(D-)) to Junction box terminal and
communication Jack on PTZ camera (Please make sure of polarity)
3. Turn on the power and then you will be on the starting mode
4. Connect the DVR (RS485(D+),RS485(D-)) to Junction box terminal and the RS-485 A port of
DVRs. Please make sure of polarity.
5. Connect Daisy-out port to DVR that DVR_ID number is 1 and connect Daisy-In port to DVR that
DVR_ID number is 2
6. Connect Daisy-out port of the last DVR to the Monitor
MONITOR
CAM 1
Juntion
Box
UKB-400
RS-485
RS-485
CAM n
A
* n : maximum 255
A port of RS -485 con.
L
O
Z
C
O
F
K
O
R
S
M
Z
E
M
Q
UL
TI
PO
W
P
ER
T
MI
Z/
SC
SE
SH
M
AR
E
CH
N
U
DVR_ID = 1
1
3
4
6
7
1
1
9
0/
1
1
1
0
1
3
4
5
PO R AL
WE E AR
R C M
2
8
1
2
1
6
5
R
E
R.
S
C
PL
T
P
AY
O
L
PA
P
A
US
Y
E
R
E
W
F
F
Daisy Out
A
Camera number(n) is different
from DVR ID number( m).
A port of RS -485 con.
L
O
Z
C
O
F
O
K
R
S
M
Z
M
E
Q
UL
TI
Daisy In
PO
W
P
ER
T
MI
Z/
SC
SE
M
SH
AR
E
CH
N
U
1
5
2
6
1
9
0/
1
1
0
3
4
PO R AL
WE E AR
R C M
3
4
7
1
1
1
5
8
1
2
1
6
R
E
R.
S
C
PL
T
P
AY
O
L
PA
P
A
US
Y
E
R
E
W
F
F
DVR_ID = m
* m : maximum 255
< Example of using multiple DVRs Configuration >
-8-
Daisy Out
PART NAME & FUNCTIONS
A. PART NAME & FUNCTION
4
5
6
9
10
33
11 19 1 17 18 25 23
24
29
30
31
32
3
2
7
8
12
15 13
16 14
21
22 20
27
28
26
1. LCD Display : Displays numeric input system status,
16. SEL: Selects Key(DVR and Key Board setting mode)
function status, general status, etc…
17. ZOOM TELE: Camera Zoom Control for Tele
2. Telemetry joystick : Allows precise setting mode control
18. ZOOM WIDE: Camera Zoom Control for Wide
of Pan/Tilt/Zoom & Moving to menu
19. FOCUS NEAR: Camera focus Control for Near
3. 0~9: : Numeric Key
20. FOCUS FAR: Camera focus Control for Far
4. Menu : Used for Camera(PTZ camera) and DVR menu
21. IRIS OPEN: Camera Iris Control for Open
adjustment
22. IRIS CLOSE: Camera Iris Control for Close
5. ESC: Closes the current work and goes to starting menu
23. REC: DVR Record Key
6. DVR: Selects address of DVR(Up to 255)
24. SEARCH: DVR Search Key
7. CLR: Cancels Key
25. R.PLAY: DVR Reverse Play key
8. CAM: Selects address of camera
26. PLAY: DVR Play key
9. PRST: Save and calls camera presets and positions
27. PAUSE: DVR Pause key
10. PTRN: Runs to camera Pattern key
28. STOP: DVR Stop key
11. SCAN/A/P: Runs to scan or Auto Pan key
29. MATRIX: Matrix Function key
12. TOUR: Runs to camera Tour key
30. ZOOM/AUX1: DVR Zoom key or Camera Aux1 key
13. SEQ: Sequential view under live mode of DVR.
31. FRZ/AUX2: DVR Freeze key or Camera Aux2 key
14. MULTI/A/I: Selection button for Screen Division of DVR or
32. MISC/FUNC: DVR Miscellaneous key or Camera Function
Camera Auto Iris key
key
15. ENTER: Enter key
33. LED: TX/RX Status View
-9-
PART NAME & FUNCTION
B. PART NAME & FUNCTIONS(REAR SIDE)
ⓐ
DATA
ⓐ Data out port (Connector to communication and power)
C. DRAWING OF CONSOLE DESK
90mm
30mm
30mm
155mm
365mm
- 10 -
ACCESS TO THE CAMERA MENU
This function is only for the PTZ camera
DISPLAY LCD WINDOW
A. Initial display
1
2
3
1. Show the selected unit (Camera or DVR)
Cam: 001 2400 BPS
2. Show the selected unit address No. (001 ~ 255)
Standby…
3. Show the selected baud rate (2400/4800/9600 bps)
4. Show the controller status
4
B. How to select address
B-1. How to select address number 1 or 2 of camera.
1
Cam: 001 2400 BPS
Standby…
or
CAM
Cam: 001 2400 BPS
2
Standby…
Up to 255
B-2. How to select address number 1 or 2 of DVR
1
Dvr: 001 9600 BPS
Standby…
or
DVR
Dvr: 001 9600 BPS
2
Standby…
Up to 255
- 11 -
ACCESS TO THE CAMERA MENU
C. Easy preset save and call (In case of cam 1 / 2400 bps)
C-1. How to save preset 1 or 2 (1~64, 100~200)
After pushing no. 1 or 2, hold PRST for about 2 seconds
1
or
2
PRST
Cam: 001 2400 BPS
Î 001 Preset Save
C-2. After pushing no. 1 or 2, push PRST shortly, it makes PRST work.
1
or
2
Cam: 001 2400 BPS
PRST
Î 001 Preset
D. How to use TOUR function
D-1. Using VICON protocol (In case of Cam1/4800 bps)
1. Tour has be to be set by using camera setup Menu.
2. Generally, Vicon tour function works by using specific preset number.( 80 ~ 87 )
3. After camera tour setup, you can operate tour function calling preset number.
8
0
PRST
Cam: 001 4800 BPS
Î080 Preset
Up to 87
D-2. Using Pelco-D protocol (in case of Cam1/2400 bps )
1. Tour has to be set by using camera setup Menu.
2. pushing no. 1 or 2, push TOUR shortly, it makes TOUR work.
1
or
2
TOUR
Cam: 001 2400 BPS
Î001 Tour
Up to 8
- 12 -
ACCESS TO THE CAMERA MENU
E. How to use PATTERN function
E-1. Using VICON protocol (In case of Cam1/4800 bps )
1. Pattern has to be set by using the camera setup Menu.
2. Generally, Vicon pattern function works by using the specific preset number.( 88 ~ 89 )
3. After set up the camera pattern, you can operate pattern function calling preset number.
8
8
PRST
Cam: 001 4800 BPS
Î088 Preset
Up to 89
E-2. Using Pelco-D protocol (in case of Cam1/2400 bps )
1. Pattern has to be set by using the camera setup Menu.
2. Push number 1 or 2, push PTRN shortly, it makes PTRN work.
1
or
2
PTRN
Î001 Pattern
Up to 8
F. How to use SCAN function
F-1. How to use auto scan.
SCAN
A/P
Cam: 001 2400 BPS
Î Scan
G. How to use AUX1 function
G-1. How to use AUX1.
ZOOM
AUX1
Cam: 001 2400 BPS
Cam: 001 2400 BPS
Î Aux1
- 13 -
ACCESS TO THE DVR MENU
H. How to use AUX2 function
H-1. How to use AUX2.
FRZ
AUX2
Cam: 001 2400 BPS
Î Aux2
I. Easy Function save and run (In case of cam 1 / 2400 BPS)
Function key is useful when you use a lot of cameras. Generally, each camera has been programmed preset
positions. If you want to watch each camera’s specific preset position, first you have to select camera and
then you should select preset number. It is inconvenient. Function key saves camera number and preset
number.
I-1. How to save function (1~999)
In case that you save preset 1 of camera 1 at function1, first you have to operate preset 1 of camera 1.
1
Cam: 001 2400 BPS
PRST
Î 001 Preset
After that push number 1 and hold FUNC key for about 2 seconds.
1
MISC
FUNC
Cam: 001 2400 BPS
Î 001FSave Pst033
Up to 999
I-2. How to run function (1~999)
After pushing no. 1, push FUNC key shortly, it makes FUNC work.
1
MISC
FUNC
Up to 999
- 14 -
Cam: 001 2400 BPS
Î 001FRun Pst001
ACCESS TO THE DVR MENU
A. Display Selection (In case of DVR 1 / 9600 bps)
A-1. How to use channel sequence
Sequential view under live mode : Viewing of all active video input channels sequentially at the selected DVR
Dvr: 001 9600 BPS
SEQ
Î SEQUENCE
A-2. How to use single channel display
First push channel number ‘n’(1~16), push ENTER, then displays the selected channel .
Exceptionally, ‘0’ + ‘ENTER’ works same as ‘MULTI’
n
Dvr: 001 9600 BPS
ENTER
Standby…
A-3. How to use multi channel display
Live mode : Selection of Screen Division for Live Viewing mode(4,8,9,16 screen divisions)
Playback mode : Selection of Screen Division for playback. It shows 4,9,16 divided screen.
It works same as MULTI key of DVR.
Dvr: 001 9600 BPS
MULTI
A/I
Î MULTI
B. DVR Function (In case of DVR 1 / 9600 bps )
B-1. How to use REC button
Press once to begin recording all active channels. Press again to end recording.
REC
Dvr: 001 9600 BPS
●
Î RECORD
B-2. How to use SEARCH button
Press once to open the menu to search for the recorded files.
Dvr: 001 9600 BPS
SEARCH
Î SEARCH
- 15 -
ACCESS TO THE DVR MENU
B-3. How to use R.PLAY button
Press once to open the menu to search for the recorded files. Under the PTZ control menu, it can be used
for decreasing the speed of Pan Tilt, Zoom, Focus.
Dvr: 001 9600 BPS
R.PLAY
◀
Î R.PLAY
B-4. How to use PLAY button
Playback button will activate assigned starting position and channel at playback setup of a selected DVR
menu. Under PTZ control menu, it can be used for increasing the speed of Pan, Tilt, Zoom, Focus.
Dvr: 001 9600 BPS
PLAY
▶
Î PLAY
B-5. How to use PAUSE button
Press once to freeze playback. Press again to restart playback.
Dvr: 001 9600 BPS
PAUSE
▐▌
Î PAUSE
B-6. How to use STOP button
Press once to stop playback.
Dvr: 001 9600 BPS
STOP
■
Î STOP
B-7. How to use ZOOM button
Zoom In/Out on the images during Live Viewing.
ZOOM
AUX1
Dvr: 001 9600 BPS
Î ZOOM
- 16 -
ACCESS TO THE DVR MENU
B-8. How to use FRZ button
Press once to freeze the frame at the live mode. Press again to release.
FRZ
AUX2
Dvr: 001 9600 BPS
Î FREEZE
B-9. How to use MISC button
There are no buttons for NET, OSD, Audio Mute, HDD, LOG on the keyboard. To substitute these buttons,
you may use MISC button.
MISC
FUNC
Dvr: 001 9600 BPS
Î MISC
C. Matrix function
C-1. How to use Matrix button
After pushing no. n, push Matrix shortly, keyboard mode is changed into Cam mode and it waits camera
control command. Daisy chain output displays n channel camera image.
n channel camera is calculated by below formula.
* n = (DVR_ID-1)*16 + camera channel number,
n
DVR ID = 1 ~ 255
Cam: n 2400 BPS
Standby…
MATRIX
Ex) Three sets of 16channel DVRs are installed. You want to control the third camera of second DVR. In this
case, n is calculated (2(DVR_ID)-1)*16 + 3(CAMERA CHANNEL) = 19
Daisy chain output displays the third camera of second DVR.
19
Cam: 019 2400 BPS
Standby…
MATRIX
- 17 -
HOW TO USE KEYBOARD CONTROLLER SETUP MENU
When you change the setting value of setup menu, you should enter “9. Save And Exit”
How to go setup menu : After pushing no. key 11, SEL key for over 3 seconds
1
1
SEL
A. How to use setup menu
A-1. As you move joystick up and down, you can go to next menu, move left and right,
you can change the value of setting.
A-2. Starting display in setup menu.
1. Baud Rate #1
Master 2400 BPS
A-3. How to set the Master Baud Rate
( You can change the value of Master baud rate by moving Joystick Left and Right)
1. Baud Rate #1
1. Baud Rate #1
1. Baud Rate #1
Master 2400 BPS
Master 4800 BPS
Master 9600 BPS
A-4. How to change Slave Baud Rate
( You can change the value of Slave baud rate by moving Joystick Left and Right)
2. Baud Rate #2
2. Baud Rate #2
2. Baud Rate #2
Slave 2400 BPS
Slave 4800 BPS
Slave 9600 BPS
A-5. How to change Protocol
(You can change the Protocol by moving Joystick Left and Right)
* TPro201 includes Pelco-D. You need Pelco-D, you can use TPro201.
3. Protocol
TPro201
3. Protocol
VICON
- 18 -
HOW TO USE KEYBOARD CONTROLLER SETUP MENU
A-6. How to use System Lock function
You can use 0~999 by no. key,
when you input 000. it is OFF, when you input 001~999, Lock mode works
* Lock mode will be active, when keypad and joystick are not used for the set time.
4. System Lock
or
OFF
4. System Lock
1~999
A-7. How to enter Password
-. You can choose 0 up to 999 and push enter key
-. When you forget the password, please call to the vendors that you purchased from.
1
ENTER
5. Password
ENTER
5. Password
[***]***
Up to999
1
* * * [* * *]
Up to 999
A-8. Beep
How to set beep.
-. You can change the beep On/Off by moving Joystick Left and Right
6. Beep
6. Beep
ON
OFF
A-9. Function Use
-. You can choose whether use or not the FUNC key.
Function Key is useful when you control several cameras. You can save camera ID & preset number at
the specific function number.(1~999)
7. Function Use
Use
7. Function Use
UnUse
- 19 -
HOW TO USE KEYBOARD CONTROLLER SETUP MENU
A-9. LCD Backlight
How to set up LCD Backlight.
-. You can change the Always ON, After 10sec, After 20sec, After 30sec, After 60sec by moving Joystick
Left and Right
8. LCD Backlight
Always ON
A-10. How to save and exit by Joystick Left and Right
9. Save And Exit
A-11. Exit
10. Exit
- 20 -
EXAMPLES OF CAMERA/DVR SETTING & OPRERATION
A. DVR Menu setting
A-1. Menu Æ Camera Setup Æ PTZ Setup
Model No : PELCO-D or VICON
PTZ ID : 0~255 (In case of “0”, it is normally not used)
Baud Rate: 9600
A-2. Menu Æ System Setup Æ DVR ID
DVR ID : 0 ~ 255(In case of “0”, it is normally not used)
B. Keyboard setting (No need to change it because it is set as the default)
B-1. Enter Setting mode : “1” +”1”+ ”SEL” (Push “SEL” button in 3 seconds)
B-2. Camera control Baud rate :
1. Baud rate #1 : Master 2400 (in case protocol is TPro201)
1. Baud rate #1 : Master 4800 (in case protocol is VICON)
B-3. DVR control Baud rate : 2. Baud rate #2 : Slave 9600
B-4. Protocol : 3. Protocol : TPro 201 (Same as PELCO-D), VICON
B-5. Exit after saving the setting value : 9. Save and Exit
C. Keyboard operation
There is DVR mode and Camera model on Keyboard.
Change DVR mode : DVR ID + “DVR” button
Change Camera mode: CAMERA ID + “CAM” button or CAMERA ID + “MATRIX” button
C-1. How to operate DVR
1. Select DVR : “ 1 ”(DVR ID) + “ DVR ” button
2. Example to operate
2.1 Menu setting screen On/Off : “ Menu ” button
2.2 Change Live screen : “ 1~16 “ + “ Enter “, “ 0 “ + “ Enter “, “Multi”
2.3 Playback start : “ Play ” button
-
21 –
EXAMPLES OF CAMERA/DVR SETTING & OPRERATION
C-2. How to operate camera
1. Select camera : “ 1 ”(Camera ID) + “ CAM ” button
2. Example to operate
2.1 Zoom Tele : “ ZOOM TELE ” button
2.2 IRIS open : “ IRIS OPEN ” button
3. Camera control command button : MENU, ZOOM TELE, ZOOM WIDE, FOCUS NEAR, FOCUS
FAR, IRIS OPEN, IRIS CLSE, PRST, PTRN, TOUR, SCAN, FUNC, AUX1, AUX2, JOYSTICK
C-3. How to operate Matrix function (When connect a lot of DVRs by using Daisy chain cable)
1. How to connect and how to set DVR, Daisy chain cable, Speed dome camera
1.1 Plug in optional Daisy chain cable into extension port on No.1, No.2 DVR
1.2 Connect Daisy chain cable Vd_out on No.1 DVR into Daisy chain cable Vd_in on No.2 DVR.
1.3 Connect Daisy chain cable Vd_out on No.2 DVR into monitor (Matrix output screen)
1.4 Set “1” on No.1 DVR ID and set “2” on No.2 DVR ID.
1.5 Set “1~16” on No.1 DVR that is connected with Speed Dome camera ID and set 17~32 on
No.2 DVR that is connect with Speed Dome Camera ID.
2. Example to operate
2.1 Select No.19 Camera: “ 19 ” + “ MATRIX ” button
Watch No.3 camera screen of No.2 DVR on Matrix output screen. In this case, the camera
controls command can be operated because the keypad is on the camera
mode.
- 22 -
SPECIFICATION
Item
Keyboard controller
MASTER(for CAM) : RS-485 (2400bps, 4800bps, 9600bps)
Communication
SLAVE(for DVR) : RS-485 (2400bps, 4800bps, 9600bps)
Axis
Joystick
3-Axis, Zoom IN/OUT available
DC 12V, 110mA
Power Consumption
Display Type
16 x 2 Character LCD, With Blue Backlight
Key Type
PC Key board Button
Key board Connector Type
Junction Box Connector
RJ45 8 Pin Modular Cable
Master : Terminal Block. Slave : Terminal Block
Humidity
10% ~ 70% non Condensing
Dimension
140(W) x 185(H) x 365(D)
Weight
1.2kg
DIMENSION
- 23 Nov. 2008.
Rev 1.0
Vicon Industries Ltd
European Headquarters
Brunel Way
Fareham, PO15 5TX
United Kingdom
+44 (0) 1489 566300
Fax: +44 (0) 1489 566322
UK Northern Office
Unit 2, Whitworth Court
Manor Farm Road
Runcorn
Cheshire WA7 1TE
Telephone: +44 1928 530420
Fax: +44 1928 530421
Belgium
Vicon Industries
Planet II - Unit E,
Leuvensesteenweg 542
B-1930 Zaventem
Belgium
Telephone: +32 27128780
Fax: +32 27128781
Spain
Vicon Industries
Molina de Segura, 3-Local 4
28030 Madrid
Spain
Telephone: +34 91 301 61 42
Fax: +34 91 773 35 25
Italy
Vicon Industries
Via Sardegna, 25
20060 Vignate
Milano
Italy
Telephone: +39 02 95938250
Fax: +39 02 95938251
Germany
vin-videotronic infosystems gmbh
Lahnstrasse 1
D-24539 Neumuenster
Phone: +49 (0) 4321 8790
Fax: +49 (0) 4321 879 47
Internet Address: www.vicon-cctv.com


