1
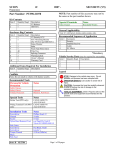
SCION
xD/xB
2008-
LEATHER STEERING WHEEL
Preparation
Part Number: 08460-12820
(Silver/Dark Gray)
NOTE: Part number of this accessory may not be
the same as the part number shown.
Kit Contents
General Applicability
Item #
1
2
3
Quantity Reqd.
1
1
1
Description
Steering Wheel
Installation Manual
Owner’s Manual
All 2008 xD/xB
Recommended Sequence of Application
Item #
1
2
Hardware Bag Contents
Item #
Quantity Reqd.
*Mandatory
Description
Vehicle Service Parts (may be required for reassembly)
Additional Items Required For Installation
Item #
Quantity Reqd.
Accessory
Description
Item #
1
2
3
Quantity Reqd.
Description
Legend
Conflicts
Note:
STOP: Damage to the vehicle may occur. Do not
proceed until process has been complied with.
OPERATOR SAFETY: Use caution to avoid risk of
injury.
CAUTION: A process that must be carefully observed
in order to reduce the risk of damage to the
accessory/vehicle and to ensure a quality installation.
TOOLS & EQUIPMENT: Used in Figures calls out the
specific tools and equipment recommended for this
process.
Recommended Tools
Safety Tools
Vehicle Protection
Blanket/tape,
Protective Sheet
Special Tools
Universal Puller Set “C”
Components used from
Universal Set “C”: Hanger 150
Slide Arm (X2)
Center Bolt 150
Claw No.2 (X2)
Toyota SST P/N:
09950-50013
Toyota SST P/N:
09951-05010
Toyota SST P/N:
09952-05010
Toyota SST P/N:
09953-05020
Toyota SST P/N:
09954-05021
Installation Tools
Screwdriver
Screwdriver
Ratchet
Spinner Handle
Extension
Torx Socket
Socket
Wrench
Wrench
Torque Wrench
Phillips #2
Small Flathead
100 mm, 150 mm
T30 (14 mm or less shaft ∅)
19 mm
19 mm, 10 mm
Adjustable
0-100 lbf-in; 0-100 lbf-ft
Special Chemicals
Grease
Issue: B
General Purpose
04/18/07
Page 1 of 12 pages
DIO only
SCION
xD/xB
2008-
LEATHER STEERING WHEEL
Procedure
Care must be taken when installing this accessory to ensure damage does not occur to the vehicle. The installation of this
accessory should follow approved guidelines to ensure a quality installation.
These guidelines can be found in the "Accessory Installation Practices" document.
This document covers such items as:• Vehicle Protection (use of covers and blankets, cleaning chemicals, etc.).
• Safety (eye protection, rechecking torque procedure, etc.).
• Vehicle Disassembly/Reassembly (panel removal, part storage, etc.).
• Electrical Component Disassembly/Reassembly (battery disconnection, connector removal, etc.).
Please see your Toyota dealer for a copy of this document.
.
Note: Images are shown for reference only.
1. Steering Wheel Alignment.
(a) When parking vehicle to install leather
steering wheel, position vehicle so the front
wheels are straight and the steering wheel is
centered.
Masking Tape
Steering Column (Upper cover
(1) Turn the steering wheel to its straight
position.
Steering Wheel (Lower Cover)
(2) Apply masking tape on the top center of
the steering wheel and steering column
upper cover. (Fig. 1-1)
(3) Draw a line on the masking tape as
shown in the illustration. (Fig. 1-1)
Fig. 1-1
2. Remove Battery Cable.
10 mm Wrench
Negative Battery Cable
(a) Remove the negative battery cable.
(Fig. 2-1)
(1) Protect the fender before starting.
Battery
(b) SRS Airbag System backup power is active
for 90 seconds after the negative cable is
disconnected from terminal.
Wait a minimum of 90 seconds after the
vehicle battery is disconnected before
beginning Step 3. (for air bag safety).
Fig. 2-1
Issue: B
(2) Do not touch the positive terminal with
any tool when removing cable.
04/18/07
Page 2 of 12 pages
DIO only
SCION
xD/xB
2008-
LEATHER STEERING WHEEL
Procedure
3. Remove the Steering Pad
(a) Using a T30 “torx” socket, loosen the 2
screws until the groove along each screw
circumference catches on the screw case.
(Fig. 3-1)
(b) Pull the steering pad assembly straight off.
Support the steering pad with one hand.
Notice: When removing the steering pad,
do not pull the airbag wire harness.
(c) Unlock the connectors for airbag, which are
on the back of the steering pad assembly,
with a small flathead screwdriver and
remove. (Fig. 3-2)
Fig 3-1
Small Flathead Screwdriver
Unlock to loosen
the connector
(d) Remove the horn wire/connector from the
steering pad assembly by pressing the
release tab on the terminal.
(e) Set aside the steering pad assembly away
from direct sunlight/heat/moisture, with the
emblem always facing up.
2P Connector
2P Connectors
for Air Bag
(f) Remove connector for spiral cable. (Fig. 3-2)
(g) Remove cruise control 2P connector from
spiral cable. (Fig. 3-3)
Note: Step 3. (g) does not apply if the
vehicle does not have cruise control.
Connector for Spiral Cable
Fig. 3-2
Harness for Horn
Remove
2P
Connector
from Spiral
Cable
Fig. 3-3
Issue: B
04/18/07
Page 3 of 12 pages
DIO only
SCION
xD/xB
2008-
LEATHER STEERING WHEEL
Procedure
4. Remove Steering Wheel Assembly.
(a) Make sure the steering wheel is centered and
the front wheels are in the straight-ahead
position.
Spinner Handle, Extension, Socket (19 mm)
Mounting Nut
(b) Remove the steering wheel mounting nut and
retain. (Fig. 4-1)
(c) Apply grease to the tip of the center bolt
(09953-05020) of special tool.
NOTE: Must use the special tools to prevent
potential damage.
Fig. 4-1
Puller C set (P/N 09950-50013)
Wrench (19 mm) Adjustable Spanner
Adjustable Spanner
(d) Using the special tool, remove the steering
wheel assembly. (Fig. 4-2)
Wrench (19 mm)
Fig. 4-2
5. Remove Cruise Control Switch.
(If equipped)
Phillips Screwdriver
(a) Disconnect 2P connector of the cruise
control switch.
Screws x2
Removing Direction
Cruise Control Switch
Fig. 5-1
Issue: B
3P Connector
04/18/07
(b) Loosen the two screws and remove the
cruise control switch, following the direction
indicated by the arrow in the figure.
(Fig. 5-1).
(1) Use caution not to scratch the design face
with the stalk of the switch when
removing it.
Page 4 of 12 pages
DIO only
SCION
xD/xB
2008-
LEATHER STEERING WHEEL
Procedure
6. Remove Lower Cover.
(a) Loosen and remove the two tapping screws
and unsnap two tabs to remove the lower
cover. (Fig. 6-1)
Phillips Screwdriver
Screw
Screw
Tabs x2
(1) Be sure not to damage the lower cover
when removing the parts by unsnapping
the tabs.
Lower Cover
Fig. 6-1
7. Remove Steering Switch Assembly.
(If equipped)
Phillips Screwdriver,
Small Flathead Screwdriver
Screws x2
:Clips x2
Urethane
(a) Remove the two screws, two clips and four
tabs, and remove the steering switch
assembly. (Fig. 7-1)
(1) Be sure not to damage the tabs when
disengaging them.
Backside View
Clips x2
Fig. 7-1
Steering Switch
Assembly
:Tabs x2
Small
Flathead
Screwdriver
8. Install Steering Switch Assembly.
(If equipped)
Phillips Screwdriver,
Torque Wrench
Screws x2
:Clips x2
Urethane
(a) Engage the two clips and four tabs on the
steering switch assembly, and fix it in place
with the two screws. (Fig. 8-1)
(1) Tighten screws to 1.7 N-m (15.6 lbf-in)
Clips x2
Fig. 8-1
Issue: B
Steering Switch
Assembly
04/18/07
(2) All removed parts other than the steering
wheel are used again when installing the
leather steering wheel assembly.
(3) Before reusing the removed parts
(including nuts and bolts), check that
there are no problems with them.
Page 5 of 12 pages
DIO only
SCION
xD/xB
2008-
LEATHER STEERING WHEEL
Procedure
9. Install Lower Cover to Leather Steering
Wheel.
Phillips Screwdriver, Torque Wrench
Screw
Setting of
Torx Bolts
(a) Set the two Torx bolts on the lower cover.
(Fig. 9-1).
(b) Fix the lower cover to the leather steering
wheel assembly with the two tapping screws.
Screw
Tabs x2
(1) Tighten screws to 0.8 N-m (7.2 lbf-in)
(2) Be sure not damage the lower cover
when installing the parts by opening the
tabs.
Lower Cover
Side Tabs
Fig. 9-1
10. Install Cruise Control Switch.
(If equipped)
(a) Install the cruise control switch, following
the arrow and fix it with the two screws.
(Fig. 10-1).
Phillips Screwdriver, Torque Wrench
Lower Cover
Hook
Fig. 10-1-1
(1) Tighten screws to 1.7 N-m (15.6 lbf-in)
Screws x2
(b) Connect 2P connector of the cruise control.
(If equipped)
(c) Fix the steering switch assembly harnesses
to each lower cover hook. (Fig. 10-1-1 and
10-1-2)
Installing
Direction
Cruise Control Switch
3P Connector
Lower Cover Hook
Lower Cover Hook
(2) Make sure that harness of the cruise
control switch assembly does not
interfere with moving section or is not
caught in the section.
Fig. 10-1-2
Fig. 10-1
Issue: B
(1) Be cautious not to scratch the design face
with the the stalk of the switch when
installing it.
04/18/07
Page 6 of 12 pages
DIO only
SCION
xD/xB
2008-
LEATHER STEERING WHEEL
Procedure
11. Center Spiral Cable.
(a) Confirm that the front wheels are straight.
(b) Carefully turn the spiral cable
counterclockwise all the way until it will no
longer turn. (Fig. 11-1)
Fig. 11-1
(c) From there, turn back the spiral cable 2.5turns clockwise and get the center marks
aligned as shown in the diagram. (Fig. 11-2)
Fig. 11-2
Issue: B
04/18/07
Center Marks
Page 7 of 12 pages
DIO only
SCION
xD/xB
2008-
LEATHER STEERING WHEEL
Procedure
12. Install Leather Bound Steering Wheel
Assembly.
NOTE: Install and hand tighten the mounting nut,
and then turn the steering wheel left or right until it
is locked. Unlock the steering wheel lock after this
operation.
Extension, Socket (19 mm),
Torque Wrench
2P Connectors for
Air Bag
(a) Holding the leather bound steering wheel
assembly horizontally in T form, assemble
the steering wheel assembly onto the
steering column shaft. (Fig. 12-1)
(1) Ensure that the marked lines
(Step 1. A. iii.) on the masking tape are
lined up.
Mounting Nut
Fig. 12-1
(b) Fasten the leather bound steering wheel
assembly to the steering column shaft with
the previously removed nut.
(1) Tighten nut to 50.0 N-m (37 lbf-ft)
Issue: B
04/18/07
Page 8 of 12 pages
DIO only
SCION
xD/xB
2008-
LEATHER STEERING WHEEL
Procedure
13. Install Steering Pad Assembly.
Push in
until it locks
(a) Mount the connectors for airbag on the back
of steering pad assembly, fasten the lock and
fix in position. (Fig. 13-1)
(b) Connect the horn wire/connector to the
steering pad assembly.
2P
(c) Reconnect connector to spiral cable.
(d) Reconnect cruise control 2P connector to
spiral cable.
2P
Connectors
(e) Mount the steering pad assembly on the
leather bound steering wheel assembly.
Connector for Spiral Cable
Fig. 13-1
Harness for
(f) Fix the steering pad assembly on the leather
bound steering wheel assembly by tightening
the two Torx bolts. (Fig. 13-2)
(1) Tighten bolts to 8.8 N-m (78 lbf-in)
14. Reconnect Negative Battery Cable.
(a) Reconnect the vehicle's negative battery
cable.
Fig 13-2
Torque Wrench, 10 mm Socket
Negative
Battery
Cable
Issue: B
04/18/07
(1) Position the negative terminal at an angle
of ~90˚ to the battery as shown.
(Fig. 14-1)
(2) Tighten the nut to 4.1 N-m (36 lbf-in).
90˚
Fig. 14-1
Battery
(3) Do not touch the positive terminal with
any tool when replacing the cable.
Battery
Page 9 of 12 pages
DIO only
SCION
xD/xB
2008-
LEATHER STEERING WHEEL
Procedure
15. Adjust Steering Wheel Angle.
(a) Perform a driving test.
(b) Inspect steering wheel off center.
(1) Drive the vehicle in a straight line for
100 meters at a constant speed of 35 mph
(56 km/h), and hold the steering wheel to
maintain the course.
(2) Turn the steering wheel to its straight
ahead position.
Steering Column (Upper Cover)
Steering Wheel (Lower Cover)
Should be “0”
(3) Draw a new line on the masking tape of
the steering wheel as shown in the
illustration. (Fig. 15-1)
(4) Measure the distance between the two
(2) lines on the masking tape of the
steering wheel. This distance should be
“0”.
(5) Convert the measured distance to
steering angle.
Measured distance 1 mm (0.04 in.) =
Steering angle approximately 1 deg.
Fig. 15-1
NOTE: Note the steering wheel angle.
(c) If angle deviates from the centerline
position, adjust angle using the following
procedure.
(d) Draw line on the RH and LH tie rods and
rack ends where it can easily be seen.
(Fig. 15-2)
(e) Use a paper gauge, measure distance from
RH and LH tie rod ends to rack end screw
thread. Note the measured values.
Marked Line
Fig. 15-2
Issue: B
04/18/07
Page 10 of 12 pages
DIO only
SCION
xD/xB
2008-
LEATHER STEERING WHEEL
Procedure
(f) Remove the RH and LH boot clips from the
rack boots. (Fig. 15-3)
(g) Loosen the RH and LH lock nuts.
(h) Turn the RH and LH rack and by the same
amount (but in different directions)
according to the steering wheel angle.
Fig. 15-3
NOTE: One (1) turn 360 deg. of rack end (1.5 mm
(0.059 in.) horizontal movement) = 12 deg. of
steering angle.
(i) Tighten the RH and LH lock nuts.
(1) Make sure that the difference in length
between RH and LH tie rod ends and
rack end screws are within 1.5 mm
(0.059 in.).
(2) Tighten lock nuts to 47.0 N-m (35 lbf-ft).
(j) Re-install the RH and LH boot clips.
Issue: B
04/18/07
Page 11 of 12 pages
DIO only
SCION
xD/xB
2008-
LEATHER STEERING WHEEL
Checklist - these points MUST be checked to ensure a quality installation.
Check:
Look For:
Negative battery terminal for tightness
Terminal should be tight.
Horn
Verify that the horn works.
SRS warning light - turn ignition key ON
Verify that SRS warning light comes ON
and then goes OFF (after ~ 5 to 6 seconds).
If SRS Warning Light remains on or
flashes, or does not illuminate at all - take
corrective measures as required in
accordance with the service manual
troubleshooting chart.
Verify that the switch functions correctly.
Cruise control switch
If switch does not function correctly,
troubleshoot as required in accordance with
the service repair manual.
Steering wheel angle
Steering wheel is straight.
Steering switch assembly functions
Verify that the switch functions correctly.
If switch does not function correctly,
troubleshoot as required in accordance with
the service repair manual.
Owner’s Manual
Issue: B
04/18/07
Make sure it’s in the glove box
Page 12 of 12 pages
DIO only