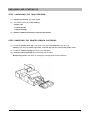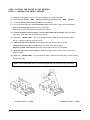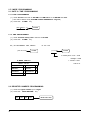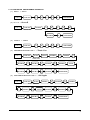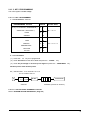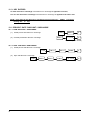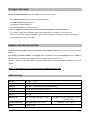
1
ER-51XX
ELECTRONIC CASH REGISTER
Programming &
Operating Manual
WITH EURO CONVERSION OPTIONS
All specifications are subject to change without notice.
UNPACKING AND STARTING UP
STEP 1 UNPACKING THE CASH REGISTER
( 1 ) Unpack and unwrap your cash register.
( 2 ) The following items are in the packing.
- 2 paper rolls
- 1 rewind spindle
- 1 ribbon cartridge
( 3 ) Remove cardboard protectors from the cash drawer.
STEP 2 INSERTING THE PRINTER RIBBON CARTRIDGE
( 1 ) Locate the printer cover key. The printer cover key is the smallest on the key ring.
Insert this key into the printer cover lock. Turn the key and then remove the printer cover.
( 2 ) Locate the ribbon cartridge as shown in the illustration.
( 3 ) Insert the ribbon cartridge and press firmly into the place.
Remove any slack in the ribbon by rotating the cartridge knob counter-clockwise.
1
STEP 3 PUTTING THE PAPER IN THE PRINTER
STEP 3.1 LOADING THE DETAIL PRINTER
( 1 ) Plug the cash register’s power cord into the properly grounded wall socket.
( 2 ) Place the key marked ‘ REG’
into the control lock and turn to the “ REG”
position.
( 3 ) Locate the black plastic rewind spindle in the Styrofoam.
( 4 ) As you face the keyboard, notice two plastic trays at the bottom of the printer compartment.
Place one of the paper rolls into the tray on the right.
Make sure the paper will unwind from the bottom of the roll.
( 5 ) Fold back about 6 inches of paper and insert the folded end of the tape into the feed slot
just in front of the paper tray at the rear of the printer.
( 6 ) Press the “ DETAIL FEED”
key on the keyboard until the edge has fed through the printer.
Run 6 ~ 8 inches of paper through the printer.
( 7 ) Hold the black rewind spindle with the gear to the right and the shaft to the left.
Insert the end of the paper into the slot on the shaft of the rewind spindle.
Wind the spindle several times to be sure that the paper will stay on the spindle.
( 8 ) Slide the axle of the rewind spindle ( between the gear and the shaft ) into the notch of the
printer housing.
( 9 ) Press the “ DETAIL FEED”
key several times again to make sure that the paper moves properly
through the printer.
NOTE : The socket-outlet shall be near the equipment and it shall be easy accessible.
* LOADING DETAIL PAPER *
2
* LOADING RECEIPT PAPER *
< THE FABRICATION OF REWIND SPINDLE >
( 1 ) Locate the black plastic rewind spindle ( A ) in the Styrofoam.
( 2 ) Locate the black plastic rewind spindle ( B ) in the manual bag.
( 3 ) Fabricate the black plastic rewind spindle ( A ) and ( B ) as shown in the illustration.
STEP 3.2 LOADING THE RECEIPT PRINTER
( 1 ) Place the other paper rolls into the small tray on the left.
Make sure the paper will unwind from the bottom of the roll.
( 2 ) Fold back about 6 inches of paper and insert the folded end of the tape into the feed slot
just in front of the paper tray at the rear of the printer.
( 3 ) Press the “ RECEIPT FEED”
key on the keyboard until the paper comes through the printer.
Run 3 ~ 4 inches of paper through the printer.
( 4 ) Replace the printer cover and make sure that the receipt paper comes out through the
opening in the printer cover.
NOTE : Do not pull the paper back through the printer as this may damage it.
PRINTER
CORRECT
PRINTER
INCORRECT
3
STEP 4 CLEARING THE RAM ( RANDOM ACCESS MEMORY )
( 1 ) Unplug the cash register.
( 2 ) Locate the control lock key marked ‘ C’ .
( 3 ) Insert the key into the control lock and turn clockwise , past the “ P”
to the “ SERVICE MODE”
position
position.
This position is not marked on the control lock, but the ‘C’ key can travel to this position.
( 4 ) Hold down the “ 00”
key on the keyboard.
While holding the “ 00”
key down, plug the cash register’s power cord into properly grounded
wall socket.
Continue to hold the “ 00”
key down until the receipt printer stops printing and the display
shows 0.00.
!! The cash register is now ready to operate. !!
WARNING : Clearing the RAM is essential before you program the cash register for the first time.
However once the cash register is programmed and operated,
clearing the RAM will cause all programs and totals to be lost.
WARNING : Do not open the printer cover while operating the cash register.
Do not operate the cash register without the ribbon cartridge.
NOTE : When you firstly configure the cash register, it is recommended that the register
remains powered on in the “ REG”
mode for at least 24 hours.
This allows the Ni-Cad battery, which maintains the memory of the machine
while the power is off, to charge completely.
4
TABLE OF CONTENTS
UNPACKING AND STARTING UP ................................................................................................
1
FEATURES ......................................................................................................................................
9
KEYBOARD LAYOUT .....................................................................................................................
10
1 ER-5115 KEYBOARD LAYOUT .................................................................................................
10
2 ER-5140 KEYBOARD LAYOUT .................................................................................................
11
FUNCTION KEY DESCRIPTION ...................................................................................................
12
CONTROL LOCK ............................................................................................................................
14
CONTROL KEYS ............................................................................................................................
14
DISPLAY ..........................................................................................................................................
15
DISPLAY SYMBOLS ......................................................................................................................
15
PROGRAMMING NOTE ................................................................................................................
17
1 SERVICE MODE PROGRAMMING .........................................................................................
17
1.1 RAM CLEARING ................................................................................................................
17
1.1.1 INITIAL CLEAR ...............................................................................................................
17
1.1.2 CLEARING TOTALS FROM MEMORY ...............................................................................
18
1.2 SETTING THE NUMBER OF DEPARTMENTS ...............................................................
19
2 P MODE PROGRAMMING ......................................................................................................
20
2.1 DATE & TIME PROGRAMMING ........................................................................................
20
2.1.1 DATE PROGRAMMING ...................................................................................................
20
2.1.2 TIME PROGRAMMING ....................................................................................................
20
2.2 REGISTER NUMBER PROGRAMMING ...........................................................................
20
2.3 TAX PROGRAMMING .......................................................................................................
21
2.4 VAT RATE PROGRAMMING ............................................................................................
21
2.5 CLERK SECRET CODE & DRAWER ASSIGNMENT PROGRAMMING ............................
22
2.6 SYSTEM OPTION PROGRAMMING ................................................................................
23
2.7 DESCRIPTOR PROGRAMMING .......................................................................................
29
2.7.1 PROGRAMMING .......................................................................................................................
29
2.7.2 DESCRIPTOR PROGRAMMING EXAMPLES ......................................................................
30
2.7.3 DESCRIPTOR PROGRAMMING SCAN ..............................................................................
31
2.8 DEPARTMENT PROGRAMMING .......................................................................................
32
2.8.1 DEPARTMENT STATUS PROGRAMMING ..........................................................................
33
2.8.2 DEPARTMENT PRICE OR HALO PROGRAMMING .............................................................
33
2.8.3 DEPARTMENT PROGRAMMING EXAMPLES .....................................................................
35
2.8.4 DEPARTMENT PROGRAMMING SCAN .............................................................................
36
2.9 PLU PROGRAMMING ........................................................................................................
37
2.9.1 PLU PROGRAMMING .......................................................................................................
38
5
2.9.2 PLU PROGRAMMING EXAMPLES .....................................................................................
39
2.9.3 PLU PROGRAMMING SCAN .............................................................................................
40
2.9.4 PLU LINK PROGRAMMING ...............................................................................................
41
2.9.5 REMOVING OR DELETING A PLU .....................................................................................
41
2.10 % KEY PROGRAMMING ...................................................................................................
42
2.10.1 % KEY PROGRAMMING ..................................................................................................
42
2.10.2 % CALCULATION ROUNDING FACTOR ...........................................................................
42
2.11 CASH/TEND KEY PROGRAMMING .................................................................................
43
2.12 CHEQUE KEY PROGRAMMING .......................................................................................
43
2.13 CHARGE KEY PROGRAMMING ......................................................................................
43
2.14 PRESET CASH KEY PROGRAMMING ............................................................................
43
2.15 CASH IN DRAWER LIMIT PROGRAMMING ....................................................................
43
2.16 CURRENCY CONVERSION KEY PROGRAMMING .........................................................
44
2.17 EUROPEAN ROUNDING PROGRAMING ........................................................................
44
2.18 PARAMETERS PROGRAM SCAN ...................................................................................
45
OPERATING NOTE ........................................................................................................................
46
1 CLERK SIGN ON ......................................................................................................................
46
1.1 IN CASE OF 4 CLERKS ( SYSTEM OPTION 28’s VALUE ‘C’ = 0 ) .....................................
47
1.1.1 PUSH BUTTON SIGN ON ..................................................................................................
46
1.1.2 SECRET CODE SIGN ON ..................................................................................................
46
1.2 IN CASE OF 15 CLERKS ( SYSTEM OPTION 28’s VALUE ‘C’ = 4 ) ...................................
46
1.2.1 PUSH BUTTON SIGN ON ..................................................................................................
47
1.2.2 SECRET CODE SIGN ON ..................................................................................................
47
2 CLERK SIGN OFF ....................................................................................................................
47
2.1 IN CASE OF 4 CLERKS ( SYSTEM OPTION 28’s VALUE ‘C’ = 0 ) ....................................
47
2.2 IN CASE OF 15 CLERKS ( SYSTEM OPTION 28’s VALUE ‘C’ = 4 ) ..................................
47
3 REAL CLERK KEY ENTRY .......................................................................................................
47
4 CLEARING AN ERROR CONDITION .......................................................................................
47
5 NO SALE OPERATION ............................................................................................................
48
6 NON-ADD NUMBER ENTRIES .................................................................................................
48
7 PRICE INQUIRY OPERATION .................................................................................................
48
8 DEPARTMENT ENTRIES .........................................................................................................
49
8.1 OPEN DEPARTMENT ENTRIES ........................................................................................
49
8.2 PRESET DEPARTMENT ENTRIES ....................................................................................
50
8.3 GALLONAGE DEPARTMENT ENTRIES ............................................................................
51
9 PLU ( PRICE LOOK UP ) ENTRIES ..........................................................................................
51
9.1 OPEN PLU ENTRIES .........................................................................................................
51
9.2 PRESET PLU ENTRIES .....................................................................................................
53
6
9.3 PLU TO PLU CHAIN OPERATION .....................................................................................
54
9.4 PLU ENTRIES BY CODE ...................................................................................................
54
10 SINGLE ITEM DEPARTMENT OR PLU ENTRIES ..................................................................
55
10.1 SINGLE ITEM PRESET ENTRIES ....................................................................................
55
10.2 SINGLE ITEM OVERRIDE ENTRIES ...............................................................................
55
11 COMPUTATION OF VAT ( Value Added Tax ) ..........................................................................
55
11.1 INCLUSIVE VAT SYSTEM ...............................................................................................
55
11.2 EXCLUSIVE VAT SYSTEM ..............................................................................................
56
12 % KEY ENTRIES ....................................................................................................................
57
12.1 PERCENT RATE DISCOUNT / SURCHARGE ..................................................................
57
12.1.1 ITEM DISCOUNT / SURCHARGE .....................................................................................
58
12.1.2 SALE DISCOUNT / SURCHARGE ....................................................................................
58
12.2 AMOUNT DISCOUNT / SURCHARGE .............................................................................
58
12.2.1 ITEM DISCOUNT / SURCHARGE ....................................................................................
58
12.2.2 SALE DISCOUNT / SURCHARGE ....................................................................................
58
13 MERCHANDISE RETURN OPERATION .................................................................................
59
14 VOID OPERATION .................................................................................................................
59
14.1 VOID OF A LAST ITEM ENTRY ( ERROR CORRECT ) ...................................................
59
14.2 VOID OF A PREVIOUS ITEM ENTRY ..............................................................................
59
14.3 VOID OUTSIDE OF A SALE .............................................................................................
60
14.4 CANCEL ( VOID 4 ) .............................................................................................................
60
15 ADD CHECK OPERATION .....................................................................................................
61
16 TENDERING OPERATION .....................................................................................................
61
16.1 CASH TENDERING ..........................................................................................................
61
16,2 PRESET CASH TENDERING ...........................................................................................
62
16.3 CHEQUE TENDERING .....................................................................................................
62
16.4 CHARGE TENDERING ....................................................................................................
62
16.5 SPLIT TENDERING ..........................................................................................................
63
16.6 TENDERING WITH CURRENCY CONVERSION .............................................................
64
16.7 POST TENDERING ..........................................................................................................
64
17 CHEQUE CASHING ................................................................................................................
65
18 RECEIVED ON ACCOUNT OPERATION ...............................................................................
66
19 PAID OUT OPERATION .........................................................................................................
66
20 TABLE MANAGEMENT ..........................................................................................................
67
20.1 TRANSACTION ................................................................................................................
67
20.2 CONSOLIDATED RECEIPT PRINTING ............................................................................
67
21 CASHIER OVERLAP ..............................................................................................................
69
21.1 TRANSACTION .................................................................................................................
69
7
21.2 CONSOLIDATED RECE IPT PRINTING ............................................................................
69
22 PRINTING A BUFFERED RECEIPT OPERATION ..................................................................
71
23 VALIDATION OPERATION .....................................................................................................
72
24 RECEIPT MESSAGE PRINTING OPERATION .......................................................................
73
24.1 PREAMBLE MESSAGE ....................................................................................................
73
24.2 POSTAMBLE MESSAGE .................................................................................................
73
25 TRAIN MODE .........................................................................................................................
74
REPORT AND BALANCING .........................................................................................................
75
1 REPORT MODES .....................................................................................................................
76
2 CASH DECLARATION ..............................................................................................................
76
3 REPORTS ................................................................................................................................
77
3.1 OPEN TABLE ( OR OPEN CLERK ) REPORT .................................................................…
77
3.2 FINANCIAL REPORT .......................................................................................................…
78
3.3 TIME REPORT .................................................................................................................…
79
3.4 PLU REPORT .....................................................................................................................
80
3.5 FROM / TO PLU REPORT ...............................................................................................…
80
3.6 IN-DRAWER REPORT .....................................................................................................…
81
3.7 DAILY SALES REPORT ...................................................................................................…
81
3.8 INDIVIDUAL CLERK REPORT .........................................................................................…
82
3.9 FROM / TO DEPARTMENT REPORT ..............................................................................…
83
3.10 DEPT REPORT ..........................................................................................................…….
83
TROUBLE SHOOTING ...................................................................................................................
84
MEMORY PROTECTION BATTERY ............................................................................................
84
SPECIFICATIO N .............................................................................................................................
84
APPENDIX .......................................................................................................................................
84
1 CHARACTER TABLE CODE .....................................................................................................
85
2 ALPHA-NUMERIC KEYBOARD LAYOUT ..................................................................................
86
2.1 ER-5115 ALPHA-NUMERIC KEYBOARD LAYOUT ............................................................
86
2.2
ER-5140 ALPHA-NUMERIC KEYBOARD LAYOUT ............................................................
3 COMMUNICATION INTERFACE ...............................................................................................
88
3.1 PIN DESCRIPTION FOR SERIAL INTERFACE .................................................................
88
3.2 CABLE SPECIFICATION .....................................................................................................
88
4 COMMUNICATION WITH PC ...................................................................................................
5 PRINTING ON THE ROLL PRINTER ........................................................................................
8
87
89
89
6 SCALE ......................................................................................................................................
90
6.1 DIRECT SCALE ENTRY .....................................................................................................
90
6.2 MANUAL WEIGHT ENTRY .................................................................................................
90
FEATURES
* Two-station printer with one-line validation capability.
* Front and rear ( pop-up ) displays.
* 6-position control locks.
* 24 hour time clock with automatic date change.
* 15 departments ( ER-5115 ) / 40 departments ( ER-5140 ).
* 1000 open or preset PLUs.
* 4 push-button clerks and 15 soft clerks with separate report totals.
* 4 VAT or straight percentage TAX.
* CANCEL function.
* Post tendering.
* Preset cash tendering.
* Table management / Cashier overlap
* Management reports.
- Daily and period-to-date financial, time, PLU and clerk report.
- Daily sales report.
- Open table ( or Open clerk ) report.
- Optional compulsory cash declaration.
* Train mode.
* Cash drawer compulsory.
* Receipt on/off function.
* Communication
- Download the programming contents from PC, Upload the programming contents and reports to PC.
- Slip printer
- Kitchen printer
- Scale
* Euro Currency Conversion (Curr Conv1) + (Curr Conv2)
9
KEYBOARD LAYOUT
1 ER-5115 KEYBOARD LAYOUT
RECEIPT
DETAIL
RECEIPT
FEED
FEED
ON/OFF
VOID
CHECK
CLEAR
RECEIPT
#/NS
VALID
PLU
TAX
5
7
8
4
CONV
4
5
CONV
INQ.
2
%1
%2
3
1
2
00
1
2
3
4
RECD
PAID
ACCT
OUT
ADD
CHARGE
CHECK
1
CHECK
CHARGE
TENDER
2
CHEQUE
SUBTL
10
15
9
14
8
13
3
2
0
CLERK
6
1
PRICE
CLERK
9
RETURN
CANCEL
CLERK
X/TIME
#
MDSE
CLERK
7
12
CASH/TEND
.
1
6
11
Important Note: ER5115 only.
PRESET
The keyboard design for the Cash/Tend & Subtotal keys has
CASH
changed with the new Euro Eprom.
The above style is the new keyboard for the Euro Eprom.
Pre-Euro keyboards will have the design shown on right.
10
SUBTL
CASH/
TEND
2 ER-5140 KEYBOARD LAYOUT
RECEIPT
DETAIL
RECEIPT
FEED
FEED
ON/OFF
VOID
CHECK
#
MDSE
ADD
RETUR
CHECK
CANCEL
CONV
1
PRICE
CONV
INQ.
2
%1
%2
RECEIPT
CLEAR
VALID
#/NS
TAX
PLU
RECD
PAID
CLERK
CLERK
CLERK
CLERK
ACCT
OUT
1
2
3
4
CHECK
CHARGE
TENDR
1
PRESET
CHARGE
CASH
2
X/time
5
7
8
9
4
5
6
1
2
3
0
00
.
4
10
9
15
14
20
19
25
24
30
29
35
34
40
39
PRESET
3
8
13
18
23
28
33
38
2
7
12
17
22
27
32
37
1
6
11
16
21
26
31
36
CASH
CHEQUE
SUBTOTAL
CASH/TEND
11
FUNCTION KEY DESCRIPTION
KEY
DESCRIPTION
1, 2 ... 9, 0, 00
Use these numeric keys for all numeric entries on the cash register.
ADD CHECK
Use this key to combine individual guest checks that will be tendered together.
CANCEL
Use this key to cancel the present incomplete transactions without updating the
departments, PLUs or function key totals.
CASH/TEND
Use this key to finalize a sale paid with cash. Enter the amount tendered before
pressing the “CASH/TEND” key for change calculation.
CHARGE 1, 2
Use these keys to finalize a sale paid with a charge account.
CHECK #
Use this key to specify the table number on table management.
CHECK TENDER
Use this key to tender a table as open status.
CHEQUE
Use this key to finalize a sale that is paid by cheque.
CLEAR
Use this key to clear the incorrect entries made on the 10 numeric keys
and error conditions.
CLERK 1, 2, 3, 4
Use these four keys to log on clerks for operation and reports.
A clerk must be logged on before the cash register will operate.
CONV 1, 2
Use these keys to convert a home currency to the equivalent of another country’ s
currency.
These keys are allowed after the “SUBTOTAL” key, convert and re-display the
subtotal at a preprogrammed exchange rate. Tendering is allowed after using the
currency conversion function. The change amount is calculated in home currency.
The amount of foreign currency tendered is stored in a separated total on the
financial report, but not added to the drawer total.
DECIMAL ( . )
Use this key for decimal multiplication.
DEPARTMENTS
Use these keys to make entries during a sale.
DETAIL FEED
Press this key to advance the detail tape.
MDSE RETURN
Use this key to return merchandise outside of a sale.
MDSE RETURN activity reports to a total on the financial report.
#/NS
Use this key to open the cash drawer outside of a sale or to enter numbers that
appear on the receipt and detail tapes but do not affect the sale total.
% 1, % 2
Use these keys to register discount and surcharge.
Depending on programming, these keys can be used to register percent or amount
and added to an item or entire sale.
PLU
Use this key to register a Price Look Up ( PLU ).
12
KEY
DESCRIPTION
PAID OUT
Use this key to register media removed from the cash drawer. ( = Paid Out )
PRESET CASH
Use this key to finalize a sale paid with cash.
These keys are preset amount cash tendering keys which have programmable
values. By pressing this key at the end of a transaction, the preset amount is
automatically tendered and the sale is finalized as a cash transaction.
PRICE INQ.
Use this key to know a HALO or preset amount of a department or PLU.
( = Price Inquiry )
RECD ACCT
Use this key to register cash and cheque added to the cash drawer.
( = Received Account )
RECEIPT
Use this key to issue the buffered receipt.
RECEIPT FEED
Press this key to advance the customer’s receipt tape.
RECEIPT ON/OFF
Use this key to turn the receipt printer on or off. When the ‘RECEIPT OFF’ sign is
illuminated on the display panel, the receipt printer will be turned off.
SUBTL
Use this key to display a subtotal. ( = SUBTOTAL )
TAX
Use this key to breakdown the amount due including value added tax
or to shift the tax status of a particular department or PLU.
VALID
Use this key to print one line validation on a check or slip.
VOID
Use this key to correct entries before a sale is finalized.
X/TIME
Use this key for multiplication, split pricing and triple multiplication.
13
CONTROL LOCK
POSITION
USE
VOID
Void outside of a sale.
OFF
The cash register will not operate.
REG
All normal operations.
X
To issue X level reports.
Also used for manager control of voids & merchandise return.
Z
To issue Z level reports.
To reset totals to zero.
P
To program the ECR ( Electronic Cash Register )
CONTROL KEYS
OFF
VOID
REG
X
‘ REG’
key : “ OFF”
~ “ REG”
‘ VD’
key : “ VOID”
~ “ X”
‘ Z’
key : “ VOID”
~ “ Z”
‘ P’
key : “ VOID”
~ “ P”
Z
P
SERVICE MODE
14
‘ C’
key : All position
DISPLAY
This cash register has a front ( or operator ) display and a pop up display.
The front display has a indicator lights. These lights provide only the operator with information about the
operation of the cash register.
DPT
RPT
AMOUNT
RCPT VOID SHIFT VALID
CLERK
OFF
DISPLAY SYMBOLS
SYMBOL
CONTENTS
C
Indicates that the amount displayed is a due as change.
=
Indicates that the amount displayed is a total.
-
Indicates that the amount displayed is negative.
This symbol shows directly in front of negative amount.
S
Indicates that the amount displayed is a subtotal.
F
Indicates that a table on table management or a clerk on cashier overlap is
temporarily finalized as open status.
SP
Indicates that validation is required.
PP
Indicates paper jam.
Please turn the power off and remove the paper in the printer,
turn the power on again.
PE
Indicates paper ending.
Please remove the printer cover and replace the paper.
And press the “CLEAR” key to print continually.
CL
Indicates that a clerk must be signed on for operating in the ‘X’ or ‘Z’ mode.
SE
Indicates that the maximum slip lines is reached.
Please insert the new slip into the slip printer and press the “ CHECK
TENDER”
15
key.
SYMBOL
E1
CONTENTS
Indicates an error condition.
Press the “ CLEAR”
key to clear this condition.
E2
Indicates that the cash drawer must be closed.
E4
Indicates that NON-ADD NUMBER should be entered.
E5
Indicates that the ADD CHECK operation must be performed.
E6
Indicates that the cash declaration operation must be performed.
E8
Indicates that now a table is open.
E9
Indicates that all the open tables or clerks must be finalized.
E 10
Indicates that the sale data is too big.
Please issue all Z report. ( ‘100’ – ‘SUBTL’ in Z mode )
E 11
Indicates that the scale runtime over.
E 12
Indicates that the scale is not measurable things on the scale.
E 13
Indicates that the open drawer warning tone sounds by the open drawer alarm.
Please close the cash drawer.
E 14
Indicates that the slip printer is disconnected.
Please check if the slip printer is connective.
NO PAP
Indicates that the paper run out on the EPSON TM-290 ? .
Please insert the paper to the slip printer and press the “ CLEAR”
SYMBOL
16
key.
CONTENTS ( related to CHECKLINE EFT terminal )
E 15
General error like disconnection, timeout and so on.
E 16
ZERO amount
E 17
Call card issuer
E 18
Prevalid date
E 19
Expiry date
E 20
No payee
E 21
No store
E 22
Card rejected
E 23
Over floor limit
E 24
Over trans limit
E 25
Illegal card use
E 26
Sensor problem
E 27
Signature reject
E 28
Function aborted
PROGRAMMING NOTE
This ECR ( Electronic Cash Register ) ‘s programming is easy.
In this manual, the programming steps are explained with flow chart boxes.
Each box represents a key on the keyboard.
The flow chart shows each key stroke you need to complete the programming.
Enter the keys in the flow chart from left to right.
DEFAULT PROGRAM : This machine arrives with a default or “ generic”
program already installed.
Program options are set to 0(zero), unless otherwise noted, which means
the machine is operational right out-of-the-box.
1 SERVICE MODE PROGRAMMING
Service mode programming is the initial programming that is required when the register is new “out-of-thebox”.
Service mode programming is also used to return the register to this condition.
1.1 RAM CLEARING
1.1.1 INITIAL CLEAR
Keyboard lock-ups and constant error conditions may be cleared by the following procedure.
This procedure will not effect register programming, or clear previously stored totals in RAM memory.
( 1 ) Turn the keylock to the ‘ P’
position and press the “ SUBTL”
( 2 ) While holding the “ SUBTL”
key down, power the register off, and back on.
Continue to hold the “ SUBTL”
key down until the receipt printer stops printing and the
key.
display shows 0.00.
* INITIAL CLEAR *
17
1.1.2 CLEARING TOTALS FROM MEMORY
A. ALL MEMORY RAM CLEAR
All programming and totals are cleared.
Use this procedure the first time when the cash register is programmed.
B. RESET ALL TOTALS & COUNTERS
All totals and counters are cleared. ( Consecutive NO. , Z-Counter, Grand total )
This procedure will not effect register programming.
C. RESET GRAND TOTAL ONLY
The Grand total is only cleared.
( 1 ) Unplug the cash register.
( 2 ) Insert lock key marked ‘ C’
into the control lock and turn clockwise, past the position marked
‘ P’ , to the ‘ SERVICE MODE’
( Master Clear position ). This position is not marked on the
control lock, but the ‘C’ key will travel to this position.
( 3 ) Choose the desired operation from those listed below.
While holding the SPECIFIED key down, plug-in the cash register.
Continue to hold the specified key down until the receipt printer stops printing and the
display shows 0.00.
KEY
00
CHEQUE
CASH/TEND
TYPE
ALL MEMORY RAM CLEAR
RESET ALL TOTALS & COUNTERS
RESET GRAND TOTAL ONLY
* ALL MEMORY RAM CLEAR *
18
* RESET ALL TOTALS & COUNTERS *
* RESET GRAND TOTAL ONLY *
1.2 SETTING THE NUMBER OF DEPARTMENTS
(XX)
X/TIME
CASH/TEND
ER-5115 : 0 = 15 Departments
ER-5140 : 0 = 40 Departments
5 = 5 Departments
20 = 20 Departments
10 = 10 Departments
EX ) If you want to program 5 departments system.
5
X/TIME
CASH/TEND
NOTE : In order to reprogram the number of departments available, firstly the register should be
RAM
cleared
and
then
all
programming
must
be
re-entered.
19
2 P MODE PROGRAMMING
2.1 DATE & TIME PROGRAMMING
2.1.1 DATE PROGRAMMING
( 1 ) Enter the date in the form of DD MM YY or MM DD YY or YY MM DD and week.
( The order of date is set by SYSTEM OPTION ADDRESS 25 : Page 25 )
( 2 ) Press the “ X/TIME”
key.
(XXXXXX Y)
Date
X/TIME
Week
2.1.2 TIME PROGRAMMING
( 1 ) Enter standard military time in the form of HH MM.
( 2 ) Press the “ X/TIME”
key.
EX ) 25 DECEMBER 1998, FRIDAY
( 2 5 12 9 8 5 )
12 : 00 noon
(1200)
X/TIME
X/TIME
In military time noon = 1200
midnight = 0000
# WEEK TABLE #
1 : 30 PM = 1330
WEEK VALUE :
and so on.
SUNDAY
0 THURSDAY
4
MONDAY
1 FRIDAY
5
TUESDAY
2 SATURDAY
6
WEDNESDAY
3
2.2 REGISTER NUMBER PROGRAMMING
( 1 ) Enter the register number up to 4 digits.
( 2 ) Press the “ MDSE RETURN”
D1
20
D2
D3
D4
key.
MDSE RETURN
2.3 TAX PROGRAMMING
You can program 4 tax rates on this cash register.
This cash register can calculate tax by two methods :
A. VAT ( Value Added Taxes ) : Inclusi ve VAT
B. Straight percentage taxes : Exclusive VAT
IMPORTANT : To program tax as INCLUSIVE, set SYSTEM OPTION ADDRESS 4 to 0.
To program tax as EXCLUSIVE, set SYSTEM OPTION ADDRESS 4 to 1.
NOTE : If you clear RAM, the machine has the INCLUSIVE TAX SYSTEM.
2.4 VAT RATE PROGRAMMING
( 1 ) Press the VAT number ( 1, 2, 3 or 4 ) and the “ TAX”
key.
( 2 ) Enter the percentage of tax from the numeric key pad.
You must use the decimal ( . ) key.
EX ) 10 % tax by entering : 1 0 . 0 0 0
6.25 % tax by entering : 6 . 2 5 0
NOTE : You must enter 3 number after the decimal key.
( 3 ) Press the “ SUBTL”
key.
If you want to use the TAX ROUNDING SYSTEM, refer to SYSTEM OPTION ADDRESS 38
( X )
TAX
VAT NO. ( 1 ~ 4 )
( XX.XXX )
SUBTL
VAT RATE ( 0.001 ~ 99.999 % )
21
2.5 CLERK SECRET CODE & DRAWER ASSIGNMENT PROGRAMMING
NOTE : If you want to use 15 clerks system, you should set the SYSTEM OPTION ADDRESS 28 to 4
( Page 25 ).
When you want to use the CLERK CODE SYSTEM, you should set the SYSTEM OPTION ADDRESS 28.
This programming assigns a clerk code number to each clerk. The code number is used by the clerk to log
on for operations. Although you don’ t program clerk code, each clerk has a default code that is same
as the clerk number.
( 1 ) Press the one of “ CLERK ( 1, 2, 3 or 4 )”
keys. Any clerk key makes no difference.
( 2 ) Press the clerk number ( 1 ~ 15 ) and press the “ DECIMAL POINT ( . )”
( 3 ) Enter the clerk secret code up to 6 digits, and then press the “ #/NS”
( 4 ) Press the drawer number ‘ 1’
or ‘ 2’
key.
key.
and then press the “ CASH/TEND”
key to finalize the
clerk
programming.
CLERK
(X)
DECIMAL ( . )
( 1, 2, 3 or 4 )
( 6 Digits Code )
CLERK NO. ( 1 ~ 15 )
( 1 or 2 )
NOTE : Default drawer assignment for all clerks is drawer 1.
22
#/NS
(X)
CASH/TEND
DRAWER NO.
2.6 SYSTEM OPTION PROGRAMMING
X/TIME
ADDRESS
SUBTL
STATUS
NOTE : Address 1 ~ 9 should not be entered 01 ~ 09, enter single digit 1 ~ 9.
The value “ 0”
ADDRESS
1
2
is default status.
OPTION
VALUE
Subtotal without tax will be printed on the receipt & journal.
Does not require press of the “SUBTL” key.
Print ORDER# on receipt
a
Tax amount charged will be printed on the receipt at finalization.
a
The printed tax amount on receipt at finalization is combined =
* Itemized tax printing lists each rate separately,
itemized =
while combined tax printing lists the total of all taxes.
Tax print ( first option ) must be set to “ YES” to allow this option.
b
b
c
Tax symbol is printed for item.
a
VAT percent rate is printed.
b
Net sale amount is automatically printed by VAT break down.
( Only inclusive VAT )
Tax is figured by inclusive VAT.
Tax is figured by exclusive VAT.
Cash declaration is compulsory before X/Z reports.
c
a
Cash drawer does not open when reports are run.
b
6
GRAND total is not printed on financial report.
a
7
Skip media totals with zero activity on financial report.
a
GROSS total is not printed on financial report.
b
4
5
8
9
10
a
MODE VOID and RETURN are not printed on financial and clerk c
report.
Consecutive number resets after Z1 financial report.
a
GRAND total resets after Z1 financial report.
b
Print full clerk report.
c
( See a clerk report section. )
code =
sequential index ( 1 ~ 1000 ) =
HASH department and PLU operations add to NET sales.
a
Print PLUs and DEPT.s with zero totals on report .
b
Print sales rate on DEPT. / PLU reports.
c
PLU is registered by
STATUS
SUM
=a+b
SUM
=a+b+c
Print taxable totals.
3
YES = 1
NO = 0
YES = 2
NO = 0
YES = 1
NO = 0
YES = 2
NO = 0
a
YES = 4
NO = 0
YES = 0
NO = 1
YES = 2
NO = 0
YES = 4
NO = 0
0
1
YES = 1
NO = 0
YES = 2
NO = 0
YES = 1
NO = 0
YES = 0
NO = 1
YES = 2
NO = 0
YES = 4
NO = 0
YES = 1
NO = 0
YES = 2
NO = 0
YES = 4
NO = 0
1
0
YES = 1
NO = 0
YES = 2
NO = 0
YES = 4
NO = 0
SUM
=a+b+c
A
SUM
=a+b
A
SUM
=a+b+c
SUM
=a+b+c
a
SUM
=a+b+c
23
ADDRESS
11
OPTION
VALUE
Disable department / PLU preset/HALO override
a
Allow 8-digit DEPT. and PLU amount entry.
b
Negative and zero sales total are not allowed.
a
Inhibit printing of positive DEPT. and PLU entries on journal.
b
13
Allow the post tender function.
a
14
VOID function is only allowed in the ‘ X’
12
15
control lock position.
Compulsory validation on VOID function.
b
VOID function is inactive.
c
CANCEL function is only allowed in the ‘ X’
control lock position.
17
18
RETURN function is only allowed in the ‘ X’
control lock position.
a
Compulsory validation on RETURN function.
b
RETURN function is inactive.
c
% key function is only allowed in the ‘ X’
control lock position.
a
Compulsory validation on % key function.
b
% key function is inactive.
c
RECD ACCT & PAID OUT are only allowed in the ‘ X’
position.
Compulsory validation on RECD ACCT & PAID OUT.
control lock a
b
c
RECD ACCT & PAID OUT are inactive.
19
a
b
CANCEL function is inactive.
16
a
CHEQUE-CASHING is only allowed in the ‘ X’
position.
control lock a
b
Compulsory validation on CHEQUE-CASHING.
c
CHEQUE-CASHING is inactive.
20
21
Validation amount is
a
Allow multiple validations.
b
Allow multiple buffered receipts.
a
Buffered receipt is only issued on the “ RECEIPT OFF”
b
When pushing the “ #/NS”
not issued.
24
amount tendered =
amount of sale =
position.
key to open the drawer,receipt ticket is
c
YES = 1
NO = 0
YES = 2
NO = 0
YES = 1
NO = 0
YES = 2
NO = 0
YES = 1
NO = 0
YES = 1
NO = 0
YES = 2
NO = 0
YES = 4
NO = 0
YES = 1
NO = 0
YES = 2
NO = 0
YES = 1
NO = 0
YES = 2
NO = 0
YES = 4
NO = 0
YES = 1
NO = 0
YES = 2
NO = 0
YES = 4
NO = 0
YES = 1
NO = 0
YES = 2
NO = 0
YES = 4
NO = 0
YES = 1
NO = 0
YES = 2
NO = 0
YES = 4
NO = 0
YES = 1
NO = 0
YES = 2
NO = 0
YES = 1
NO = 0
YES = 2
NO = 0
YES = 4
NO = 0
STATUS
SUM
=a+b
SUM
=a+b
a
SUM
=a+b+c
SUM
=a+b
SUM
=a+b+c
SUM
=a+b+c
SUM
=a+b+c
SUM
=a+b+c
SUM
=a+b
SUM
=a+b+c
ADDRESS
22
23
OPTION
VALUE
Print the “ CASH” when only SINGLE ITEM is registered.
a
Print sale item no.
b
Subtotal is printed when the “ SUBTL”
c
key is pressed.
Inhibit TIME print on receipt and journal.
a
Inhibit MACHINE NO. print on receipt and journal.
b
Inhibit Z REPORT ISSUING COUNTER print on receipt and journal.
c
Inhibit DATE print on receipt and journal.
a
Inhibit CONSECUTIVE NO. print on receipt and journal.
b
The date format is
* Same in validation
a
29
Day, Month and Year =
Month, Day and Year =
Year, Month and Day =
Decimal for print and display :
No decimal =
Set at one place =
Set at three places =
Set at two places =
Enter the HDLO ( High Digit Lock Out )
0.01 ~ 0.09
=
For the total amount allowed for RECD ACCT
0.01 ~ 0.99
=
& PAID OUT transactions.
0.01 ~ 9.99
=
0.01 ~ 99.99 =
0.01 ~ 999.99 =
0.01 ~ 9999.99 =
0.01 ~ 99999.99 =
Clerks are
Pop-up =
Stay-down =
Secret sign-on code =
Push button =
15 Clerks =
4 Clerks =
Allow clerk change without clerk sign-off operation.
30
Home Currency Symbol.
a
31
Other logos ( Refer to page 89 : “ CHARACTER CODE TABLE”
Disable NON-ADD NUMBER function.
24
25
26
27
28
“ TRAIN MODE START”
mode starts.
32
33
(∈= 91, £= 0, Pts= 92)
a
a
a
b
c
a
YES = 1
NO = 0
YES = 2
NO = 0
YES = 4
NO = 0
YES = 1
NO = 0
YES = 2
NO = 0
YES = 4
NO = 0
YES = 1
NO = 0
YES = 2
NO = 0
0
1
2
1
2
3
0
1
2
3
4
5
6
7
1
0
2
0
4
0
YES = 1
NO = 0
0 – 122
STATUS
SUM
=a+b+c
SUM
=a+b+c
SUM
=a+b
a
a
a
SUM
=a+b+c
a
a
)
a
message is not printed when train b
c
“ TRAIN MODE END” message is not printed when train mode
ends.
Disable NO SALE function.
a
Inhibit NO SALE after NON-ADD NUMBER entry.
b
Enforce NON-ADD NUMBER entry at the beginning of sale.
c
Number of digits required for NON-ADD NUMBER entry.
( ‘0’ allows any length, 1 ~ 8 digits )
a
YES = 1
NO = 0
YES = 2
NO = 0
YES = 4
NO = 0
YES = 1
NO = 0
YES = 2
NO = 0
YES = 4
NO = 0
0
1~8
SUM
=a+b+c
SUM
=a+b+c
a
25
34
ADD CHECK advances the consecutive no. at final tender only.
a
Print the consolidated receipt automatically when finalising
Check sale
YES = 1
NO = 0
YES = 2
NO = 0
YES = 4
NO = 0
OPTION
VALUE
Compulsory validation on ADD CHECK.
ADDRESS
35
Compulsory drawer is disabled.
a
Validation sensor is activated.
b
Paper sensor is activated.
c
36
Open drawer alarm is activated.
a
37
40
The number of seconds before the open drawer warning tone
sounds.
( default = 30 sec. )
% and tax calculation will
round up at 0.50 =
always round up =
always round down =
Rounding factor for split pricing, triple & decimal multiplication
Calculation will
round up at 0.50 =
always round up =
always round down =
European round is activated.
41
X/TIME operation is
42
“ PRICE INQ.”
38
39
43
44
split pricing =
Triple multiplication =
key is used as “ SCALE”
key.
46
47
48
49
26
a
a
a
a
Allow manual entry of weight.
b
Weight symbol for manual entry is
c
kg =
lb =
Only stamp will be printed on the receipt.
=
Both stamp & preamble message will be printed on the receipt. =
Only preamble message will be printed on the receipt.
=
Postamble message will be printed on the receipt.
Preamble message will be not printed on the slip printer.
45
a
a
a
a
b
Postamble message will be not printed on the slip printer.
c
Train mode
a
Train mode title is not printed on the receipt during train mode.
b
Cash drawer does not open during train mode.
c
Table management = a
Cashier overlap =
Consolidated receipt on table management or cashier
a
Overlap is only printed on the receipt of ECR.
Consolidated receipt on table management or cashier
Overlap is printed on the receipt of ECR and the slip printer.
Consolidated receipt on table management or cashier
Overlap is only printed on the slip printer.
Slip operation =
a
KP operation =
a
Amount tender is compulsory on “ CASH/TEND” tendering.
YES = 1
NO = 0
YES = 2
NO = 0
YES = 4
NO = 0
YES = 1
NO = 0
0 ~ 99
0
1
2
0
1
2
YES = 1
NO = 0
0
1
YES = 1
NO = 0
YES = 2
NO = 0
YES = 4
NO = 0
0
1
2
YES = 1
NO = 0
YES = 2
NO = 0
YES = 4
NO = 0
YES = 1
NO = 0
YES = 2
NO = 0
YES = 4
NO = 0
0
1
0
SUM
=a+b+c
STATUS
SUM
=a+b+c
a
a
a
a
a
a
SUM
=a+b+c
a
SUM
=a+b+c
SUM
=a+b+c
a
a
1
2
0
1
YES = 1
NO = 0
a
SUM
b
Under tendering by “ CASH/TEND”
Validation on “ CASH/TEND”
is not allowed.
tendering is compulsory.
c
YES = 2
NO = 0
YES = 4
NO = 0
=a+b+c
27
ADDRESS
50
OPTION
VALUE
Amount tender is compulsory on “ CHEQUE”
Under tendering by “ CHEQUE”
tendering.
a
b
is not allowed.
c
Validation on “ CHEQUE”
51
tendering is compulsory.
NON-ADD NUMBER entry is compulsory
tendering.
Over tendering by “ CHARGE 1” is allowed.
on
“ CHARGE 1”
a
b
c
Validation on “ CHARGE 1”
52
NON-ADD
tendering.
NUMBER entry
tendering is compulsory.
is
Over tendering by “ CHARGE 2”
compulsory
on
“ CHARGE 2”
a
b
is allowed.
c
Validation on “ CHARGE 2”
53
54
55
56
57
tendering is compulsory.
Clerk key :
Button key =
Real clerk key =
Printer type :
No printer =
EPSON TM-290 =
EPSON TM-300(D) =
EPSON TM-T80 =
CITIZEN iDP 3540/3541 =
STAR SP200 =
SAMSUNG SRP-100/200 =
Feed line after printing on the roll printer :
( Default = 7Line )
EAT-IN / TAKE-OUT / DRIVE-THRU procedure compulsory
before tendering.
Department LEVEL Keys are
Stay-down =
Item pop-up =
Ticket pop-up =
58
Disable “LEVEL” Key:
LEVEL 1 =
LEVEL 2 =
LEVEL 3 =
YES = 1
NO = 0
YES = 2
NO = 0
YES = 4
NO = 0
YES = 1
NO = 0
YES = 2
NO = 0
YES = 4
NO = 0
=a+b+c
SUM
=a+b+c
a
b
c
4
a
a
60
Feed lines before printing on the slip printer
a
0 ~ 99
61
Reserved for future use
62
Characters entered by:
a
0
1
63
Conversion rate 1 currency character code (∈= 91, £ = 0, Pts =92)
0~122
64
Conversion rate 2 currency character code (∈= 91, £ = 0, Pts =92)
0~122
Enable printing Conversion 1 CHANGE amount
SUM
a
a
0 ~ 99
Enable printing Conversion 1 TENDERED amount
= a+b+c
YES = 1
NO = 0
0
1
2
1
2
a
a
Enable printing Conversion 1 TOTAL amount
SUM
a
Maximum slip line
Alpha Numeric Keyboard =
Character Code =
STATUS
0
1
0
1
2
3
4
5
6
0 ~ 99
59
65
28
a
YES = 1
NO = 0
YES = 2
NO = 0
YES = 4
NO = 0
a
b
c
YES = 1
NO = 0
YES = 2
NO = 0
YES =4
NO = 0
a
a
a
SUM
=a+b+c
a
a
a
SUM
=a+b+c
66
Base currency is:
ADDRESS
67
68
a
OPTION
When using currency Conversion 2, print TOTAL for both currencies
a
When using currency Conversion 2, print TENDERED amount for
both currencies
When using currency Conversion 2, print CHANGE for both currencies
b
Disable printing in FOREIGN AMOUNT during conversion operation
a
c
Euro = 1
Local = 0
a
VALUE
STATUS
YES = 1
NO = 0
YES = 2
NO = 0
YES = 4
NO = 0
YES = 1
NO = 0
SUM
=a+b+c
a
The following system options are applicable to the 5115/5140
59
Characters entered by:
Alpha Numeric Keyboard =
0
a
a
Character Code =
60
Conversion rate 1 currency character code (∈= 91, £ = 0, Pts =92)
61
Conversion rate 2 currency character code (∈= 91, £ = 0, Pts =92)
62
1
0~122
0~122
a
Enable printing Conversion 1 TOTAL amount
b
Enable printing Conversion 1 TENDERED amount
63
Enable printing Conversion 1 CHANGE amount
c
Base Currency is:
a
YES =1
NO = 0
YES =2
NO = 0
YES=4
NO = 0
Euro = 1
SUM
=a+b+c
a
Local = 0
64
When using currency Conversion 2, print TOTAL for both currencies
When using currency Conversion 2, print TENDERED amount for
both currencies
When using currency Conversion 2, print CHANGE for both
a
b
c
currencies
65
Disable printing in FOREIGN AMOUNT during conversion operation
a
YES = 1
NO = 0
YES = 2
NO = 0
YES = 4
NO = 0
YES = 1
NO = 0
SUM
=a+b+c
a
29
2.7 DESCRIPTOR PROGRAMMING
You can program descriptors for each DEPARTMENT, PLU, CLERK, DEPARTMENT GROUP, SOME
FUNCTION KEYS and RECEIPT MESSAGE using the following programming procedure.
2.7.1 PROGRAMMING
Y
X
X
X
X
CHARACTER
PAID OUT
NOTE : Refer to “ ALPHA-NUMERIC KEYBOARD LAYOUT”
STANDARD
DESCRIPTOR
DEPARTMENT
30
ADDRESS
Y
1
PLU
CLERK
GROUP0
GROUP1
GROUP2
GROUP3
GROUP4
GROUP5
GROUP6
GROUP7
GROUP8
GROUP9
CASH
CHEQUE
CHG1
CHG2
CHANGE
TOTAL
RECD ACCT
PAID OUT
NON-ADD#
ADD CHECK
NO SALES
ERR CORRECT
PREV VOID
RETURN
ALL CANCEL
%1
%2
CONV 1
CONV 2
2
3
3
3
3
3
3
3
3
3
3
3
3
3
3
3
3
3
3
3
3
3
3
3
3
3
3
3
3
3
3
NUMBER
XXXX
0001 ~ 0015
0001 ~ 0040
0001 ~ 1000
0001 ~ 0015
0 0 1 6
0 0 1 7
0 0 1 8
0 0 1 9
0 0 2 0
0 0 2 1
0 0 2 2
0 0 2 3
0 0 2 4
0 0 2 5
0 0 2 6
0 0 2 7
0 0 2 8
0 0 2 9
0 0 3 0
0 0 3 1
0 0 3 2
0 0 3 3
0 0 3 4
0 0 3 5
0 0 3 6
0 0 3 7
0 0 3 8
0 0 3 9
0 0 4 0
0 0 4 1
0 0 4 2
0 0 4 3
0 0 4 4
RCPT MSG
RCPT MSG
4
4
0001 ~ 0004
0005 ~ 0006
( Page 90, 91 ) for entering characters.
CHARACTER
LENGTH
12 CHAR.
12 CHAR.
12 CHAR.
12 CHAR.
12 CHAR.
12 CHAR.
12 CHAR.
12 CHAR.
12 CHAR.
12 CHAR.
12 CHAR.
12 CHAR.
12 CHAR.
12 CHAR.
12 CHAR.
12 CHAR.
12 CHAR.
12 CHAR.
12 CHAR.
12 CHAR.
12 CHAR.
12 CHAR.
12 CHAR.
12 CHAR.
12 CHAR.
12 CHAR.
12 CHAR.
12 CHAR.
12 CHAR.
12 CHAR.
12 CHAR.
12 CHAR.
12 CHAR.
21 CHAR.
21 CHAR.
CASH/TEND
REMARKS
- ER-5115
- ER-5140
PREAMBLE
POSTAMBLE
2.7.2 DESCRIPTOR PROGRAMMING EXAMPLES
( 1 ) DEPT.1 = APPLE
10001
PAID OUT
A
P
P
L
CASH/TEND
E
( 2 ) PLU 10 = ORANGE
20010
PAID OUT
DOUBLE
O
R
A
N
G
SUBTL KEY
DOUBLE
E
CASH/TEND
( 3 ) CLERK 4 = JAMES
30004
PAID OUT
J
A
M
E
S
CASH/TEND
( 4 ) PREAMBLE MESSAGE LINE 1 = Thank You
40001
PAID OUT
SPACE
SPACE
DOUBLE
T
DOUBLE
h
SUBTL KEY
DOUBLE
a
DOUBLE
n
DOUBLE
k
DOUBLE
DOUBLE
Y
DOUBLE
o
DOUBLE
u
CASH/TEND
SPACE
( 5 ) POSTAMBLE MESSAGE LINE 1 = Call Again
40005
PAID OUT
DOUBLE
SPACE
C
DOUBLE
a
DOUBLE
SUBTL KEY
l
DOUBLE
DOUBLE
a
l
SPACE
DOUBLE
i
DOUBLE
A
DOUBLE
DOUBLE
n
CASH/TEND
g
31
2.7.3 DESCRIPTOR PROGRAMMING SCAN
CASH/TEND
32
PAID OUT
2.8 DEPARTMENT PROGRAMMING
* HASH Department *
- Typically HASH department may be used to register items such as delivery charges or lottery sales
that a merchant may not want to appear in accumulated sales totals.
- Sales registered into HASH department do not add to the grand total, gross sales total and may
also be programmed not to add to the net sales total.
- HASH departments add to the total of each sale and therefore are included in all media and
the drawer totals. Like normal departments, HASH departments also add to a total of all HASH
departments and PLUs on the financial report.
- SYSTEM OPTION ADDRESS 10 is used to select whether HASH department totals add to the net
sales total or not.
2.8.1 DEPARTMENT STATUS PROGRAMMING
A. PROGRAMMING OPTION
PROGRAMMING OPTION
VALUE
Department GROUP NO.
OPTION DIGIT
0~9
Resettable counter, counter will increase.
0
Nonresettable counter, counter will increase.
1
Resettable counter, counter will decrease.
2
Nonresettable counter, counter will decrease.
3
N1
N2
HASH department feature
a
YES = 1
NO = 0
GALLONAGE department feature
b
YES = 2
NO = 0
NON-ADD NUMBER compulsory
c
YES = 4
NO = 0
Department is NEGATIVE.
a
YES = 1
NO = 0
Department is SINGLE ITEM.
b
YES = 2
NO = 0
VALIDATION compulsory
c
YES = 4
NO = 0
Department is PRESET.
0
Department is OPEN ( HALO ).
1
Department is DISABLED.
2
Department is not taxable.
0
Department is taxable by VAT 1.
1
Department is taxable by VAT 2.
2
Department is taxable by VAT 3.
3
Department is taxable by VAT 4.
4
Department is taxable by VAT 1 & 3.
5
Department is printed on KITCHEN PRINTER
a
YES = 1
N3=a+b+c
N4=a+b+c
N5
N6
NO = 0
N7
33
B. PROGRAMMING
N1
N2
N3
N4
N5
N6
N7
SUBTL
STATUS
DEPARTMENT
CASH/TEND
EXIT
DEPARTMENT
DEPARTMENT
2.8.2 DEPARTMENT PRICE OR HALO PROGRAMMING
A zero amount entry for open department will set the HALO ( High Amount Lock Out ) at the maximum
seven digits ( 99999.99 ) for standard department, and five digits ( 99.999 ) for gallonage department.
Zero preset departments are allowed.
DEPARTMENT
PRESET PRICE
OR HALO
RECD ACCT
ACTIVITY
DEPARTMENT
COUNTER
( 0 ~ 9999 )
DEPARTMENT
34
CASH/TEND
EXIT
2.8.3 DEPARTMENT PROGRAMMING EXAMPLES
A. DEPARTMENT STATUS PROGRAMMING
EX 1 ) Program ‘ DEPT 1’
111
and ‘ DEPT 2’ . ‘DEPT 1’ and ‘DEPT 2’ are VAT 1 and KP items.
SUBTL
EX 2 ) Program ‘ DEPT 3’
21
DEPT 1
CASH/TEND
so it is a PRESET department, VAT 2 and a KP item.
SUBTL
EX 3 ) Program ‘ DEPT 4’
2030
DEPT 2
DEPT 3
CASH/TEND
so it is a PRESET, SINGLE ITEM department and VAT 3.
SUBTL
EX 4 ) Program ‘ DEPT 5’
DEPT 4
CASH/TEND
so it is a NEGATIVE PRESET and NON TAX with nonresettable and
increasing counter.
101000
SUBTL
EX 5 ) Program ‘ DEPT 6’
51
20100
DEPT 6
CASH/TEND
so it is a GALLONAGE and NON TAX.
SUBTL
EX 7 ) Program ‘ DEPT 15’
CASH/TEND
so it is a PRESET, VAT 1 & 3 and a KP item.
SUBTL
EX 6 ) Program ‘ DEPT 10’
DEPT 5
DEPT 10
CASH/TEND
so it is accumulated to GROUP 7 and HASH, PRESET and VAT 4.
‘DEPT 15’ is a KP item.
7010041
SUBTL
DEPT 15
CASH/TEND
35
B. DEPARTMENT PRICE OR HALO PROGRAMMING
EX 1 ) Program ‘ DEPT 1’
9999
and ‘ DEPT 2’ . ‘DEPT 1’ and ‘DEPT 2’ have a @99.99 HALO.
DEPT 1
DEPT 2
EX 2 ) Program ‘ DEPT 3’ , ‘ DEPT 6’
1000
DEPT 3
EX 3 ) Program ‘ DEPT 4’
1500
36
DEPT 6
DEPT 4
DEPT 15
CASH/TEND
CASH/TEND
so it has a price @1.00 and activity counter is 50.
DEPT 5
EX 5 ) Program ‘ DEPT 10’
1.399
and ‘ DEPT 15’ . These departments have a price @10.00.
so it has a price @15.00.
EX 4 ) Program ‘ DEPT 5’
100
CASH/TEND
50
RECD ACCT
CASH/TEND
so it has a price @1.399 ( Gallonage Price ).
DEPT 10
CASH/TEND
2.8.4 DEPARTMENT PROGRAMMING SCAN
( 1 ) Press the “ CASH/TEND”
key.
( 2 ) Press the first “ DEPARTMENT”
key you want to scan.
( 3 ) Press the last “ DEPARTMENT”
key you want to scan.
If you want to scan only one department, press the same “ DEPARTMENT”
key twice.
NOTE : The first department number ≤ The last department number
EX ) To scan dept. 1 ~ 15
CASH/TEND
DEPT 1
DEPT 15
37
2.9 PLU PROGRAMMING
HASH PLU’s operation is the same as HASH department operation.
PLU is registered by sequential index ( 1 ~ 1000 ) or by PLU code ( 1 ~ 99999999 ) that you program.
( SYSTEM OPTION ADDRESS 9, Page 23 )
Although you don’ t program PLU code, each PLU has a default code that is same as the PLU
number.
2.9.1 PLU PROGRAMMING
A. PROGRAMMING OPTION
PROGRAMMING OPTION
Resettable counter, counter will increase.
0
Nonresettable counter, counter will increase.
1
Resettable counter, counter will decrease.
2
Nonresettable counter, counter will decrease.
3
OPTION DIGIT
N1
HASH PLU feature
a
YES = 1
NO = 0
GALLONAGE PLU feature
b
YES = 2
NO = 0
NON-ADD NUMBER compulsory
c
YES = 4
NO = 0
PLU is NEGATIVE.
a
YES = 1
NO = 0
PLU is SINGLE ITEM.
b
YES = 2
NO = 0
VALIDATION compulsory
c
YES = 4
NO = 0
PLU is PRESET.
0
PLU is OPEN ( HALO ).
1
PLU is DISABLED.
2
PLU is not taxable.
0
PLU is taxable by VAT 1.
1
PLU is taxable by VAT 2.
2
PLU is taxable by VAT 3.
3
PLU is taxable by VAT 4.
4
PLU is taxable by VAT 1 & 3.
5
PLU is printed on KITCHEN PRINTER
38
VALUE
a
YES = 1
N2=a+b+c
N3=a+b+c
N4
N5
NO = 0
N6
B. PROGRAMMING
A zero amount entry for open PLU will set the HALO ( High Amount Lock Out ) at the maximum
seven digits ( 99999.99 ) for standard PLU, and five digits ( 99.999 ) for gallonage PLU.
Zero preset PLUs are allowed.
(0 ~ 99999999)
PLU CODE
PRICE
INQ.
STATUS
N1 N2 N3 N4 N5 N6
PL
DEPARTMENT
Linked Dept.
From PLU NO.
Only When resetting
PLU CODE to 0.
To PLU NO.
RECD
X/TIME
PL
ACCT
PRESET PRICE
OR HALO
ACTIVITY
COUNTER
( 0 ~ 9999 )
CASH/TEND
EXIT
NOTE : From PLU NO. ( 1 ~ 1000 ) ≤ To PLU NO. ( 1 ~ 1000 )
39
2.9.2 PLU PROGRAMMING EXAMPLES
IMPORTANT : If PLU is not linked to department, PLU registration is not allowed.
EX 1 ) Program ‘ PLU 10’
so it is VAT 1 and a KP item. It has a @99.99 HALO and linked to ‘ DEPT
1’ .
Its code is ‘ 12345678’ .
10
12345678
PLU
111
PRICE INQ.
EX 2 ) Program ‘ PLU 20’
DEPT 1
9999
X/TIME
CASH/TEND
so it is VAT 2 and a KP item. It has a PRESET price @10.00 and linked to
‘ DEPT 2’ . Its code is ‘ 20010’ .
20
20010
PLU
21
PRICE INQ.
EX 3 ) Program ‘ PLU 30’
1000
DEPT 2
X/TIME
CASH/TEND
so it is VAT 3, SINGLE ITEM and has a PRESET price @15.00 and linked
to ‘ DEPT 3’ . Its code is ‘ 313131’ .
30
313131
PLU
2030
PRICE INQ.
EX 4 ) Program ‘ PLU 40’
DEPT 3
1500
X/TIME
CASH/TEND
so it is VAT 4 and a KP item. It has a PRESET price @1.00 and linked to
‘ DEPT 4’ , initial activity counter is 100 with nonresettable, decreasing status.
40
300041
PLU
100
DEPT 4
EX 5 ) Program ‘ PLU 50’
X/TIME
100
RECD ACCT
CASH/TEND
so it is VAT 1 and a KP item. It has a PRESET price @10.00 and linked to
‘ DEPT 6’ . Its code is ‘ 50100’ .
50
50100
PLU
11
PRICE INQ.
EX 6 ) Program ‘ PLU 1000’
DEPT 6
1000
X/TIME
CASH/TEND
so it is VAT 1 and a KP item. It has a PRESET price @5.00 and linked to
‘ DEPT 6’ .
1000
EX 7 )
40
PLU
DEPT 6
Link ‘ PLU 1000’
PROGRAMMING’
50
11
PLU
500
X/TIME
to ‘ PLU 50’ .
)
1000
#/NS
CASH/TEND
CASH/TEND
( Refer to next page ‘ 2.9.4
PLU
LINK
2.9.3 PLU PROGRAMMING SCAN
( 1 ) Press the “ CASH/TEND”
key.
( 2 ) Enter the number of the first PLU you want to scan, and press the “ PLU”
key.
( 3 ) Enter the number of the last PLU you want to scan, and press the “ PLU”
key.
NOTE : The first PLU number ≤ The last PLU number
EX ) To scan PLU 1 ~ 1000
CASH/TEND
1
PLU
1000
PLU
41
2.9.4 PLU LINK PROGRAMMING
This programming is used to link two or more PLUs.
The second PLU ( B ) will be automatically registered when the first PLU ( A ) is registered.
XXXX
PLU
PLU NO. ( A )
XXXX
#/NS
PLU NO. ( B )
2.9.5 REMOVING OR DELETING A PLU
In order to “ de-activate”
a PLU, or “ remove”
its status and linked department.
Deleted or inactivated PLUs will not be allowed to register.
( 1 ) Enter the PLU number ( 1 ~ 1000 ), and press the “PLU” key.
( 2 ) Press the “VOID” key.
NOTE : PLUs with a total may not be removed ( or deleted ).
Issue the PLU report in “ Z”
mode before removing any PLU with a total.
XXXX
42
PLU
VOID
CASH/TEND
2.10 % KEY PROGRAMMING
This cash register has two % keys.
2.10.1 % KEY PROGRAMMING
A. PROGRAMMING STATUS
PROGRAMMING OPTION
VALUE
% k ey is POSITIVE ( SURCHARGE )
a
NEGATIVE ( DISCOUNT )
OPEN
PRESET
% key is
1
0
b
OPTION DIGIT
N1=a+b
2
0
SALE
a
ITEM
1
0
AMOUNT
b
PERCENTAGE
2
N2=a+b+c
0
INACTIVE
c
ACTIVE
4
0
B. PROGRAMMING
( 1 ) Press the “ %”
key to be programmed.
( 2 ) Enter the status from the above table and press the “ SUBTL”
key.
( 3 ) Enter the percentage or amount up to 5 digits and press the “ CASH/TEND”
key.
Decimal point is fixed at three places.
EX ) Percent Rate : 10 % would be 1 0 0 0 0
5.6 % would be 5 6 0 0
%
N1
N2
SUBTL
STATUS
CASH/TEND
5 DIGITS ( Percent or Amount )
2.10.2 % CALCULATION ROUNDING FACTOR
Refer to SYSTEM OPTION ADDRESS 38 ( Page 26 )
43
2.11 CASH/TEND KEY PROGRAMMING
CASH/TEND
CASH/TEND
Tendering HALO ( 0 ~ 999999, 0 for no HALO )
2.12 CHEQUE KEY PROGRAMMING
Change HALO ( 0 ~ 999999, 0 for no HALO )
CHEQUE
#/NS
CHEQUE
Tendering HALO ( 0 ~ 999999, 0 for no HALO )
2.13 CHARGE KEY PROGRAMMING
This cash register has two charge keys.
CHARGE
CHARGE
Tendering HALO ( 0 ~ 999999, 0 for no HALO )
2.14 PRESET CASH KEY PROGRAMMING
PRESET CASH
PRESET CASH
Desired amount ( 0 ~ 999999 )
2.15 CASH IN DRAWER LIMIT PROGRAMMING
#/NS
CASH/TEND
Total amount of cash allowed to be in the cash drawer at one time. ( 0 ~ 9999999 )
NOTE : If the cash-in-drawer limit is exceeded, an error tone will sound.
The “ CLEAR”
44
key will stop the error tone.
2.16 CURRENCY CONVERSION KEY PROGRAMMING
This cash register has two conversion key.
The foreign exchange rate is determined on a six-digit code entered.
Numbers N1 ~ N5 are the numeric value of the exchange rate, number N6 sets the decimal point
position ( 0 ~ 5 ).
N1 N2 N3 N4 N5
N6
VALUE
DECIMAL POINT POSITION
( From the right )
EX ) £ 1.00 = 2.4455 DM
2
CONV
4
4
5
5
4
CONV
DECIMAL POINT POSITION
2.17 EUROPEAN ROUNDING PROGRAMMING
If you use the European rounding, after programming the European rounding, set the SYSTEM OPTION
ADDRESS 40 to 1.( Page 26 )
MAX. 5 RANGES
(XX
YY
START OF RANGE
ZZZ)
PRICE INQ.
CASH/TEND
EXIT
VALUE
END OF RANGE
NOTE : The last end of range should be 9 or 99.
EX )
0002000
PRICE INQ.
0307005
PRICE INQ.
0809010
PRICE INQ.
CASH/TEND
45
2.18 PARAMETERS PROGRAM SCAN
CASH/TEND
46
SUBTL
OPERATING NOTE
This section shows you how to operate the cash register during normal use .
The operating steps are explained with flow chart boxes.
Each box represents a key on the keyboard that you should press to complete an operation.
Unless the specified note, the flow charts use the “ CASH/TEND”
key to finalize the sale.
NOTE : A clerk must be signed on before operation takes place.
All registrations are made in the “ REG”
or “ VOID”
control lock position.
1 CLERK SIGN ON
1.1 IN CASE OF 4 CLERKS ( SYSTEM OPTION 28’ s VALUE ‘ C’
=0 )
1.1.1 PUSH BUTTON SIGN ON
CLERK
The clerk key ( 1, 2, 3 or 4 ) to start operation
1.1.2 SECRET CODE SIGN ON
To use this sign on method, SYSTEM OPTION ADDRESS 28 must be set to value ‘ b’ .
The code will not be shown.
( 6 digits secret code )
CLERK
CLERK
The clerk key ( 1, 2, 3 or 4 ) to start operation
1.2 IN CASE OF 15 CLERKS ( SYSTEM OPTION 28’ s VALUE ‘ C’
=4 )
1.2.1 PUSH BUTTON SIGN ON
(XX)
CLERK 4
CLERK NO. ( 1 ~ 15 )
47
1.2.2 SECRET CODE SIGN ON
To use this sign on method, SYSTEM OPTION ADDRESS 28 must be set to value ‘b’.
The code will not be shown.
CLERK 4
( 6 digits secret code )
CLERK 4
2 CLERK SIGN OFF
2.1 IN CASE OF 4 CLERKS ( SYSTEM OPTION 28’ s VALUE ‘ C’
CLERK
When clerk sign off, the message “ CLOSEd”
=0 )
displays on the display.
1, 2, 3 or 4
2.2 IN CASE OF 15 CLERKS ( SYSTEM OPTION 28’ s VALUE ‘ C’
CLERK 4
When clerk sign off, the message “ CLOSEd”
=4 )
displays on the display.
3 REAL CLERK KEY ENTRY ( Optional Device )
If you want to use the real clerk keys, you should set the SYSTEM OPTION ADDRESS 53 to 1.
4 CLEARING AN ERROR CONDITION
If the error tone is ringing, press
CLEAR
There are several error symbols. Refer to ‘ DISPLAY SYMBOLS’
48
( Page 15 )
5 NO SALE OPERATION
A no sale operation is used to open the cash drawer outside of a sale.
#/NS
6 NON-ADD NUMBER ENTRIES
The “ #/NS” key can be used to enter up to eight digits.
This numeric entry will be added to non-add number total.
#/NS
7 PRICE INQUIRY OPERATION
If you want to know the price ( preset or HALO ) of DEPT. or PLU during registration,
PRICE INQ.
DEPT
OR
PRICE INQ.
PLU
( SYSTEM OPTION 9 = 0 )
PLU NO. ( 1 ~ 1000 )
PRICE INQ.
PLU
( SYSTEM OPTION 9 = 1 )
PLU CODE ( 1 ~ 99999999 )
49
8 DEPARTMENT ENTRIES
8.1 OPEN DEPARTMENT ENTRIES
( 1 ) Single open DEPARTMENT entry
1000
DEPT 1
AMOUNT
( 2 ) Repeat open DEPARTMENT entry
( 3 ) Multiple open DEPARTMENT entry
3
500
DEPT 1
DEPT 1
X/TIME
1000
DEPT 1
1000
DEPT 1
Q’ty ( 1 ~ 999 )
( 4 ) Decimal multiplication
1.5
of open DEPARTMENT entry
X/TIME
Decimal Q’ty ( 0.001 ~ 999.999 )
( 5 ) Override HALO price entry
1
X/TIME
10000
DEPT 1
Q’ty ( 1 ~ 999 )
( 6 ) Split pricing on open DEPARTMENT entry ( Triple multiplication : SYSTEM OPTION 41 = 1 )
3
X/TIME
Q’ty ( 0.001 ~ 999.999 )
50
4
X/TIME
Basic Q’ty ( 0.001 ~ 999.999 )
1000
DEPT 1
8.2 PRESET DEPARTMENT ENTRIES
( 1 ) Single preset DEPARTMENT entry
DEPT 3
( 2 ) Repeat preset DEPARTMENT entry
( 3 ) Multiple preset DEPARTMENT entry
3
DEPT 3
DEPT 3
X/TIME
DEPT 3
Q’ty ( 1 ~ 999 )
( 4 ) Decimal multiplication
1.5
of preset DEPARTMENT entry
X/TIME
DEPT 3
Decimal Q’ty ( 0.001 ~ 999.999 )
( 5 ) Override preset price entry
2000
DEPT 3
( 6 ) Split pricing on preset DEPARTMENT entry ( Triple multiplication : SYSTEM OPTION 41 = 1 )
3
X/TIME
Q’ty ( 0.001 ~ 999.999 )
4
X/TIME
DEPT 3
Basic Q’ty ( 0.001 ~ 999.999 )
51
8.3 GALLONAGE DEPARTMENT OPERATION
NOTE : 1 ) Although gallonage departments are considered open departments,
a price per gallon must be programmed on department programming.
This price is calculated to three decimal points.
2 ) Although gallonage departments are programmed as a preset price,
you must enter amount when gallonage department is registered.
* Same as gallonage PLU
EX ) DEPARTMENT 10 has been programmed as gallonage department and unit price @1.399.
1000
DEPT 10
AMOUNT
CASH/TEND
Gallonage Dept. 10
9 PLU ( PRICE LOOK UP ) ENTRIES
9.1 OPEN PLU ENTRIES
( 1 ) Single open PLU entry
10
PLU
1000
PLU NO. ( 1 ~ 1000 )
( 2 ) Repeat open PLU entry
10
( 3 ) Multiple open PLU entry
3
X/TIME
PLU
10
500
PLU
PLU
AMOUNT
PLU
500
PLU
PLU
Q’ty ( 1 ~ 999 )
( 4 ) Decimal multiplication of open PLU entry
1.5
X/TIME
10
Decimal Q’ty ( 0.001 ~ 999.999 )
52
PLU
1000
PLU
( 5 ) Override HALO price entry
1
X/TIME
10
PLU
10000
PLU
Q’ty ( 1 ~ 999 )
( 6 ) Split pricing on open PLU entry ( Triple multiplication : SYSTEM OPTION 41 = 1 )
3
X/TIME
Q’ty ( 0.001 ~ 999.999 )
4
X/TIME
10
PLU
1000
PLU
Basic Q’ty ( 0.001 ~ 999.999 )
53
9.2 PRESET PLU ENTRIES
( 1 ) Single preset PLU entry
20
PLU
PLU NO. ( 1 ~ 1000 )
( 2 ) Repeat preset PLU entry
1000
( 3 ) Multiple preset PLU entry
3
X/TIME
PLU
PLU
20
PLU
20
PLU
Q’ty ( 1 ~ 999 )
( 4 ) Decimal multiplication of preset PLU entry
1.5
X/TIME
Decimal Q’ty ( 0.001 ~ 999.999 )
( 5 ) Override preset price entry
1
X/TIME
20
PLU
2000
PLU
20
PLU
Only 1
( 6 ) Split pricing on preset PLU entry ( Triple multiplication : SYSTEM OPTION 41 = 1 )
3
X/TIME
Q’ty ( 0.001 ~ 999.999 )
54
4
X/TIME
Basic Q’ty ( 0.001 ~ 999.999 )
9.3 PLU TO PLU CHAIN OPERATION
All preset PLUs in the same chain ( PLU to PLU linking ) will be automatically registered
when the first PLU of the chain is registered.
If a PLU located in the middle of the chain is registered, the following preset PLUs will be
automatically registered.
EX ) PLU 1000 is linked to PLU 50.
9.4 PLU ENTRIES BY CODE
This cash register can register PLU not only sequential index ( 1 ~ 1000 ) but also code up to 8
digits. If you want to register PLU by code, you must program PLU code on PLU programming and
set SYSTEM OPTION ADDRESS 9 to 1.
NOTE : PLU entries by code is same to PLU entries by sequential index.
12345678
PLU CODE
PLU
1000
PLU
AMOUNT
20010
PLU
PLUCODE
55
10 SINGLE ITEM DEPARTMENT OR PLU ENTRIES
Single item operation finalizes transaction without tendering key entry.
But the transaction is not finalized when you register another department or PLU before entering single
item department or PLU.
10.1 SINGLE ITEM PRESET ENTRIES
DEPT 4
10.2 SINGLE ITEM OVERRIDE ENTRIES
1
30
X/TIME
PLU NO.
1000
PLU
PLU
AMOUNT
11 COMPUTATION OF VAT ( Value Added Tax )
This cash register has four taxes.
NOTE : Refer to SYSTEM OPTION ADDRESS 4 to select inclusive or exclusive VAT.
11.1 INCLUSIVE VAT SYSTEM
( 1 ) Inclusive VAT is used when a tax amount is already included in the item price,
and a breakdown of the various tax charged is separated out.
( No Breakdown )
SUBTL
TAX
TENDER
If you set SYSTEM OPTION ADDRESS 3 to value ‘ c’ , breakdown will be automatically done.
( 2 ) VAT SHIFT
when the “ TAX”
key is pressed before entering a department or PLU programmed as VAT 1,
their tax status shift VAT 1 to VAT 2.
when the “ TAX”
key is pressed before entering a department or PLU programmed as VAT 1&3,
their tax status becomes VAT 1, in that VAT 1 remains unchanged and VAT 3 is deleted.
TAX
56
DEPT. or PLU
11.2 EXCLUSIVE VAT SYSTEM
( 1 ) Exclusive VAT is used when a tax amount is not included in the item price,
and a tax amount is calculated by a tax rate.
( 2 ) TAX EXEMPT
While the exclusive VAT system is in use, you can exempt a taxable departm ent or PLU from
tax.
TAX
* Inclusive VAT *
DEPT. or PLU
* Exclusive VAT *
57
12 % KEY ENTRIES
The item discount or surcharge is that discount or surcharge is applied to one item,
while the sale discount or surcharge is that discount or surcharge is applied to the entire sale.
NOTE : If you want to sale discount or surcharge you must press the “ SUBTL”
entering the “ %”
key before
key.
12.1 PERCENT RATE DISCOUNT / SURCHARGE
12.1.1 ITEM DISCOUNT / SURCHARGE
( 1 ) Preset percent item discount / surcharge
1000
( 2 ) Override preset item discount / surcharge
DEPT 3
DEPT 1
%1
15.500
%2
Percent Rate ( 0.001 ~ 99.999 )
12.1.2 SALE DISCOUNT / SURCHARGE
( 1 ) Preset percent sale discount / surcharge
1000
DEPT 1
DEPT 1
SUBTL
%1
15.500
%2
( 2 ) Open sale discount / surcharge
1000
DEPT 1
DEPT 3
SUBTL
Percent Rate ( 0.001 ~ 99.999 )
58
12.2 AMOUNT DISCOUNT / SURCHARGE
12.2.1 ITEM DISCOUNT / SURCHARGE
( 1 ) Preset amount item discount / surcharge
1000
( 2 ) Override amount item discount / surcharge
DEPT 3
DEPT 1
%1
100
%2
AMOUNT
12.2.2 SALE DISCOUNT / SURCHARGE
( 1 ) Preset amount sale discount / surcharge
1000
DEPT 1
DEPT 1
SUBTL
%1
SUBTL
500
%2
( 2 ) Open sale discount / surcharge
1000
DEPT 1
DEPT 3
AMOUNT
59
13 MERCHANDISE RETURN OPERATION
A. Merchandise return of a single department or PLU entry
1000
MDSE RETURN
DEPT 1
B. Merchandise return of multiple department or PLU entry
2
MDSE RETURN
20
X/TIME
PLU
C. Merchandise return of the discounted / surcharged item
1000
MDSE RETURN
DEPT 1
%1
NOTE : Merchandise return of the negative department or PLU is not allowed,
and void of merchandise return entry is not allowed.
14 VOID OPERATION
14.1 VOID OF A LAST ITEM ENTRY ( ERROR CORRECT )
Press the “ VOID”
key immediately after making an incorrect entry.
DEPT. or PLU
DEPT. or PLU
VOID
Incorrect Entry
14.2 VOID OF A PREVIOUS ITEM ENTRY
You can correct using the “ VOID”
DEPT. or PLU
key at any point during the sale.
CLEAR
VOID
DEPT. or PLU
OR
DEPT. or PLU
X/TIME
VOID
Q’ty
DEPT. or PLU
60
14.3 VOID OUTSIDE OF A SALE
If you want to void a number of items of incorrect entries that were not made void during a sale.
( 1 ) Turn the control lock key to the “ VOID”
position.
( 2 ) Make all entries that you want to void in the normal sequence.
( 3 ) All these items will appear as alternative sign amount.
( 4 ) All “VOID” position operations maintain their own total on the report.
14.4 CANCEL ( VOID 4 )
The pressing of the “ CANCEL”
key during a transaction cancels the entire transaction.
This is not a tendering key !!
Transactions up to thirty items may be canceled.
If a cancel operation is attempted after the entering of more than thirty items, an error will occur.
DEPT. or PLU
DEPT. or PLU
Up to 30 items
DEPT. or PLU
DEPT. or PLU
CANCEL
61
15 ADD CHECK OPERATION
DEPT. or PLU
Where multiple receipts are required for one purchase.
ie: For admissions where people require separate entrance tickets.
ADD CHECK
DEPT. or PLU
ADD CHECK
TENDER
16 TENDERING OPERATION
16.1 CASH TENDERING
DEPT. or PLU
SUBTL
CASH/TEND
AMOUNT
62
16.2 PRESET CASH TENDERING
You must program the “ PRESET CASH”
key.
If you don’t program this key, an error will occur when you enter the “PRESET CASH” key.
DEPT. or PLU
SUBTL
PRESET CASH
AMOUNT
16.3 CHEQUE TENDERING
DEPT. or PLU
SUBTL
CHEQUE
AMOUNT
63
16.4 CHARGE TENDERING
The entering amount of charge must not be more than subtotal amount.
DEPT. or PLU
SUBTL
CHARGE
AMOUNT
16.5 SPLIT TENDERING
You can tender any combination of media.
DEPT. or PLU
SUBTL
CHECK
AMOUNT
CASH/TEND
AMOUNT
64
CHARGE
16.6 TENDERING WITH CURRENCY CONVERSION
You must program the “ CONV”
key.
If you don’t program this key, an error will occur when you enter the “CONV” key.
DEPT. or PLU
SUBTL
CONV
CASH/TEND
AMOUNT ( Foreign Currency )
16.7 POST TENDERING
NOTE : If you want to use post tendering function, you must set SYSTEM OPTION ADDRESS 13
to 1 ( Page 24 ).
Post tendering function is only allowed on cash transactions.
After post tendering, the display will show the remaining amount and the drawer will
open.
DEPT. or PLU
SUBTL
CASH/TEND
CASH/TEND
AMOUNT
EX )
500
DEPT 1
DEPT 3
SUBTL
CASH/TEND
2000
CASH/TEND
65
17 CHEQUE CASHING
If a customer wants to cash a cheque, use this function.
( 1 ) Enter the amount of cheque.
( 2 ) Press the “ CHEQUE”
key.
CHEQUE
AMOUNT
66
18 RECEIVED ON ACCOUNT OPERATION
A. Use the “ RECD ACCT”
key to register cash or cheque that is added to the cash drawer.
RECD ACCT
CASH/TEND
RECD ACCT
AMOUNT
CHEQUE
B. CHANGE BACK
RECD ACCT
CASH/TEND
AMOUNT ( A )
AMOUNT ( B )
* ( A ) <= ( B )
CHEQUE
19 PAID OUT OPERATION
Use the “ PAID OUT”
key to register cash or cheque that is moved from the cash drawer.
PAID OUT
CASH/TEND
PAID OUT
AMOUNT
CHEQUE
67
20 TABLE MANAGEMENT
This cash register can support the table management up to 50 lines.
( 40 item lines + 10 tendering lines ).
NOTE : If you want to use the table management, SYSTEM OPTION ADDRESS 46 must be 0.
20.1 TRANSACTION
CHECK #
TRANSACTION
CHECK TENDER
CHECK #
TRANSACTION
CHECK TENDER
CHECK #
TRANSACTION
TABLE NO.
( 1 ~ 50 )
TABLE NO.
TENDER
TABLE NO.
20.2 CONSOLIDATED RECEIPT PRINTING
If you want to issue the consolidated receipt about the table to be opened or tendered ( by cash or
cheque ... ), press the table number and the “ CHECK TENDER”
key.
CHECK TENDER
TABLE NO.
NOTE : If you set the SYSTEM OPTION 47 to 0, the consolidated receipt is only printed on the
receipt of ECR.
If you set the SYSTEM OPTION 47 to 1, the consolidated receipt is printed on the
receipt of ECR and the slip printer.
If you set the SYSTEM OPTION 47 to 2, the consolidated receipt is only printed on the
slip printer.
NOTE : If you set the SYSTEM OPTION ADDRESS 48 to 0, when table management, the transaction
will be printed on the slip printer.
( Refer to SYSTEM OPTION ADDRESS 54 ( Page 27 ) to select the printer type. )
68
EX )
STEP 1
1
CHECK #
1000
DEPT 1
DEPT 3
CHECK TENDER
TABLE NO.
STEP 2
2
CHECK #
3
DEPT 3
X/TIME
20
PLU
TABLE NO.
CHECK TENDER
STEP 3
1
CHECK #
2
CHECK #
MDSE RETURN
CHECK #
1500
X/TIME
DEPT 3
CHECK TENDER
TABLE NO.
STEP 4
2
20
PLU
CHECK TENDER
TABLE NO.
STEP 5
1
CASH/TEND
CHARGE 1
TABLE NO.
STEP 6
1
CHECK TENDER
* STEP 6 ( SLIP PRINTING ) *
TABLE NO.
STEP 7
2
CHECK #
20
PLU
1000
CHEQUE
CASH/TEND
TABLE NO.
STEP 8
2
CHECK TENDER
* STEP 8 ( SLIP PRINTING )
TABLE NO.
69
21 CASHIER OVERLAP
NOTE : If you want to use the cashier overlap, SYSTEM OPTION ADDRESS 46 must be 1.
If you set SYSTEM OPTION ADDRESS 29 to 1,
clerk change can be made without clerk sign-off operation.
21.1 TRANSACTION
CLERK X ! =>
TRANSACTION
CLERK CHANGE ! ( CLERK X -> Y ) ====>
TRANSACTION
CLERK CHANGE ! ( CLERK Y -> Z ) ====>
TRANSACTION
TENDER
CLERK Z FINALIZES !
CLERK CHANGE ! ( CLERK Z -> Y ) ====>
TRANSACTION
TENDER
CLERK Y FINALIZES !
CLERK CHANGE ! ( CLERK Y -> X ) ====>
TRANSACTION
TENDER
CLERK X FINALIZES !
21.2 CONSOLIDATED RECEIPT PRINTING
If you want to issue the consolidated receipt about the clerk to be opened or tendered ( by cash or
cheque ... ), press the clerk number and the “ CHECK TENDER”
CHECK TENDER
CLERK NO.
70
key.
NOTE : If you set the SYSTEM OPTION 47 to 0, the consolidated receipt is only printed on the
receipt of ECR.
If you set the SYSTEM OPTION 47 to 1, the consolidated receipt is printed on the
receipt of ECR and the slip printer.
If you set the SYSTEM OPTION 47 to 2, the consolidated receipt is only printed on the
slip printer.
NOTE : If you set the SYSTEM OPTION ADDRESS 48 to 0, when cashier overlap, the transaction
will be printed on the slip printer.
( Refer to SYSTEM OPTION ADDRESS 54 ( Page 27 ) to select the printer type. )
EX ) Assume that clerk sign on method is push button type.
STEP 1
CLERK 1 ! =>
1000
STEP 2
DEPT 1
PLU
CLERK 1
CLERK CHANGE ! ( 1 -> 2 ) ====>
10
CLERK 2
STEP 3
20
DEPT 1
500
PLU
PLU
DEPT 3
CLERK 2
CLERK CHANGE ! ( 2 -> 1 ) ====>
4
CLERK 1
X/TIME
DEPT 3
CASH/TEND
CLERK 1
CLERK 1 FINALIZES !
STEP 4
1
* STEP 4 ( SLIP PRINTING ) *
CHECK TENDER
CLERK NO.
STEP 5
CLERK CHANGE ! ( 1 -> 2 ) ====>
1000
CLERK 2
CASH/TEND
CHEQUE
CLERK 2 FINALIZES !
STEP 6
2
CHECK TENDER
* STEP 6 ( SLIP PRINTING ) *
CLERK NO.
71
22 PRINTING A BUFFERED RECEIPT OPERATION
If a customer requests a receipt after a sale has been finalized and the “ RECEIPT ON/OFF”
was in the ‘ OFF’
position during a sale, the press of the “ RECEIPT”
key
key will issue a buffered
receipt.
( Up to 70 lines : 50 item lines + 20 tendering lines )
If more than 50 entries are made in the sale, the cash register will issue a stub receipt only,
show the total net sale and correct the tax totals and payment tendered.
NOTE : The “ RECEIPT ON/OFF”
key must be used on “ REG / VOID”
position and can’ t be
used
during transactions.
Press the “ RECEIPT ON/OFF”
When the “ RECEIPT ON/OFF”
key once to change its status.
sign is illuminated on the display panel, the receipt
printer will be turned off.
Refer to SYSTEM OPTION ADDRESS 21 ( Page 24 )
72
23 VALIDATION OPERATION
First of all, place a check or slip into the slot below the receipt / detail printer.
Upon pressing of the “ VALID”
key, validation will be performed on department and PLU entries,
RECD ACCT & PAID OUT operation, % key entries, merchandise return, voids and
tendering operations.
If an operation is programmed as “ Validation Compulsory” , the cash register will not operate until
validation is completed and the message “ S P”
will appear on the display.
If any other operations are attempted before validation, an error will occur.
Refer to SYSTEM OPTION ADDRESS 20 ( Page 24 )
* SAMPLE VALIDATION RECEIPTS *
< RECEIPT SIDE >
01
a
01
a
< JOURNAL SIDE >
251298 14:10
b
c
122598 14:10
b
c
000068 RTN
d
e
000068 DPT
d
APPLE
-10.00
f
DEPT.3
e
£10.00
f
* Date ( b ) = SYSTEM OPTION ADDRESS 25 = 1 ( MM/DD/YY ). ( Page 25 )
01
981225 14:10
a
b
c
000068 AMT
d
e
CASH
£10.00
f
* Date ( b ) = SYSTEM OPTION ADDRESS 25 = 2 ( YY/MM/DD ). ( Page 25 )
a = Clerk number.
b = Date.
c = Time.
d = Receipt consecutive number.
e = Registration step.
f = Validated transaction content.
73
24 RECEIPT MESSAGE PRINTING OPERATION
24.1 PREAMBLE MESSAGE
If you want to print the receipt preamble messages on the receipt, you must program SYSTEM
OPTION ADDRESS 43 ( Page 26 ) after programming the preamble message descriptors.
* SYSTEM OPTION 43 = 0 *
* SYSTEM OPTION 43 = 1 *
* SYSTEM OPTION 43 = 2 *
24.2 POSTAMBLE MESSAGE
If you want to print the receipt postamble messages on the receipt, you must program SYSTEM
OPTION ADDRESS 44 ( Page 26 ) after programming the postamble message descriptors.
74
25 TRAIN MODE
If you want to operate the train mode, you must program SYSTEM OPTION ADDRESS 45.
Refer to SYSTEM OPTION ADDRESS 45 ( Page 26 )
NOTE : All the amounts registered in the training mode are accumulated to the training mode
report area and will not effect the normal report area.
The training mode reports are only daily reports and reset totals to ‘ 0’
after issuing Z
mode reports.
During the training mode, the journal paper will be not printed.
75
REPORT AND BALANCING
REPORT
REPORT NO.
FINANCIAL
1
TIME
2
PLU
3
REPORT TYPE
KEY LOCK
KEY SEQUENCE
X
X
1 SUBTL
Z
Z
1 SUBTL
X2
X
201 SUBTL
Z2
Z
201 SUBTL
X
X
2 SUBTL
Z
Z
2 SUBTL
X2
X
202 SUBTL
Z2
Z
202 SUBTL
X
X
3 SUBTL
Z
Z
3 SUBTL
X2
X
203 SUBTL
X2
Z
203 SUBTL
IN-DRAWER
4
X
X
4 SUBTL
DAILY SALES
5
X2
X
205 SUBTL
Z2
Z
205 SUBTL
X
X
6 SUBTL
X
X
SUBTL CLERK
Z
Z
SUBTL CLERK
X2
X
20 SUBTL CLERK
Z2
Z
20 SUBTL CLERK
X
X
OPEN TABLE
6
( or OPEN CLERK )
INDIVIDUAL CLERK
FROM/TO DEPT
FROM DEPT. KEY
TO DEPT. KEY
FROM/TO PLU
X
X
FROM XXXX ( PLU NO.) PLU
TO XXXX ( PLU NO.) PLU
DEPARTMENT
NOTE
76
:
You
30
can
not
X
X
30 SUBTL
Z
Z
30 SUBTL
X2
X
230 SUBTL
Z2
Z
230 SUBTL
issue
the
PLU
report
during
training
mode.
1 REPORT MODES
REPORT TYPE
TOTALS
Z Counter
REMARKS
X
Not reset
Not advance
Z
Reset to ‘0’
Advance
X2
Not reset
Not advance
Period-to-date report
Z2
Reset to ‘0’
Advance
Period-to-date report
NOTE : If you don’ t want to open the drawer when the reports are run,
set SYSTEM OPTION ADDRESS 5 to value ‘ b’ . ( Page 23 )
2 CASH DECLARATION
If the compulsory cash declaration is programmed ( SYSTEM OPTION ADDRESS 5 ),
the cash declaration must be performed in “ X / Z”
CASH/TEND
START
mode prior to taking X / Z reports.
CASH/TEND
AMOUNT
OR
CASH/TEND
EXIT
CHEQUE
NOTE : After doing cash declaration in the ‘ X / Z’
mode, if you turn the control key to any other
position except the ‘ X / Z’ , the cash declaration function will be lost.
So if you want to print the reports, you should perform the cash declaration again.
77
3 REPORTS
3.1 OPEN TABLE ( or OPEN CLERK ) REPORT
NOTE : If you operate table management ( SYSTEM OPTION ADDRESS 46 = 0 ),
open table report will be issued,
while if you operate cashier overlap ( SYSTEM OPTION ADDRESS 46 = 1 ),
open clerk report will be issued.
NOTE : If open table ( or clerk ) exists, the reports in ‘ Z’
tone will sound ( ‘ E9’
mode will not be issued and an error
).
So if you want to issue the reports in ‘ Z’
mode, you must finalize the open table
( or clerk ).
A. X open table ( or clerk ) report ( Key lock : ‘X’ )
78
6
SUBTL
3.2 FINANCIAL REPORT
A. X financial report ( Key lock : ‘X’ )
1
SUBTL
201
SUBTL
B. Z financial report ( Key lock : ‘Z’ )
C. X2 financial report ( Key lock : ‘X’ )
D. Z2 financial report ( Key lock : ‘Z’ )
79
3.3 TIME REPORT
A. X time report ( Key lock : ‘X’ )
2
SUBTL
202
SUBTL
B. Z time report ( Key lock : ‘Z’ )
C. X2 time report ( Key lock : ‘X’ )
D. Z2 time report ( Key lock : ‘Z’ )
80
3.4 PLU REPORT
A. X PLU report ( Key lock : ‘X’ )
3
SUBTL
203
SUBTL
B. Z PLU report ( Key lock : ‘Z’ )
C. X2 PLU report ( Key lock : ‘X’ )
D. Z2 PLU report ( Key lock : ‘Z’ )
3.5 FROM / TO PLU REPORT
A. X from / to PLU report ( Key lock : ‘X’ )
PLU
PLU
PLU NO. ( 1 ~ 1000 )
a
NOTE : If you press the “ CASH/TEND”
b
PLU NO. ( 1 ~ 1000 )
(a ≤ b )
key during issuing the PLU or FROM/TO PLU report,
the report will be finished after printing TOTAL COUNT and TOTAL AMOUNT.
81
3.6 IN-DRAWER REPORT
A. X in-drawer report ( Key lock : ‘X’ )
4
SUBTL
3.7 DAILY SALES REPORT
A. X2 daily sales report ( Key lock : ‘X’ )
205
B. Z2 daily sales report ( Key lock : ‘Z’ )
82
SUBTL
3.8 INDIVIDUAL CLERK REPORT
3.8.1 IN CASE OF 4 CLERKS ( SYSTEM OPTION 28’ s VALUE ‘ C’
=0 )
A. X individual clerk report ( Key lock : ‘X’ )
SUBTL
B. Z individual clerk report ( Key lock : ‘Z’ )
CLERK
1, 2, 3 or 4
C. X2 individual clerk report ( Key lock : ‘X’ )
20
SUBTL
D. Z2 individual clerk report ( Key lock : ‘Z’ )
CLERK
1, 2, 3 or 4
3.8.2 IN CASE OF 15 CLERKS ( SYSTEM OPTION 28’ s VALUE ‘ C’
=4 )
A. X individual clerk report ( Key lock : ‘X’ )
SUBTL
B. Z individual clerk report ( Key lock : ‘Z’ )
CLERK 4
CLERK NO. ( 1 ~ 15 )
C. X2 individual clerk report ( Key lock : ‘X’ )
20
D. Z2 individual clerk report ( Key lock : ‘Z’ )
SUBTL
CLERK 4
CLERK NO. ( 1 ~ 15 )
* OPTIONAL FULL CLERK REPORT ( SYSTEM OPTION 8 ) *
83
3.9 FROM / TO DEPARTMENT REPORT
A. X from / to department report ( Key lock : ‘X’ )
DEPT
DEPT
a
b
(a≤ b)
3.10 DEPARTMENT REPORT
A. X department report ( Key lock : ‘X’ )
30
SUBTL
230
SUBTL
B. Z department report ( Key lock : ‘Z’ )
C. X2 department report ( Key lock : ‘X’ )
D. Z2 department report ( Key lock : ‘Z’ )
84
TROUBLE SHOOTING
Check the following items if the cash register does not work correctly !!
* Is the power cord plugged into the main socket correctly ?
* Is the wall outlet supplying power ?
Try plugging in another appliance.
* Is the control lock in the correct position ?
* Did you change the position of the control lock during registration of the transaction ?
If you set the control lock to another position while registration is in progress, an error will occur.
Return to the previous control lock position and press the correct keys to finalize the original transaction
before changing the control lock setting.
MEMORY PROTECTION BATTERY
Totaled sales and other items are protected during power failures by a built in memory protection
battery.
The memory protection battery is charging when the power is on and discharging when the power is
off. This cause the capacity of the battery to decrease after about one year of use.
A label on the back of the cash register shows the normal service period of the battery installed in your cash
register.
NOTE : A weak battery has the potential of losing valuable transaction data.
SPECIFICATION
POWER
AC 230 V , 50 Hz
CABINET
ABS ( V0 )
PRINTER
ERP-300V ( 2 STATION DOT-MATRIX PRINTER )
DISPLAY
FRONT 10 DIGITS / REAR 10 DIGITS
DRAWER
METAL ( 8 COINS / 4 BILLS )
WEIGHT
15.0 Kg
DIMENSION
SET = 374 (W) x 458 (D) x 195 (H)
DRAWER = 400 (W) x 450 (D) x 111 (H)
( Including foot )
USAGE CONDITION
TEMPERATURE : 0°C ~ 40°C
NOISE
UNDER 70 dB
HUMIDITY : 10 % ~ 90 %
85
APPENDIX
1 CHARACTER CODE TABLE
CHAR
á
à
â
ä
å
Ä
Å
é
è
ê
CODE
001
002
003
004
005
006
007
008
009
010
CHAR
ë
É
ñ
Ñ
ó
CODE
011
012
013
014
015
016
017
018
019
020
CHAR
ò
ô
ö
Ö
ú
ù
ü
û
Ü
æ
CODE
021
022
023
024
025
026
027
028
029
030
CHAR
ß
!
"
#
$
%
&
CODE
031
034
035
036
037
038
039
040
0
1
2
048
049
050
CHAR
)
SPACE
í
032
033
*
+
ì
,
î
-
ï
.
Í
/
'
(
CODE
041
042
043
044
045
046
047
CHAR
3
4
5
6
7
8
9
CODE
051
052
053
054
055
056
057
058
059
060
CHAR
=
>
?
@
A
B
C
D
E
F
CODE
061
062
063
064
065
066
067
068
069
070
CHAR
G
H
J
K
L
M
N
O
P
CODE
071
072
073
074
075
076
077
078
079
080
CHAR
Q
R
S
T
U
V
W
X
Y
Z
CODE
081
082
083
084
085
086
087
088
089
090
CHAR
∈
Pts
ƒ
^
?
Ft
a
b
c
d
CODE
091
092
093
094
095
096
097
098
099
100
CHAR
e
g
h
m
n
CODE
101
102
103
104
105
CHAR
o
p
q
r
s
CODE
111
112
113
114
115
CHAR
y
z
CODE
121
122
86
f
I
i
j
106
t
116
k
:
l
;
<
107
108
109
110
u
v
w
x
117
118
119
120
2 ALPHA-NUMERIC KEYBOARD LAYOUT
2.1 ER-5115 ALPHA-NUMERIC KEYBOARD LAYOUT
ñ
RECEIPT
DETAIL
FEED
FEED
RECEIPT
SPACE
CLEAR
4
8
5
æ
8
#
=
w
W
&= LEVEL 3
@ = LEVEL 2
z
= LEVEL 1
Z
= LEVEL 0
”
<
v
V
%
?
y
Y
f
F
l
L
r
R
BKSP
Í
+
e
E 5
ö
1
k
K 10
Ü
7
q
Q 15
9
ï
*
d
D 4
ô
0
û
6
p
P 14
ON/OFF
7
Ö
2
,
6
j
J
î
)
c
C 3
I
1
2
3
ì
(
b
B 2
0
00
.
í
’
a
A 1
9
ò
!
;
u
U
SPACE
8
ü
5
o
O 13
t
T
ó
.
h
H 7
ù
4
n
N 12
ß
9
s
S
Ñ
g
G 6
ú
3
m
M 11
/
i
$
>
x
X
:
DOUBLE
LEVEL
SHIFT
CASH/
TEND
87
2.2 ER-5140 ALPHA-NUMERIC KEYBOARD LAYOUT
RCPT
DETL
RCPT
FEED
FEED
ON/OFF
OUT
CLEAR
Bksp
W
/
Å 5
Pt
4
É 10
Æ
3
ë 9
7
8
9
V
.
Ä 4
4
5
6
U
å 3
Z
2
ê 8
T
,
ä 2
Y
1
è 7
S
+
â 1
X
0
é 6
1
0
88
PAID
Space
2
00
3
.
a
9
Í 15
Ft
8
ï 14
?
7
î 13
^
6
ì 12
ƒ
5
í 11
f
>
ô 20
k
C
ü 25
p
H
Space
u
M
% 35
e
=
ò 19
j
B
ù 24
o
G
ß 29
t
L
$ 34
d
<
ó 18
i
A
ú 23
n
F
æ 28
s
K
# 33
c
;
Ñ 17
h
@
Ö 22
m
E
Ü 27
J
b
:
ñ 16
g
?
ö 21
l
D
û 26
= LEVEL 2
= LEVEL 1
= LEVEL 0
y
Q
. 39
- 38
w
O
32
q
I
! 31
SHIFT
x
P
r
”
LEVEL
’
DOUBLE
37
v
N
& 36
CASH/TEND
3 COMMUNICATION INTERFACE
3.1 PIN DESCRIPTION FOR SERIAL INTERFACE
5
4
9
3
8
2
7
1
6
SERIAL PORT
SERIAL PORT
PIN NO.
1
2
3
4
5
6
7
8
9
SIGNAL
Not connect
RXD
TXD
DTR
GND
Not connect
Not connect
Not connect
Not connect
3.2 CABLE SPECIFICATION
Ferrite core inserted and turned to
2 ( Core type : OP-18E )
50mm
CABLE FOR SERIAL PORT
89
4 COMMUNICATION WITH PC
This cash register can communicate with PC.
The programming contents are downloaded from PC and uploaded to PC.
And the each report is uploaded to PC.
To communicate with PC,
( 1 ) Turn the control lock key to the “ SERVICE MODE” .
( 2 ) Press the “ RECD ACCT”
key. The message “ --OnLInE--”
NOTE : If you want to escape from “ online”
will be shown on the display.
mode, press the “ CLEAR”
key.
It is advisable to always shut down ‘WINDOWS’ into ‘DOS’ before using the ER5100 Utility program.
5 PRINTING ON THE ROLL PRINTER
If you want to print the sale items on the roll printer, set the SYSTEM OPTION ADDRESS 48 to 1.
And then, the sale items will be printed on the roll printer when tendering.
Refer to SYSTEM OPTION ADDRESS 54 ( Page 27 ) to select the printer type.
NOTE : If the roll printer is disconnected, the contents will be printed on the receipt.
EX )
13
CHECK #
20
90
PLU
1000
DEPT 1
CASH/TEND
3
X/TIME
DEPT 3
6 SCALE
If you want to operate the scale, set the SYSTEM OPTION ADDRESS 42 to 1.
And then you can use the “PRICE INQ.” key as the “SCALE” key.
6.1 DIRECT SCALE ENTRY
When product is placed on the scale and the “SCALE” key is pressed, the weight will be appear on the
display.
EX )
SCALE
20
PLU
CASH/TEND
6.2 MANUAL WEIGHT ENTRY
If you want to make manual weight entries, set the SYSTEM OPTION ADDRESS 42’ s value ‘ b’ .
EX )
1.25
SCALE
500
DEPT 1
CASH/TEND
Weight ( 0.001 ~ 999.999 )
91
WIRING SPECIFICATION FOR PC & PRINTER
Samsung ER-5100 to Personnel Computer.
ECR
9 pin (male)
Computer
9 pin (female)
25 pin female
RXD 2 ……………………………………..TXD 3…………………TXD 2
TXD 3 ……………………………………..RXD 2…………………RXD 3
GND 5……………………………………..GND 5…………………GND 7
Samsung ER-5100 to Kitchen/Slip Printer
ECR
9 pin (male)
Printer
25 pin (male)
RXD 2………………………………………………….TXD 2
TXD 3………………………………………………….RXD 3
DTR 4………………………………………………….DSR 6
GND 5…………………………………………………GND 7
DSR 8………………………………………………….DTR 20
92