1
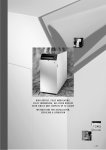
MICROMAT EC
Wall mounted Ultra High Efficiency Gas Boilers
16/22 24/28 31/36 38/45
Instructions for Usage, Installation & Commissioning
Index
Page
4
8
8
10
11
11
11
12
12
13
14
14
15
16
19
22
24
33
33
33
43
44
45
48
50
52
Section
1.0
2.0
3.0
4.0
5.0
6.0
7.0
8.0
9.0
9.1
10.0
11.0
12.0
13.0
14.0
15.0
16.0
16.1
16.2
17.0
18.0
18.1
18.2
18.3
18.4
18.5
User Instructions
General Notes
Product Description
Technical Data & Dimensions
Delivery Consignment/Unpacking The Boiler
Boiler Location
Installation Clearances
Wall Mounting
Gas Connection
Gas Conversion
System Flow & Return Connections
Condensate Connection
Flue Combustion Air Connection - General
Flue Systems
Calculating Flue Resistance
Ventilation Requirements Single Appliances
Hydraulic system Design (circuit diagrams)
Water Treatment System Cleaning
Care With The Use of Soldering Flux
Electrical Connections
Commissioning The MICROMAT EC Boiler
Pre-Commissioning Checks
Installation codes
First Firing
Commissioning -- pop-up menu and weather compensation
Commissioning -- the status indicator
1.0 user instructions for
the micromat boiler
Boiler Switch Panel
Display
ON/Off switch
Water pressure
guage
Menu/Reset
Button
Summer/Winter
and “+” button
Engineers
Test button
and “-” button
Before operating the boiler:
Check that the boiler has been installed in strict accordance with the instructions contained in this manual. Non
compliance with the instructions may result in injury and/or damage to property. the warranty on the boiler is void if
the boiler is not installed in accordance with these instructions.
Check the following points with the installer:
A suitable corrosion inhibitor has been added to the water in the system. (see page 33)
The water used to fill the system is within the purity limits specified (page 33)
Any soldering fluxes used are compatible with the boiler.
A low pressure cut out switch has been fitted (RVR stock no. SEC569) This must interrupt the power supply to the
boiler if the pressure is less than 0.4bar.
The installer should inform the user about the operation and use of the MICROMAT EC boiler and in particular
point out:
- Any safety provisions
- The need to carry out regular maintenance when the screen display shows a “SERVICE” message
The installer must provide the user with all documentation relating to the MICROMAT EC boiler and any ancillary
items.
Important!
The Micromat EC boiler requires an annual service. The boiler display will display [Service] when a service is due
although the boiler will continue to operate normally. An RVR approved service technician should carry out the
annual service.
Switching ON the MICROMAT EC
1) Ensure the pressure gauge indicates a pressure within the system of not less than 0.5 bar and
not more than 3 bar.
2) Ensure the gas supply is turned on.
3) Switch on the on/off switch on the appliance control panel.
After switching on the boiler the MICROMAT EC operates automatically.
Switching OFF the MICROMAT EC
1) Switch off the on/off switch on the appliance control panel.
2) Turn off the gas supply
Turning off the boiler will leave the system at risk of freezing during the winter months and will disable the automatic
pump exercising routine. If the only reason for shutdown is that normal heating is not required, then it is recommended
to leave the boiler on and turn off or turn down any external controls.
4
1.0 user instructions for
the micromat boiler
Description of Boiler Contr
ols
Controls
Menu/Reset Button
This button has three functions
1. Resetting of fault conditions: - When the display text is flashing on and off, a boiler fault is indicated. The type
of fault is displayed on the screen. Please refer to the fault finding section on page 56 for a description of these
faults. The boiler control is reset by pressing the Menu/Reset button once.
2. Inspection of boiler operating parameters:- When the display is not flashing (ie when the boiler is in normal
operation), the Menu/Reset button may be used to inspect the boiler operating parameters.
Press once - Display shows “T1 Sup --°C” - This is the flow water temperature from the boiler.
Press twice - Display shows “T4 Ret --°C “ - This is the return water temperature to the boiler.
Press three times - Display shows “T5 DHW --°C” - This is the domestic hot water storage temperature. A temperature
is shown only if the hot water temperature sensor (RVR Stock no: SBA021) is connected to terminals 1 & 2 on the
front terminal block of the boiler.
Press four times - Display shows “T6 Out --°C” - This is the outside air temperature. A temperature is shown only
if the outside air temperature sensor (RVR Stock no: SPR950) is connected to terminals 3 & 4 on the front terminal
block of the boiler.
Press five times - Display shows “T7 Sec --°C” - This is the mixed flow temperature in the secondary heating circuit.
This menu item is displayed only if the boiler is configured for a mixing valve circuit and the MR03 regulator is
installed.
Press six times - “Revolu -- R/s” - This is the burner blower speed.
Press seven times - Display shows “Pump 1 --%” - This is the speed of the circulation pump as a percentage of its
maximum speed.
Press an eighth time and the display returns to normal displaying the supply water temperature and the date & time.
3. Pop-Up menu function - This function is accessed by pressing and holding the button for at least three seconds.
The following parameters may now be adjusted.
Day setpoint temperature
Timeclock overide function
Domestic hot water storage temperature
Current Day and Time
Timeclock On and Off times for central heating and water heating.
Setback temperature
Holiday fuction
Installation codes
The pop-up menu is navigated using the “+” and/or “-” buttons. The user may move between the menu points as
shown in table 1. Menu parameters are adjusted by pressing the menu/reset button when the required menu point
is shown on the screen. Values are then adjusted using the “+” and/or “-” buttons. After adjustment the value is
saved by pressing the menu/reset button once.
When all adjustments are completed, exit the pop-up menu by moving to [Back] using the “+” and/or “-” buttons and
pressing the menu/reset once.
[*1] Day Temperature
This may be used to adjust the boiler output when weather compensation is used. The default value is 20°C and can
be adjusted between 5C and 30C. Press the menu/reset once to enter adjustment mode. The “+” and/or “-” buttons
may be used to alter the value and cause a parallel displacement in the weather compensation line. The new value
is saved by pressing the menu/reset button. Note: This menu point is visible only when weather compensation is
enabled.
[*2] Party
The “Party” menu point overides the boiler time programs. It can be set from 0 - 24 hours and returns to 0 once the
time has expired. Press the menu/reset button once and then adjust the value using the “+” and/or “-” buttons.
Press the menu/reset button once again to save.
[*3] Temp DHW
Press the menu/reset once to enter adjustment mode. The domestic hot water storage temperature is adjusted
using the “+” and/or “-” buttons and saved by pressing the menu/reset once. The adjustment range is between 40
and 60°C.
[*4] Day/Time
The current day, hour and minute may be adjusted. Move between the day, hour and minute values using the menu/
reset button and change the settings using the “+” and/or “-” buttons as required.
Ltd.
E n e r g y
T e c h n o l o g y
5
1.0 user instructions for
the micromat boiler
[*5] Set CH Times
The central heating on and off times are adjusted using this menu point. There are three ON times and three OFF
times per day.
There are two sub-menus in this menu.
a) Day required
b) On and Off times for central heating
With the menu item [Set CH Times] displayed, press the menu/reset once and [Monday] appears in the display. One
can move between the days using the ‘+’ and/or ‘-’ buttons. When the required day is reached, the time program for
that day may be entered by pressing the menu/reset button once. [COPY ...>...] now appears on the display. Press
the ‘+’ button once to move to the first switching time [SWITCH ON 1]. Press the Menu/Reset button once, the hour
value flashes and may be adjusted using the ‘+’ and/or ‘+’ buttons. Press the menu button once more. The minute
value now flashes. This may now be adjusted using the ‘+’ and/or ‘-’ buttons. When adjustments have been made,
press the menu/reset once again and the new switching time is saved. Use the ‘+’ and/or ‘-’ buttons to move
between the switching times for the day which you are adjusting. If no switching times are required then use the
value 00:00. When adjustments for the day are completed, repeatedly press the ‘+’ button until [BACK] is displayed
and then press menu/reset once. The next day will be displayed. Perform all of the adjustments required for each
day and then press the ‘+’ button until [BACK] appears.
Press the Menu/Reset button once to exit CH times. The next menu item [Set HW Times] will now be displayed.
Note: It is also possible to copy a complete switching programme for one day to the next day by using the [Copy]
menu item. When [COPY] is displayed press the menu/reset button once. This copies one days programme to the
next day. The display will show the next day in sequence once the copy operation is completed.
[*6] Set HW Times
The hot water heating on and off times are adjusted using this menu point. There are three ON times and three OFF
times per day. The programming procedure for this is the same as for menu point [*5].
[*7] Set MV Times
When a mixing valve circuit is used for a low temperature circuit (e.g. underfloor heating circuit) , this menu point is
available. The mixing valve on and off times are adjusted using this menu point. There are three ON times and three
OFF times per day. The programming procedure for this is the same as for menu point [*5].
[*8] Setback
This menu point may be used to set the temperature to be maintained during the off periods. It may be set at any
value up to 10°C below the day temperature.
[*9] Holiday
This may be used to overide all of the time programmes for a fixed number of days. The room temperature setpoint
will be reduced to the level set using the ‘SETBACK’ menu point and the domestic water temperature setpoint will be
20°C.
[*10] Install
Configuration of the boiler and the setting of operating parameters is carried out using this menu point. This will
generally be done when the boiler is first commissioned. Great care should be taken when altering these parameters
as the adjustments can greatly affect the boiler performance.
To access the configuration level in the Pop Up menu, enter the code (21) in menu point [*10]. This is done using the
“+” and/or “-” buttons and then pressing the Menu/Reset button. A range of parameter settings then becomes available.
These are described in the Commissioning section of this manual.
[*11] Back
Press the Menu/Reset button to exit the Pop-Up menu.
6
1.0 user instructions for
the micromat boiler
Engineer
s Button
Engineers
The user will not normally need to use this button. It is used by the service technician to enable measurement of
flue emissions even without heat requirement being present.
NOTE: This function will not be available if the MICROMAT EC and the heating system have reached their maximum
temperatures.
If the Engineers button is pressed once then the MICROMAT EC operates with half power. The display shows [Flue
Emissi]. If the Engineers button is not pressed again within 10 minutes the MICROMAT EC will switch back to
automatic operation after this period. Pressing the button again when [Flue-Emissi] is displayed brings [10min Low]
onto the display. In this condition the power output of the boiler can be adjusted using the ‘+’ and ‘-’ keys
Pressing the ‘-’ key will reduce the power & pressing the ‘+’ key will increase power.
Pressing the Engineers button again while [10 min. low] is shown in the display switches the MICROMAT EC back
to automatic operation. After 10 minutes partial output the MICROMAT EC will return to automatic operation
TEST Button
The Test button is used to simulate the operation of the hot water high limit stat.
Whilst theTEST-button is pressed the display shows [Limit F/R W/D]. During this display the function of the
MICROMAT EC is blocked. When the button is released the boiler will return to normal operation.
If the button is pressed for more than 3 minutes [STB-Supply] will blink on the display. The function of the MICROMAT
EC is then locked.
The MICROMAT EC can also be locked more quickly by simultaneously pressing the TEST and ENGINEERS button.
When the RESET button is pressed again the MICROMAT EC returns to automatic operation.
Ltd.
E n e r g y
T e c h n o l o g y
7
2.0 general
notes
These instructions are intended to assist the installer, commissioning engineer, maintenance engineer and user with
the installation, maintenance and usage of MICROMAT EC 16/22, 24/28, 31/36 & 38/45 models gas fired condensing
boilers.
Please read this manual fully before commencing the installation of the appliance. The MICROMAT EC must only be
installed by persons deemed to be competent. This manual must be handed to the appliance user following completion of the installation.
3.0 product
description
The MICROMAT EC range of wall mounted gas fired condensing boilers are state of the art appliances which include
a comprehensive range of features. The appliance must only be used on sealed and pressurised systems. System
design must take into account the boiler operating Dt of 20o C.
Wall mounted with compact dimensions
At 900H x 458W x 355D the MICROMAT EC boiler provides maximum heat from minimum dimensions without
compromising serviceability.
fully modulating heat output
The output of the boiler is fully variable, sliding between (approx.) 20% to 100%, which automatically and instantly
adjusts to match the needs of the system. The percentage of power at any given time can be dictated by either
outside air temperature, flow temperature, return temperature, stored domestic hot water temperature, or room
temperature, or a combination of the aforementioned.
fully condensing stainless steel heat exchanger
The MICROMAT EC boiler is designed with extended heat exchange surface area and is fabricated from corrosion
resistant long-life stainless steel. The unique Spiranox heat exchanger will return operating efficiencies from 88%
gross (96% nett) at 60°C return temperature, up to 96% gross (104% nett), at 30°C return temperature.
extremely low harmful emissions
The boiler utilises 100% pre-mix gas/air fed at positive pressure to the metal fibre sheathed radiant burners. The
combustion system incorporates internal flue gas re-circulation and this combined with the precise nature of pre-mix
fuel/air control, gives ultra low emissions to satisfy the most stringent emission regulations in the world currently.
That is: <20mg/kWh NOx (14 ppm DAF) and <14mg/kWh CO (13 ppm DAF). The fully modulating nature of the
appliance also reduces emissions by avoiding repeated start/stops and the associated increase in emissions, which
occurs with burner on/off cycling.
accurate variable burner output control
The pre-mix burner fans have low voltage direct current drive motors with pulse relay counting. This system allows
precise control over fan speed/combustion air volumes. Coupled with a gas valve system set to provide a one to one
ratio of precisely measured volumes of fuel to air, this allows extremely accurate and instant variable burner output
control to be achieved.
8
3.0 product
description
energy saving
In addition to the extremely efficient burner and heat exchanger system employed in the MICROMAT EC each
appliance includes a modulating speed boiler primary pump.
This feature allows the boiler to self-maintain a 20°C ∆t across the heat exchanger, optimising the heat
exchanger efficiency and reducing also the electrical consumption of the pump motors. The result is a
seasonal increase in boiler efficiency of a further 7-10% and a reduction in pump electricity consumption of
up to 70%.
natural gas or LPG
Appliances can be supplied for use with natural gas (G20) or LPG (G31).
comprehensive microprocessor control
The boiler control panel includes a user friendly microprocessor control centre which manages the entire function of
the appliance and encompasses: 1. Management of the essential safety functions of burner ignition and flame monitoring.
2. Water high temperature and flue gas high temperature safety cut out.
3. Modulation of the boiler output and pump speeds in conjunction with operating temperature control.
4. LCD display screen with two lines of text to continuously display operational or fault status.
5. In built weather compensator to provide direct-on boiler VT flow temperature (if required).
6. Remote stored hot water temperature control.
7. In built 2 stage boiler frost protection program.
8. In built pump exercising program to avoid standstill seizure.
9. Cold start boost facility.
10. PC compatibility with data logging which allows communication with the boiler via a lap-top computer to
review / modify operational parameters and access operational history as an aid to fault finding and
preventative maintenance.
11. Range rate adjustment which allows the power to be set to accurately match the maximum needs of
the system, with the facility to set a different firing rate for heating. Output to hot water self adjusts to
the heat transfer capability of the calorifier.
12. Facility to connect optional matched control components which allow the boiler to control a heating circuit
pump, HWS primary pump or diverter valve and an underfloor circuit mixing valve and pump, plus the
ability for the boiler to be controlled by a remote multi function modulating room unit. Multiple boilers may
be connected to a modulating Kaskade manager which further enhances the operating efficiency of a
larger load modular boiler system.
room sealed option
If required, the boiler may be installed to be completely room sealed, taking combustion air directly from outside the
building, using a 125/70 concentric air duct/flue system. Inherent safety is afforded by the negative pressure within
the boiler casing, which in the event of incorrect sealing results in safe inward air leakage only.
extended flue lengths
The excess fan pressure from the combustion system is 100 Pa, which allows the appliance to be exhausted using
small diameter PPS plastic flue components, over long distances, allowing for complete flexibility in boiler siting.
designed for ease of maintenance
Although compact, the MICROMAT EC does not compromise serviceability. The appliance has been engineered to
be easy to maintain with even the most major of service operations being able to be completed easily and quickly
with the minimum of tools.
guarantee
The heat exchanger carries a five year guarantee against manufacturing or material defect provided that INIBAL
corrosion inhibitor is used in the system and a service contract is in place with an RVR approved service agent.
Please contact the RVR Customer Care Dept. for details.
Ltd.
E n e r g y
T e c h n o l o g y
9
4.0 technical data
& dimensions
Model
underside - models EC16/22, EC24/
28, EC31/36 & EC38/45H
60
4
60
5
6
7
50
110
60
3
9
100
10
145
40
100
8
145
plan - models EC16/22, EC24/28,
EC31/36 & EC38/45H
458
16/22
24/28
31/36
38/45
Nominal Heat Input Nett (max)
MICROMAT EC
kW
2.9-15.0
3.4-22.0
4.8-29.0
6.4-36.0
Nominal Heat Output 80/60°C
kW
2.5-14.3
3.1-21.4
4.5-28.4
6.0-35.1
Nominal Heat Output 50/30°C
kW
3.1-15.8
3.6-23.1
5.1-30.7
6.8-38.0
Input Rate Nat Gas (max)
m3/h
1.6
2.3
3.1
3.3
Input Rate LPG (max)
m3/h
0.6
0.89
1.14
1.2
Minimum/Maximum Gas Pressure
mbar
15/60
15/60
15/60
15/60
Flue Gas Volume (hot)
m3/h
Pressure at Flue Outlet
pa
100
100
100
Maximum Working Pressure
bar
3.0
3.0
3.0
3.0
Minimum Working Pressure
bar
0.5
0.5
0.5
0.5
Maximum Flow Temperature
°C
85
85
85
85
Power Supply
Volts
230
230
230
230
Fuse rating
Amps
3.0
3.0
3.0
3.0
Average Power Consumption
Watts
60
60
60
70
Water Content
litres
1.5
1.8
2.1
2.5
Weight (Dry)
kg
34
36
39
45
D e si g n D t
°C
20
20
20
20
100
355
155
229
125mm
125mm
125mm
125mm
2. Flue Gas (OD)
70mm
70mm
70mm
70mm
3. Flow
22mm
22mm
22mm
22mm
4. Flow DHW (EC...HS & S)
22mm
22mm
22mm
22mm
5. Return DHW (EC...HS & S)
22mm
22mm
22mm
22mm
6. Return
22,mm
22,mm
22,mm
22,mm
7. Condense Waste
20mm
20mm
20mm
20mm
8. Gas
15mm
15mm
15mm
15mm
9. Condense Siphon Cleaning
Point (capped)
3/4" BSP
3/4" BSP
3/4" BSP
3/4" BSP
10. Cable Entries
Multiple
Grommets
2
900
45
1
1. Air Duct (OD)
10
5.0 delivery consignment
unpacking the boiler
The boiler is delivered as a consignment of a carton containing the boiler and associated fittings, plus any other
optional ancillary flue or control components in separate cartons.
The boiler carton contains
• Assembled Boiler
• Wall mounting bracket
• Fittings bag attached to corner bracket of packaging containing outside air temperature sensor, vent key
and hose connection.
To unpack the boiler, the carton should be laid on the floor with the top carton seam uppermost. Carefully remove
tape from seam and open carton flaps, remove packing material, wall mounting bracket and fittings carton. For ease
of boiler handling from the carton it is suggested that the carton be slit down each corner and the carton sides laid
out flat. The boiler should only be lifted by contact with the rear (grey) chassis assembly.
To remove the casing from the boiler, slacken the screw in the underside of the casing, unlatch left and right hand
catches on underside of case, pull casing slightly to the front and lift upwards to disengage casing hooks from rear
chassis and then remove casing to the front.
6.0 boiler
location
The MICROMAT EC Boiler is not suitable for installation external to a building. The position chosen for the boiler
must be a structurally sound wall capable of supporting the weight of the boiler and any ancillaries. The position
should allow for access to a condensate drain nearby or an alternative is to install a condensate sump receptacle
and condensate disposal pump which should remove the condensate water to a remote drain. The wall mounting
position of the boiler must allow the boiler to be true plumb vertical to ensure correct operation of the internal gravity
flow condense system. The position for the boiler must satisfy the requirements of BS6798: 1987 or BS6644: 1991.
7.0
installation
clearances
For ease of installation, commissioning and maintenance the following minimum clearances should be observed.
Sides
Above
Below
Front
50mm
250mm
150mm
450mm
Ltd.
E n e r g y
T e c h n o l o g y
11
8.0 wall
mounting
45
458
∅ 12
165
important
945
165
115
2x35x12
785
The MICROMAT EC boiler mounts to the wall via a wall
mounting bracket which interlocks to a rail mounted on the
rear of the boiler. The wall mounting bracket should be firmly
fixed to the wall using suitable fixings with a countersunk
head. The wall mounting bracket positioning detail is shown
in fig 1. The boiler must be carefully offered up to the wall
so that the rail on the rear of the boiler is just above the
wall mounting bracket and then the boiler should be lowered
to engage the bracket and rail. Lifting is advised with 2
persons. Do NOT lift the boiler by the internal parts of the
appliance.
When viewed from the side, the north/south axis of the
boiler must be vertical. The appliance must not be inclined
out from the top, if necessary block or shim behind the
bottom rear of the boiler to achieve a vertical installation.
9.0 gas
connection
The gas connection is located at the base of the appliance
rear r/h side, see fig 2.
The pipe size used to supply the appliance must not be
smaller than the gas connection size on the appliance.
The connection to the appliance must include a suitable
method of disconnection and a gas control cock must be
installed adjacent to the appliance for isolation purposes.
The gas pipe used to supply the appliance must not allow a
pressure drop of greater than 1mbar from the meter to the
appliance.
The nominal inlet working gas pressure measured at the
appliance should be 20.0 mbar for Nat Gas
(G20) or 37 mbar for LPG (G31).
Gas
Connection
12
9.1 gas
conversion
The MICROMAT EC is factory fitted for Natural Gas (G20). However the unit can easily be converted to LPG
(G31) by using the kit supplied (part no. 251588) and following the instructions below.
•Remove cover from boiler
•Open the outlet flange joints at the gas combi valve.
•On the outlet side of the gas combi valve add the Ø 5.7mm LPG jets from the conversion kit.
•Re-tighten the flange joint. Do not forget the O-ring.
•Check for Leakage.
•Plug all the air holes (front and back) on the gas/air mixing chamber using the blind grommets supplied.
Enter the gas type to which the MICROMAT EC is converted on the label next to the type label
Ltd.
E n e r g y
T e c h n o l o g y
13
10.0 system flow
& return connections
NOTE: The MICROMAT EC boiler must only be installed on sealed and pressurised systems. The maximum working
pressure of the boiler = 3 bar. It is recommended that the final working pressure (hot) of the system does not exceed
2.3 bar.
The boiler is equipped with a 22mm flow connection on the left (when looking head on at the boiler) and one return
on the right (22mm).
fig 3
fig 4
Exhaust (125mm)
Air Intake (70mm)
Return DHW/Storage
Connection (EC...HS
& EC...S)
Condensate
Connection
Flow DHW/Storage
Connection (EC...HS
& EC...S)
Return Connection
Flow Connection
11.0 condensate
connection
The condensate connection is located at the underside rear of the appliance see fig 5.
The condensate syphon cleaning point is factory fitted with a heavy grade black plastic cap which MUST NOT BE
REMOVED (see fig 5) apart from routine maintenance cleaning operations and must be in place whenever the
appliance is in operation. WARNING operating the appliance with the cap removed from the syphon cleaning point
will cause products of combustion to be discharged from the cleaning point.
The condensate connection is a ¾” BSP Male threaded stub fabricated from plastic.
The installer must connect to this stub, a ccondensate pipe fabricated from plastic tube and fittings (¾”, 22mm,
overflow pipe is considered suitable). Copper Tube is not acceptable. The condensate pipe must fall continuously
from the appliance to suitable nearby drain.
14
11.0 condensate
connection (contd.)
If any part of the condensate pipe is to be run external to the building or is at risk of freezing, then the pipe must be
suitably insulated to protect from freezing.
If a suitable drain for accepting the condensate is not available nearby to, and below the boiler (e.g. boiler installed
in a basement below ground level location), then a suitable condensate sump receptacle with a discharge pump
should be installed below the boiler to remove the condensate to a remote drain.
When making the condensate pipe connection to the boiler, do not use adhesives, it is recommended to
lightly apply a suitable jointing tape (PTFE or similar) and use only light pressure to connect fittings to the
appliance to avoid damage to the condensate outlet assembly.
It is recommended that the condensate pipework should include a method of disconnection and cleaning points.
12.0 flue/combustion
air connection
The flue connection and combustion air inlet to the appliance are located on the top of the appliance, see fig 6.
These connections are arranged concentrically with the 70mm flue gas connection centrally within the 125mm air
inlet connection.
There are two options for flueing the MICROMAT EC boiler.
i) Conventionally, using flue gas tube only and air for combustion from the room or compartment in which the
appliance is installed. If using a conventional flue arrangement then the room or compartment must be
ventilated in accordance with the requirements of BS 6644 or BS5440 as appropriate. For guidance on
ventilation see section 15.
ii) Room sealed using concentric 70/125 components where air for combustion is taken from outside of the
building. When using a room sealed flue, where air for combustion is provided from outside of the building
directly to the appliance, ventilation to a compartment may still be required - See section 15 for general
space cooling.
Multiple Boilers
For detail and advice on common flues serving multiple boilers, contact RVR Ltd.
Important Note
Where the MICROMAT EC is to be installed in an application where the combustion air is likely to be contaminated
with oxidising agents, such as swimming pool areas, special industrial processes etc, then the
appliance must be room sealed.
Fig 5
Fig 6
Exhaust (125mm)
Air Intake (70mm)
Condensate
Connection
Condensate
Connection
Ltd.
E n e r g y
T e c h n o l o g y
15
13.0 flue
systems
The MICROMAT EC has an excess pressure combustion system that allows the appliance to be exhausted over extended
distances using small OD flue components.
The flue gas temperature is extremely low (typically the same as the flow water temperature), which allows the use of easy
to install PPS (polypropylene) flue pipe and fittings.
The appliance can take combustion air from the room in which it is installed (conventional application) or can be room
sealed (fanned balanced flue) using a concentric flue arrangement of a 70mm PPS flue duct within a 125mm galvanised
metal air duct, finished in off-white RAL 7035. A full range of flue pipe and air duct components including roof and wall
terminals is available from RVR Limited.
Concentric Wall
Terminal Set
Order Code
SBA050
Flue System Option No. 1
Horizontal Balanced Flue System
Using this sytem the air for combustion and the flue
products are piped to/from outside the space.
Flue Products
Sampling Tee.
The balanced flue may pass through the wall directly
behind, or, on either side of the MICROMAT EC.
The following components and options are available from
RVR Limited:--
MICROMAT EC
•70/125 concentric wall terminal set complete with flue
products sampling tee, 500mm straight concentric flue,
wall sealing plates and outside terminal. These are
finished in RAL 7035 (the 125mm galvanised pipe) and
light grey (natural coulour of 70mm PPS pipe). RVR
Order Code - SBA050
Horizontal Balanced Flue with side exit.
The system may be extended using the following accessories:
•125mm Ø Extension pipe RAL7035, 250mm long. RVR Order
Code - SBA053
Concentric Wall
Terminal Set
Order Code
SBA050
•125mm Ø Extension pipe RAL7035, 500mm long. RVR Order
Code - SBA054
•125mm Ø Extension pipe RAL7035, 1000mm long. RVR Order
Code - SBA055
Flue Products
Sampling Tee.
•125mm Ø 90° bend RAL7035. RVR Order Code - SBA056
•70mm Ø Extension Pipe PPS, 250 mm long. RVR Order Code
- SBA057
•70mm Ø Extension Pipe PPS, 500mm long. RVR Order Code SBA058
•70mm Ø Extension Pipe PPS, 1000mm long. RVR Order Code
- SBA059
•70mm Ø 90° bend PPS. . RVR Order Code - SBA060
MICROMAT EC
•Birdscreen for 70mm Pipe. RVR Order Code - ACB002
Horizontal Balanced Flue with rear exit.
16
13.0 flue
systems
Flue System Option No
No.. 2
tical Balanced F
lue System
ertical
Flue
Ver
Using this system the air for combustion and the flue products are piped vertically to/from outside the space.
The balanced flue may exit through both flat and pitched roofs. Suitable flashings are available for either case.
This following components and options are available from RVR Limited:
•70/125 concentric roof terminal set, complete with concentric pipes and terminal. The air pipe is finished in black
PPS and the flue pipe in grey PPS. The length is 1150mm. RVR Order Code - SBA051
•70/125 concentric roof terminal set, complete with concentric pipes and terminal. The air pipe is finished in black
PPS and the flue pipe in grey PPS. The length is 2000mm. RVR Order Code - SBA061
•Flue Products Sampling Tee (RAL 7035). RVR Order Code - SBA052 (Note: This item must be used with either of
the above kits)
•Pitched Roof Flashing (20° - 45°). RVR Order Code - SBA062
or
• Flat Roof Flashing. RVR Order Code - SBA063
The system may be extended using the following accessories:
•125mm Ø Extension Pipe, Black PPS, 1020mm long. RVR Order Code - SBA064
•125mm Ø Extension Pipe, Black PPS, 2000mm long. RVR Order Code - SBA065
•70mm Ø Extension Pipe, Grey PPS, 1000mm long. RVR Order Code - SBA059
•70mm Ø Extension Pipe, Grey PPS, 2000mm long. RVR Order Code - SBA066
•45° Bend Black PPS, Male and Female Connections. RVR Order Code - SBA067
•45° Bend Black PPS, two Female Connections. RVR Order Code - SBA068
•70mm Ø 90° bend PPS. RVR Order Code - SBA060
Pitched Roof
Flashing 20°-45°
Order Code
SBA062
Flat Roof
Flashing
Order Code
SBA063
Vertical Balanced Flue
Kit (Black PPS)
Order Code SBA051/
SBA061(1150mm/
2000mm)
Vertical Balanced
Flue Kit (Black PPS)
Order Code
SBA051/
SBA061(1150mm/
2000mm)
Flue Products
Sampling Tee
(RAL 7035)
Order Code
SBA052
Flue Products
Sampling Tee
(RAL 7035)
Order Code
SBA052
MICROMAT EC
MICROMAT EC
Vertical Concentric System (Pitched Roof)
Vertical Concentric System (Flat Roof)
Ltd.
E n e r g y
T e c h n o l o g y
17
13.0 flue
systems
Cut Flue
Hole Dia
130mm
of
op ssis
e T ha
Lin ce C
n
a
pli
Ap
70mm Ø Grey
PPS Pipe
Order Code
SBA059
70mm Ø Grey
PPS Pipe
250mm long
Order Code
SBA057
155
170
70mm Ø Grey
PPS Pipe
500mm long
Order Code
SBA058
Flue Products
Sampling Tee
Order Code
SBA052
Cut Flue Hole
Dia 130mm
70mm Ø 90°
Bend Grey PPS
Order Code
SBA060
170
MICROMAT EC
C
L
Flue System Option No. 3
Horiz
ontal Disc
har
ge with air ffor
or Comb
ustion tak
en fr
om R
oom.
Horizontal
Dischar
harg
Combustion
taken
from
Room.
Using this sytem the air for combustion is taken in from the room at the sampling Tee and the flue products
are exhausted horizontally through a wall.
This sytem comprises :
•Flue Products Sampling Tee (RAL 7035). RVR Order Code - SBA052 ( This must always be used)
•70mm Ø Extension Pipe, Grey PPS, 1000mm long. RVR Order Code - SBA059
The system may be extended using the following accessories:
•70mm Ø Extension Pipe PPS, 250 mm long. RVR Order Code - SBA057
•70mm Ø Extension Pipe PPS, 500mm long. RVR Order Code - SBA058
•70mm Ø Extension Pipe PPS, 2000mm long. RVR Order Code - SBA066
•70mm Ø 90° bend PPS. RVR Order Code - SBA060.
•Birdscreen for 70mm Pipe. RVR Order Code - ACB002.
18
14.0 calculating
flue resistance
The excess pressure available for overcoming the frictional resistance of a flue system is 100 Pa. The table below
of flue component resistances will assist the designer in calculating total flue system frictional loss.
If the total installed flue system resistance exceeds 100 Pa., then the result will be a reduction in boiler output.
Reference to the ‘Effect of Flue System Resistance On Boiler Output”, graphs will assist. If the resistance of a
proposed flue system has an unacceptable effect on boiler output, then a larger diameter flue tube should be
selected.
Thermal up-draught is generated in a vertical flue system, reducing the resistance of the system. Reference to the
‘Thermal Up-draught Graph’ will provide a figure in Pa., which may be deducted from the total calculated flue system
resistance.
NB. Thermal up-draught does not apply to horizontal sections of a flue system.
Component Resistance (Pa).
70/125 Concentric Wall Terminal
Boiler Model
16/22
24/28
31/36
38/45
6
8.5
10.6
12.7
6
8.5
10.6
12.7
70/ 125 Concentric Roof Terminal With Rain Cap
8.9
12.7
15.8
19
I m length 70/I25 Concentric Tube
4.5
6.4
7.9
9.5
93°C 70/I25 Concentric Bend
4.5
6.4
7.9
9.5
45°C 70/I25 Concentric Bend
2.4
3.4
4.2
5
4
5.7
7.1
8.5
2.4
3.4
4.2
5
70/125 Concentric Roof Terminal Without Rain Cap
Im length DN 70 PPS Tube Carrying Fluegas
Im length DN 70 PPS Tube Carrying Combustion
Ai r
90° DN 70 PPS Bend Carrying Fluegas
4
5.7
7.1
8.5
2.4
3.4
4.2
5
45° DN 70 PPS Bend Carrying Fluegas
2
2.8
3.4
4
45° DN 70 PPS Bend Carrying Combustion Air
1
1.4
1.7
2
90° DN 70 PPS Bend Carrying Combustion Air
Room Sealed Chimney Cap DN 70
5.6
8
10
12
DN 70 x 100 PPS Increaser Piece-Fluegas or Air
0.8
1.1
1.3
1.5
90° DN 100 PPS Bend Carrying Fluegas
1.7
2.4
3
3.5
90° DN 100 PPS Bend Carrying Combustion Air
1.2
1.7
2.1
2.5
45° DN 100 PPS Bend Carrying Fluegas
0.8
1.1
1.3
1.5
45° DN 100 PPS Bend Carrying Combustion Air
0.8
1.1
1.3
1.5
Im length DN 100 PPS Tube Carrying Fluegas
0.8
1.1
1.3
1.5
Im length DN 100 PPS Tube Carrying Combustion
Ai r
0.8
1.1
1.3
1.5
DN 70 Open Termination With Mesh
3.4
4.8
5.9
7
DN 100 Open Termination with Mesh
0.8
1.1
1.3
1.5
70/125 To 100/150 Concentric Increaser
1.4
2
2.5
3
90° DN 100 PPS Bend Carrying Fluegas
0.6
0.8
0.9
1.0
90° DN 100 PPS Bend Carrying Combustion Air
0.6
0.8
0.9
1.0
45° DN 100 PPS Bend Carrying Fluegas
0.6
0.8
0.9
1.0
45° DN 100 PPS Bend Carrying Combustion Air
0.3
0.4
0.5
0.5
Im length DN 100 PPS Tube Carrying Fluegas
0.8
1.1
1.3
1.5
Ltd.
E n e r g y
T e c h n o l o g y
19
14.0 calculating flue resistanceflue pressure loss
20
thermal updraught when
flue gas temp 80°C and outside temp -5°C
A = Insulated or within the building
B = Uninsulated and exterior to the
building
140
A
130
120
110
100
Draught - Pa
90
80
70
B
60
50
40
30
20
10
0
0
2 4
6 8 10 12 14 16 18 20 22 24 26 28 30 32 34 36 38 40
Vertical Flue Lengths - metres
effect of flue system resistance
on boiler output
73
71
69
67
65
MI
CR
63
OM
AT
EC
76
61
59
57
55
Boiler output kW at: flow 80°C Return 60°C
example I
A MICROMAT EC 62 boiler is installed with a concentric
flue system which takes an all horizontal route to a wall
terminal. Length of flue = 3m including one 90° bend.
Resistance =
3 x 1m length 70/125 concentric tube @ 16.6 Pa = 49.8
1 x 90° 70/125 concentric bend @ 16.6 Pa =16.6
I x 70/125 concentric wall terminal @ 21.4 Pa = 21.4
Total Resistance = 87.6Pa
conclusion: Total resistance is less than 100 Pa. therefore,
no alternative design required and no effect on boiler output,
or positioning required
example 2
A MICROMAT EC 45 boiler is installed with a concentric
flue system which takes a part horizontal, part vertical route
to a roof terminal with rain cap.
Length of horizontal section = 1m, vertical section = 6m,
system includes 1 x 90 o bend.
Resistance =
7 x 1m lengths 70/125 concentric tube @ 10.7 Pa = 74.9
1 x 90° 70/125 concentric bend @ 10.7 Pa= 10.7
1 x 70/125 roof terminal @ 21.9 Pa = 21.9
Total Resistance = 107.5 Pa
Take into account that 6m of vertical (assume uninsulated,
as air for combustion direct from outside air surrounds the
flue gas tube) flue creates 10 Pa of up-draught,
then final resistance = 107.5 - 10 = 97.5 Pa.
conclusion: Final operating resistance is less than 100 Pa,
therefore, no alternative design required and no effect on
boiler output.
example 3
A MICROMAT 1-75 boiler is installed (non room sealed) with
a proposed flue using DN 70 PPS single skin flue components which takes a part horizontal, part vertical route to a
vertical open termination with bird mesh.
Length of horizontal section = 4m, length of vertical
(uninsulated) section = 11m with 4 x 90 o bends,
and 2 x 45 o bends.
Resistance =
15 x 1m lengths DN 70 PPS tube @ 21.4 Pa = 321
4 x 90 o DN 70 PPS bends @ 21.4 Pa = 85.6
2 x 45 o DN 70 bends @ 10.7 Pa = 21.4
1 x DN 80 open termination @ 15.6 Pa = 15.6
Total Resistance: 443.6 Pa
Take into account that 11m of vertical uninsulated flue
creates 18 Pa of up-draught, then final resistance would be
443.6-18 = 425.6 Pa.
Reference to the graph of resistance effect on boiler output
shows the output would be reduced to approximately 59kW.
If this is unacceptable, then the flue resistance must be recalculated using a larger size flue tube as shown below or
consideration given to moving the boiler position.
Re-calculating proposed flue installation using DN 100.
15 x 1m lengths DN 100 PPS tube @ 3.0 Pa = 45
4 x 90 o DN 100 bends @ 3.0 Pa = 12
2 x 45 o DN 100 bends @ 1.5 Pa = 3.0
1 x DN 100 open termination @ 4.0 Pa = 4.0
Total Resistance: 64 Pa
Take into account thermal up-draught created (as before)
18 Pa. Therefore operating resistance = 64 – 18 = 46 Pa,
with no effect on boiler output.
53
51
49
MIC
ROM
AT
47
EC
62
45
43
41
MIC
ROM
AT
39
EC
45
37
35
33
31
29
0
50
100
150
200
250
300
350
Flue System resistance - Pa
400
450
500
14.0 calculating flue resistanceflue pressure loss
Minimum dimensions of flue terminal positions see fig. 7 below
D i mensi on Termi nal Posi ti on
A
B
Balanced Flue Room Sealed
D i rectly below an openi ng, ai r bri ck,
wi ndows etc.
Not Recommended
Below gutters, soi l pi pes or drai n
pi pes
Non Room Sealed
300mm
300mm
75mm
75mm
200mm
200mm
200mm
But i nstallati on not
recommended
200mm
But i nstallati on not
recommended
C
Below eaves
D
Below balconi es or car port roof.
Not Recommended
E
From verti cal drai n pi pe or soi l pi pe
75mm
75mm
F
From an i nternal or external corner
300mm
300mm
G
Above ground, i ntersecti ng roof or
balcony level
300mm
300mm
H
From a surface faci ng the termi nal
2000mm
2000mm
I
From a termi nal faci ng the termi nal
2000mm
2000mm
J
From an openi ng i n the car port (e.g.
door, wi ndow) i nto dwelli ng
1200mm
But i nstallati on not
recommended
1200mm
But i nstallati on not
recommended
1500mm
1500mm
300mm
300mm
n/a
50mm
K
L
M
Verti cally from a termi nal on the same
wall
Hori zontally from a termi nal on the
same wall
From the wall on whi ch the termi nal i s
mounted
N
From a verti cal structure on the roof
500mm
500mm
P
Above i ntersecti on wi th roof
500mm
500mm
flue terminal positions
N
The flue terminal of a MICROMAT EC boiler
will plume heavily and care must be taken
when selecting a terminal position to ensure
that a ‘nuisance situation’ is not created.
If a flue terminal is positioned within 2 m
above ground level or any upper part of a
building where people have general access
(e.g. balcony etc) then the terminal should
be fitted with an appropriate guard.
P
P
A
P
B,C
G
H,I
D
F
K
J
L
E
A
G
L
K
F
F
Fig 7
Ltd.
E n e r g y
T e c h n o l o g y
21
15.0 ventilation requirements
single appliances
The room or space in which the Micromat EC boiler is installed is required to be ventilated in accordance with
BS 5440: Part 2:2000.
The following tables must be read to ascertain the amount of ventilation required.
Table 1
Room Intallation - Non Room Sealed Flue.
Natural Ventilation Direct to Outside Air
Boiler Model
Ventilation openings Free Area cm 2
High Level
Low Level
75
--105
--145
--190
---
Micromat
Micromat
Micromat
Micromat
EC
EC
EC
EC
16/22
24/28
31/36
38/45
Tabel 2
Room Installation - Non Room Sealed Flue.
Natural Ventilation from Adjacent Room
Boiler Model
Micromat EC
Micromat EC
Micromat EC
Micromat EC
16/22
24/28
31/36
38/45
Table 3
Ventilation openings Free Area
75 with adjacent room similarly ventilated to outside air
105 with adjacent room similarly ventilated to outside air
145 with adjacent room similarly ventilated to outside air
190 with adjacent room similarly ventilated to outside air
Room Installation - Room Sealed Flue
There are no specific requirements for a room to be ventilated where the appliance
is room sealed. However consideration should be given to providing ventilation for general cooling, (BS 6644
specifies room temperature limits) and the following free ventilation areas are recommended to be installed.
Boiler Model
Micromat EC
Micromat EC
Micromat EC
Micromat EC
Recommended Natural Ventilation free Area cm 2
75 with adjacent room similarly ventilated to outside air
105 with adjacent room similarly ventilated to outside air
145 with adjacent room similarly ventilated to outside air
190 with adjacent room similarly ventilated to outside air
Table 4
Compartment Installation - Non room sealed flue
Natural Ventilation Direct to Outside Air
Boiler Model
Ventilation Openings free Area cm2
High Level
Low Level
Micromat
Micromat
Micromat
Micromat
EC
EC
EC
EC
16/22
24/28
31/36
38/45
110
140
180
225
220
280
360
450
Table 5
Compartmetn Installation - Non Room Sealed Flue
Natural Ventilation from Adjacent Room
Boiler Model
Ventilation Openings free Area cm2
High Level
Low Level
Micromat
Micromat
Micromat
Micromat
22
16/22
24/28
31/36
38/45
EC
EC
EC
EC
16/22
24/28
31/36
38/45
220
280
360
450
440
560
720
900
15.0 ventilation requirements
single appliances
Table 6
Compartment Installation - Room Sealed Flue
Natural Ventilation Direct to Outside Air
Boiler Model
Ventilation openings Free Area cm 2
High Level
Low Level
Micromat
Micromat
Micromat
Micromat
EC
EC
EC
EC
16/22
24/28
31/36
38/45
110
140
180
225
110
140
180
225
Table 7
Compartment Installation - Room Sealed Flue
Natural Ventilation from Adjacent room
Boiler Model
Ventilation Openings Free Area cm 2
High Level
Low Level
Micromat
Micromat
Micromat
Micromat
EC
EC
EC
EC
16/22
24/28
31/36
38/45
220
280
360
450
220
280
360
450
Ltd.
E n e r g y
T e c h n o l o g y
23
16.0 hydraulic system
design
• The MICROMAT EC boiler can be operated to serve a heating load in a number of ways:
I.Constant flow temperature, with the option to set either high temperature (85°C), medium temperature
(75°C) or low temperature (55°C).
2.Direct-on-boiler weather compensated flow temperatures, with adjustable maximum flow temperature.
3.Underfloor heating coils via a VT mixing valve with a maximum flow temperature of 55°C plus a second
circuit (eg. radiators) operating with direct-on-boiler weather compensated temperatures.
• Flow to return drop (∆t). The microprocessor controls monitor return temperature and the facility to dictate a set ∆t
(by pump speed modulation) is a standard and most important feature and will maintain the ∆t across the boiler at
20°C, as the lower the return temperature, the higher the operating efficiency. HT and MT systems should be designed
for ∆t 20°C and LT (underfloor coils via a mixing valve) systems ∆t 10°C. Designing for a ∆t 20°C gives the added
cost saving advantage of smaller pipe sizes and pumps.
• The MICROMAT EC includes ‘in built’ primary pumps with a residual head pressure as listed below.
• Appliances may be installed as single units or in multiples.
• Single units may or may not require additional system pumps which will be dictated by the system configuration
and by the index resistance.
• Multiple units (and single units which require additional pumps), should always be installed with a low loss mixing
header or similar arrangement – see table below.
• The MICROMAT EC boiler has in built domestic hot water (remote stored) temperature control ability, and if required, the in built pumps may be used to provide the primary flow to a nearby indirect cylinder or calorifier with the
boiler controlling a diverter valve in the main flow or return pipework.
The following system schematics show a number of typical installation types to which the MICROMAT EC boiler may
be connected.
The MICROMAT EC is not limited to just the systems shown, and may be used in conjunction with many
commercially available control items.
For further advice or guidance on schematic designs or control options contact RVR Ltd.
low velocity mixing header
diameter sizing guide
Boiler Power kW
Up to 45
75
10 0
12 0
15 0
200
250
270
300
340
Design ∆t 20°C
40mm
50mm
65mm
65mm
80mm
80mm
100mm
100mm
100mm
100mm
Tube Diameters refer to steel pipe and calculated from
C IBSE Guide C 4
24
Inbuilt boiler pumps
approx residual head pressure at
∆t 20°C
Boiler Model
16/22
24/28
31/36
38/45
Pressure Metres wc
1
1
1
1
16.0 hydraulic system
design
System type 1
Typical Typical Single MICROMAT EC boiler installation serving heating only where the boiler’s own in-built circulating
pump is used to circulate the water around the system (used only where system index resistance <1 metre). Flow
temperature may be fixed/constant or weather variable.
OS
Micromat EC
boiler
C
Safety Valve
LSV
IV
DOC
Condensate
DOC
Expansion Vessel
CWM
IV
DOC
IV
Return from
system
Strainer
Flow to
system
OS = Outside air temperature sensor, used where
direct-on-boiler weather compensated flow
temperatures are required.
C = Room temperature controls e.g. RE2132
modulating room unit from RVR Ltd., or,
separate time clock & room thermostat.
Ltd.
E n e r g y
T e c h n o l o g y
25
16.0 hydraulic system
design
System type 2
Typical Single MICROMAT EC boiler installation serving domestic hot water and heating where hot water has priority
via a divertor valve. The in-built circulating pump in the boiler is used to circulate the system (used only where
system index resistance <1 metre). Flow temperature to hot water is constant and flow temperature to heating may
be constant or weather variable.
OS
Micromat EC
boiler
Hot Water
Cold Water
W
C
S
Calorifier
T
LSV
Safety
Valve
Divertor Valve
Condensate
DOC
DOC
Expansion Vessel
DOC
IV
IV
IV
DOC
Strainer
CWM
OS = Outside air temperature sensor, used where direct-on-boiler weather
compensated flow temperatures are required.
C = Room temperature controls e.g. RE2132 modulating room unit from RVR Ltd.,
or, separated time clock & room thermostat.
S = HWS sensor from RVR Ltd. Gives 24hr HWS operation.
W/T = Alternative to “S” where “W” is a time switch in series with a cylinder
thermostat “T”. Allows for timed HWS.
Divertor valve will require SPDT relay if not spring return.
Divertor valve must be so installed as to spring return to heating.
26
Return from
system
Flow to
system
16.0 hydraulic system
design
System type 3
Typical Single MICROMAT EC boiler installation serving heating only and using a low velocity mixing header
where system index resistance exceeds 1 metre. Flow temperature may be fixed/constant or weather variable.
OS
Micromat EC
boiler
C
PRO 1
AAV
Safety Valve
LSV
Return from
system circuits
Condensate
IV
Flow to
system circuits
DOC
IV
IV
Strainer
DOC
Expansion Vessel
DOC
Low velocity mixing header
Max. velocity 0.5m/s
CWM
OS = Outside air temperature sensor, used where direct-on-boiler weather
compensated flow temperatures are required.
C = Room temperature controls e.g. RE2132 modulating room unit from RVR Ltd.,
or, separated time clock & room thermostat.
PR01 = Pump regulation module from RVR Ltd. Allows heating pump to be driven
from boiler, providing for auto operation, frost protector running & summer standstill
exercising.
Must be used where RE2132 modulating room unit is installed. Max pump motor
load 2A.
Ltd.
E n e r g y
T e c h n o l o g y
27
16.0 hydraulic system
design
System type 4
Typical Single MICROMAT EC boiler installation serving heating & domestic hot water. Hot water is priority and is
served via a divertor valve and the boiler’s in built circulating pump where index loss through HWS primaries is less
than 1 metre. Heating circuit index loss exceeds 1 metre and is served via a low velocity mixing header and a
separate pump. Heating flow temperature may be fixed/constant or weather variable.
OS
Micromat EC
boiler
C
W
PRO 1
AV
Safety Valve
Flow to
system circuits
Condensate
Strainer
DOC
Return from
system circuits
DOC
T
LSV
IV
IV
IV
Low velocity mixing header
Max. velocity 0.5m/s
DOC
CWM
OS = Outside air temperature sensor, used where direct-on-boiler weather
compensated flow temperatures are required.
C = Room temperature controls e.g. RE2132 modulating room unit from RVR Ltd.,
or, separated time clock & room thermostat.
S = HWS sensor from RVR Ltd. Gives 24hr HWS operation.
W/T = Alternative to “S” where “W” is a time switch in series with a cylinder
thermostat “T”. Allows for timed HWS.
PR01=Pump regulation module from RVR Ltd. Allows heating pump to be driven
from boiler, providing for auto operation, frost protector running & summer standstill
exercising.
Must be used where RE2132 modulating room unit is installed. Max pump motor
load 2A.
Divertor valve will require SPDT relay if not spring return.
Divertor valve must be so installed as to spring return to heating.
28
S
Expansion Vessel
Calorifier
16.0 hydraulic system
design
System type 5
Typical Single MICROMAT EC boiler installation serving heating & domestic hot water with hot water priority. Hot
water & heating circuits both have index resistance exceeding 1 metre & are served by independent pumps from a
low velocity mixing header. Heating flow temperature may be fixed/constant or weather variable.
OS
C
Micromat EC
boiler
PRO 1
W
AV
Safety Valve
LSV
Flow to
DOC
system circuits
S
T
Calorifier
IV
DOC
HWS Primary
Pump Max 1A
DOC
Expansion Vessel
IV
IV
IV
DOC
Return from
system circuits
Condensate
Strainer
IV
Low velocity mixing header
Max. velocity 0.5m/s
CWM
OS = Outside air temperature sensor, used where direct-on-boiler weather
compensated flow temperatures are required.
C = Room temperature controls e.g. RE2132 modulating room unit from RVR Ltd.,
or, separated time clock & room thermostat.
S = HWS sensor from RVR Ltd. Gives 24hr HWS operation
W/T = Alternative to “S” where “W” is a time switch in series with a cylinder
thermostat “T”. Allows for timed HWS.
PR01= Pump regulation module from RVR Ltd. Allows heating pump to be driven
from boiler, providing for auto operation, frost protector running & summer standstill
exercising.
Must be used where RE2132 modulating room unit is installed. Max pump motor
load 2A.
Ltd.
E n e r g y
T e c h n o l o g y
29
16.0 hydraulic system
design
System type 6
Typical Multiple MICROMAT EC installation. Boilers controlled by modulating Kaskade manager which also has the
facility to control heating & domestic hot water production. Heating flow temperature may be fixed/constant or weather
variable. Hot water has priority.
OS
C
KKM 2
Flow to System
Circuits
Micromat
EC boiler
Heating pump
2A. Max
Micromat
EC boiler
Micromat
EC boiler
FS
HWS Primary
Pump 2A. Max
SV
SV
SV
DOC
S
DOC
DOC
Low Velocity Mixing header
Max Velocity 0.5m/s
Condensate
NRV
NRV
NRV
Calorifier
IV
IV
IV
IV
DOC
IV
Return from
system circuits
IV
DOC
RS
LSV
CWM
OS = Outside air temperature sensor, used where direct-on-boiler weather
compensated flow temperatures are required.
C = Room temperature controls e.g. RE2132 modulating room unit from RVR Ltd.,
or, separated time clock & room thermostat.
FS = Flow temperature sensor
RS = Return temperature sensor
S = Hot water temperature sensor or thermostat.
KKM2 = Modulating Kaskade Manager. Up to 9Nr boilers may be controlled using
2Nr linked KKm2’s.
30
IV
IV
16.0 hydraulic system
design
System type 7
Typical Single MICROMAT EC boiler installation serving domestic hot water and radiator heating zone and an underfloor
coil zone all via a low velocity mixing header. The HWS will always have priority. The 2Nr heating zones may operate
independently via 2 Nr separate room units. The 2 Nr heating zones will always be weather compensated but may
have differing compensation slopes.
OS
RC
Micromat
EC boiler
Radiator Zone
Radiator
Zone
Pump
HWS Primary
Pump
W
SV
MRO3
S
IV
VS
T
Under Floor
VT Mixing
Valve
RC
2
Calorifier
DOC
Condensate
Under Floor Zone
VT Pump
IV
Low Velocity
Mixing Header
V max 0.5m/s
Strainer
Under Floor Coils
Zone ∆t 10°C
LSV
IV
Expansion
Vessel
DOC
DOC
DOC
DOC
IV
IV
DOC
Filling Point
CWM
OS = Outside air temperature sensor. Provides outside air temperature references for both heating
zones
MR03 = Pumps and mixer regulation control box from RVR Ltd. provides pump control for both heating
zones i.e. auto operation, frost protection and summer stand still protection running.
Provides drive for underfloor coil zone VT mixing valve with max flow temperature limitation set at 55°C.
Includes ratio setter for compensation of under floor coils. Max pump motor loads 2A.
RC1 = RE2132 modulating room unit from RVR Ltd. provides Time & Temperature control for radiator
heating zone.
RC2 = As RC1 but for underfloor coil zone.
VS = Underfloor zone VT flow sensor (supplied with MR03)
S = HWS sensor from RVR Ltd. Gives 24hr operation.
W/T = Alternative to “S” where “W” is a time switch in series with a cylinder thermostat “T”. Allows for
timed HWS.
Ltd.
E n e r g y
T e c h n o l o g y
31
16.0 hydraulic system
design
System type 8
Typical Single MICROMAT EC boiler installation serving heating and domestic hotwater via a system pump and 2Nr
2Port motorised valves with conventional controls i.e. programmer, room stat & cylinder stat.
NOTE: system temperature will be fixed constant and direct-on-boiler weather compensation is not possible.
RS
Micromat
EC boiler
P
Return from
system circuits
WC
Flow to System
Circuits
AV
CH
M/Valve
Safety Valve
LSV
HW
M/Valve
Condensate
IV
System Pump
DOC
DOC
CS
Expansion Vessel
Reg Valve
IV
IV
DOC
Strainer
CWM
Low velocity mixing header
Max. velocity 0.5m/s
P = Programmer WC = Wiring Centre/Junction Box RS = Room Thermostat CS = Cylinder Thermostat
Typical schematic arrangement where system has multiple
pumps that will operate at the same time.
Flow
Header
Circuit pumps that
can / will run at the
same time
To / From
Boiler/s
32
Low velocity mixing
header
max velocity 0.5m/s
16.1 water treatment
system cleaning
The entire system must be thoroughly cleansed and flushed to remove debris, flux residues etc before opening the
boiler isolation valves & flooding the boiler. Particular care must be taken where the MICROMAT EC boiler is being
retro-fitted into an old/existing system, as system silt or magenite can be very damaging to the new boiler.
The system must be filled with clean chemically neutral water. Water hardness must not exceed 3.6 mol/m 3 (=20°dH).
Chloride Concentrations must not exceed 150mg/l.
Following cleansing and flushing, the system must be dosed with a good quality water treatment to prevent corrosion
and the formation of scale. A suitable corrosion inhibitor ‘INIBAL’ is available from RVR Limited and should be used
in all systems. The required concentration is 1-2% of system capacity.
Failure to observe these requirements will render the guarantee on the product void.
Cleansing, flushing and water treatment must be carried out in accordance with the requirements of BS 7593:1992.
16.2 care with the use of
soldering flux
The MICROMAT EC boiler has heat exchangers fabricated from 316L stainless steel. It is most important that the
compatibility of any flux is checked with the flux supplier before use, and that any flux manufacturers recommendations
are strictly followed with regards to use in conjunction with stainless steel.
17.0 electrical
connection
The electrical connections to the MICROMAT EC boiler are made via a Weiland Plug and socket (incoming live,
neutral and earth) and two terminal blocks which are located within the boiler case and below the control panel. The
lower terminal block is 24V d.c. and the upper terminal block is 220V a.c.
Connections must only be made using appropriate diameter multi strand flex cables and cable entry must only be
via the rubber glanded cable entry points located at the bottom rear r/h side of the appliance. If the boiler is to be
room sealed flued then care must be taken to ensure the cable entries are reasonably air tight.
For electrical connection plug/socket & terminal function and location see fig below.
Back Terminal Block
N
L1
N
L2
L1
N
2way 3port
mixing valve
or storage
water pump
Earth
L1
N
External gas
valve or external
pump
L1
MR03 and/
or Room
thermostat
Wieland plug no. 1 Incoming Power
Front Terminal Block
PE
1
2
3
4
R1
R2
R3
5
6
Not Used
RE2132
Outside Air
Sensor
DHW
Sensor
Cable
glands
Ltd.
E n e r g y
T e c h n o l o g y
33
2
1
1
1
2
1
2
1
2
S5
2
S3
1
10
S4
2
RS 232
S1
K5
K5
Flow temperature sensor
X10
K6
K6
X12
1
5
10
1
2
not used
DHW Thermostat
or DHW Temperature sensor
Outside temperature sensor
RE2132
8
1
PRO1/MRO3
16
6
X16
K14
K3
11
1
9
KO = white
K2 = brown
K3 = green
K4 = grey
K5 = orange
K6 = blue
K7 = red
K8 = black
3
6
1
4
2
K18
K12
K9 = violet
K12 = yellow/white
K13 = brown/white
K14 = green/white
K17 = blue/white
K18 = red/white
K19 = black/white
K20 = violet/white
6
Fuse 24V
Alarm contact
1
X9
X21
20
K20
4
X13
K0
K0
K4
K8
K6
K0
K7
1
2
3
4
R1
R2
R3
K8
2
1
K9
X17
K9
X18
Limit Thermostat
Water
K8
X20
X19
Limit Thermostat
Fluegas
X14
Return temperature sensor
K19
K17
Burner Fan
24 VDC
K7
K7
K7
DHW Flow water sensor
(S-models only)
K3
DHW Inlet water sensor
(S-models only)
K20
Fan
4
Gas Valve
L
PE
N
L
N
PE
5
2
7
6
3
1
N
L
L
N
4
3
4
5
6
1
2
3
X7
2
PE
1
PE
5
External gas valve
or external pump
Room thermostat or MR03
3-way divertor valve or pump
(H-models only)
3
2
X8
PE
6
5
PE
Ignition / Ionisation
X32
Fuse
230VAC
HSP Top
Fuse 230VAC
4 1
2
3
6
X6
X28
X22
X5
3-way divertor
valve
3
X4
X29
X23
Transformer
X31
Pump 1
X25
X3
Boiler
1
4
5
PE
X2
Supply
230 VAC
X41
34
L
PE
N
X1
17.0 electrical
connections
Plan of internal electrical connections
X30
X27
X26
L1
PE
N
Install only one method of external time and
room temperature control. If room and stat
time switch are required, then do not install
RE2132 room unit and vice versa.
**
On LPG installations where an additional
gas safety shut off valve is required,
connect to L1 and N terminals on left side
of lower terminal strip.
Install only if direct-on-boiler weather
compensated flow temperature are
required.
230V
*
4 3 2 5 1
GND
* Outside
Air Sensor
OS
PMW
RE2132
QAW44
optional
Remote Sensor
Supply
1 2
+24V
lower terminal strip
**
Room Thermostat
And Time Switch
1
2
3
4
R1
R2
R3
5
6
** Modulating
Room unit
L1
N
L1
N
L2
L1
N
upper terminal strip
20
3
23
6
Installation code
5
10
Not Used
1
6
2
1
2 pin plug on X4
X16
No outside sensor.
RE2132 modulating
room unit installed.
Outside sensor
installed. RE2132
modulating room unit
installed.
No outside sensor.
Room stat & time switch
installed.
Outside sensor
installed. Room stat &
time switch installed.
Description
X3
17.0 electrical
connections
Typical electrical connection schematic to suit system type 1
E n e r g y
T e c h n o l o g y
Ltd.
35
***
**
*
On LPG installations where an
additional gas safety shut off
valve is required, connect to
L1 and N terminals on left side
of lower terminal strip.
Install only one method of HWS temperature
control. The use of an HWS sensor will allow
no time control over hot water production.
If timed hot water control is required then do
not install an HWS sensor, but install only
timeswitch & cylinder thermostat.
Install only one method of external time and
room temperature control. If room and stat
time switch are required, then do not install
RE2132 room unit and vice versa.
4 3 2 5 1
+24V
lower terminal strip
Alternative connection
for floating actuator
**
Room Thermostat
And Time Switch
L1
PE
N
Supply
HWS
sensor
Install only if direct-on-boiler weather
compensated flow temperature are
required.
OS
* Outside
Air Sensor
GND
230V
1 2
PMW
RE2132
QAW44
optional
Remote Sensor
Cylinder ***
thermostat
1
2
3
4
R1
R2
R3
5
6
** Modulating
Room unit
L1
N
L1
N
L2
L1
N
36
open
L1
N
L1
N
L2
L1
N
upper terminal strip
HWS divertor valve
spring return type
closed
1
5
20
3
23
6
Installation code
Not Used
6
10
X3
1
No outside sensor.
RE2132 modulating
room unit installed.
Outside sensor
installed. RE2132
modulating room unit
installed.
No outside sensor.
Room stat & time switch
installed.
Outside sensor
installed. Room stat &
time switch installed.
Description
2
2 pin plug on X4
X16
17.0 electrical
connections
Typical electrical connection schematic to suit system type 2
**
*
Supply
L1
PE
N
On LPG installations where an additional gas
safety shut off valve is required, connect to L1
and N terminals on left side of lower terminal
strip.
Install only one method of external time and
room temperature control. If room and stat
time switch are required, then do not install
RE2132 room unit and vice versa.
Install only if direct-on-boiler weather
compensated flow temperature are
required.
4 3 2 5 1
GND
* Outside
Air Sensor
OS
PMW
RE2132
QAW44
optional
Remote Sensor
230V
1 2
+24V
lower terminal strip
**
Room Thermostat
And Time Switch
1
2
3
4
R1
R2
R3
5
6
** Modulating
Room unit
L1
N
L1
N
L2
L1
N
upper terminal strip
X16
1
L
PE
N
Heating Pump 2A Max
Outside sensor
installed. RE2132
modulating room unit
installed.
No outside sensor.
RE2132 modulating
room unit installed.
20
No outside sensor.
Room stat & time switch
installed.
Outside sensor
installed. Room stat &
time switch installed.
Description
2
2 pin plug on X4
3
23
6
Installation code
1
5
PRO 1
6
10
X3
17.0 electrical
connections
Typical electrical connection schematic to suit system type 3
E n e r g y
T e c h n o l o g y
Ltd.
37
***
On LPG installations where an additional
gas safety shut off valve is required,
connect to L1 and N terminals on left side
of lower terminal strip.
Install only one method of HWS temperature
control. The use of an HWS sensor will allow
no time control over hot water production.
If timed hot water control is required then do
not install an HWS sensor, but install only
timeswitch & cylinder thermostat.
**
Install only if direct-on-boiler weather
compensated flow temperature are
required.
4 3 2 5 1
+24V
lower terminal strip
Alternative connection
for floating actuator
**
Room Thermostat
And Time Switch
L1
PE
N
230V
HWS
sensor
Install only one method of external time and
room temperature control. If room and stat
time switch are required, then do not install
RE2132 room unit and vice versa.
*
OS
* Outside
Air Sensor
GND
Supply
1 2
PMW
RE2132
QAW44
optional
Remote Sensor
cylinder ***
thermostat
1
2
3
4
R1
R2
R3
5
6
** Modulating
Room unit
L1
N
L1
N
L2
L1
N
38
open
L1
N
L1
N
L2
L1
N
upper terminal strip
HWS divertor valve
spring return type
closed
20
3
23
6
Installation code
1
5
PRO 1
6
10
X3
1
L
PE
N
Heating Pump 2A Max
No outside sensor.
RE2132 modulating
room unit installed.
Outside sensor
installed. RE2132
modulating room unit
installed.
No outside sensor.
Room stat & time switch
installed.
Outside sensor
installed. Room stat &
time switch installed.
Description
2
2 pin plug on X4
X16
17.0 electrical
connections
Typical electrical connection schematic to suit system type 4
***
**
*
X3 X16
upper terminal strip
= Control sockets on control panel
= Weiland Plugs / Sockets
On LPG installations where an additional gas
safety shut off valve is required, connect to L1
and N terminals on left side of lower terminal
strip.
Install only one method of HWS temperature
control. The use of an HWS sensor will allow
no time control over hot water production.
If timed hot water control is required then do
not install an HWS sensor, but install only
timeswitch & cylinder thermostat.
Install only one method of external time and
room temperature control. If room and stat
time switch are required, then do not install
RE2132 room unit and vice versa.
Install only if direct-on-boiler weather
compensated flow temperature are
required.
230V
L1
PE
N
Supply
HWS
sensor
6
OS
1 2
4 3 2 5 1
+24V
5
* Outside
Air Sensor
GND
4
lower terminal strip
**
Room Thermostat
And Time Switch
3
PMW
RE2132
QAW44
optional
Remote Sensor
cylinder ***
thermostat
1
2
3
4
R1
R2
R3
5
6
** Modulating
Room unit
L1
N
L1
N
L2
L1
N
1
1
L
PE
N
Heating Pump 2A Max
Outside sensor
installed. RE2132
modulating room unit
installed.
No outside sensor.
RE2132 modulating
room unit installed.
20
No outside sensor.
Room stat & time switch
installed.
Outside sensor
installed. Room stat &
time switch installed.
Description
2
2 pin plug on X4
X16
3
23
6
Installation code
1
5
PRO 1
6
10
X3
17.0 electrical
connections
Typical electrical connection schematic to suit system type 5
E n e r g y
T e c h n o l o g y
Ltd.
39
N
L
5
N
L
* Heating Circuit
Pump 230V 2A
Max
PE
N
L
N
L
Supply
PE
230V
9
16
15
11
17
13
20
16
19
15
Alternative External
Control Options
18
14
22
18
21
17
19
X2
20
4
22
21
3
2
1
5
X2
GND
7
12
PMW
* Modulating
Room unit
+24V
RE2132
* QAW44 optional
Remote Sensor
PE
* HWS Primary
Pump 230V 2A
Max
* - If Required
3
X1
23
26
25
Not Used
24
28
27
R3
10
30
29
1
32
31
34
35
Additional
Boilers
33
36
R3
1
6
* Cylinder Stat / HWS
Time Switch
1
38
37
X4
71
35
Cascaded boiler (KKM
2) installation with
DHW sensor and
pumped DHW circuit.
Cascaded boiler (KKM
2) installation without
DHW sensor or with
DHW control via
thermostat and three
way valve
Description
1
R2 and R3 on boiler
upper terminal switch
Installation code
NOTE: No connections
other than those shown
are to be made to the
boilers.
R3
4
* External Controls for
Heating Circuit
R2
L
Boiler
No. 1
PE
230V
N
Supply
R2
L
Boiler
No. 2
PE
230V
N
Supply
R2
L
Boiler
No. 3
N
Supply
PE
40
230V
2
17.0 electrical
connections
Typical electrical connection schematic to suit system type 6
***
**
*
On LPG installations where an additional gas
safety shut off valve is required, connect to L1 and
N terminals on left side of lower terminal strip.
Install only one method of HWS temperature
control. The use of an HWS sensor will allow
no time control over hot water production.
If timed hot water control is required then do
not install an HWS sensor, but install only
timeswitch & cylinder thermostat.
Install only one method of external time and
room temperature control. If room and stat
time switch are required, then do not install
RE2132 room unit and vice versa.
+24V
4 3 2 5 1
L1
N
L1
N
L2
L1
N
**
Room Thermostat
And Time Switch
L1
PE
N
230V
HWS
sensor
cylinder ***
thermostat
Install only if direct-on-boiler weather
compensated flow temperature are
required.
OS
* Outside
Air Sensor
GND
QAW44
optional
Remote Sensor
Supply
1 2
PMW
RE2132
4
5
10
3
GND
2
X3
MRO 3
R5
5
PMW
1
2
3
4
R1
R2
R3
5
6
** Modulating
Room unit
R4
RE2132
R6
1
+24V
Modulating
Room unit for
underfloor zone
lower terminal strip
1
6
N
L
2
X16
1
25
11
No outside sensor. MR03
mixing valve controller
and 2 x RE2132 installed
Outside sensor installed.
MR03 mixing valve
controller and 2 x RE2132
installed
Description
Underfloor Zone VT
Mixing Valve
Underfloor Zone VT
Pump 2A Max
Radiator Zone Pump
2A Max
NOTE: All Connections into
MRO 3 are made via
labelled factory fitted
Cables with the exception
of the underfloor zone
RE2132 which is cabled by
the installer
L2
N
L1
L
PE
N
L
PE
N
2 pin plug on X4
Installation code
Underfloor Zone
VT Flow Sensor
upper terminal strip
17.0 electrical
connections
Typical electrical connection schematic to suit system type 7
E n e r g y
T e c h n o l o g y
Ltd.
41
On LPG installations where an additional gas safety
shut off valve is required, connect to L1 and N terminals
on left side of lower terminal strip.
Install only one method of external time and
room temperature control. If room and stat
time switch are required, then do not install
RE2132 room unit and vice versa.
**
230V
L1
PE
N
Supply
Install only if direct-on-boiler weather
compensated flow temperature are
required.
Junction Box
1
2
3
4
R1
R2
R3
5
6
*
N
L
4
HW
ON
3
HW
OFF
CH
OFF
5
M
CH
ON
6
M
Typical Programmer
L
L
L1
N
L1
N
L2
L1
N
lower terminal strip
HW M / V
CH M / V
42
Cyl Stat
upper terminal strip
E
7
N
L N
N
P
E
5
E
1
2
1
2 pin plug on X4
X16
System Pump
2A Max
E
23
No outside sensor.
Room stat & time switch
installed.
Installation
Description
code
Not Used
6
10
X3
17.0 electrical
connections
Typical electrical connection schematic to suit system type 8
R / Stat
17.0 electrical
connections
Remote Fault Indication
The MICROMAT EC boiler includes a built in fault alarm relay with volt free
contacts for interface with, if required a remote alarm indicator.
The volt free contacts within the boiler control panel will close in the event
that the boiler goes to a fault resulting in boiler lockout. The volt free contacts
indicate “common alarm” upon closing. The actual fault description will be
displayed upon the LCD screen of the boiler.
Connection to the volt free contacts is made via an alarm plug and lead
assembly available from RVR Ltd.
X9 Socket
1
2
X9 Alarm Plug
and Lead
Assembly
The alarm plug and lead connects to socket x9 located in the lower area of
the boiler control panel.
Remote Alarm
Circuit
18.0 commissioning
the micromat EC boiler
The MICROMAT EC boiler should be expertly commissioned by a competent engineer who will need, in addition
to standard hand tools, a U tube manometer and a combustion analyser.
Before attempting to set the MICROMAT EC boiler to work, the following check list must be worked through.
See 18.1.
Ltd.
E n e r g y
T e c h n o l o g y
43
18.1 pre-commissioning
checks
a) Ensure system has been thoroughly cleansed and flushed, any strainers have been cleaned and that the
appropriate water treatment has been added to the system to prevent corrosion, scale formation etc.
b) Ensure the system and boiler has been properly and fully flooded and vented of air and the cold fill pressure
at the boiler is at a minimum 0.5 Bar
c) Check that the pumps within the boiler are free to rotate by removing the vent screw in the end of both pump
motors and checking that the impeller shafts rotate freely when turned with an appropriate sized screwdriver.
Replace vent screws.
d) Ensure Gas supply has been purged and them is the availability of working inlet pressure of nominal 20 mbar
(Nat gas) or 37 mbar (LPG).
e) Check that the flue installation has been properly made.
f) Check that a condensate pipe (in plastic - copper tube is not acceptable) has been connected to the boiler
and that the syphon cleaning point cap is in place.
g) Where the appliance is taking air for combustion from the room in which it is installed - ensure an adequate
provision for ventilation has been made.
h) Ensure that there is an adequate heat load available.
i) Ensure that the electrical connections have been made correctly.
j) Ensure that the appliance has been correctly configured with the appropriate installation code for the system,
See tables page 45 onwards.
44
18.2 installation
codes
Weather compensated control without DHW sensor or with DHW control via
thermostat and three way valve.
Function Number
Low Temperature heating
1
with RE2132 Room Unit
Weather Compensation
without mixing circuit.
(Direct Heating Only)
with Room Thermostat
without room unit or thermostat or with RE2 room regulator
Medium Temperature heating
2
High Temperature heating
3
Low Temperature heating
4
Medium Temperature heating
5
High Temperature heating
6
Low Temperature heating
7
Medium Temperature heating
8
High Temperature heating
9
Medium Temperature Direct heating
10
High Temperature Direct heating
11
Medium Temperature Direct heating
12
with two RE2132 Room Units
Weather Compensated
Direct Heating and
mixing circuit with
MR03(the mixing circuit
is always low temperatue
heating)
with one RE2132 Room Unit
High Temperature Direct heating
13
Medium Temperature Direct heating
14
High Temperature Direct heating
15
with Room Thermostat
Medium Temperature Direct heating
16
High Temperature Direct heating
17
without room unit or thermostat or with RE2 room regulator
R
t
t
Room temperature controlled (without weather compensation) without DHW
sensor or with DHW control via thermostat and three way valve
Low Temperature heating
18
with RE2132 Room Unit
Room Temperature
control without mixing
circuit. (Direct Heating
Only)
with Room Thermostat
Medium Temperature heating
19
High Temperature heating
20
Low Temperature heating
21
Medium Temperature heating
22
High Temperature heating
23
Medium Temperature Direct heating
24
High Temperature Direct heating
25
with two RE2132 Room Units
Room temperature
controlled Direct Heating
and mixing circuit with
MR03 (the mixing circuit
is always low temperatue
heating)
Medium Temperature Direct heating
26
High Temperature Direct heating
27
with one RE2132 Room Unit
Medium Temperature Direct heating
28
High Temperature Direct heating
29
with Room Thermostat
Ltd.
E n e r g y
T e c h n o l o g y
45
18.2 installation
codes
Flow temperature control(without room controller and without weather
compensation) without DHW sensor or with DHW control via thermostat and
three way valve
without mixing circuit
(Direct heating only)
Direct Heating and
mixing circuit with MR03
(the mixing circuit is
always low temperatue
heating)
Without outside temperature sensor, room unit, room thermostat
(Fixed point control)
Without outside temperature sensor, room unit, room thermostat
(Fixed point control)
Low Temperature heating
30
Medium Temperature heating
31
High Temperature heating
32
Medium Temperature heating
33
High Temperature heating
34
Cascaded boiler installation without DHW sensor or with DHW control via
thermostat and three way valve
MAN Kaskade manager(KKM) with PWM signal. (Connected to R2 and R3)
Other cascade controller with 0 - 3V output signal (connection to ...)
Max heating temperature is set in
the KKM
Max heating temperature is set in
the cascade controller
35
36
Weather compensated control with DHW sensor and pumped DHW circuit.
with RE2132 Room Unit
Weather Compensated
Direct Heating without
mixing circuit (direct
heating only)
with Room Thermostat
without room unit or thermostat or with RE2 room regulator
Low Temperature heating
37
Medium Temperature heating
38
High Temperature heating
39
Low Temperature heating
40
Medium Temperature heating
41
High Temperature heating
42
Low Temperature heating
43
Medium Temperature heating
44
High Temperature heating
45
Medium Temperature Direct heating
46
High Temperature Direct heating
47
Medium Temperature Direct heating
48
High Temperature Direct heating
49
Medium Temperature Direct heating
50
High Temperature Direct heating
51
Medium Temperature Direct heating
52
High Temperature Direct heating
53
with two RE2132 Room Units
Weather Compensated
Direct Heating and
mixing circuit (the mixing
circuit is always low
temperatue heating)
with one RE2132 Room Unit
with Room Thermostat
without room unit or thermostat or with RE2 room regulator
46
18.2 installation
codes
Room temperature controlled (without weather compensation) with DHW
sensor and pumped DHW circuit.
Function Number
Low Temperature heating
54
Medium Temperature heating
55
High Temperature heating
56
Low Temperature heating
57
Medium Temperature heating
58
High Temperature heating
59
Medium Temperature Direct heating
60
High Temperature Direct heating
61
Medium Temperature Direct heating
62
High Temperature Direct heating
63
Medium Temperature Direct heating
64
High Temperature Direct heating
65
with RE2132 Room Unit
Room Temperature
control without mixing
circuit. (Direct Heating
Only)
with Room Thermostat
with two RE2132 Room Units
Room temperature
controlled Direct Heating
and mixing circuit (the
mixing circuit is always
low temperatue heating)
with one RE2132 Room Unit
with Room Thermostat
Flow temperature controlled (without room controller & without weather
compensation) with DHW sensor and pumped DHW circuit.
Function Number
Without mixing circuit
t outside temperature sensor, room unit, room thermostat (Fixed point
(Direct heating only)
Direct Heating and
mixing circuit (the mixing
circuit is always low
temperatue heating)
Without outside temperature sensor, room unit, room thermostat
(Fixed point control)
Low Temperature heating
66
Medium Temperature heating
67
High Temperature heating
68
Medium Temperature heating
69
High Temperature heating
70
Cascaded boiler installation with DHW sensor and pumped DHW circuit.
Function Number
MAN Kaskade manager(KKM) with PWM signal. (Connected to R2 and R3)
Other cascade controller with 0 - 3V output signal (connection to ...)
Max heating temperature is set in
the KKM
Max heating temperature is set in
the cascade controller
71
72
Ltd.
E n e r g y
T e c h n o l o g y
47
18.3 first
firing
Notes
The MICROMAT EC boiler has a single heat exchange
and burner assembly. There is one gas valve serving
the assembly.
a) Ensure gas & electricity supplies are turned on to
the appliance.
Menu/Reset Display
Button
ON/Off switch
b) Switch on the boiler at the on/off switch. (See figure
to the right) The appliance will purge the combustion
chamber with air from the burner fan and then will pulse
the pumps on/off (deaerating).
c) Attach U tube manometer to inlet pressure test point
on gas valve (See figure 8). The nominal pressure
should be 20mb for NG or 37mb for LPG.
Summer/Winter
and “+” button
Engineers Test button
and “-” button
d) Press the Engineers test button twice - the screen
should/must display [10 min Low]. To reduce the burner
to its lowest firing rate press the ‘-’ key until the fan
speed reduces to its minimum revs (see section 18.5).
In the event that ignition of the burner does not occur
after 4 attempts the appliance will go to ignition failure
lockout. Remove the cover cap screws from Qmin Gas type
adjustment on gas valve (See figure 8(3)) turn
adjustment screw half turn clockwise.
CO2 % at Min Output
Flue Gas CO2% Settings
Press reset button, appliance will post purge and vent
again.
CO2 % at Max Output
Press Engineers test button twice to reset appliance to
“I0 min Low” and ignition sequence will start again. If
ignition fails again after 4 attempts, then further increase
Qmin on gas valve by half turn until burner ignites.
e) Observe the colour of burner flame - correct colour
should be dull red. Adjust colour of burner flame using
Qmin until flame colour is correct. Following this
procedure will avoid poisoning your combustion
analyser.
f)Remove flue gas analysis test point cap or plug (from
top right of combustion chamber) of the heat exchanger
and insert probe of combustion analyser Adjust as
necessary Qmin of valve to obtain required C02% value.
(See table 2) Make adjustments slowly and wait at least
2 minutes for reading to stabilise before re-adjusting.
Remove analyser and refit cap/plug to test point.
NOTE: Test period expires after 10 minutes - if this
expires whilst commissioning is still in progress, press
Engineers button twice to reset and carry on with
necessary checks and adjustments. To exit “10 min Low’
test period - press Engineers button once, this will set
controls to auto.
g)Press the ‘+’ button until the fan is at its maximum
rate (see section 18.5) This will set the burner to
maximum output.
48
Nat Gas G20
LPG G31
9-9.5
11-12
8.7-9.2
10-11
Figure 8
4
Q max
3
Q min
2
Burner offset
pressure test
point
1
Gas inlet
pressure test
point
Adjustments
Turning 3 clockwise increases min output & CO2%
Turning 4 clockwise increase max output & CO2%
18.3 first
firing
h)Check CO2% of heat exchanger and adjust as necessary screw (4) Q max of right hand valve, to obtain required
value. (See table I)
NOTE: Adjustment of either (3) Q min or (4) Q max will affect the other adjustment to a lesser or greater extent.
Following either adjustment of (3) or (4) check the effect on the setting of the other adjustment and correct as
necessary.
i)Remove analyser from upper heat exchanger and refit cap/plug to test point.
j)Press Engineer ‘s test button once to exit 10 minute test mode.
k)Turn off electricity and gas supplies and remove manometer from inlet pressure test point and refit test point
screw.
l)Turn on gas and electricity supplies.
Ltd.
E n e r g y
T e c h n o l o g y
49
18.4 commissioning -pop-up menu
& weather compensation
Explanation of the [install] pop up menu
Menu Point
[1]
[2]
[3]
[4]
[5]
[6]
[7]
[8]
[9]
[10]
[11]
[12]
[13]
[14]
Parameter
Curv 20C CH
Curv -1C CH
Pump min
Pump max
Curv 20C MV
Service in
Pump Continue
ECO+
Postrun HW
Postrun CH
Min Power
Max Power
Function Nr
Back
Minimum Maximum Default value Adjustment Unit
-20
20
0
1 0C
0
-20
20
0
1 C
35 Pump max
35
1%
Pump min.
100
100
1%
0
-20
20
0
1 C
1
1500
365
1 Day
Off
On
Off
Off
On
On
0
5
1
1 Minute
0
20
3
1 Minute
Min speed Max ??
Min speed
1%
Min speed
100
100
1%
1
72
9
[1] fixed point of of the direct heating circuit.
Using menu point [1] the flow temperature at an outside air
temperature of 20°C may be adjusted between -20°C and +20°C.
70
60
Flow Temperature °C
[2] Design point of the direct heating circuit.
50
Using menu point [2] the design point of the direct heating circuit
40
may be set at an external temperature of -15°C.
High Temperature Heating
30
The adjustable range is 60°C - 100°C
Medium temperature Heating
20
The adjustable range is 50°C - 90°C
Low temperature heating
10
The adjustable range is 35°C-75°C
Frost protection
0
Notes:
Do not set underfloor heating to a temperature greater than
20
15
10
5
0
-5
-10
-15
45°C. Comfort will be optimised by low floor heating
Outside Air Temperature °C
temperatures.
Fixed Point Adjustment Range
If menu point [13] [function no.] is set to ‘no external sensor’
then the weather compensation settings will not work. The Micromat EC will then heat according with the
max. temperature set in [function no.]. The flow temperature control will then be taken over by a modulating
room controller or a cascade controller.
The adjustable range for the design point temperature depends on which heating system has been entered in [function
no.]. This function also determines the control function ( High temp : 80°C, Medium Temp : 70°C, Low Temp : 55°C)
This setting does not replace the safety thermostat for underfloor heating!
+20
90
-20
60
50
40
80
Flow Temperature °C
Flow Temperature °C
70
80
0
70
60
-20
50
40
+20
70
60
0
50
40
-20
30
30
30
20
20
20
20
15
10
5
0
-5
-10
Outside Air Temperature °C
High Temperature heating
50
+20
90
0
80
Flow Temperature °C
100
-15
20
15
10
5
0
-5
-10
-15
Outside Air Temperature °C
Medium Temperature Heating
20
15
10
5
0
-5
-10
Outside Air Temperature °C
-15
Low Temperature Heating
18.4 commissioning -pop-up menu
& weather compensation
[3] The minimum pump revolution setting [pump min]
To set the minimum pump revolutions select menu item [3] and press the ‘reset’ key to confirm. The value may then
be changed by using the ‘+’ and ‘-’ keys. Confirm the selection by pressing the ‘menu’ key.
[4] The maximum pump revolutions setting [pump max]
To set the maximum pump revolutions select menu item [4] and press the ‘reset’ key to confirm. The value may then
be changed by using the ‘+’ and ‘-’ keys. Confirm the selection by pressing the ‘menu’ key.
[5] Setting the fixed point of a mixed flow circuit.
If the mxing valve controller MR03 is connected to the Micromat EC then menu item [5] may be used to set the fixed
point for the mixed circuit weather compensation curve. The fiexed point may be adjusted from -20°C up to 20°C at
an outside temperature of 20°C.
[6] Service [Service In]
To reset the sevice interval back to 365 days select menu item [6] and press the ‘menu’ key twice‘. this will remove
the service request from the display.
If a servicing is carried out before the service interval has expired, and if no service request appears on the display
then menu item [6] must still be reset to 365days by pressing the ‘menu’ key twice. If no service request is required
to appear on the display then set the number of days in menu item [6] to OFF (<1)
[7] Pump Continue [Pump ____]
If a pump run-on time is required, then set this parameter to [ON]. The default value for this parameter is [OFF]
[8] ECO and ECO PLUS Operation [ECO+]
Use this parameter to set ECo or ECO+ operation.
In ECO PLUS operation the Micromat EC pump regulates a temperature differential of 20K (10K for underfloor
heating) as long as this is possible. This gives the best fuel consumption figures.
In ECO operation the temperature differential is regulated only if the return temperature rises to over 50°C. For lower
temperatures the pump works at full capacity. This mode of operation will also give very good fuel consumption.
ECO operation is recommended if individual rooms do not get warm enough and hydraulic balancing is not possible.
[9] Domestic hot water pump run on time. [Postrun HW]
The run on time of the DHW charging pump is set in parameter [9]. THis must be set to 0 if the DHW is controlled
using a 2 way 3 port diverting valve. The adjustment range of this parameter is 0 up to 5 minutes wth adjustment
steps of 1 minute.
[10] Heating circulating pump run on time. [Postrun CH]
The run on time for the circulating pumps are set in parameter [10]. The adjustment range is 0 up to 20 minutes with
adjustment steps of 1 minute.
[11] Minimum load [Min Power]
The minimum boiler load is set in parameter [11] . The adjustment range is min boiler output up to max CH.
[12] Maximum load for heating operations [Max Power]
The maximum boiler load is set in parameter [12]. the adjustment range is min. boiler output up to 100%.
[13] Function no. [Function no.]
In this parameter the installation codes may be entered (see last column of the tables on pages ______) These
codes are used to set up the boiler controls and the type of heating required.
[14] Back [Back]
When this parameter is on the display pressing the ‘menu’ key will exit the installation pop up menu.
Ltd.
E n e r g y
T e c h n o l o g y
51
18.5 commissioning the status indicator
Overview of fan revolutions per minute
Boiler type
EC 11/22
EC 15/22
EC 23/28
EC 31/36
EC 40 H
Boiler Absolute
Max HK??
Start Revs
Min. rev/min Max. Rev/min Rev/min Rev/min
[%]
900
6000
2200
3000
100
900
6000
2200
4080
100
900
6000
2200
4680
100
900
6000
2200
4860
100
1260
6300
2200
6300
100
Min. Boiler standard
Rev/min
[%] of max. HC
1380
46
1380
33
1380
29
1380
28
1380
22
Min. Boiler absolute
Rev/min [%] of max. HC
900
30
900
22
900
19
900
18
1260
19
in case of a boiler controlpanel exchange (EC 11/22 - EC 40) the Revs per min. should correspond to the back-up
panel instructions.
Status Indicator
The status indicator gives information in clear text on the operating condition of the boiler. Status reports appear
as non flashing messages and fault reports appear as flashing text.
Status report (non flashing)
The following status reports are given during normal operation of the micromat EC
1. [No Demand] The burner is switched off and the circulating pump is operating in accordance with heat
requirements.
2. [Pre-Purge] The fan is purging the burner.
3. [Ignition] The gas/air mix is being fired.
4. [Heating] burner and circulating pumps are heating the system
5. [Storage] burner and/or circulating pumps are heating strorage water.
6. [Post-Purge] the fan is purging the burner.
7. [Legionella] tha anti-Legionella program is active.
8. [S/D] The boiler is in Summer mode / day mode (heating up stage)
9. [S/N] The boiler is in Summer mode / night mode.
10. [W/D] The boiler is in Winter mode / day mode (heating up stage)
11 [W/N] The boiler is in Winter mode / Night mode (cooling down stage)
The following status reports are exceptions to these:
1. [Service] A yearly maintenance must be carried out on the Micromat EC. The boiler will continue to work as
normal when this display is showing.
2. [Fault M. Ru]???? The connection to the room unit is broken. The Micromat EC will heat to the recommended
room temperature of 20°C.
3. [Fault M. ET]???? The connection to the external temperature sensor is broken. In this instance the Micromat
EC will heat as for a 0°C external temperature.
4. [Fan High] The boiler fan revolutions per minute are too high
5. [Fan Low] The boiler fan revolutions per minute are too low.
6. [Deaeration]???? The boiler is undergoing a short ventilation program.
7. [Limit F/R]???? The boiler is experiencing a high flow / return temperature momentarily.
Fault Report (flashing indicator)
A table of fault reports and possible sources of the faults can be found in the section entitles ‘Screen display /
Diagnosis of faults’ on pages _____
When the source of the error has been found and corrected the report must be deleted by using the ‘reset’ key. If
the fault occurs again,please contact the RVR Customer Care Department.
The boiler is locked when the status display shows a flashing indicator (fault report).
18.6 setting domestic
hot water temperature
A) With HWS sensor in/on calorifier
Press and hold the menu/reset button on the boiler conbtrol panel for over 3 seconds. Next press the ‘+’
key until [temp DHW] appears on the display. Press the menu/reset button to enter adjustment mode. Press the
‘+’ or ‘-’ key to adjust the setpoint. The maximum temperature temperature setting is 60°C.
B) With cylinder thermostat in/on DHW calorifier
Set desired stored hot water temperature by the adjustment of the cylinder thermostat. With this
arrangment time control of hot water charging is possible by installing a time switch in series with the cylinder
thermostat, but hot water charging always takes priority over the heating demand.
18.7 output for charging
hot water
There is no adjustment necessary or possible, as the boiler controls are self learning and will self adapt the
optimum output to hot water according to the heat transfer capabilities of the connected hot water calorifier or
cylinder.
19.0 setting the boiler
to work
1. To fit casing to boiler ensure hooks on top rear edge of boiler case engage properly into rear chassis assembly.
Latch bottom case fixings and tighten central locking screw.
2. Turn ON on/off switch and set any external controls to auto operation.
3. Set ECO/ECO plus option to ECO position for systems without additional heating circuit pump OR Set
ECO/ECO plus switch to ECO plus position for systems with a local low velocity header and additional heating
circuit pump.
4. With boiler operating (burners on) press “Test” button on boiler control panel to test overheat controls in the
boiler. The boiler must shut-down and then re-ignite.
20.0 servicing
instruction
GENERAL
In general, maintenance/inspections should take place:
a) When the display on the unit indicates that inspection is required (status shows [SERVICE]).
b) At least every 18 months, before carrying out any maintenance the unit must be inspected.
20.1 inspection
a) Ask the user about any problems with the boiler unit or any other comments.
b) Check the water pressure of the installation.
c) Remove the casing of the unit and inspect all pipes and connections for water leaks.
d) Inspect the top of the casing and/or the top of the upper heat exchanger for water leaks or signs of water
from the flue air supply tube.
e) Open the siphon cleaning rinsing point at the base of the unit.
f) If you have a notebook computer, connect it and check the service page for any errors, messages, starts
and successful restarts. (Special communication lead and service software required)
g) Run the unit at maximum capacity and measure the input and the CO2%.
h) Run the unit at minimum capacity and measure the input and the CO2%.
i) Listen to the sound of the in built pumps.
j) Disassemble each burner by removing the six M6 nuts around the burner door, removing the ignition cable and
pulling the burner forwards. When the burner has been pulled forwards to halfway across the burner area, the
plug on the fan cable must be removed from the fan motor. Check the interior of the heat exchanger.
k) Disassemble the plastic box at the suction side of the fan, inspect the fan blades.
I) Check the distance between the electrode and the burner; this should be 4 to 5 mm.
20.2 maintenance
Depending on the results of the inspection carry out any maintenance and if necessary any preventive
maintenance.
Possible actions include:
at a) The remarks and comments of the client must be taken seriously and the cause(s) of any faults or problems
must be found.
at b) The pressure of the installation must be between 1 and 2 bar: any possible leaks in the system must be
identified; if necessary, have a pipework engineer solve the problem.
at c) Possible leaks or weeping must be resolved immediately.
at d) In case of water leakage or ingress from the air supply pipe, the cause must be found.
at e) If the condensation in the siphon is highly contaminated, the siphon must be rinsed. With the burners
removed, use a filling hose to insert water into the heat exchanger, which will automatically reach the siphon.
at f) Draw your conclusions from the service screen and attend to those parts that have caused any faults.
at g) and at h) If necessary, adjust the gas setting on the gas valves.
at i) If the in built pumps make an un-natural noise, and in particular if the pumps are more than 5 years old, it is
recommended that the pumps should be replaced by way of preventive action.
Note the pumps are fully modulating and do have characteristic a “yet yet” noise which is normal at low speeds.
at j) NEVER CLEAN THE BURNER ITSELF
If the interior of the heat exchanger is contaminated and/or there is a deposit on the surfaces of the coiled
stainless steel pipes, the latter must be removed with a hard brush or citric acid. (DO NOT USE A STEEL
BRUSH!) Then remove any dirt with a vacuum cleaner
at k) If dirt has deposited on the fan blades, each blade must be carefully cleaned, until the blade material is
visible
again. If this is not done evenly the fan will not rotate properly and be out of balance.
at I) Carefully bend the electrode without touching the burner, until the correct distance has been reached
IMPORTANT NOTE
IF ANY WATER CARRYING JOINT WITHIN THE BOILER IS DISASSEMBLED THEN THE “0” RING
SEAL MUST ALWAYS BE REPLACED, LIKEWISE IF ANY OTHER SEAL IS NOTED TO BE DEFORMED
THEN THEY SHOULD ALSO BE REPLACED.
WATER SEALING “0” RINGS ARE A ONE TIME USE ONLY AND SHOULD NOT BE RE-USED.
Cancelling the Service Message
Following the maintenance operations, the service message (when displayed) must be cancelled. This is done by
pressing and holding in the service button for at least 10 seconds.
21.0 screen display
diagnosis of faults
2.1 Screen display
The control panel of the MICROMAT EC boiler has an LCD screen, displaying two lines of data. This screen provides
information about the operation of the appliance; it shows operation messages (non flashing) and fault messages
(flashing display). The first line contains text information about the status of the unit.
It shows:
STATUS MESSAGES (NON FLASHING) FOR NORMAL OPERATION
Standby
No heat demand (boiler not required to be on)
Pre-purge
Combustion chambers are being pre-ventilated with air from the burner fans
Ignition
The ignition sequence of the burners is initiated
CH Demand
The boiler is operating in central heating mode
DHW Demand
The boiler is operating to produce domestic hot water
Flue-emission
10min Low
The boiler is operating in test mode at mid output to enable flue gas emissions to be checked
(auto expires after 10 mm)
The boiler is operating in engineers test mode for adjustment purposes (auto expires
Post-purge
Combustion chambers are being post-ventilated with air following boiler operation
Limit F/R
The flow and/or return temperature is too high (currently)
Fan high The lower burner fan is running too fast (currently)
Fan low The lower burner fan is running too slow (currently)
Fault room u
There is a fault with the modulating unit (RE 132) or Cascade manager (KKM2) or a
fault in the wiring to these controls (in these circumstances the boiler runs continuously
in heating mode to protect the building)
Fault outside
There is a fault in the outside air sensor or in the wiring to the sensor or the dip switches are
incorrectly set to ask the boiler to look for an outside sensor when there is none installed
Deaerating
The in built pumps are operating to remove any possible collection of air from the heat exchangers.
(Occurs when power turned off/on and after reset of fault)
The second line of text displays values such as temperature, percentages etc and the red reset button may be used to
scroll through (for information) the values of the various sensors that are/may be connected in the boiler plus fan speeds
and pump speed etc.
56
21.1 screen display
diagnosis of faults
STATUS MESSAGES (FLASHING DISPLAY) INDICATING A FAULT
A flashing display indicates a fault and that the boiler has shutdown (lockout). The boiler will not attempt
to operate until the red’ reset button is pressed.
Any repetitive flashing fault message should be investigated, the cause found and corrective action taken.
For each flashing display message there is a possible cause, see list of cause numbers following the flashing
status’ list.
Display Message
Meaning
cause number/s
FLASHING
Wat 1 Lockout
high limit stat has tripped.
5,6,7,8,21,24,25,26,31
Wat 2/Flue Lo
ht/exch high limit or flue
limit stat has tripped
2,5,6,7,8,21,24,25,26,31
Fan High
burner fan speed is too high
9,11,29,31,33
Fan Low
burner fan speed during
pre-purge is too low
9,10,11,14,18,29,31,33
Fan oper
Lower burner fan is detected as
operating when should be idle
3,4,11,29,31
Ignit fault
Ignition to burner has not
been successful after 4 attempts
12,13,15,16,17,19,22,
23,27,29,30,31,35
Flame 1 out
Flame at burner has been lost
on 4 consecutive occasions during
operation
13,15,17,19,20,23
Flame 1 on w/
Flame is detected at the lower burner
when there should be no flame
17,19,30
S3
ht/exch flow temperature
sensor interrupted
3,5,33
S4
Return temperature sensor
Interrupted
3,5,33
S7
Mixed flow temperature sensor
Interrupted. Only when MR03
Unit installed
1,3,5,33
Program end
Follows reprogramming of control
panel with laptop PC, not a fault
-just press reset button
Ltd.
E n e r g y
T e c h n o l o g y
57
21.1 Screen display/
Diagnosis of faults (contd)
Gas valve
Connection to gas valve interrupted
16,26,28,29,31,33
Soft fault
Error in software in the control
29
Reset button
There is a fault with the reset button
29,31,34
Eeprom
There is a fault in the EEPROM in the control
29
21.2 (possible) causes of fault
& corrective action
CAUSE No.
58
REASON/ACTION
1-
Dip switches not set correctly / Check and correct settings
2-
Unsound electrical connections to flue limit stat / Check and correct
3-
Sensor not correctly connected or sensor defective/Check connections and
or replace sensor
4-
Short circuit in wiring / Check and rectify
5-
Short circuit in wiring to sensor / Check and rectify
6-
Boiler pumps not rotating (seized or defective)/Free seized shaft or
if defective replace pump
7-
System lacks water / Investigate, refill and vent
8-
Connections to heat exchanger limit stat unsound /check & rectify
9-
Unsound electrical connection to fan / Check integrity of fan connection plug
10 -
Fan blades heavily contaminated / Clean fan
11 -
Fan is defective / Replace fan
12 -
There is no gas supply available / Investigate, restore gas supply
13 -
Low gas pressure / Investigate and rectify
14 -
Fuse defective / Check fuses and replace as necessary
15 -
Gas valve mm output setting is incorrect / Check and adjust mm output C02%
17 -
Poor ignition lead connection to electrode or damp connection or lead damaged
and shorting to earth / Check and rectify
18 -
Transformer defective / Replace transformer
19 -
Condense siphon is blocked or condense waste blocked or frozen / Clear siphon or
waste pipe
20 -
Flue gas leakage from connection at rear of heat exchanger / Check, reposition or
replace seal
21 -
System strainer blocked, isolation valve closed. Or some other interruption to water
flow / Check and rectify
21.2 (possible) causes of fault
& corrective action
22 -
Unacceptably high resistance in flue or air supply tubes or flue blocked / Check flue
for suitability or clear obstruction
23 -
Leakage of flue gas from flue gas tube into air tube vitiating the combustion air / Strip
out flue system and remake joints
24 -
Zone pumps not running / Check and rectify
25 –
Heat exchangers fouled internally with silt or scale / Clean, descale heat exchangers
and system and re-dose system with water treatment
26 -
Heat exchanger high limit stat defective / Replace limit stat
27 -
Boiler set for wrong gas type / Convert boiler to burn the gas being supplied
28 -
Flue gas limit stat defective / Replace limit stat
29 -
Boiler control panel defective / Replace control panel
30 -
Incorrect position of ignition electrode / Reset gap 4-5mm
31 -
moisture in-on electrical connections or components / Dry carefully using warm air
from a hair dryer
32 -
Incorrect electrical connection / Check and rectify
33 -
Wiring interrupted (broken wire) / Check and rectify
34 -
reset button stuck / Press button in attempt to free sticking contacts. If no success
then replace control panel
35 -
Ignition electrode damaged or broken / Replace electrode
Ltd.
E n e r g y
T e c h n o l o g y
59
For further information please contact:
RVR Limited
Kenmare
Co Kerry
Ireland
Tel: +353 64 41344
Fax: +353 64 41511
email: [email protected]