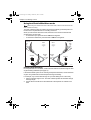
1
81302_1.book Page 13 Tuesday, October 23, 2007 7:44 AM
Chapter 1: Basic operation
13
Message
Description and possible actions
NEXT WPT?
Responding to a Waypoint Advance alarm
To respond to a Waypoint Advance alarm:
• check that it is safe to turn onto the new track, then press track to accept
the waypoint advance
• alternatively, you can cancel the alarm without accepting the waypoint
advance by pressing: standby to return to hand steering, or auto to
return to Auto mode.
Note: Waypoint advance only operates if the SPX-5 Wheel system is
receiving valid bearing to waypoint and waypoint number information.
(continued)
OFFCOURSE
(PT or Stb)
Off course alarm
Occurs if the vessel has been off course from the locked heading for longer
than 20 seconds.
• PT = Deviation to port
• Stb = Deviation to starboard
You can adjust the specified alarm angle in Dealer setup, see your Commissioning guide for details.
If this happens frequently you should check sail balance and also review
autopilot performance. Seepage 7.
SHALLOW
Shallow alarm
The SPX-5 Wheel system activates the Shallow alarm if it receives a shallow depth alarm via SeaTalk:
• press standby or disp to cancel the alarm
WINDSHIFT
Large wind shift warning
Indicates a change in the apparent wind angle of more than 15º. See page
24.
1.9 User setup options
User setup functions are accessed using a User calibration mode. The setup
functions in this book are those likely to require adjustment during normal operation.
Information on other setup functions is given in the SmartPilot X-5 Wheel Installation
& Setup Guide.
Note: Many of the setup functions are sailboat specific so will be displayed only if your vessel
type is set to SAILBOAT.
Accessing the setup functions
You can access the User Calibration mode only from Standby mode:
1. With the SPX-5 Wheel system in Standby mode, press and hold the standby
button for 2 seconds. The display will change to show DISPLAY CAL.
2. Press the disp button once, the display will now show USER CAL.
3. Press auto to enter User Calibration.
The first page of User Calibration is displayed.
4. To access other User Calibration pages, press disp to scroll through the
calibration functions (described below).