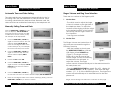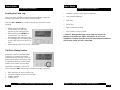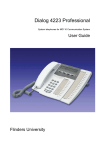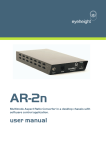
1
User’s Guide
4666(2003 04) C
Regency™ Series 400
Single Line
Caller ID Telephone
User’s Guide
User’s Guide
Table of Contents
Congratulations on the purchase of your Regency™ Series single
line caller ID telephone. This high precision electronic device
includes advanced features suitable for use in today’s
environment and requires minimum maintenance. It is simple to
install and easy to use — especially with your Telephone
Company operating features.
LCD Display Information
Deleting Caller Log Records
To delete ONE stored call:
1
Press the UP or DOWN key to
activate the display for scrolling.
The LCD screen will display TOP
OF LIST or BOTTOM OF LIST if you
reach either end. Scroll to the
number to be deleted.
2
Then press the DELETE key once
and the LCD will display the question ‘DELETE?’.
Connection Points . . . . . . . . . . . . . . . . . . . . . . . . . . . . . . . . . .Page 4
3
Press the DELETE key a second time to delete.
Installing the Telephone . . . . . . . . . . . . . . . . . . . . . . . . . . . . .Page 6
• Checking the parts list . . . . . . . . . . . . . . . . . . . . . . . . . . . . . .6
• Connecting the handset cord . . . . . . . . . . . . . . . . . . . . . . .6
• Connecting the line cord . . . . . . . . . . . . . . . . . . . . . . . . . 7
• Connecting the power adapter . . . . . . . . . . . . . . . . . . . 7
To delete ALL stored calls:
Read this user’s guide to become familiar with all aspects of your
new telephone:
Getting to know the Features . . . . . . . . . . . . . . . . . . . . . . . . .Page 1
Learning about the Function Keys . . . . . . . . . . . . . . . . . . . . .Page 3
Wall Mounting the Telephone . . . . . . . . . . . . . . . . . . . . . . . . .Page 9
Programming the Telephone . . . . . . . . . . . . . . . . . . . . . . . .Page 10
• Language Option . . . . . . . . . . . . . . . . . . . . . . . . . . . . . . . .10
• Tone / Pulse Dialing Option . . . . . . . . . . . . . . . . . . . . . . . .10
• Automatic Time and Date Setting . . . . . . . . . . . . . . . . . . .11
• Manually Setting Time and Date . . . . . . . . . . . . . . . . . . . .11
• Flash into Memory . . . . . . . . . . . . . . . . . . . . . . . . . . . . . . . .12
• Pause into Memory . . . . . . . . . . . . . . . . . . . . . . . . . . . . . .12
• Area Code into Memory . . . . . . . . . . . . . . . . . . . . . . . . . . .13
• Access Code into Memory . . . . . . . . . . . . . . . . . . . . . . . . .15
• TouchLite® Message Retrieval Button . . . . . . . . . . . . . . . .16
• Editing the TouchLite Message Retrieval Button . . . . . . .18
• Speed Dial . . . . . . . . . . . . . . . . . . . . . . . . . . . . . . . . . . . . . .19
• Manual Entry and Key Pad Guide . . . . . . . . . . . . . . . . . .20
Regency™ Series 400 Single Line Caller ID Telephone
1
Press the UP or DOWN key to
activate the display for scrolling.
2
Press and hold the DELETE key until
the LCD displays the question
‘DELETE ALL?’
3
Release and press the DELETE key again.
Regency™ Series 400 Single Line Caller ID Telephone
36
User’s Guide
User’s Guide
LCD Display Information
2
Add a character by pressing a
keypad number to activate the
editing feature.
3
Press the DELETE key to start
deleting individual characters.
4
Lift handset.
5
Press the DIAL key to dial the
number.
Note: When deleting characters from
a caller's identity, the call log will not
be changed.
Table of Contents
•
•
•
•
Direct Entry from Caller Log . . . . . . . . . . . . . . . . . . . . . . . .21
Reviewing Information in Memory . . . . . . . . . . . . . . . . . . .22
Changing Information in Memory . . . . . . . . . . . . . . . . . .23
Ringer Volume and Ring Tone Selection . . . . . . . . . . . . .24
Using the Features and Options . . . . . . . . . . . . . . . . . . . . . .Page 25
• Retrieving Messages . . . . . . . . . . . . . . . . . . . . . . . . . . . . . .25
• Turning Message Waiting Light On or Off Manually . . . .26
• Placing a Call from Speed Dial Memory Location . . . . .27
• Data Port . . . . . . . . . . . . . . . . . . . . . . . . . . . . . . . . . . . . . . . .28
• Hold Key . . . . . . . . . . . . . . . . . . . . . . . . . . . . . . . . . . . . . . . .28
• Redial Key . . . . . . . . . . . . . . . . . . . . . . . . . . . . . . . . . . . . . . .29
• In Use Line Indicator . . . . . . . . . . . . . . . . . . . . . . . . . . . . . .29
• Handset Volume Control . . . . . . . . . . . . . . . . . . . . . . . . . .30
• Flash Key . . . . . . . . . . . . . . . . . . . . . . . . . . . . . . . . . . . . . . . .30
LCD Display Information . . . . . . . . . . . . . . . . . . . . . . . . . . . .Page 31
• Visual Call Waiting LCD Display Information . . . . . . . . . .32
• LCD Contrast Adjustment . . . . . . . . . . . . . . . . . . . . . . . . . .32
• Scrolling the Caller Log . . . . . . . . . . . . . . . . . . . . . . . . . . . .33
• Call Back Dialing Feature . . . . . . . . . . . . . . . . . . . . . . . . . .33
• Adding/Deleting Characters on LCD Display . . . . . . . . .34
• Deleting Caller log Records . . . . . . . . . . . . . . . . . . . . . . . .36
• On-hook Display Mode . . . . . . . . . . . . . . . . . . . . . . . . . . . .37
• Dialing Display Mode . . . . . . . . . . . . . . . . . . . . . . . . . . . . .37
• Incoming Ring Display Mode . . . . . . . . . . . . . . . . . . . . . . .38
• In Use and Timer Display Features . . . . . . . . . . . . . . . . . . .38
• No Calls Display . . . . . . . . . . . . . . . . . . . . . . . . . . . . . . . . . .39
• Line Error Display . . . . . . . . . . . . . . . . . . . . . . . . . . . . . . . . .39
Trouble Shooting Tips . . . . . . . . . . . . . . . . . . . . . . . . . . . . . . .Page 40
Regency™ Series 400 Single Line Caller ID Telephone
35
Regency™ Series 400 Single Line Caller ID Telephone
User’s Guide
User’s Guide
Getting to know the Features
The FEATURES of this telephone are:
• Large, backlit, contrast adjustable, LCD display shows:
Caller ID information
Date and Time
Dialing Verification
Elapsed Call Timer
Functional Icons
•
*Caller ID feature – Type II with 60 memory, up / down scroll,
and direct call back
•
10 Speed Dial memory locations with directory display and
dial out
•
Interactive caller log editing for storing memory
•
*Visual message waiting indication – ClassSM compatible
•
* One touch message retrieval feature
•
Caller Log Call Back Dialing Feature:
Adding or Deleting Characters on the LCD Display
• Single line
•
•
•
•
•
LCD Display Information
Interactive directory and storage feature
•
Electronic hold with a back-lit indicator
•
In-use line status indicator
•
Tone or Pulse dialing
•
Ringer volume control
•
Convenient data port
Numbers in the caller log can be edited before dialing. When
editing a number to be dialed, the caller log will not remove the
information already stored. To delete one or more digits from the
caller log, you must first press a digit or add a character from the
keypad to activate delete.
To add digits to the displayed number:
1
Press the UP or DOWN key to activate the display for scrolling.
2
Scroll the UP or DOWN key to find the number to be dialed.
3
If you need to add a number prior to the numeric string on
the display, press the keypad number you require and it will
be placed on the display for dialing.
4
Lift handset.
5
Press the DIAL key to dial the number.
Note: The number can only be inserted prior to the displayed
digits. See Delete Characters for improperly inserted characters.
To delete digits from the displayed
number:
Press the UP or DOWN key to activate
the display for scrolling.
1
Scroll the UP or DOWN key to find
the number to be dialed.
Caller ID/LCD DIsplay continued on next page
Regency™ Series 400 Single Line Caller ID Telephone
1
Regency™ Series 400 Single Line Caller ID Telephone
34
User’s Guide
User’s Guide
LCD Display Information
Getting to know the Features
Scrolling the Caller Log
•
Handset volume control (ADA compliant)
Users can scroll upward and downward through the caller log
records in the same order as they were received.
•
Last number redial key
•
Flash Key
Press the UP or DOWN key continuously for two seconds to start
scrolling.
•
Pause key
•
•
Desk or wall mountable
•
Fully modular, easy to install
•
•
•
When pressing the UP key
continuously, you will scroll
upward in the calling record.
When pressing the DOWN key
continuously, you will scroll
downward in the calling record.
The starting point of scrolling starts
at the caller log record that is in
view.
Stop scrolling when TOP OF LIST is displayed.
* Caller ID, Message Manager (voice mail) and Visual Call
Waiting are features that require subscription to your local
Telephone Company provided services. These telephone features
will not work unless you are a subscriber.
Call Back Dialing Feature
Allows the user to call back stored
numbers, or to select and call a
number from the call log. The Call
Back feature allows the user to add
or delete characters to accurately
pattern the number to be called.
Information available on the LCD
when using the DIAL feature key includes incoming call history:
•
•
•
•
Date and time of the incoming call.
Location number of the call in storage.
Caller's number.
Caller's name.
Regency™ Series 400 Single Line Caller ID Telephone
33
Regency™ Series 400 Single Line Caller ID Telephone
2
User’s Guide
User’s Guide
Learning about the Function Keys
LCD Display Information
Visual Call Waiting LCD Display Information
LCD Display
Large back-lit display that shows
the callers ID number of new calls
recieved and total, with date and
time, and caller log history.
Up & Down Scroll Key(s)
Displays the calls received in sequential
order and searches storage locations.
Delete Key
Used to edit Caller Log characters for
storage and deletes Caller Log
information.
Dial Key
Used to dial numbers from the Caller
Log and memory storage locations.
Directory/Storage Key
Used to locate stored numbers for
dialing and used for storing memory
locations.
Redial/Pause Key
Redials the last number manually
dialed. Pause is used to program a 3
second delay in speed dialing.
Flash Key
Provides a 600ms timed line break.
Data Input Keys
Data input keys for feature
programming.
Handset Volume Control Key
Controls the loudness of the handset
when off hook.
LCD Contrast Control
Controls the darkness of the LCD
(UP/DOWN) on hook.
In Use Light
Shows the line is in use when illuminated.
Hold Key
Used to place caller on hold
TouchLite® Message Retreival Button
Visual lamp indicator and message
retrieval button that illuminate when a
message is waiting, if you are equipped
with a message system
Numeric Dial Pad
Large keys used for outbound dialing
and programming memory locations
Handset
Low profile design, hearing aid
compatible.
The Regency™ Series LCD display supports Type II Caller ID which
provides incoming Call ID information while the phone is in use.
The user has the option to answer the call or allow the call to
automatically be forwarded to the user's voicemail.
When the user is on one call any new incoming call will be
displayed on the screen. The display will show the following
information:
•
•
•
The date and time of the
incoming call and a CW
symbol.
The location number of the
call in storage, and the
incoming caller's telephone number.
The incoming caller's name.
Note: When the call goes to voicemail, the Caller ID information
can be retrieved from the call log.
Contrast Adjustment (5-Step)
When the phone is on-hook, the
VOLUME key is used for the 5-step
LCD contrast adjustment.
Press volume ▲ once to darken the
screen. Press volume ▼ once to lighten
the background of the LCD screen.
Note: Contrast adjustment starts in the
third step and can be increased or
decreased by two steps.
Regency™ Series 400 Single Line Caller ID Telephone
3
Regency™ Series 400 Single Line Caller ID Telephone
32
User’s Guide
User’s Guide
LCD Display Information
LCD Display Information
Connection Points
Right side
The backlit Liquid Crystal Display (LCD) shows Caller ID information
(name and number, call log, message waiting indicator, time and
date, call timer).
Feature Note:
The LCD display backlighting feature is activated upon receipt of
the first ring, when the handset is lifted, or by pressing any key.
The callers name and number is displayed on the LCD between
the first and second ring. You may elect to answer or allow the
call to be forwarded to a voicemail system. The number will be
stored in the caller log for retrieval in either case.
Data Port
There are four keys (UP, DOWN, DELETE and DIAL) that help
manage stored information.
Information available on the screen when in idle mode (on-hook)
is:
•
•
•
Date, time and an envelope on the first line. The envelope will
appear only when a message
has been received in
voicemail or "Message
Manager".
(NEW) - The number of new
messages awaiting retrieval.
Left side
Handset Jack
Rear
Line Cord Connector
(TOTAL) -Total messages received and stored into memory (up
to 60 messages). When the memory is full, the oldest of the 60
call records will be automatically deleted, and the newest
call will be accepted into memory.
Power Supply Connector
Strain Relief
See chart on page 5 for description of connection points.
Regency™ Series 400 Single Line Caller ID Telephone
31
Regency™ Series 400 Single Line Caller ID Telephone
4
User’s Guide
User’s Guide
Connection Points
This table explains the labels in the diagram:
CONNECTION
POINT
FUNCTION
Data port
Convenient port for connecting a computer,
modem, base station for a cordless phone, fax
or answering service.
Note: A safety plug found inserted in the data
port must be removed before use.
Handset jack
Modular receptacle for connecting the handset
coil cord.
Line cord
Modular receptacle for connecting telephone
receptacle
line cord.
Power receptacle Used to connect the power adapter.
Using the Features and Options
Handset Volume Control
With the handset off-hook, press
the upward arrow ▲ on the
VOLUME key repeatedly to
increase the volume. The volume
of the handset receiver can be
increased by 12 to 18 decibels.
The VOLUME key is an 8-step
volume control switch. Each
volume level is indicated on the LCD screen.
Note:
The handset volume control switch
will automatically reset back to its
normal level when hanging up.
This will ensure that the handset
volume resets back to normal for
the next phone call.
Flash Key
The FLASH key is an electronic
timed line break of 600 milli
seconds that is used for accessing
line features provided by your
telephone company or by your
telephone system. For example,
many times a flash is used for accessing features such as Call
Waiting. When used in a Centrex application, it can be used to
access other features like Call Pick-Up, Call Transfer, etc. Contact
your telephone system coordinator or your local telephone
company for further information regarding your line features.
Regency™ Series 400 Single Line Caller ID Telephone
5
Regency™ Series 400 Single Line Caller ID Telephone
30
User’s Guide
User’s Guide
Using the Features and Options
Installing the Telephone
Redial Key
Checking the Parts List
The REDIAL key is used to automatically redial the last number
dialed.
Ensure you have the following parts:
To use:
1 Lift the handset.
2
Press the REDIAL key.
3
The number that was last
dialed will automatically
be dialed.
1. Wall mount wedge.
2. Power Adapter.
3. 7’ Modular
telephone line cord.
4. 10’ Modular coiled
handset cord.
5. 8" Modular wall
mount telephone
line cord.
6. Wall mount clip.
2
1
3
6
4
5
Connecting the
handset cord
In Use Line Indicator
1
The LED will illuminate to indicate that another phone is in use and
sharing the same line.
Plug one end of the handset cord into the modular jack on
the handset.
2
The remaining end
of the handset cord
plugs into the jack
located on the left
side of the base
unit.
Handset Cord
Regency™ Series 400 Single Line Caller ID Telephone
29
Regency™ Series 400 Single Line Caller ID Telephone
6
User’s Guide
User’s Guide
Installing the Telephone
Using the Features and Options
Connecting the line cord
Data Port
1
If the telephone is to be desk mounted, plug one end of the 7’
line cord into the modular jack at the rear of the telephone.
The data port (jack) on the side of the base unit is used to plug in
any standard telephone device such as a:
2
The remaining
end of the line
cord plugs into
the jack located
on the wall.
•
•
3
If the telephone is
to be wall
mounted, use the
8" line cord supplied instead. See also page 9 for more
information on wall mounting your telephone.
Connecting the power adapter
The power adapter provides the power source to the telephone.
1
Plug the power adapter into the back of the telephone.
2
Wrap the power wire around the strain relief provided . This will
avoid accidental disconnection of the power cord.
3
Plug the power adapter
into a standard 120V
AC power outlet.
Mounting holes are
provided to secure the
power adapter to the
AC wall outlet.
Regency™ Series 400 Single Line Caller ID Telephone
7
•
•
fax machine
base station for a
cordless telephone
computer modem
answering machine
Note: There is a plastic safety plug inserted into the data jack
which must be removed using a small tool such as tweezers.
BE SURE TO UNPLUG BOTH THE TELEPHONE LINE CORD AND THE
POWER SUPPLY FROM THE REAR OF THE TELEPHONE PRIOR TO
REMOVING THIS SAFETY PLUG.
Hold Key
To use, press the HOLD key. The key will
illuminate indicating that the line is on
hold.
When placing a caller on hold, the
handset can be returned to its on-hook position. The line will not
be disconnected. To return to the caller, lift the handset.
Regency™ Series 400 Single Line Caller ID Telephone
28
User’s Guide
User’s Guide
Using the Features and Options
Installing the Telephone
Placing a Call from Speed Dial Location:
Installation is completed
1
Lift the handset.
2
Press the DIRECTORY / STORE
key.
The following information will be displayed on the LCD (after
going on-hook) when the installation is complete.
3
Press the UP / DOWN key to
locate the name or number’s
memory location (i.e. MEM1,
MEM2, etc.). The number will
be displayed on the LCD
display.
4
If needed, add (or delete) any
digits to the number by
pressing the dialing keypad (or
the delete key, respectively).
5
Press the DIAL key and the number will be dialed.
Regency™ Series 400 Single Line Caller ID Telephone
27
Regency™ Series 400 Single Line Caller ID Telephone
8
User’s Guide
User’s Guide
Wall Mounting the Telephone
Using the Features and Options
Wall Mounting the Telephone
Turning Message Waiting Light On/Off Manually
1
First, remove the clip provided in the set
by sliding it straight up (Figure 1) , and
replace with the Wall Mount Clip found in
the packaging, as shown (Figures 2-3).
2
Replace the desk mount wedge with the
wall mount wedge. To remove the desk
mount wedge, press the two release tabs
as shown. The wedge will snap off. Insert
the tabs of the wall mount wedge (Figure
4) and snap into place.
This allows the first user of voicemail the opportunity to notify
another user that a voicemail message is waiting for their review.
It also allows the user to stop the message waiting light from
flashing if it is doing so in error. When used, it will reset the light
signal in the phone. This does not send any outgoing signal to an
outside voicemail service.
3
Wall Mount Clip
Insert the short line cord into the jack at the rear of the
telephone. Plug the opposite end into the jack on wall.
When the message waiting light is turned off, it will re-activate
when a new phone message arrives in voicemail.
To turn ON:
While in on-hook state, and the light
is OFF, press the * key for three
seconds and the TouchLite® will
light.
To turn OFF:
While in on-hook state, and the light
is ON, press the * key for three
seconds and the TouchLite® will
turn off.
Figure 1
Figure 2
Figure 3
Note: When turning light off, the Mail Icon on the LCD display will
also turn off.
Figure 4
Regency™ Series 400 Single Line Caller ID Telephone
9
Regency™ Series 400 Single Line Caller ID Telephone
26
User’s Guide
User’s Guide
Using the Features and Options
- You may also adjust the ringer volume while the telephone is
ringing due to an incoming call by simply pressing the
VOLUME key up or down. The ringer
volume control will automatically set
to the selected level for the next
phone call (Figure 3).
Note: The lowest level will turn off the
ringer.
Figure 3
Retrieving Messages
Programming The Telphone
Features and options are programmed by utilizing the DIRECTORY
STORE key.
Language option
Used to change the LCD
screen from English
(default) to French or
Spanish.
1
Press the DIRECTORY /
STORE key until the LCD display reads:
-1-ENG, -2-FRA, -3-ESP.
Enter the digit number of the selected language.
TouchLite® Message Retrieval Feature
1
Lift the handset.
2
2
Press the TouchLite® Message Retrieval Button to
automatically call your voice
messaging service or "Message
Manager".
RESULT: The language selected displays immediately.
Note: The TouchLite® must be
programmed before messages can be
retrieved. Refer to page 16 for
programming instructions.
Note: When storing a password into
memory, pauses should be
programmed into the dialing pattern to
delay the connection. To find the proper timing, continue to
change the SECOND OF WAIT programming until the voicemail
connects properly. Refer to page 16 for programming
instructions.
Regency™ Series 400 Single Line Caller ID Telephone
25
Tone / Pulse dialing option
Allows the user to select
tone (default) or pulse dial
mode from the LCD
display.
1
Press the DIRECTORY /
STORE key until the LCD
display reads: TONE = 1 PULSE = 2.
2
For tone dial mode, press the 1 key.
For pulse dial mode, press the 2 key.
RESULT: The LCD displays OK for the selected dial mode.
Regency™ Series 400 Single Line Caller ID Telephone
10
User’s Guide
User’s Guide
Programming The Telephone
Automatic Time and Date Setting
The date and time are programmed automatically by the 1st
incoming call if the user subscribes to Caller ID service. Each
incoming call refreshes the date and time. Between calls, the
date and time are maintained internally by the telephone unit.
Programming The Telephone
Ringer Volume and Ring Tone Selection
There are two versions of the Regency 400:
1
- The switch used to adjust the ringer
volume is located on the right side of
the telephone base. To adjust the
loudness of the ringing, slide the switch
to the desired position of HI/LOW/OFF.
The factory sets the ringer volume to
the HI position.
- One ring tone available.
Manually Setting Time and Date
Press the DIRECTORY / STORE key until
the LCD displays: SET UP MONTH 01.
Using the keypad, enter the two-digit
number of the current month (01-12).
For example, 09 for September.
1
Press the DIRECTORY / STORE key
again to store the month. The LCD
will then display SET UP DAY 01.
Enter the two-digit number of the
current date (01-31). For example,
09 for the ninth day in the month.
2
Press the DIRECTORY / STORE key
again to store the day. The LCD
screen will then display AM=1
PM=2.
3
Press 1 for AM or 2 for PM.
4
Press the DIRECTORY / STORE key
again until the LCD displays: SET UP
HOUR 01, then enter the current
hour (01-12).
5
Press the DIRECTORY / STORE key
to store the hour. The LCD screen will then display SET UP MINUTE 00.
6
Enter the two-digit number of the current minutes(s) (00-59), press the
DIRECTORY / STORE key to store the minute.
Regency™ Series 400 Single Line Caller ID Telephone
11
Version One:
2
Version Two:
The Ringer Volume and 4 selections of
ring tones are accessed through the
Directory Store Key
Figure 1
- With the handset on-hook, press
the DIRECTORY/STORE key until the
LCD display reads VOLUME <<<
( Figure 1). The ringer volume is
initially set to the 4th level of the
volume range. Use the VOLUME key,
located below the dial pad, to
Figure 2
adjust the volume. The ringer
volume control will automatically set to the selected level for
the next phone call.
- Press the DIRECTORY/STORE key again. The LCD display will
read RINGER TONE 0 — 3: 0 ( Figure 2). Then enter the digit
number ( 0, 1, 2, 3) of the desired ringer tone. The ringer tone
control will automatically set to selected level for the next
phone call.
Ringer Volume & Ring Tone Selection continued on next page . . .
Regency™ Series 400 Single Line Caller ID Telephone
24
User’s Guide
User’s Guide
Programming The Telephone
Programming The Telephone
Changing information in memory
Flash into Memory
To change a name and number that is already programmed into
a speed dial location:
The FLASH key is a storable function into memory that is used to
provide a 600 milli second timed line break, like hanging up
momentarily. This function may be required for accessing line
features provided by your
telephone system or local
telephone company. For
example, the FLASH is used
to access line features such
as Call Waiting. In a centrex
application, it is convenient
to program the FLASH
function along with the
system feature access code
and labeling the speed dial
position as CallPick-Up, Call
Transfer, etc. Contact your system coordinator or local telephone
company regarding special line features that you may have.
1
To select a memory location, press the
DIRECTORY / STORE key. The LCD will
display as follows. (MEM1: NAME): (Figure
1). Use the UP / DOWN key to find the
desired memory location (MEM1,
MEM2…MEM10).
Figure 1
2
Press the DIRECTORY / STORE key again and the LCD will display
OVERWRITE? (Figure 2). To proceed, press
the DIRECTORY / STORE key again and
the LCD will display MEM 1 ENTER NAME
(figure 3). If you do not want to make any
changes, simply lift the handset, then
hang up again.
Figure 2
3
Enter any alphanumeric characters for
the name using the keypad. If you
entered an incorrect character, press the
DELETE key to delete the character. When
complete, press the DIRECTORY / STORE
key again to store the name. The LCD will
then display NUMBER (figure 4).
4
Enter the number using the keypad. Press
the DIRECTORY STORE key to store the
number. If the number does not need to
be overwritten, press the DIRECTORY /
STORE key to bypass the number edit
mode and the original number in memory
will be retained.
5
Note: The FLASH function counts as 1 digit when stored into a
speed dial memory location.
Figure 3
Figure 4
Press the DIRECTORY / STORE key twice to bypass the store AREA CODE
and ACCESS CODE. These two areas are not part of the speed dial
programming and any changes could affect the proper operation of
other features. See pages 13 to 15 for further information about AREA
CODE AND ACCESS CODE.
Regency™ Series 400 Single Line Caller ID Telephone
23
Pause into Memory
The PAUSE key is used to program a 3 second delay into memory.
A speed dial number may
need to pause during its
dialing sequence prior to
entering the next set of digits
to ensure proper
connections
Note: The PAUSE function
counts as 1 digit when
stored into a speed dial
memory location.
Regency™ Series 400 Single Line Caller ID Telephone
12
User’s Guide
User’s Guide
Programming The Telephone
Area Code into Memory
Programming The Telephone
4
If your local telephone company does not deliver the area code
with a local number’s caller ID information, it is not necessary to
program this feature.
The area code is programmed into memory to allow the
telephone to recognize the local
area code. When this number is
programmed, the area code will
not be dialed when using the call
back feature to call back a
person within the same local
calling area.
Note: Programming should be performed with the telephone onhook
1
Press the DIRECTORY / STORE key (located on the top side of
the base) until ENTER AREA CODE is displayed on the LCD
screen.
2
Enter the area code number of your location using the
numeric dial pad. Do not enter a ‘1’ as the first digit.
3
Press the DIRECTORY / STORE key again and the screen will go
back to its normal position after a 15 second delay.
Press the DIRECTORY / STORE key. The LCD will display a
number along with a memory
location (Figure 2). Use the UP /
DOWN key to change the
memory location to the desired
memory location (Figure 3).
(MEM 1, MEM2, … MEM10)
Figure 2
5
Press the DIRECTORY / STORE key to store the name and
number.
To program additional numbers,
repeat steps 2 thru 5.
Figure 3
Reviewing information in memory
To review a name and number that is already programmed into
a speed dial location:
1
To select a memory location, press the DIRECTORY / STORE
key. The LCD will display the
following (MEM1: NAME): (Figure
4). Use the UP / DOWN key to find
the desired memory location
(MEM1, MEM2 . . .MEM10)
2
To exit, simply lift the handset,
then hang up.
Figure 4
Programming continued on next page . . .
Regency™ Series 400 Single Line Caller ID Telephone
13
Regency™ Series 400 Single Line Caller ID Telephone
22
User’s Guide
User’s Guide
Programming The Telephone
Programming The Telephone
Manual entry from keypad (guide)
Use the following Key Pad Guide to add characters when
programming into memory.
Press
1 time
Number: to get:
1
2
3
4
5
6
7
8
9
0
*
#
1
A
D
G
J
M
P
T
W
0
space
.
2 times
to get:
3 times
to get:
4 times
to get:
B
E
H
K
N
Q
U
X
C
F
I
L
O
R
V
Y
2
3
4
5
6
S
8
Z
=
:
-
(
5 times
to get:
6 times
to get:
In Some Areas, The Area Code is Required for a Local Call
In some areas, the local service provider uses the same area
code for local calls. The following options are available for these
areas. Try each of the following scenarios and use the one with
the best result:
1
Program the area code, then place a local test call using the
call back feature.
2
Delete the area code and do not program the access code.
Place a local test call.
3
Program the area code into the access code location. Place
a local test call. (caution: this will always dial the area code)
4
Use the keypad to add any additional number(s) to the
displayed number on the screen. Place a local test call.
7
9
)
#
Note: Depending on your area and dialing pattern, you may
obtain the best result by using both the access code and area
code fields. If these sequences do not work, use the keypad entry
as an option for your Call Back.
Direct entry from Caller Log
1
Confirm the display is in the idle
mode as shown in Figure 1.
2
Press the UP / DOWN key to locate
the incoming caller name and number from the caller log.
3
To activate the EDIT MODE, press any key on the keypad. Use
the DELETE key to delete a digit or use the keypad to add a
digit.
Figure 1
Regency™ Series 400 Single Line Caller ID Telephone
21
Regency™ Series 400 Single Line Caller ID Telephone
14
User’s Guide
User’s Guide
Programming The Telephone
Programming The Telephone
Access Code into Memory
Speed Dial continued
In most cases, this feature is not
used. It is usually only required
when the telephone is installed
outside of a residential application
where you may have to dial a
number(s), such as "9", to get an
outside line. Whatever number(s) is programmed as an Access
Code will automatically be dialed, followed by a 3 second
pause, prior to any number dialed from Speed Dial, or from the
Call Back Feature.
Manual entry for memory storing
To set up the access code:
1
Press the DIRECTORY / STORE key until the display screen reads
ENTER ACCESS CODE.
2
Enter the desired number, such as 9.
Note: There is no need to enter PAUSE. The Dial Call Back
operation automatically inserts a 3 second pause after the
access code number is dialed.
To delete the access code:
1
Press the DIRECTORY / STORE key until the display screen reads
ENTER ACCESS CODE.
2
Press the DELETE key.
3
Press the DIRECTORY / STORE key again and the screen will go
back to its normal position after a 15 second delay.
Regency™ Series 400 Single Line Caller ID Telephone
15
1
Confirm the display is in the idle mode as
shown in Figure 1.
2
Press the DIRECTORY / STORE key until the
LCD display is similar to Figure 2.
3
Press the UP / DOWN key to change the
memory location to the desired memory
location. (MEM 1, MEM2, … MEM10) (See
Figure 2 then 3.)
4
Enter the name by pressing the alphabetic
characters repeatedly on the keypad.
(see keypad guide on next page)
5
Use delete key to delete an incorrect
entry.
6
When the name is complete, press the
DIRECTORY STORE key once to store the
information.
Figure 1
Figure 2
Figure 3
7
The LCD will request NUMBER (Figure 4.)
8
Enter the number using the dialing
keypad. Press the DIRECTORY STORE key.
9
Press the DIRECTORY / STORE key twice to
Figure 4
bypass the store AREA CODE and ACCESS
CODE. These two areas are not part of the speed dial programming and any
changes could affect the proper operation of other features. See pages
13-15 for further information about AREA CODE AND ACCESS CODE.
To program additional numbers, repeat steps 2 thru 9.
Manual entry from keypad (guide).
Regency™ Series 400 Single Line Caller ID Telephone
20
User’s Guide
User’s Guide
Programming The Telephone
Programming The Telephone
Speed Dial
TouchLite® Message Retrieval Button
There are 10 speed dial name and number memory locations.
Each location can store up to 32 digits.
Read these notes before beginning the programming process:
The red TouchLite® button must be programmed to automatically
dial the voice mail system or "Message Manager". During
programming, you have the option of storing the voicemail
password.
Note 1:
Speed Dial programming must be done with the line
cord connected and the telephone power adapter
fully installed.
1
Note 2:
Programming should be performed with the telephone
on-hook (hung up).
Note 3:
There are two different methods for entering a name
and number into speed dial memory:
1. Manual Entry – Uses the dial keypad to enter names
and numbers into memory.
2. Direct Entry – Takes caller log information and saves it
into a speed dial memory location.
While on hook, Press the
DIRECTORY STORE key until the
LCD displays VOICE MAIL NO.?.
Using the keypad, enter the
telephone number of your
voicemail eg. *99. Press the red
TouchLite® button to store the number
into TouchLite® memory.
2
Press the DIRECTORY / STORE key until
the LCD displays: SECOND OF WAIT.
If you use a password or PIN number,
enter a value, between 3 and 6, corresponding to how many
seconds are required after dialing *99 as an example to wait
prior to dialing your password.
Allow enough time for your
voicemail or "Message
Manager" to answer.
3
Press the DIRECTORY / STORE
key until the LCD displays: ENTER PIN. A personal Identification
Number (PIN) or password can be programmed into the
TouchLite® memory and will be dialed after the voicemail
number**. Press DIRECTORY
STORE to retain the number or
the DELETE key to change the
number.
Note 4:
Numbers displayed from the caller log can be edited
for dialing purposes.
Touchlite Message Retrieval Button continued on next page . . .
Regency™ Series 400 Single Line Caller ID Telephone
19
Regency™ Series 400 Single Line Caller ID Telephone
16
User’s Guide
User’s Guide
Programming The Telephone
4
The PIN number has a maximum of 8 digits. When the
TouchLite® is dialed, the display will not show the last 4 digits
of the PIN. This is for security purposes.
**CAUTION: When a PIN or password is programmed into
memory, other users can obtain the messages. A password is not
required to be programmed.
Programming The Telephone
Editing the TouchLite®
To display the number that has
been programmed into the
TouchLite®, press the TouchLite®
Message Retrieval Button and
read the display. Note: This will
activate dialing.
1
The handset must be on-hook.
2
Press the DIRECTORY / STORE key until the Caller ID displays
VOICE MAIL NO.?.
3
Use the DELETE key to delete
the number. Then, use the
keypad to re-enter the correct
numbering sequence.
4
When the number is correct, press the TouchLite® Message
Retrieval button to store the number.
Note: When editing the voicemail
PIN number or password, the
display will not show the last 4
characters. A dash will be
displayed in the characters position
on the LCD.
Regency™ Series 400 Single Line Caller ID Telephone
17
Regency™ Series 400 Single Line Caller ID Telephone
18
User’s Guide
User’s Guide
Programming The Telephone
4
The PIN number has a maximum of 8 digits. When the
TouchLite® is dialed, the display will not show the last 4 digits
of the PIN. This is for security purposes.
**CAUTION: When a PIN or password is programmed into
memory, other users can obtain the messages. A password is not
required to be programmed.
Programming The Telephone
Editing the TouchLite®
To display the number that has
been programmed into the
TouchLite®, press the TouchLite®
Message Retrieval Button and
read the display. Note: This will
activate dialing.
1
The handset must be on-hook.
2
Press the DIRECTORY / STORE key until the Caller ID displays
VOICE MAIL NO.?.
3
Use the DELETE key to delete
the number. Then, use the
keypad to re-enter the correct
numbering sequence.
4
When the number is correct, press the TouchLite® Message
Retrieval button to store the number.
Note: When editing the voicemail
PIN number or password, the
display will not show the last 4
characters. A dash will be
displayed in the characters position
on the LCD.
Regency™ Series 400 Single Line Caller ID Telephone
17
Regency™ Series 400 Single Line Caller ID Telephone
18
User’s Guide
User’s Guide
Programming The Telephone
Programming The Telephone
Speed Dial
TouchLite® Message Retrieval Button
There are 10 speed dial name and number memory locations.
Each location can store up to 32 digits.
Read these notes before beginning the programming process:
The red TouchLite® button must be programmed to automatically
dial the voice mail system or "Message Manager". During
programming, you have the option of storing the voicemail
password.
Note 1:
Speed Dial programming must be done with the line
cord connected and the telephone power adapter
fully installed.
1
Note 2:
Programming should be performed with the telephone
on-hook (hung up).
Note 3:
There are two different methods for entering a name
and number into speed dial memory:
1. Manual Entry – Uses the dial keypad to enter names
and numbers into memory.
2. Direct Entry – Takes caller log information and saves it
into a speed dial memory location.
While on hook, Press the
DIRECTORY STORE key until the
LCD displays VOICE MAIL NO.?.
Using the keypad, enter the
telephone number of your
voicemail eg. *99. Press the red
TouchLite® button to store the number
into TouchLite® memory.
2
Press the DIRECTORY / STORE key until
the LCD displays: SECOND OF WAIT.
If you use a password or PIN number,
enter a value, between 3 and 6, corresponding to how many
seconds are required after dialing *99 as an example to wait
prior to dialing your password.
Allow enough time for your
voicemail or "Message
Manager" to answer.
3
Press the DIRECTORY / STORE
key until the LCD displays: ENTER PIN. A personal Identification
Number (PIN) or password can be programmed into the
TouchLite® memory and will be dialed after the voicemail
number**. Press DIRECTORY
STORE to retain the number or
the DELETE key to change the
number.
Note 4:
Numbers displayed from the caller log can be edited
for dialing purposes.
Touchlite Message Retrieval Button continued on next page . . .
Regency™ Series 400 Single Line Caller ID Telephone
19
Regency™ Series 400 Single Line Caller ID Telephone
16
User’s Guide
User’s Guide
Programming The Telephone
Programming The Telephone
Access Code into Memory
Speed Dial continued
In most cases, this feature is not
used. It is usually only required
when the telephone is installed
outside of a residential application
where you may have to dial a
number(s), such as "9", to get an
outside line. Whatever number(s) is programmed as an Access
Code will automatically be dialed, followed by a 3 second
pause, prior to any number dialed from Speed Dial, or from the
Call Back Feature.
Manual entry for memory storing
To set up the access code:
1
Press the DIRECTORY / STORE key until the display screen reads
ENTER ACCESS CODE.
2
Enter the desired number, such as 9.
Note: There is no need to enter PAUSE. The Dial Call Back
operation automatically inserts a 3 second pause after the
access code number is dialed.
To delete the access code:
1
Press the DIRECTORY / STORE key until the display screen reads
ENTER ACCESS CODE.
2
Press the DELETE key.
3
Press the DIRECTORY / STORE key again and the screen will go
back to its normal position after a 15 second delay.
Regency™ Series 400 Single Line Caller ID Telephone
15
1
Confirm the display is in the idle mode as
shown in Figure 1.
2
Press the DIRECTORY / STORE key until the
LCD display is similar to Figure 2.
3
Press the UP / DOWN key to change the
memory location to the desired memory
location. (MEM 1, MEM2, … MEM10) (See
Figure 2 then 3.)
4
Enter the name by pressing the alphabetic
characters repeatedly on the keypad.
(see keypad guide on next page)
5
Use delete key to delete an incorrect
entry.
6
When the name is complete, press the
DIRECTORY STORE key once to store the
information.
Figure 1
Figure 2
Figure 3
7
The LCD will request NUMBER (Figure 4.)
8
Enter the number using the dialing
keypad. Press the DIRECTORY STORE key.
9
Press the DIRECTORY / STORE key twice to
Figure 4
bypass the store AREA CODE and ACCESS
CODE. These two areas are not part of the speed dial programming and any
changes could affect the proper operation of other features. See pages
13-15 for further information about AREA CODE AND ACCESS CODE.
To program additional numbers, repeat steps 2 thru 9.
Manual entry from keypad (guide).
Regency™ Series 400 Single Line Caller ID Telephone
20
User’s Guide
User’s Guide
Programming The Telephone
Programming The Telephone
Manual entry from keypad (guide)
Use the following Key Pad Guide to add characters when
programming into memory.
Press
1 time
Number: to get:
1
2
3
4
5
6
7
8
9
0
*
#
1
A
D
G
J
M
P
T
W
0
space
.
2 times
to get:
3 times
to get:
4 times
to get:
B
E
H
K
N
Q
U
X
C
F
I
L
O
R
V
Y
2
3
4
5
6
S
8
Z
=
:
-
(
5 times
to get:
6 times
to get:
In Some Areas, The Area Code is Required for a Local Call
In some areas, the local service provider uses the same area
code for local calls. The following options are available for these
areas. Try each of the following scenarios and use the one with
the best result:
1
Program the area code, then place a local test call using the
call back feature.
2
Delete the area code and do not program the access code.
Place a local test call.
3
Program the area code into the access code location. Place
a local test call. (caution: this will always dial the area code)
4
Use the keypad to add any additional number(s) to the
displayed number on the screen. Place a local test call.
7
9
)
#
Note: Depending on your area and dialing pattern, you may
obtain the best result by using both the access code and area
code fields. If these sequences do not work, use the keypad entry
as an option for your Call Back.
Direct entry from Caller Log
1
Confirm the display is in the idle
mode as shown in Figure 1.
2
Press the UP / DOWN key to locate
the incoming caller name and number from the caller log.
3
To activate the EDIT MODE, press any key on the keypad. Use
the DELETE key to delete a digit or use the keypad to add a
digit.
Figure 1
Regency™ Series 400 Single Line Caller ID Telephone
21
Regency™ Series 400 Single Line Caller ID Telephone
14
User’s Guide
User’s Guide
Programming The Telephone
Area Code into Memory
Programming The Telephone
4
If your local telephone company does not deliver the area code
with a local number’s caller ID information, it is not necessary to
program this feature.
The area code is programmed into memory to allow the
telephone to recognize the local
area code. When this number is
programmed, the area code will
not be dialed when using the call
back feature to call back a
person within the same local
calling area.
Note: Programming should be performed with the telephone onhook
1
Press the DIRECTORY / STORE key (located on the top side of
the base) until ENTER AREA CODE is displayed on the LCD
screen.
2
Enter the area code number of your location using the
numeric dial pad. Do not enter a ‘1’ as the first digit.
3
Press the DIRECTORY / STORE key again and the screen will go
back to its normal position after a 15 second delay.
Press the DIRECTORY / STORE key. The LCD will display a
number along with a memory
location (Figure 2). Use the UP /
DOWN key to change the
memory location to the desired
memory location (Figure 3).
(MEM 1, MEM2, … MEM10)
Figure 2
5
Press the DIRECTORY / STORE key to store the name and
number.
To program additional numbers,
repeat steps 2 thru 5.
Figure 3
Reviewing information in memory
To review a name and number that is already programmed into
a speed dial location:
1
To select a memory location, press the DIRECTORY / STORE
key. The LCD will display the
following (MEM1: NAME): (Figure
4). Use the UP / DOWN key to find
the desired memory location
(MEM1, MEM2 . . .MEM10)
2
To exit, simply lift the handset,
then hang up.
Figure 4
Programming continued on next page . . .
Regency™ Series 400 Single Line Caller ID Telephone
13
Regency™ Series 400 Single Line Caller ID Telephone
22
User’s Guide
User’s Guide
Programming The Telephone
Programming The Telephone
Changing information in memory
Flash into Memory
To change a name and number that is already programmed into
a speed dial location:
The FLASH key is a storable function into memory that is used to
provide a 600 milli second timed line break, like hanging up
momentarily. This function may be required for accessing line
features provided by your
telephone system or local
telephone company. For
example, the FLASH is used
to access line features such
as Call Waiting. In a centrex
application, it is convenient
to program the FLASH
function along with the
system feature access code
and labeling the speed dial
position as CallPick-Up, Call
Transfer, etc. Contact your system coordinator or local telephone
company regarding special line features that you may have.
1
To select a memory location, press the
DIRECTORY / STORE key. The LCD will
display as follows. (MEM1: NAME): (Figure
1). Use the UP / DOWN key to find the
desired memory location (MEM1,
MEM2…MEM10).
Figure 1
2
Press the DIRECTORY / STORE key again and the LCD will display
OVERWRITE? (Figure 2). To proceed, press
the DIRECTORY / STORE key again and
the LCD will display MEM 1 ENTER NAME
(figure 3). If you do not want to make any
changes, simply lift the handset, then
hang up again.
Figure 2
3
Enter any alphanumeric characters for
the name using the keypad. If you
entered an incorrect character, press the
DELETE key to delete the character. When
complete, press the DIRECTORY / STORE
key again to store the name. The LCD will
then display NUMBER (figure 4).
4
Enter the number using the keypad. Press
the DIRECTORY STORE key to store the
number. If the number does not need to
be overwritten, press the DIRECTORY /
STORE key to bypass the number edit
mode and the original number in memory
will be retained.
5
Note: The FLASH function counts as 1 digit when stored into a
speed dial memory location.
Figure 3
Figure 4
Press the DIRECTORY / STORE key twice to bypass the store AREA CODE
and ACCESS CODE. These two areas are not part of the speed dial
programming and any changes could affect the proper operation of
other features. See pages 13 to 15 for further information about AREA
CODE AND ACCESS CODE.
Regency™ Series 400 Single Line Caller ID Telephone
23
Pause into Memory
The PAUSE key is used to program a 3 second delay into memory.
A speed dial number may
need to pause during its
dialing sequence prior to
entering the next set of digits
to ensure proper
connections
Note: The PAUSE function
counts as 1 digit when
stored into a speed dial
memory location.
Regency™ Series 400 Single Line Caller ID Telephone
12
User’s Guide
User’s Guide
Programming The Telephone
Automatic Time and Date Setting
The date and time are programmed automatically by the 1st
incoming call if the user subscribes to Caller ID service. Each
incoming call refreshes the date and time. Between calls, the
date and time are maintained internally by the telephone unit.
Programming The Telephone
Ringer Volume and Ring Tone Selection
There are two versions of the Regency 400:
1
- The switch used to adjust the ringer
volume is located on the right side of
the telephone base. To adjust the
loudness of the ringing, slide the switch
to the desired position of HI/LOW/OFF.
The factory sets the ringer volume to
the HI position.
- One ring tone available.
Manually Setting Time and Date
Press the DIRECTORY / STORE key until
the LCD displays: SET UP MONTH 01.
Using the keypad, enter the two-digit
number of the current month (01-12).
For example, 09 for September.
1
Press the DIRECTORY / STORE key
again to store the month. The LCD
will then display SET UP DAY 01.
Enter the two-digit number of the
current date (01-31). For example,
09 for the ninth day in the month.
2
Press the DIRECTORY / STORE key
again to store the day. The LCD
screen will then display AM=1
PM=2.
3
Press 1 for AM or 2 for PM.
4
Press the DIRECTORY / STORE key
again until the LCD displays: SET UP
HOUR 01, then enter the current
hour (01-12).
5
Press the DIRECTORY / STORE key
to store the hour. The LCD screen will then display SET UP MINUTE 00.
6
Enter the two-digit number of the current minutes(s) (00-59), press the
DIRECTORY / STORE key to store the minute.
Regency™ Series 400 Single Line Caller ID Telephone
11
Version One:
2
Version Two:
The Ringer Volume and 4 selections of
ring tones are accessed through the
Directory Store Key
Figure 1
- With the handset on-hook, press
the DIRECTORY/STORE key until the
LCD display reads VOLUME <<<
( Figure 1). The ringer volume is
initially set to the 4th level of the
volume range. Use the VOLUME key,
located below the dial pad, to
Figure 2
adjust the volume. The ringer
volume control will automatically set to the selected level for
the next phone call.
- Press the DIRECTORY/STORE key again. The LCD display will
read RINGER TONE 0 — 3: 0 ( Figure 2). Then enter the digit
number ( 0, 1, 2, 3) of the desired ringer tone. The ringer tone
control will automatically set to selected level for the next
phone call.
Ringer Volume & Ring Tone Selection continued on next page . . .
Regency™ Series 400 Single Line Caller ID Telephone
24
User’s Guide
User’s Guide
Using the Features and Options
- You may also adjust the ringer volume while the telephone is
ringing due to an incoming call by simply pressing the
VOLUME key up or down. The ringer
volume control will automatically set
to the selected level for the next
phone call (Figure 3).
Note: The lowest level will turn off the
ringer.
Figure 3
Retrieving Messages
Programming The Telphone
Features and options are programmed by utilizing the DIRECTORY
STORE key.
Language option
Used to change the LCD
screen from English
(default) to French or
Spanish.
1
Press the DIRECTORY /
STORE key until the LCD display reads:
-1-ENG, -2-FRA, -3-ESP.
Enter the digit number of the selected language.
TouchLite® Message Retrieval Feature
1
Lift the handset.
2
2
Press the TouchLite® Message Retrieval Button to
automatically call your voice
messaging service or "Message
Manager".
RESULT: The language selected displays immediately.
Note: The TouchLite® must be
programmed before messages can be
retrieved. Refer to page 16 for
programming instructions.
Note: When storing a password into
memory, pauses should be
programmed into the dialing pattern to
delay the connection. To find the proper timing, continue to
change the SECOND OF WAIT programming until the voicemail
connects properly. Refer to page 16 for programming
instructions.
Regency™ Series 400 Single Line Caller ID Telephone
25
Tone / Pulse dialing option
Allows the user to select
tone (default) or pulse dial
mode from the LCD
display.
1
Press the DIRECTORY /
STORE key until the LCD
display reads: TONE = 1 PULSE = 2.
2
For tone dial mode, press the 1 key.
For pulse dial mode, press the 2 key.
RESULT: The LCD displays OK for the selected dial mode.
Regency™ Series 400 Single Line Caller ID Telephone
10
User’s Guide
User’s Guide
Wall Mounting the Telephone
Using the Features and Options
Wall Mounting the Telephone
Turning Message Waiting Light On/Off Manually
1
First, remove the clip provided in the set
by sliding it straight up (Figure 1) , and
replace with the Wall Mount Clip found in
the packaging, as shown (Figures 2-3).
2
Replace the desk mount wedge with the
wall mount wedge. To remove the desk
mount wedge, press the two release tabs
as shown. The wedge will snap off. Insert
the tabs of the wall mount wedge (Figure
4) and snap into place.
This allows the first user of voicemail the opportunity to notify
another user that a voicemail message is waiting for their review.
It also allows the user to stop the message waiting light from
flashing if it is doing so in error. When used, it will reset the light
signal in the phone. This does not send any outgoing signal to an
outside voicemail service.
3
Wall Mount Clip
Insert the short line cord into the jack at the rear of the
telephone. Plug the opposite end into the jack on wall.
When the message waiting light is turned off, it will re-activate
when a new phone message arrives in voicemail.
To turn ON:
While in on-hook state, and the light
is OFF, press the * key for three
seconds and the TouchLite® will
light.
To turn OFF:
While in on-hook state, and the light
is ON, press the * key for three
seconds and the TouchLite® will
turn off.
Figure 1
Figure 2
Figure 3
Note: When turning light off, the Mail Icon on the LCD display will
also turn off.
Figure 4
Regency™ Series 400 Single Line Caller ID Telephone
9
Regency™ Series 400 Single Line Caller ID Telephone
26
User’s Guide
User’s Guide
Using the Features and Options
Installing the Telephone
Placing a Call from Speed Dial Location:
Installation is completed
1
Lift the handset.
2
Press the DIRECTORY / STORE
key.
The following information will be displayed on the LCD (after
going on-hook) when the installation is complete.
3
Press the UP / DOWN key to
locate the name or number’s
memory location (i.e. MEM1,
MEM2, etc.). The number will
be displayed on the LCD
display.
4
If needed, add (or delete) any
digits to the number by
pressing the dialing keypad (or
the delete key, respectively).
5
Press the DIAL key and the number will be dialed.
Regency™ Series 400 Single Line Caller ID Telephone
27
Regency™ Series 400 Single Line Caller ID Telephone
8
User’s Guide
User’s Guide
Installing the Telephone
Using the Features and Options
Connecting the line cord
Data Port
1
If the telephone is to be desk mounted, plug one end of the 7’
line cord into the modular jack at the rear of the telephone.
The data port (jack) on the side of the base unit is used to plug in
any standard telephone device such as a:
2
The remaining
end of the line
cord plugs into
the jack located
on the wall.
•
•
3
If the telephone is
to be wall
mounted, use the
8" line cord supplied instead. See also page 9 for more
information on wall mounting your telephone.
Connecting the power adapter
The power adapter provides the power source to the telephone.
1
Plug the power adapter into the back of the telephone.
2
Wrap the power wire around the strain relief provided . This will
avoid accidental disconnection of the power cord.
3
Plug the power adapter
into a standard 120V
AC power outlet.
Mounting holes are
provided to secure the
power adapter to the
AC wall outlet.
Regency™ Series 400 Single Line Caller ID Telephone
7
•
•
fax machine
base station for a
cordless telephone
computer modem
answering machine
Note: There is a plastic safety plug inserted into the data jack
which must be removed using a small tool such as tweezers.
BE SURE TO UNPLUG BOTH THE TELEPHONE LINE CORD AND THE
POWER SUPPLY FROM THE REAR OF THE TELEPHONE PRIOR TO
REMOVING THIS SAFETY PLUG.
Hold Key
To use, press the HOLD key. The key will
illuminate indicating that the line is on
hold.
When placing a caller on hold, the
handset can be returned to its on-hook position. The line will not
be disconnected. To return to the caller, lift the handset.
Regency™ Series 400 Single Line Caller ID Telephone
28
User’s Guide
User’s Guide
Using the Features and Options
Installing the Telephone
Redial Key
Checking the Parts List
The REDIAL key is used to automatically redial the last number
dialed.
Ensure you have the following parts:
To use:
1 Lift the handset.
2
Press the REDIAL key.
3
The number that was last
dialed will automatically
be dialed.
1. Wall mount wedge.
2. Power Adapter.
3. 7’ Modular
telephone line cord.
4. 10’ Modular coiled
handset cord.
5. 8" Modular wall
mount telephone
line cord.
6. Wall mount clip.
2
1
3
6
4
5
Connecting the
handset cord
In Use Line Indicator
1
The LED will illuminate to indicate that another phone is in use and
sharing the same line.
Plug one end of the handset cord into the modular jack on
the handset.
2
The remaining end
of the handset cord
plugs into the jack
located on the left
side of the base
unit.
Handset Cord
Regency™ Series 400 Single Line Caller ID Telephone
29
Regency™ Series 400 Single Line Caller ID Telephone
6
User’s Guide
User’s Guide
Connection Points
This table explains the labels in the diagram:
CONNECTION
POINT
FUNCTION
Data port
Convenient port for connecting a computer,
modem, base station for a cordless phone, fax
or answering service.
Note: A safety plug found inserted in the data
port must be removed before use.
Handset jack
Modular receptacle for connecting the handset
coil cord.
Line cord
Modular receptacle for connecting telephone
receptacle
line cord.
Power receptacle Used to connect the power adapter.
Using the Features and Options
Handset Volume Control
With the handset off-hook, press
the upward arrow ▲ on the
VOLUME key repeatedly to
increase the volume. The volume
of the handset receiver can be
increased by 12 to 18 decibels.
The VOLUME key is an 8-step
volume control switch. Each
volume level is indicated on the LCD screen.
Note:
The handset volume control switch
will automatically reset back to its
normal level when hanging up.
This will ensure that the handset
volume resets back to normal for
the next phone call.
Flash Key
The FLASH key is an electronic
timed line break of 600 milli
seconds that is used for accessing
line features provided by your
telephone company or by your
telephone system. For example,
many times a flash is used for accessing features such as Call
Waiting. When used in a Centrex application, it can be used to
access other features like Call Pick-Up, Call Transfer, etc. Contact
your telephone system coordinator or your local telephone
company for further information regarding your line features.
Regency™ Series 400 Single Line Caller ID Telephone
5
Regency™ Series 400 Single Line Caller ID Telephone
30
User’s Guide
User’s Guide
LCD Display Information
LCD Display Information
Connection Points
Right side
The backlit Liquid Crystal Display (LCD) shows Caller ID information
(name and number, call log, message waiting indicator, time and
date, call timer).
Feature Note:
The LCD display backlighting feature is activated upon receipt of
the first ring, when the handset is lifted, or by pressing any key.
The callers name and number is displayed on the LCD between
the first and second ring. You may elect to answer or allow the
call to be forwarded to a voicemail system. The number will be
stored in the caller log for retrieval in either case.
Data Port
There are four keys (UP, DOWN, DELETE and DIAL) that help
manage stored information.
Information available on the screen when in idle mode (on-hook)
is:
•
•
•
Date, time and an envelope on the first line. The envelope will
appear only when a message
has been received in
voicemail or "Message
Manager".
(NEW) - The number of new
messages awaiting retrieval.
Left side
Handset Jack
Rear
Line Cord Connector
(TOTAL) -Total messages received and stored into memory (up
to 60 messages). When the memory is full, the oldest of the 60
call records will be automatically deleted, and the newest
call will be accepted into memory.
Power Supply Connector
Strain Relief
See chart on page 5 for description of connection points.
Regency™ Series 400 Single Line Caller ID Telephone
31
Regency™ Series 400 Single Line Caller ID Telephone
4
User’s Guide
User’s Guide
Learning about the Function Keys
LCD Display Information
Visual Call Waiting LCD Display Information
LCD Display
Large back-lit display that shows
the callers ID number of new calls
recieved and total, with date and
time, and caller log history.
Up & Down Scroll Key(s)
Displays the calls received in sequential
order and searches storage locations.
Delete Key
Used to edit Caller Log characters for
storage and deletes Caller Log
information.
Dial Key
Used to dial numbers from the Caller
Log and memory storage locations.
Directory/Storage Key
Used to locate stored numbers for
dialing and used for storing memory
locations.
Redial/Pause Key
Redials the last number manually
dialed. Pause is used to program a 3
second delay in speed dialing.
Flash Key
Provides a 600ms timed line break.
Data Input Keys
Data input keys for feature
programming.
Handset Volume Control Key
Controls the loudness of the handset
when off hook.
LCD Contrast Control
Controls the darkness of the LCD
(UP/DOWN) on hook.
In Use Light
Shows the line is in use when illuminated.
Hold Key
Used to place caller on hold
TouchLite® Message Retreival Button
Visual lamp indicator and message
retrieval button that illuminate when a
message is waiting, if you are equipped
with a message system
Numeric Dial Pad
Large keys used for outbound dialing
and programming memory locations
Handset
Low profile design, hearing aid
compatible.
The Regency™ Series LCD display supports Type II Caller ID which
provides incoming Call ID information while the phone is in use.
The user has the option to answer the call or allow the call to
automatically be forwarded to the user's voicemail.
When the user is on one call any new incoming call will be
displayed on the screen. The display will show the following
information:
•
•
•
The date and time of the
incoming call and a CW
symbol.
The location number of the
call in storage, and the
incoming caller's telephone number.
The incoming caller's name.
Note: When the call goes to voicemail, the Caller ID information
can be retrieved from the call log.
Contrast Adjustment (5-Step)
When the phone is on-hook, the
VOLUME key is used for the 5-step
LCD contrast adjustment.
Press volume ▲ once to darken the
screen. Press volume ▼ once to lighten
the background of the LCD screen.
Note: Contrast adjustment starts in the
third step and can be increased or
decreased by two steps.
Regency™ Series 400 Single Line Caller ID Telephone
3
Regency™ Series 400 Single Line Caller ID Telephone
32
User’s Guide
User’s Guide
LCD Display Information
Getting to know the Features
Scrolling the Caller Log
•
Handset volume control (ADA compliant)
Users can scroll upward and downward through the caller log
records in the same order as they were received.
•
Last number redial key
•
Flash Key
Press the UP or DOWN key continuously for two seconds to start
scrolling.
•
Pause key
•
•
Desk or wall mountable
•
Fully modular, easy to install
•
•
•
When pressing the UP key
continuously, you will scroll
upward in the calling record.
When pressing the DOWN key
continuously, you will scroll
downward in the calling record.
The starting point of scrolling starts
at the caller log record that is in
view.
Stop scrolling when TOP OF LIST is displayed.
* Caller ID, Message Manager (voice mail) and Visual Call
Waiting are features that require subscription to your local
Telephone Company provided services. These telephone features
will not work unless you are a subscriber.
Call Back Dialing Feature
Allows the user to call back stored
numbers, or to select and call a
number from the call log. The Call
Back feature allows the user to add
or delete characters to accurately
pattern the number to be called.
Information available on the LCD
when using the DIAL feature key includes incoming call history:
•
•
•
•
Date and time of the incoming call.
Location number of the call in storage.
Caller's number.
Caller's name.
Regency™ Series 400 Single Line Caller ID Telephone
33
Regency™ Series 400 Single Line Caller ID Telephone
2
User’s Guide
User’s Guide
Getting to know the Features
The FEATURES of this telephone are:
• Large, backlit, contrast adjustable, LCD display shows:
Caller ID information
Date and Time
Dialing Verification
Elapsed Call Timer
Functional Icons
•
*Caller ID feature – Type II with 60 memory, up / down scroll,
and direct call back
•
10 Speed Dial memory locations with directory display and
dial out
•
Interactive caller log editing for storing memory
•
*Visual message waiting indication – ClassSM compatible
•
* One touch message retrieval feature
•
Caller Log Call Back Dialing Feature:
Adding or Deleting Characters on the LCD Display
• Single line
•
•
•
•
•
LCD Display Information
Interactive directory and storage feature
•
Electronic hold with a back-lit indicator
•
In-use line status indicator
•
Tone or Pulse dialing
•
Ringer volume control
•
Convenient data port
Numbers in the caller log can be edited before dialing. When
editing a number to be dialed, the caller log will not remove the
information already stored. To delete one or more digits from the
caller log, you must first press a digit or add a character from the
keypad to activate delete.
To add digits to the displayed number:
1
Press the UP or DOWN key to activate the display for scrolling.
2
Scroll the UP or DOWN key to find the number to be dialed.
3
If you need to add a number prior to the numeric string on
the display, press the keypad number you require and it will
be placed on the display for dialing.
4
Lift handset.
5
Press the DIAL key to dial the number.
Note: The number can only be inserted prior to the displayed
digits. See Delete Characters for improperly inserted characters.
To delete digits from the displayed
number:
Press the UP or DOWN key to activate
the display for scrolling.
1
Scroll the UP or DOWN key to find
the number to be dialed.
Caller ID/LCD DIsplay continued on next page
Regency™ Series 400 Single Line Caller ID Telephone
1
Regency™ Series 400 Single Line Caller ID Telephone
34
User’s Guide
User’s Guide
LCD Display Information
2
Add a character by pressing a
keypad number to activate the
editing feature.
3
Press the DELETE key to start
deleting individual characters.
4
Lift handset.
5
Press the DIAL key to dial the
number.
Note: When deleting characters from
a caller's identity, the call log will not
be changed.
Table of Contents
•
•
•
•
Direct Entry from Caller Log . . . . . . . . . . . . . . . . . . . . . . . .21
Reviewing Information in Memory . . . . . . . . . . . . . . . . . . .22
Changing Information in Memory . . . . . . . . . . . . . . . . . .23
Ringer Volume and Ring Tone Selection . . . . . . . . . . . . .24
Using the Features and Options . . . . . . . . . . . . . . . . . . . . . .Page 25
• Retrieving Messages . . . . . . . . . . . . . . . . . . . . . . . . . . . . . .25
• Turning Message Waiting Light On or Off Manually . . . .26
• Placing a Call from Speed Dial Memory Location . . . . .27
• Data Port . . . . . . . . . . . . . . . . . . . . . . . . . . . . . . . . . . . . . . . .28
• Hold Key . . . . . . . . . . . . . . . . . . . . . . . . . . . . . . . . . . . . . . . .28
• Redial Key . . . . . . . . . . . . . . . . . . . . . . . . . . . . . . . . . . . . . . .29
• In Use Line Indicator . . . . . . . . . . . . . . . . . . . . . . . . . . . . . .29
• Handset Volume Control . . . . . . . . . . . . . . . . . . . . . . . . . .30
• Flash Key . . . . . . . . . . . . . . . . . . . . . . . . . . . . . . . . . . . . . . . .30
LCD Display Information . . . . . . . . . . . . . . . . . . . . . . . . . . . .Page 31
• Visual Call Waiting LCD Display Information . . . . . . . . . .32
• LCD Contrast Adjustment . . . . . . . . . . . . . . . . . . . . . . . . . .32
• Scrolling the Caller Log . . . . . . . . . . . . . . . . . . . . . . . . . . . .33
• Call Back Dialing Feature . . . . . . . . . . . . . . . . . . . . . . . . . .33
• Adding/Deleting Characters on LCD Display . . . . . . . . .34
• Deleting Caller log Records . . . . . . . . . . . . . . . . . . . . . . . .36
• On-hook Display Mode . . . . . . . . . . . . . . . . . . . . . . . . . . . .37
• Dialing Display Mode . . . . . . . . . . . . . . . . . . . . . . . . . . . . .37
• Incoming Ring Display Mode . . . . . . . . . . . . . . . . . . . . . . .38
• In Use and Timer Display Features . . . . . . . . . . . . . . . . . . .38
• No Calls Display . . . . . . . . . . . . . . . . . . . . . . . . . . . . . . . . . .39
• Line Error Display . . . . . . . . . . . . . . . . . . . . . . . . . . . . . . . . .39
Trouble Shooting Tips . . . . . . . . . . . . . . . . . . . . . . . . . . . . . . .Page 40
Regency™ Series 400 Single Line Caller ID Telephone
35
Regency™ Series 400 Single Line Caller ID Telephone
User’s Guide
User’s Guide
Table of Contents
Congratulations on the purchase of your Regency™ Series single
line caller ID telephone. This high precision electronic device
includes advanced features suitable for use in today’s
environment and requires minimum maintenance. It is simple to
install and easy to use — especially with your Telephone
Company operating features.
LCD Display Information
Deleting Caller Log Records
To delete ONE stored call:
1
Press the UP or DOWN key to
activate the display for scrolling.
The LCD screen will display TOP
OF LIST or BOTTOM OF LIST if you
reach either end. Scroll to the
number to be deleted.
2
Then press the DELETE key once
and the LCD will display the question ‘DELETE?’.
Connection Points . . . . . . . . . . . . . . . . . . . . . . . . . . . . . . . . . .Page 4
3
Press the DELETE key a second time to delete.
Installing the Telephone . . . . . . . . . . . . . . . . . . . . . . . . . . . . .Page 6
• Checking the parts list . . . . . . . . . . . . . . . . . . . . . . . . . . . . . .6
• Connecting the handset cord . . . . . . . . . . . . . . . . . . . . . . .6
• Connecting the line cord . . . . . . . . . . . . . . . . . . . . . . . . . 7
• Connecting the power adapter . . . . . . . . . . . . . . . . . . . 7
To delete ALL stored calls:
Read this user’s guide to become familiar with all aspects of your
new telephone:
Getting to know the Features . . . . . . . . . . . . . . . . . . . . . . . . .Page 1
Learning about the Function Keys . . . . . . . . . . . . . . . . . . . . .Page 3
Wall Mounting the Telephone . . . . . . . . . . . . . . . . . . . . . . . . .Page 9
Programming the Telephone . . . . . . . . . . . . . . . . . . . . . . . .Page 10
• Language Option . . . . . . . . . . . . . . . . . . . . . . . . . . . . . . . .10
• Tone / Pulse Dialing Option . . . . . . . . . . . . . . . . . . . . . . . .10
• Automatic Time and Date Setting . . . . . . . . . . . . . . . . . . .11
• Manually Setting Time and Date . . . . . . . . . . . . . . . . . . . .11
• Flash into Memory . . . . . . . . . . . . . . . . . . . . . . . . . . . . . . . .12
• Pause into Memory . . . . . . . . . . . . . . . . . . . . . . . . . . . . . .12
• Area Code into Memory . . . . . . . . . . . . . . . . . . . . . . . . . . .13
• Access Code into Memory . . . . . . . . . . . . . . . . . . . . . . . . .15
• TouchLite® Message Retrieval Button . . . . . . . . . . . . . . . .16
• Editing the TouchLite Message Retrieval Button . . . . . . .18
• Speed Dial . . . . . . . . . . . . . . . . . . . . . . . . . . . . . . . . . . . . . .19
• Manual Entry and Key Pad Guide . . . . . . . . . . . . . . . . . .20
Regency™ Series 400 Single Line Caller ID Telephone
1
Press the UP or DOWN key to
activate the display for scrolling.
2
Press and hold the DELETE key until
the LCD displays the question
‘DELETE ALL?’
3
Release and press the DELETE key again.
Regency™ Series 400 Single Line Caller ID Telephone
36
User’s Guide
User’s Guide
LCD Display Information
On-Hook Display Mode
Clock - The current date and time is
continually displayed.
Number of Calls - The number of
new calls (unanswered) and total
number of calls in storage is
displayed. (middle line)
Data Display Line - The current activity is displayed as NEW and
TOTAL to compliment the number of calls. (bottom line)
Safety Precautions, Care and Maintenance
c) If the product has been exposed to rain or water.
d) If the product does not operate according to the
operating instructions.
e) If the product has been dropped or the cabinet has been
damaged.
f) If the product exhibits a distinct change in performance.
17. Do not use the telephone (other than a cordless type) during
an electrical storm. There is a remote risk of electrical shock
from lightning.
18. Do not use the telephone to report a gas leak if the telephone
is in the vicinity of the leak.
Dialing Display Mode
19. Keep the telephone dry. Wipe immediately if wet. Liquids
may contain minerals that can corrode the electronic circuits.
Clock - The current date and time is
displayed along with an off-hook
handset display. (top line)
20. Use and store the telephone in a moderate temperature
environment. Extreme temperatures can shorten the life of
electronic devices, damage batteries and distort or melt
plastic parts.
Dialing of Number - The number you
are dialing will display as you press the dial keys or with the
REDIAL feature, the last number will be displayed. (middle line)
Data Display Line - The current activity is TALK when the receiver is
off-hook. (bottom line)
Regency™ Series 400 Single Line Caller ID Telephone
37
21. Keep the telephone away from excessive dust and dirt.
22. Wipe the telephone with a damp cloth occasionally to keep
it looking new. Do not use harsh chemicals, cleaning solvents
or strong detergents to clean the telephone.
Regency™ Series 400 Single Line Caller ID Telephone
User’s Guide
User’s Guide
Safety Precautions, Care and Maintenance
11. Be sure to plug the power adapter in to the appropriate
power outlet:
a. If the power adapter has a three pronged, grounded type
attachment plug:
It will only fit into a three-holed grounding-type power
outlet. This is a safety feature. If you are unable to insert
the plug into the outlet, contact an electrician to replace
your obsolete outlet.
b. If the power adapter has a polarized attachment plug
(one blade wider than the other):
It will fit into the power outlet only one way. This is a safety
feature. If you are unable to insert the plug fully into the
outlet, try reversing the plug. If the plug does not fit,
contact an electrician to replace your obsolete outlet.
12. Do not allow anything to rest on the power cord. Do not
locate this product where the cord will be walked on.
13. Do not overload wall outlets and extension cords. This can
result in the risk of fire or electric shock.
14. Never push objects of any kind into this product through
cabinet slots. This could result in fire or electric shock. Never
spill liquid of any kind on the product.
15. To reduce the risk of electric shock, do not disassemble this
product. When service or repair is required, take it to a
qualified serviceperson.
16. Unplug this product from the wall outlet and refer servicing to
qualified personnel under the following conditions:
LCD Display Information
Incoming Ring Signal Display Mode
Clock - The current date and time is continually displayed. (top
line)
Number -Call display informs you of
the message memory location of
the call being received as well as
the caller's telephone number.
(middle line)
Name - Identifies the caller IF the
caller has properly set up their system to identify themselves
(bottom line). Note: Each service area may have different
identification display systems and is usually controlled by the
calling party. Check with your local phone service provider for
their specific feature options available.
In Use and Timer Display Features
Clock - The current date and time is
continually displayed along with a
phone in use indicator. (top line)
Dialed Number - The number you
dialed and connected to. (middle line)
Data Display Line - The current activity is TALK. As soon as the line
connects, the Timer Display activates. This tracks the current calls'
length in time of minutes and seconds. (bottom line)
a) When the power supply cord or plug is damaged or
frayed.
b) If liquid has been spilled into the product.
Regency™ Series 400 Single Line Caller ID Telephone
Regency™ Series 400 Single Line Caller ID Telephone
38
User’s Guide
User’s Guide
LCD Display Information
No Calls Display
This indicates that no calls were received, and that there are no
new messages.
Safety Precautions, Care and Maintenance
When using your telephone equipment, follow basic safety
precautions to reduce the risk of fire, shock and injury to persons:
1. Read all instructions.
2. Follow all warnings and instructions marked on the product.
3. Before cleaning, unplug this product from the wall. Use a
damp cloth for cleaning. Do not use liquid cleaners or
aerosol cleaners.
Line Error Display
4. Do not use this product near water, for example, near a
bathtub, washbowl, kitchen sink or laundry tub, in a wet
basement, or near a swimming pool.
Indicates that there was a line error when attempting to connect
to the dialed party.
5. Do not place this product on an unstable cart, stand, or table.
The product may fall, causing damage to the product.
6. Do not block or cover the slots and openings in the cabinet
and on the back or bottom of the product. Do not place the
product on the bed, sofa, rug, or other similar surface.
7. Do not place this product near or over a radiator or heat
register.
8. Do not place this product in a built-in installation unless proper
ventilation is provided.
9. Use only the power supply provided with the set. Do not use a
power supply from another product.
10. The power supply is intended for use ONLY on a 110V-120V AC
60 Hz power outlet, which is the standard power offering in
Canada.
Regency™ Series 400 Single Line Caller ID Telephone
39
Regency™ Series 400 Single Line Caller ID Telephone
User’s Guide
Trouble Shooting Tips for Regency 400 and 500
Can I go straight to a
certain number/name
in my directory without
scrolling?
No, you have to scroll through the list to reach the
number you want to dial. You can scroll quickly through
by holding down the “Up” button or the “Down”
button.
Display is blank.
Check the power cord. Ensure that you are using the
power supply that was provided with the Regency
telephone.
Display is faint or hard
to read.
With the receiver "on hook" adjust contrast using the
volume control button.
How do I clear or delete
only one memory
location?
You must overwrite a memory location once you have
stored something into that location. You cannot
individually erase a memory location.
How do I stop the
TouchLite® from flashing
when there are no
messages in the mail
box?
While the receiver is "on hook" hold the * key down for
3 seconds.
Messages cannot be
accessed by pressing
TouchLite®.
First, ensure that the TouchLite® is programmed
correctly for easy access. See page 16. Also, please
note the TouchLite® will not operate if the telephone
has been programmed to dial in Pulse. Ensure that the
telephone is programmed for Tone dialing
(see page 10)
Must I program the area
code?
If your local telephone company does not deliver the
area code with a local number’s caller ID information,
it is not necessary to program this feature.
No sound on the
receiver on a brand
new phone.
Ensure that the curly cord is connected into the correct
jack on the left side of the telephone as shown on
page 4.
Receiver won't stay
hung up when the set is
wall mounted.
Install wall mount clip provided in the package as
shown on page 9. Also, IT IS IMPORTANT when you
place the receiver into the cradle, do so by placing
the top of the receiver into place first.
Why do I have to use the
Regency power
adapter?
All phones should be used ONLY with the power
adapter supplied with that telephone. Using another
power adapter will cause internal damage to the set.
Regency™ Series 400 Single Line Caller ID Telephone
40
User’s Guide
User’s Guide
LCD Display Information
No Calls Display
This indicates that no calls were received, and that there are no
new messages.
Safety Precautions, Care and Maintenance
When using your telephone equipment, follow basic safety
precautions to reduce the risk of fire, shock and injury to persons:
1. Read all instructions.
2. Follow all warnings and instructions marked on the product.
3. Before cleaning, unplug this product from the wall. Use a
damp cloth for cleaning. Do not use liquid cleaners or
aerosol cleaners.
Line Error Display
4. Do not use this product near water, for example, near a
bathtub, washbowl, kitchen sink or laundry tub, in a wet
basement, or near a swimming pool.
Indicates that there was a line error when attempting to connect
to the dialed party.
5. Do not place this product on an unstable cart, stand, or table.
The product may fall, causing damage to the product.
6. Do not block or cover the slots and openings in the cabinet
and on the back or bottom of the product. Do not place the
product on the bed, sofa, rug, or other similar surface.
7. Do not place this product near or over a radiator or heat
register.
8. Do not place this product in a built-in installation unless proper
ventilation is provided.
9. Use only the power supply provided with the set. Do not use a
power supply from another product.
10. The power supply is intended for use ONLY on a 110V-120V AC
60 Hz power outlet, which is the standard power offering in
Canada.
Regency™ Series 400 Single Line Caller ID Telephone
39
Regency™ Series 400 Single Line Caller ID Telephone
User’s Guide
User’s Guide
Safety Precautions, Care and Maintenance
11. Be sure to plug the power adapter in to the appropriate
power outlet:
a. If the power adapter has a three pronged, grounded type
attachment plug:
It will only fit into a three-holed grounding-type power
outlet. This is a safety feature. If you are unable to insert
the plug into the outlet, contact an electrician to replace
your obsolete outlet.
b. If the power adapter has a polarized attachment plug
(one blade wider than the other):
It will fit into the power outlet only one way. This is a safety
feature. If you are unable to insert the plug fully into the
outlet, try reversing the plug. If the plug does not fit,
contact an electrician to replace your obsolete outlet.
12. Do not allow anything to rest on the power cord. Do not
locate this product where the cord will be walked on.
13. Do not overload wall outlets and extension cords. This can
result in the risk of fire or electric shock.
14. Never push objects of any kind into this product through
cabinet slots. This could result in fire or electric shock. Never
spill liquid of any kind on the product.
15. To reduce the risk of electric shock, do not disassemble this
product. When service or repair is required, take it to a
qualified serviceperson.
16. Unplug this product from the wall outlet and refer servicing to
qualified personnel under the following conditions:
LCD Display Information
Incoming Ring Signal Display Mode
Clock - The current date and time is continually displayed. (top
line)
Number -Call display informs you of
the message memory location of
the call being received as well as
the caller's telephone number.
(middle line)
Name - Identifies the caller IF the
caller has properly set up their system to identify themselves
(bottom line). Note: Each service area may have different
identification display systems and is usually controlled by the
calling party. Check with your local phone service provider for
their specific feature options available.
In Use and Timer Display Features
Clock - The current date and time is
continually displayed along with a
phone in use indicator. (top line)
Dialed Number - The number you
dialed and connected to. (middle line)
Data Display Line - The current activity is TALK. As soon as the line
connects, the Timer Display activates. This tracks the current calls'
length in time of minutes and seconds. (bottom line)
a) When the power supply cord or plug is damaged or
frayed.
b) If liquid has been spilled into the product.
Regency™ Series 400 Single Line Caller ID Telephone
Regency™ Series 400 Single Line Caller ID Telephone
38
User’s Guide
User’s Guide
LCD Display Information
On-Hook Display Mode
Clock - The current date and time is
continually displayed.
Number of Calls - The number of
new calls (unanswered) and total
number of calls in storage is
displayed. (middle line)
Data Display Line - The current activity is displayed as NEW and
TOTAL to compliment the number of calls. (bottom line)
Safety Precautions, Care and Maintenance
c) If the product has been exposed to rain or water.
d) If the product does not operate according to the
operating instructions.
e) If the product has been dropped or the cabinet has been
damaged.
f) If the product exhibits a distinct change in performance.
17. Do not use the telephone (other than a cordless type) during
an electrical storm. There is a remote risk of electrical shock
from lightning.
18. Do not use the telephone to report a gas leak if the telephone
is in the vicinity of the leak.
Dialing Display Mode
19. Keep the telephone dry. Wipe immediately if wet. Liquids
may contain minerals that can corrode the electronic circuits.
Clock - The current date and time is
displayed along with an off-hook
handset display. (top line)
20. Use and store the telephone in a moderate temperature
environment. Extreme temperatures can shorten the life of
electronic devices, damage batteries and distort or melt
plastic parts.
Dialing of Number - The number you
are dialing will display as you press the dial keys or with the
REDIAL feature, the last number will be displayed. (middle line)
Data Display Line - The current activity is TALK when the receiver is
off-hook. (bottom line)
Regency™ Series 400 Single Line Caller ID Telephone
37
21. Keep the telephone away from excessive dust and dirt.
22. Wipe the telephone with a damp cloth occasionally to keep
it looking new. Do not use harsh chemicals, cleaning solvents
or strong detergents to clean the telephone.
Regency™ Series 400 Single Line Caller ID Telephone
User’s Guide
4666(2003 04) C
Regency™ Series 400
Single Line
Caller ID Telephone