1
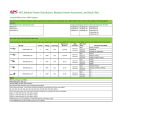
Operation Modular Power Distribution Unit PDPM138H-5U PDPM138H-R PDPM72F-5U PDPM72F-R PDPM277H PDPM144F About this Manual This manual is intended for users of the Modular Power Distribution Unit (PDU). It refers to important safety warnings and instructions, gives an introduction to the display interface, and provides information on operation, troubleshooting, and maintenance. Companion manuals For additional information about the Modular Power Distribution Unit (PDU), refer to the following sheets and manuals: • Installation – 990-3079 – InfraStruXure Power Distribution Module • Installation – 990-3051 – Modular Rack-Mount Power Distribution Unit • Installation – 990-3219 – Modular Rack-Mount Power Distribution Unit in an SX Rack How to find updates to this manual You can check for updates to this manual on the APC Web site (www.apc.com) 990-3054B-001 Modular Power Distribution Unit – Operation Contents Safety ............................................................................... 1 IMPORTANT SAFETY INSTRUCTIONS - SAVE THESE INSTRUCTIONS . . . . . . . . . . . . . . . . . . . . . . . . . . . . . . 1 Symbols used in this manual . . . . . . . . . . . . . . . . . . . . . . . . 1 Regulatory Agency Approval . . . . . . . . . . . . . . . . . . . . . . . . 1 Overview .......................................................................... 2 User Interface . . . . . . . . . . . . . . . . . . . . . . . . . . . . . . . . . . . . . . . . . . . . 2 Interface area . . . . . . . . . . . . . . . . . . . . . . . . . . . . . . . . . . 2 Display Interface . . . . . . . . . . . . . . . . . . . . . . . . . . . . . . . . 2 How to navigate the user interface . . . . . . . . . . . . . . . . . . . . 3 Menu tree . . . . . . . . . . . . . . . . . . . . . . . . . . . . . . . . . . . . . 4 Operation ......................................................................... 5 Operation Procedures . . . . . . . . . . . . . . . . . . . . . . . . . . . . . . . . . . . . . 5 How to perform a total power off procedure . . . . . . . . . . . . . . 5 How to view the Power Distribution Module status . . . . . . . . . . 6 How to view Power Distribution Module information . . . . . . . . 7 How to view circuit status information . . . . . . . . . . . . . . . . . . 8 How to view output voltages . . . . . . . . . . . . . . . . . . . . . . . . 8 How to view the log . . . . . . . . . . . . . . . . . . . . . . . . . . . . . . 9 How to clear the log . . . . . . . . . . . . . . . . . . . . . . . . . . . . . . 9 How to view the list of active alarms . . . . . . . . . . . . . . . . . . . 9 Configuration................................................................. 10 Settings . . . . . . . . . . . . . . . . . . . . . . . . . . . . . . . . . . . . . . . . . . . . . . . . 10 How to set up the network . . . . . . . . . . . . . . . . . . . . . . . . . 10 How to set the name and location of the circuits . . . . . . . . . . 11 How to set the individual alarm thresholds . . . . . . . . . . . . . . 12 How to set the alarm thresholds for all Power Distribution Modular Power Distribution Unit – Operation i Modules in the system . . . . . . . . . . . . . . . . . . . . . . . . . . . .13 How to change the display settings . . . . . . . . . . . . . . . . . . .14 How to set and change the password settings . . . . . . . . . . . .14 How to change date and time . . . . . . . . . . . . . . . . . . . . . . .15 Maintenance ................................................................... 16 Parts Replacement . . . . . . . . . . . . . . . . . . . . . . . . . . . . . . . . . . . . . . . 16 How to determine if you need a replacement part . . . . . . . . . .16 How to return parts to APC . . . . . . . . . . . . . . . . . . . . . . . . .16 How to install a Power Distribution Module . . . . . . . . . . . . . .17 How to remove a filler plate . . . . . . . . . . . . . . . . . . . . . . . . .18 How to test the Residual Current Device . . . . . . . . . . . . . . . .20 How to install a PDM circuit breaker handle tie . . . . . . . . . . . .20 How to reinstall a filler plate . . . . . . . . . . . . . . . . . . . . . . . .21 Troubleshooting ............................................................ 22 LED Indication on the Power Distribution Modules . . . . . . . . . . . . 22 Status and Alarm Messages . . . . . . . . . . . . . . . . . . . . . . . . . . . . . . . 23 ii Modular Power Distribution Unit – Operation Safety IMPORTANT SAFETY INSTRUCTIONS - SAVE THESE INSTRUCTIONS This manual contains important instructions that must be followed during installation, operation, and maintenance of the Modular Power Distribution Unit (PDU). For safety reasons, only trained users are allowed to operate the display and replace the Power Distribution Modules: The Power Distribution Modules are hot-swappable, and may be replaced while the unit is operating. Symbols used in this manual Electrical Hazard: Indicates an electrical hazard which, if not avoided, could result in injury or death. Heavy: Indicates a heavy load that should not be lifted without assistance. Caution: Indicates a potential hazard which, if not avoided, could result in personal injury or damage to product or other property. Note: Indicates important information. Indicates that more information is available on the same subject in a different section of this manual. Regulatory Agency Approval This equipment has been tested and found to comply with the limits for a class A digital device, pursuant to part 15 of the FCC Rules. These limits are designed to provide reasonable protection against harmful interference, when the equipment is operated in a commercial environment. This equipment generates, uses, and can radiate radio frequency energy and, if not installed and used in accordance with the installation guide, may cause harmful interference to radio communications. Operation of this equipment in a residential area is likely to cause harmful interference in which case the user will be required to correct the interference at his own expense. This class A digital apparatus complies with Canadian ICES-003. Cet appareil numérique de la classe A est conforme à la norme NMB-003 du Canada. This is a class A product. In a domestic environment this product may cause interference in which case the user may be requires to take adequate measures. 990-3054B-001 Modular Power Distribution Unit – Operation 1 Overview User Interface Interface area Normal ESC Check Log ? Warning Critical Normal LED When green, no alarms are present. Check Log LED When green, a new event has been added to the log. Warning LED When yellow, a warning alarm exists. CriticaL LED When red, there are one or more critical alarms in the system. LCD SCREEN Displays alarms, status data, instructional help, and configuration items. UP and DOWN keys Scrolls through menu items. ENTER Opens menu items and confirms changes to system parameters. HELP Opens context-sensitive help. ESC Returns to previous screen. Display Interface Overview Screens. When the system is running, the display will scroll through screens showing information on the status of the PDU and any active alarms. Overview Screens Output Voltage L1: xxx L1-2: xxx L2: xxx L2-3: xxx L3: xxx L3-1: xxx No Active Alarms System Date/Time: 28-May-2007 10:37:01 The ENTER key takes you from the Overview Screens to the Main Menu Screen. 2 Modular Power Distribution Unit – Operation 990-3054B-001 Overview: User Interface Main Menu Screen. Use the Main Menu Screen to operate, configure, and monitor the system through the sub menu screens: Module View, Load/Energy, Circuit Cfg, Volt Meter, Alarms, Log, Admin, and Help (see "Menu tree"). Main Menu Screen Module View Load/Energy Circuit Cfg Volt Meter Alarms Log Admin Help Note: If the user interface is inactive for the time configured for the password time-out, it returns to the scrolling status screens. For information on the password time-out setting, see "How to set the individual alarm thresholds". Note: Pressing the UP key from the top line of the top screen of the main menu will take you to the top line of the bottom screen. How to navigate the user interface > > » Selector arrow. Press the UP or DOWN arrow key to move the selector arrow to a menu option or setting. Press the ENTER key to view the selected screen or modify the setting. Continue arrows. Indicate that additional sub menus are available on a menu or status screen. Press the UP or DOWN arrow key to view the additional items. Input arrows. Input arrows next to a selected setting indicate that the setting can be modified by pressing the UP or DOWN arrow key. Press the ENTER key to save the change or the ESC key to cancel. Menu prompt. Press the UP or DOWN arrow key to navigate the selector arrow through the menu prompts. Change target item. Press the UP or DOWN arrow key to change the target item. Editable text string. Press the UP or DOWN arrow key to change the target character in the text string. Press ENTER to confirm and advance to the next character. 990-3054B-001 Modular Power Distribution Unit – Operation 3 Overview: User Interface Menu tree The menu tree provides a quick overview of the functions and views you can access. Detailed Status Module View Module Mfg Info Current & Power Percent Loading Energy Usage Volt Meter Name/Location Overview Screen Circuit Cfg Main Menu Individual Load Cfg Alarm Configuration Global Alarm Config Threshold Values Reset to Defaults Threshold Enable Breaker Position Alarms Log Network Setup Admin Local Interface Local Password Date & Time Display Device IP Manufacturer Data Help 4 Modular Power Distribution Unit – Operation 990-3054B-001 Operation Operation Procedures How to perform a total power off procedure Caution: This procedure will cut the supply to the load. Set all circuit breakers of the Power Distribution Module to OFF. Set all utility/mains circuit breakers to OFF. OFF position ON position 990-3054B-001 Modular Power Distribution Unit – Operation 5 Operation: Operation Procedures How to view the Power Distribution Module status The Module View Screens are used for status information on a Power Distribution Module level. Select Module View on the Main Menu Screen and press ENTER. Press ENTER at the Module number and scroll through the list of modules to the specific module and One-corded press ENTER. To view more information about the module, select Circuit Details and press ENTER. Module View Load/Energy Circuit Cfg Volt Meter Module:>xx Status: Critical >Circuit Details >About This Module Alarms Log Admin Help Three-corded Module >Cable >Cable >Cable xx: y Cables 1: Normal 2: Critical 3: Normal Module xx, Cable y: Name: <Circuit Name> Power: xx.x kW In 3-corded systems, select the relevant cable and press ENTER. Scroll through the three status screens for information on the specific Power Distribution Module. The example shows that there is a warning alarm on L2. 6 Mod L1: L2: L3: xx, Breakers: Closed Open Closed Mod L1: L2: L3: xx, Cable y: 10.1A 051% 11.4A 057% High! 04.4A 025% Modular Power Distribution Unit – Operation 990-3054B-001 Operation: Operation Procedures How to view Power Distribution Module information Select Module View on the Main Menu Screen and press ENTER. Module View Load/Energy Circuit Cfg Volt Meter Module:>xx Status: Critical >Circuit Details >About This Module Alarms Log Admin Help Press ENTER at the Module number and scroll through the list of modules to the specific module and press ENTER. Select About This Module and press ENTER. Select to view either: Module Mfg Info Cable Details Breaker Ratings Module:>xx >Module Mfg Info >Cable Details >Breaker Ratings Module xx Info>: Model: zz S/N: xxxxxxxxxxxx Mfg Date: dd/mm/yyyy Mod xx, Cable:>yy Breaker Ratings: L1:20A L2:20A L3:20A Mod xx, Cable:>yy Length: 3.0m (9.8ft) Connector: IEC309-3W Voltages 230V 990-3054B-001 Modular Power Distribution Unit – Operation 7 Operation: Operation Procedures How to view circuit status information The Load/Energy screens are used for status information on a circuit level and the data is grouped by output cable. Scroll to the list to go to the specific circuit. The circuit names are stated for identification. Refer to "How to set the name and location of the circuits" for information on how to set the circuit name. Select Load/Energy on the Main Menu Screen and press ENTER. Module View Load/Energy Circuit Cfg Volt Meter Alarms Log Admin Help Select to view either Current & Power Percent Loading Energy Usage. Press ENTER at the Reset prompt and confirm the reset to zero the kWh registration for the circuit and set the reset date to the current date. Circuit Loading >Current & Power >Percent Loading >Energy Usage Mod:>xx Cable:>yy <Circuit Name>: L1:xxA L2:xxA L3:xxA Total Power: xx.xkW Mod:>xx Cable:>yy <Circuit Name> Energy: xxx,xxx kWh >Reset: mm/dd/yyyy Mod xx, Cable:>yy L1:xx.xA xxx% L2:xx.xA xxx% L3:xx.xA xxx% How to view output voltages Select Volt Meter on the Main Menu Screen and press ENTER. Module View Load/Energy Circuit Cfg Volt Meter Alarms Log Admin Help The Output Voltage Screen shows the output voltages for the three phases and the phase-tophase voltages. 8 Output Voltage L1: xxx L1-2: xxx L2: xxx L2-3: xxx L3: xxx L3-1: xxx Modular Power Distribution Unit – Operation 990-3054B-001 Operation: Operation Procedures How to view the log The log saves information and a message every time a change in the PDU is detected. Alarms and events are recorded in the log and displayed as an active alarm. Status changes are only displayed in the log, and will not display as an active alarm. Note: Viewing the log will clear the Check Log LED. Select Log on the Main Menu Screen, and press Module View Load/Energy Circuit Cfg Volt Meter >New Logged Items >Entire Log >Clear Log ENTER. Alarms Log Admin Help Choose to view recently logged items or the entire log. Use the arrow keys to scroll through the list of events. Press the ENTER key to view the date and time of a specific event. How to clear the log Select Log on the Main Menu Screen, and press Module View Load/Energy Circuit Cgf Volt Meter >New Logged Items >Entire Log >Clear Log ENTER. Alarms Log Admin Help Select Clear Log and press ENTER. Select Yes to clear the entire log, or No to return to the Main Menu Screen. How to view the list of active alarms The alarm menu lists all active alarms in the PDU. When an alarm is triggered, the PDU will create an alarm and the LEDs on the front panel will illuminate to signify that an alarm has been set. The list of active alarms shows the number of alarms, the severity, and a brief description of each alarm. From the Main Menu Screen, select Alarms. Module View Load/Energy Circuit Cfg Volt Meter >All Active Alarms >Active by Severity >Active by Type Choose to view all alarms, or alarms by severity or type. Alarms Log Admin Help Use the UP and DOWN arrow keys to scroll through the list of active alarms. Press the ENTER key to view the date and time of a specific alarm. 990-3054B-001 Modular Power Distribution Unit – Operation 9 Configuration Settings How to set up the network Select Admin on the Main Menu Screen, and press ENTER. Select Network Setup and press ENTER. Set the IP-address and subnet mask for the system. Press the continue arrow and set the gateway and MAC address. 10 Module View Load/Energy Circuit Cfg Volt Meter >Network Setup >Local Interface >Date & Time >Device ID <Network Status> >Mode: Fixed IP Addr IP:xxx.xxx.xxx.xxx SM:xxx.xxx.xxx.xxx GW:xxx.xxx.xxx.xxx MAC Address: xx xx xx xx xx xx Modular Power Distribution Unit – Operation Alarms Log Admin Help 990-3054B-001 Configuration: Settings How to set the name and location of the circuits Select Circuit Cfg on the Main Menu Screen, and press ENTER. Select Individual Load Cfg and press ENTER. Select Name/Location and press ENTER. Change the settings for circuit name and circuit location. Use the UP and DOWN arrow keys to select a character and press ENTER to confirm and go to the next character. 990-3054B-001 Module View Load/Energy Circuit Cfg Volt Meter >Individual Load Cfg >Mass Configuration >Reset Ckt Defaults >Electrical Config Mod:>xx Cable:>yy <Circuit Name> >Name/Location >Alarm Configuration Alarms Log Admin Help Mxx, Cable y: »circuit name >Location »circuit location Modular Power Distribution Unit – Operation 11 Configuration: Settings How to set the individual alarm thresholds The Individual Load Cfg screens are used to set the alarm thresholds for a single Power Distribution Module in the system. It is also possible to set the settings for all modules at the same time. Refer to "How to set the alarm thresholds for all Power Distribution Modules in the system". Select Circuit Cfg on the Main Menu Screen, and press ENTER. Select Individual Load Cfg and press ENTER. Scroll through the modules/circuits to go to the desired module/circuit. Press ENTER to select a specific module/circuit. Change the settings for: Alarms: Select to enable or disable alarms. Alarm Thresholds: Select to change the settings for Warning Thresholds, Critical Thresholds, and Position Alarms. Reset to defaults: Select to reset to factory defaults. 12 Module View Load/Energy Circuit Cfg Volt Meter Alarms Log Admin Help >Individual Load Cfg >Mass Configuration >Reset Ckt Defaults >Electrical Config Mod:>xx Cable:>yy <Circuit Name> >Name/Location >Alarm Configuration Mod xx, Cable yy: >Alarms:>Enabled >Alarm Thresholds >Reset to defaults Modular Power Distribution Unit – Operation 990-3054B-001 Configuration: Settings How to set the alarm thresholds for all Power Distribution Modules in the system The Mass Configuration screens are used to set the alarm thresholds for all Power Distribution Modules in the system. Select Circuit Cfg on the Main Menu Screen, and press ENTER. Module View Load/Energy Circuit Cfg Volt Meter Alarms Log Admin Help Select Mass Configuration and press ENTER. Change the settings for Threshold Values: Select the maximum and minimum values that should generate an alarm. Threshold Enable: Enable or disable the alarms for the different settings. Breaker Position: Enable or disable alarms when a breaker is opened. >Individual Load Cfg >Mass Configuration >Reset Ckt Defaults >Electrical Config Mass Configuration: >Threshold Values >Threshold Enable >Breaker Position Pick Alarm Limits: >Min:>xx% >Hi: >xx% >Low:>xx% >Max:>xx% >Apply to All >Breaker Position Alarms:>Enabled >Apply to All >Alarms:>OFF >Min:>ON High:>OFF >Low:>OFF >Max: >OFF >Apply to All Select Apply to All and press ENTER to confirm your changes. 990-3054B-001 Modular Power Distribution Unit – Operation 13 Configuration: Settings How to change the display settings Select Admin on the Main Menu screen and press ENTER. Select Local Interface and press ENTER. Select Display Behavior and press ENTER. From this screen the settings for contrast, key click, beeper volume and check log light can be changed. Module View Load/Energy Circuit Cfg Volt Meter Alarms Log Admin Help >Network Setup >Local Interface >Date & Time >Device ID >Local Password >Display Behavior >Alarm Beeper:>Off >Contrast:> >Key Click:> >Beeper Volume:> >Check Log Light How to set and change the password settings Follow the below procedure to set or change the password. This screen also allows you to lock passwordprotected screens and set the time limit before the display will lock, and a password will be required to make any changes. Select Admin on the Main Menu screen and press ENTER. Select Local Interface and press ENTER. Select Local Password and press ENTER. Select Password and type in the new password. Use the UP and DOWN arrow keys to select a character and press ENTER to confirm and go to the next character. 14 Module View Load/Energy Circuit Cfg Volt Meter Alarms Log Admin Help >Network Setup >Local Interface >Date & Time >Device ID >Local Password >Display Behavior >Alarm Beeper:>Off >Password:>> >Timeout:>10min >Invalidate NOW Modular Power Distribution Unit – Operation 990-3054B-001 Configuration: Settings How to change date and time Select Admin on the Main Menu screen and press ENTER. Select Date & Time and press ENTER. From this screen the date format, date, and time can be changed. 990-3054B-001 Module View Load/Energy Circuit Cfg Volt Meter >Network Setup >Local Interface >Date & Time >Device ID >Mode: Manual >Format:> >Date: xx-xxx-xx >Time: xx:xx:xx Modular Power Distribution Unit – Operation Alarms Log Admin Help 15 Maintenance Parts Replacement How to determine if you need a replacement part To determine if you need a replacement part, contact APC Customer Support and follow the procedure below so that the APC Customer Support representative can assist you promptly: 1. In the event of a module failure, the display interface may show additional “fault list” screens. Press any key to scroll through these fault lists, record the information, and provide it to the representative. 2. Write down the serial number of the unit so that you will have it easily accessible when you contact APC Customer Support. 3. If possible, call APC Customer Support from a telephone that is within reach of the UPS display interface so that you can gather and report additional information to the representative. 4. Be prepared to provide a detailed description of the problem. A representative will help you solve the problem over the telephone, if possible, or will assign a Return Material Authorization (RMA) number to you. If a module is returned to APC, this RMA number must be clearly printed on the outside of the package. 5. If the unit is within the warranty period, repairs or replacements will be performed free of charge. If it is not within the warranty period, there will be a charge. 6. If the unit is covered by an APC service contract, have the contract available to provide information to the representative. How to return parts to APC Call APC Customer Support to obtain an RMA number. To return a failed module to APC, pack the module in the original shipping materials, and return it by insured, prepaid carrier. The APC Customer Support representative will provide the destination address. If you no longer have the original shipping materials, ask the representative about obtaining a new set. Pack the module properly to avoid damage in transit. Never use styrofoam beads or other loose packaging materials when shipping a module, as the module may settle in transit and become damaged. Enclose a letter in the package with your name, RMA number, address, a copy of the sales receipt, description of the problem, a phone number, and a check as payment (if necessary). Note: Damages sustained in transit are not covered under warranty. 16 Modular Power Distribution Unit – Operation 990-3054B-001 Maintenance: Parts Replacement How to install a Power Distribution Module Electrical Hazard: To prevent arcing when removing an APC Power Distribution Module (PDM) from the Modular Power Distribution Unit (PDU), set all PDMs to OFF. Do not remove the modules when they are under load. Caution: PDMs must be replaced by trained personnel only (see the section "Safety"). Note: The PDM can be safely installed into a powered rack. Note: For PDMs with RCDs installed, the occurrence of an earth fault will automatically open the adjacent circuit-breaker. (See the below drawing under "PDMs with RCDs"). Note: PDMs with RCDs are equipped with a test button. Periodic testing of the RCD may be required. Check your local codes for your region. (See the section "Note: Do not throw away the filler plate. Keep it for potential later use."). PDM with RCD (Residual Current Devices) - Three phase PDM – Single and Three phase PDM with RCD – Single phase Test button ON position ON position Test button ON position PDMs with RCDs An earth fault will open the adjacent circuit breaker to the OFF position. The fault is indicated by a red strip on the RCD toggle. The circuit breaker has been closed manually by pushing the toggle to the ON position. 990-3054B-001 Modular Power Distribution Unit – Operation 17 Maintenance: Parts Replacement How to remove a filler plate Note: Filler plates come pre-installed in UL certified Modular Power Distribution Unit (PDU) products PDPM72F-5U and PDPM72F-R when a Power Distribution Module (PDM) is not installed. Note: Do not throw away the filler plate. Keep it for potential later use. Press down on the clip to remove the filler plate. Pull out the plate from the unit =Verify that all breakers are in the OFF position. =Press the red button to release the latch. =Pull open the latch. Vertical Rack Distribution Panel Horizontal Rack Distribution Panel Busbar Feed the cable(s) up through the top opening in the enclosure and into the cable power troughs (if applicable) on top of the racks. 18 Modular Power Distribution Unit – Operation 990-3054B-001 Maintenance: Parts Replacement Vertical Rack Distribution Panel Horizontal Rack Distribution Panel Slide the PDM all the way into the slots. Close the latch to secure the module in the busbar. Use plastic ties to secure loose cable(s) to the enclosure (only in Vertical Rack Distribution Panels). Connect the PDM cable to the load. Turn the PDM circuit breakers ON (see the drawing under “How to install a Power Distribution Module” on page 17). Use the reverse procedure to remove the PDM. 990-3054B-001 Modular Power Distribution Unit – Operation 19 Maintenance: Parts Replacement How to test the Residual Current Device Note: Pushing the test button will open circuit breakers distributing power to the equipment. Press the test button and confirm that the Residual Current Device (RCD) and adjacent circuit breaker trip to the OFF position. Reset the RCD and circuit breaker into normal by pushing the toggle to the ON position. How to install a PDM circuit breaker handle tie Note: A circuit breaker handle tie has been provided for some PDMs that may require them. Check local codes for your region. Locate the handle tie over the circuit breaker handles aligning the two tabs between the three handles. Push the handle tie towards the circuit breaker handles until it snaps into position. Check to make sure that the handle tie is secure. The handle tie can be removed by pulling it from the circuit breaker handles. 20 Modular Power Distribution Unit – Operation 990-3054B-001 Maintenance: Parts Replacement How to reinstall a filler plate Position the filler plate in front of the open PDM location. Insert the bottom tab of the filler plate into the slot. Tilt up the filler plate and snap it into position until it is secured. 990-3054B-001 Modular Power Distribution Unit – Operation 21 Troubleshooting LED Indication on the Power Distribution Modules There are three LEDs on each Power Distribution Module. The LEDs indicate the following conditions: • Red: A critical alarm. LED Indication • Yellow: A warning alarm • Green: No alarm. • Flashing green: The module is being identified by the system. 22 Modular Power Distribution Unit – Operation 990-3054B-001 Status and Alarm Messages This section lists the status and alarm messages that the PDU might display. The messages are listed in alphabetical order, and a suggested corrective action is listed with each alarm message to help you troubleshoot problems. Display Message Detailed Description Corrective Action High Module Current. The high module current threshold has been exceeded. Evaluate the threshold setting. If necessary, adjust it for your situation. High Subfeed Current. The high subfeed current threshold has been exceeded. Evaluate the threshold setting. If necessary, adjust it for your situation. Low Module Current. The low module current threshold has been exceeded. Evaluate the threshold setting. If necessary, adjust it for your situation. Low Subfeed Current. The low subfeed current threshold has been exceeded. Evaluate the threshold setting. If necessary, adjust it for your situation. Maximum Module Current. The maximum module current threshold has been exceeded. Evaluate the threshold setting. If necessary, adjust it for your situation. Maximum Subfeed Current. The maximum subfeed current threshold has been exceeded. Evaluate the threshold setting. If necessary, adjust it for your situation. Minimum Module Current. The minimum module current threshold has been exceeded. Evaluate the threshold setting. If necessary, adjust it for your situation. Minimum Subfeed Current. The minimum subfeed current threshold has been exceeded. Evaluate the threshold setting. If necessary, adjust it for your situation. Modular Distribution Communication. Communication has been lost with the modular distribution breakers. Check the communication cables to ensure they are properly connected. Contact APC Customer Support. Module Breaker Open. A modular circuit breaker is open. Check the modular circuit breakers to see if one has overloaded. Replace if necessary. Subfeed Breaker Open. A subfeed circuit breaker is open. Check the subfeed circuit breakers to see if one has been over-loaded. 990-3054B-001 Modular Power Distribution Unit – Operation 23 APC Worldwide Customer Support Customer support for this or any other APC product is available at no charge in any of the following ways: • Visit the APC Web site to access documents in the APC Knowledge Base and to submit customer support requests. – www.apc.com (Corporate Headquarters) Connect to localized APC Web sites for specific countries, each of which provides customer support information. – www.apc.com/support/ Global support searching APC Knowledge Base and using e-support. • Contact an APC Customer Support center by telephone or e-mail. – Regional centers Direct InfraStruXure Customer Support Line (1)(877)537-0607 (toll free) APC headquarters U.S., (1)(800)800-4272 (toll free) Canada Latin America (1)(401)789-5735 (USA) Europe, Middle East, Africa (353)(91)702000 (Ireland) Western Europe (inc. Scandinavia) +800 0272 0272 Japan (0) 36402-2001 Australia, New Zealand, (61) (2) 9955 9366 (Australia) South Pacific area – Local, country-specific centers: go to www.apc.com/support/contact for contact information. Contact the APC representative or other distributor from whom you purchased your APC product for Entire contents copyright 2008 American Power Conversion Corporation. All rights reserved. Reproduction in whole or in part without permission is prohibited. APC, the APC logo, and TRADEMARK NAMES are trademarks of American Power Conversion Corporation. All other trademarks, product names, and corporate names are the property of their respective owners and are used for informational purposes only. 990-3054B-001 *990-3054B-001* 03/2008