1
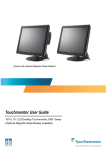
Elo LCD Touchmonitor
User Guide
Version 1.0
Models
ETL121K/P-6PWA-1
ETL121K/P-7PWA-1
ETL121K/P-8PWA-1
ETL150K/P-6PWA-1
ETL150K/P-7PWA-1
ETL150K/P-8PWA-1
Elo TouchSystems, Inc.
A Raychem Company
1-800-ELOTOUCH
www.elotouch.com
P/N 008509 DOC# SW500025
Rev B
Copyright © 1999 Elo TouchSystems Inc. All Rights Reserved.
No part of this publication may be reproduced, transmitted, transcribed, stored in a retrieval system or
translated into any language or computer language, in any form or by any means, including, but not limited to, electronic, magnetic, optical, chemical, manual or otherwise without prior written permission of
Elo TouchSystems.
Disclaimer
The information in this document is subject to change without notice. Elo TouchSystems makes no representations or warranties with respect to the contents hereof, and specifically disclaims any implied
warranties of merchantability or fitness for a particular purpose. Elo TouchSystems reserves the right to
revise this publication and to make changes from time to time in the content hereof without obligation of
Elo TouchSystems to notify any person of such revisions or changes.
Trademark Acknowledgments
IntelliTouch, SecureTouch AccuTouch and MonitorMouse are registered trademarks of Elo TouchSystems, Inc.
Other product names mentioned herein may be trademarks or registered trademarks of their respective
companies. Elo TouchSystems claims no interest in trademarks other than its own.
Elo LCD Touchmonitor User Guide - i
Elo LCD Touchmonitor User Guide - ii
Table of Contents
TABLE OF CONTENTS
Chapter 1 Introduction ..........................................................................5
About This Manual ...................................................................................5
LCD Touchmonitor Features ....................................................................5
Contacting Elo ..........................................................................................7
Customer Service .................................................................................7
Chapter 2 Installation.............................................................................9
Unpacking Your Touchmonitor................................................................9
Basic Assembly Instructions.....................................................................11
Pre-install Steps....................................................................................11
Connecting the Cables .........................................................................12
Chapter 3 Operation...............................................................................15
Touchmonitor Controls and
Adjustments ..............................................................................................15
On-Screen Menus: Quick Glance .............................................................16
Adjustments ..............................................................................................17
Basic Adjustments................................................................................17
Auto-Adjust .............................................................................................18
Brightness ...............................................................................................18
Contrast ..................................................................................................18
Color Balance.........................................................................................19
Phase ......................................................................................................20
Default Settings.......................................................................................20
Image Position......................................................................................20
Horizontal Position.................................................................................21
Horizontal Size .......................................................................................21
Vertical Position .....................................................................................22
Expand/Center ........................................................................................22
System ..................................................................................................22
Language ................................................................................................23
OSD Position ..........................................................................................23
OSD Turn Off Time.................................................................................24
Elo LCD Touchmonitor User Guide - iii
Table of Contents
Care and Handling of Your
Touchmonitor............................................................................................25
Cleaning Your LCD Touchmonitor ..........................................................26
Screen...................................................................................................26
Case......................................................................................................26
Appendix A Troubleshooting.................................................................27
Technical Support .....................................................................................28
Appendix B Touch Technology .............................................................29
Touchscreens ............................................................................................29
IntelliTouch...............................................................................................29
AccuTouch................................................................................................30
Kiosk Touchmonitors ...............................................................................31
Cabinet Design..........................................................................................32
Appendix C Native Resolution...............................................................33
Appendix D Touchmonitor Safety.........................................................35
Regulatory Information ............................................................................37
Appendix E Technical Specifications ....................................................39
Warranty ................................................................................................45
Index ........................................................................................................47
Elo LCD Touchmonitor User Guide - iv
About This Manual
Chapter 1
Introduction
Congratulations on your purchase of an Elo TouchSystems LCD touchmonitor. Your new high-resolution touchmonitor combines the reliable
performance of Elo’s touch technology with the latest advances in LCD
display design. This combination of features creates a natural flow of
information between a user and your touchmonitor.
About This Manual
This manual includes assembly instructions, touch technology data, onscreen adjustment instructions and technical specifications for Elo
TouchSystems’ 12.1-inch and 15-inch LCD Touchmonitors.
❑
Chapter 1: Touchmonitor features and contacting Customer
Service.
❑
Chapter 2: Unpacking your new touchmonitor and touchmonitor installation.
❑
Chapter 3: LCD Touchmonitor operation and adjustments.
❑
Appendix A: Troubleshooting tips.
❑
Appendix B: Overview of touch technology including sections
on IntelliTouch and SecureTouch touchscreens.
❑
Appendix C: Native Resolution.
❑
Appendix D: LCD Touchmonitor safety precautions.
❑
Appendix E: LCD Touchmonitor specifications.
LCD Touchmonitor Features
❑
12.1-inch (246.0 x 184.5 mm useful) or 15-inch (304.1 x 228.1
mm useful) diagonal screens.
Elo LCD Touchmonitor User Guide - 5
Chapter 1 : Introduction
❑
Compatible with VGA, Super VGA, and XGA (15-inch only)
video standards.
❑
High brightness pictures for operation in brightly lit environments.
❑
Digital “on-screen” adjustments which remain in the touchmonitor’s memory allowing for easy setup and maintenancefree operation.
❑
Durable Elo TouchSystem’s LCD Touchmonitor metal frame
construction.
❑
Elo TouchSystems patented touchscreen technology.
Elo LCD Touchmonitor User Guide - 6
Contacting Elo
Contacting Elo
Elo TouchSystems, Inc.
6500 Kaiser Drive
Fremont, CA 94555
USA
Elo TouchSystems GmbH & Co. KG.
Haidgraben 6
D-85521 Ottobrunn
Germany
www.elotouch.com
Customer Service
Voice: (888) 356-2878 (Toll Free in United States)
(510) 739-4600 (Pacific Time)
+32 (16) 35-2100 (Europe except Germany)
+49 (0) 89/60822-0 (Germany)
FAX: (510) 790-2605
+32 (16) 35-2101 (Europe)
Elo LCD Touchmonitor User Guide - 7
Chapter 1 : Introduction
Elo LCD Touchmonitor User Guide - 8
Unpacking Your Touchmonitor
Chapter 2
Installation
Unpacking Your Touchmonitor
Carefully unpack your touchmonitor. Check that you have everything
you need and that none of the components have been damaged during
shipping. Save the box and packaging in case you need to ship back the
touchmonitor.
Elo LCD Touchmonitor User Guide - 9
Chapter 2 : Installation
LCD TouchMonitor
AC Power cord
Video Cable (15-pin)
Touchscreen Cables
Serial (RS-232)
AND
cable (9-pin)
OSD module
TouchTools CD
Elo LCD Touchmonitor User Guide - 10
USB cable
Basic Assembly Instructions
Basic Assembly Instructions
Read the section about touchmonitor safety in Appendix D before
installing your touchmonitor. Also read the section about designing your
kiosk cabinet found in Appendix B.
Your touchmonitor is designed to operate from 100 to 240 VAC at 50 to
60 Hz. It automatically senses and adjusts for the supply voltage.
Do not install your touchmonitor where it will be subject to direct sunlight, excessive dust, mechanical vibration or shock, or near heat
sources such as radiators or air ducts.
Pre-install Steps
1. Set the touchmonitor into the kiosk cabinet before connecting
the cables and plugging your PC into the wall socket. See Chapter 4 for information on making any necessary display adjustments.
2. After you make your display adjustments, settle the touchmonitor into the cabinet.
Elo LCD Touchmonitor User Guide - 11
Chapter 2 : Installation
Connecting the Cables
OSD
Video (15-pin)
USB
AC Power
Serial (RS-232)
Your touchmonitor comes with two touchscreen connector cables:
Serial (RS-232) cable and USB cable (For Windows 98 computers
only.)
1. Before connecting the cables to your touchmonitor and PC, be
sure that the computer and the touchmonitor are turned off.
2. Connect the ferrite end of the video cable to the video connector
on your PC. Connect the other end of the video cable to the
touchmonitor. Secure the cable to your touchmonitor and PC by
turning the screws on the connector.
3. Connect the power cord to the AC connector on your touchmonitor. To protect your equipment against risk of damage from
electrical surges in the power line, plug the touchmonitor’s
power cord into a surge protector, and then connect the power
strip to a grounded (three-pronged) AC electrical outlet.
4. Connect either the Serial cable or the USB cable. Do not connect
both cables.
❑
If you are using a serial connection, connect the female
end of the serial (RS-232) cable to the serial port on the
back of your PC. Connect the male end of the cable to the
touchscreen connector on your touchmonitor.
Elo LCD Touchmonitor User Guide - 12
Basic Assembly Instructions
❑
If your PC is running Windows 98 you can connect the
USB cable to the USB port. The touchscreen cable connectors should fit snugly into the connectors on your
touchmonitor and PC.
5. Power on your PC. After a brief pause the picture should appear.
Unless you disconnect the power cord from the monitor or from the
wall, your touchmonitor will always remain in power-on mode.
6. Install the driver software using the procedure described in the
documentation accompanying the driver disk.
Elo LCD Touchmonitor User Guide - 13
Chapter 2 : Installation
Elo LCD Touchmonitor User Guide - 14
Touchmonitor Controls and Adjustments
Chapter 3
Operation
Touchmonitor Controls and
Adjustments
By design your LCD touchmonitor should not require any adjustments.
The factory settings will give you optimum video results with most standard PC video display adapters.
However, after connecting your touchmonitor, should you notice picture
instability, jitter, and/or a lack of good contrast, follow the directions in
this chapter to optimize the settings.
All adjustments you make to the controls are automatically memorized.
This feature saves you from having to reset your choices every time you
unplug or power your touchmonitor off and on. If there is a power failure your touchmonitor settings will not default to the factory specifications.
IMPORTANT: Do not remove the LCD touchmonitor cover as there
are high voltages and sharp metal edges inside the touchmonitor
cover. Removing the touchmonitor cover will void the warranty.
Elo LCD Touchmonitor User Guide - 15
Chapter 3 : Operation
On-Screen Menus: Quick Glance
Main Menu
Image Position
Basic Adjustment
System
Image Position
Auto-Adjust
Basic Adjustments
Horizontal Position
Horizontal Size
Vertical Position
Expand/Center
Brightness
Contrast
Color Balance
Phase
Default Settings
Language
System
OSD Position
OSD Turn Off Time
Auto-Adjust
Elo LCD Touchmonitor User Guide - 16
Auto-Adjust
Adjustments
Adjustments
All adjustments are made by using the OSD module.
All menu items can be selected by using the following buttons on the
OSD module:
❑
RST-Resets all controls to default factory settings.
❑
UP-Moves between menu selections or increases selected setting.
❑
DN-Moves between menu selections or decreases selected setting.
❑
SEL-Activates and selects the on-screen menus.
Basic Adjustments
To make adjustments:
1. Connect the OSD module and press the SEL button. The main
menu will be displayed.
You can connect the OSD module to your monitor any time, even
while it is powered on.
2. From the main menu you can choose:
❑
Basic Adjustment
❑
Image Position
❑
System
❑
Auto-Adjust
3. To exit the menu, highlight the Exit menu option and press the
SEL button.
Elo LCD Touchmonitor User Guide - 17
Chapter 3 : Operation
Auto-Adjust
Auto-Adjust automatically optimizes a number of video characteristics
such as, vertical, horizontal, size and positioning as well as, contrast and
phase settings. This is accomplished by analyzing the dynamic characteristics of the video adapter board in the host PC. (This is not to be confused with the factory reset option.)
To Auto-adjust the video screen:
1. Highlight the Auto-adjust menu option and press the SEL button. The screen will jitter momentarily as it adjusts.
2. To exit the menu, highlight the Exit menu option and press the
SEL button.
If needed use the “Phase” settings to optimize the video quality.
Brightness
The brightness adjustment will affect the “backlight” brightness setting.
Raising the brightness to maximum levels will degrade the life of the
backlight.
1. Highlight the Brightness menu option and press the SEL button.
A Brightness gauge will display. The gauge will indicate a
numeric value which will change as you increase or decrease the
brightness.
2. By using the UP and DN buttons, adjust the brightness.
3. When you have the brightness at the desired level press the SEL
button.
4. To exit the menu highlight the Exit menu option and press the
SEL button.
Contrast
The contrast function allows you to adjust the image crispness. Contrast
adjusts the difference between black and white shades.
Elo LCD Touchmonitor User Guide - 18
Adjustments
To adjust the contrast:
1. Highlight the Contrast menu option and press the SEL button. A
Contrast gauge will display. The gauge will indicate a numeric
value which will change as you increase or decrease the contrast.
2. By using the UP and DN buttons adjust the contrast.
3. When you have the contrast at the desired level, press the SEL
button.
4. To exit the menu highlight the Exit menu option and press the
SEL button.
Color Balance
The color balance function allows you to adjust the RGB (red, green,
blue) colors in order to obtain desirable color temperature.
Color balance is a factory setting and seldom requires adjustment.
To adjust the color balance:
1. Highlight the Color Balance menu option and press the SEL
button. Another menu will display with the following menu
items:
❑
Contrast Red
❑
Contrast Green
❑
Contrast Blue
❑
Exit
2. Highlight the color contrast menu option you want to adjust and
press the SEL button. When you select any of the contrast
options a contrast gauge will display.
3. By using the UP and DN buttons adjust the color contrast level.
4. When you have the contrast at the desired level, press the SEL
button.
5. To exit the menu, highlight the Exit menu option and press the
SEL button.
Elo LCD Touchmonitor User Guide - 19
Chapter 3 : Operation
Phase
The phase function is similar to the tracking control on a VCR. If your
VCR displays a jumpy or jittery picture, the tracking control allows you
to adjust the picture. The phase function allows you to optimize the
video timing and thus minimize jitter in the displayed video image.
Phase is factory set and seldom requires adjustment.
To adjust the phase:
1. Highlight the Phase menu option and press the SEL button. A
Phase gauge will display. The gauge will indicate a numeric
value which will change as you increase or decrease the contrast.
2. By using the UP and DN buttons adjust the phase.
3. When you have the phase at the desired level, press the SEL
button.
4. To exit the menu, highlight the Exit menu option and press the
SEL button.
Default Settings
The default settings function allows you to restore factory default settings stored in the touchmonitor’s memory. These defaults cannot be
overwritten.
To restore the default settings:
1. Highlight the Default Settings menu option and press the SEL
button. All settings will be restored to their defaults.
2. Highlight the Exit menu option to return to the main window.
Image Position
The image position menu options allow you to center the active video
area.
Elo LCD Touchmonitor User Guide - 20
Adjustments
To access the Image Position menu options:
1. From the main menu, highlight Image Position and press the
SEL button.
2. You can choose the following menu options:
❑
Horizontal Position
❑
Horizontal Size
❑
Vertical Position
❑
Expand/Center
3. To exit from the menu, highlight the Exit menu option and press
the SEL button.
Horizontal Position
The horizontal position function allows you to adjust the horizontal
image position.
To adjust the horizontal position:
1. From the main menu, highlight the Image Position option and
press the SEL button.
2. Highlight the Horizontal Position menu item and press the SEL
button. The Horizontal Position gauge will display.
3. By using the UP and DN buttons adjust the horizontal position.
4. When you have the position at the desired level, press the SEL
button.
5. To exit the menu, highlight the Exit menu option and press the
SEL button.
Horizontal Size
The horizontal size function allows you to adjust the horizontal image
size.
To adjust the horizontal size:
1. From the main menu, highlight the Image Position option and
press the SEL button.
Elo LCD Touchmonitor User Guide - 21
Chapter 3 : Operation
2. Highlight the Horizontal Size option and press the SEL button.
The Horizontal Size gauge will display.
3. By using the UP and DN buttons adjust the horizontal size.
4. When you have the size at the desired level, press the SEL button.
5. To exit the menu, highlight the Exit menu option and press the
SEL button.
Vertical Position
The vertical position function allows you to adjust the vertical image
position.
To adjust the vertical position:
1. From the main menu, highlight the Image Position option and
press the SEL button.
2. Highlight the Vertical Position option and press the SEL button.
The Vertical Position gauge will display.
3. By using the UP and DN buttons adjust the vertical size.
4. When you have the size at the desired level, press the SEL button.
5. To exit the menu, highlight the Exit menu option and press the
SEL button.
Expand/Center
This function is not available at this time.
System
The system menu functions allow you to change system features.
To access the System menu options:
1. From the main menu, highlight System and press the SEL button.
2. You can choose the following menu options:
Elo LCD Touchmonitor User Guide - 22
Adjustments
❑
Language
❑
OSD Position
❑
OSD Turnoff Time
Below these menu options the screen resolution, horizontal and vertical
settings are displayed. If the screen resolution on your PC is changed,
that change will be reflected here.
3. To exit from the menu, highlight the Exit menu option and press
the SEL button.
Language
You are able to change the language of all menu items within the main
menu.
To change the language:
1. Highlight the Language menu option and press the SEL button
to display the language menu.
2. Highlight the language you want displayed then press the SEL
button.
The menu items will change to the language you have selected.
3. To exit the menu, highlight the Exit menu option and press the
SEL button.
OSD Position
The OSD Position option allows you to set the screen location where the
on-screen menu appears.
To adjust the OSD position:
1. Highlight the OSD Position menu option and press the SEL button.
2. A menu will display allowing you to choose a position on the
screen where the on-screen menu will be displayed. Highlight
the position you want and press the SEL button.
The menu will display in the position you selected.
Elo LCD Touchmonitor User Guide - 23
Chapter 3 : Operation
3. To exit the menu, highlight the Exit menu option and press the
SEL button.
OSD Turn Off Time
The OSD turn off time function allows you to set the time delay before
the on-screen menus are deactivated.
To set the time delay:
1. Highlight the OSD turn off time menu option and press the SEL
button. A menu will display allowing you to choose an increment of time in which the on-screen menu will be deactivated.
2. Highlight the increment you want then press the SEL button.
3. To exit the menu, highlight the Exit menu option and press the
SEL button.
Elo LCD Touchmonitor User Guide - 24
Care and Handling of Your Touchmonitor
Care and Handling of Your
Touchmonitor
The following tips will help you keep your LCD touchmonitor functioning at the optimal level:
Protect your touchmonitor from extremely low or high
temperatures (see Appendix E, Technical Specifications).
Keep your touchmonitor dry. Do not wash it with a wet cloth
or pour fluid into it.
Check your touchmonitor for condensation. If condensation
develops, do not power your touchmonitor on until the
condensation evaporates.
Protect your touchmonitor from being bumped or dropped.
Keep your touchmonitor away from dust, sand and dirt.
Keep your touchmonitor away from humid environments.
Elo LCD Touchmonitor User Guide - 25
Chapter 3 : Operation
Cleaning Your LCD Touchmonitor
Prevent damage to your touchmonitor (and PC) by powering off the
computer system and disconnecting the touchmonitor from the AC outlet before you clean it. After you finish cleaning, make sure the touchmonitor is completely dry before you reconnect the cables and power it
on. Do not apply liquid or aerosol spray cleaners directly on the screen
or cabinet. Do not use any type of abrasive pad, alkaline cleaner, scouring powder or solvent (such as alcohol or benzine) to clean your touchmonitor. Avoid getting liquids inside your touchmonitor. If liquid does
get inside, have a qualified service technician check it before you power
it on again.
Screen
Remove dust and dirt by wiping the touchscreen with a soft, clean, lintfree cloth. Moisten a soft cloth with an ammonia-based glass cleaner
and use it to remove fingerprints and smudges.
Case
Clean the touchmonitor cabinet with a soft cloth slightly moistened with
a mild detergent solution. Rinse the cloth with clear water, wring it dry,
and wipe the cabinet to remove any detergent residue.
Elo LCD Touchmonitor User Guide - 26
Appendix A
Troubleshooting
Problem:
Suggestion:
No picture
Your touchmonitor may not be getting
power. Make certain that your powerstrip is plugged into the wall socket and
that the PC and touchmonitor are plugged
in and powered on.
Test power supply by trying different
cables, a different wall outlet or plug
another appliance into the outlet.
Make certain the video cable is properly
connected and that it is not damaged.
Check for bent pins on the cable connectors.
Ensure that your computer and video card
are properly configured. (Consult video
card documentation.)
Picture appears to be ghosting
Make certain there is a good connection
between the touchmonitor and the computer.
Picture is not centered
Read about adjusting your touchmonitor
picture (see Chapter 3) and make the
appropriate adjustments.
Picture is “jittery”
Reset your phase setting (see Chapter 3).
Picture appears “washed out”
Re-adjust your brightness and contrast
settings (see Chapter 3).
Picture not present or severely
distorted
Verify your video display adapter settings
are formatted for the correct resolution
and vertical refresh rates (see Chapter 3).
Touch doesn’t work
Check to make sure cable is securely
attached at both ends.
Elo LCD Touchmonitor User Guide - 27
Appendix A : Troubleshooting
Technical Support
Voice: (800) 489-9935 (Pacific Time; voice mail after hours)
+49 (0) 89/60822-194 (Europe except Germany)
0180/ 530 41 70 (Germany)
FAX: (510) 790-0627
+49 (1) 8161/ 660 43 (Europe)
E-mail: [email protected]
Elo LCD Touchmonitor User Guide - 28
Touchscreens
Appendix B
Touch Technology
Touchscreens
Typically, people communicate with computers using a mouse, a keyboard or a combination of the two. Users who are not keyboard literate
or mouse savvy can become frustrated with how long human-to-computer interactions take.
Computer literacy is learned. This is complicated by the fact that using a
keyboard or a mouse is neither intuitive nor natural for most people.
Touchscreens cut out the learning curve by eliminating keyboard/mouse
intermediaries and allowing a natural flow of information to develop
between a user and a computer.
When a user wants to access information or perform a function on a
computer with a touchscreen installed, a touch does the job that often
complicated keyboard interactions or clumsy mice movements used to
do—only faster and more accurately. The beauty and power of a touchscreen is that users do not have to think, they just do.
Touchscreens speed up user/computer interactions. People get what they
want faster and are more satisfied with the process. A clumsy, frustrating experience with a computer during a transaction can create dissatisfaction for your customer. This negative atmosphere can transfer itself
to your product or service. Touchscreens help eliminate unpleasant
transactions by creating a natural flow of information that enhances
your product or service.
IntelliTouch
IntelliTouch uses Elo’s patented Surface Wave Technology to provide
superior image clarity, stable drift-free operation, and a durable surface
that is unaffected by scratches. With IntelliTouch you get fast, accurate
Elo LCD Touchmonitor User Guide - 29
Appendix B : Touch Technology
response to soft stylus stimulation (finger, gloved hand, pencil eraser)
that is also sensitive to pressure. For example, a customer in a department store could scroll through a product catalog by increasing or
decreasing pressure on an icon. IntelliTouch’s pressure sensitivity
increases the intuitive nature of a user/touchscreen interaction by allowing for increased selectivity.
An IntelliTouch touchscreen is a great choice for point-of-information
or public access applications such as the following:
❑
Point-of-information kiosks
❑
Vending
❑
Electronic Catalogs
❑
In-store locators
❑
Gaming and lottery
❑
Banking/financial transactions
❑
Ticket sales
❑
Interactive education
❑
Multimedia demonstrations
AccuTouch
Elo’s patented five-wire resistive technology makes AccuTouch products unmatched for durability and accuracy. Touch an AccuTouch
screen with a finger, gloved hand, stylus, fingernail or even a credit
card, and you’ll receive a fast accurate response—every time. The surface of an AccuTouch touchscreen is scratch-resistant and can withstand
spills and other types of wear and tear that often occur in heavy-usage
environments.
An AccuTouch touchscreen is best used for clerk or employee-activated
applications such as:
❑
Industrial process control
❑
Handheld computers
❑
Medical equipment
❑
Point-of-sale terminals
❑
Transportation
Elo LCD Touchmonitor User Guide - 30
Kiosk Touchmonitors
Kiosk Touchmonitors
Kiosks are all around us—whether we notice them or not. The stand in
the middle of a hotel lobby offering up piles of brochures is a kiosk. The
booth in the airport where you buy your pre-flight gum is a kiosk. A
kiosk is a small pavilion with one or more open sides. Kiosks function
as newsstands, coffee stands and point-of-information booths—and they
are everywhere.
Adding a touchmonitor to a kiosk brings a new dimension of functionality to it. For example, a kiosk touchmonitor can sell airline or theater
tickets, give information or directions in a museum or hotel, act as an
ATM to process bank transactions and demonstrate products. Since
kiosks do not take up much space they are a cost efficient addition to
your work force.
When you place a computer and touchmonitor into a kiosk cabinet, you
want it to remain trouble-free for as long as possible. Elo’s technical
expertise and high manufacturing standards go into creating a kiosk
touchmonitor that will withstand stress and succeed in a public access
context.
The custom designed metal chassis serves as a protective structure for
the touchscreen and its bezel. The flat touchmonitor bezel is sealed to
the touchscreen in order to protect the touchmonitor electronics from
splashed liquids, dirt and dust.
Elo designed its kiosk touchmonitor to allow for creativity in your cabinet plans. Elo’s kiosk touchmonitors fit into your cabinet designs, not
the other way around.
Elo LCD Touchmonitor User Guide - 31
Appendix B : Touch Technology
Cabinet Design
Give some thought as to where you place the touchmonitor. The user
should be able to easily reach the screen, so do not place the touchmonitor either too high or too low in the cabinet.
❑
Your touchmonitor and PC need to remain dry. If your kiosk
must be located outdoors build a cabinet that protects your
touchmonitor and PC from the weather (see Appendix E for
touchmonitor environmental specifications).
❑
Build the kiosk cabinet so that it will support the weight of the
touchmonitor (see Appendix E for touchmonitor specifications).
❑
To ensure trouble-free operation, make certain your kiosk
touchmonitor is properly ventilated. Leave at least four inches
of air space around the touchmonitor and make certain that the
ventilation slots, located on the top and bottom of the touchmonitor, are not covered or blocked.
❑
The temperature around your touchmonitor needs to remain
within the range specified in the tables in Appendix E. An
increase in temperature will degrade your touchmonitor’s performance and reduce its life span.
❑
Dust will damage your touchmonitor. You can prevent damage
this damage by keeping the air ventilation intake away from
the floor, or by adding a filter.
❑
You want your kiosk cabinet to make a good first impression
on potential users. Choose a finish that does not show finger
prints. Avoid polished stainless steel, chrome or glossy black
paint.
Elo LCD Touchmonitor User Guide - 32
Appendix C
Native Resolution
The native resolution of a monitor is the resolution level at which the
LCD panel is designed to perform best. For Elo LCD monitors, the
native resolution is 1024 x 768 for the XGA-15 inch size and 800 x 600
for the SVGA-12.1 inch size. In almost all cases, screen images look
best when viewed at their native resolution. You can lower the resolution setting of a monitor but not increase it.
Input Video
12.1” LCD
15” LCD
640x480 (VGA)
Transforms input
format to 800x600
Transforms input
format to
1024x768
800x600 (SVGA)
Displays in Native
Resolution
Transforms input
format to
1024x768
1024x768 (XGA)
No Display
Displays in Native
Resolution
The native resolution of an LCD is the actual number of pixels horizontally in the LCD by the number of pixels vertically in the LCD. LCD
resolution is usually represented by the following symbols:
VGA
SVGA
XGA
SXGA
UXGA
640x480
800x600
1024x768
1280X1024
1600X1200
Elo LCD Touchmonitor User Guide - 33
Appendix C : Native Resolution
As an example, a SVGA resolution LCD panel has 800 pixels horizontally by 600 pixels vertically. Input video is also represented by the
same terms. XGA input video has a format of 1024 pixels horizontally
by 768 pixels vertically. When the input pixels contained in the video
input format match the native resolution of the panel, there is a one to
one correspondence of mapping of input video pixels to LCD pixels. As
an example, the pixel in 45 column and 26 row of the input video is in
45 column and 26 row of the LCD. For the case when the input video is
at a lower resolution than the native resolution of the LCD, the direct
correspondence between the video pixels and the LCD pixels is lost.
The LCD controller can compute the correspondence between video
pixels and LCD pixels using algorithms contained in the controller. The
accuracy of the algorithms determines the fidelity of conversion of
video pixels to LCD pixels. Poor fidelity conversion can result in artifacts in the LCD displayed image such as varying width characters.
Elo LCD Touchmonitor User Guide - 34
Appendix D
Touchmonitor Safety
This manual contains information that is important for the proper setup
and maintenance of your touchmonitor. Before setting up and powering
on your new touchmonitor, read through this manual, especially Chapter
2 (Installation), and Chapter 3 (Operation).
1. To reduce the risk of electric shock, follow all safety notices and
never open the touchmonitor case.
2. Your new touchmonitor is equipped with a 3-wire, grounding
power cord. The power cord plug will only fit into a three-prong
safety ground outlet. Do not attempt to fit the plug into an outlet
that has not been configured for this purpose. Do not use a damaged power cord. Use only the power cord that comes with your
Elo TouchSystems Touchmonitor. Use of an unauthorized
power cord may invalidate your warranty.
3. The slots located on the sides and top of the touchmonitor case
are for ventilation. Do not block or insert anything inside the
ventilation slots.
4. It is important that your touchmonitor remains dry. Do not pour
liquid into or onto your touchmonitor. If your touchmonitor
becomes wet do not attempt to repair it yourself.
Elo LCD Touchmonitor User Guide - 35
Appendix D : Touchmonitor Safety
Elo LCD Touchmonitor User Guide - 36
Regulatory Information
I. Electrical Safety Information:
A) Compliance is required with respect to the voltage, frequency, and current requirements indicated on the manufacturer’s label. Connection to a different power source than those specified
herein will likely result in improper operation, damage to the equipment or pose a fire hazard if
the limitations are not followed.
B) There are no operator serviceable parts inside this equipment. There are hazardous voltages
generated by this equipment which constitute a safety hazard. Service should be provided only
by a qualified service technician.
C) This equipment is provided with a detachable power cord which has an integral safety
ground wire and 3-prong connector intended for connection to a grounded safety outlet.
1) Do not substitute the cord with other than the provided approved type. Under no circumstances use an adapter plug to connect to a 2-wire outlet as this will defeat the continuity of the grounding wire.
2) The equipment requires the use of the ground wire as a part of the safety certification,
modification or misuse can provide a shock hazard that can result in serious injury or
death.
3) Contact a qualified electrician or the manufacturer if there are questions about the
installation prior to connecting the equipment to mains power.
II. Emissions and Immunity Information
A) Notice to Users in the United States: This equipment has been tested and found to comply
with the limits for a Class B digital device, pursuant to Part 15 of FCC Rules. These limits are
designed to provide reasonable protection against harmful interference in a residential installation. This equipment generates, uses, and can radiate radio frequency energy, and if not installed
and used in accordance with the instructions, may cause harmful interference to radio communications.
B) Notice to Users in Canada: This equipment complies with the Class B limits for radio noise
emissions from digital apparatus as established by the Radio Interference Regulations of Industrie Canada.
C) Notice to Users in the European Union: Use only the provided power cords and interconnecting cabling provided with the equipment. Substitution of provided cords and cabling may compromise electrical safety or CE Mark Certification for emissions or immunity as required by the
following standards:
This Information Technology Equipment (ITE) is required to have a CE Mark on the manufacturer’s label which means that the equipment has been tested to the following Directives and Standards:
This equipment has been tested to the requirements for the CE Mark as required by EMC
Directive 89/336/EEC indicated in European Standard EN 55 022 Class B and the Low
Voltage Directive 73/23/EEC as indicated in European Standard EN 60 950.
D) General Information to all Users: This equipment generates, uses and can radiate radio frequency energy. If not installed and used according to this manual the equipment may cause
interference with radio and television communications. There is, however, no guarantee that
interference will not occur in any particular installation due to site-specific factors.
Elo LCD Touchmonitor User Guide - 37
1) In order to meet emission and immunity requirements, the user must observe the following:
a) Use only the provided I/O cables to connect this digital device with any computer.
b) To ensure compliance, use only the provided manufacturer’s approved line cord.
c) The user is cautioned that changes or modifications to the equipment not
expressly approved by the party responsible for compliance could void the user’s
authority to operate the equipment.
2) If this equipment appears to cause interference with radio or television reception, or any
other device:
a) Verify as an emission source by turning the equipment off and on.
b) If you determine that this equipment is causing the interference, try to correct the
interference by using one or more of the following measures:
i) Move the digital device away from the affected receiver.
ii) Reposition (turn) the digital device with respect to the affected receiver.
iii) Reorient the affected receiver’s antenna.
iv) Plug the digital device into a different AC outlet so the digital device and
the receiver are on different branch circuits.
v) Disconnect and remove any I/O cables that the digital device does not use.
(Unterminated I/O cables are a potential source of high RF emission levels.)
vi) Plug the digital device into only a grounded outlet receptacle. Do not use
AC adapter plugs. (Removing or cutting the line cord ground may increase RF
emission levels and may also present a lethal shock hazard to the user.)
If you need additional help, consult your dealer, manufacturer, or an experienced radio or
television technician.
Elo LCD Touchmonitor User Guide - 38
Appendix E
Technical Specifications
All specifications are subject to change.
Elo LCD Touchmonitor User Guide - 39
Appendix E : Technical Specifications
12.1” LCD Touchmonitor (ETL121K-XPWA-1)
Display Type
Active matrix, thin film
transistor (TFT), liquid
crystal display
Size
12.1-inch diagonal
246.0 x 184.5 mm useful
screen area
Pixel Format
800 x 600
Touchscreen
0.125-inch IntelliTouch,
anti-glare
Surface acoustic wave
(SAW) technology
Colors
16 million with dithering
Display Brightness
255 cd/m² typical
Back-light Lamp Life
30,000 hours at full
brightness
Viewing Angle
Horizontal
Vertical
Contrast Ratio
300:1 typical
Display Response
Time
20 msec rise, 40 msec delay
typical
Environmental
Operating Temp
Storage Temp
Humidity
0°C to 35°C
-25°C to +60°C
95% non-condensing
Mechanical
Weight
10.5lbs. IntelliTouch
11.0lbs SecureTouch
See drawings on next page.
Size
Electrical
Input Video
Input Power
Power Dissipation
Agencies
Safety & EMC
Elo LCD Touchmonitor User Guide - 40
=/-70 or 140 degrees total
=/-55 or 110 degrees total
VGA/SVGA analog video
100-240 VAC, 50/60 Hz
universal
35 watts at maximum brightness
typical
UL, cUL and TUV
FCC-B and CE
12.1” LCD Touchmonitor (ETL121K-XPWA-1)
Elo LCD Touchmonitor User Guide - 41
Appendix E : Technical Specifications
15” LCD Touchmonitor (ETL150K-XPWA-1)
Display Type
Active matrix, thin film
transistor (TFT), liquid
crystal display
Size
15-inch diagonal
304.1 x 228.1 mm useful
screen area
1024 x 768 pixel format
Pixel Format
1024 x 768
Touchscreen
0.125-inch IntelliTouch,
anti-glare
Surface acoustic wave
(SAW) technology
Colors
16 million with dithering
Display Brightness
190 cd/m² typical
Back-light Lamp Life
25,000 hours at full
brightness typical
Viewing Angle
Horizontal
Vertical
Contrast Ratio
150:1 typical
Display Response
Time
30 msec rise, 50 msec delay
typical
Environmental
Operating Temp
Storage Temp
Humidity
0°C to 35°C
-25°C to +60°C
95% non-condensing
Mechanical
Weight
Size
15 lbs. IntelliTouch
See drawings on next page.
Electrical
Input Video
Input Power
Power Dissipation
VGA/SVGA/XGA analog video
100-240 VAC, 50/60 Hz.
Universal
Agencies
Safety & EMC
UL, cUL and TUV
FCC-B and CE
Elo LCD Touchmonitor User Guide - 42
+/-70 or 140 degrees total
+/-60 or 120 degrees total
15” LCD Touchmonitor (ETL150K-XPWA-1)
Elo LCD Touchmonitor User Guide - 43
Appendix E : Technical Specifications
Elo LCD Touchmonitor User Guide - 44
Warranty
Except as otherwise stated herein or in an order acknowledgment delivered to
Buyer, Seller warrants to Buyer that the Product shall be free of defects in materials and workmanship. The warranty for the touchmonitors and components of
the product are: 1 year monitor, 10 years IntelliTouch screen, 5 years AccuTouch screen, 5 years Controller.
Seller makes no warranty regarding the model life of components. Seller’s suppliers may at any time and from time to time make changes in the components
delivered as Products or components.
Buyer shall notify Seller in writing promptly (and in no case later than thirty
(30) days after discovery) of the failure of any Product to conform to the warranty set forth above; shall describe in commercially reasonable detail in such
notice the symptoms associated with such failure; and shall provide to Seller the
opportunity to inspect such Products as installed, if possible. The notice must be
received by Seller during the Warranty Period for such product, unless otherwise
directed in writing by the Seller. Within thirty (30) days after submitting such
notice, Buyer shall package the allegedly defective Product in its original shipping carton(s) or a functional equivalent and shall ship to Seller at Buyer’s
expense and risk.
Within a reasonable time after receipt of the allegedly defective Product and verification by Seller that the Product fails to meet the warranty set forth above,
Seller shall correct such failure by, at Seller’s options, either (i) modifying or
repairing the Product or (ii) replacing the Product. Such modification, repair, or
replacement and the return shipment of the Product with minimum insurance to
Buyer shall be at Seller’s expense. Buyer shall bear the risk of loss or damage in
transit, and may insure the Product. Buyer shall reimburse Seller for transportation cost incurred for Product returned but not found by Seller to be defective.
Modification or repair, of Products may, at Seller’s option, take place either at
Seller’s facilities or at Buyer’s premises. If Seller is unable to modify, repair, or
replace a Product to conform to the warranty set forth above, then Seller shall, at
Seller’s option, either refund to Buyer or credit to Buyer’s account the purchase
price of the Product less depreciation calculated on a straight-line basis over
Seller’s stated Warranty Period.
THESE REMEDIES SHALL BE THE BUYER’S EXCLUSIVE REMEDIES
FOR BREACH OF WARRANTY. EXCEPT FOR THE EXPRESS WARRANTY SET FORTH ABOVE, SELLER GRANTS NO OTHER WARRANTIES, EXPRESS OR IMPLIED BY STATUTE OR OTHERWISE,
REGARDING THE PRODUCTS, THEIR FITNESS FOR ANY PURPOSE,
THEIR QUALITY, THEIR MERCHANTABILITY, THEIR NONINFRINGE-
Elo LCD Touchmonitor User Guide - 45
MENT, OR OTHERWISE. NO EMPLOYEE OF SELLER OR ANY OTHER
PARTY IS AUTHORIZED TO MAKE ANY WARRANTY FOR THE GOODS
OTHER THAN THE WARRANTY SET FORTH HEREIN. SELLER’S LIABILITY UNDER THE WARRANTY SHALL BE LIMITED TO A REFUND
OF THE PURCHASE PRICE OF THE PRODUCT. IN NO EVENT SHALL
SELLER BE LIABLE FOR THE COST OF PROCUREMENT OR INSTALLATION OF SUBSTITUTE GOODS BY BUYER OR FOR ANY SPECIAL,
CONSEQUENTIAL, INDIRECT, OR INCIDENTAL DAMAGES.
Buyer assumes the risk and agrees to indemnify Seller against and hold Seller
harmless from all liability relating to (i) assessing the suitability for Buyer’s
intended use of the Products and of any system design or drawing and (ii) determining the compliance of Buyer’s use of the Products with applicable laws, regulations, codes, and standards. Buyer retains and accepts full responsibility for
all warranty and other claims relating to or arising from Buyer’s products, which
include or incorporate Products or components manufactured or supplied by
Seller. Buyer is solely responsible for any and all representations and warranties
regarding the Products made or authorized by Buyer. Buyer will indemnify
Seller and hold Seller harmless from any liability, claims, loss, cost, or expenses
(including reasonable attorney’s fees) attributable to Buyer’s products or representations or warranties concerning same.
Elo LCD Touchmonitor User Guide - 46
Index
INDEX
A
About This Manual ● 5
AccuTouch ● 30
Adjustments ● 17
Auto-Adjust ● 18
B
Basic Adjustments ● 17
Basic Assembly Instructions ● 11
Brightness ● 18
C
Cabinet Design ● 32
Care and Handling Of Your Touchmonitor
● 25
Case ● 26
Cleaning Your LCD Touchmonitor ● 26
Color Balance ● 19
Connecting The Cables ● 12
Contacting Elo ● 7
Contrast ● 18
Customer Service ● 7
D
Default Settings ● 20
E
Expand/Center ● 22
H
Horizontal Position ● 21
Horizontal Size ● 21
L
Language ● 23
LCD Kiosk Touchmonitor Features ● 5
N
Native Resolution ● 33
O
On-Screen Menus
Quick Glance ● 16
Operation ● 15
OSD Position ● 23
OSD Turn Off Time ● 24
P
Phase ● 20
Pre-install Steps ● 11
R
Regulatory Information ● 37
S
Screen ● 26
System ● 22
T
Technical Specifications ● 39
Technical Support ● 28
Touch Technology ● 29
Touchmonitor Controls and Adjustments ●
15
Touchmonitor Safety ● 35
Touchscreens ● 29
Troubleshooting ● 27
U
Unpacking Your Touchmonitor ● 9
I
Image Position ● 20
Installation ● 9
IntelliTouch ● 29
Introduction ● 5
V
Vertical Position ● 22
K
Kiosk Touchmonitors ● 31
W
Warranty ● 45
Elo LCD Touchmonitor User Guide - 47