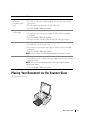
1
Dell™ Photo All-In-One Printer 924
Owner’s Manual
Look Inside For:
• Ordering Supplies
• Getting Started
• Using the Printer
• Understanding the Printer Software
• Maintenance and Troubleshooting
w w w. d e l l . c o m / s u p p l i e s | s u p p o r t . d e l l . c o m
Ordering Supplies
Your Dell Photo AIO Printer 924 includes software installed to detect the ink levels in the printer. During
a print job, a screen appears on your computer to warn you of low ink levels. You can order ink online at
www.dell.com/supplies or by phone.
US
877-INK-2-YOU
Luxembourg
02.713 1590
Australia
1300 303 290
Malaysia
1800 88 0301
Austria
08 20 - 24 05 30 35
Mexico
001 866 851 1754
Belgium
02.713 1590
Netherlands
020 - 674 4881
Canada
877-501-4803
Norway
231622 64
Chile
1230-020-3947
Portugal
21 4220710
800-202874
PRC
800-858-0888
Colombia
01800-9-155676
Poland
022 579 59 65
Czech
+420 225 372 711
Puerto Rico
866-851-1760
Denmark
3287 5215
Singapore
1800 394 7486
Finland
09 2533 1411
South Africa
0860 102 591
France
825387247
Spain
902120385
Germany
0800 2873355
Sweden
08 587 705 81
Ireland
1850 707 407
Switzerland
0848 335 599
Italy
800602705
UK
0870 907 4574
Japan
044-556-3551
NOTE: If your country is not listed, contact your Dell distributor to order supplies.
Your printer has been designed to print using the following ink cartridges.
Supply Item
Part number
Standard Capacity black ink cartridge
J5566
Standard Capacity color ink cartridge
J5567
High Capacity black ink cartridge
M4640
High Capacity color ink cartridge
M4646
Photo ink cartridge
J4844
Notes, Notices, and Cautions
NOTE: A NOTE indicates important information that helps you make better use of your printer.
NOTICE: A NOTICE indicates either potential damage to hardware or loss of data and tells you how
to avoid the problem.
CAUTION: A CAUTION indicates a potential for property damage, personal injury, or
death.
____________________
Information in this document is subject to change without notice.
© 2005 Dell Inc. All rights reserved.
Reproduction in any manner whatsoever without the written permission of Dell Inc. is strictly forbidden.
Trademarks used in this text: Dell and the DELL logo, Dell Picture Studio, and Dell Ink Management System are trademarks
of Dell Inc.; Microsoft and Windows are registered trademarks of Microsoft Corporation.
Other trademarks and trade names may be used in this document to refer to either the entities claiming the marks and names
or their products. Dell Inc. disclaims any proprietary interest in trademarks and trade names other than its own.
UNITED STATES GOVERNMENT RESTRICTED RIGHTS
This software and documentation are provided with RESTRICTED RIGHTS. Use, duplication or disclosure by the Government
is subject to restrictions as set forth in subparagraph (c)(1)(ii) of the Rights in Technical Data and Computer Software clause
at DFARS 252.227-7013 and in applicable FAR provisions: Dell Inc., One Dell Way, Round Rock, Texas, 78682, USA.
w w w. d el l. c om | s upp ort . del l . com
Contents
1 About Your Printer
Understanding the Printer Parts
Setting Up Your Printer
. . . . . . . . . . . . . . . . . .
11
. . . . . . . . . . . . . . . . . . . . . .
13
Setting the Language on Your Printer
. . . . . . . . . . . . . .
13
. . . . . . . . . . . . .
13
Using the Operator Panel .
. . . . . . . . . . . . . . . . . . . . .
14
Operator Panel Menus .
. . . . . . . . . . . . . . . . . . . . .
15
Resetting the Language on Your Printer
Understanding the Automatic Paper Type Sensor
Loading Paper
. . . . . . . . .
17
. . . . . . . . . . . . . . . . . . . . . . . . . . .
19
Print Media Guidelines
. . . . . . . . . . . . . . . . . . . . . . .
Placing Your Document on the Scanner Glass
20
. . . . . . . . . . .
21
. . . . . . . . . . . . . . . . . . . . . . . . . . . . . . .
23
2 Using the Printer
Printing
. . . . . . . . . . . . . . . . . . . . . .
23
. . . . . . . . . . . . . . . . . . . . . . . . .
24
Printing a Document
Printing Photos
Print Borderless Photos
. . . . . . . . . . . . . . . . . . . . .
Copying
25
. . . . .
26
. . . . . . . . . . . . . . . . . . . . . . . . . . . . . . .
26
Printing Photos From a PictBridge-Compatible Camera
Copying Documents Using the Operator Panel
. . . . . . . . . .
26
. . . . . . . . . . . .
27
Copying Photos Using Your Computer
. . . . . . . . . . . . . .
28
Copying Photos Without a Computer
. . . . . . . . . . . . . .
28
Copying Documents Using Your Computer
Contents
5
Changing Copy Settings
Scanning
. . . . . . . . . . . . . . . . . . . .
29
. . . . . . . . . . . . . . . . . . . . . . . . . . . . . .
30
Scanning Photos
. . . . . . . . . . . . . . . . . . . . . . . .
Scanning Multiple Pages or Images
. . . . . . . . . . . . . .
Scanning a Photo or Document Across a Network
. . . . . . .
Editing Scanned Text Using Optical Character Recognition
(OCR) . . . . . . . . . . . . . . . . . . . . . . . . . .
Saving an Image on Your Computer
31
32
. . .
33
. . . . . . . . . . . . . .
34
E-mailing a Scanned Image or Document
. . . . . . . . . . .
Enlarging or Reducing Images or Documents
Faxing
30
34
. . . . . . . . . .
35
. . . . . . . . . . . . . . . . . . . . . . . . . . . . . . .
35
Installing Microsoft Fax Console in Windows XP .
. . . . . . .
Configuring Microsoft Fax Console (Windows XP) or Fax
Service Management (Windows 2000) . . . . . . . . . .
Faxing a Paper Document
36
. . .
36
. . . . . . . . . . . . . . . . . . .
37
Faxing Electronic Documents
. . . . . . . . . . . . . . . . .
Receiving a Fax Using Fax Console or Fax Service
Management . . . . . . . . . . . . . . . . . . .
. . . . . . .
Viewing Sent and Received Faxes Using Fax Console or Fax
Service Management . . . . . . . . . . . . . . . . . . . .
Viewing the Status of a Fax Using Fax Console or Fax
Service Management . . . . . . . . . . . . . . . . .
38
38
. .
38
. . . . .
39
. . . . . . . . . . . . . . . .
39
. . . . . . . . . . . . . . . . .
41
. . . . . . . . . . . . . . . . . . . .
43
Changing the Fax Configuration
3 Understanding the Software
Using the Dell All-In-One Center
Using Printing Preferences
Using Dell Picture Studio v2.0
Dell Ink Management System
. . . . . . . . . . . . . . . . . .
45
. . . . . . . . . . . . . . . . . . .
45
Removing and Reinstalling the Software
6
Contents
. . . . . . . . . . . . .
47
4 Ink Cartridge Maintenance
Replacing Ink Cartridges
. . . . . . . . . . . . . . . . . . . . . .
49
Aligning Ink Cartridges .
. . . . . . . . . . . . . . . . . . . . . .
53
Cleaning the Ink Cartridge Nozzles
. . . . . . . . . . . . . . . .
54
. . . . . . . . . . . . . . . . . . . . . . . . . . .
55
5 Troubleshooting
Setup Problems
. . . . . . . . . . . . . . . . . . . . . . .
55
. . . . . . . . . . . . . . . . . . . . . . . .
56
. . . . . . . . . . . . . . . . . . . . . . . . . .
57
Computer Problems
Printer Problems
General Problems
. . . . . . . . . . . . . . . . . . . . . . . .
57
. . . . . . . . . . . . . . . . . . . . . . . . .
57
Faxing Problems
Paper Problems
Error Messages and Lights
. . . . . . . . . . . . . . . . . . . . .
58
. . . . . . . . . . . . . . . . . . . . . .
60
. . . . . . . . . . . . . . . . . . . . . . . .
61
Improving Print Quality
6 Contacting Dell
Technical Assistance
Automated Order-Status Service
Contacting Dell
. . . . . . . . . . . . . . . . . .
61
. . . . . . . . . . . . . . . . . . . . . . . . . . .
62
7 Appendix
U.S. Terms and Conditions of Sale
. . . . . . . . . . . . . . . . .
Limited Warranties and Return Policy
. . . . . . . . . . . . . . .
Dell™ Printer Consumables Limited Warranties
Export Regulations
81
84
. . . . . . . . . .
88
. . . . . . . . . . . . . . . . . . . . . . . . .
89
Contents
7
Dell™ Software License Agreement
. . . . . . . . . . . . . . . .
89
. . . . . . . . . . . . . . . . . . . . . . . .
90
. . . . . . . . . . . . . . . . . . . . . . . . . . . . . . . . . . .
93
Regulatory Notices
Index
8
Contents
CAUTION: SAFETY INSTRUCTIONS
Use the following safety guidelines to help ensure your own personal safety and to help protect your
product and working environment from potential damage.
•
If your product includes a modem, the cable used with the modem should be manufactured with a
minimum wire size of 26 American wire gauge (AWG) and an FCC-compliant RJ-11 modular plug.
•
To help protect your product from sudden, transient increases and decreases in electrical power, use a
surge suppressor, line conditioner, or uninterruptible power supply cord (UPS).
•
Do not use your printer in a wet environment, for example, near a bath tub, sink, or swimming pool
or in a wet basement.
•
Ensure that nothing rests on your product’s cables and that the cables are not located where they can
be stepped on or tripped over.
•
Use only the power cable provided with this product or the manufacturer’s authorized replacement
power cable.
CAUTION: If your product is not marked with this symbol
to an electrical outlet that is properly grounded.
, it must be connected
•
Connect the power cable to an electrical outlet that is near the product and easily accessible.
•
To completely turn off the product, the power cable must be removed from the power source.
•
Refer service or repairs, other than those described in the user documentation, to a professional
service person.
•
Do not use the fax feature during an electrical storm. Do not set up this product or make any
electrical or cabling connections, such as the power cable or telephone, during an electrical storm.
•
This product is designed to meet safety standards with the use of specific Dell-authorized
components. The safety features of some parts may not always be obvious. Dell disclaims liability
associated with the use of non-Dell-authorized components.
•
Refer to your Owner’s Manual for instructions on the proper way to clear paper jams.
CAUTION: SAFETY INSTRUCTIONS
9
10
CAUTION: SAFETY INSTRUCTIONS
w w w. d el l. c om | s upp ort . del l . com
1
About Your Printer
Understanding the Printer Parts
1
2
3
12
4
11
10
5
6
7
8
9
About Your Printer
11
w w w. d el l. c om | s upp ort . del l . com
Part:
1
Paper support
Part that supports loaded paper.
2
Paper guide
Guide that helps the paper feed into the printer properly.
3
Top cover
Top of printer that holds your document or photo flat while you
scan it.
4
Paper exit tray
Tray that holds the paper as it exits the printer.
NOTE: Pull the paper exit tray straight out to extend it.
5
Printer unit
Unit you lift to gain access to the ink cartridges.
6
Ink cartridge carrier
Carrier that holds two ink cartridges, one color and the other black
or photo. For more information on your cartridges, see "Replacing
Ink Cartridges" on page 49.
7
Scanner support
Part under printer unit that keeps the printer open while you
change ink cartridges.
NOTE: To close the printer for normal operation, lift the printer
unit, press the scanner support to the right, and then lower the
printer unit until it rests on the main body of the printer.
8
USB connector
Slot into which you plug the USB cable (sold separately). The
other end of the USB cable plugs into your computer.
9
Power connector
Slot into which you plug the power cable.
NOTE: Insert the power cable into the printer before connecting
the power cable into the wall outlet.
10 PictBridge USB connector
Slot into which you plug the USB cable (sold separately) that
connects your printer to a PictBridge-enabled camera. For more
information, see "Printing Photos From a PictBridge-Compatible
Camera" on page 26.
11
Panel on the printer you use to control copying, faxing, and
printing. For more information, see "Using the Operator Panel" on
page 14.
Operator panel
12 Scanner glass
12
Description:
About Your Printer
Surface on which you place your document or photo face down to
copy, fax, or scan it.
Setting Up Your Printer
NOTE: The Dell AIO Printer 924 supports Microsoft® Windows® 2000, Windows XP, and
Windows XP Professional x64 Edition.
Follow the instructions on your Setting Up Your Printer poster to install the hardware and
software. If you encounter problems during setup, see "Setup Problems" on page 55.
Setting the Language on Your Printer
To set the language on your printer initially:
1
When you first power on your printer, press the Arrow buttons
language.
2
Press the Menu button
to find your
to select your language.
Resetting the Language on Your Printer
If you need to change the default language used on the operator panel, complete the following
steps:
1
Press the Power button
to turn off the printer.
2
Press the Power button
and the up arrow button
3
When the language settings appear, press the Arrow buttons
language.
4
Press the Menu button
simultaneously.
to scroll to your
to select your language.
About Your Printer
13
w w w. d el l. c om | s upp ort . del l . com
Using the Operator Panel
The operator panel buttons allow you to scan, copy, and customize documents. The printer is on
when the Power button
is illuminated.
1
8
Start
Menu
2
7
Cancel
3
6
5
4
14
Use the
To
1
Display
• View the number of copies selected.
• View settings for Mode, Copy, Copies, Quality,
Dark, Size, Zoom, and Maintenance. For more
information, see "Operator Panel Menus" on
page 15.
2
Menu button
• Scroll through the available menus. Each time you
press this button, the current option is saved and
the next menu appears on the display.
• Feed newly loaded paper.
3
Up/Down arrow
buttons
• Navigate menus and menu items.
• Decrease/increase number of copies.
• Change the selected mode.
4
Power button
Turn your printer on or off.
About Your Printer
Use the
To
5
Error light
Alert you to errors such as paper out, paper jam, or
low ink.
6
Cancel button
• Cancel a scan, print, or copy job in progress.
• Cancel a copy job (using only the printer), and
eject a page.
• Exit a menu, and return to the default settings.
7
Start button
Start the copying or scanning process. If the printer is
in Scan mode, pressing this button opens the Dell
All-In-One Center (if your printer is connected to a
computer).
8
Ink Drop
Determine the amount of ink remaining in each ink
cartridge.
• The black ink cartridge level is shown in the
display above the black ink drop.
• The color ink cartridge level is shown in the
display above the blue ink drop.
Operator Panel Menus
When you press the Menu button
, the following menus appear. Press the Arrow buttons
to scroll through the options available in each menu. When the setting you want to use
is displayed, press the Menu button
available.
again to save the setting and move to the next menu
About Your Printer
15
w w w. d el l. c om | s upp ort . del l . com
Copy Mode
Menu:
Submenu item:
Settings:
Copy
Copy
• Color*
• Black
Copies (use arrow buttons to specify quantity)
Quality
• Draft
• Normal*
• Photo
Dark (use arrow buttons to specify darkness setting)
Size
•
•
•
•
•
•
•
•
•
•
•
•
•
Letter*
Legal
B5
A4
A5
3x6
4x6
L
2L
5x7
Hagaki
10x15 cm
13x18 cm
Zoom
•
•
•
•
•
•
•
•
•
•
•
•
•
•
•
25%
50%
75%
100%*
125%
150%
175%
200%
4x6
5x7
Letter
A4
L
2L
Hagaki
* Factory default setting
16
About Your Printer
Scan Mode
The Scan submenu is only available if the printer is connected to a network adapter. If you
choose Scan as the mode, you are prompted to choose the destination computer for the scanned
document. You can scroll through the available computers by pressing the arrow buttons.
Pressing the Menu button
selects the currently displayed computer name.
NOTE: If your printer is connected locally, the Scan submenu does not appear; the host computer is
automatically selected.
Maintenance Mode
Menu
Submenu item
Maintenance
Align Cartridges
Clean Cartridges
Print Text Page
Back
NOTE: The Back option allows you to leave the Maintenance menu without making a selection.
Choosing this option takes you back one menu level.
Understanding the Automatic Paper Type Sensor
Your printer has an automatic paper type sensor that detects the following paper types:
•
Plain
•
Transparency
•
Glossy/photo
If you load one of these paper types, the printer detects the paper type and automatically adjusts
the Quality/Speed settings.
Quality/Speed settings
Paper type
Black and Color Cartridges Installed
Photo and Color Cartridges
Installed
Plain
Normal
Photo
Transparency
Normal
Photo
Glossy/photo
Photo
Photo
NOTE: Your printer cannot detect the paper size.
About Your Printer
17
w w w. d el l. c om | s upp ort . del l . com
To choose paper size:
1
With your document open, click File→ Print.
2
In the Print dialog box, click Preferences or Properties (depending on your program or
operating system).
The Printing Preferences dialog box opens.
3
On the Print Setup tab, select the paper size.
4
Click OK.
Unless you turn off the automatic paper type sensor, it always remains on. To turn off the
automatic paper type sensor for a specific print job:
1
With your document open, click File→ Print.
2
In the Print dialog box, click Preferences or Properties (depending on your program or
operating system).
The Printing Preferences dialog box opens.
3
Click the Print Setup tab.
4
Select the paper type from the Media Type drop-down menu.
5
Click OK.
To turn off the automatic paper type sensor for all print jobs:
1
In Windows XP, click Start→ Control Panel→ Printers and Other Hardware→ Printers and
Faxes.
In Windows 2000, click Start→ Settings→ Printers.
18
2
Right-click the Dell Photo AIO Printer 924 icon.
3
Click Printing Preferences.
4
Click the Print Setup tab.
5
Select the paper type from the Media Type drop-down menu.
6
Click OK.
About Your Printer
Loading Paper
1
Fan the paper.
2
Center the paper on the paper support.
3
Adjust the paper guides so both are resting against the edges of the paper.
NOTE: Do not pull on both paper guides simultaneously. When one paper guide is moved, the other
adjusts accordingly.
NOTE: Do not force paper into the printer. The paper should be flat against the paper support
surface, and the edges of the paper should be flush against both paper guides.
About Your Printer
19
w w w. d el l. c om | s upp ort . del l . com
Print Media Guidelines
Load up to:
Make sure:
100 sheets of plain
paper
• The paper is centered between the left and right paper guides.
NOTE: Load letterhead paper with the top of the letterhead entering the printer
first and facing up.
• You select Draft, Normal, or Photo print quality.
NOTE: Do not select Draft if you have a Photo cartridge installed.
20 sheets of banner
paper
• You remove any paper from the paper support before inserting banner paper.
• You place a stack of banner paper on or behind the printer, with only the
number of sheets required.
NOTE: You must select A4 Banner or Letter Banner paper size in Print
Properties. Failure to do so will cause a paper jam. See "Paper Problems" on
page 57.
• You load the leading edge of the banner paper into the printer against the
right side of the paper support.
• The banner paper is centered between the left and right paper guides.
• You use banner paper designed for inkjet printers.
10 envelopes
• The print side of the envelopes faces up.
• The envelopes are centered on the paper support, in between the left and
right paper guides.
• The stamp location is in the upper left corner and printed with landscape
orientation.
NOTE: For Japanese customers: If you are mailing within Japan, the envelope
can be printed with portrait orientation with the stamp in the lower right corner
or with landscape orientation with the stamp in the lower left corner. If you are
mailing internationally, print landscape orientation with the stamp in the upper
left corner.
• The paper guide rests against the left edge of the envelopes.
• You select the correct envelope size. Select the next biggest size if the exact
envelope size is not listed, and set the left and right margins so that your
envelope text will be correctly positioned.
20
About Your Printer
Load up to:
Make sure:
25 greeting cards,
index cards,
postcards, or photo
cards
• The print side of the cards faces up.
• The cards are centered on the paper support, in between the left and right
paper guides.
• The paper guide rests against the left edge of the cards.
• You select Normal or Photo print quality.
25 sheets of photo
or glossy paper
• The glossy side of the paper faces up.
• The paper is centered on the paper support, in between the left and right
paper guides.
• You select Normal or Photo print quality.
• The paper is loaded vertically against the right side of the paper support.
10 iron-on transfers
• You follow the loading instructions on the packaging.
• The blank side of the transfer faces up.
• The transfer is centered on the paper support, in between the left and right
paper guides.
• You select Normal or Photo print quality.
NOTE: For best results, iron-on transfers should be fed one sheet at a time.
50 transparencies
• The rough side of the transparencies faces up.
• The transparencies are centered on the paper support, in between the left and
right paper guides.
NOTE: You can load a single transparency into the paper support without
removing plain paper.
• You select Normal or Photo print quality.
Placing Your Document on the Scanner Glass
1
Open the top cover.
About Your Printer
21
w w w. d el l. c om | s upp ort . del l . com
2
Place the document on the scanner glass.
NOTE: Make sure the upper left corner of the front of the item aligns with the arrow on the printer.
3
22
Close the top cover.
About Your Printer
2
Using the Printer
Printing
Printing a Document
1
Turn on your computer and printer, and make sure they are connected.
2
Load paper with the print side facing up. For more information, see "Loading Paper" on
page 19.
3
With your document open, click File→ Print.
4
To customize your print settings:
a
Click Preferences, Properties, Options, or Setup (depending on the program or
operating system).
The Printing Preferences dialog box opens.
5
b
On the Print Setup tab, select the print quality/speed, paper size, black and white or
color printing, borderless printing, orientation, and number of copies.
c
On the Advanced tab, you can specify a 2-sided printing option, a specialized layout
option, or if you want to use Automatic Image Sharpening.
d
After making the changes in Printing Preferences, click OK at the bottom of the
screen to return to the Print dialog box.
Click OK or Print (depending on the program or operating system).
Using the Printer
23
w w w. d el l. c om | s upp ort . del l . com
Printing Photos
1
Load the photo paper with the print (glossy) side facing up. For more information, see
"Print Media Guidelines" on page 20.
2
Make sure you have a color cartridge and a photo cartridge installed. For more information,
see "Replacing Ink Cartridges" on page 49.
3
With your document open, click File→ Print.
4
To customize your print settings, click Preferences, Properties, Options, or Setup
(depending on the program or operating system).
The Printing Preferences dialog box opens.
NOTE: If you are using the Dell Picture Studio™ v2.0, select View All Printer Settings to view Print
Properties.
5
On the Print Setup tab, select Photo, and then select the dpi settings for the photo from
the drop-down menu.
6
Select the paper size, orientation, and the number of copies.
NOTE: Photo/glossy paper is recommended for printing photos.
7
When you are finished customizing your print settings, click OK.
8
Click OK or Print (depending on the program or operating system).
9
To prevent your photos from sticking together or smudging, remove each photo after it
exits the paper exit tray.
NOTE: Before placing your prints in a nonadhesive photo album or frame, allow sufficient time for
the prints to dry thoroughly (12 to 24 hours, depending on the ambient conditions). This maximizes
the life of your prints.
24
Using the Printer
Print Borderless Photos
1
For best results, load photo/glossy paper, and make sure the print side is facing up. For
more information, see "Print Media Guidelines" on page 20.
2
Make sure you have a color cartridge and a photo cartridge installed. For more information,
see "Replacing Ink Cartridges" on page 49.
3
With your document open, click File→ Print.
4
To customize your print settings, click Preferences, Properties, Options, or Setup
(depending on the program or operating system).
The Printing Preferences dialog box opens.
5
On the Print Setup tab, select Photo, and then select the dpi settings for the photo from
the drop-down menu.
6
Select the Borderless check box, orientation of the photo, and the number of copies you
want.
7
On the Advanced tab, select the borderless paper size from the drop-down menu, and click
OK.
8
Click OK or Print (depending on the program or operating system).
Using the Printer
25
w w w. d el l. c om | s upp ort . del l . com
Printing Photos From a PictBridge-Compatible Camera
Your printer supports PictBridge-compatible cameras.
1
Insert one end of the USB cable into the camera.
2
Insert the other end of the USB cable into the PictBridge port on the front of the printer.
NOTE: When your printer is not connected to a computer, and a PictBridge-compatible camera is
connected to your printer, most functions accessed from your printer’s operator panel buttons are
unavailable. These functions become available after you disconnect the PictBridge-compatible
camera from your printer.
3
Turn on your digital camera. Refer to the instructions included with your camera for
selection of the appropriate camera USB settings and PictBridge connection and usage
information.
NOTE: For many digital cameras, there are two USB mode selections: computer and printer (or
PTP). For PictBridge-compatible printing, the printer (or PTP) USB selection should be used. For
more information, refer to the documentation included with your camera.
Copying
To make copies, you can use the printer operator panel or your computer.
Copying Documents Using the Operator Panel
26
1
Turn on your printer.
2
Load the paper. For more information, see "Loading Paper" on page 19.
3
Open the top cover.
Using the Printer
4
Place the document you want to copy face down on the scanner glass and make sure the
upper left corner of the front of the document aligns with the arrow on the printer. For
more information, see "Placing Your Document on the Scanner Glass" on page 21.
5
Close the top cover.
6
Access the menu to change copy settings. For more information, see "Operator Panel
Menus" on page 15.
7
On the operator panel, press the Start button
specified copy selection (Color or Black).
. The copy is made in the currently
Copying appears on the display.
NOTE: If you press the Start button
color by default.
without specifying a copy selection, the copy is printed in
Copying Documents Using Your Computer
1
Turn on your computer and printer, and make sure they are connected.
2
Load the paper. For more information, see "Loading Paper" on page 19.
3
Open the top cover.
4
Place the document you want to copy face down on the scanner glass, and make sure the
upper left corner of the front of the document aligns with the arrow on the printer. For
more information, see "Placing Your Document on the Scanner Glass" on page 21.
5
Close the top cover.
6
Click Start→ Programs or All Programs→ Dell Printers→ Dell Photo AIO Printer
924→ Dell All-In-One Center.
The Dell All-In-One Center opens.
7
Select the number of copies (1–99) and color setting from the drop-down menu.
8
Click See More Copy Settings to:
– Choose a copy quality.
– Select the blank paper size.
– Select the original document size.
– Lighten or darken your document.
9
When you are finished customizing your settings, click Copy Now.
Using the Printer
27
w w w. d el l. c om | s upp ort . del l . com
Copying Photos Using Your Computer
1
Turn on your computer and printer, and make sure they are connected.
2
Load photo paper with the print side facing up. For more information, see "Print Media
Guidelines" on page 20.
3
Open the top cover.
4
Place the photo you want to copy face down on the scanner glass, and make sure the upper
left corner of the front of the photo aligns with the arrow on the printer. For more
information, see "Placing Your Document on the Scanner Glass" on page 21.
5
Close the top cover.
6
Click Start→ Programs or All Programs→ Dell Printers→ Dell Photo AIO Printer
924→ Dell All-In-One Center.
The Dell All-In-One Center opens.
7
Click Preview Now.
8
Adjust the dotted lines to fit around the portion of the image you want to print.
9
In the Copy section, select a quantity, and choose a photo option (Color Photo or Black
and White Photo).
10
To customize your photo, click See More Copy Settings.
11
When you finish customizing your settings, click Copy Now.
Copying Photos Without a Computer
28
1
Turn on your printer.
2
Load photo paper with the print side facing up. For more information, see "Loading Paper"
on page 19.
3
Open the top cover.
4
Place the photo you want to copy face down on the scanner glass, and make sure the upper
left corner of the front of the photo aligns with the arrow on the printer. For more
information, see "Placing Your Document on the Scanner Glass" on page 21.
5
Close the top cover.
6
From the Quality submenu, select Photo. For more information, see "Operator Panel
Menus" on page 15.
7
Press the Start button
Using the Printer
.
Changing Copy Settings
1
Click Start→ Programs or All Programs→ Dell Printers→ Dell Photo AIO Printer
924→ Dell All-In-One Center.
The Dell All-In-One Center opens.
2
Select a copy quantity and color.
3
Click See More Copy Settings to:
– Choose a copy quality.
– Select the blank paper size.
– Select the original document size.
– Lighten or darken your document.
– Reduce or enlarge your document.
4
Click the Advanced button to change options such as paper size and quality.
5
To make any changes, click the following tabs.
Click this tab:
To:
Print
• Select the paper size and type.
• Select borderless printing options.
• Select the print quality.
Scan
• Select the color depth and scan resolution.
• Auto-crop the scanned image.
Image Enhancements
• Sharpen your blurry images.
• Adjust the brightness of your image.
• Adjust the color correction curve (gamma) of your image.
Image Patterns
• Smooth the conversion of a gray image to a black and white dot
pattern (dither).
• Remove image patterns from magazines or newspapers (descreen).
• Reduce the background noise on your color document.
6
When you finish customizing your copy settings, click OK, and then click Copy Now.
Using the Printer
29
w w w. d el l. c om | s upp ort . del l . com
Scanning
You can scan with your printer using the printer operator panel or your computer.
1
Turn on your computer and printer, and make sure they are connected.
2
Open the top cover.
3
Place the document you want to scan face down on the scanner glass, and make sure the
upper left corner of the front of the document aligns with the arrow on the printer. For
more information, see "Placing Your Document on the Scanner Glass" on page 21.
4
Close the top cover.
5
Open the Dell All-In-One Center by clicking Start→ Programs or All Programs→ Dell
Printers→ Dell Photo AIO Printer 924→ Dell All-In-One Center.
The Dell All-In-One Center opens.
NOTE: You can also open the Dell All-In-One Center from the operator panel on your printer. When
your printer is in Scan mode, press the Start button
computer.
6
. The Dell All-In-One Center opens on your
In the Send scanned image to: drop-down menu, select a program as your scan
destination. For example, choose Fax to scan an image you want to fax.
NOTE: If the program you want to use is not listed, select Search for more... in the drop-down menu.
On the next screen, click Add to locate and add your program to the list.
7
Customize your scan settings.
8
Click Scan Now to complete your scan.
Scanning Photos
30
1
Turn on your computer and printer, and make sure they are connected.
2
Open the top cover.
3
Place the photo you want to scan face down on the scanner glass, and make sure the upper
left corner of the front of the document aligns with the arrow on the printer. For more
information, see "Placing Your Document on the Scanner Glass" on page 21.
4
Close the top cover.
Using the Printer
5
Open the Dell All-In-One Center by clicking Start→ Programs or All Programs→ Dell
Printers→ Dell Photo AIO Printer 924→ Dell All-In-One Center.
The Dell All-In-One Center opens.
NOTE: You can also open the Dell All-In-One Center from the operator panel on your printer. When
your printer is in Scan mode, press the Start button
computer.
. The Dell All-In-One Center opens on your
6
Click Preview Now to see your scanned image.
7
Adjust the dotted lines to fit around the portion of the image you want to scan.
8
In the Send scanned image to: drop-down menu, select the program you want to use.
NOTE: If the program you want to use is not listed, select Search for more... in the drop-down menu.
On the next screen, click Add to locate and add your program to the list.
9
10
Change any settings.
When you finish customizing your image, click Scan Now.
When your document has finished processing, the selected program opens.
Scanning Multiple Pages or Images
1
Turn on your computer and printer, and make sure they are connected.
2
Open the top cover.
3
Place the first item you want to scan face down on the scanner glass, and make sure the
upper left corner of the front of the sheet aligns with the arrow on the printer. For more
information, see "Placing Your Document on the Scanner Glass" on page 21.
4
Close the top cover.
5
Open the Dell All-In-One Center by clicking Start→ Programs or All Programs→ Dell
Printers→ Dell Photo AIO Printer 924→ Dell All-In-One Center.
The Dell All-In-One Center opens.
NOTE: You can also open the Dell All-In-One Center from the operator panel on your printer. When
your printer is in Scan mode, press the Start button
computer.
6
. The Dell All-In-One Center opens on your
In the Send scanned image to: drop-down menu, select a program as your scan
destination.
NOTE: If the program you want to use is not listed, select Search for more... in the drop-down menu.
On the next screen, click Add to locate and add your program to the list.
Using the Printer
31
w w w. d el l. c om | s upp ort . del l . com
7
In the Scan section, click See More Scan Settings.
8
Click the Advanced button.
9
Click Display Advanced Scan Settings to change advanced options.
10
On the Scan tab, click the Scan multiple items before output box.
11
Click OK.
12
When you finish customizing your settings, click Scan Now.
After you scan the first page, a prompt appears requesting the next page.
13
Place the next sheet on the scanner glass, and click Yes. Repeat until you finish scanning all
pages.
14
When finished, click No. The program opens with the multiple pages scanned.
Scanning a Photo or Document Across a Network
If your printer is attached to a network, you can scan photos or documents and have them sent
to any computer on the network.
1
Open the top cover.
2
Place the document or photo you want to scan face down on the scanner glass, and make
sure the upper left corner of the front of the item aligns with the arrow on the printer. For
more information, see "Placing Your Document on the Scanner Glass" on page 21.
3
Close the top cover.
4
Press the up arrow button
on the operator panel to change printer modes. When the
LED displays Scan, press the Menu button
5
to save the selection.
From the submenu, scroll through the available computers until you find the one you want
to send your photo or document to, and then press the Menu button
selection.
to save the
The photo or document is scanned and sent to the specified computer.
NOTE: If your printer is connected locally, the Scan submenu does not appear; the host computer is
automatically selected.
32
Using the Printer
Editing Scanned Text Using Optical Character Recognition (OCR)
Optical Character Recognition (OCR) software converts a scanned image into editable text
within a word-processing program.
NOTE: Japanese and Chinese customers: Ensure you have OCR software installed on your computer.
A copy of OCR software was provided with your printer and should have installed at the same time as
your printer drivers.
1
Open the top cover.
2
Place the document you want to scan face down on the scanner glass. Make sure the upper
left corner of the front of the document aligns with the arrow on the printer.
3
Close the top cover.
4
Open the Dell All-In-One Center by clicking Start→ Programs or All Programs→ Dell
Printers→ Dell Photo AIO Printer 924→ Dell All-In-One Center.
The Dell All-In-One Center opens.
NOTE: You can also open the Dell All-In-One Center from the operator panel on your printer. When
your printer is in Scan mode, press the Start button
computer.
5
. The Dell All-In-One Center opens on your
In the Send scanned images to: drop-down menu, select a word-processing or text-editing
program.
NOTE: If the program you want to use is not listed, select Search for more... in the drop-down menu.
On the next screen, click Add to locate and add your program to the list.
Using the Printer
33
w w w. d el l. c om | s upp ort . del l . com
6
In the How will the scan be used? drop-down menu, select To edit text (OCR and 300
DPI).
7
Click Scan Now.
The scanned text appears.
Saving an Image on Your Computer
1
Click Start→ Programs or All Programs→ Dell Printers→ Dell Photo AIO Printer
924→ Dell All-In-One Center.
The Dell All-In-One Center opens.
2
In the Productivity Tools section, click Save an image on my computer.
3
Follow the instructions on your screen.
E-mailing a Scanned Image or Document
To send scanned images or documents through e-mail:
1
Open the top cover.
2
Place the document or photo you want to scan face down on the scanner glass, and make
sure the upper left corner of the front of the item aligns with the arrow on the printer. For
more information, see "Placing Your Document on the Scanner Glass" on page 21.
3
Close the top cover.
4
Click Start→ Programs or All Programs→ Dell Printers→ Dell Photo AIO Printer
924→ Dell All-In-One Center.
The Dell All-In-One Center opens.
5
Click Preview Now.
6
In the Productivity Tools section, click E-mail an image to a friend.
7
In the What is being scanned? menu, make a selection.
8
Follow the instructions on the screen to prepare the photograph for e-mail.
9
Click Next.
10
Open your e-mail program, write a note to accompany the attached photo, and then send
it.
NOTE: If you have questions about attaching documents to e-mail, consult the Help for your e-mail
program.
34
Using the Printer
Enlarging or Reducing Images or Documents
If you are using your printer with a computer, you can enlarge or reduce your document between
25–400 percent using the Dell All-In-One Center.
If you are using your printer without a computer, you can enlarge or reduce your document by
25, 50, 100, 150, or 200 percent, and with Fit-to options using the operator panel.
1
Load the paper. For more information, see "Loading Paper" on page 19.
2
Open the top cover.
3
Place the document or photo face down on the scanner glass, and make sure the upper left
corner of the front of the item aligns with the arrow on the printer. For more information,
see "Placing Your Document on the Scanner Glass" on page 21.
4
Close the top cover.
5
Click Start→ Programs or All Programs→ Dell Printers→ Dell Photo AIO Printer
924→ Dell All-In-One Center.
The Dell All-In-One Center opens.
6
Click Preview Now.
7
In the Productivity Tools section, select Enlarge or reduce an image.
8
Follow the instructions on the screen to select the size of your new image.
9
When you finish customizing your image, click Print Now.
Faxing
To send a fax using this printer, you need to have the printer attached to a computer which is
equipped with a modem and has Microsoft Fax installed. Before you do anything else, check to
see that the Microsoft Fax software is on your computer:
Click Start→ Programs or All Programs→ Accessories→ Communications.
For Windows XP:
•
If you see Fax in the list that appears, you have Microsoft Fax on your computer. Continue
with "Configuring Microsoft Fax Console (Windows XP) or Fax Service Management
(Windows 2000)" on page 36.
•
If you do not see Fax in the list that appears, continue with "Installing Microsoft Fax
Console in Windows XP" on page 36.
For Windows 2000, Fax Service Management is automatically installed.
Using the Printer
35
w w w. d el l. c om | s upp ort . del l . com
Installing Microsoft Fax Console in Windows XP
1
Click Start→ Settings→ Control Panel. Under Pick a Category, click Add or Remove
Programs.
The Add or Remove Programs dialog box opens.
2
Click Add/Remove Windows Components.
3
In the Components list, click to select the Fax Services box.
4
Click Next.
5
Click Finish.
6
In the Add or Remove Programs dialog box, click Close.
Configuring Microsoft Fax Console (Windows XP) or Fax Service Management
(Windows 2000)
To configure for fax:
1
Click Start→ Programs or All Programs→ Accessories→ Communications→ Fax→ Fax
Console (Windows XP) or Fax Service Management (Windows 2000).
2
On the Welcome to Fax Configuration screen, click Next.
3
On the Sender Information screen, type the information you want to be displayed on your
fax cover page, and then click Next.
4
On the Select Device for Sending or Receiving Faxes screen, click the modem that is
installed in your computer in the Please select the fax device list.
5
If you want to disable the sending of faxes, click to clear the Enable Send check box.
6
Click the Manual answer button or Automatically answer after (user-defined number of
rings) button.
7
Click to select the Enable Receive check box if you want to receive faxes.
NOTE: Selecting the Enable Receive check box allows you to receive faxes but may cause the
computer modem to answer all phone calls, in which case you may not receive voice mail.
8
Click Next.
9
On the Transmitting Subscriber Identification (TSID) screen, type the identification
information (usually your fax number and your name or business name) in the TSID box.
This information will appear in the header area of the faxes you send and identifies your
fax machine to the person who receives your faxes.
NOTE: The TSID is mandatory in some areas.
36
Using the Printer
10
Click Next.
NOTE: Steps 10–13 only occur if you enabled your machine to receive faxes in step 6.
11
On the Called Subscriber Identification (CSID) screen, type the CSID (appears to
confirm that the fax is being sent to the correct recipient) that you want in the CSID box.
12
Click Next.
13
On the Routing Options screen, click to select the Print it on check box if you want each
received fax to be automatically printed. When you select this check box, select the Dell
Photo AIO Printer 924 to print the received fax.
NOTE: Your printer must be on and connected to your computer in order to automatically print
faxes.
14
Click to select the Store a copy in a folder check box if you want to create an archive copy
of each fax. When you select this check box, you are able to specify the storage location for
the fax copy.
15
Click Next.
16
Confirm the configuration settings in the Configuration Summary list, and then click
Finish.
You are now ready to send or receive faxes.
Faxing a Paper Document
To fax a single or multiple page paper document, use the Dell All-In-One Center.
1
Turn on your printer and computer, and make sure they are connected. Make sure your
computer modem is connected to an active analog phone line. If you have DSL broadband
service on the same phone line that you are using to fax, you must also have a DSL filter
installed. Contact your Internet Service Provider for information.
2
Place your document on the scanner glass, and make sure the upper left corner aligns with
the arrow on the printer.
3
Click Start→ Programs or All Programs→ Dell Printers→ Dell Photo AIO Printer
924→ Dell All-In-One Center.
The Dell All-In-One Center opens.
Using the Printer
37
w w w. d el l. c om | s upp ort . del l . com
4
In the Dell All-In-One Center you can either:
•
In the Scan or Fax section, send a single or multiple page fax. First, customize your fax
job by answering the questions that appear on your screen.
To send a single-page fax, click Fax Now.
To send a multiple-page fax, click Advanced→ Scan multiple items before
output→ OK.
•
In the Productivity Tools section, click Fax an image, and follow the instructions on
the screen.
NOTE: One of the questions on the screen asks if there is more than one page. If there are multiple
pages in your fax, you should choose Yes, prompt me for each page.
Faxing Electronic Documents
1
With the file open, click File→ Print.
2
In the printer list, select Fax.
3
Click Print, and then follow the instructions on the screen.
Receiving a Fax Using Fax Console or Fax Service Management
1
Make sure that an active telephone line is connected to the wall jack connector on the
computer modem.
2
Click Start→ Programs or All Programs→ Accessories→ Communications→ Fax.
3
Click Fax Console or Fax Service Management.
If you selected the Enable Receive check box when configuring Fax Console or Fax Service
Management, you are now ready to receive a fax.
NOTE: Selecting the Enable Receive check box allows you to receive faxes but may cause the
computer modem to answer all phone calls, in which case you may not receive voice mail.
Viewing Sent and Received Faxes Using Fax Console or Fax Service Management
NOTE: Only faxes sent and received by Fax Console can be seen by Fax Console.
1
Click Start→ Programs or All Programs→ Accessories→ Communications→ Fax.
2
Click Fax Console or Fax Service Management.
View received faxes in the Inbox; view sent faxes in Sent Items.
38
Using the Printer
Viewing the Status of a Fax Using Fax Console or Fax Service Management
1
Click Start→ Programs or All Programs→ Accessories→ Communications→ Fax.
2
Click Fax Console or Fax Service Management.
3
The following folders appear:
•
Incoming — faxes currently being received
•
Inbox — faxes that have been received
•
Outbox — faxes scheduled to be sent
•
Sent Items — faxes successfully sent
4
Click the folder of your choice.
5
Click the fax in the right pane for which you want to view the status, and then click
Preferences or Properties.
6
Click the General tab, and view the Status line.
7
Click Close when you are finished.
Changing the Fax Configuration
1
Click Start→ Programs or All Programs→ Accessories→ Communications→ Fax, and then
click Fax Console.
2
In Fax Console, click Configure Fax on the Tools menu to start the Fax Configuration
Wizard.
Using the Printer
39
40
Using the Printer
w w w. d el l. c om | s upp ort . del l . com
3
Understanding the Software
The printer software includes:
•
Dell All-In-One Center — Allows you to perform various scan, copy, fax, and print
operations with newly scanned and previously saved documents and images.
•
Printing Preferences — Allows you to adjust printer settings.
•
Dell Picture Studio™ v2.0 — Allows you to manage, edit, display, print, and convert
photos and other types of images.
•
Dell Ink Management System™ — Warns you when your printer is running low on ink.
Using the Dell All-In-One Center
The Dell All-In-One Center allows you to:
•
Scan, copy, fax, and use productivity tools.
•
Select where you want to send the scanned image.
Understanding the Software
41
w w w. d el l. c om | s upp ort . del l . com
•
Select the quantity and color of your copies.
•
Access troubleshooting and maintenance information.
•
Preview images you want to print or copy.
•
Manage photos (copy them to folders, print them, perform creative copying).
To access the Dell All-In-One Center:
Click Start→ Programs or All Programs→ Dell Printers→ Dell Photo AIO Printer 924→ Dell
All-In-One Center.
The Dell All-In-One Center includes four main sections: Scan or Fax, Copy, Productivity Tools,
and Preview.
In this section:
You can:
Scan or Fax
• Select the program where you want to send the scanned image.
• Select the type of image being scanned.
• Select how you will use the scan.
• Select Fax Now.
NOTE: Click See More Scan Settings to view all settings.
Copy
•
•
•
•
Select the quantity and color of your copies.
Select a quality setting for your copies.
Adjust the size of the scanned area.
Lighten or darken your copies (this can also be accomplished using the
operator panel).
• Enlarge or reduce your copies.
NOTE: Click See More Copy Settings to view all settings.
Productivity Tools
•
•
•
•
•
•
•
•
Preview
• Select a portion of the preview image to scan.
• View an image of what will be printed or copied.
Enlarge or reduce an image.
Repeat an image several times on one page.
Print an image as a multi-page poster.
Fax using your computer’s modem.
E-mail an image.
Save an image on your computer.
Edit text found in a scanned document (Optical Character Recognition).
Modify an image with a photo editor.
For more information about the Dell All-In-One Center, click Help in the Dell All-In-One
Center.
42
Understanding the Software
Using Printing Preferences
Printing Preferences allows you to change the various printer settings. You can change your
printer settings in Printing Preferences depending on the type of project you want to create.
To access Printing Preferences:
1
With your document open, click File→ Print.
The Print dialog box opens.
2
In the Print dialog box, click Preferences, Properties, Options, or Setup (depending on the
program or operating system).
The Printing Preferences dialog box opens.
To access Printing Preferences when a document is not open:
1
In Windows XP, click Start→ Control Panel→ Printers and Other Hardware→ Printers
and Faxes.
In Windows 2000, click Start→ Settings→ Printers.
2
Right-click the printer icon, and then select Printing Preferences.
NOTE: Changes made to the printer settings from the Printers folder become the default settings for
most programs.
Understanding the Software
43
w w w. d el l. c om | s upp ort . del l . com
Printing Preferences Tabs
Printing Preferences includes three main tabs.
Tab
Options
Print Setup
Quality/Speed — Select Automatic, Draft, Normal, or Photo depending
on your desired output quality. Draft is the fastest option but should not
be selected if you have a photo cartridge installed.
Media Type — Allows you to set the paper type manually, or have the
printer sensor detect the paper type automatically.
Paper Size — Select the size and type of paper.
Print Color Images in Black and White — Print your color images in
black and white to save the ink in your color ink cartridge.
NOTE: You cannot select this setting if you have selected Color Cartridge
for all Black Printing.
Orientation — Select how the document is arranged on the printed page.
You can print using portrait or landscape orientation.
Multiple Copies — Customize how the printer prints several photocopies
of a single print job: Collated, Normal, or Print Last Page First.
Advanced
2-Sided Printing — Select this to print on both sides of the paper.
Layout — Select Normal, Banner, Mirror, N-up, Poster, Booklet, or
Borderless.
Automatic Image Sharpening — Automatically select the best image
sharpening level based on image content.
More Options — Allows you to specify Appearance Mode and
Complete-A-Print settings.
Maintenance
Install Print Cartridges
Clean Print Cartridges
Align Print Cartridges
Print a Test Page
Network Support
Remove Japanese Postcard Residue
44
Understanding the Software
Using Dell Picture Studio v2.0
In Dell Picture Studio v2.0, you can explore digital photography and learn how to organize,
create, or print photos. There are three components to the Dell Picture Studio:
•
Paint Shop Photo Album
Click Start→ Programs or All Programs→ Dell Picture Studio v2.0→ Paint Shop Photo
Album 4→ Paint Shop Photo Album.
•
Dell Picture Studio Home
Click Start→ Programs or All Programs→ Dell Picture Studio v2.0→ Dell Picture Studio
Home.
•
Dell.Shutterfly.com - Online Print Service
Click Start→ Programs or All Programs→ Dell Picture Studio v2.0→ Dell.Shutterfly.com Online Print Service.
Dell Ink Management System
Each time you print a job, a printing progress screen appears, which shows the progress of the
print job as well as the amount of ink remaining and the approximate number of pages
remaining in the cartridge. The page counter is hidden during the first 50 pages of cartridge use,
until printing habits are learned and a more accurate count can be given. The number of pages
remaining changes as a result of the type of print jobs the printer completes.
When your ink cartridge levels are low, a Low Ink Warning appears on your screen when you try
to print. This warning is displayed every time you print until you install a new ink cartridge. For
more information on replacing ink cartridges, see "Replacing Ink Cartridges" on page 49.
When one or both of your ink cartridges are empty, the Reserve Tank window appears on your
screen when you try to print. If you continue printing, the print job may not print as you expect.
Understanding the Software
45
w w w. d el l. c om | s upp ort . del l . com
If your black ink cartridge is out of ink, you can choose to print black from the color ink cartridge
(Process Black) by selecting Complete-A-Print before clicking the Continue Printing button. If
you select Complete-A-Print, and click Continue Printing, Process Black is used for all black
printing until the black cartridge is replaced, or the option is cleared from More Options,
located on the Advanced tab of the Printing Preferences. The Reserve Tank dialog does not
display again until after the low ink cartridge has been replaced. The Complete-A-Print check
box is automatically reset when a new or different cartridge is installed.
46
Understanding the Software
Removing and Reinstalling the Software
If your printer does not function properly, or communication error messages appear when using
your printer, you can remove and reinstall the printer software.
1
Click Start→Programs or All Programs→Dell Printers→Dell Photo AIO Printer
924→Uninstall Dell Photo AIO Printer 924.
2
Follow the instructions on the screen.
3
Restart your computer.
4
Insert the Drivers and Utilities CD, and then follow the instructions on the screen.
If the installation screen does not appear:
a
In Windows XP, click Start→ My Computer.
In Windows 2000, double-click My Computer from your desktop.
b
Double-click the CD-ROM drive icon. If necessary, double-click setup.exe.
c
When the printer software installation screen appears, click Personal Installation or
Network Installation.
d
Follow the instructions on your screen to complete the installation.
Understanding the Software
47
48
Understanding the Software
w w w. d el l. c om | s upp ort . del l . com
4
Ink Cartridge Maintenance
Replacing Ink Cartridges
Before performing any of the procedures listed in this section, read and follow the
"CAUTION: SAFETY INSTRUCTIONS" on page 9.
Dell ink cartridges are only available through Dell. You can order more ink online at
www.dell.com/supplies or by phone. To order by phone, see "Ordering Supplies" on page 2.
Dell recommends Dell ink cartridges for your printer. Dell does not provide warranty coverage
for problems caused by using accessories, parts, or components not supplied by Dell.
1
Turn on your printer.
2
Lift the printer unit, and position the scanner support between the tabs to hold it open.
The ink cartridge carrier moves and stops at the loading position unless the printer is busy.
Ink Cartridge Maintenance
49
w w w. d el l. c om | s upp ort . del l . com
50
3
Press down on the ink cartridge lever to raise each ink cartridge lid.
4
Remove the old ink cartridges.
5
Store the cartridges in an air-tight container, such as the storage unit you received with
your photo cartridge, or dispose of them properly.
6
If you are installing new ink cartridges, remove the sticker and transparent tape from the
back and bottom of each ink cartridge.
Ink Cartridge Maintenance
NOTE: The illustration below shows a black cartridge and a color cartridge (used for normal
printing). For photo printing, use a photo cartridge and a color cartridge.
7
Insert the new ink cartridges. Make sure the black or photo ink cartridge is secure in the
left ink cartridge carrier, and the color ink cartridge is secure in the right ink cartridge
carrier.
Ink Cartridge Maintenance
51
w w w. d el l. c om | s upp ort . del l . com
52
8
Snap each lid closed.
9
Lift the printer unit, and hold the scanner support up while lowering the printer unit until
it is completely closed.
Ink Cartridge Maintenance
Aligning Ink Cartridges
Your printer automatically prompts you to align the ink cartridges when they are installed or
replaced. To verify your ink cartridges are aligned, you can print an alignment page. After you
close the printer unit, press the Menu button . The alignment page begins printing. During
printing, the operator panel display reads Printing alignment page. When complete,
the message reads Automatic Alignment Complete. Your ink cartridges are now aligned
for optimal print quality.
You may also need to align ink cartridges when characters are not properly formed or are not
aligned at the left margin, or when vertical or straight lines appear wavy.
To align the ink cartridges:
1
Load plain paper. For more information, see "Loading Paper" on page 19.
2
In Windows XP, click Start→ Control Panel→ Printers and Other Hardware→ Printers and
Faxes.
In Windows 2000, click Start→ Settings→ Printers.
3
Right-click the Dell Photo AIO Printer 924 icon.
4
Click Printing Preferences.
The Printing Preferences dialog box opens.
5
Click the Maintenance tab.
6
Click Align Print Cartridges.
7
Click Print.
The ink cartridges align when the page prints.
Ink Cartridge Maintenance
53
w w w. d el l. c om | s upp ort . del l . com
Cleaning the Ink Cartridge Nozzles
You may need to clean the nozzles when:
•
White lines appear in graphics or solid black areas.
•
Print appears smudged or too dark.
•
Colors fade, do not print, or do not print completely.
•
Vertical lines appear jagged, or edges appear rough.
To clean the ink cartridge nozzles:
1
Load plain paper. For more information, see "Loading Paper" on page 19.
2
In Windows XP, click Start→ Control Panel→ Printers and Other Hardware→ Printers and
Faxes.
In Windows 2000, click Start→ Settings→ Printers.
3
Right-click the Dell Photo AIO Printer 924 icon.
4
Click Printing Preferences.
The Printing Preferences dialog box opens.
54
5
Click the Maintenance tab.
6
Click Clean Print Cartridges.
7
If the print quality has not improved, click Print Again.
8
Print your document again to verify the improved print quality.
9
If you are not satisfied with the print quality, wipe the ink cartridge nozzles, and then print
your document again.
Ink Cartridge Maintenance
5
Troubleshooting
Follow these tips when you troubleshoot your printer:
•
If the printer does not work, ensure that the printer is properly connected.
•
If an error message appears on the operator panel display, write down the exact message.
Setup Problems
Computer Problems
V E R I F Y T H A T Y O U R P R I N T E R I S C O M P A T I B L E W I T H Y O U R C O M P U T E R.
The Dell Photo AIO Printer 924 supports Windows 2000, Windows XP, and Windows XP
Professional x64 Edition.
M A K E S U R E Y O U T U R N E D O N B O T H Y O U R P R I N T E R A N D Y O U R C O M P U T E R.
C H E C K T H E U SB C A B L E .
• Ensure the USB cable is firmly connected to your printer and your computer.
• Shut down the computer, reconnect the USB cable as shown on the setup diagram for your
printer, and then restart the computer.
I F T H E S O F T W A R E I N S T A L L A T I O N S C R E E N D O E S N O T A P P E A R A U T O M A T I C A L L Y,
I N S T A L L T H E S O F T W A R E M A N U A L L Y.
1 Insert the Drivers and Utilities CD.
2 Click Install.
DETERMINE IF THE PRINTER SOFTWARE IS INSTALLED.
Click Start→ Programs or All Programs→ Dell Printers→ Dell Photo AIO Printer 924. If Dell
Photo AIO Printer 924 does not appear in the list of programs, the printer software is not installed.
Install the printer software. For more information, see "Removing and Reinstalling the Software"
on page 47.
Troubleshooting
55
w w w. d el l. c om | s upp ort . del l . com
S E T Y O U R P R I N T E R A S T H E D E F A U L T P R I N T E R.
1 In Windows XP, click Start→ Control Panel→ Printers and Other Hardware→ Printers and
Faxes.
In Windows 2000, click Start→ Settings→ Printers.
2 Right-click Dell Photo AIO Printer 924, and select Set as Default.
CORRECT COMMUNICATION PROBLEMS BETWEEN THE DELL ALL-IN- ONE CENTER
A N D T H E C O M P U T E R.
• Remove the USB cable from your printer and your computer. Reconnect the USB cable to your
printer and your computer.
• Turn off the printer. Unplug the printer power cable from the electrical outlet. Reconnect the
printer power cable to the electrical outlet, and turn on the printer.
• Restart your computer.
Printer Problems
ENSURE THE PRINTER POWER CABLE IS FIRMLY CONNECTED TO THE PRINTER AND
THE ELECTRICAL OUTLET.
DETERMINE IF THE PRINTER HAS BEEN HELD OR PAUSED.
1 In Windows XP, click Start→ Control Panel→ Printers and Other Hardware→ Printers and
Faxes.
In Windows 2000, click Start→ Settings→ Printers.
2 Double-click Dell Photo AIO Printer 924, and then click Printer.
3 Make sure a check mark is not next to Pause Printing. If a check mark is next to Pause Printing,
click Pause Printing to clear it.
C H E C K F O R F L A S H I N G L I G H T S O N T H E P R I N T E R.
For more information, see "Error Messages and Lights" on page 58.
ENSURE YOU INSTALLED THE INK CARTRIDGES CORRECTLY AND REMOVED THE
STICKER AND TAPE FROM EACH CARTRIDGE.
M A K E S U R E Y O U L O A D E D T H E P A P E R C O R R E C T L Y.
For more information, see "Loading Paper" on page 19.
56
Troubleshooting
E N S U R E A P I C T B R I D G E - E N A B L E D C A M E R A I S N O T C O N N E C T E D T O T H E P R I N T E R.
For more information, see "Printing Photos From a PictBridge-Compatible Camera" on page 26.
ENSURE THE PRINTER DISPLAYS THE CORRECT LANGUAGE.
For more information, see "Resetting the Language on Your Printer" on page 13.
I F Y O U A R E U S I N G A W I R E L E S S P R I N T E R A D A P T E R, E N S U R E Y O U H A V E T H E L A T E S T
FIRMWARE UPDATES.
For the latest updates and information, visit www.support.dell.com.
General Problems
Faxing Problems
M A K E S U R E Y O U T U R N E D O N B O T H Y O U R P R I N T E R A N D Y O U R C O M P U T E R, A N D T H E
US B C A B L E I S P R O P E R L Y C O N N E C T E D .
ENSURE THE COMPUTER IS CONNECTED TO AN ACTIVE ANALOG PHONE LINE.
Using the fax function requires a phone connection to the fax/modem in your computer.
WHEN USING AN EXTE RNAL MOD EM, MA KE SURE IT IS TUR NED ON, AND IT IS
C O R R E C T L Y C O N N E C T E D T O Y O U R C O M P U T E R.
Paper Problems
M A K E S U R E Y O U L O A D E D T H E P A P E R C O R R E C T L Y.
For more information, see "Loading Paper" on page 19.
U S E O N L Y P A P E R R E C O M M E N D E D F O R Y O U R P R I N T E R.
For more information, see "Print Media Guidelines" on page 20.
USE A SMALLER AMOUNT OF PAPER WHEN PRINTING MULTIPLE PAGES.
For more information, see "Print Media Guidelines" on page 20.
Troubleshooting
57
w w w. d el l. c om | s upp ort . del l . com
MAKE SURE THE PAPER IS NOT WRINKLED, TORN, OR DAMAGED.
MAKE SURE THE PAPER IS CENTERED IN THE PAPER SUPPORT, AND THE PAPER
G U I D E S R E S T A G A I N S T T H E L E F T A N D R I G H T S I D E S O F T H E P A P E R.
CHECK FOR A PAPER JAM.
Using your printer and your computer
Follow the instructions on the screen for clearing the paper jam.
Using your printer only
If the paper jam is located in the paper support:
1 Turn off your printer.
2 Firmly grasp the paper, and gently pull it from the printer.
3 Turn on your printer, and print the document again.
If the paper jam is not visible:
1 Turn off your printer.
2 Lift the printer unit, and position the scanner support between the tabs to keep it open.
3 Gently pull the paper from the printer.
4 Close the printer (scanner unit), turn on the printer, and print the document again.
Error Messages and Lights
The following error messages can be found on your computer screen or operator panel display.
Error Code: Error Message:
58
Troubleshooting
What it indicates:
Solution:
Blinking Power
Button
The printer has a paper jam or If a paper jam exists, see "Paper
is out of paper.
Problems" on page 57. If your printer
is out of paper, see "Loading Paper"
on page 19.
Ink Low
The ink cartridge is running
Replace the ink cartridge. For more
low on ink. The Low Ink Alert information, see "Replacing Ink
occurs when your ink
Cartridges" on page 49.
cartridges reach levels of 25
percent, 15 percent, and 5
percent remaining.
Reserve Tank
A print cartridge’s available ink Order a new ink cartridge from Dell
dot count is zero.
at www.dell.com/supplies, and
replace the old ink cartridge.
Error Code: Error Message:
What it indicates:
Solution:
1100
Paper jam
A paper jam exists in the
printer.
Clear the paper jam. For more
information, see "Paper Problems" on
page 57.
1101
Paper out
The printer is out of paper.
Load more paper into the printer. For
more information, see "Loading
Paper" on page 19.
1102
Incorrect
print head
The ink cartridge is not valid.
Replace the ink cartridge. For more
information, see "Replacing Ink
Cartridges" on page 49.
1103
Missing print
head
An ink cartridge has not been
installed.
Install an ink cartridge in the empty
carrier. For more information, see
"Replacing Ink Cartridges" on
page 49.
1104
Print head
order
The ink cartridges have been Swap the ink cartridges. For more
installed in the wrong carriers. information, see "Replacing Ink
Cartridges" on page 49.
1200
Print carrier
stall
The ink cartridge carrier has
stalled.
1201
Print
incomplete
Data error or incomplete data. Press the Power button
1203
Print head
short
Short circuit detected in the
print head.
1204
Print head
programming
Unable to program print head Reinstall the ink cartridges. For more
ID.
information, see "Replacing Ink
Cartridges" on page 49.
1205
Mono TSR error Problem in the mono TSR
circuit.
1206
Color TSR
error
1208
Incorrect home The printer is unable to locate Clear the carrier jam and press the
position
the cartridge home position.
Start button
.
2100
Unlock scanner The scan carrier has stalled.
Problem in the color TSR
circuit.
Disconnect the printer power cable,
check for paper jams, and then
reconnect the power cable.
to reset.
Disconnect and then reconnect the
printer power cable. Reinstall the ink
cartridges. For more information, see
"Replacing Ink Cartridges" on
page 49.
Reinstall the black ink cartridge. For
more information, see "Replacing Ink
Cartridges" on page 49.
Reinstall the color ink cartridge. For
more information, see "Replacing Ink
Cartridges" on page 49.
Turn off the printer, wait a few
seconds, and then turn on the
printer.
Troubleshooting
59
w w w. d el l. c om | s upp ort . del l . com
Improving Print Quality
If you are not satisfied with the print quality of your documents, there are several different ways
to improve the print quality.
•
Use the appropriate paper. For example, use Dell Premium Photo Paper if you are printing
photos with a photo ink cartridge.
•
Use paper that is a heavier weight, bright white, or coated. Use Dell Premium Photo Paper
if you are printing photos.
•
Select a higher print quality.
To select a higher print quality:
1
With your document open, click File→Print.
The Print dialog box opens.
2
Click Preferences, Properties, or Options (depending on your program or operating
system).
The Printing Preferences dialog box opens.
3
On the Print Setup tab select a higher quality setting.
4
Print your document again.
5
If the print quality does not improve, try aligning or cleaning the ink cartridges. For more
information on aligning, see "Aligning Ink Cartridges" on page 53. For more information on
cleaning ink cartridges, see "Cleaning the Ink Cartridge Nozzles" on page 54.
For additional solutions, go to support.dell.com.
60
Troubleshooting
6
Contacting Dell
Technical Assistance
If you need help with a technical problem, Dell is ready to assist you.
1
Call technical support from a telephone near or at the printer so that technical support can
assist you with any necessary procedures. When calling Dell, use your Express Service
Code to help expedite the routing of your call to the proper support personnel.
The Express Service Code is located on the back panel of the printer near the serial
number for the printer.
NOTE: Dell's Express Service Code system may not be available in all countries.
2
In the U.S., Business customers should call 1-877-459-7298, and Consumer (Home and
Home Office) customers should call 1-800-624-9896.
If you are calling from a different country or are in a different Service area, see "Contacting
Dell" on page 62 for your local telephone number.
3
Follow the menu prompts in the automated telephone system to speak with a technical
support representative.
Automated Order-Status Service
To check on the status of any Dell products that you have ordered, you can go to
support.dell.com, or you can call the automated order-status service. A recording prompts you
for the information needed to locate and report on your order. See "Contacting Dell" on page 62
for the telephone number to call for your region.
Contacting Dell
61
w w w. d el l. c om | s upp ort . del l . com
Contacting Dell
To contact Dell electronically, you can access the following websites:
•
www.dell.com
•
support.dell.com (technical support)
•
premiersupport.dell.com (technical support for educational, government, healthcare, and
medium/large business customers, including Premier, Platinum, and Gold customers)
For specific web addresses for your country, find the appropriate country section in the table
below.
NOTE: Toll-free numbers are for use within the country for which they are listed.
When you need to contact Dell, use the electronic addresses, telephone numbers, and codes
provided in the following table. If you need assistance in determining which codes to use,
contact a local or an international operator.
62
Contacting Dell
Country (City)
International Access Code
Country Code
City Code
Department Name or Service Area,
Website and E-Mail Address
Area Codes,
Local Numbers, and
Toll-Free Numbers
Anguilla
General Support
toll-free: 800-335-0031
Antigua and Barbuda
General Support
1-800-805-5924
Argentina (Buenos Aires)
Website: www.dell.com.ar
International Access Code: 00
E-mail: [email protected]
Country Code: 54
E-mail for desktop and portable computers:
[email protected]
City Code: 11
E-mail for servers and EMC:
[email protected]
Customer Care
toll-free: 0-800-444-0730
Tech Support
toll-free: 0-800-444-0733
Tech Support Services
toll-free: 0-800-444-0724
Sales
Aruba
General Support
Australia (Sydney)
E-mail (Australia): [email protected]
0-810-444-3355
toll-free: 800-1578
International Access Code: 0011 E-mail (New Zealand): [email protected]
Country Code: 61
Home and Small Business
1-300-655-533
City Code: 2
Government and Business
toll-free: 1-800-633-559
Preferred Accounts Division (PAD)
toll-free: 1-800-060-889
Customer Care
toll-free: 1-800-819-339
Technical Support (portables and desktops)
toll-free: 1-300-655-533
Technical Support (servers and workstations)
toll-free: 1-800-733-314
Corporate Sales
toll-free: 1-800-808-385
Transaction Sales
toll-free: 1-800-808-312
Fax
toll-free: 1-800-818-341
Contacting Dell
63
w w w. d el l. c om | s upp ort . del l . com
Country (City)
International Access Code
Country Code
City Code
Department Name or Service Area,
Website and E-Mail Address
Area Codes,
Local Numbers, and
Toll-Free Numbers
Austria (Vienna)
Website: support.euro.dell.com
International Access Code: 900
E-mail: [email protected]
Country Code: 43
Home/Small Business Sales
City Code: 1
Home/Small Business Fax
0820 240 530 49
Home/Small Business Customer Care
0820 240 530 14
Preferred Accounts/Corporate Customer Care
0820 240 530 16
Home/Small Business Technical Support
0820 240 530 14
Preferred Accounts/Corporate Technical Support
Switchboard
0820 240 530 00
0660 8779
0820 240 530 00
Bahamas
General Support
toll-free: 1-866-278-6818
Barbados
General Support
1-800-534-3066
Belgium (Brussels)
Website: support.euro.dell.com
International Access Code: 00
Country Code: 32
E-mail for French-speaking Customers:
support.euro.dell.com/be/fr/emaildell/
City Code: 2
Technical Support
02 481 92 88
Technical Support Fax
02 481 92 95
Customer Care
02 713 15 65
Corporate Sales
02 481 91 00
Fax
02 481 92 99
Switchboard
02 481 91 00
Bermuda
General Support
1-800-342-0671
Bolivia
General Support
toll-free: 800-10-0238
Brazil
Website: www.dell.com/br
International Access Code: 00
Customer Support, Technical Support
Country Code: 55
Technical Support Fax
51 481 5470
City Code: 51
Customer Care Fax
51 481 5480
Sales
0800 90 3355
0800 90 3390
British Virgin Islands
General Support
Brunei
Customer Technical Support (Penang, Malaysia)
604 633 4966
Country Code: 673
Customer Service (Penang, Malaysia)
604 633 4949
Sales (Singapore)
64
Contacting Dell
toll-free: 1-866-278-6820
toll-free: 1 800 394 7425
Country (City)
International Access Code
Country Code
City Code
Department Name or Service Area,
Website and E-Mail Address
Area Codes,
Local Numbers, and
Toll-Free Numbers
Canada (North York, Ontario)
Online Order Status: www.dell.ca/ostatus
International Access Code: 011
AutoTech (automated technical support)
toll-free: 1-800-247-9362
Customer Care (Home Sales/Small Business)
toll-free: 1-800-847-4096
Customer Care (med./large business, government)
toll-free: 1-800-326-9463
Technical Support (Home Sales/Small Business)
toll-free: 1-800-847-4096
Technical Support (med./large bus., government)
toll-free: 1-800-387-5757
Sales (Home Sales/Small Business)
toll-free: 1-800-387-5752
Sales (med./large bus., government)
toll-free: 1-800-387-5755
Spare Parts Sales & Extended Service Sales
1 866 440 3355
Cayman Islands
General Support
1-800-805-7541
Chile (Santiago)
Sales, Customer Support, and Technical Support
toll-free: 1230-020-4823
Country Code: 56
City Code: 2
Contacting Dell
65
w w w. d el l. c om | s upp ort . del l . com
Country (City)
International Access Code
Country Code
City Code
Department Name or Service Area,
Website and E-Mail Address
China (Xiamen)
Technical Support website: support.dell.com.cn
Country Code: 86
Technical Support E-mail: [email protected]
City Code: 592
Customer Care E-mail: [email protected]
Technical Support Fax
Area Codes,
Local Numbers, and
Toll-Free Numbers
592 818 1350
Technical Support (Dell™ Dimension™ and
Inspiron™)
toll-free: 800 858 2969
Technical Support (OptiPlex™, Latitude™, and
Dell Precision™)
toll-free: 800 858 0950
Technical Support (servers and storage)
toll-free: 800 858 0960
Technical Support (projectors, PDAs, switches,
routers, and so on)
toll-free: 800 858 2920
Technical Support (printers)
Customer Care
Customer Care Fax
86 592 818 3144
or toll-free: 800 858 2311
toll-free: 800 858 2060
592 818 1308
Home and Small Business
toll-free: 800 858 2222
Preferred Accounts Division
toll-free: 800 858 2557
Large Corporate Accounts GCP
toll-free: 800 858 2055
Large Corporate Accounts Key Accounts
toll-free: 800 858 2628
Large Corporate Accounts North
toll-free: 800 858 2999
Large Corporate Accounts North Government and
Education
toll-free: 800 858 2955
Large Corporate Accounts East
toll-free: 800 858 2020
Large Corporate Accounts East Government and
Education
toll-free: 800 858 2669
Large Corporate Accounts Queue Team
toll-free: 800 858 2572
Large Corporate Accounts South
toll-free: 800 858 2355
Large Corporate Accounts West
toll-free: 800 858 2811
Large Corporate Accounts Spare Parts
toll-free: 800 858 2621
Colombia
General Support
980-9-15-3978
Costa Rica
General Support
0800-012-0435
66
Contacting Dell
Country (City)
International Access Code
Country Code
City Code
Department Name or Service Area,
Website and E-Mail Address
Czech Republic (Prague)
Website: support.euro.dell.com
International Access Code: 00
E-mail: [email protected]
Country Code: 420
Technical Support
Area Codes,
Local Numbers, and
Toll-Free Numbers
22537 2727
Customer Care
22537 2707
Fax
22537 2714
Tech Fax
22537 2728
Switchboard
22537 2711
Denmark (Copenhagen)
Website: support.euro.dell.com
International Access Code: 00
E-mail: support.euro.dell.com/dk/da/emaildell/
Country Code: 45
Technical Support
7023 0182
Customer Care (Relational)
7023 0184
Home/Small Business Customer Care
3287 5505
Switchboard (Relational)
3287 1200
Switchboard Fax (Relational)
3287 1201
Switchboard (Home/Small Business)
3287 5000
Switchboard Fax (Home/Small Business)
3287 5001
Dominica
General Support
toll-free: 1-866-278-6821
Dominican Republic
General Support
1-800-148-0530
Ecuador
General Support
toll-free: 999-119
El Salvador
General Support
01-899-753-0777
Finland (Helsinki)
Website: support.euro.dell.com
International Access Code: 990
E-mail: support.euro.dell.com/fi/fi/emaildell/
Country Code: 358
Technical Support
09 253 313 60
City Code: 9
Customer Care
09 253 313 38
Fax
09 253 313 99
Switchboard
09 253 313 00
Contacting Dell
67
w w w. d el l. c om | s upp ort . del l . com
Country (City)
International Access Code
Country Code
City Code
Department Name or Service Area,
Website and E-Mail Address
Area Codes,
Local Numbers, and
Toll-Free Numbers
France (Paris) (Montpellier)
Website: support.euro.dell.com
International Access Code: 00
E-mail: support.euro.dell.com/fr/fr/emaildell/
Country Code: 33
Home and Small Business
City Codes: (1) (4)
Technical Support
0825 387 270
Customer Care
0825 823 833
Switchboard
0825 004 700
Switchboard (calls from outside of France)
04 99 75 40 00
Sales
0825 004 700
Fax
0825 004 701
Fax (calls from outside of France)
04 99 75 40 01
Corporate
Technical Support
0825 004 719
Customer Care
0825 338 339
Switchboard
01 55 94 71 00
Sales
01 55 94 71 00
Fax
01 55 94 71 01
Germany (Langen)
Website: support.euro.dell.com
International Access Code: 00
E-mail: [email protected]
Country Code: 49
Technical Support
City Code: 6103
Home/Small Business Customer Care
68
Contacting Dell
06103 766-7200
0180-5-224400
Global Segment Customer Care
06103 766-9570
Preferred Accounts Customer Care
06103 766-9420
Large Accounts Customer Care
06103 766-9560
Public Accounts Customer Care
06103 766-9555
Switchboard
06103 766-7000
Country (City)
International Access Code
Country Code
City Code
Department Name or Service Area,
Website and E-Mail Address
Area Codes,
Local Numbers, and
Toll-Free Numbers
Greece
Website: support.euro.dell.com
International Access Code: 00
E-mail: support.euro.dell.com/gr/en/emaildell/
Country Code: 30
Technical Support
00800-44 14 95 18
Gold Service Technical Support
00800-44 14 00 83
Switchboard
2108129810
Gold Service Switchboard
2108129811
Sales
2108129800
Fax
2108129812
Grenada
General Support
toll-free: 1-866-540-3355
Guatemala
General Support
1-800-999-0136
Guyana
General Support
toll-free: 1-877-270-4609
Hong Kong
Website: support.ap.dell.com
International Access Code: 001
Technical Support E-mail: [email protected]
Country Code: 852
Technical Support (Dimension and Inspiron)
2969 3188
Technical Support (OptiPlex, Latitude, and Dell
Precision)
2969 3191
Technical Support (PowerApp™, PowerEdge™,
PowerConnect™, and PowerVault™)
2969 3196
Customer Care
3416 0910
Large Corporate Accounts
3416 0907
India
Global Customer Programs
3416 0908
Medium Business Division
3416 0912
Home and Small Business Division
2969 3105
Technical Support
1600 33 8045
Sales (Large Corporate Accounts)
1600 33 8044
Sales (Home and Small Business)
1600 33 8046
Contacting Dell
69
w w w. d el l. c om | s upp ort . del l . com
Country (City)
International Access Code
Country Code
City Code
Department Name or Service Area,
Website and E-Mail Address
Ireland (Cherrywood)
Website: support.euro.dell.com
International Access Code: 16
E-mail: [email protected]
Country Code: 353
Technical Support
City Code: 1
U.K. Technical Support (dial within U.K. only)
Area Codes,
Local Numbers, and
Toll-Free Numbers
1850 543 543
0870 908 0800
Home User Customer Care
01 204 4014
Small Business Customer Care
01 204 4014
U.K. Customer Care (dial within U.K. only)
Corporate Customer Care
Corporate Customer Care (dial within U.K. only)
Ireland Sales
U.K. Sales (dial within U.K. only)
0870 906 0010
1850 200 982
0870 907 4499
01 204 4444
0870 907 4000
Fax/Sales Fax
01 204 0103
Switchboard
01 204 4444
Italy (Milan)
Website: support.euro.dell.com
International Access Code: 00
E-mail: support.euro.dell.com/it/it/emaildell/
Country Code: 39
Home and Small Business
City Code: 02
Technical Support
02 577 826 90
Customer Care
02 696 821 14
Fax
02 696 821 13
Switchboard
02 696 821 12
Corporate
Technical Support
02 577 826 90
Customer Care
02 577 825 55
Fax
02 575 035 30
Switchboard
Jamaica
70
General Support (dial from within Jamaica only)
Contacting Dell
02 577 821
1-800-682-3639
Country (City)
International Access Code
Country Code
City Code
Department Name or Service Area,
Website and E-Mail Address
Japan (Kawasaki)
Website: support.jp.dell.com
International Access Code: 001
Technical Support (servers)
Country Code: 81
Technical Support outside of Japan (servers)
City Code: 44
Technical Support (Dimension and Inspiron)
Technical Support outside of Japan (Dimension and
Inspiron)
Technical Support (Dell Precision, OptiPlex, and
Latitude)
Technical Support outside of Japan (Dell Precision,
OptiPlex, and Latitude)
Technical Support (PDAs, projectors, printers,
routers)
Technical Support outside of Japan (PDAs,
projectors, printers, routers)
Area Codes,
Local Numbers, and
Toll-Free Numbers
toll-free: 0120-198-498
81-44-556-4162
toll-free: 0120-198-226
81-44-520-1435
toll-free: 0120-198-433
81-44-556-3894
toll-free: 0120-981-690
81-44-556-3468
Faxbox Service
044-556-3490
24-Hour Automated Order Service
044-556-3801
Customer Care
044-556-4240
Business Sales Division (up to 400 employees)
044-556-1465
Preferred Accounts Division Sales (over 400
employees)
044-556-3433
Large Corporate Accounts Sales (over 3500
employees)
044-556-3430
Public Sales (government agencies, educational
institutions, and medical institutions)
044-556-1469
Global Segment Japan
044-556-3469
Individual User
044-556-1760
Switchboard
044-556-4300
Korea (Seoul)
Technical Support
toll-free: 080-200-3800
International Access Code: 001
Sales
toll-free: 080-200-3600
Country Code: 82
Customer Service (Penang, Malaysia)
City Code: 2
Fax
2194-6202
Switchboard
2194-6000
Technical Support (Electronics and Accessories)
604 633 4949
toll-free: 080-200-3801
Contacting Dell
71
w w w. d el l. c om | s upp ort . del l . com
Country (City)
International Access Code
Country Code
City Code
Latin America
Department Name or Service Area,
Website and E-Mail Address
Area Codes,
Local Numbers, and
Toll-Free Numbers
Customer Technical Support (Austin, Texas,
U.S.A.)
512 728-4093
Customer Service (Austin, Texas, U.S.A.)
512 728-3619
Fax (Technical Support and Customer Service)
(Austin, Texas, U.S.A.)
512 728-3883
Sales (Austin, Texas, U.S.A.)
512 728-4397
SalesFax (Austin, Texas, U.S.A.)
512 728-4600
or 512 728-3772
Luxembourg
Website: support.euro.dell.com
International Access Code: 00
E-mail: [email protected]
Country Code: 352
Technical Support (Brussels, Belgium)
Home/Small Business Sales (Brussels, Belgium)
3420808075
toll-free: 080016884
Corporate Sales (Brussels, Belgium)
02 481 91 00
Customer Care (Brussels, Belgium)
02 481 91 19
Fax (Brussels, Belgium)
02 481 92 99
Switchboard (Brussels, Belgium)
02 481 91 00
Macao
Technical Support
Country Code: 853
Customer Service (Xiamen, China)
toll-free: 0800 105
34 160 910
Transaction Sales (Xiamen, China)
29 693 115
Malaysia (Penang)
Website: support.ap.dell.com
International Access Code: 00
Technical Support (Dell Precision, OptiPlex, and
Latitude)
toll-free: 1 800 88 0193
Technical Support (Dimension, Inspiron, and
Electronics and Accessories)
toll-free: 1 800 88 1306
Technical Support (PowerApp, PowerEdge,
PowerConnect, and PowerVault)
toll-free: 1800 88 1386
Country Code: 60
City Code: 4
Customer Service (Penang, Malaysia)
Sales
72
Contacting Dell
04 633 4949
toll-free: 1 800 88 0553
Country (City)
International Access Code
Country Code
City Code
Mexico
Department Name or Service Area,
Website and E-Mail Address
Customer Technical Support
International Access Code: 00
Country Code: 52
Area Codes,
Local Numbers, and
Toll-Free Numbers
001-877-384-8979
or 001-877-269-3383
Sales
50-81-8800
or 01-800-888-3355
Customer Service
001-877-384-8979
or 001-877-269-3383
Main
50-81-8800
or 01-800-888-3355
Montserrat
General Support
toll-free: 1-866-278-6822
Netherlands Antilles
General Support
001-800-882-1519
Netherlands (Amsterdam)
Website: support.euro.dell.com
International Access Code: 00
Technical Support
020 674 45 00
Country Code: 31
Technical Support Fax
020 674 47 66
City Code: 20
Home/Small Business Customer Care
020 674 42 00
Relational Customer Care
020 674 43 25
Home/Small Business Sales
020 674 55 00
Relational Sales
020 674 50 00
Home/Small Business Sales Fax
020 674 47 75
Relational Sales Fax
020 674 47 50
Switchboard
020 674 50 00
Switchboard Fax
020 674 47 50
New Zealand
E-mail (New Zealand): [email protected]
International Access Code: 00
E-mail (Australia): [email protected]
Country Code: 64
Technical Support (for desktop and portable
computers)
toll-free: 0800 446 255
Technical Support (for servers and workstations)
toll-free: 0800 443 563
Nicaragua
Home and Small Business
0800 446 255
Government and Business
0800 444 617
Sales
0800 441 567
Fax
0800 441 566
General Support
001-800-220-1006
Contacting Dell
73
w w w. d el l. c om | s upp ort . del l . com
Country (City)
International Access Code
Country Code
City Code
Department Name or Service Area,
Website and E-Mail Address
Norway (Lysaker)
Website: support.euro.dell.com
International Access Code: 00
E-mail: support.euro.dell.com/no/no/emaildell/
Country Code: 47
Technical Support
Area Codes,
Local Numbers, and
Toll-Free Numbers
671 16882
Relational Customer Care
671 17575
Home/Small Business Customer Care
231 62298
Switchboard
671 16800
Fax Switchboard
671 16865
Panama
General Support
001-800-507-0962
Peru
General Support
0800-50-669
Poland (Warsaw)
Website: support.euro.dell.com
International Access Code: 011
E-mail: [email protected]
Country Code: 48
Customer Service Phone
57 95 700
City Code: 22
Customer Care
57 95 999
Sales
57 95 999
Customer Service Fax
57 95 806
Reception Desk Fax
57 95 998
Switchboard
57 95 999
Portugal
Website: support.euro.dell.com
International Access Code: 00
E-mail: support.euro.dell.com/pt/en/emaildell/
Country Code: 351
Technical Support
Customer Care
Sales
Fax
707200149
800 300 413
800 300 410, 800 300 411,
800 300 412, or 21 422 07 10
21 424 01 12
Puerto Rico
General Support
1-800-805-7545
St. Kitts and Nevis
General Support
toll-free: 1-877-441-4731
St. Lucia
General Support
1-800-882-1521
St. Vincent and the Grenadines General Support
toll-free: 1-877-270-4609
74
Contacting Dell
Country (City)
International Access Code
Country Code
City Code
Department Name or Service Area,
Website and E-Mail Address
Area Codes,
Local Numbers, and
Toll-Free Numbers
Singapore (Singapore)
Website: support.ap.dell.com
International Access Code: 005
Technical Support (Dimension, Inspiron, and
Electronics and Accessories)
toll-free: 1800 394 7430
Technical Support (OptiPlex, Latitude, and Dell
Precision)
toll-free: 1800 394 7488
Technical Support (PowerApp, PowerEdge,
PowerConnect, and PowerVault)
toll-free: 1800 394 7478
Country Code: 65
Customer Service (Penang, Malaysia)
Sales
Slovakia (Prague)
Website: support.euro.dell.com
International Access Code: 00
E-mail: [email protected]
Country Code: 421
Technical Support
Customer Care
604 633 4949
toll-free: 1 800 394 7425
02 5441 5727
420 22537 2707
Fax
02 5441 8328
Tech Fax
02 5441 8328
Switchboard (Sales)
02 5441 7585
South Africa (Johannesburg)
Website: support.euro.dell.com
International Access Code:
E-mail: [email protected]
09/091
Gold Queue
011 709 7713
Country Code: 27
Technical Support
011 709 7710
City Code: 11
Customer Care
011 709 7707
Sales
011 709 7700
Fax
011 706 0495
Switchboard
011 709 7700
Customer Technical Support, Customer Service,
and Sales (Penang, Malaysia)
604 633 4810
Southeast Asian and Pacific
Countries
Contacting Dell
75
w w w. d el l. c om | s upp ort . del l . com
Country (City)
International Access Code
Country Code
City Code
Department Name or Service Area,
Website and E-Mail Address
Area Codes,
Local Numbers, and
Toll-Free Numbers
Spain (Madrid)
Website: support.euro.dell.com
International Access Code: 00
E-mail: support.euro.dell.com/es/es/emaildell/
Country Code: 34
Home and Small Business
City Code: 91
Technical Support
902 100 130
Customer Care
902 118 540
Sales
902 118 541
Switchboard
902 118 541
Fax
902 118 539
Corporate
Technical Support
902 100 130
Customer Care
902 115 236
Switchboard
91 722 92 00
Fax
91 722 95 83
Sweden (Upplands Vasby)
Website: support.euro.dell.com
International Access Code: 00
E-mail: support.euro.dell.com/se/sv/emaildell/
Country Code: 46
Technical Support
08 590 05 199
City Code: 8
Relational Customer Care
08 590 05 642
Home/Small Business Customer Care
08 587 70 527
Employee Purchase Program (EPP) Support
Technical Support Fax
08 590 05 594
Sales
08 590 05 185
Switzerland (Geneva)
Website: support.euro.dell.com
International Access Code: 00
E-mail: [email protected]
Country Code: 41
E-mail for French-speaking HSB and Corporate
Customers: support.euro.dell.com/ch/fr/emaildell/
City Code: 22
76
Contacting Dell
20 140 14 44
Technical Support (Home and Small Business)
0844 811 411
Technical Support (Corporate)
0844 822 844
Customer Care (Home and Small Business)
0848 802 202
Customer Care (Corporate)
0848 821 721
Fax
022 799 01 90
Switchboard
022 799 01 01
Country (City)
International Access Code
Country Code
City Code
Department Name or Service Area,
Website and E-Mail Address
Area Codes,
Local Numbers, and
Toll-Free Numbers
Taiwan
Website: support.ap.dell.com
International Access Code: 002
E-mail: [email protected]
Country Code: 886
Technical Support (OptiPlex, Latitude, Inspiron,
Dimension, and Electronics and Accessories)
toll-free: 00801 86 1011
Technical Support (PowerApp, PowerEdge,
PowerConnect, and PowerVault)
toll-free: 00801 60 1256
Transaction Sales
toll-free: 00801 65 1228
Corporate Sales
toll-free: 00801 65 1227
Thailand
Website: support.ap.dell.com
International Access Code: 001
Technical Support (OptiPlex, Latitude, and Dell
Precision)
toll-free: 1800 0060 07
Technical Support (PowerApp, PowerEdge,
PowerConnect, and PowerVault)
toll-free: 1800 0600 09
Country Code: 66
Customer Service (Penang, Malaysia)
604 633 4949
Corporate Sales
toll-free: 1800 006 009
Transaction Sales
toll-free: 1800 006 006
Trinidad/Tobago
General Support
1-800-805-8035
Turks and Caicos Islands
General Support
toll-free: 1-866-540-3355
Contacting Dell
77
w w w. d el l. c om | s upp ort . del l . com
Country (City)
International Access Code
Country Code
City Code
Department Name or Service Area,
Website and E-Mail Address
Area Codes,
Local Numbers, and
Toll-Free Numbers
U.K. (Bracknell)
Website: support.euro.dell.com
International Access Code: 00
Customer Care website: support.euro.dell.com/uk/en/ECare/Form/Home.asp
Country Code: 44
City Code: 1344
Uruguay
78
E-mail: [email protected]
Technical Support (Corporate/Preferred
Accounts/PAD [1000+ employees])
0870 908 0500
Technical Support (direct and general)
0870 908 0800
Global Accounts Customer Care
01344 373 186
Home and Small Business Customer Care
0870 906 0010
Corporate Customer Care
01344 373 185
Preferred Accounts (500–5000 employees)
Customer Care
0870 906 0010
Central Government Customer Care
01344 373 193
Local Government & Education Customer Care
01344 373 199
Health Customer Care
01344 373 194
Home and Small Business Sales
0870 907 4000
Corporate/Public Sector Sales
01344 860 456
Home and Small Business Fax
0870 907 4006
General Support
Contacting Dell
toll-free: 000-413-598-2521
Country (City)
International Access Code
Country Code
City Code
Department Name or Service Area,
Website and E-Mail Address
Area Codes,
Local Numbers, and
Toll-Free Numbers
U.S.A. (Austin, Texas)
Automated Order-Status Service
toll-free: 1-800-433-9014
International Access Code: 011
AutoTech (portable and desktop computers)
toll-free: 1-800-247-9362
Country Code: 1
Consumer (Home and Home Office)
Technical Support
toll-free: 1-800-624-9896
Customer Service
toll-free: 1-800-624-9897
DellNet™ Service and Support
toll-free: 1-877-Dellnet
(1-877-335-5638)
Employee Purchase Program (EPP) Customers
toll-free: 1-800-695-8133
Financial Services website: www.dellfinancialservices.com
Financial Services (lease/loans)
toll-free: 1-877-577-3355
Financial Services (Dell Preferred Accounts [DPA])
toll-free: 1-800-283-2210
Business
Customer Service and Technical Support
toll-free: 1-800-822-8965
Employee Purchase Program (EPP) Customers
toll-free: 1-800-695-8133
Printers and Projectors Technical Support
toll-free: 1-877-459-7298
Public (government, education, and healthcare)
Customer Service and Technical Support
toll-free: 1-800-456-3355
Employee Purchase Program (EPP) Customers
toll-free: 1-800-234-1490
Dell Sales
toll-free: 1-800-289-3355
or toll-free: 1-800-879-3355
Dell Outlet Store (Dell refurbished computers)
toll-free: 1-888-798-7561
Software and Peripherals Sales
toll-free: 1-800-671-3355
Spare Parts Sales
toll-free: 1-800-357-3355
Extended Service and Warranty Sales
toll-free: 1-800-247-4618
Fax
toll-free: 1-800-727-8320
Dell Services for the Deaf, Hard-of-Hearing, or
Speech-Impaired
toll-free: 1-877-DELLTTY
(1-877-335-5889)
U.S. Virgin Islands
General Support
1-877-673-3355
Venezuela
General Support
8001-3605
Contacting Dell
79
80
Contacting Dell
w w w. d el l. c om | s upp ort . del l . com
7
Appendix
U.S. Terms and Conditions of Sale
These terms and conditions ("Agreement") apply to your purchase of computer systems and/or related products and/or
services and support sold in the United States ("Product") by the Dell entity named on the invoice or acknowledgement
("Dell") provided to you. By accepting delivery of the Product, you accept and are bound to the terms and conditions of
this Agreement. If you do not wish to be bound by this Agreement, you must notify Dell immediately and return your
purchase pursuant to Dell's Total Satisfaction Return Policy.
(See: http://support.dell.com/ContactUs/ByPhone.aspx?c=us&l=en&s=gen for our contact information.) If returned,
Product(s) must remain in the boxes in which they were shipped. THIS AGREEMENT SHALL APPLY UNLESS (I)
YOU HAVE A SEPARATE PURCHASE AGREEMENT WITH DELL, IN WHICH CASE THE SEPARATE
AGREEMENT SHALL GOVERN; OR (II) OTHER DELL TERMS AND CONDITIONS APPLY TO THE
TRANSACTION.
1
Other Documents.
This Agreement may NOT be altered, supplemented, or amended by the use of any other document(s) unless
otherwise agreed to in a written agreement signed by both you and Dell. If you do not receive an invoice or
acknowledgement in the mail, via e-mail, or with your Product, information about your purchase may be obtained at
http://support.dell.com/dellcare/Invoice.aspx or by contacting your sales representative.
2
Payment Terms; Orders; Quotes; Interest.
Payment terms are within Dell's sole discretion, and, unless otherwise agreed to by Dell, payment must be made at
the time of purchase. Payment for Product may be made by credit card, wire transfer, or some other prearranged
payment method. Dell may invoice parts of an order separately. Your order is subject to cancellation by Dell, at Dell's
sole discretion. Unless you and Dell have agreed to a different discount, Dell's standard pricing policy for
Dell™-branded systems, which include both hardware and services in one discounted price, allocates the discount off
list price applicable to the service portion of the system to be equal to the overall calculated percentage discount off
list price on the entire system. Dell is not responsible for pricing, typographical, or other errors, in any offer by Dell
and reserves the right to cancel any orders resulting from such errors.
3
Shipping Charges; Taxes; Title; Risk of Loss.
Shipping and handling are additional unless otherwise expressly indicated at the time of sale. Loss or damage that
occurs during shipping by a carrier selected by Dell is Dell's responsibility. Loss or damage that occurs during
shipping by a carrier selected by you is your responsibility. You must notify Dell within 30 days of the date of your
invoice or acknowledgement if you believe any part of your purchase is missing, wrong or damaged. Unless you
provide Dell with a valid and correct tax exemption certificate applicable to your purchase of Product and the
Product ship-to location, you are responsible for sales and other taxes associated with the order. Shipping dates are
estimates only. Title to software will remain with the applicable licensor(s).
4
Warranties.
THE LIMITED WARRANTIES APPLICABLE TO DELL-BRANDED HARDWARE PRODUCT CAN BE FOUND
AT http://www.dell.com/policy/legal/warranty.htm OR IN THE DOCUMENTATION DELL PROVIDES WITH
THE PRODUCT. DELL MAKES NO WARRANTIES FOR SERVICE, SOFTWARE, OR NON-DELL BRANDED
PRODUCT. SUCH PRODUCT IS PROVIDED BY DELL "AS IS." WARRANTY AND SERVICE FOR NON-DELL
Appendix
81
w w w. d el l. c om | s upp ort . del l . com
BRANDED PRODUCT, IF ANY, IS PROVIDED BY THE ORIGINAL MANUFACTURER, NOT BY DELL. DELL
MAKES NO EXPRESS WARRANTIES EXCEPT THOSE STATED IN DELL'S APPLICABLE WARRANTY
STATEMENT IN EFFECT ON THE DATE OF THE INVOICE, PACKING SLIP OR ACKNOWLEDGEMENT.
WARRANTIES AND SERVICE WILL BE EFFECTIVE, AND DELL WILL BE OBLIGATED TO HONOR ANY
SUCH WARRANTIES AND SERVICES, ONLY UPON DELL'S RECEIPT OF PAYMENT IN FULL FOR THE
ITEM TO BE WARRANTED OR SERVICED.
5
Software.
All software is provided subject to the license agreement that is part of the software package and you agree that you
will be bound by such license agreement.
6
Return Policies; Exchanges.
New and refurbished Product that you purchase directly from Dell (and not a third party) you may return or exchange
only in accordance with Dell's return policy in effect on the date of the invoice or acknowledgement. Any returns or
exchanges will be made in accordance with Dell's exchange policies in effect on the date of the return or exchange.
You must contact us directly before you attempt to return Product to obtain a Return Material Authorization
Number for you to include with your return. You must return Product to us in their original or equivalent packaging.
You are responsible for risk of loss, shipping and handling fees for returning or exchanging Product. Additional fees
may apply. Dell's return policy for Dell-branded Product can be found at:
http://www.dell.com/policy/legal/warranty.htm. Non-Dell branded software and peripheral return policies can be
found at: http://rcommerce.us.dell.com/rcomm/include/dw_policies.htm.
Refurbished Product return policies can be found at:
http://www.dell.com/us/en/dfh/topics/segtopic_nav_info_002_info.htm. If you fail to follow the return or exchange
instructions and policies provided by Dell, Dell is not responsible whatsoever for Product that is lost, damaged,
modified or otherwise processed for disposal or resale. If you are returning all components in an order, you will be
credited the full amount paid for the order. At Dell's discretion, credit for partial returns may be less than invoice or
individual component prices due to bundled or promotional pricing.
7
Changed or Discontinued Product.
Dell's policy is one of ongoing update and revision. Dell may revise and discontinue Product at any time without
notice to you and this may affect information saved in your online "cart." Dell will ship Product that has the
functionality and performance of the Product ordered, but changes between what is shipped and what is described in
a specification sheet or catalog are possible. Parts used in repairing or servicing Product may be new,
equivalent-to-new, or reconditioned.
8
Service and Support.
Service offerings may vary from Product to Product. If you purchase optional services and support from Dell, Dell
and/or your third-party service provider will provide such service and support to you in the United States in
accordance with the terms and conditions located at
http://www.dell.com/us/en/gen/services/service_service_contracts.htm or as mailed to you. You may contact Dell for
more information, see http://www1.us.dell.com/content/topics/segtopic.aspx/contact/contact?c=us&l=en&s=gen
for contact information. Dell and/or the third-party service provider may at their discretion, revise their general and
optional service and support programs and the terms and conditions that govern them without prior notice to you.
Dell has no obligation to provide service or support until Dell has received full payment for the Product or
service/support contract you purchased. Dell is not obligated to provide service or support you purchase through a
third party and not Dell.
9
Limitation of Liability.
DELL DOES NOT ACCEPT LIABILITY BEYOND THE REMEDIES SET FORTH HEREIN, INCLUDING BUT
NOT LIMITED TO ANY LIABILITY FOR PRODUCT NOT BEING AVAILABLE FOR USE, LOST PROFITS,
LOSS OF BUSINESS OR FOR LOST OR CORRUPTED DATA OR SOFTWARE, OR THE PROVISION OF
SERVICES AND SUPPORT. EXCEPT AS EXPRESSLY PROVIDED HEREIN, DELL WILL NOT BE LIABLE
FOR ANY CONSEQUENTIAL, SPECIAL, INDIRECT, OR PUNITIVE DAMAGES, EVEN IF ADVISED OF THE
82
Appendix
POSSIBILITY OF SUCH DAMAGES, OR FOR ANY CLAIM BY ANY THIRD PARTY. YOU AGREE THAT FOR
ANY LIABILITY RELATED TO THE PURCHASE OF PRODUCT, DELL IS NOT LIABLE OR RESPONSIBLE
FOR ANY AMOUNT OF DAMAGES ABOVE THE AMOUNT INVOICED FOR THE APPLICABLE PRODUCT.
NOTWITHSTANDING ANYTHING IN THIS AGREEMENT TO THE CONTRARY, THE REMEDIES SET
FORTH IN THIS AGREEMENT SHALL APPLY EVEN IF SUCH REMEDIES FAIL THEIR ESSENTIAL
PURPOSE. DELL IS NOT LIABLE TO YOU FOR WARRANTIES, SUPPORT, OR SERVICE MADE BY OR
PURCHASED FROM A THIRD PARTY AND NOT DIRECTLY FROM DELL. DELL IS NOT
RESPONSIBLE FOR REPRESENTATIONS OR OMISSIONS MADE BY A THIRD PARTY.
10
Applicable Law; Not For Resale or Export.
You agree to comply with all applicable laws and regulations of the various states and of the United States. You agree
and represent that you are buying only for your own internal use only, and not for resale or export. Dell has separate
terms and conditions governing resale of Product by third parties and transactions outside the United States. Terms
and conditions for resale are located at: http://www.dell.com/policy/legal/termsofsale.htm.
11
Governing Law.
THIS AGREEMENT AND ANY SALES THERE UNDER SHALL BE GOVERNED BY THE LAWS OF THE
STATE OF TEXAS, WITHOUT REGARD TO CONFLICTS OF LAWS RULES.
12
Headings.
The section headings used herein are for convenience of reference only and do not form a part of these terms and
conditions, and no construction or inference shall be derived there from.
13
Binding Arbitration.
ANY CLAIM, DISPUTE, OR CONTROVERSY (WHETHER IN CONTRACT, TORT, OR OTHERWISE,
WHETHER PREEXISTING, PRESENT OR FUTURE, AND INCLUDING STATUTORY, COMMON LAW,
INTENTIONAL TORT AND EQUITABLE CLAIMS) BETWEEN CUSTOMER AND DELL, its agents,
employees, principals, successors, assigns, affiliates (collectively for purposes of this paragraph, "Dell") arising from or
relating to this Agreement, its interpretation, or the breach, termination or validity thereof, the relationships which
result from this Agreement (including, to the full extent permitted by applicable law, relationships with third parties
who are not signatories to this Agreement), Dell's advertising, or any related purchase SHALL BE RESOLVED
EXCLUSIVELY AND FINALLY BY BINDING ARBITRATION ADMINISTERED BY THE NATIONAL
ARBITRATION FORUM (NAF) under its Code of Procedure then in effect (available via the Internet at
http://www.arb-forum.com
, or via telephone at 1-800-474-2371). The arbitration will be limited solely to the
dispute or controversy between customer and Dell. NEITHER CUSTOMER NOR DELL SHALL BE ENTITLED
TO JOIN OR CONSOLIDATE CLAIMS BY OR AGAINST OTHER CUSTOMERS, OR ARBITRATE ANY CLAIM
AS A REPRESENTATIVE OR CLASS ACTION OR IN A PRIVATE ATTORNEY GENERAL CAPACITY. This
transaction involves interstate commerce, and this provision shall be governed by the Federal Arbitration Act 9
U.S.C. sec. 1-16 (FAA). Any award of the arbitrator(s) shall be final and binding on each of the parties, and may be
entered as a judgment in any court of competent jurisdiction. Dell will be responsible for paying any arbitration filing
fees and fees required to obtain a hearing to the extent such fees exceed the amount of the filing fee for initiating a
claim in the court of general jurisdiction in the state in which you reside. Each party shall pay for its own costs and
attorneys' fees, if any. However, if any party prevails on a statutory claim that affords the prevailing party attorneys'
fees, or if there is a written agreement providing for fees, the Arbitrator may award reasonable fees to the prevailing
party, under the standards for fee shifting provided by law. Information may be obtained and claims may be filed with
the NAF at P.O. Box 50191, Minneapolis, MN 55405. (REV 4/04)
Appendix
83
w w w. d el l. c om | s upp ort . del l . com
Limited Warranties and Return Policy
Limited Warranty for Dell-Branded Hardware Products (U.S. Only)
Dell-branded hardware products purchased in the U.S. come with either a 90-day, 1-year, 2-year, 3-year, or 4-year limited
warranty depending on the product purchased. To determine which warranty came with your hardware product(s), see
your packing slip or invoice.
What is covered by this limited warranty?
This limited warranty covers defects in materials and workmanship in your—our end-user customer's—Dell-branded
hardware products, including Dell-branded peripheral products.
What is not covered by this limited warranty?
This limited warranty does not cover:
•
Software, including the operating system and software added to the Dell-branded hardware products through our
factory-integration system, third-party software, or the reloading of software
•
Non-Dell-branded and Solution Provider Direct products and accessories
•
Problems that result from:
–
External causes such as accident, abuse, misuse, or problems with electrical power
–
Servicing not authorized by Dell
–
Usage that is not in accordance with product instructions
–
Failure to follow the product instructions or failure to perform preventive maintenance
–
Problems caused by using accessories, parts, or components not supplied by Dell
•
Products with missing or altered Service Tags or serial numbers
•
Products for which Dell has not received payment
THIS WARRANTY GIVES YOU SPECIFIC LEGAL RIGHTS, AND YOU MAY ALSO HAVE OTHER RIGHTS
WHICH VARY FROM STATE TO STATE (OR JURISDICTION TO JURISDICTION). DELL'S
RESPONSIBILITY FOR MALFUNCTIONS AND DEFECTS IN HARDWARE IS LIMITED TO REPAIR AND
REPLACEMENT AS SET FORTH IN THIS WARRANTY STATEMENT. ALL EXPRESS AND IMPLIED
WARRANTIES FOR THE PRODUCT, INCLUDING BUT NOT LIMITED TO ANY IMPLIED WARRANTIES
AND CONDITIONS OF MERCHANTABILITY AND FITNESS FOR A PARTICULAR PURPOSE, ARE
LIMITED IN TIME TO THE TERM OF THE LIMITED WARRANTY PERIOD REFLECTED ON YOUR
PACKING SLIP OR INVOICE. NO WARRANTIES, WHETHER EXPRESS OR IMPLIED, WILL APPLY AFTER
THE LIMITED WARRANTY PERIOD HAS EXPIRED. SOME STATES DO NOT ALLOW LIMITATIONS ON
HOW LONG AN IMPLIED WARRANTY LASTS, SO THIS LIMITATION MAY NOT APPLY TO YOU.
WE DO NOT ACCEPT LIABILITY BEYOND THE REMEDIES PROVIDED FOR IN THIS LIMITED
WARRANTY OR FOR CONSEQUENTIAL OR INCIDENTAL DAMAGES, INCLUDING, WITHOUT
LIMITATION, ANY LIABILITY FOR THIRD-PARTY CLAIMS AGAINST YOU FOR DAMAGES, FOR
PRODUCTS NOT BEING AVAILABLE FOR USE, OR FOR LOST DATA OR LOST SOFTWARE. OUR
LIABILITY WILL BE NO MORE THAN THE AMOUNT YOU PAID FOR THE PRODUCT THAT IS THE
SUBJECT OF A CLAIM. THIS IS THE MAXIMUM AMOUNT FOR WHICH WE ARE RESPONSIBLE.
SOME STATES DO NOT ALLOW THE EXCLUSION OR LIMITATION OF INCIDENTAL OR
CONSEQUENTIAL DAMAGES, SO THE ABOVE LIMITATION OR EXCLUSION MAY NOT APPLY TO YOU.
84
Appendix
How long does this limited warranty last?
This limited warranty lasts for the time period indicated on your packing slip or invoice, except for the following
Dell-branded hardware:
•
Portable computer batteries carry a 1-year limited warranty.
•
Projector lamps carry a 90-day limited warranty.
•
Memory carries a lifetime limited warranty.
•
Monitors carry the longer of either a 3-year limited warranty or the remainder of the warranty for the Dell™
computer to which the monitor will be connected.
•
PDAs, MP3 players, earphones, remote inline controls, and AC adapters carry a 1-year limited warranty.
•
Other add-on hardware carries the longer of either a 1-year limited warranty for new parts and a 90-day limited
warranty for reconditioned parts or, for both new and reconditioned parts, the remainder of the warranty for the
Dell computer on which such parts are installed.
The limited warranty on all Dell-branded products begins on the date of the packing slip or invoice. The warranty period
is not extended if we repair or replace a warranted product or any parts. Dell may change the availability of limited
warranties, at its discretion, but any changes will not be retroactive.
What do I do if I need warranty service?
Before the warranty expires, please call us at the relevant number listed in the following table. Please also have your Dell
Service Tag or order number available.
Web Support
support.dell.com/ContactUs/ContactUsHome.aspx?c
=us&l=en&s=gen
Individual Home Consumers:
U.S. Only
Technical Support
1-800-624-9896
Customer Service
1-800-624-9897
Individual Home Consumers who purchased through an
Employee Purchase Program:
Technical Support and Customer Service
1-800-822-8965
Home and Small Business Commercial Customers:
Technical Support and Customer Service
1-800-456-3355
Medium, Large, or Global Commercial Customers,
Healthcare Customers, and Value-Added Resellers (VARs):
Technical Support and Customer Service
1-877-459-7278
Government and Education Customers:
Technical Support and Customer Service
1-877-459-7278
Dell-Branded Memory
1-888-363-5150
Appendix
85
w w w. d el l. c om | s upp ort . del l . com
What will Dell do?
During the 90 days of the 90-day limited warranty and the first year of all other limited warranties: During the 90 days
of the 90-day limited warranty and the first year of all other limited warranties, we will repair any Dell-branded hardware
products returned to us that prove to be defective in materials or workmanship. If we are not able to repair the product,
we will replace it with a comparable product that is new or refurbished.
When you contact us, we will issue a Return Material Authorization Number for you to include with your return. You
must return the products to us in their original or equivalent packaging, prepay shipping charges, and insure the
shipment or accept the risk if the product is lost or damaged in shipment. We will return the repaired or replacement
products to you. We will pay to ship the repaired or replaced products to you if you use an address in the United States
(excluding Puerto Rico and U.S. possessions and territories). Otherwise, we will ship the product to you freight collect.
If we determine that the issue is not covered under this warranty, we will notify you and inform you of service
alternatives that are available to you on a fee basis.
NOTE: Before you ship the product(s) to us, make sure to back up the data on the hard drive(s) and any other storage
device(s) in the product(s). Remove any confidential, proprietary, or personal information and removable media such as
floppy disks, CDs, or PC Cards. We are not responsible for any of your confidential, proprietary, or personal information; lost
or corrupted data; or damaged or lost removable media.
During the remaining years: For the remaining period of the limited warranty, we will replace any defective part with
new or refurbished parts, if we agree that it needs to be replaced. When you contact us, we will require a valid credit card
number at the time you request a replacement part, but we will not charge you for the replacement part as long as you
return the original part to us within 30 days after we ship the replacement part to you. If we do not receive the original
part within 30 days, we will charge to your credit card the then-current standard price for that part.
We will pay to ship the part to you if you use an address in the United States (excluding Puerto Rico and U.S.
possessions and territories). Otherwise, we will ship the part freight collect. We will also include a prepaid shipping
container with each replacement part for your use in returning the replaced part to us.
NOTE: Before you replace parts, make sure to back up the data on the hard drive(s) and any other storage device(s) in the
product(s). We are not responsible for lost or corrupted data.
What if I purchased a service contract?
If your service contract is with Dell, service will be provided to you under the terms of the service agreement. Please refer
to that contract for details on how to obtain service.
If you purchased through us a service contract with one of our third-party service providers, please refer to that contract
for details on how to obtain service.
How will you fix my product?
We use new and refurbished parts made by various manufacturers in performing warranty repairs and in building
replacement parts and systems. Refurbished parts and systems are parts or systems that have been returned to Dell,
some of which were never used by a customer. All parts and systems are inspected and tested for quality. Replacement
parts and systems are covered for the remaining period of the limited warranty for the product you bought. Dell owns all
parts removed from repaired products.
May I transfer the limited warranty?
Limited warranties on systems may be transferred if the current owner transfers ownership of the system and records the
transfer with us. The limited warranty on Dell-branded memory may not be transferred. You may record your transfer by
going to Dell's website:
•
86
If you are an Individual Home Consumer, go to www.dell.com/us/en/dhs/topics/sbtopic_015_ccare.htm
Appendix
•
If you are a Home Office, Small, Medium, Large, or Global Commercial Customer, go to
www.dell.com/us/en/biz/topics/sbtopic_ccare_nav_015_ccare.htm
•
If you are a Government, Education, or Healthcare Customer, or an Individual Home Consumer who purchased
through an Employee Purchase Program, go to www.dell.com/us/en/pub/topics/sbtopic_015_ccare.htm
If you do not have Internet access, call your customer care representative or call 1-800-624-9897.
All requests to transfer ownership are at Dell's sole discretion. All such transfers will be subject to the terms and
conditions of the original service or limited warranty agreement and Dell's terms and conditions of sale located at
www.dell.com. Dell cannot guarantee the authenticity of the products, limited warranties, service or support, or the
accuracy of the listings of products you purchase from a third party.
Total Satisfaction Return Policy (U.S. Only)
We value our relationship with you and want to make sure that you are satisfied with your purchases. That is why we
offer a Total Satisfaction return policy for most products that you, the end-user customer, purchase directly from Dell.
Under this policy, you may return to Dell products that you purchased directly from Dell for a credit or a refund of the
purchase price paid, less shipping and handling and applicable return fees as follows:
New Hardware Products and Accessories — Unless you have a separate agreement with Dell, all hardware, accessories,
peripherals, parts, and unopened software still in its/their sealed package, excluding the products listed below, may be
returned within twenty-one (21) days from the date on the packing slip or invoice.
Exclusions from the foregoing return policy:
•
New Dell PowerEdge™, Dell PowerConnect™, and Dell PowerVault™ products (excluding PowerVault 160T tape
libraries) may be returned within thirty (30) days from the date on the packing slip or invoice, except that new
PowerEdge SC servers and n series products purchased from the Small and Medium Business Sales Division may
only be returned within fourteen (14) days from the date on the packing slip or invoice.
•
Application software or an operating system that has been installed by Dell may not be returned unless you return
the entire computer under the 21-day return policy, if applicable to your purchase (if not applicable to your
purchase, you may not return application software or an operating system).
•
Nondefective third-party and Dell-branded software, peripheral, electronics and accessory products (for example:
televisions, printers, projectors, MP3 players, PDAs, battery chargers, un-preinstalled third-party software, wireless
cards/access points/routers), including but not limited to those sold by or through Dell's "Software & Peripherals"
or "Electronics & Accessories" groups, may be returned within twenty-one (21) days from the date on the packing
slip or invoice, but a fifteen percent (15%) return fee may be deducted from any refund or credit.
•
Dell | EMC storage products, EMC-branded products, Unisys-branded products, PowerVault 160T tape libraries,
enterprise software, non-Dell-branded enterprise products, software and/or software licenses, or any
non-Dell-customized hardware and/or software product(s) may not be returned at any time.
Reconditioned or Refurbished Dell-Branded Hardware Products and Parts — All reconditioned or refurbished
PowerEdge, PowerConnect, and PowerVault products may be returned within thirty (30) days from the date on the
packing slip or invoice. All other reconditioned or refurbished Dell-branded hardware products and parts may be
returned within fourteen (14) days of the date on the packing slip or invoice.
How to Return — To return products, e-mail or call Dell customer service to receive a Credit Return Authorization
Number within the return policy period applicable to the product you want to return. You must obtain a Credit Return
Authorization Number in order to return the product. See "Contacting Dell" or "Getting Help" in your customer
documentation (or go to www.dell.com/us/en/gen/contact.htm) to find the appropriate contact information for
obtaining customer assistance.
Appendix
87
w w w. d el l. c om | s upp ort . del l . com
You must ship the products to Dell within five (5) days of the date that Dell issues the Credit Return Authorization
Number. You must also return the products to Dell in their original packaging, in as-new condition along with any
media, documentation, and all other items that were included in the original shipment, prepay shipping charges, and
insure the shipment or accept the risk of loss or damage during shipment.
NOTE: Before you ship the product(s) to us, make sure to back up the data on the hard drive(s) and any other storage
device(s) in the product(s). Remove any confidential, proprietary, or personal information and removable media such as
floppy disks, CDs, or PC Cards. We are not responsible for any of your confidential, proprietary, or personal information; lost
or corrupted data; or damaged or lost removable media.
Dell™ Printer Consumables Limited Warranties
The following section describes the limited warranty for printer consumables (ink cartridges, toner cartridges, photo
print packs, and photo paper) for Dell-branded printers, for the U.S.
Consumables Limited Warranty (U.S. Only)
Dell Inc. warrants to the original purchaser of genuine Dell-branded toner cartridges that they will be free from defects
in material and workmanship for the life of the cartridge and that for genuine Dell-branded ink cartridges, photo print
packs and photo paper, they will be free from defects in material and workmanship for two years beginning on the date
of invoice. If this product proves defective in either material or workmanship, it will be replaced without charge during
the limited warranty period if returned to Dell. You must first call our toll-free number to get your return authorization.
In the U.S., call 1-800-822-8965; in Canada, call 1-800-387-5757. If we are not able to replace the product because it has
been discontinued or is not available, we will either replace it with a comparable product or reimburse you for the
cartridge purchase cost, at Dell’s sole option. This limited warranty does not apply to ink or toner cartridges that have
been refilled or improperly stored or due to problems resulting from misuse, abuse, accident, neglect, mishandling,
incorrect environments, or wear from ordinary use.
THIS WARRANTY GIVES YOU SPECIFIC LEGAL RIGHTS, AND YOU MAY ALSO HAVE OTHER RIGHTS
WHICH VARY FROM STATE TO STATE (OR JURISDICTION TO JURISDICTION). DELL’S RESPONSIBILITY
FOR MALFUNCTIONS AND DEFECTS IN HARDWARE IS LIMITED TO REPLACEMENT AS SET FORTH IN
THIS WARRANTY STATEMENT. FOR CANADIAN CUSTOMERS, EXCEPT FOR THE EXPRESS WARRANTIES
CONTAINED IN THIS WARRANTY STATEMENT, DELL DISCLAIMS ALL OTHER WARRANTIES AND
CONDITIONS, EXPRESS OR IMPLIED, STATUTORY OR OTHERWISE, FOR THE PRODUCT. FOR U.S.
CUSTOMERS, ALL EXPRESS AND IMPLIED WARRANTIES FOR THE PRODUCT, INCLUDING BUT NOT
LIMITED TO ANY IMPLIED WARRANTIES AND CONDITIONS OF MERCHANTABILITY AND FITNESS FOR
A PARTICULAR PURPOSE ARE LIMITED IN TIME TO THE TERM OF THIS LIMITED WARRANTY. NO
WARRANTIES, WHETHER EXPRESS OR IMPLIED, WILL APPLY AFTER THE LIMITED WARRANTY PERIOD
HAS EXPIRED. SOME STATES OR JURISDICTIONS DO NOT ALLOW THE EXCLUSION OF CERTAIN
IMPLIED WARRANTIES OR CONDITIONS, OR LIMITATIONS ON HOW LONG AN IMPLIED WARRANTY OR
CONDITION LASTS, SO THIS LIMITATION MAY NOT APPLY TO YOU. THIS WARRANTY COVERAGE
TERMINATES IF YOU SELL OR OTHERWISE TRANSFER THIS PRODUCT TO ANOTHER PARTY.
DELL DOES NOT ACCEPT LIABILITY BEYOND THE REMEDIES PROVIDED FOR IN THIS LIMITED
WARRANTY OR FOR SPECIAL, INDIRECT, CONSEQUENTIAL OR INCIDENTAL DAMAGES, INCLUDING,
WITHOUT LIMITATION, ANY LIABILITY FOR THIRD-PARTY CLAIMS AGAINST YOU FOR DAMAGES, FOR
PRODUCTS NOT BEING AVAILABLE FOR USE, OR FOR LOST DATA OR LOST SOFTWARE. DELL’S
LIABILITY WILL BE NO MORE THAN THE AMOUNT YOU PAID FOR THE PRODUCT THAT IS THE
SUBJECT OF A CLAIM. THIS IS THE MAXIMUM AMOUNT FOR WHICH DELL IS RESPONSIBLE.
SOME STATES OR JURISDICTIONS DO NOT ALLOW THE EXCLUSION OR LIMITATION OF SPECIAL,
INDIRECT, INCIDENTAL OR CONSEQUENTIAL DAMAGES, SO THE ABOVE LIMITATION OR EXCLUSION
MAY NOT APPLY TO YOU.
88
Appendix
Export Regulations
Customer acknowledges that these Products, which may include technology and software, are subject to the customs
and export control laws and regulations of the United States (“U.S.”) and may also be subject to the customs and export
laws and regulations of the country in which the Products are manufactured and/or received. Customer agrees to abide
by those laws and regulations. Further, under U.S. law, the Products may not be sold, leased or otherwise transferred to
restricted end-users or to restricted countries. In addition, the Products may not be sold, leased or otherwise transferred
to, or utilized by an end-user engaged in activities related to weapons of mass destruction, including without limitation,
activities related to the design, development, production or use of nuclear weapons, materials, or facilities, missiles or
the support of missile projects, and chemical or biological weapons.
Dell™ Software License Agreement
This is a legal agreement between you, the user, and Dell Products, L.P ("Dell"). This agreement covers all software that
is distributed with the Dell product, for which there is no separate license agreement between you and the manufacturer
or owner of the software (collectively the "Software"). This agreement is not for the sale of Software or any other
intellectual property. All title and intellectual property rights in and to Software is owned by the manufacturer or owner
of the Software. All rights not expressly granted under this agreement are reserved by the manufacturer or owner of the
Software. By opening or breaking the seal on the Software packet(s), installing or downloading the Software, or using the
Software that has been preloaded or is embedded in your product, you agree to be bound by the terms of this agreement.
If you do not agree to these terms, promptly return all Software items (disks, written materials, and packaging) and
delete any preloaded or embedded Software.
You may use one copy of the Software on only one product at a time. If you have multiple licenses for the Software, you
may use as many copies at any time as you have licenses. "Use" means loading the Software in temporary memory or
permanent storage on the product. Installation on a network server solely for distribution to other products is not "use"
if (but only if) you have a separate license for each product to which the Software is distributed. You must ensure that
the number of persons using the Software installed on a network server does not exceed the number of licenses that you
have. If the number of users of Software installed on a network server will exceed the number of licenses, you must
purchase additional licenses until the number of licenses equals the number of users before allowing additional users to
use the Software. If you are a commercial customer of Dell or a Dell affiliate, you hereby grant Dell, or an agent selected
by Dell, the right to perform an audit of your use of the Software during normal business hours, you agree to cooperate
with Dell in such audit, and you agree to provide Dell with all records reasonably related to your use of the Software. The
audit will be limited to verification of your compliance with the terms of this agreement.
The Software is protected by United States copyright laws and international treaties. You may make one copy of the
Software solely for backup or archival purposes or transfer it to a single hard disk provided you keep the original solely for
backup or archival purposes. You may not rent or lease the Software or copy the written materials accompanying the
Software, but you may transfer the Software and all accompanying materials on a permanent basis as part of a sale or
transfer of the Dell product if you retain no copies and the recipient agrees to the terms hereof. Any transfer must
include the most recent update and all prior versions. You may not reverse engineer, decompile, or disassemble the
Software. If the package accompanying your product contains compact discs, 3.5", and/or 5.25" disks, you may use only
the disks appropriate for your product. You may not use the disks on another computer or network, or loan, rent, lease, or
transfer them to another user except as permitted by this agreement.
Limited Warranty
Dell warrants that the Software disks will be free from defects in materials and workmanship under normal use for
ninety (90) days from the date you receive them. This warranty is limited to you and is not transferable. Any implied
warranties are limited to ninety (90) days from the date you receive the Software. Some jurisdictions do not allow limits
on the duration of an implied warranty, so this limitation may not apply to you. The entire liability of Dell and its
Appendix
89
w w w. d el l. c om | s upp ort . del l . com
suppliers, and your exclusive remedy, shall be (a) return of the price paid for the Software or (b) replacement of any disk
not meeting this warranty that is sent with a return authorization number to Dell, at your cost and risk. This limited
warranty is void if any disk damage has resulted from accident, abuse, misapplication, or service or modification by
someone other than Dell. Any replacement disk is warranted for the remaining original warranty period or thirty
(30) days, whichever is longer.
Dell does NOT warrant that the functions of the Software will meet your requirements or that operation of the Software
will be uninterrupted or error free. You assume responsibility for selecting the Software to achieve your intended results
and for the use and results obtained from the Software.
DELL, ON BEHALF OF ITSELF AND ITS SUPPLIERS, DISCLAIMS ALL OTHER WARRANTIES, EXPRESS OR
IMPLIED, INCLUDING, BUT NOT LIMITED TO, IMPLIED WARRANTIES OF MERCHANTABILITY AND
FITNESS FOR A PARTICULAR PURPOSE, FOR THE SOFTWARE AND ALL ACCOMPANYING WRITTEN
MATERIALS. This limited warranty gives you specific legal rights; you may have others, which vary from jurisdiction to
jurisdiction.
IN NO EVENT SHALL DELL OR ITS SUPPLIERS BE LIABLE FOR ANY DAMAGES WHATSOEVER
(INCLUDING, WITHOUT LIMITATION, DAMAGES FOR LOSS OF BUSINESS PROFITS, BUSINESS
INTERRUPTION, LOSS OF BUSINESS INFORMATION, OR OTHER PECUNIARY LOSS) ARISING OUT OF
USE OR INABILITY TO USE THE SOFTWARE, EVEN IF ADVISED OF THE POSSIBILITY OF SUCH
DAMAGES. Because some jurisdictions do not allow an exclusion or limitation of liability for consequential or
incidental damages, the above limitation may not apply to you.
U.S. Government Restricted Rights
The software and documentation are "commercial items" as that term is defined at 48 C.F.R. 2.101, consisting of
"commercial computer software" and "commercial computer software documentation" as such terms are used in 48
C.F.R. 12.212. Consistent with 48 C.F.R. 12.212 and 48 C.F.R. 227.7202-1 through 227.7202-4, all U.S. Government end
users acquire the software and documentation with only those rights set forth herein. Contractor/manufacturer is Dell
Products, L.P., One Dell Way, Round Rock, Texas 78682.
General
This license is effective until terminated. It will terminate upon the conditions set forth above or if you fail to comply
with any of its terms. Upon termination, you agree that the Software and accompanying materials, and all copies
thereof, will be destroyed. This agreement is governed by the laws of the State of Texas. Each provision of this
agreement is severable. If a provision is found to be unenforceable, this finding does not affect the enforceability of the
remaining provisions, terms, or conditions of this agreement. This agreement is binding on successors and assigns. Dell
agrees and you agree to waive, to the maximum extent permitted by law, any right to a jury trial with respect to the
Software or this agreement. Because this waiver may not be effective in some jurisdictions, this waiver may not apply to
you. You acknowledge that you have read this agreement, that you understand it, that you agree to be bound by its
terms, and that this is the complete and exclusive statement of the agreement between you and Dell regarding the
Software.
Regulatory Notices
Electromagnetic Interference (EMI) is any signal or emission, radiated in free space or conducted along power or signal
leads, that endangers the functioning of a radio navigation or other safety service or seriously degrades, obstructs, or
repeatedly interrupts a licensed radio communications service. Radio communications services include but are not
limited to AM/FM commercial broadcast, television, cellular services, radar, air-traffic control, pager, and Personal
Communication Services (PCS). These licensed services, along with unintentional radiators such as digital devices,
including computers, contribute to the electromagnetic environment.
90
Appendix
Electromagnetic Compatibility is the ability of items of electronic equipment to function properly together in the
electronic environment. While this product has been designed and determined to be compliant with regulatory agency
limits for EMI, there is no guarantee that interference will not occur in a particular installation. If this equipment does
cause interference with radio communications services, which can be determined by turning the equipment off and on,
you are encouraged to try to correct the interference by one or more of the following measures:
•
Reorient the receiving antenna.
•
Relocate the product with respect to the receiver.
•
Move the product away from the receiver.
•
Plug the product into a different outlet so that the product and the receiver are on different branch circuits.
If necessary, consult a Dell Technical Support representative or an experienced radio/television technician for additional
suggestions.
Dell™ products are designed, tested, and classified for their intended electromagnetic environment. These
electromagnetic environment classifications generally refer to the following harmonized definitions:
•
Class A is typically for business or industrial environments.
•
Class B is typically for residential environments.
Information Technology Equipment (ITE), including devices, expansion cards, printers, input/output (I/O) devices,
monitors, and so on, that are integrated into or connected to the product should match the electromagnetic
environment classification of the product.
A Notice About Shielded Signal Cables: Use only shielded cables for connecting devices to any Dell device to reduce
the possibility of interference with radio communications services. Using shielded cables ensures that you maintain
the appropriate Electromagnetic Compatibility classification for the intended environment. For parallel printers, a
cable is available from Dell. If you prefer, you can order a cable from Dell on the World Wide Web at
www.dell.com/supplies.
Most Dell products are classified for Class B environments. However, the inclusion of certain options may change the
rating of some configurations to Class A. To determine the electromagnetic classification for your computer or device,
see the following sections specific for each regulatory agency. Each section provides country-specific Electromagnetic
Compatibility/EMI, telecommunications, wireless, or product safety information.
FCC Notices (U.S. Only)
For FCC information, see the appropriate documentation for your product: Dell printer User’s Guide.
Appendix
91
92
Appendix
w w w. d el l. c om | s upp ort . del l . com
Index
A
D
Advanced tab, 44
Dell
contacting, 61
aligning ink cartridges, 53
B
borderless printing, 25
buttons, operator panel
Cancel, 15
down arrow, 14
Power, 14
C
Cancel button, 15
Dell All-In-One Center
accessing, 42
Copy section, 42
Preview section, 42
Productivity Tools, 42
Scan section, 42
using, 41
F
Dell Picture Studio v2.0
using, 45
G
E
e-mail
document, 34
scanned image, 34
cartridges, ink
aligning, 53
replacing, 49
envelopes
loading, 20
copies, 26
copying
operator panel, 26
software, 27
faxing, 35
glossy paper
loading, 21
cards
loading, 21
cleaning
ink cartridge nozzles, 54
Print head order, 59
Print head programming, 59
Print head short, 59
Print incomplete, 59
Unlock scanner, 59
error message
Color TSR error, 59
Incorrect home position, 59
Incorrect print head, 59
Ink Low, 58
Missing print head, 59
Mono TSR error, 59
Paper jam, 59
Paper tray empty, 59
Print carrier stall, 59
greeting cards
loading, 21
I
index cards
loading, 21
ink cartridges
aligning, 53
cleaning, 54
replacing, 49
Ink Low message, 58
iron-on transfers
loading, 21
Index
93
94
L
O
loading
cards, 21
envelopes, 20
greeting cards, 21
index cards, 21
iron-on transfers, 21
photo cards, 21
photo paper, 21
postcards, 21
transparencies, 21
operator panel
copying with, 26
using, 14
P
paper exit tray, 12
Paper jam message, 59
Paper tray empty message, 59
paper type sensor, 17
turning off, 18
M
Maintenance tab, 44
messages, error
Color TSR error, 59
Incorrect home position, 59
Incorrect print head, 59
Ink Low, 58
Missing print head, 59
Mono TSR error, 59
Paper jam, 59
Paper tray empty, 59
Print carrier stall, 59
Print head order, 59
Print head programming, 59
Print head short, 59
Print incomplete, 59
Unlock scanner, 59
photo cards
loading, 21
photo paper
loading, 21
photos
printing, 24
PictBridge, 26
postcards
loading, 21
Print Setup tab, 44
Printing Preferences
accessing, 43
Advanced tab, 44
Maintenance tab, 44
Print Setup tab, 44
multiple copies, 44
S
N
nozzles, ink cartridge
cleaning, 54
94
Index
software
Dell All-In-One Center, 41
Printing Preferences, 43
reinstalling, 47
uninstalling, 47
specialty media
cards, 21
envelopes, 20
glossy, 21
greeting cards, 21
index cards, 21
iron-on transfers, 21
photo cards, 21
photo paper, 21
postcards, 21
transparencies, 21
support
contacting Dell, 61
T
troubleshooting
ink low message, 58
paper out message, 59