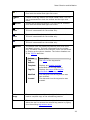
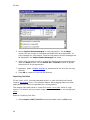
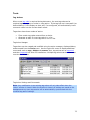
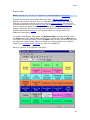
1
P3 Help
Table Of Contents
Overview ...................................................................................................... 1
What's new in version 1.4.4 .......................................................................... 1
Documentation ........................................................................................... 2
Installing P3 and Getting Updates .................................................................. 3
What's Installed ....................................................................................... 3
What's not installed .................................................................................. 3
Customizing the P3 Installation................................................................... 4
Removing a P3 Installation......................................................................... 4
System Requirements .................................................................................. 4
Minimum Hardware Requirements............................................................... 4
Optional Requirements .............................................................................. 5
Supported Peripheral Devices........................................................................ 5
Tag Readers ............................................................................................ 5
Electronic Balances ................................................................................... 5
Digitizer Tablets ....................................................................................... 6
Multiports ................................................................................................ 6
Configuration ................................................................................................ 7
Configuration Profiles ................................................................................... 7
Active Profile............................................................................................ 7
Note: Changing the active profile while a Tag Session is open will cause
peripheral devices to be disconnected and reconnected to the application; it may
also reset the default repeating comments. .................................................. 8
Profile Settings......................................................................................... 8
General Profile Settings ................................................................................ 9
iii
P3 Help
Configuring Devices ....................................................................................12
Device Profile Settings..............................................................................12
General Device Properties .........................................................................13
Serial Port Device Settings ........................................................................14
Tag Reader Devices .................................................................................15
Balance Devices ......................................................................................17
Digitizer Tablets ......................................................................................17
Baytech Multiport Controllers ....................................................................19
Terminal Window.....................................................................................19
Activating Tag Actions.................................................................................21
Validation Constraints .................................................................................21
Profile Commands for Managing Validation Constraints..................................22
Validation Constraint Properties .................................................................22
Audible Alert Sound Events ..........................................................................23
Types of Sound Events:............................................................................24
Assigning Wave Files to Sound Events ........................................................25
Data Collection and Validation.........................................................................27
Tag Session Overview .................................................................................27
Tag Files and Tag Sessions .......................................................................27
Naming conventions for Tag Sessions and Tag Files ......................................27
Header Templates and Tag Sessions...........................................................27
Incomplete Tag Sessions ..........................................................................28
Managing Tag Sessions ...............................................................................28
Tag Session Manager Commands ...............................................................28
Tag Session Header ....................................................................................30
iv
Table Of Contents
Drop-Down Value Lists .............................................................................31
Session Header Note ................................................................................31
Saving Session Header Information ............................................................31
Tag Session Header Field Reference Guide .....................................................32
Tag Session Header Templates .....................................................................35
Creating a Header Template......................................................................36
Customizing Field Labels...........................................................................37
Entering Default Data...............................................................................37
Hiding Optional Header Fields ....................................................................37
Tag Detail .................................................................................................38
Field Navigation and Data Entry.................................................................38
Scrolling Between Detail Records ...............................................................39
Tag Detail Field Reference Guide ..................................................................39
Tag Code Buffer ......................................................................................40
Character Codes ......................................................................................41
Verbose .................................................................................................41
Tag Detail Validation...................................................................................43
Field-Level Validation ...............................................................................43
Tag Session Commands ..............................................................................45
Customizing the Tag Session Tool Bar ........................................................50
Statistics Viewer ........................................................................................51
Species Counts........................................................................................51
Duplicate Tag Code ..................................................................................52
Reader Device Statistics ...........................................................................52
Uploading Data ..........................................................................................52
v
P3 Help
Upload Configuration Settings ...................................................................53
Uploading Data to PTAGIS ........................................................................53
Upload History ........................................................................................54
Importing and Exporting ................................................................................57
Exporting Data...........................................................................................57
Steps for Exporting ..................................................................................57
Importing Tag Files.....................................................................................58
Note: P3 will only import tag files created by P3 or PITTag2. Older files will need
to be imported into PITTag2 and reformatted to be imported into P3...............58
Steps for Importing Tag Files ....................................................................58
Importing Tag Sessions...............................................................................60
Tip: Use this feature when upgrading from PITTag2 to automatically transfer all
tag sessions from the old version to the new. ..............................................60
Steps for Importing Tag Sessions...............................................................60
Importing Text Files....................................................................................62
Steps for Importing Text Files ...................................................................62
Importing and Exporting VRT Tables .............................................................66
Exporting VRT Tables ...............................................................................66
Importing VRT Tables...............................................................................67
Downloading Data From a Tag Reader ...........................................................70
Steps for Downloading Data from a Tag Reader ...........................................70
Importing Configuration Data.......................................................................73
Steps for Importing Configuration Data.......................................................74
Tools...........................................................................................................75
Tag Actions ...............................................................................................75
Tag Action Manager .................................................................................75
vi
Table Of Contents
Tag Action Settings and Commands ...........................................................75
Tip: the Replace command will import tag codes much faster than the Import
command. Use the Import command only when appending a relatively small
number of tag codes (less than 25k) to a tag action. ....................................80
Tip: the Delete All and Replace commands will generate a lot of empty space in
the P3 database. We recommend running the Compact and Repair utility after
running any of these commands to optimize the database. ............................80
Tag Actions and Data Entry .......................................................................80
Digitizer Maps ............................................................................................80
Digitizer Maps .........................................................................................81
Digitizer Map Commands ..........................................................................84
Searching Data ..........................................................................................87
Searching Data .......................................................................................87
Defining Search Criteria............................................................................89
Designating which Fields to Display ............................................................91
Managing Search Results ..........................................................................91
Replacing Data Values.................................................................................92
Confirm Replaced Values ..........................................................................94
Merging Tag Sessions .................................................................................94
Advanced Merge Settings..........................................................................95
Dot-Out Wizard ..........................................................................................96
Using the Dot-Out Wizard .........................................................................96
Remove Dot-Outs.......................................................................................97
Duplicate Viewer ........................................................................................98
Validation Codes ......................................................................................100
Updating Validation Codes ......................................................................100
Custom Validation Codes ........................................................................101
vii
P3 Help
Deletion of Verbose Species, Run and Rear Codes ......................................101
Database Maintenance ..............................................................................102
Appendix ...................................................................................................103
Frequently Asked Questions .......................................................................103
Questions .............................................................................................103
Answers ...............................................................................................103
Hardware Support ....................................................................................105
Tag Readers .........................................................................................105
Digital Balances.....................................................................................105
USB/PCMCIA/Serial Converters, Hubs and Controllers. ................................106
Troubleshooting Common Tag Reader Problems............................................107
Tag Reader Won't Read a PIT Tag ............................................................107
Tag Reader Won't Communicate with PC ...................................................107
Tag Reader Won't Update the Tag Code Field in a Tag Session .....................108
Troubleshooting Common Digitizer Tablets Problems .....................................108
Digitizer Tablet Doesn't Register Pen Clicks ...............................................108
WinTab Digitizer Tablet Won't Communicate with a PC ................................108
ASCII Digitizer Tablet Won't Communicate with a PC via Serial Port ..............108
Digitizer Tablet doesn't Communicate with P3 ............................................108
Digitizer Tablet is Sending the Wrong Commands .......................................109
Digitizer Tablet is Sending Wrong Lengths.................................................109
Digitizer Tablet Hangs P3 when Connected via Baytech Multiport ..................109
Operating the Destron 400 kHz Benchtop Tag Reader ....................................109
Changing the Communication Settings......................................................109
Testing the Destron 400 kHz Reader and Antenna Assembly ........................110
viii
Table Of Contents
Collecting Data on the Destron Reader......................................................110
Downloading Data from the Destron Reader into P3....................................110
Erasing Stored Records from the Destron Reader ....................................... 110
Configuring Calcomp Drawing Board III .......................................................111
Index ........................................................................................................113
ix
Overview
Overview of the P3 Application
P3, also known as PITTag3, is a data entry, edit, and validation tool developed expressly to
facilitate the collection of PIT tag mark/recapture data in the Columbia/Snake river basins. P3
provides the user with a very fast data entry module that recognizes, coordinates, and assigns
input from a number of peripheral electronic components. The data editing module provides a
structured environment to review and modify existing data records while ensuring the integrity
of data content and format. The data verification and validation routines are designed to detect
and prevent inadvertent errors in data entry, and alert the user to questionable data values at
the time of entry, without significantly increasing processing time. The ultimate product of P3 is
a thoroughly-proofed and precisely-formatted Tag File, containing up to 10,000 PIT tag
records and adjunct data, ready for incorporation into the regional PTAGIS database.
What's new in version 1.4.4
Check out Readme.txt for more information about this release. We recommend using
Windows XP or higher for this version of the program.
New Features:
•
•
•
Support added for Sartorius Combics 1 electronic balance. This balance does
not automatically send data to PC. The user has to press Print button for the
data to be sent.
Whenever a tag action is imported into P3, the user will be prompted to
activate the tag actions in the current profile. If the user agrees, then the
activation will occur automatically.
When tag actions associated with tag sessions are exported, the user how has
an option to export all the tags from the associated tag session as a list of
tags assigned to this action. The user will be asked if she wants to export tags
from the associated session. If the user agrees, the session is converted into
a tag list and included in the export.
1
P3 Help
Other Fixes:
•
•
•
Layout of the exported tag file was changed to match previous versions of P3.
The note in the detail records will have a blank like above and below the note.
Default baud rate for Avid PowerTracker II is set to 2400 baud.
When the user changes file name used for a tag session, all upload history for
the old file will be erased to avoid confusion.
Documentation
This documentation is meant to provide quick, easily accessible information about
the P3 application. This document assumes that you are proficient in the use of the
Windows operating system. If you need help using the operating system, consult its
user documentation. This document also assumes that you are familiar with PIT tag
marking procedures and PTAGIS data specifications. If not, we encourage you to
read this documentation, located at www.ptagis.org.
The P3 application often provides multiple ways to accomplish a task. In some cases,
you can use the main menu, the right-click menu, a toolbar function, or you can
press a key combination for a certain task, but instructions in this documentation
generally include only the most convenient method.
The following sources provide additional support for the P3 application:
PIT Tag Specification Document. This document contains detailed specifications
about the data collected in the P3 application. Read this document first if you have
any questions about what data should be entered into the P3 application.
Readme.txt. This text file covers new features, enhancements, bug fixes, and
known issues for the current version of P3. Please read this carefully before using the
application. It is located in the P3 root directory.
EULA.txt. This document is the end-user license agreement and is displayed in the
About window accessed from the Help menu heading.
The P3 web site, at P3 Home Page, contains up-to-date information about the
application.
2
Overview
Installing P3 and Getting Updates
The P3 application can be downloaded from the P3 Home Page web site. There are
two types of installation files that can be downloaded:
Full Installation. This single setup file contains the setup program and all of the
necessary components to install P3. This file is very large and should be used for the
initial installation and/or used for installing on systems that do not have a connection
to the Internet.
Web Installation. This file is much smaller, but contains only the setup program to
install the application. Once the file is downloaded and run, it will install or update
the P3 application over the Internet. Use this feature to quickly upgrade existing
installations to the latest version.
The P3 application can also be obtained on CD. Please contact the PIT Tag
Operations Center at Pacific States Marine Fisheries Commission, 205 SE Spokane
Street, Suite 100, Portland, OR 97202; (503) 595-3100, [email protected].
What's Installed
The following files are installed in the application directory chosen during the
installation:
•
•
•
•
•
•
P3.exe is the executable file for starting the application.
P3.mdb is a database compatible with Microsoft Access 2000. It contains
data and configuration information for the application. This data is secured so
that if you open the file in MS Access, you have read-only privileges to the
data and schema objects. This file should be backed up on a regular basis to
avoid losing data in the event of a system crash or file corruption. In addition,
periodic maintenance on this file should be performed to optimize
performance.
Secured.mdw contains the MS Access Workgroup information for securing
the P3.mdb database.
Readme.txt is a text file documenting new features, enhancements, bug
fixes, and known issues for the current version.
EULA.txt is the end-user license agreement accompanying this application.
P3Device.dll contains all of the necessary drivers for supported peripheral
devices.
In addition, several library files are installed in the Windows system directory.
What's not installed
3
P3 Help
The P3 installation program does not include the validation code libraries. These
libraries are updated as necessary. P3 will prompt the user to download or import
the current codes into the application the first time it is started.
Customizing the P3 Installation
By default, when the P3 application starts, it looks in the installation directory for the
P3.mdb and Secured.mdw files. If these files are not found, it will prompt you to find
them.
You can customize the P3 application to open a P3 database file in an alternate
location. Start by creating an application shortcut (refer to 'Windows Help' for
instructions) to the P3.exe file. Once created, open the properties of the shortcut
(right mouse click) and append the alternate file path of the database to the Target
executable path as shown below. The next time the application starts it will open the
alternate database.
Removing a P3 Installation
Once installed, you can remove P3 by following these steps:
1. Close all programs.
2. Click the Windows Start button, point to Settings, and then click Control
Panel.
3. Double-click the Add/Remove Programs icon .
4. Click P3 in the Install/Uninstall tab, and then click Add/Remove.
5. Follow the instructions on the screen.
System Requirements
•
•
Windows 2000 SP4 (or later)
Windows XP SP1 (or later)
Minimum Hardware Requirements
4
Overview
•
•
•
•
Processor Type: Pentium
Processor Clock Speed: 100 MHz
Memory: 32 Megabytes RAM
Hard Disk Space: 30 Megabytes free space
Note: For optimal performance, additional memory (64 Megabytes or greater), disk
space, and greater processor speed (300 MHz or faster) are highly recommended, as
is the use of a mouse or other pointing device.
Optional Requirements
•
•
An Internet connection is required for the following:
• web-deployed installations
• automated data upload
• web import of validation codes
A sound card and speakers are required for audible alerts.
Supported Peripheral Devices
This summary is a list of the devices supported by the P3 application for data entry.
This listing may change over time. Please check the P3 Home Page web site for the
latest information on supported peripheral devices.
Tag Readers
Destron 2001F Portable Transceiver with firmware version 2.0, 2.3 or
version 1.2 with 'Time Tag' firmware setting equal to 'No'.
Destron 2001F Portable Transceiver with firmware version 1.2 and 'Time
Tag' firmware setting equal to 'Yes'.
Destron 400 kHz Benchtop Reader (also supports the 'Proximity GP30
Reader').
Destron Paddle Reader.
Avid PowerTracker II.
DataMars ISO MAX III Fisheries.
AllFlex ISO Compatible RF/ID Portable Reader
Electronic Balances
OHAUS Navigator, Scout and CT600-1200 models with RS-232 kit.
5
P3 Help
A&D FX/FY3000 series with RS-232 kit.
Sartorius Combics 1 models with RS-232.
Digitizer Tablets
CalComp Drawing Boards and Drawing Slates supporting the ASCII 2000
format.
WinTab digitizer tablets.
Multiports
BayTech H-Series Multiport Controller.
6
Configuration
Configuration Profiles
Profiles contain all of the P3 configuration settings specific to the data collection
environment such as device settings, audible alerts, and data logging. Multiple
profiles can be created, copied, and modified using the profile manager accessed
from the Tools menu, displayed below. In addition, profiles can be exported and
imported into other P3 installations.
Active Profile
The active profile is defined to be the profile currently in use by the application. If a
default profile is defined, P3 will open that profile automatically when it starts.
Otherwise the user will be prompted to select a profile. Users can change the active
profile at any time, even while a tag session is open, by setting the Active Profile
drop-down list in the menu or toolbar as shown below.
7
P3 Help
Note: Changing the active profile while a Tag Session is open will cause peripheral
devices to be disconnected and reconnected to the application; it may also reset the
default repeating comments.
Tip: Clicking on the Active Profile label on the toolbar will automatically open the
active profile for editing.
Profile Settings
Profile settings control how a tag session will collect and display data. Only after
pressing the OK or Apply buttons on the dialog box will changes to the profile
settings be saved. If changes are made to the active profile and a tag session is
currently open, the new settings will take effect immediately. However, take care in
doing this; as with changing the active profile, this too will cause devices to
disconnect and reconnect to the application and it's possible to miss a scanned tag
code during this very short period of time.
8
Configuration
The following categories describe profile settings as they are grouped in the profile
window:
General
Devices
Tag Actions
Species/Run/Rearing-Type Constraints
Audible Alert Sounds
General Profile Settings
Most of the general profile settings effect how data will be collected and processed in
a tag session.
9
P3 Help
Navigating and Changing General Profile Settings
P3 uses a standard tabular data entry mechanism. The ARROW keys move between
fields and the TAB and SHIFT-TAB keys move forward and backwards between
controls such as the data entry grid and command buttons. To edit a profile setting,
do the following:
1. Double-click or press ENTER in the Value field you want to edit. The cell will
display a cursor; this state is referred to as Edit Mode.
2. Make any changes to the field contents or select a value from a drop-down
that will display an additional data
list. Some fields display a cell-button
entry window.
3. To complete your changes, press ENTER.
4. To cancel your changes, press ESC.
5. Use the DOWN-ARROW to move to the next field.
General profile settings have two columns; the first describes the setting and the
second supplies a value.
Property
Profile
Name
Default
Profile
Tag File
Prefix
10
Effect
Identifies a particular profile; can contain a maximum of 50
characters.
Setting the value to 'Yes' will cause the current profile to
automatically load and become the active profile each time the P3
application starts.
Tag file names must begin with a valid two- or three-character
Coordinator ID code. This Tag File Prefix is used to automatically
generate that default Tag File value in each Tag Session Header.
The Tag File Prefix field must contain a code selected from the
drop-down list before the Profile can be saved. The only way to
change the Coordinator ID value in the Tag File field is to change
Configuration
Duplicate
Tag Codes
Auto
Accept
Verbose
Species
Run and
Rear
Mandatory
Length
Mandatory
Weight
Data
Logging
Log File
this Tag File Prefix value. Changing this value in the Profile will not
affect the tag file names in existing tag sessions.
This setting determines what to do in the event a duplicate tag code
is detected during data collection. It is highly recommended to use
the 'Prompt user for choice' value for this setting, which notifies
the user of the duplicate tag event and prompts them to take one of
four actions.
The other values for this settings will bypass the notification prompt
and automatically invoke a particular action for the duplicate tag
code event. These automated actions are useful in situations when
multiple tag readers are sending large amounts of redundant
information to the application.
When the Auto Accept setting is set to 'Yes', individual Tag Detail
Records are processed and written to disk automatically when the
next tag code is read from a device. Auto Accept will not override
any program or user-defined validation routines that might detect
an error or alert condition and prevent processing. In such an event
the new tag code, and any subsequent input, will be stored in the
Tag Code Buffer until the current record has been completed and
manually processed.
If this setting is set to 'Yes', a single, verbose description will be
used in place of the species, run and rearing-type codes throughout
the entire application (with the exception of the search and replace
features). If it is set to 'No', single-character codes are used to
identify the species, run and rearing-type values throughout the
application.
Note: Verbose descriptions are limited to only common
combinations of numeric codes. If a verbose description does not
exist for a particular combination, the numeric combination of
species run and rearing-type codes will be displayed instead.
If the Mandatory Length setting is set to 'Yes', a tag detail record
cannot be processed until a valid length (or Dash-Out) value is
entered into the field.
If the Mandatory Weight setting is set to 'Yes', a tag detail record
cannot be processed until a valid weight (or Dash-Out) value is
entered into the field.
Setting this value to 'Yes' will write a comma separated line of data
for each new or edited detail record to an external file described in
the Log File setting below.
Tip: Logged data can be easily recovered from a file using the
Import CSV Wizard.
This setting designates the log file to be used for logging any new
or edited detail records, if the Data Logging setting described
above is enabled.
Note: The log file may reside on a floppy drive to ensure data
recovery in the case of a hard disk failure. However, logging to the
11
P3 Help
Default
Export
Path
Default
Repeating
Comments
floppy drive may impact performance during the data collection
process.
This setting defines the default path for exported tag data
information. If no path is defined, P3 will automatically create an
Export sub-directory in the application path, by default.
If this setting is set to 'Yes', default repeating comments will be
applied each time the application is started or the active profile is
changed.
when the field is
To modify this setting, press the cell button
selected and the following window will appear:
Starting
Detail
Field
If the first check box labeled 'Use the comments below...' is
enabled, the specified comments will be defined as default values
whenever this profile is activated. These defaults are applied to
data entry by checking the Enable Repeating Comments option, or
through the Set Repeating Comments function.
This setting will define which tag detail field will gain initial focus
when a new record is displayed. By default, this setting is 'Last
Used Field', which means the input field is 'sticky' and focus
remains in the same field as the previous record.
Configuring Devices
Device Profile Settings
Device profile settings determine which peripheral devices should have their
connections opened for data input when a tag session is opened. The device
manager (displayed below) allows the user to add, delete and modify device property
12
Configuration
settings. A device can be configured for each available serial port. Devices are no
longer restricted to one serial port as with the PITTag2 application.
Device Manager Functions
Open - opens the selected device to modify its properties.
New - creates a new device for this profile.
Delete - deletes the selected device setting.
Terminal - launches a terminal window connected to the selected device's
serial port.
Types of Devices
P3 supports four types of serial devices: Tag Readers, Digital Balances, Baytech
Multiport Controllers and ASCII Digitizer Tablets. WinTab digitizer tablets are also
supported through their native WinTab device drivers.
General Device Properties
There are property settings common to all devices. When creating a new device, the
property window looks like this:
13
P3 Help
Property
Device Type
Label
Device
Enabled
Effect
The field lists all of the supported peripheral devices.
Changing this setting will automatically add or remove
additional property settings associated with the type of
device selected.
Allows the user to customize the description of this device
throughout the application so that it can be easily
identified.
This enables or disables device input when a tag session is
opened. This allows the user to disable device input
without removing its configuration.
Note: Only one WinTab digitizer device can be configured for a profile. When a
WinTab configuration already exists, the WinTab digitizer Device Type will not be
available for selection.
Serial Port Device Settings
All devices must have their serial port settings defined, with the exception of a
WinTab device. The serial port settings determine how the device communicates to
the application. These settings should match the internal RS-232 settings of the
selected peripheral device, or the input data will appear abnormal, or most likely will
not appear at all. Use the Terminal window to troubleshoot configuration settings.
Click on the Settings tab to display these property settings:
14
Configuration
Property
Port
Baud
Parity
Data
Bits
Stop
Bits
Flow
Control
Effect
Selects an RS-232 serial port that the device is connected to on
the PC. P3 supports serial ports ranging from COM1 to COM25.
The baud rate determines the rate which data is sent to the PC
from the device. Baud rates range from 1200 to 115200.
An error-detection method that checks the validity of a
transmitted character. P3 supports None, Odd, Even, Mark and
Space parity settings.
All serial communications methods utilize some number of data
bits to represent a character or byte. A Data Bit is just one of
the data bits in a character or byte frame on the serial port.
A bit used to signal the ending of a character sequence. At least
one stop bit and often two or 1 ½ stop bits are employed.
A method used to control the flow of data between two
communicating points, such as nodes, modems, or PCs.
Typically flow control is not used, but XON/XOFF is supported.
Tag Reader Devices
P3 supports a variety of Tag Reader devices. Tag Readers, also known as
transceivers, decode and transmit PIT tag codes; each of these codes is entered into
a new detail record of an open tag session.
Reader devices have additional configuration settings to support the Device Actions,
as described below.
15
P3 Help
Device Action
A device action is triggered when a tag code is received from a reader device. This is
useful for identifying a tag code scanned from a particular device (e.g. scanning for
recaptured fish). The user may want to be notified of such an event and an optional
comment can be placed on the current detail record. Additionally, an optional sound
event can be configured for this action in the profile's audible alert profile settings.
The device Action tab becomes available when the user selects a reader device in the
Device Type setting.
Note: Device actions are not allowed for tag readers connected to a Baytech
Multiport Controller.
Property
Device Action
Enabled
Alert Message
Species Run
and Rearing
Type
VRT
Additional
Positional
Conditional
Comment
Text Comment
16
Effect
Enables the action to trigger when a tag code is input
from the associated device.
An optional message can be displayed to notify the user.
This message can be up to 255 characters long.
If this field is not empty, this comment will overwrite any
species run and rearing-type codes in the current detail
record, whether verbose or numeric.
If this field is not empty, this code will overwrite any
existing variable release time code in the current detail
record.
Any comments placed in this field will merge by position
with any existing Additional Positional Comments in the
current detail record.
Any valid comment placed in this field will be uniquely
appended to any existing conditional comments in the
current detail record.
Any comment placed in this field will be appended to any
Configuration
existing textual comment in the current detail record.
Note: Leaving the Alert Message field blank will suppress the display of a visual
alert when the device action is triggered.
Balance Devices
Balance devices input weight information, measured in grams and precise to one
decimal place. This data is written to the weight field in the current detail record.
The balance device type does not have any additional property settings.
Digitizer Tablets
Note: A handy mm ruler for your digitizer can be downloaded on P3 ftp site.
Digitizer tablets act as an external input device issuing commands to the application
or inserting comments into the current detail record. The digitizer tablet uses
predefined digitizer maps, so that when a user presses on a particular map cell, the
command associated with that cell, called a map command, is sent to the application
for processing. If the user presses on the tablet outside of the physical digitizer map,
the position is translated into a length (in millimeters) and this information is written
into the length field of the current detail record as shown below.
P3 supports two types of digitizer tablets: ASCII 2000 and WinTab.
ASCII 2000 Serial Digitizer Tablets
The ASCII 2000 tablets are serial devices that communicate coordinate information
to the application using a CalComp ASCII 2000 format. The user must verify the
internal configuration settings of tablet are set to the ASCII 2000 format and that a
Carriage Return (CR) character is appended to all ASCII output.
17
P3 Help
WinTab Digitizer Tablets
WinTab digitizer tablets communicate to the application using an external device
driver. This tablet must be installed using the manufacturer's installation program
before it can be used with P3. This type of device cannot be connected to a multiport
controller. When a tag session is not currently open, this device may control the
mouse cursor.
Note: Only one WinTab device can be configured for a single profile.
Digitizer Tablet Property Settings
Both types of digitizer tablets have the following additional property settings:
Property
Map
Resolution
Divisor
Nose Stop
Extension
Effect
Associates a digitizer map with this device.
This decimal number is used as a divisor to convert the xcoordinate of a digitizer pen click into a length in
millimeters. ASCII tablet resolutions are usually specified
in lines-per-inch and this setting is used to divide linesper-inch into lines-per-millimeter. So, for example, if the
resolution is 2,540 lines-per-inch, setting the resolution
divisor to 10 would convert the x-coordinate into
millimeters (Hint: 254 millimeters per inch). WinTab
resolutions are vendor or model-specific. See the P3
Home Page web site for recommended divisor values.
This number, in millimeters, is added to any length input
from the associated tablet device and is used to extend
the range of measure.
If this setting is set to a non-zero value, a "+" sign will
appear above the Length input field to indicate all lengths
18
Configuration
will be extended.
Note: This setting can be enabled or disabled using a
digitizer map command. By default, a non-zero nose stop
extension is enabled whenever a tag session is opened or
the active profile is changed.
Baytech Multiport Controllers
A Baytech multiport controller extends a single serial port into four or more
additional serial ports. Devices are connected to the multiport so that each is
uniquely addressed in such a way that the P3 application can identify and separate
input.
Multiport controllers are considered to be legacy equipment. P3 does not require
devices to be connected on a single serial port (as PITTag2 does). If you have more
peripheral devices than serial ports, we recommend using USB or PCMCIA serial port
hubs. With little effort, these plug-and-play devices work with the operating system
to extend the total number of serial ports. Refer to the P3 Home Page web site for
more information on these devices.
A multiport controller device has these additional property settings:
These property settings designate which devices, if any, are connected to the ports
of the multiport controller. The RS-232 serial settings must match between port and
device. To do this, use the Terminal window and issue the configuration command
listed for the multiport device.
If a digitizer tablet device is selected, you must associate a digitizer map using the
digitizer tablet property settings.
Terminal Window
19
P3 Help
The terminal window connects directly to a serial port to help troubleshoot device
connections. This tool provides raw data from the connected device and contains a
set of device commands specific to the type of device selected. This tool is not
available while a tag session is open. Also, the Terminal Window does not support
WinTab type devices. This tool is selected by pressing the Terminal menu button on
the device manager window.
Commands
Port Settings
Terminal
Settings
Show
Commands
20
Descriptions
Use this tool to override default serial port settings.
When the Terminal window is launched, it
automatically connects to the device using the serial
port property settings. If it cannot connect to the
device or garbage characters appear, most likely the
baud rate or other serial port settings are incorrect
and need to be adjusted. The serial port settings can
be configured without leaving the Terminal window
using this command. You must toggle the Port
Connection command to enable the new port
settings.
Select the Terminal Settings button to change the
dimension of the terminal window or change the font
size and color.
Pressing this button on the tool bar will show/hide
the commands listed at the bottom of the terminal
window. This list contains most commands for the
given device type. Double-click any command in the
Configuration
Port Connection
list to automatically invoke it. The commands can
also be manually typed into the terminal window,
followed by a RETURN.
Pressing this button on the tool bar will toggle the
connection on/off between serial port and terminal
window.
Activating Tag Actions
Tag Actions trigger specific responses to tag code input and can be defined and
enabled within a profile. In addition to replacing the file validation function in
PITTag2, tag actions allow users to filter out test tag input or to issue an alert when
a particular tagged fish or group of fish is recaptured.
The profile settings displayed below only enable or disable actions for a particular
profile. A single action can be enabled in more than one profile; actions are created
and managed independently from any particular profile.
Two actions are enabled in the figure above. When this profile is used, 'Clip File
CS555313' and 'Filter Test Tags' will be activated whenever a tag session is opened.
Note: When a profile is exported, any tag actions that are enabled will be included in
the export file.
Validation Constraints
Validation Constraints allow the user to verify that the Species, Run, and RearingType codes entered into each tag detail record are in a predefined list of expected
values (domain). This feature can be used to ensure that tagged fish are not
erroneously categorized or alert the user to the presence of a non-target fish.
21
P3 Help
Optionally, the user can assign to each constraint minimum and maximum expected
values for length and weight data entry. If, during data entry, the user encounters a
combination of Species, Run, and Rear- Type codes other than those that were
predefined within a constraint, or a length or weight value outside the range defined
for that code combination, they will be alerted to, but not prevented from,
processing those data as part of the Tag Detail Record.
Note: minimum and maximum values for length and weight data entry do not
automatically require the user to enter values into these fields. See Mandatory
Length and Mandatory Weight general profile settings if the user should be required
to enter data into the weight and length fields.
Constraints are created and managed within a single profile. Unlike Tag Actions,
constraints cannot be shared between profiles; constraints exist only in the profile
they were created in. The user can enable one or more constraints by clicking the
corresponding check box field in the Enabled column. All of the constraints that are
enabled for a profile define the restricted domain of allowable input when that profile
is active.
Profile Commands for Managing Validation Constraints
Open - opens the selected constraint to modify its properties.
New - creates a new validation constraint for this profile.
Delete - deletes the selected validation constraint.
Validation Constraint Properties
22
Configuration
Property
Species Run
and Rear
Min Length
(mm)
Max Length
(mm)
Min Weight
(g)
Max Weight
(g)
Effect
Selects a specific species, run and rearing type code for
this validation constraint. This required field may be
verbose or coded and defines the restricted domain of
allowable input.
An optional minimum length constraint. The user will be
alerted if the current detail record matches the specified
species, run and rearing-type setting and the input length
is less than this value.
An optional maximum length constraint. The user will be
alerted if the current detail record matches the specified
species, run and rearing-type setting and the input length
is greater than this value.
An optional minimum weight constraint, with precision to
one decimal point. The user will be alerted if the current
detail record matches the specified species, run and
rearing-type setting and the input weight is less than this
value.
An optional maximum weight constraint, with precision to
one decimal point. The user will be alerted if the current
detail record matches the specified species, run and
rearing-type setting and the input length is greater than
this value.
Audible Alert Sound Events
23
P3 Help
P3 uses audible alerts to confirm data entry and to signal various events, mostly
within the data collection and validation process. By default, P3 issues a series of
beeps through the computer's internal speaker to signify these events. The user can
assign wave (*.wav) files to any or all of these events outside of the application
using the Sounds applet in Window's Control Panel.
This section of the profile settings allows users to enable or disable sound events.
Only sound events that have been previously assigned an external wave file can be
enabled within a profile.
To enable a sound event within a profile, click on the check box under the Enabled
column for the specific Sound Event.
Types of Sound Events:
Sound Event
Accept
Record
Action Event
Attention
Constraint
Violation
24
Description
Fires when the current detail record is accepted, either by
the user manually pressing the accept command or a new
tag code generated the auto accept event.
Fires when an action Lookup event occurs.
A general purpose sound event, usually when the user
must respond to a dialog box before processing can
continue.
Fires whenever a validation constraint occurs while
processing the current detail record.
Configuration
Error
Input
Digitizer
Command
Input Length
Input Tag
Input Weight
Device
Action
Reject
Record
Tag Buffer
Event
Duplicate
Tag Code
A general purpose sound event dedicated to runtime or
system generated errors.
Fires whenever a digitizer command is sent to the
application.
Fires whenever
Fires whenever
device.
Fires whenever
Fires whenever
length input is sent from a digitizer tablet.
a tag code input is sent from a reader
weight input is sent from a balance device.
a device action event occurs.
Fires when the current detail record is rejected.
Fires when a tag code is placed into the tag code buffer.
Fires when a duplicate tag code is encountered.
Assigning Wave Files to Sound Events
The profile settings enable or disable particular sound events only. Assigning a wave
file to a sound event is performed outside of any profile. Assigning a different
external wave file for a sound event will effect all profiles using that sound event,
and removing an external wave file from a sound event will disable that event in all
profiles.
P3 provides a shortcut to assigning wave files to specific sound events. By doubleclicking a specific sound event inside a profile, P3 will automatically launch the
Window's Sound Applet and position it to the sound event that was clicked.
25
P3 Help
26
Data Collection and Validation
Tag Session Overview
A tag session contains individual records of each fish marked or recaptured with a
PIT tag. These records are referred to as detail records. In addition, a tag session
contains global information about the marking session, such as location, time and
temperatures. This global information is stored in header fields.
Tag sessions can be closed and reopened for data input at a later time. Only one tag
session can be opened at any given time. When a tag session is opened, it loads
configuration settings from the active profile, which includes connections to
peripheral devices. Many of the menu/toolbar commands are context sensitive; they
will be enabled only when a tag session is open.
A tag session has two basic sections: Session Header, Tag Detail. These sections are
represented by tab pages in the tag session data entry window. The user can switch
between these sections by clicking on the top of the tab page, using a preprogrammed map command, or navigating from the keyboard with the TAB and
cursor keys.
Note: PITTag2 users may be wondering where the statistics tab page is. It has been
moved to a separate window so that it can be viewed side-by-side with the open tag
session.
Tag Files and Tag Sessions
When a user has completed entering or editing data, the tag session can be validated
and exported into a tag file for uploading to the PTAGIS database system. A tag file
is an ASCII text file and the content is specified in the current PIT Tag Specification
Document. A tag file can be imported back into P3 as a new tag session.
Naming conventions for Tag Sessions and Tag Files
The tag file name is generated by P3 and stored in a read-only header field. By
default, when the user saves a tag session the very first time, it is automatically
given the same name generated for the tag file. The name of a tag session is used
throughout the application and can be modified in the tag session manager. The tag
session name gives the user a simple mechanism for managing copies of a tag
session or importing multiple versions of the same tag file into P3.
Tip: Experienced PITTag2 users can think of a tag session name in P3 as the Header
ID field in PITTag2, but instead of a number, its default value is the name of the tag
file.
Header Templates and Tag Sessions
Because many of the header field values are usually the same between tag sessions,
users can create predefined header templates to associate default values to header
fields when a tag session is created. In addition to supplying default values, header
27
P3 Help
templates allow the user to customize the header field names or hide fields that are
not required.
Incomplete Tag Sessions
P3 allows users to save tag sessions that are incomplete or invalid. Incomplete tag
sessions can not be exported or uploaded until all required data have been provided,
and the session contents have been validated. P3 uses the following icons to identify
tag sessions:
Indicates a valid tag session.
Indicates an incomplete or invalid tag session.
Use the validate command to identify which data fields (if any) in a tag session are
not valid.
Managing Tag Sessions
To create a new tag session, use the New Tag Session command under the File
menu. This will open a new tag session with empty header fields. To create a tag
session from a header template, click on the arrow to the right of the New Tag
Session command and select a template from the drop down list as shown below.
To open or manage existing tag sessions, use the Open Tag Session command
under the File menu. The tag session manager, shown below, will appear.
Tag Session Manager Commands
Command
28
Description
Data Collection and Validation
Open
Opens the selected tag session. This tool can be accessed
from both the toolbar and right-click menu.
New
Creates a new tag session with blank header fields. This tool
can be accessed from both the toolbar and the right-click
menu.
Deletes the selected tag session. This tool can be accessed
from both the toolbar and right-click menu.
Delete
Large
Icon
Tag sessions will be displayed with large icons in the list.
This tool is accessed from the toolbar only.
Small
Icon
Tag sessions will be displayed with small icons in the list.
This tool is accessed from the toolbar only.
List
Details
Tag sessions will be listed with small icons and in columns.
This tool is accessed from the toolbar only.
This default view will display tag sessions with small icons
and detail columns. This tool is accessed from the toolbar
only. The detail consists of five columns, which can be sorted
by clicking on the column headers. The column headers are:
In the Tag File definition.
Column
Description
Tag
Session
The name of the tag session.
Template
Displays any header template
associated with the tag session.
Tag File
Displays the name of the tag file
associated with the tag session.
Modified
The date and time the tag session was
last modified.
Created
The date and time the tag session was
created.
Make a
Copy
This command, accessed from the right-click menu, will
make a complete copy of the selected tag session.
Rename
This command, accessed from the right-click menu only,
allows the user to rename the selected tag session by typing
over the existing tag session name.
29
P3 Help
Template
This command, accessed from the right-click menu only,
allows the user to change the header template association
for the selected tag session. The user can select a different
header template or set the association to "None".
Tag Session Header
The Tag Session Header contains global information about the tagging project.
Header fields shown in bold are required fields which the user must enter data into
before a tag session is considered valid and complete. Use the Accept command
located under the Session menu to save any changes made to the tag header.
Navigating and Entering Data into Header Fields
P3 uses a standard tabular data entry mechanism. The ARROW keys move between
header fields. To edit a selected data field, do the following:
30
Data Collection and Validation
1. Double-click or press ENTER in the data field you want to edit. The cell will
display a cursor; this state is referred to as Edit Mode.
2. Make any changes to the field contents or select a value from a drop-down
list.
3. To complete your changes, press ENTER.
4. To cancel your changes, press ESC.
5. Use the DOWN-ARROW to move to the next field.
Drop-Down Value Lists
Some header fields have a limited set of values. When the user tries to edit one of
these fields, a drop-down list is displayed. The user can type characters to search for
particular codes within the list, or use the mouse to select a single code from the list.
Once a code has been entered from the list, the user can clear the selection by
pressing the DELETE key.
The drop-down lists are populated with validation codes. The user can customize
these codes by pressing the F4 key and completing the dialog window below:
Note: P3 allows the creation of any number of user-defined codes. However, Tag
Files containing user-defined values will not be accepted by PTAGIS unless and until
those values have been defined and incorporated into the PTAGIS database. Utilize a
user-defined value as a last, temporary, resort only when the code has not yet been
published by PTAGIS.
Session Header Note
The user can associate a note with a tag header using the Note command located
under the Session menu. This field is referenced as the Session Note field in the
current PIT Tag Specification document.
Note: The Note command has a dual function: when the tag header page is
displayed, it will create or edit a session note; if the detail page is displayed, the
command will prompt the user to enter a note for the current detail record.
Saving Session Header Information
Use the Accept command located under the Session menu heading to save any
changes made to the Tag Session Header.
Tip: When creating a new tag session, we recommend completing the data entry for
all tag header fields before entering any detail information. This will reduce any
31
P3 Help
confusion about what information is saved when the Accept command is pressed
and any validation error messages will remain within the context of the Tag Session
Header.
Tag Session Header Field Reference Guide
This topic provides a reference guide for all session header fields. Please consult the
current PIT Tag Specification Document if you have further questions about these
data fields.
Header Field
Content
Mandatory/Optional
Tag Date
MM/DD/YY hh:mm
Mandatory
This field records the date the tag data was collected. The default value for
this field is the current system date and time.
When the tag session contains records of PIT tag releases or
recaptures/mortalities collected over multiple days then, by convention, the
Tag Date field should contain the first day of sampling effort. Under these
circumstances, the Release Date field (see below) should reference the last
day of sampling effort, the actual dates of PIT tag release/recovery should be
denoted using Variable Release Times, and the procedure should be
documented in the Session Header Note.
This field can be modified using the keyboard. If the field is in edit mode,
then pressing the Control and Semi colon keys simultaneously will insert
the current system date and time; pressing the F4 key will display a
calendar.
xxxYYDDD.zzz
Mandatory
Tag File
This field combines the Tag File Prefix (xxx) in the active profile with the date
from the Tag Date field, in a Julian format (YYDDD). This field can't be edited
directly, but changes in the Tag Date field will be automatically reflected in
the Tag File field.
The user must assign a one- to three-character Tag File Extension (zzz).
Extensions should be chosen and applied to ensure that Tag File names are
not duplicated anywhere within the Columbia Basin.
This value is used as the default tag session name.
Session Message
Text
Optional
The Session Message field contains an optional description or summary of
the tagging session. This information is displayed in many PTAGIS reports,
and should concisely describe the tag project.
Tag Site
32
[Valid Tag Site]
Mandatory
Data Collection and Validation
This is a required header field containing a code representing the
geographical location of the tag event (e.g., a hatchery location for the
original marking, or a trap or dam location of a subsequent recapture event).
The code must be a code from a predefined drop-down value list.
Tagger
Lastname I
Mandatory
This is a required header field containing a last name and first initial (e.g.,
BODY A).
Coordinator ID
[Valid Coordinator ID]
Mandatory
This field contains the initials of the individual in charge of the PIT tag
marking or recovery activity.
The code must be from the predefined drop-down value list.
Organization
[Valid Organization]
Mandatory
This field contains the code for the agency or entity responsible for the PIT
tag marking or recovery activity.
The code must be from the predefined drop-down value list.
Tag Method
[Valid Tagging
Method]
Mandatory
This field contains the (abbreviated) four-character method by which PIT tags
were inserted into the fish. If all Tag Detail records in the tag session refer to
the recapture or mortality of previously-tagged fish, the value is “NONE”.
The code must from the predefined drop-down value list.
Tagging Temp.
nn.n
Mandatory
This field contains the temperature (00.0-25.0°C, inclusive) of the tagging
water. A value of 25.0 should be entered if the water temperature is not
available, or the value is not applicable (e.g., a multi-week recapture
session).
nn.n
Optional
Post Tag Temp.
When there is a significant time interval between the marking and release of
PIT-tagged fish, this field contains the temperature (00.0-25.0°C, inclusive)
of the water in the post-tagging holding facilities (e.g., an outdoor raceway).
Raceway/Transect
Text
Optional
This field contains an abbreviated description of the sampling location, to a
maximum of six characters.
33
P3 Help
Hatchery Site
[Valid Hatchery]
Optional
When fish are tagged at a hatchery, this field contains the four-character
abbreviation from the domain of hatchery codes.
The code must from the predefined drop-down value list.
Stock
Text
Optional
This field contains a description of the genetic or geographic stock, to a
maximum of 15 characters.
Brood Year
nn
Optional
This field contains the last two digits of the calendar year when eggs were
deposited or collected, if known.
Migratory Year
nn
Mandatory
This field contains the last two digits of the earliest possible calendar year
when fish will out-migrate. For a recapture/mortality event, or if adults are
tagged, this value references the current calendar year.
[Valid Capture
Mandatory
Method]
This field contains the code denoting the method by which the fish were
captured for marking (or recaptured).
Capture Method
The code must be from the predefined drop-down value list.
Release Site
[Valid Release Site]
Cond. Mand.*
This field contains a code denoting the site where the tagged fish were
released. When the tag session contains records detailing recapture or
mortality events, this code denotes the mortality site or the re-release site for
recaptures. This field is required when the Tagging File provides Release
Information.
The code must be a code from a predefined drop-down value list.
River Kilometer
34
nnn(.nnn)
Cond. Mand.*
Data Collection and Validation
This field indicates the point of release, in kilometers, and the default value is
based on a value entered in the Release Site header field. This is a
hierarchical coding scheme from the mouth of the Columbia River to the Point
Release site or stream of release (up to 7th order streams), with each river
segment delimited with a period.
A Point Release site is a fixed release location such as a hatchery or
geographical landmark, and this field displays the entire Release River KM for
this location. If fish are released away from a Point Release site, this field
allows the user to append an extension to the Release River KM to indicate
the distance from the mouth of the specified stream to the actual release site.
The default value of this field cannot be modified, however, the last segment
can be modified as an extension in kilometers for defining the exact location
of the release. The format for this field extension is a three-digit numerical
value.
Release Temp.
nn.n
Cond. Mand.*
This field contains the temperature (00.0-25.0°C, inclusive) of the water the
tagged fish were released into. This field is required when the tag session
provides Release Information. A value of 25.0 should be entered if the water
temperature is not available, or the value is not applicable (e.g., a multi-week
recapture session).
Release Date
MM/DD/YY hh:mm
Cond. Mand.*
This field contains the date and time of Release, in Pacific Standard Time
(PST). During a recapture event, this code designates the re-release date.
When the tag session contains records of PIT tag releases or
recaptures/mortalities collected over multiple days then, by convention, the
Tag Date field (see above) should contain the first day of sampling effort.
Under these circumstances, the Release Date field should reference the last
day of sampling effort, the actual dates of PIT tag release/recovery should be
denoted using Variable Release Times, and the procedure should be
documented in the Header Note.
This field can be modified using the keyboard. If the field is in edit mode then
pressing the Control and Semi-colon keys simultaneously will insert the
current system date and time; pressing the F4 key will display a calendar.
*Cond. Mand (Conditionally Mandatory): If any of the four header fields related to
release information (Release Site, River Kilometer, Release Temp. and Release Date)
are submitted with data, then all four of those header fields must contain data. In
addition, if Variable Release Times are declared and defined within the Tag Detail
records, all four Release Information header records must be completed.
Tag Session Header Templates
35
P3 Help
A tag file header template allows the user to customize header field labels, define
default values, and/or hide selected fields. Templates are typically used to populate a
header with specific field values and/or to prevent erroneous or extraneous data
entry.
When a tag session is created with a header template, it will apply any customization
and default values defined in that template. Any customization changes made to a
template may effect any tag sessions that are associated with that template;
modifications to default values will not effect existing tag sessions.
The Templates command is located under the File menu. This command will open
the Template Manager, from which users can create new templates - or they can
open, rename, copy or delete existing templates. In addition, templates can be
exported and imported into other P3 installations.
Creating a Header Template
The template window below was designed to look very similar to the session header.
Navigation, data entry and field formatting are the same as for a Tag File Header.
36
Data Collection and Validation
Customizing Field Labels
To customize a field label, select a field label, located under the Field column, by
double-clicking or pressing ENTER, and type over the default field label. The field
must contain at least one character and can contain a maximum of fifty characters.
The new field label will be displayed in any tag sessions that are associated with this
template. This allows the user to add more meaningful labels in the context of their
tagging project.
Entering Default Data
Any values entered into the data fields will become default values in any new tag
session created from this template. Template fields have the same formatting as
header fields and must follow the same constraints. The only field that provides an
exception to this is the Tag File field. The user can specify a default file extension by
typing directly into this field and it will be automatically appended to the system
generated tag file name when a new tag session is created. All other default values
are WYSIWYG.
Hiding Optional Header Fields
Optional header fields are any fields not displayed in bold font. If a field's check box
is cleared under the Show column, the corresponding field label will be displayed
37
P3 Help
with a strike-through font and this field will be hidden in any associated tag sessions.
Any default values associated with a hidden field will be ignored.
Note: A tag session will always display a header field if it has data, regardless of any
template setting.
Tag Detail
This section of a tag session provides data entry for a tag detail record. A detail
record is comprised of data fields containing information about a specific fish marked
with a PIT tag. Only one detail record is displayed at a time. The user can scroll
between detail records and make modifications to existing data. Scrolling past the
last record provides data entry for a new detail record. A tag session is limited to
9,999 detail records.
Field Navigation and Data Entry
TAB and SHIFT-TAB keys will move the cursor forward and reverse between fields.
Fields that are not drop-down lists can be edited by typing directly into the field. If
the Tag Code field already contains valid data, it is locked and cannot be modified
except for the dot-out command. Fields that are drop-down lists can be edited by
selecting with a mouse or typing characters to match a particular value, with the
exception of the conditional comment field: it allows codes to be directly typed in or
selected from a list. See the field definitions for more information about data entry.
Use the Starting Detail Field profile setting to determine which field will initially
receive focus.
38
Data Collection and Validation
Scrolling Between Detail Records
The scroll bar is located at the bottom of the detail record. If the current detail
record is modified, the scroll bar is disabled until the modification is accepted or
rejected.
The scroll bar has these functions, left to right:
Scroll
Function
First
Previous
Record
Number
Next
Last
New
Record Count
Description
Scrolls to first detail record.
Scrolls to the previous detail record.
Displays the ordinal number of the current detail record
within a tag session. Typing any valid record number into
this field and pressing return will automatically scroll to the
corresponding detail record.
If the current detail record is a new record, this field will
display (*New).
Scrolls to the next detail record.
Scrolls to the very last detail record.
Scrolls to a new detail record.
Displays the number of actual detail records in a tag
session. This count only includes saved detail records and
does not include the new detail record, unlike the PITTag2
application.
Note: When a tag session is opened, the detail page is automatically scrolled to a
new detail record to reduce the possibility of overwriting existing data.
Tag Detail Field Reference Guide
This topic provides a reference guide for all detail record fields. Please consult the
current PIT Tag Specification Document if you have further questions about these
data fields.
Detail Field
Content
Mandatory/Optional
Tag Code
(HHH.)HHHHHHHHHH
Mandatory
39
P3 Help
This field can contain three types of data:
•
•
•
10-character hex ID code characteristic of a 400 kHz PIT tag code.
14-character hex ID code comprised of a three-character hex country
code, a period, and a 10-character hex ID code; this mask is typical of
134.2 kHz ISO-compliant Duplex-B PIT Tags.
A "dot-out" value, which is a series of 10 periods that indicates the tag
was removed from, or shed by, the original marked animal. This type
of value can be entered into this field using the dot-out command
only.
The hexadecimal Tag Code can be entered automatically from a tag reader
device or manually from the keyboard. The format of the Tag Code is verified
as the code is entered, and the code is not stored to the field unless and until
that verification is successful. Each tag detail record in the tag session must
include a value in the Tag Code field.
Note: Once the Tag Code has been successfully entered, it cannot be altered;
it can only be replaced with a "dotted out" value using a dot-out command.
Tag Code Buffer
During normal data entry operations, data will be received and
simultaneously displayed in the Tag Code field. However, if another code is
received from a reader device before the existing detail record is processed
and recorded, the Tag Code field changes into a Tag Code Buffer (a dropdown list with a red background, displayed below) and the new tag code will
be added to its list. Multiple, unique tag codes can be held in the buffer until
the detail record can accept input; then a buffered tag code can be selected
into the Tag Code field using the mouse or the Next Tag Code in Buffer
command. Additionally, the tag code buffer can be cleared using the Clear
Tag Buffer menu command. Once all of the tag codes are removed from the
buffer, the field changes back into the normal Tag Code input field shown
above.
40
Data Collection and Validation
Species Run and
Rear
[Valid Species Run and
Rearing-Type code(s)]
Mandatory
This field (or fields) will be displayed one of two ways based upon the verbose
profile setting:
Character Codes
In this format, the user must select individual codes for each field, using the
mouse, keyboard or a digitizer command. Refer to the current PIT Tag
Specification Document for more information about these validation codes.
Verbose
In this format, the user can select one verbose species run and rearing-type
string from the field's drop-down list. The verbose string is translated into
the appropriate codes when the tag session is exported to a Tag File for
submission to PTAGIS.
nnnnn
Optional
Length
This field holds a length measurement of a fish (in millimeters). The value
may be entered from the keyboard or from a properly-configured digitizer
tablet.
41
P3 Help
If the mandatory length setting is enabled in the active profile, this field will
require input before the current detail record can be saved. The field name
will contain a blue check mark to identify that it is required. The user can
enter a null value (a series of four dash characters) using the dash command
to satisfy the mandatory length requirement for the current record.
nnnnn.n
Optional
Weight
This field holds the weight of a fish (in grams) and uses a real-number format
precise to one decimal place. Data can be entered from the keyboard or from
a properly-configured electronic balance.
If the mandatory weight setting is enabled in the active profile, this field will
require input before the current detail record can be saved. The field name
will contain a blue check mark to identify that it is required. The user can
enter a null (a series of four dash characters) using the dash command to
satisfy the mandatory weight requirement for the current record.
nn
Optional
VRT
If a group of fish within a tag session is released at a single time
independently of other groups within the same tag session, then the release
date and time must be recorded for that group of fish. This is done by
assigning each detail record a Variable Release Time (VRT) code as the fish is
processed, and then defining a date/time value for that code when the fish in
that group are released. Every Variable Release Time code used during a tag
session must have a corresponding date/time definition. These values will
supersede the Release Date value assigned in the Tag Session Header.
Variable Release Time codes are two digit, zero-padded, numeric codes with
values of 00-99, inclusive. Codes can be entered from a keyboard or digitizer
command, or the user can increment/decrement the current value.
Text
Optional
Additional
Positional
Up to 45 non-blank columns, or field positions, of Additional Positional
Comments, required by individual research projects, may appear in this field,
but will not be recognized by PTAGIS. Data can be entered into this field from
either the keyboard or a digitizer command.
Conditional
Comment
[Valid Conditional
Comment Codes]
Optional
There are 50 characters available to record Conditional Comments, or 'Flag
Codes', about events such as recapture, mortality, or
morphological/physiological condition (e.g., bleeding, descaled, dropped,
etc.). Conditional comments can be entered from the keyboard or selected
from the drop-down list, or entered from a digitizer command. This field
performs real-time validation and will not allow invalid or duplicate codes to
be entered.
Text
Optional
Text Comment
42
Data Collection and Validation
There are 50 columns available to record Text Comments, a free-form
annotation pertaining to the existing detail record. Data can be entered from
a keyboard and recurring phrases can be entered from a digitizer command.
Tag Detail Validation
P3 performs a number of validation and verification routines on every processed Tag
Detail Record. There are field-level routines that ensure that the entered data
matches the expected format, and that the content is present within domains of
values. There are record-level routines that verify that all required fields within the
record contain data values. There are also session-level routines that address
contingencies such as duplicate Tag Codes between Tag Detail Records, Variable
Release Time code declarations without corresponding assignments, and the
appearance of unexpected Tag Codes in a Tag Session. These various methods of
data validation and verification are described in the sections below.
Field-Level Validation
The following detail record fields perform field-level validation and format checking:
Tag Code
Length
Weight
VRT
Conditional
Comment
Only hexadecimal characters (0-9;A-F) can be entered into
this field, with the exception of a period in the fourth
character position (denoting a country code prefix). This
field allows two styles of tag codes to be entered: a 10character hexadecimal code or a 14-character hexadecimal
code with a period in the fourth position. Once a valid code
has been entered, the field is locked to prevent accidental
typos. Only a dot-out command can overwrite a valid tag
code once it has been entered.
When a tag code is entered, either by device or keyboard,
P3 performs a lookup into any activated actions. A device
action may also fire when a tag code is entered from a
device.
Only numeric characters can be entered into this field.
Only numeric characters, and a decimal point, can be
entered into this field. The field will automatically round any
weight input to a tenth of a gram.
Only numeric characters can be entered into this field, with
values between 00-99 inclusive; input will be zero padded
to two digit values.
This field accepts valid conditional flag codes. The codes can
be typed in or selected from the drop-down list. This field
will automatically remove duplicate flag codes and format
multiple flag codes to be delimited by a single space.
43
P3 Help
Record-Level Validation
Mandatory
Fields
Constraint
Validation
Maximum
Detail
Records
To complete a detail record, the Tag Code and Species,
Run and Rearing-Type fields are mandatory and must
have a valid value entered.
Note: The active profile provides settings to optionally make
the Length and Weight fields mandatory also.
When the user presses the Accept button to save a complete
detail record, the data entered is validated against any
activated constraints. If the data does not comply within the
constraints, the user is warned and given a choice to either
fix the record or continue processing.
A tag session can contain a maximum of 9,999 detail
records. The user is warned when the last detail record is
entered and prevented from entering any additional records.
Session-Level Validation
Duplicate
Tag Codes
When a new tag code is entered, the value is compared
against all other tag codes within the current tag session,
and if one or more tag codes are duplicated, the user is
prompted to take one of four possible actions (unless a
default duplicate action has been configured in the active
profile).
Reject
44
Clears the contents of the current Tag
Data Collection and Validation
Code field and resets the detail record
for new input.
Replace
Automatically scrolls to the detail record
containing the first instance of the
duplicate Tag Code. The user can edit
the other detail fields in that record.
Dot Out
The original detail record containing the
duplicate tag code is automatically
dotted-out. The current detail record will
contain the new tag code and the user
can continue entering data into the other
fields.
Accept
Accepts the duplicate tag code and
allows the user to continue processing
the detail record. This method can be
used when the user wants to dot-out the
previous instance of the tag code and
also wants to annotate the record with a
comment explaining the dot-out.
Tag detail records containing duplicate
tag codes are displayed on the Statistics
viewer. All detail records containing
duplicate tag codes must be resolved
(each duplicate converted to a Dot-Out)
before a tag session is considered valid.
VRT Code
Assignments
All VRT codes must have a variable release date and time
assigned to them before the tag session is considered to be
valid. Also, all of the release header fields must be
completed.
Tag Session Commands
This topic describes commands specific to data entry and validation of the tag
session. These commands are grouped together under the Session menu heading
and some can also be found on one of the tool bars. Most of these commands can be
associated with a digitizer map and called from a tablet device.
45
P3 Help
Command
Accept
Scroll Detail
Records
Description
Saves any changes to the current header fields and/or detail record. In the
case of a new detail record, the record will be saved and the tag detail
section will automatically scroll to the next new record for input.
The user can toggle the Auto Accept profile setting to automate this
command when tag codes are input from a device.
In addition to scrolling detail records with the tag detail scroll bar, records
can be scrolled by selecting one of the menu commands below or using the
hot-key equivalent.
•
•
•
•
•
Reject
Cancels any changes to the current detail record only.
Validate
Validates the tag session and reports any header or detail fields that are
invalid or incomplete.
Validates the current tag session, and if valid, exports the tag session into a
tag file, using the tag file name and the default export path defined in the
active profile.
Validate
and Export
46
First (Shift-F9)
Previous (Shift-F10)
Next (Shift-F11)
Last (Shift-F12)
New (Ctrl-F12)
Data Collection and Validation
Repeating
Comments
Set
Repeating
as Current
Enable
Repeating
Comments
Reset
Comments
Dot/Dash
All
Repeating comments supply default values for new detail records. This
command displays a window to define those default values.
If enabled, any value entered into a field will be the default value for each
new record.
This command will display the repeating comments dialog window (shown in
the previous command) with the comments from the current detail record as
default values. This is a quick and easy way to change repeating comments
on the fly.
This command enables or disables the repeating comments for subsequent
new detail records. If repeating comments are enabled, this command will
display a small check mark and 'RC' will appear in the third status bar panel.
Use this command to populate the current detail record with the current
repeating comments values.
This command will dot-out the existing Tag Code field and dash-out the
Length and Weight fields of the current detail record. Use this command to
quickly reject the current detail record when mandatory length and weight
profile settings are enabled.
Pressing the arrow to the right of the command displays a list of four
additional subcommands:
Dot-Out
This command only dots-out the tag code field.
Dash
Length
Dashes length field only.
Dash
Weight
Dashes weight field only.
47
P3 Help
Dash
Length and
Weight
Undo DotOut
Next Tag
Code in
Buffer
Clear Tag
Buffer
Align
Digitizer
Map
Dashes length and weight fields only.
If the tag code field in the current detail record was dotted-out and the
record has not yet been saved, this command will replace the dot-out with
original tag code.
If the tag code buffer is not empty, this command will automatically select
the first buffered tag code and enter it into the tag code field of a new detail
record.
This command will clear any tag codes currently in the tag code buffer.
This command will display a dialog window to align any digitizer map
currently defined in the active profile.
When this dialog is displayed, the user first presses the lower left-hand
corner of the selected digitizer map configured for a tablet device. An XY
coordinate pair will appear in the Lower Left frame. Next, the user presses
the upper-right hand corner of the digitizer map and the XY coordinates will
display in the Upper Right frame. To repeat the alignment for a specific
frame, select the frame's option button and press the corresponding corner
again. Once both coordinate pairs are complete, press OK to save this
alignment.
Assign
VRT
48
In the unlikely case there is more than one digitizer map configured for the
active profile, use the Map drop-down to select another digitizer map to
align.
This command displays a dialog window to assign specific release dates and
times to every distinct VRT code defined in the current Tag Session.
Data Collection and Validation
To assign a release date and time to a variable, double-click or press ENTER
in the corresponding Date/Time cell and either type in the value or press
[CTRL-;] (semicolon) to enter the system date and time, or press F4 to
display a calendar. Press the OK button to save the assignments.
All VRT codes must have a release date and time defined before a tag
session is considered valid. All release times must be in Pacific Standard
Time.
Note
Time
Check
Statistics
Viewer
Tag
Detail
Viewer
For more information about VRT Export and Import functions, see Importing
and Exporting VRT Tables.
This command has a dual purpose: if the Tag Session header page is
displayed, then this command will allow the user to create a header note; if
the tag detail page is displayed, then this command will allow the user to
create a detail note - an ad-hoc annotation to record additional information
about the current detail record.
This command stores the system date and time with the current detail
record.
This command displays a window containing statistical information about
detail records and any connected reader devices in the current tag session.
See the Statistic Viewer topic for more information.
This command displays a window containing a table of all detail records in
the current tag session.
49
P3 Help
The detail viewer has these features:
•
•
•
•
•
•
Sort any column in ascending order by clicking on the column
header; click again to sort in descending order.
Resize columns by positioning the mouse at the edge of the column
header and dragging.
Lock columns and/or rows from scrolling by dragging the lock icon
that's displayed when the mouse is at the edge of the row or column
headers.
Search for a record by typing into a cell; the viewer will automatically
scroll to the first record matching the pattern.
Retrieve a tag detail record by double-clicking on the record link.
The right-click pop-up menu does the following tasks:
• Merge columns with similar data into one, contiguous cell for
enhanced readability.
• Show/Hide specific columns.
• Refresh the contents of the viewer.
• Copy selected cells to the window's clipboard
• Print either the Tag Session Header or the contents of the
viewer (Tag Detail).
• Save the contents of the viewer to a comma-separated file.
Note: the detail viewer will automatically stay in-sync with changes and
scrolling of tag detail records, however, this synchronization may impact
system performance during data collection.
Customizing the Tag Session Tool Bar
All of the tool bars displayed in the P3 application can be customized by right-clicking
on the tool bar and selecting the Properties command from the menu. Functions
can be appended by dragging them onto the toolbar. Existing toolbar functions can
be removed by highlighting them and pressing the DELETE key.
Note: P3 provides an additional tool bar which is a larger version of the Session tool
bar. To access this tool bar, right-click anywhere on the menu or tool bar of the main
application and enable the LargeSession toolbar.
50
Data Collection and Validation
Statistics Viewer
The Statistics Viewer presents an up-to-date summary of Species Counts,
Duplicate Tag Codes, and Reader Device Statistics for an open tag session. The
viewer is automatically refreshed whenever data is changed in the open tag session
or new information is recorded from a reader device. This feature can be accessed
from under the Session menu or from a digitizer map command (there is also a
digitizer map command to switch between sections of the viewer). The Statistics
Viewer has three sections, described in detail below.
Species Counts
Each row in the Species Count table presents subtotals for each unique species, run
and rear type combination included in the current Tag Session. Tag Detail Records
are tallied into subtotal columns ("Mortalities", "Recaptures", "Dot Outs", "New
Tags") based upon three attributes: records containing a Mortality Flag comment,
records containing a Recapture Flag, and/or records with a Dot-Out value in the Tag
Code field.
If a Tag Detail Record contains two or more of these attributes, it will be counted in
the left-most attribute's subtotal only. For example, a Tag Detail Record has a
Mortality Flag and a Dot-Out value for a Tag Code–only the Mortality subtotal will be
incremented. If a Tag Detail Record contains none of these attributes, it will be
counted in the "New Tags" subtotal column. The table also includes totals for each
row and column in the table.
Note: the columns for this table are fixed, however the individual flag codes that
determine if a record should be counted as a mortality or a recapture subtotal can be
modified by double-clicking on a cell under the respective column heading.
Tip: use the Search feature if you need custom subtotals based upon other data
fields or comment flags. A search can be saved and recalled at any time to provide
similar functionality as the Statistics Viewer.
51
P3 Help
Duplicate Tag Code
This section presents all duplicate tag codes in the current detail record set. Although
the user is alerted to duplicate Tag Codes during data entry, they have the option of
accepting the duplicate, and it is here where two or more detail records with identical
tag codes are displayed.
Tip: Double-clicking any cell under the Record # column will switch to the tag detail
tab page and automatically scroll to the corresponding detail record.
Reader Device Statistics
This section provides information about each reader device configured in the active
profile. The Tag Count column displays the number of tag codes input from each
reader. This value is reset each time the tag session is closed or when the active
profile is changed. The Last Message column contains the last diagnostic message
sent from the tag reader.
Uploading Data
52
Data Collection and Validation
Once data has been collected and validated, the next step is to upload the data to
PTAGIS. In previous versions, this was accomplished by exporting the tag sessions
into tag files and submitting them to PTAGIS via email. This manual process still
works; however, P3 has a new feature that automates this task and keeps track of
which tag sessions have been uploaded.
To access the automated upload feature, select the Upload command located under
the File menu. The Upload Manager window will be displayed, as shown below.
Upload Configuration Settings
Before the automated upload feature can be used, it must first be configured. Press
the Configure button located at the top of the Upload Manager window. The
Upload Settings window will display the following configuration settings:
Property
Registered
Email
Address
Sender's
Name
Transfer
data in
'Passive
Mode'
Effect
This field contains an email address registered with PTAGIS.
Any tag session submitted without a registered address will
be rejected by PTAGIS.
This field identifies a particular user and is useful for
situations where multiple P3 installations submit data and
share the same registered email account.
Use this feature if the upload process cannot establish a
connection to the PTAGIS server due to firewall issues. This
setting will direct the server into a passive mode, where only
the client can initiate FTP connections.
Uploading Data to PTAGIS
53
P3 Help
The Upload page of the Upload Manager displays a list of all valid tag sessions that
can be selected for submission. To select a particular tag session for uploading,
check the corresponding box in the Upload column. To submit the tag session as a
correction, check the corresponding box in the Correction column.
Note: When uploading multiple files, each file must have a unique Tag File Name.
Once the tag sessions have been selected, simply press the Upload command
button and the tag sessions will be automatically submitted to PTAGIS. A progress
window will display each step in the automated process. The upload process may
take a few moments to complete, depending upon how busy the PTAGIS server is.
The data transfer is verified by the PTAGIS server and status information is
downloaded to the client PC and displayed in the History tab page described in the
next section. The client also downloads any updated status information from
previous upload attempts.
A visual indicator next to each tag session name in the upload manager indicates the
upload status of each tag session:
Indicates a tag session that has never been uploaded according
to the current history.
Indicates a tag session that has been uploaded at least one
time.
Indicates a tag session that has been uploaded as a correction
at least one time.
Upload History
An additional benefit using the automated upload process is that status information
is stored for each upload attempt. This is useful information when managing several
tag sessions. The status information is stored on the History tab page of the
Upload Manager.
This page displays a row for each tag session that was uploaded. Each column can be
grouped by dragging the column with the mouse to the top of the report, such as the
54
Data Collection and Validation
File Name column in the example above. Grouping columns is useful for viewing all
tag sessions submitted on a certain date or for viewing all upload attempts for a
particular tag session.
The history report contains the following columns:
Column
Session
Name
File Name
Upload
Date
Upload
Complete
Status
Correction
Message
Description
Name of the Tag Session that was uploaded.
Name of the Tag File associated with the Tag Session.
Date and time the upload attempt occurred.
When data is submitted to PTAGIS, it is usually
queued for processing at a later time. A check mark
in this column indicates that PTAGIS has completed
processing the associated data.
Indicates whether the particular tag session data was
successfully loaded into PTAGIS.
Indicates if the tag session was submitted as a
correction.
Displays the first line of feedback from PTAGIS about
the submitted data. The entire message can be
displayed in the Upload Detail window, accessed by
double-clicking a row.
The history report has the following commands located on the tool bar:
Command
Refresh
Detail
Purge
Description
This command will query the PTAGIS server and
attempt to refresh the status information for all tag
sessions that do not have a check mark in the Upload
Complete column.
Displays the Upload Detail window, which contains
detailed status information for the selected tag
session. This can also be displayed by double-clicking
the row.
This command will delete status information from a
certain date or for a particular Status flag or if the
Upload Complete field is checked.
Print
Note: If a tag session is deleted from P3, any
associated upload status information will also be
removed.
Prints the status report.
Save
Saves the status report to a file.
55
P3 Help
56
Importing and Exporting
Exporting Data
P3 can export tag sessions as well as configuration information such as profiles,
header templates, tag actions, and digitizer maps. This is useful for transferring
information between multiple installations of the application.
Only valid tag sessions can be exported. Tag sessions will be exported to individual
text files using the Tag File header field as a name.
Exporting configuration information is a little different than exporting tag sessions.
Multiple configuration items will be exported and combined into one file. Only objects
of the same Export Type (profiles, actions etc.) can be exported to the same file. The
type of file created from the export process is XML and should not be modified. When
the file is imported, P3 will automatically detect the Export Type from the file.
Exported profiles will also include any activated Actions or associated digitizer maps.
Steps for Exporting
1. Select the Export command located under the File menu.
2. Select an Export Type from the drop down: 'Valid Tag Session',
'Profiles','Templates', 'Actions', or 'Digitizer Maps'.
3. A list of available items will be displayed. Select which items will be exported.
To select multiple items, use the mouse while pressing the CTRL key.
Note: When selecting multiple Tag Sessions for exporting, two or more items
cannot contain the same File Name.
4. Press the OK button.
5. A prompt will display asking where to export the selected items to. The
default location is the default export file path set in the active profile.
57
P3 Help
5. Once a location has been selected, press OK and the export process will start.
6. If any of the files already exist, a prompt will display asking whether to
overwrite the existing file, overwrite all existing files, skip this file or skip all
existing files:
Importing Tag Files
Tag files can be imported into P3 tag sessions. Multiple tag files from the same
directory can be imported simultaneously. A tag session will be created with the
name of the tag file. If a tag session already exists with that name, the new tag
session name will have a version number appended to it.
Note: P3 will only import tag files created by P3 or PITTag2. Older files will need to
be imported into PITTag2 and reformatted to be imported into P3.
Steps for Importing Tag Files
1. Select Import-> Tag File command from under File menu.
58
Importing and Exporting
2. Next, select one or more files to import from the prompt. The default export
path is used as the initial location. To select multiple files, press and hold the
CTRL key while making your selections. Press the Open key once the file
selections have been made.
3. P3 will begin importing each selected tag file. Before the import process is
completed, the user will be prompted to confirm the results. The prompt
reports each tag session that will be created when the OK button is pressed.
In addition, it displays any error messages discovered during the import
process for each tag session.
4. Review the Import Status Messages for each tag session. The '# Msgs'
column lists the number of messages associated with each tag session. To
view messages for a tag session, select the tag session and the messages will
be displayed in the Import Status Messages box.
59
P3 Help
5. Select which tag sessions will be created by checking the corresponding box
under the Save column. Use the Select All or Clear All buttons to quickly
select/clear all of the imported tag files.
Note: Some files that have too many validation errors or are not a tag file
will not be allowed to be saved. These files will be marked with a large red 'X'
(like 'Logfile.txt' in the example for step 3).
6. Optionally, select a header template to associate with all of the new tag
sessions.
7. Press OK to create all of the tag sessions from the selected tag files.
Importing Tag Sessions
New to P3 is a feature that allows tag sessions to be directly imported from another
database. This feature allows one or more tag sessions to be directly imported from
either a PITTag2 database (pittag.mdb) or a P3 database (p3.mdb).
Tip: Use this feature when upgrading from PITTag2 to automatically transfer all tag
sessions from the old version to the new.
Steps for Importing Tag Sessions
1. Select the Import->Tag Session command located under the File menu.
2. Select the type of database file to import from (P3.mdb or pittag.mdb) from
the Files of type drop-down. Then locate and select a database file and press
Open.
60
Importing and Exporting
3. Select the tag sessions to import from the list. To select multiple tag sessions,
use the mouse while pressing and holding the CTRL key. Once the tag
sessions are selected, click the Import command to begin the import
process.
4. P3 will begin importing each selected tag session. Before the import process is
completed, the user will be prompted to confirm the results. The prompt
reports each tag session that will be created when the OK button is pressed.
In addition, it displays any error messages discovered during the import
process for each tag session.
61
P3 Help
5. Review Import Status Messages for each tag session. The '# Msgs'
column lists the number of messages associated with each tag session. To
view messages for a tag session, select the tag session and the messages will
be displayed in the Import Status Messages box below.
6. Select which tag sessions will be created by checking the corresponding box
under the Save column. Use the Select All or Clear All buttons to quickly
select/clear all of the tag sessions.
7. Optionally, select a header template to associate with the all of the new tag
sessions.
8. Press OK to create the imported tag sessions.
Importing Text Files
P3 can import a CSV (comma-separated values) or other delimited text file and
create a tag session from it. This powerful feature allows tagging data from other
applications to be easily incorporated into a P3 tag session.
This feature maps field values in a text file to detail record field values in a tag
session. This feature will only import single-character species, run and rearing-type
codes.
Steps for Importing Text Files
1. Select Import->CSV/Text File command located under the File menu.
62
Importing and Exporting
2. You will be prompted to select a text file to import. Once a file is selected,
press Open.
3. The selected file is opened in the Import CSV Wizard. This wizard will guide
you through the rest of the import process.
Complete the first page of the CSV Wizard by selecting the correct delimiter
that separates the fields in the selected text file. The Preview pane displays
the first few lines parsed from the text file. Use the quotation options to
distinguish text from numeric fields or to remove quotes from the final
product. Once complete, press the Next button to go to the second page.
4. The second page of the CSV Wizard maps data from the text file to detail
record fields in the tag session.
63
P3 Help
For each row under the 'File Field' column, select a corresponding 'Detail
Record Field'. Use the {Skip} selection to ignore the file field (or leave the
assignment blank). Note that only single-character species, run and rearingtype codes can be mapped. There must be at least one field mapped for the
import process to start. Press the Next button when the field mapping is
complete.
Click Save Fields to save the mapping to the registry. Click Clear Fields to
delete registry entries.
64
Importing and Exporting
5. Optionally apply any repeating comments to detail records where there are no
values from the text file; repeating comments will not overwrite values from
the text file. Go to the next page.
6. You can create a new tag session or append the imported data to the detail
records of an existing tag session. Keep in mind, tag sessions have a limit of
9,999 tag detail records. Press the Next button to go to the next page.
7. The P3 Import Wizard will scan the selected text file and report any parsing or
field mapping errors. Pressing the Finish button will save the imported data
to the selected tag session.
65
P3 Help
Importing and Exporting VRT Tables
P3 can import and export VRT tables. VRT tables are exported to CSV (commaseparated values) files into your default Export directory. They are imported from
CSV files.
Exporting VRT Tables
1. Open a tag session from which you'd like to export VRT values and open VRT
table by clicking on Assign VRT... icon on the toolbar or choosing Assign
VRT... command from Session menu.
2. Click Export button. Save As dialog will be displayed. The dialog will open in
your default export folder.
66
Importing and Exporting
3. Click Save. If a file with the same name exists, you will be prompted by the
program. You can overwrite existing file, or change the name of the export
file. The program will display Success message when export is finished.
Importing VRT Tables
1. Open a tag session to which you would like the codes to be imported. Open
VRT table by clicking on Assign VRT... icon on the toolbar or choosing
Assign VRT... command from Session menu.
67
P3 Help
2. Click Import button. Select import file dialog will be displayed. The dialog
will open in your default export folder.
3. Select the file from which you want to import and click Open. Standard
import wizard will be displayed.
68
Importing and Exporting
4. The first step of the wizard is to choose the separator, note if the first row
contains field names, or if you need to filter quotes around text fields. The
next step will filter invalid data. Note: The wizard expects that the VRT codes
are stored in the first column and the dates are stored in the second column
of the file. The second column data must be in valid date format.
5. The wizard will find and overwrite duplicates in your import file. The last entry
with the same key VRT code will be used.
69
P3 Help
6. The wizard will not create new entries in the VRT table. It will only update
dates of the codes that are in both the current VRT table and the import file.
Downloading Data From a Tag Reader
Some tag readers have the capability to store scanned tag codes. With P3 you can
download these codes from the tag reader and create new detail records in a tag
session.
Steps for Downloading Data from a Tag Reader
70
Importing and Exporting
1. Select the Import->Reader Download command located under the File
menu.
2. The Download Device Data wizard will guide you through the rest of the
process.
3. The first page of the wizard asks you to select a tag reader configured in the
active profile.
Some advanced tag readers can store data in multiple files. Select a
particular file number to download or by default all files will be downloaded.
You can also filter any duplicate tag codes downloaded from the reader.
4. From the next page of the wizard you can assign repeating comments to the
new detail records created from the download.
5. The next page of the wizard allows you to optionally select one or more tag
actions to activate during the download. A tag action that filters certain tag
codes will remove these tags during the download process - a notification
message will be displayed for each tag filtered. Other types of tag actions that
apply comments to the new tag detail record will occur once the Finish
command is executed.
Note: Any alert notifications associated with active tag actions will be
suppressed during this process.
71
P3 Help
6. The wizard prompts you to either create a new tag session (and optionally
associate a template header) or append the new detail records to an existing
tag session. Keep in mind, tag sessions are limited to 9,999 detail records.
7. Initiate the download from the last page of the wizard. Some tag readers,
such as the Destron 2001F Portable Transceiver, will allow P3 to automatically
initiate the download command from the reader when the Start button is
pressed. Others tag readers require the user to manually start the download
process. To perform a manual download, press the Start button on the
wizard and then manually initiate the download command from the reader
device. It may be difficult synchronizing the download process between the
72
Importing and Exporting
reader and the application. Press the Stop button (Start button toggles to the
Stop button when pressed) if no data appears to be downloading. The
application will stop the process after approximately 15 seconds if no data
appear.
Tip: to initiate a buffer download from a Destron 400kHz benchtop tag
reader, cycle the power off and on, as necessary, and press the "MENU"
button repeatedly until the reader displays "DUMP MEM TO PORT". Pressing
the "START/STOP" button at this point will initiate the buffer download
process.
Warning: Do not stop a download process in progress! Tag readers cannot
be automatically stopped when they are downloading data and this may
produce undesirable side effects elsewhere in the application.
Warning: P3 will automatically time out if a device does not respond or is
configured as the wrong type. The application is not stalled. Wait for at least
20 seconds before aborting the process.
For some tag readers, P3 will automatically detect the end of input and notify
you that it is complete, or, it will automatically time out when the tag reader
stops responding. Once complete, press the Finish button to create the new
detail records in the tag session.
8. Once the download process has completed, press the Finish button to save
the download data into the selected tag session.
Importing Configuration Data
73
P3 Help
You can import configuration data that was previously exported by a P3 application.
This is a useful feature for transferring configuration information between multiple
installations of the application.
Steps for Importing Configuration Data
1. Select the Import->Configuration command located under the File menu
command.
2. Select a file to import. Only configuration files previously exported from P3
can be imported.
3. P3 will analyze the file to determine the contents. Press the OK button and
the configuration data will be imported into P3.
Note: P3 will automatically append a version identifier to the name of all imported
objects to distinguish them from existing configuration objects.
Notes on Importing/Exporting Profiles: Any activated Tag Actions or associated
digitizer maps will be included with the other profile configuration data in the export
file. Wave files associated with sound events are not included in the export file.
Therefore, it's a good idea to verify the configuration of sound events after
importing a profile.
74
Tools
Tag Actions
When a new tag code is received during data entry, the new tag code can be
matched against a group of codes in a tag action. If the tag look-up is successful (as
defined below) P3 will display an alert and, if so configured, will automatically insert
comment values into the current detail record.
Tag actions have three modes of action:
•
•
•
Filter certain tag codes entered from a device.
Generate an alert if a new tag code is in a list.
Generate an alert if a new tag code is not in a list.
Tag Action Manager
Tag actions can be created and modified using the action manager, displayed below,
and accessed from the Tools menu. Use the right-click menu to display additional
commands such as copy, delete and rename. Also, tag actions can be exported
and then imported into other P3 installations. Multiple tag actions can be selected at
one time for deletion.
Tag Action Settings and Commands
Note: Any modification to an existing tag action will only take effect when the
'Action' window is closed. When the window is closed, all settings are saved to the
database and any open tag session will be automatically synchronized with the
modified tag action settings.
75
P3 Help
Property
Name
Type
Effect
Identifies the tag action throughout the application.
There are three tag action types:
Filter
If a tag code is entered from a reader
device and it is a member of the list of
tags in the action, it will be ignored.
Tip: An action of this type is useful for
testing the readability of a tag reader
with a test tag without affecting the data
of an open tag session.
Exclusive
If a tag code is not a member of the list
of tags, then the message alert will fire
and any comments defined in the action
will be inserted into the current detail
record.
Tip: This is similar to the clip-file
verification function in PITTag2.
Inclusive
If a tag code is a member of the list of
tags, then the message alert will fire and
any comments defined in the action will
be inserted into the current detail record.
Tip: An action of this type is useful for
notifying the user when a target fish is
recaptured.
Source
76
Select which kind of list will be used for a source of tag codes.
If List of Tag Codes is selected, the 'Tag Codes' tab page will
display as shown below. If Tag Session option is selected,
the 'Tag Sessions' tab page is displayed instead allowing the
Tools
Message
Alert
Comments
user to select one or more tag sessions as a source for tag
code lookup.
This text is displayed when an action event occurs. If no text
is supplied, then no visual alert will be displayed.
Any values entered into the comment fields will be applied to
a new detail record when the action occurs. The Filter action
type does not add comments, for obvious reasons.
Comments will overwrite existing comments unless the
Overwrite Existing Comment option for the Conditional
Comment or Textual Comment is not selected. Instead, these
comments will be appended, and in the case of Conditional
Comments, any duplicate values will be automatically filtered.
Tag
Session
Note: Checking the Overwrite Existing Comment option
with an empty comment will clear any existing comment.
This section is displayed only if Source is set to Tag Session.
Users can select one or more tag sessions as a source for
looking up tag codes to fire an action. This is a more dynamic
lookup because a static list of tag codes does not have to be
managed within the action itself. As detail records are added
to the selected tag session, the action will automatically use
the new records as a source.
77
P3 Help
Tag Codes
Note: If tag session is deleted, the source is also removed
from any and all associated tag actions.
This section is displayed only if Source is set to List of Tag
Codes and allows the user to manage the list of tag codes
associated with the tag action:
Show
Tags
78
By default, tag codes are not displayed
until this command is pressed. This is to
reduce the overhead for displaying tag
actions with several thousand tag codes
unnecessarily. With the exception of the
Replace command, all other commands
will automatically refresh the tag list
display.
Tools
Add Tag
Prompts the user to enter a single tag
code into the list.
Import
User can select one or more files
containing a list of tag codes to import
into the list. The tag codes in the file
must be line and/or comma delimited.
Only recognizable tag codes will be
imported into the list - and a tag code
can only appear once in the list;
duplicate tag codes will be automatically
filtered during the import process.
Replace
This command will replace any existing
tag codes with new tag codes from one
or more selected files. Unlike the Import
command, the tag codes in the file must
be line delimited and the file name must
have a *.txt or *.csv extension. Any
duplicate tag codes will be automatically
filtered, however, tag codes will not be
validated for format when imported.
Note: the files selected for importing
must reside on read/write media. The
Replace command must generate a
temporary configuration file in the same
directory as the selected files.
Activation
Download
This command will prompt the user to
select a tag reader device configured in
the active profile to download the tag
codes stored in the device's memory and
append them to the list.
Delete All
This command will prompt the user to
delete all of the tag codes currently in
the list.
Delete
Selected
Tags
Selecting one or more tag codes in the
list and pressing DELETE will delete only
the selected tags from the list.
This page allows the user to select which profile the tag action
should be enabled for. Tag Actions can also be activated from
within a profile as well.
79
P3 Help
Tip: the Replace command will import tag codes much faster than the Import
command. Use the Import command only when appending a relatively small number
of tag codes (less than 25k) to a tag action.
Tip: the Delete All and Replace commands will generate a lot of empty space in the
P3 database. We recommend running the Compact and Repair utility after running
any of these commands to optimize the database.
Tag Actions and Data Entry
Tag actions are only activated during data entry if they are enabled in the active
profile. If more than one tag action is enabled, it is possible that more than one
action will display an alert and insert comments into the detail record. Multiple
actions will overwrite some comment fields and append values to other fields where
possible.
The chart below describes the precedence for all automated input during data entry
from highest to lowest (e.g., an Inclusive Action will overwrite an Exclusive Action):
1.
2.
3.
4.
5.
Inclusive Action
Exclusive Action
Device Action
Repeating Comments
Filter Tag Action (no automated input)
The precedence of a tag action cannot be explicitly set. The rule of precedence for
tag actions of the same type is that newer actions will overwrite older actions. The
creation date of tag actions is displayed in the Tag Action Manager. Modifying an
existing tag action will not effect the precedence.
Note: Tag actions can be activated when downloading data from a tag reader.
Digitizer Maps
80
Tools
Digitizer Maps
Note: A handy mm ruler for your digitizer can be downloaded on P3 ftp site.
Digitizer maps define customizable data entry from a digitizer tablet device. A
digitizer map contains a grid of cells in a specified number of rows and columns.
Each cell is assigned a specific command, called a map command, that can input
predefined data into the current detail record or evoke a tag session command. The
user can adjust the display format and print size of the digitizer map. Once the
design is complete, the user prints the map and places the paper map onto a
digitizer tablet and then aligns it. The digitizer tablet can now be used as an
additional input device.
To create a new digitizer map, select the Digitizer Maps command located under
the Tools menu. The Digitizer Map manager will be displayed. Click the New button
to create a new digitizer map or press the Open button to open an existing map. Use
the right-click menu to copy, delete or rename an existing digitizer map. Digitizer
maps can be exported and imported into other P3 installations.
Below is a picture of the digitizer map editor:
81
P3 Help
When a digitizer map is created, by default it will have 4 rows and 6 columns. To
change the default settings of a digitizer map, select the Properties command
located under the Edit menu on the digitizer map editor.
The digitizer map editor has these commands:
Command
Description
New
Creates a new digitizer map.
Open
Opens an existing digitizer map.
Save
Saves any changes to the current digitizer map.
Save As
Insert Map
Command
Page Setup
Print
Print
Preview
Properties
Note: any changes to an existing digitizer map will take
effect the next time a tag session is opened.
Saves the current digitizer map as a new map.
Inserts a map command into the selected cell. This
command can also be invoked automatically by doubleclicking the selected cell.
These settings affect how the map will be printed, and
include parameters such as margin size, orientation
(landscape or portrait), and paper source.
Prints the digitizer map to the selected printer.
Previews the digitizer map in a window as it would be
printed on a page.
Opens the property settings window:
Digitizer maps have the following properties:
Property
Name
Rows
82
Effect
The name of the digitizer map
displayed throughout the application.
Number of horizontal rows in the
Tools
Columns
Height
Width
Default
Format
Zoom
Add/Remove
Columns/Rows
Cell
Formatting
Commands
digitizer map.
Number of vertical columns in the
digitizer map.
The printed height of the map (in
inches).
The printed width of the map (in
inches)
Default cell attributes such as font
style, background color, etc.
Changes the magnification of the display from 'Fit to
Window' to 25%-150% of the defined print size. Zoom
settings are reset whenever the map is printed.
The digitizer map editor allows rows and columns to be
added or removed from point of selection. Removing
rows and columns will remove any associated map
commands, so take care in performing these functions
on existing maps.
These commands will change the font and color of one or
more selected digitizer cells. To select more than one
digitizer cell, hold the SHIFT key while clicking with the
mouse. The default format for map cells is set in the
Properties settings.
Assigning Map Cells
To assign a command to a map cell, simply double-click the cell and select a map
command. To remove an assigned map command from a cell, select the cell and
press the DELETE key.
Arranging Map Cells
Two contiguous map cells containing the same map command will be merged into
one cell. This feature is limited to merging multiple cells in a single row or a single
column.
An assigned map cell can be easily copied to another map cell by dragging the
selected cell's border with the mouse and dropping it on another cell.
83
P3 Help
Digitizer Map Commands
Map commands are assigned to cells of a digitizer map and define what happens
when the user clicks on a printed map located on top of a digitizer tablet. There are
three types of map commands: Application, Comment and Device - which are
represented as tab pages on the map command dialog window. The current page
displayed determines the type of map command that will be associated with a
digitizer map cell.
Application Map Commands
Assigning an application command to a digitizer map allows the user to control the
application with the digitizer tablet. Most of the application map commands have an
equivalent tag sessions command.
The user simply checks which command they want from the list. The Text to
display in map cell field defaults to the name of the command. The following table
describes each application map command:
Map
Commmand
Accept Record
Reject Record
OK (Yes)
Cancel
No
84
Description
Accept a new tag record or commits an update to the
current detail record.
Reject a new tag record and rolls back any changes to the
current detail record.
Send an OK/Yes response to the application.
Send a Cancel response to the application.
Send a 'No' response to the application.
Tools
Edit Repeating
Comments
Set Current as
Repeating
Comments
Clear
Comments
Repeating
Comments
On/Off
Reset
Repeating
Comments
Replace
Duplicate Tag
Increment VRT
Decrement
VRT
Scroll First
Scroll Previous
Scroll Next
Scroll Last
Scroll New
Next Buffer
Tag
Clear Tag
Buffer
Dot/Dash All
Dot-out Tag
Code
Dash Length
Dash Weight
Undo Dot-Out
Time Check
Validate
Validate/Export
View Header
View Detail
Show/Hide
Statistics
Viewer
Change
Make changes to the current repeating comments.
The existing comments in the current detail record will be
set as the repeating comments.
Erase all comments in the current detail record or in the
repeating comment window.
Enable or disable repeating comments.
Reset comment fields to the defined repeating comments
in current detail record
Scroll to the first detail record matching the duplicate tag
code
Increment the VRT field value by one in the current detail
record.
Decrement the VRT field value by one in the current detail
record.
Scroll to the first detail record.
Scroll to the previous detail record.
Scroll to the next detail record.
Scroll to the last detail record.
Scroll to a new detail record.
Select the next tag code in buffer.
Clears any tag codes currently in tag buffer.
Dot-out current tag code and dash weight and length in
current record.
Dot-out tag code in the current detail record.
Dash-out length in current detail record.
Dash-out weight in current detail record.
Undo any previous Dot-Out command for the current
detail record.
Insert the current date and time between detail records.
Validate the current tag session.
Validate the current tag session and export to an ASCII
tag file.
Display the Session Header tab page in the current tag
session.
Display the Tag Detail tab page in the current tag session.
Toggles the display of the Statistics Viewer window while a
tag session is open.
Switches between tab pages (Species Count, Duplicates
85
P3 Help
Statistics
Viewer Page
Clear
Additional
Positional
Clear
Conditional
Comment
Clear Textual
Comment
Toggle Length
Extension
and Reader Devices) while the Statistics Viewer is open.
Clears any codes currently in the Additional Positional
comment field of the current detail record or repeating
comment window.
Clears and flag codes currently in the Conditional
Comment field of the current detail record or repeating
comment window.
Clears any text currently in the Textual Comment field of
the current detail record or repeating comment window.
If a Nose Stop Extension is defined, this command will
toggle the extension on or off. When the extension is
enabled, a "+" sign will appear above the Length field.
Note: If the Nose Stop Extension setting is zero, this
command has no effect. By default, a non-zero nose stop
extension is enabled whenever a tag session is opened or
the active profile is changed.
Comment Map Commands
This type of map command will automatically insert any values entered into this
page into the current detail record. If a field is blank, nothing will be inserted into the
corresponding field of the current detail record.
Any comments in Species, Run, Rear or VRT fields of this command will overwrite
any existing values in the current detail record. The Additional Positional
Comment field inputs a comment into the current detail record with an offset
defined in the Start field. In the example shown, the word 'TEST' will be inserted
into the current detail record five positions from the beginning. Conditional
comments in this command will be appended to current detail record; any duplicate
86
Tools
codes will be filtered. Text Comments in this command will be appended to the
current detail record and duplicate comments are not filtered.
Device Map Commands
This type of command allows the user to control a peripheral device from the
digitizer tablet, such as toggling the scan mode of a reader on and off or making a
balance send a weight to the application.
Once the user selects a Device Type, a list of commands associated with the device
type will be displayed. The user selects a command from the list and may change the
default value to display in the associated map cell. In the example above, this device
command will turn the scanning off for all Destron 2001F readers connected to the
application.
Note: Device commands will control all devices of a single type. Keep this in mind
when you have a configuration with two devices of the same type. Device
commands will control a device even if it's connected through a multiport controller.
Searching Data
Searching Data
A new feature in P3 allow users to perform an ad hoc search on data collected in tag
sessions. The user can save a search to recall and reuse as new data are collected.
The results from the search can be saved to a text file, printed, or used as a source
for replacing field values.
Accessing the Search Command
87
P3 Help
The search feature is accessed using the Search command located under the Edit
menu.
Selecting the Search command will create a new search query. Clicking on the arrow
to the right of the command will display a Manage Favorite Searches command
and any saved searches below. Selecting the Manage Favorite Searches command
will display a manager window where the user can copy, rename and delete saved
searches.
Creating a Search Query
There are two basic steps for creating a search query. First, the user defines the
search criteria by creating one or more elementary conditions such as 'VRT Code is
equal to 01' or 'Conditional Comment Contains RE' and combines them together by
saying all or any of these conditions apply to the search. Second, the user defines
which data fields will appear in the results. Once these two steps are complete, the
user presses the Search button and the results are displayed below the search
definitions. The example below searches for any records containing a mortality or
recapture conditional comment flag.
88
Tools
Note: The search feature displays Species, Run and Rearing-Type codes rather than
the verbose string descriptor.
Defining Search Criteria
The search conditions define which records will be returned when the Search
command is pressed. Individual lines of criteria are called Elementary Conditions,
89
P3 Help
such as 'Records where Conditional Comment contains M'. The condition that
logically combines one or more Elementary Conditions is called a Complex
Condition, such as 'Select records where any of the following apply'. A search can
have one or more Complex Conditions. To add or delete a condition, click the
button.
Elementary Conditions
When creating an Elementary Condition, there are three statement components
that must be defined: Field, Comparison and Value.
Clicking on the Field modifier will display a drop-down list of all available fields from
a tag session, grouped by Tag Session Header, Tag Detail and Variable Release
Times.
The Comparison modifier defines how the Field and Value modifiers will be
related. This modifier can be 'Equal', 'Greater', 'Less', 'Greater or Equal', 'Less or
Equal', 'Not Equal', 'Is Empty', 'Is Not Empty', 'Contains', and 'Starts With'. The last
two modifiers, 'Contains' and 'Starts With', can only be used with text fields.
If the Comparison modifier is set to something other than 'Is Empty' or 'Is Not
Empty', then the user must supply a Value. A list box will automatically appear so
you can choose an item from pre-defined field domains. For fields without predefined domains of values (such as the Length, Weight, and Textual Comments
fields) you can key in the comparison value. For text fields you can use a "%"
wildcard to match any group of characters or a "_" wildcard to match any single
character within the text value.
Advanced Elementary Conditions
The primary use of the Advanced Elementary Conditions statement is to compare the
contents of two fields. For example, to find all differences between the Session
Name and Tag File values, your statement would be "Records where field Session
Name is not equal to field Tag File".
Complex Conditions
When defining a Complex Condition, click on the blue hyperlinked word to select a
modifier. The modifier determines how all elementary conditions are logically
connected to produce the result set:
90
Tools
Any
All
None
Not All
Any one of the elementary conditions is true.
All of the elementary conditions must be true.
None of the elementary conditions are true.
At least one of the elementary conditions is false.
Note: Complex Conditions can be nested (a Complex Condition containing
another Complex Condition as a sub-condition).
Designating which Fields to Display
Clicking on the Fields tab displays a list of data fields that can be returned in the
result set.
A new search will have default fields selected for display in the result set. Checking
the box next to each field will display that field in the result set; if the box is not
checked, the field will not be displayed. Additional fields can be added or deleted
button. Each field can be sorted by selecting a sort function. If multiple
using the
fields are selected for sorting, the multi-column sort will occur in the order the fields
are listed, top to bottom. Each field, depending upon it's type, can have a function
associated with it to display a count, maximum, minimum or an average of that
field's values. The Default command button will reset the field selections to default
fields. The Clear command button will remove all field selections.
Note: The Session_ID and Detail_ID fields contain primary key values from a
relational database. If these fields are selected, by default they will be hidden in the
search results. Select these fields if the search results will be a source for a search
and replace action.
Managing Search Results
91
P3 Help
When the Search command is pressed, the results of the search will be displayed in
the box below the search definitions. Clicking on a column header will automatically
sort the column. Clicking it again will sort the column in reverse order.
The following commands can be accessed by right-clicking in the results box:
Command
Save Search
Save Search
As
Print
Results
Save Results
to a File
Replace
Hide Column
Show All
Columns
Merge
Columns
Replacing Data Values
92
Description
Prompts the user for a name and saves the
search. The search can be accessed from the
main menu.
Saves a copy of an existing search with a new
name.
Prints the result display exactly as it appears.
Writes the records, as comma-separated values
(CSV), to a file.
Opens the Replace window and automatically
designates the result set as a source.
Hides the selected column.
Displays any hidden columns.
Combines adjacent cells within a column that
contain the same value.
Tools
This tool allows the user to change a value for a particular data field. To access this
tool, select the Replace command located under the Edit menu.
In the example above, a Text Comment field containing 'THIS VALUE' will be
replaced with 'THAT VALUE' in all tag sessions.
The replacement window has the following property settings:
Property
Field to
Replace
Pattern To
Match
Replacement
Value
Search
Append Value
Instead of
Replacing
Match Case
Use Regular
Expressions
Effect
This setting is a list of all data fields in a tag
session except the Tag Code field.
This is the value, or pattern, that P3 will search
for. Depending on the type of field selected, this
value may be restricted to a value from a dropdown list.
This is the value, or pattern, that P3 will replace
or append. Depending upon the type of field
selected, this value may be restricted to a value
from a drop-down list.
The Search and Replace operation can target the
current Tag session only (if one is open), or All
Tag Sessions in the P3.mdb database. The
Replace operation can be constrained to specific
rows by first using the Search function to identify
the records of interest.
If this setting is checked, the replacement value
will be appended to the field instead of
overwriting the search pattern. This option is only
available for certain text fields.
Searches for case-sensitive occurrences of a
pattern in a field. This limits the search so it only
locates text that matches the upper- and
lowercase characters you enter.
This setting is available for fields that contain
text. If it is checked, the search uses regular
expressions to determine a match.
93
P3 Help
Confirm Replaced Values
Pressing the Replace command button will start the replacement process. Before the
process completes, the user is prompted with the results of the replacement and
asked to confirm the changes:
Merging Tag Sessions
This tool allows two or more tag sessions to be combined into a single tag session.
This may be convenient for management purposes, or may be necessary for
updating detail records with additional information from another set of data.
To access this tool, select the Merge Tag Sessions command located under the
Edit menu.
94
Tools
To perform a simple merge, select a Primary Tag Session to merge into and then
select one or more Secondary Tag Sessions to merge from and press the Merge
button. All of the detail records contained in the Secondary Tag Sessions will be
appended to the Primary Tag Session. Only the primary tag session is affected in
this operation.
Note: Tag Sessions are limited to 9,999 detail records. Merged sessions will
automatically truncate at this limit. Keep this in mind when merging several tag
sessions.
Advanced Merge Settings
Clicking the Advanced button will display advanced property settings describing
what should be done when merging detail records with the same tag code.
Property
Combine detail
records with
Duplicate Tag Codes
Effect
If this setting is checked and a detail
record from a Secondary Tag Session
has the same Tag Code as a detail
record in a Primary Tag Session, the
two detail records will be combined into
95
P3 Help
one.
Set how duplicate
record fields should
Merge
Filter out Dot-Outs in
Secondary Tag
Sessions
Merge Duplicate
Records Only
If this setting is not checked, the
following options are disabled and all
detail records from the Secondary Tag
Sessions will be appended to the
Primary Tag Session regardless of any
duplicate tag codes.
If you choose to combine records with
duplicate tag codes from multiple
sessions, you can specify which value
version (primary or secondary) to use for
each field. The Additional Comment,
Conditional Comment, Textual
Comment and the Note fields allow
their contents to be Combined (to their
respective field width limits).
If this setting is checked, any detail
records in the Secondary Tag Session
that have a Dot-Out for a tag code will
not be appended to the Primary Tag
Session.
If this setting is checked, then only detail
records from the Secondary Tag
Sessions that have matching tag codes
in the Primary Tag Session will be
merged.
Note: If data records are merged from multiple secondary sources, the last source
accessed provides the final value.
Note: When combining Additional Positional Comment fields, blank columns in
the Primary Sessions are overwritten by the Secondary Source(s), and blank
columns in the Secondary Source(s) are ignored.
Dot-Out Wizard
The Dot-Out wizard takes a list of tag codes from a selected tag session and dots-out
every occurrence of those tags in a selected group of other tag sessions. This is
useful for updating tag sessions with mortality information. The Dot-Out wizard will
guide you through this process.
Using the Dot-Out Wizard
1. Select the Dot-Out Wizard command located under the Edit menu.
2. Select a tag session from the wizard containing the tag codes you want to
dot-out. Go to the next page.
3. Enter any conditional or textual comments that will be inserted into the detail
records that are dotted-out. You can also choose to append the original tag
code to the text comment field.
96
Tools
4. The wizard displays all tag sessions containing one or more of the tag codes
from the source list. Select which of these tag sessions to apply the dotout(s) to by checking the box next to the name.
The Detail button will display a report of specific tag detail records that will
be dot-out when the Finish button is pressed. It will also display any tag
codes that did not match with any other detail records for dotting-out. This
report, as shown below, can be printed or saved to a file.
5. Press the Finish button to start the dot-out process.
Remove Dot-Outs
This function allows the user to select one or more tag session(s) and delete any
detail records with a dot-out value in the tag code field. The remaining detail records
are then re-sequenced so they remain in numerical order within the tag session.
To access this tool, select the Remove Dot-Outs command located under the Edit
menu.
97
P3 Help
Simply select one or more tag sessions and press the Remove button. All dot-out
records contained within the selected tag sessions will be removed.
Duplicate Viewer
The duplicate viewer prompts the user to select one or more Tag Sessions and then
displays any tag detail records that have duplicate tag codes. All of the tag detail
fields are displayed to help the user to decide which record may be valid. The viewer
allows the user to select one or more of these duplicate detail records and
automatically dot-out these records in the associated tag session.
98
Tools
Duplicate detail records are initially ordered from older to new records, grouped
together by tag codes in ascending order; the columns are ordered by 'Tag Code',
'Created On' and finally 'Record #'. Clicking on any columns will reorder the viewer.
The 'Tag Code' column is fixed, so that it will always be displayed when scrolling the
viewer horizontally. Selecting a record in the 'Dot-Out' column will mark that record
for the 'Dot-Out Duplicates' command, described below.
The Duplicate Viewer has these features:
•
•
•
Order any column by clicking on that column. Click on the same column
again toggles the order from ascending to descending.
To search for a record, click any cell associated with a column and begin
typing. The viewer will automatically scroll as it matches values in the same
column as you type.
Right-Clicking the viewer will display a pop-up menu with these commands:
• Select All will a select all records under the 'Dot-Out' column.
• Select All But First Duplicate' command will select all duplicate
detail records except for the first instance (or the oldest record). This
command only works if the viewer is in the original order.
• Select All But Last Duplicate' similar to the command above, but
instead it will select all duplicate detail records except the last instance
(or the newest record).
• Invert Selection command will toggle the 'dot-out' selection for all
records.
• Select Tag Session... allows the user to change the selection of tag
sessions to search for duplicate tag records. The original selection of
tag session is preserved each time this command is executed.
• Dot-Out Duplicates... this command will automatically dot-out each
records selected under the 'dot-out' column. Before this command is
processed, the user is prompted to confirm to continue the process. In
addition, the user can apply conditional and/or textual comments to
each record that will be dot-out.
99
P3 Help
•
•
•
Print... command will print the viewer exactly as displayed.
Save to File... will save the contents of the detail viewer to a commaseparated file.
Refresh will cause the viewer to scan the selected tag sessions and
refresh the display of duplicate tag records in the grouping and order
described above.
Validation Codes
This tool manages all of the runtime Validation codes maintained and generated by
PTAGIS. Validation codes populate the drop-down lists in many of the session header
and tag detail fields. The "official" validation codes often change and must be
periodically updated in the application from the PTAGIS system.
Note: P3 allows the creation of user-defined validation codes. However, tag sessions
containing user-defined validation codes will not be accepted by PTAGIS until those
values have been defined and incorporated into the PTAGIS database. Therefore, the
creation of custom validation codes is discouraged.
The various code lists can be accessed by selecting the Validation Codes command
located under the Tools menu. The example below shows the list of validation codes
of type 'Tagging Method' with a custom validation code called 'Test'. There are
several different types of validation codes; each type can be accessed by selecting a
value from the Type of Code drop-down list.
Updating Validation Codes
There are two methods for updating validation codes from PTAGIS. The first method
is to manually import the files into the application. There are two files that PTAGIS
100
Tools
generates for updating validation codes: rkmcodes.txt and validtbl.txt. Both of these
files are available for download from the Download page on P3 Home Page. Pressing
the Import File command will prompt the user to select one or both of these files;
by default the prompt looks for these files in the ../P3/Config directory. Once the
files are selected they are then imported into the P3 internal database, updating and
replacing similarly-named codes.
The second method for updating validation codes automatically downloads the
validation files from the PTAGIS web site and imports them into the P3 internal
database. This method requires an internet connection and the ability for the client
PC to establish an FTP connection with the PTAGIS server. This method of updating is
initiated by simply pressing the Web Update command button.
Note: Custom codes will be overwritten by "official" codes with the same code name.
Custom Validation Codes
Press the Add command button to enter a custom validation code. If the type of
validation code is a Tag Site or a Release Site, then the custom code data entry will
look like this:
All other validation codes use this dialog for data entry:
Once a custom code has been entered, the code will be displayed with a 'Yes' under
the User Defined column. Use the Edit command button to modify a custom
validation code and the Delete command to remove the custom code.
Deletion of Verbose Species, Run and Rear Codes
101
P3 Help
When the Type of Code selection is set to 'Verbose Species, Run and Rear Codes',
the Delete command button will permanently remove one or more selected codes.
This may be useful for restricting the number of codes displayed in the Species Run
and Rear tag detail field (verbose mode only). Removing these validation codes
applies for all tag sessions and is not associated with any profile.
Note: The verbose validation codes will be refreshed each time the validation codes
are updated; you will need to remove any verbose codes each time the validation
codes are updated.
Database Maintenance
As you delete objects (e.g., tag sessions or dot-out records) in the application, the
application's internal database can become fragmented and use disk space
inefficiently. The database maintenance tool makes a copy of the database file and
rearranges how the file is stored on your disk; this usually results in a much smaller
file size. This command should be run periodically to ensure optional performance.
To access this tool, select the Database Maintenance command located under the
Tools menu. The command will display a prompt to confirm running this command;
once the maintenance process starts, it may take several minutes and cannot be
stopped. This tool makes a copy of the original database and places it in the
../P3/Temp directory.
Note: Before running this utility, make sure there is adequate disk space availableat least double the size of the p3.mdb file.
102
Appendix
Frequently Asked Questions
Questions
Do I have to export all of my tag sessions from PITTag2 to import them
into P3?
I have the wrong File Name Prefix for a tag session, how do I fix it?
How do I determine which tag sessions were modified using the replace
feature?
How do I transfer a group of detail records from one tag session to
another?
Are the digitizer maps I created in PITTag2 compatible with P3?
Why is my digitizer map printing on two pages?
Why is my digitizer tablet moving the mouse cursor?
What's the fastest way of importing a large number of tag codes into a tag
action?
Answers
Do I have to export all of my tag sessions from PITTag2 to import
them into P3?
The Import Tag Session feature located under File menu heading will
allow you to quickly import all of the tag sessions currently in your
PITTag2 database.
Note: make sure you select PITTag2 Database (pittag2.mdb) in the
File of Type drop-down box.
I have the wrong File Name Prefix for a tag session, how do I fix it?
By specification, the file name prefix (zzz) and Julian date (YYDDD)
portion of the Tag File header field (zzzYYDDD.xxx) cannot be
modified. The file name prefix comes from a setting in the active
profile when the tag session is created.
If the wrong file name prefix is used on a tag session that contains
detail records, create a new tag session with the correct prefix and
use the Merge Tag Sessions tool to transfer the detail records in the
original tag session to the new tag session.
103
P3 Help
How do I determine which tag sessions were modified using the
replace feature?
The Replace feature can perform a global update of a particular field,
meaning several tag sessions can be updated at once. To find out
which tag sessions were modified, open the tag session manager and
sort the Modified column by clicking on it (clicking on it multiple
times will toggle the sort in ascending and descending order).
How do I transfer a group of detail records from one tag session to
another?
This will take a few steps:
1. Make a Copy of the tag session containing the detail records
you want to transfer.
2. Create a Search that selects the detail records you don’t want
to keep in the copy of the tag session (i.e “Record# is less
than 250’ and ‘Session Name is equal to “Tag Session 2”’)
3. Dot-Out the tag codes for each detail record currently in the
search results using the Replace feature.
4. Use the Remove Dot-Outs feature on the copy of the tag
session, this should leave you with just the detail records you
want to transfer.
5. Use the Merge Tag Sessions utility to merge the remaining
detail records in the modified copy of the tag session to the
destination tag session.
Are the digitizer maps I created in PITTag2 compatible with P3?
No. Digitizer maps must be recreated in P3 using the Digitizer Map
editor to take full advantage of the new features in P3. PITTag2
device drivers are also not compatible with P3.
Why is my digitizer map printing on two pages?
You may need to adjust either the map Height and Width settings
using the Properties command in the Digitizer Map editor, and/or
the Margin settings in Page Setup window. All of these settings are
in inches. Use the Print Preview command to view the digitizer map
to make sure it will print on a single page.
Why is my digitizer tablet moving the mouse curser?
Digitizer tablets using the WinTab interface driver will intentionally
act as a mouse device. When a tag session is open the tablet will
stop moving the mouse; P3 will intercept messages from the WinTab
driver and translate the coordinates into map commands and
lengths. When the tag session is closed, the tablet will change back
into a mouse device.
104
Appendix
What's the fastest way of importing a large number of tag codes
into a tag action?
Use the Replace command instead of the Import command. The
Replace command is much faster, however it will overwrite any
existing tag codes with new ones. The Import command will append
new tags with existing tags, however it takes much longer to
process.
Hardware Support
This page lists information about known devices used with the P3 application when
this help file was compiled. Go to the P3 Home Page to get up-to-date information
about hardware support for the P3 application.
Tag Readers
Device
Manufacturer Website
www.destronfearing.com
Notes
Support for firmware versions 1.5
(time stamp) and 2.0. Out of
warranty repairs can be directed
to www.biomark.com.
DestronIDI
Benchtop
400 kHz
Reader
www.destronfearing.com
Avid
Power
Tracker II
Tag
Reader
www.avidmicrochip.com
Powering on the unit may cause
garbage to appear when the first
tag code is read (hint: prime with
a test tag and filter the code with
a tag action in P3) - see
"Operating the Destron 400 kHz
Benchtop Reader" topic for more
information.
Typical serial port settings are
2400-N-8-1.
Data
Mars ISO
Max I Fish
Reader
www.datamars.com
Destron
Fearing
2001F
134.2 kHz
Reader.
Digital Balances
Device
OHAUS
Manufacturer
Website
www.ohaus.com
Notes
Can be controlled from a digitizer
105
P3 Help
tablet. Uses a proprietary cable to
communicate RS-232 and a NULL
modem adapter.
Electronic
Balance
CT600/1200,
Navigator
and Scout
series.
A&D
FX/FY Model
3000
Balance
www.andweighing.com
Suggested device parameter
settings: C1-1;C2-1; C3-2; C4-4;
C5-1;C6-0.
Sartorius
Combics 1
www.sartorius.com
Default RS-232 settings:
1200 baud
Odd parity
1 stop bit
Handshake: none
The user needs to press Print
button to send current reading to
PC.
Digitizer Tablets
Device
Calcomp
Drawing
Boards,
Drawing
Slates and
CadPro.
Aiptek
Hyperpen
8000
Manufacturer
Website
www.gtcocalcomp.com
www.aiptek.com
Notes
Support for standard RS-232,
WINTAB/USB. Should be set to
Calcomp 2000 ASCII format with
a resolution of 254 lpi.
WINTAB support via USB.
USB/PCMCIA/Serial Converters, Hubs and Controllers.
Device
Comtrol
RocketPort
USB Serial
Hub
Manufacturer
Website
www.comtrol.com
WhiteHeat
www.connecttech.com
Ruggedized
Dual Serial
I/O PC
www.socketcom.com
106
Notes
Doesn't require additional power
adapter.
Doesn't require additional power
adapter. Problems with installation
and caused additional serial ports to
be out of sequence.
PC Card adds two high-speed serial
COM ports to a notebook PC.
Appendix
Card #
SL0723116
D-Link
DSB-H4 4Port
Universal
Serial Bus
USB Hub
D-Link USB
to Serial
Port
Converter
Cable
Belkin
Model
F5U014-OE
4-port USB
hub
Baytech
Multiport
525/529 H
Series
www.dlink.com
Expands the number of USB ports
on your PC only (not serial ports).
This device requires AC power
supply to other operate peripheral
devices.
www.dlink.com
There are many manufacturers of
these types of cables, however this
6 ft. cable comes recommended by
other P3 users.
www.belkin.com
We do not recommend this
product! There have been reports
of only one serial port working at
once.
www.baytech.net
This legacy equipment multiplexes
4 serial ports into one. This
equipment is expensive, prone to
failure, complex configuration and
requires and an external power
supply.
Additionally, there is a known issue
with this equipment and P3 - see
readme.txt for more information.
Troubleshooting Common Tag Reader Problems
Tag Reader Won't Read a PIT Tag
If the reader won’t read a tag, make sure the antenna cable is connected securely.
Some newer tag readers such as the Destron 2001F portable tag reader will display
an ANT alarm if the antenna is disconnected or not functioning properly.
Environmental noise interference will reduce the reader's ability to read a tag.
Interference can be minimized by isolating the antenna from metal sources and
florescent lights. Peripheral devices such as digitizer tablets and display monitors can
also cause interference. Changing the refresh frequency of any nearby display
monitors may also help. If the tag reader has a setting for adjusting the antenna
power, try reducing it.
Tag Reader Won't Communicate with PC
107
P3 Help
Make sure the serial cable is connected and functioning properly. Some tag readers
may need a NULL modem adapter (refer to the online Hardware page for more
information).
Verify the communication settings using the Terminal Window.
Sometimes tag readers operating on DC power will not communicate with laptops
running on AC power due to grounding issues. Try operating the tag reader on AC
power and see if this resolves the issue.
If the tag reader is a Destron 2001F portable tag reader, make sure 'Send To
CommPort' setting is set to 'ON' and the reader is in Scan mode.
Tag Reader Won't Update the Tag Code Field in a Tag Session
If the tag reader communicates with the Terminal Window but not to a tag session,
make sure there is a valid device configuration in the active profile for the reader
and the serial port settings are correct.
Troubleshooting Common Digitizer Tablets Problems
Digitizer Tablet Doesn't Register Pen Clicks
Usually an LED light will indicate when pen contact is made with the digitizer tablet.
If the pen contact doesn't register with the tablet, try the following:
1. Make sure the power is on and all tablet cables are properly connected.
2. Change the batteries inside the pen.
3. Verify the tablet configuration settings according to the manufacturer’s
recommendations.
4. Turn off any other devices in the immediate area, especially tag readers, to
reduce environmental noise interference. Also, try isolating the tablet from
any large display monitors, sources of metal and fluorescent lights.
WinTab Digitizer Tablet Won't Communicate with a PC
Make sure the tablet was installed correctly according to the manufacturer’s
documentation. Use tools provided by the manufacturer to diagnose connectivity
issues (the Terminal Window is not compatible with WinTab devices).Also, make sure
you have only one type of digitizer tablet installed.
ASCII Digitizer Tablet Won't Communicate with a PC via Serial Port
If the tablet communicates directly to the PC using RS-232 (serial), verify the
communication settings using the Terminal Window feature. When the pen is clicked,
you should see a pair of coordinates display in the window. If nothing or garbage
appears, adjust the serial communication settings so they match between serial port
and tablet.
Digitizer Tablet doesn't Communicate with P3
108
Appendix
Make sure there is a valid device configuration in the active profile for the tablet. For
ASCII tablets, makes sure the data format is set to ‘ASCII 2000’. For WinTab tablets,
make sure there isn’t additional WinTab software such as KYE that prevents
applications from intercepting messages from the WinTab driver.
Digitizer Tablet is Sending the Wrong Commands
Make sure the digitizer map that is assigned in the device configuration is the same
version as the printed map on the tablet. Also, make sure the printed map is
properly aligned.
Another cause for this behavior is the pen is registering before it is actually clicked
on the tablet because of a high-proximity setting in the tablet configuration. Or, the
tablet may send several coordinates for one pen click due to environmental noise
interference or because the tablet is malfunctioning. Verify your tablet settings to
correct issues such as these.
Digitizer Tablet is Sending Wrong Lengths
You may need to adjust the resolution divisor value in the digitizer settings. This
value is used to divide the x-coordinate from the digitizer tablet to produce
millimeters. Typically, the manufacturer specifies the number of lines-per-inch for
each tablet. This value divided by the resolution divisor should produce lines-permillimeter. Refer to the hardware support page for recommended resolution divisor
values for popular digitizer tablets.
Also, make sure the ruler at the bottom of the digitizer tablet is properly aligned.
Digitizer Tablet Hangs P3 when Connected via Baytech Multiport
If you are using an ASCII tablet connected to the PC through a Baytech Multiport
Controller, some of the map commands will cause the application to hang due to a
process threading issue. We recommend connecting the digitizer directly to the PC or
using PITTag2 software if this is not feasible.
Operating the Destron 400 kHz Benchtop Tag Reader
Changing the Communication Settings
1.
2.
3.
4.
Cycle the power off then on.
Press the MENU button repeatedly until “SET UP SYSTEM” is displayed.
Press START/STOP button once; “SET SERIAL PORT” is displayed.
Press START/STOP button once more, the baud rate will be displayed; cycle
through the options with the MENU button until “9600 BAUD” is displayed.
5. Press START/STOP button and, if necessary, cycle through the parity
options until “NO PARITY” is displayed.
6. Press START/STOP button and select either 7 or 8 for data bits setting.
Make sure this setting is the same in P3.
7. Toggle between the options using the MENU button and confirm your choice
using the START/STOP button. Verify the following settings: “1 STOP BIT”,
“END LINE = CR,LF” and “IGNORE CTS&DSR”.
109
P3 Help
8. When the display cycles back to “SET SERIAL PORT” you may turn the reader
off.
Testing the Destron 400 kHz Reader and Antenna Assembly
1. Connect the antenna to the reader, ensuring the connector pins are properly
aligned and fully inserted.
2. Turn the reader on.
3. Press the MENU button repeatedly, cycling through the options until “SCAN
ONLY” is displayed.
4. Press START/STOP button – the reader should change to “WORKING”. If the
reader displays “READY”, then either the antenna is not connected, or the
antenna contains a toggle or trigger switch that needs to be activated.
5. With the reader displaying “WORKING”, run a 400 kHz test tag through the
antenna, the reader should emit a beep and display the tag code.
Collecting Data on the Destron Reader
This reader can store scanned tag codes into an internal memory buffer. The buffer
is maintained even when the reader is turned off (memory is lost if the reader’s
internal batteries are disconnected or completely discharged). Follow these steps to
configure the reader to store scanned tag codes:
1.
2.
3.
4.
Cycle the reader power off and on.
Press MENU button twice, to cycle from "SCAN ONLY" to “SCAN/STORE”.
Press the START/STOP button - the reader should change to “WORKING”
Any PIT tags scanned from this point on will be stored to the reader’s internal
memory. Each scanned tag code will be displayed along with it’s internal
record number.
Downloading Data from the Destron Reader into P3
1. Create a device configuration for this reader in P3.
2. Open the download device data wizard and follow the steps up to initiating
the download on the reader listed in the online help.
3. To initiate a buffer download from a Destron 400kHz benchtop tag reader,
cycle the power off and on, as necessary, and press the MENU button
repeatedly until the reader displays "DUMP MEM TO PORT". Pressing the
START/STOP button at this point will initiate the buffer download process.
Erasing Stored Records from the Destron Reader
1. Cycle the reader power off and on.
2. Press the MENU button repeatedly until “SET UP SYSTEM” is displayed.
3. Press the START/STOP button once, then press the MENU button twice,
until “CLEAR MEMORY” is displayed.
4. Press the START/STOP button once, and then press and hold both buttons ,
as prompted, until the reader displays “FINISHED”.
5. When you release the keys, the reader will automatically return to “SCAN
ONLY” mode.
110
Appendix
Configuring Calcomp Drawing Board III
This section describes how to configure a Calcomp Drawing Board III for use with P3.
To set up the tablet:
1.
Turn on configuration mode by clicking on the Config/Exit
key. The configuration light will turn on and remain on while the
tablet is in configuration mode.
2.
Click on the Bank key where you need to work (A,B, or C).
You can determine which bank you are in by placing the pointing
tool over one of the Bank keys. The power light is on if the bank
is active.
3. Determine whether the Configuration keys are on or off by
placing the pointing tool over each key. If the key is on, the
power light is on; if the key is off, the power light is off. Click on
the key to toggle the setting, if necessary.
4. Repeat steps 2 and 3 so that the configuration matches the
settings displayed in Figure 1.
5. After you have completed your setup, you can save it by
clicking on one of the Save keys. This will ensure the settings will
persist when the unit is powered off.
6. Exit configuration mode by clicking on the Config/Exit key.
The configuration light will turn off.
The configuration settings in Figure 1 are compatible with P3 with a serial port
setting of 9600-N-8-1.
111
P3 Help
112
Index
4
Buffer 39
400 kHz Benchtop Tag Reader 109
C
A
CalComp Drawing Boards 5
A&D Balances 5
Capture Method 32
Accept 45
Change a Value 92
Access another database 3
Clear Tag Buffer 45
Action 15
Clip-file Verification 75
Actions 75
Combine Tag Sessions 94
Activating Tag Actions 21
Comma Separated Files
Ad Hoc Search 87
Alert Message 15
Align Digitizer Map 45
Importing 62
Commands
Session 45
Application Map Commands 84
Comment Map Commands 84
ASCII 2000 Serial Digitizer Tablets
17
Common Digitizer Tablets Problems
108
Assign VRT 45
Common Tag Reader Problems 107
Assigning Wave Files to Sound
Events 23
Compact Database 102
Audible Alert Sound Events 23
Auto Accept 9
Avid PowerTracker II 5
Complex Search Condition 89
Configuration Data
Importing 73
Configuration Profiles 7
B
Balance Devices 17
Baud 14
Baytech Multiport Controllers 5, 19
Brood Year 32
Configuring Devices 12
Constraints 21
Controllers 105
Coordinator ID 32
Copy a Tag Session 28
113
P3 Help
Creating a Header Template 35
Detail Records 38
Creating a Search Query 87
Detail Validation 43
Criteria for Search 89
Detail Viewer 45
CSV Wizard 62
Device 12
Custom Validation Codes 100
Device Action 15
Customizing Header Field Labels 35
Device Commands 19
Customizing the installation 3
device configuration 109
Customizing the Tag Session Tool
Bar 45
Device drivers 3
Device Map Commands 84
D
Dash Length and Weight 45
Data Bits 14
Data Logging 9
Database Maintenance 102
DataMars ISO MAX III Fisheries 5
Date of Tagging or Release 32
Default Export Path 9
Default Header Values 35
Default Profile 9
Default Repeating Comments 9
Delete Dot-Out Records 97
Delete Tag Sessions 28
Destron 2001F Portable Transceiver
5
Device Profile Settings 12
Device Type 13
Devices 5
Digital Balances 105
Digitizer Map Commands 84
Digitizer Maps
Importing 73
Digitizer Maps 81
Digitizer Tablets 5, 17, 105
Disable a Device 13
Disable Repeating Comments 45
Documentation 2
Domain 21
Dot-Out 45
Destron 400 kHz Benchtop Reader 5
Dot-Out Wizard 96
Destron 400 kHz Benchtop Tag
Reader 109
Download Device Data 70
Detail Fields 39
Drop-Down Value Lists 30
Duplicate Tag Codes 9, 43, 51, 98
114
Index
Importing 73
E
Electronic Balances 5
Header Templates 27, 35
Elementary Search Conditions 89
Hiding Optional Header Fields 35
Enable a Device 13
History of Uploaded Data 52
Enable a Device Action 15
Hubs 105
Enable Repeating Comments 45
I
Enable Tag Actions 21
Importing Configuration Data 73
Entering Default Data 35
Importing Tag Files 58
EULA.txt 2
Importing Tag Sessions 60
Export Path 9
Importing Text Files 62
Exporting Data 57
Incomplete Tag Sessions 27
F
Installation 3
Field Headers Reference Guide 32
Internet Connection 4
Filter Tag Codes 75
L
Flow Control 14
Labeling a device 13
Fork Length 39
Length 9, 39
Frequently Asked Questions 103
License Agreement 2
G
List Values in a Session Header 30
General Device Properties 13
Log File 9
General Profile Settings 9
Logging 9
H
M
Hard Disk Space 4
Maintain Database 102
Hardware Support 105
Managing Search Results 91
Hatchery Site 32
Managing Tag Sessions 28
Header 30
Mandatory Detail Fields 43
Header Field Reference Guide 32
Mandatory Header Fields 32
Header Templates
Mandatory Length 9
115
P3 Help
Mandatory Weight 9
Organization 32
Map Commands 84
Overview 1
Maps 81
P
Marking Procedures 2
Parity 14
Maximum Detail Records 43
PCMCIA 105
Maximum Lengths and Weights 21
PIT Tag Specification Document 2
Memory 4
PITTag2 Tag Sessions
Importing 60
Merging Tag Sessions 94
Migratory Year 32
Port 14
Minimum Hardware Requirements 4
Portable Transceiver 5
Minimum Lengths and Weights 21
Post Tag Temperature 32
Mortality Information
Print Search Results 91
Update 96
Print Tag Detail Records 45
Multiport 5, 19
Print Upload History 52
N
Printing Digitizer Maps 81
Name a Tag Session 28
Profile Name 9
Naming a Device 13
Profiles
Naming conventions 27
Importing 73
New Tag Session 28
Profiles 7
Next Tag Code in Buffer 45
Q
Nose Stop Extension 17
Querying Session Data 87
Note 45
R
O
Raceway 32
OHAUS 5
Reader Device Statistics 51
Open Tag Session 28
Readme.txt 2
Optional Header Fields 32
Record Count 38
Optional Requirements 4
Reject 45
116
Index
Release Date 32
Serial Port Device Settings 14
Release Notes 2
Session Commands 45
Release Site 32
Session Header 30
Release Temperature 32
Session Header Note 30
Remove Dot-Out Records 97
Session Header Templates 35
Removing the installation 3
Session Message 32
Rename a Tag Session 28
Set Repeating as Current 45
Repair Database 102
Settings 7
Repeating Comments 9, 45
Sort Tag Sessions 28
Replacing Data Values 92
Sound card 4
Reset Repeating Comments 45
Sound Events 23
Resolution Divisor 17
Species Counts 51
River Kilometer 32
Species Validation Constraints 21
RS-232 14
Specifications 2
Runtime Validation codes 100
Statistics Viewer 51
S
Stock 32
Save Search 91
Stop Bits 14
Save Search Results to a File 91
Supported Peripheral Devices 5
Saving Session Header Information
30
System Requirements 4
T
Scrolling Between Detail Records 38
Search Criteria 89
Search Fields to Display 91
Searching Data 87
Secured.mdw 3
Security 3
Serial Converters 105
Tablets 17
Tag Actions
Activating 21
Importing 73
Tag Actions 75
Tag Code 39
Tag Code Buffer 39
117
P3 Help
Tag Date 32
Time Check 45
Tag Detail 38
Transceivers 15
Tag Detail Field Reference 39
Transect 32
Tag Detail Validation 43
Troubleshooting Device Connections
19
Tag Detail Viewer 45
Troubleshooting Digitizer Tablets 108
Tag File 32
Troubleshooting Tag Readers 107
Tag File Prefix 9
Types of Devices 12
Tag Files and Tag Sessions 27
Types of Sound Events 23
Tag Method 32
U
Tag Reader Devices 15
Tag Readers 5, 105
Tag Session Commands 45
Tag Session Header 30
Tag Session Header Templates 35
Tag Session Overview 27
Tag Site 32
Undo Dot-Out 45
Uninstalling the application 3
Updating the application 3
Updating Validation Codes 100
Uploading Data 52
USB 105
User Requirements 2
Tagger 32
V
Tagging Temperatures 32
Temperatures 32
Template
Associating with a Tag Session 28
Templates
Importing 73
Terminal Window 19
Validate 45
Validate and Export 45
Validating Tag Detail 43
Validation Codes 100
Validation Constraints 21
Verbose Species Run and Rear 9
VRT 66
Test Current Window 19
W
Text Files
Importing 62
118
Wave Files 23
Index
Web installation 3
WinTab digitizer tablets 5, 17
Web site 2
X
Weight 9, 39
XON/XOFF 14
Windows 4
119