1
ADJUSTING BLADE
PARALLEL TO
MITER GAGE SLOTS
A
The blade was adjusted parallel to the miter gage slots
at the factory. In order to insure accurate cuts and help
prevent kickback when cutting, this adjustment should
be rechecked and if necessary, readjusted as follows:
B
1. DISCONNECT MACHINE FROM POWER SOURCE.
2. Raise the blade to its highest position and adjust the
blade so it is 90 degrees to the table.
Fig. 50
3. Select a tooth on the saw blade that is set to the left.
Mark this tooth with a pencil or marker.
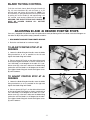
4. Using a combination square, place the body (A)
Fig. 50, of the square against the miter gage slot and
adjust the blade (B) of the square until it just touches the
marked tooth, as shown.
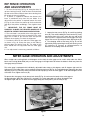
5. Rotate the blade and check the same marked blade
tooth at the rear of the saw table in the same manner, as
shown in Fig. 51.
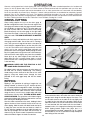
6. If the front and back measurements, shown in Figs.
50 and 51, are not identical, loosen four screws (C) Fig.
52. Carefully grasp and move the saw blade until the
blade is parallel to the miter gage slot. Then tighten four
screws (C) Fig. 52, securely. NOTE: If sufficient
adjustment cannot be achieved by loosening screws (C),
screws (D) may also be loosened if absolutely necessary
to make the adjustment.
NOTE: Guard has been removed for illustrative
purposes only.
Fig. 51
C
C
D
CHANGING THE BLADE
1. DISCONNECT MACHINE FROM POWER SOURCE.
WARNING: USE ONLY 10" DIAMETER SAW
BLADES RATED FOR 5000 RPM OR HIGHER WITH
5/8" ARBOR HOLES.
Fig. 52
2. Raise the saw blade to its maximum height and
remove the table insert (A) Fig. 53.
D
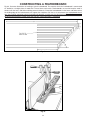
3. Using the open end wrench (B) Fig. 53, place open
end of wrench on flats on inside blade flange to keep the
saw arbor from rotating and remove arbor nut (C) with
wrench (D). Turn nut (C) counterclockwise to remove.
Remove outside blade flange (E) and saw blade (F).
A
4. Assemble new blade, making certain teeth of blade
are pointing down at the front of the saw table and
assemble the outside blade flange (E) Fig. 53, and arbor
nut (C). Tighten nut (C) with wrench (D) by turning nut
clockwise while holding arbor steady with other wrench
(B).
B
C
E
Fig. 53
5. Replace table insert.
19
F