1
®
Dominion SX
Quick Installation and Setup Guide
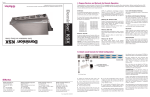
Physical Installation Diagram
4
6
Dominion SX32
Dominion SX8
3
4
6
3
5
5
I. Prepare Devices and Network for Remote Operation
Congratulations on your purchase of Dominion SX, the complete solution for secure console management. Before
installing Dominion SX, first configure each device that you intend to access remotely with the following parameters.
This very important installation procedure ensures a smooth installation.
Pre-installation
Network Information
Have the right cabling on-hand to
connect to the serial consoles of the
target server(s) or other seriallymanaged devices that provide a
console port. See section III,
Attaching Servers or other seriallymanaged devices to the Dominion
SX.
Raritan Unit Name: A generic name
or term for your Dominion SX unit maximum 64 characters (underscores are permitted), no minimum
size, and no spaces.
IP Address: The IP address of the
unit, as directed by your network
administrator.
IP Subnet Mask: The IP subnet
mask for the unit, as directed by
your network administrator.
IP Gateway: The IP gateway for the
unit, as directed by your network
administrator.
Port Address: Port 51000 (default)
or any port number from 1024 to
65536, as directed by your network
administrator.
Network
The
following
list,
Information, outlines required information for your Dominion SX unit.
We recommend that you obtain all
required information prior to performing the configuration steps outlined in this guide. If you are uncertain of any information, contact your
system administrator for assistance.
We recommend you store this information in a secure location for future
reference.
Domain Name: Your domain name,
ex: mycompany.com or mycompany.co.uk.
[Optional] Port for CommandCenter
(CC) discovery: not required for a
standalone installation of Dominion
SX. If you are going to manage this
Dominion SX unit using Raritan's
CC, leave this port number set at
the default value of 5000, or set it to
the port number specified by the
administrator. In rare cases another
device may be using port 5000 as
its default broadcast (or discovery)
port.
II. Physical Installation and Initial Configuration
There are two ways to complete the basic network installation of the Dominion SX 1) Using a Java enabled web-browser and Ethernet cable - see II, A: Java enabled System Configuration for DSX or 2) Using a VT100 terminal or equivalent
setup, such as a communications package like HyperTerminal/Minicom or equivalent and a serial cable - see II, B:
Command Line Interface System Configuration for DSX.
Physical Installation
(see illustration above, right)
1. Obtain a computer with a network card and crossover network
cable. This computer will be
referred to as the 'installation computer.'
2. Physically mount the unit in an
ergonomically sound manner. The
unit is designed to be easily rackmounted, and rack mounting is recommended.
3. Connect the crossover network
LAN cable to the primary LAN connection on the back of the chassis.
Connect the other end to the network card in the installation computer.
4. Connect the female end of the
external power cord to the back of
the chassis.
5. Connect the male end of the
external power cord to the power
supply outlet.
6. Power ON the Dominion SX
unit.
Note: The unit will perform a hardware and firmware self-test and then
start the software boot sequence.
The boot sequence is complete
when the light goes on and remains
on.
Each unit comes with a certain set
of configuration defaults henceforth
referred to as Factory Reset Mode.
The default network settings for this
mode are:
Internet Address (IP): 192.168.0.192
Gateway Address: 192.168.0.192
Subnet Mask: 255.255.255.0
Port Address: 51000
Username: admin
Password: raritan
A. Java-enabled System
Configuration for DSX
Ensure that your installation computer has a route to and can communicate with IP address 192.168.0.192
by entering the command route
print on the command line interface
of the installation computer.
If 192.168.0.192 is not on the gateway list, add it to the gateway list by
typing the following commands into
either a DOS or UNIX command line
interface on the installation computer where your browser is running.
On a Windows NT/95/98/2000 system, type: route add 192.168.0.192
<client_host IP address>
For example:
route add 192.168.0.192
15.128.122.12
On a UNIX (incl. Sun Solaris) system, type:
route add 192.168.0.192 <client_host IP
address> -interface
For example:
route add 192.168.0.192
15.128.122.12 interface
On the command line interface, type: ping
192.168.0.192.
If this does not produce a reply, please verify
that:
- The Dominion SX unit is powered on and has
completed the self-test
- It has a crossover Ethernet cable connected to
it from the installation computer (or a straightthrough cable from a known-good port on a
hub, switch, or router)
- The correct IP address was entered into the
URL on a Java-enabled browser
- There is route from the installation computer to
the Dominion SX.
Use the installation computer to connect to the
unit, typing the factory default IP address
192.168.0.192 in the installation computer Web
browser's address line. Once you have reached
the unit's initial configuration screen, enter the
Initial Software Configuration information as
described below.
User Information
This information should be entered for each
user, up to 50 user accounts, with at least one
administrator for each Dominion SX unit.
User Name: 32 characters maximum, one character minimum, spaces permitted.
Login Name: 20 characters maximum, one character minimum, no spaces.
User Type:
- Administrator: Can modify configuration of the
unit, has read/write access to the console window.
- Operator: Cannot modify configuration of the
unit (except own password), has read/write
access to the console window.
- Observer: Cannot modify configuration of the
unit (except own password), has read-only
access to the console window.
Information: Any additional information (text)
you want associated with this user. Can be 64
characters maximum, no minimum, spaces per-
mitted.
Password: Alphanumeric text, 6-16 characters
in length, no spaces. The first six characters of
the password must contain at least two alphas
and one numeric character; the first four characters cannot be the same as the user name.
network and firewall must allow communication
on TCP Port 51000.
Once configured, the Dominion unit will automatically reboot. The unit will now be operating
at its newly assigned IP address. If the unit is
not yet mounted in the final installation location,
the unit can be powered down and disconnected from the AC/DC power source (mains) and
then relocated to its place in the rack or equipment shelf.
To communicate with the unit, please use a
Java-enabled browser, and enter the unit's new
IP address. Use the newly created Administrator
Username and Password to access the unit,
add users, and configure ports for access via
the Dominion SX.
Also, at this time, it is important to verify/correct
the Time and Date settings for the unit (under
the Time tab), since all log entries rely on this
information.
To access Dominion SX via web browser, your
firewall must also allow access to TCP Port 443
(Standard HTTPS). You may also wish to allow
access to TCP Port 80 (Standard for HTTP) for
additional convenience; because Dominion SX
will forward all HTTP requests to HTTPS.
Allowing the initial HTTP requests on TCP Port
80 usually reduces complication for users
(users may initiate the connection with either
"http" - unit will automatically switch to "https" - or
"https" as a URL).
Configure the ports, using the information
below, for secure console access. Set up the
user profile for the specific ports each specific
user is authorized to access.
All Servers
1. Note the communication settings for the
console port on each server that is to be connected to the Dominion SX. These will include
baud/bit rate, typically 9600bps to 115.2Kbps,
parity, flow-control; hardware (CTS/RTS) or software (XON/XOFF).
2. Ensure that you have the right cabling, and
in some cases, adapters, to connect the server
to the Dominion SX serial port.
3. Ensure that the console port is enabled on
the server to be connected to the Dominion SX.
4. Ensure that the server supports - and console is set for - VT100 emulation. Default codeset for Raritan's terminal emulation package,
RaritanConsole is US ASCII; alternatively,
RaritanConsole can be set for ISO 8859-1 or
ISO 8859-15.
Dominion SX can be configured to use a different TCP port of your own designation (from
1024-65536).
B. Command Line Interface System
Configuration for DSX
As of release 2.5, you can use a Command Line
Interface (CLI) or a Web browser for basic networking setup and configuration.
1. Connect the Dominion SX unit to power, AC
or DC, depending on the unit. For DC models,
cabling is customer-provided.
2. Power ON the unit.
3. Connect a VT100 terminal (or equivalent)
to the Terminal (or Terminal/Reserved on some
models) serial port. This port is a DB9-Male port
on most models, except ALL dual-power dualLAN models, including DSXA-48, which have an
RJ45 connector for a terminal port.
4. The cabling required varies depending on
the terminal used for this initial configuration;
maximum length is 50 feet at 9600bps. Without
the correct cabling, it is impossible to communicate with the Dominion SX.
a. PC with serial port using Windows
with HyperTerminal (or equivalent communications package): DB9-F (female) to DB9-F serial
cable OR RJ45 male to DB9-F serial cable
(RJ45 male end plugs into the Dominion SX)
b. PC with serial port using Linux operating system and Minicom (or equivalent) communications package: DB9-F (female) to DB9-F
serial cable OR RJ45 male to DB9-F serial cable
(RJ45 male end plugs into the Dominion SX)
(continued, over)
Network / Firewall
In order to enable access to Dominion SX, your
For more detailed instructions, please consult the User Manual found on the enclosed CD-ROM. Rev. D June 2005 255-60-2010
Quick Installation and Setup Guide
Dominion SX
®
IV. Launch RaritanConsole (RC)
II. Physical Installation and Initial Configuration (continued)
(continued from other side)
c. Another device with an asynchronous RS232 communications
port and a communications package
capable of being set to 9600-N-8-1:
Custom cabling may be required.
Minimally, the following pins must be
supported by the device - Transmit,
Receive, and Ground.
5. Set the communication parameters for the communications package
to 9600-N-8-1 and ensure that the
communications port configured in
the software is the same as the physical port that the serial cable from the
Dominion SX is plugged into. Keep in
mind that other devices in a PC may
be using a communications port
internally. In these instances, the
COM port that the Dominion SX is
connected to must be different than
the port used by the modem.
6. Press Enter on your keyboard;
the initial configuration screen for
network parameters should appear. If
the screen does not appear, one of
the following may have happened:
a. The unit is running software ver-
sion below 2.5; initial network installation from a terminal is supported
only in units running 2.5 or higher.
b. The cabling is not correct.
Please review the cabling instructions earlier in this document.
c. The communications settings
are not set to 9600-N-8-1.
d. The Dominion SX unit is not
plugged into the right COM (communications) port.
e. The communications software is
not configured to connect to the correct port (may be set to COM3, while
the Dominion SX is connected to
COM2).
8) Type a name for the administrator of the Dominion SX unit. The
default username is admin. This
name is required to configure the
unit, and is case-sensitive.
9) Type a password for the administrator. The default password is rari tan and is case-sensitive.
After initial network setup, the admin
user must change the password for
the admin account. This new username and password are required for
future configurations to the unit. If
you forget or misplace this information, you must reset the unit to
Factory Default. Once lost, there is
no way for a user or Raritan to recover this information. Note that usernames and password are case sensitive. The following characters (within double-quotes) cannot be used in
these fields: spaces, "<", " >". Login
Name: 20 characters maximum, one
character minimum, no spaces.
Passwords: use a mixture of letter
and numbers.
Upon completion of network configuration, the unit performs a self-test,
and then starts the software boot
sequence. Depending on the unit,
the initial boot sequence can take
from 1-3 minutes, and is complete
when the blue LED on unit's front
panel lights and remains on for
longer than 30 seconds (subsequent
reboots take less time).
The unit can now be accessed at the
new IP address, using the admin
username and password entered
above. The user will be prompted to
change the password.
3
4
5
6
III. Attaching Servers or other serially-managed devices to Dominion SX
2
3
7
[Optional]
Dominion SX32
1
4
Dominion SX8
1
2
4
Launch RaritanConsole
download and execution of Java-applets.
Dominion SX provides secure web-browser
access to devices connected to each of your
servers or other serially managed devices from
any Java-enabled browser. This enables convenient
remote
access
to
your
server(s)/devices without the burden of having
software on-hand.
Note:
- The Microsoft Windows default security setting, "Medium" will suffice.
1. Log on to any computer with a Javaenabled browser with network access to
Dominion SX.
Attaching Servers
1. Plug in power cord to AC (main)
supply.
2. Connect a standard Cat5
Ethernet cable from the Dominion SX
network port, to your networked
switch / hub / router.
3. [Optional] Depending on the
model, connect the integrated
modem found in Dominion SX by
attaching one end of the included
telephone cable to the modem port,
and the other end to an analog telephone line.
4. To connect a standard DB9 or
DB25 serial console port to Dominion
SX, use a Raritan Nulling Serial
Adapter (p/n ASCSDB9F, ASCSDB9M, ASCSDB25F, ASCSDB25M)
to interconnect the console port to
Dominion SX via a standard Cat5
Ethernet cable.
5.
Many Cisco and Sun devices
are equipped with serial console
ports employing non-standard RJ45
connections. Most of these devices'
serial console ports can be directly
connected to Dominion SX with a
"serial rollover cable" (not a standard
Ethernet cable, nor a crossover
Ethernet cable). If you have misplaced the rollover cable supplied
with your Cisco or Sun device, you
may purchase one from Raritan (p/n
CRLVR-15).
3. Enter the IP address for the Dominion unit
in the URL field, and provide a valid username
and password when prompted.
4. Once authenticated, the list of ports that
the user is authorized to access will appear.
Notes:
- If you are using Windows NT, 2000, or XP,
ensure that you are not a "restricted" user.
- If you are using Windows XP, ensure that
either Java Virtual Machine or Microsoft VM (XP
Service Pack 1) is installed.
5. Click on a specific port to access, which
must be connected to a powered-on and properly configured server/device.
2. Launch Microsoft Internet Explorer or the
Netscape browser. Ensure that your Internet
Explorer/Netscape security settings allow the
7. You should then see the login prompt from
the target server/device. Alternatively, just to
test the port, please plug in the supplied RJ45
6. A
terminal
emulation
window
(RaritanConsole) will be launched. Position the
mouse in the window and press the Enter key
on the keyboard.
loop-back plug into a specific port and then
select that port. You will see the characters you
type echoed back.
The installation is now complete!
Please refer to your Dominion SX
Installation and Operations Manual,
located on the Raritan User Manual
CD-ROM for more details on any spe cific topic.