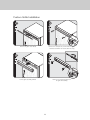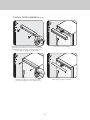
1
General Information
Unpacking unit
• DO NOT use the self-piercing feature of a saddle
valve. The hole made by the piercing lance is too
small for the water flow rate required by the ice
maker.
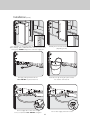
• If saddle valve is not used, place a separate shutoff valve in an easily accessible location between
water supply and the unit. DO NOT install shutoff valve behind the unit.
• The installation of applliances with a reverse
osmosis system is acceptable as long as the
water pressure remains within the allowable
PSI as stated below. It is important to note that
with many reverse osmosis systems, the pressure
range starts off high, but then it decreases as the
water level of the reverse osmosis storage area
drops. This must be considered when checking
the water pressure coming into the unit.
• Connect a vertical or horizontal 1/2” (1.2 cm)
to 1-1/4” (3.2 cm) COLD water line near water
area.
• Run water line through the floor, back, or side
wall. Tubing should lay flat on floor underneath
the unit. Clamp tubing to wall or floor.
• Water pressure must be greater than 20 psi and
less than 120 psi on non-dispensers and greater
than 35 psi and less than 120 psi on dispensers.
• Most of the unit’s weight is at the top. Extra care
is needed when moving the unit to
prevent tipping.
• DO NOT remove protective film until unit is in
operating position.
• All four leveling legs must make contact with the
floor to support and stabilize the full weight.
• DO NOT drop unit.
• Remove exterior shipping materials prior to
moving unit into home.
• Use two or more people to move and install unit.
Failure to follow this instruction can result in back
or other injury.
• To avoid personal injury, wear gloves when
performing any installation procedure and wear
eye protection when cutting metal straps.
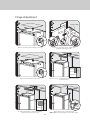
1. Remove top and bottom strap.
2. Remove top cap.
3. Cut rear of carton approximately 1/4” (0.6 cm)
to 1” (2.5 cm) from right corner with a utility
knife extended 1/4” (0.6 cm).
4. Remove carton and exterior packaging.
Save cardboard shipping material to protect
floor surface when installing unit. Remove
anti-tip board, kickplate and door trim pieces
(DF models) from rear of unit.
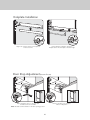
Moving Unit
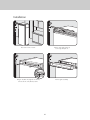
1
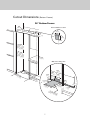
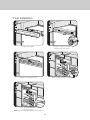
Remove shipping brackets from skid by removing four bolts (two on
each side) with a 1/2” deep-well socket wench and a pair of pliers.
Note: Tilting unit is not required to remove shipping brackets.
2
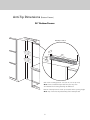
Tip Over Hazard
Appliance is top heavy and tips easily when not
completely installed. Keep doors closed until
appliance is completely installed and secured per
installation instructions. Use two or more people to
move and install the appliance. Failure to do so can
result in death or serious injury.
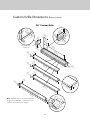
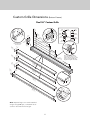
Slip cart between unit and skid. Remove unit from skid.
Note: Use excess packaging to protect decorative trim; also,
verify that leveling legs are up (0” adjustment).
21