1
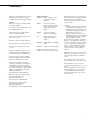
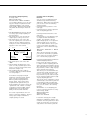
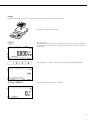
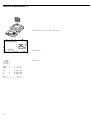
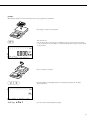
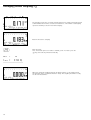
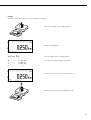
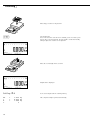
Operating Instructions
Sartorius Combics 3
Models CISL3 | CIS3 | CW3P | CW3S
Basic Application Programs
98646-002-06
Contents
–
–
–
–
–
–
–
–
–
–
–
–
–
–
–
–
–
2
Combics 3 is a rugged, easy-to-use
indicator for the complex quality control tasks you perform every day. It
meets the highest requirements placed
on the accuracy and reliability of
weighing results in the following areas:
in the food industry
in the pharmaceutical industry
in the chemical industry
in the electronics and metal industries
Combics 3 indicators are:
rugged, thanks to their stainless steel
housing, and
easy to operate, thanks to the following
features:
– large keys with positive click action
– alphanumeric keypad with 'ABC'
input
– large, backlit, fully graphic-capable
dot-matrix display
– plain-text user guidance
easy to clean and disinfect
can be operated independently of the
weighing platform location
range of interfaces for flexible use
optional password-protection for
operating parameters
Combics 3 indicators speed up your
routine procedures with:
Fast response times
Built-in application programs for calculation and display of weight values,
including:
– Counting
– Neutral measurement
– Weighing in percent
– Averaging
– Checkweighing
– Classification
– Net-total formulation
– Totalizing
Simple function for assigning up
to 4 alphanumeric lines for identifying
weight values
Connectivity for two weighing platforms
Automatic initialization when the
Combics is switched on
Automatic taring when a load is placed
on the weighing platform
Optional remote control using an external computer
Intended Use
Symbols
The following symbols are used in these
instructions:
2
Contents
2
Intended Use
§ indicates required steps
3
Counting Z
$ indicates steps required only under
certain conditions
8
Neutral Measurement D
13
Averaging (Animal Weighing) V
> describes what happens after you have
performed a certain step
17
Checkweighing O
! indicates a hazard
22
Classification W
27
Weighing in Percent L
32
Net-total Formulation R
37
Totalizing s
42
Setup: Overview of Application
Parameters
For technical advice on applications:
Phone: +49.0.551.308.4440
Fax:
+49.0.551.308.3791
This manual describes the application
programs in the Combics 3 indicator.
For details on installation, weighing functions and device setup, please refer to the
general operating instructions for the
Combics 3.
Counting Z
With the Counting application, you can
determine the number of parts that
each have approximately equal weight.
Features
– Enter the average piece weight “wRef”
through the keypad
Soft Key Functions
Start Begin calculation of the
average piece weight
“wRef” **
nRef
– Save the reference weight “wRef” from
the weighing platform
Save value entered as
reference sample quantity
Begin calculation of the
average piece weight
“wRef” *
– Enter the reference sample quantity
“nRef” through the keypad
wRef
Save value entered as
reference sample weight
– Enter reference sample weight using
a bar code scanner
n=
Begin calculation of the
average piece weight
“wRef” *
– Automatic reference sample updating
Weigh. Toggle display to Weighing
– Counting with two weighing platforms
– Activate info-mode by pressing D
(> 2 sec)
– Toggle the display from piece count to
weight by pressing the Weigh. soft
key, and back by pressing Count.
– Define the level of accuracy (display
resolution) applied when a calculated
reference sample quantity is saved
– Automatic initialization when the
Combics is switched on. The indicator
is initialized with the most recently
used values for reference sample quantity “nRef” and reference sample weight
“wRef”. Configured in Setup under:
Application:
Counting: Autostart
mode
Count. Toggle to Counting display
* Calculation is based on the active net
weight value and the quantity entered
Before the quantity on the platform can
be calculated, the average piece weight
must be entered in the application.
There are three ways to enter this value
in the program:
– Calculation:
– Place the number of parts defined as
the reference sample quantity on the
weighing platform and calculate the
average piece weight by pressing the
Start key or n= key, or
– Place any number of parts on the
weighing platform, enter the number
of parts using the keypad, and then
press the nRef soft key.
How the reference weight is calculated
depends on the application setting for
resolution. The value is either rounded
off in accordance with the display resolution, or saved with 10-fold or 100fold resolution, or with the maximum
internal resolution of the weighing
platform.
– Keypad input: Enter a reference sample
weight (i.e., the weight of one piece)
using the keypad and press wRef to
save it.
– Bar code input: Enter the reference
sample weight using a bar code scanner
After initialization, you can use the
connected weighing platform to count
parts.
The initial application values are valid
until deleted by pressing the c key,
or until overwritten by a new value.
They also remain saved after you turn
off the Combics.
– Automatic taring of container weight.
Configured in Setup under:
Application:
Counting: Autotare
– Restore factory default settings.
Configured in Setup under:
Application:
Counting: Fty settings
3
Counting Z
Preparation
§ Select Setup: Press the M key
§ Select Application Parameters:
Press the O soft key
§ Select the Counting application:
Press the O soft key
Counting
Minimum load for autotaring
1 digit
2 digits
5 digits
o 10 digits
20 digits
50 digits
100 digits
200 digits
500 digits
1000 digits
Minimum load for initialization
o 1 digit
2 digits
5 digits
10 digits
20 digits
50 digits
100 digits
200 digits
500 digits
1000 digits
Autotare first weight
o Off
On
Autostart app. at power on
On
o Off
Accuracy: avg. piece wt. calculation
o Display accuracy
Display accuracy + 1 decimal place
Display accuracy + 2 decimal places
With internal resolution
Parameter for saving weight
o Standard stability
Increased stability
Average piece weight updating
Off
o Automatic
Scale for reference weight
o Do not change
WP 1
WP 2
Factory settings
Yes
o No
o = factory setting
§ Save settings and exit Setup:
Press the M key or the oo soft key
4
Parameter for Saving Weight Values
The weight on the platform is saved
as a reference value when the platform
has stabilized. “Stability” is defined as
the point at which the fluctuation of
a measured value lies within a defined
tolerance range. The narrower the
tolerance range, the more stable the
platform is at “stability”.
In Setup, under:
Application:
Counting: Save wt.,
you can define whether the value is
saved when “standard stability” is
reached, or only at “increased stability”
(narrower tolerance range). If you
select increased stability, the value saved for average piece
weight will be more accurate and the
results more reproducible, but the
response time of the weighing platform
might be longer.
Accuracy of Average Piece Weight
Calculation
The resolution applied for calculating
the average piece weight is defined in
Setup under:
Application:
Counting: APW calcul.
The resolution for calculating the
average piece weight is increased if
“+1 decimal place”, “+2 decimal places”
or “Internal resolution” is selected.
With the “+1 decimal place” setting,
the net value is determined to one
additional decimal place (i.e., display
accuracy x 10); “+2 decimal places”
increases display accuracy + 100, and
so on up to the maximum resolution
available.
Minimum Load
The minimum load required for initialization of the weighing platform is configured in Setup under:
Application:
Counting: MinL.Init
Once the limit is exceeded by the load,
initialization can begin. If the load on
platform is too light, the following will
occur when you try to save the reference value:
– The error code inf 29 is displayed
– A warning signal is emitted (doublebeep)
– The weighing platform is not initialized
– The preset reference sample quantity is
saved
The minimum load required for automatic taring of the container weight on
the platform (first weight) is configured
in Setup under:
Application:
Counting:
MinL.Autotar
You can choose from the following
10 levels for this setting:
1 digit (no minimum load)
2 digits
5 digits
10 digits
20 digits
50 digits
100 digits
200 digits
500 digits
1000 digits
The “digits” here refer to the scale
intervals in the connected weighing
platform. If the interval of the connected platform is 1 g, for example,
and 1000 digits are required, you must
place at least 1000 g (=1000 intervals
=1000 digits) on the weighing platform
for initialization.
Average Piece Weight Updating
In Setup, under:
Application:
Counting: APW update
you can define whether or not the average piece weight is updated automatically during weighing. The average
piece weight is updated automatically
only when the following 6 criteria are
met:
1. The Automatic setting is selected
for average piece weight updating in
the Setup menu
2. The current piece count exceeds the
original piece count by at least two
3. The current piece count is less than
twice the original piece count (does not
apply for the first updating operation
if the piece count is entered using the
keypad or a bar code scanner)
n
n+2
2·n
Counting with Two Platforms of the
Same Type
Use this mode to count different types
of sample material with different
weights. For example, count the
lighter-weight pieces on one platform
and the heavier pieces on another.
You can define which of the two platforms is active when the Combics is
switched on. This is defined in Setup,
under:
Device: Operat.: Main
scale
Range for reference
sample updating
“Old” ref.
sample qty.
Counting with Two Weighing
Platforms
You can use two weighing platforms
simultaneously with the Counting
application. When using two platforms,
you can choose from the following
operating modes:
– Counting with two platforms of the
same type
– Counting with one reference platform
and one weighing platform
Pieces on
platform
4. The current piece count is less than
1000
5. The internally calculated piece count
(such as 17.24 pcs) differs by less than
± 0.3 pcs from the nearest whole number (in this example: 17).
6. The weighing platform is stable in
accordance with the parameter defined
for saving weights.
If automatic average piece weight
updating is selected in Setup and the
piece count (pcs) is displayed, the
Auto symbol is displayed below
the bar graph. If the average piece
weight has been updated since you
began weighing, the text line shows the
“optimized” code: (opt.). During
an updating operation, 0pt and the
updated piece count are displayed
briefly in the measured value line.
An acoustic signal indicates the completion of reference updating. The new
average piece weight and reference
sample quantity are saved.
This is the first platform active when
you switch on the Combics, regardless
of the setting for automatic initialization of the Counting application.
Counting with One Reference Platform
and One Weighing Platform
In this mode, the reference platform
is a high resolution weighing platform
with a relatively low maximum capacity.
The other platform is used for counting
large amounts, and has a high capacity
with a relatively low resolution.
This allows you to both determine the
average piece weight with high resolution; i.e., very precisely, and to count
large amounts of parts, without requiring an expensive high-resolution, highcapacity weighing platform.
The system can be configured to switch
automatically to the reference platform
for initialization (the measured value
line shows Ref). Following initialization, you can switch to the counting
platform.
The definition of one weighing platform as a reference platform is configured in Setup, under:
Application:
Counting:
Ref.wt.scale
If automatic average piece weight
updating is enabled, the update is performed on the active platform; in other
words, the system does not automatically switch to the reference platform.
5
Counting Z
Example:
Determining the number of uncounted parts (using the factory-set application parameters)
Place empty container on the platform
)
Tare the platform
Note: If the automatic tare function is enabled, you do not need to press the ) key
to tare the platform; the tare weight is saved automatically when you place the container
on the platform
Place a number of parts in the container for the reference quantity
(in this example, 20 pcs)
20
Soft key: nRef
6
Enter the number of parts using the keypad
Start calculation of average piece weight
If the weight is too light, an error code
appears in the main display: inf 29
Reduce the minimum load setting or increase the reference sample quantity setting
and the number of parts in the container
Add a quantity of uncounted parts to the container
Read the result
Opt is displayed if automatic reference sample updating is enabled
p
Print the results
nRef
wRef
+
38 pcs
+ 0.003280 kg
G#
T
N
+
+
+
0.373 kg
0.248 kg
0.125 kg
Qnt
38 pcs
--------------------
7
Neutral Measurement D
With this application you can use
your weighing platform to measure
the length, surface and volume of parts
that have roughly the same specific
weight. The o symbol is displayed as
the weight unit.
Soft Key Functions
Start
Begin calculation of the
reference weight “wRef”.*
nRef
Features
– Enter the reference weight “wRef”
through the keypad
Save value entered as
calculation factor.
Begin calculation of the
reference weight “wRef”.*
wRef
Save value entered as
reference weight.
– Save the reference weight “wRef” from
the weighing platform
n=
Begin calculation of the
reference weight “wRef”.*
– Enter the factor for calculation “nRef”
using the keypad
Weigh.
Toggle to weighing
display
– Enter reference weight using a bar code
scanner
Measure Toggle to Neutral
Measurement display
– Measuring with two weighing platforms
– Activate info-mode by pressing D
(> 2 sec)
– Toggle the display from neutral
measurement to weight by pressing the
Weigh. soft key, and back by pressing Measure.
– Define the level of accuracy (display
resolution) applied when a calculated
reference weight is saved
– Automatic initialization when the
Combics is switched on. The indicator
is initialized with the most recently
used calculation factor “nRef” and
reference weight “wRef”. Configured
in Setup under:
Application:
Neut.Meas.: Autostart
– Automatic taring of container weight.
Configured in Setup under:
Application:
Neut.Meas.: Autotare
– Restore factory settings. Configured in
Setup under:
Application:
Neut.Meas.: Fty settings
8
* The calculation is based on the active
net weight value and the factor entered.
In order to calculate the length, surface
or volume of a given sample, the average weight of a reference quantity of
the sample must be known (in the
example below, the reference is 1 meter
of electrical cable). There are three
ways to enter the reference weight in
the program:
– Calculation:
– Place the reference quantity (defined
by the calculation factor) on the
connected weighing platform and
calculate the reference weight by
pressing the Start or n= soft
key.
– Place any amount of the sample
material on the connected weighing
platform, enter the calculation factor
through the keypad, and press the
nRef soft key to calculate the
reference weight.
How the reference weight is calculated
depends on the application setting for
resolution. The value is either rounded
off in accordance with the display
resolution, or saved with 10-fold or
100-fold resolution, or with the maximum internal resolution of the weighing platform.
– Keypad input: Enter the reference
weight (i.e., the weight of one meter
of electrical cable) using the keypad and
press wRef to save it.
– By using a bar code scanner
The initial application values are valid
until deleted by pressing the c key
or until overwritten by a new value.
They also remain saved after you turn
off the Combics.
Preparation
§ Select Setup: Press the M key
§ Select Application Parameters:
Press the O soft key
§ Select the Neutral Measurement
application:
Press the O soft key
Neutral Measurement
Minimum load for autotaring
1 digit
2 digits
5 digits
o 10 digits
20 digits
50 digits
100 digits
200 digits
500 digits
1000 digits
Minimum load for initialization
o 1 digit
2 digits
5 digits
10 digits
20 digits
50 digits
100 digits
200 digits
500 digits
1000 digits
Autotare first weight
o Off
On
Autostart app when power is on
On
o Off
Accuracy f. reference val. calculation
o Display accuracy
Display accuracy + 1 decimal place
Display accuracy + 2 decimal places
With internal resolution
Decimal places in displayed result
o None
1 decimal place
2 decimal places
3 decimal places
Parameter for saving weight
o Standard stability
Increased stability
Parameter for Saving Weight Values
The reference weight is saved when
the platform has stabilized. “Stability”
is defined as the point at which fluctuation of a measured value lies within a
defined tolerance range. The narrower
the tolerance range, the more stable the
platform is at “stability”.
In Setup, under:
Application:
Neut.Meas.: Save wt.,
you can define whether the value is
saved when “standard stability” is
reached, or only at “increased stability”
(narrower tolerance range). If you select
increased stability,
the reference weight saved will be more
accurate and the results more reproducible, but the response time of the
weighing platform might be longer.
Accuracy of Reference Weight
Calculation
The resolution applied for calculating
the reference weight is defined in Setup
under:
Application:
Neut.Meas.: Ref.calc.
The resolution for calculating the reference weight is increased if “+1 decimal
place”, “+2 decimal places” or “Internal
resolution” is selected. With the “+1
decimal place” setting, the net value
is determined to one additional decimal
place (i.e., display accuracy + 10);
“+2 decimal places” increases display
accuracy + 100, and so on up to the
maximum resolution available.
Decimal Places in Displayed Result
In neutral measurement, not only whole
numbers but also decimal numbers (for
example, 1.25 o electrical cabling) can
be displayed. The number of decimal
places displayed in neutral measurement is configured in Setup under:
Application:
Neut.Meas.: Dec. disp.
Minimum Load
The minimum load required for initialization of the weighing platform is
configured in Setup under:
Application:
Neut.Meas.:
MinL.Init.
Once the limit is exceeded by the load,
initialization can begin. If the load on
platform is too light for initialization,
the following will occur when you try to
set the reference memory:
– The error code inf 29 is displayed
– A warning signal is emitted (doublebeep)
– The weighing platform is not initialized
– The preset calculation factor is saved
The minimum load required for automatic taring of the container weight on
the platform (first weight) is configured
in Setup under:
Application:
Neut.Meas.:
MinL.Autotar
You can choose from the following
10 levels for this setting:
1 digit (no minimum load)
2 digits
5 digits
10 digits
20 digits
50 digits
100 digits
200 digits
500 digits
1000 digits
The “digits” here refer to the scale
intervals in the connected weighing
platform. If the interval of the connected platform is 1 g, for example,
and 1000 digits are required, you must
place at least 1000 g (=1000 intervals
=1000 digits) on the weighing platform
for initialization.
Scale for reference weight
o Do not change
WP 1
WP 2
Factory settings
Yes
o No
o = factory setting
§ Save settings and exit Setup:
Press the M key or the oo soft key
9
Neutral Measurement D
Neutral Measurement
with Two Weighing Platforms
You can use two weighing platforms
simultaneously with the Neutral
Measurement application. When using
two platforms, you can choose from
the following operating modes:
– Neutral measurement with two weighing platforms
– Neutral measurement with one reference platform and one weighing
platform
Neutral Measurement with Two
Platforms of the Same Type
Use this mode to measure different
types of sample material with different
weights. For example, measure the
lighter-weight samples on one platform
and the heavier samples on another.
You can define which of the two platforms is active when the Combics is
switched on. This is configured in
Setup, under:
Device: Operat.: Main
scale
This is the first platform active when
you switch on the Combics, regardless
of the setting for automatic initialization of the Neutral Measurement application.
Neutral Measurement with One
Reference Platform and One Weighing
Platform
In this mode, the reference platform
is a high resolution weighing platform
with a relatively low maximum capacity.
The other platform is used for weighing
heavier samples, and has a high capacity with a relatively low resolution.
This allows you to both determine the
reference weight with high resolution;
i.e., very precisely, and to measure large
samples, without requiring an expensive
high-resolution, high-capacity weighing
platform.
The system can be configured to switch
automatically to the reference platform
for initialization (the measured value
line shows Ref). Following initialization, the platform for larger amounts
is automatically activated.
The definition of one weighing platform as a reference platform is configured in Setup, under:
Application:
Neut.Meas.:
Ref.wt.scale
10
Example:
Determining the length of an amount of electrical cable (using the factory-set application parameters)
Place empty container on the platform
)
Tare the platform
Note: If the automatic tare function is enabled, you do not need to press the ) key to
tare the platform; the tare weight is saved automatically when you place the container on
the platform
.248
Enter the weight of 1 meter of cable using the keypad (in this example, 0.248 kg)
Softkey »wRef«
Save the value entered as the reference weight
11
Neutral Measurement D
Place the desired amount of cable in the container
Read the result
p
Print results
nRef
wRef
+
+
1 o
0.248 kg
G#
T
N
+
+
+
6.794 kg
0.541 kg
6.253 kg
Qnt
25 o
--------------------
12
Averaging (Animal Weighing) V
With the Averaging application, you
can use your weighing platform for
calculating weights as the average of a
number of individual weighing operations. These individual operations are
also known as “subweighing operations.”
This function is used to determine
weights under unstable ambient conditions or for weighing unstable samples
(such as live animals).
Features
– Averaging started manually or automatically. Configured in Setup under:
Application: Animal
wgh: Start
With manual start selected, the averaging routine begins when you press a key
(provided the start conditions are met).
With automatic start selected, averaging
begins when you place the first load on
the platform (provided the start conditions are met).
Soft Key Functions
Start Begin animal weighing.
The calculation is made when
the specified number of
subweighing operations have
been completed.
A number of subweighing operations
are required to form the basis for calculation of an average weight. You can
enter the desired number of subweighing operations using the keypad.
The number you enter is saved until
it is overwritten by another number.
It also remains in memory when you
switch to a different application
program, or turn off the Combics.
mDef – Save the value entered
as “Number of weighing operations for averaging”.
– Begin averaging with the
number of weighing operations entered as the basis
There are three ways to start the
averaging routine:
Weigh. Toggle display to Weighing
mode
Result Toggle display to result
of last measurement
- Manual start with preset number of
subweighing operations:
Place the sample on the platform and
press the Start soft key
– Enter the number of subweighing
operations using the keypad
– Manual start with user-defined number
of subweighing operations:
Place the sample on the platform and
enter the number of weighing operations using the keypad. Press the
mDef soft key to save the number
entered and begin weighing.
– Info mode
–
– Toggle the display from “result of last
measurement” to “current weight” by
pressing the Weigh soft key, and
back by pressing Result
Automatic start with preset number
of subweighing operations:
Measurement begins when you place
the first sample on the platform,
provided the start conditions are met.
– Automatic start of averaging when
the Combics is turned on and a sample
placed on the platform (provided start
conditions are met). Configured in
Setup under:
Application: Animal
wgh: Autostart
– Automatic taring of container weight.
Configured in Setup under:
Application: Animal
wgh: Autotare
– Automatic printout of results.
Configured in Setup under:
Application: Animal
wgh: Printout
– Restore factory default settings.
Configured in Setup under:
Application: Animal
wgh: Factory set
13
Averaging (Animal Weighing) V
Preparation
§ Select Setup: Press the M key
§ Select Application Parameters:
Press the O soft key
§ Select the Animal Weighing application:
Press the O soft key
Animal Weighing
Minimum load for autotaring
1 digit
2 digits
5 digits
o 10 digits
20 digits
50 digits
100 digits
200 digits
500 digits
1000 digits
Minimum load for starting
o 1 digit
2 digits
5 digits
10 digits
20 digits
50 digits
100 digits
200 digits
500 digits
1000 digits
Autotare first weight
o Off
On
Autostart app when power is on
On
o Off
Start
o Manual
Automatic
Animal activity (averaging)
0.1% of the animal/object
o 0.2% of the animal/object
0.5% of the animal/object
11% of the animal/object
11% of the animal/object
11% of the animal/object
11% of the animal/object
11% of the animal/object
11% of the animal/object
11% of the animal/object
Auto printout of results
o Off
On
Show normal weight after unloading
o Threshold for load change
Toggle key
Factory settings
Yes
o No
§ Save settings and exit Setup:
Press the M key or the oo soft key
14
Minimum Load
The minimum load required for initialization of the averaging routine is configured in Setup under:
Application: Animal
wgh: MinL.Start
Setting a minimum load for averaging
can be especially useful if you configure
automatic start of measurement.
The minimum load required for automatic taring of the container weight on
the platform (first weight), or for automatic printout of results, is configured
in Setup under:
Application: Animal
wgh: MinL.Autotar
You can choose from the following
10 levels for this setting:
1 digit (no minimum load)
2 digits
5 digits
10 digits
20 digits
50 digits
100 digits
200 digits
500 digits
1000 digits
The “digits” here refer to the scale
intervals in the connected weighing
platform. If the interval of the connected platform is 1 g, for example, and
1000 digits are required, you must
place at least 1000 g (=1000 intervals
=1000 digits) on the weighing platform
to start the averaging routine.
Starting the Measurements
The averaging routine does not begin
until the fluctuation in weight value
remains below a defined threshold
over three consecutive measurements.
The tolerance limit is defined as a percentage of the animal or object weight
(for example, 0.1%; 0.2%, 0.5%, etc., up
to 20%, 50%; 100%), configured in
Setup under:
Application: Animal
wgh: Averaging
If the “Averaging” parameter is set
to 2%, for example, and the animal or
object weighs 10 kg, measurement does
not begin until the fluctuation in
weight value remains below 200 g during three consecutive measurements.
Display
A calculated average value is shown
continuously on the main display.
The symbol a (calculated value) is
also displayed.
You can toggle from this display to
a readout of the current weight on the
platform by pressing the Weigh.
soft key, and back again by pressing the
press the Result soft key.
In the Setup menu, under:
Application: Animal
wgh: Weight af. unload
you can select Threshold to have
the display switch automatically to the
weight readout when you unload the
weighing platform (i.e., when the load
is less than half the minimum load).
The result of the most recent averaging
operation remains in memory.
If you select Toggle key, the
calculated average remains displayed
even after the weighing platform is
unloaded, until you press the c key
or begin a new measurement.
Example:
Measuring the weight of a live mouse (using the factory-set application parameters)
Place empty container on the platform
)
Tare the platform
Note: If the automatic tare function is enabled, you do not need to press the ) key
to tare the platform; the tare weight is saved automatically when you place the container
on the platform
Place 1st animal in container
20
Enter the number of subweighing operations using the keypad (in this example,
20 measurements)
Soft key: mDef
Save the value entered and begin averaging
15
Averaging (Animal Weighing) V
The averaging routine does not begin until the fluctuation in weight value remains below
a defined threshold over three consecutive measurements. The number of subweighing
operations remaining is shown in the numeric display.
Read off the result of averaging
p
mDef
+
Print the results
Note: If automatic printout of results is enabled, you do not need to press the
p key; the results are printed automatically.
20
T
+
0.292 kg
x-Net +
0.183 kg
--------------------
When you unload the weighing platform, the display switches to the weight readout
automatically, unless configured otherwise in Setup. The weighing instrument is ready
for the next measurement.
16
Checkweighing O
With the Checkweighing application,
you can check whether the sample on
the weighing platform matches a target
value or lies within a given tolerance
range. Checkweighing also makes it
easy to fill sample materials to a specified target weight.
Soft Key Functions
Start Begin initial input of target
and tolerance limit values
Param. Enter new target and toler-
ance values
LLHH
Features
– Enter the nominal or target weight
(setpoint) and the tolerance range
delimiters either using the keypad or by
saving the weight value of a load on
the platform.
– Enter the tolerance limits as absolute
values (Min and Max) or as percentages
of the target. Configured in Setup
under:
Application:
Checkwgh.: Chck. input
Toggle display from weight
to tolerance limits
Weigh. Toggle display from tolerance
limits to weight readout
During initialization:
Save the weight value displayed
as a target or tolerance limit
value
Checkweighing entails comparing
the current weight value to a defined
target. You can enter the value for this
target using the keypad, or by saving
the weight value indicated. You can
also define upper and lower tolerance
limits based on this target. You can do
this by:
– Entering absolute values using the
keypad or placing the desired amount
of weight on the platform and saving
the value, or
– by entering each value as a percentage
of the target weight
The initial application values are valid
until deleted by pressing the c key
or until overwritten by a new value.
They also remain saved after you turn
off the Combics.
– Results are output to the main display,
the bar graph and three control LEDs,
as well as to control output ports for
further processing.
– Toggle the main display from the
weight value to the tolerance limits by
pressing the LLHH soft key, and back
again by pressing the Weigh. soft
key. If the weight on the readout in
outside the tolerance range, “LL” (too
low) or “HH” (too high) is displayed.
– Activate info-mode by pressing D
(> 2 sec)
– Automatic initialization when you
switch on the Combics with most
recently saved application data.
Configured in Setup under:
Application:
Checkwgh.: Autostart
– Automatic taring of container weight.
Configured in Setup under:
Application:
Checkwgh.: Autotare
– Automatic printout. Configured in
Setup under:
Application:
Checkwgh.: Automatic
printout of results
– Restore factory default settings.
Configured in Setup under:
Application:
Checkwgh.: Fty settings
17
Checkweighing O
Preparation
§ Select Setup: Press the M key
§ Select Application Parameters:
Press the O soft key
§ Select the Checkweighing application:
Press the O soft key
Checkweighing
Minimum load for autotaring
1 digit
2 digits
5 digits
o 10 digits
20 digits
50 digits
100 digits
200 digits
500 digits
1000 digits
Autotare first weight
o Off
On
Autostart app. at power on
On
o Off
Checkweighing range
o 30% to 170%
10% to max. load
<SET> control output
o ‘SET’ control signal
Ready to operate (for
process control systems)
Activation of port lines
Off
Always on
At stability
o Within checkweighing range
Stabil. + chckw. range -> on
Type of checkweighing input
o Target, min, max, weight
Target, min in %, max in %
Auto printout of results
o Off
On
Only OK values
Only nonconforming values
Factory settings
Yes
o No
o = factory setting
§ Save settings and exit Setup: Press the
M key or the oo soft key
18
Minimum Load
The minimum load required for automatic taring of the container weight on
the platform (first weight), or for automatic printout of results, is configured
in Setup under:
Application:
Checkwgh.:
MinL.Autotar
You can choose from the following
10 levels for this setting:
1 digit (no minimum load)
2 digits
5 digits
10 digits
20 digits
50 digits
100 digits
200 digits
500 digits
1000 digits
The “digits” here refer to the scale
intervals in the connected weighing
platform. If the interval of the connected platform is 1 g, for example, and
1000 digits are required, you must
place at least 1000 g (=1000 intervals
=1000 digits) on the weighing platform
to activate autotaring or autoprint.
Display:
The result of a measurement is shown
either as a weight value or in relation to
the target.
– Weight display
The measured value line always shows
the weight value, even if it lies outside
the tolerance range.
The bar graph is displayed with symbols
indicating lower limit, target and upper
limit. Weights are shown logarithmically up to the lower tolerance limit, and
linearly beyond that point.
The LEDs are activated as follows:
Yellow: weight value > upper tolerance
limit
Green: weight value is within OK range
Red: weight value < lower tolerance
limit
If no LED is lit:
– the application is not completely
initialized, or
– the weight value is outside the
checkweighing range. (The limits
of the checkweighing range are
configured in Setup under:
Application:
Checkwgh.:
Chckw.rng.), or
– the weighing platform has not
stabilized
– Relation to target value
As “Weight display” above, with the
exception that:
– LL is shown on the main display
if the weight value is lower than the
target, and
– HH is shown on the main display
if the weight value is higher than the
target
Digital I/O Interface
The Checkweighing application supports the digital input/output-interface.
There are 4 control lines, or outputs,
which are activated as follows (see also
the diagram below):
–
–
–
–
Lighter
Equal
Heavier
Set
Checking Range
30 % Target weight 170%
Lower
limit
Upper
limit
Output port specifications
– When not in use, the voltage level is
high: 3.7 V/+4 mA.
– When actived, the voltage level is low:
<0.4 V/4 mA.
! The output ports are not protected
against short circuits!
Lighter
Equal
In Setup, under:
Application:
Checkwgh.: Act.Ports
you can define whether these control
ports are
– off
– always on
activated at stability
– on within the checkweighing range
– activated at stability within the checkweighing range
The “SET” output normally changes its
voltage level when the load is near the
target weight. Alternatively, you can
assign the “Ready-for-use” function to
this port. Configured in Setup under:
Application:
Checkwgh.: Set output
Heavier
Set
Ready to operate
Digital I/O Interface
– <SET> control output: set
– Activation of port lines: always on
This makes it possible, for example, to
connect a simple indicator for weighing
or calculation results, similar to the 3segment checkweighing display on the
Combics 3 indicator.
All data output ports have a high voltage level when:
– The application has not been initialized
– The weighing instrument is not at stability and one of the “at stability ...”
parameters is selected
– The weight is not within the checkweighing range
Checking Range
30 % Target weight 170%
Lower
limit
Upper
limit
Lighter
Equal
Heavier
Set
Ready to operate
Digital I/O Interface
– <SET> control output: set
– Activation of port lines: within checkweighing range
19
Checkweighing O
Example:
Checkweighing samples with a target weight of 1.25 kg and a tolerance range from -10 g to +30 g (using the factory-set application
parameters)
Soft key: Start
Begin input of target and tolerance values
Place a sample with the target weight (in this example, 1.25 kg) on the platform
Soft key: Weigh.
1.24
20
Save target value
Enter value for lower limit (in this example, 1.240 kg)
Soft key: l
Save value for the lower limit
1.28
Enter value for the upper limit (in this example, 1.280 kg)
Soft key: l
Save value for upper limit
Weigh samples
p
Print the results
Note: If automatic printout of results is enabled, you do not need to press the p key;
the results are printed automatically.
Setp
Min
Max
+
+
+
1.250 kg
1.240 kg
1.280 kg
Target
Minimum
Maximum
G#
T
N
+
+
+
1.256 kg
0.000 kg
1.256 kg
Gross weight
Tare weight
Net weight
Lim
+
0.48 %
W.Diff+
0.006 kg
--------------------
Percentage of deviation from target*
Absolute deviation from target
* When displayed in relation to target value:
If the weight is lighter than the target, the display shows: Stat
If the weight is heavier than the target, the display shows: Stat
LL
HH
21
Classification W
With the Classification application,
you can determine whether the weight
of a given sample lies within the limits
of a defined weight class.
Features
– Classification with 3 or 5 weight classes.
Configured in Setup under:
Application:
Classific.: Number of
classes
Soft Key Functions
Start Begin first initialization
Param. Begin new initialization
Net
Toggle display from classes
to the weighing mode
Class
Toggle the display from
weighing mode to classes
Weigh. During initialization:
– Enter the upper class limits using the
keypad or by saving weight values from
a load on the platform
– Enter the upper limits of weight classes
as absolute values or as a percentage
of deviation from the upper limit of
Class 1. Configured in Setup under:
Application:
Classific.: Input
– Class of current weight also indicated
by 1 LED (when using 3 classes) or
2 LEDs (when using 5 classes)
– Activate info-mode by pressing D
(> 2 sec)
– Toggle the main display from classes to
weights by pressing the Net soft key,
and back again by pressing the
Class soft key
– Automatic initialization when you
switch on the Combics with most
recently saved application data.
Configured in Setup under:
Application:
Classific.: Autostart
– Automatic taring of container weight.
Configured in Setup under:
Application:
Classific.: Autotare
– Automatic printout. Configured in
Setup under:
Application:
Classific.: Printout
– Restore factory default settings.
Configured in Setup under:
Application:
Classific.: Fty settings
22
To use the Classification application,
you need to enter the delimiters that
separate one class from another.
Save the current weight value
as the upper limit of a weight
class
The lower limit of Class 1 is defined by
the preset minimum load. The other
classes are configured by defining their
upper limits. There are two ways to
enter the delimiters for classes 1
through 3 (or 5):
– By saving the weight value indicated:
Each upper limit value, with the exception of the highest class, is entered
using the keypad or by saving the
weight value of a load on the weighing
platform.
– By entering a percentage:
The upper value of Class 1 is entered
using the keypad or by saving the value
indicated. Upper limits for the other
classes are defined by entering a percentage of deviation from the upper
limit of Class 1, using the keypad.
Example: Enter 100 g as the upper
limit of Class 1. Then enter 15%.
When working with 3 classes, this yields
the following weight classes:
Class 0: up to the minimum load
Class 1: > minimum load - 100 g
Class 2: > 100 g – 115 g
Class 3: > 115 g - maximum load
When working with 5 classes, this yields
the following weight classes:
Class 0: up to the minimum load
Class 1: > minimum load - 100 g
Class 2: > 100 g – 115 g
Class 3: > 115 g – 130 g
Class 4: > 130 g – 145 g
Class 5: > 145 g - maximum load
The initial application values are valid
until deleted by pressing the c key
or until overwritten by a new value.
They also remain saved after you turn
off the Combics.
Preparation
§ Select Setup: Press the M key
§ Select Application Parameters: Press the
O soft key
§ Select the Classification application:
Press the O soft key
Classification
Minimum load for autotaring
1 digit
2 digits
5 digits
o 10 digits
20 digits
50 digits
100 digits
200 digits
500 digits
1000 digits
Minimum load for Class 1 lower limit
o 1 digit
2 digits
5 digits
10 digits
20 digits
50 digits
100 digits
200 digits
500 digits
1000 digits
Autotare first weight
o Off
On
Autostart app when power is on
On
o Off
<SET> control output
o ‘SET’ control signal
Ready to operate (for
process control systems)
Activation of port lines
Off
Always on
o Activated at stability
Minimum Load
The minimum load for the first class
is configured in Setup under:
Application:
Classific.: MinL.Cl1
LL
When this limit is exceeded by the load,
initialization can begin.
Once the application is initialized,
a weight value below the minimum
load is designated Class 0; no class
is displayed.
The minimum load required for automatic taring of the container weight on
the platform (first weight), or for automatic printout of results, is configured
in Setup under:
Application:
Classific.:
MinL.Autotar
You can choose from the following 10
levels for this setting:
1 digit (no minimum load)
2 digits
5 digits
10 digits
20 digits
50 digits
100 digits
200 digits
500 digits
1000 digits
Display:
The result of a given measurement
is shown as either a weight value
or a class number.
– Weight display
The current weight is shown in the
measured value line and the current
class in the text line. Additionally,
the LEDs are lit as follows:
With 3 classes:
– Class 1: red LED
– Class 2: green LED
– Class 3: yellow LED
With 5 classes:
– Class 1: red LED
– Class 2: red and green LEDs
– Class 3: green LED
– Class 4: green and yellow LEDs
– Class 5: yellow LED
– Display of classes
The current class is shown in the
measured value line, and the current
weight in the text line. Additionally,
the LEDs are lit as described above.
The “digits” here refer to the scale
intervals in the connected weighing
platform. If the interval of the connected platform is 1 g, for example, and
1000 digits are required, you must
place at least 1000 g (=1000 intervals
=1000 digits) on the weighing platform
for the first class to activate autotaring
or autoprint.
Number of classes
o 3 classes
5 classes
Parameter input
o Weights
Percentages
Auto printout of results
o Off
On
Factory settings
Yes
o No
o = factory setting
§ Save settings and exit Setup:
Press the M key or the oo soft key
23
Classification W
Digital I/O Interface
The Classification application supports
the digital input/output-interface.
There are 4 control lines, or outputs,
which are activated as follows (see also
the diagram below):
– With 3 classes:
– Class 1
– Class 2
– Class 3
– Set
– With 5 classes:
– Classes 1/2
– Classes 2/3/4
– Classes 4/5
– Set
Min. load
Max. load
Class
2
1
3
Class 1
Class 2
Class 3
In Setup, under:
Application:
Classific.:
Act.Ports.
Set
you can define whether these control
ports are
Operative
– off,
– always on, or
– activated at stability.
The “SET” output normally changes its
voltage level when the current weight
exceeds the minimum load.
Alternatively, you can assign the
“Ready-for-use” function to this port.
Configured in Setup under:
Digital I/O Interface
Control lines when working with 3 classes
Min. load
Application:
Classific.: Set output
1
2
Max. load
Class
3
4
5
Classes 1/2
Classes 2/3/4
Classes 4/5
Set
Operative
Digital I/O Interface
Control lines when working with 5 classes
24
Example:
Defining 3 classes (using the factory-set application parameters)
Soft key: Start
Begin input of class delimiters
.11
Enter the upper limit for Class 1 using the keypad (in this example, 0.110 kg)
Soft key: l
Save the upper limit for Class 1
.13
Enter the upper limit for Class 2 using the keypad (in this example, 0.130 kg)
Soft key: l
Save the upper limit for Class 2
25
Classification W
Place the sample on the weighing platform
Read the result
p
Print the result
Note: If automatic printout of results is enabled, you do not need to press the p key;
the results are printed automatically.
Lim1
Lim2
+
+
0.110 kg
0.130 kg
G#
T
N
+
+
+
0.118 kg
0.000 kg
0.118 g
Class
2
--------------------
26
Weighing in Percent L
With the Weighing in Percent
application, you can use your weighing
platform to obtain weight readouts in
percent which are in proportion to
a reference weight. L is displayed as
the weight unit.
Features
– Enter the reference weight “Wxx%” for
100% using the keypad
Soft Key Functions
Start
Begin calculation of the
reference weight*
pRef
– Save the value entered as
the reference percentage
– Begin calculation of the
reference weight*
Wxx%
Save value entered as
reference weight for
100%
p=
Begin calculation of the
reference weight.*
Perc.
Toggle display to
Weighing in Percent
application
Weigh.
Toggle display to
Weighing mode
– Save the current weight value as reference weight “pRef”
– Enter the reference percentage “pRef”
using the keypad
– Enter reference weight using a bar code
scanner
– Display result as loss (difference) or
residue
– Display up to 3 decimal places.
Configured in Setup under:
Application: Wgh in
Pct: No.dec.pct.
– Weigh in percent with two weighing
platforms
– Activate info-mode by pressing D
(> 2 sec)
– Toggle the display from percentage to
weight by pressing the Weigh. soft
key, and back by pressing Perc..
– Automatic initialization when the
Combics is switched on. The application is initialized with the most recently
saved data. Configured in Setup under:
* Calculation is based on the active
net weight value and the percentage
entered.
To determine the weight of a sample
relative to a reference weight, you need
to define the reference weight value.
There are three ways to enter this value
in the application program:
– Calculation:
– Place the reference quantity (defined
by the reference percentage) on the
connected weighing platform and
press the Start or p= soft key to
initialize the application.
– Place any amount of the sample
material on the connected weighing
platform, enter the reference percentage through the keypad, and
press the pRef soft key to initialize the application.
How the reference weight is calculated
depends on the application setting that
defines “Accuracy for saving weights”.
The value is either rounded off in
accordance with the display resolution,
or saved with 10-fold or 100-fold resolution, or with the maximum internal
resolution of the weighing platform.
– By entering the reference weight for
100% using the keypad and pressing
the Wxx% soft key to initialize the
application.
– By using a bar code scanner
The initialization data remains valid
until deleted by pressing the c key
or until overwritten by a new value.
It also remains saved after you turn off
the Combics.
Application: Wgh in
Pct: Autostart
– Automatic taring of container weight.
Configured in Setup under:
Application: Wgh in
Pct: Autotare
– Restore factory default settings.
Configured in Setup under:
Application: Wgh in
Pct: Fty settings
27
Weighing in Percent L
Preparation
§ Select Setup: Press the M key
§ Select Application Parameters: Press the
O soft key
§ Select the Weighing in Percent application:
Press the O soft key
Weighing in Percent
Minimum load for autotaring
1 digit
2 digits
5 digits
o 10 digits
20 digits
50 digits
100 digits
200 digits
500 digits
1000 digits
Minimum load for initialization
o 1 digit
2 digits
5 digits
10 digits
20 digits
50 digits
100 digits
200 digits
500 digits
1000 digits
Autotare first weight
o Off
On
Autostart app when power is on
On
o Off
Accuracy for saving weights
o Display accuracy
Display accuracy + 1 decimal place
Display accuracy + 2 decimal places
With internal resolution
Number of decimals for percentages
o None
1 decimal place
2 decimal places
3 decimal places
Parameter for saving weight
o Standard stability
Increased stability
Scale for reference weight
o Do not change
WP 1
WP 2
Display of calculated value
o Residue
Loss
Factory settings
Yes
o No
§ Save settings and exit Setup: Press the
M key or the oo soft key
28
Parameter for Saving Weight Values
The reference weight is saved when
the platform has stabilized. “Stability”
is defined as the point at which fluctuation of a measured value lies within a
defined tolerance range. The narrower
the tolerance range, the more stable the
platform is at “stability”.
In Setup, under:
Application: Wgh in
Pct: Save weight
you can define whether the value
is saved when “standard stability” is
reached, or only at “increased stability”
(narrower tolerance range). If you select
increased stability,
the reference weight saved will be more
accurate and the results more reproducible, but the response time of the
weighing platform might be longer.
Accuracy of Reference Weight
Calculation
The resolution applied for calculating
the reference weight is defined in Setup
under:
Application: Wgh in
Pct: Acc.save wts.
The resolution for calculating the reference weight is increased if “+1 decimal
place”, “+2 decimal places” or “Internal
resolution” is selected. With the “+1
decimal place” setting, the net value
is determined to one additional decimal
place (i.e., display accuracy x 10);
“+2 decimal places” increases display
accuracy x 100, and so on up to the
maximum resolution available.
Display
With the Weighing in Percent application, the result can be displayed as a
remainder or loss. Configured in Setup
under:
Application: Wgh in
Pct: Display
Equations:
Residue = Current weight /
100% weight + 100
Loss =
(current weight – 100%
weight) /
100% weight + 100
Minimum Load
The minimum load required for
initialization of the weighing platform
is configured in Setup under:
Application:
Wgh in Pct:
MinL.Init
Once the limit is exceeded by the load,
initialization can begin. If the load on
platform is too light, the following will
occur when you try to save the reference value:
– The error code inf 29 is displayed
– A warning signal is emitted (doublebeep)
– The weighing platform is not initialized
– The preset reference percentage is saved
The minimum load required for automatic taring of the container weight on
the platform (first weight) is configured
in Setup under:
Application: Wgh in
Pct:
MinL.Autotar
You can choose from the following 10
levels for this setting:
1 digit (no minimum load)
2 digits
5 digits
10 digits
20 digits
50 digits
100 digits
200 digits
500 digits
1000 digits
The “digits” here refer to the scale
intervals in the connected weighing
platform. If the interval of the connected platform is 1 g, for example,
and 1000 digits are required, you must
place at least 1000 g (=1000 intervals
=1000 digits) on the weighing platform
for initialization.
Weighing in Percent with Two
Weighing Platforms
You can use two weighing platforms
simultaneously with the Weighing in
Percent application. When using two
platforms, you can choose from the
following operating modes:
– Weighing in Percent with two platforms
of the same type
– Weighing in Percent with one reference
platform and one weighing platform
Weighing in Percent with Two
Platforms of the Same Type
Use this mode to measure different
types of sample material with different
weights. For example, measure the
lighter-weight samples on one platform
and the heavier samples on another.
You can define which of the two platforms is active when the Combics is
switched on. This is configured in
Setup, under:
Device: Operat.: Main
scale
This is the first platform active when
you switch on the Combics, regardless
of the setting for automatic initialization of the Weighing in Percent application.
Weighing in Percent with One
Reference Platform and One Weighing
Platform
In this mode, the reference platform
is a high-resolution weighing platform
with a relatively low maximum capacity.
The other platform is used for weighing
heavier samples, and has a high capacity with a relatively low resolution.
This allows you to both determine the
reference weight with high resolution;
i.e., very precisely, and to measure large
samples, without requiring an expensive
high-resolution, high-capacity weighing
platform.
The system can be configured to switch
automatically to the reference platform
for initialization (the measured value
line shows Ref). Following initialization, the platform for larger amounts
is automatically activated.
The definition of one weighing platform as a reference platform is configured in Setup, under:
Application: Wgh in
Pct: Ref.wt.scale
29
Weighing in Percent L
Example:
Weighing in 100% of the target weight of a sample material (using the factory-set application parameters)
Place empty container on the platform
)
Tare the platform
Note: If the automatic tare function is enabled, you do not need to press the ) key to
tare the platform; the tare weight is saved automatically when you place the container on
the platform
Add reference material in accordance with reference percentage (in this example,
0.085 kg)
Soft key: Start
30
Begin calculation of reference weight. The calculation is based on the active net weight
value and the reference percentage entered
If the weight is too light, an error code
is shown in the main display inf 29
Reduce the minimum load setting or increase the reference
Continuing filling the container until the target amount is reached (in this example,
100%)
p
Print the results
pRef
wRef
+
+
20 %
0.085 kg
G#
T
N
+
+
+
1.080 kg
0.675 kg
0.423 kg
Prc
+
100 %
--------------------
31
Net-total Formulation R
With the Net-total Formulation application, you can weigh in different components up to a defined total. Each component is saved in the net-total
memory.
Features
– Weigh in up to 999 components in
series
– Current component number displayed
in the text line (indicating the component to be added)
– Toggle the display from “component
mode” to “additive mode” by pressing
the A-mode soft key, and back by
pressing C-mode.
– Component mode: Display the
weight of the component currently
on the platform (for 1 second after it
is saved; then the platform is tared)
– Additive mode: Display the weight
of all components on the platform
(after it is saved, the net weight of
the last component added is displayed briefly)
– Toggle to a second weighing platform
while weighing on the first
– Activate info-mode by pressing D
(> 2 sec)
– Automatic taring of container weight.
Configured in Setup under:
Application: Net
Total: Autotare
– Automatic printout of component
or total weight when weight is saved.
Configured in Setup under:
Application: Net
Total: Printout
If the Print one component on request parameter
is set, the entire standard printout
is generated every time. If Print
components is set, the full
printout is generated only once.
– Restore factory default settings.
Configured in Setup under:
Application: Net
Total: Factory set
32
Soft Key Functions
M+
Save the component value in
net-total memory
A-mode Toggle to Additive mode
C-mode Toggle to Component mode
Preparation
§ Select Setup: Press the M key
§ Select Application Parameters: Press the
O soft key
§ Select the Net-total Formulation application:
Press the O soft key
Net-total Formulation
Minimum load for autotaring
1 digit
2 digits
5 digits
o 10 digits
20 digits
50 digits
100 digits
200 digits
500 digits
1000 digits
Min. load for saving values
o 1 digit
2 digits
5 digits
10 digits
20 digits
50 digits
100 digits
200 digits
500 digits
1000 digits
Autotare first weight
Off
o On
Printout when saved
Off
o Print one component on request
Print components
Factory settings
Yes
o No
o = factory setting
§ Save settings and exit Setup:
Press the M key or the oo soft key
Minimum Load
The minimum amount that a component must weigh before it can be saved
in net-total memory is configured in
Setup under:
Application: Net
Total: MinL.Autosv
Once the limit is exceeded by the load,
the value can be saved. If the load on
platform is too light, the following will
occur when you try to save a value:
– The error code inf 29 is displayed
– A warning signal is emitted (doublebeep)
- The weighing platform is not initialized
The minimum load required for automatic taring of the container weight on
the platform (first weight) is configured
in Setup under:
Application: Net
Total: MinL.Autotar
You can choose from the following
10 levels for this setting:
1 digit (no minimum load)
2 digits
5 digits
10 digits
20 digits
50 digits
100 digits
200 digits
500 digits
1000 digits
Net-total Formulation with
Two Weighing Platforms
This mode is used for weighing large
and small components at the same
time.
This makes it possible to toggle from
the small-component platform to the
large-component platform during
measurement. Once you toggle to the
large-component platform, the ( and
) keys are available until a component is value is saved. For example,
you can tare a partially-filled container
taken from the small-component platform on the large component platform.
The value in component memory on
the small-component platform is transferred to the large-component platform
and the weight unit is converted,
if necessary. The Component and
Additive display modes are both available on the large-component platform.
The value read by the active platform
is saved in component memory. The
displayed result is accurately calculated
in the active weight unit.
When you press c to stop a measurement series the tare memories for both
platforms are cleared, unless the largecomponent platform is an SBI instrument, in which case the platform is only
tared.
The “digits” here refer to the scale
intervals in the connected weighing
platform. If the interval of the connected platform is 1 g, for example,
and 1000 digits are required, you must
place at least 1000 g (=1000 intervals
=1000 digits) on the weighing platform
for initialization.
33
Net-total Formulation R
Example:
Weighing in 3 components of a formulation recipe (using the factory-set application parameters)
Place empty container on the platform
)
Tare the platform
Note: If the automatic tare function is enabled, you do not need to press the ) key to
tare the platform; the tare weight is saved automatically when you place the container on
the platform
Prompt to fill and save the first component is shown
Add the first component to the container (in this example, 1.100 kg)
The weight of the first component is displayed
Soft key: M+
Save the first component weight
Cmp001+
The component weight is printed automatically
34
1.100 kg
The weighing platform is tared and the component counter value is increased by one.
Prompt to fill and save the second component is shown
Add the second component to the container (in this example, 0.525 kg)
The weight of the second component is displayed
Soft key: M+
Save the second component weight
Cmp002+
The component weight is printed automatically
0.525 kg
The weighing platform is tared and the component counter value is increased by one.
Prompt to fill and save the third component is shown
Soft key: A-mode
to toggle to the “additive mode”, to display the total weight of all components
The value displayed equals the weight of components added up to now plus the current
weight on the platform.
35
Net-total Formulation R
Add the third component to the container until the desired target is reached (in this
example, 2000 kg)
The total weight is displayed
Soft key: M+
Save the third component weight
Cmp003+
The component weight is printed automatically
0.375 kg
The component counter value is increased by one. Prompt to fill and save a fourth
component is shown
c
End weighing-in operation
Results are printed automatically
n
+
3
S-Comp+
2.000 kg
Cont.T
0.296 kg
--------------------
36
Number of components
Content of component memory
Content of tare memory (container weight)
Totalizing s
With the Totalizing application, you
can add weight values to the totalizing
memory. In addition to weight values,
the number of separate values added
to memory is also saved (transaction
counter).
Features
– Weigh in up to 999 items
– Current transaction number displayed in
the text line (indicating the items
already added)
– Weighing in up to a defined target,
with the totalization memory content +
current weight displayed in the text
line.
– Save weight values manually or automatically
– Accurate calculation of total of weight
values from two weighing platforms
– Activate info-mode by pressing D
(> 2 sec)
– Incomplete totalizing routines saved in
battery-backed memory. Configured in
Setup under:
Application:
Totalizing: Autostart
– Automatic taring of container weight.
Configured in Setup under:
Application:
Totalizing: Autotare
– Automatic printout when value saved
– Restore factory default settings.
Configured in Setup under:
Application:
Totalizing: Fty settings
Soft Key Functions
M+ Add net weight value from active
platform to totalizing memory.
The Combics has a totalizing memory
for adding individual net and gross
values. You can save weight values in
totalizing memory manually or automatically. Configured in Setup under:
Application:
Totalizing: Autosave
– Save value manually by pressing M+.
The value taken from the active
platform is added to the value already
saved in totalization memory and
the transaction counter value
is increased by one.
When a value is added manually,
the program does not check whether
the platform has been unloaded since
the last time the M+ soft key was
pressed.
– Value saved automatically when the
weighing platform is stable and the
defined minimum load is exceeded.
If the defined minimum load is not
exceeded, you can save the item
manually by pressing the M+ soft key.
Regardless of these settings, the current
value cannot be saved automatically
unless the platform is unloaded before
the next sample is placed on it.
The weighing platform is considered to
be unloaded when the load is less than
50% of the minimum load.
The number of items added to memory
is displayed in the text line.
Press the c key to clear the totalizing
memory. A printout is automatically
generated.
With 2 weighing platforms connected,
you can add values from both platforms
to the totalizing memory.
The displayed result is accurately
calculated in the active weight unit.
Example: When you add 1.243 kg
(determined on a weighing platform
with three decimal places) to 1.4 kg
(determined on a platform with
1 decimal place), the display shows
2.643 kg.
37
Totalizing s
Preparation
§ Select Setup: Press the M key
§ Select Application Parameters: Press the
O soft key
§ Select the Totalizing application:
Press the O soft key
Totalizing
Minimum load for autotaring
1 digit
2 digits
5 digits
o 10 digits
20 digits
50 digits
100 digits
200 digits
500 digits
1000 digits
Minimum load for autosave
o 1 digit
2 digits
5 digits
10 digits
20 digits
50 digits
100 digits
200 digits
500 digits
1000 digits
Autotare first weight
o Off
On
Autostart app when power is on
On
o Off
Autosave mode
o Off
On
Printout when saved
Off
o Print one component on request
Print components
Factory settings
Yes
o No
o = factory setting
§ Save settings and exit Setup:
Press the M key or the oo soft key
38
Minimum Load
The minimum load required for automatic taring of the container weight on
the platform (first weight) is configured
in Setup under:
Application:
Totalizing:
MinL.Autotar
The minimum amount that a component must weigh before it can be saved
in totalizing memory is configured in
Setup under:
Application:
Totalizing:
MinL.Autosv
You can choose from the following
10 levels for this setting:
1 digit (no minimum load)
2 digits
5 digits
10 digits
20 digits
50 digits
100 digits
200 digits
500 digits
1000 digits
The “digits” here refer to the scale
intervals in the connected weighing
platform. If the interval of the connected platform is 1 g, for example,
and 1000 digits are required, you must
place at least 1000 g (=1000 intervals =
1000 digits) on the weighing platform
for autotaring (only with the “Autotare
first weight” option selected).
Printout
In Setup, under:
Application:
Totalizing: Printout
you can configure whether a printout
is generated manually, by pressing p,
or automatically when a weight value is
stored in the totalizing memory.
If you select Off for this setting,
printouts can be generated only manually, by pressing p, and the transaction counter value is not increased.
If the Print one component on request option
is selected, the full printout is generated
every time the “Print” key is pressed;
this printout header lines, date, time,
and dotted line preceding the gross,
tare, net and transaction counter
values.
If Print components is
selected, the header lines, date, time
and dotted line are included only on
the first printout. Subsequent printouts
include only the gross, tare, net and
transaction counter values.
The total data record is printed
when you clear the totalizing memory
(by pressing the c key).
The total data record includes data
from the gross totalizing memory
(*G), the net totalizing memory (*N),
the total transaction count (n) and
a dotted line.
Example:
Totalizing weight values (using the factory-set application parameters)
Place the first weight on the weighing platform
Weight value is displayed
Soft key: M+
G#
T
N
n
+
+
+
0.250 kg
0.000 kg
0.250 kg
1
Store first weight value in totalizing memory
The component weight is printed automatically
The transaction counter value is increased by one, to “1
Remove the first weight from the weighing platform
39
Totalizing s
Place empty container on the platform
)
Tare the platform
Note: If the automatic tare function is enabled, you do not need to press
the ) key to tare the platform; the tare weight is saved automatically
when you place the container on the platform
Place the second weight in the container
Weight value is displayed
Soft key: M+
G#
T
N
n
40
+
+
+
1.346 kg
0.346 kg
1.000 kg
2
Store second weight value in totalizing memory
The component weight is printed automatically
The transaction counter value is increased by one, to “2”
c
*G
+
1.346 g
*N
+
1.250 g
n
2
--------------------
End totalizing
Total data record is printed as configured under:
Device: Printout
41
Setup: Overview of Application Parameters
o = Factory setting
W = User-defined setting
Setup
Application Parameters
Weighing Mode
Minimum load for automatic tare
1 digit
2 digits
5 digits
o 10 digits
20 digits
50 digits
100 digits
200 digits
500 digits
1000 digits
Autotare first weight
o Off
On
Factory settings
Yes
o No
Counting
Minimum load for automatic tare
1 digit
2 digits
5 digits
o 10 digits
20 digits
50 digits
100 digits
200 digits
500 digits
1000 digits
Minimum load for initialization
o 1 digit
2 digits
5 digits
10 digits
20 digits
50 digits
100 digits
200 digits
500 digits
1000 digits
Autotare first weight
o Off
On
Autostart app. at power on
On
o Off
42
Counting
Accuracy: avg. piece wt. calculation
o Display accuracy
Display accuracy + 1 decimal place
Display accuracy + 2 decimal places
Internal resolution
Parameter for saving weight
o Standard stability
Increased stability
Average piece weight updating
Manual
o Automatic
Scale for reference weight
o Do not change
WP 1
WP 2
Factory settings
Yes
o No
Neutral Measurement
Minimum load for automatic tare
1 digit
2 digits
5 digits
o 10 digits
20 digits
50 digits
100 digits
200 digits
500 digits
1000 digits
Minimum load for initialization
o 1 digit
2 digit
5 digits
10 digits
20 digits
50 digits
100 digits
200 digits
500 digits
1000 digits
Autotare first weight
o Off
On
Autostart app. at power on
On
o Off
Accuracy f. reference val. calculation
o Display accuracy
Display accuracy + 1 decimal place
Display accuracy + 2 decimal places
Internal resolution
Neutral Measurement
Decimal places for display of results
o None
1 decimal place
2 decimal places
3 decimal places
Parameter for saving weight
o Standard stability
Increased stability
Scale for reference weight
o Do not change
WP 1
WP 2
Factory settings
Yes
o No
Animal Weighing
Minimum load for automatic tare
1 digit
2 digits
5 digits
o 10 digits
20 digits
50 digits
100 digits
200 digits
500 digits
1000 digits
Minimum load for starting
o 1 digit
2 digits
5 digits
10 digits
20 digits
50 digits
100 digits
200 digits
500 digits
1000 digits
Autotare first weight
o Off
On
Autostart app. at power on
On
o Off
Start
o Manual
Automatic
Animal Weighing
Minimum load for automatic tare
0.1% of the animal/object
o 0.2% of the animal/object
0.5% of the animal/object
1% of the animal/object
2% of the animal/object
5% of the animal/object
10% of the animal/object
20% of the animal/object
50% of the animal/object
100% of the animal/object
Automatic printout of results
o Off
On
Show normal weight after unloading
o Threshold for load change
Toggle key
Factory settings
Yes
o No
Checkweighing
Minimum load for automatic tare
1 digit
2 digits
5 digits
o 10 digits
20 digits
50 digits
100 digits
200 digits
500 digits
1000 digits
Autotare first weight
o Off
On
Autostart app when power is on
On
o Off
Checkweighing range
o 30% to 170%
10% to maximum load
<SET> control output
o ‘SET’ control signal
Ready to operate
(for process control systems)
Activation of port lines
Off
Always on
At stability
o Within checkweighing range
Stability + chckw. range = on
Type of checkweighing input
o Target, min, max, weight
Target, min in %, max in %
43
Setup: Overview of Application Parameters
Checkweighing
Auto printout of results
o Off
On
Only OK values
Only nonconforming values
Factory settings
Yes
o No
Classification
Minimum load for automatic tare
1 digit
2 digits
5 digits
o 10 digits
20 digits
50 digits
100 digits
200 digits
500 digits
1000 digits
Minimum load for Class 1
o 1 digit
2 digits
5 digits
10 digits
20 digits
50 digits
100 digits
200 digits
500 digits
1000 digits
Autotare first weight
o Off
On
Autostart app when power is on
On
o Off
<SET> control output
o ‘SET’ control signal
Ready to operate
(for process control systems)
Activation of port lines
Off
Always on
o Activated at stability
Number of classes
o 3 classes
5 classes
Parameter input
o Weights
Percentages
Auto printout of results
o Off
On
44
Classification
Factory settings
Yes
o No
Weighing in Percent
Minimum load for automatic tare
1 digit
2 digits
5 digits
o 10 digits
20 digits
50 digits
100 digits
200 digits
500 digits
1000 digits
Minimum load for initialization
o 1 digit
2 digits
5 digits
10 digits
20 digits
50 digits
100 digits
200 digits
500 digits
1000 digits
Autotare first weight
o Off
On
Autostart app when power is on
On
o Off
Accuracy for saving weights
o Display accuracy
Display accuracy + 1 decimal place
Display accuracy + 2 decimal places
Internal resolution
Decimal places in displayed result
o None
1 decimal place
2 decimal places
3 decimal places
Save weight
o Standard stability
Increased stability
Scale for reference weight
o Do not change
WP 1
WP 2
Display calculated values
o Residue
Loss
Weighing in Percent
Factory settings
Yes
o No
Net-total Formulation
Minimum load for automatic tare
1 digit
2 digits
5 digits
o 10 digits
20 digits
50 digits
100 digits
200 digits
500 digits
1000 digits
Minimum load for saving values
o 1 digit
2 digits
5 digits
10 digits
20 digits
50 digits
100 digits
200 digits
500 digits
1000 digits
Autotare first weight
o Off
On
Totalizing
Minimum load for saving values
o 1 digit
2 digits
5 digits
10 digits
20 digits
50 digits
100 digits
200 digits
500 digits
1000 digits
Autotare first weight
o Off
On
Autostart app when power is on
On
o Off
Autosave mode
o Off
On
Printout when saved
Off
o Print one component on request
Print components
Factory settings
Yes
o No
Printout when saved
Off
o Print one component on request
Print components
Factory settings
Yes
o No
Totalizing
Minimum load for automatic tare
1 digit
2 digit
5 digits
o 10 digits
20 digits
50 digits
100 digits
200 digits
500 digits
1000 digits
45
Sartorius Weighing Technology GmbH
Weender Landstrasse 94–108
37075 Goettingen, Germany
Phone +49.551.308.0
Fax +49.551.308.3289
www.sartorius-mechatronics.com
Copyright by Sartorius,
Goettingen, Germany.
All rights reserved. No part
of this publication may
be reprinted or translated in
any form or by any means
without the prior written
permission of Sartorius.
The status of the information,
specifications and illustrations
in this manual is indicated
by the date given below.
Sartorius reserves the
right to make changes to the
technology, features,
specifications and design of the
equipment without notice.
Status:
February 2012, Sartorius,
Goettingen, Germany
Printed in Germany on paper that has been bleached
without any use of chlorine
RS· KT
Publication No.: WCI6003-e12022